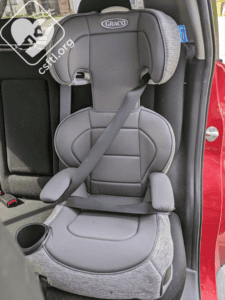
The Graco TurboBooster has been a mainstay of the booster seat world for quite a while now. Many a CSFTL child has ridden in a TurboBooster — some of those kiddos are now adults themselves. But the booster seat’s staying power lies in the fact that it’s easy to setup and use correctly and lasts for a good long time as the child grows. Until now, the TurboBooster’s main flaw was that it’s a bit wide to fit in tight spaces (and some models required the caregiver to install screws in the armrests).
Enter the TurboBooster 2.0 LX. It has the same ease of use features we like and the same consistent fit to child we adore, it’s narrower, has lower anchors, and does not require screws in the armrests!
CSFTL Quick Stats
- Weight range: 40-100 pounds
- Height range: 43-57 inches tall. The seat is outgrown when the child’s ears are above the top of the vehicle seat back or booster seat headrest.
- Age minimum: at least 4 years old. CSFTL advocates that children be at least 5 years old before moving to a booster seat.
- Replace after any crash
- Expiration: 10 years after date of manufacture
Features
- Lower anchors (to secure the booster when it’s unoccupied)
- Single cupholder
- Storage compartment
- Narrow enough to be an option in many 3 across situations
Measurements
- Width at widest point (cupholder): 16.5 inches
- Highest shoulder belt guide position: 20 inches
- Seat weight, high back mode: 8.4 pounds
- Seat weight, backless mode: xx pounds
Assembly Required
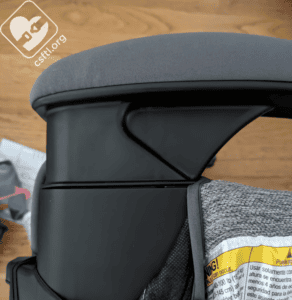
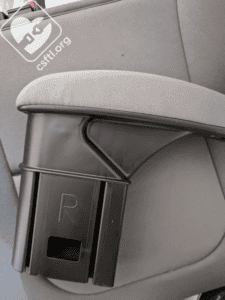
Like many models of TurboBooster before it, the 2.0 requires armrest assembly but, unlike previous versions of the TurboBooster, it does NOT require an additional screw on the outside of the armrest.
Each armrest is labeled to indicate the side they belong on and the back of the armholes are rounded so it’s pretty much impossible to install the armrests on the wrong side of the seat. To assemble the armrests, slide them into the armholes until they click into position. That’s all there is to it!
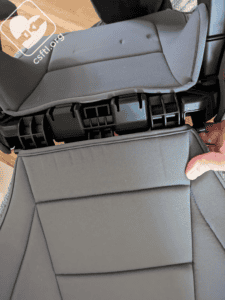
Assembling the rest of the booster takes a little bit more effort. Attach the headrest to the middle section (the manual sort of calls it the back support pad, but that’s referring to the padding so I’m at a loss for a good term on this one), squeeze the handle and slide the headrest down onto the middle section. Tuck the end of the fabric on the headrest behind the back support pad.
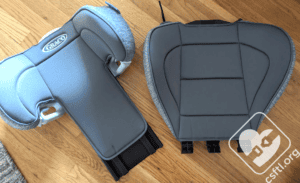
Once that’s assembled, attach the backrest to the backless portion of the seat by lining the c-shaped hooks on the bottom of the backrest up with the holes in the backless booster portion of the seat. Bring the seat upright by pulling the seat back into the upright position, you should hear a click when the backrest is attached correctly.
Cupholder
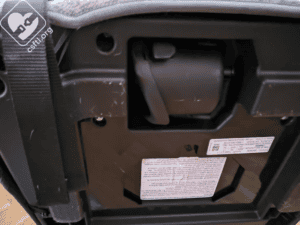
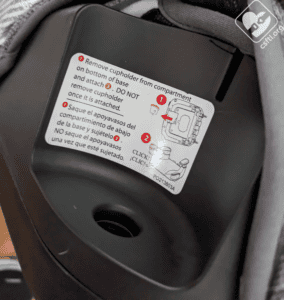
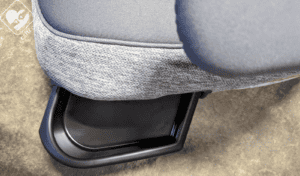
First of all, the cupholder storage is super interesting. It ships in a spot that’s molded into the bottom of the booster seat, which is pretty interesting. The single cupholder is required for use. To assemble it, remove it from that nifty storage spot, then align the grooves on the cupholder with the grooves on the booster seat and slide the cupholder in. It will click once it’s in place and you should not be able to remove it once it’s assembled.
It’s a bit odd to us that Graco would intentionally mold a storage spot into the seat when the cupholder will only be stored there once. But that’s the only thing about this seat that has us scratching our heads just a bit.
Graco did explain that this nifty cupholder spot was inspired by their sustainability efforts — reducing the use of plastic bags in the products and shrinking the packaging size. This innovation also simplifies the unboxing process, minimizing the chance of misplacing cupholders. We’d call that a win.
All the same, I’m unfortunately confident that we’ll see many of these seats in the wild without that cupholder installed. I guess the good news is that the cupholders are likely to still be in that convenient storage location so we’ll be able to find them and get them attached to the seats before the family leaves the seat check event.
Media Storage
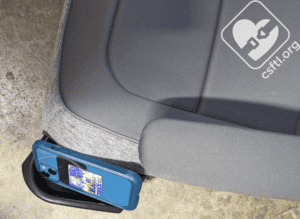
The booster also includes a media storage compartment. I found it a little hard to open — reaching from the bottom of the compartment, then sliding it out worked best.
While I have no doubt that children who ride in this seat will find a multitude of objects to put in this little compartment, my iPhone 13 didn’t fit. That makes me wonder if many of today’s modern phones would fit there.
Setup and Use
The seat includes lower anchors, these are optional. Their main purpose is to secure the unoccupied seat in the event of a crash. If a child is in the seat, the vehicle seat belt will do the same job and keep the child in place as well.
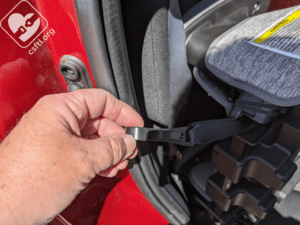
To attach the TurboBooster 2.0 via the lower anchors, press down on the release button just over the lower anchor webbing on the front of the booster and pull the lower anchor from the back of the seat. Attach the lower anchor connector to the lower anchor in the vehicle, then pull the webbing until the seat is secure.
When using the seat in high back booster mode, thread the vehicle seat belt though the shoulder belt guide before heading out for a drive.
Fit to Child
High Back Mode
6 Year Old Doll
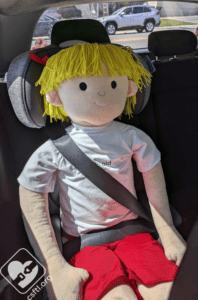
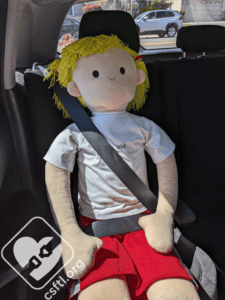
Our 6 year old Huggable Images doll is 48 inches tall. We expected the TurboBooster 2.0 to have the same great vehicle seat belt fit as the previous models — and it does! The lap portion of the seat belt goes across our doll’s hips, the shoulder belt fits across the center of the shoulder.
Converting to Backless Booster Mode
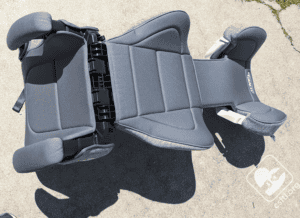
At a certain point, your child may grow too tall to use this seat in high back mode but it’s highly possible that they’d still need a booster seat. Remove the back from this seat and use it in backless mode until your child passes the Five Step Test to fit in the adult seat belt properly.
Shoulder Belt Guide Adjuster
The TurboBooster 2.0 includes a shoulder belt guide adjuster. If the vehicle seat belt doesn’t lay across the middle of the child’s shoulder in backless mode, attach this piece.
Backless Booster Mode
6 Year Old Doll
Our 6 year old Huggable Images doll remains 48 inches tall. In backless mode, the TurboBooster 2.0 fits our doll well. The lap portion of the belt sits across the top of the child’s thighs and the shoulder portion of the belt lays across the center of the shoulder.
Important Information: Where to Find
FAA approval: this seat is not approved for use on aircraft because it requires a lap and shoulder belt. Airplanes do not typically have lap and shoulder belts.
Manual storage: the manual stores in a compartment on the bottom of the seat.
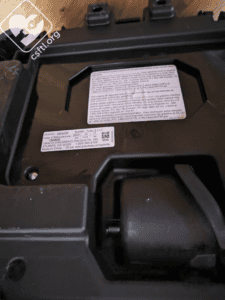
Date of manufacture label: the seat has a 10 year expiration. The date of manufacture label is on the bottom of the backless portion of the booster seat.
Overall Thoughts
We’ve been fans of pretty much every version of the TurboBooster so we approached this seat with a pretty high level of expectation. I’m pleased to say that it delivers! It’s narrow enough to be a viable option in many three across situations and doesn’t require those pesky screws in the armrests. The TurboBooster 2.0 also has the excellent belt fit that we’d expect, isn’t too difficult to convert between backless and high back modes, and as a bonus, it has lower anchors plus that handy media storage compartment. We have no complaints about this seat!
