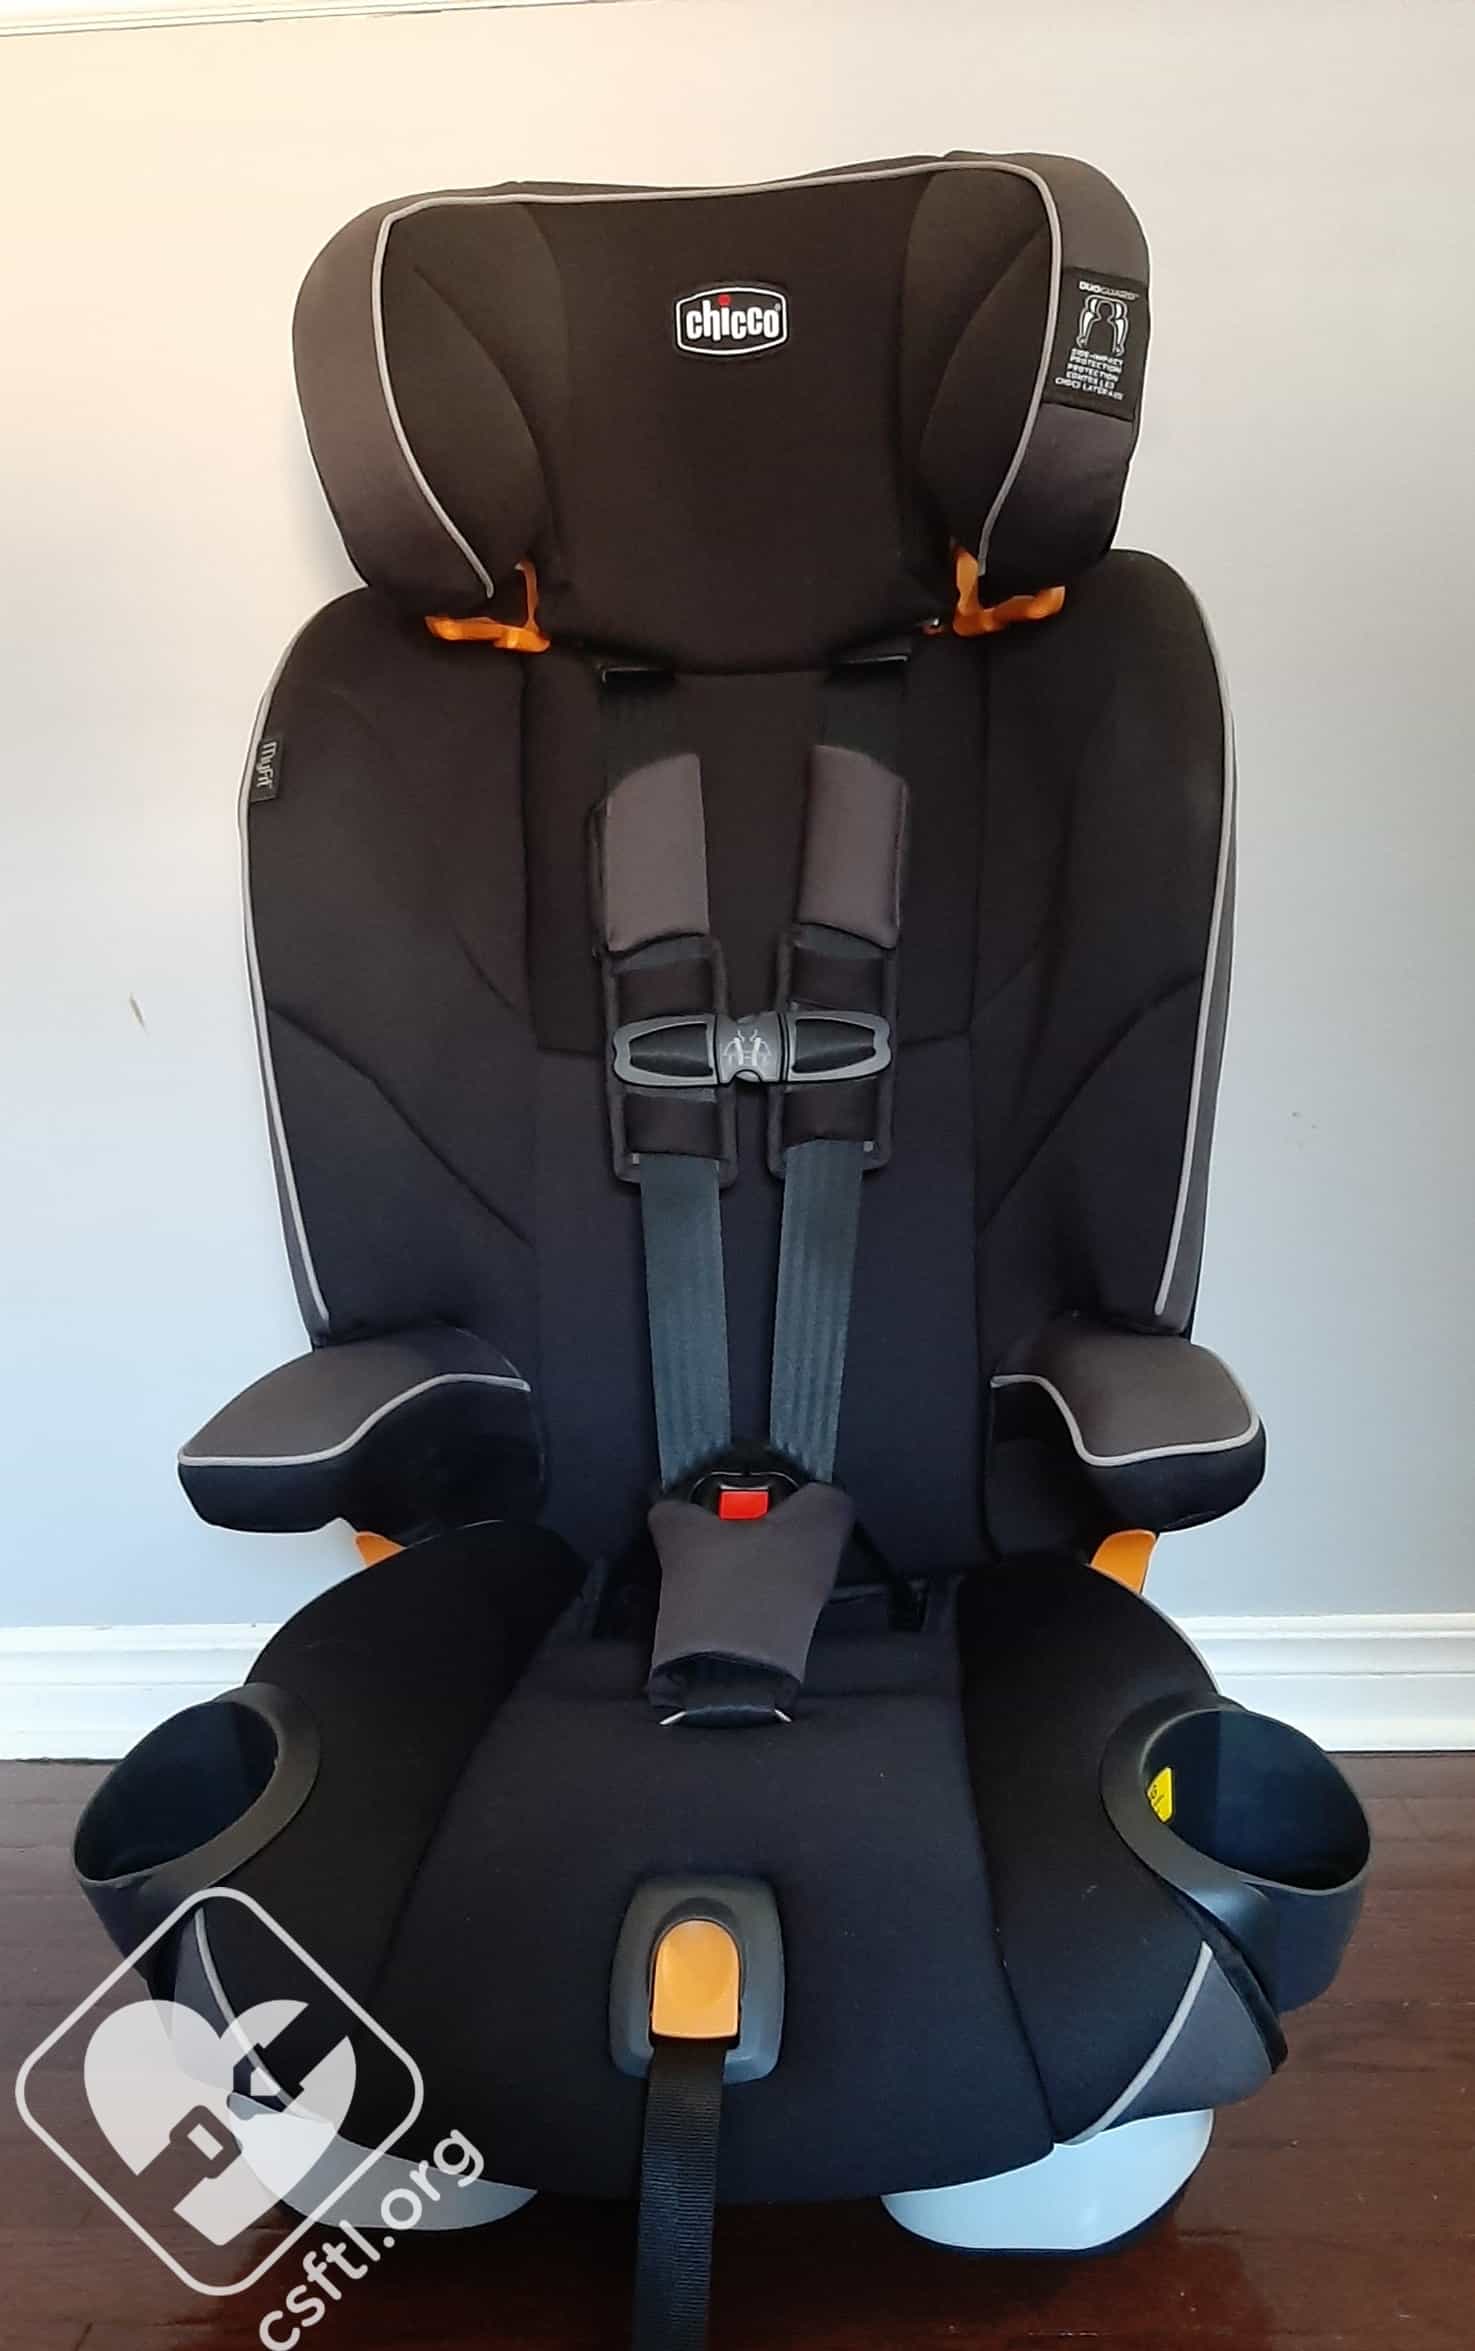
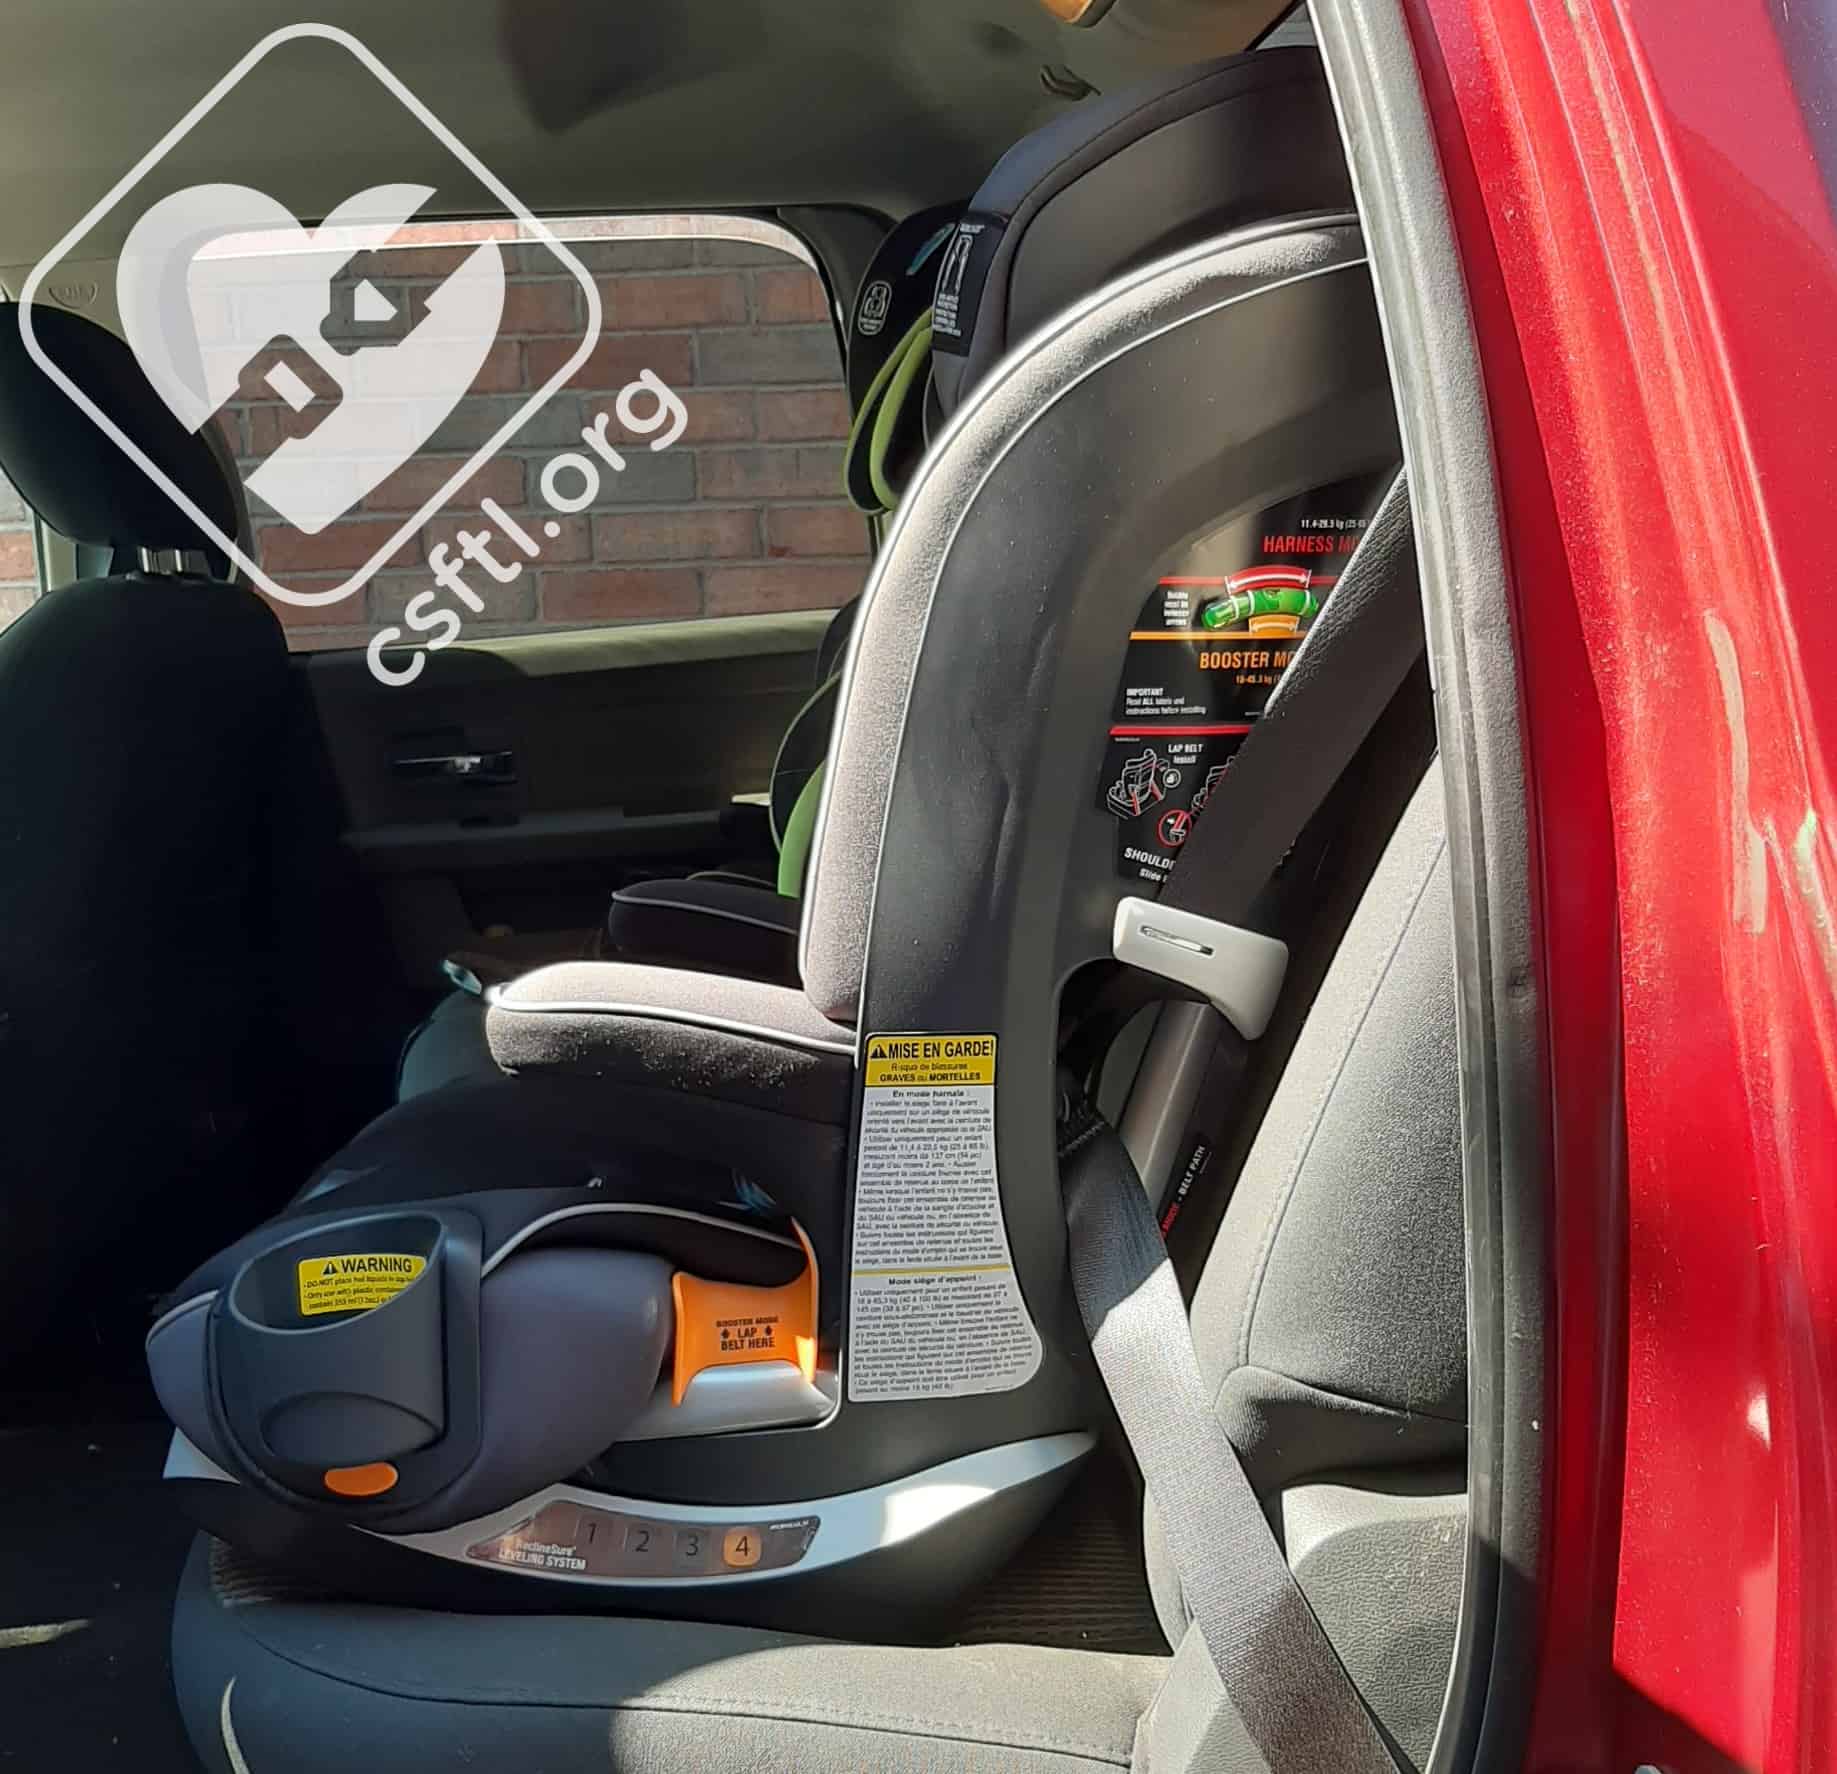
Chicco MyFit Canada – fully extended
The Chicco MyFit is a much-loved forward facing only combination car seat in the United States. Its narrow width, high harness height, and high standing height limit in harness mode make it a go-to for taller kiddos – especially in tight 3 car seats across scenarios. The seat has hit the Canadian market and our friends at Elfe Juvenile have kindly provided us with a seat to review. Come with us as we discover the Canadian Chicco MyFit combination seat!
CSFTL Quick Stats
- Weight range harness mode: 25-65 pounds
- Height range harness mode: 54 inches tall or less
- Harness mode has a 2 year minimum for use
- Weight range booster mode: 40-100 pounds
- Height range booster mode: 38-57 inches
- Booster mode has a 4 year minimum for use. CSFTL advocates that children be at least 5 years old before using a booster seat
- Expiration: 8 years from date of purchase (if known. If not known, the expiration is 8 years from the date of manufacture)
- Lower anchor weight limit: 40 pounds
Measurements
- Width at widest point of car seat with cup holders extended: 20.5 inches
- Width at widest point of car seat with cup holders collapsed: 17.5 inches at front end of base and at the child’s shoulders
- Seat weight: 23.8 pounds
- Lowest harness position: 13 inches
- Highest harness position: 20 inches
- Lowest booster belt guide: 13.5 inches
- Highest booster belt guide: 20.5 inches
- Internal shell height (fully extended): 27 inches
- External shell height (fully extended): 36 inches
- Width at child’s hips: 11 inches
- Width at child’s shoulders: 13 inches
- Seat pan depth: 14.5 inches
- 2 crotch buckle positions at 6.5 and 8 inches from back of seat
Features/Important Information
- Optional padding in harness mode includes shoulder pads and a crotch strap pad
- Chest clip pads mandatory in harness mode
- Premium LUAS
- 4 recline positions
- Bubble recline indicator
- 9 position no rethread harness
- Vehicle seat belt lock off
- May not be installed with an inflatable seat belt when used in harness mode
- May not be installed in front of an active airbag
- Does not allow lower anchor “borrowing”
- Allows up to 3 inches of overhang on the front of the seat
- The vehicle headrest can not push on the MyFit (creating a gap at the back of the seat)
CupFolders
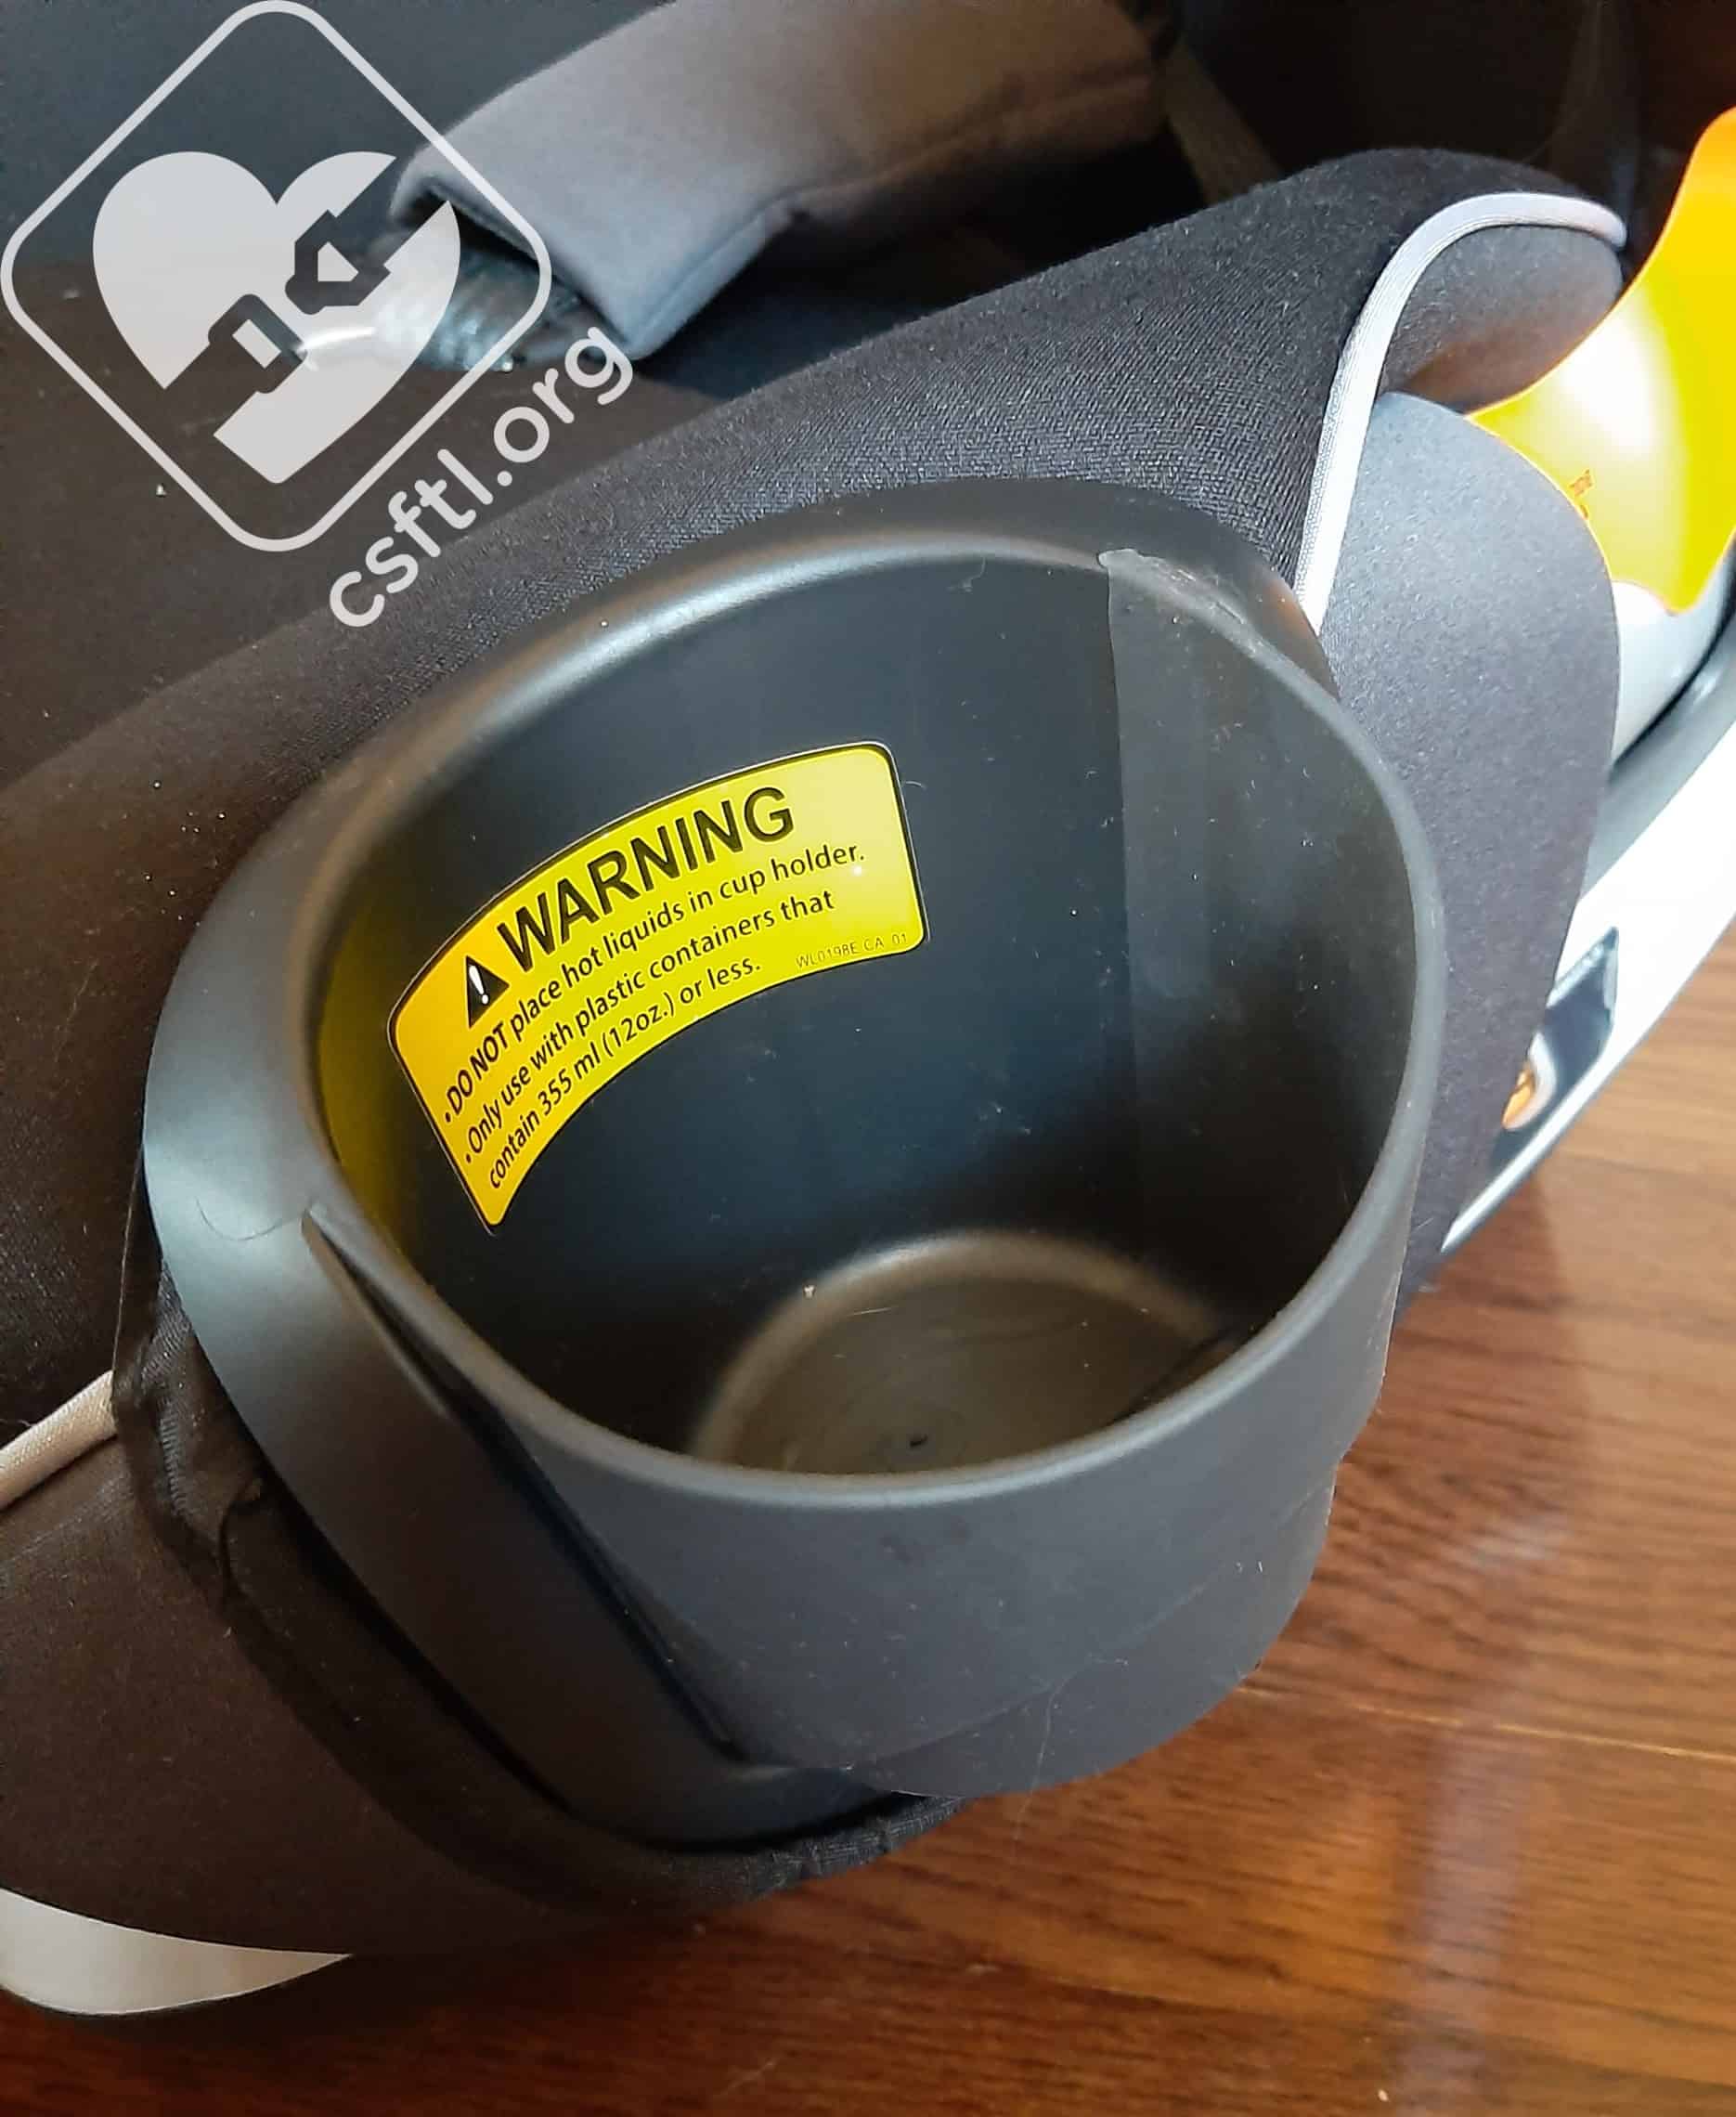
MyFit Cupfolder
The Chicco MyFit includes some pretty handy cupholders that fold in half if they need to be tucked out of the way. The seat ships with these cupfolders uninstalled. To install, match the cupfolder that’s labelled R on the right hand side of the seat, then match the cupfolder that’s marked L to the left hand side of the seat. Slide each cup holder down into the groove on the side of the seat until it clicks in place.
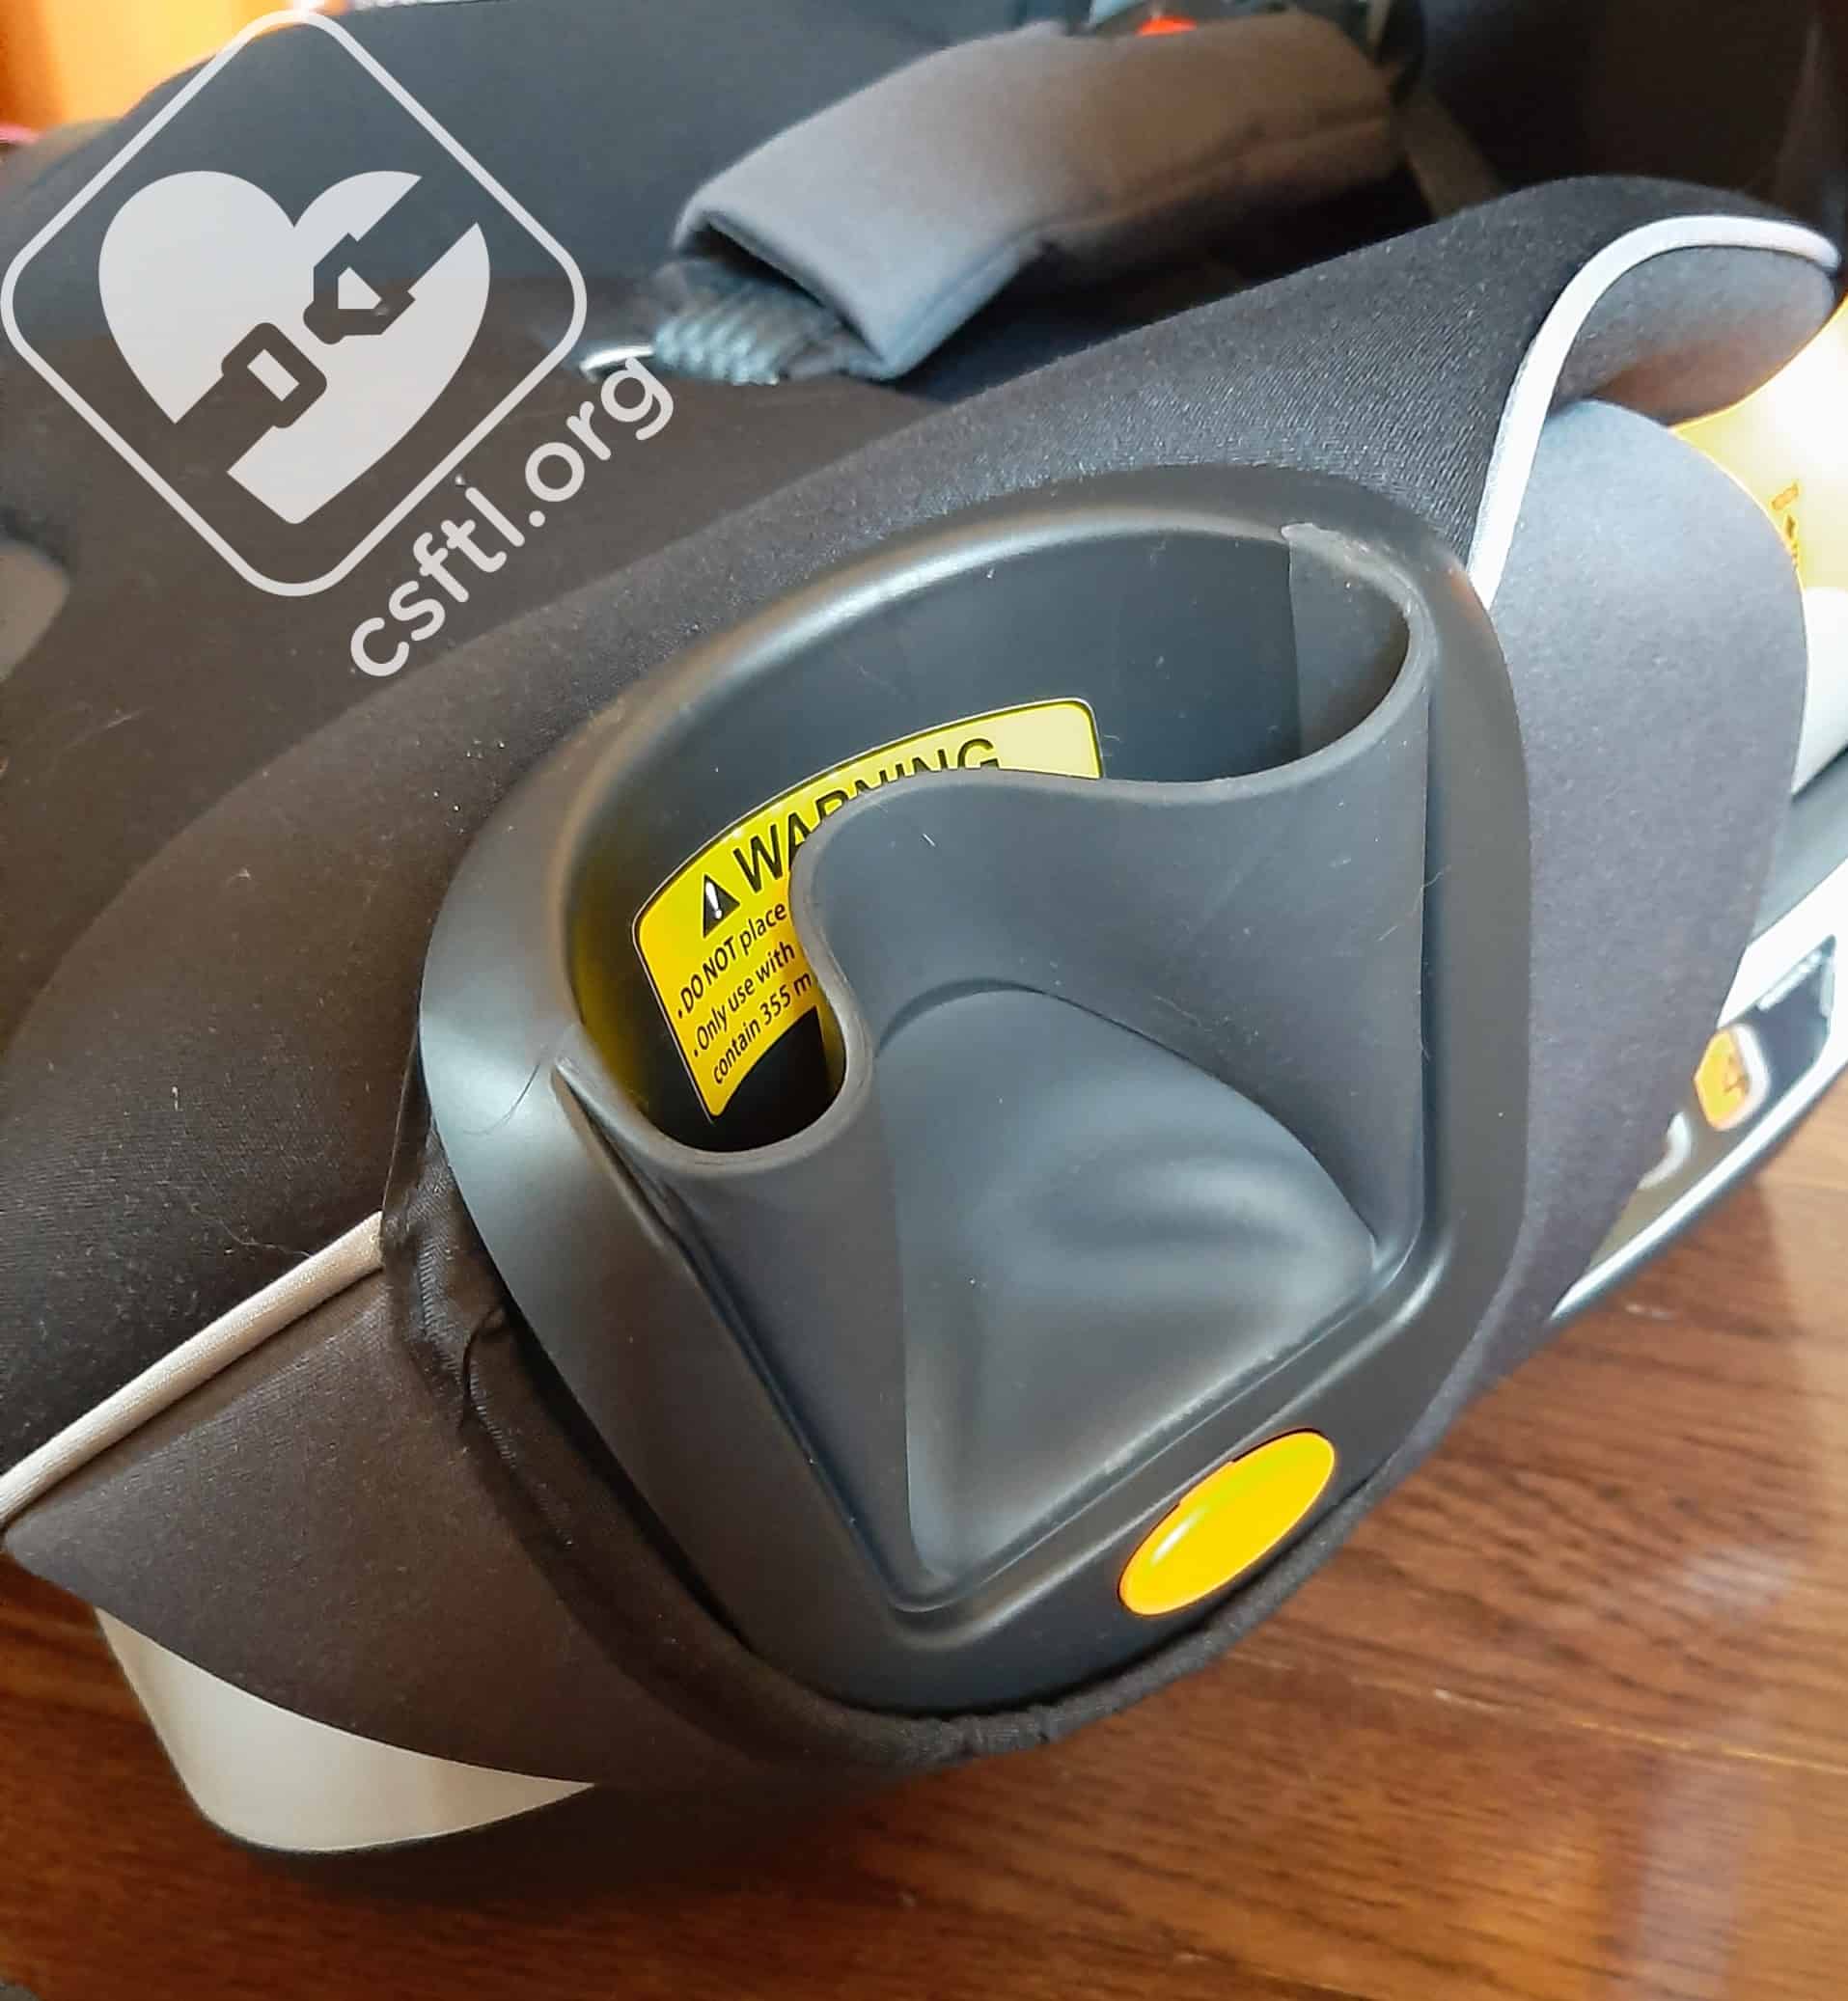
MyFit Cupfolder folded
To remove the cupfolders, press the orange button located on the bottom edge of the cupfolder, then slide the cupfolder up and out of the groove.

4 year old unfolding the MyFit cupfolders
Warning: Our 4 year old model took offense to the cupfolder being collapsed, so if you need the MyFit because of the slim profile and have a precocious child, you may need to put up with comments like “Why are my cup holders broken? Fix them!”
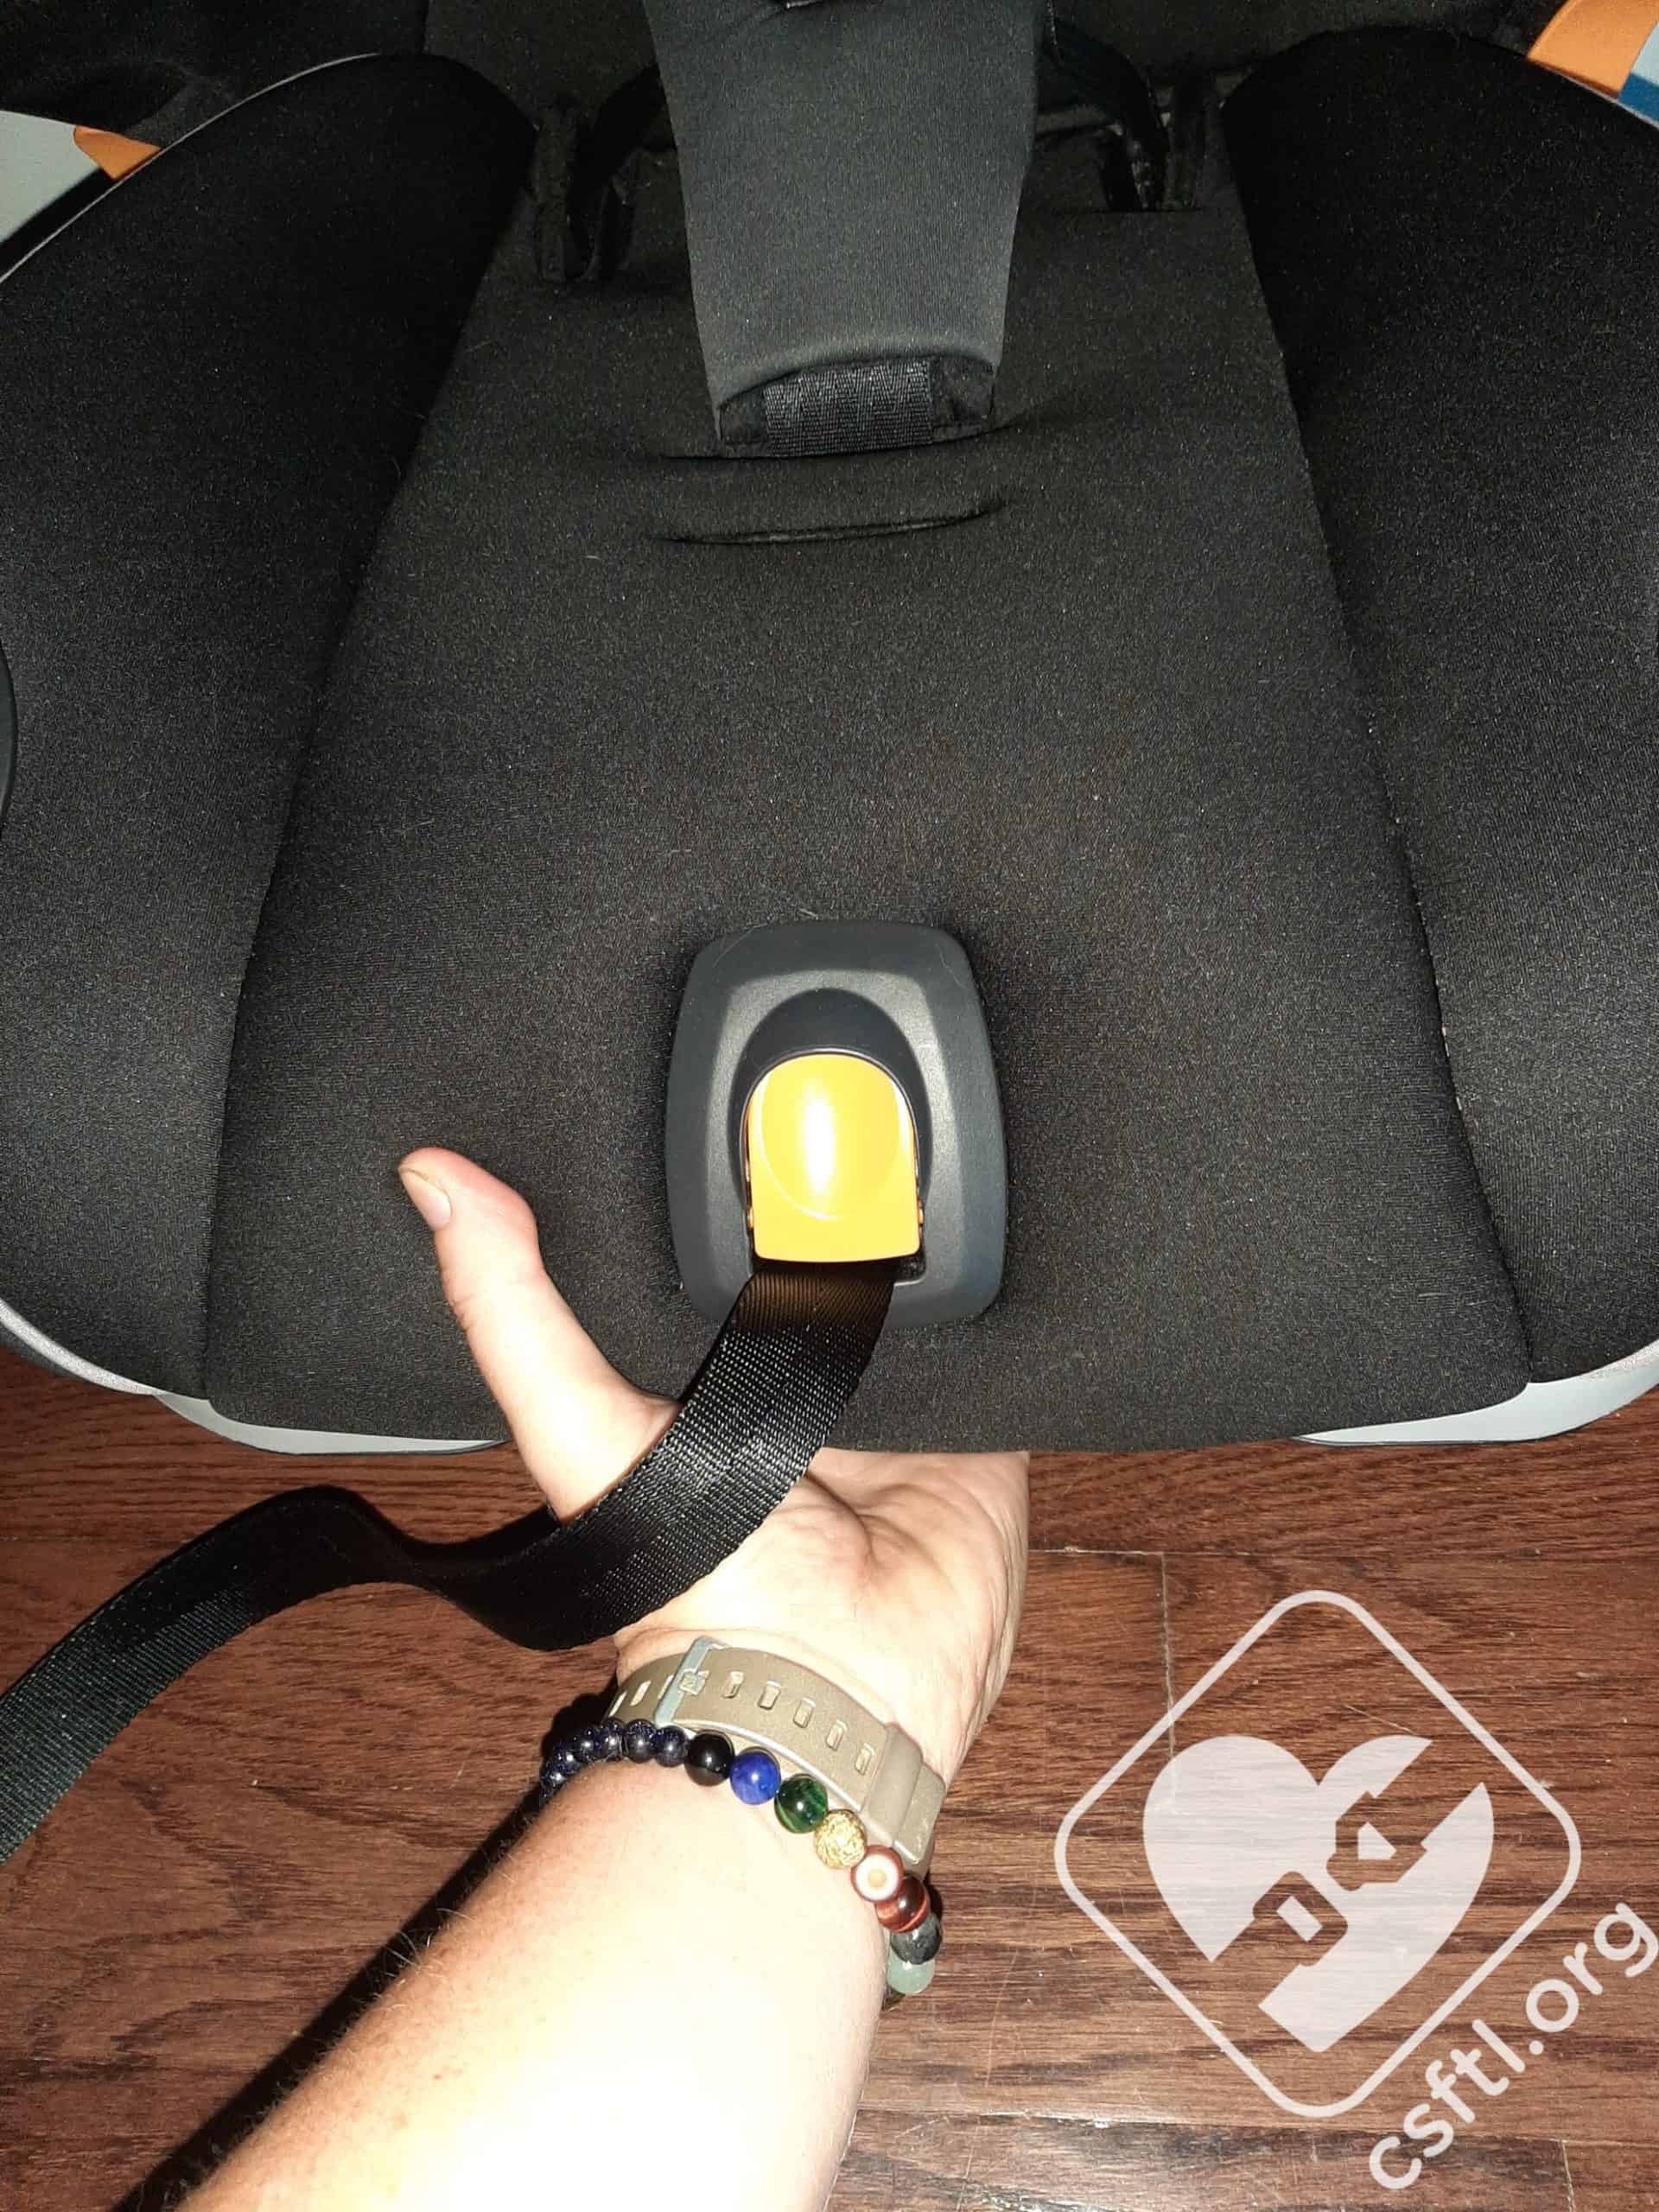
Crotch Buckle
Chicco MyFit crotch buckle adjustment
To move the crotch buckle from one position to the other, simply pull back the cover on the seat bottom, twist the crotch buckle sideways, and slide it into the other position. At times, a bit of shimmying was required to get the full webbing sideways into the slot, but once we figured out the exact amount of shimmying to do, we became fairly proficient at moving the buckle.
Recline Positions
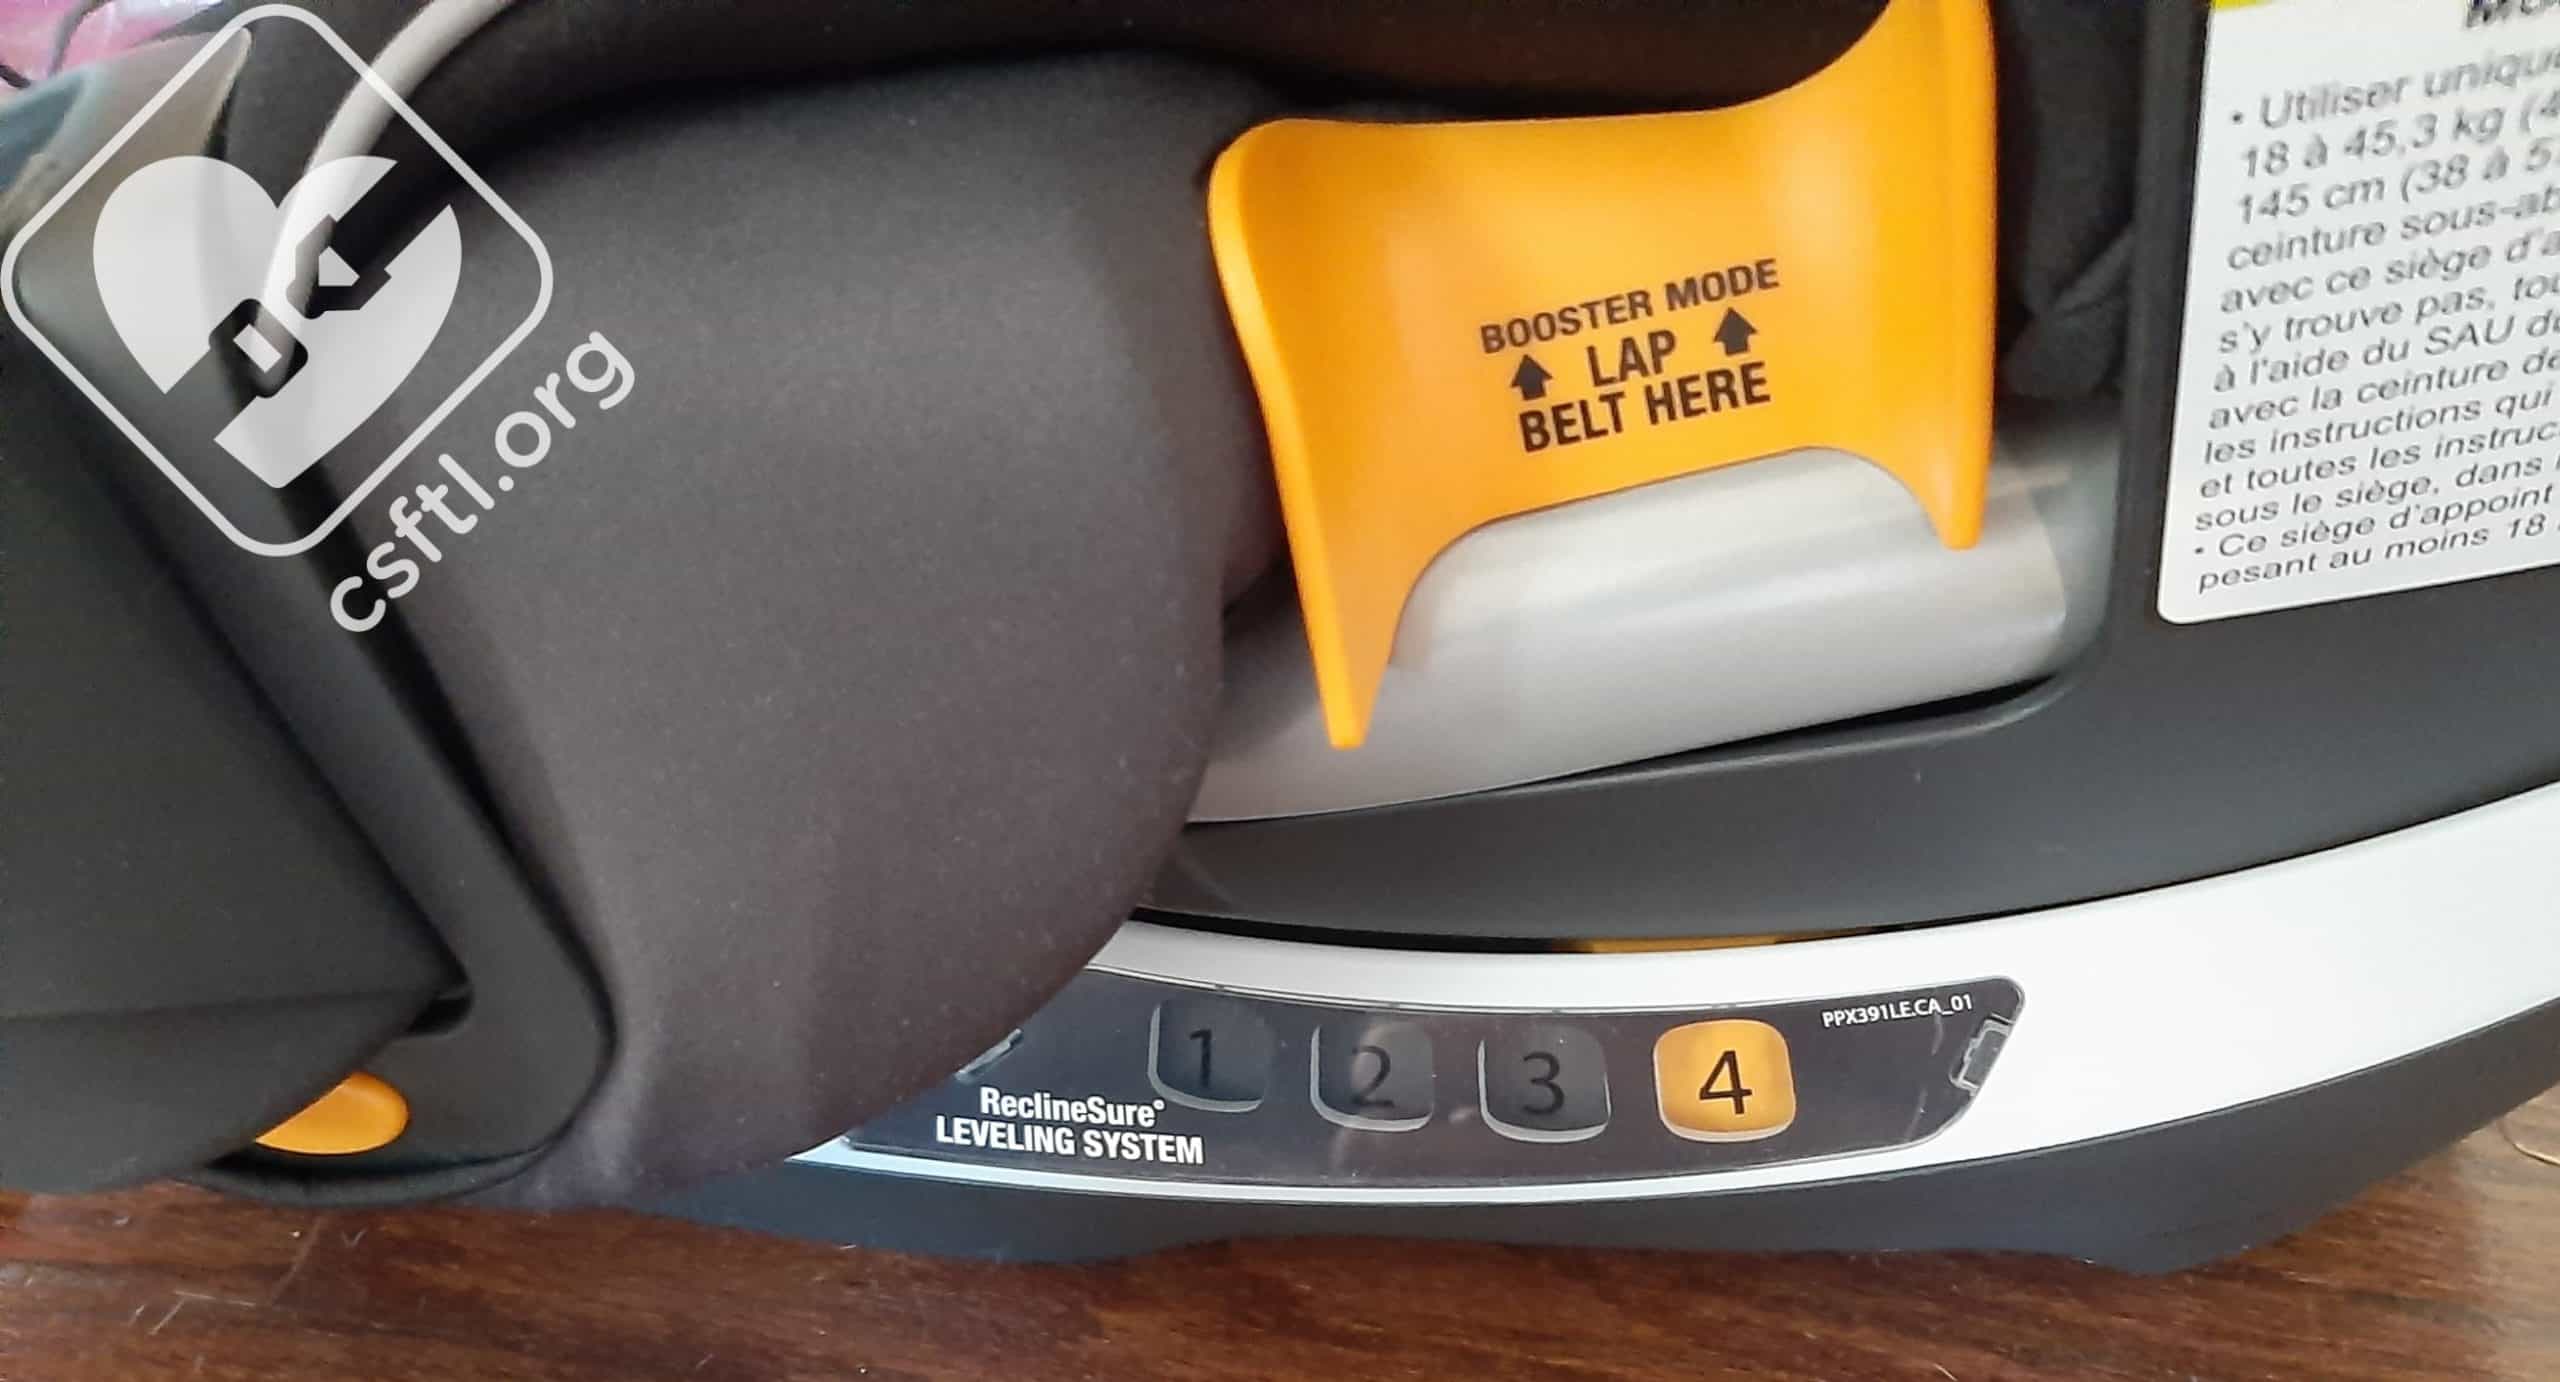
Chicco MyFit recline positions
The MyFit has 4 recline positions. There are no restrictions noted in the manual aside from ensuring that that the bubble is within the allowable range in the recline indicator (when parked on level ground). The manual seems to imply that the back of the MyFit must be flush with the vehicle seat back, but we reached out to Elfe Juvenile’s CPST who confirmed that a gap at the back of the MyFit is acceptable as long as there is contact between the MyFit and the vehicle seat back (not the vehicle headrest) and the bubble is within the allowable recline range.
Adjusting the Chicco MyFit recline
To adjust the recline position, pull on the handle under the front of the seat and slide the MyFit into a more upright/more reclined position until the shell clicks into place. Whichever number recline position the seat is now set to will be highlighted in orange on the side of the seat’s base.
Harness Mode Installation
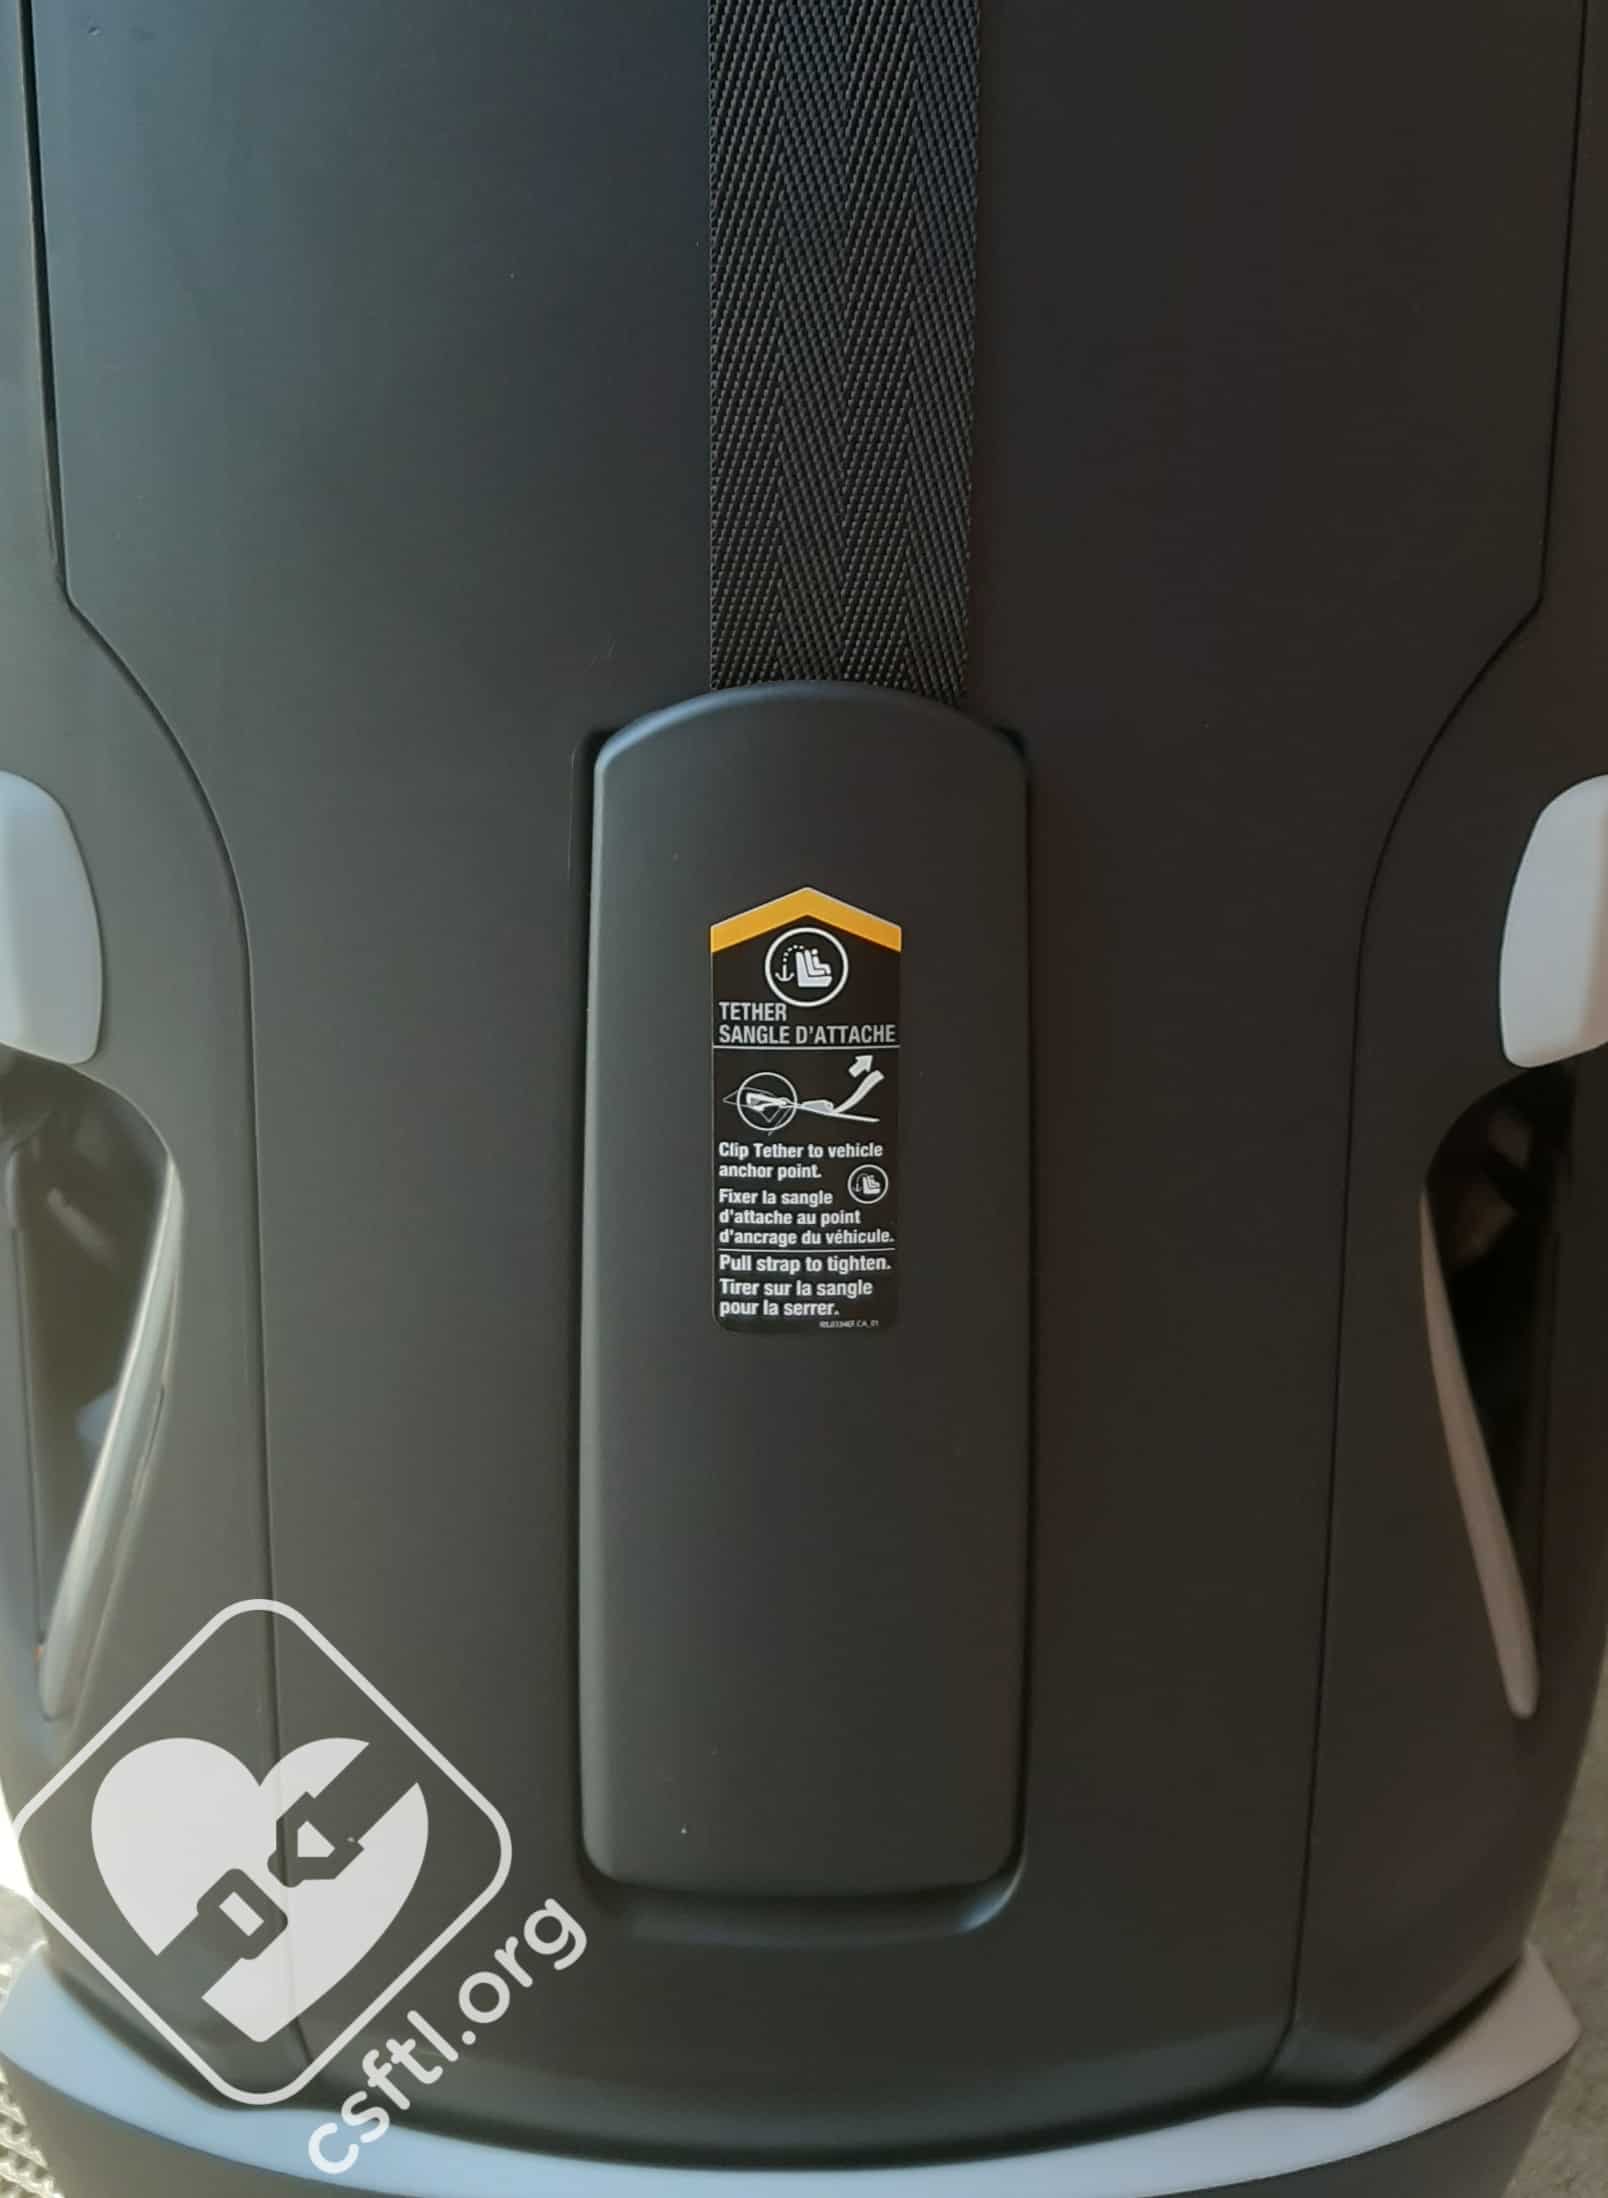
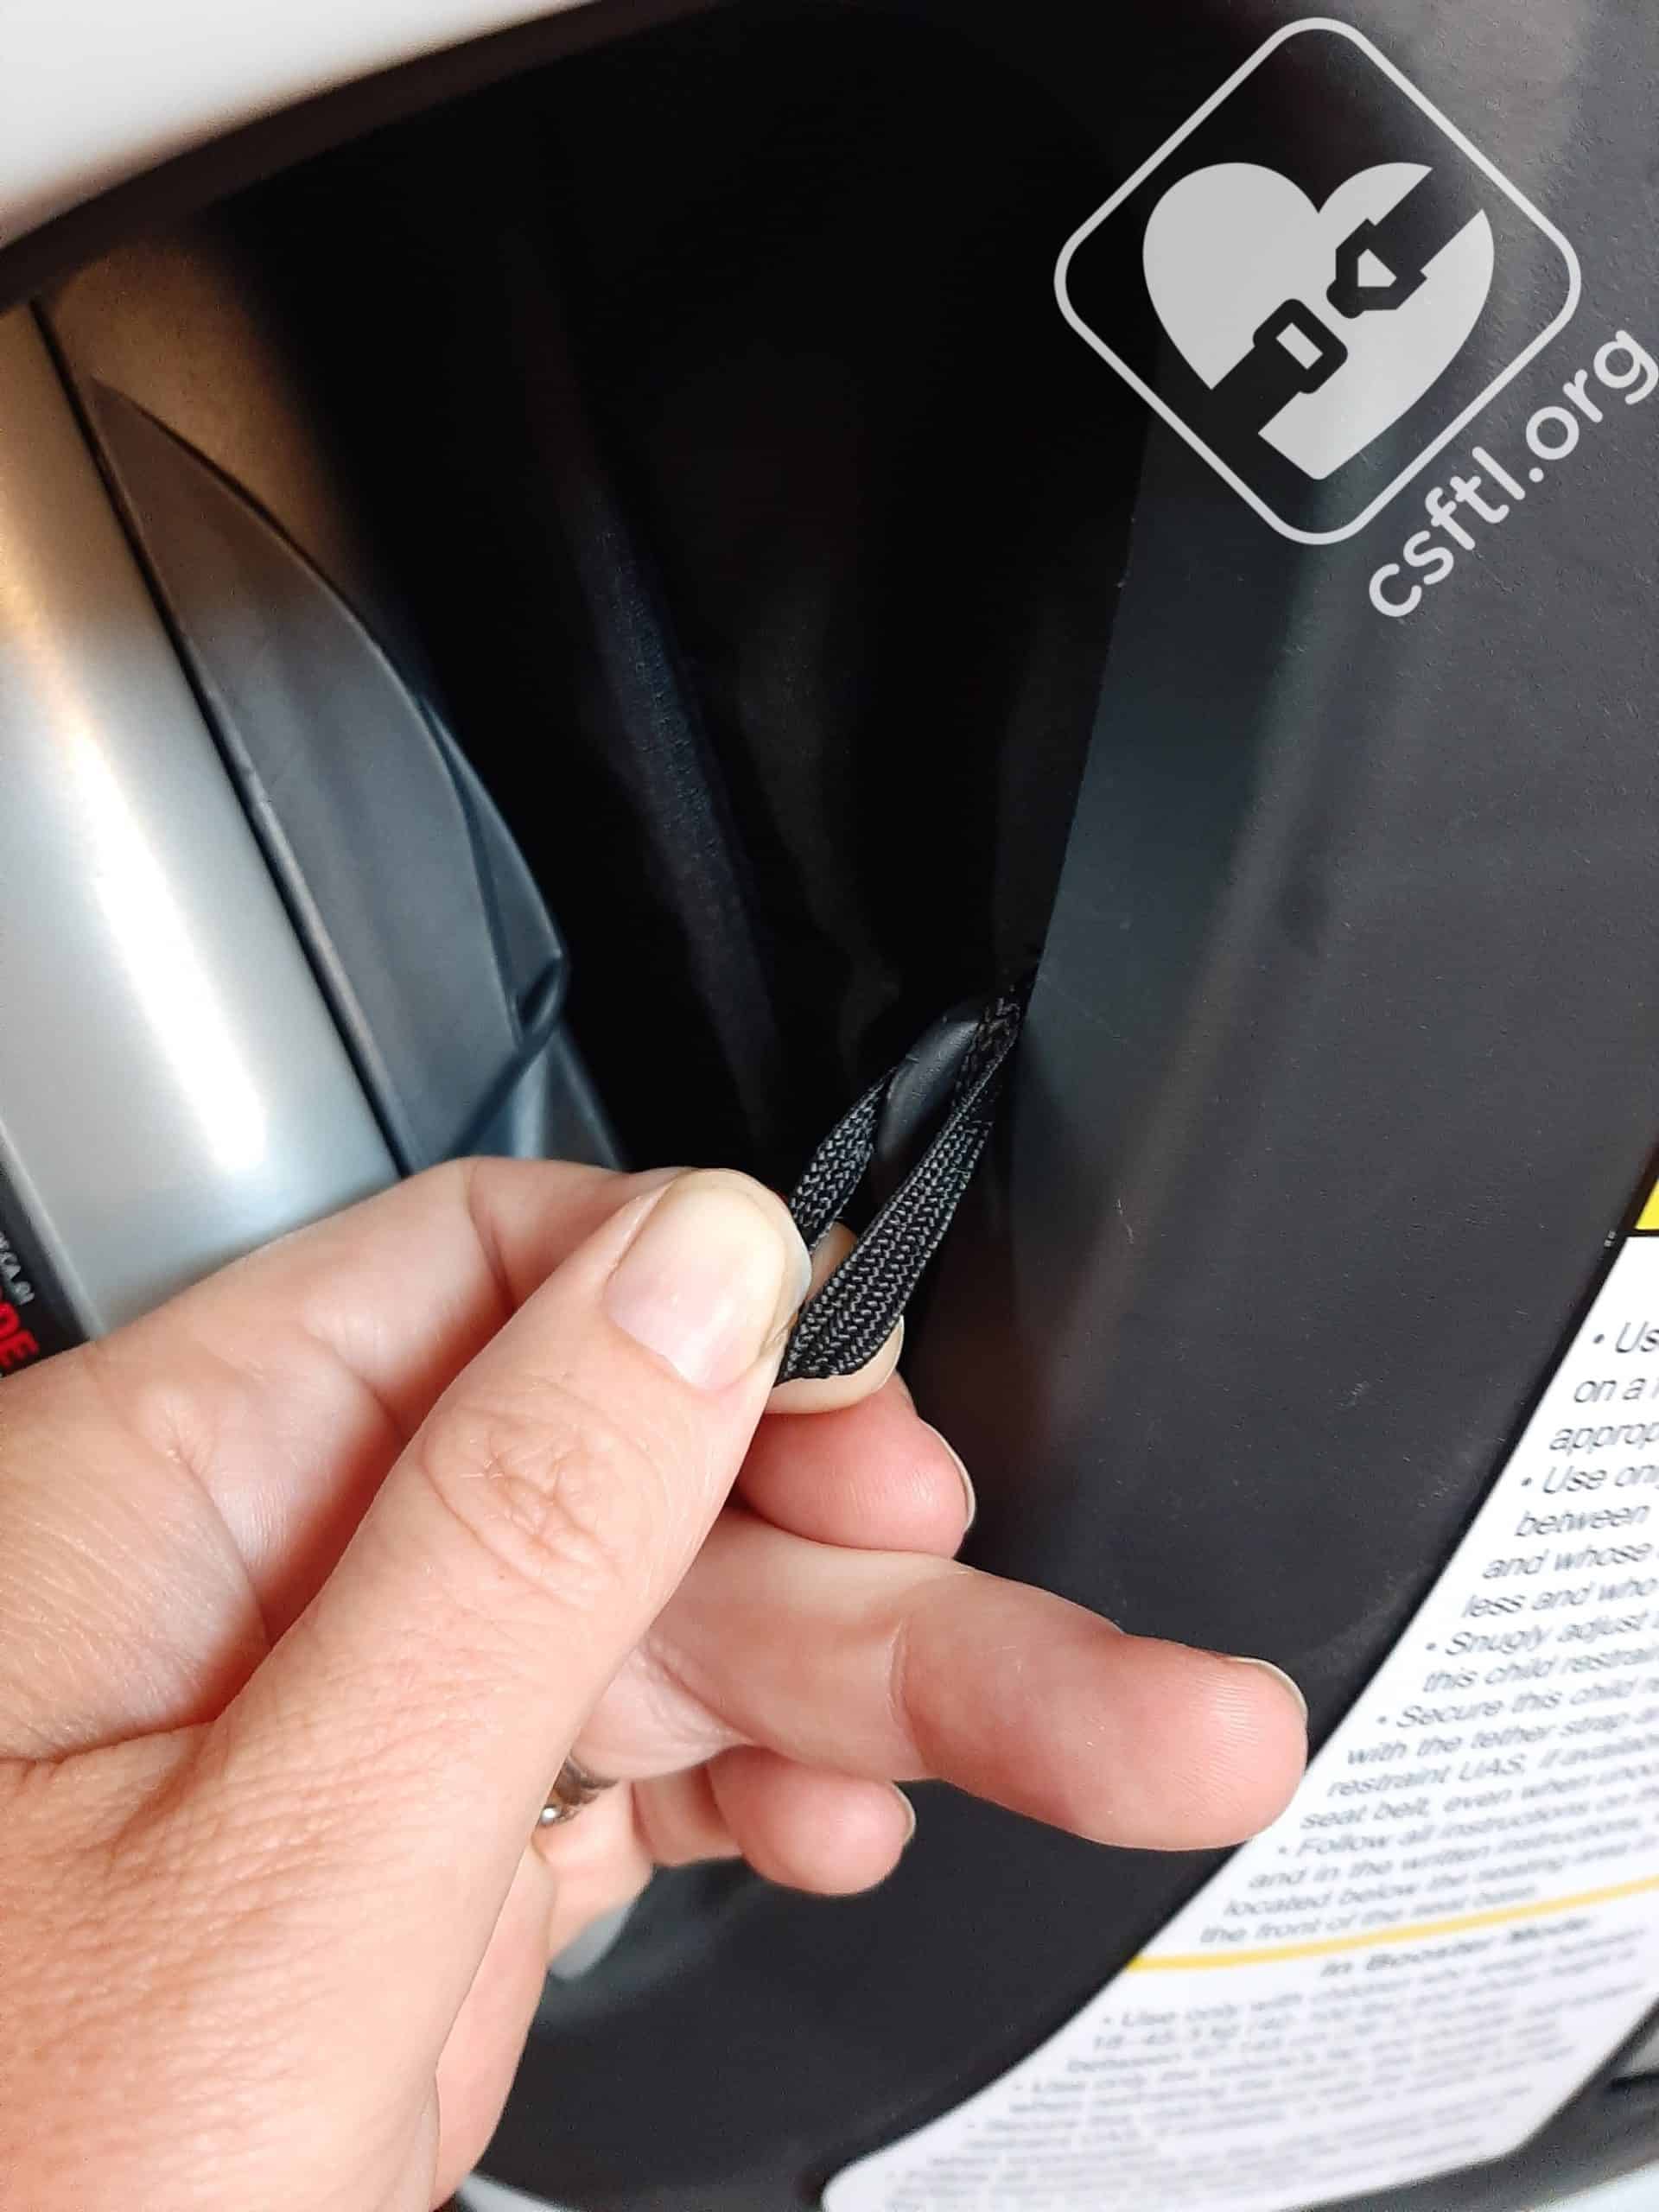
Chicco MyFit tether storage
Before installing the Chicco MyFit forward facing in harness mode, the top tether needs to be removed from the storage location on the back of the seat’s shell. Pull the tether storage door open from the top, loosen the tether, unhook it from the storage hook on the seat’s shell and finally, extend the length of the webbing. Close the door and you are ready to install the seat.
The Chicco MyFit ships with the LUAS (lower anchors) in the belt path. If you will be installing the MyFit with the vehicle seat belt, the LUAS will need to be stored out of the way.

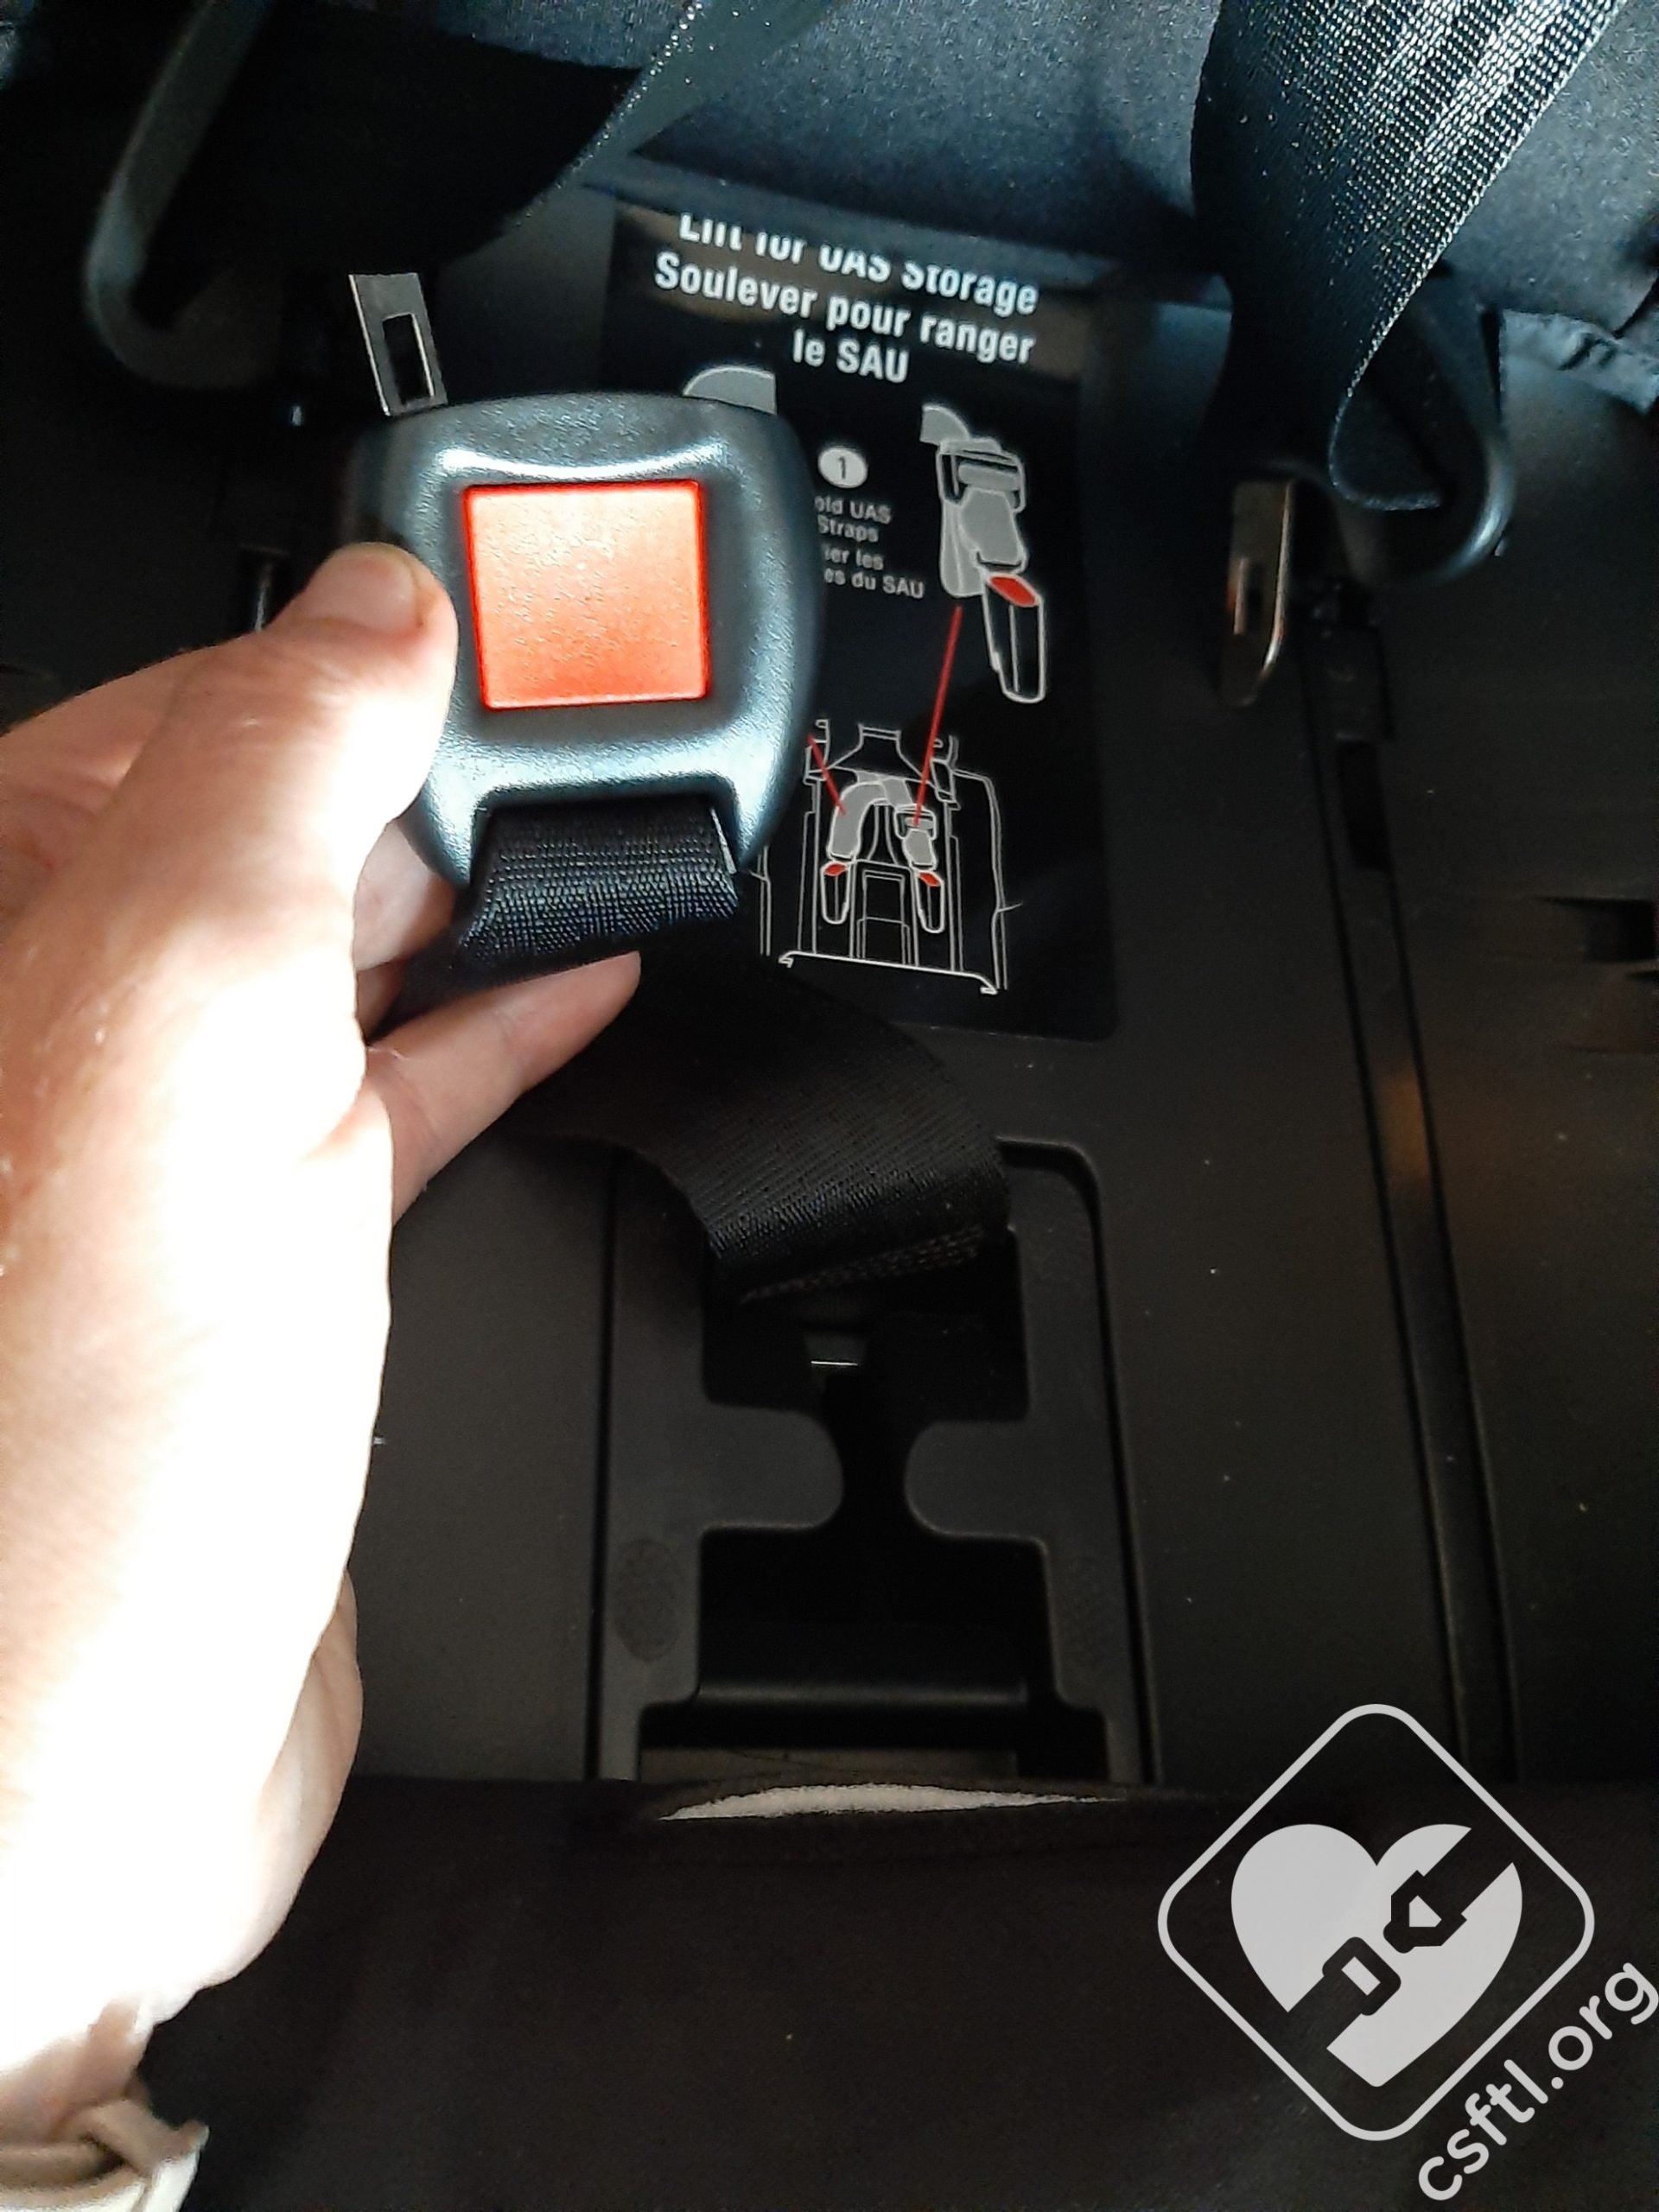
Chicco MyFit LUAS storage
To store the LUAS, loosen the harness and pull the bottom seat pad forward to reveal the storage compartment. Open the compartment by pulling the top seam, and tuck the LUAS anchors in as shown in the manual and in this handy picture as well. They do not attach to anything, they just set into the compartment. Close the compartment door, replace the seat’s cover, and you are ready to install with the vehicle seat belt.
Level Lines
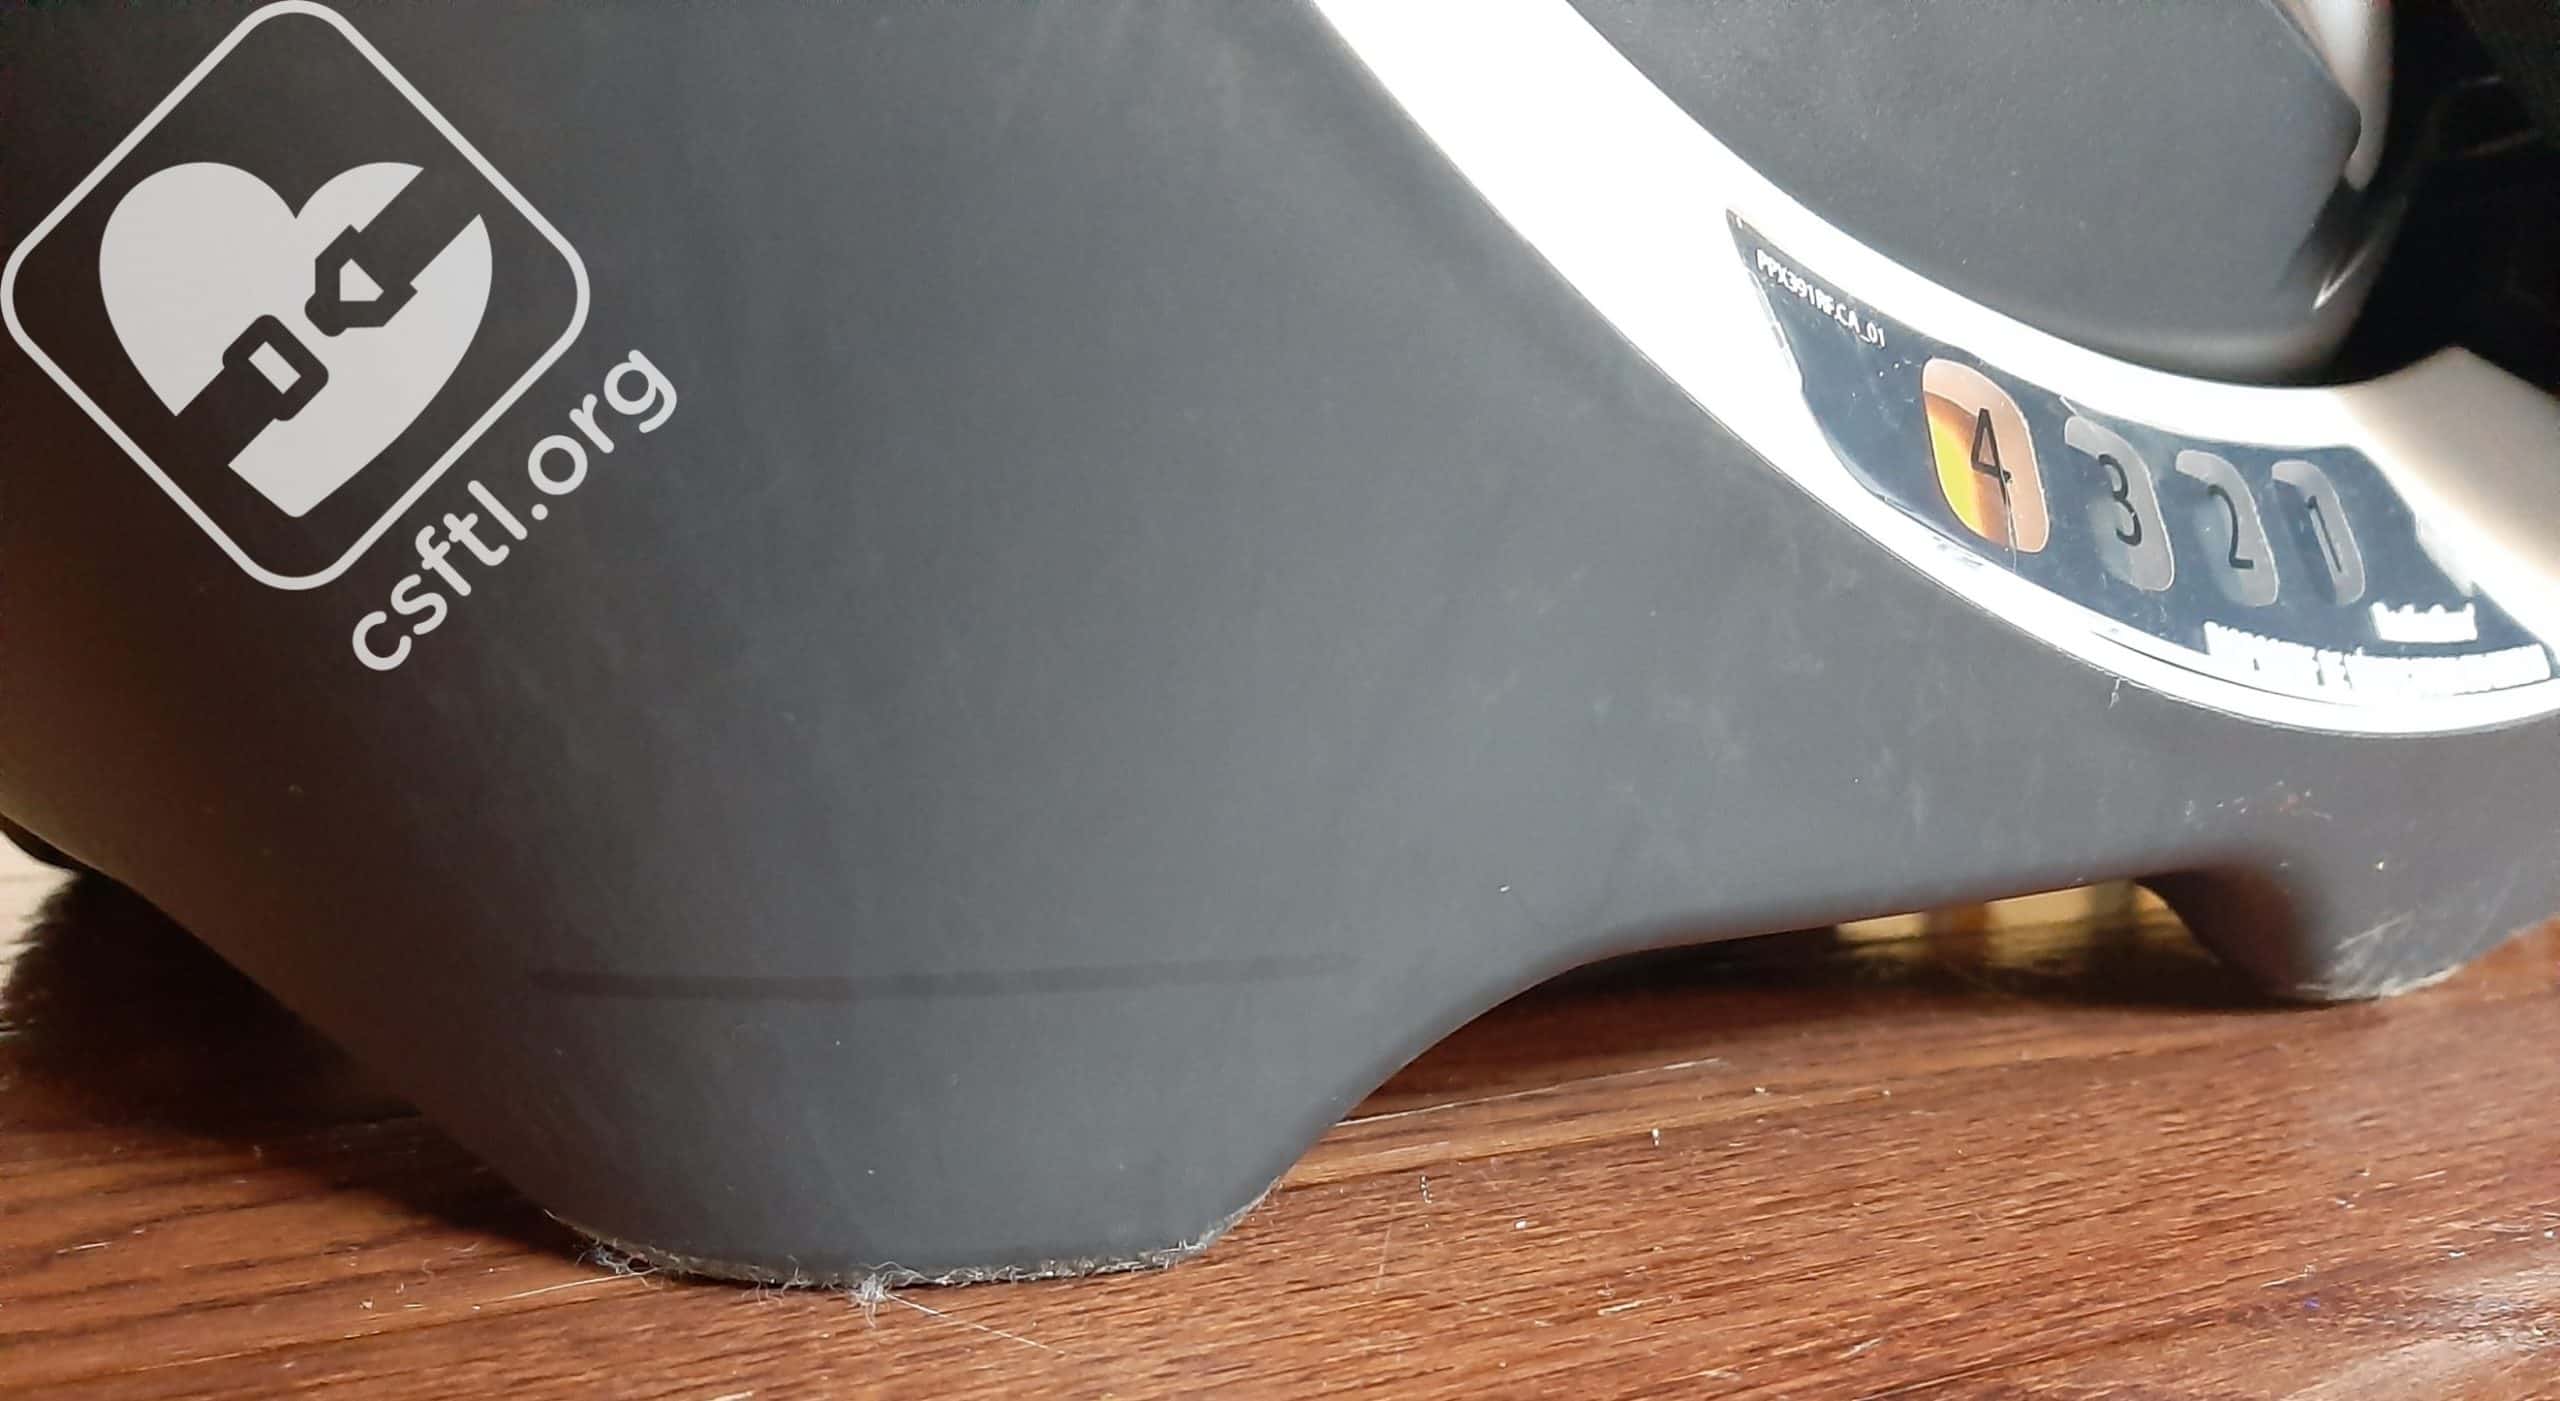
Chicco MyFit level line on the back end of the side of the base
The MyFit includes some lines on the seat that are fairly difficult to see. Unfortunately, ensuring that they’re parallel to the vehicle’s seating surface is a requirement for the installation. We’re unclear on why these lines were added to a seat that already has a recline angle indicator.
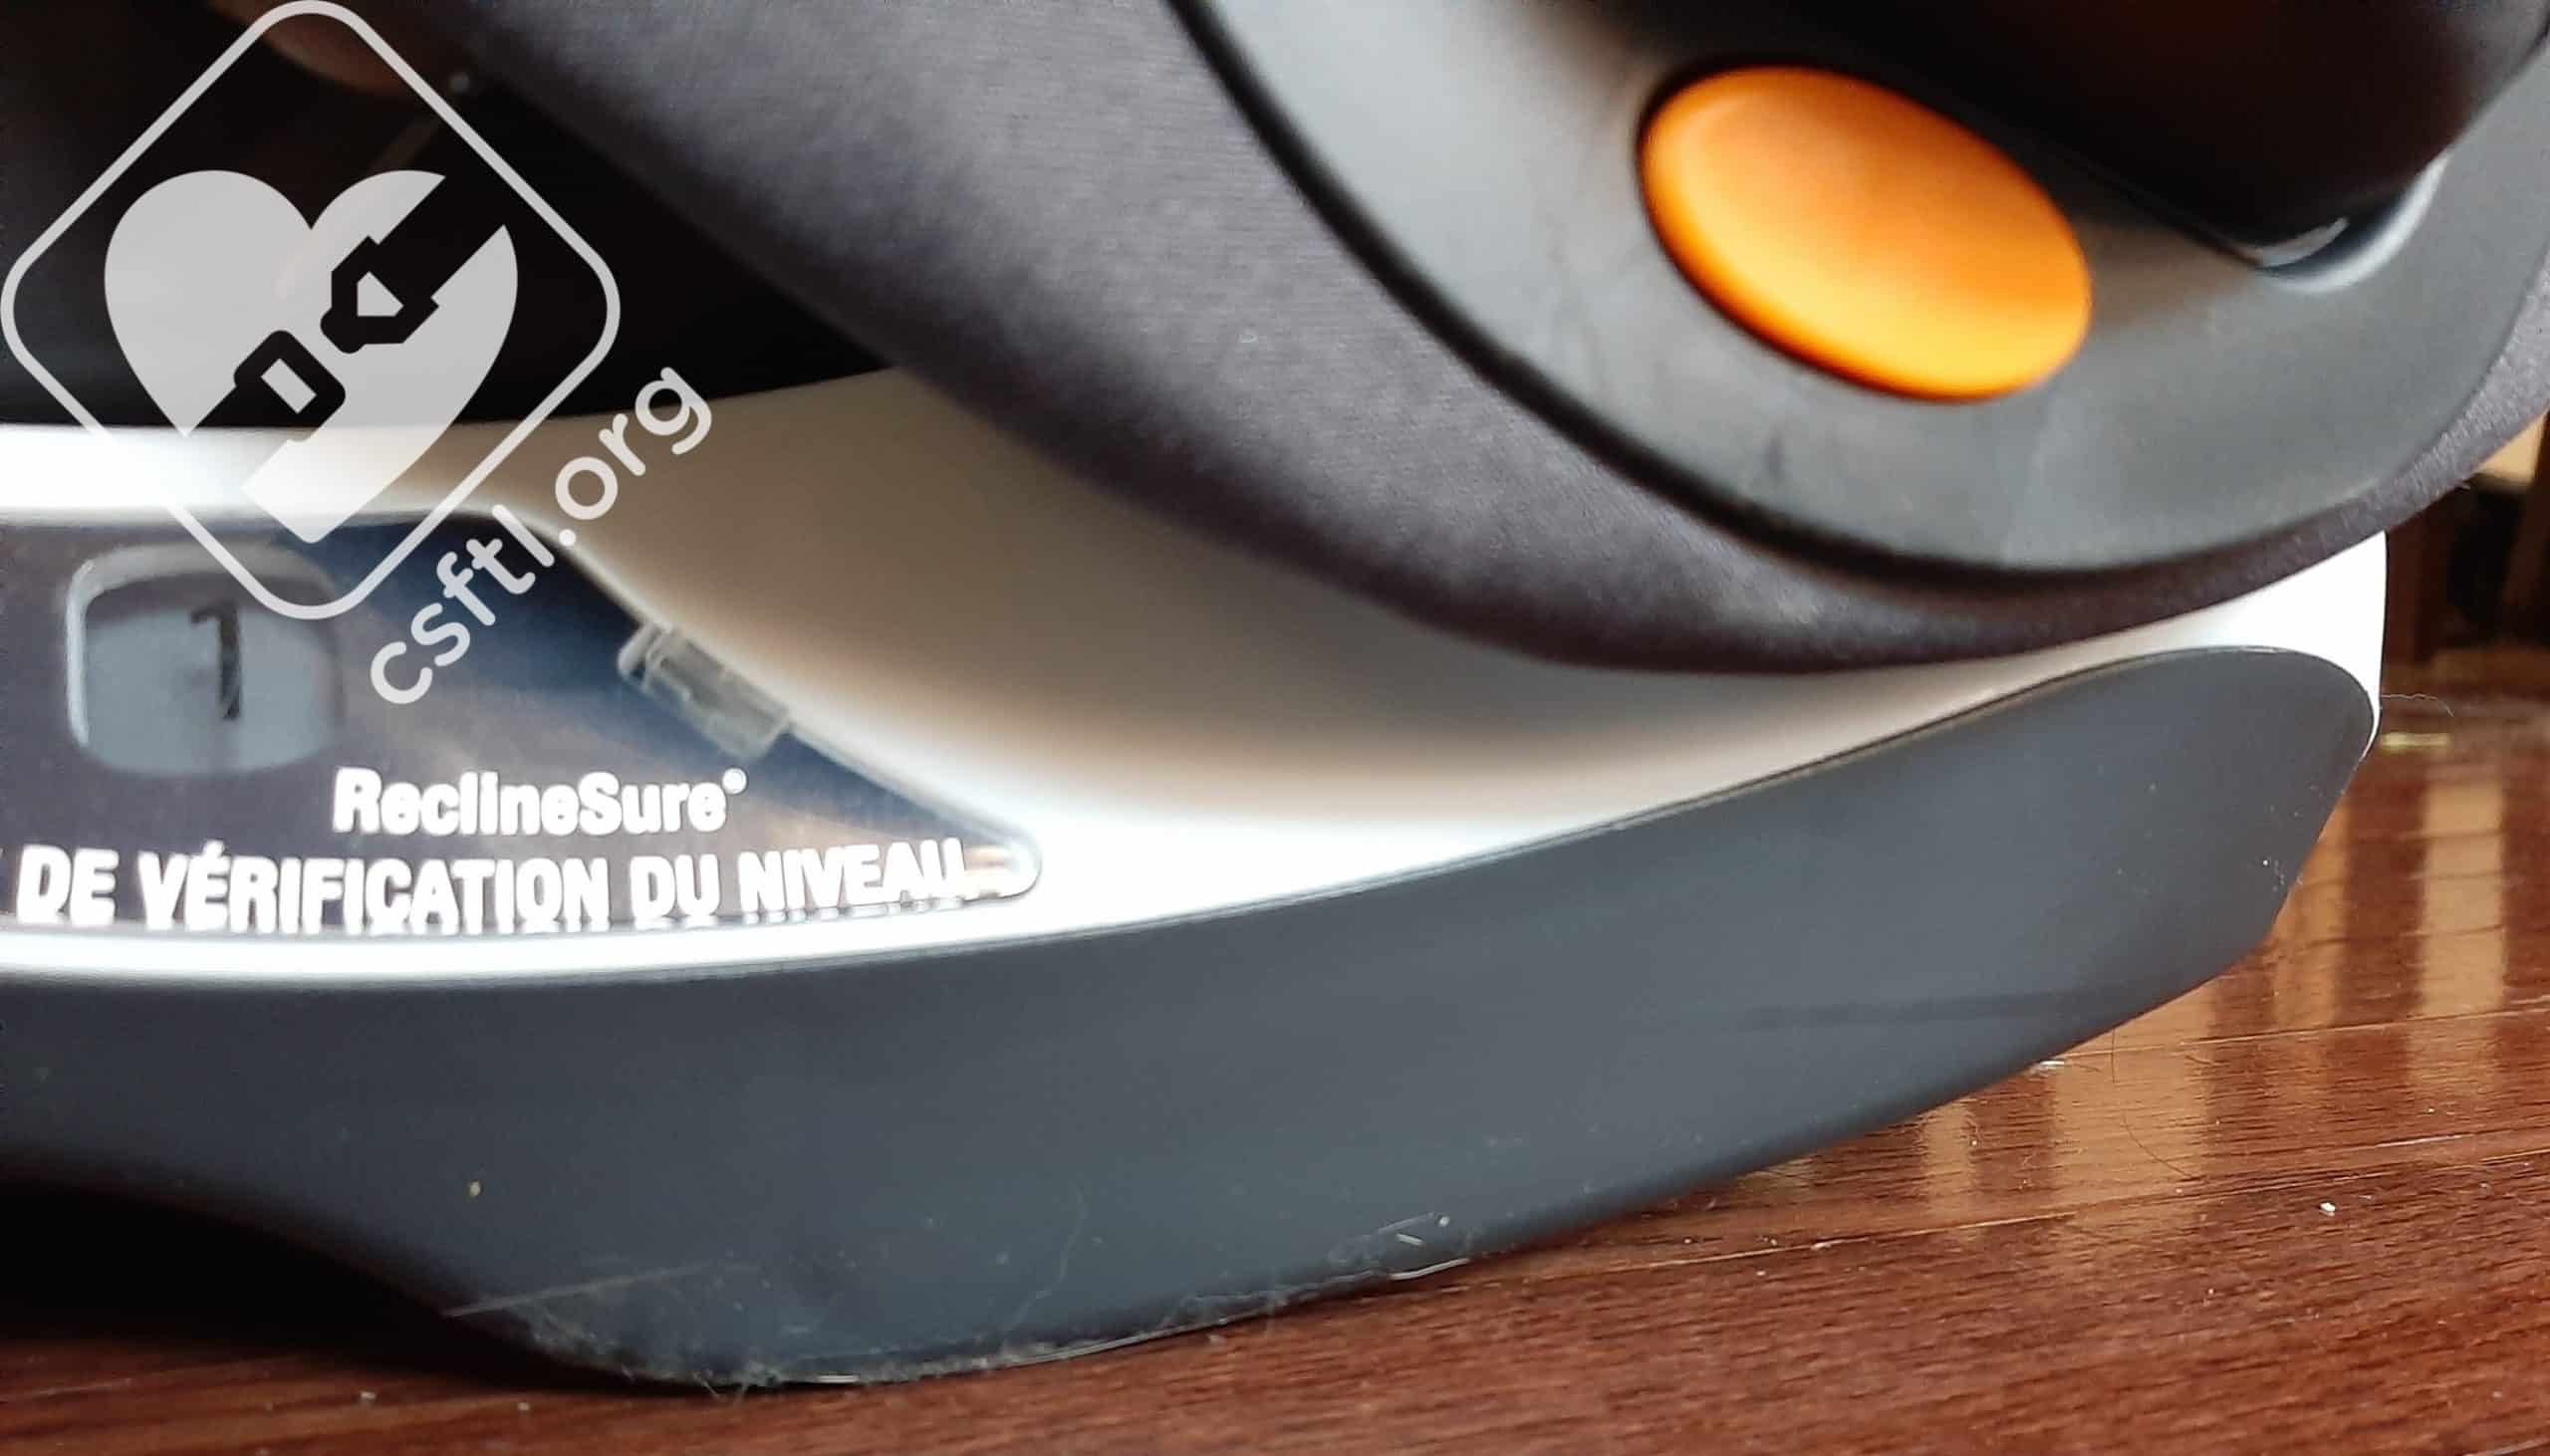
Chicco MyFit level line on the front end of the side of the base
Our guess about this requirement is that Chicco wants the base of the MyFit making full contact with the vehicle seat (and do not want the front or back edges of the MyFit to float). We asked Chicco and were told that the lines “are there to assist on leveling your car seat base to your vehicle seat”. Because the lines are a bit difficult to see in some seating positions, we’d recommend that caregivers focus on ensuring that the MyFit makes full contact with the vehicle seat – this will ensure the lines are level to the vehicle seat.
Recline Angle Indicator
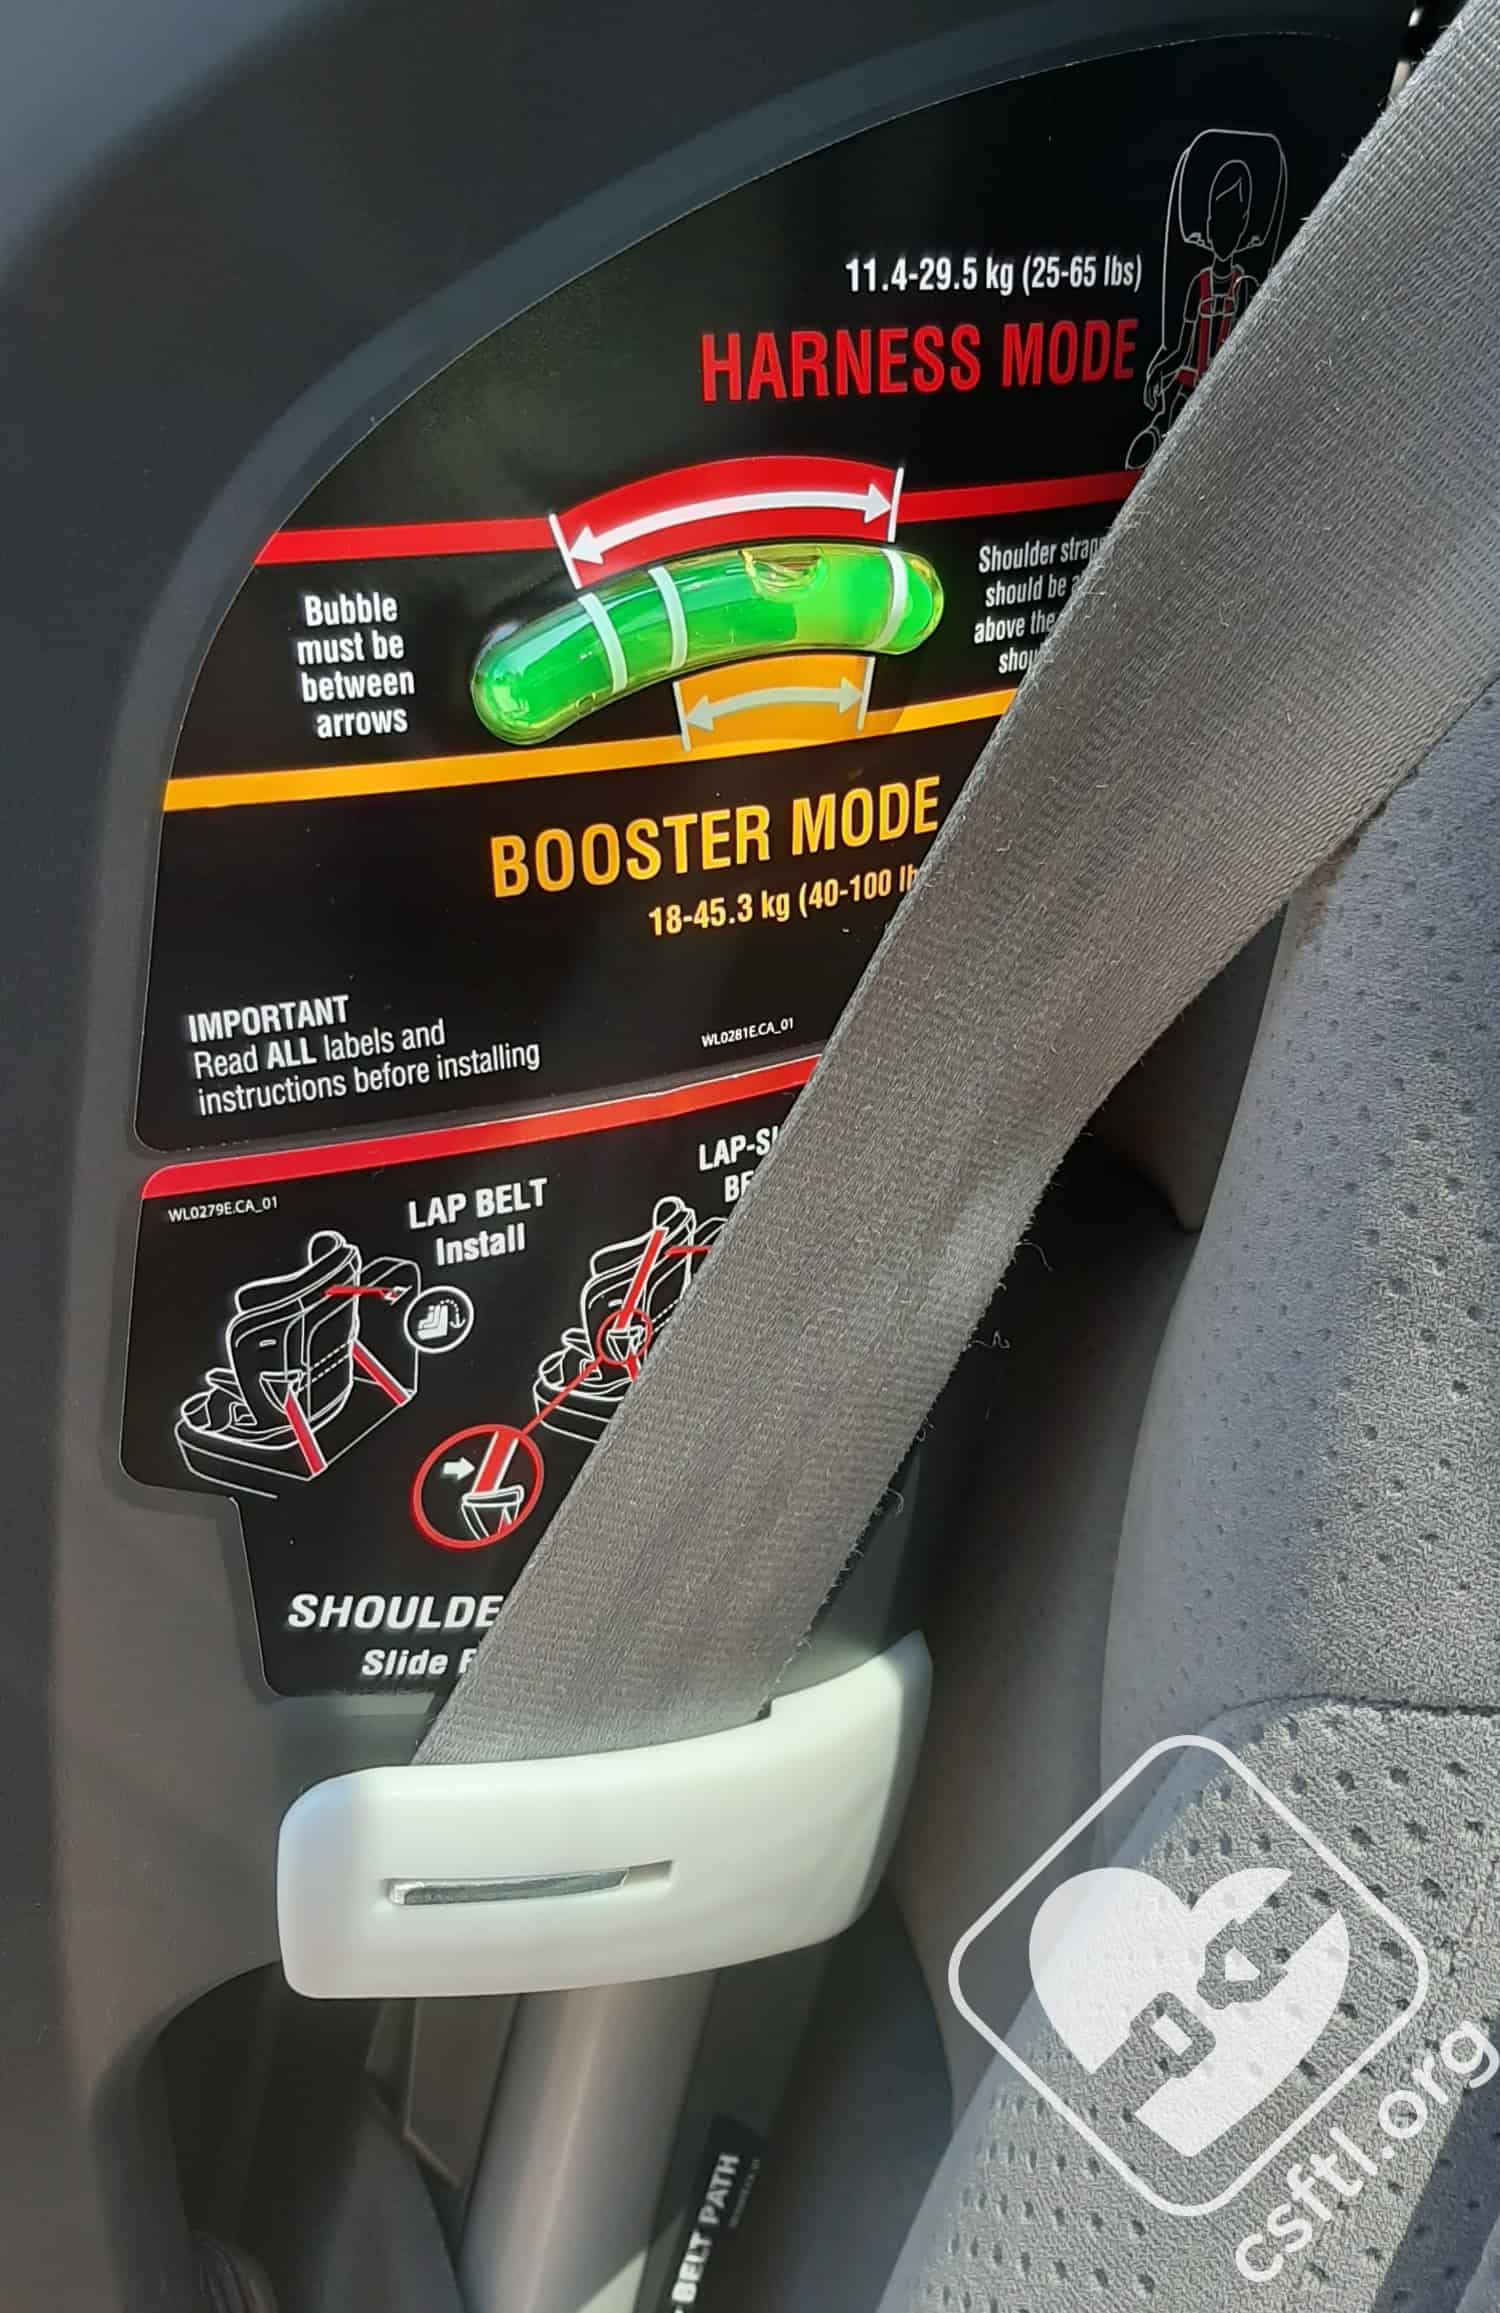
Chicco MyFit Recline Indicator and Lock Off
This is a fairly unique item on a forward facing only seat. We see bubble indicators frequently on rear facing seats (like the Chicco Keyfit), but it’s interesting to see one on a forward facing seat. The MyFit has 4 recline positions, squeeze the handle on the front of the seat and rotate the seat back to select the recline position that places the bubble within the allowable range (when parked on level ground) before installing the MyFit.
Installation With Vehicle Lap/Shoulder Seat Belt, Using Lock Off
Once the MyFit is adjusted to fit the vehicle seat, the installation with the vehicle seat belt using the lockoffis very straightforward. In fact, we found this installation quite simple. Here’s how it worked:
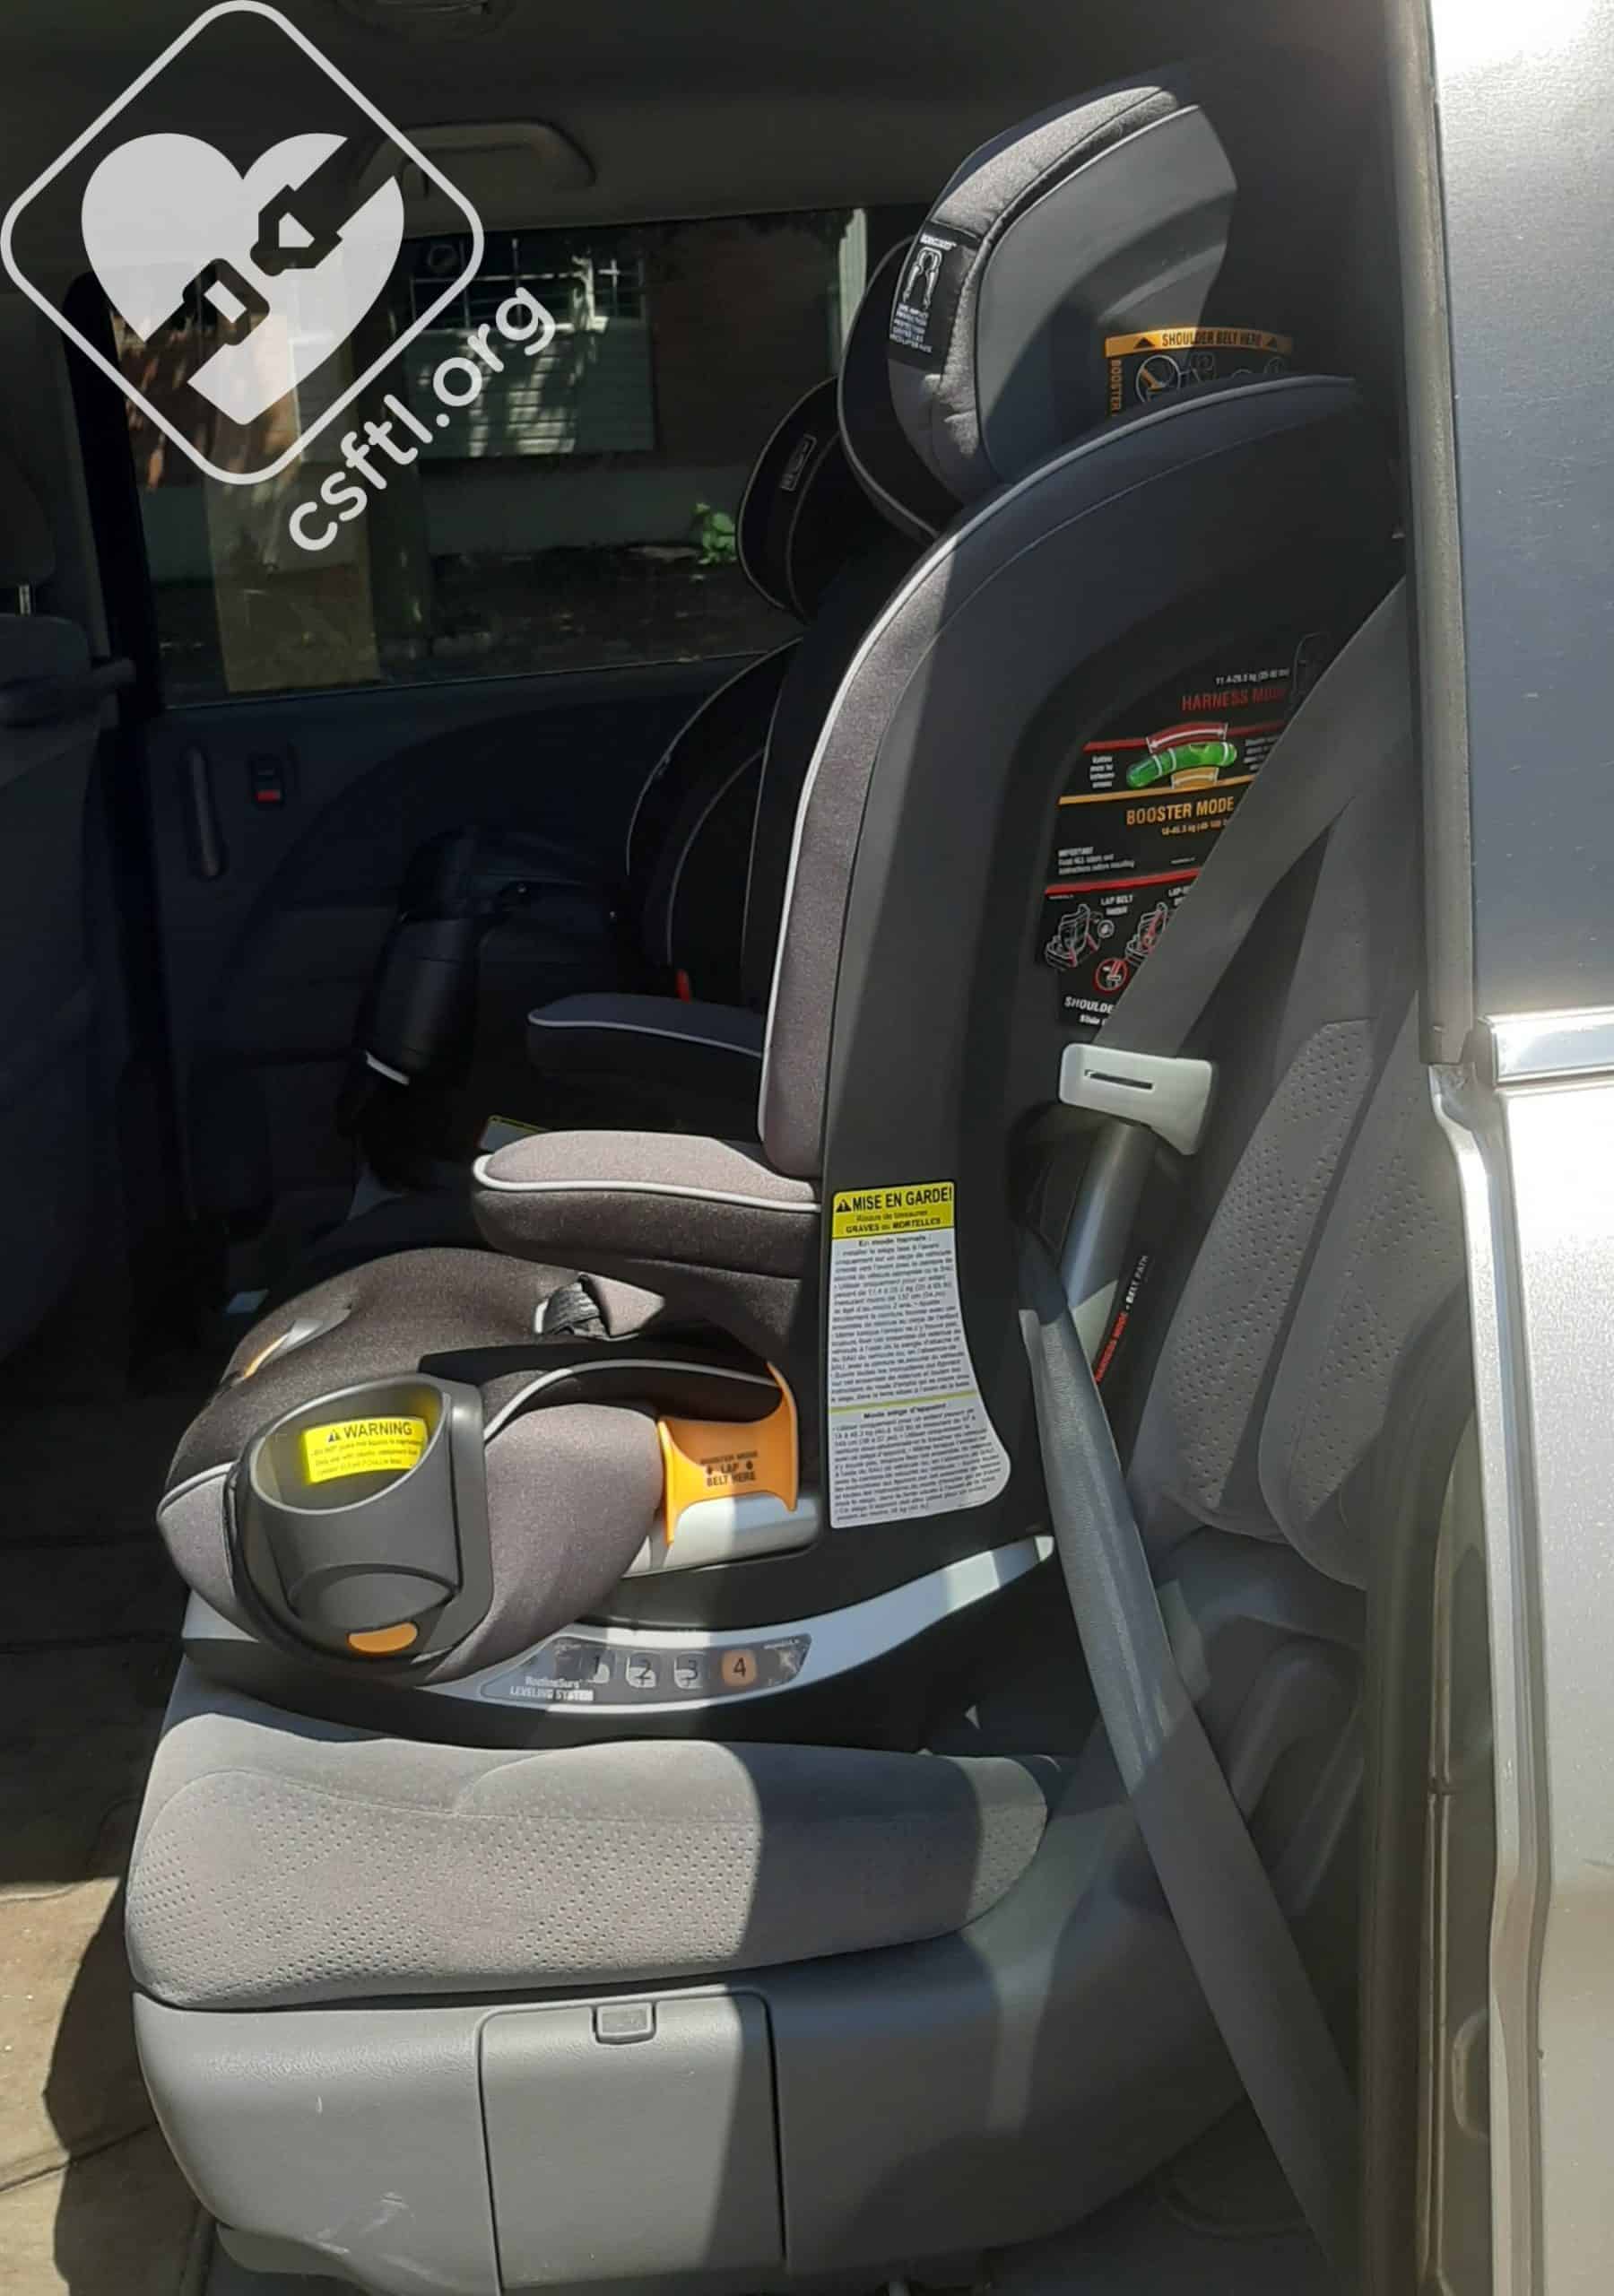
Chicco MyFit installed with vehicle lap shoulder belt and Lock Off
Route the lap/shoulder belt through the red “harness mode” seat belt path, and buckle the vehicle seat belt. Remove the slack from the seat belt by pushing down on the MyFit, and, once tight, slide the shoulder portion of the vehicle seat belt on the opposite side of the buckle into the lock off.
Check for movement at the belt path. If there is less than 1 inch of movement in any direction at the belt path, attach the top tether to the vehicle’s tether anchor, remove the slack from the tether strap, double check the angle shown on the recline angle indicator, and you are ready to go.
With Vehicle Lap-Only Seat Belt, no Lock Off
The MyFit can be installed without using the built in lockoff (aside from installing with a lap-only belt, we don’t see any scenarios where you wouldn’t want to use the lockoff):
Unsnap the armrest fabric from the back cover on both sides of the seat. Route the lap-only belt through the red “harness mode” seat belt path, and buckle the vehicle seat belt. Engage the locking mechanism on the seat belt (if the belt does not lock at the latchplate), and remove the slack from the seat belt while pushing down on the MyFit.
Check for movement at the belt path. If there is less than 1 inch of movement in any direction, attach the top tether to the vehicle’s tether anchor, remove the slack from the tether strap, double check the recline indicator, and you are ready to go.
Because of the pandemic we did not have access to any vehicles with a lap-only vehicle seat belt to demonstrate this type of installation. When we are able to, we will add photos to this review.
With Lower Anchors/LUAS

Chicco MyFit lower anchor connector
If the lower anchors have been stored, loosen the harness and pull the bottom seat pad forward to reveal the storage compartment. Open the compartment by pulling the top seam, and remove the LUAS anchors from the storage compartment. Close the compartment door, thread the LUAS webbing through the belt path, ensuring that the straps lay flat against the seat back with no twists. Replace the seat’s cover and you are ready to install the seat with LUAS.
Loosen the LUAS webbing and attach the anchors to the LUAS bars in the vehicle, ensuring the red button is on top. Push down on the MyFit while pulling on the tightening strap. Check for movement at the belt path. If there is less than 1 inch of movement in any direction, attach the top tether to the vehicle’s tether anchor, remove the slack from the tether strap, double check the recline indicator, and you are ready to go.
Converting to Booster Mode
The MyFit requires a few steps to convert the seat from harness to booster mode. This particular conversion is about the hardest task to do on this seat.
Converting the MyFit to booster mode: loosen the harness
Completely loosen the harness and unbuckle the chest clip and crotch buckle.

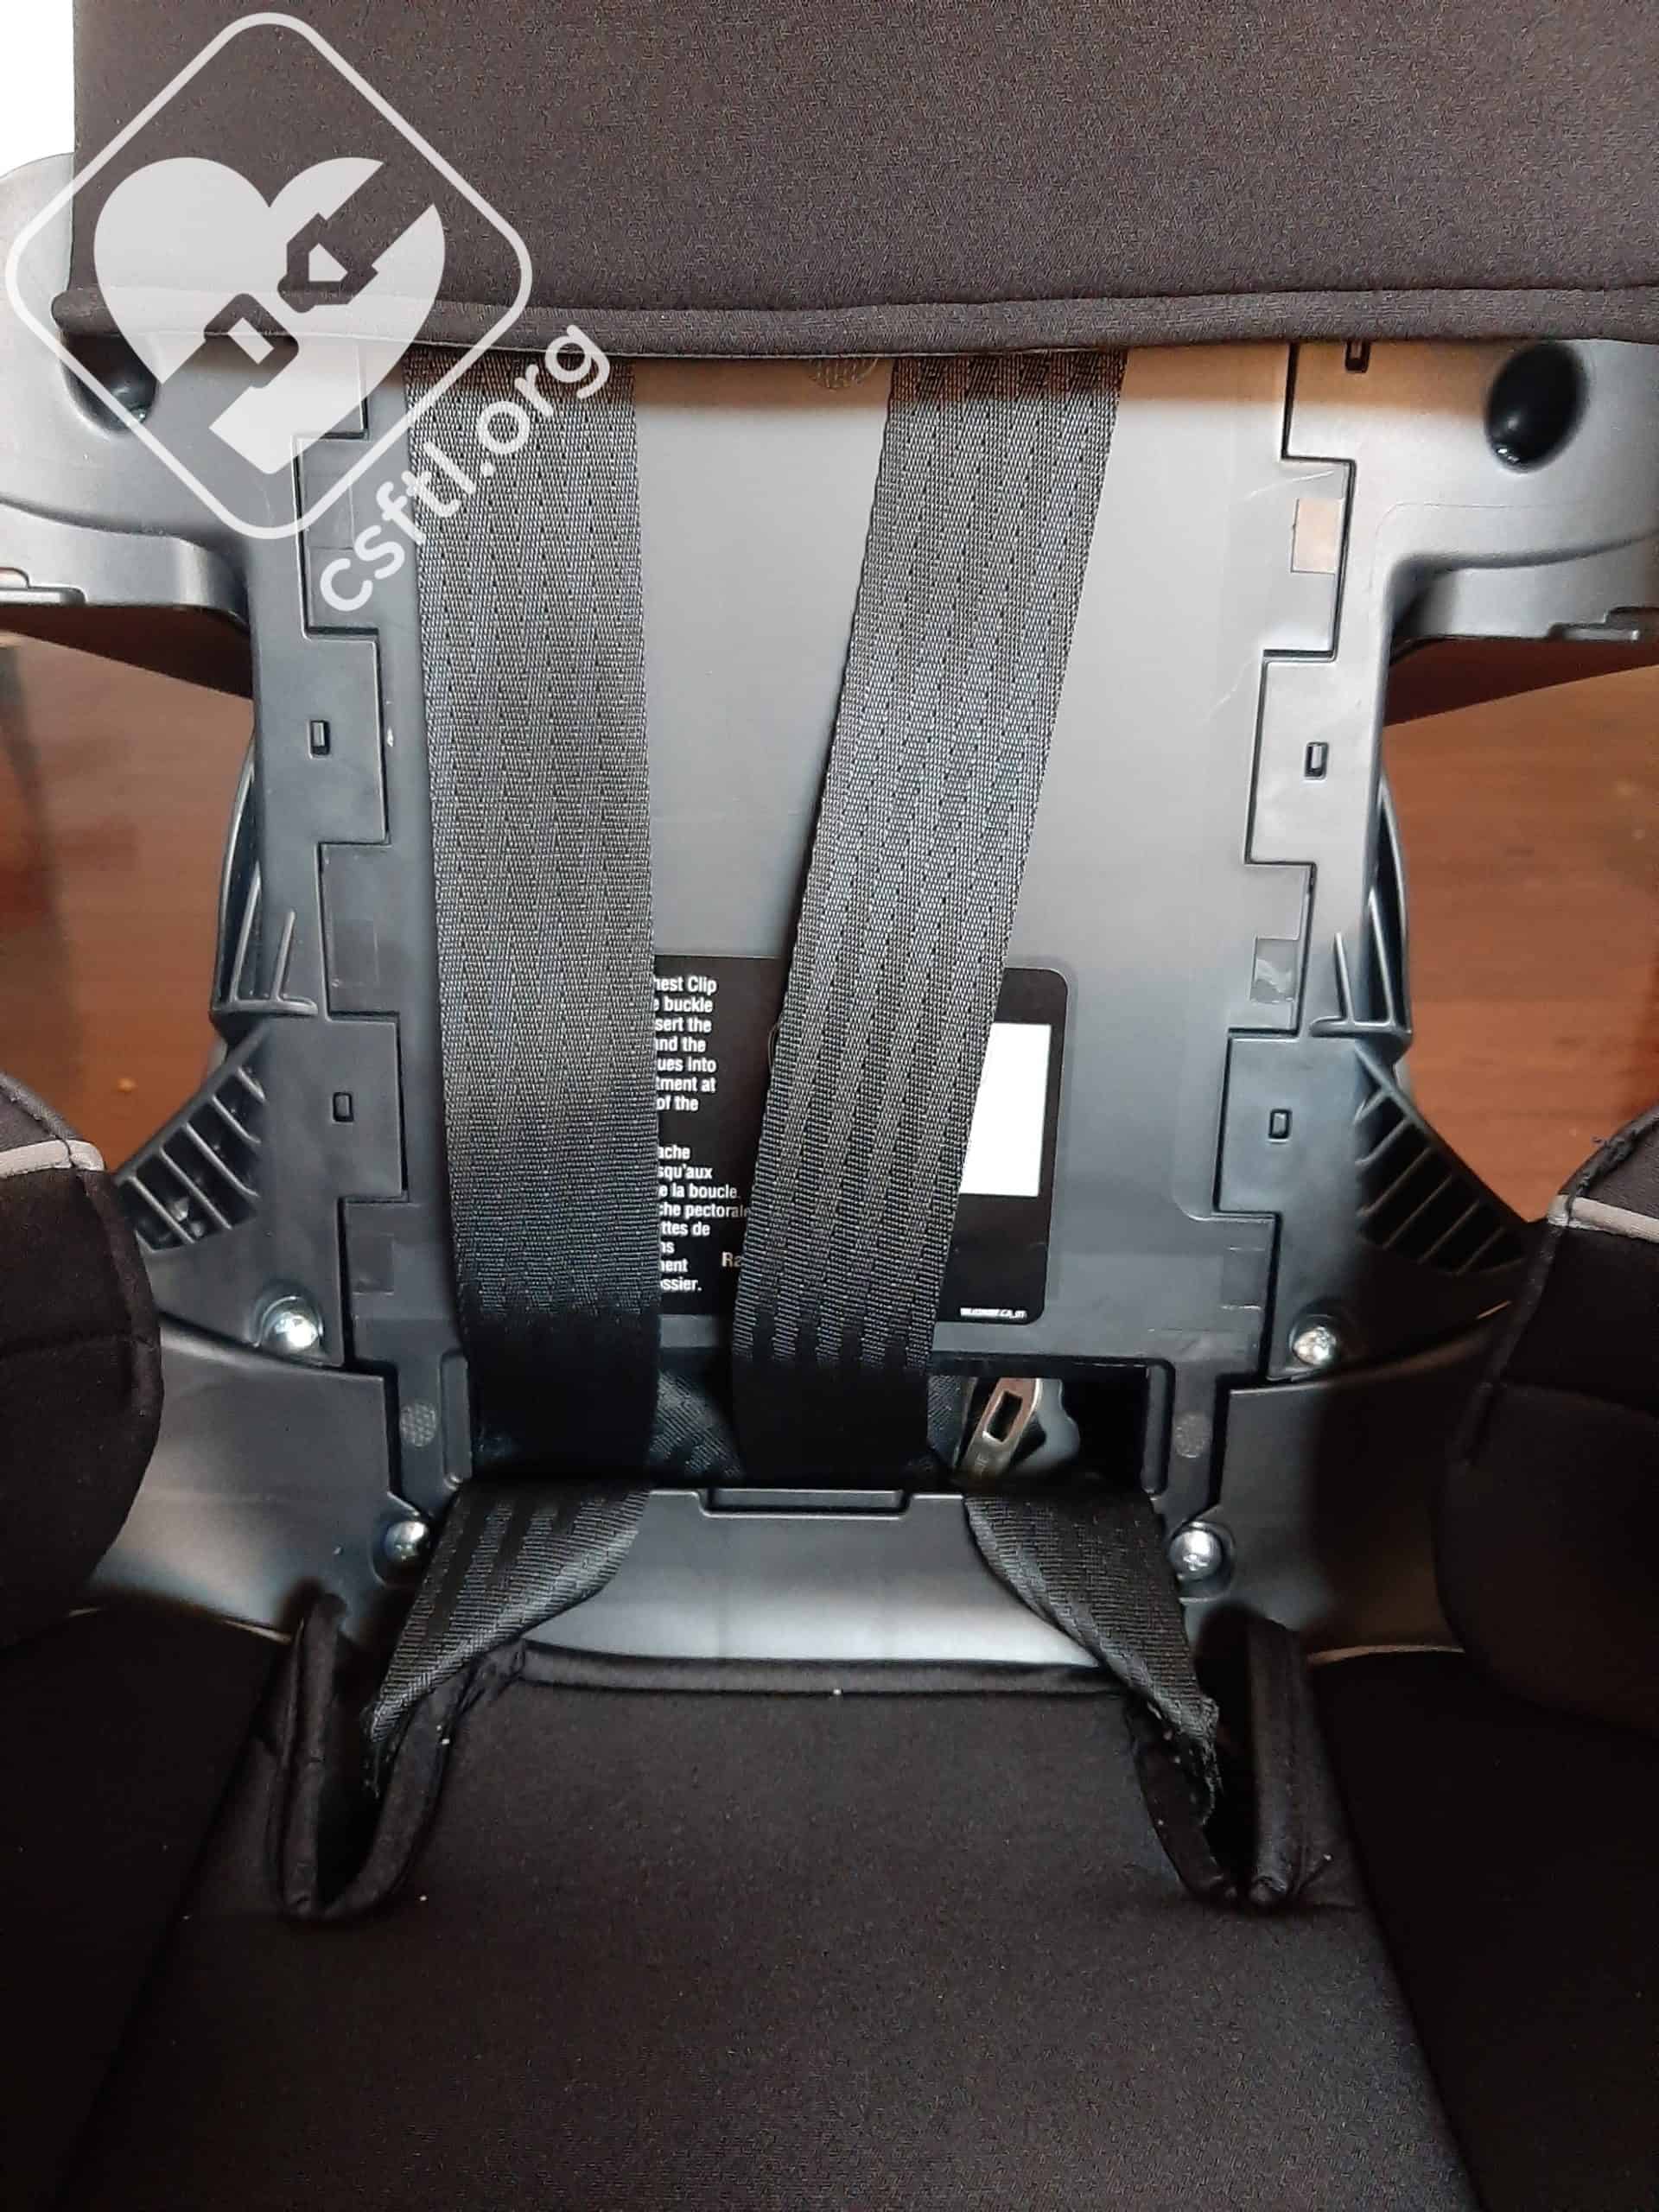
Converting the MyFit to booster mode: unhook elastics at the top of the seat
Unhook the two elastic straps from the top of the back of the seat and pull the top of the fabric out of the groove in the seat.
Converting the MyFit to booster mode: unhook elastics at the belt path
Unhook the elastic straps on the top and inside edges of the belt path on both sides.
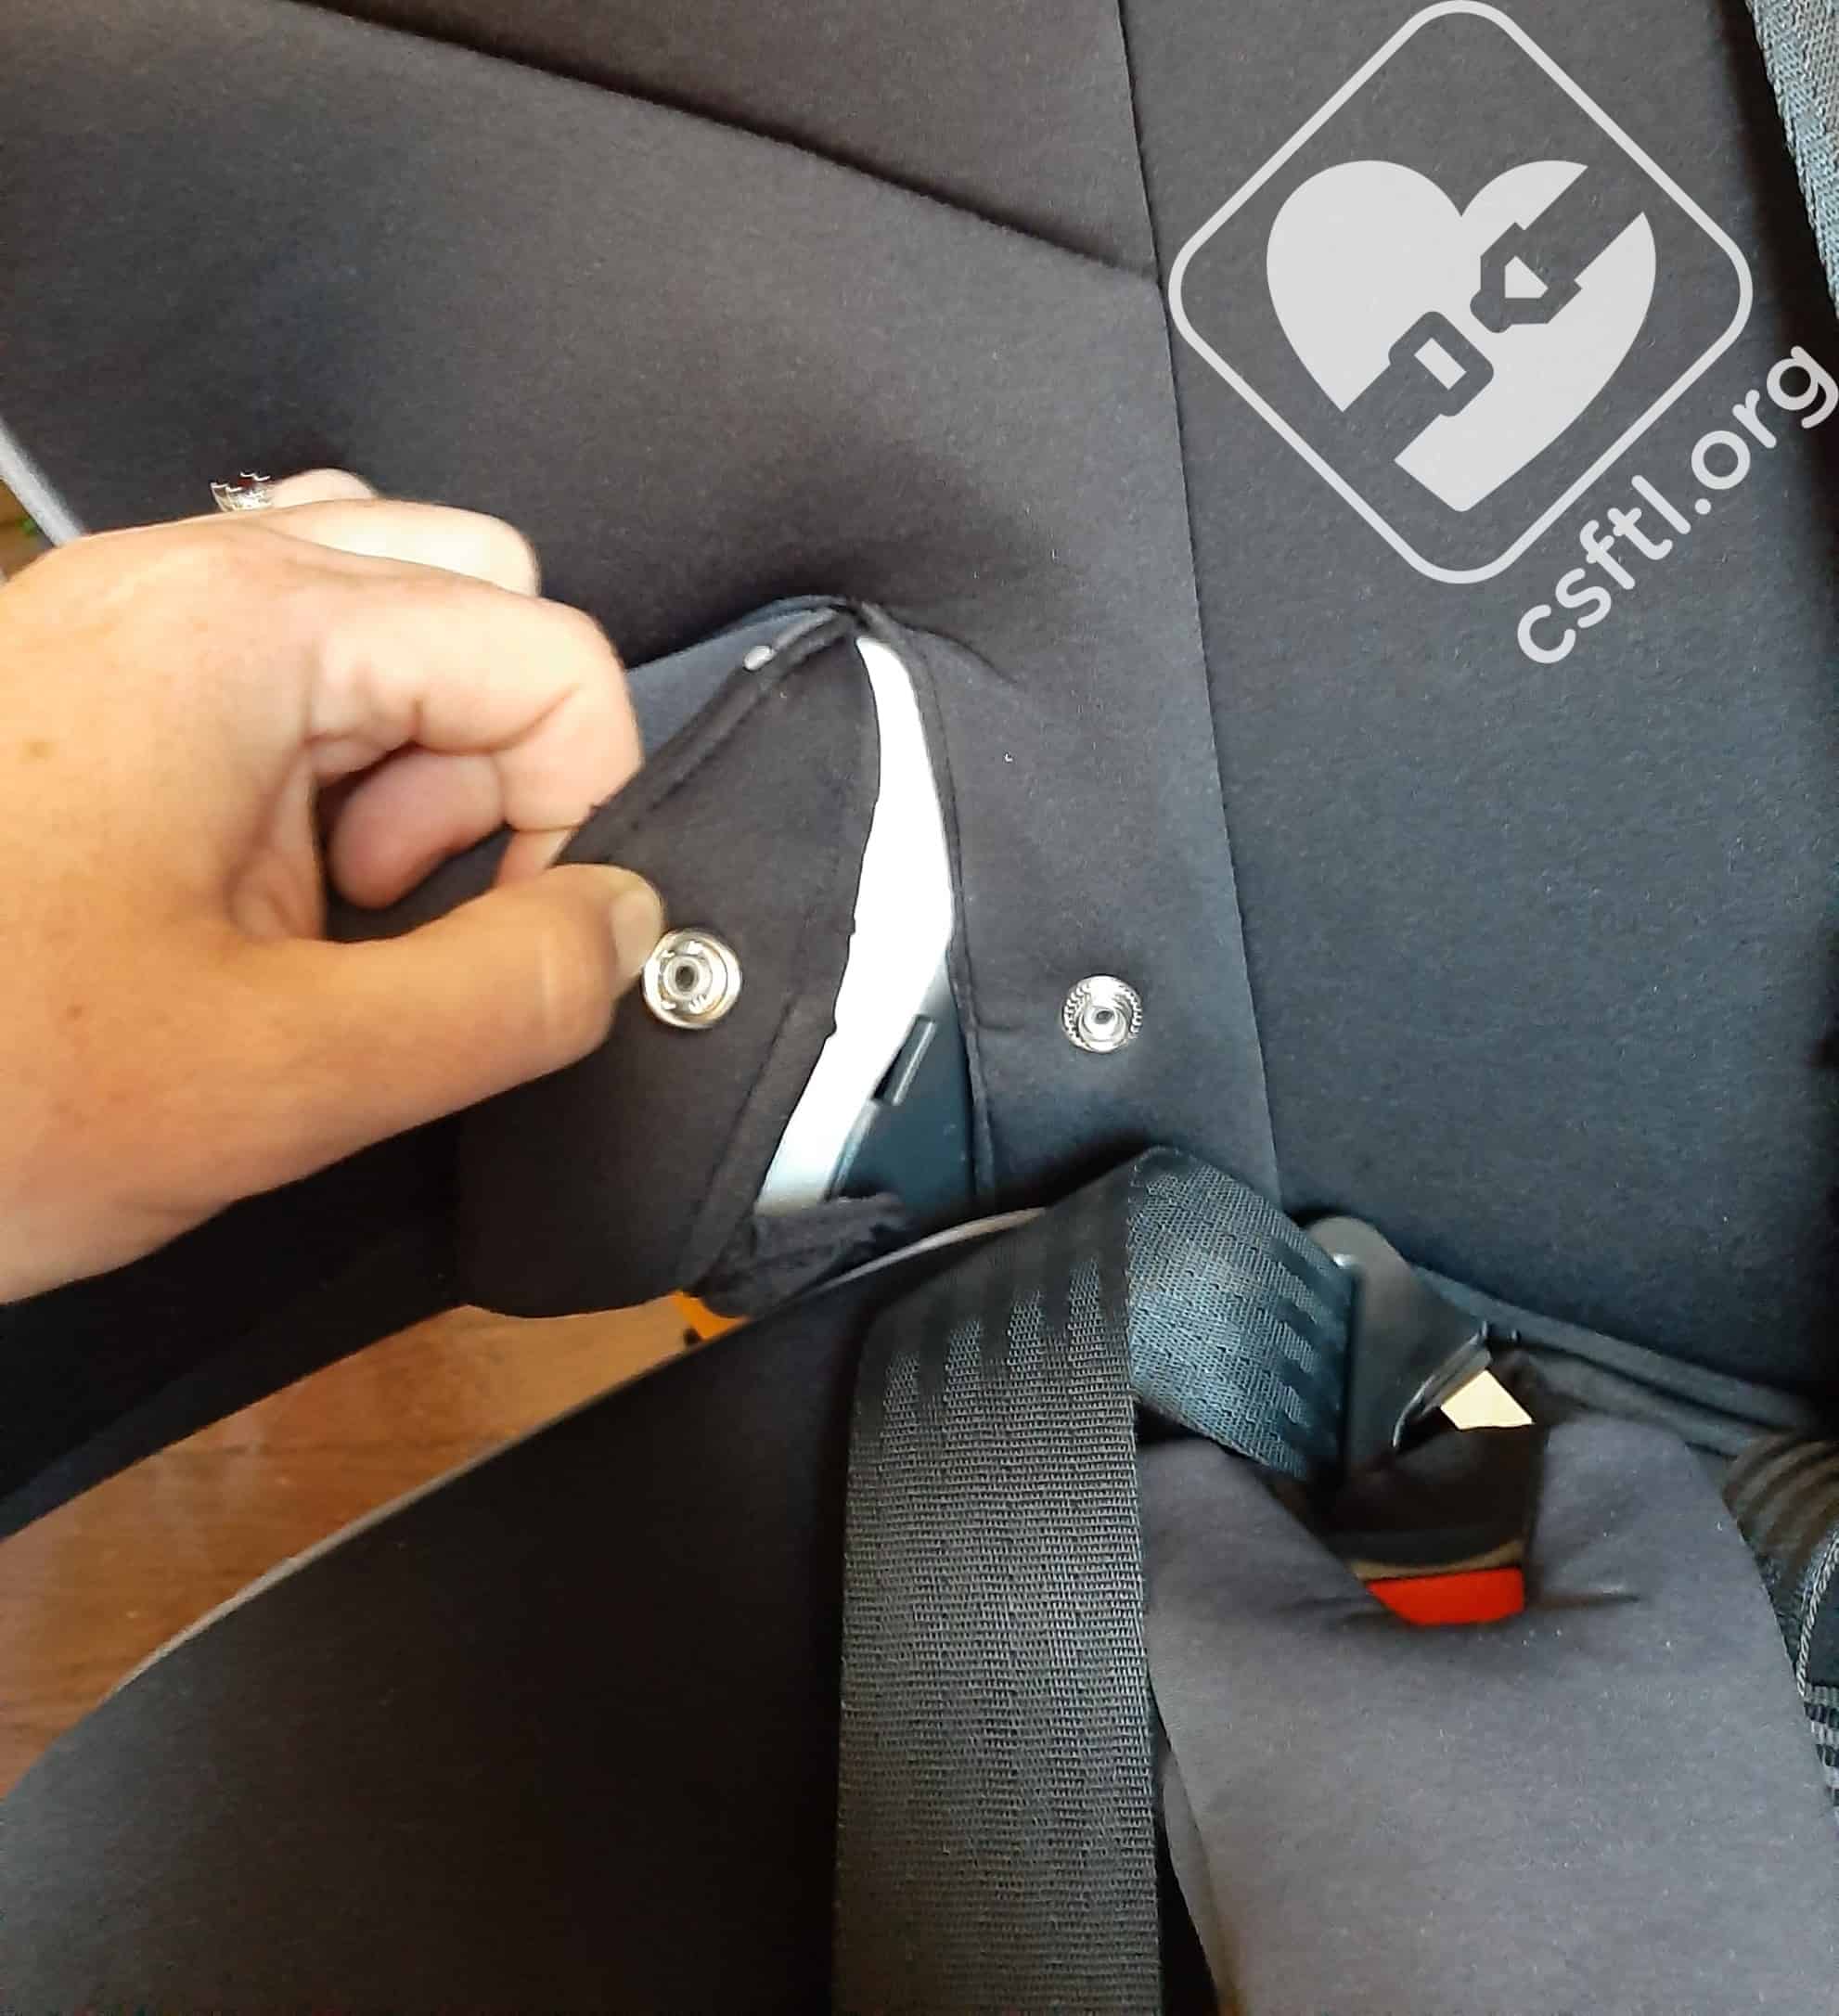
Converting the MyFit to booster mode: undo the snaps
Undo the snap attaching the armrest fabric to the backrest seat pad and remove the backrest seat pad from the MyFit.
Converting the MyFit to booster mode: lift the headrest pad
Lift up the headrest pad to expose the seat shell and open the storage compartment.
Converting the MyFit to booster mode: store the chest clip and harness in the compartment
Connect both pieces of the chest clip together then store the chest clip, crotch buckle, and shoulder pads in the storage compartment opening. This spot is just barely large enough to hold all of these items.
Converting the MyFit to booster mode: remove crotch strap padding
Remove the crotch strap pad (be sure to store it in a safe place) and thread the crotch strap through the slot in the seat pad.

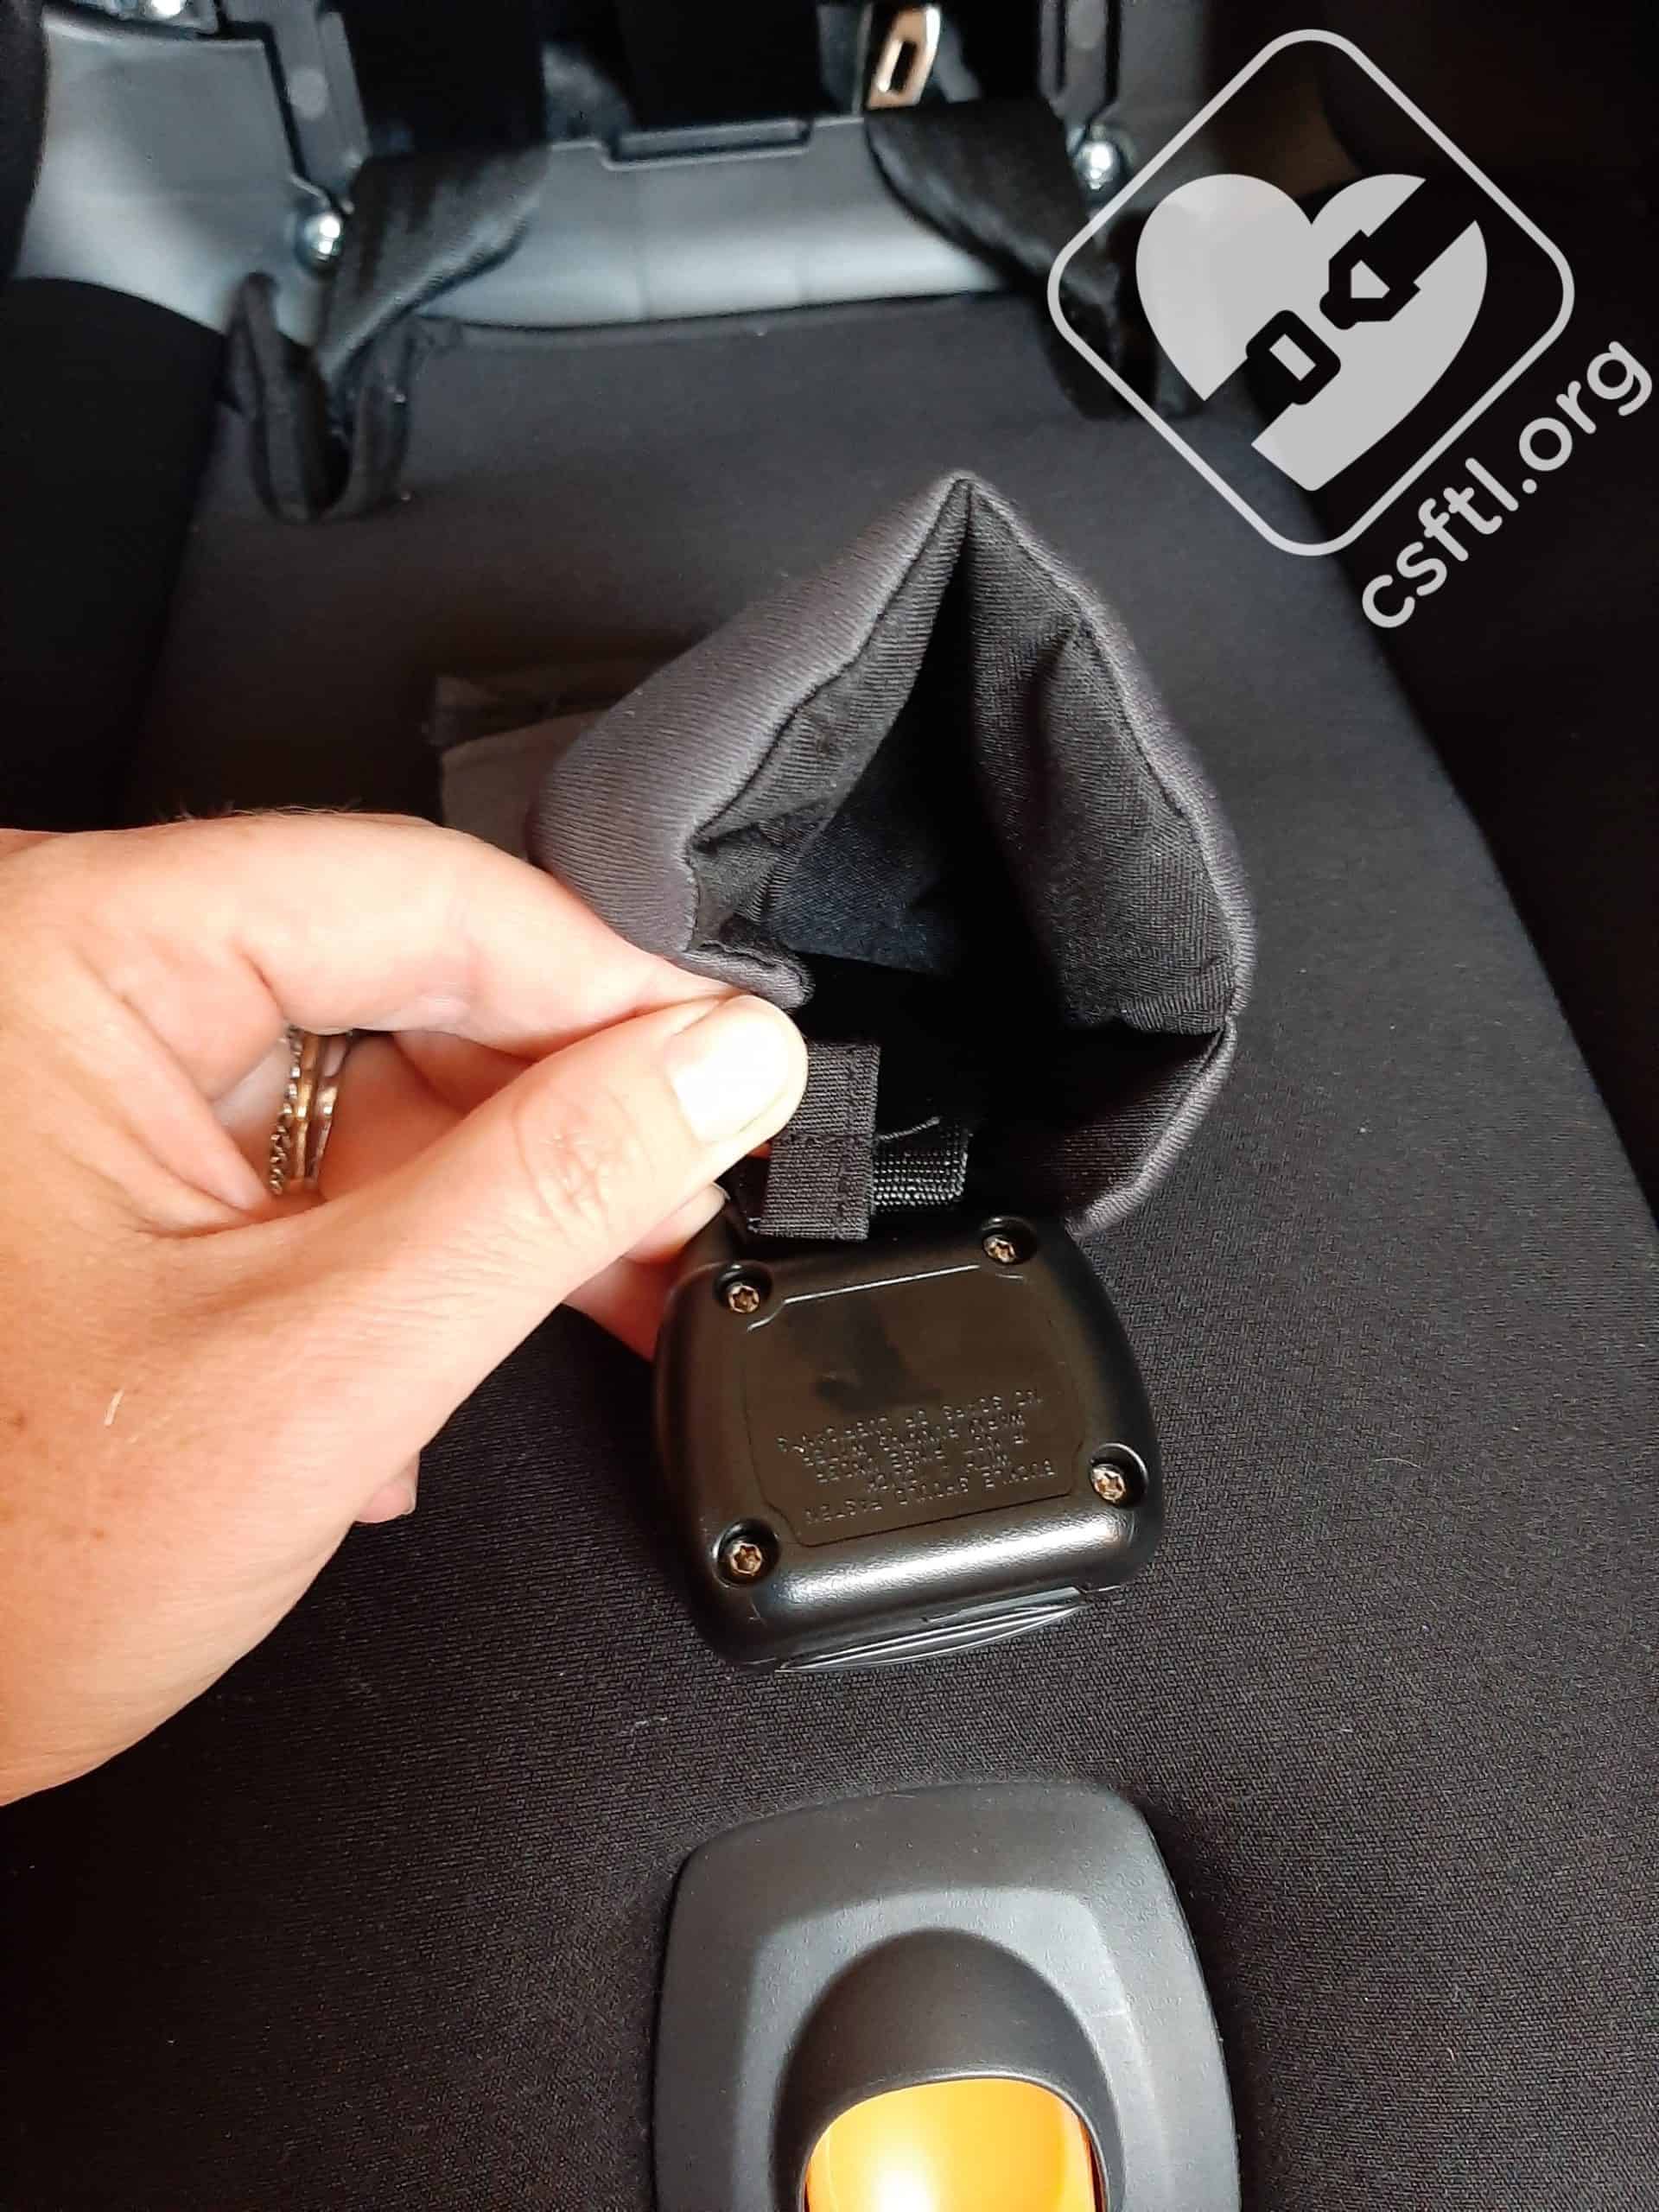
Converting the MyFit to booster mode: store crotch buckle in seat base
Pull back the seat pad to expose the crotch buckle compartment (in front of the crotch strap adjustment slots)

Chicco MyFit crotch buckle
Store the crotch buckle in the compartment and replace the seat cover.
Our Editorial Director reviewed the United States version of the MyFit and she challenged me to time myself converting the MyFit from harness to booster mode. I never back down from a challenge and since it took her 13 minutes to do this conversion the first time, I powered through and was able to convert it to booster mode in 9 minutes while taking pictures of my progress. I won the contest, but we also need to point out that the conversion is not a quick process.

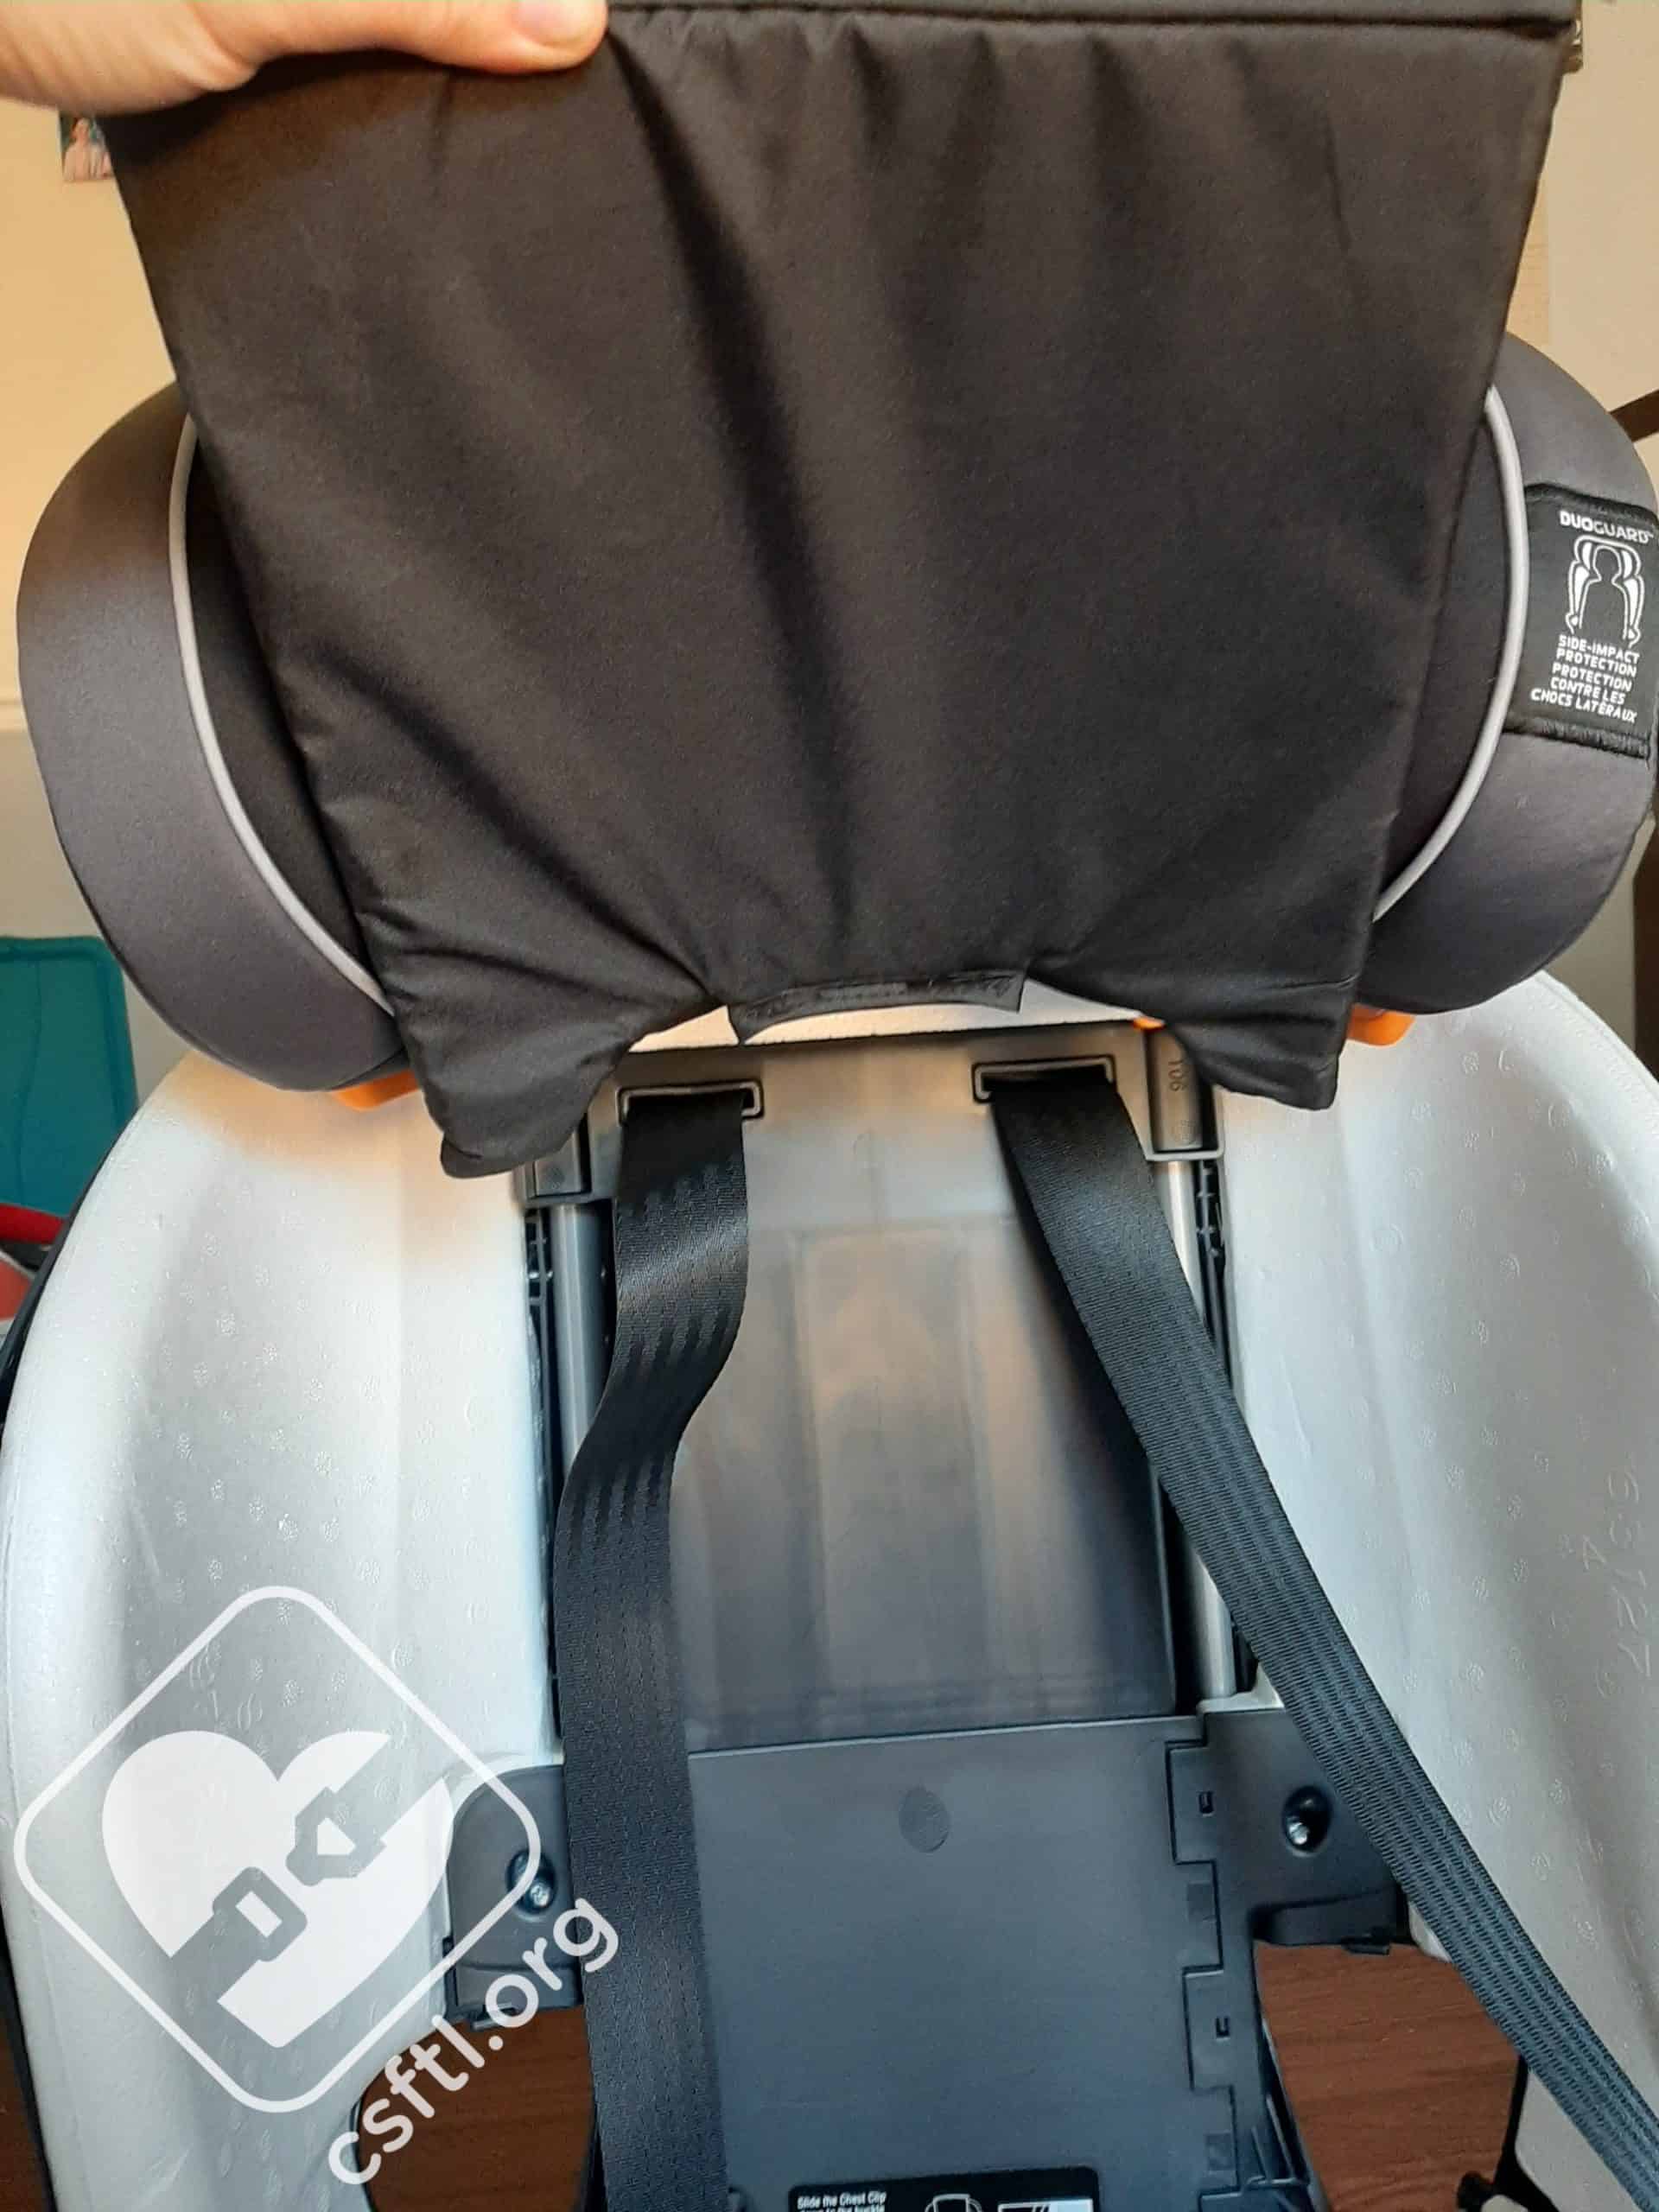
Chicco MyFit in booster mode fully extended
I found that replacing the cover is what took the longest time – especially re-attaching the elastic at the inside top of the belt path. That elastic loop is small and need to be stretched to attach to the anchor, and it took me a few tries on both sides to be able to hold the elastic with enough of a grip to also attach it to the seat. Thankfully most users will not convert to booster mode more than once or twice during the seat’s life. This is not a conversion I would want to do regularly!
Installation: Booster Mode
There is no need to install the MyFit in booster mode, but if you choose to use the MyFit in a seating position that does not have lower anchors, be sure to buckle the seat in when not in use or it could become a dangerous projectile in a collision.
If the MyFit is in a seating position that has lower anchors, attach the LUAS to the vehicle lower anchors and remove the slack from the webbing until the seat is snug.
Note: The MyFit DOES need to have the recline bubble in the “booster” recline range when used in booster mode. Be sure to adjust the recline as necessary to ensure that the bubble is within the allowable range before using the MyFit as a booster.
Fit to Child – Harness Mode
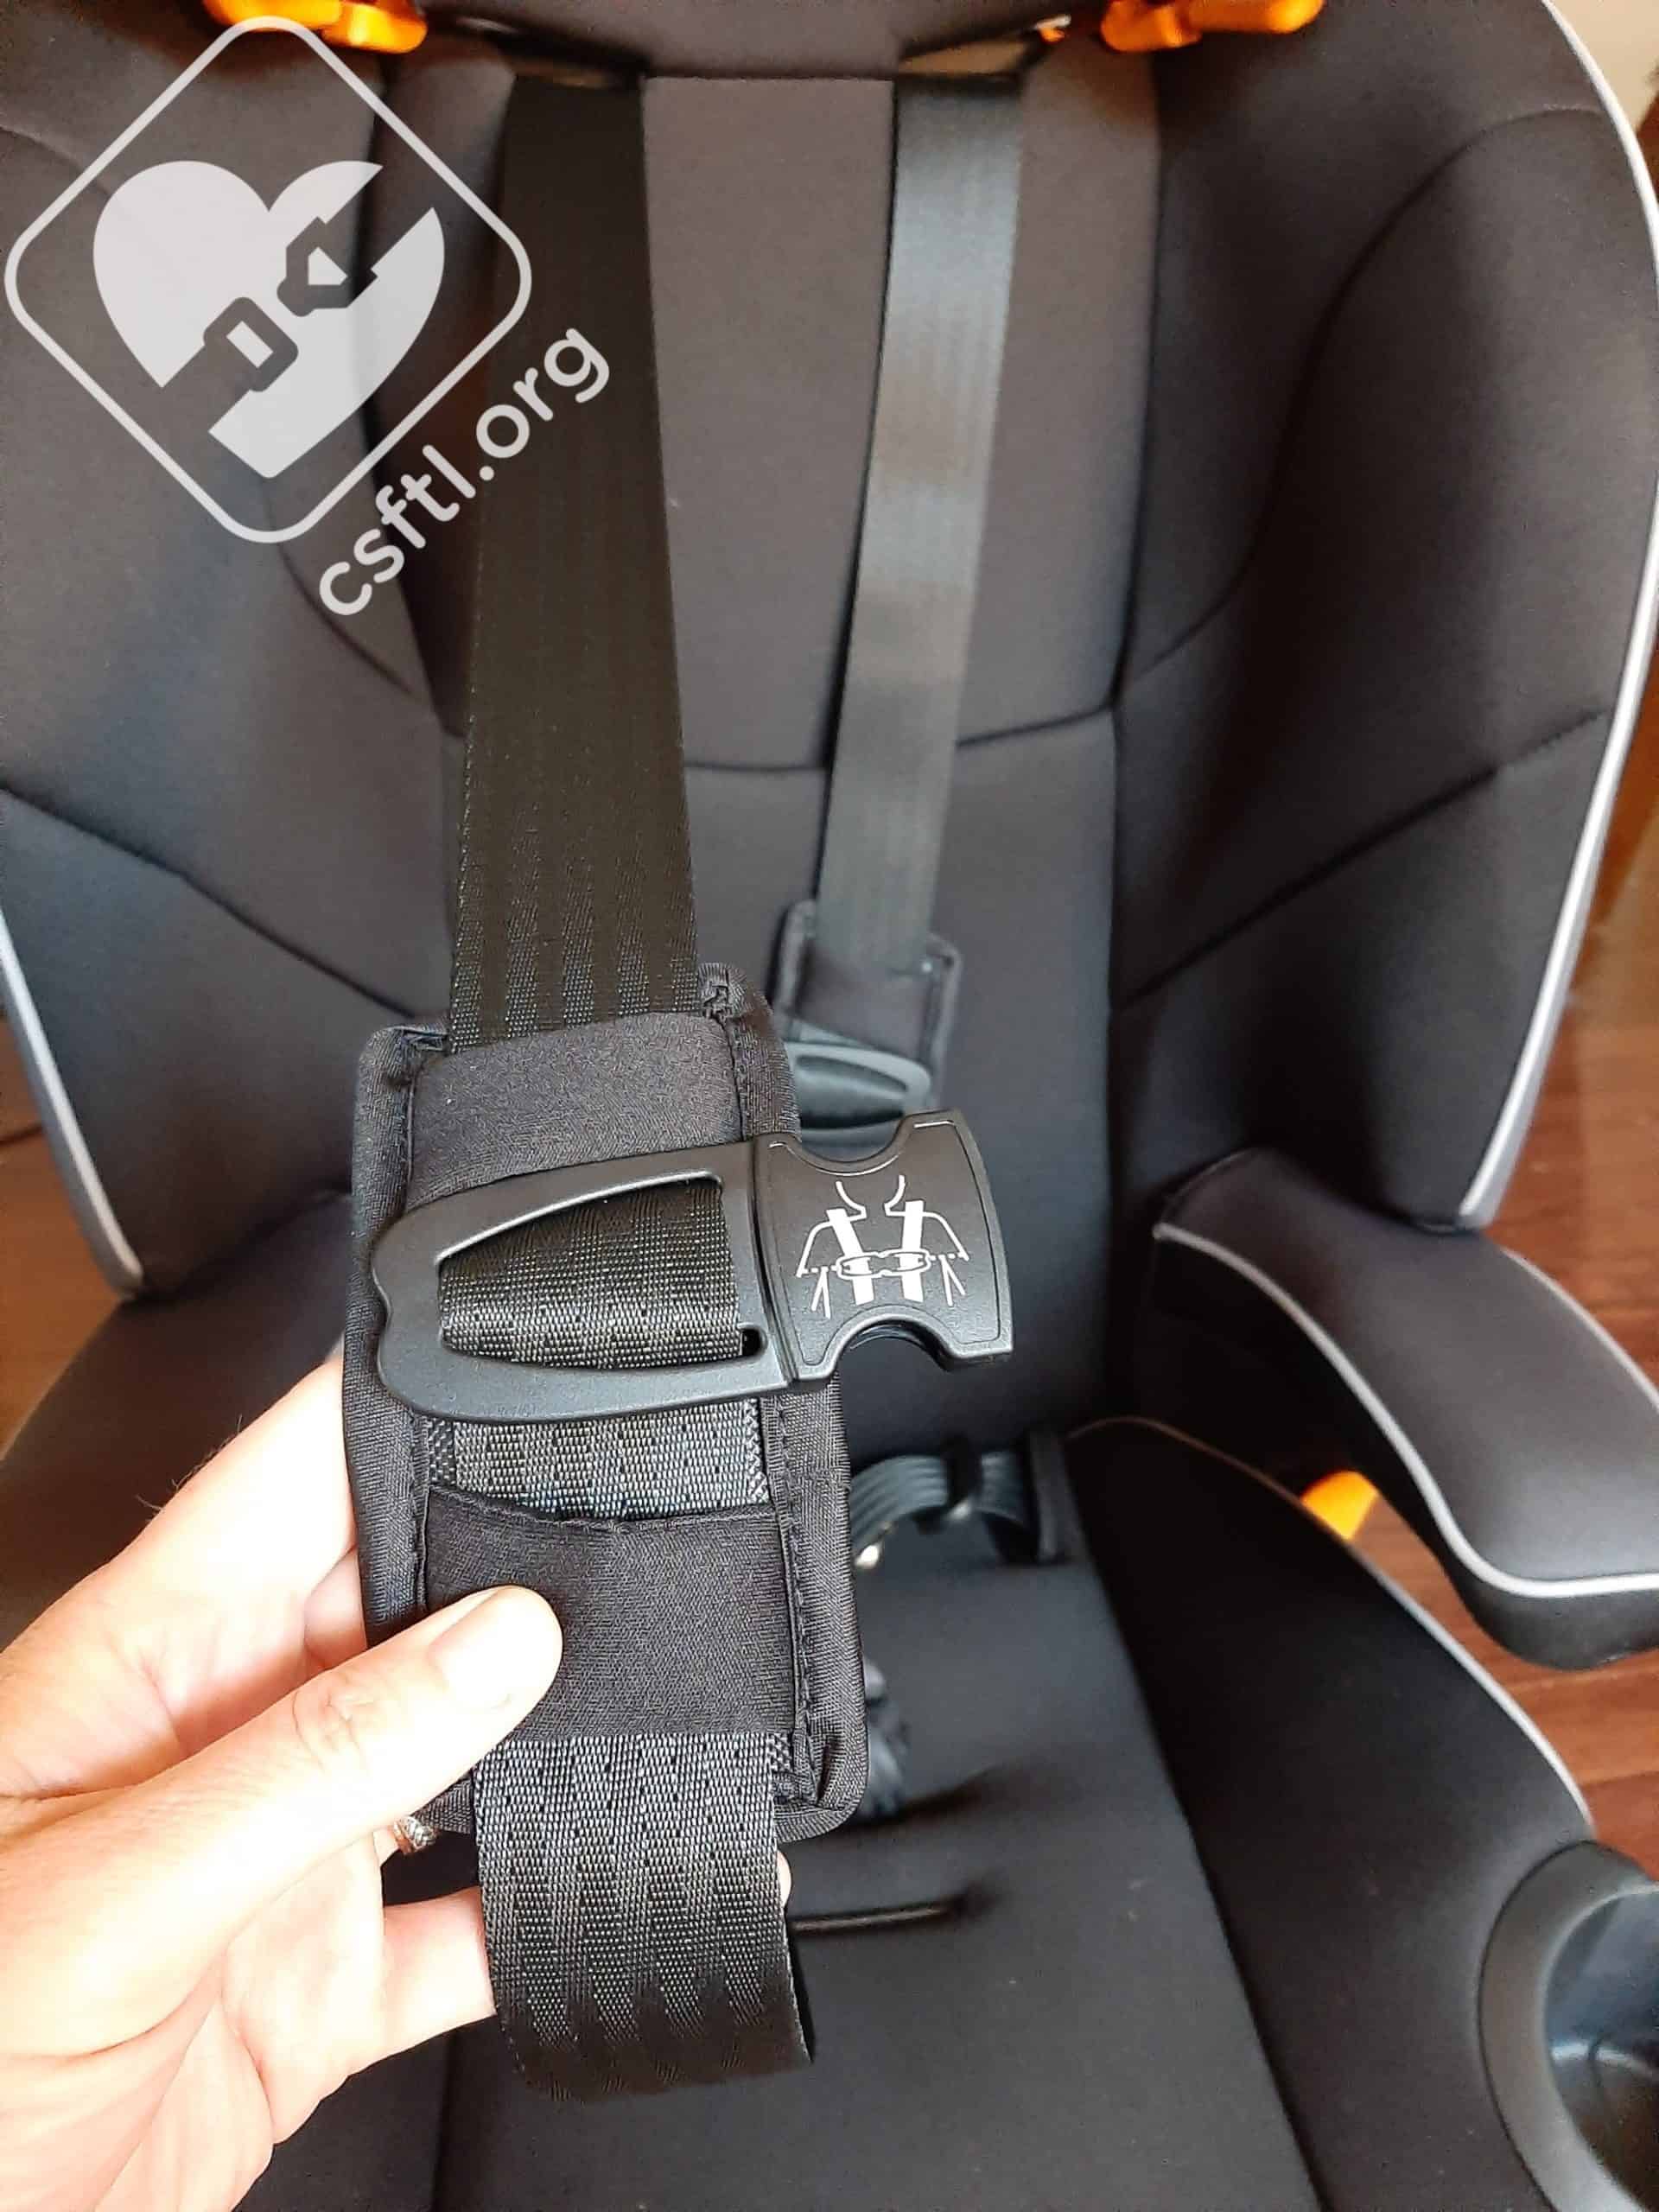
A Note About Harnessing in the MyFit
The hip straps on the Chicco Myfit are set quite close together, which results in even smaller children sitting close to or on the opening in the shell. We found that because of this, we had to dig the crotch buckle tongues out from under the child’s bum every time they rode in the seat. While this isn’t a safety concern, it was an annoyance for us and for our models. Having the ability to clip the harness out of the way while the child is getting in the seat would be a wonderful addition to the MyFit. Maybe on a future cover?
4 Years Old
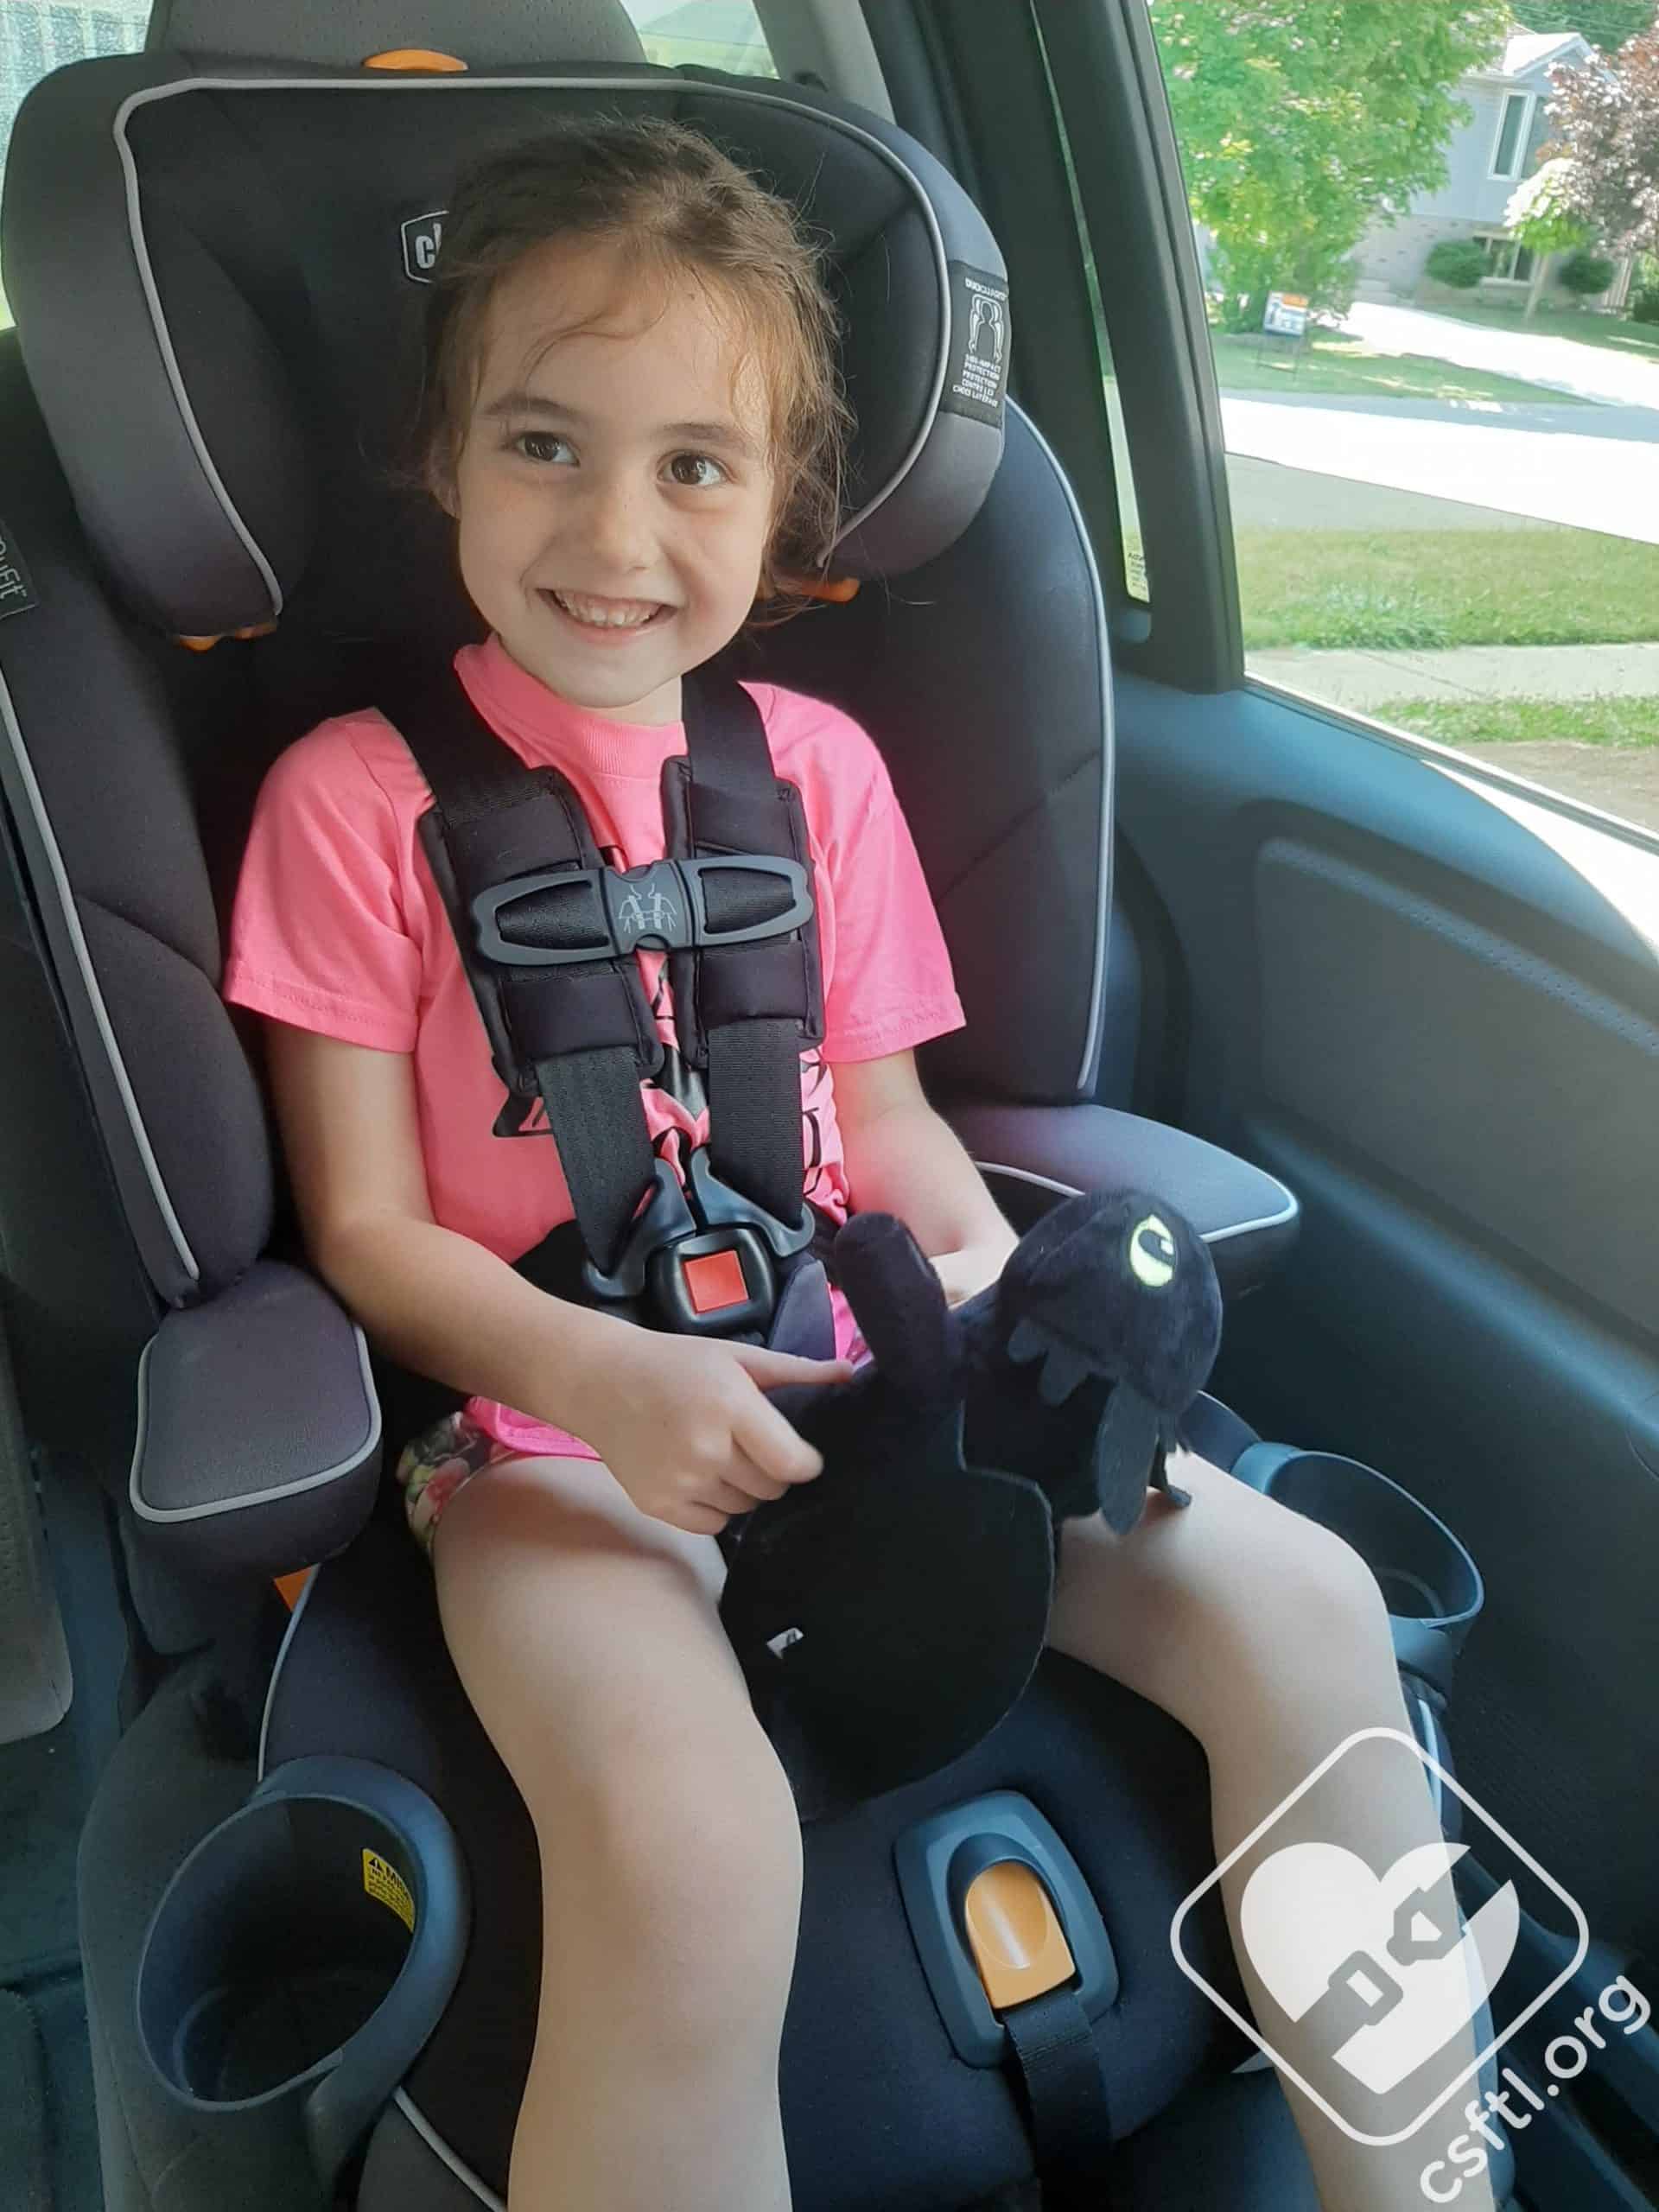
Chicco MyFit – 4 year old
Our first model is 4 years old, 41 inches tall and weighs 38 pounds. She is a long time review model for CSFTL, and is very vocal about her dislike for harness covers. Sure enough, between the time it took us to buckle her in to the MyFit and climb in to the driver’s seat, she had already thrown the shoulder pads in the front seat. Thankfully the chest clip pads are not removable, or she would have thrown those as well.
She also had some thoughts around the chest clip pads, so many that we were very thankful that those pads are not removable because the manual indicates that they are mandatory in harness mode. It took a bit of convincing, but our model accepted the pads eventually and after a few minutes of driving even told me that she liked her new seat.

Chicco MyFit harness adjuster
We needed to move the crotch buckle to the inner slot for this model, which was an odd experience as usually she requires the crotch buckle in the outer position for her seats. The MyFit was definitely designed for bigger kids, and we’re sure that extra room will be appreciated.
In harness mode, this average-height model has lots and lots of growing room in the MyFit.
6 Year Old
Chicco MyFit – 6 year old
Our second model is 6 years old, 50 inches tall, and weighs 54 pounds. She has outgrown the standing height limit on some of our favorite car seats, so she has been riding in a booster seat regularly for a while now. She was not especially impressed at the prospect of going back in a harnessed seat for this review, but a little bit of bribing goes a long way at this age, so the promise of a treat did the trick.
We were quite impressed to see just how much growing room this model has in harness mode. She does not have a short torso (wears size 7-8 shirts) and yet she is nowhere near maxing out the seat in harness mode either by standing height or torso height. If needed, she could ride harnessed for easily another couple of years. This option gives us some ammunition if she stops sitting properly in her booster seat!
She allowed us to leave all the padding in, and the crotch buckle has been moved to the outer slot.
Fit to Child – Booster Mode
6 Year Old

Chicco MyFit – 6 year old
Our 6 year old model remains 50 inches tall and 54 pounds. She preferred the MyFit in booster mode vs harness mode and the vehicle seat belt fits her perfectly.
We did find that the shoulder belt didn’t retract as nicely as it could have in the captain’s chair of this 2007 Odyssey, but it wasn’t bad enough that we wouldn’t use the seat here (knowing that she fits the harness mode of the MyFit will be a good threat if she starts squirming too much!).
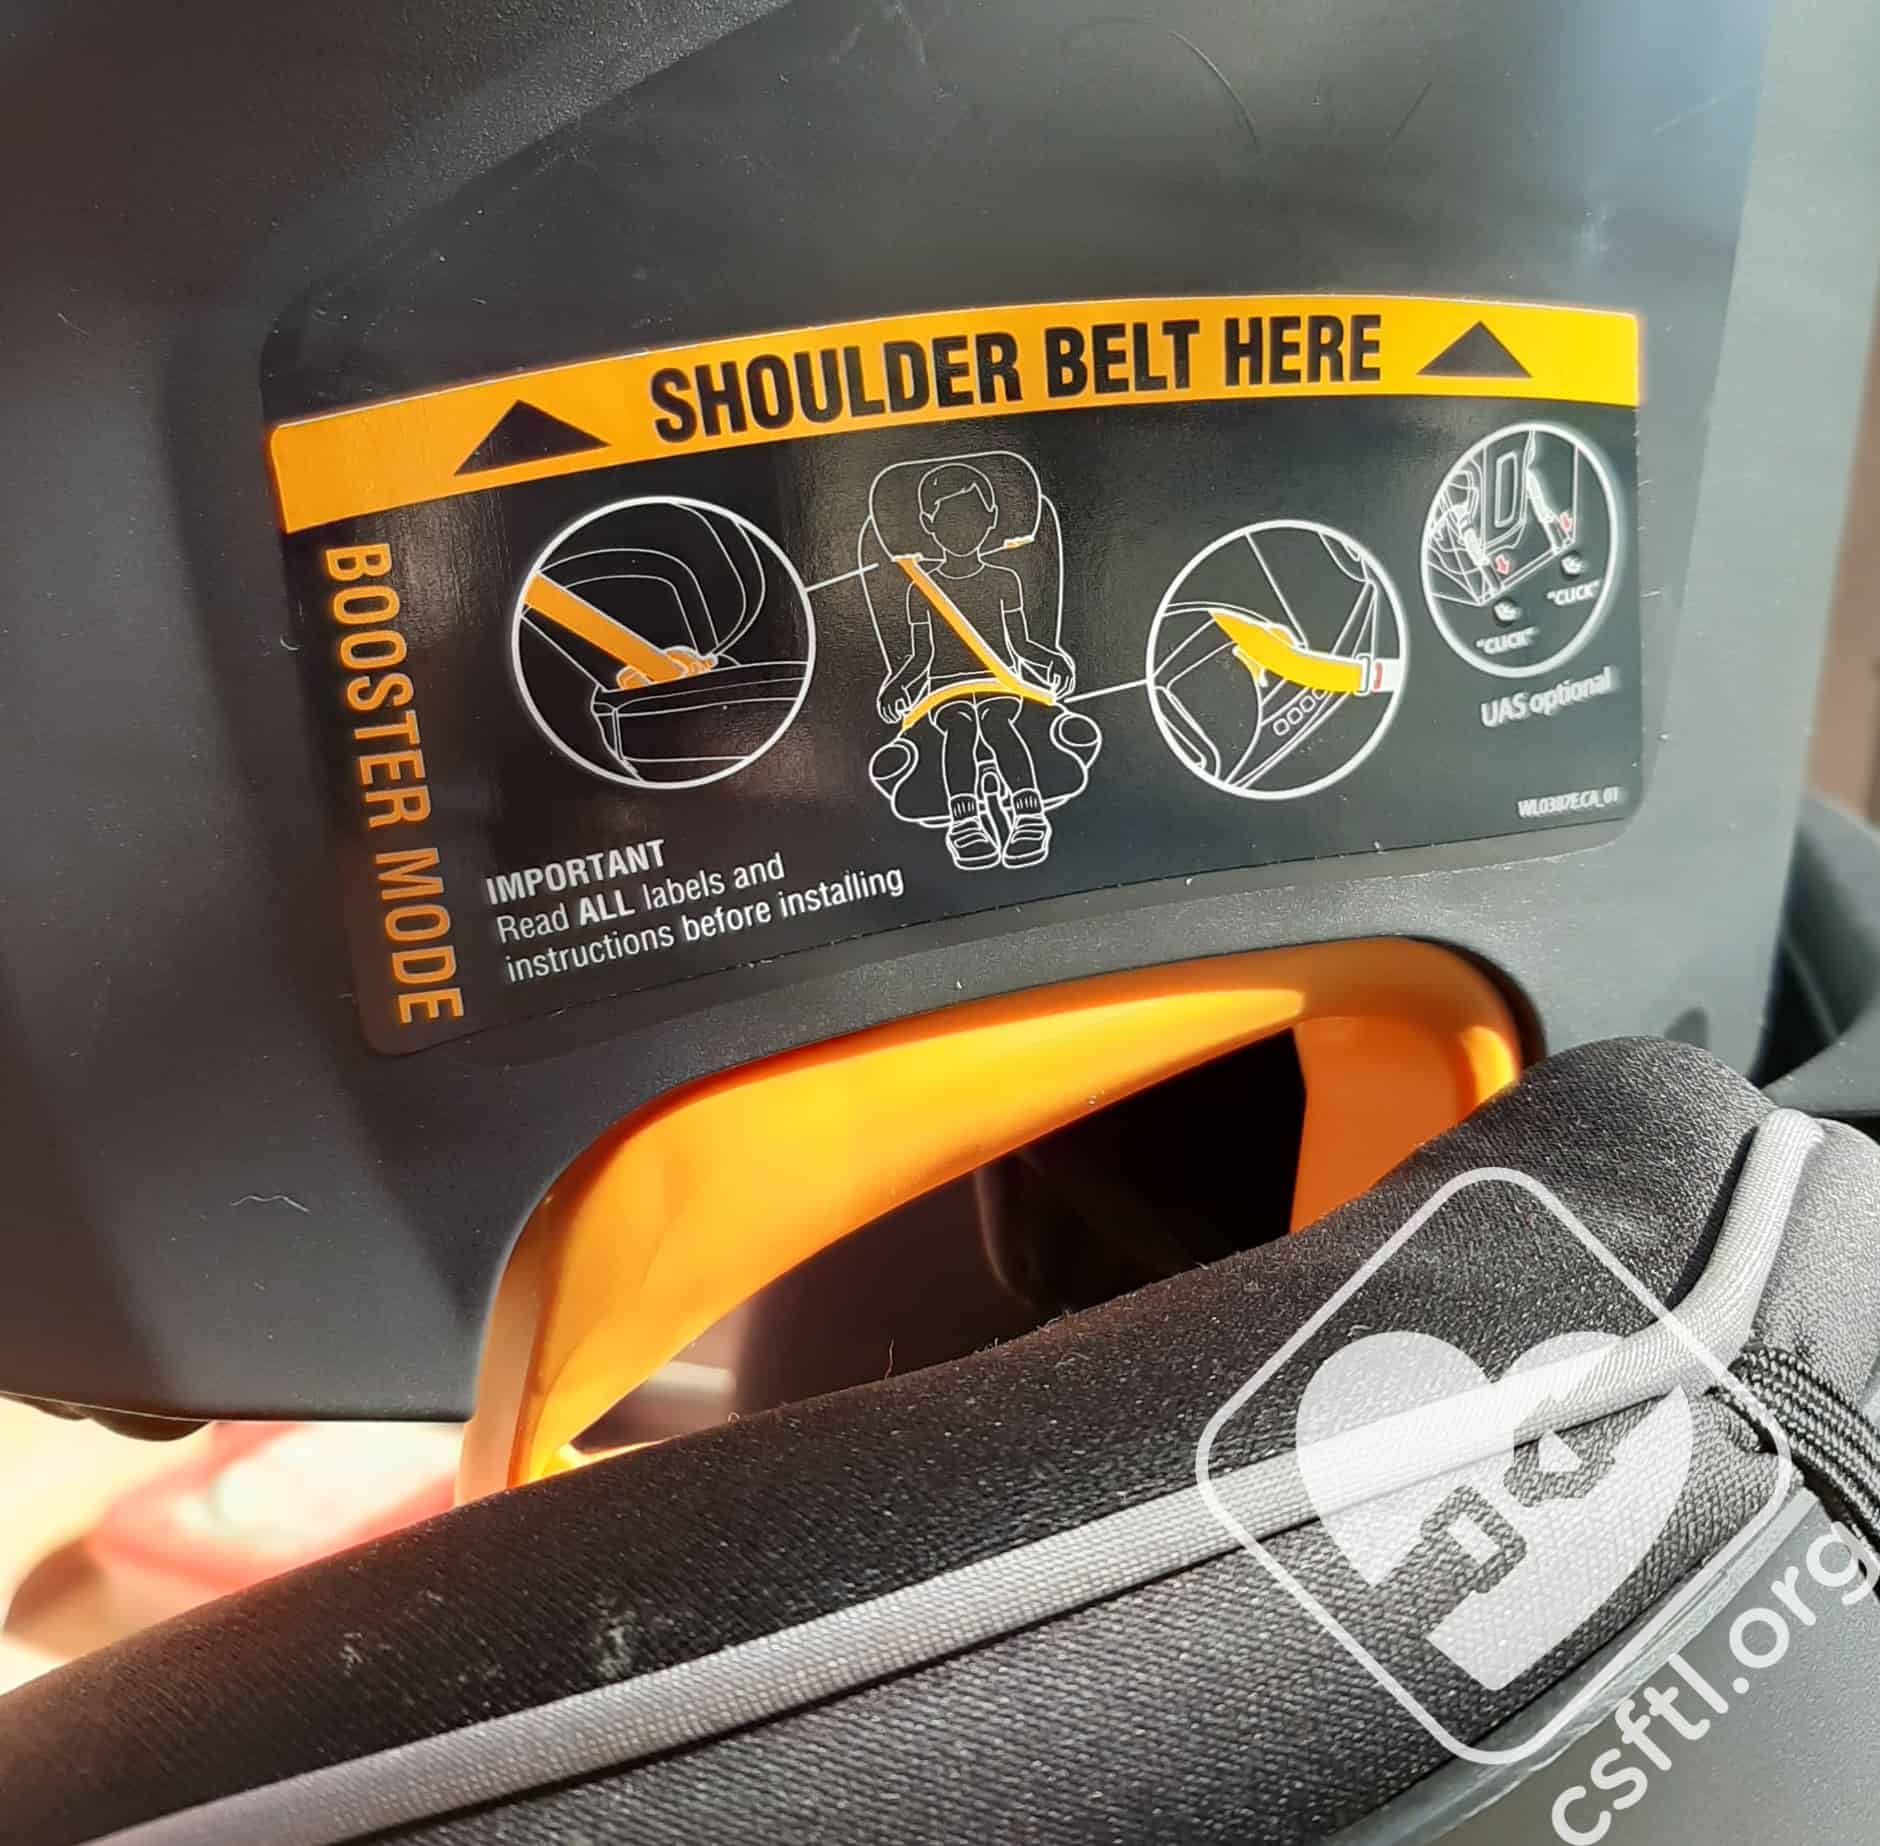
Chicco MyFit shoulder belt guide for booster mode
She found the seat a bit difficult to buckle initially, but after a few tries she was able to do it herself.
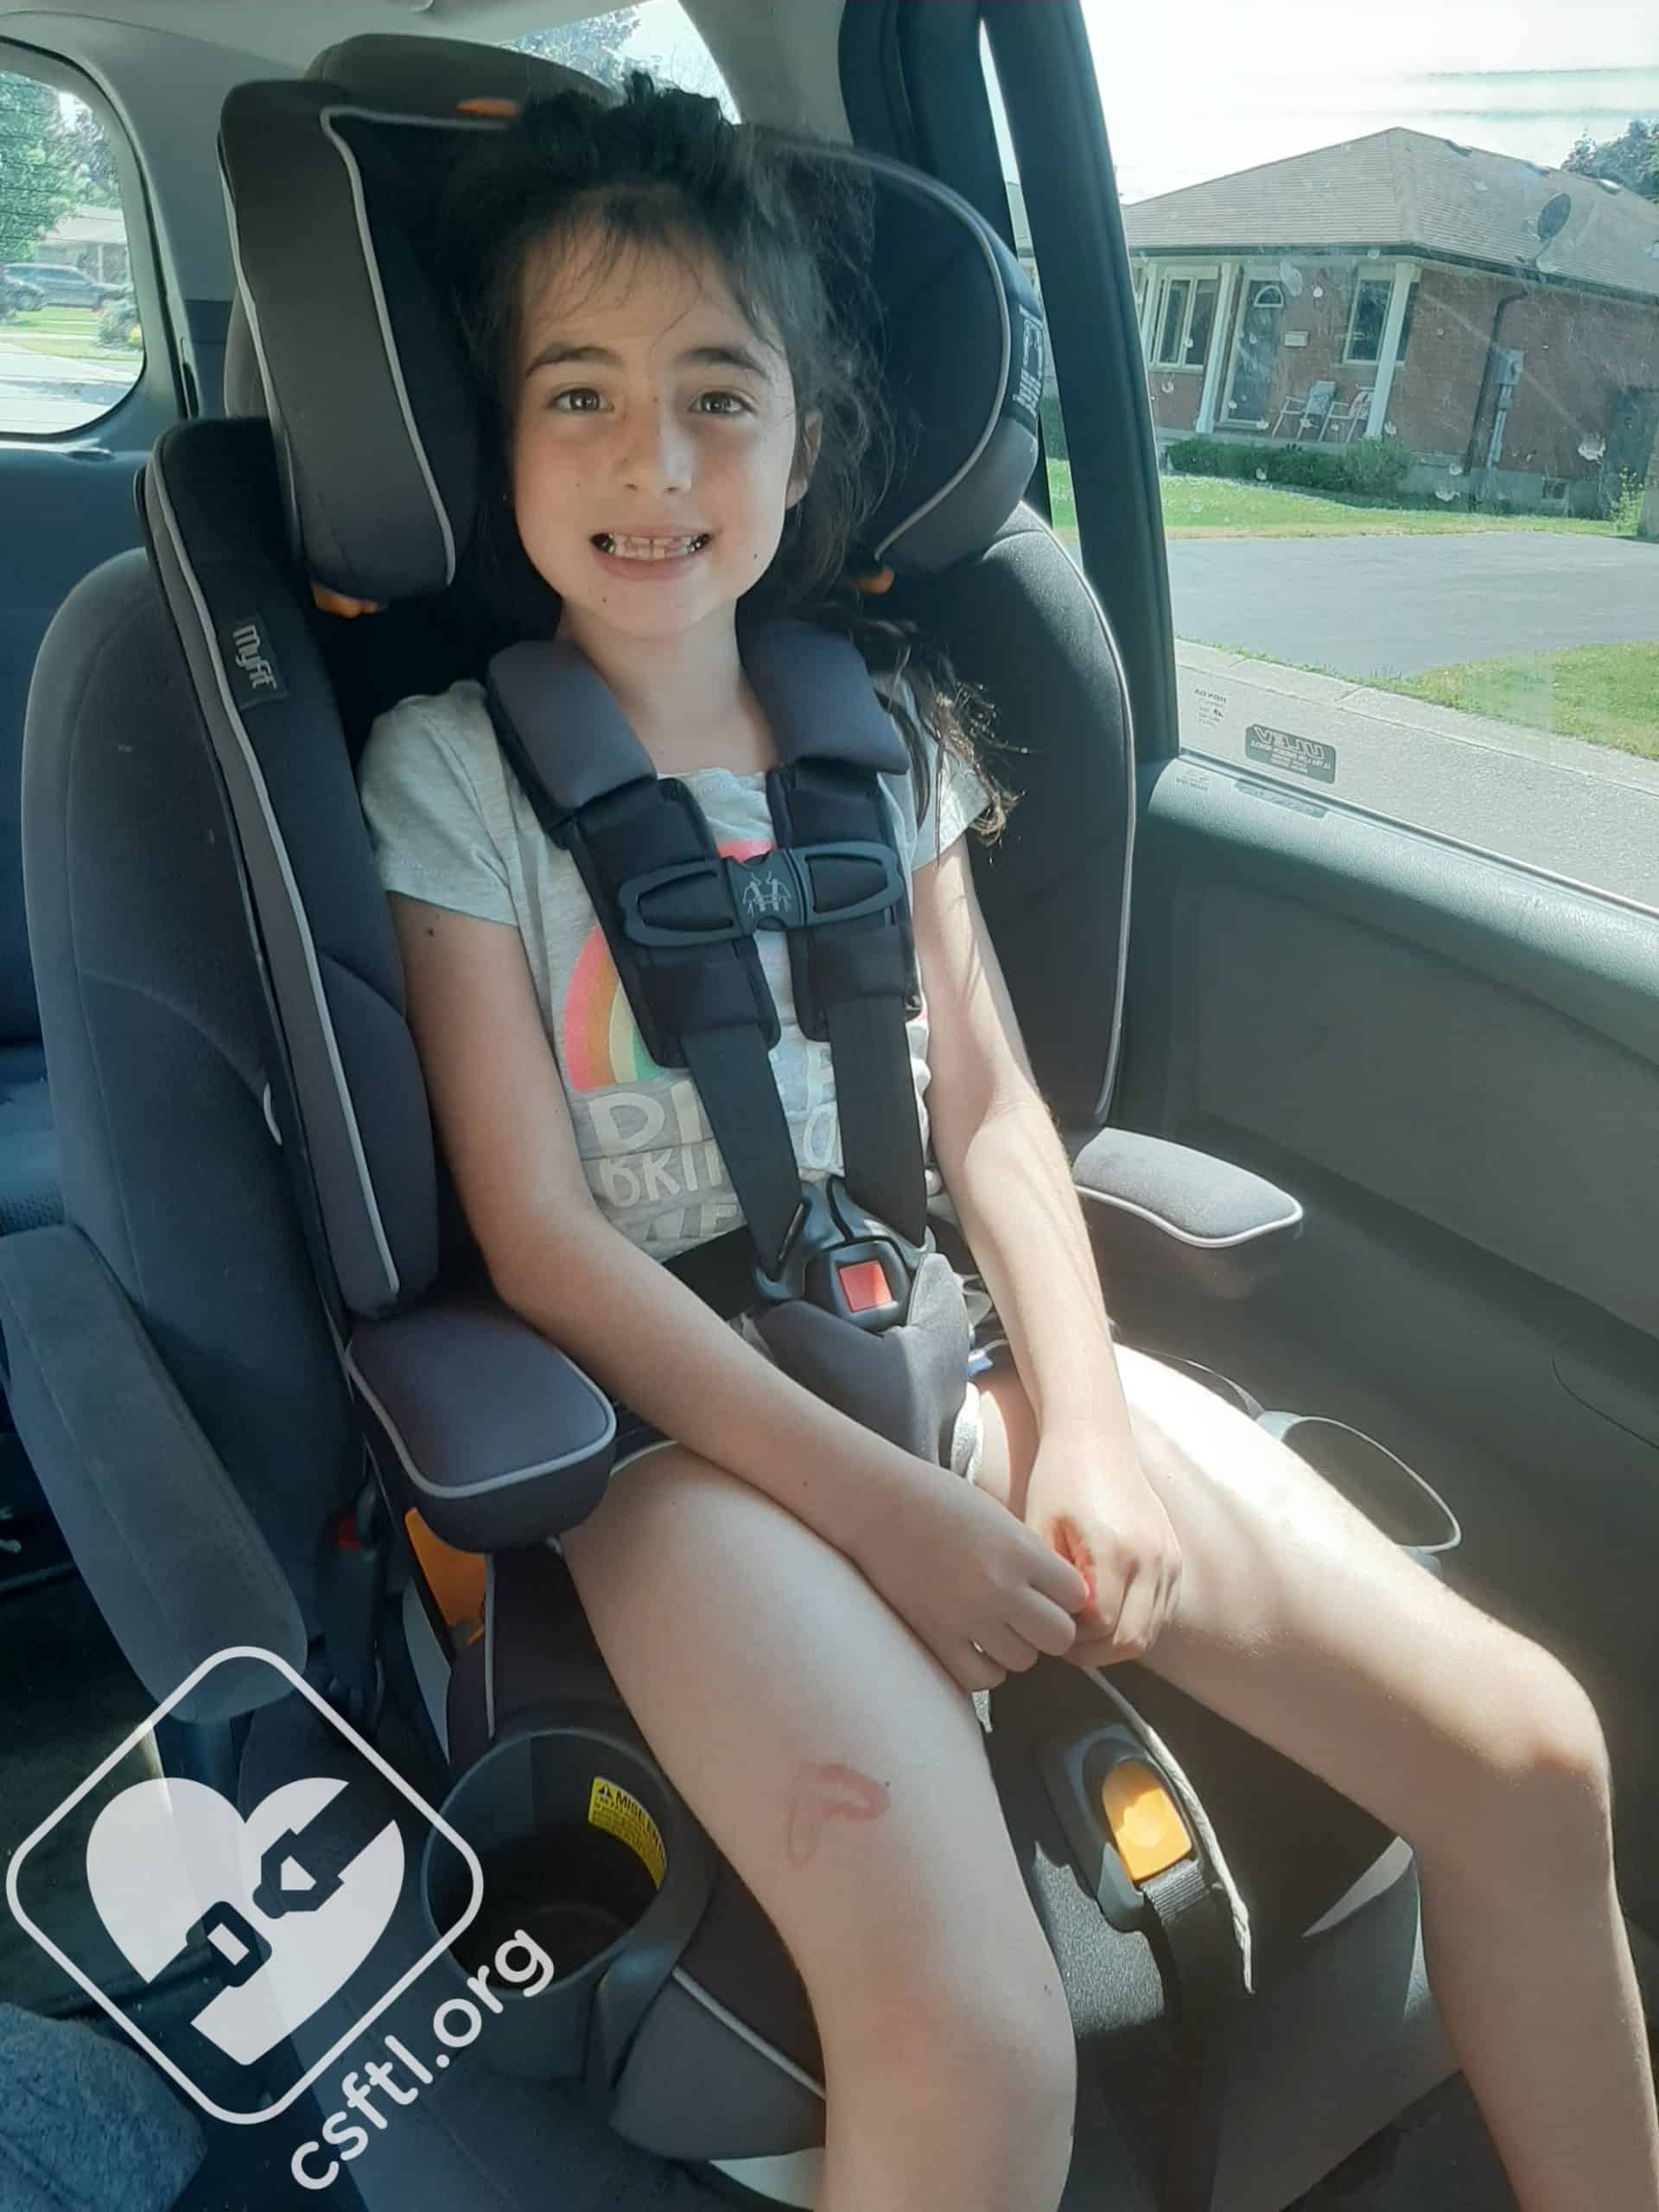
8 Years Old
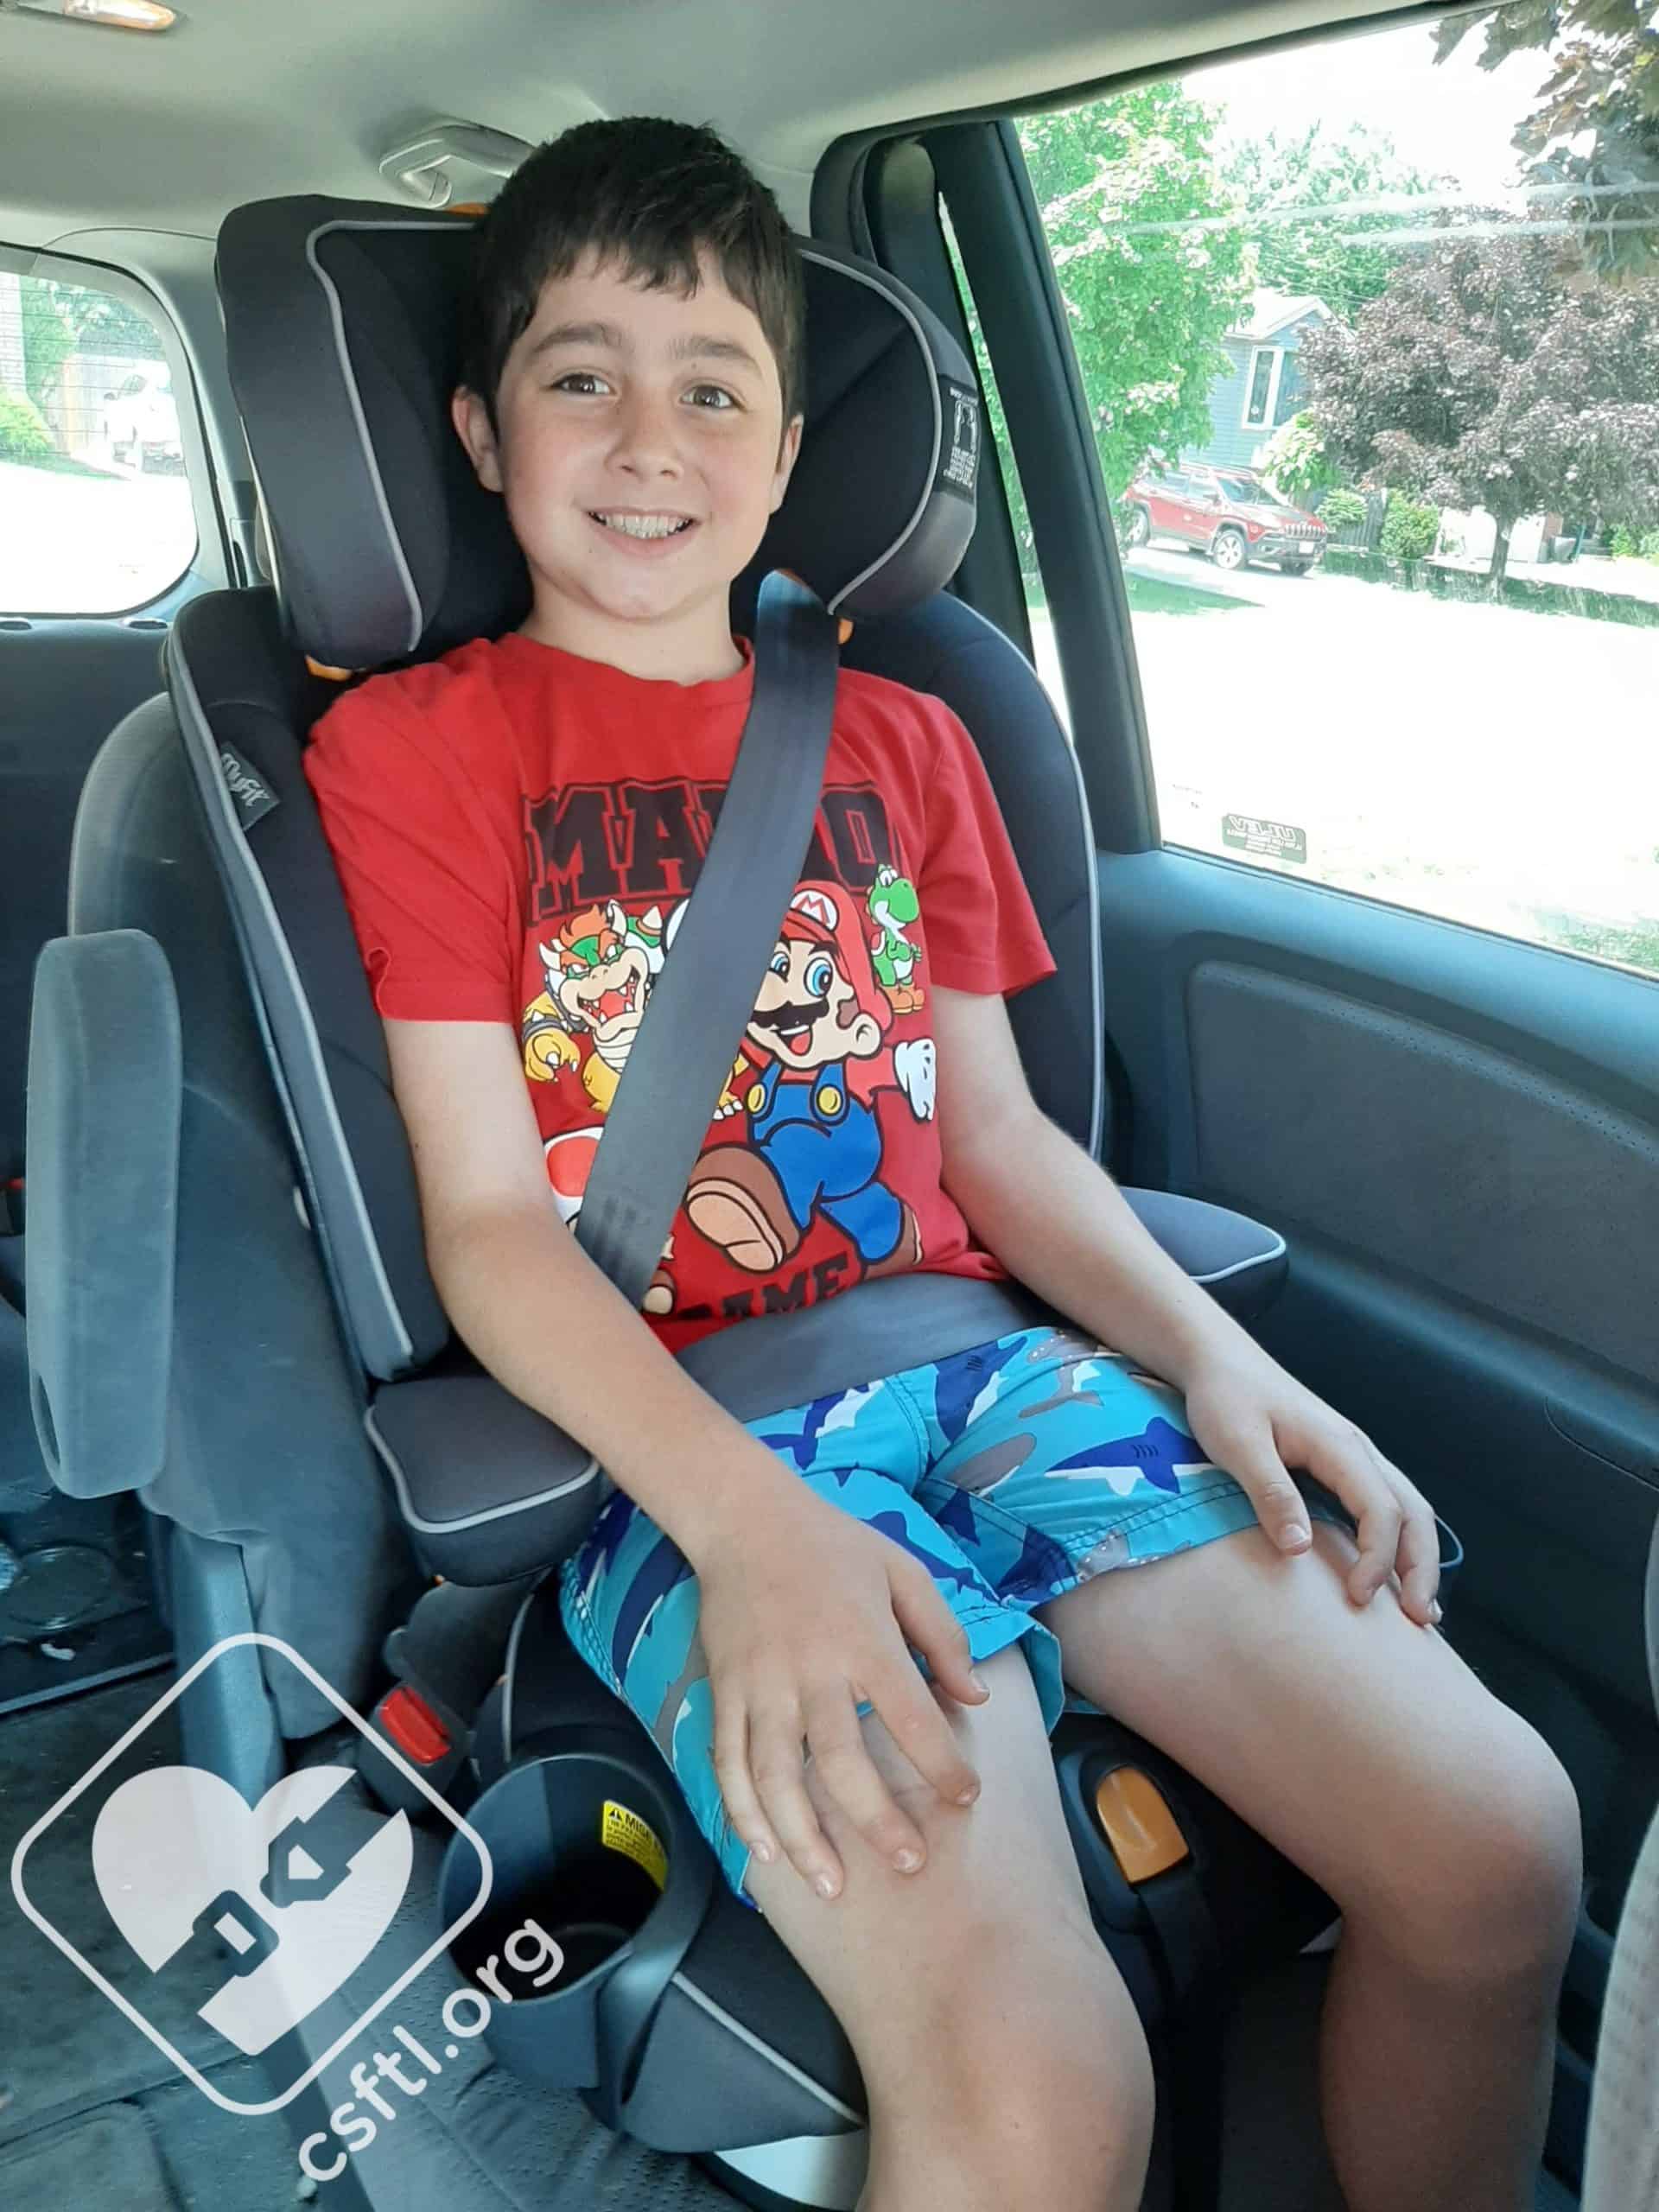
Chicco MyFit – 8 year old
Our 8 year old model is 54 inches tall and weighs 72 pounds. Although the laws of his home province would allow him to ride without a booster seat, this kiddo is aware that that is not a safe option for him and he regularly rides in a high back booster since he doesn’t yet pass the Five Step Test.
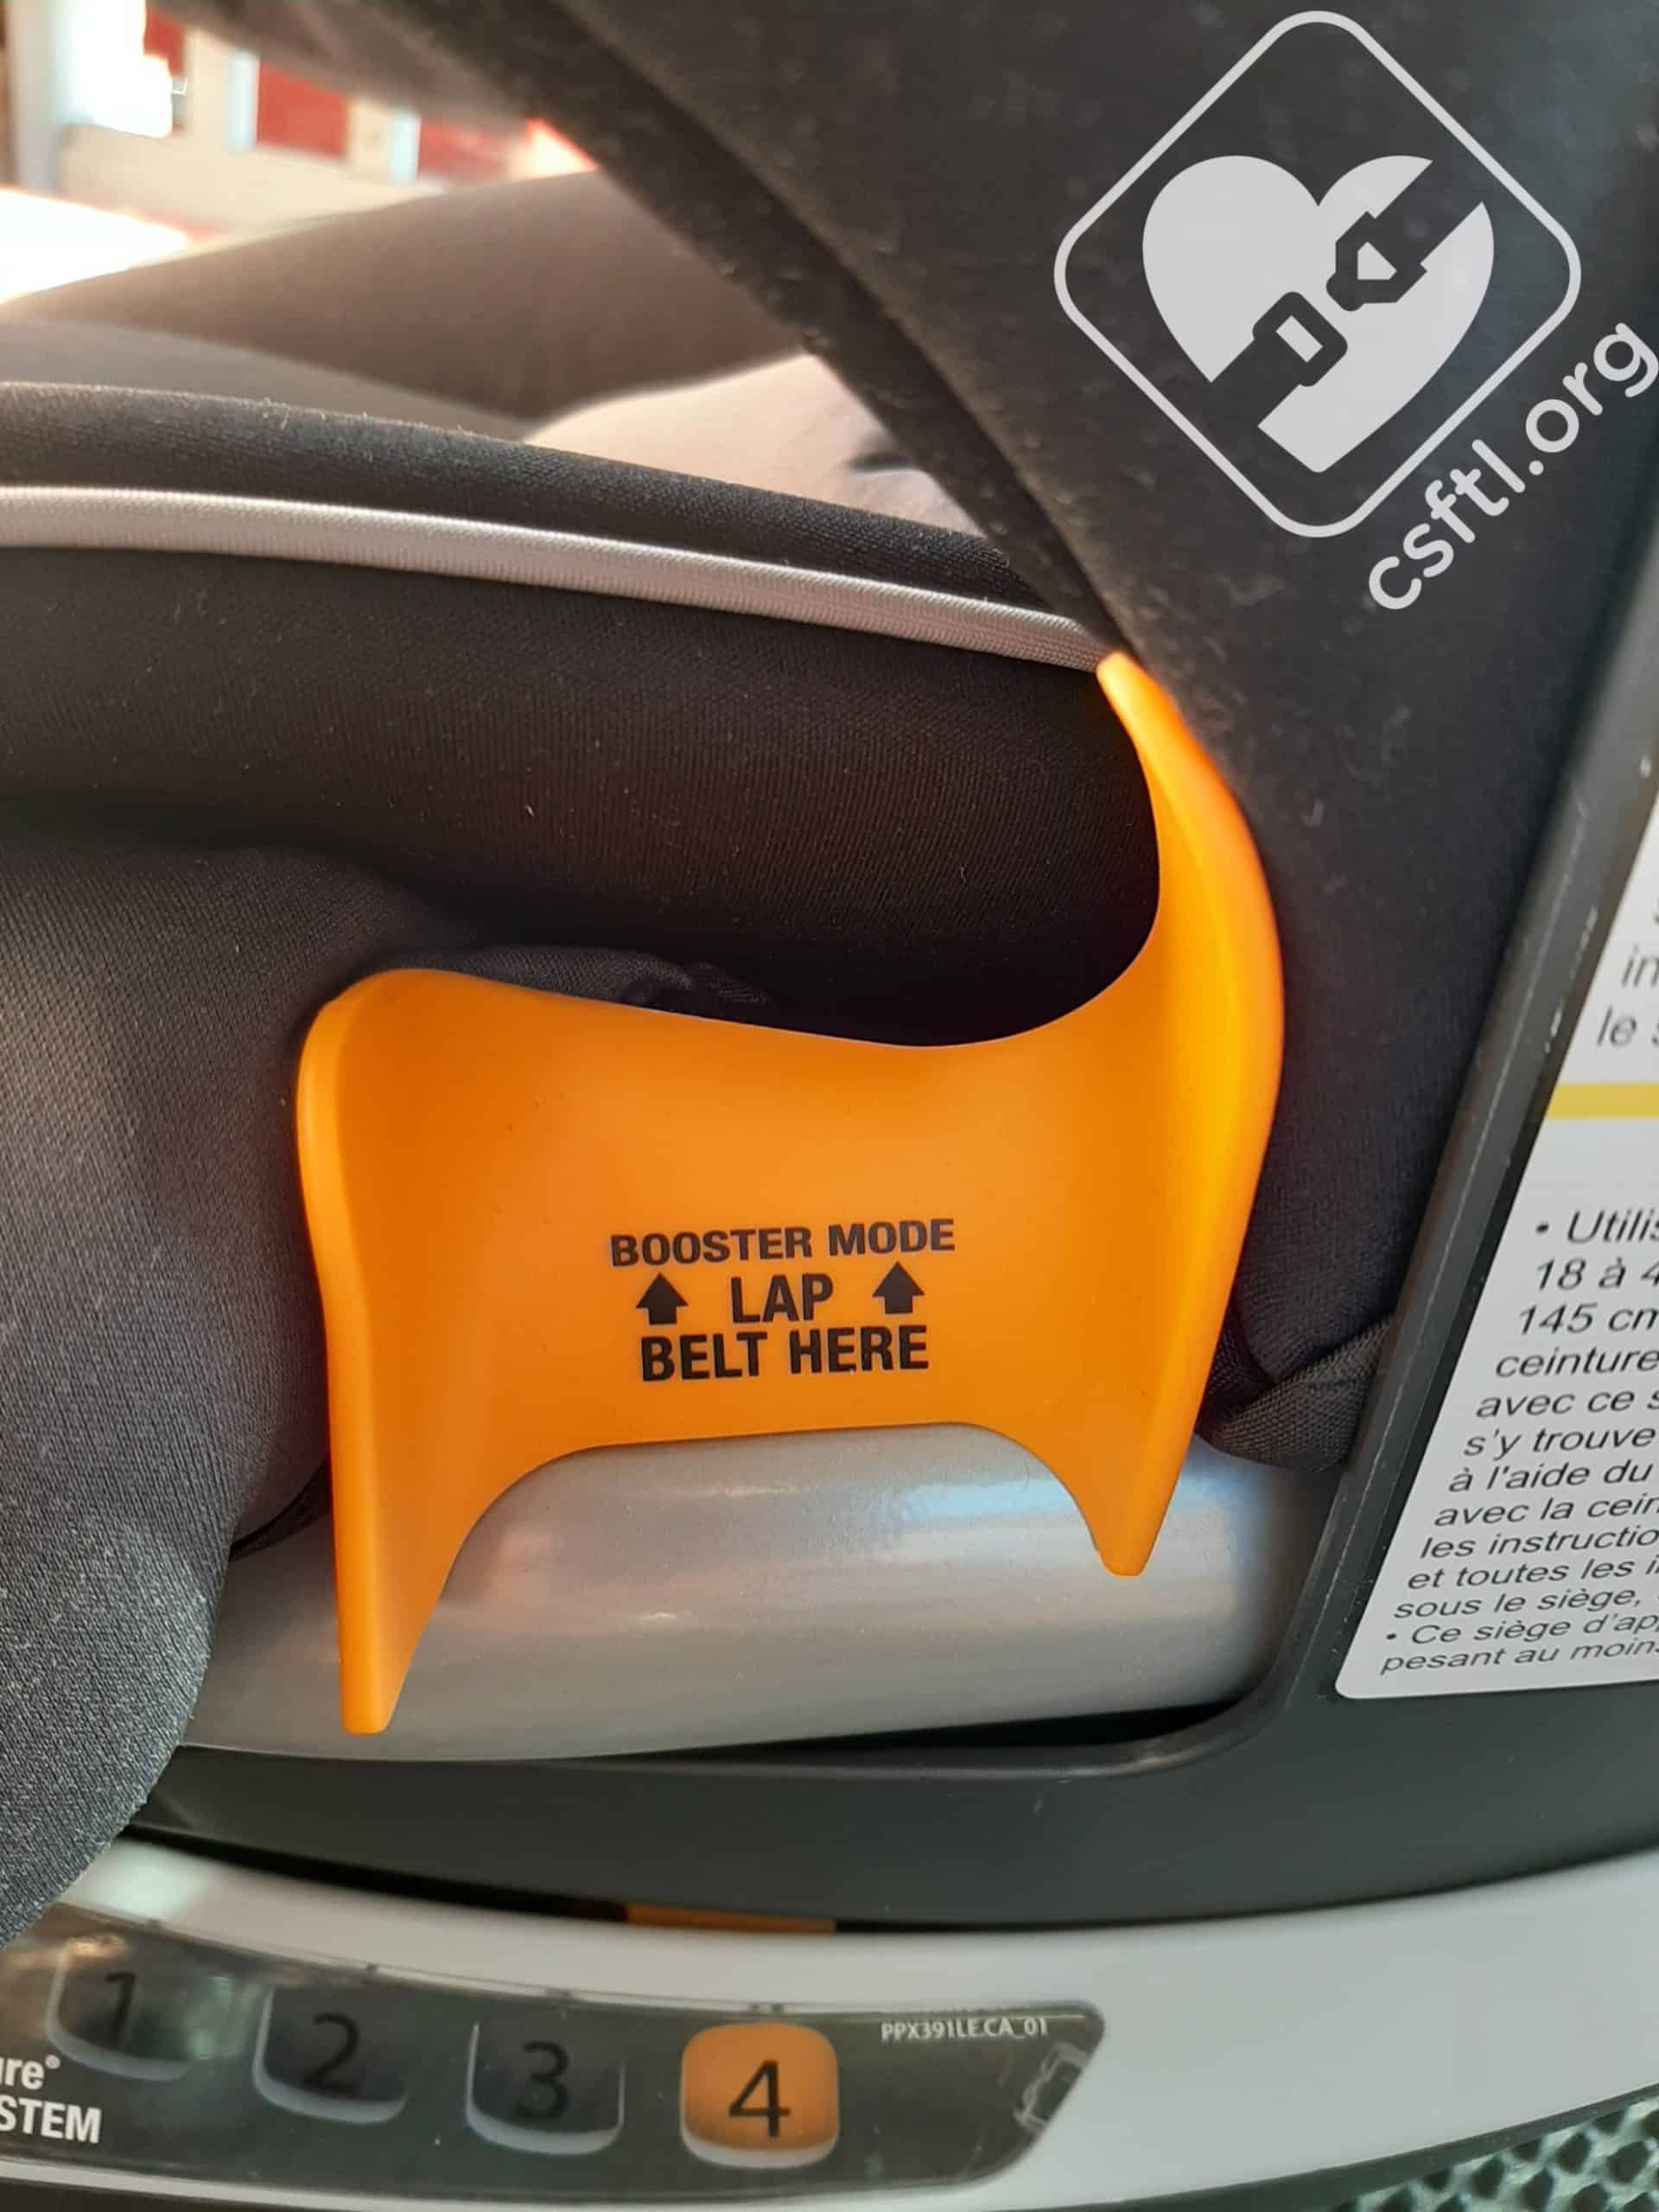
Chicco MyFit lap belt guide for booster mode
He wears a size 10-12 shirt and is 3 inches from the maximum height for the Chicco Myfit, so we were pleasantly surprised to see that he still has a little over an inch of torso growth left in the MyFit with the headrest fully extended. This seat could last him another year and possibly even get him to the point of passing the 5 step test and no longer needing a booster. He had no trouble buckling himself into the MyFit and commented that it’s a comfortable booster. He didn’t spend a lot of time in the seat as he decided it belongs to his sister and did not want to ride in “her seat”.
Fit to Vehicle
2007 Honda Odyssey
Chicco MyFit – 2007 Honda Odyssey on recline 4
The MyFit installation in this 2007 Honda Odyssey captain’s chair was very straightforward. Recline 4 resulted in the MyFit base fitting the vehicle seat well, and both the installation with LUAS and the installation with vehicle lap/shoulder belt took very little time at all.
Three Across

3 across in 2007 Honda Odyssey third row
Three across in the third row of the 2007 Odyssey has always been a challenge. We attempted a three across with our three models and were VERY grateful (even though the 8 year old model is not) to be able to fit all three children in the vehicle’s third row.
In this photo, the 4 year old is harnessed in the Chicco MyFit, the 8 year old is in the Graco RightGuide, and the 6 year old is in the Graco Turbobooster TakeAlong (along with her stuffed dragons, which are a great toy option in the vehicle because they are soft and not a projectile risk).
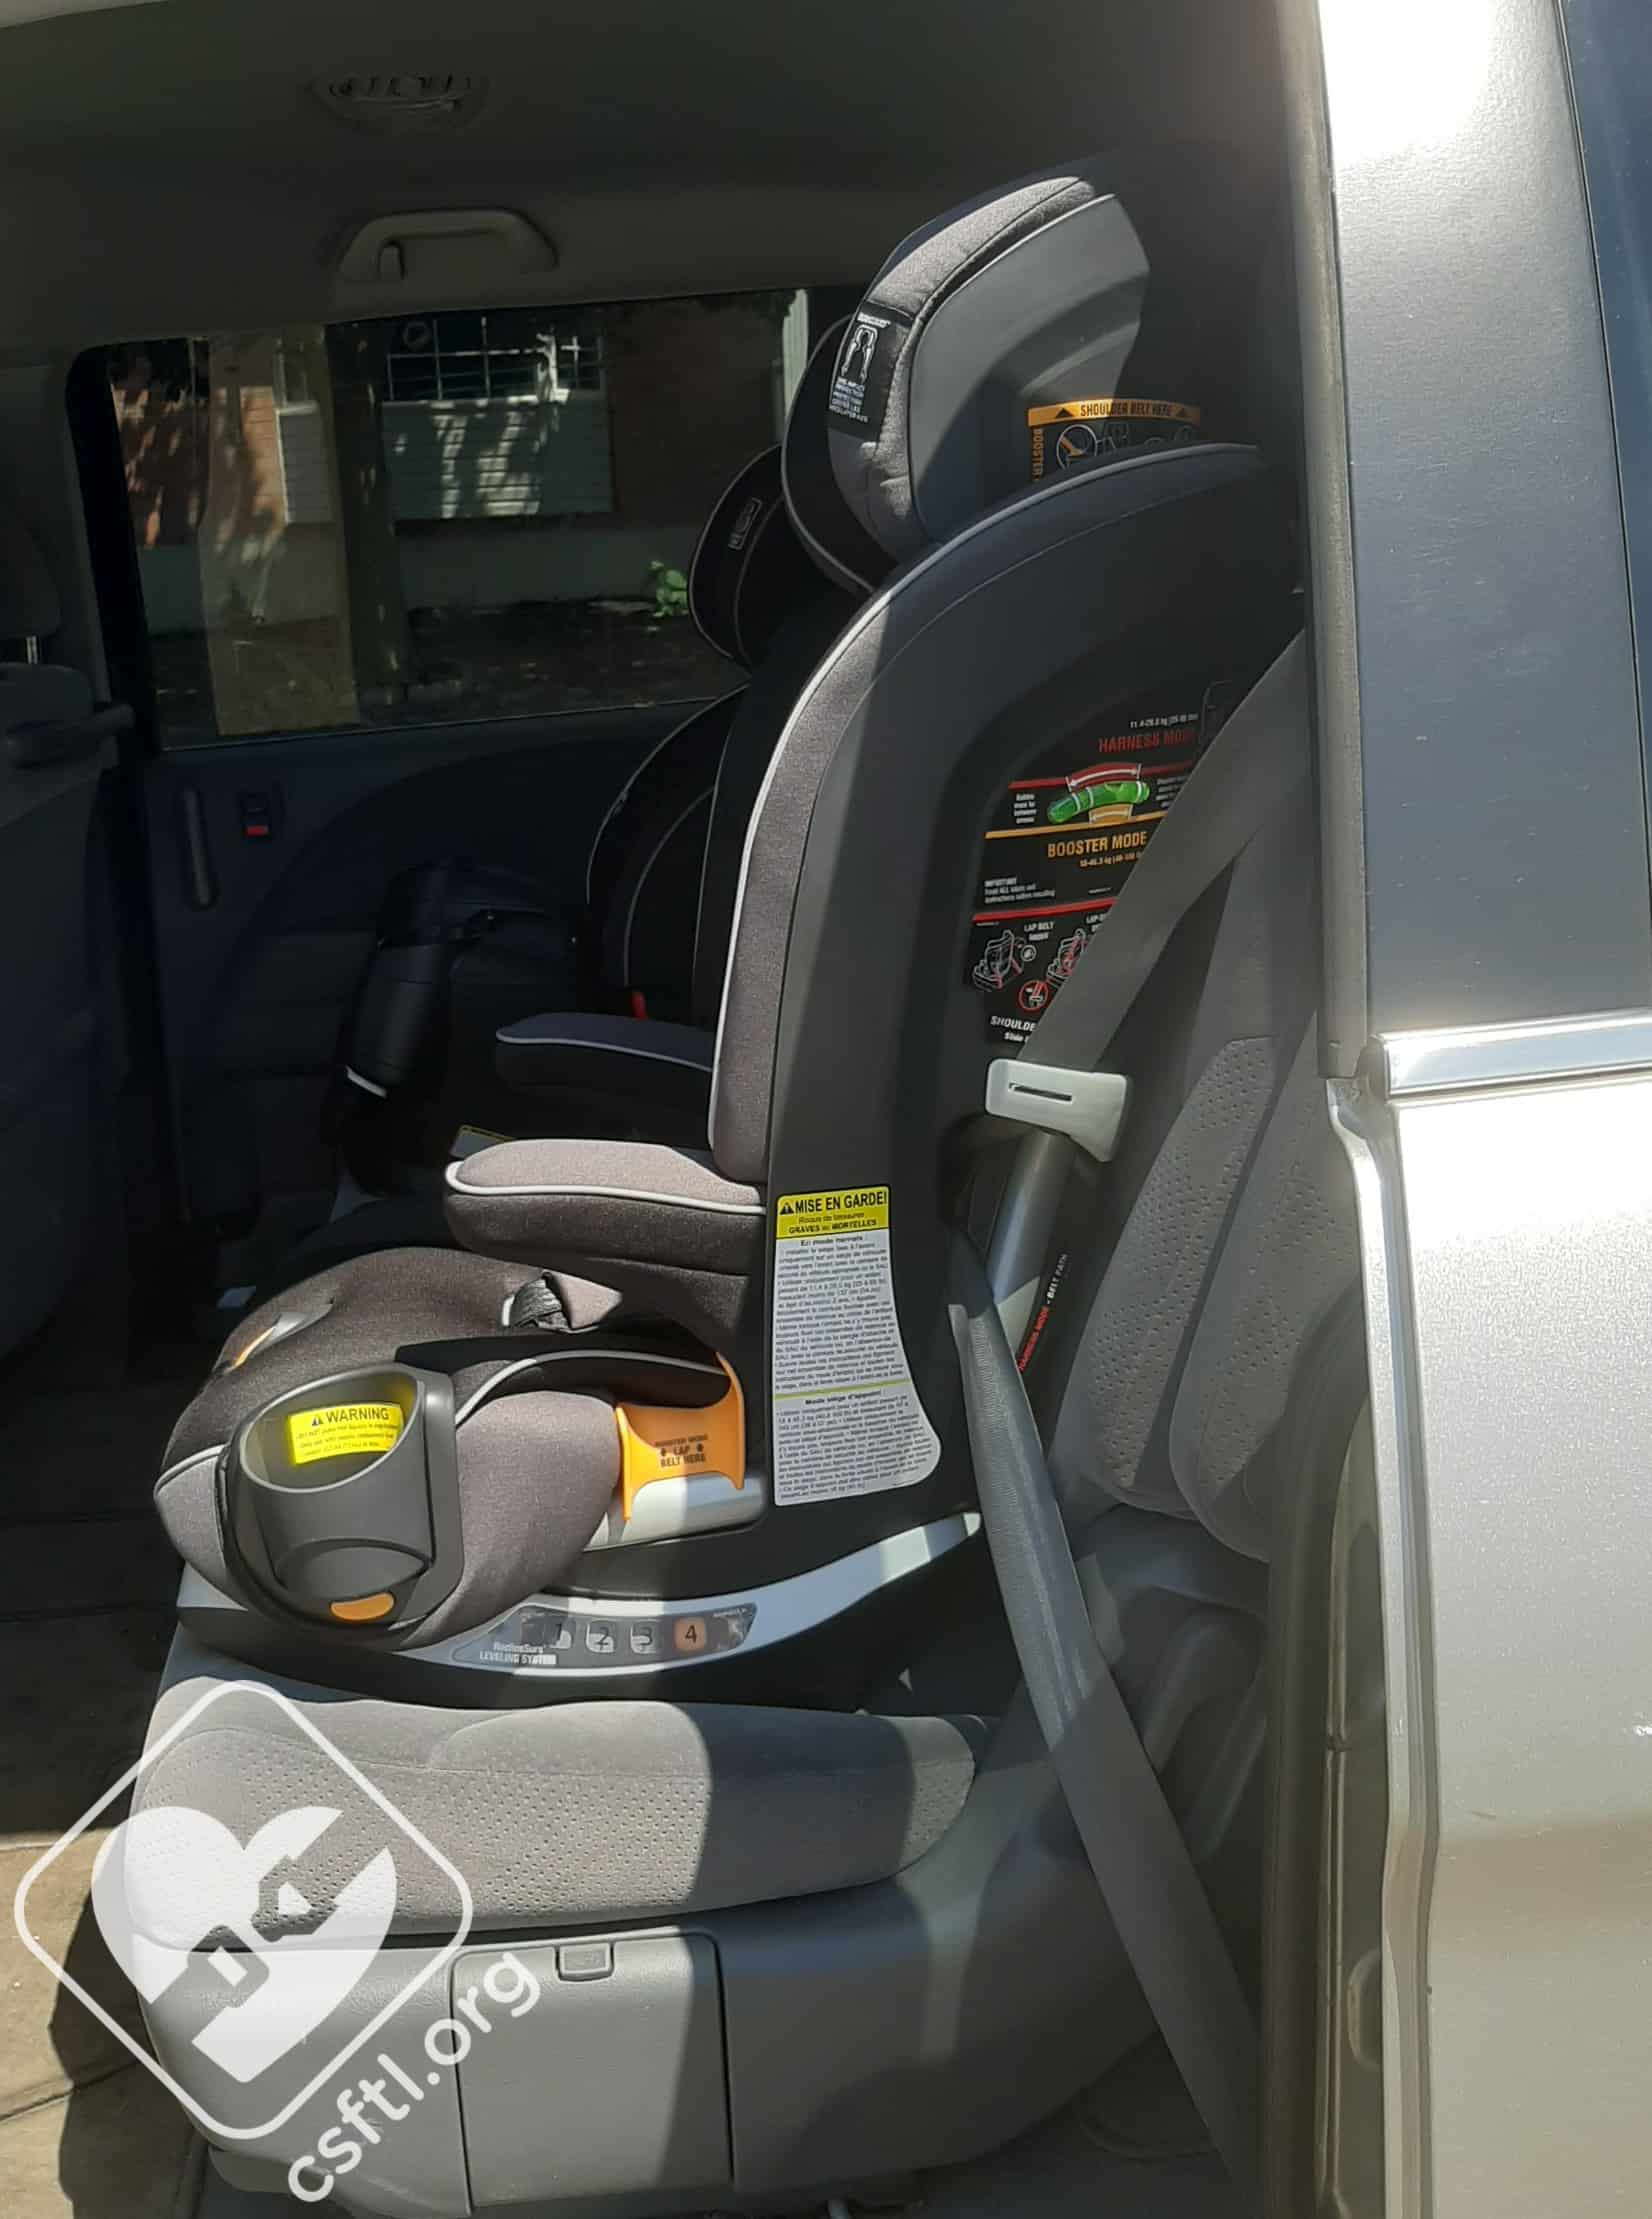
2012 Dodge Ram
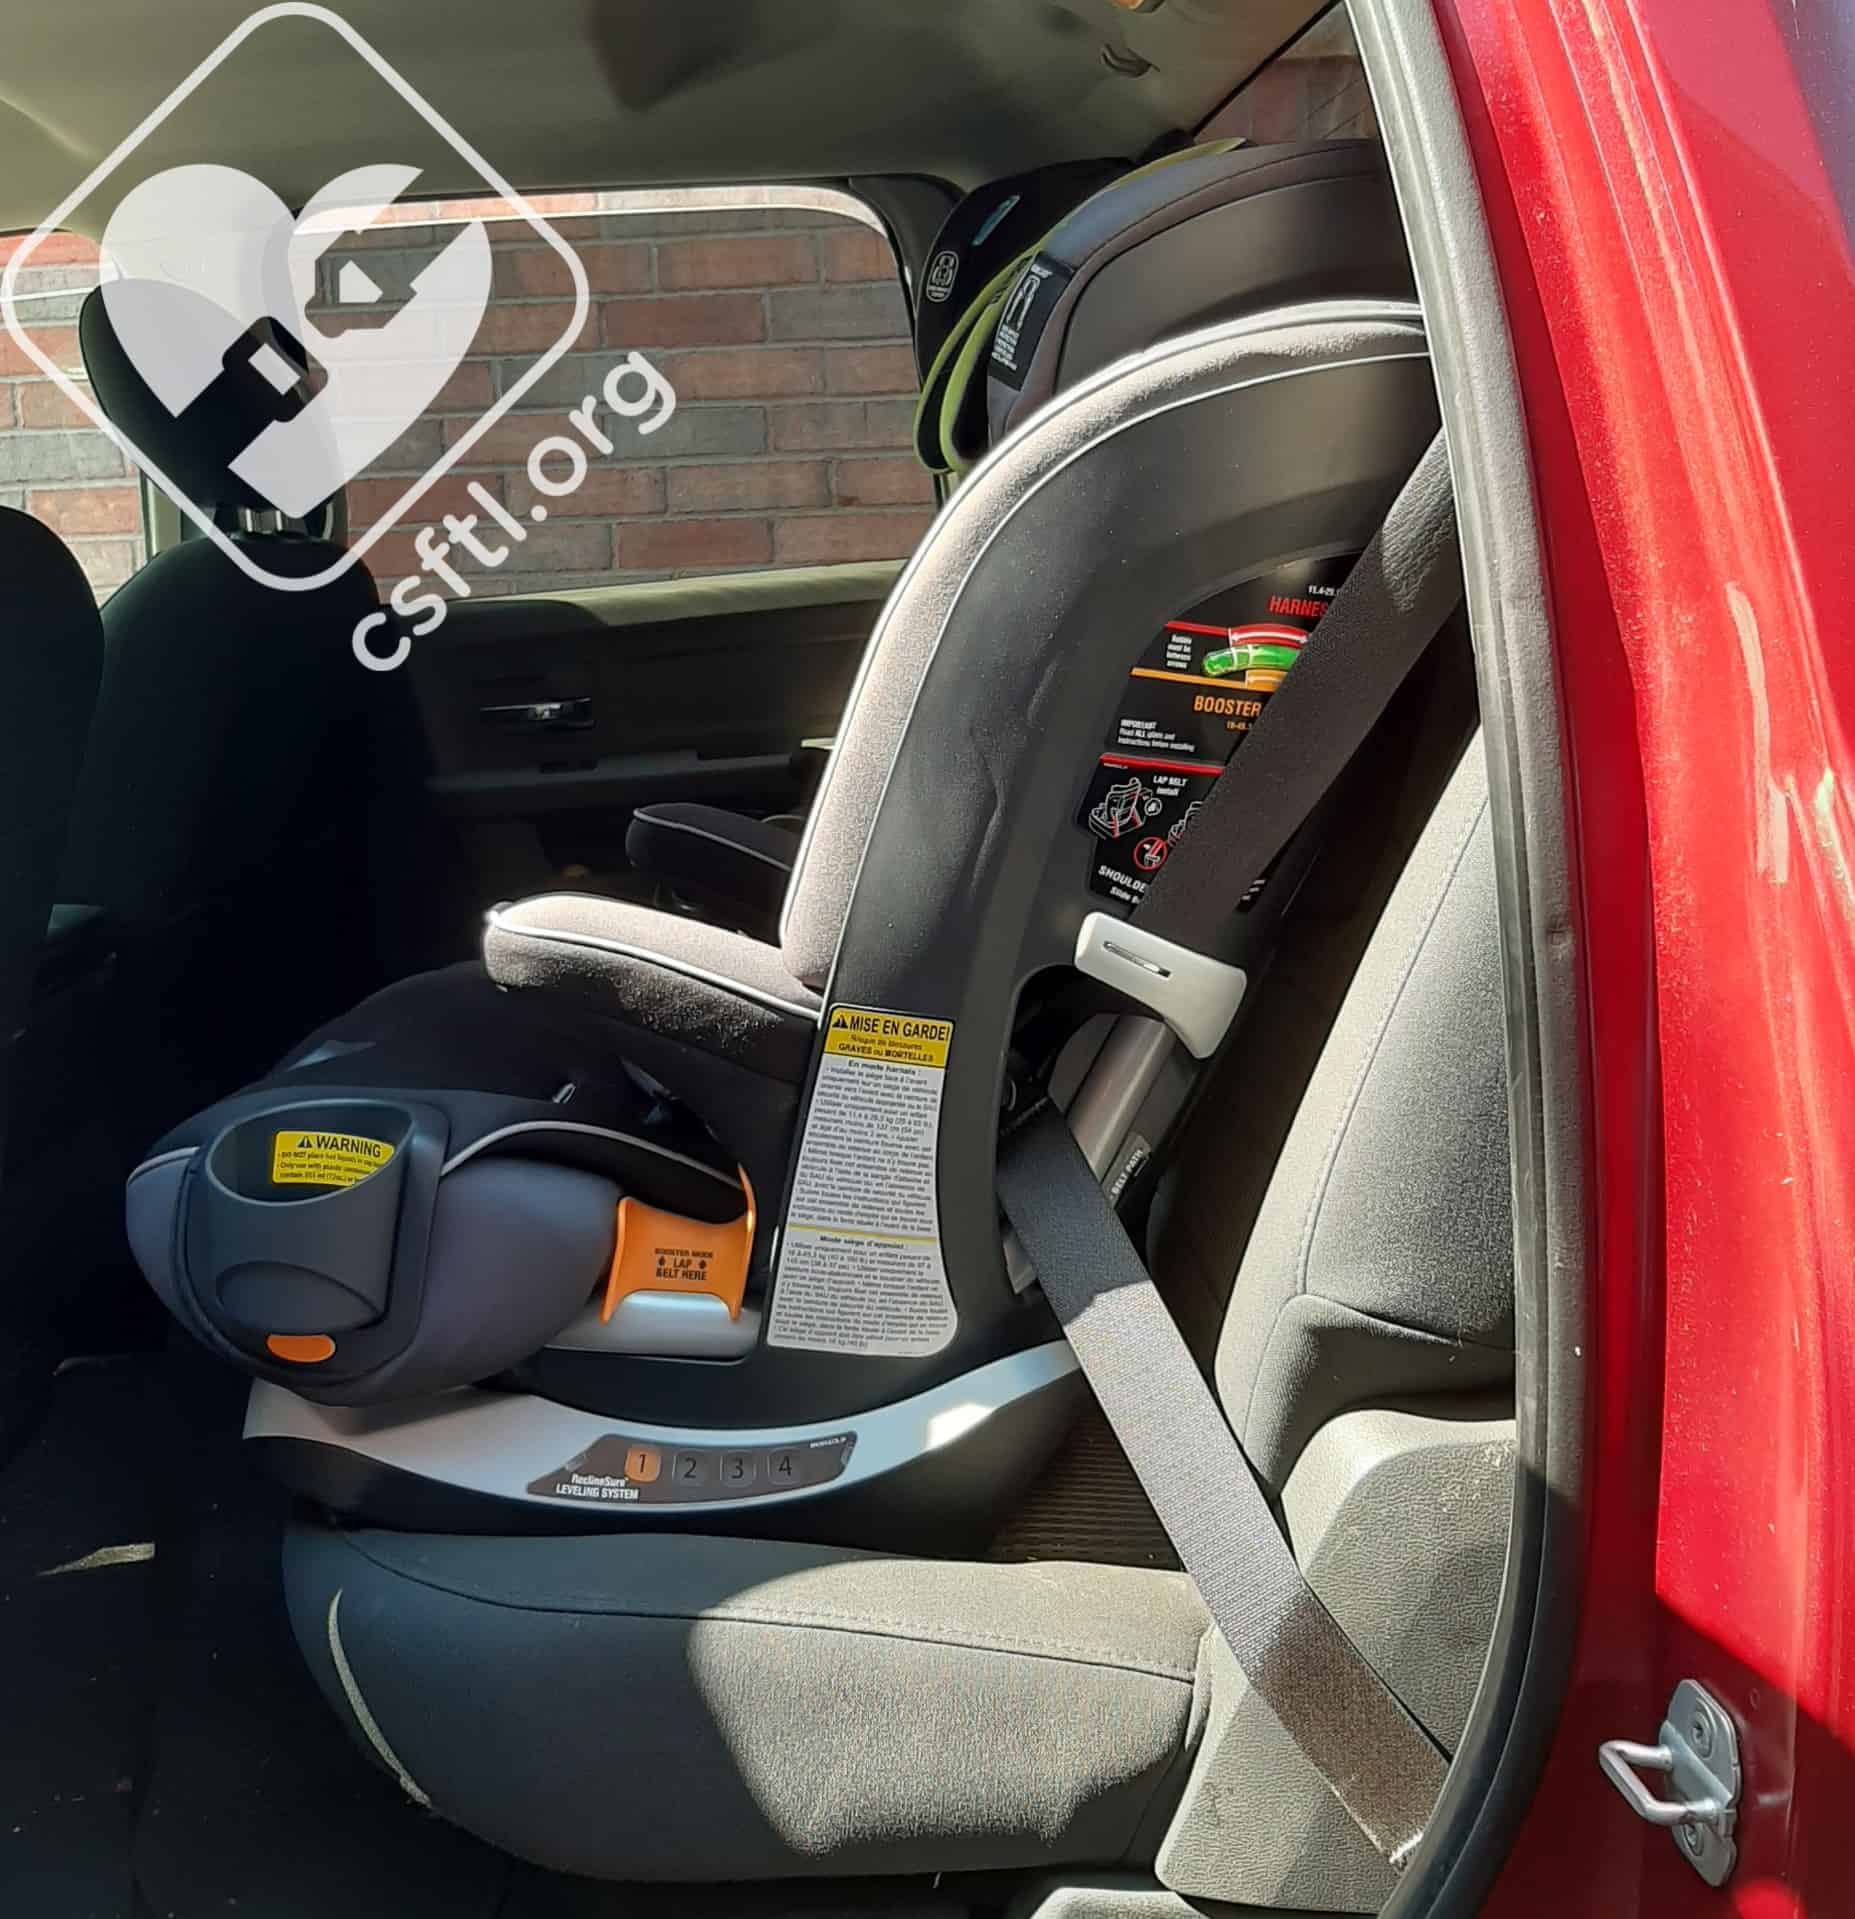
Chicco MyFit – 2012 Dodge Ram on recline 1
Again the installation of the MyFit was quick and easy in this 2012 Dodge Ram. We installed the seat with the LUAS (see the LUAS section of this review for the photo) and the vehicle seat belt to see how they compared. We appreciated the small tether hardware when routing it through the Ram’s tether loops – especially since we’re writing this review during a Southwestern Ontario summer!
Chicco MyFit – 2012 Dodge Ram on recline 4
We installed the MyFit in recline positions 1 and 4 on the driver’s side of the back seat. Recline 1 (most reclined angle) would not have been acceptable for booster mode, but for harness mode any of the four recline settings put the bubble within the allowable range for harness mode. Both installations were quick and easy. We are definitely a fan of this seat for this truck!
Important Information – Where to Find
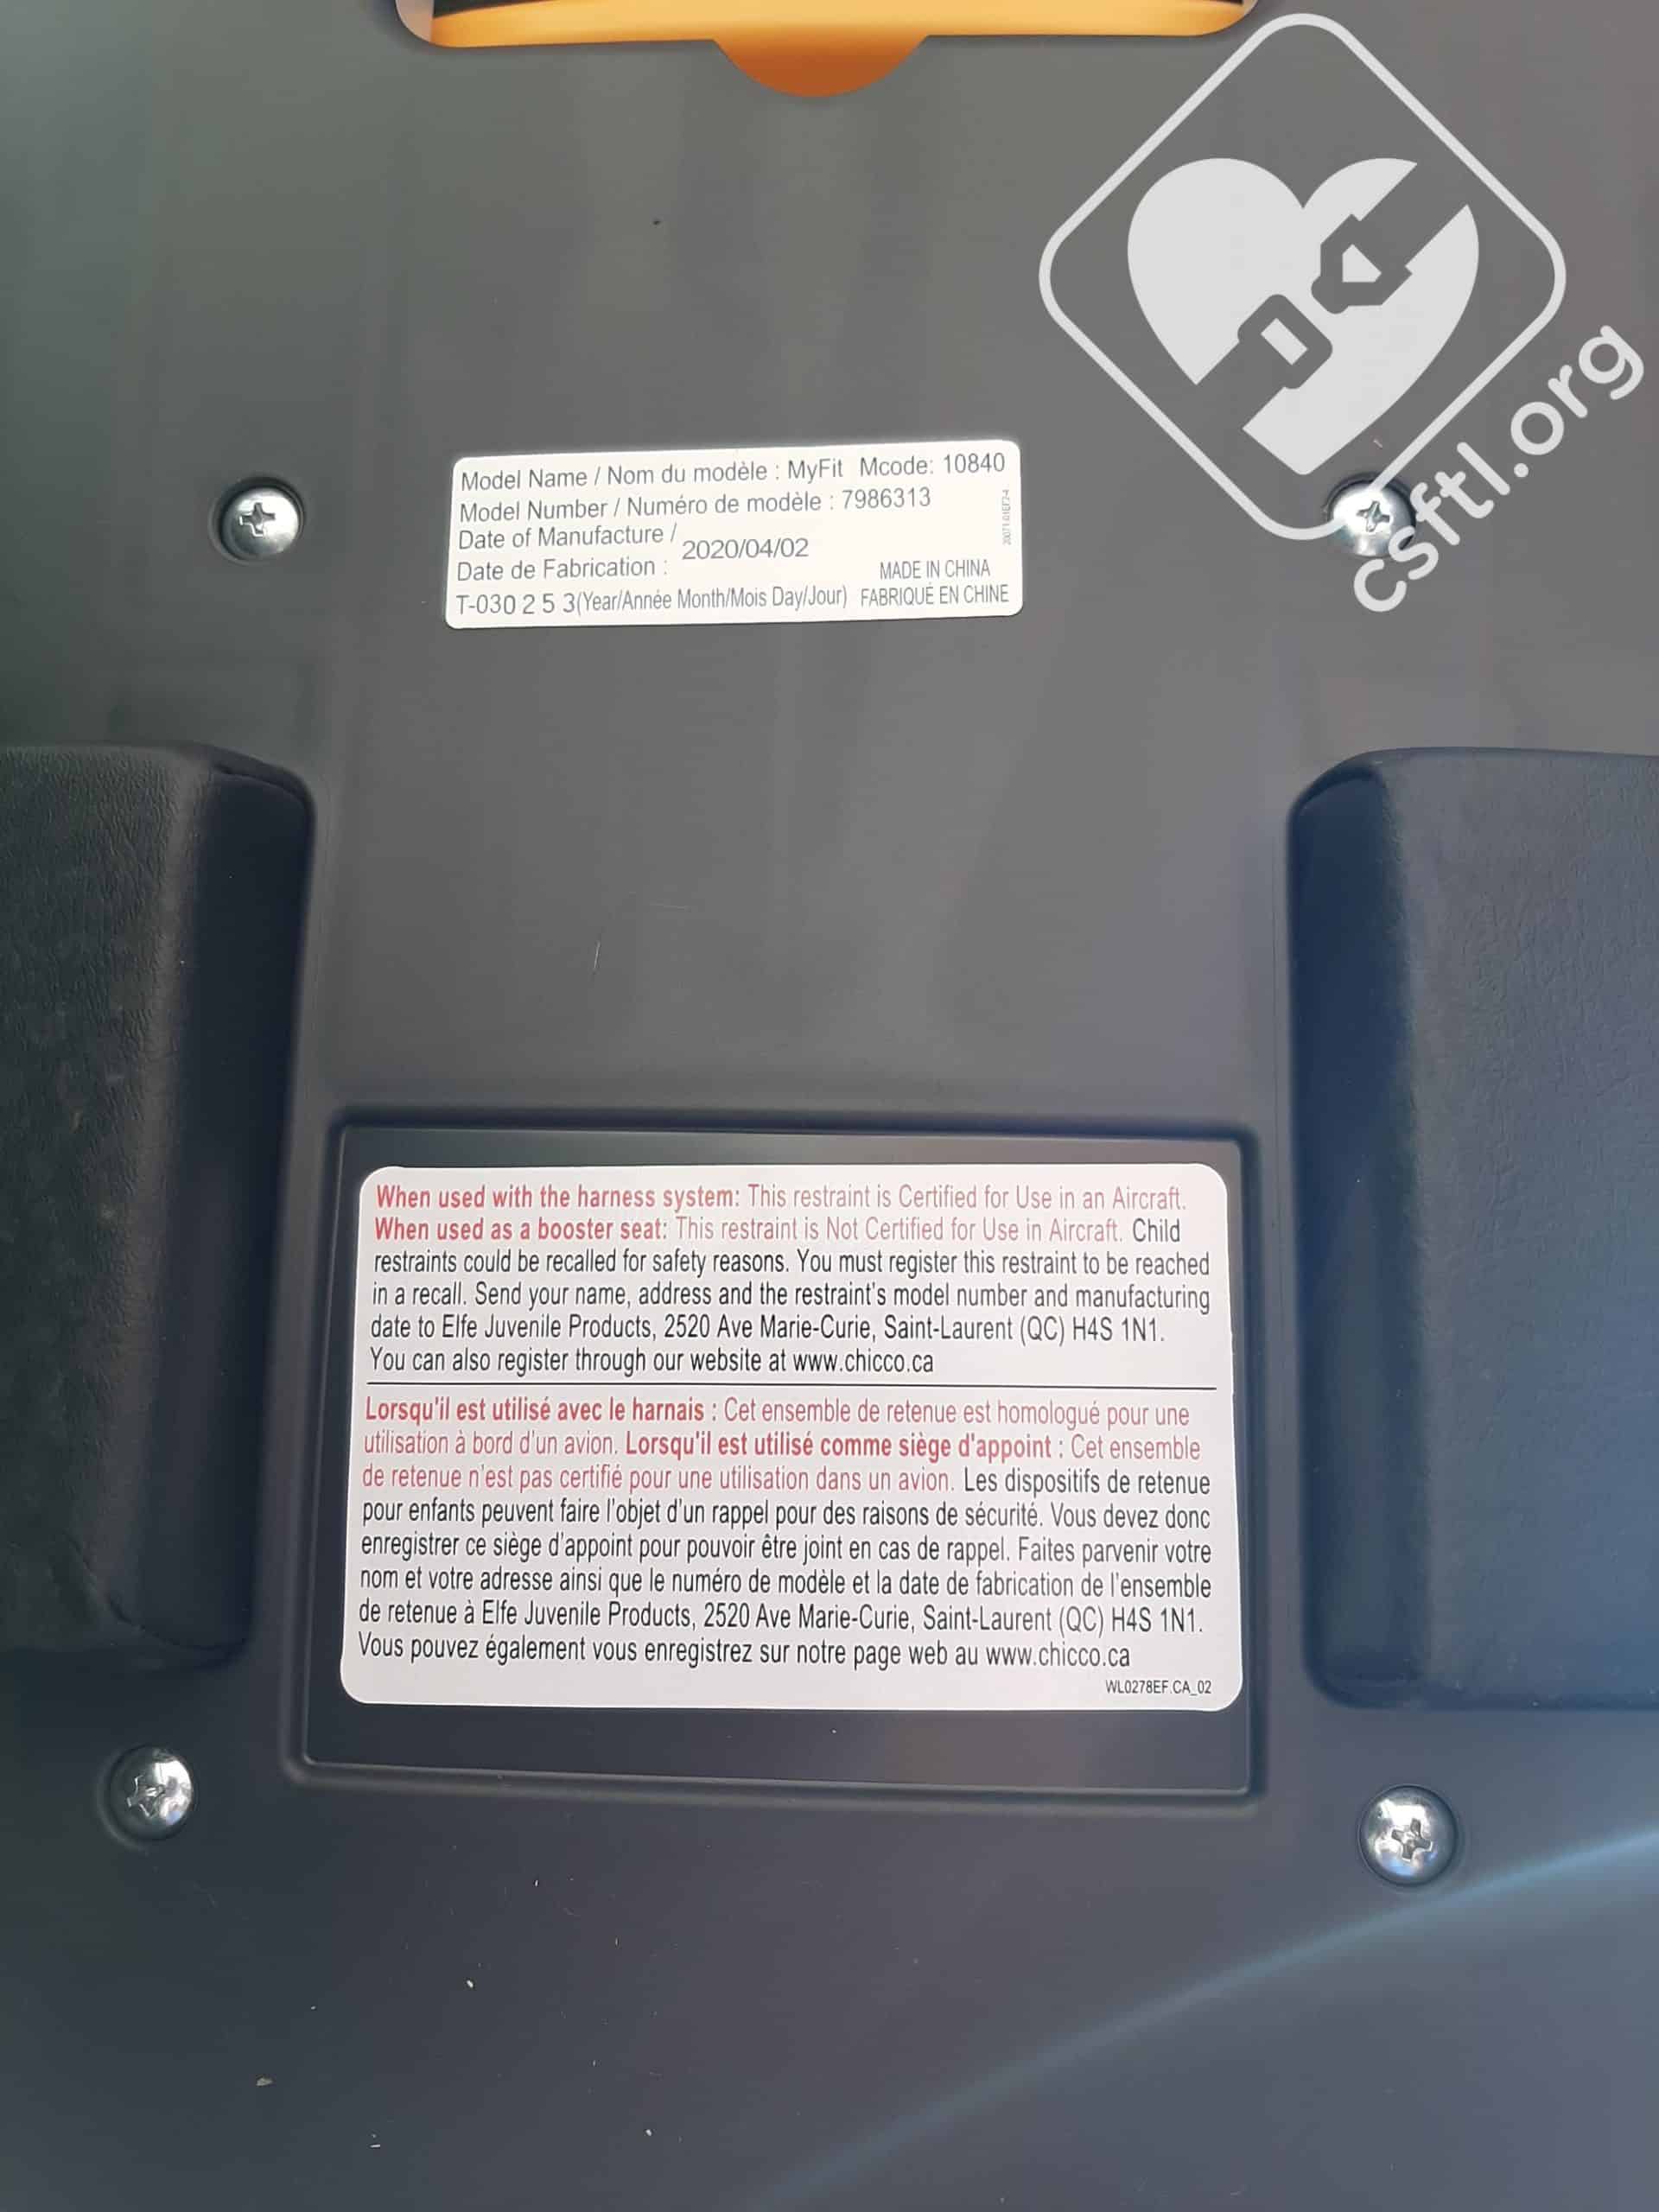
Chicco MyFit Date of Manufacture Label
Date of Manufacture label: this label is located on the bottom of the seat with the airplane approval sticker. The MyFit is approved for use in airplanes when it’s in harnessed mode.

Chicco MyFit Manual Storage
Manual storage: the manual stores under the front cover of the seat. The front cover of the manual highlights this location.
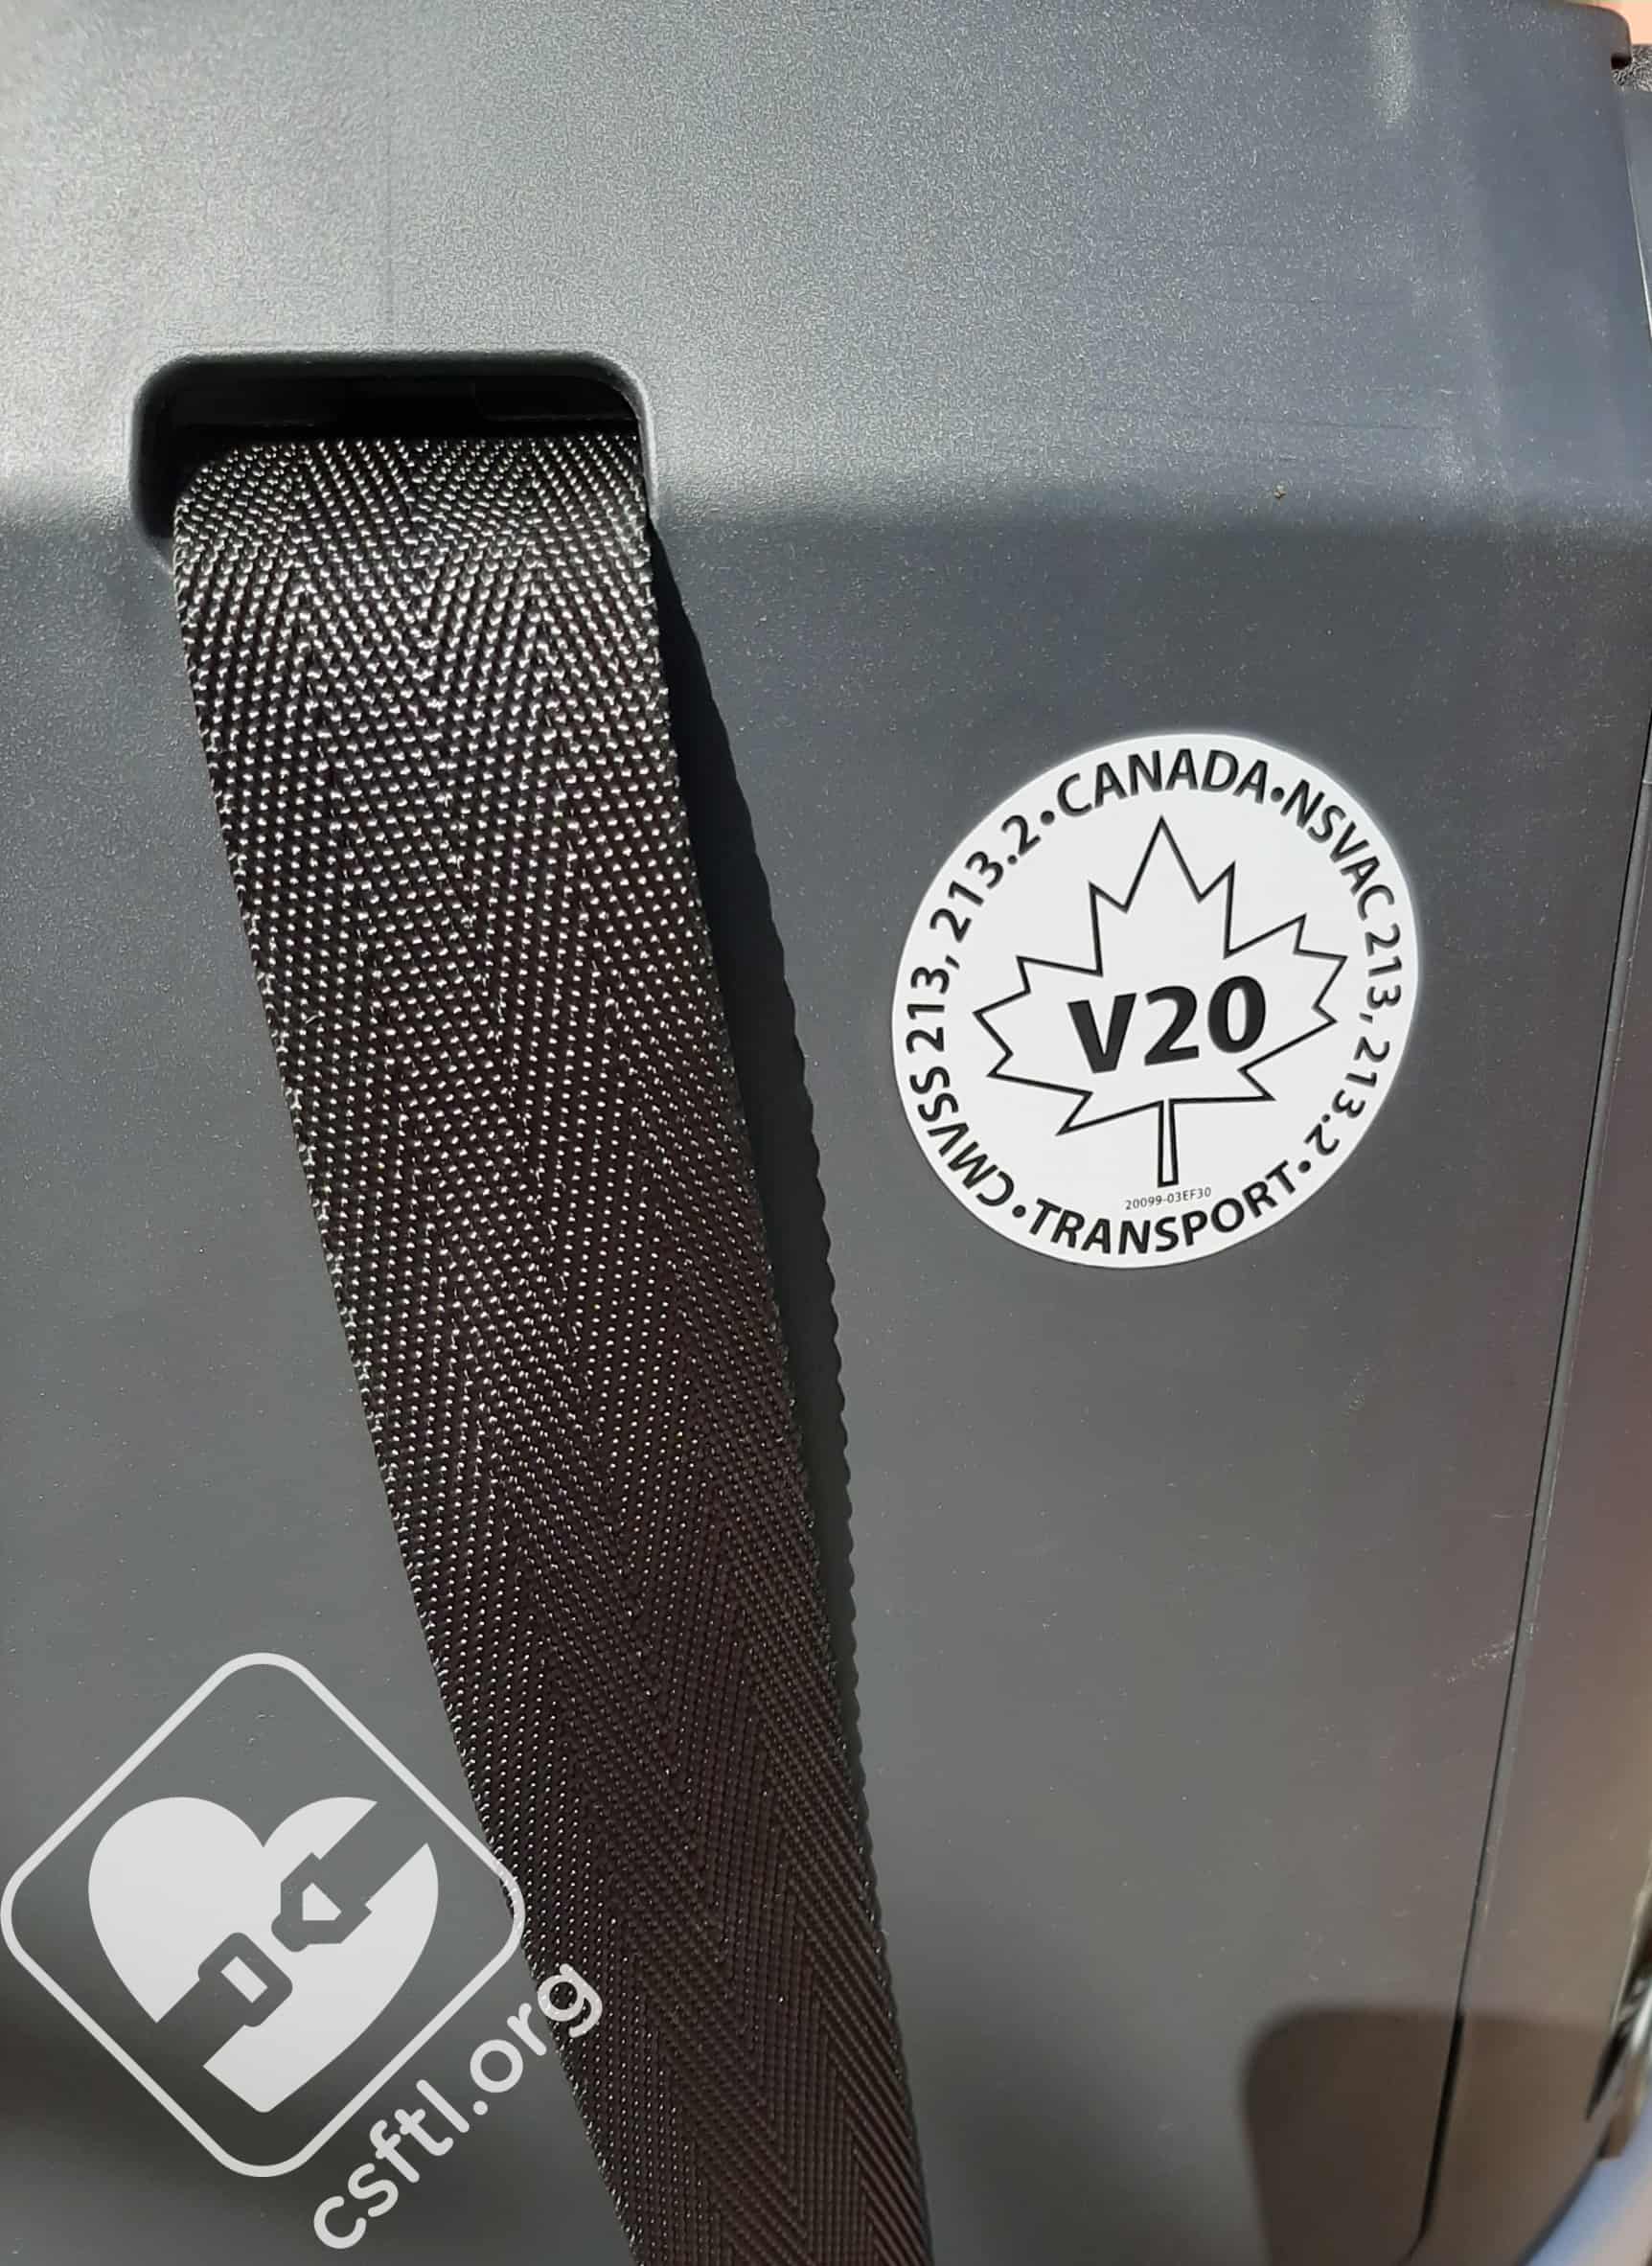
Chicco MyFit National Safety Mark
National Safety Mark: this is located on the back of the seat’s shell.
Overall Thoughts
The Chicco MyFit is a welcome addition to the Canadian market. Not only does the seat have a high harness height limit, it has a high harness height AND a slim profile which makes it fit in a variety of seating locations.
Here are some of the things we loved about this seat: the ease of install both with vehicle seat belt and LUAS, recline settings that help fit the seat well on differently shaped vehicle seats, and a booster mode that provides a consistent belt fit. These features make the MyFit an excellent option for any child 2+ years old.
Thanks for bringing this seat to Canada, Chicco. Parents, caregivers, and CPSTs alike appreciate it!
Giveaway
Want to enter to win a Chicco MyFit? Our friends at Elfe Juvenile are giving away one Chicco MyFit to one lucky reader in Canada. Read our Terms and Conditions, then for your chance to win: