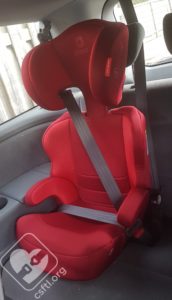
Booster seats with rigid lower anchors are a bit of an anomaly in the United States and Canada so we were pretty interested when we met the newest addition to the Diono family at the 2019 JPMA Show in Orlando. The Everett high back booster seat was originally a European design, brought by Diono to the United States and Canadian markets. In addition to the rigid lower anchors, this booster seat has some plush padding, and lists some very generous height and weight limits. In this review, we’ll take a look at both the Canadian and the United States versions of this seat.
CSFTL Quick Stats
- High back booster weight range: 40-120 pounds
- High back booster height range: 38- 63 inches tall
- Expiration: 8 years from the date of purchase
- Replace after any crash
- No overhang allowed
- Requires vehicle seat back support
- Contact of the back of the seat to the vehicle seat OR top of the seat required to be touching the vehicle seat back
Measurements
- Seat pan depth: 14 inches
- Width of high back at widest point: 18.5 inches
- Internal seating width: 11.5 inches
- Height with headrest fully extended: 30 inches high
- Highest shoulder belt guide position: 21 inches high*
- Width at the back of the base: 12 inches
- Width at headwings: 15.5 inches
- Weight: 9.8 pounds
Features
- Rigid LATCH
- Two optional cup holders, available for purchase separately
* Shoulder Belt Guide
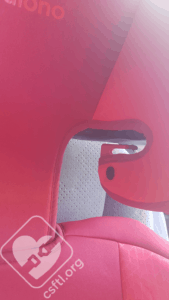
Yes, every high back booster seat has a shoulder belt guide, but we wanted to mention the Everett’s because it’s a little different than most. The Everett’s headrest design places the shoulder belt guide just over 2 inches inside of the headrest. We found that this deep placement limited the use of the seat since the headrest cannot be positioned comfortably behind the child’s shoulders. We’ll discuss those challenges later in the review.
Padded Seat Pan
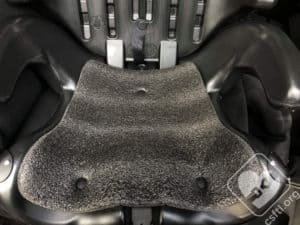
The seat pan (the area underneath the child’s bottom) includes a bit of extra foam padding. Many of our models commented that this extra padding was very comfortable!
One Mode: High Back Booster
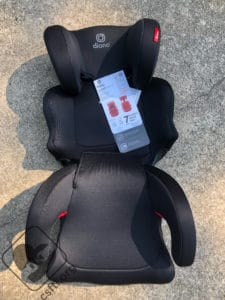
The Everett has just one mode, high back booster only — it does not convert to a backless booster seat. Diono ships the seat packed flat, disassembled, but with the bottom attached to the back portion. It must be assembled for use.
The manual explains how to join the back and bottom portions, and there are no instructions for using the bottom without the back since it cannot be used that way!
We’d like to see more clarity in the manual around assembly — clarifying that it is not optional, and that the backless portion of the seat cannot be used alone. It’s possible that families who are familiar with assembling other dedicated booster seats could overlook the important fact that the Everett is a high back booster seat only.
QR Code
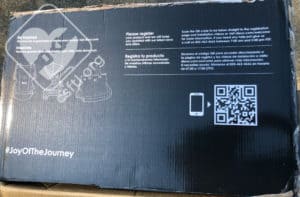
Diono has included a QR code on the Everett box for easy seat registration and online access. We applaud all efforts to have caregivers register their seats and read the manual. Great job Diono, for offering an easy way for caregivers to register their seats!
Sleek Design
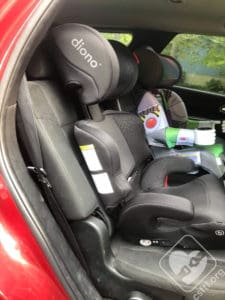
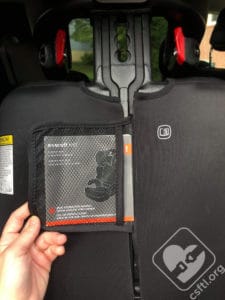
The Everett is fairly minimalist in appearance — it has clean lines and looks great in our back seats! The cover zips up the back to conceal the inner workings of the seat and the plastic shell. That’s also where the manual is stored.
There’s an icon on the cover that indicates where the manual is stored — it ships tucked away inside the cover, within a mesh bag.
We had a bit of a challenge with this storage location — our second reviewer initially missed the location where the manual was stored on the seat. She thought her Everett had shipped without a manual! It was only after she saw the instructions on the box for locating the manual that she realized it was located under the zipped up cover. Shipping the manual in the storage location may cause caregivers to not know that their seat includes a manual at all.
Cupholder Placement
Small icons indicate the locations for the optional cupholders on either side of the seat.
Three Across
The Everett is narrower than some other booster seat options, so it may be a seat to consider when faced with three across situations if it fits your booster rider correctly. However, our challenges with getting a consistent shoulder belt fit for the children in this review don’t put the Everett at the top of our go-to list for tight spaces.
Height and Weight Limits
The Everett’s height range is 38 – 63 inches tall, and the weight limit is 40 to 120 pounds. These are very high height and weight limits, which is fantastic! Unfortunately, the headrest’s design leads us to assert that it’s unlikely that most children could use the seat until they are 63 inches tall — or anywhere close to that height.
Rigid LATCH
Lower anchors on booster seats keep the seat attached to the vehicle when it’s unoccupied. Beyond that traditional use, the manufacturer indicated that the Everett’s rigid lower anchor connectors are meant to offer parents and caregivers simple and quick installation.
We had some trouble using the Everett’s lower anchors in one of the vehicles we used for this review. This isn’t too unusual — the longer connectors don’t work well with some more contoured vehicle seats or vehicle seats with recessed lower anchors but they may install with ease on a flat vehicle seat or in vehicles where the lower anchor connectors are closer to the seat bight.
Rigid LATCH Installation
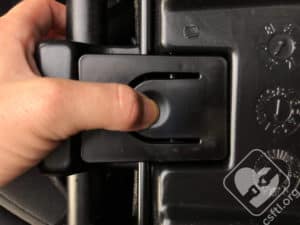
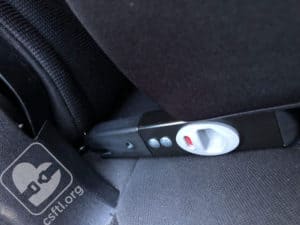
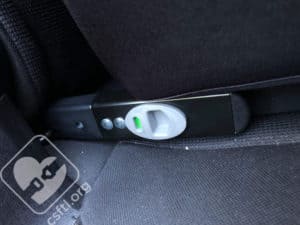
Installing the Everett with rigid LATCH was simple and quick in a 2014 Dodge Durango. Just push on the LATCH adjustment button that’s found on the bottom of the booster seat, then flip the lower anchor connectors out. Place the Everett on the vehicle seat, align the lower anchor connectors with the vehicle’s lower anchors, and push back until they connect. The lower anchors will make a satisfying click and the indicator on the side of the rigid LATCH connectors will switch from red to green. Reverse these steps to store the LATCH connectors when not in use.
In a 2003 Grand Am, we had some trouble with installation. The lower anchors in that vehicle are buried deeper within the seat bight (where the seat back and bottom meet) and we had to feel around a bit more to help guide the LATCH connectors into place. We found it easiest to kneel down, use both hands to guide the connectors, and push the seat forward with our chest. It was awkward, but it worked.
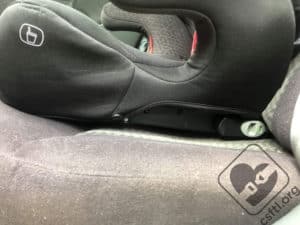
However, once we’d attached the rigid LATCH connectors, we realized that almost the entire bottom of the Everett was lifted from the vehicle seat when the lower anchors were attached. We’ve had similar experiences with rigid LATCH connectors and contoured vehicle seats/waterfall seat bights so this wasn’t a total surprise.
Diono confirmed our suspicions — we could not use rigid LATCH in this seating position in this vehicle. So we needed to store the lower anchors and secure the booster seat when it wasn’t in use. The only challenge with being unable to use the rigid LATCH is that the Everett’s manual indicates that the rigid LATCH feature improves safety.
Recline Positions
Page 20 of the manual includes a section titled “Comfort Features,” addressing the available recline options. We were hopeful that this recline adjustment (and the way it was paired with the term “Comfort Features”) could mean that the seat could be reclined for the child’s comfort. This was not the case.
Diono later confirmed that this section of the manual is not about reclining a seat for the comfort of the child, but instead instructs parents and caregivers about reclining the back portion of the Everett to better fit a vehicle seat.
Even though our short-lived hopes of having a reclining booster were dashed, we did appreciate that Diono allows the Everett’s recline to be adjusted a bit to accommodate varying vehicle seat shapes.
The manual also indicates that a gap behind the booster seat is fine as long as the Everett’s head support is touching the vehicle seat back or headrest.
Cleaning Instructions
The cleaning instructions are located on a tag on the inside of the cover. The manual states that the cover can be washed on a gentle cycle with cold water and a mild detergent. Flat air drying in a shady spot with no direct sunlight is indicated.
We asked Diono about this instruction since it’s pretty specific and a lot of us use the sun to dry things. They let us know that this restriction is intended to prevent a faded cover. This is a valid concern – your red Everett may turn pink in the sun over time, so be aware of that before using the sun to dry your cover.
Manual
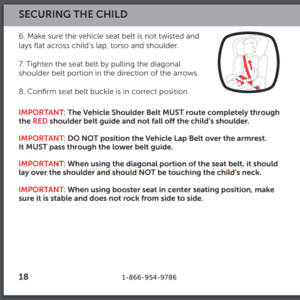
Before we installed our Everett, we spent some time reading the manual.The “Securing the Child” section of the manual includes some illustrations of the seat that look a bit different than our Everett. One of these illustrations indicates that the red belt guides are located at the bottom of the headrest, even though they’re just over 2 inches inside the headrest on the actual seat. Diono let us know that the manual can be changed, so hopefully we’ll see updated illustrations in the future.
Headrest Adjustment
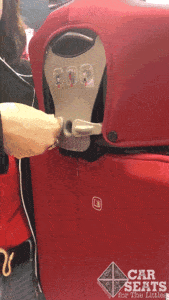
The Everett’s headrest works a bit differently than other car seats and booster seats we’ve used. Not only are instructions for use in the manual, but they’re right on the headrest itself. First, swing the two head support locks outwards. Then, pull out the head support adjustment handle to release the headrest. From there, move the headrest up or down, making sure it clicks into one of the seven settings completely before returning the locks to their original positions.
When we saw the Everett at JPMA 2019, we learned how to adjust the headrest on the pre-production model they had at the show. The display seat seemed as if it adjusted smoothly, and we were impressed! Unfortunately, both of the production seats we used for this review did not adjust with as much ease. We often had to use a bit more force than we would have liked to have needed when adjusting the headrest.
We were always able to adjust it, and pulling up on the headrest after adjustment ensured that the handle had clicked into place. The locks were definitely easy to use, even though having a multi-step process for adjusting the headrest was not always convenient.
Seat Belt Retraction Issues
The narrow belt guide caused the belt to not retract well in certain seating positions of certain vehicles. For example, the vehicle seat belt did not retract well in the 2nd row captain’s chairs of a 2007 Honda Odyssey, but retracted beautifully in the 3rd row outboard seating position of the same vehicle. When we asked Diono about these challenges, we were a bit surprised at the answer — the belt guide is optional. We didn’t see any information about that in the manual, that’s definitely something we’d like to see included in the manual. We would recommend reaching out to Diono directly if you have any fit or retraction issues.
Fit to Child
5 Years Old
This model is 5 years old, 48 inches tall, and weighs 49 pounds. She is new to booster riding, and so far she has only used booster seats for short trips in town. The Everett provided her with an excellent vehicle seat belt fit — her shoulder belt is centered on her shoulder and the lap belt is low on her thighs, touching her hips. She doesn’t have much experience with booster comfort, but she found the Everett to be very comfortable.
7 Years Old
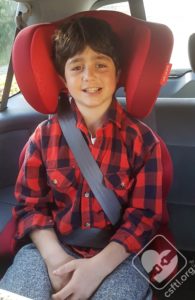
This model is 7 years old, 53 inches tall, and weighs 68 pounds. He typically uses a high back booster and was very excited to have a brand new RED booster seat to try out (he chose the color).
Before he buckled himself in, he pointed out how comfortable the seat is. That gets a big thumbs up from us because he has tried quite a few high back booster seats and this was the first time he has commented on the comfort without being asked.
When the headrest was adjusted so that it was not positioned below his shoulders, the shoulder belt was quite close to his neck — not in the recommended “centered on the shoulder” position from the CPST curriculum. Despite the fit not being perfect on his shoulder, he did not complain at all and still finds the Everett quite comfortable after a couple of weeks worth of car rides.
Because this kiddo is very close to needing the headrest moved up one position, we decided to move it up and see what the fit looked like. While again, we see that the shoulder belt is closer to than neck than centred on his shoulder, it is still providing our model with a pretty good seatbelt fit, and he did not complain of comfort with the headrest in this position – even though we were initially concerned that this would position the shoulder belt uncomfortably close to his neck.
8 Years Old
This model is 8 years old, he’s 50 inches tall and weighs 58 pounds. He read the whole way to Portland and back in it last week, falls asleep in it occasionally with no complaints. His only real complaint is that the cupholder isn’t integrated, but that might be because we had misplaced the cupholder!
Thoughts on Fit
While most of our models found the Everett comfortable, it doesn’t consistently provide an ideal shoulder belt fit (centered on the shoulder). While it’s true that positioning the belt on/near the neck is a better option than off shoulder, most of our models found the position to be uncomfortable. This discomfort caused some of them to squirm and attempt to play with the shoulder belt while riding in the seat.
The manufacturer clarified that the belt guide does not need to be used as long as the shoulder belt fits on the collar bone, but this is not stated in the manual. The manual states (page 17, number 4) that the vehicle seat belt is to be fed through the red belt guide. Sometimes, individual situations are best managed by contacting the manufacturer directly for guidance outside of what the manual can cover but we always prefer when the manual has the last word on a topic.
Important Information: Where to Find
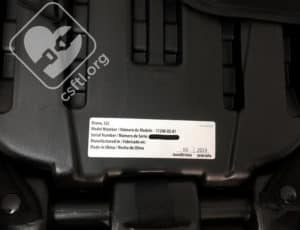
Date of Manufacture: The label with manufacturer information is at the back of the seat, under the cover, just above where the back of the seat meets the bottom.
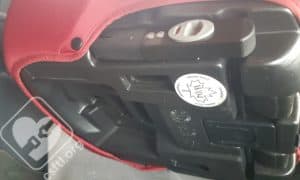
National Safety Mark (Canadian users only): the National Safety Mark label is located on the bottom of the Everett’s base.
FAA Approval: like all booster seats, the Everett is not approved for use on aircraft.
Manual Storage: the Everett’s manual is cleverly hidden in a mesh pocket inside the cover on the back of the seat. The back of the cover has a tab with an icon manual on it to indicate the location.
Overall Thoughts
The Everett’s padding is quite comfortable and the rigid LATCH is a great feature. Unfortunately, we had enough challenges with fitting our models correctly that we can’t say with confidence that the Everett is a booster seat we’d recommend on a regular basis. We would recommend that caregivers who are considering the Everett test it out in their vehicle and with their child before buying.

