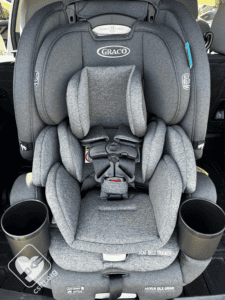
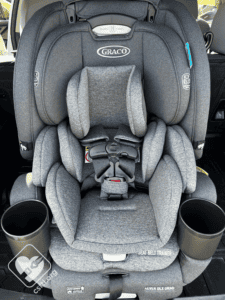
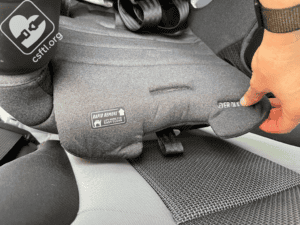
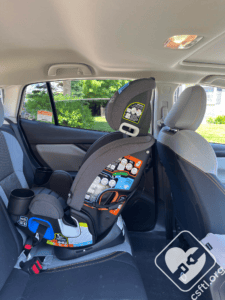
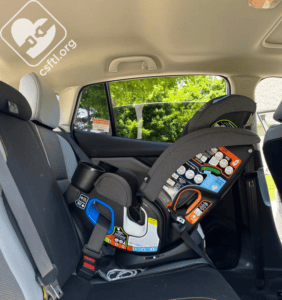
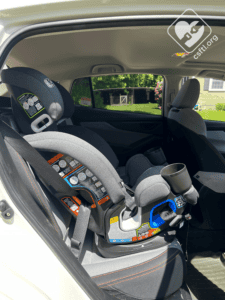
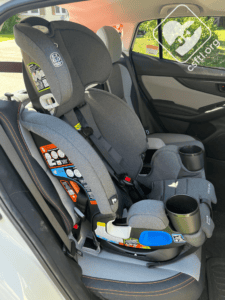
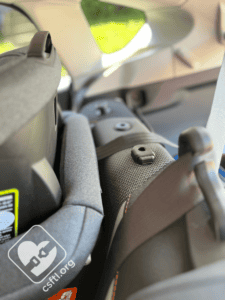
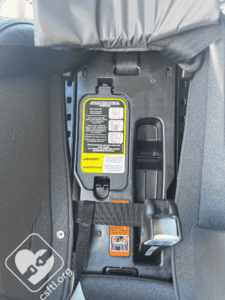
Graco has a lengthy line up of multimode car seats. The original Graco 4Ever is a well-loved, tried and true car seat that really does go from birth to booster seat, so we were excited to see what this new version of the 4Ever had to offer. The best bonus for us? The 4Ever DLX Grad comes with a new version of the seat belt trainer that was formerly (and lovingly) known as the RightGuide.
CSFTL Quick Stats
- Rear Facing
- Weight range: 4-40 pounds
- 49 inches or until the child’s head is 1 inch below the adjuster handle
- Forward Facing
- Weight range: 22-65 pounds
- Forward facing height range: under 49 inches
- High Back Booster Mode
- Minimum age: at least 4, CSFTL recommends children be at least 5 years old before moving to a booster seat
- Weight range: 40-100 pounds
- Height range: 43-57 inches
- Backless Booster Mode
- Minimum age: At least age 4, CSFTL recommends children be at least 5 years old before moving to a booster seat
- Weight range: 40 – 120 pounds
- Height range: 43-57 inches
- Seat Belt Trainer
- Age: must be 5+ CSFTL recommends this product for older children who do not yet pass the Five Step Test to fit properly in the adult seat belt
- Weight range: 50-120 pounds
- Height range: 43-60 inches
- Soft Goods
- Harness covers: optional
- Crotch buckle cover: optional
- Infant head and back support: rear facing only, maximum weight, 20 pounds
- Infant lower body support: rear facing only, maximum weight, 20 pounds
- Lumbar support:
- No weight limit/optional in rear facing mode
- Must be used in forward facing mode for children weighing 22-25 pounds
- Cannot be used in forward facing mode after 25 pounds
- Lower Anchor Weight Limit:
- Rear facing: 40 pounds
- Forward facing: 45 pounds
- Lower Anchor Weight Limit:
Measurements
- Lowest harness position:
- With insert and trainer: 5.5 inches
- Without insert, with trainer: 6.5 inches
- Without insert, without trainer: 7.5 inches
- Highest harness position:
- With trainer: 17 inches
- Without trainer: 19 inches
- Highest shoulder belt guide position:
- With trainer: 18 inches
- Without trainer: 20 inches
- Crotch buckle positions:
- With all inserts and trainer in place: 3 inches, 5 inches
- With all inserts and trainer removed: 5 inches, 7 inches
- Width at widest point: 18 inches
- Seat belt trainer measurements:
- Belt guides fully extended: 19 inches
- Belt guides at their most narrow: 15 inches
- Seat pan width: 11.5 inches
- Seat pan depth: 11 inches
- Seat weight fully assembled:
- 23.5 pounds in harnessed mode
- 20.5 pounds in booster mode without the seat belt trainer
- 9.3 pounds in backless booster mode
- 2 pounds, seat belt trainer only
Features
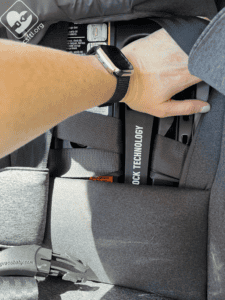
- SnugLock lockoff installation in rear facing and forward facing modes
- RapidRemove cover for easy cleaning
- Adjustable cup holders that come preassembled on the seat (hooray!)
- Includes a seat belt trainer for older booster riders
- The seat can be used with or without the trainer at all times
- Approved for use on aircraft in harness mode
- LATCH allowed in booster mode
- Expiration: 10 years
- Replace after any crash
Assembly
This seat comes fully preassembled. Just take it out of the box and remove the packaging!
Accessories
The 4Ever DLX Grad includes more padding than we usually see with Graco car seats. Here are the infant head and back support along with the infant lower body support. These have a 20 pound weight limit. The manual states that they can be used if they help the child fit better in the seat. The manual does not state they are required.
The lumbar support is optional and can be used any time in rear facing mode but *must* be used in forward facing mode when the child weighs between 22-25 pounds. It cannot be used in forward facing mode after 25 pounds.
This seat also comes with optional strap covers and a crotch buckle cover.
There are two cupholders that can be rotated inward and outward. The cupholders come preassembled on the 4Ever DLX Grad. After seeing gazillions of 4Ever car seats that were missing cupholders over the years, we were pretty happy to see this change.
Rapid Remove Cover
Graco’s Rapid Remove cover is a nice convenience that makes cleaning the seat easier. It allows you to remove just the part you need to clean versus the entire cover. Review your manual for complete cleaning instructions. While Graco does give instructions to spot clean first, if that doesn’t work, they allow for machine washing on delicate in cold water followed by drip drying.
Seat Belt Trainer
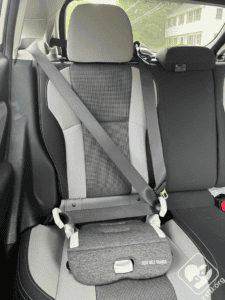
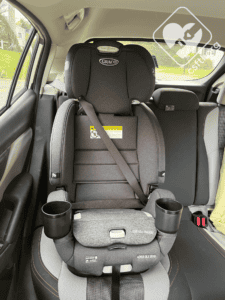
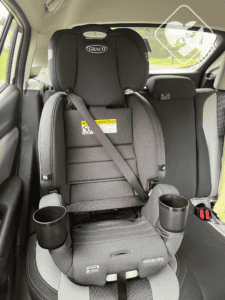
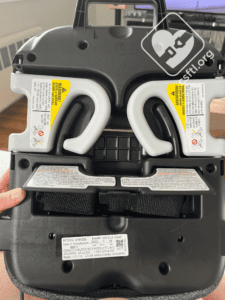
The seat belt trainer sets this seat apart from other multimode car seats. The loss of the Graco RightGuide was a tough one for the CPST community. Having this seat include a similar product is a glimmer of hope for all of us who have been trying to find a way to keep our oldest booster riders safe.
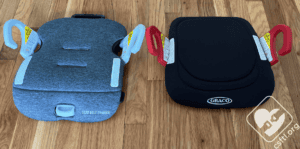
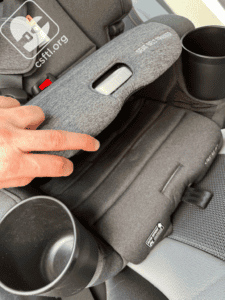
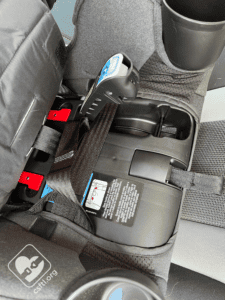
The seat belt trainer is pretty darn similar to the much-beloved and quite-missed RightGuide. Here is a photo for comparison: The 4Ever DLX Grad car seat can be used with or without the seat belt trainer at all times. This removable additional feature makes the 4Ever DLX Grad an ideal car seat for families who have an older child that could use the trainer while a younger child that can use the full seat in a different mode at the same time.
Installation
Rear Facing
Recline Angle Indicator and Settings
There are three recline positions for rear facing: 1, 2, and 3. Use the recline position that moves the indicator bubble into the correct recline range once the seat is installed. The manual permits the use of a rolled towel or pool noodle to install the seat at a deeper recline angle if needed for a smaller infant or a newborn.
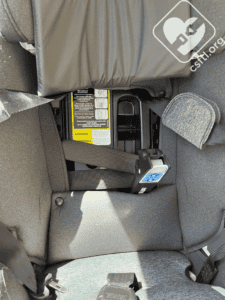
To install the seat in rear facing mode, first remove the seat belt trainer to access the belt path and lockoff. You can replace the Seatbelt trainer after installation or store it until it’s needed.
Lower Anchors
To install the seat rear facing with the lower anchors, open the lockoff, then and route the lower anchor strap under the lock off through the rear facing belt path.
Attach the lower anchor connectors to the lower anchors in your vehicle, press down on the car seat while pulling up on the lower anchor webbing to remove the slack, then close the lockoff.
The seat should move less than one inch side to side and front to back when checked at the belt path with the force of a firm handshake with your non-dominant hand.
Vehicle Seat Belt
To install rear facing using the vehicle seat belt, first make sure the lower anchor connectors are in the forward facing belt path and stored away.
Open the lockoff and route the seat belt through the rear facing belt path, then buckle the seat belt. Remove any excess slack from the lap portion of the vehicle seat belt, then close the SnugLock lockoff. The seat should move less than one inch side to side and front to back when checked at the belt path with the force of a firm handshake with your non-dominant hand.
Forward Facing Recline Positions
Recline positions 4, 5, and 6 are for use in forward facing mode. Recline position 4 is required when installing this seat for children who weigh between 22-25 pounds.
Of course, we’d rather see that same 22-25 pound child ride rear facing rather than be burdened by these rules.
Recline position 6 is required for children who weigh between 50-65 pounds. If the vehicle manufacturer allows it, the vehicle head restraint can be removed for a better installation.
Lower Anchors
To install the seat forward facing with the lower anchors, loosely attach the top tether to the tether anchor connector in your vehicle. We suggest doing this first so the top tether isn’t forgotten!
Route the top tether per your vehicle manual. Adjust the seat to the necessary recline position according to per your child’s weight and open the SnugLock lock off. Route the lower anchors through the forward facing belt path and under the lockoff. Attach the lower anchor connectors to the lower anchors in the vehicle.
Remove any excess slack in the lower anchor webbing, then close the SnugLock lockoff. The seat should move less than one inch side to side and front to back when checked at the belt path with the force of a firm handshake with your non-dominant hand. Lastly, pull the top tether webbing until the tether is snug.
Vehicle Seat Belt
To install the seat forward facing using the vehicle seat belt, first make sure that the lower anchor connectors are stored in the rear facing belt path. Then, loosely attach the top tether to the tether anchor connector in your vehicle.
Adjust the seat to the necessary recline position according to your child’s weight and open the SnugLock lockoff. Route the vehicle seat belt through the lockoff, then buckle it in. Remove any excess slack in the seat belt and then close the lockoff. The seat should move less than one inch side to side and front to back when checked at the belt path with the force of a firm handshake with your non-dominant hand.
High Back Booster
Storing the Harness
To store the harness, loosen the straps as much as possible and raise the headrest to its highest position. Unbuckle the chest clip and crotch buckle. Shift the cupholders out, remove the seat belt trainer, and move all of the fabric out of the way to expose the under the seat pad and back pad.
Open the harness storage door and puzzle the chest clip and buckle tongues inside the storage compartment and close the door. The manual also states the harness pads can be stored here. I found that the storage door kept popping open with just chest clip and tongues so I opted to leave out the harness pads.
The crotch buckle stores on the seat. That means it’s nearly impossible to lose it! After storing the harness, replace the seat pads.
There were no instructions on how to store the harness adjuster strap. This caused a lot of consternation and struggle on our part.
Final step: adjust the recline position to position 6 so the seat is ready for use in booster mode.
Lower Anchor and Top Tethers in Booster Mode
Graco allows the use of the LATCH system to secure the seat in booster mode. The top tether must also be used if the lower anchors are used.
Converting to Backless Booster Mode
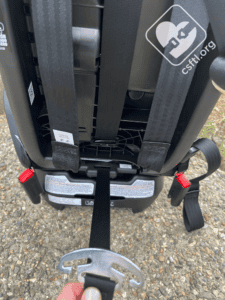
To convert to backless mode, start by loosening the harness straps and removing them from the splitter plate in the back.
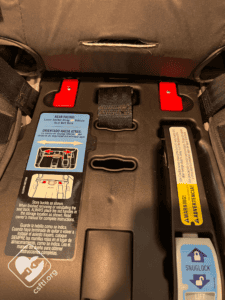
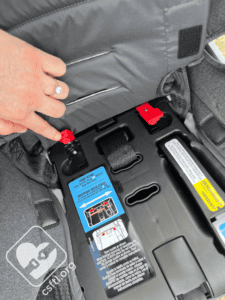
Lift the seat pad to expose the red backrest locks. Note: these are NOT lockoffs. Caregivers and future CSPTs alike confuse this so we like to point it out.
Lift and slide the locks towards the center of the seat and slide the seat back from the base. Relock th
e backrest locks and store the splitter plate. If a belt positioning clip is needed, attach it to the same slot as the harness adjustment strap.
Rotate the seat belt guides out and remove the shoulder belt positioning clip from the storage compartment, if needed. Use the shoulder belt guide adjuster only if the vehicle seat belt doesn’t fit the child properly without it.
Fit to Child
Rear Facing
Newborn
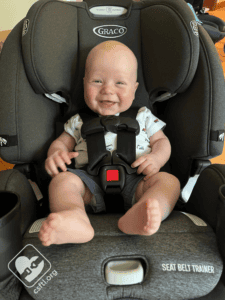
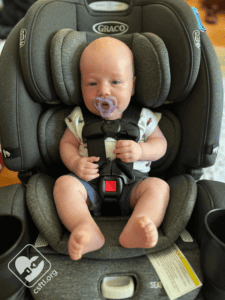
This 8 pound, 20 inch long kiddo is 7 days old. The kiddo fits quite well with the inserts in place and harness strap covers removed. I did raise the headrest to position the harness straps at or below his shoulders. I appreciated that I needed to move them up because it means that an even smaller newborn would likely fit quite well.
3 Month Old
That previously photographed newborn is now 3 months old, 12 pounds, 23 inches and much happier to model. I found he fit great without all of the inserts even though he is still within the weight limit to use them.
While he seemed to prefer no inserts, he still got a good fit with the infant inserts at this size. The lumbar support was not in place for this photo.
4 Years Old
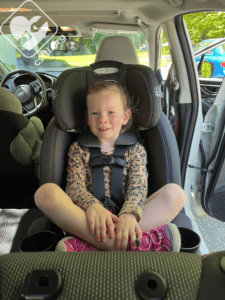
This rear facing 4 year old weighs 37 pounds and is 40 inches tall. She’s no stranger to her car seat modeling duties at this point and was excited to give this new one a try. While she is nearing the end of her rear facing time in this particular seat, she still fit quite well.
Forward Facing
4 Years Old
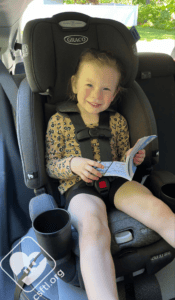
The same model is seen here forward facing and still 37 pounds and 40 inches. As expected, she also got a great fit in forward facing mode. She did briefly try the seat without the seat belt trainer and said it was more comfortable with it in place. She would also like to remind everyone to make sure to read your manual! 😉
6 Years Old
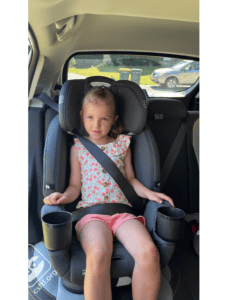
This 6 year old is 40 pounds and 43 inches tall. She too tried the seat both with and without the seat belt trainer and stated she preferred it with the trainer. Something to note though, with the seat belt trainer in place, she has nearly outgrown this seat in harness mode by torso height. With it removed, it put the straps about 2 inches above her shoulders giving her more time harnessed if she needed it.
High Back Booster Mode
6 Years Old
Here is the same kiddo using the seat in high back booster mode still weighing 40 pounds and standing 43 inches tall. She gets a great belt fit with the seat belt trainer in place.
Because of how much higher kids sit when the seat belt trainer is in place, I was interested to test her lap belt fit without it. Much to my surprise, even though the belt was definitely a little higher up on her pelvis, I also found this belt fit to be safe.
11 Years Old
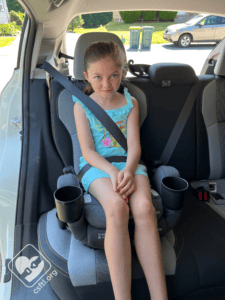
This petite 11 year old is 50 pounds and 49 inches. She still fits well in this seat in high back mode.
Backless Booster Mode
11 Years Old
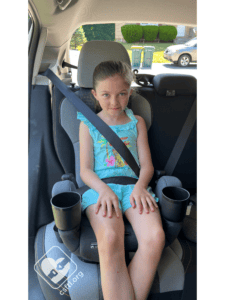
This same tween is still 50 pounds and 49 inches. She got a great belt fit in backless booster mode with and without the seat belt trainer in place.
Seat Belt Trainer
11 Years Old
This was a new type of seat belt positioner for this 50 pound, 49 inch tall model. Her petite stature and age makes her a great candidate for this seat belt trainer.Even though we would love to see it sold separately like the Right Guide was, having this option on a multimode car seat is a great start.
Important Information: Where to Find
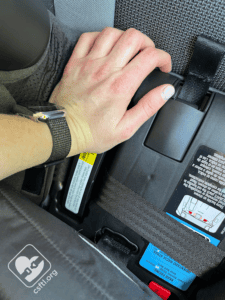
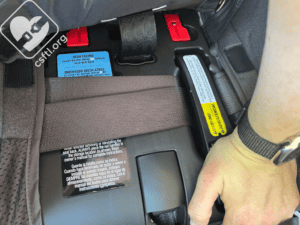
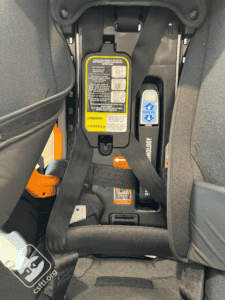
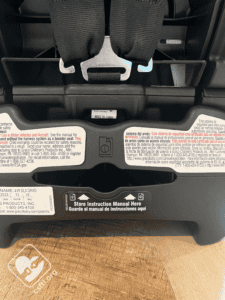
Manual Storage: the manual stores on the back side of the base of the car seat in the center.
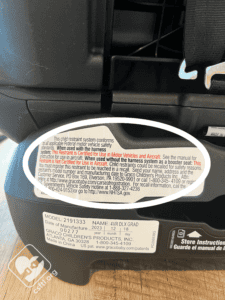
FAA Approval Label: the 4Ever DLX Grad is approved for use on aircraft when it’s in harnessed mode. The approval label is the red sentence on the label on the backside of the base of the car seat.
Date of Manufacture Labels: the 4Ever DLX Grad has a 10 year expiration. This label can be found on the left side of the back of the base.
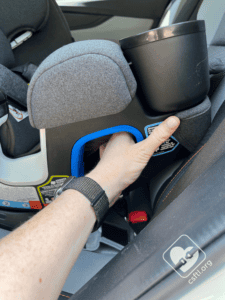
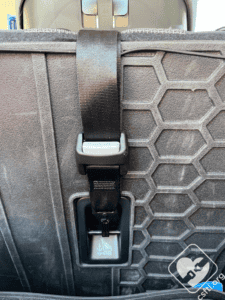
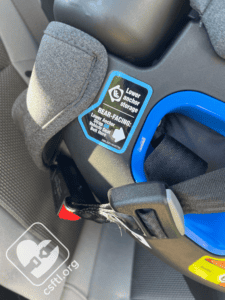
Lower Anchor Storage: the lower anchors store on the front of the seat.
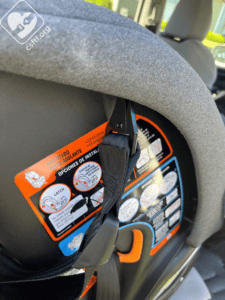
Top Tether Storage: the top tether attaches to the outside of the seat’s shell when not in use.
Shoulder Belt Guide Adjuster Storage: the seat belt trainer includes a shoulder belt guide adjuster. It stores on the underside of the trainer in a handy compartment.
Overall Thoughts
With Graco’s extensive line up of (similarly named) car seats and booster seats, it’s sometimes hard to find features that set one apart from another. It isn’t easy for a car seat to fit a newborn and booster rider really well, but the DLX Grad came through!
I found this seat user friendly, it fits a wide variety of children well in each mode, and offers a unique feature that can’t be found elsewhere – the seat belt trainer. Because of how well this seat seems to do everything it sets out to do, I’m happy to add it to our recommended seats list.

