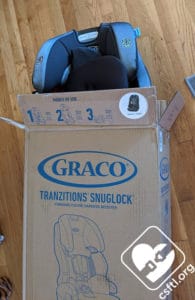
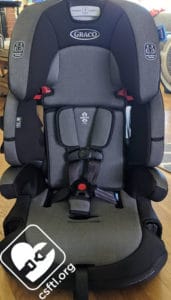
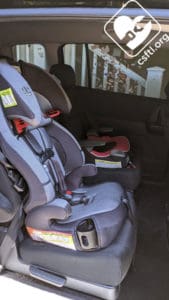
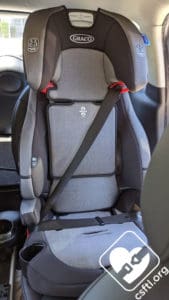
The Graco Tranzitions isn’t the newest seat on the market but it is among the most narrow. We’ve been fans of this seat since its debut because it’s a nice option for tight three across situations but there is a caveat — the installation, especially the vehicle seat belt install, can be quite challenging, so it’s not the seat for everyone. So when we saw that Graco released a version of the seat with their SnugLock belt tensioner, we were VERY eager to meet the seat and see if adding SnugLock removes the challenges from that installation.
CSFTL Quick Stats
- Forward Facing harnessed weight range: 22-65 pounds
- Forward Facing harnessed height range: 27-49 inches tall
- Top harnessed height: 18.25 inches
- Crotch buckle depths: 6 and 7.5 inches
- High back booster weight range, United States: 40-100 pounds
- High back booster height range, United States: 43-57 inches tall
- High back booster tallest belt guide position: 19.5 inches
- Backless booster weight range: 40-100 pounds
- Backless booster height range: 40-57 inches tall
- Lower Anchor weight maximum: 45 pounds
- Expiration: 7 years from date of manufacture
- Can use LATCH in booster mode
Measurements
- Seat pan: 13 inches in harnessed and high back mode, 15 inches in backless mode
- Interior hip width at narrowest portion: 11 inches
- Widest point at the back: 17 inches
- Widest point at the front: 19 inches with optional cupholders, 17.5 inches without
- Seat weight: 15 pounds fully assembled
Assembling the Seat
Out of the box, the Tranzitions SnugLock needs a bit of assembly — the back must be attached to the bottom, then moved upright into position. Unfortunately, the manual doesn’t mention how to do this but it does explain how to do the process in the section on how to convert the seat to booster mode.
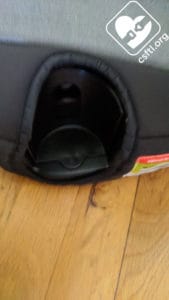
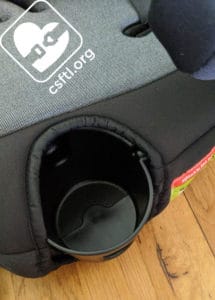
The Tranzitions SnugLock ships with the optional cupholders facing inward. To extend them for use, spin them around and click them into their holders. You may use one, both, or neither. This flexibility improves the chances of an installation in a small space. We learned while writing this review that these cupholders are not quite large enough to hold my phone.
Energy Management
In a sudden stop or collision, car seats protect children from crash forces in different ways. Many seats currently on the market achieve energy management with a combination of methods, often including EPS or EPP foam lining the shell under the cover. Graco chose to use blow-molded plastic rather than EPS foam, presumably to reduce cost and keep the weight of the seat down.
Travel
The Graco Tranzitions SnugLock weighs in at roughly 15 pounds. That’s about 2.5 pounds more than the original version of this seat.
Since the widest point of the seat is 17.5 inches, the Graco Tranzitions is highly suitable for traveling, particularly by airplane. While it’s never fun to hoist and haul a car seat through an airport, the streamlined design and minimal excess weight of the Tranzitions SnugLock make it an excellent option for a travel seat. We do want to note that the manual’s instructions for installing the Tranzitions SnugLock on an airplane currently do not mention bypassing the SnugLock panel. Our friends at Graco let us know that they’ll be updating the manual with more specific aircraft installation instructions for this seat.
Installation: Harnessed Mode
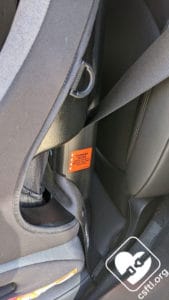
In our original review, we found the installation compatible in the variety of vehicles we tried it in and noted that the Tranzitions SnugLock may be incompatible with vehicles where the shoulder belt is anchored abreast of or in front of the vehicle seat back, rather than beyond it. Our 2020 experience with this SnugLock version of the seat absolutely bears that assertion out.
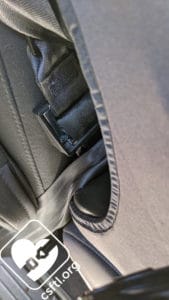
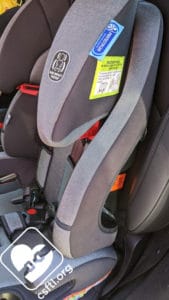
The belt path on this seat sits fairly high up and is a bit narrower than the belt paths on most other combination car seats. Not only that, the Tranzitions SnugLock is fairly lightweight and has a slippery seat bottom. These things can combine to make a challenging installation in many vehicles whether the lower anchors or the vehicle seat belt is used to install the seat. In addition, the Tranzition SnugLock’s headrest must be raised all the way up to access the SnugLock so if the vehicle has immovable headrests, this makes using the SnugLock quite a challenge.
Vehicle Seat Belt
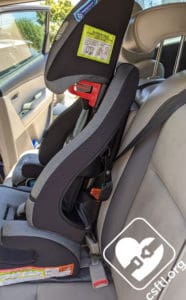
Of the two installation methods — vehicle seat belt and lower anchors — we had the most challenges with the vehicle seat belt. To install the Tranzitions SnugLock with the vehicle seat belt, first set the seat on the vehicle seat with the harness pointed toward the front of the vehicle. Remove the top tether from its storage and place it inside the car seat so you don’t forget to attach it at the end of the installation process.
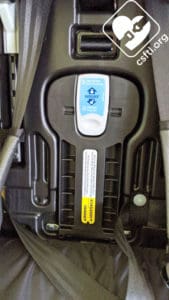
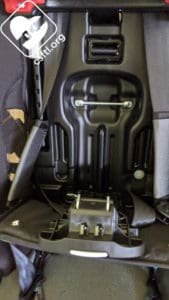
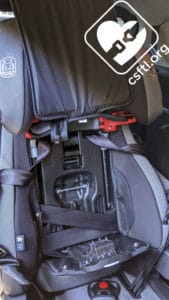
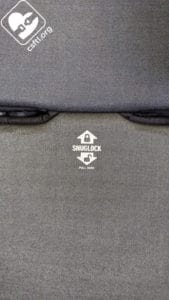
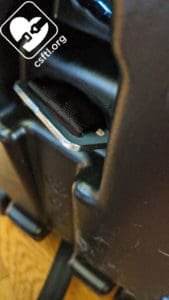
Raise the headrest all the way up, store the harness on both sides of the seat in the handy little compartments for the buckle tongues, then lift the cover to expose the belt path and SnugLock. Press on the bottom of the gray part of the SnugLock, then pull the tab out to open the panel. Move the lower anchor webbing out of the SnugLock before continuing.
Thread the vehicle seat belt through the belt path and inside the SnugLock. Now is the tricky part — use your body weight to compress the seat backwards into the vehicle seat while pulling on the shoulder portion of the vehicle seat belt to remove as much slack as possible.
That’s pretty much the same technique we’d use with the non-SnugLock version of this seat.
What makes the SnugLock nice is that after we removed as much slack as possible, closing the SnugLock was the finishing touch — it made for a secure installation in most of the scenarios we tried.
Lower Anchors
Installing the Tranzitions SnugLock with the lower anchors proved to be quite a bit more consistent than vehicle seat belt installs. This matches the experience I’d had with the original, non-SnugLock version of the seat.
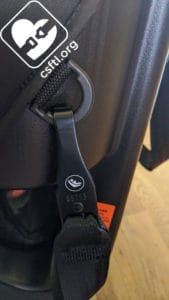
The lower anchors and top tether store on plastic hooks on the outside of the cover. One nice touch is that the hooks themselves have icons on them to indicate if they’re lower anchors or the top tether. That’s a new feature that we’re very fond of!
To install the Tranzitions SnugLock with the lower anchors, raise the headrest all the way up, store the harness on both sides of the seat in the handy little compartments for the buckle tongues, then lift the cover to expose the belt path and SnugLock. Press on the bottom of the gray part of the SnugLock, then pull the tab out to open the panel. Thread the lower anchor webbing through the belt path and inside the SnugLock. Attach the lower anchor connectors to the lower anchors in the vehicle. Pull the tail of the lower anchor webbing up into the interior of the belt path. Press the seat pan of the car seat directly down into the vehicle seat while pulling straight up on the webbing’s tail to remove all of the slack from the webbing. Removing all of that slack is the trick to a secure installation, with this seat more than others. Once the slack is removed, close the SnugLock panel and check for front-to-back and side-to-side movement at the belt path.
Using my body weight (not kneeling in the seat, this is more of a gentle pressure from my knees on the front of the seat) to press the car seat down into the vehicle seat while pulling upward on the webbing’s tail to remove as much slack as possible from the lower anchor webbing. That’s pretty much the same technique we’d use with the non-SnugLock version of this seat. What makes the SnugLock nice is that after we removed as much slack as possible, closing the SnugLock was the finishing touch — it made for a secure installation in most of the scenarios we tried.
2011 Mini Countryman
Knowing these challenges, we were eager to see how adding SnugLock would help with the installation. Well…it did and it didn’t. In my car, a 2011 Mini Countryman that’s got some quirky seat belt geometry, I found it almost impossible to install the Tranzitions SnugLock correctly with the vehicle seat belt.
Now, please take this assessment with a grain of salt because my car has presented challenges with a number of otherwise not challenging car seats! The vehicle seat belt is mounted quite high on the vehicle itself and the buckle stalk is fixed, tipping forward. That setup means that the seat belt bunches up very quickly when I’m trying to install a harnessed car seat.
The headrests are not removable and only move up and down about a half of an inch, which means that when the headrest is extended enough to access the SnugLock panel, the vehicle headrest is in the way. In my defense, I bought this car after my kids were out of harnessed car seats so I haven’t had to deal with this struggle outside of writing reviews.
I was able to install the seat successfully using the lower anchors. The lower anchor weight limit is 45 pounds so this wouldn’t be the longest-lasting option in my car for a kiddo who needs a harnessed car seat.
2012 Mazda CX-9
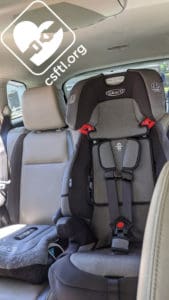
I moved the Tranzitions SnugLock to our 2012 Mazda CX-9 and found some of the same challenges when installing the seat behind the driver. No matter what I tried, I couldn’t get a fully secure installation with the vehicle seat belt, even when I flipped the headrest around to get it out of the way.
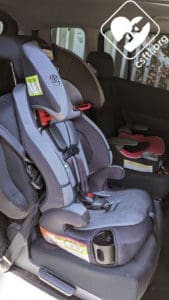
I moved it to the middle seat, which has a stunningly narrow belt path, and was able to get the most secure installation out of all the seating locations I’d attempted thus far. The Tranzitions SnugLock fit nicely in the space and fit next to my kiddo’s backless Graco TurboBooster TakeAlong.
2009 Mazda 5
Since it was close to 100 degrees outside, I decided that was the perfect set of weather conditions to attempt to install the Tranzitions SnugLock into our 2009 Mazda 5. This vehicle has some fairly flat (or at least, not very contoured) seats and a buckle stalk that’s mounted more toward the ceiling than the front of the vehicle than the buckle stalk in my sassy Mini Countryman. This setup made for a terrific place to install the seat with the vehicle seat belt.
The winning combination was to install the seat as if there was no lockoff device by removing as much slack from either the vehicle seat belt or the lower anchors (depending on the installation method I was using), then close the SnugLock. The good news is that even with some tension on the belt or the webbing, the SnugLock still closed without issue. That’s not always the case with big lockoff devices.
Pro tip: push the seat straight back into the vehicle seat back while removing the slack from the vehicle seat belt before closing the SnugLock panel. This will help to remove as much of the slack as possible.
Many car seats with a lockoff device don’t require that all of that slack be removed but the Tranzitions SnugLock still has a very narrow, rather high belt path. We found that the only way to get a solid installation was by removing as much of the slack as possible AND by shoving the Tranzitions SnugLock back into the vehicle seat at the same time.
Fit to Child
3 Year Old
This model is 3.5 years old. She weighs 35 pounds and is 36 inches tall. She’s got plenty of room to grow in the Tranzitions SnugLock and the harness fits her well.
3 Year Old Doll
At press time, the pandemic still rages. (please, folks, wear those masks!!) so our dolls continue to do an excellent job of modeling Fit to Child for us. Our 3 year old Huggable Images doll was kind enough to model the harness mode for us. The doll is 36 inches tall and rather dodgy about providing its weight to our reviewers. The doll fit well and had plenty of room to grow in this seat. The harness is smooth like butter so getting this rather compliant kiddo into the seat proved pretty darn easy!
High Back Booster Mode
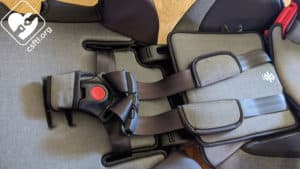
Before the Tranzitions SnugLock can be used in booster mode, the harness must be removed. The manual includes some pretty clear instructions on how to do this, here’s a brief overview. First, fasten the chest clip and loosen the harness all the way. Then, flip the seat over so the back is facing you.
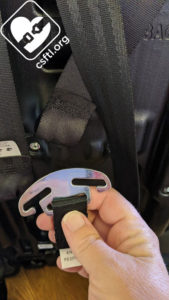
Remove the two harness loops from the splitter plate.
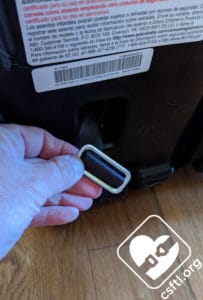
Next, turn your attention to the bottom of the seat. There are two metal clips securing the harness, remove these clips by turning them sideways so they slide through the slot in the seat, then push them through.
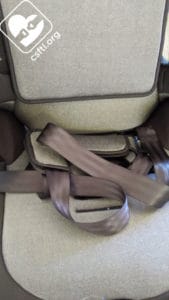
The harness will now be a bit of a messy pile inside the seating area but it should all be loose and ready for removal. Then, turn your attention to the crotch buckle.
Finally, remove the crotch buckle by sliding it up through the top of the seating area. Reattach it to the harness for storage. Grab the harness, place it in a safe location that you’ll remember later.
Step back and admire your handiwork, then take the seat out to the car and set it on the vehicle seat. At that point, you’re ready to go!
Fit to Child
High Back Booster Mode
9 Years Old
Our 9 year old model is 53 inches tall and weighs and 84 pounds. Though he technically fits into the Tranzitions SnugLock in high back booster mode, it’s a pretty narrow seat and he doesn’t find this mode comfortable at all. At 9 years old, we’d expect that most neurotypical passengers can sit correctly in a backless booster so this finding, that the high back mode isn’t a good fit for him, isn’t a huge deal.
10 Years Old
Since the pandemic rages on and my access to actual child models who are not my own children remains restricted, I figured I’d be showing you a picture of a very attractive, empty booster seat here. Imagine my great surprise when my 10 year old model (57 inches tall, wears a size 10/12 in clothes) fit on the highest headrest setting!
Converting to Backless Booster Mode
This part of the seat downsizing process was pretty simple. Set the Tranzitions SnugLock on a flat surface, keep a little pressure on the seat pan, then push the high back portion of the seat away from you. You’ll be left with a very lightweight backless booster seat. For bonus points, get your model to help carry the back portion of the seat back into the house!
Fit to Child
Backless Booster Mode
9 Years Old
Our 9 year old model remains the same height and weight as he was when he demonstrated the fit in high back mode for us. He’s considerably happier using the Tranzitions SnugLock in backless booster mode!
10 Years Old
My 10 year old model remains at the very top of the height range for this seat. She found it a bit difficult to buckle in my Mini Countryman but once she was able to get herself buckled in, she was good to go. We’ve been using this as her booster for a few weeks now. She wanted me to note that over time, she did find that it slides around a bit when she’s trying to get settled and buckle herself in. That’s likely because my vehicle seat has some contours that make the wide, flat base of the Tranzitions SnugLock not quite level when it’s in my car. This affirms my assertion that the Tranzitions SnugLock is well-suited to flatter vehicle seats than contoured seats.
Important Information: Where to Find
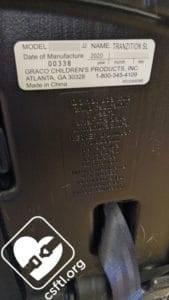
Date of Manufacture: the seat expires 7 years after the date of manufacture. This information is stamped into the bottom of the seat and is on a label on the bottom of the seat as well.
FAA Approval: in harness mode, the Tranzitions SnugLock is approved for use on aircraft. Note about installation with SnugLock.
The manual states that the seat can be installed on an airplane, then refers readers to the lap-only installation section. Most seats with this type of lockoff device include instructions to bypass the lockoff on aircraft. Our version of the manual does not include those instructions. We reached out to Graco about this. “This child restraint is certified for use in aircraft only when used with the internal harness system. Use only on forward-facing aircraft seats. Install using the lap belt and without the Snuglock. We will update the manual to be more clear!”
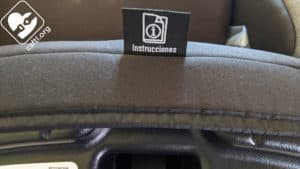
Manual Storage: the back cover of the manual has a handy diagram that shows this location — under the seat pad, right in the front of the seat. This label is in English on one side and Spanish on the other side.
Overall Thoughts
After years of struggling with the installation on the original Tranzitions, I was so hopeful that adding SnugLock to the seat would make it super easy to install. Unfortunately, that wasn’t quite the case. Where SnugLock can make installation a breeze on seats with a wider or lower belt path, or on a rear facing only base, in this case, it was more like a finishing touch than the complete answer for a secure installation.
The good news is that when we installed the seat as snugly as we might have without SnugLock, then closed the panel, the installations were quite solid in most of the seating positions and vehicles that we used for this review. This seat is not without its quirks, it doesn’t work in every situation. It installs the best when the vehicle headrest can be moved out of the way and when the vehicle seat is a flat surface. However, it fit our models well, is fairly lightweight, and fits in some tight spaces for a very reasonable price. That makes the Tranzitions SnugLock a solid option for many families.
Giveaway!
Our friends at Graco are giving away one Tranzitions SnugLock to a lucky reader in the United States. Read our terms and conditions, then enter below for your chance to win!
a Rafflecopter giveaway

