Maxi Cosi Mico Max Plus
Maxi-Cosi started helping keep children safe in Europe in 1984 with the first rear facing only car seat. Since that time, they’ve expanded their product line to include other types of car seats and other baby products, then moved beyond Europe and into the United States.
Their latest effort, the Mico Max Plus, adds some exciting new features to a seat that’s been a solid option. The Maxi-Cosi Mico Max Plus has arrived in both the United States and Canada. Let’s see how Maxi-Cosi’s legacy carries into today’s market with a closer look at this seat.
CSFTL Quick Stats
- Weight range: 4-30 pounds
- Height range: less than 32 inches tall, requires at least 1 inch of shell above the child’s head
- Expiration: 8 years from date of manufacture
- Follows NHTSA criteria for replacement after a minor crash
Measurements
- Width at widest point of car seat: 18 inches (handle)
- Width at widest point of base: 14.5 inches
- Weight: 16.9 pounds with base
- Weight: 8.8 pounds carrier only
- Lowest harness position: 6.5 inches (6 inches with insert)
- Highest harness position: 9.5 inches
Features/Important Information
- Vehicle seat belt lockoff on base (AutoLock)
- Premium lower anchors on base
- Cannot be used with inflatable seat belts
- Carry handle must always be up in the vehicle
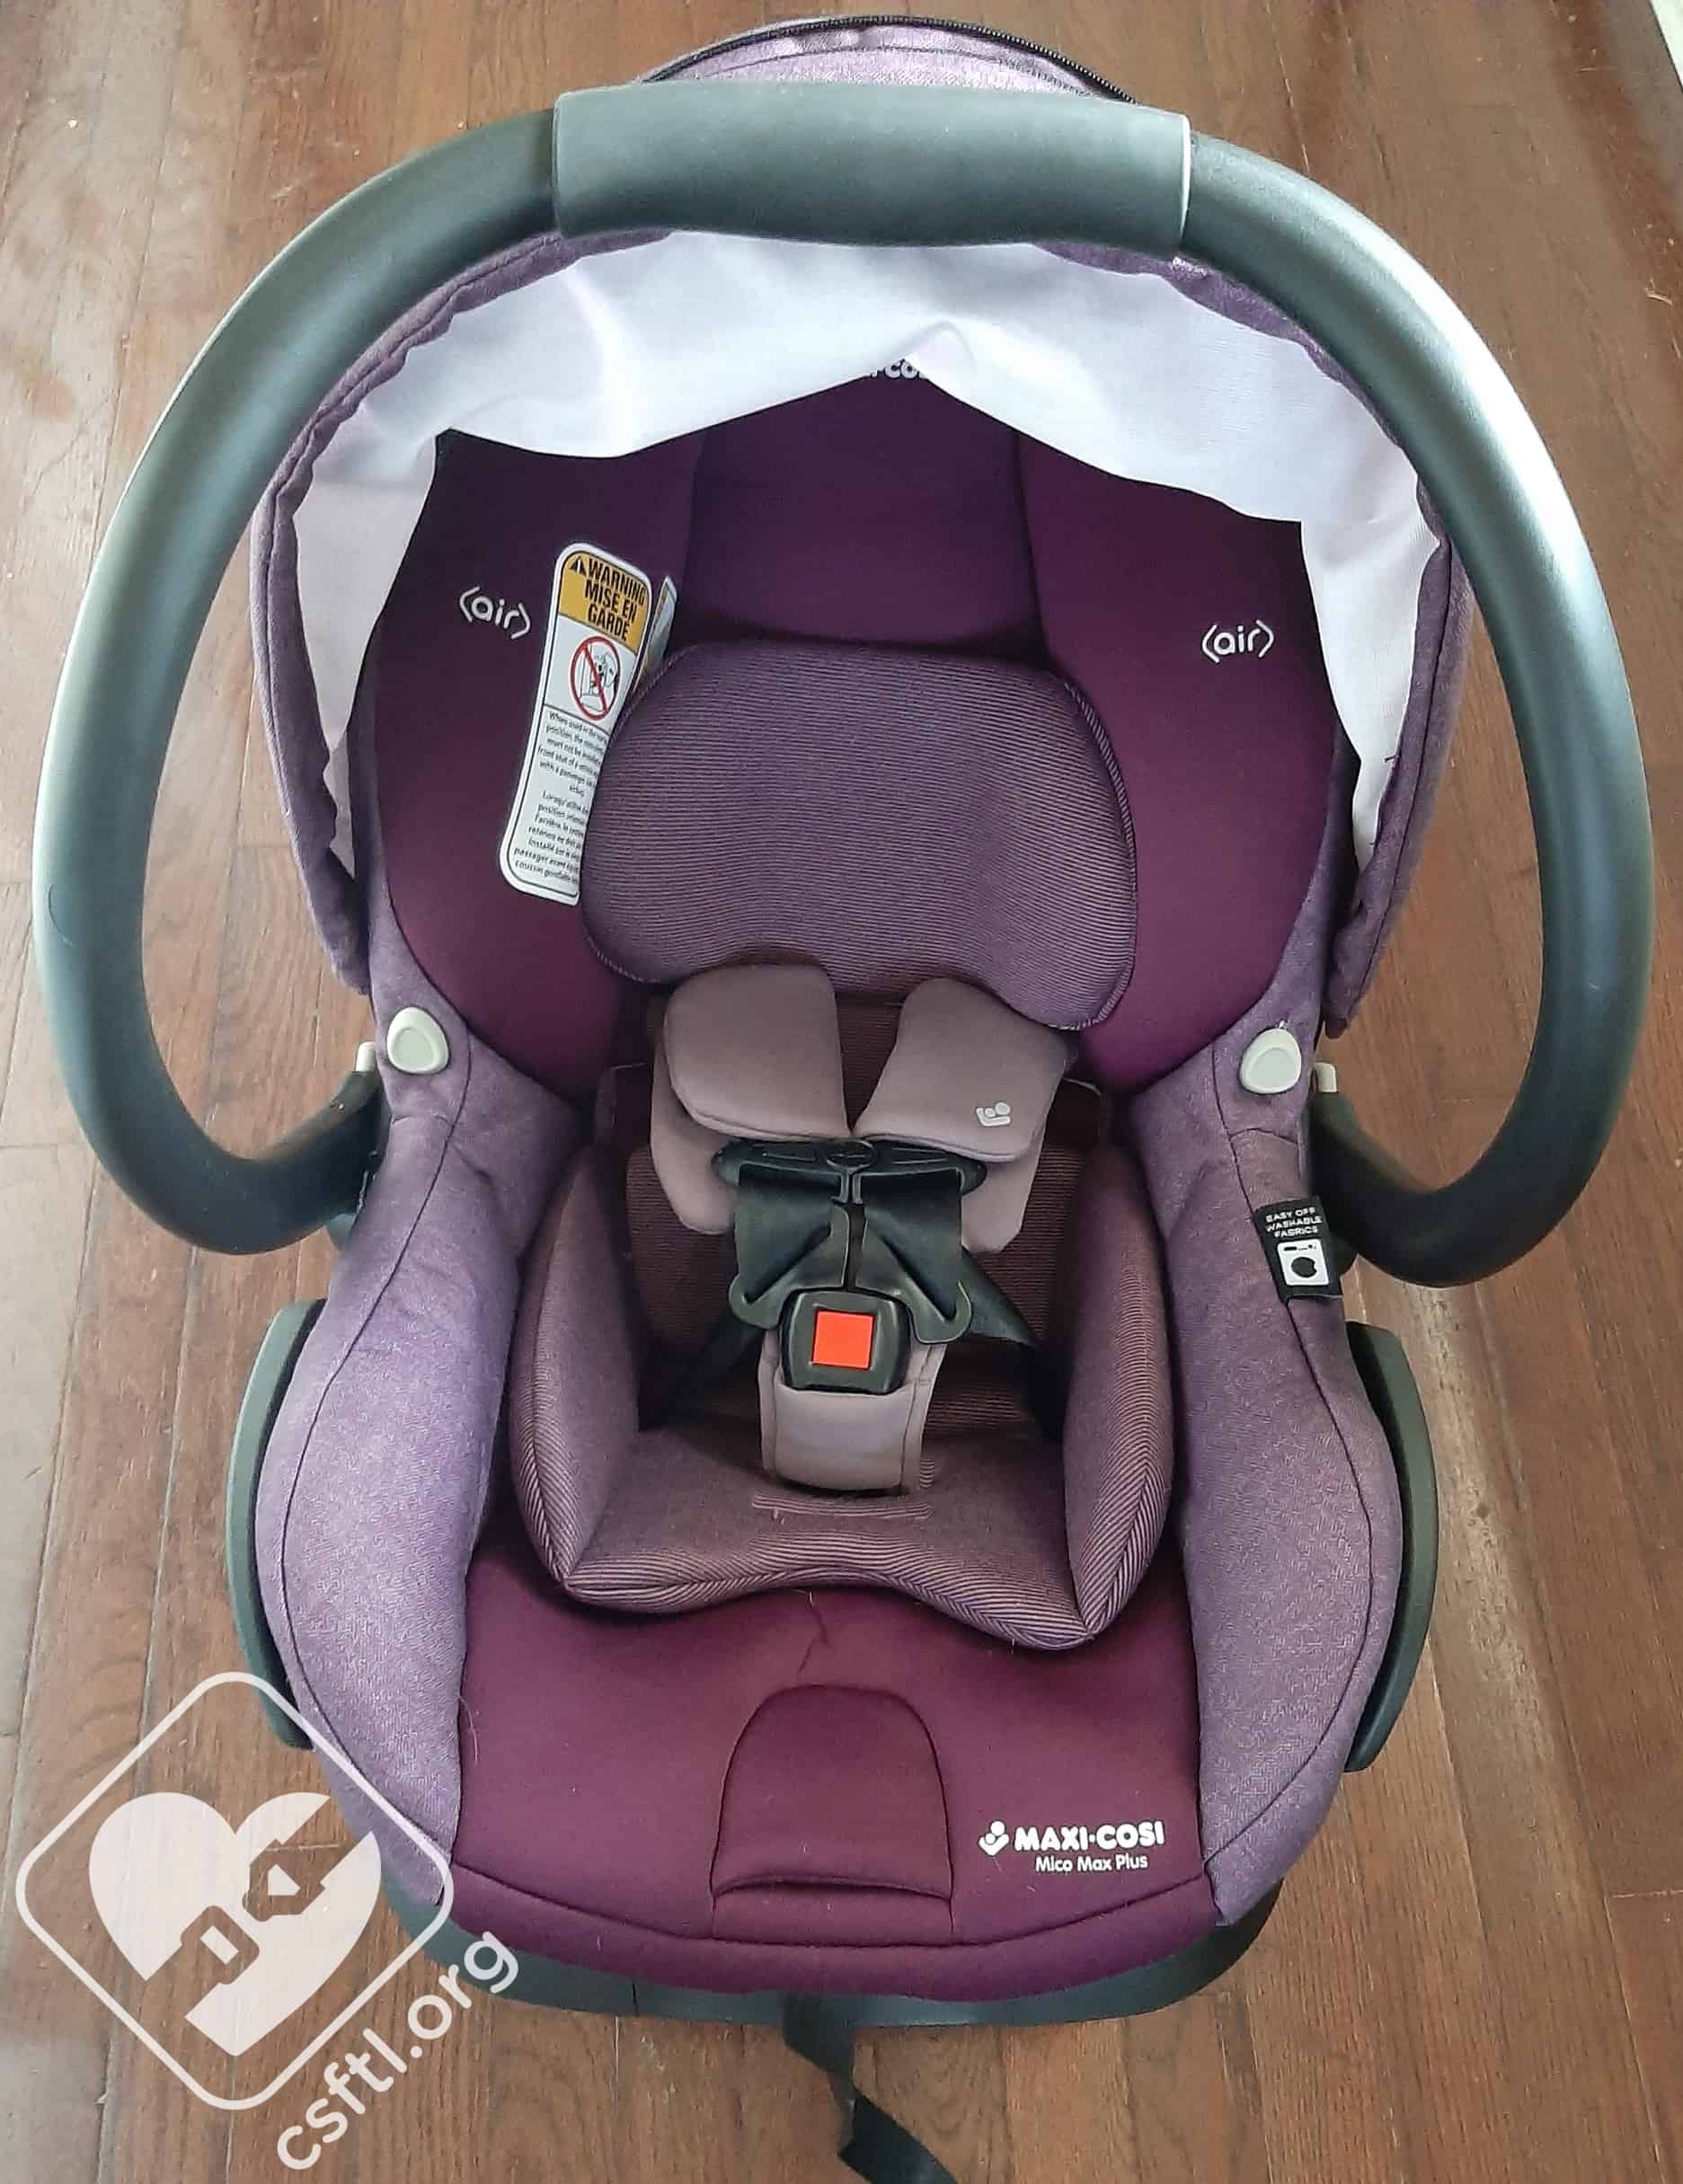
Extra Padding

Maxi Cosi Mico Max Plus padding
The Mico Max Plus includes a head pillow, harness covers, a body pillow, and a flip-away crotch buckle cover. The only restrictions for this padding is that the body pillow MUST be used for infants who weigh between 4-5 pounds.
Using this padding when the child weighs more than 4-5 pounds is optional. We found the harness pads to be much too large for newborns, but we’ll get into that more later in the review.
Harness Loop Adjustment
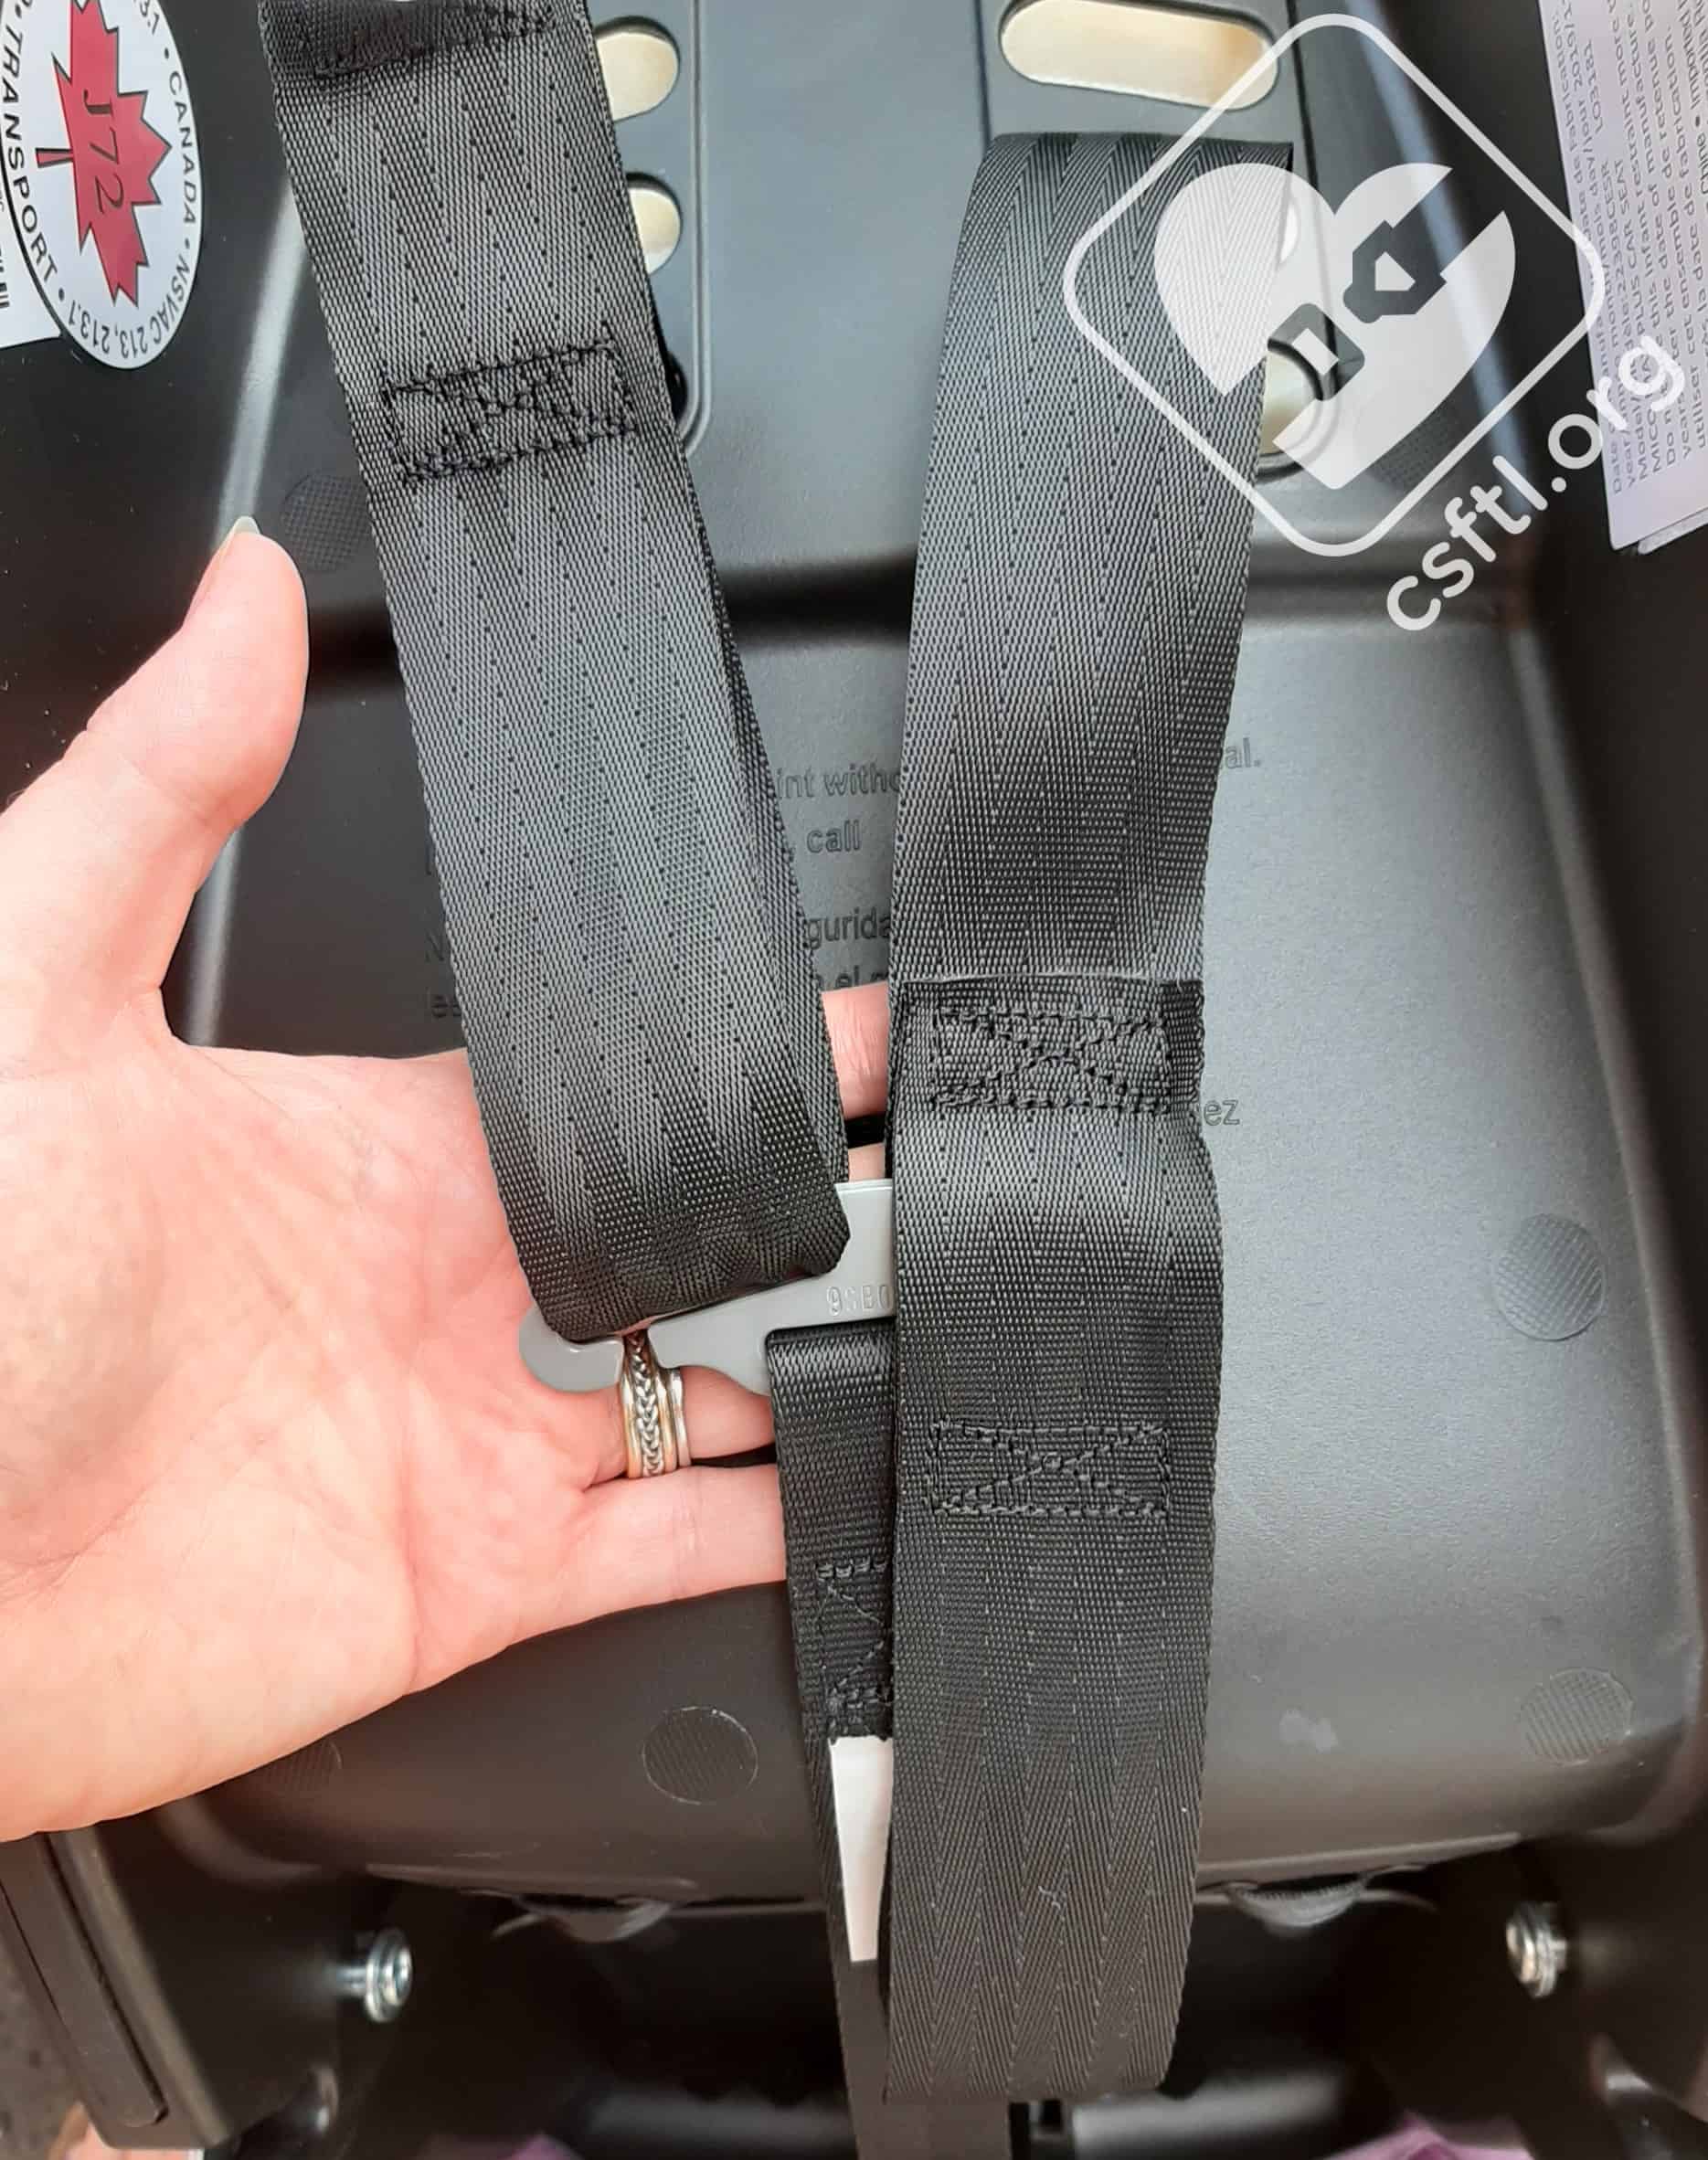
Maxi Cosi Mico Max Plus harness loop options – must be on the same setting at all times
The Mico Max Plus’s harness has two sets of loops. There are no instructions indicating when to use the smaller loops or when not to, so we reached out to Maxi-Cosi. They confirmed either loop is permitted at any harness height position (the same loop must be used on both sides), as long as the harness can fit the child snugly and pass the pinch test. The manual indicates that the sewn end of the harness must ALWAYS face toward the outside of the seat, regardless of which loop is used.
Robust Canopy
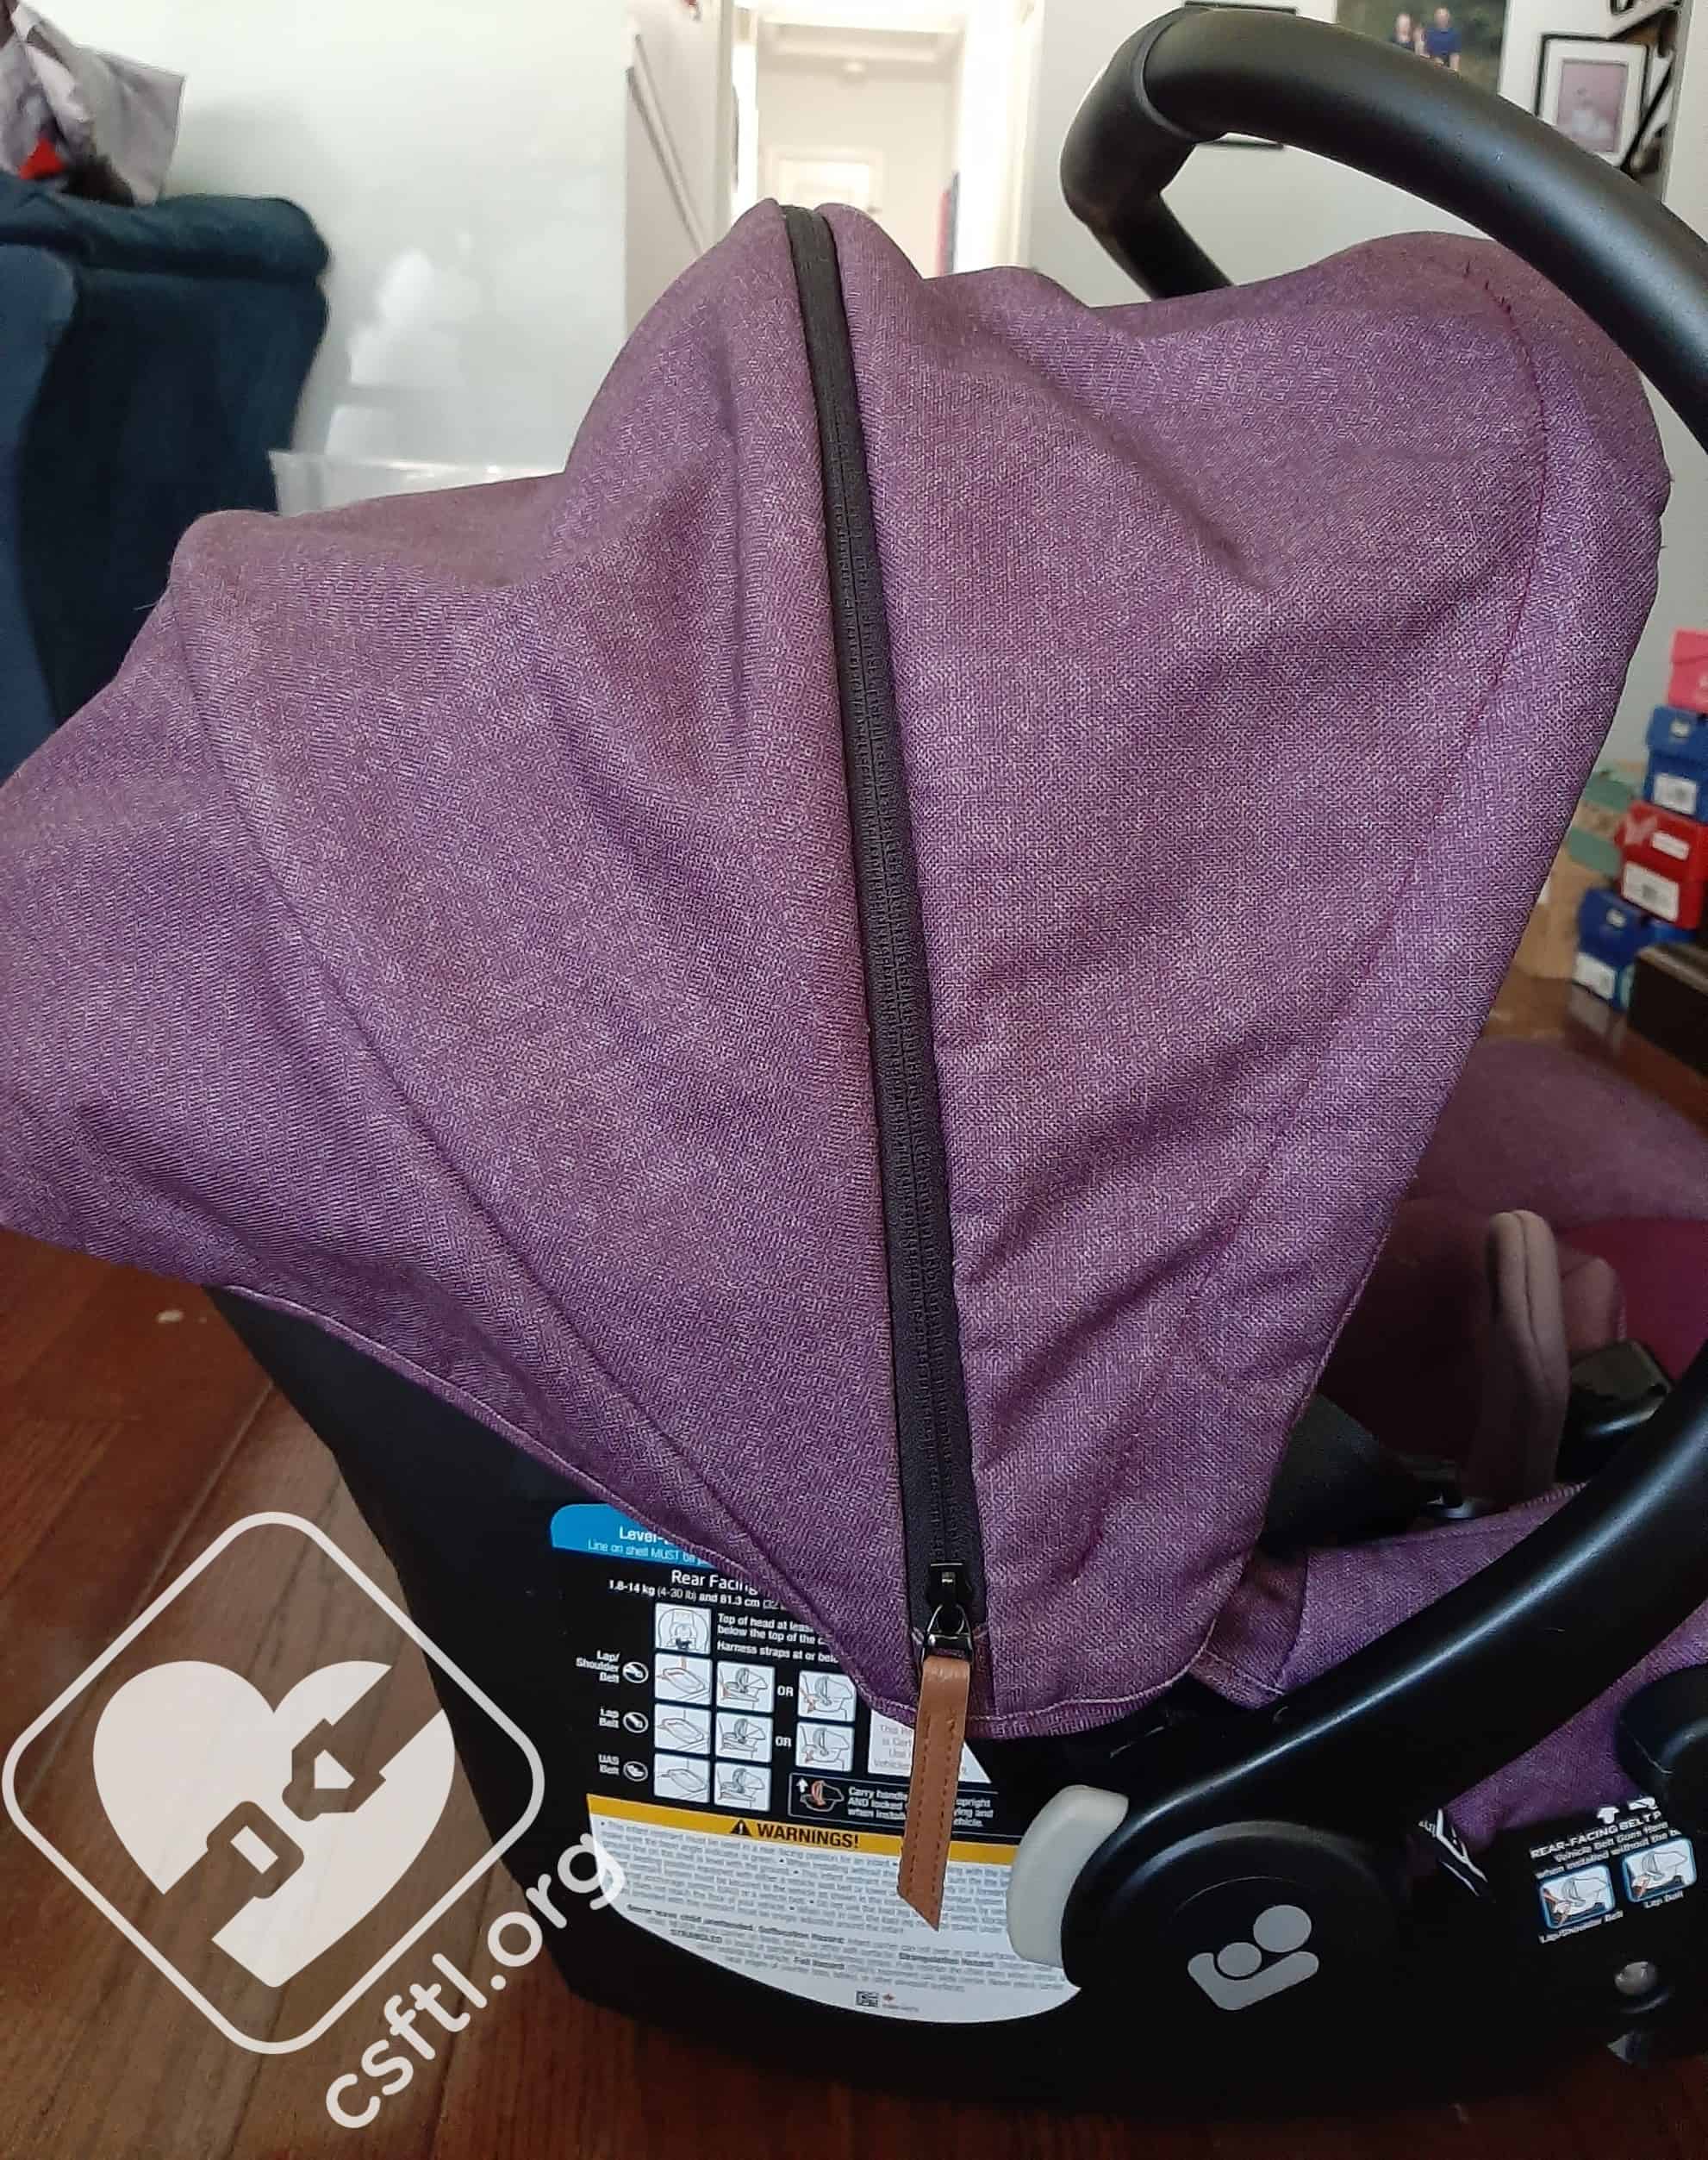
Maxi Cosi Mico Max Plus canopy – zipped
We’re so fond of this canopy that it gets its own section! Our model’s CPST mom raved about it every time we checked in with her.

Maxi Cosi Mico Max Plus canopy – unzipped
This breathable canopy is quite large, with mesh windows on the side and it clicks into place so it stays put when you’re on the go.
AutoLock
The Mico Max Plus base features a vehicle seat belt lock off that Maxi-Cosi has named the AutoLock. When it is used, the vehicle seat belt should NOT be locked. When it is not used and the base is installed with a vehicle seat belt, the belt MUST be locked. We’ll get into this more later in the review.
Installation – with the Base
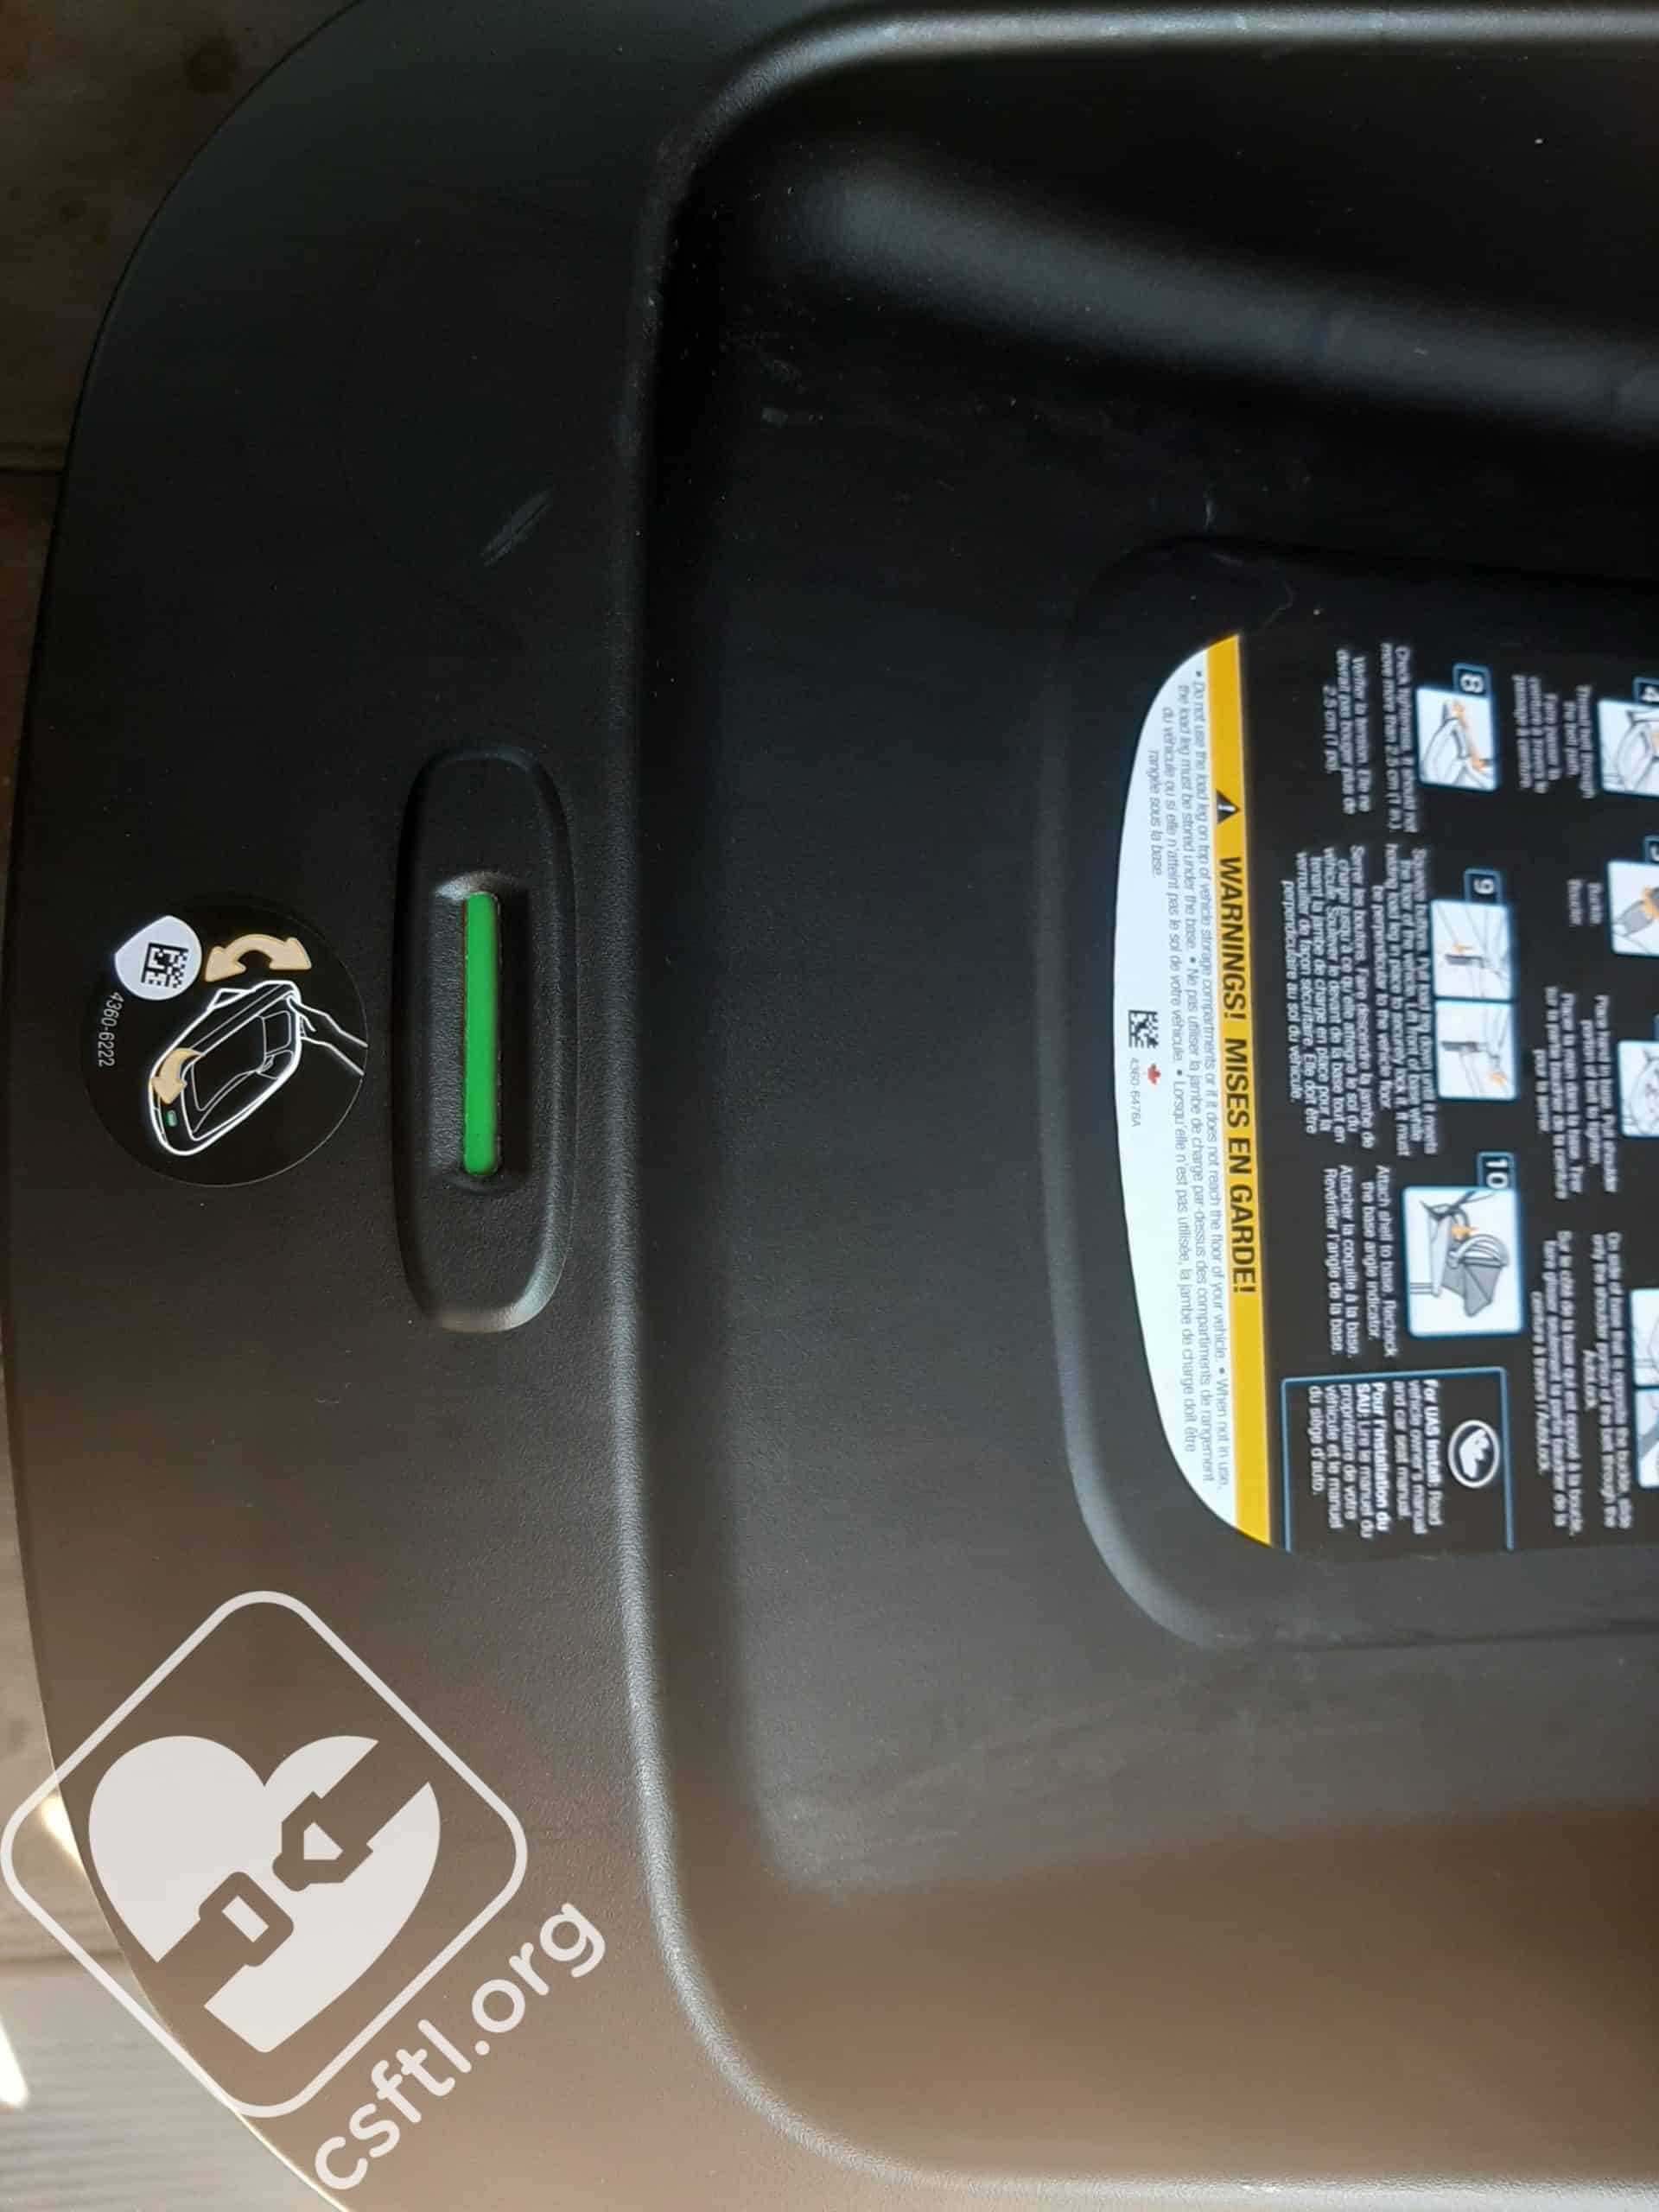
Maxi Cosi Mico Max Plus recline indicator
To install the Mico Max Plus with the base, first pull the load leg out from under the base (if you’ll be using the load leg, and we suggest that you do if your vehicle allows it). Place the base on the vehicle seat, and check the recline angle.
When the recline angle indicator is mostly in the correct range (this will change a bit as the seat is installed), it will be in the green. To adjust the recline angle, squeeze the recline handle on the base to recline the base more or less until the indicator is in the green.
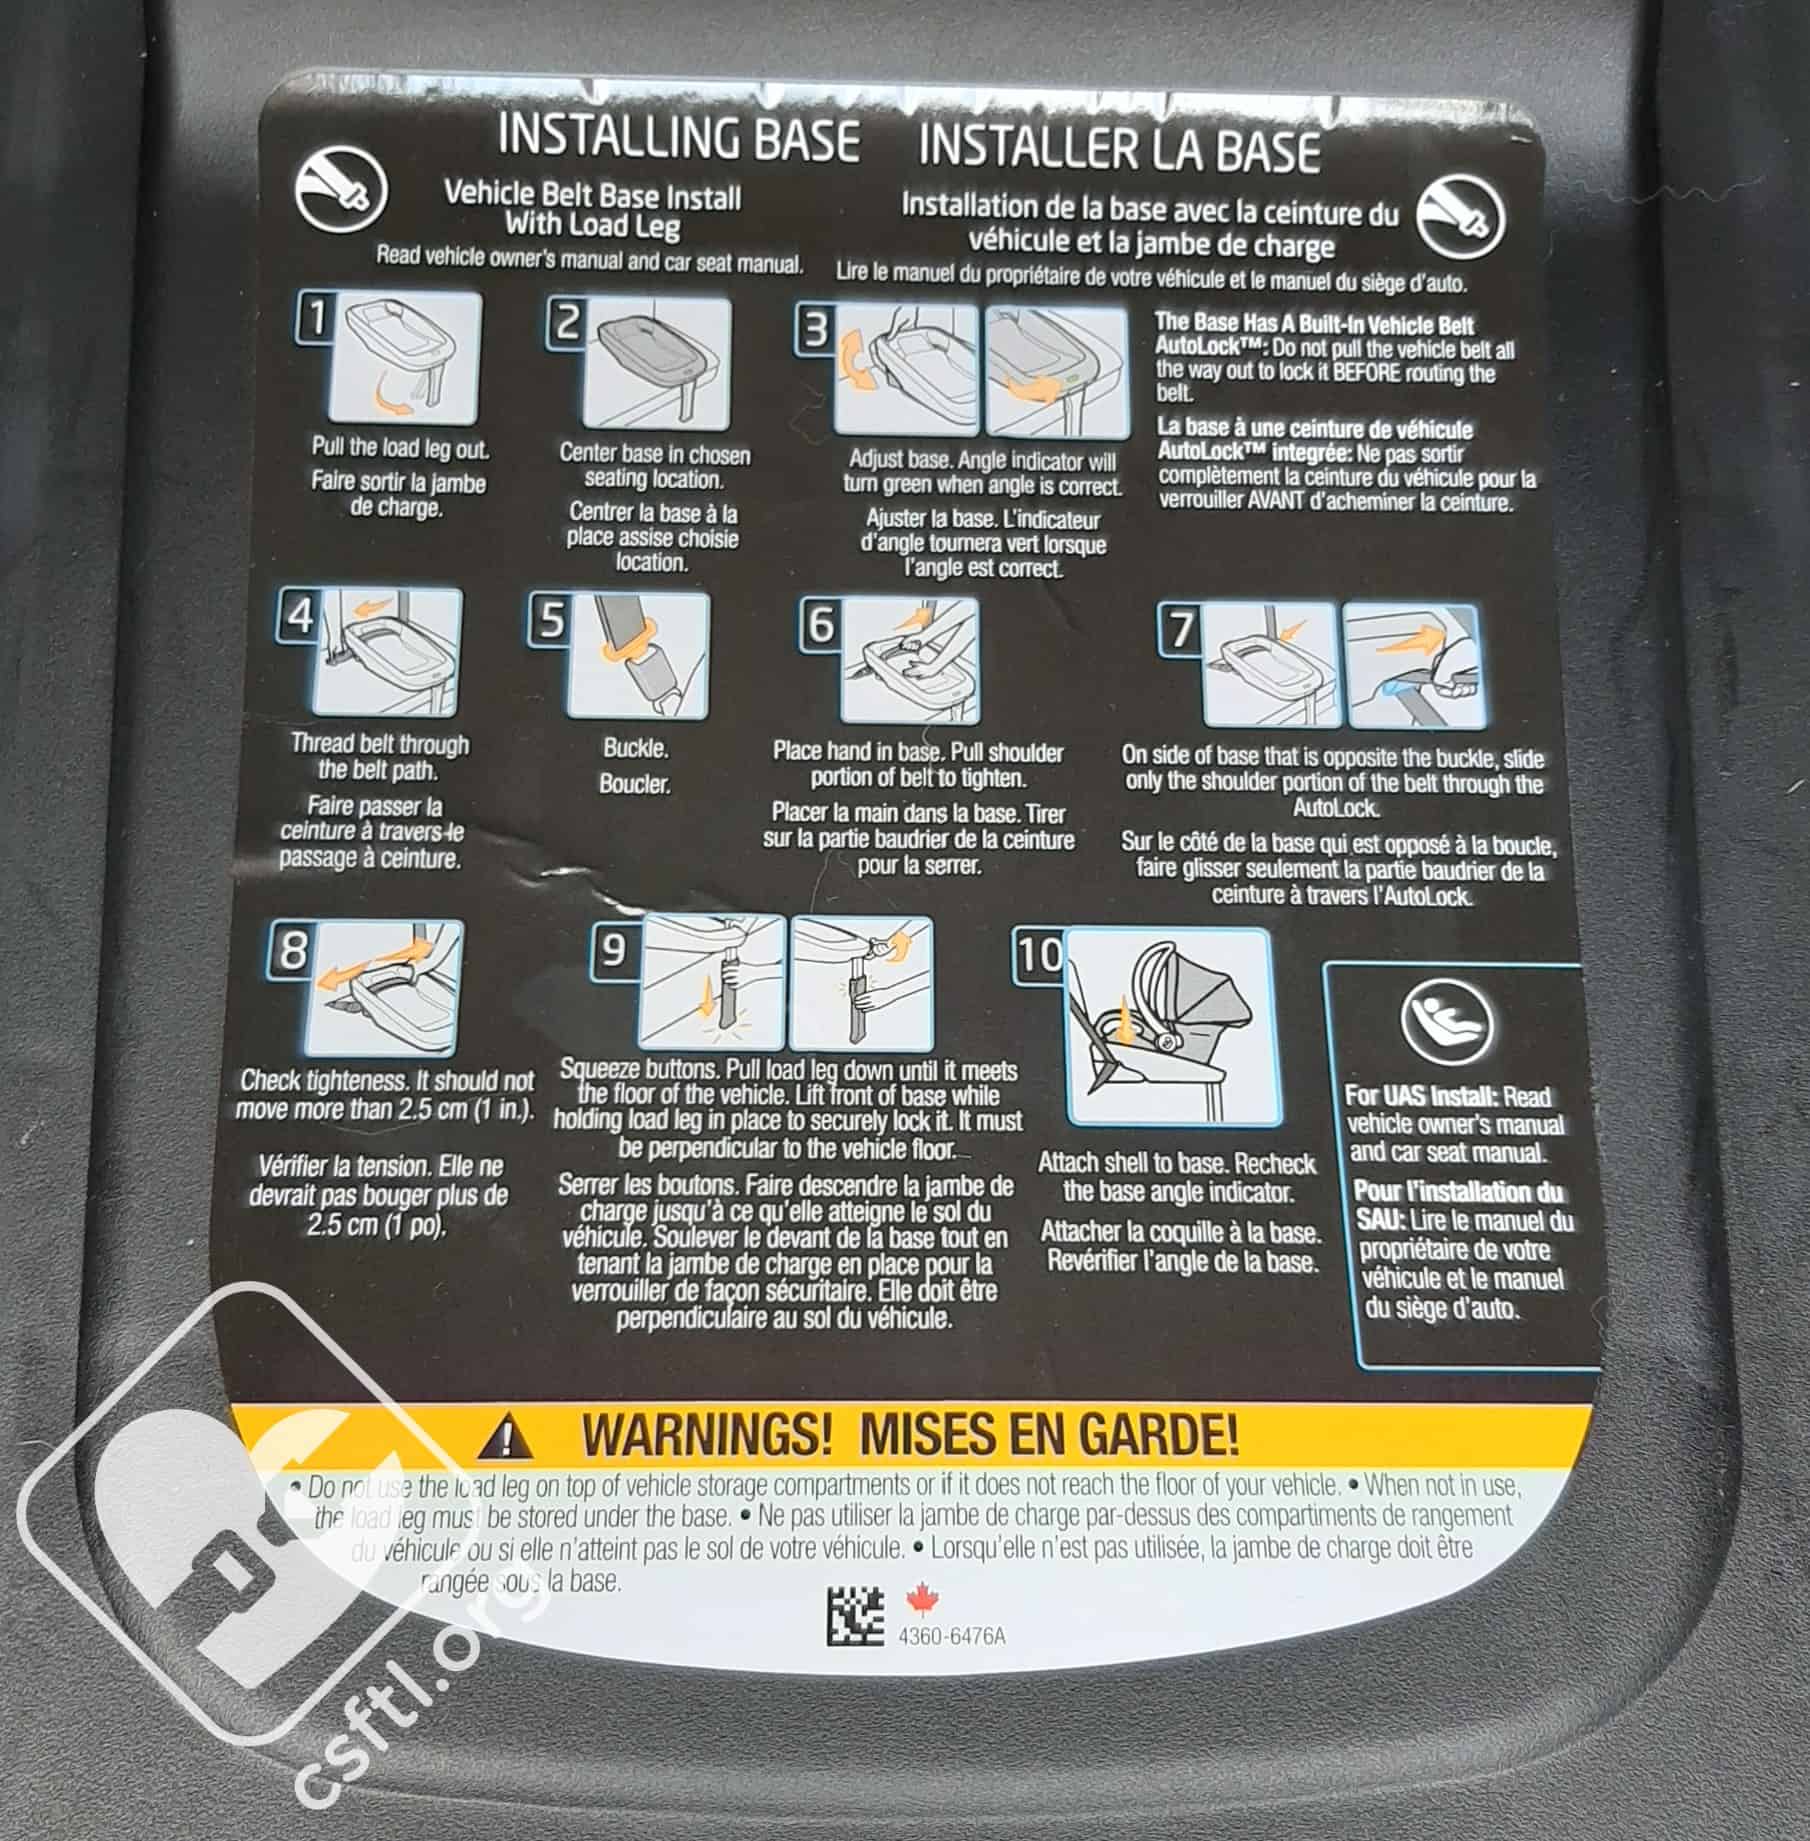
Maxi Cosi Mico Max Plus includes installation instructions on the top of the base
If the largest recline angle is not angled enough to install the base in the most reclined position, a rolled towel or pool noodle may be used to increase the recline. Maxi-Cosi has confirmed that the rolled towel may be used with either the recline foot extended all the way or with it fully stored.
With Vehicle Seat Belt, Using AutoLock

Maxi Cosi Mico Max Plus base installed with AutoLock
To install the base with the AutoLock, thread the vehicle seat belt through the base’s belt path, being careful not to lock the vehicle seat belt, then buckle the seat belt. Remove the slack from the lap portion of the vehicle seat belt, then slide the shoulder belt portion of the vehicle seat belt on the opposite side from the vehicle seat belt buckle into the AutoLock.
Pull the shoulder belt into the AutoLock until it cannot move any further. Check for movement by grabbing the belt path and, using the force of a handshake, trying to move the base side to side and front to back. If the movement is less than an inch, the seat is installed correctly.
With Vehicle Seat Belt, without AutoLock
Maxi Cosi Mico Max Plus base installed with seatbelt and no AutoLock
To install the base with the vehicle seat belt without using the AutoLock, thread the vehicle seat belt through the base’s belt path and buckle the seat belt. Tighten the vehicle seat belt and remove the slack from the lap portion of the belt. Then, engage the vehicle seat belt’s locking mechanism and feed the slack back into the retractor until the seat is installed snugly.
Check for movement by grabbing the belt path and, using the force of a handshake, trying to move the base side to side and front to back. If the movement is less than an inch, the seat is installed.
Note: The manual includes a section on vehicle seat belt types, and includes this blurb on page 32:
“Determine How This Car Seat Will Be Locked Into Place
The vehicle belt must not loosen after tightening. This means there needs to be a way to lock the vehicle belt.
- By using this base’s built-in AutoLock (see step 3); OR
- By using the seat belt’s retractor (see step 4); OR
- By using the seat belt’s latch plate (see step 5).”
While this is great information, there are no instructions in the manual showing how to install the base without using the AutoLock, so we are concerned that a caregiver may forget to lock the vehicle seat belt when installing the base without using the AutoLock. We’d love to see a note in the installation section about locking the vehicle seat belt if the AutoLock is not in use.
Installation With Lower Anchors/LUAS

Maxi Cosi Mico Max Plus base installed with lower anchors
To install the base with the lower anchors/LUAS, first remove the lower anchor connectors from their storage positions on the side of the base by pressing the red buttons on the connectors to release them. Thread the lower anchor webbing through the base’s belt path, ensuring there are no twists in the webbing, then attach the anchor connectors to the vehicle’s lower anchors.
To remove the slack from the lower anchor webbing, pull the adjuster tail straight up through the belt path while pressing down on the base. Check for movement by grabbing the belt path and, using the force of a handshake, trying to move the base side to side and front to back. If the base moves less than an inch from side to side, the installation is secure.
Using the Load Leg
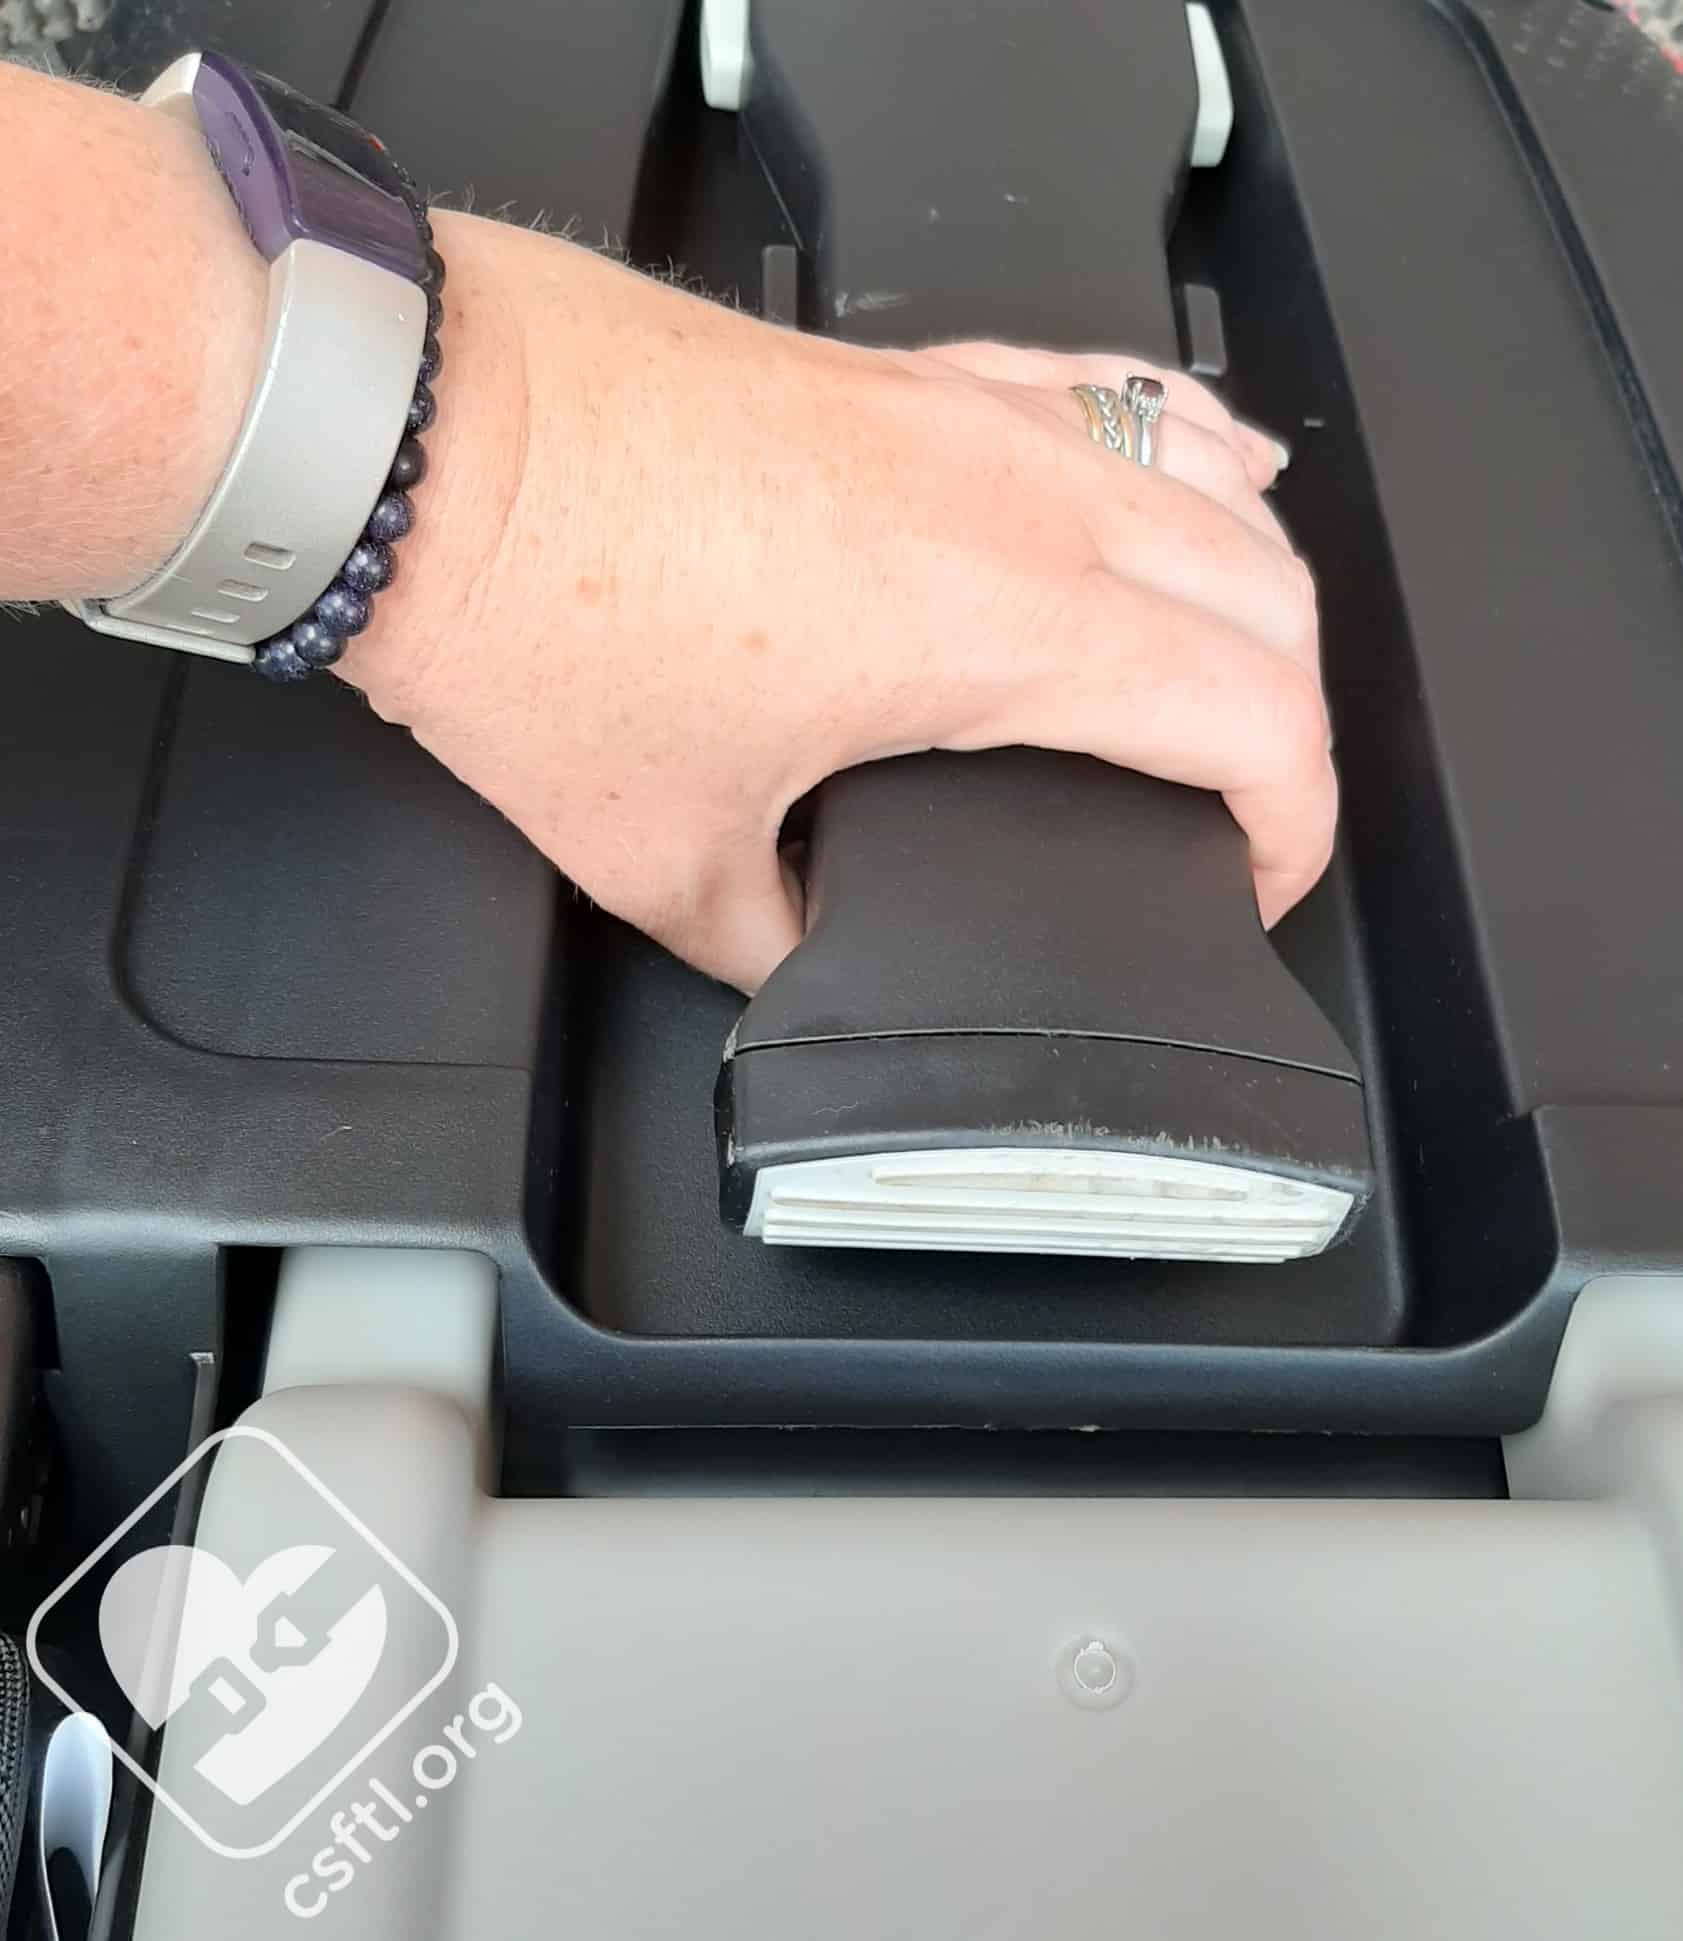
Maxi Cosi Mico Max Plus load leg
Once the base is correctly installed, it’s time to ensure that the load leg is set up correctly. First, ensure that the load leg is completely extended forward (away from the base). Next, squeeze the buttons on the side of the load leg and pull it down until it meets the floor of the vehicle. Release the buttons. Make sure the load leg is perpendicular to the floor and securely locked in position.
The load leg cannot be used over vehicle storage compartments like the Stow and Go. It must be used over a solid vehicle floor. If the load leg does not reach the floor of the vehicle, or if the vehicle prohibits the use of a load leg, it cannot be used. Always check the vehicle manual before using a load leg.
Installation – Without the Base
Maxi Cosi Mico Max Plus base installed without the base
With the child already harnessed in the car seat, place the Mico Max Plus rear facing on the vehicle seat. Check that the level line on the side of the carrier is level to the ground. Once the level is correct, route the lap portion of the vehicle’s seat belt through the belt paths on both sides of the carrier, and fasten the vehicle seat belt. The manual is missing an important step at this stage (but we will not bypass it): at this point in the installation process, the vehicle seat belt’s locking mechanism needs to be engaged. Ensure all the slack is removed from the vehicle seat belt, that the level line remains level to the ground, and check that there is less than 1 inch of movement at the belt path. If all of those criteria are met, the seat is installed.
Note: Maxi-Cosi allows the use of a tightly rolled towel or pool noodle to adjust the recline angle with a baseless installation, if needed.
Fit to Child
Because we are writing this review amid a global pandemic, we are limited to our Huggable Images dolls and one newborn model. We will add photos of real babies as needed as the world returns to normal.
Preemie Doll
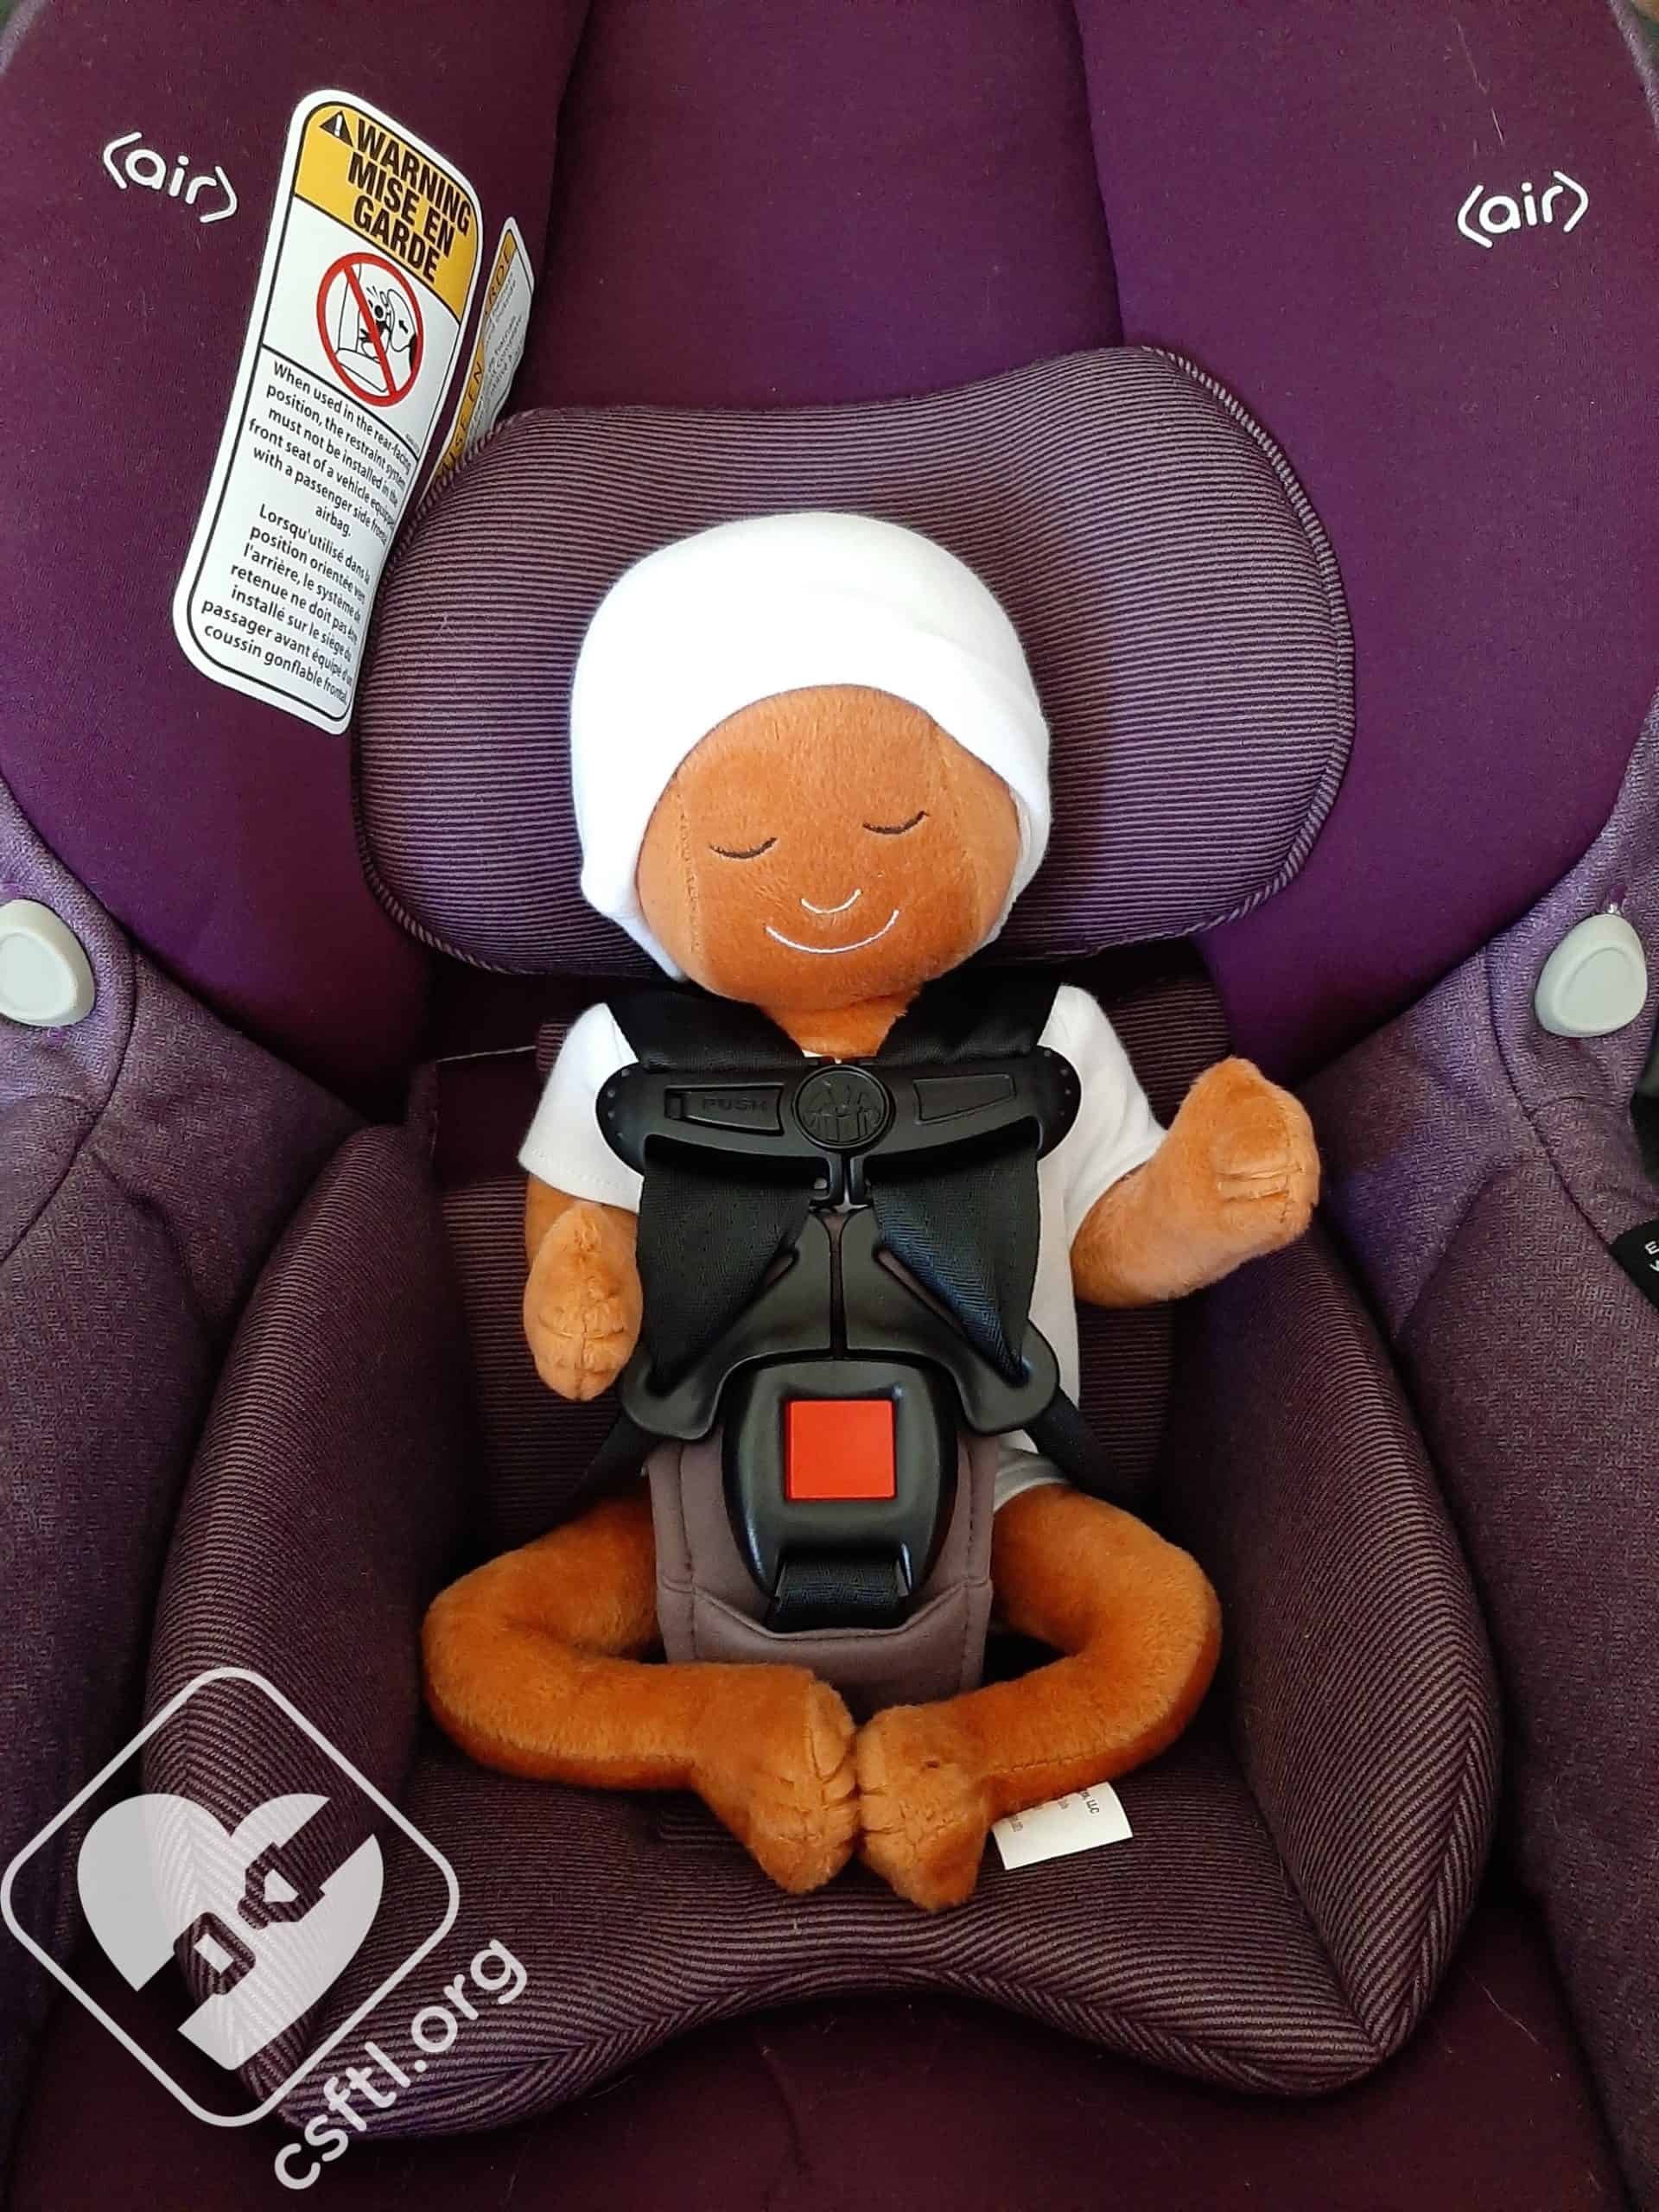
Maxi Cosi Mico Max Plus – preemie doll
We were pleasantly surprised to see that our 17 inch tall, 4 pound Huggable Images preemie doll fits in the Mico Max Plus.

Maxi Cosi Mico Max Plus – preemie doll
The harness is JUST at the doll’s shoulders when the harness is in the lowest position and the body insert is in place. We left the head pillow and crotch buckle cover on, but removed the quite large harness pads (more on those later), and ensured the harness straps were on the inner loops so that the harness could be tightened enough to pass the pinch test on our doll.
Newborn Doll
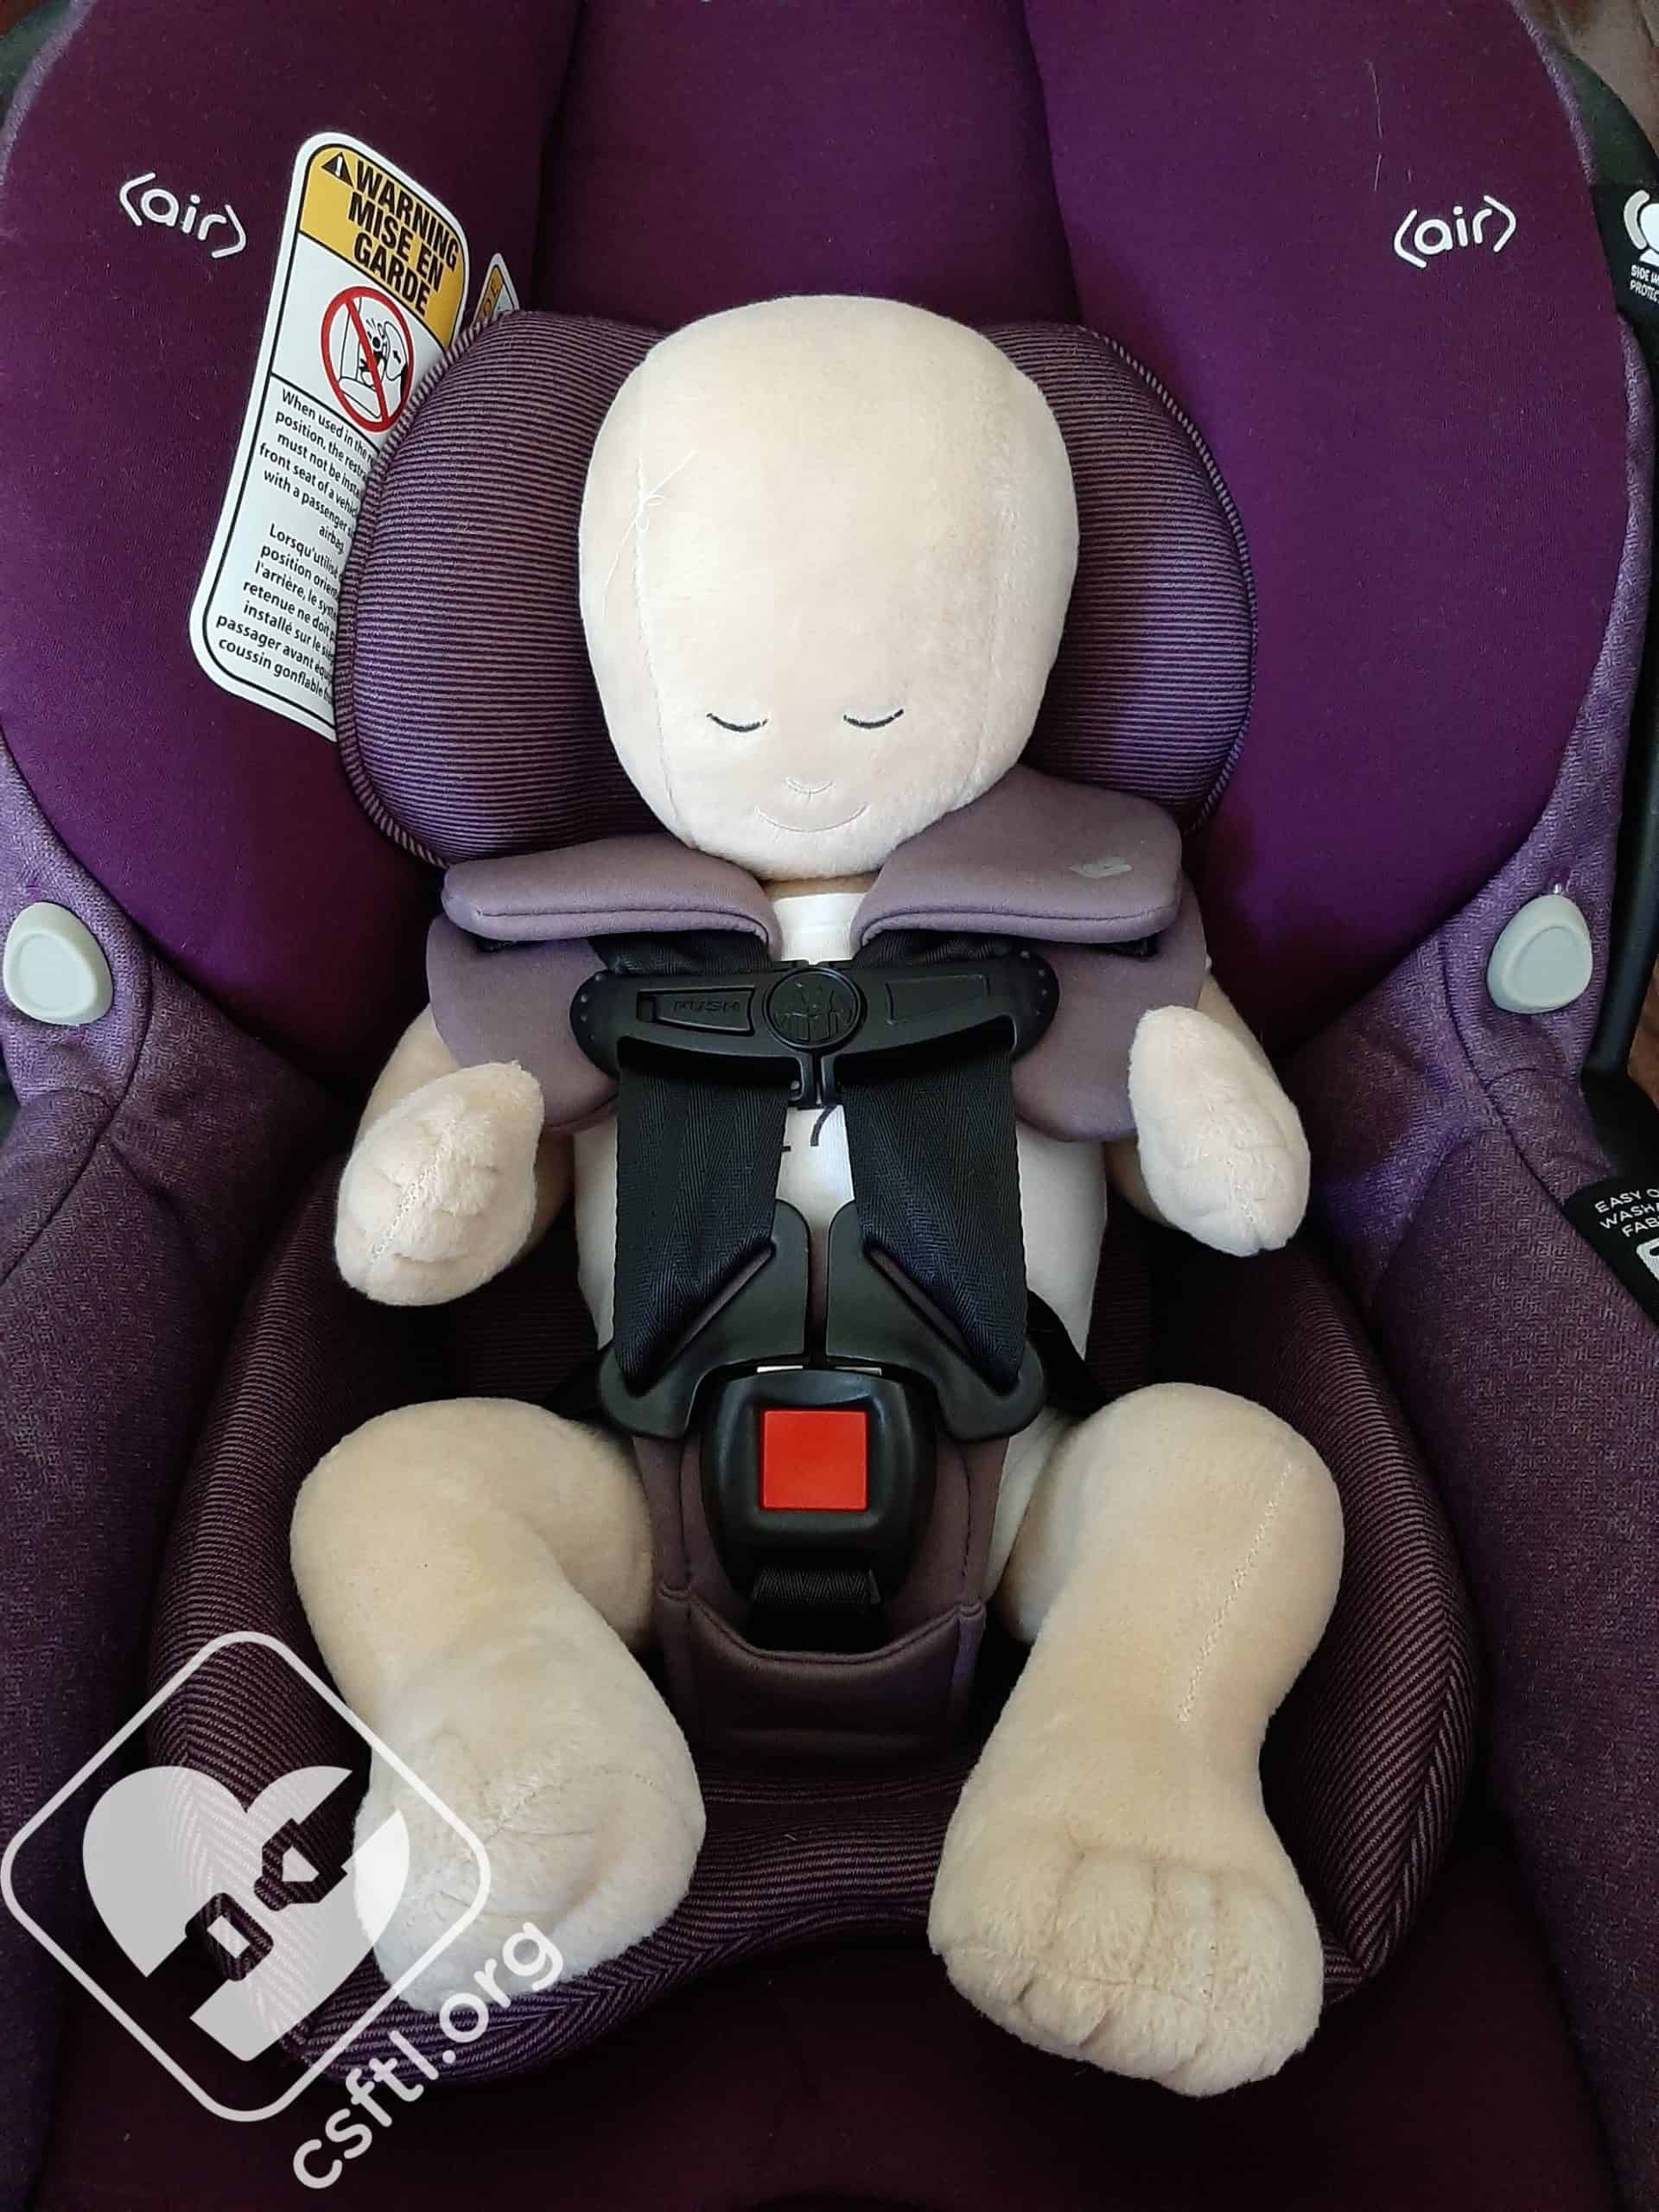
Maxi Cosi Mico Max Plus – newborn doll
One of the best parts about using the Huggable Images dolls in our reviews is that they don’t give us any attitude when we try different scenarios with the padding. Because the Mico Max Plus is a seat for infants, we tried the 17 inch tall, 7 pound newborn Huggable Images doll with all of the padding in the seat.
The shoulder pads, while they do indeed come with this seat, remind me of a 1980’s power suit (am I showing my age?). They protrude off the doll’s shoulders and although they do not actually interfere with the harness fit, the Huggable Images dolls don’t squirm or protest as we’re bucking them into the seat, and we are not convinced that they would not interfere with the fit on a real life newborn.
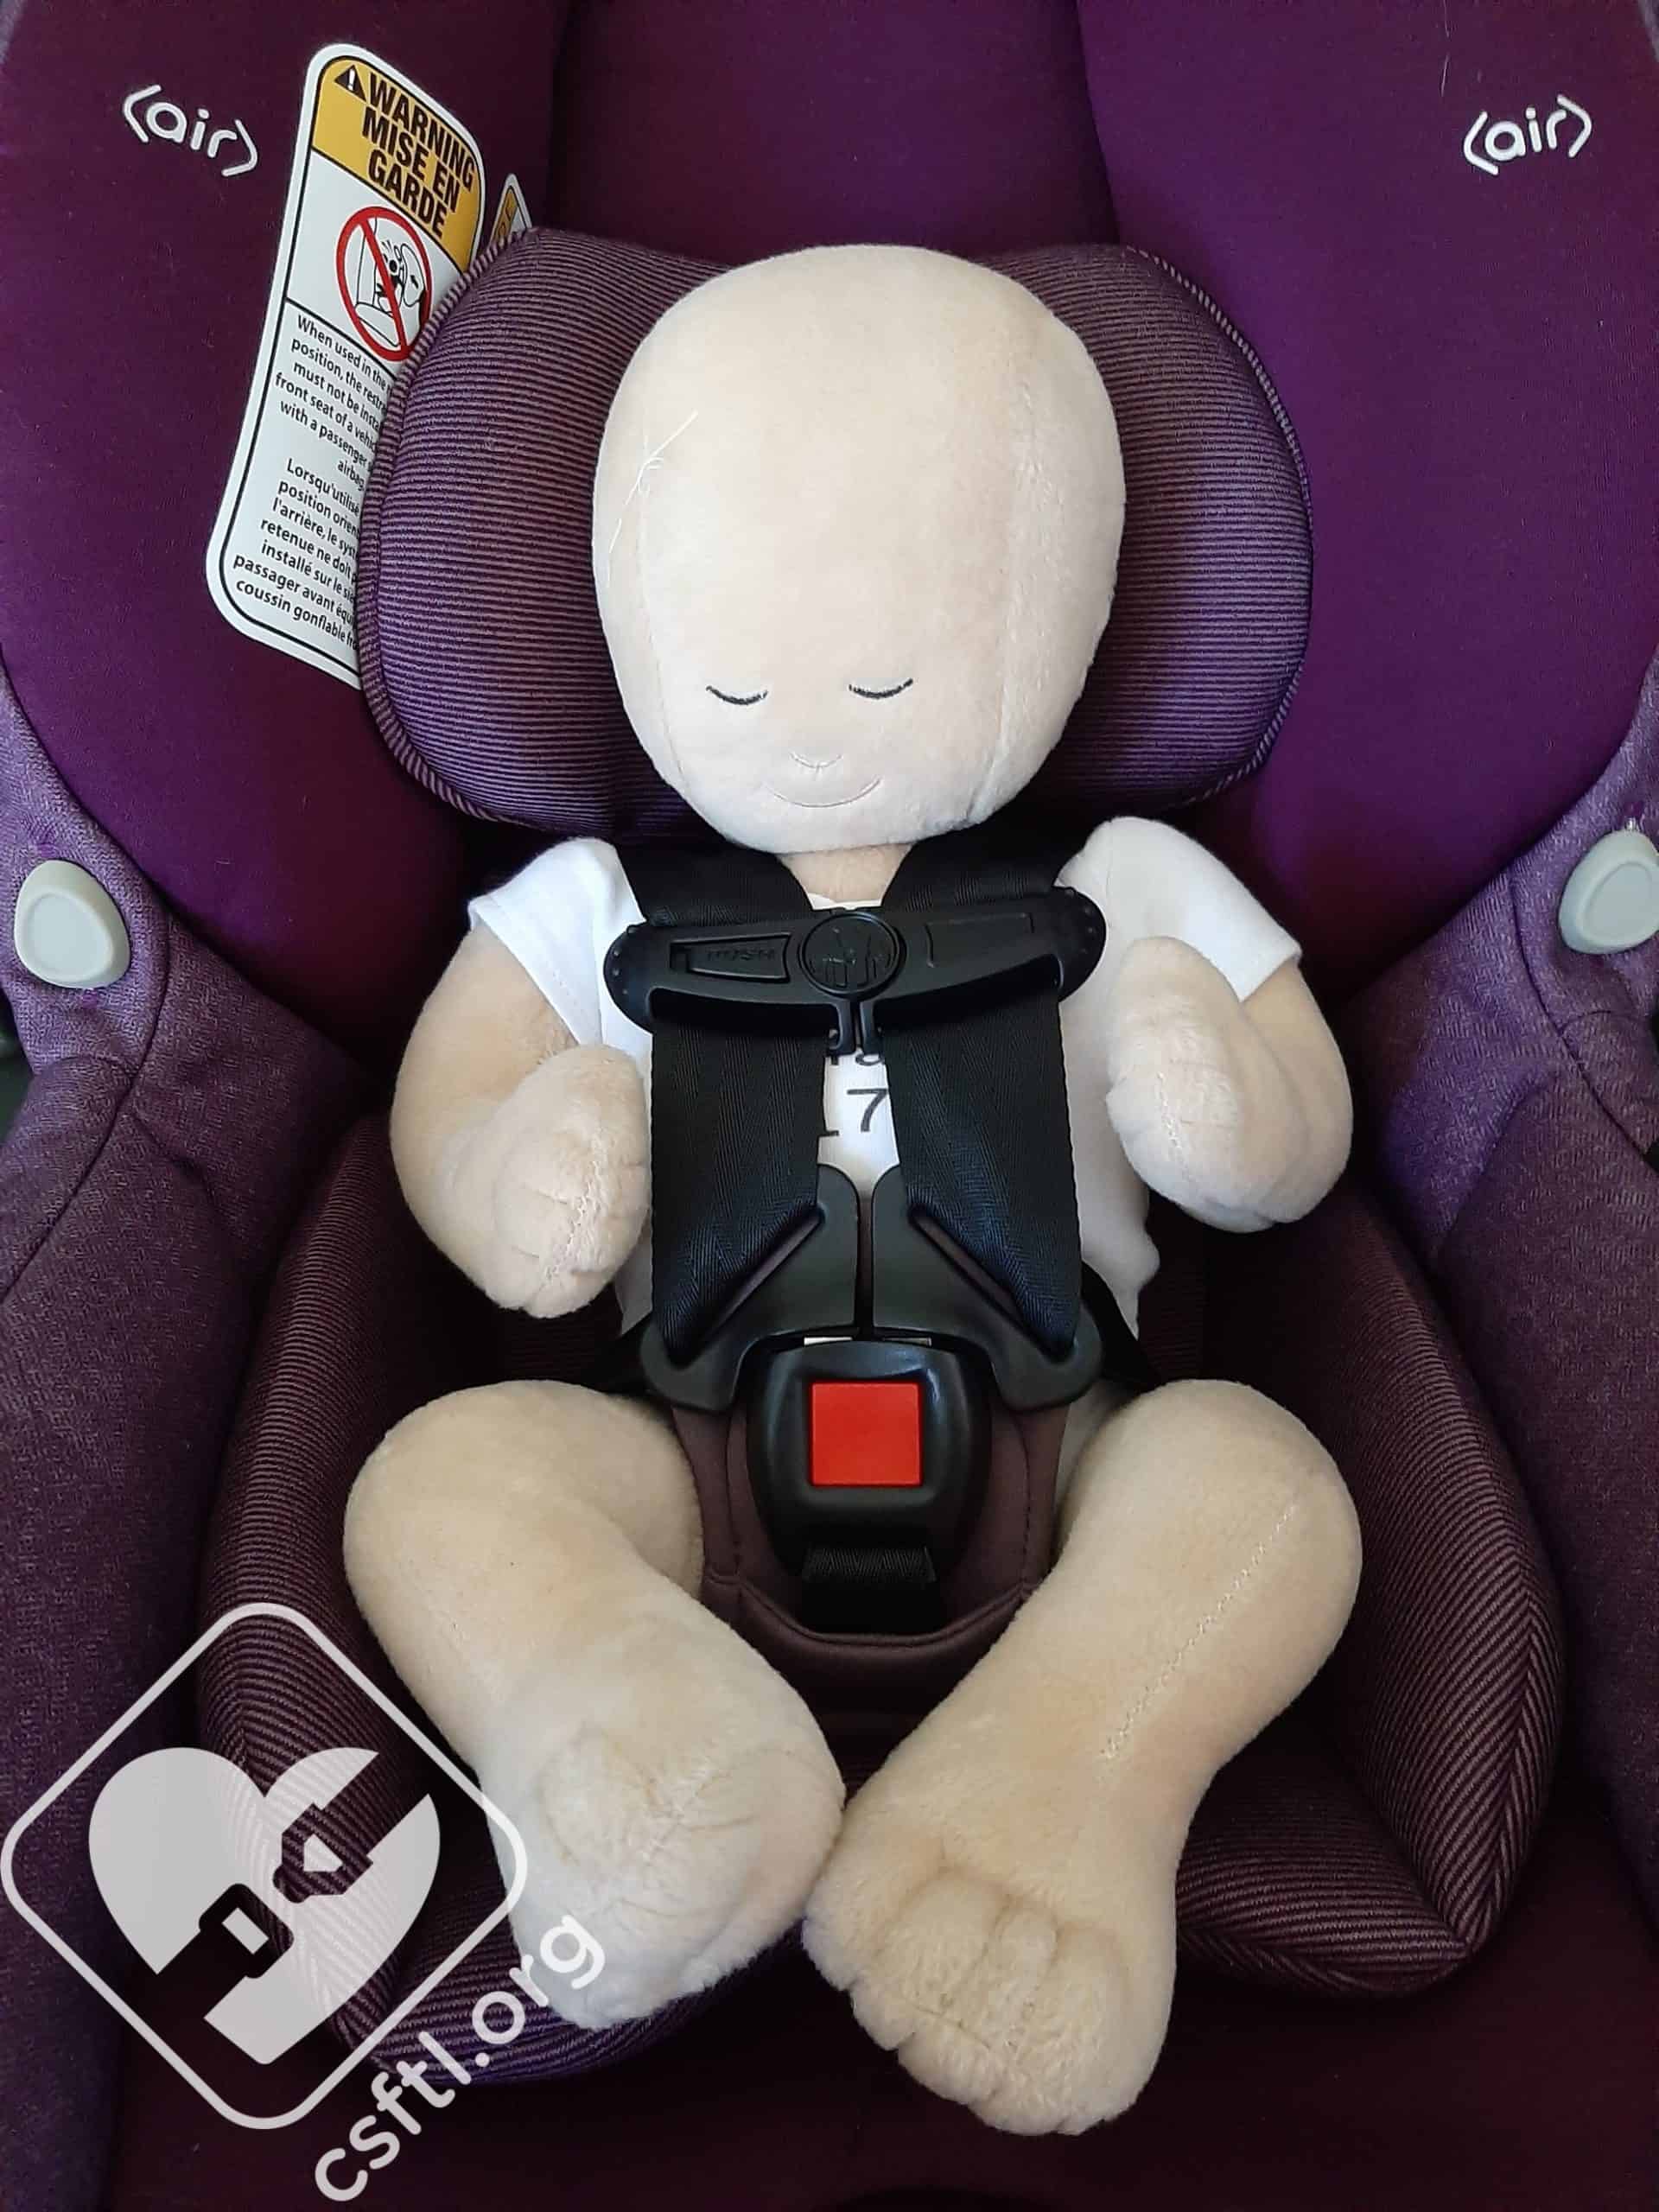
Maxi Cosi Mico Max Plus – newborn doll
When we removed the harness pads, the fit on the newborn doll was much better. In both photos, the harness is in the 2nd position from the bottom and the harness has been moved to the outer loops on the splitter plate. It seems that the inner loops would only need to be used on very small newborns.
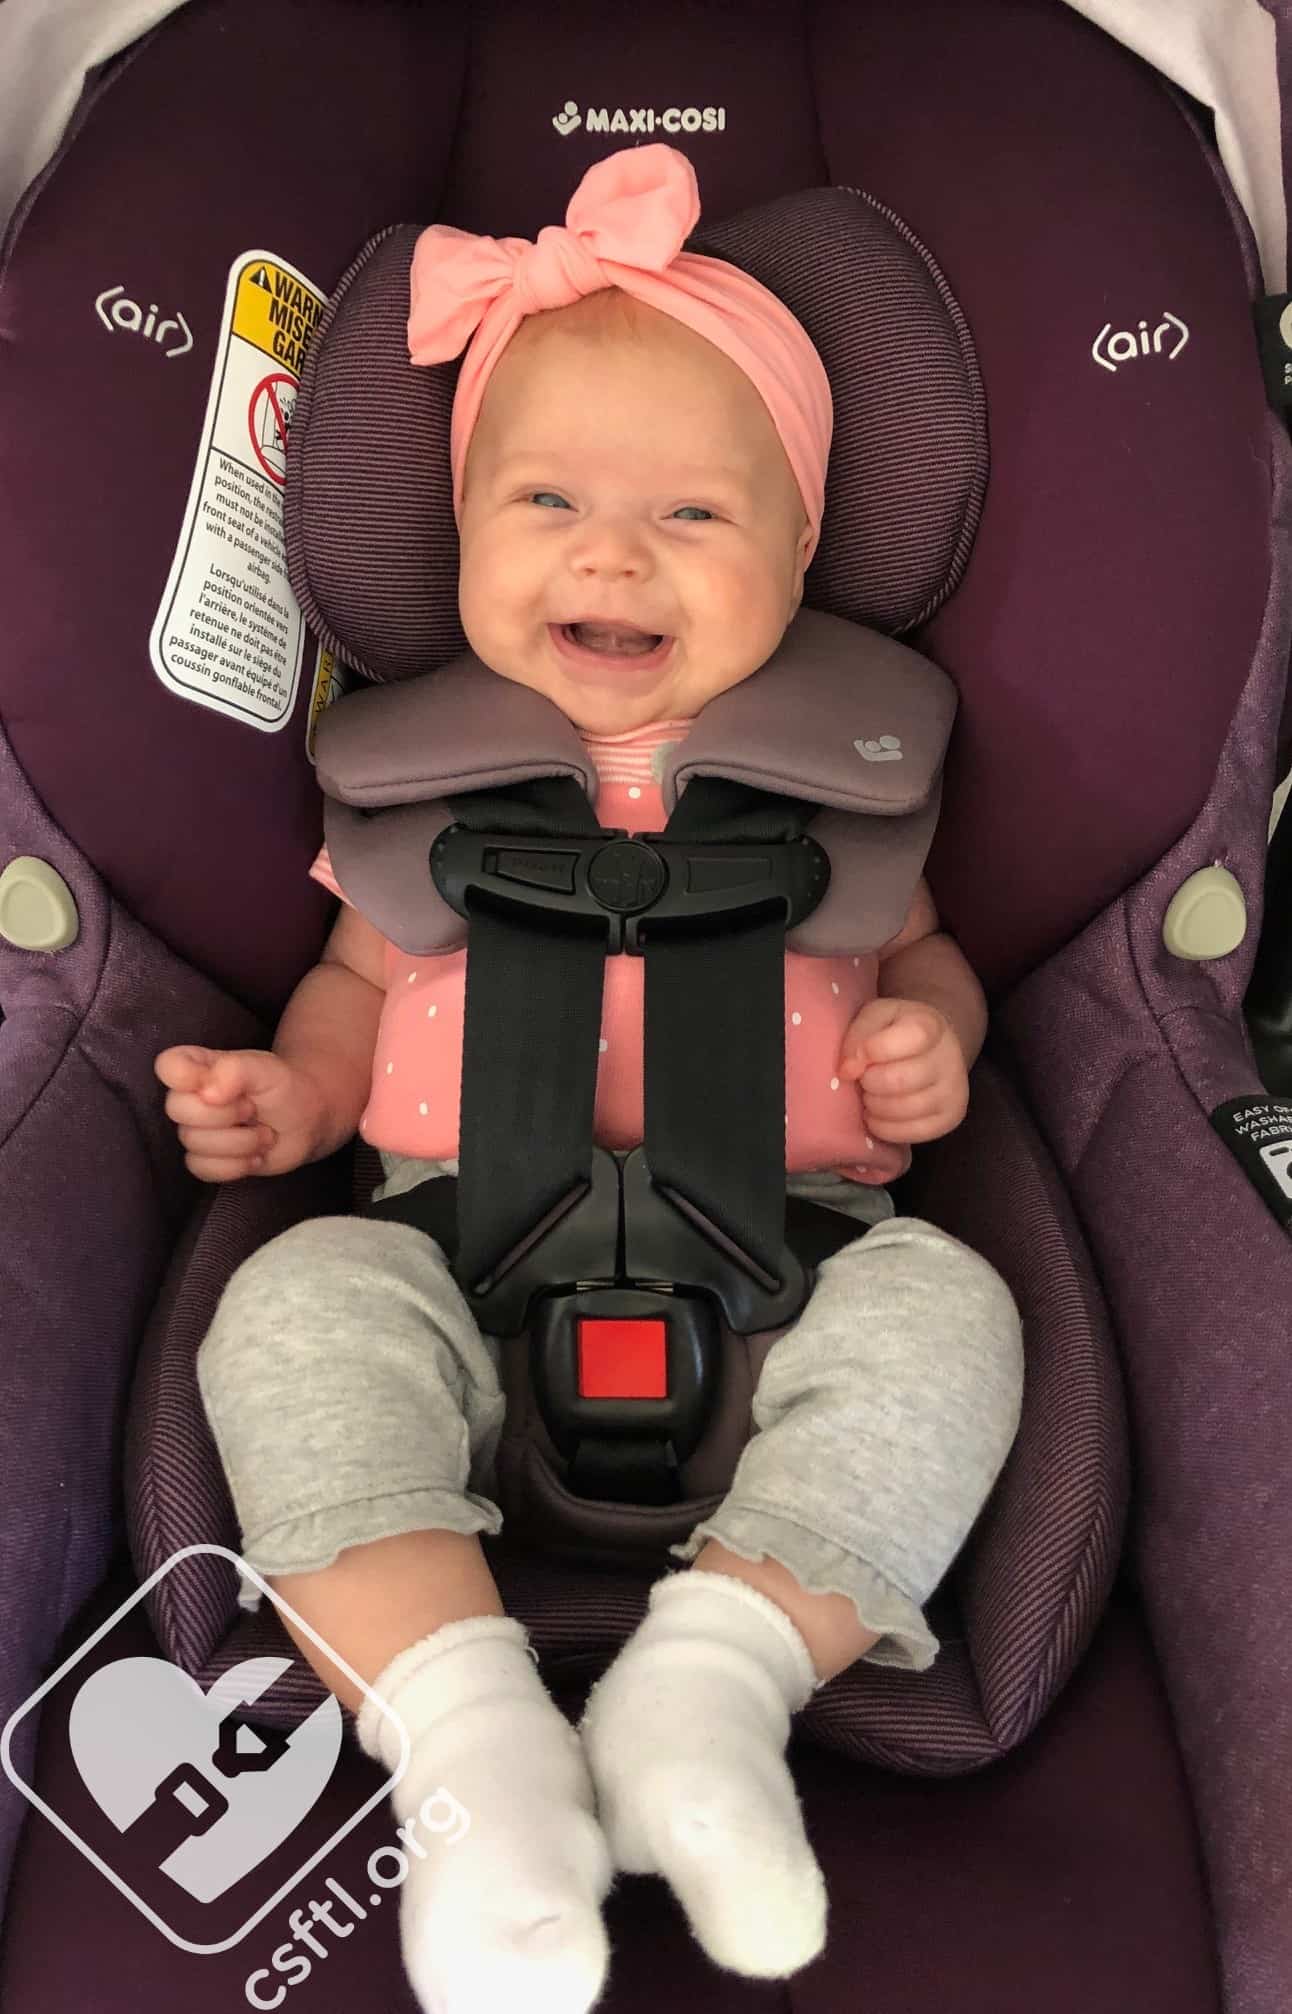
4 Weeks Old
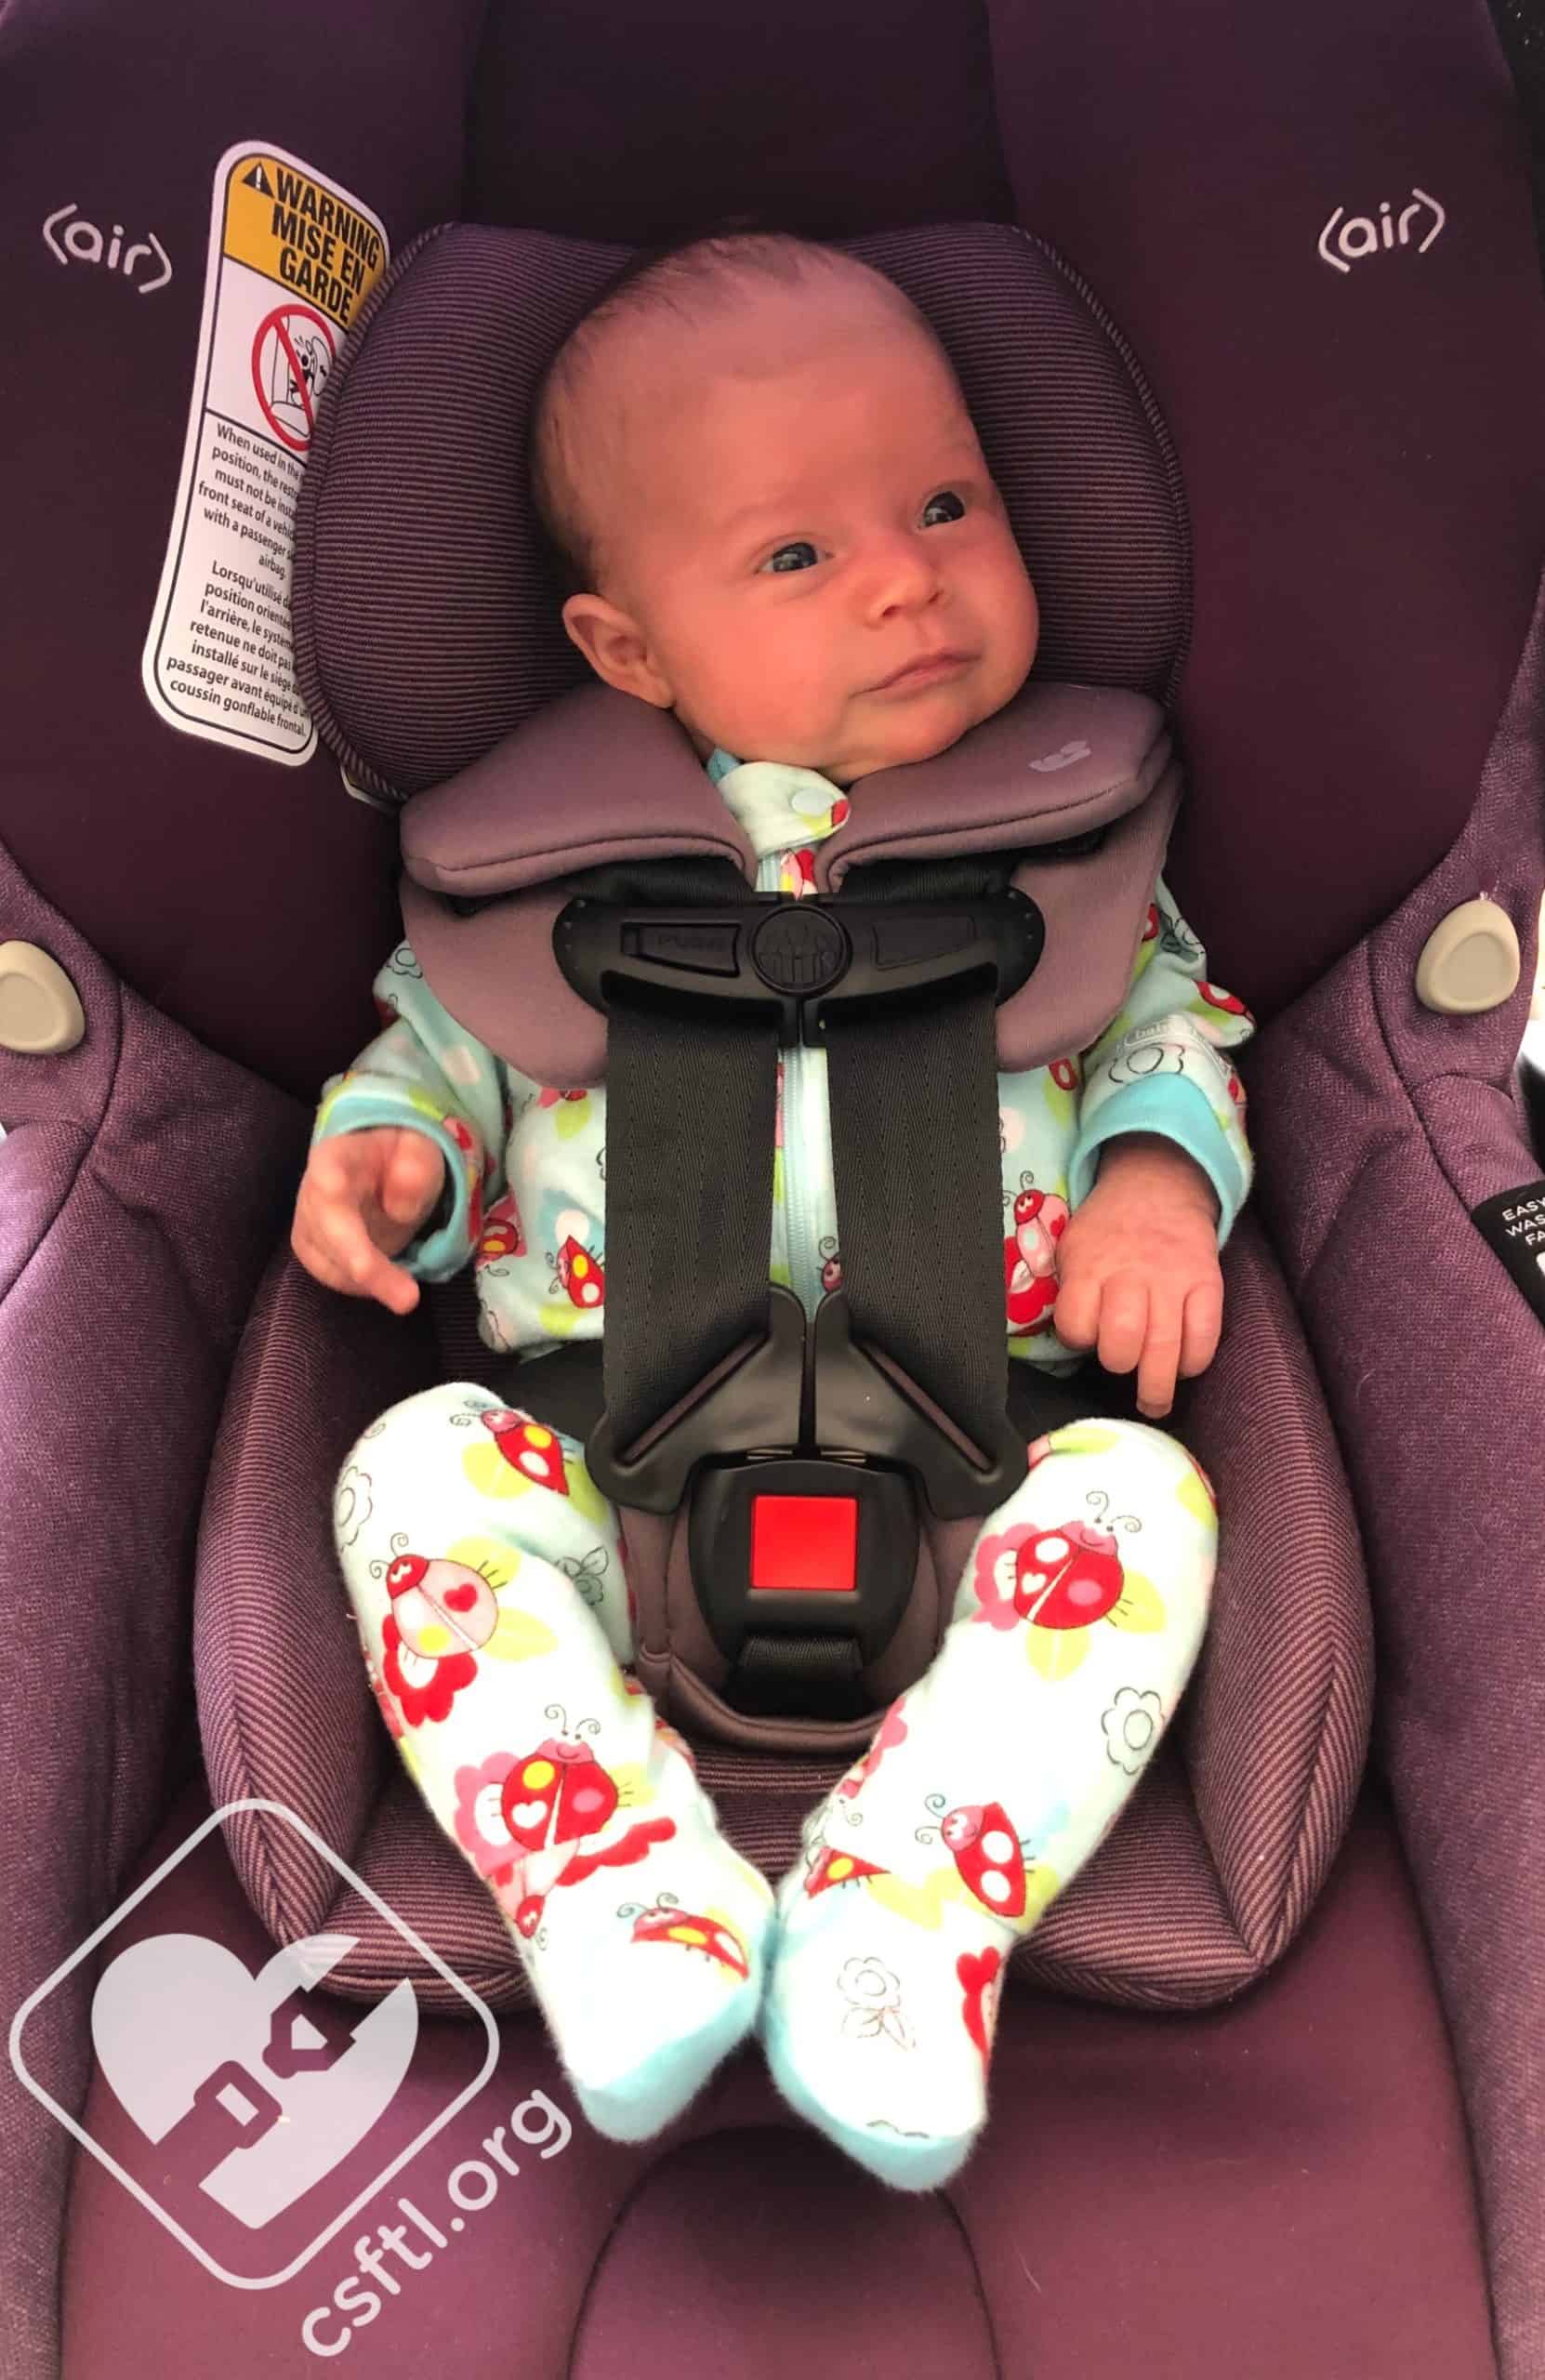
Maxi Cosi Mico Max Plus – 4 weeks old
This little one is 4 weeks old, weighs 8.7 pounds and is 21 inches tall. Her mom tried her in the Mico Max Plus with all of the padding left in, and we have to say – the harness pads really overwhelmed this little one! Mom had to be extra careful to ensure the harness was centered on her shoulders when harnessing her with the shoulder pads, and after a few outing she opted to remove them to make loading and unloading her newborn easier.
Our little model fits in the Mico Max Plus quite nicely with all of the padding in the seat. The harness is well below her shoulders on the second position and it tightens nicely using the outer harness loops (there was no need to use the inner harness loops for this model. We’d guess that they are only needed for very small babies).
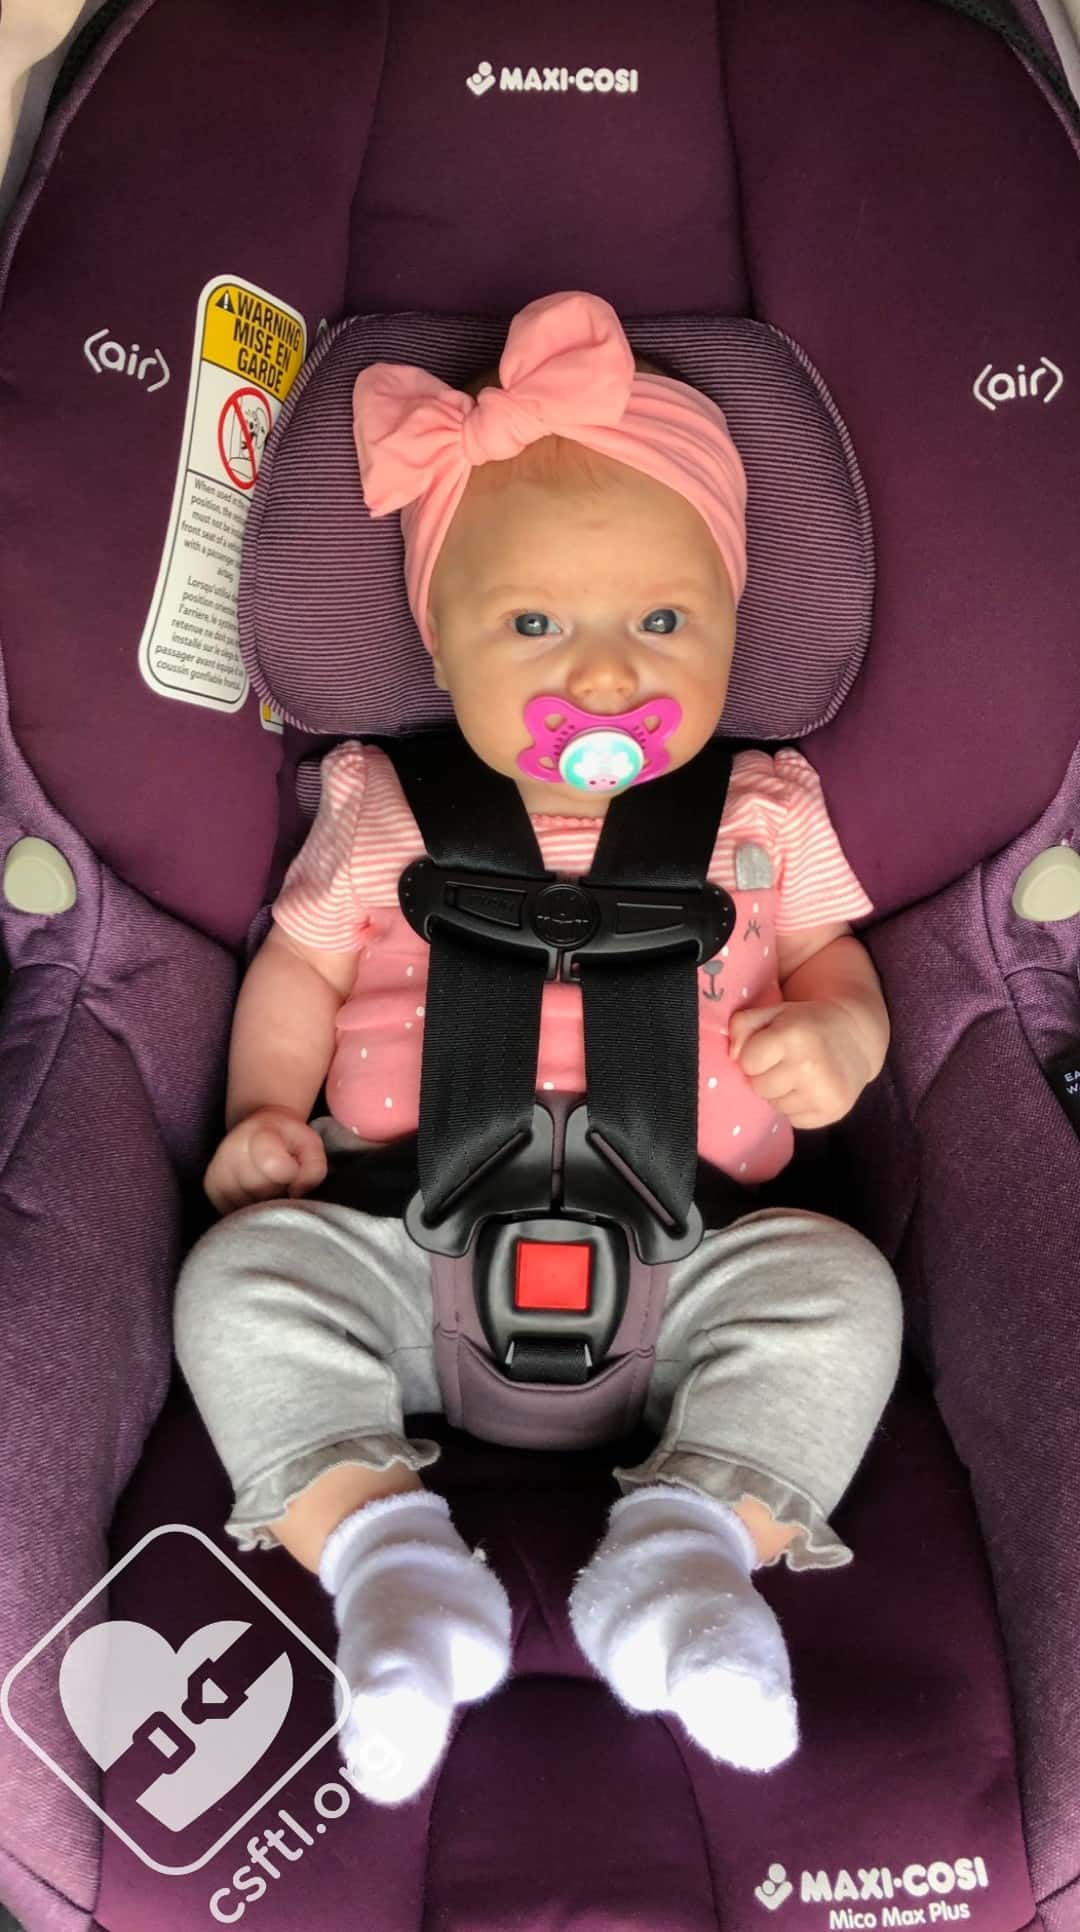
10 Weeks Old
Maxi Cosi Mico Max Plus – 10 weeks old
We’re happily following this little one’s growth for this review, and here she is at 10 weeks old, weighing 11 pounds and coming in at 23.75 inches tall. She sure is a lot more smiley now and continues to fit the Mico Max Plus nicely – even with the large harness pads in place.
Now that she’s a bit bigger, the harness pads (although still quite large!) don’t quite overwhelm her little body anymore. She’s still using all of the rest of the padding and the outer harness loops.
Maxi Cosi Mico Max Plus – 10 weeks old
We tried her out in the seat without the harness pads and still love the fit. Mom gushed about the head padding – this little model nestled right into the seat with the head padding, so it was left in for the duration on this review.
Fit to Vehicle
2013 Mazda CX-3
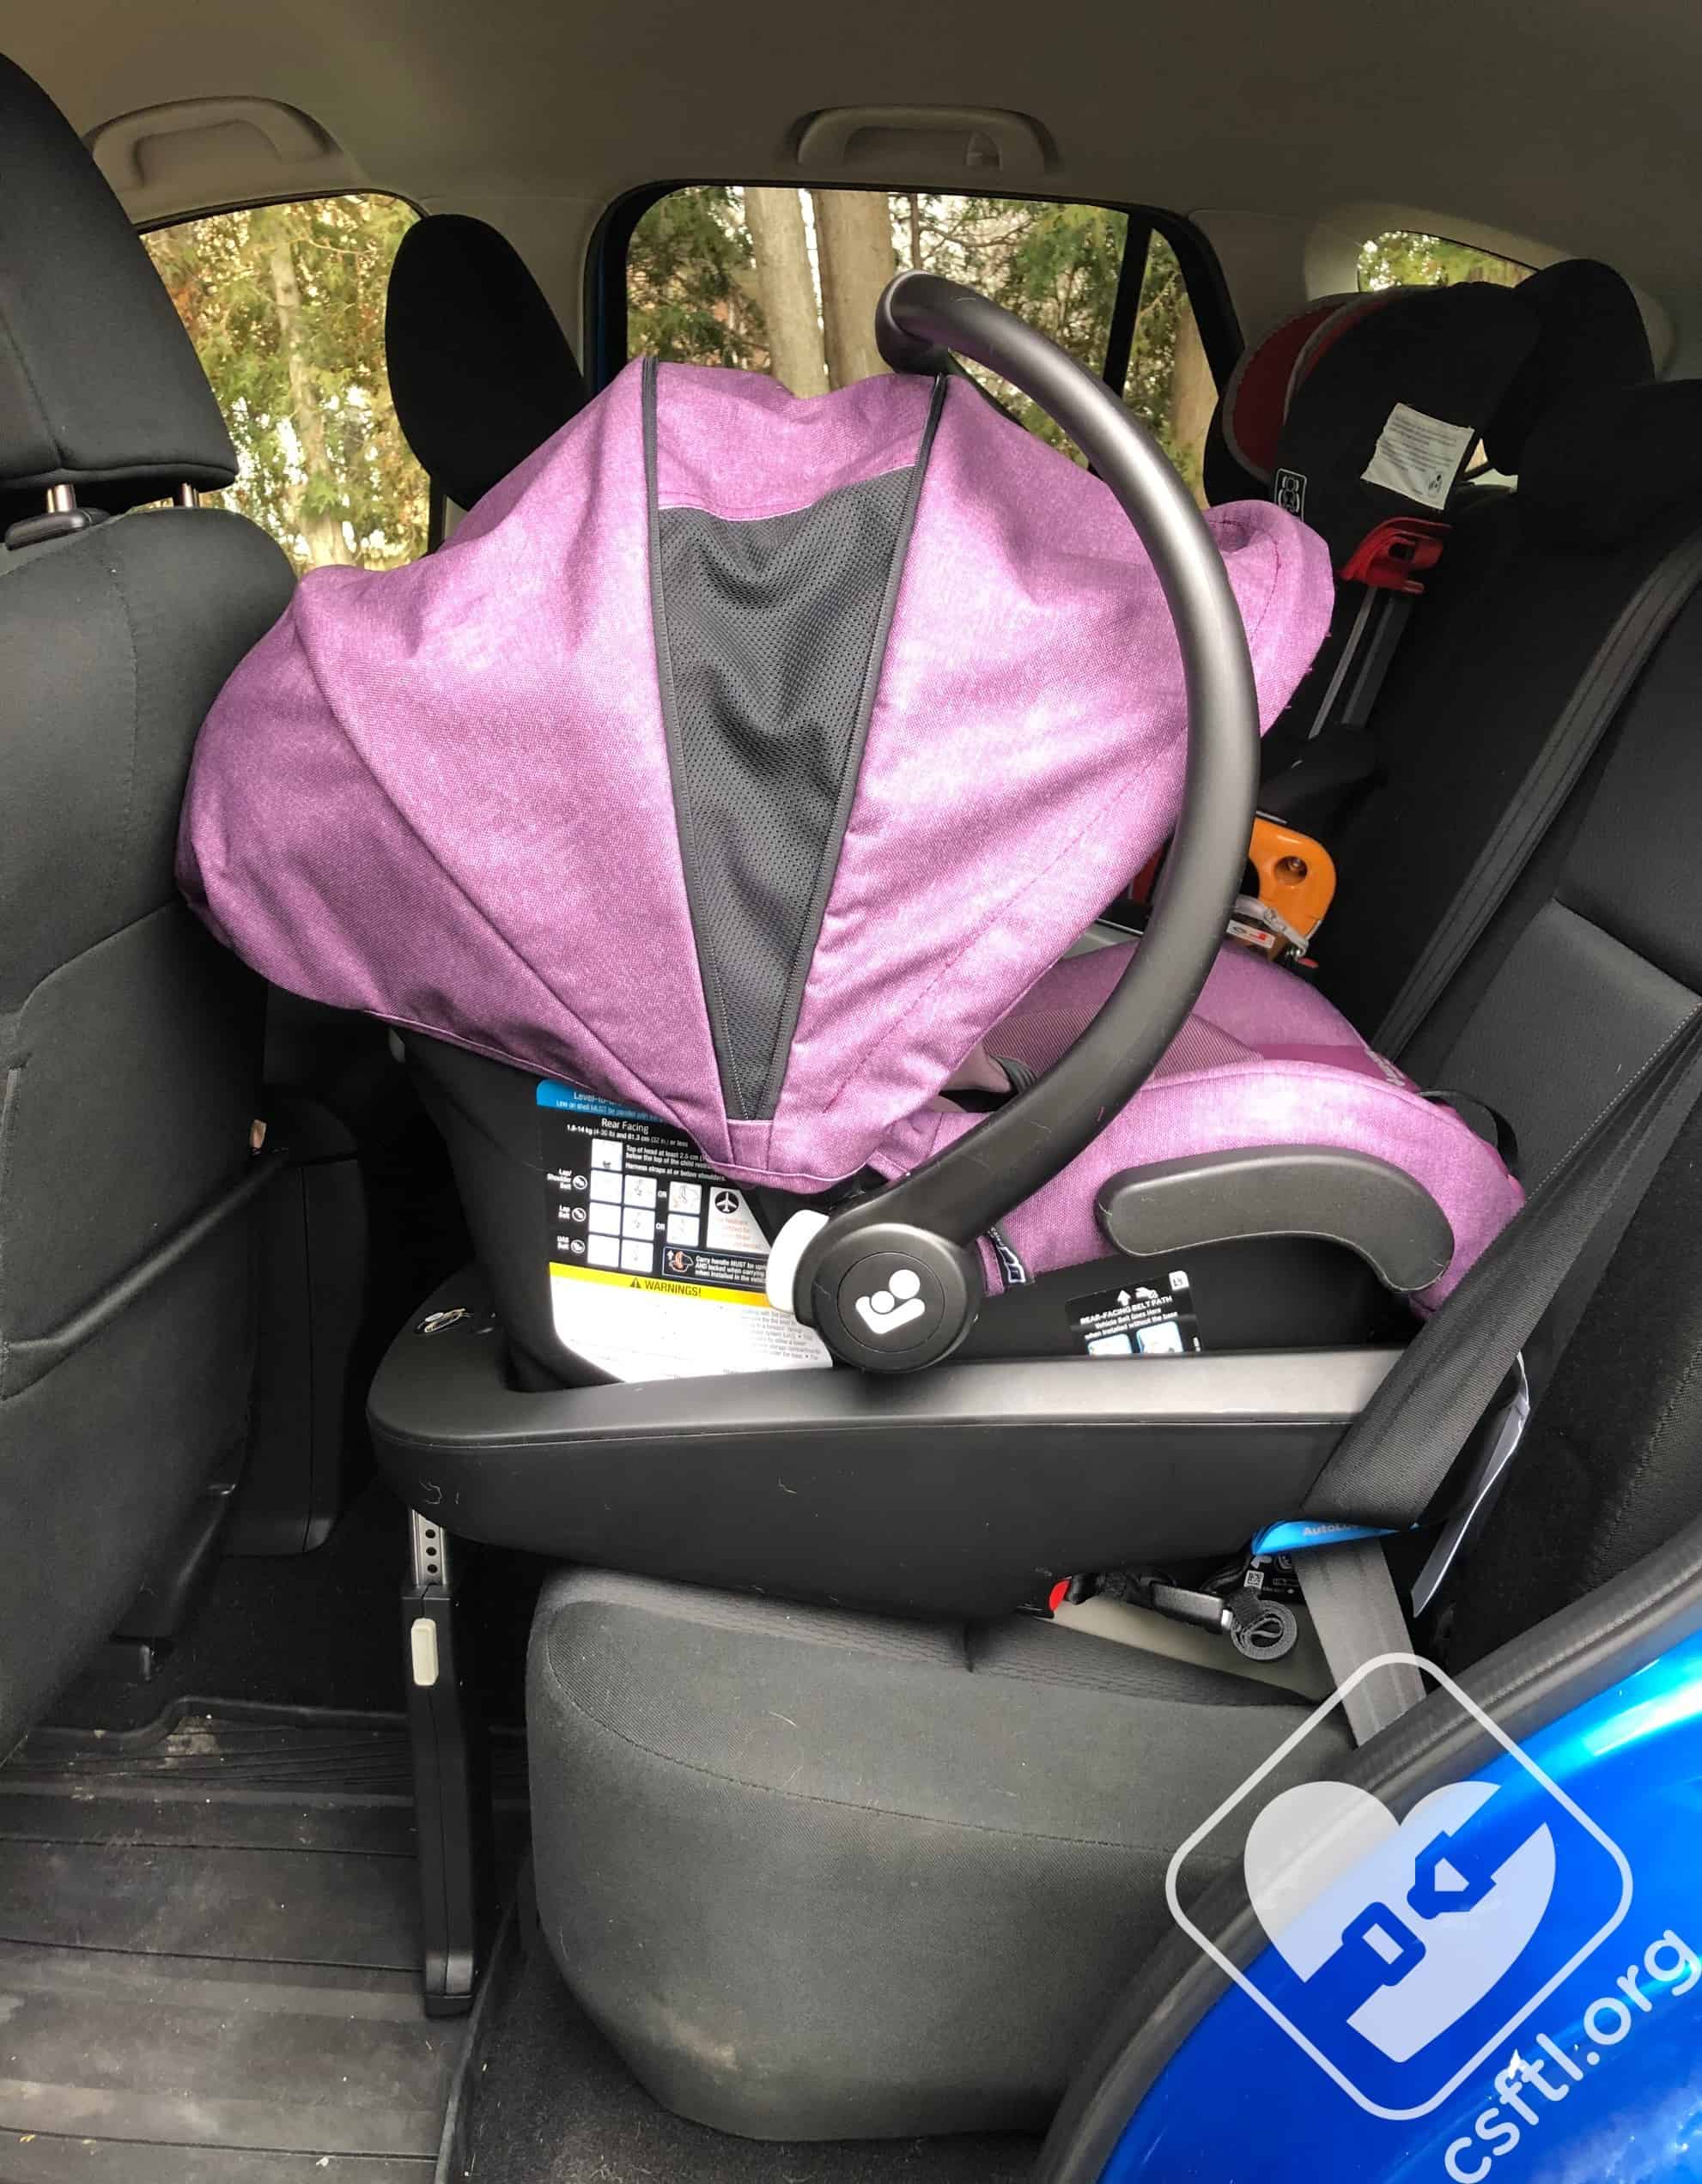
Maxi Cosi Mico Max Plus – 2013 Mazda CX-3
Here we see the Mico Max Plus installed behind the driver’s seat. Unfortunately, the seat takes up a decent amount of front to back space and the 5’5” driver had JUST enough room to safely drive. If she were any taller, we would have needed to move the Mico Max Plus to either the middle seating position or the passenger side.
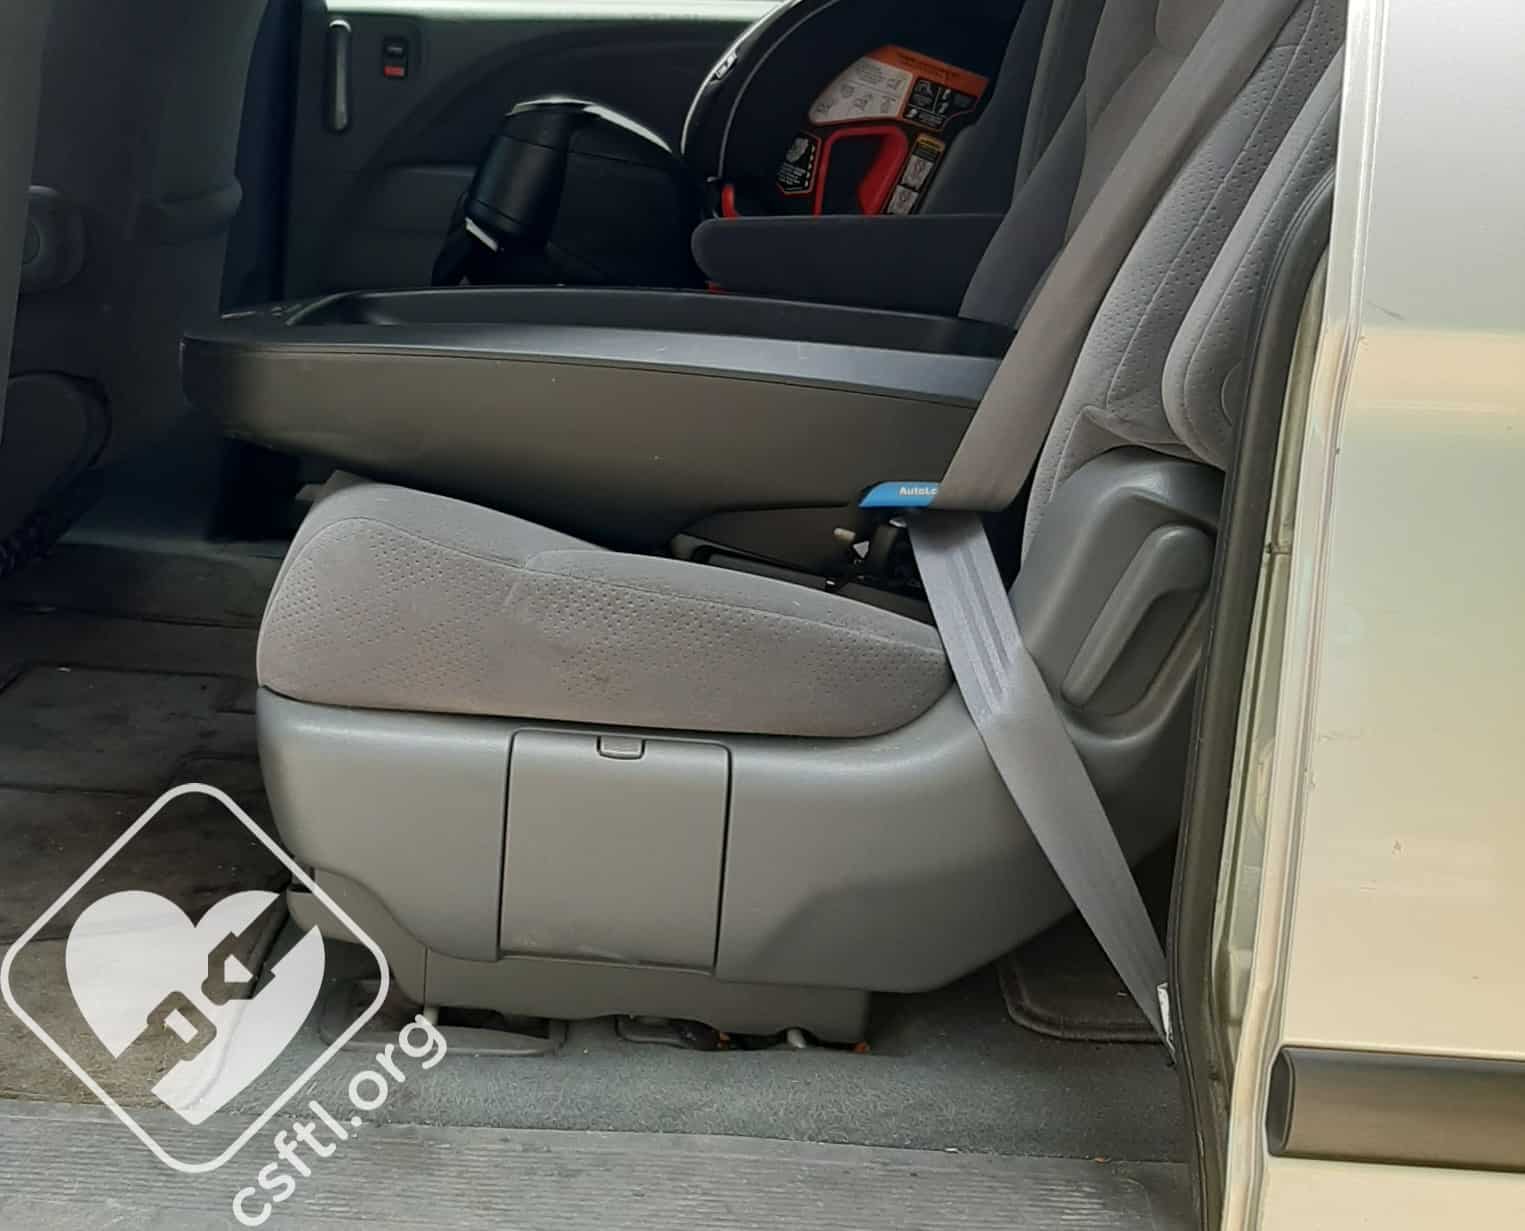
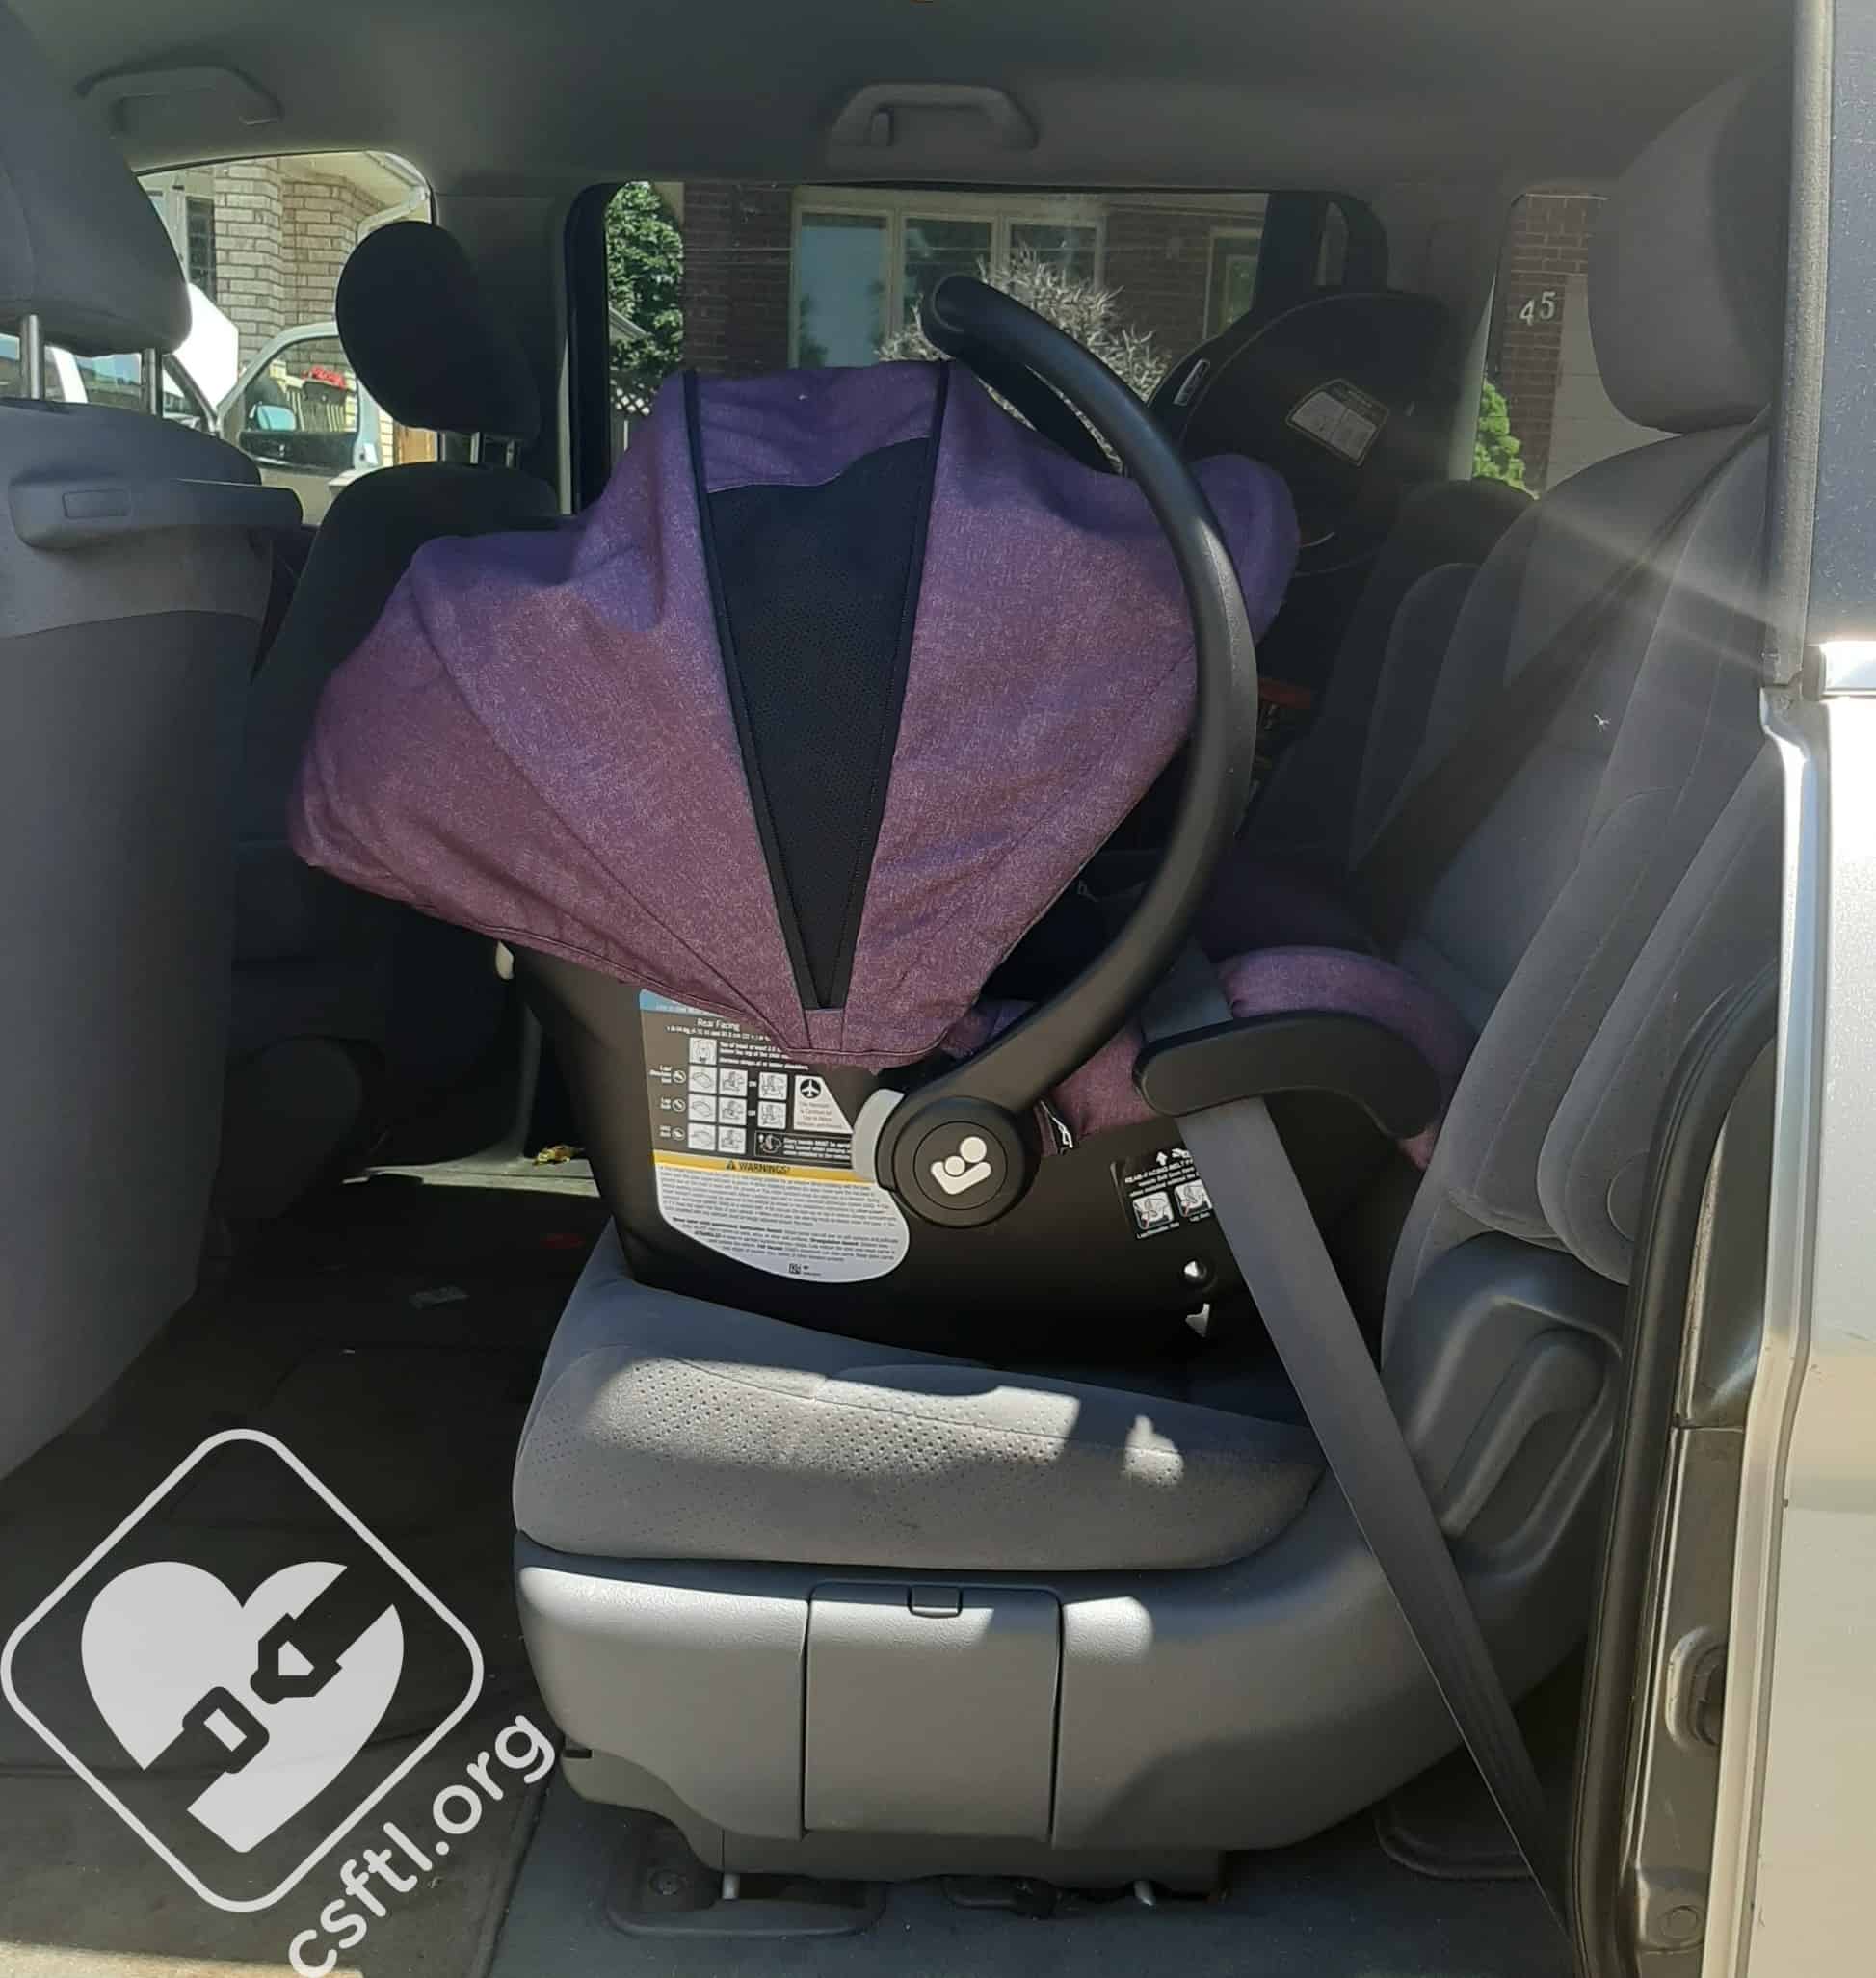
2007 Honda Odyssey

Maxi Cosi Mico Max Plus – 2007 Honda Odyssey
Because the Honda Odyssey has built-in floor storage compartments, we are unable to install the Mico Max Plus with the load leg. Thankfully the installation without the load leg is still nice and easy, and the seat driver’s seat was not affected at all.
1998 Chevrolet Malibu
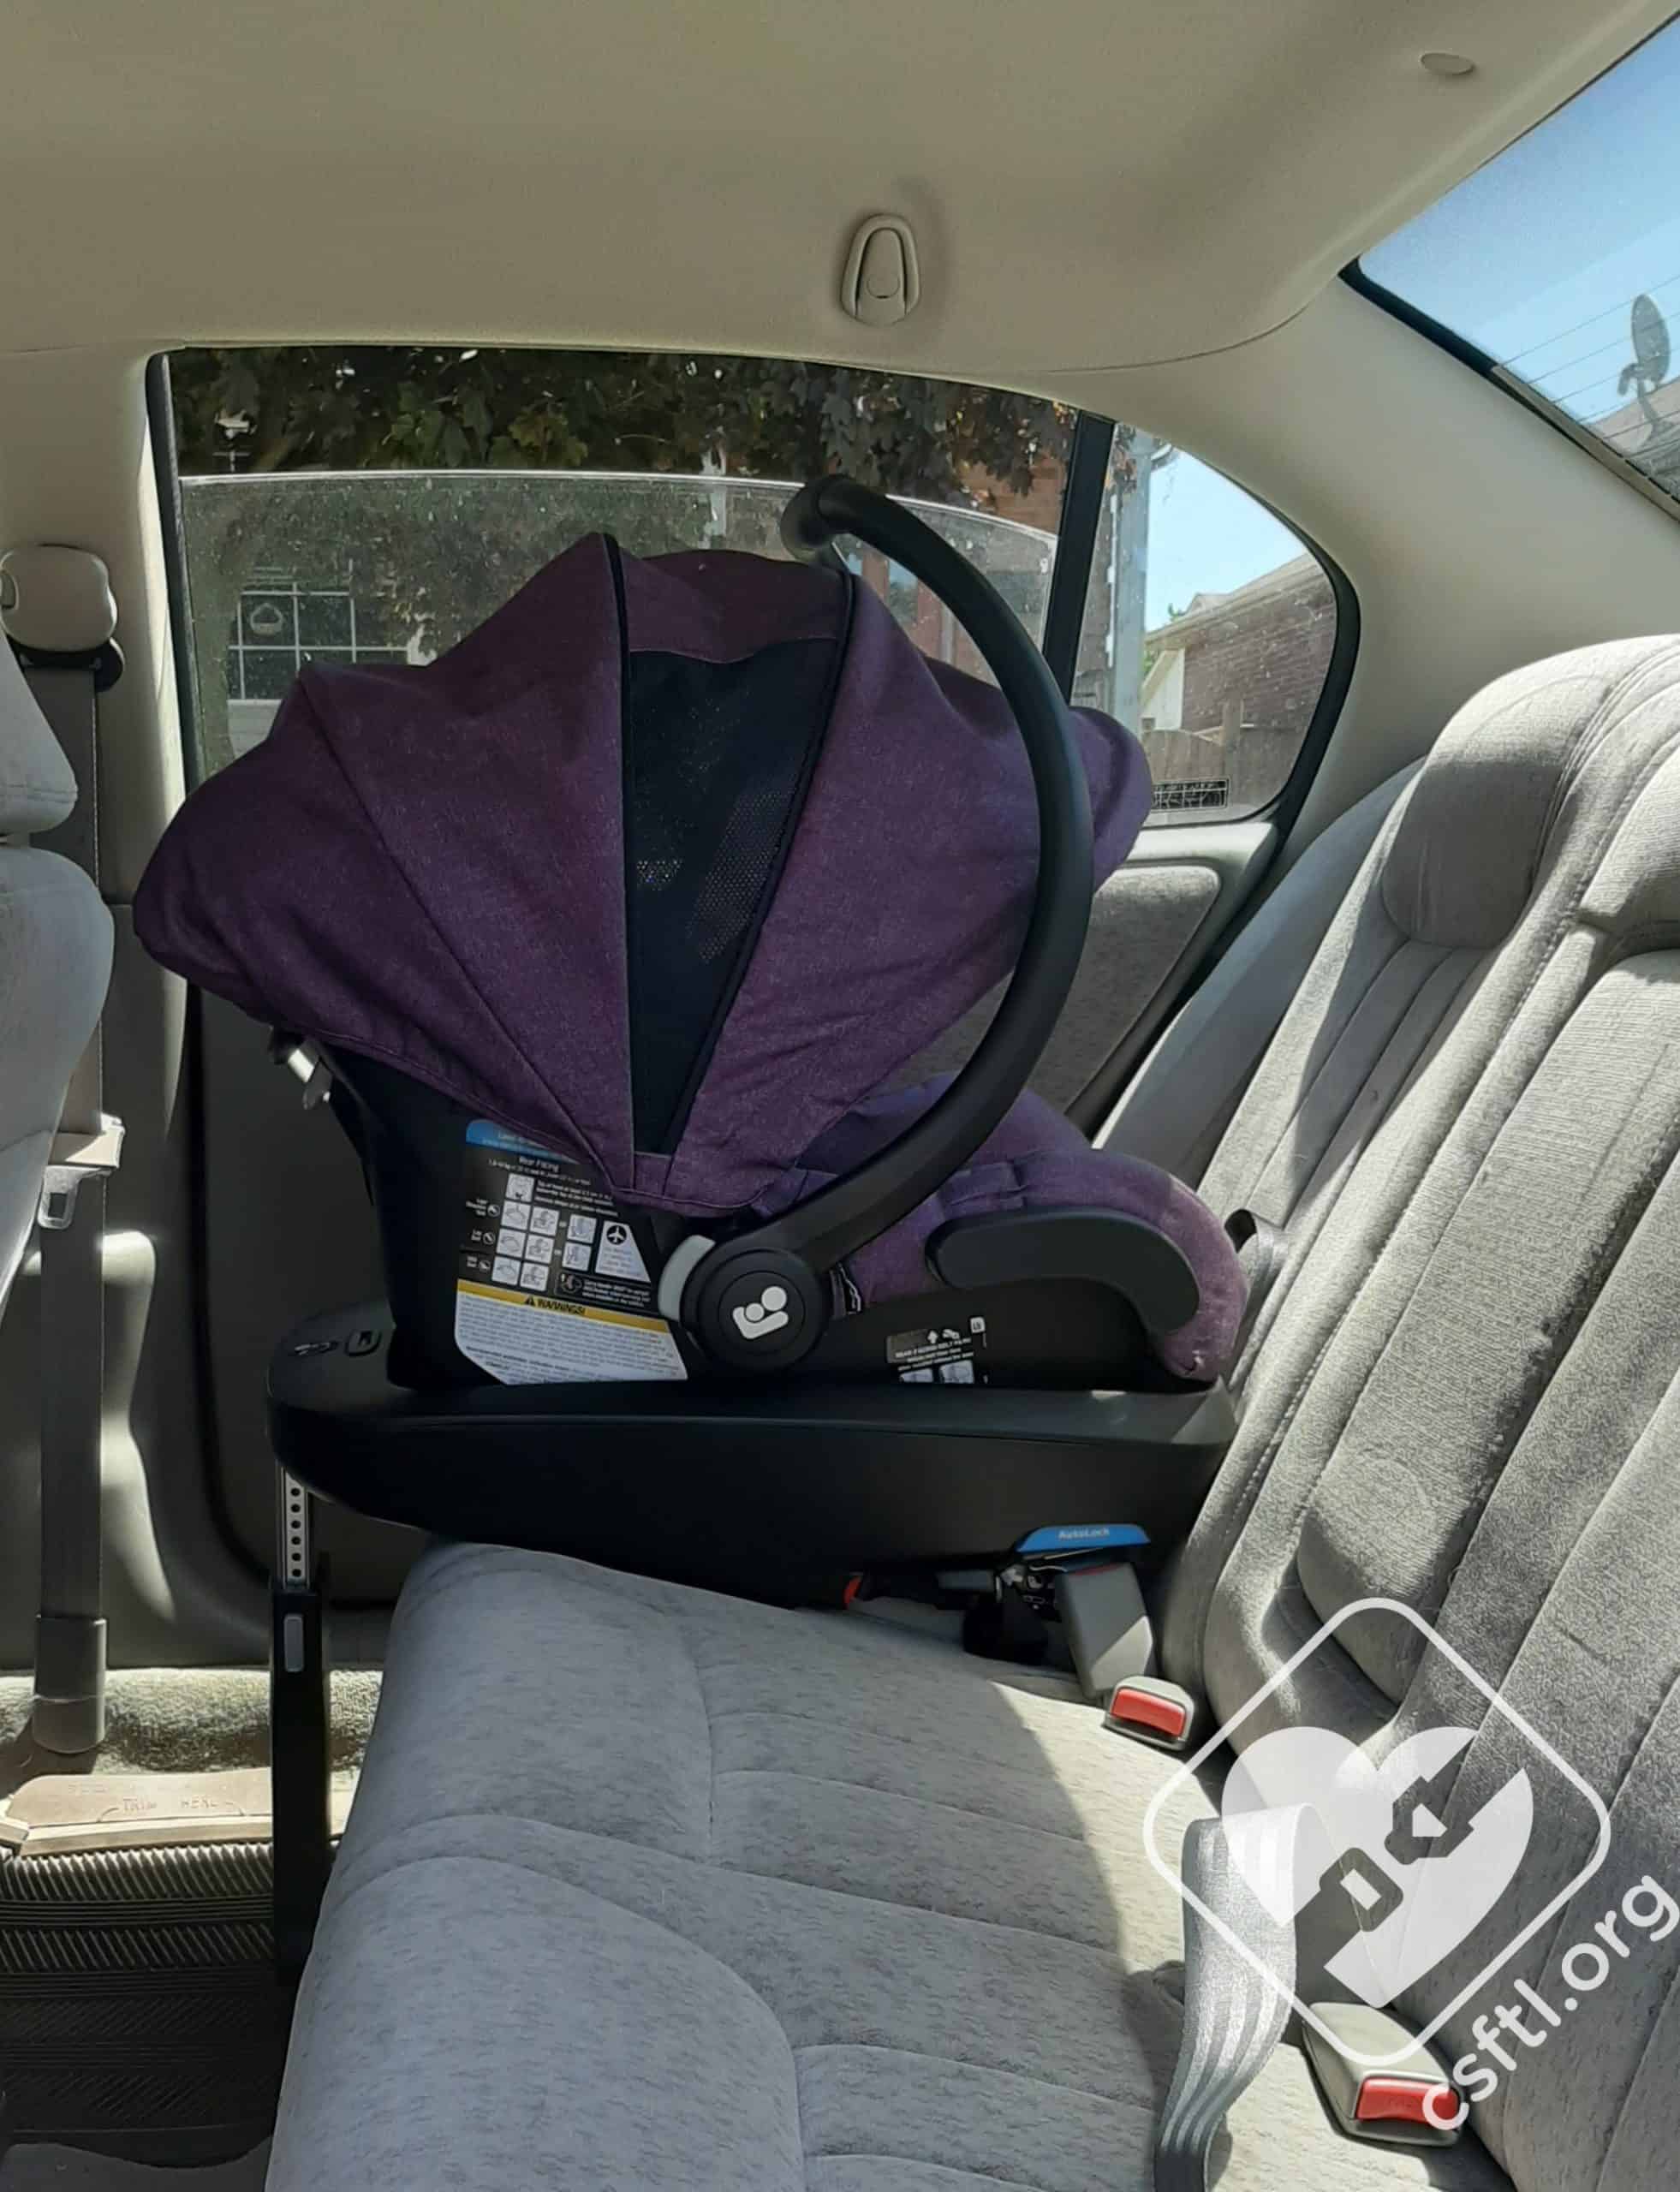
Maxi Cosi Mico Max Plus – 1998 Chevrolet Malibu
Despite the Chevrolet Malibu not being a large vehicle, the Mico Max Plus was able to be installed behind the passenger seat with only a small effect on the front seat space. An average adult should be able to sit in front of the Mico Max Plus fairly comfortably.
Important Information – Where to Find
Maxi Cosi Mico Max Plus Date of Manufacture and Expiration label
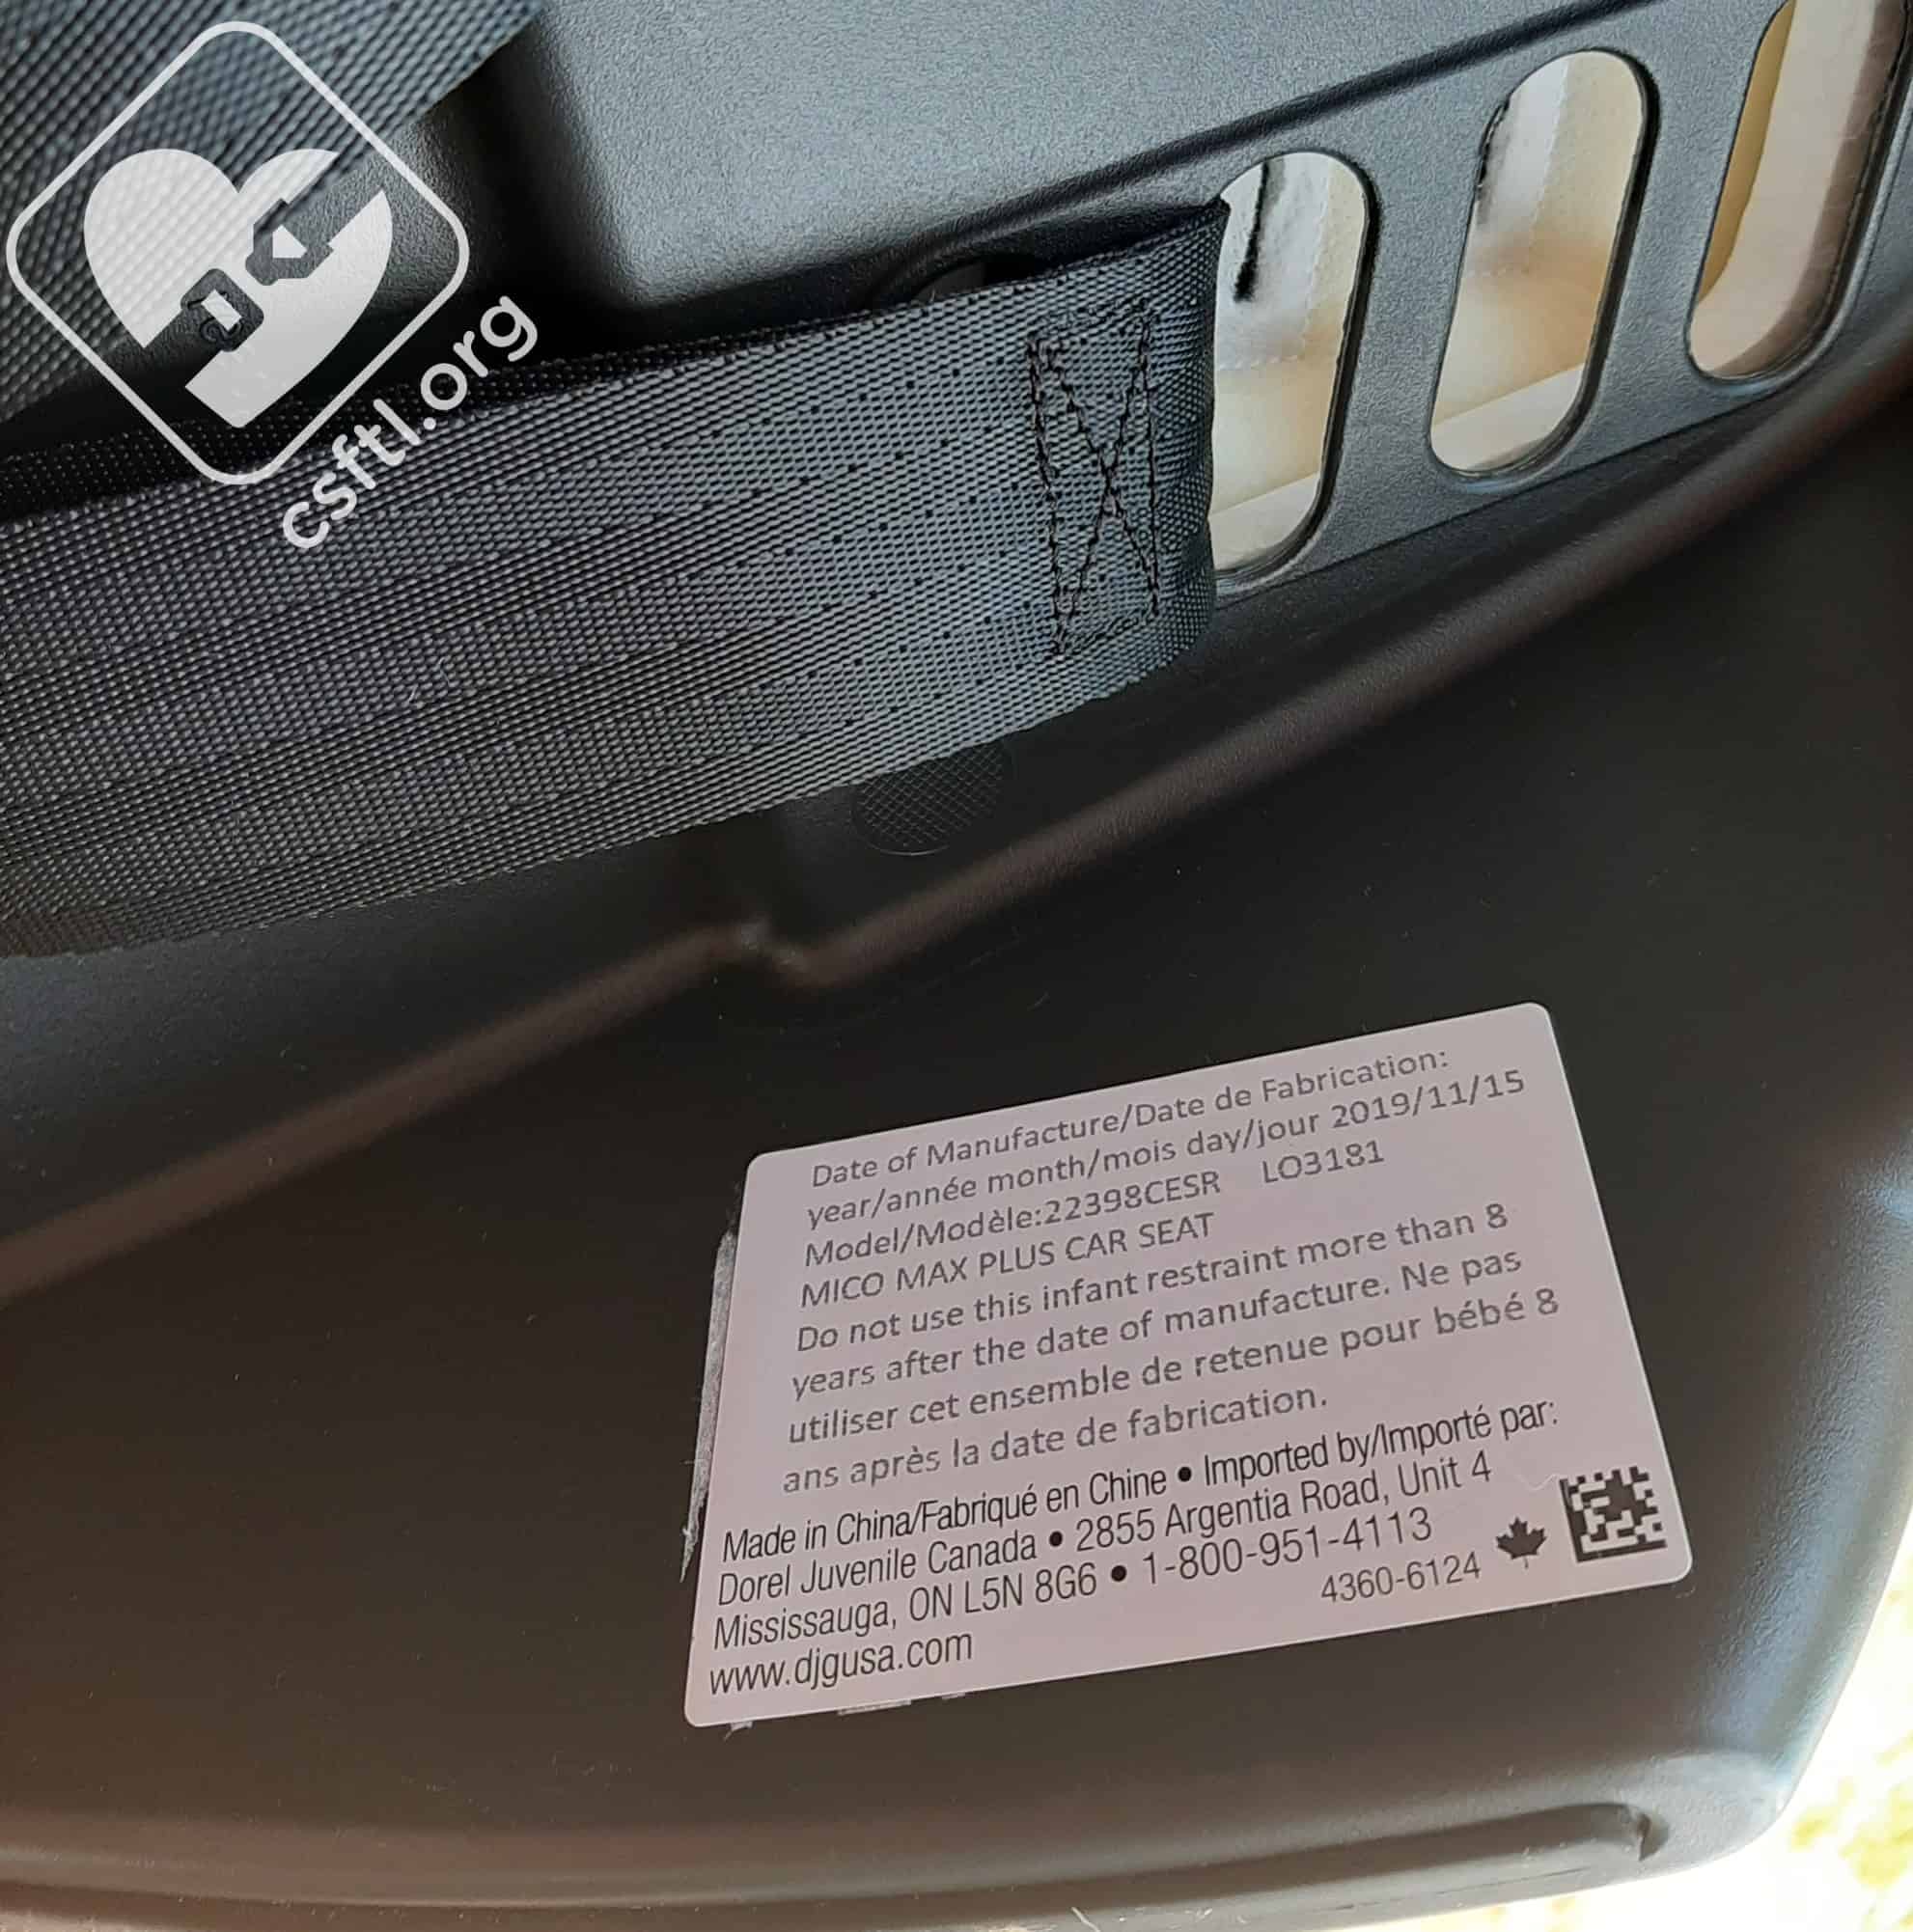
Manufacture Date and expiration: The date of manufacture label with the expiration date is located on the back (not bottom) of the carrier. The expiration is also located on page 74 of the manual.
Maxi Cosi Mico Max Plus National Safety Mark
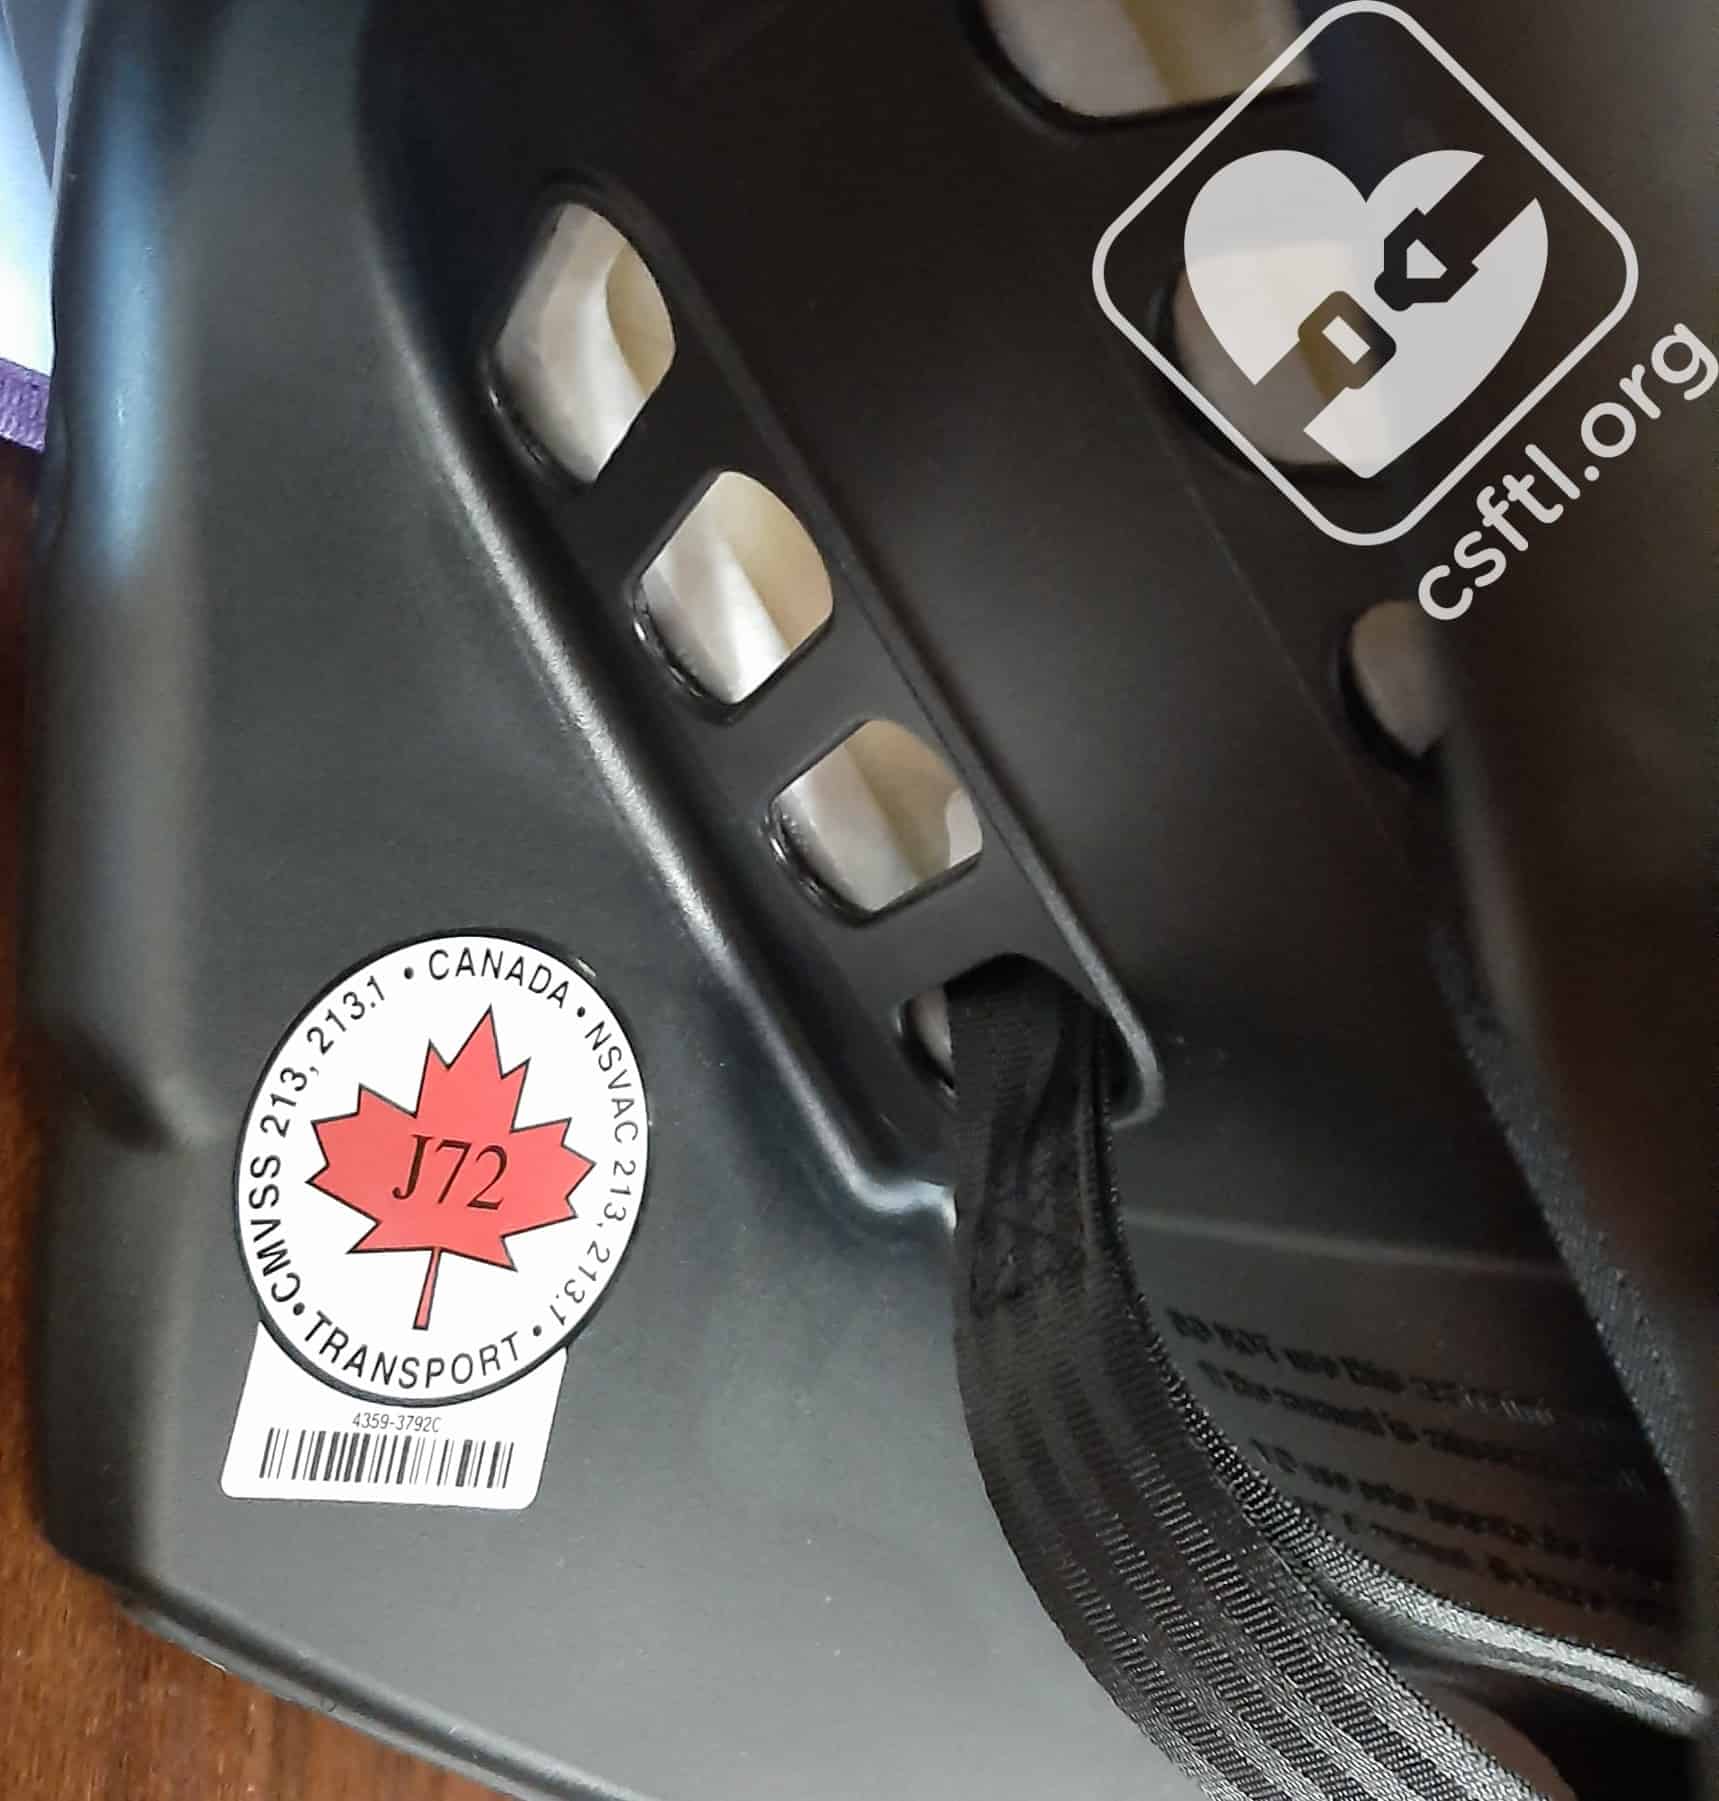
National Safety Mark: On Canadian versions of the Mico Max Plus, the National Safety mark is located on the side of the back of the carrier
Maxi Cosi Mico Max Plus FAA approval
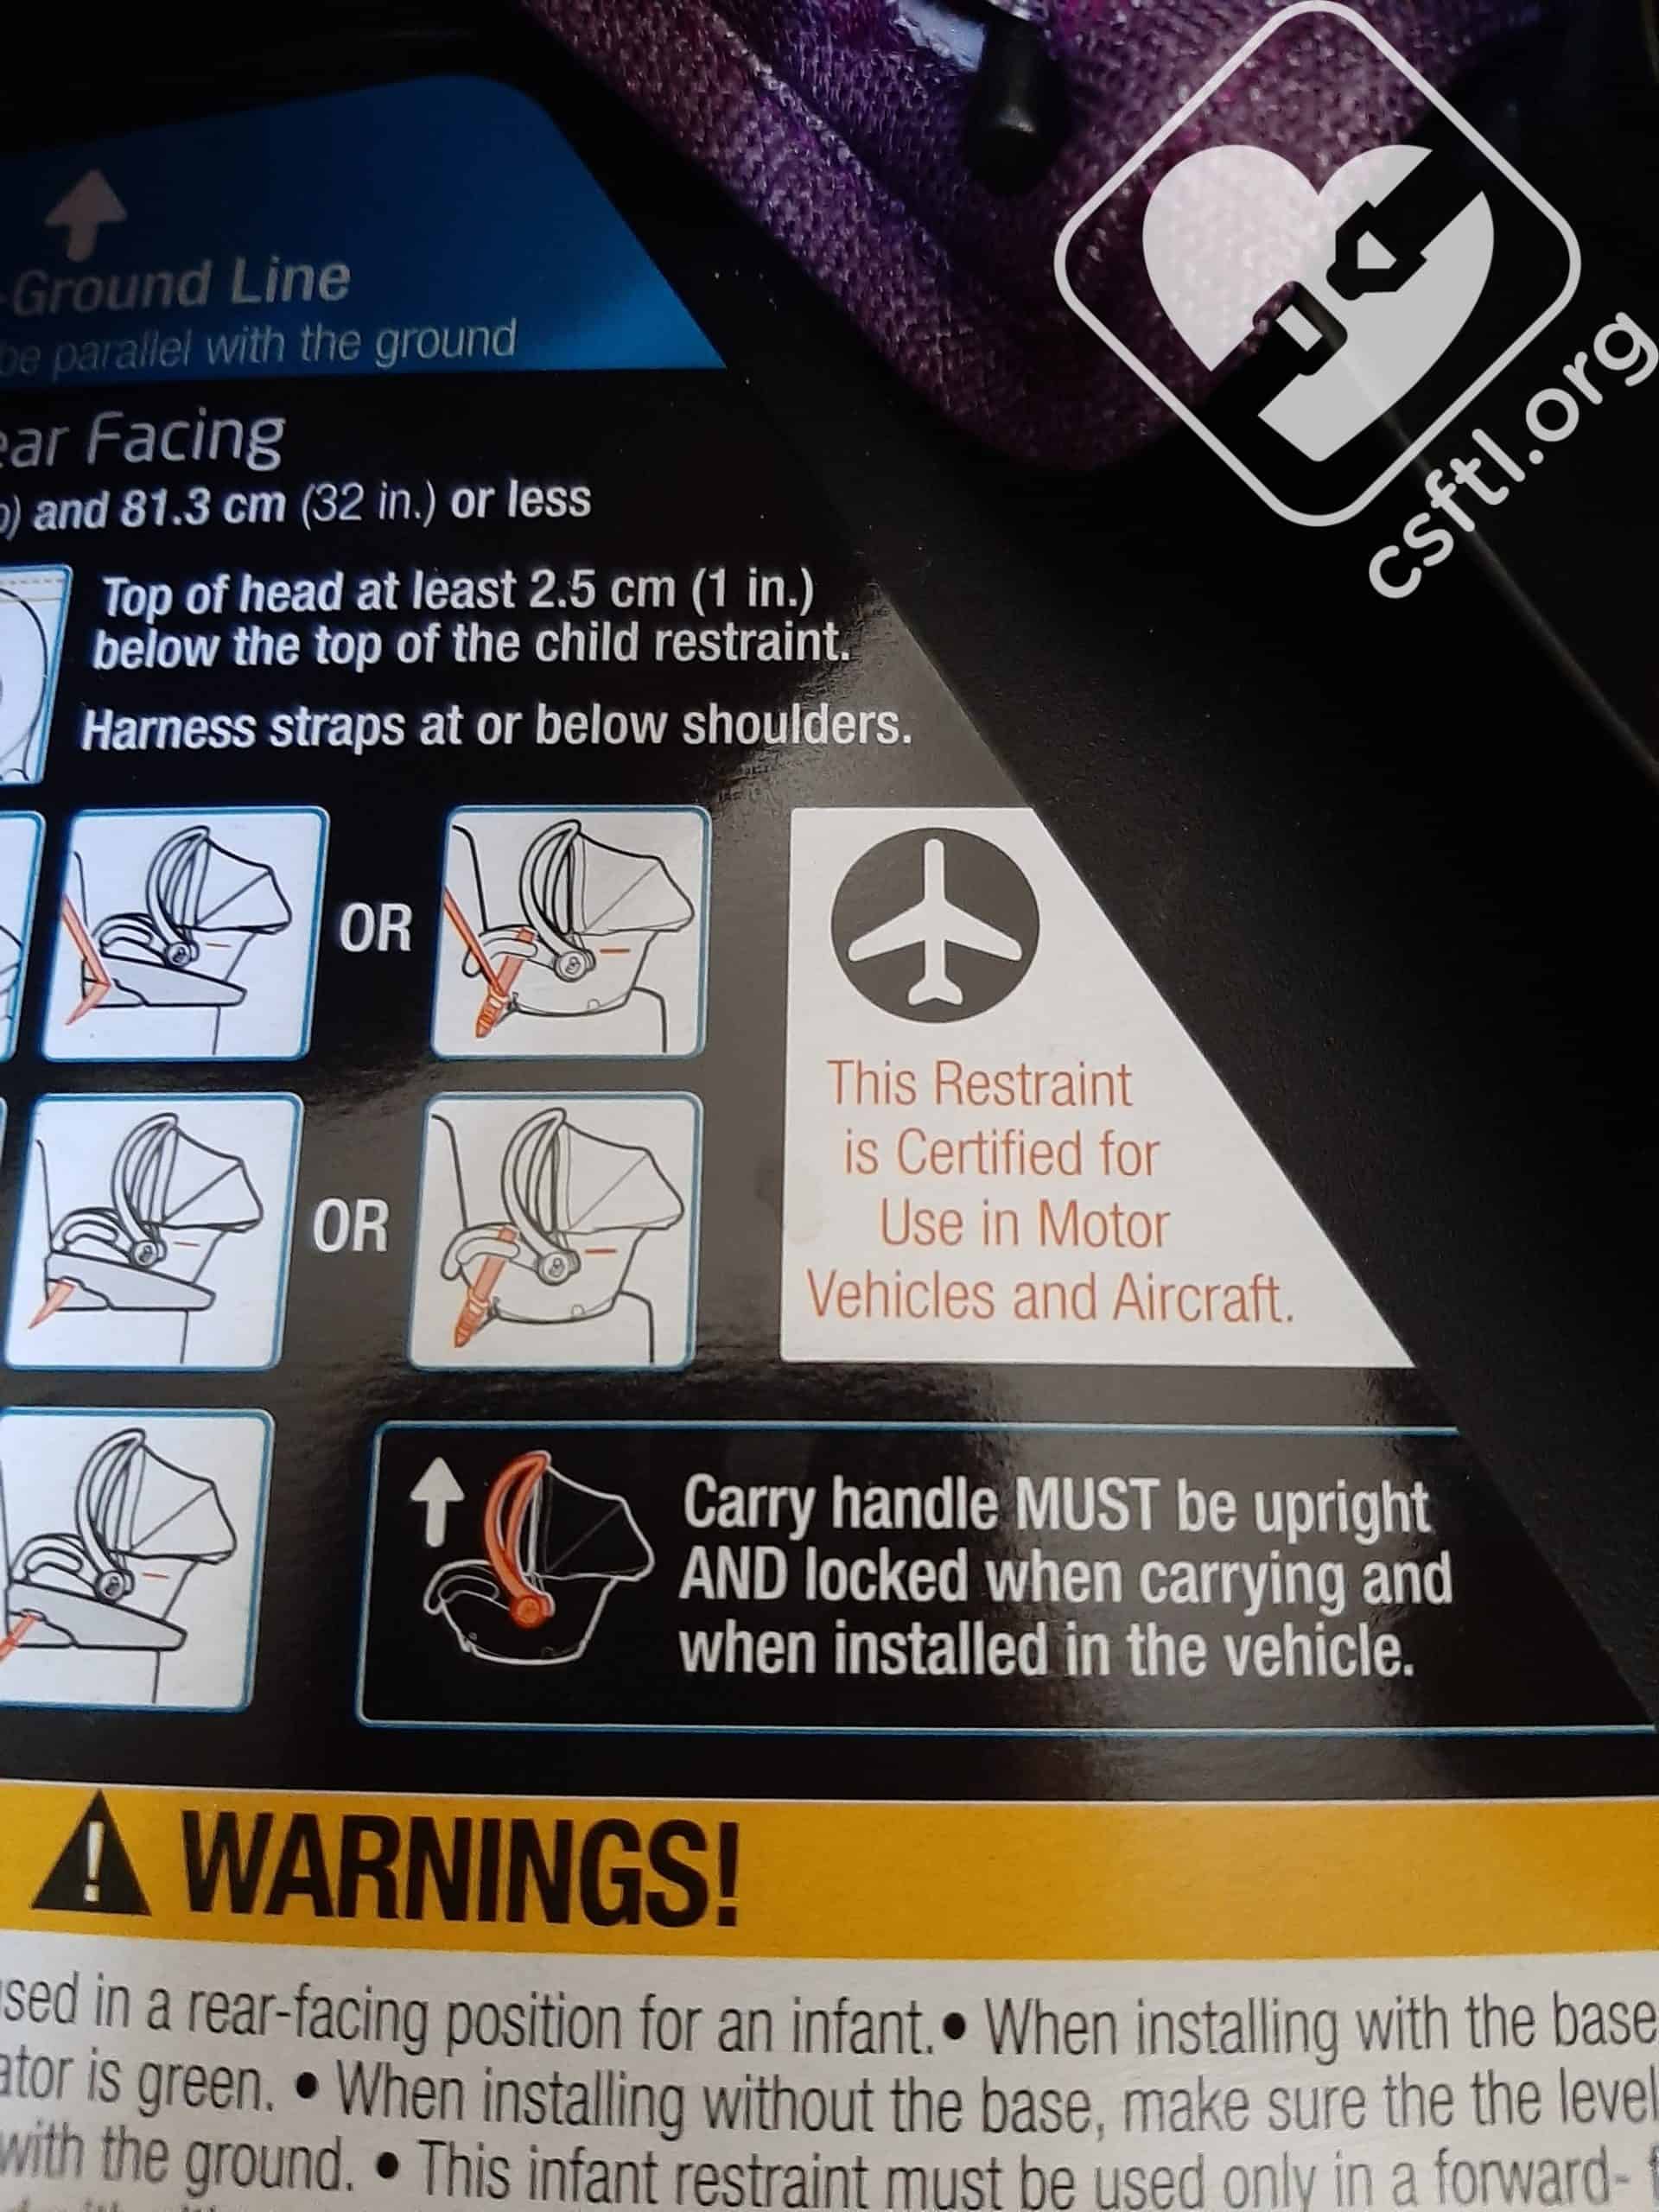
FAA approval: For Canadians, the National Safety Mark is the label you’re looking for to indicate that the seat is approved for airline use, but both the US and Canadian versions of the Mico Max Plus include a label on the side of the carrier showing that the seat is approved for airline use (without the base).
Maxi Cosi Mico Max Plus manual storage location
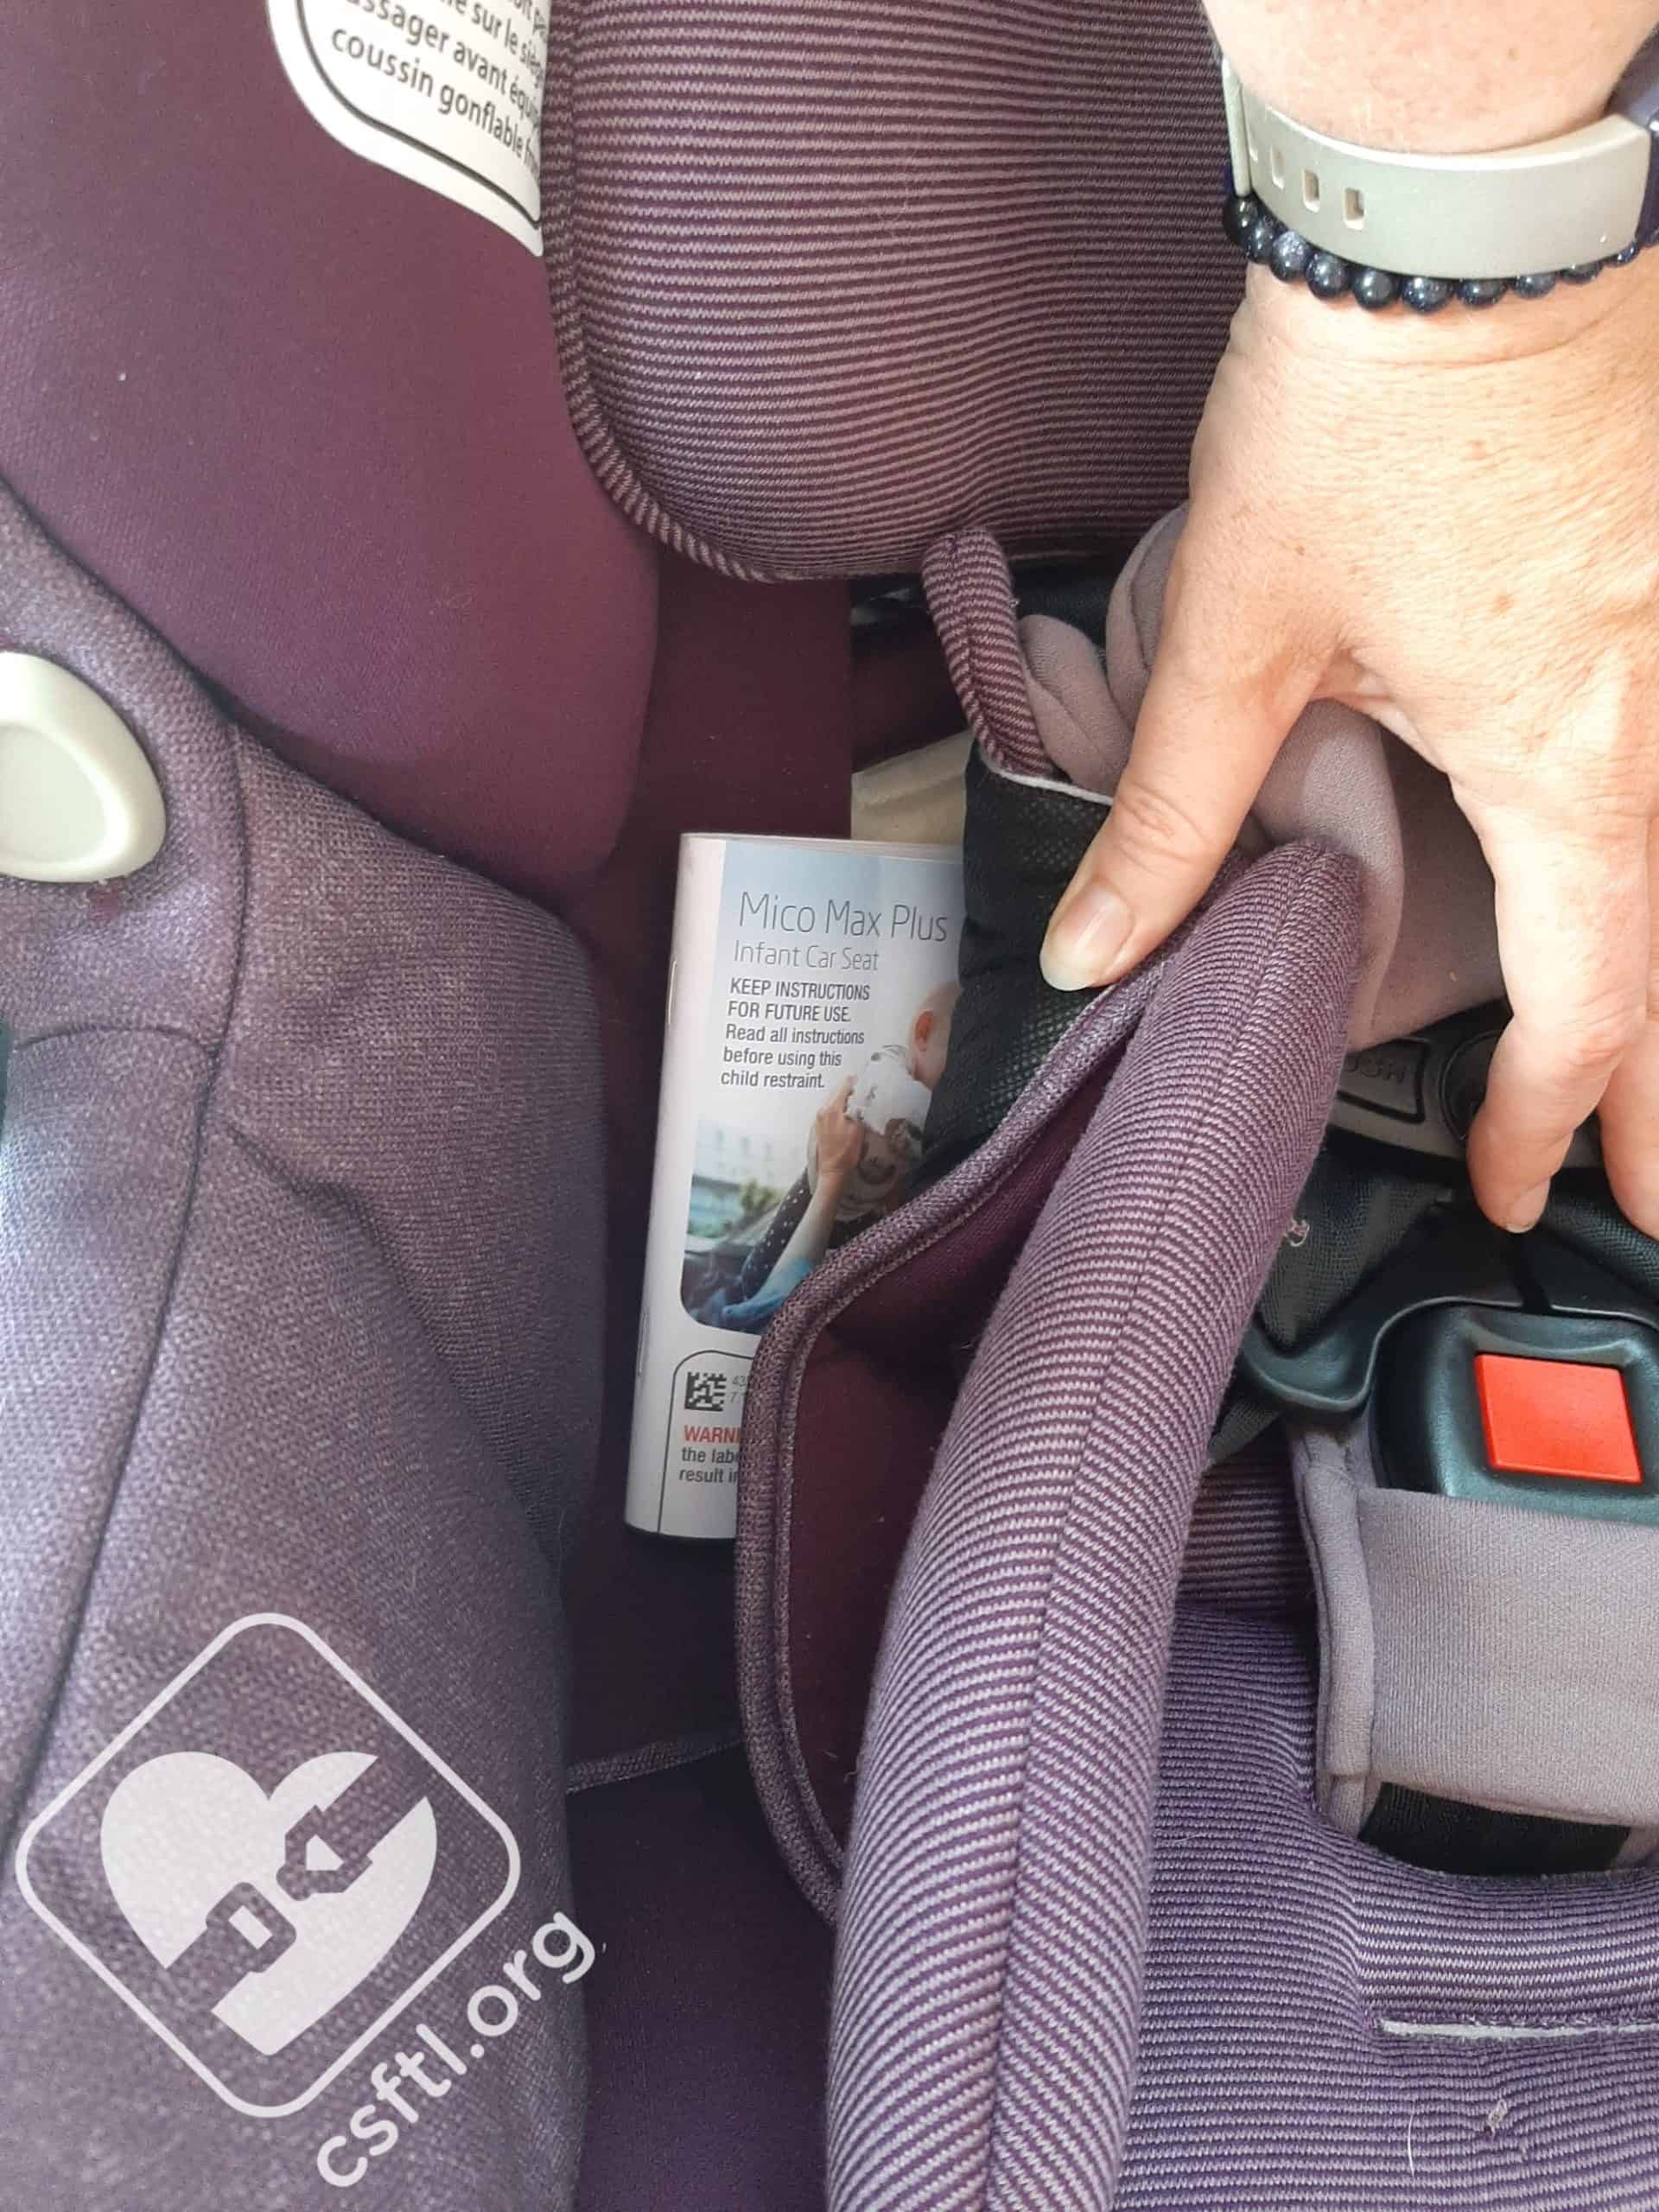
Manual Storage: The manual is a little unclear about where the manual should be stored. There is a tag on the left side of the cover indicating the manual storage position, and the manual itself indicates that the manual stores under the seat pad. We have assumed that means under there cover where we have shown in this photo.
Overall Thoughts
The Maxi-Cosi Mico has always provided a solid option in the world of rear facing only seats, and the Mico Max Plus is a welcome addition to the lineup. With the fun fashion covers, load leg, vehicle seat belt lock off, and a harness that fits preemies and newborns well, we don’t have many cons when it comes to this seat. The only con we can think to mention is that it’s a larger seat front to back, so it may not be a great option for tall drivers/passengers or small vehicles. But if you want a plush car seat with fun fashions and an easy installation, the Maxi-Cosi Mico Max Plus may just be the seat for your newborn!
Giveaway!
Read our terms and conditions, then enter below for your chance to win a Mico Max Plus. This giveaway is open to Canadian residents 18 and older (not eligible to residents of Quebec).