UPPAbaby’s Mesa rear facing only car seat is a mainstay in our world — in real life, I see so many of these seats during car seat checks. Since the Mesa was introduced, UPPAbaby has gone on to add the Mesa Max and the Mesa V2 to the lineup (I see a lot of those, too!). I’m beyond excited to introduce the very latest offering — the Aria. This well-featured, easy-to-use, lightweight carrier has a lot to offer caregivers of new babies.
CSFTL Quick Stats
- Weight range: 4-30 pounds
- Height range: 30 inches or less
- Expiration: 7 years from date of manufacture
- Rolled towels are not permitted around the child’s head
- Crotch rolls are not permitted
- Crash replacement: replace after any crash
Height range: this is a little long so it gets a separate section
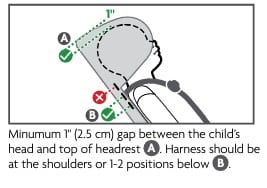
- The top of the child’s head should not be less than 1 inch (2.5 cm) from the top of the headrest structure.
- There must be a minimum 1 inch (2.5 cm) gap between the child’s head and the top of headrest (later referred to as the SIP Carriage)
- Specific rules: Harness should be at the shoulders or 1-2 positions below B.
Measurements
- Carrier weight: 7 pounds with all padding, covers, and the canopy attached. *Note: the manufacturer lists this weight as 6.8 pounds, their website lists it at 5.9 pounds. It’s not uncommon for our weights to be a little different, we weigh with all soft goods and the canopy attached.
- Base weight: 12 pounds
- Width at widest point: 17 inches
- Lowest harness position, with inserts: 6 inches
- Highest harness position, without inserts: 11 inches
- Front-to-back space, carrier only: 24 inches
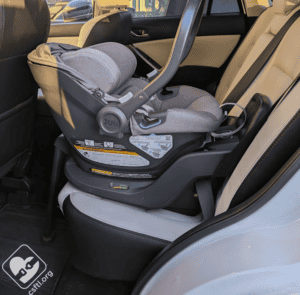
- Front-to-back space, carrier and base: 28 inches
Features/Requirements
- Mats are not permitted underneath the seat
- No rethread harness
- The Aria Carrier is compatible with the Mesa Max base
- Euro routing for painless baseless installations
- Automatically retracting lower anchor connectors
- XL canopy provides nearly full coverage over the child
- Retardant-free fabrics
- Robust infant inserts and head support for infants weighing between 4-9 pounds
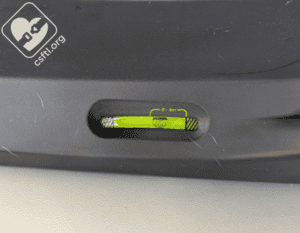
- SmartSecure system has a red-to-green visual indicator that clearly shows if the base is installed securely
- Recline angle indicator bubble with a clearly labeled section for infants up to 4 months old
Getting the Seat Ready for Use
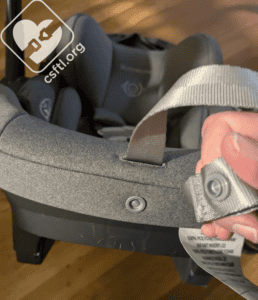
The seat emerges from the box with no assembly required. The main thing I wanted to note here (okay, it’s the entire reason I added this section) is that the harness adjuster snaps onto the seat’s cover. It is okay to remove this snap and equally okay to snap it back into place once your child is secure in the carrier.
Releasing the Carrier from the Base
When I’m teaching a newborn car seat class, I like to joke and be serious all at the same time. One of my jokes is that releasing the carrier from the base is the first parenting test for many new parents since it can be a little tricky, especially when they choose not to read the car seat manual first. The Aria’s release handle is pretty far down the back of the base. If you’re a brand new caregiver/user of car seats, this could be your only frame of reference so that may seem quite usual but for my seasoned self, it was a teeny bit surprising. If you don’t find the release handle right away, look a little lower on the carrier!
Infant Inserts
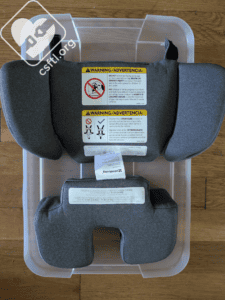
The Aria includes two separate inserts for smaller babies. The preemie cushion is used when the child weighs between 4-9 pounds. It’s not required for children that size, but it must be used with the back positioning insert. It goes underneath the child’s bottom and just tucks around the crotch buckle.
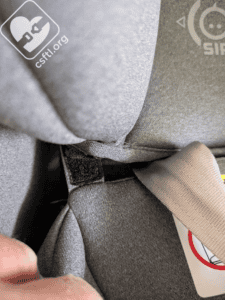
The back positioning insert must be attached to the carrier via two tabs on the back of the insert — these slide into the harness slots.
The back positioning insert can be used alone or with the preemie cushion. The manual recommends using this insert when the child is between 4 pounds and 4 months old. I realize that this range includes both a weight and an age, this set of mixed measurements could be a little confusing for some caregivers. In addition to those guidelines, the manual requires these conditions to be met before removing the (recommended but not required) inserts:
- Harness straps are at or slightly below the child’s shoulders
- Harness pads are optional. They must be removed when securing a preemie
- Chest clip must be at the child’s armpit level
- Child is not slouching and has good head and neck control
- The crotch buckle rests securely against the child with no gaps, and the child is not sitting on top of the buckle
- The harness can be properly tightened
- Perform the pinch test to ensure proper fit
Recline Angle Indicator
The manual instructs caregivers to always check the recline angle indicator on the base and adjust the recline bubble until it displays between the designated range indicated for the infant insert use.
The indicator includes a smaller range for babies between 0-4 months of age. This tiny print was oddly difficult to capture in a picture, I swear it’s pretty easy to see in person!
The recline angle indicator on the carrier is a red line on the outside. Make sure that’s level when installing the Aria without the base.
Adjusting the Recline Angle
The Aria’s base includes a pretty robust recline angle adjuster that we’d expect would accommodate a wide range of vehicle seat types. To adjust the base’s recline, lift the adjuster on the top of the base.
SIP Carriage
The manual refers to a SIP Carriage several times but doesn’t define it or explicitly show it in the parts diagram at the front. In that diagram, it’s just called the Side Impact Protection (SIP). We’d prefer to see this called the SIP Carriage in the diagram so it’s quite clear exactly what this is. We’d consider the SIP Carriage the headrest so we’ll refer to it that way from here on out.
I will say that the headrest is quite large, we suspect that’s because of an impending change to the FMVSS 213 A and B standards, requiring additional side impact protection on all car seats.
Front-to-Back Space
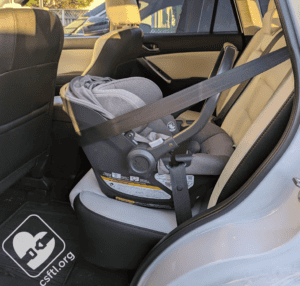
Families who have tiny vehicles may not be thrilled with the Aria. With the carrier clicked into the base, the seat measures roughly 28 inches front to back. That’s not an issue in many cars but I wanted to point it out since it could make the difference in those really tiny cars. Alternatively, the carrier itself is quite small front to back, I measured it at roughly 23 inches. So, families with tiny vehicles who really want that lightweight awesomeness of the Aria’s carrier could have that awesomeness by installing the carrier without the base.
Handle Position
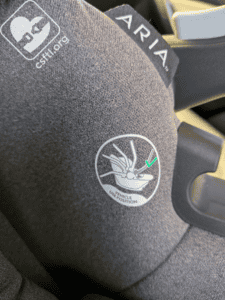
Anytime the Aria is in use in the vehicle with an actual child in the seat, the handle position must be in the 5th rebound position. That’s the position closest to the child’s feet. There’s a diagram on the cover reminding caregivers about this requirement.
Installation with the Base
Lower Anchor Connectors
One of my favorite features of UPPAbaby rear facing only car seats is the self-ratcheting lower anchors. I’m a big fan of those connectors and that base so I was pleased to see that it’s part of the Aria as well. These are slightly different because the release button is on the side of the base instead of on top. I found this change a huge win — I was able to hold the button down to keep the connector extended while I was attaching each of them to the lower anchors in my vehicle.
These lower anchor connectors have one mission in life — to retract themselves back into the base. That makes keeping them outside of the base while you’re attaching them a bit tricky but that trickiness is absolutely worth it when the base installs in about two seconds without a lot of fanfare.
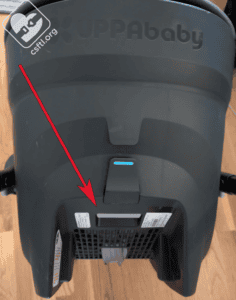
To install the Aria’s base flip the base over and press the lever on the bottom to release the load leg, if your vehicle is compatible with using it. I forgot this step every time I installed the base so I figured I’d say it first and prevent you from having that particular struggle. Set the base on the vehicle seat, then make sure the recline angle indicator is in the correct position for your child. Press the button in the belt path to release the lower anchor connector. Pull the connector out from the base and attach it to the lower anchor in your vehicle. It will do everything it can to tighten itself at this point. Turn your attention to the other side and repeat the process. Once both connectors are attached, stand above the base (note: you’re not kneeling or climbing into the base, just a hand on each side of the belt path) and press each side of the base into the vehicle seat until the tension indicator on the top of the base turns green. When it’s green, the base should move no more than an inch at the belt path and you’re ready to go!
Vehicle Seat Belt
To install the base with the vehicle seat belt, make sure the recline angle indicator is in the correct position for your child, then open the lockoff on the base. Thread the seat belt through the belt path and buckle it in. Pull the shoulder portion of the belt tight while applying downward pressure on the base.
Once the belt is tight, close the lockoff. If the tension indicator is green, the base should move no more than an inch at the belt path and you’re ready to go. The base includes a very nice lockoff, it’s so well-designed that I was able to close it with one hand!
Waterfall Seat Bight
If the vehicle seat has a waterfall seat bight (that’s the wedge of material where the vehicle seat cushion and seat back meet) and the base isn’t fully flush with the vehicle seat back, the manual permits the use of a rolled towel to fill that space.
Installation without the Base
The Aria has some rather lovely, easy-to-find and use belt guides for baseless installation. It also has optional Euro routing (the little clip on the back, you thread the shoulder portion of the vehicle seat belt around the back of the carrier and through that clip). I had no trouble at all installing it without the base, those belt guides made the process quite easy. Because the Aria’s carrier is so compact, the Euro routing installation didn’t actually use all of my seat belt so I had to pull the belt all the way out, then feed the remaining slack back into the retractor.
Fit to Child
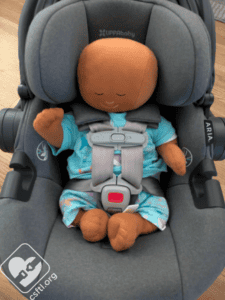
Preemie Doll
With Inserts
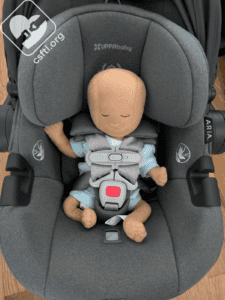
Our preemie Huggable Images doll weighs 4 pounds and is 17 inches long. The preemie cushion is recommended when the child weighs between 4-9 pounds so we just had the doll model with both inserts in the seat.
With the inserts in, the seat fit our doll so well! If you find yourself needing to transport a kiddo who weighs 4 pounds, the Aria would be an excellent option.
Without Inserts
Since the inserts are recommended for children who weigh between 4-9 pounds, it seemed prudent to have our preemie doll model the seat without them,
This was less successful than having the inserts in use, even with the harness at its smallest setting, it was still a bit loose on our doll.
We would absolutely expect this — those inserts are designed to fit the tiniest passengers well and the Aria’s deliver on that 100%. We’d encourage caregivers to try both options for their kiddos before heading out for a ride.
Newborn Doll
With Inserts
Weighing in at 7 pounds, our 17 inch long newborn doll is within the recommended weight range for the preemie cushion so we asked our doll to model the Aria both with and without the inserts.
With both inserts in the seat, our doll fit reasonably well but possibly seems a bit uncomfortable. Granted, this is a doll and not a human so uncomfortable is relative here.
Without Inserts
So, we tried the seat without the inserts and I swear, our doll looks a bit happier. Both options worked well for our doll, we’d encourage caregivers to try both options for their kiddos, especially as they approach the 9 pound mark.
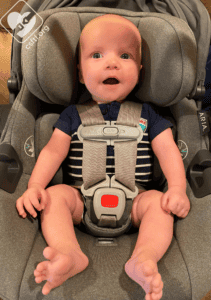
2 Month Old Tiny Person
This adorable model is the newest member of the CSFTL team! He weighs 11 pounds and is 24 inches long. The Aria fits him so well and his parents report that using the seat is pretty darn easy — they’re especially fond of the easy-to-install ratcheting lower anchors.
Here are some additional thoughts from his family:
- It’s so easy to carry and feels really lightweight compared to the seat we’d been using!
- Putting the handle into the correct position for use in the vehicle isn’t always easy to remember. I appreciate the reminder ON the seat.
- The recline foot gives a nice wide range. It’s the only install that I have done in my newer Camry that didn’t require a towel for newborn recline.
- The canopy is fantastic! It’s not too thick of fabric and virtually covers all of baby. Having so many setting/opening options on it is great.
- Only one crotch buckle setting makes use easier. It seems like it’s in a really great spot to not get too tight over time and fits great now with the buckle pad.
- I like how the harness adjuster is completely covered. No chance of stuff getting up in there. But it is different than the seat we’d been using, it threw my husband off for a minute.
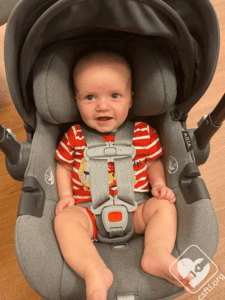
4 Month Old Tiny Person
Our model is on the grow! He’s now 4 months old and weighs 15.5 pounds, he’s 26 inches long. The seat still fits him quite well and he’s got room to keep on growing. Many thanks to his family for continuing to share his progress in this seat!
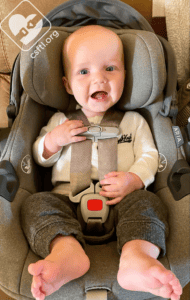
6 Month Old Tiny Person
Our model continues to grow! Now he’s 6 months old and weighs 17 pounds. He’s now 27 inches tall. The Aria still fits him well but the top of his head is getting close to the top of the headrest structure so he may not have a lot of room to grow left in this seat.
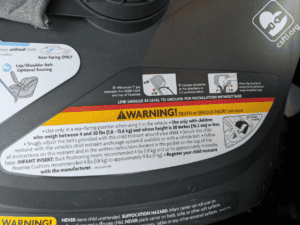
Important Information: Where to Find
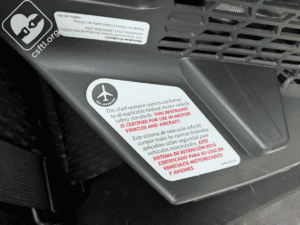
FAA approval label: the carrier is approved for use on airplanes. The manual includes some guidelines for airplane use:
- Notify the airline ahead of time that you’ll be traveling with a child restraint and ask about their specific policies for using a child restraint system on board their aircraft.
- Install this carrier in a window seat to avoid blocking the aisle.
- Ask for a seat belt extender if the lap belt is too short. • Use only on a forward-facing aircraft seat.
- DO NOT use this restraint if a secure installation cannot be achieved.
- Place carry handle in the most forward locked position (child’s foot end) for use in the aircraft as long as it doesn’t interfere with the back of the seat in front of the carrier.
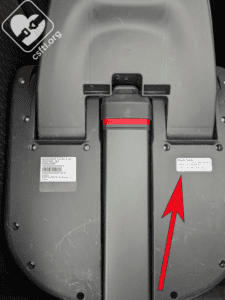
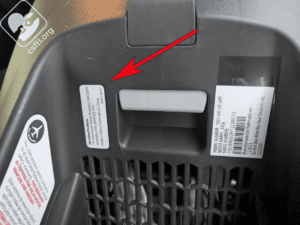
Date of manufacture label: the Aria expires 7 years after the date of manufacture. The labels are on the bottom of the carrier and on the bottom of the base.
Here’s the label on the bottom of the carrier. If you purchased an additional base separately, it’s quite likely to have a different date than the one on your base.
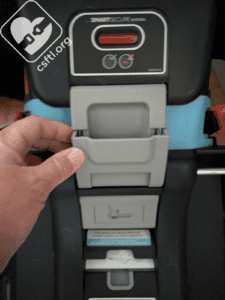
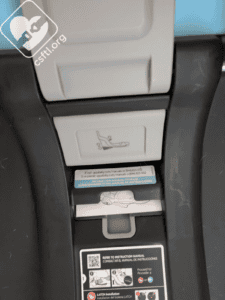
Manual storage: the manual stores in a handy, easy-to-see-and-access compartment on the top of the base. In a world where many manuals are stored in far less obvious places, the Aria chalks up another win with this design.
Overall Thoughts
The Aria delivers in every area we tested, from installation to use and everything in between. It’s easy to install with lower anchors, seat belt, or without the base. It fits our smallest models well and offers a terrific preemie fit with the optional inserts. The carrier is among the lightest weight carriers on the market today. It’s also lower-priced than some similar seats, so if your family is considering the Aria, we’d suggest that it’s worth a closer look.


