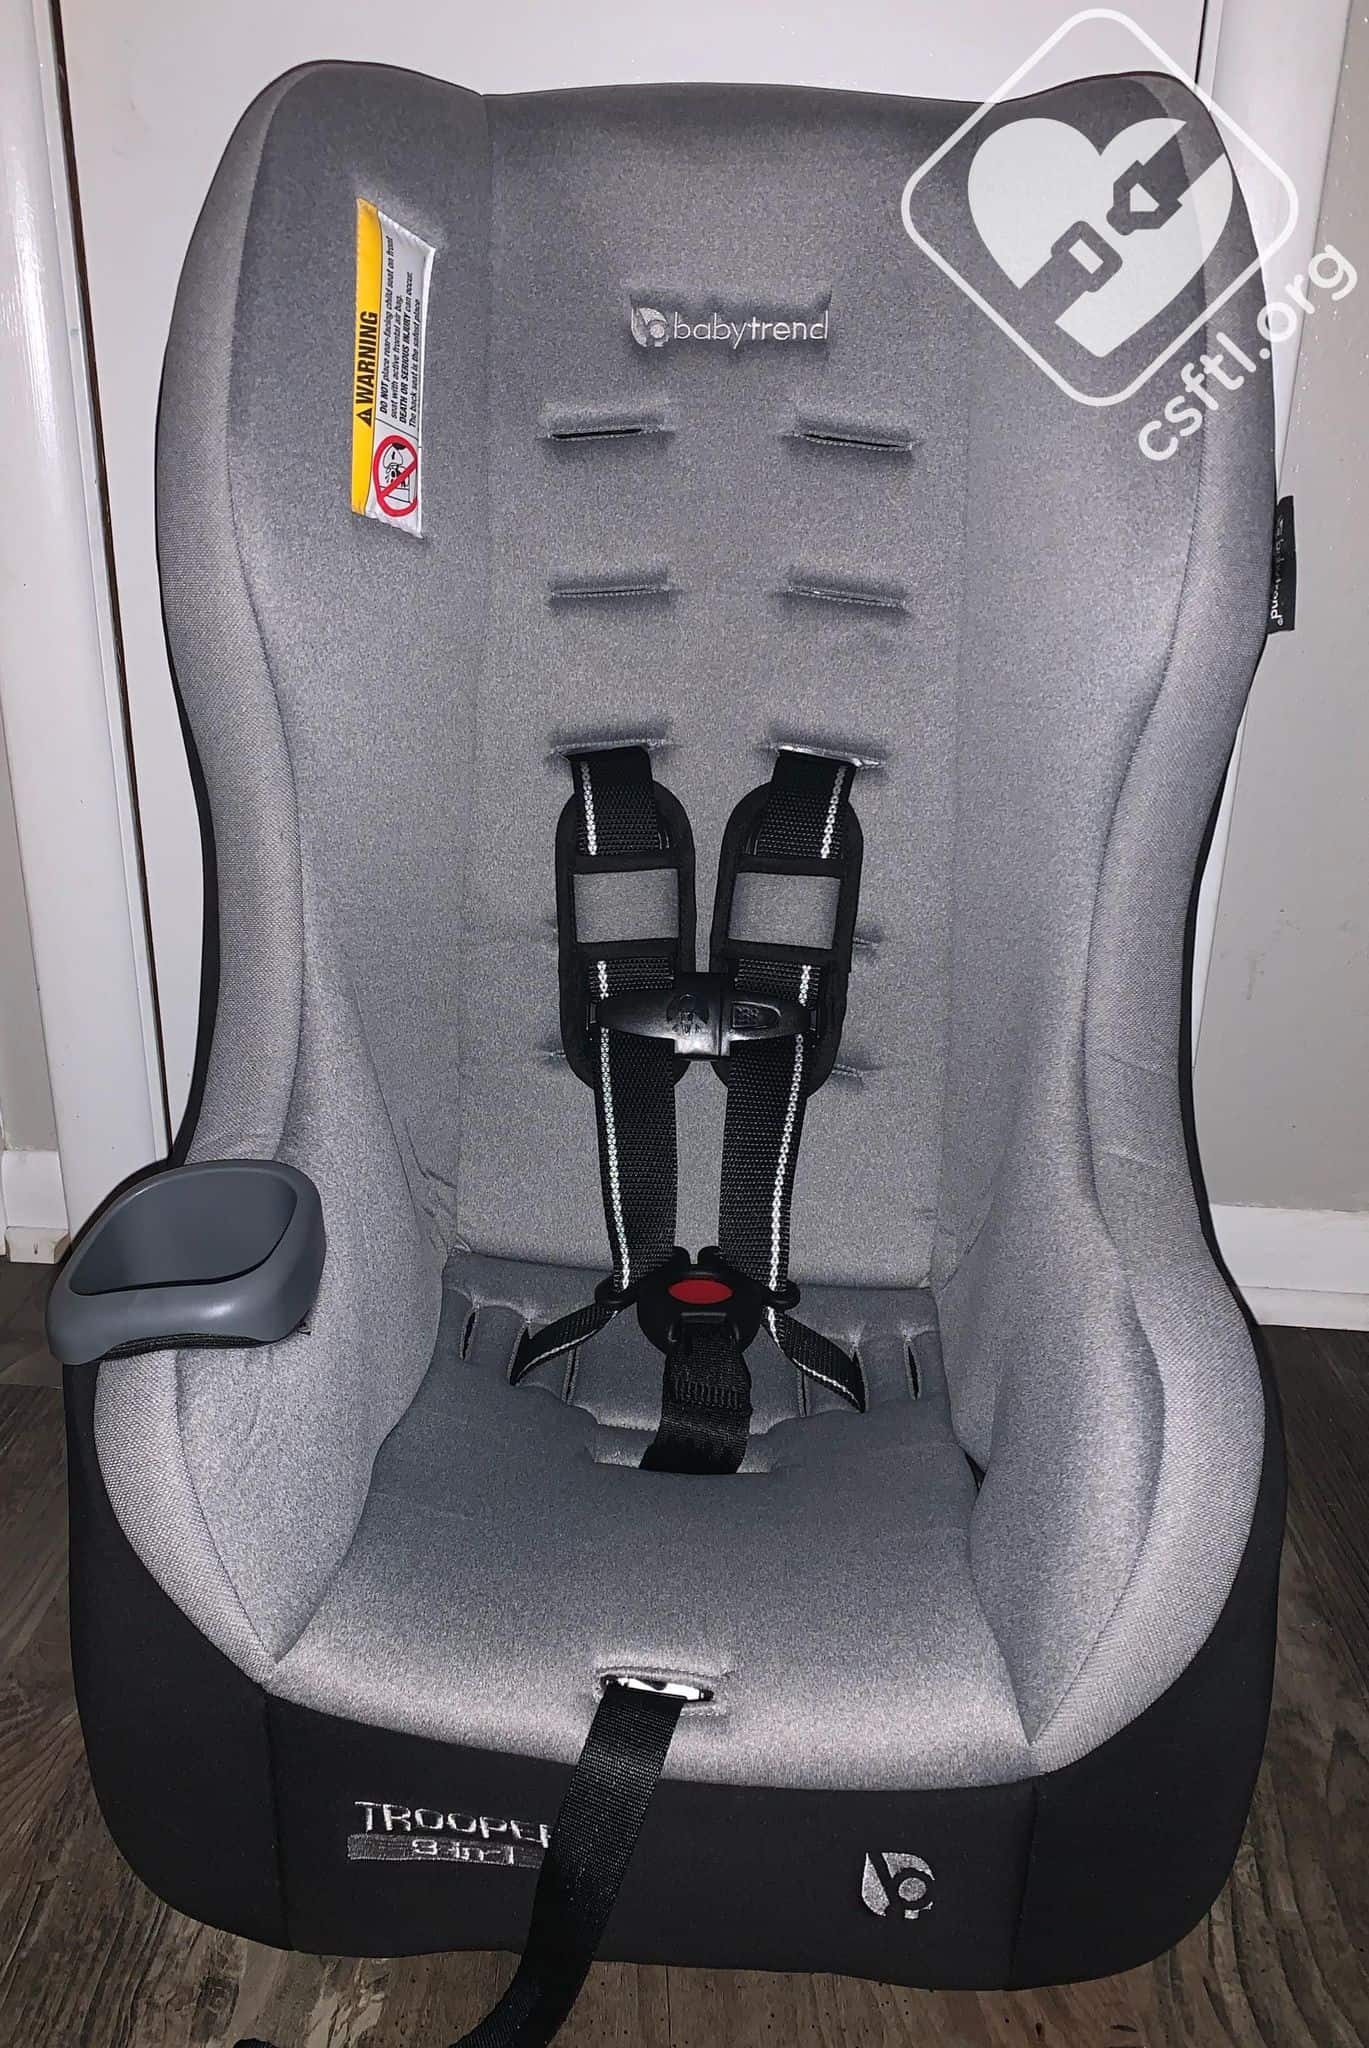
Baby Trend Trooper
Baby Trend is a well-known brand that appeals to many caregivers who are looking for a reasonably-priced option to keep their children safe. We’ve reviewed a few of their seats and are pleased to have become well acquainted with the newest member of the Baby Trend family: the Trooper convertible car seat. The Trooper is narrow, fits small newborns well, and comes in at under $100. Since a narrow, budget-friendly seat is kind of the Holy Grail, we were eager to see how the Trooper works in tight spaces.
CSFTL Quick Stats
- Rear facing weight range: 4-40 pounds
- Rear facing height range: Until the child’s head is 1 inch below the top of the seatback. Note that no minimum height is listed, the manufacturer has confirmed that is correct.
- Forward facing weight range: 23-65 pounds
- Forward facing height range: 50 inches
- Lowest harness position: 4.5 inches with insert
- Highest harness position: 16.5 inches
- Crotch buckle positions: 4 and 5.5 inches from the back of the seat
- Expiration: December of the 7th year after the date of manufacture
- Lower anchor weight limit: 55 pounds
- Seat weight: 10 pounds
- Width at widest point (with cup holder attached and top of seat at the shoulders): 17.5 inches
- Infant padding can be used when the child weighs between 4-18 pounds
Features
- Infant padding for children who weigh between 4-18 pounds
- Head pillow for rear or forward facing
- Adjustable crotch buckle
- Cup holder
- Narrow width makes it a nice option for 3 car seats across
- Harness webbing twist indicator stripe
- Low birthweight harness routing
The Baby Trend Trooper came out of the box fully assembled. As a parent and caregiver, that is a nice way to start the installation process. This means there are fewer parts to lose, forget to use, or misuse.
The Trooper is labeled as a “3 in 1” car seat. This does not mean what we expected it would mean — that the seat has three modes of use such as rear facing, forward facing, and booster mode. For the Trooper, “3 in 1” means that there are two recline angles for rear facing mode and one recline angle for forward facing mode.
Unique Features
Narrow/Three Across
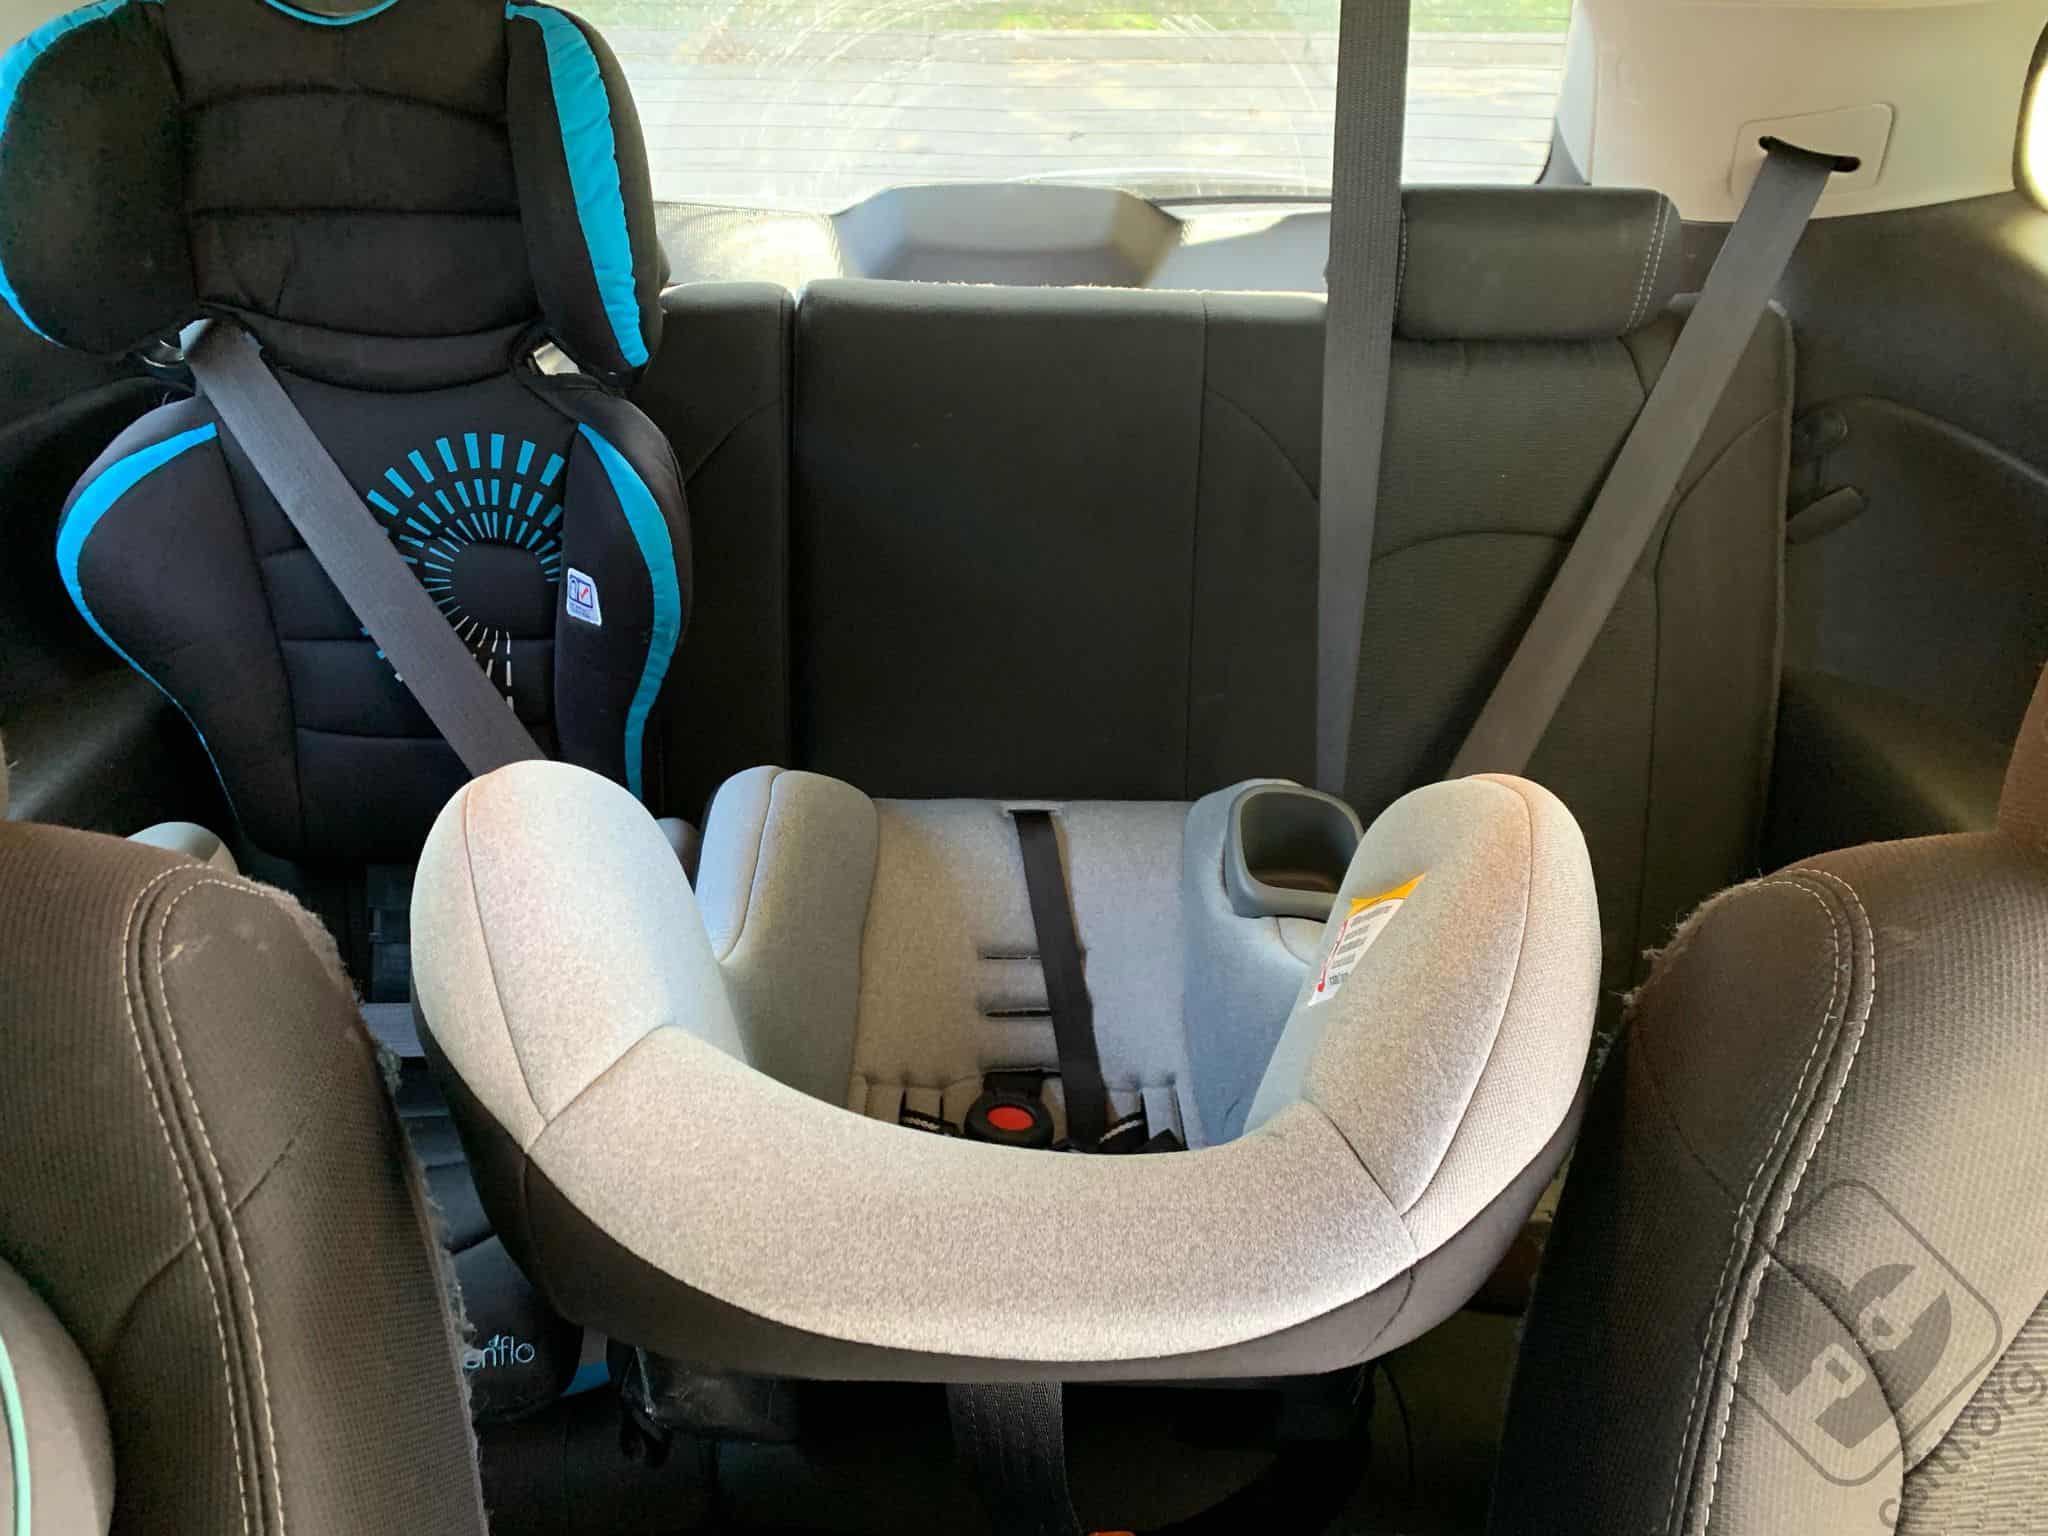
Three across with an Evenflo Amp, Baby Trend Trooper, and Graco Rightguide
I was giddy when I realized how truly narrow the Trooper is! One of my vehicles is a 2014 Chevy Traverse and the 3rd row is no cakewalk for seating three across. I was easily able to have three passengers across one row with an Evenflo Amp booster seat, the Baby Trend Trooper, and a Graco RightGuide.
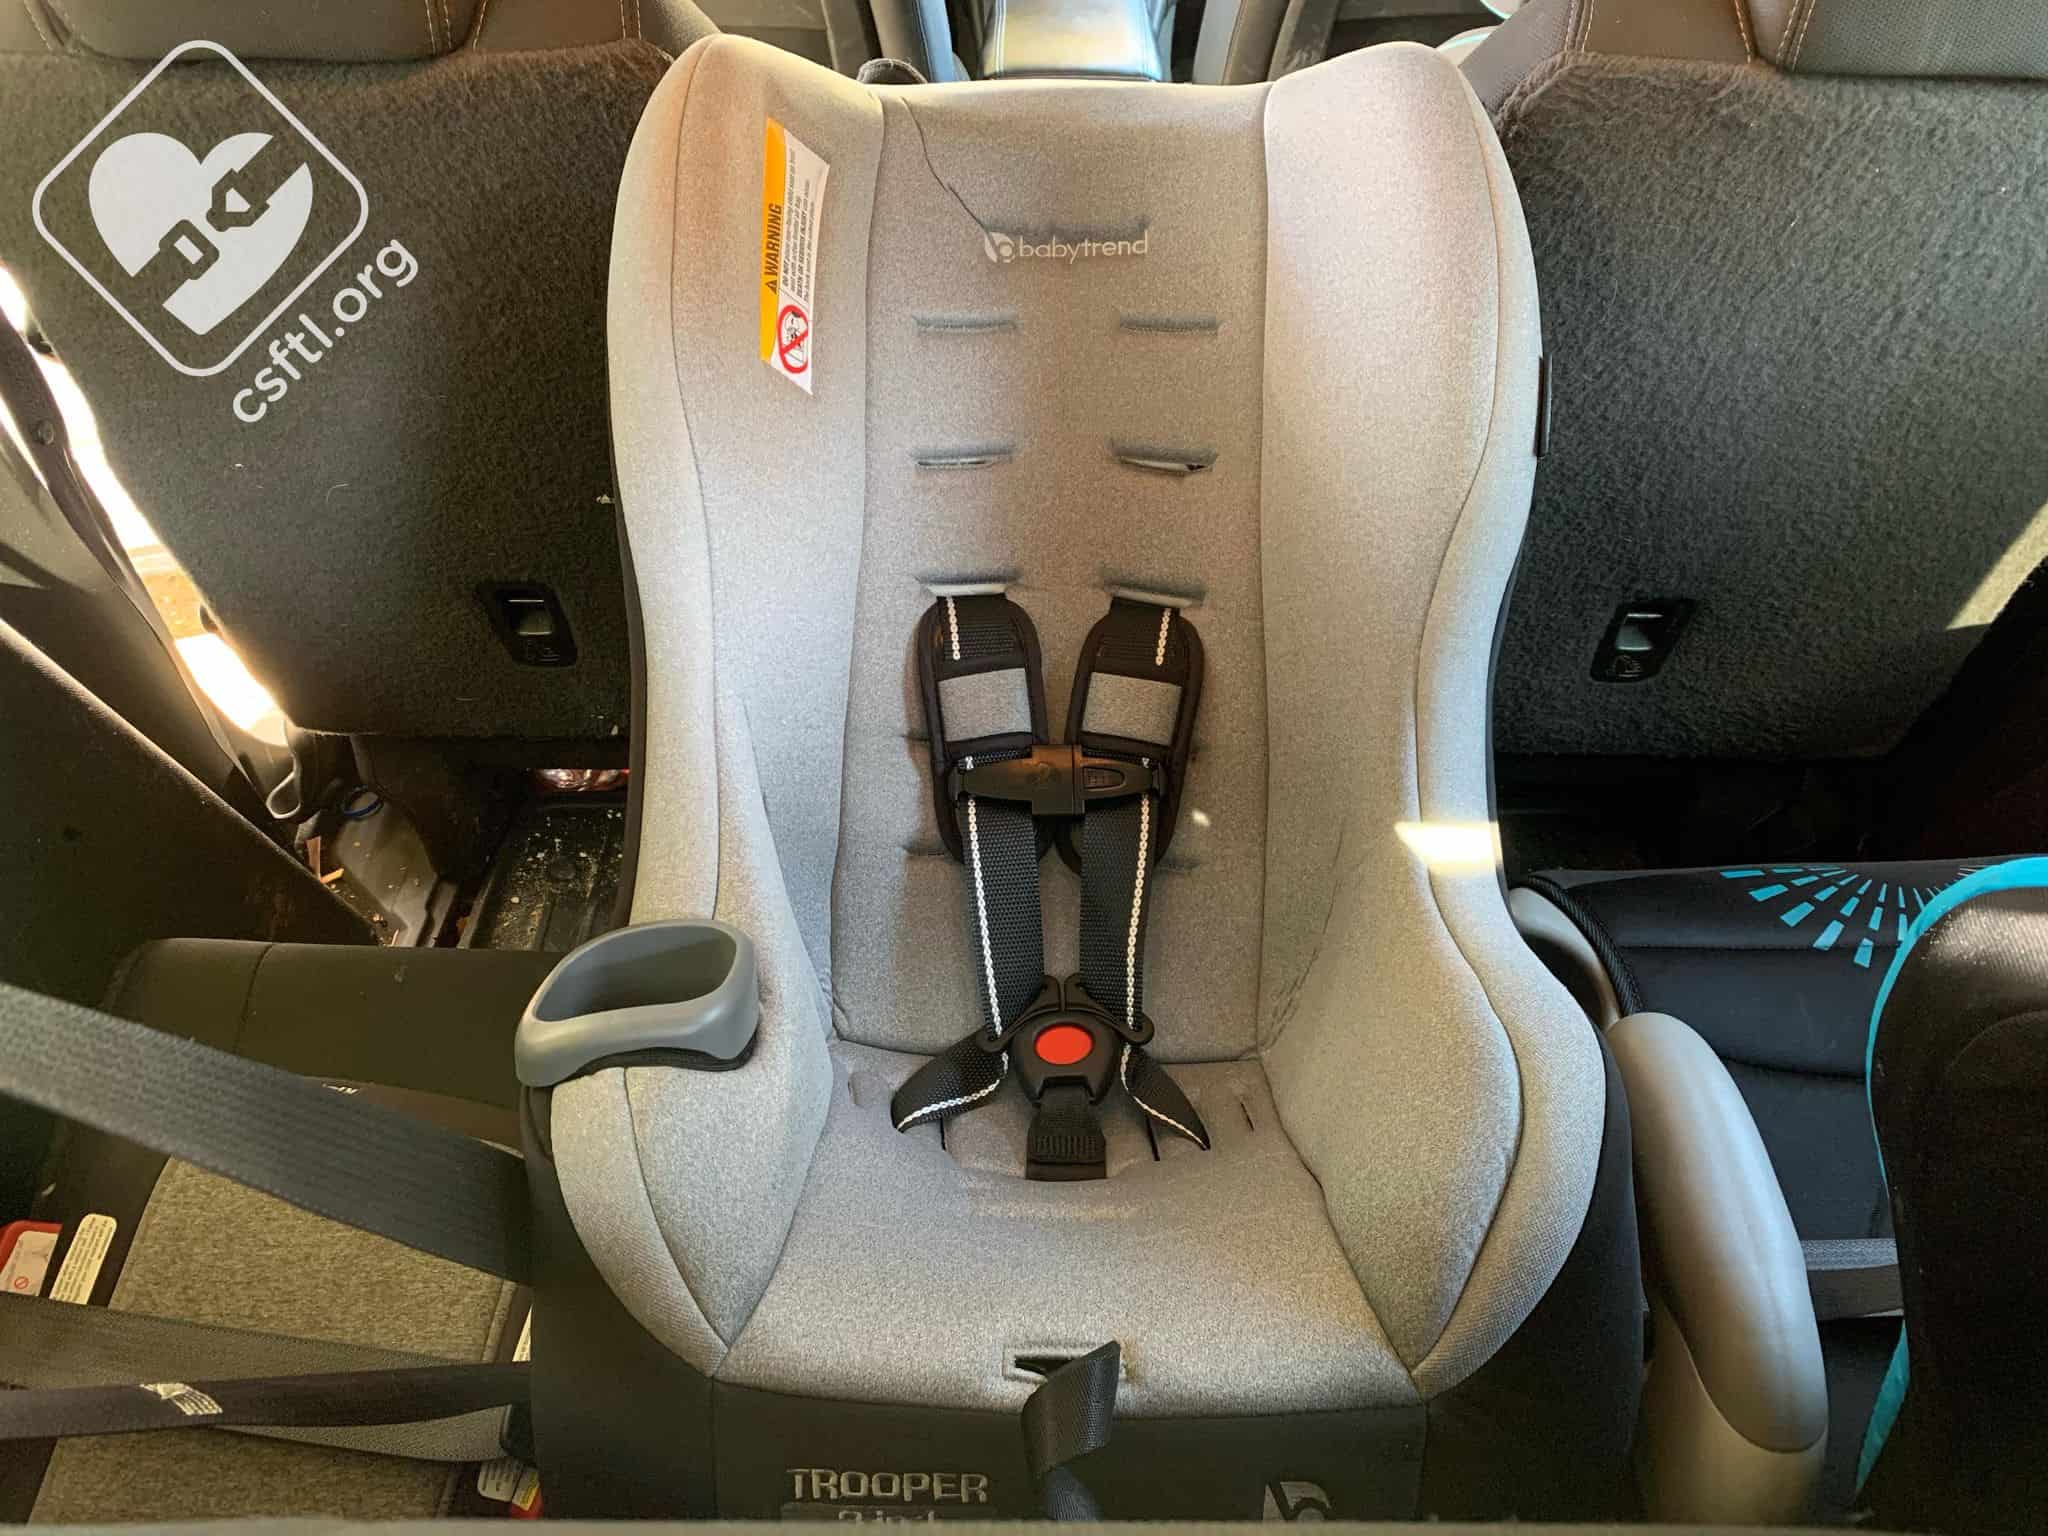
Baby Trend Trooper rear facing
The Trooper fit perfectly rear facing on the bench between the captain’s chairs. The seat does take up quite a bit of space front to back when it’s installed rear facing and fully reclined but I believe it would fit between the front seats of a sedan or truck. Unfortunately, I don’t have access to either type of vehicle due to the pandemic.
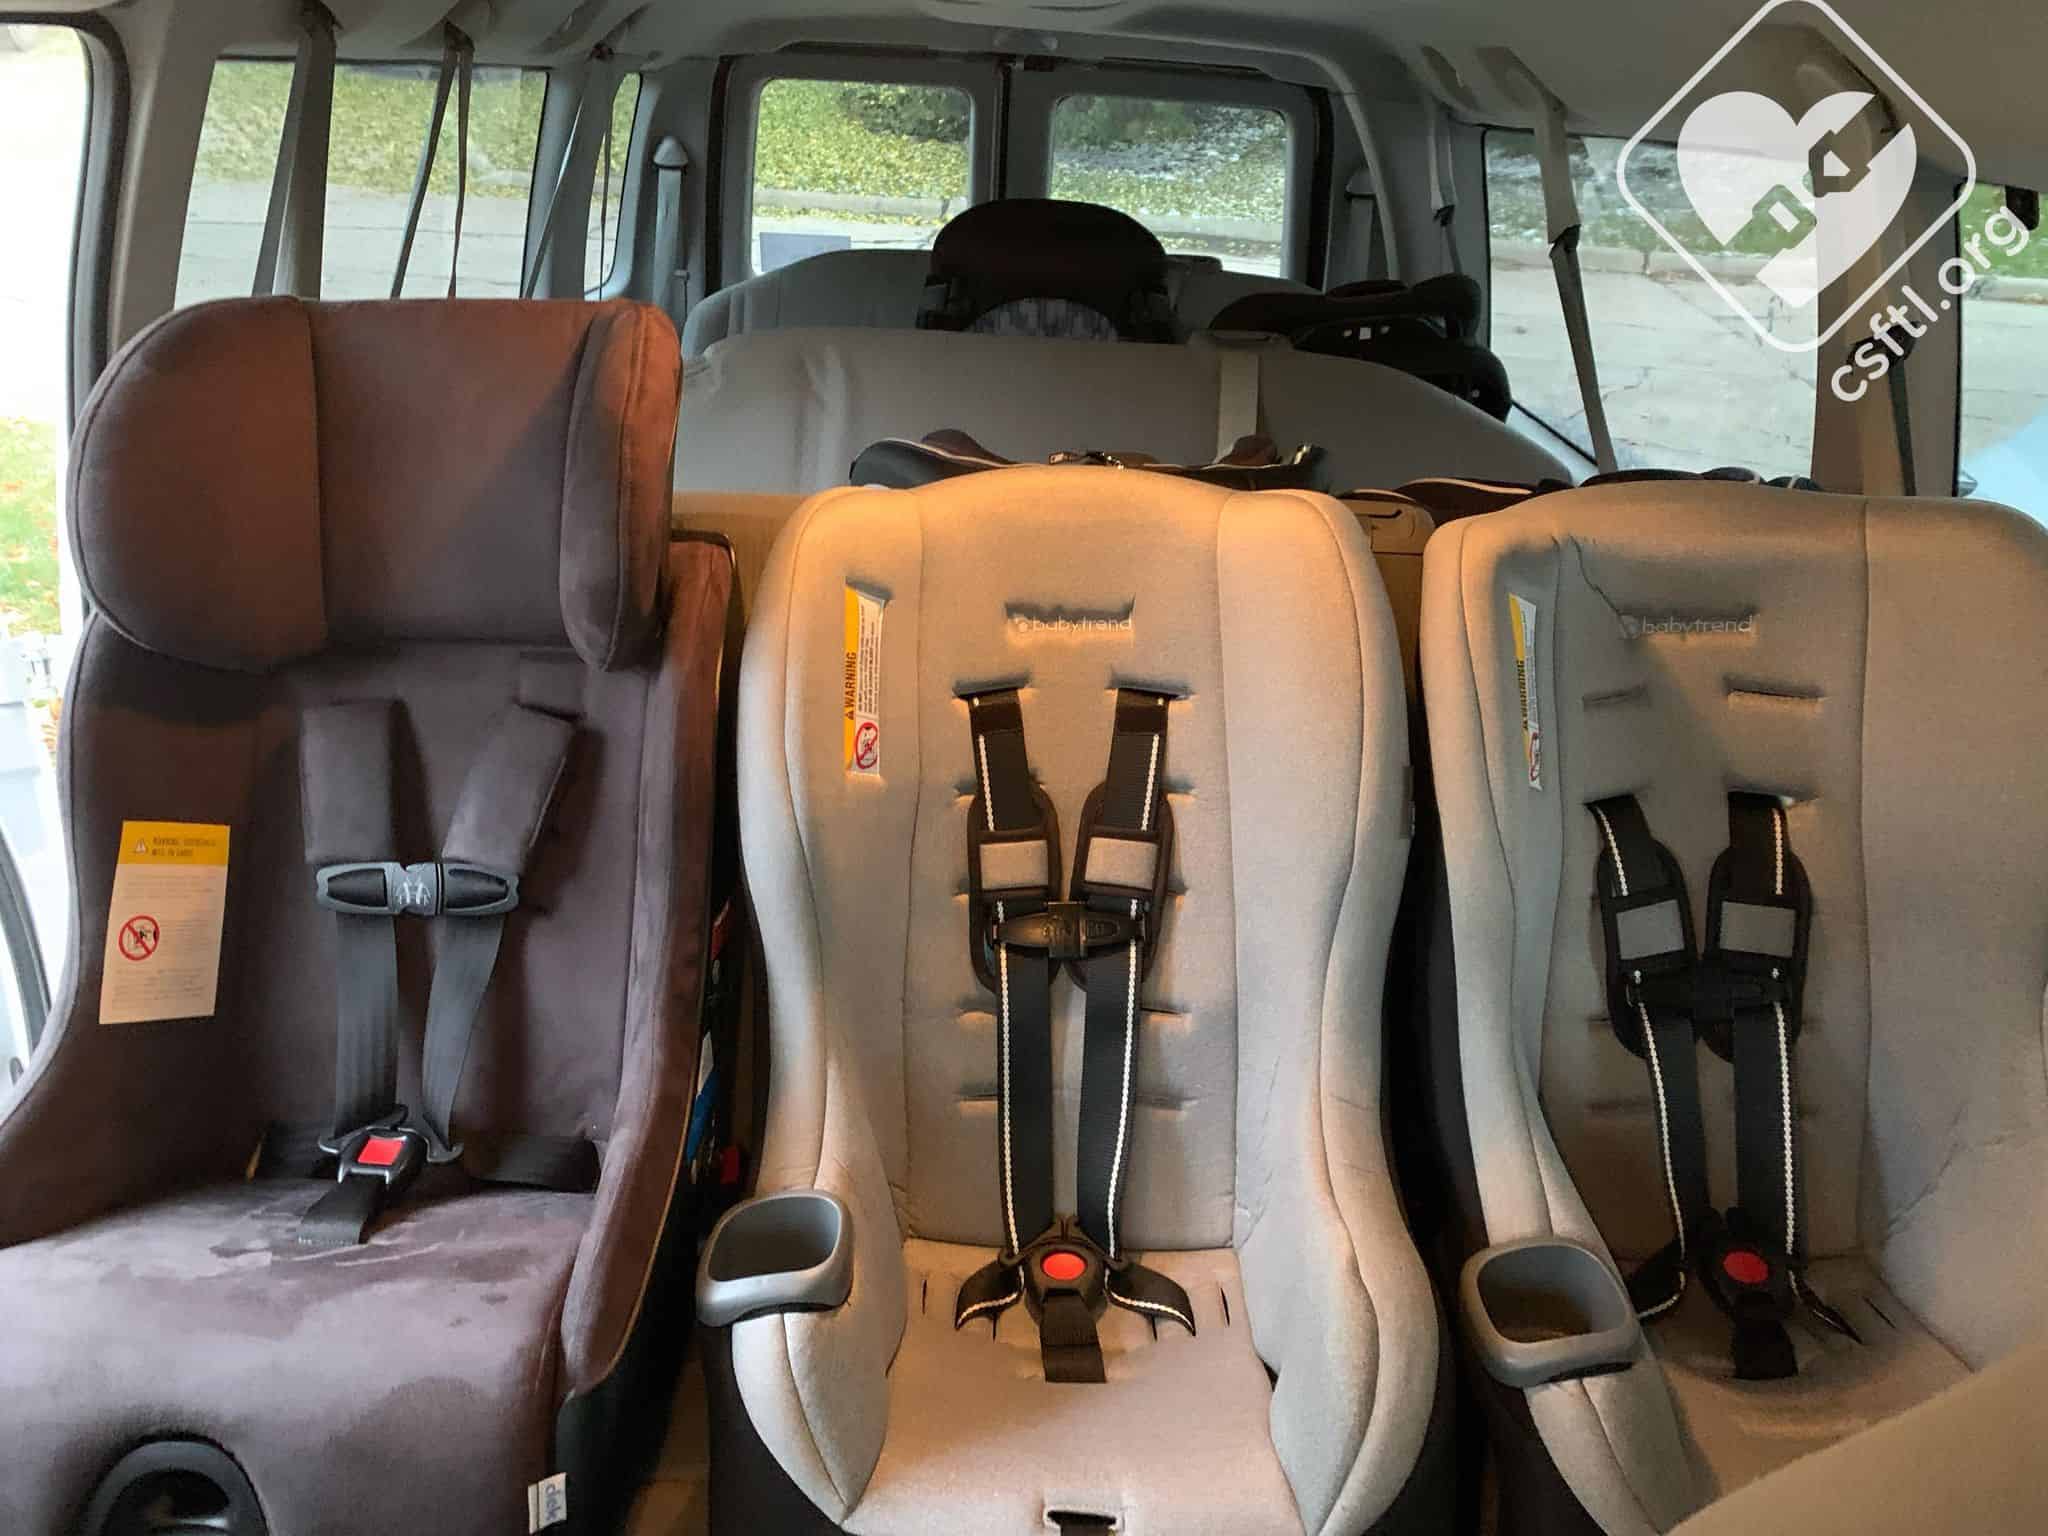
Baby Trend Trooper three across!
We also installed two Troopers and a Clek in my 2011 Ford E350 Econoline 15 passenger van. It was pretty amazing — there was so much space between the seats! Granted, this van has some pretty wide seats but it was great to see how easy getting three narrow car seats next to each other can be.
Baby Trend App/Installation Videos

Baby Trend App Icon
Baby Trend has created an app (cleverly named Baby Trend App) that can be used for registering car seats, installation assistance, and frequently asked questions. Here’s how the manufacturer describes it:
The Baby Trend App provides you with product content at your fingertips. The revolutionary app allows you to quickly and easily register your Baby Trend products using the in-app QR code scanner, and view product manuals and how-to videos. The app will also notify you of any developments regarding your product.

Main Page in the App
Once you register the product in the App, you can click on the “installation help” icon. There is a link to the English manual and installation and usage videos. I love this feature. I will admit most of my manuals live in a file in my garage. It’s nice to have the manual handy on my phone and know it is the exact manual that came with my particular seat.
Baby Trend also has a set of installation videos for the Trooper. These videos can be accessed from within the app and via the link.
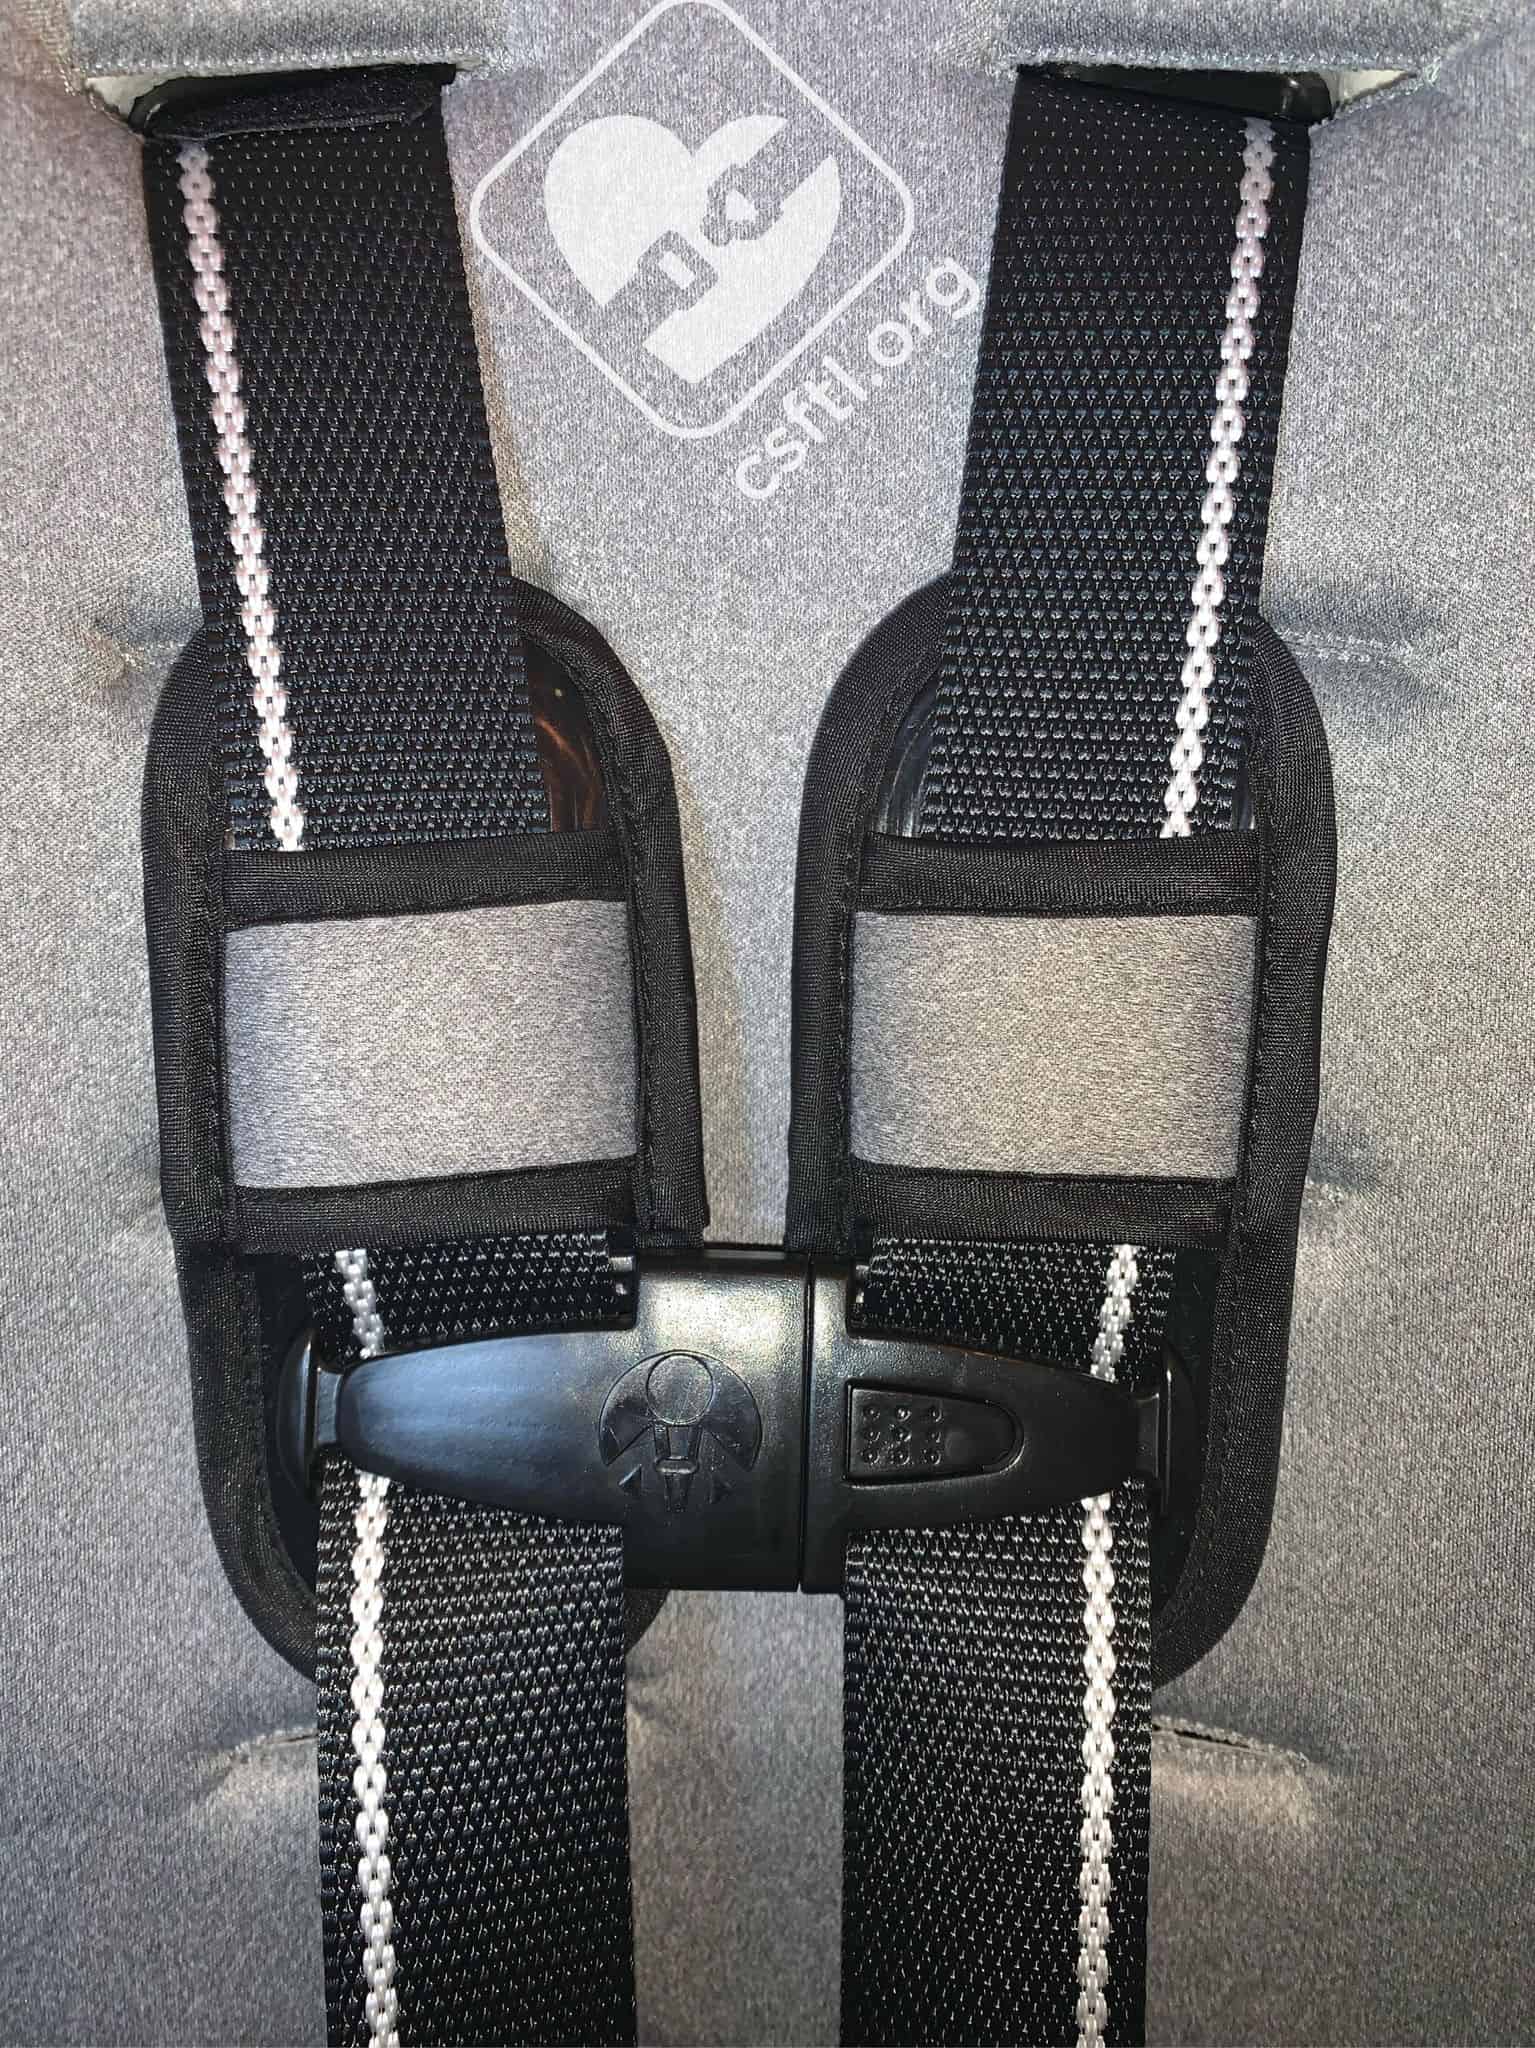
Harness Webbing Twist Indicator Stripe
The Trooper’s harness has a white stripe on the webbing. This is a twist indicator that makes it pretty clear when the straps have become twisted. I found it useful for my 4-year-old who likes to buckle himself but often gets the harness twisted.
Optional Padding Requirements
Harness Covers
Baby Trend Trooper harness pads
The harness covers are required except when using the “Low birth weight harness shorting routing.” They can not be used in that mode. We found the covers to be a bit pokey on the neck of the younger riders.
Head Pillow
The optional head pillow can be used in both rear and forward facing modes. However, the head pillow can not be used with the low birth weight routing.
Body Insert

Baby Trend Trooper body insert label
The optional body pillow can only be used rear facing for children who weigh between 4 and 18 pounds. It can be used with the low birth weight routing, but is not required if the harness is at or below the shoulders without it.
Harness Slots
The Trooper has five harness slots, each with a different intended use. The bottom two slots are for the low birth weight harness routing. The bottom three slots can be used when the seat is installed rear facing. The top three slots are for forward facing.
We recognize that these guidelines might be difficult to remember; we’d suggest that caregivers consult the manual as they adjust the seat when the child grows.
Hip Harness Slots
The Trooper has three sets of harness slots for the child’s hips. This isn’t a standard adjustment on most car seats so caregivers should read the manual when it is time to adjust the hip harness slots.
Like the shoulder harness slots, the hip harness slots have some guidelines around their use. The innermost slot is for the low birth weight routing only. The middle slot can be used until the child weighs 40 pounds, and the outermost slot can be used for children who weigh more than 40 pounds.
The manual also states the hip harness should not be under the child. We confirmed with Baby Trend that the weight guidelines were just that, guidelines. They do not want the harness under the child, regardless of the child’s weight.
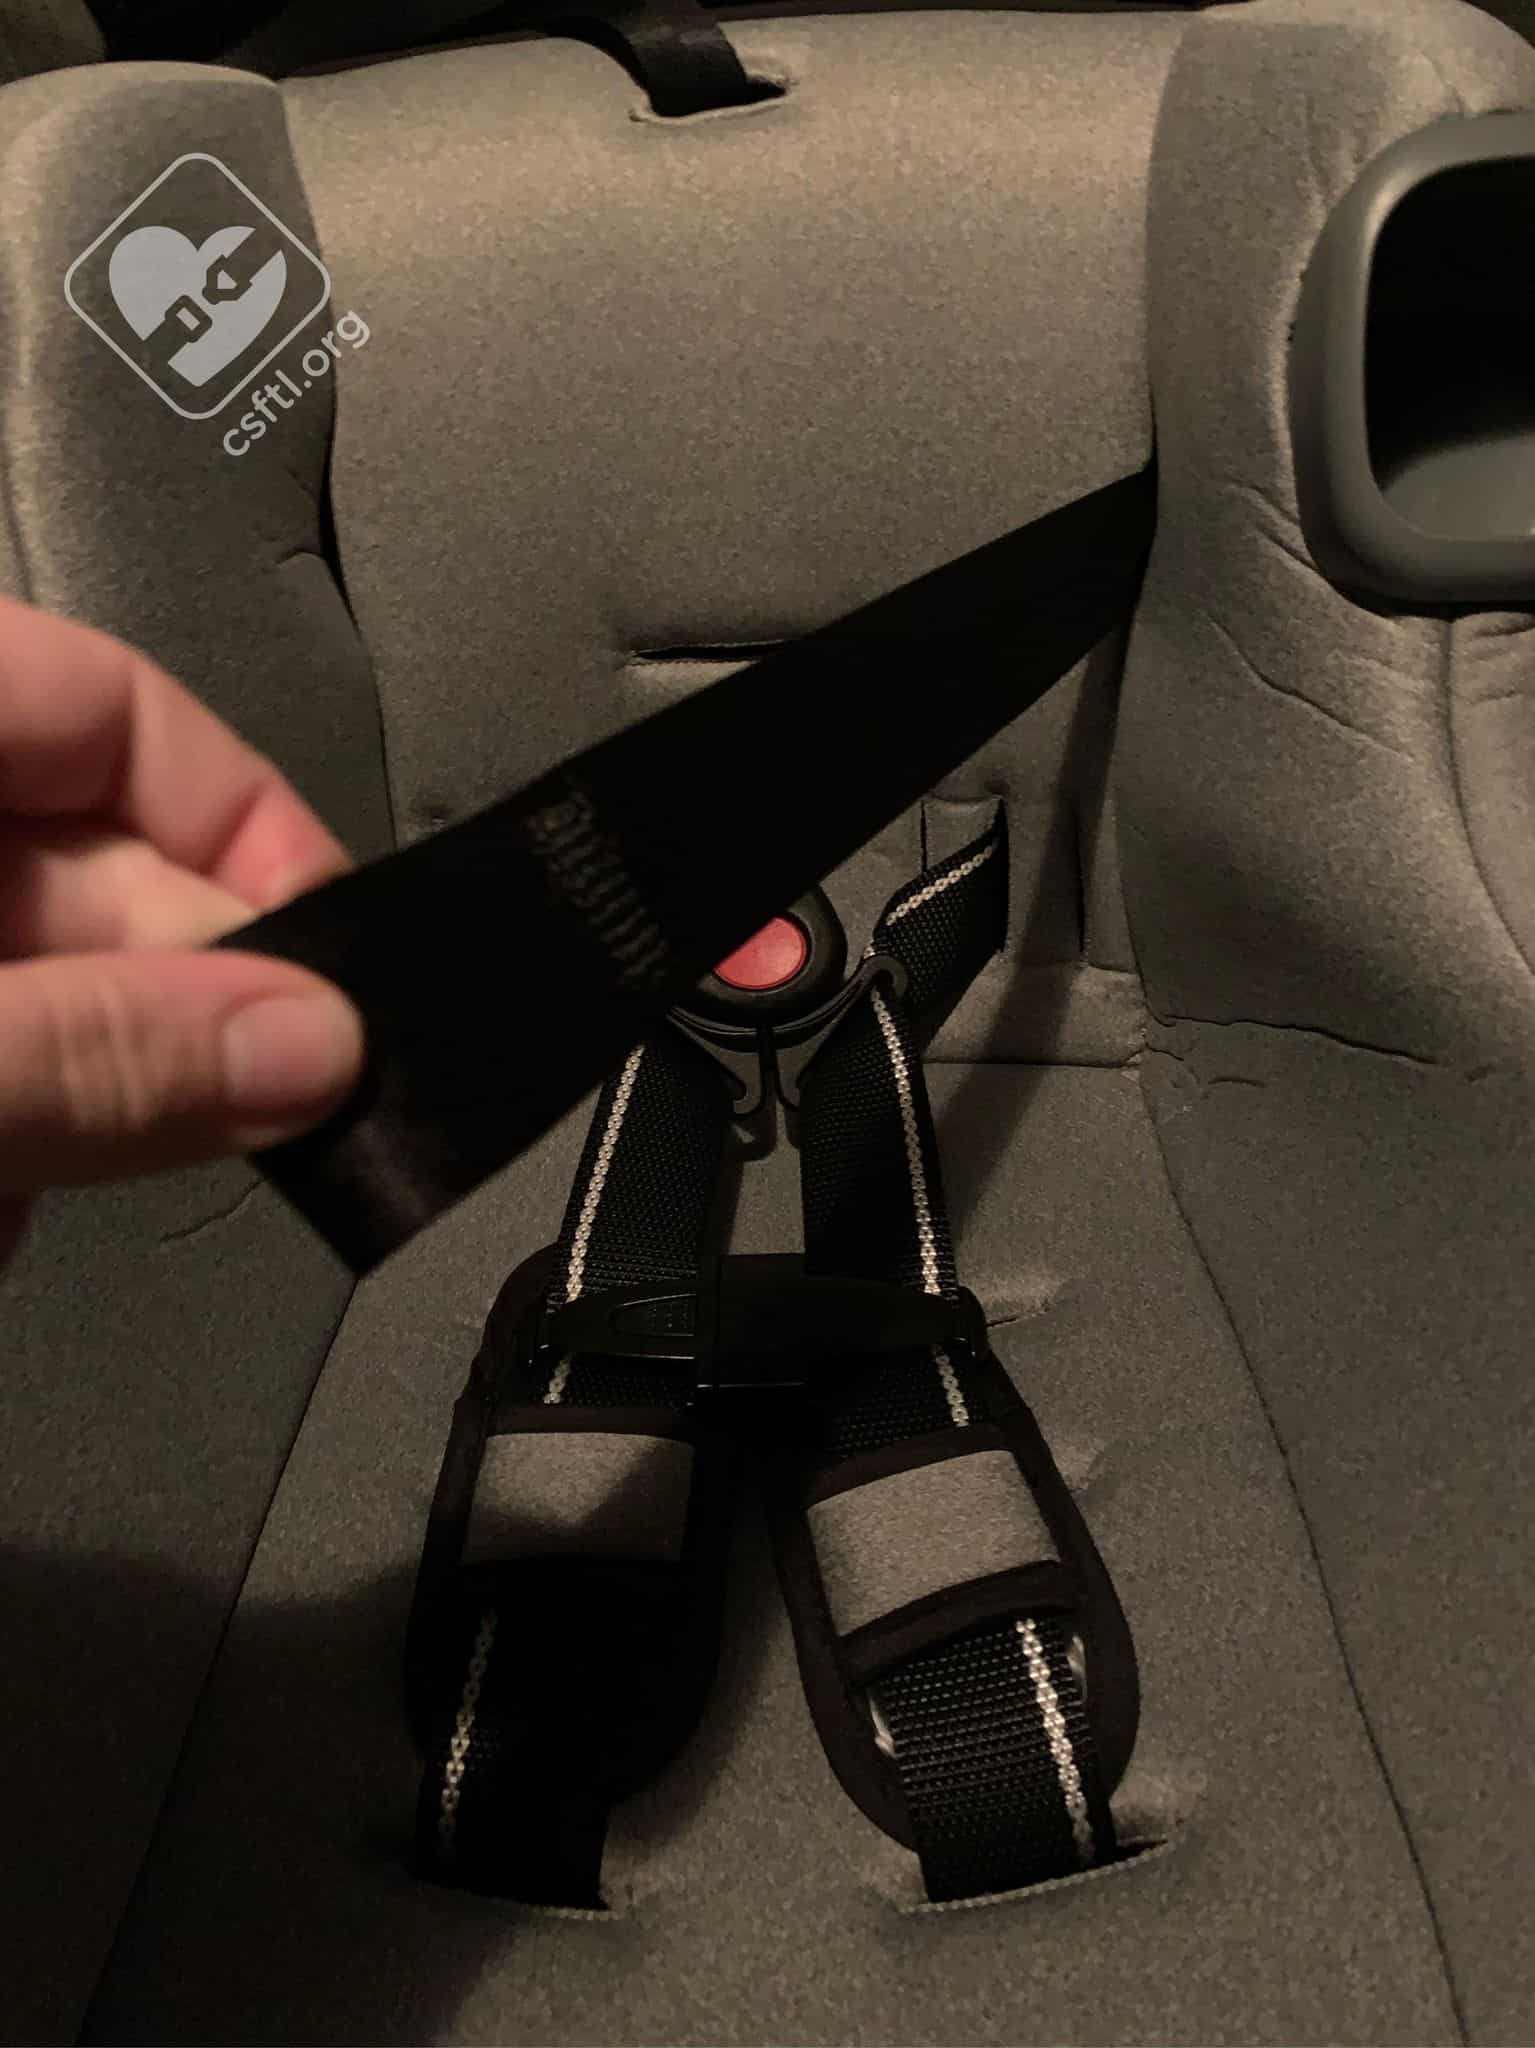
Crotch Buckle Adjustment
The Trooper also includes three different crotch buckle positions, each of which has rules for use. In this case, the outermost slot can only be used for buckle shortening. That’s the “J” routing for the tiniest passengers where the webbing goes through the outermost slot, then is routed up through the innermost slot. This routing is not required with the low birth weight routing, but can be used to make sure the harness fits the child better.
The other crotch buckle slots can be used for rear or forward facing modes.
In all cases, the metal crotch buckle tongues must be .5 to 1 inch above the child’s thigh.
Low Birth Weight Harness Routing
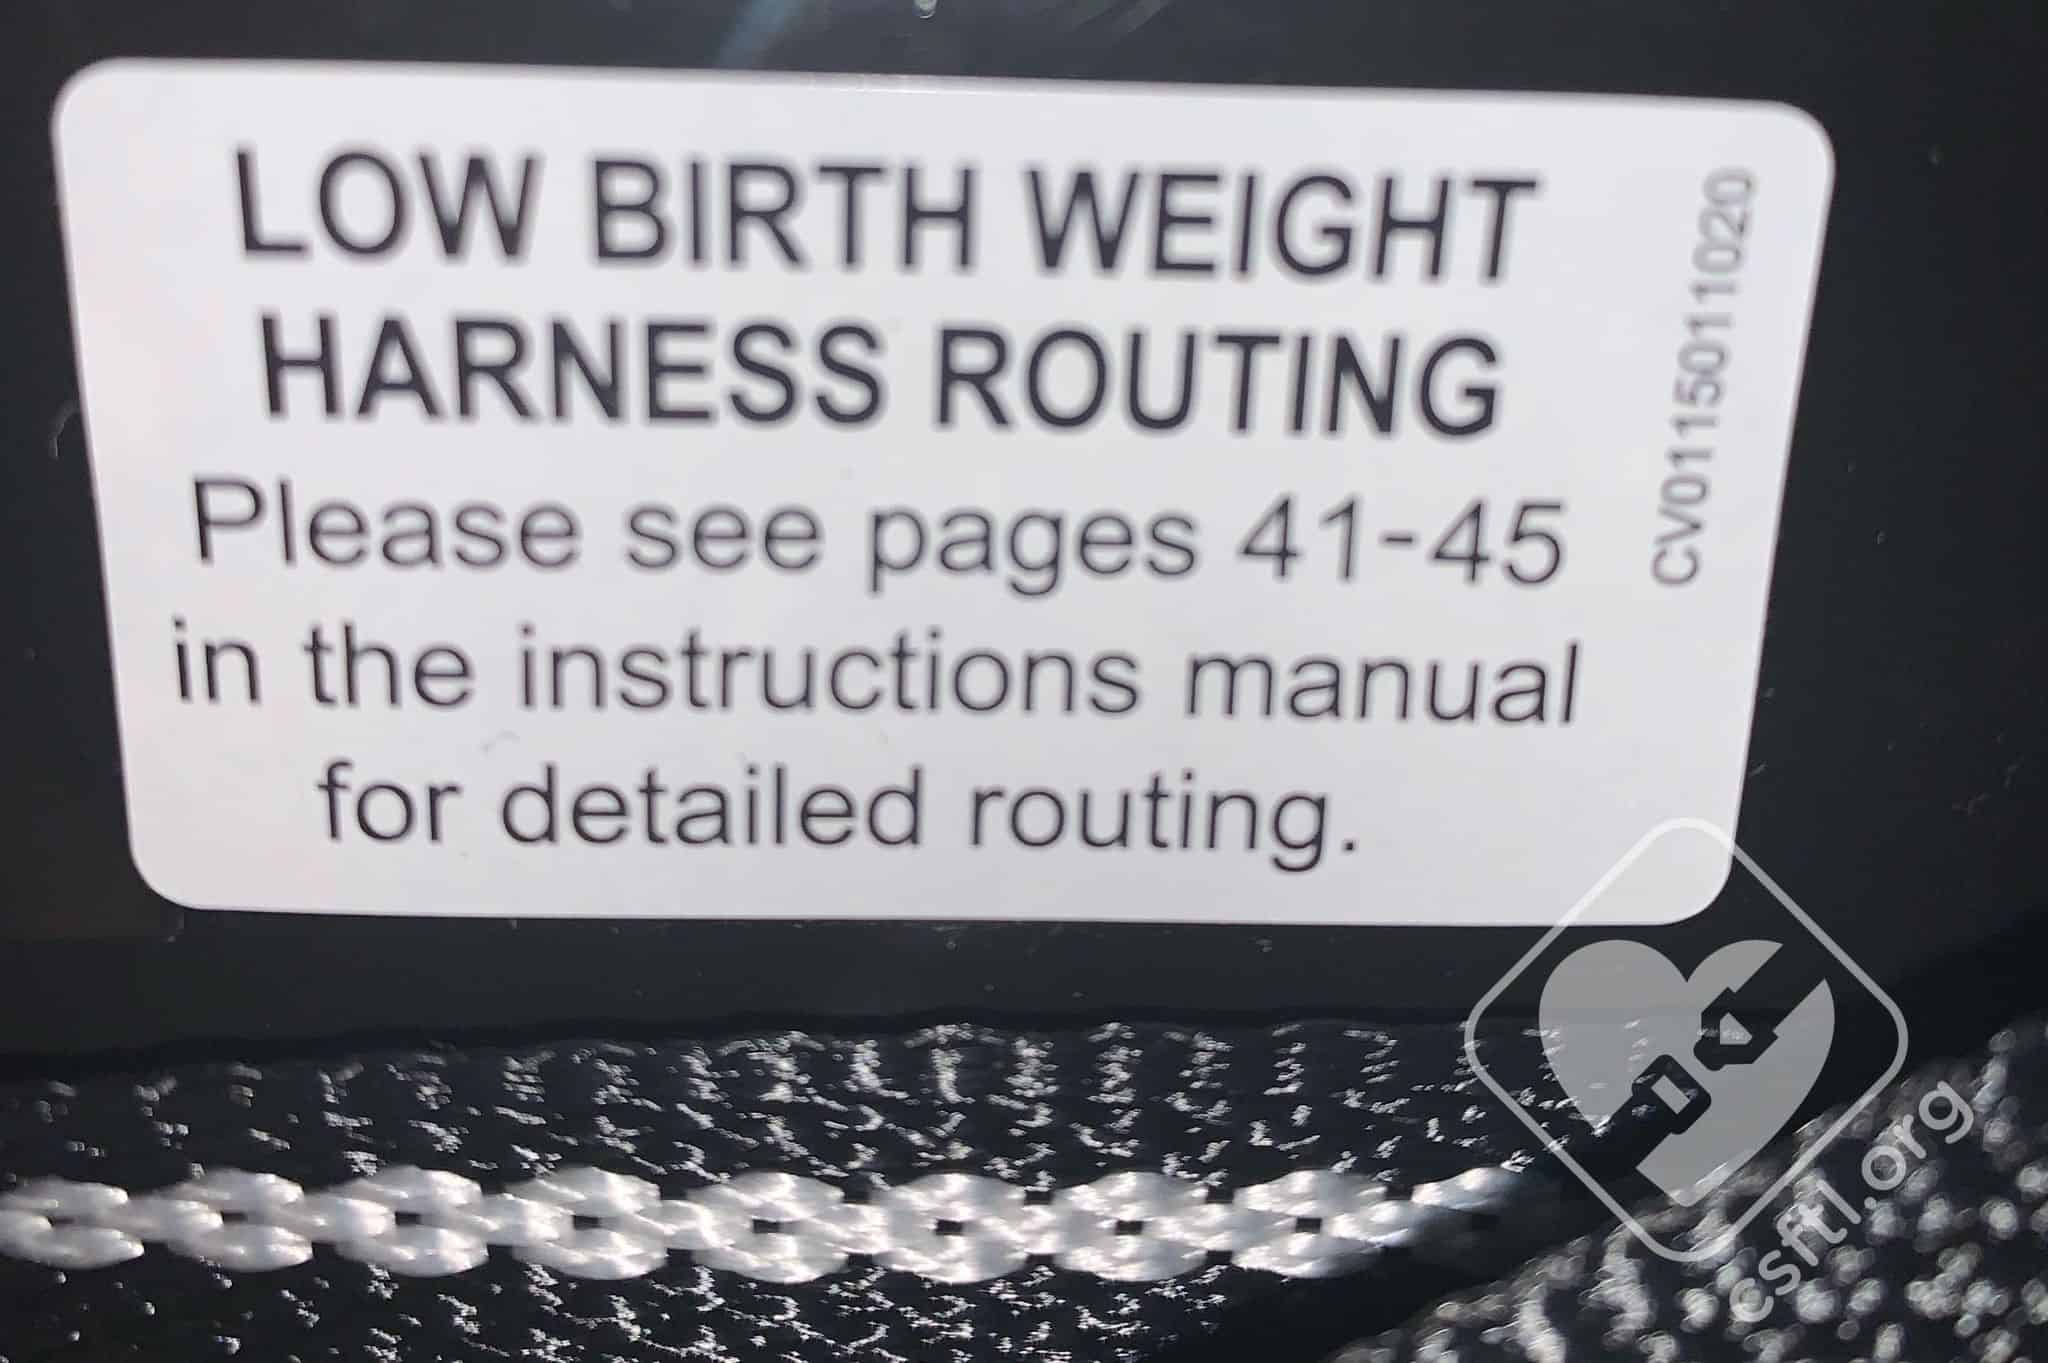
Baby Trend Trooper low birth weight harness routing
The harness can be routed into a pretty tiny length to fit the tiniest of passengers. There’s a handy label on the underside of the seat’s shell directing caregivers to the correct page in the manual for the instructions.
Note: the manual calls this “Low Birth Weight Harness Shorting Routing”

Baby Trend Trooper harness
Here’s how it works: unhook the harness from the splitter plate. Remove the harness cover, chest clip, and crotch buckle tongue from the harness webbing on one side. Unthread that strap from the seat completely. Following the diagram in the manual starting on page 41, weave the harness through the hip slots in the bottom of the shell. Then replace the crotch buckle tongue and chest clip. Rethread the harness in the lowest or second lowest slot in the back of the seat and hook the harness to the uppermost harness loop.
The Trooper has a continuous harness, which means the harness webbing is all connected instead of each strap being mounted to the seat at each hip. This continuous harness posed a bit of an issue with the low birth weight routing. It was difficult to even out an uneven harness when the harness was in this mode.
Eventually, I discovered this method: Before threading the harness through the harness slots in the back of the shell, ensure the straps are the same length.
Once both sides of the harness are the same length, thread them through the harness slots in the shell and hook the harness end loop to the splitter plate on the uppermost harness webbing loops. Make sure both sides are fully on the splitter plate. Then, attach the velcro on the end of the harness end loops to the velcro at the top of the harness end loops. This keeps the ends of the harness out of the way.

Baby Trend Trooper harness

Baby Trend Trooper harness
Overhanging the Vehicle Seat Overhang
We confirmed with Baby Trend that they allow 20% of the base to overhang the vehicle seat.
Installation: Rear Facing Setup
Lower Anchors

Baby Trend Trooper installed rear facing using lower anchors for a child over 23 pounds
The standard lower anchor connectors are shipped in the forward facing belt path. To install the seat rear facing with lower anchors, you will need to move the lower anchor connectors to the rear facing belt path. To do so, unhook them from their storage place on the shell of the seat. Pull them out of the shell. Thread them through the rear facing belt path with the hooks facing down.
Recline Foot
Baby Trend Trooper recline foot rear facing
When installing the Trooper rear facing, the recline foot on the bottom of the seat’s shell needs to be flipped to the rear facing position.
Recline Angle Indicator

Baby Trend Trooper recline angle indicator
There are two separate recline angle indicators on the Trooper. The first is a bubble level to be used for children weighing between 4 and 22 pounds. The bubble needs to be centered between the lines. The second indicator is a line that must be parallel to the ground for children weighing between 23 and 40 lbs.
Rolled Towel Usage
Like most car seats sold in the United States, the Trooper allows the use of a rolled towel or pool noodle under the front edge of the base to increase the recline when rear facing. I didn’t find a vehicle seating position where this was necessary. I installed in the Econoline and the Traverse.
One thing that makes the Trooper a bit unique is that a rolled towel or pool noodle can be used under the rear edge of the seat’s shell to decrease the recline angle when it’s installed rear facing. This is a different rule than most car seats on the market in the United States today. We point out this uniqueness because it’s so rare.
Manual Concerns Around Lower Anchor Recommendations
We did want to note some wording from the manual that we worry may cause confusion for caregivers. On page 12, there is a statement saying the car seat should be tightly secured by the vehicle seat belt at all times. Later, on page 16, the manual says to use LATCH if the seat belt system is unsafe. Further, on page 18, there is a statement that LATCH is the preferred method of installation. Baby Trend confirmed they put those three separate statements in there intentionally.
Installation: Rear Facing
Vehicle Seat Belt
Baby Trend Tooper rear facing seat belt installation, for a child under 22 pounds
Installing the Trooper rear facing with the vehicle seat belt is pretty straightforward. Set the Trooper on the vehicle seat with the harness facing the back of the vehicle. Locate and identify the rear facing belt path, then thread the vehicle seat belt through the belt path. Buckle the seat belt, then press down on the spot of the Trooper where the child’s rear end would go with one hand while removing the slack from the vehicle seat belt with the other. Once most of the slack is removed from the lap portion of the seat belt, hold the belt in place with one hand while extending the seat belt all the way out until the retractor is engaged (you’ll hear a clicking noise that confirms that the seat belt is now in car seat mode). Feed the seat belt back in slowly while maintaining the pressure on the seat itself — this will keep the tension on the belt. Once the seat belt has been fed back into the retractor, let go of the seat itself, then apply a little more pressure to feed a few more clicks worth of tension back into the retractor. Check your work by giving the Trooper a firm handshake at the belt path — it should move less than an inch.
The belt path is wide enough that you won’t lose any skin (or your watch!) while threading the seat belt through the belt path. Since the Trooper is so light, it does have a tendency to tip slightly toward the buckle when installed with the vehicle seat belt.
Lower Anchors
Using the inside/outside trick rear facing
After moving the lower anchors to the rear facing belt path, the installation was fast. Installing the seat with the lower anchors is a good way to avoid the tipping we saw with the vehicle seat belt install.
Here’s how: make sure that the lower anchors are in the rear facing belt path. Set the Trooper on the vehicle seat with the harness facing the back of the vehicle. Loosen the lower anchor webbing as much as possible, then attach each lower anchor connector to the lower anchor in the vehicle.
Press down on the spot of the Trooper where the child’s rear end would go with one hand while removing the slack from the tail of the lower anchor webbing by pulling the webbing straight up. There is handy slot in the cover to make tightening easier using the inside/outside trick. Once the slack is removed from the lower anchor connectors, press down just a bit harder on the seat itself and give the lower anchor webbing one more pull to secure it. Check your work by giving the Trooper a firm handshake at the belt path — it should move less than an inch.
Fit to Child
Rear Facing
Preemie Doll

Baby Trend Trooper preemie doll
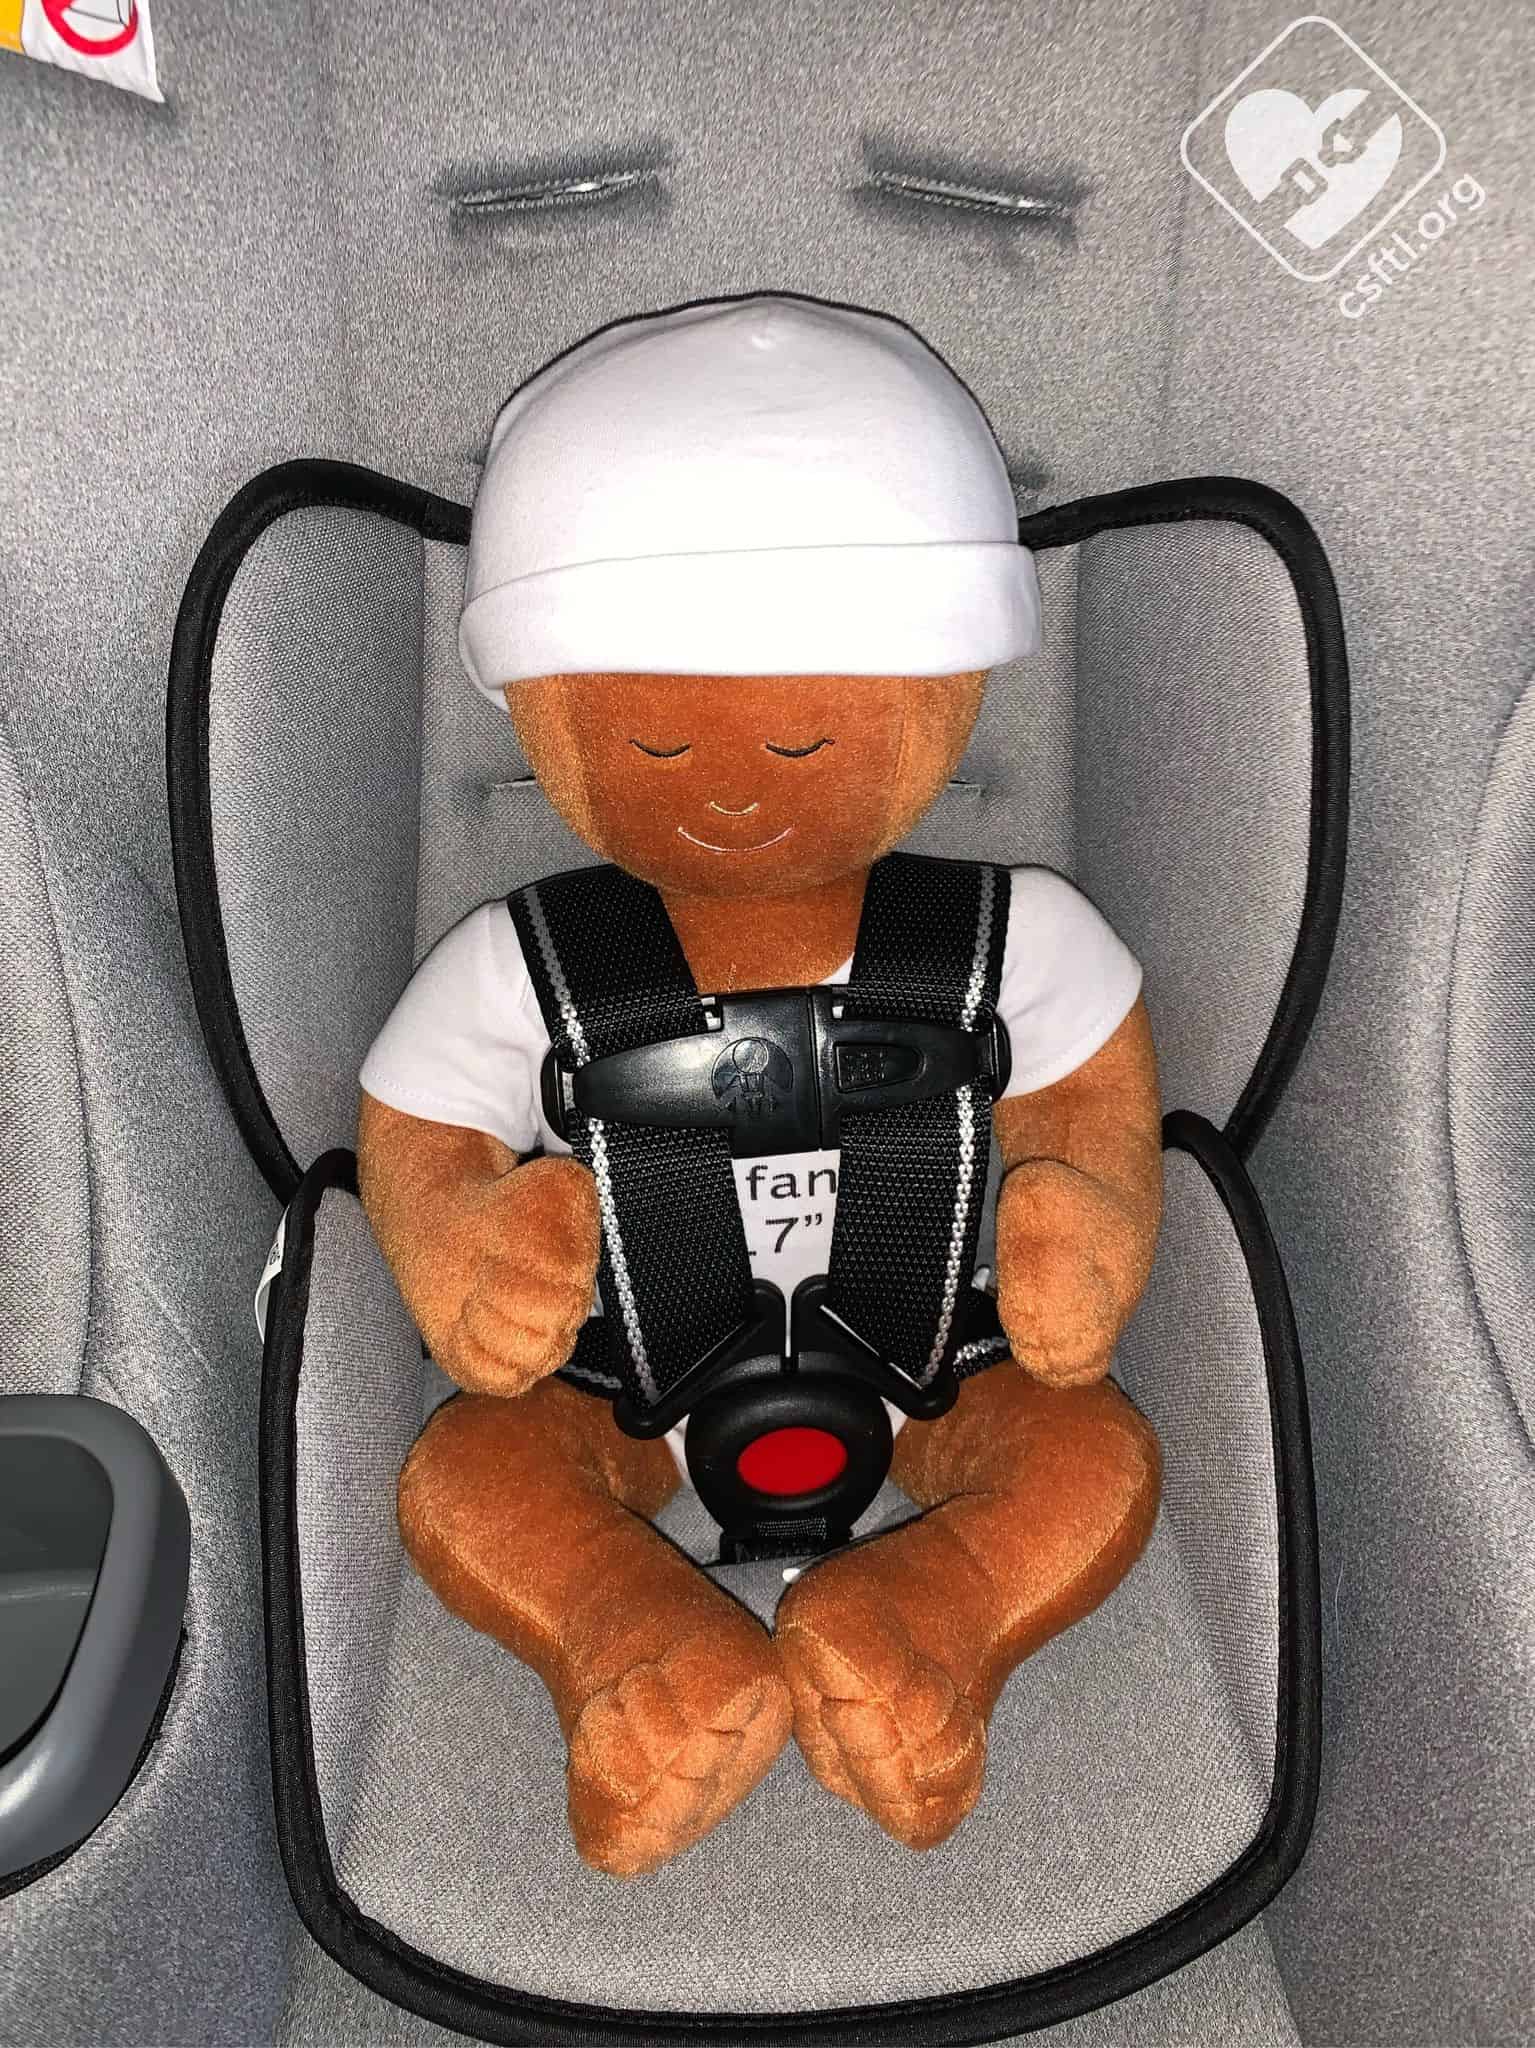
Our preemie Huggable Images doll is 4 pounds and 17 inches long. This model fits very well using the infant insert and the low birth weight harness routing. The harness is below the shoulder and the crotch buckle is about a half-inch above the doll’s thighs. The harness is on the lowest setting and the crotch buckle in the closest slot to baby and shortened to achieve the proper length.
Newborn Doll
Baby Trend Trooper newborn doll with insert
We are using our 7 pound and 17 inch long newborn Huggable Images doll to show how well the Trooper fits the tiniest of passengers.

Baby Trend Trooper newborn doll with insert
This model fits well both with and without the infant insert. The harness is still in the low birth weight routing with the crotch buckle in the closest slot to baby and shortened to achieve the proper length. The harness is below the shoulder.
2 Year Old

Baby Trend Trooper 2 years old
Our 2 year old model weighs 24 pounds and 32 inches tall. She fits comfortably in the Trooper and has plenty of time left in this seat rear facing. The required harness covers do poke her in the neck when they are up high enough to allow the chest clip to be in the proper position. She was only bothered by this for a short time.
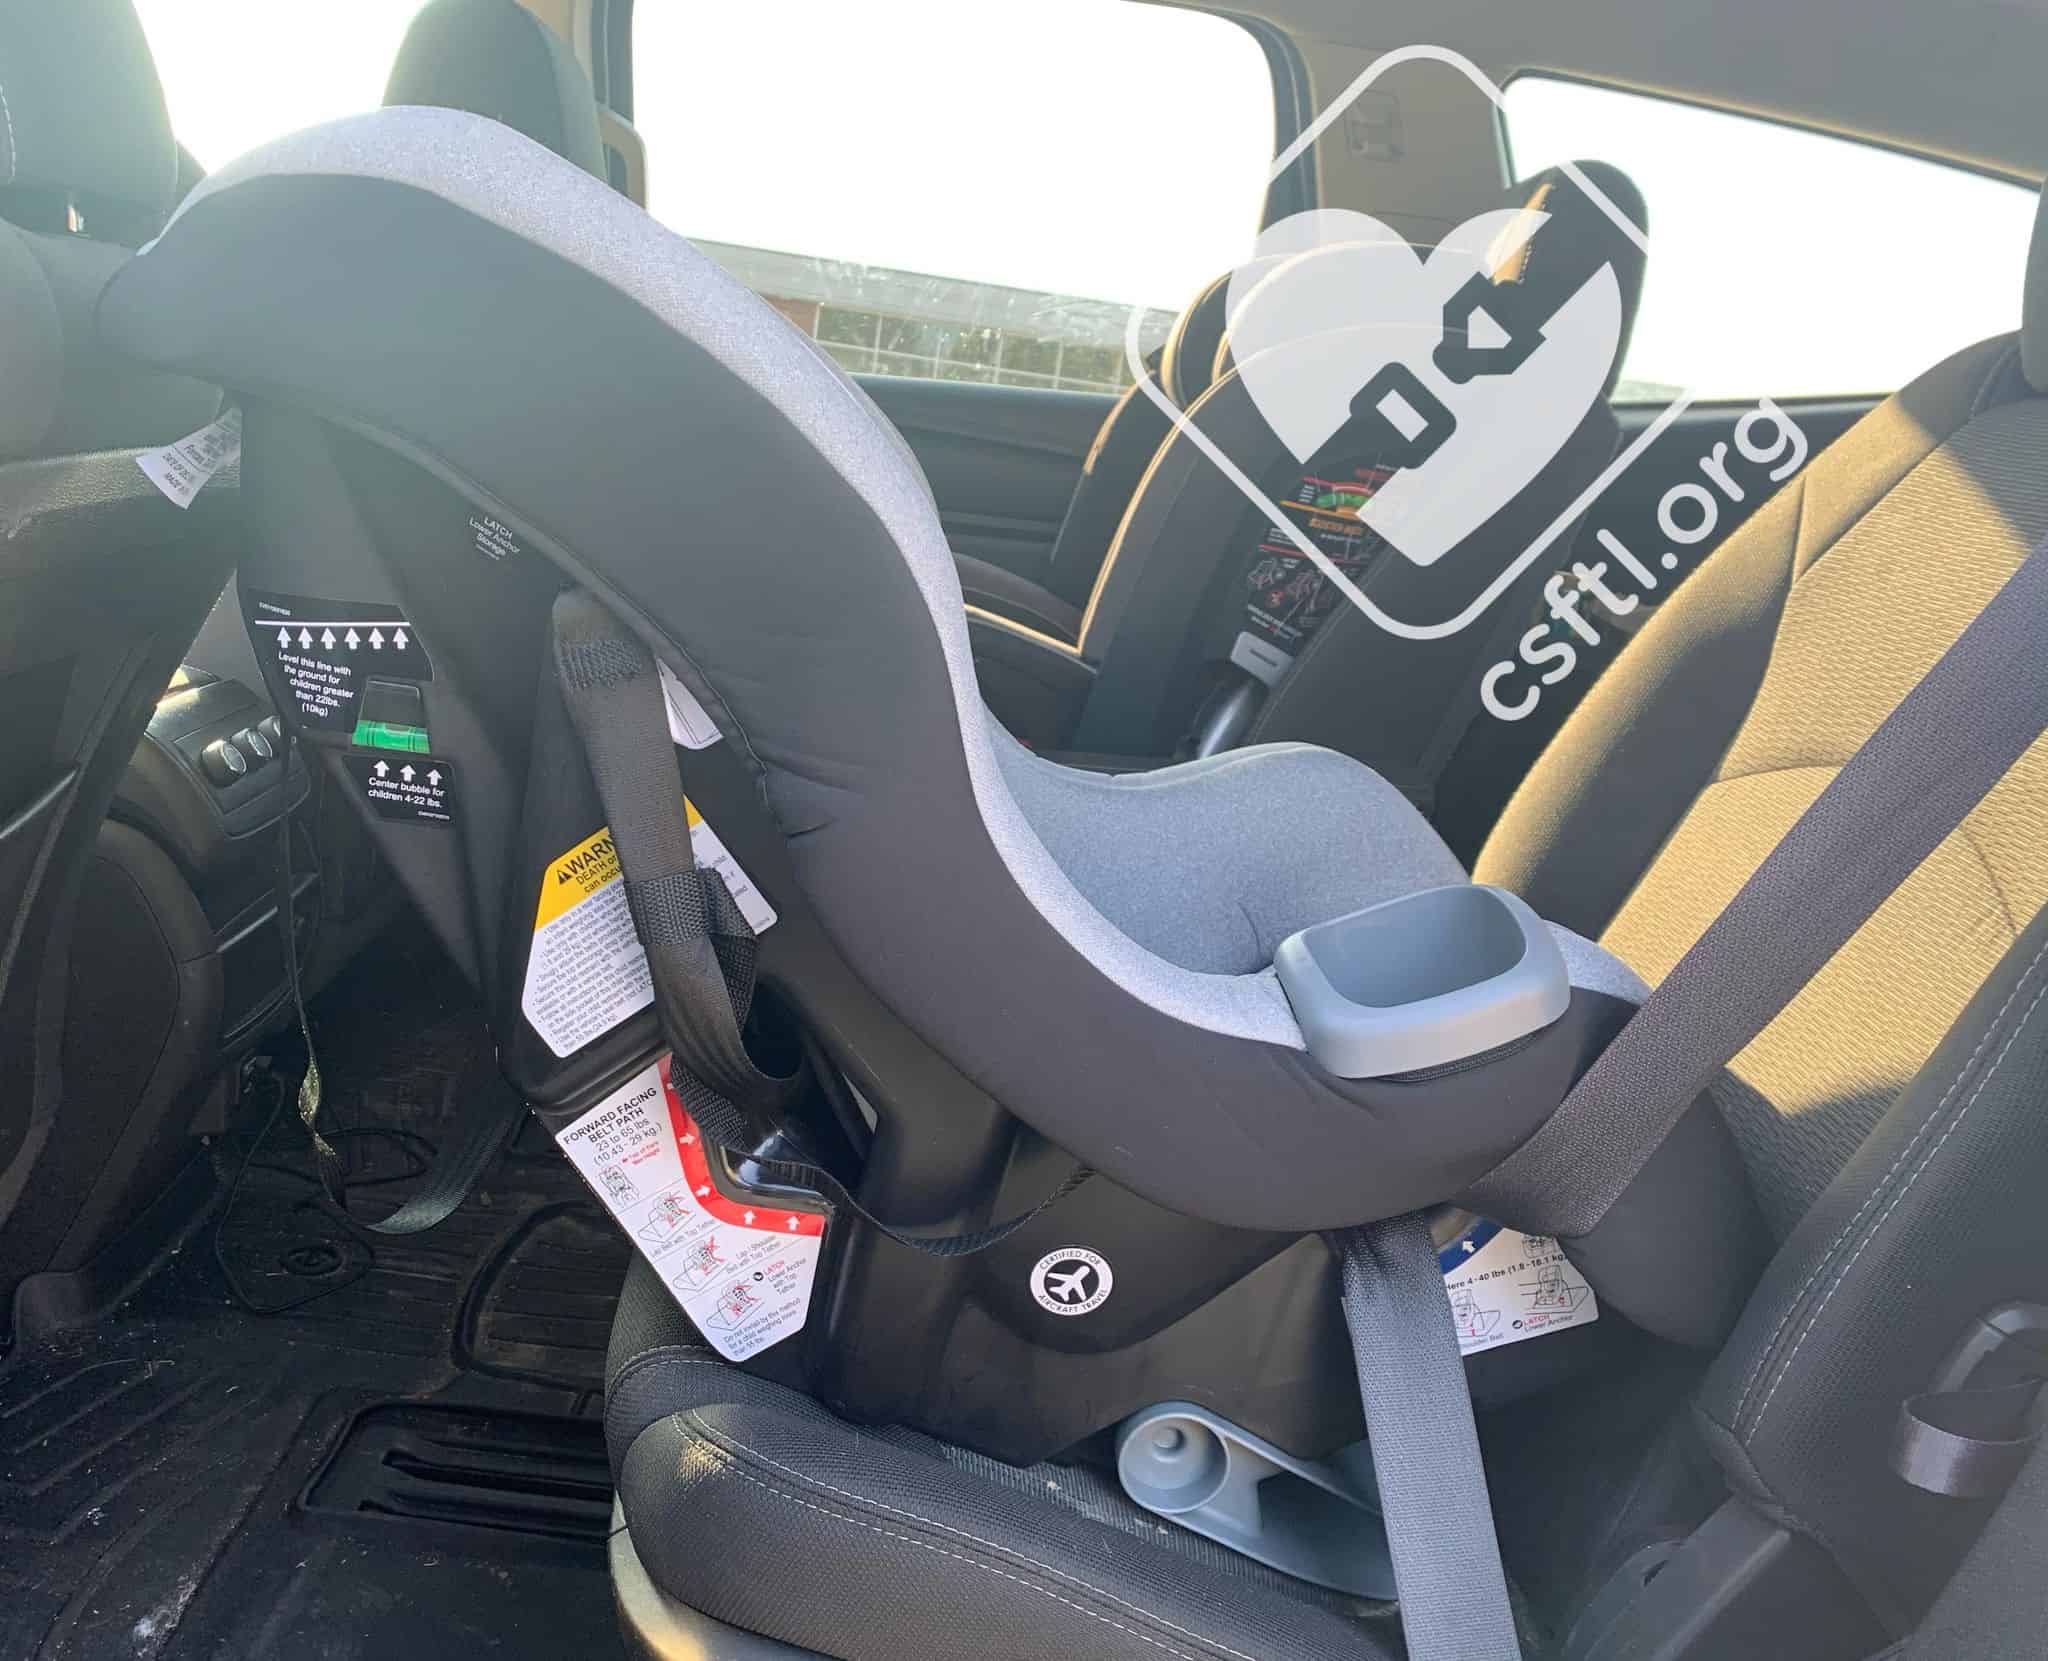
Forward Facing Installation
Lower Anchor Setup
The lower anchors ship in the forward facing belt path. The lower anchors can be used for a child weighing up to 55 pounds. After the child weighs 55 pounds, the Trooper must be installed with the vehicle seat belt.
Recline Foot
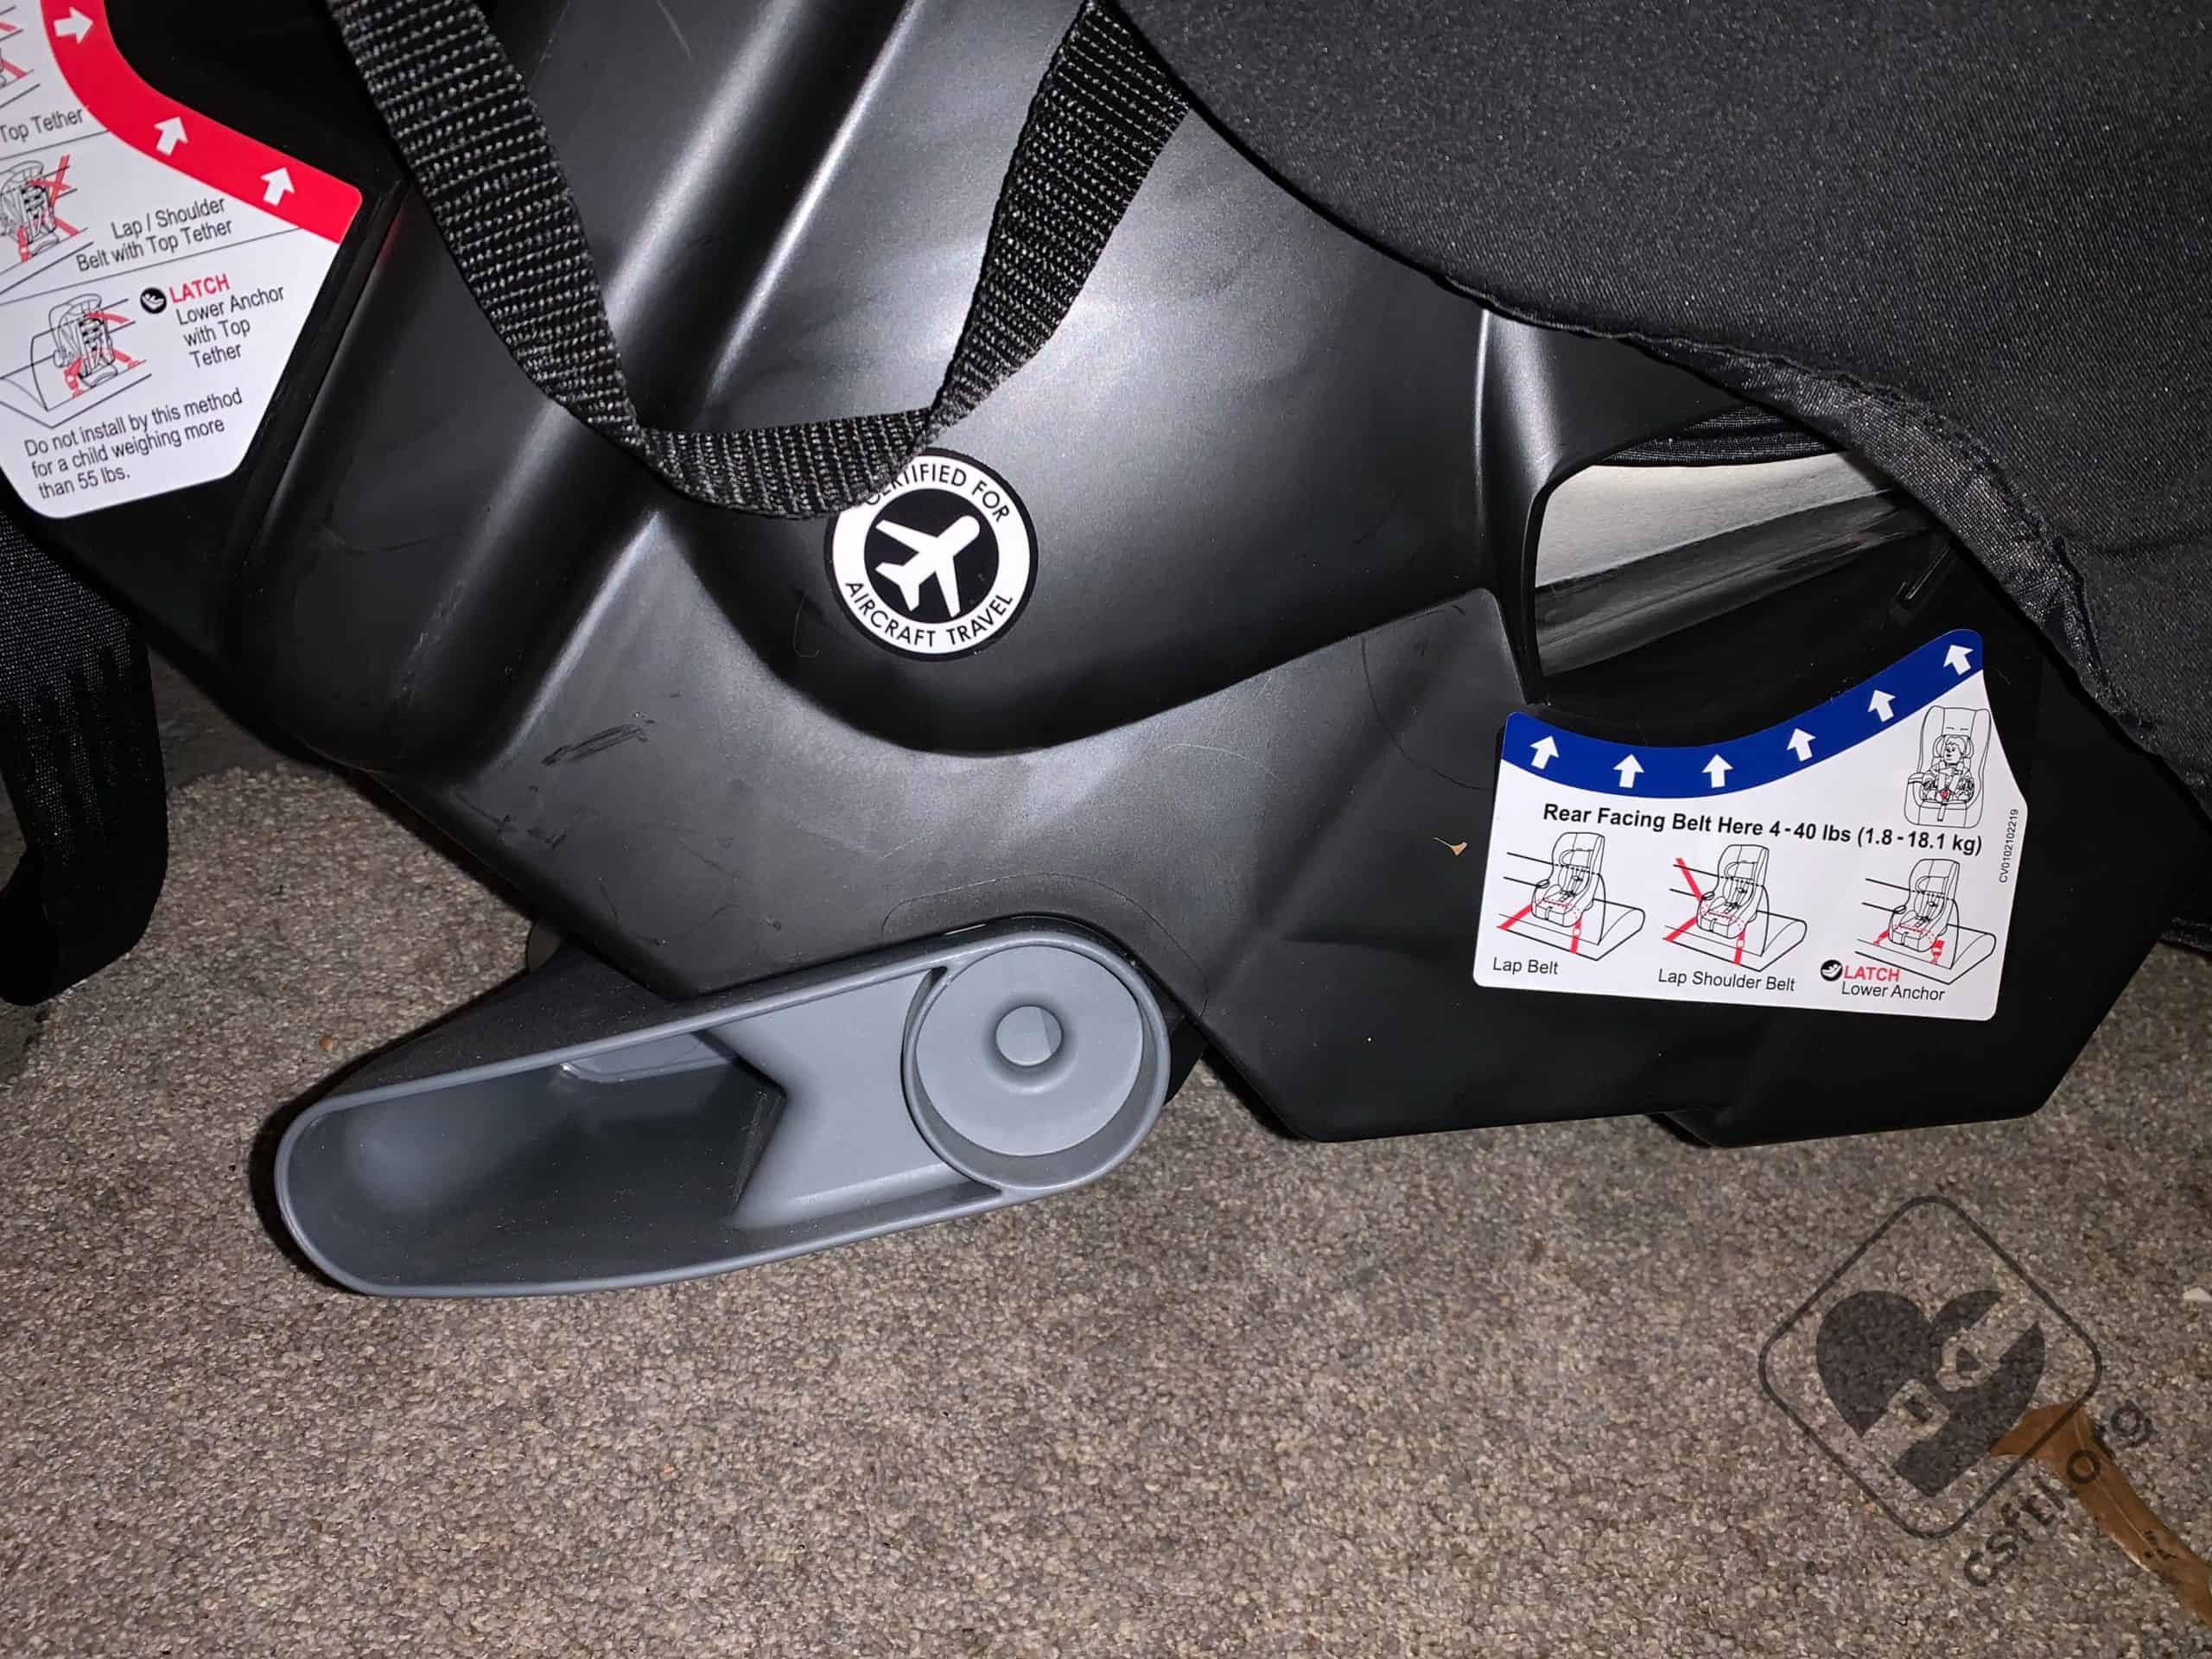
Baby Trend Trooper recline foot forward facing
The recline foot must be in the forward facing position for forward facing installations. Here’s what that looks like.
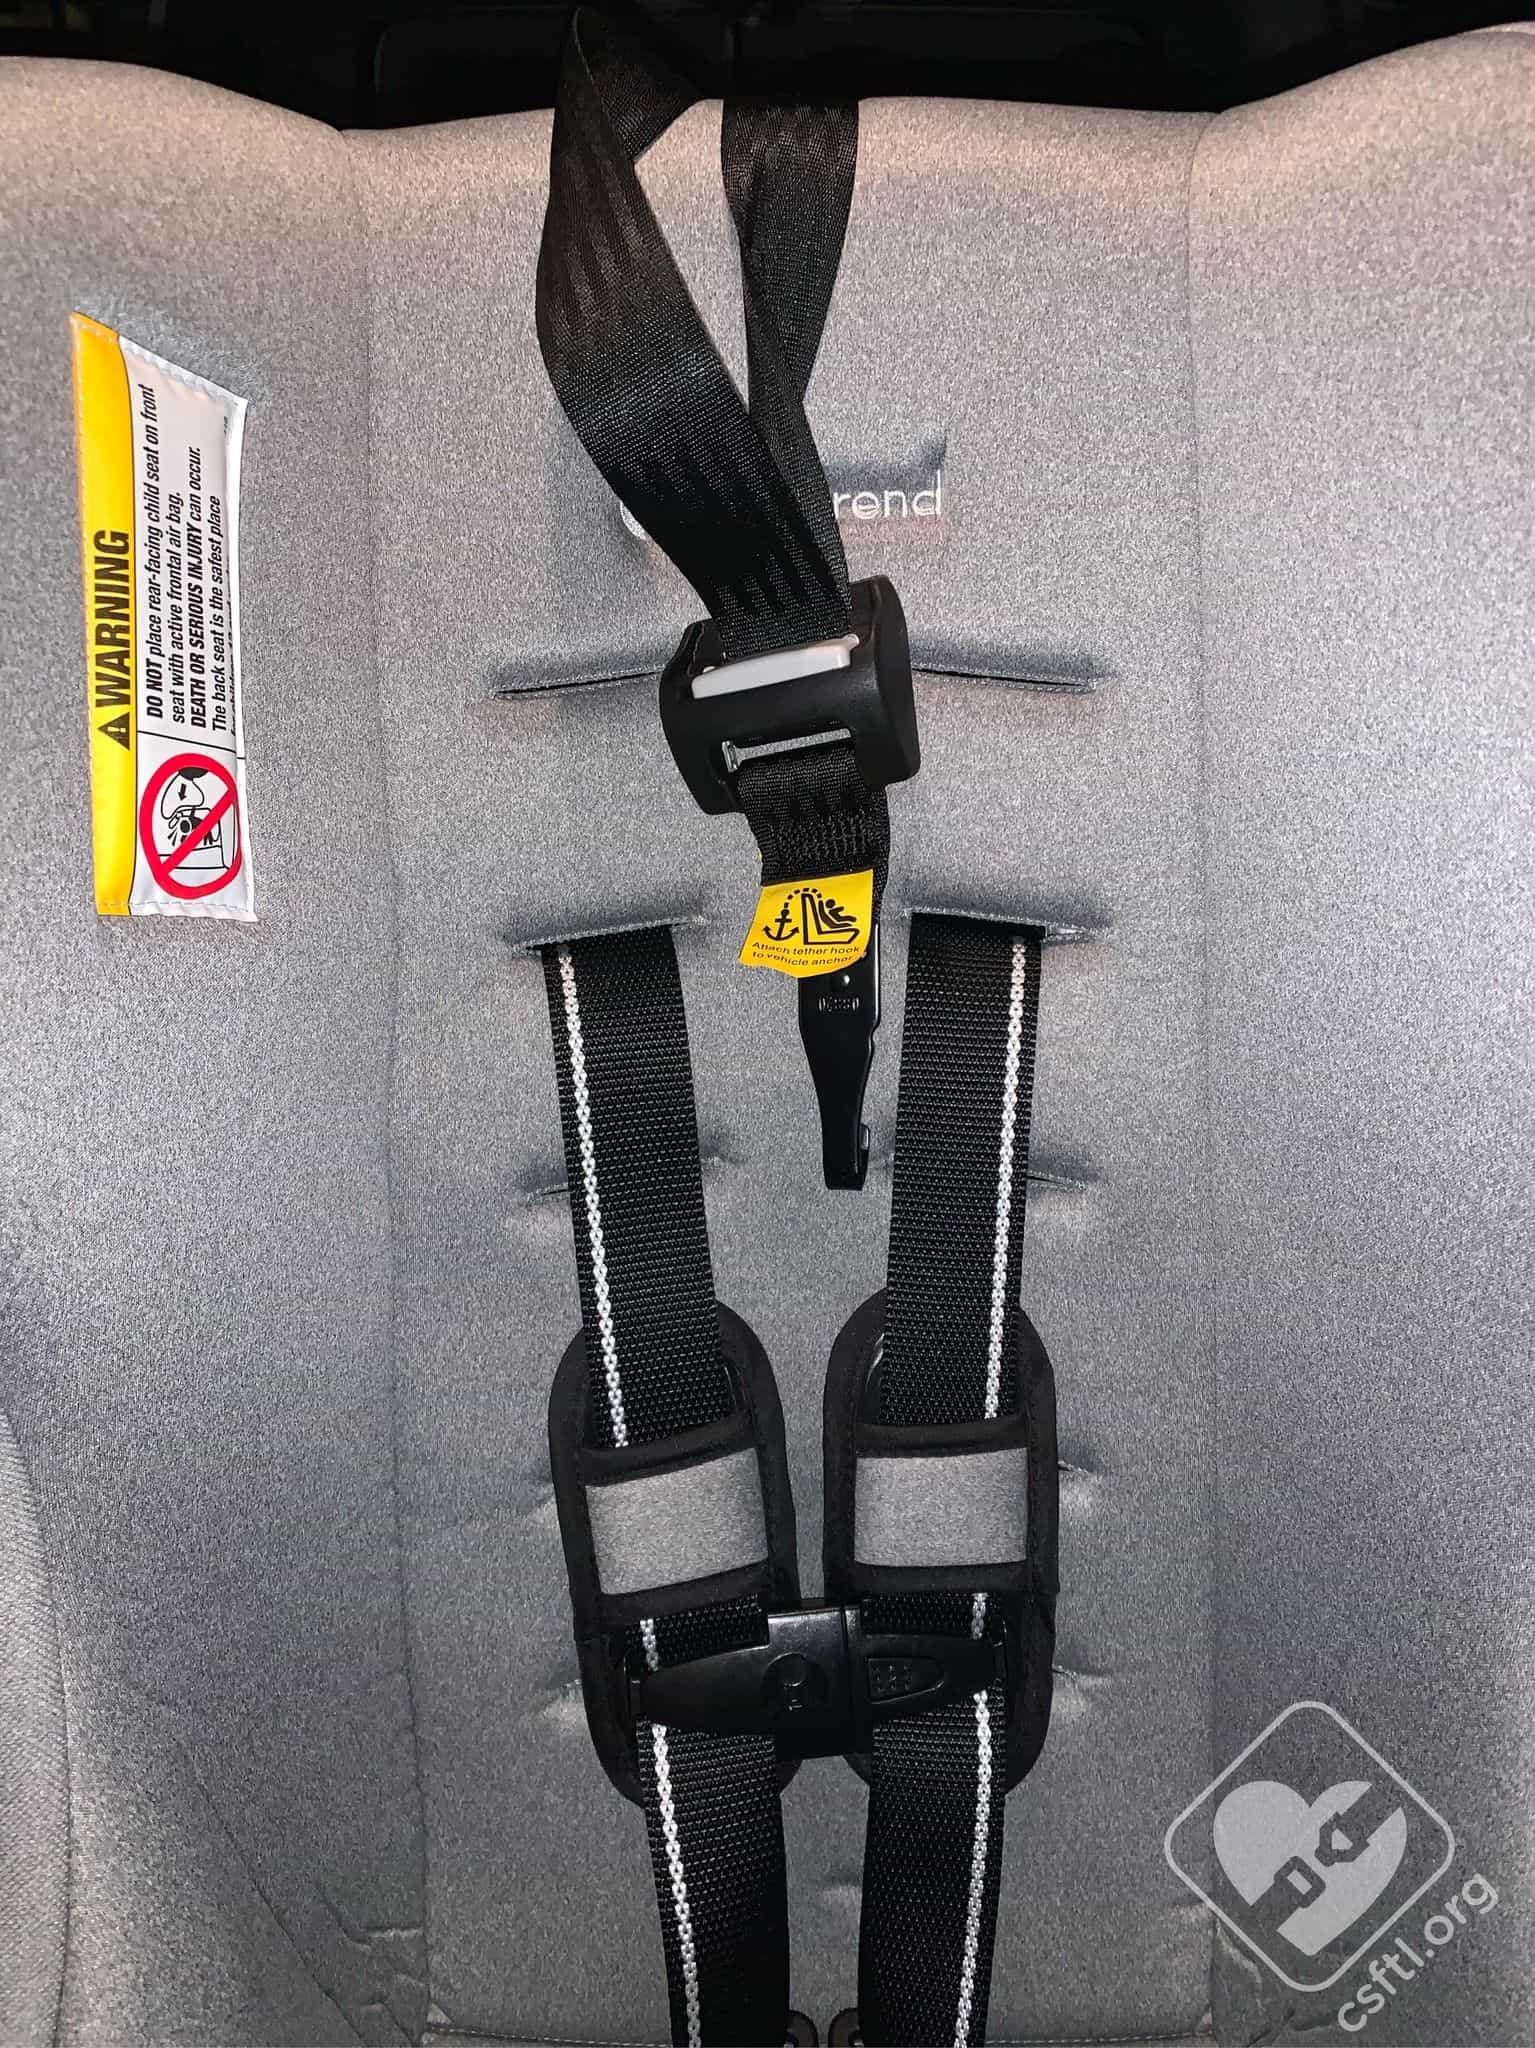
Using the Top Tether
Lower anchor strap in front of the seat for a forward facing install
As always, we recommend using the top tether for forward facing installations. The top tether webbing on the Trooper is generous in length. This is a huge perk in some vehicles where the tether anchor is a distance from the vehicle seat.
Installation: Forward Facing
Lower Anchors

Baby Trend Trooper lower anchors
Moving the lower anchors to the forward facing belt path was intuitive. I found it very easy to achieve 1 inch or less of movement at the belt path when installing with the lower anchors.
Here’s how: make sure that the lower anchors are in the forward facing belt path. Set the Trooper on the vehicle seat with the harness facing the front of the vehicle. Remove the top tether from its storage location and let it hang in the front of the seat.Loosen the lower anchor webbing as much as possible, then attach each lower anchor connector to the lower anchor in the vehicle. Press the Trooper toward the back of the vehicle seat with one hand while removing the slack from the tail of the lower anchor webbing by pulling the webbing straight up. Once the slack is removed from the lower anchor connectors, press down just a bit harder on the seat itself and give the lower anchor webbing one more pull to secure it. Check your work by giving the Trooper a firm handshake at the belt path — it should move less than an inch.Complete the installation by attaching the top tether to the vehicle’s top tether anchor, then pulling it snug.
Vehicle Seat Belt

Baby Trend Trooper forward facing vehicle seat belt installation
The forward facing belt path is nice and open, just like the rear facing belt path. The Trooper didn’t tip quite as noticeably right away but over time it also tipped towards the buckle side.To install the seat forward facing with the vehicle seat belt, set the Trooper on the vehicle seat with the harness facing the front of the vehicle. Remove the top tether from its storage location and let it hang in the front of the seat.
Next, locate and identify the forward facing belt path, then thread the vehicle seat belt through the belt path. Buckle the seat belt, then press the Trooper back toward the back of the vehicle seat with one hand while removing the slack from the vehicle seat belt with the other.
Once most of the slack is removed from the lap portion of the seat belt, hold the belt in place with one hand while extending the seat belt all the way out until the retractor is engaged (you’ll hear a clicking noise that confirms that the seat belt is now in car seat mode). Feed the seat belt back in slowly while maintaining the pressure on the seat itself — this will keep the tension on the belt. Once the seat belt has been fed back into the retractor, let go of the seat itself, then apply a little more pressure to feed a few more clicks worth of tension back into the retractor. Check your work by giving the Trooper a firm handshake at the belt path — it should move less than an inch.
Complete the installation by attaching the top tether to the vehicle’s top tether anchor, then pulling it snug.
Forward Facing
4 Year Old

Baby Trend Trooper 4 years old
This model is 4 years old, weighs 42 pounds, and is 40.5 inches tall. He still has room to grow in the Trooper Like our two year old model, he was also bothered by the required harness covers at first but he did get used to them eventually. He was able to climb into the seat and buckle himself in easily.
7 Year Old

Baby Trend Trooper 7 years old
This 7 year old model typically rides in a high back booster but agreed to test this seat out for us. He is 47 inches tall and weighs 50 pounds. He has about 6 months left to grow in the harness, that guesstimate is based on the half inch of space between the top harness slot and his shoulder. The manual states that his head can poke over the top of the seat’s shell as long as his ears are contained by the shell. The interior of the seat was a bit narrow for him but he did fit.
Important Information: Where to Find

Baby Trend Trooper date of manufacture label
Date of Manufacture: on the bottom of the car seat next to the crotch buckle. There is a QR code located here for use in the App.
Expiration Date: the seat’s expiration date is stamped into the underside of the car seat, next to the crotch buckle.

Baby Trend Trooper expiration date stamp
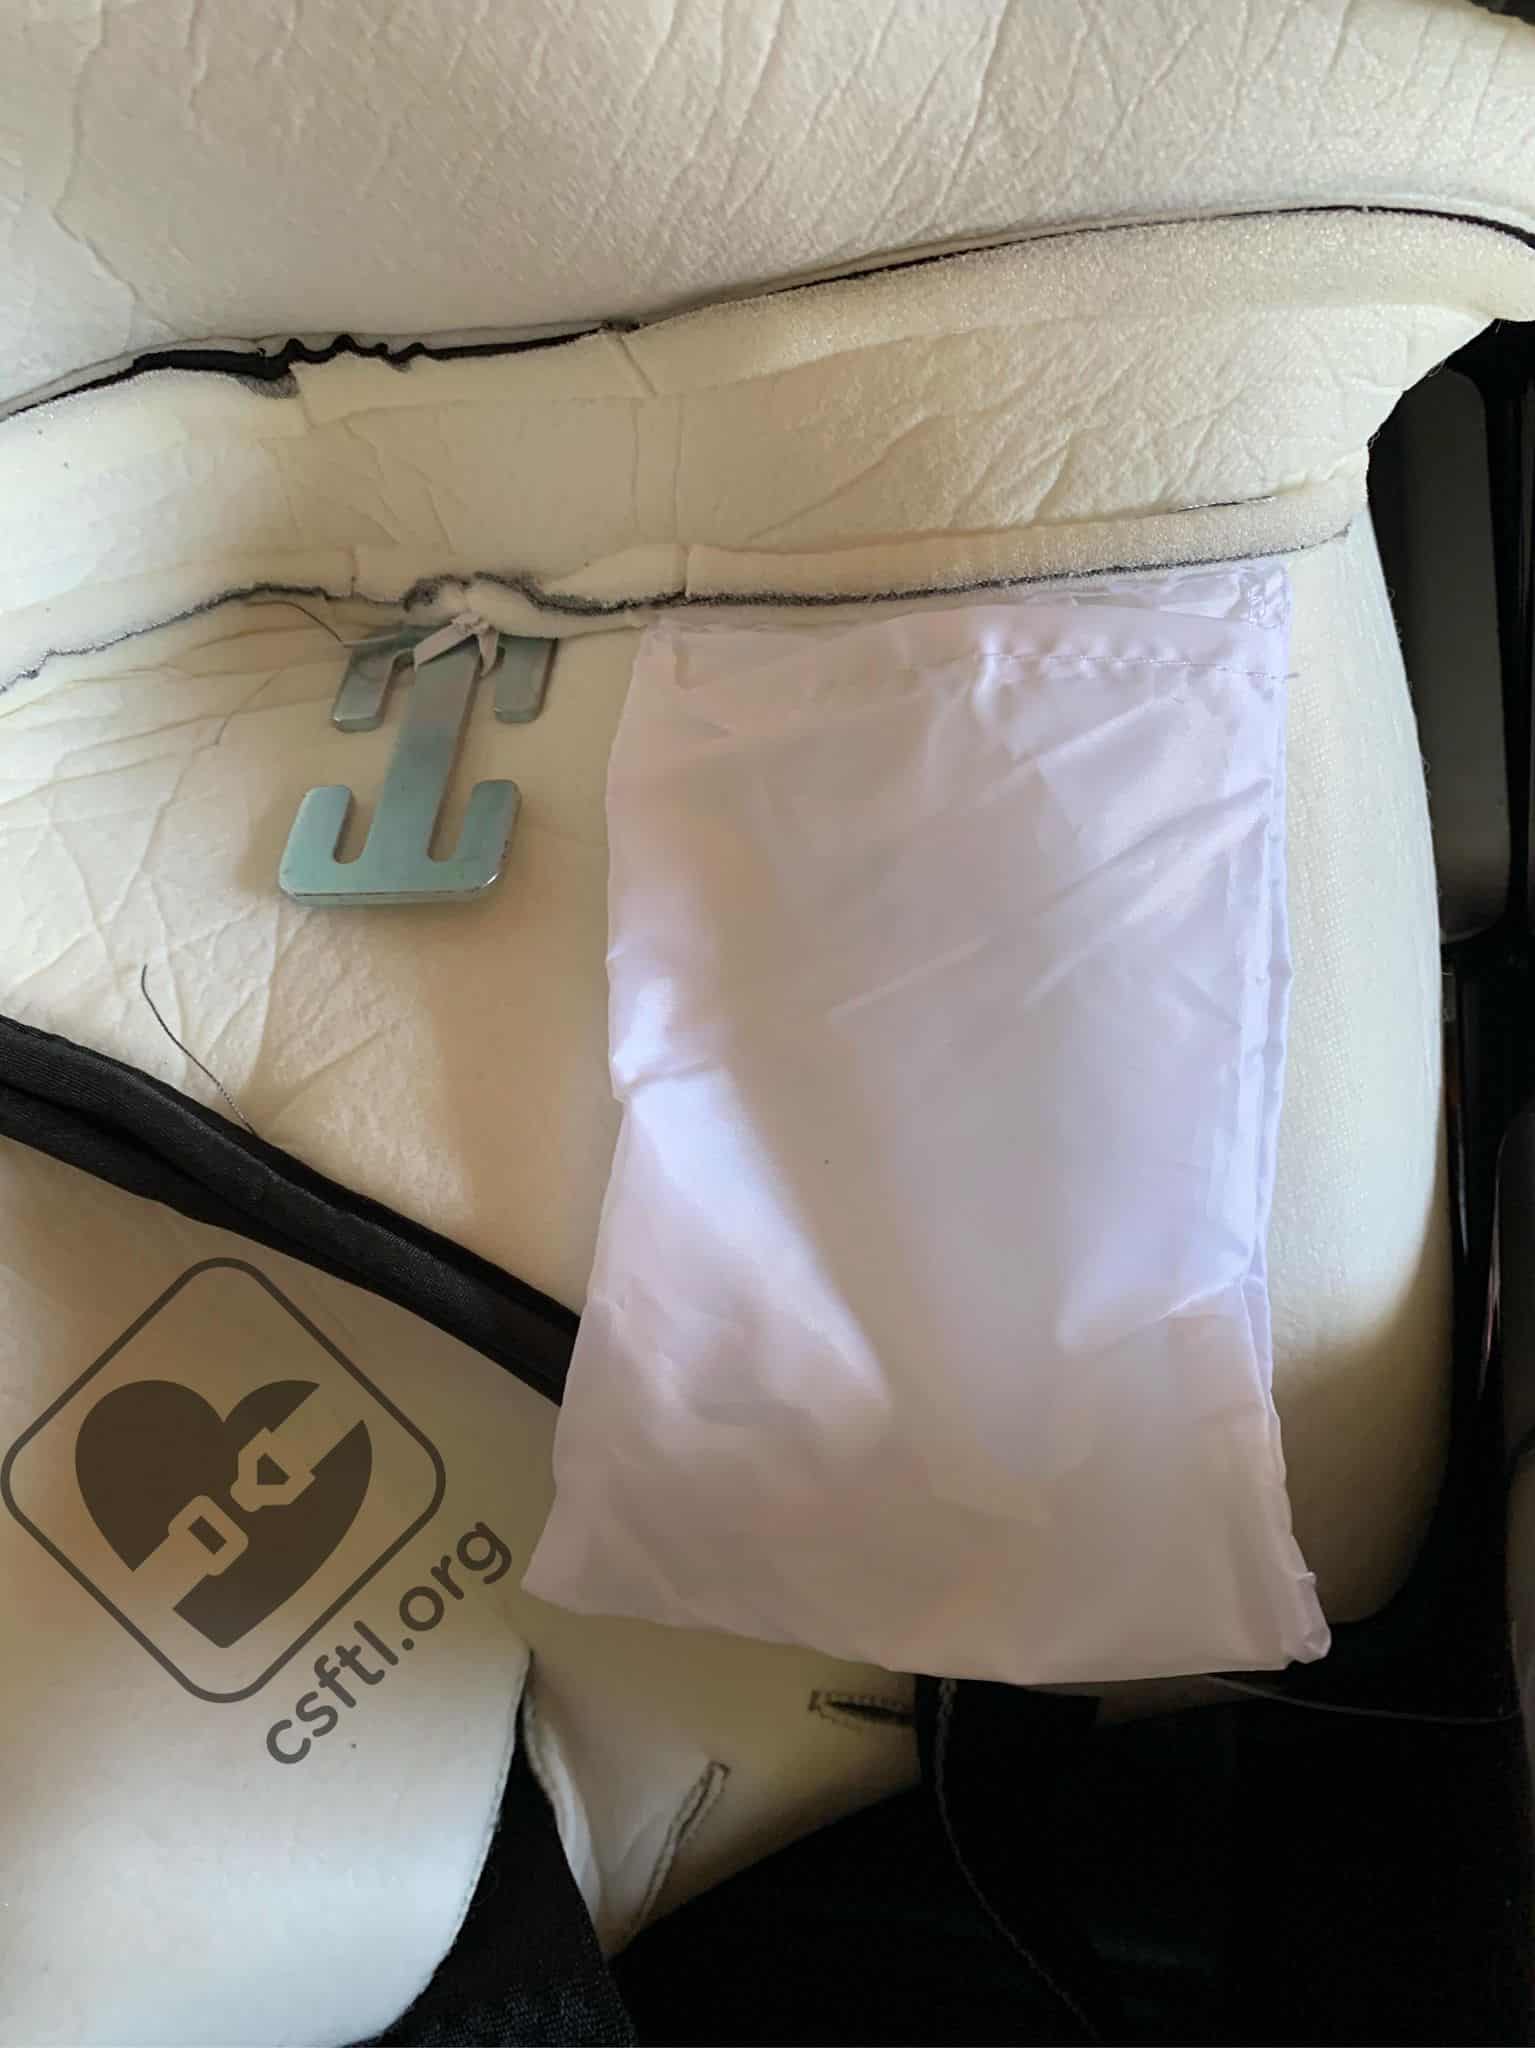
Baby Trend Trooper locking clip storage
Manual Storage: the manual stores under the cover at the child’s left knee. There is also a locking clip located in the same location.

Baby Trend Trooper FAA approval label
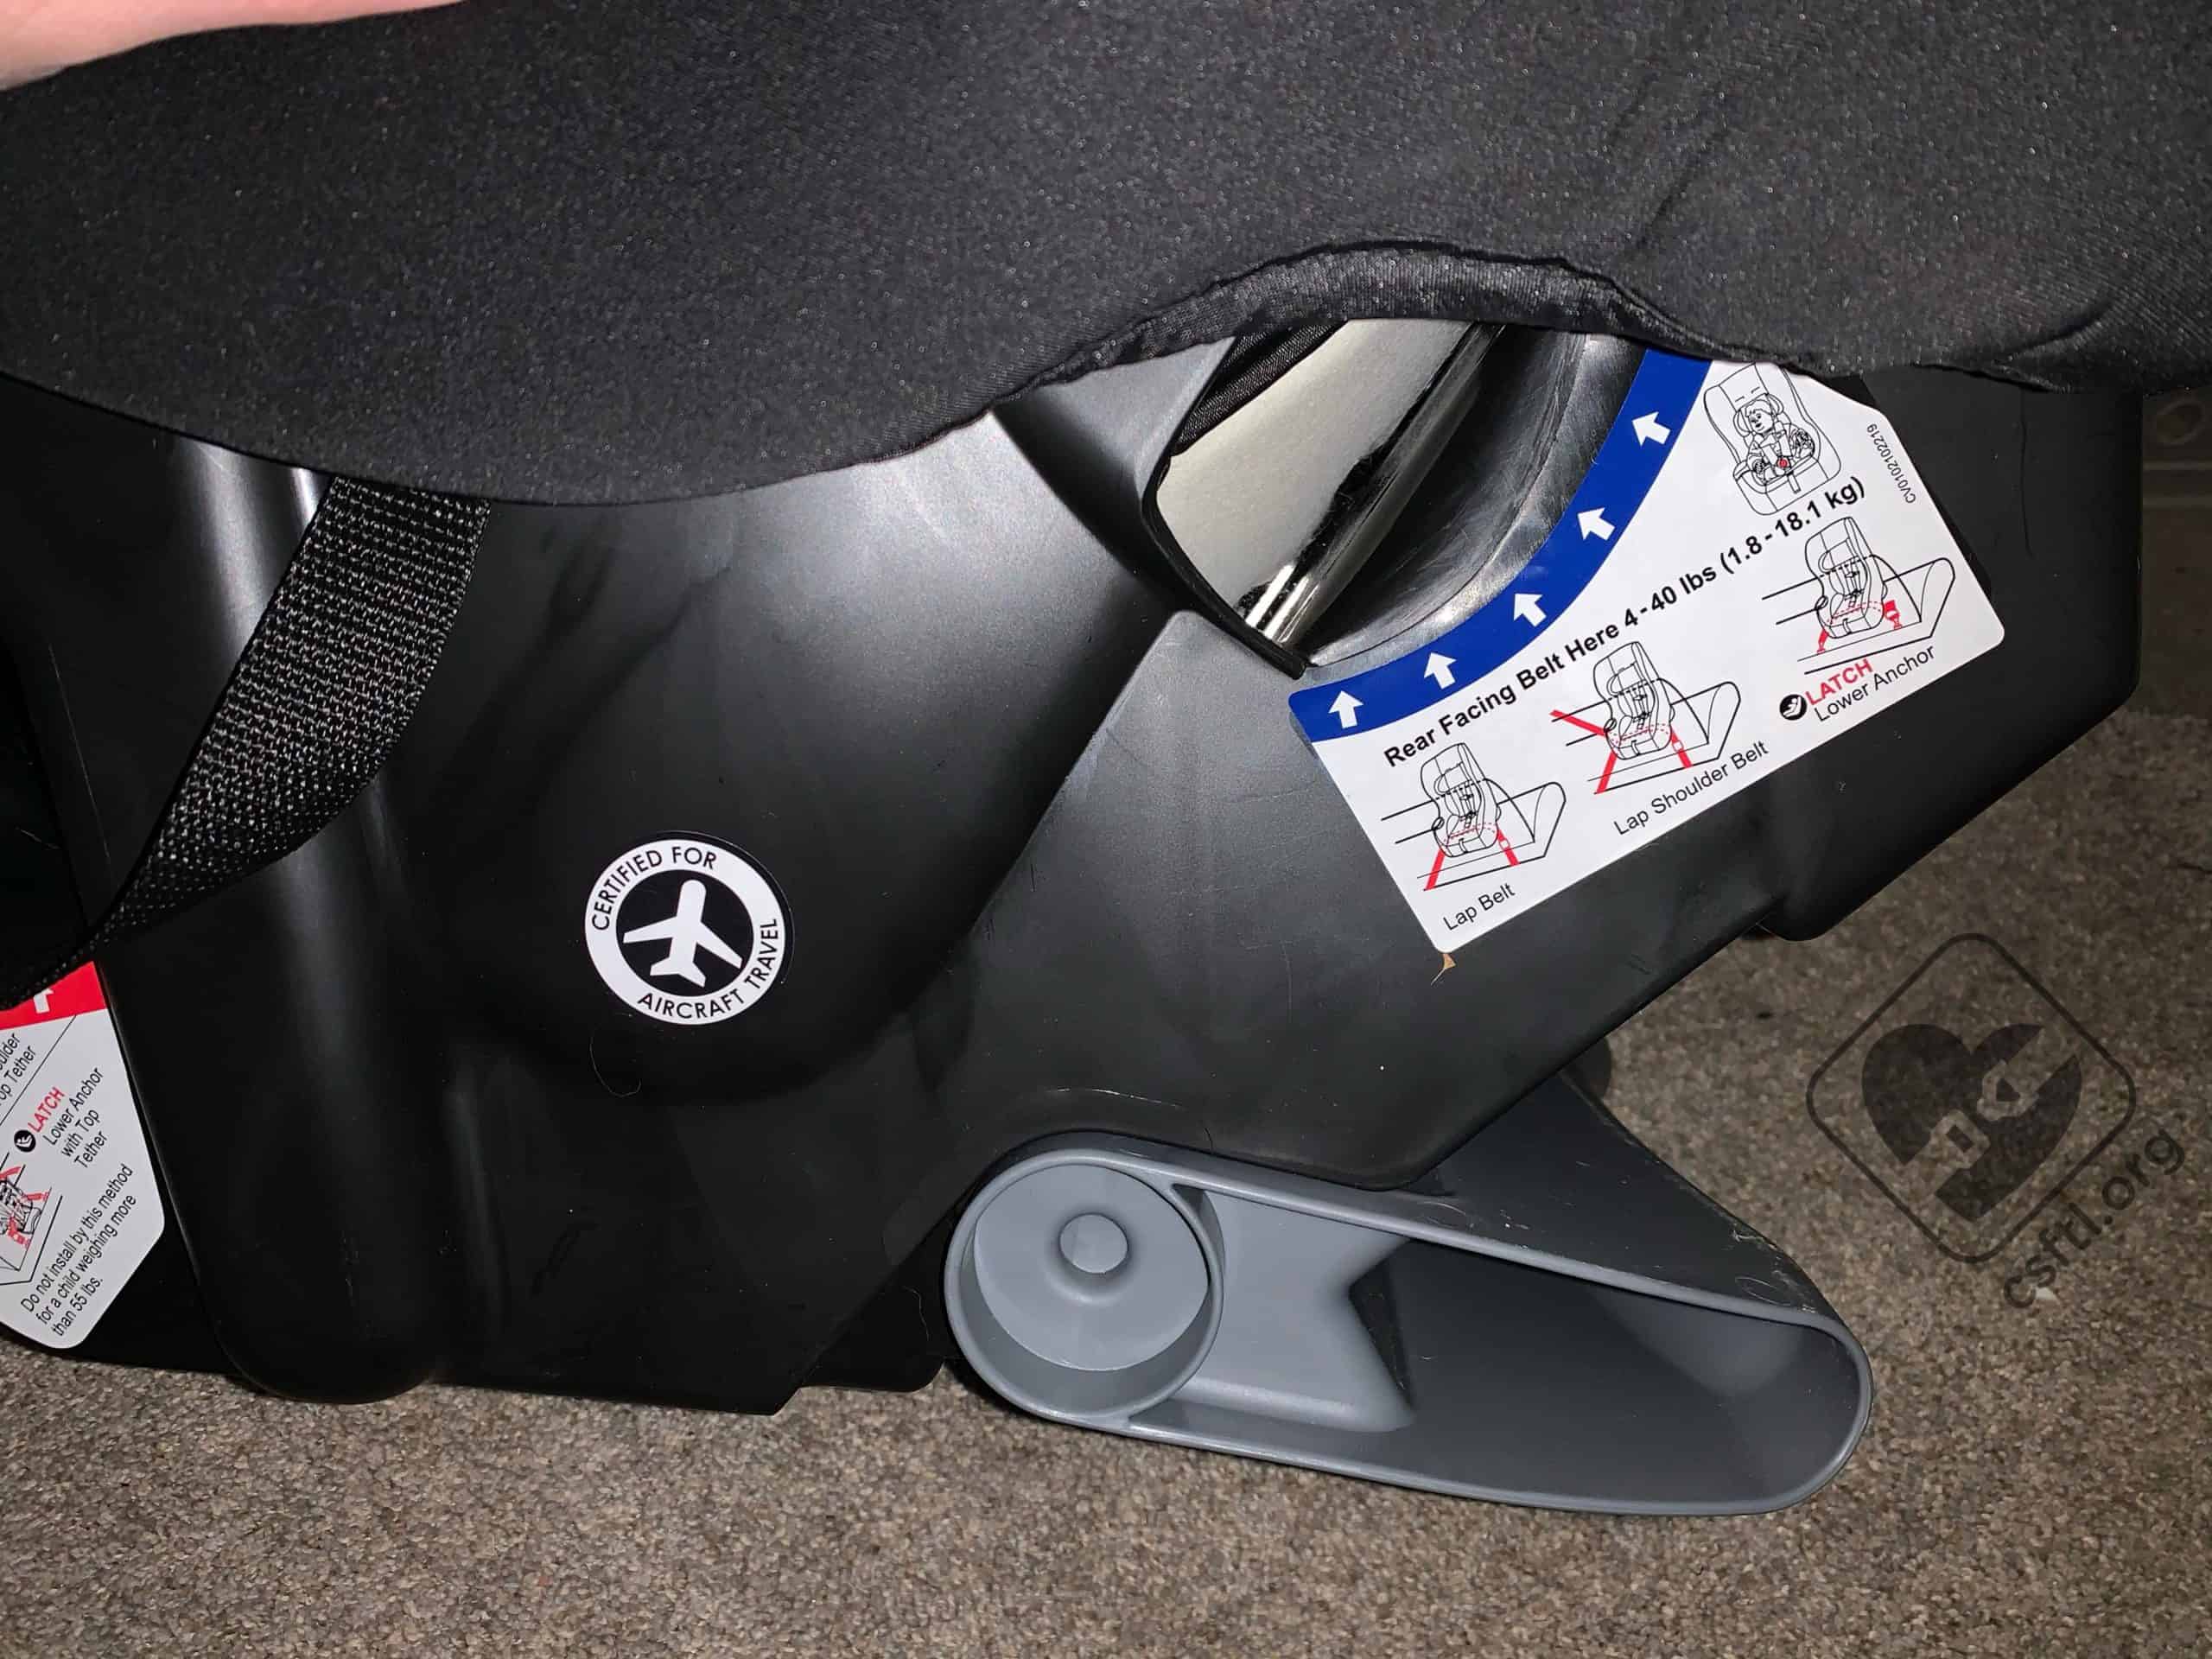
FAA Approval label: this label is located on the side of the shell near the recline foot. Unlike many car seats sold in the United States, this seat’s label has a picture of an airplane on it. Most other seats just have some red text on a wordy label.

Baby Trend Trooper top tether and lower anchor storage
Lower Anchor and Top Tether Storage: one side of the lower anchors and the top tether store on a clip that’s located near the child’s shoulders on either side of the shell.
Overall Thoughts
It’s rare to find a lightweight, narrow car seat that fits preemies through the average 7 year old, let alone a seat that comes in under $100. The Trooper does just that. For those things alone, we find the Trooper an excellent option for many situations, especially tight 3 across setups. In addition, we think it would be a good option for air travel (not that we can know for sure right now!).