The Britax B-Safe line of rear facing only car seats are a well-regarded staple of the car seat world. Caregivers generally find it easy to install and use properly. The B-Safe 35 has been retired and in its place is the B-Safe Gen2. The updated version of this seat takes the seat we’ve known and adds some internal space and a few nice features to it for a refresh. The most notable changes are the increased space inside the seating area, the updated cover, and some extra metal loops on the lower anchor connectors.
CSFTL Quick Stats
- Weight range: 4-35 pounds
- Height range: up to 32 inches tall
- Lowest harness position: 5.5 inches, 4.5 inches with the optional head pad
- Two buckle positions: 3.5 and 5.5 inches
- Weight (carrier only): 10.6 pounds
- Weight (base): 9 pounds
- Can overhang the front edge of the vehicle seat by up to 3 inches
- Expiration: 6 years
- Handle position: Allows any locked position in the vehicle
Features
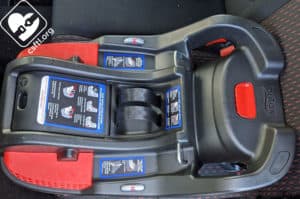
- Vehicle seat belt lockoff on the base
- Premium push-button lower anchor connectors with metal loops for increased flexibility
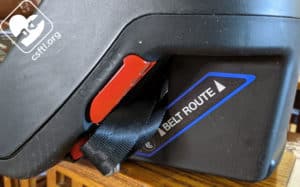
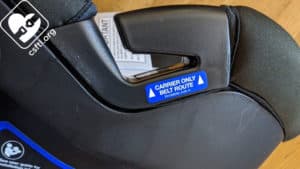
- Easily accessible belt path for baseless installation
- Optional head pillow for babies under 11 pounds
- Smooth, plush cover (no seams on the brand label!)
- SafeCell impact protection
- Steel frame in the base
- Safe Wash cover can be dried in the dryer!
- Extra large canopy
Measurements
- Shell height: 19.5 inches
- Width at widest point: 17 inches
- Front to back: 26 inches (note this very unofficial measurement is taken on a flat surface, this measurement will change when the seat is installed)
- Width at front of base: 12 inches
Features
Soft Wash/Plush Cover + Review Dog
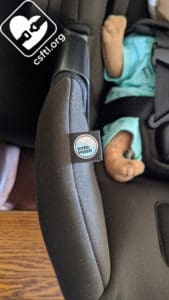
The cover is quite plush, it’s more like neoprene than cloth. The soft goods are branded with Safe Wash, which is Britax’s solution for making cleaning easy — they can be washed and put into the dryer. The cover removes without too much trouble.
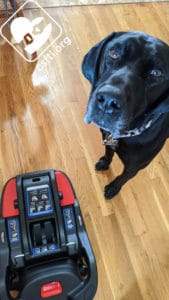
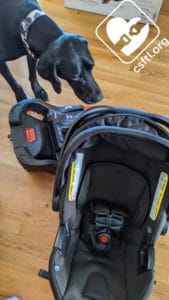
Review Dog Benson is happy to note that the cover fabrics match his fur, while his cow print collar harkens back to a different time in Britax covers.
The SafeWash fabric is indicated by a label on the cover. My favorite feature of the SafeWash cover is that it can go in the dryer. Translation: blowout diaper issues can be resolved within the same day, instead of waiting for a cover to drip dry!
Lower Anchor Connectors
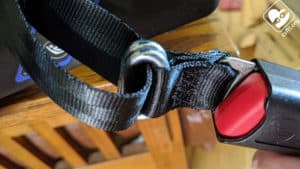
The lower anchor connectors have a set of metal loops that connect the webbing to the lower anchor connector itself. This may allow for some increased flexibility in using those lower anchors in some tight spaces, like a particularly hard-to-reach lower anchor in a vehicle.
Rethread Harness
As the child grows, the harness loops on the back of the seat must be unhooked from the splitter plate and the harness must be raised to the next slot. The manual contains a notice about not disassembling the harness so we asked the manufacturer about that restriction. We figured it would be difficult to move that harness to the next slot without disassembling it. The manufacturer clarified the intention around that instruction — it’s intended to remind caregivers to leave the chest clip and buckle tongues attached to the harness.
Harness Loops — Move at 11 Pounds
The harness has a smaller set of loops that are intended for use with the tiniest passengers. The seat arrives with the harness in this smaller position. When the baby weighs 11 pounds, the crotch buckle must be moved to the outer position, and the harness must be moved from the newborn loops to the longer setting.
Optional Head Pad
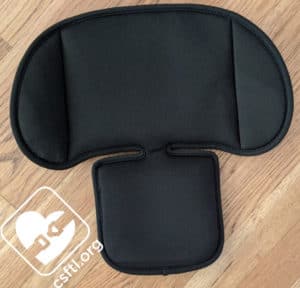
The seat includes an optional head pad that’s the same plush fabric as the rest of the soft goods. The manual describes this head pad as optional but doesn’t include any restrictions around when it can or cannot be used. We’d suggest using it when it provides a better fit to child and removing it if it doesn’t.
Recline Angle Adjuster
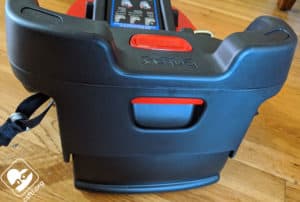
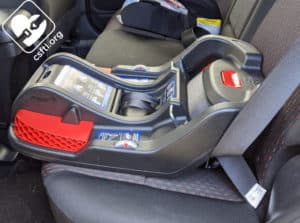
The recline angle adjuster extends quite a bit to fit into the vehicle seat bight. It’s so large that through several years of teaching a newborn car seat class where caregivers installed their seats as part of the class, I haven’t once found a situation where the B-Safe base doesn’t fit properly. I expect the Gen2 base to work the same way and during my limited trial, I had no issues with getting the base installed at the right recline angle. This adjuster extends by squeezing the handle on the front of the base and letting the plastic piece extend from the bottom of the base.
Installation with the Base
Lower Anchors
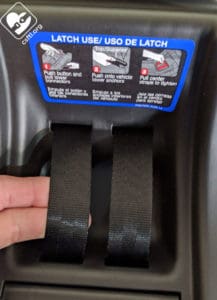
The anchor webbing is mounted in the center of the base, these two straps of webbing adjust each of the lower anchor connectors. This is a little different than many other rear facing only seats that have only one tail to pull. They release via the red button the top of the base.
Installing the B-Safe Gen2 with the base is just like installing the older version of this seat. In case that isn’t something you’ve done a bazillion times already, here’s a quick overview. Remove the lower anchors from their storage locations on the side of the base, set the base on the vehicle seat with the lower anchors pointing toward the back of the vehicle. Press the red button on the top of the base to loosen the webbing, then connect each lower anchor to the lower anchor in the vehicle. Press down on the base with one hand while pulling the lower anchor webbing on the middle of the base. I’ve found that this base benefits from an extra pull at the very end to snug things up one final time.
Vehicle Seat Belt
The base includes a steel-reinforced lockoff that’s quite easy to use. Set the base on the vehicle seat with the tallest part of the base pointing toward the back of the vehicle. Make sure that the lower anchors are stored in their handy storage spots on the base, then pull out the seat belt just far enough to fit the width of the base.
Thread the vehicle seat belt through the belt path on the base, then buckle the seat belt. Press down on the top of the base with one hand while pulling the shoulder portion of the seat belt nice and snug. Once the belt is snug, keep the pressure applied to the base, then slide the shoulder portion of the seat belt through the lockoff until it stops moving.
Check Your Work
Once your install is complete, check your work by giving the base a firm handshake at the belt path with your non-dominant hand. The base should move less than an inch.
Installation without the Base
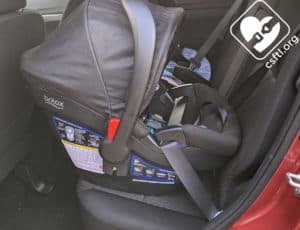
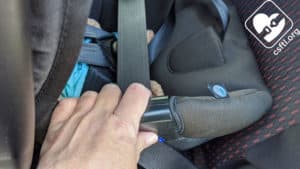
One of my favorite parts of the older B-Safe series of seats is the belt path for installation without the base. On so many rear facing only seats, this belt path seems like an afterthought — it’s sort of crammed on top of the padding and is hard to access or for new parents to identify. But that is not the case for the B-Safe Gen2! That belt path is clearly marked and easy to access. Families who use ride share vehicles or find themselves installing the seat without the base would find this seat an excellent option!
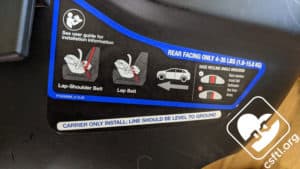
This seat does not include Euro routing — where the shoulder portion of the seat belt wraps around the back of the carrier — so the installation just uses the lap portion of the vehicle seat belt. To install using this method, set the carrier on the vehicle seat with the harness facing toward the back of the vehicle.
Do a first check to see that the white recline angle indicator line is somewhat parallel with the ground, then thread the lap portion of the vehicle seat belt through the belt path. Buckle the seat belt, then press down on the carrier to remove the slack from the vehicle seat belt. Continue pressing down and pulling on the shoulder portion of the seat belt until it is snug. Then, use one hand to hold the belt in place while the other hand reaches back to pull the length of the seat belt from the retractor in the vehicle until it clicks. At that point, feed the shoulder portion of the belt back into the vehicle until the car seat is installed snugly. You may need to press down on the carrier one final time to remove the last few clicks of slack from the belt.
Check Your Work
Once your install is complete, check your work by giving the base a firm handshake at the belt path with your non-dominant hand. The base should move less than an inch.
Fit to Child
Preemie Doll
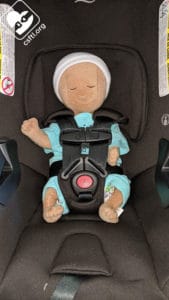
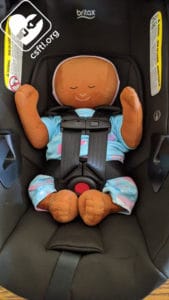
Our preemie Huggable Images doll weighs 4 pounds and is 17 inches long. With the harness on the lowest slot and the infant padding in the seat, the B-Safe Gen2 offered a great fit. As always, we suggest that caregivers who find themselves taking a preemie home from the hospital check with a CPST (many hospitals that care for preemies have one or more of us on staff!) before that first ride.
Newborn Doll
With the pandemic still in full swing, our access to local friends, let alone local friends’ newborn babies, remains scarce. Good thing our dolls are at the ready to help out! The newborn Huggable Images doll weighs 7 pounds and is 17 inches long.
16 Month Old Doll
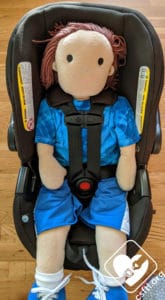
Since this seat is rated to 35 pounds and 32 inches tall, we called upon our 16 month old Huggable Images doll to pose for us. The doll is 31 inches tall. We were pleased to see that the doll fits in the seat with a smidge of room left to grow. We recognize that most families transition to a convertible or multimode car seat after about a year, so it’s fairly unlikely that most families who have a child this size would be using this seat as their child’s primary seat but we like to demonstrate it just the same.
Important Information: Where to Find
FAA approval label: the carrier portion of the seat is approved for use on aircraft. The FAA approval label is on the outside of the carrier.
Date of manufacture label: the B-Safe Gen2 expires 6 years after the date of manufacture. The label is found on the underside of the carrier,
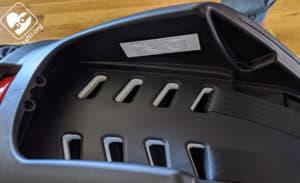
Manual storage: the manual stores in a handy compartment on the base.
Overall Thoughts
The B-Safe Gen2 has all of the features we know and love about the older versions of this seat with the added benefit of a different type of cover and a larger internal seating area.
Giveaway
Our friends at Britax are giving one B-Safe Gen2 away to a lucky reader in the United States. Read our Terms and Conditions, then enter below for your chance to win.
a Rafflecopter giveaway
