That first trip home with your newborn baby can be so daunting. Here you’ve just gone through an overwhelming yet exhilarating experience by adding a tiny new member to your family, now you’re expected to safely transport that tiny new human on a regular basis. This is absolutely where we come in, your friends here at CSFTL or any CPST who can help. We’re ready to help you gain confidence around car seat usage.
The Basics
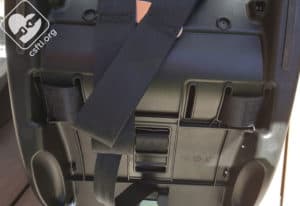
Setting up the seat: most of the time, a brand new rear facing only car seat (also known as infant seats, baby car seats, infant carriers or many other terms, we’ll use rear facing only car seat here) will come out of the box with the harness in the right harness slot for most average sized newborns.
A small number of rear facing only car seats have multiple sets of harness loops to fit different sizes of babies. In most cases, families shouldn’t have to change these loops, especially not at first. Confirm the rules for your particular seat in the car seat’s manual before heading out for the first ride.
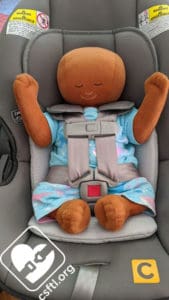
Child’s position: Unlike our very compliant dolls, newborn babies can be very wiggly. We suggest putting one hand under the child’s bum to ensure that the child’s rear end is all the way back in the seat before harnessing. Use that hand to set the child solidly in the seat, bum first. That approach helps to reduce the amount of squirming/slouching that occurs, but don’t be surprised if you find yourself needing to take baby out and restart the harnessing process – some babies can be quite effective at avoiding being harnessed in their seat!
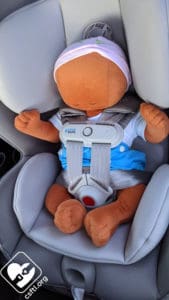
Harnessing: a child who rides rear facing must have the harness at or below their shoulders. The harness should be snug enough to pass the pinch test (check for slack at the hips and torso in addition to the traditional pinch test location: the shoulders).
Harness adjustment: the harness should be snug, with the chest clip at the child’s chest.
Here’s our method: we suggest loosening the harness all of the way, moving it out of the way before placing baby in the seat.
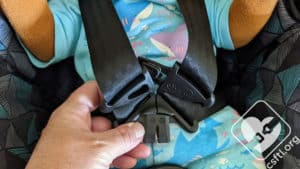
Secure the crotch buckle by pulling the harness over the child’s legs, then insterting the 2 metal pieces into the buckle between the child’s legs first.
Then, move the slack all the way up to the shoulders. Push the chest clip down (for a moment), then pull the harness adjuster to remove the slack.
Once all slack is removed and the harness passes the pinch test (pinch vertically at the child’s shoulders, you should not be able to pinch any slack), move the chest clip up to the child’s chest, it should align with the armpits, then check the torso and hips because slack tends to hide there as well.
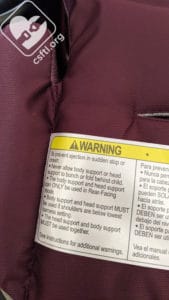
Inserts: many car seats that rear face (rear facing only, convertibles, and multimode seats) include an insert or a set of inserts that can be used up to or between certain weight range. This particular misuse — using the inserts long after they’re permitted — is one of the most common misuses we see. Confirm the rules for your particular seat in the car seat’s manual.
When to remove the inserts: in many cases, the inserts are optional. We sometimes find that preemies and newborns have a better harness fit when the padding is removed, that’s why we try to show both ways in our reviews. If the manual permits it, we usually suggest trying the harness without the inserts to see how well it fits the child unless they are required.
Aftermarket inserts: we know that the baby aisle in many stores is full of car seats and accessories that are within an arm’s reach of those car seats. But that does not mean that those accessories were tested with the car seats, the bottom line is that we really can’t predict how these unregulated products will perform in a crash. Use only the inserts and padding that came with the seat or those that were provided for the seat by the manufacturer.
Head positioning: ideally, the child’s head is flat against the back of the seat and in the middle of the head area. The last thing we’d want to see is a child’s head pushed down to their chest — this can restrict the airway in a child who doesn’t yet have head and neck control. Some head inserts can push a child’s head forward so it’s often a good idea to check the fit both with and without the insert before heading out for a drive.
Clothing: avoid puffy coats. Each winter, we post a public service announcement in our Facebook group about the dangers of a child wearing a puffy coat in a harnessed car seats and are met with a ton of questions about specific coats. Unfortunately, this isn’t Puffy Coats for the Littles, it’s Car Seats for the Littles so we keep our message more generic rather than attempt to armchair analyze each coat for safety.
Bottom line: puffy coats can compress in a crash and the child can fly out of the harness. Unfortunately, we do see this type of crash in the real world so we’re hyper aware of this danger.
Handle positions: the only type of car seat with a carry handle is a rear facing only car seat. Most rear facing only car seats allow this handle to be used in any locked position. Confirm the rules for your particular seat in the car seat’s manual.
Alternate/Less Frequent Topics
Crotch roll: some car seats allow the use of a rolled washcloth The proper way to use a crotch roll (and that they’re not always permitted) is to roll the washcloth into a tight roll, and place it between the crotch buckle webbing and the baby (the baby should not be sitting on the washcloth).
Side blankets: While not necessary, some seats also allow the use of rolled receiving blankets alongside baby for support instead of or in conjunction with the seat’s own padding. Generally these rolled receiving blankets are more for the caregivers and less for the baby – but they can provide some support along the baby’s sides. Ensure that they travel along each side of the baby and do not circle over baby’s head (this could slip behind their head and cause that chin to chest position we don’t want to see in a newborn).
Froggy legs: newborns typically emerge having just spent a good bit of time squashed into a small space so it’s natural that their little legs will go back into a curled-up position at times. Sometimes, this even happens when new caregivers put their child into the car seat for the first time, those little legs will get tucked into the wrong place and the caregiver may not know. Always take a moment to make sure the child’s legs are in the proper position underneath the hip section of the harness.
Time to Ride
Once your child’s car seat is installed properly and you’ve practiced harnessing until you’re confident that you can do it correctly on every ride, it’s time to head out into the world as a larger group than you were before. We hope that these tips helped you and your family gain the confidence to use your child’s car seat correctly on every ride.
