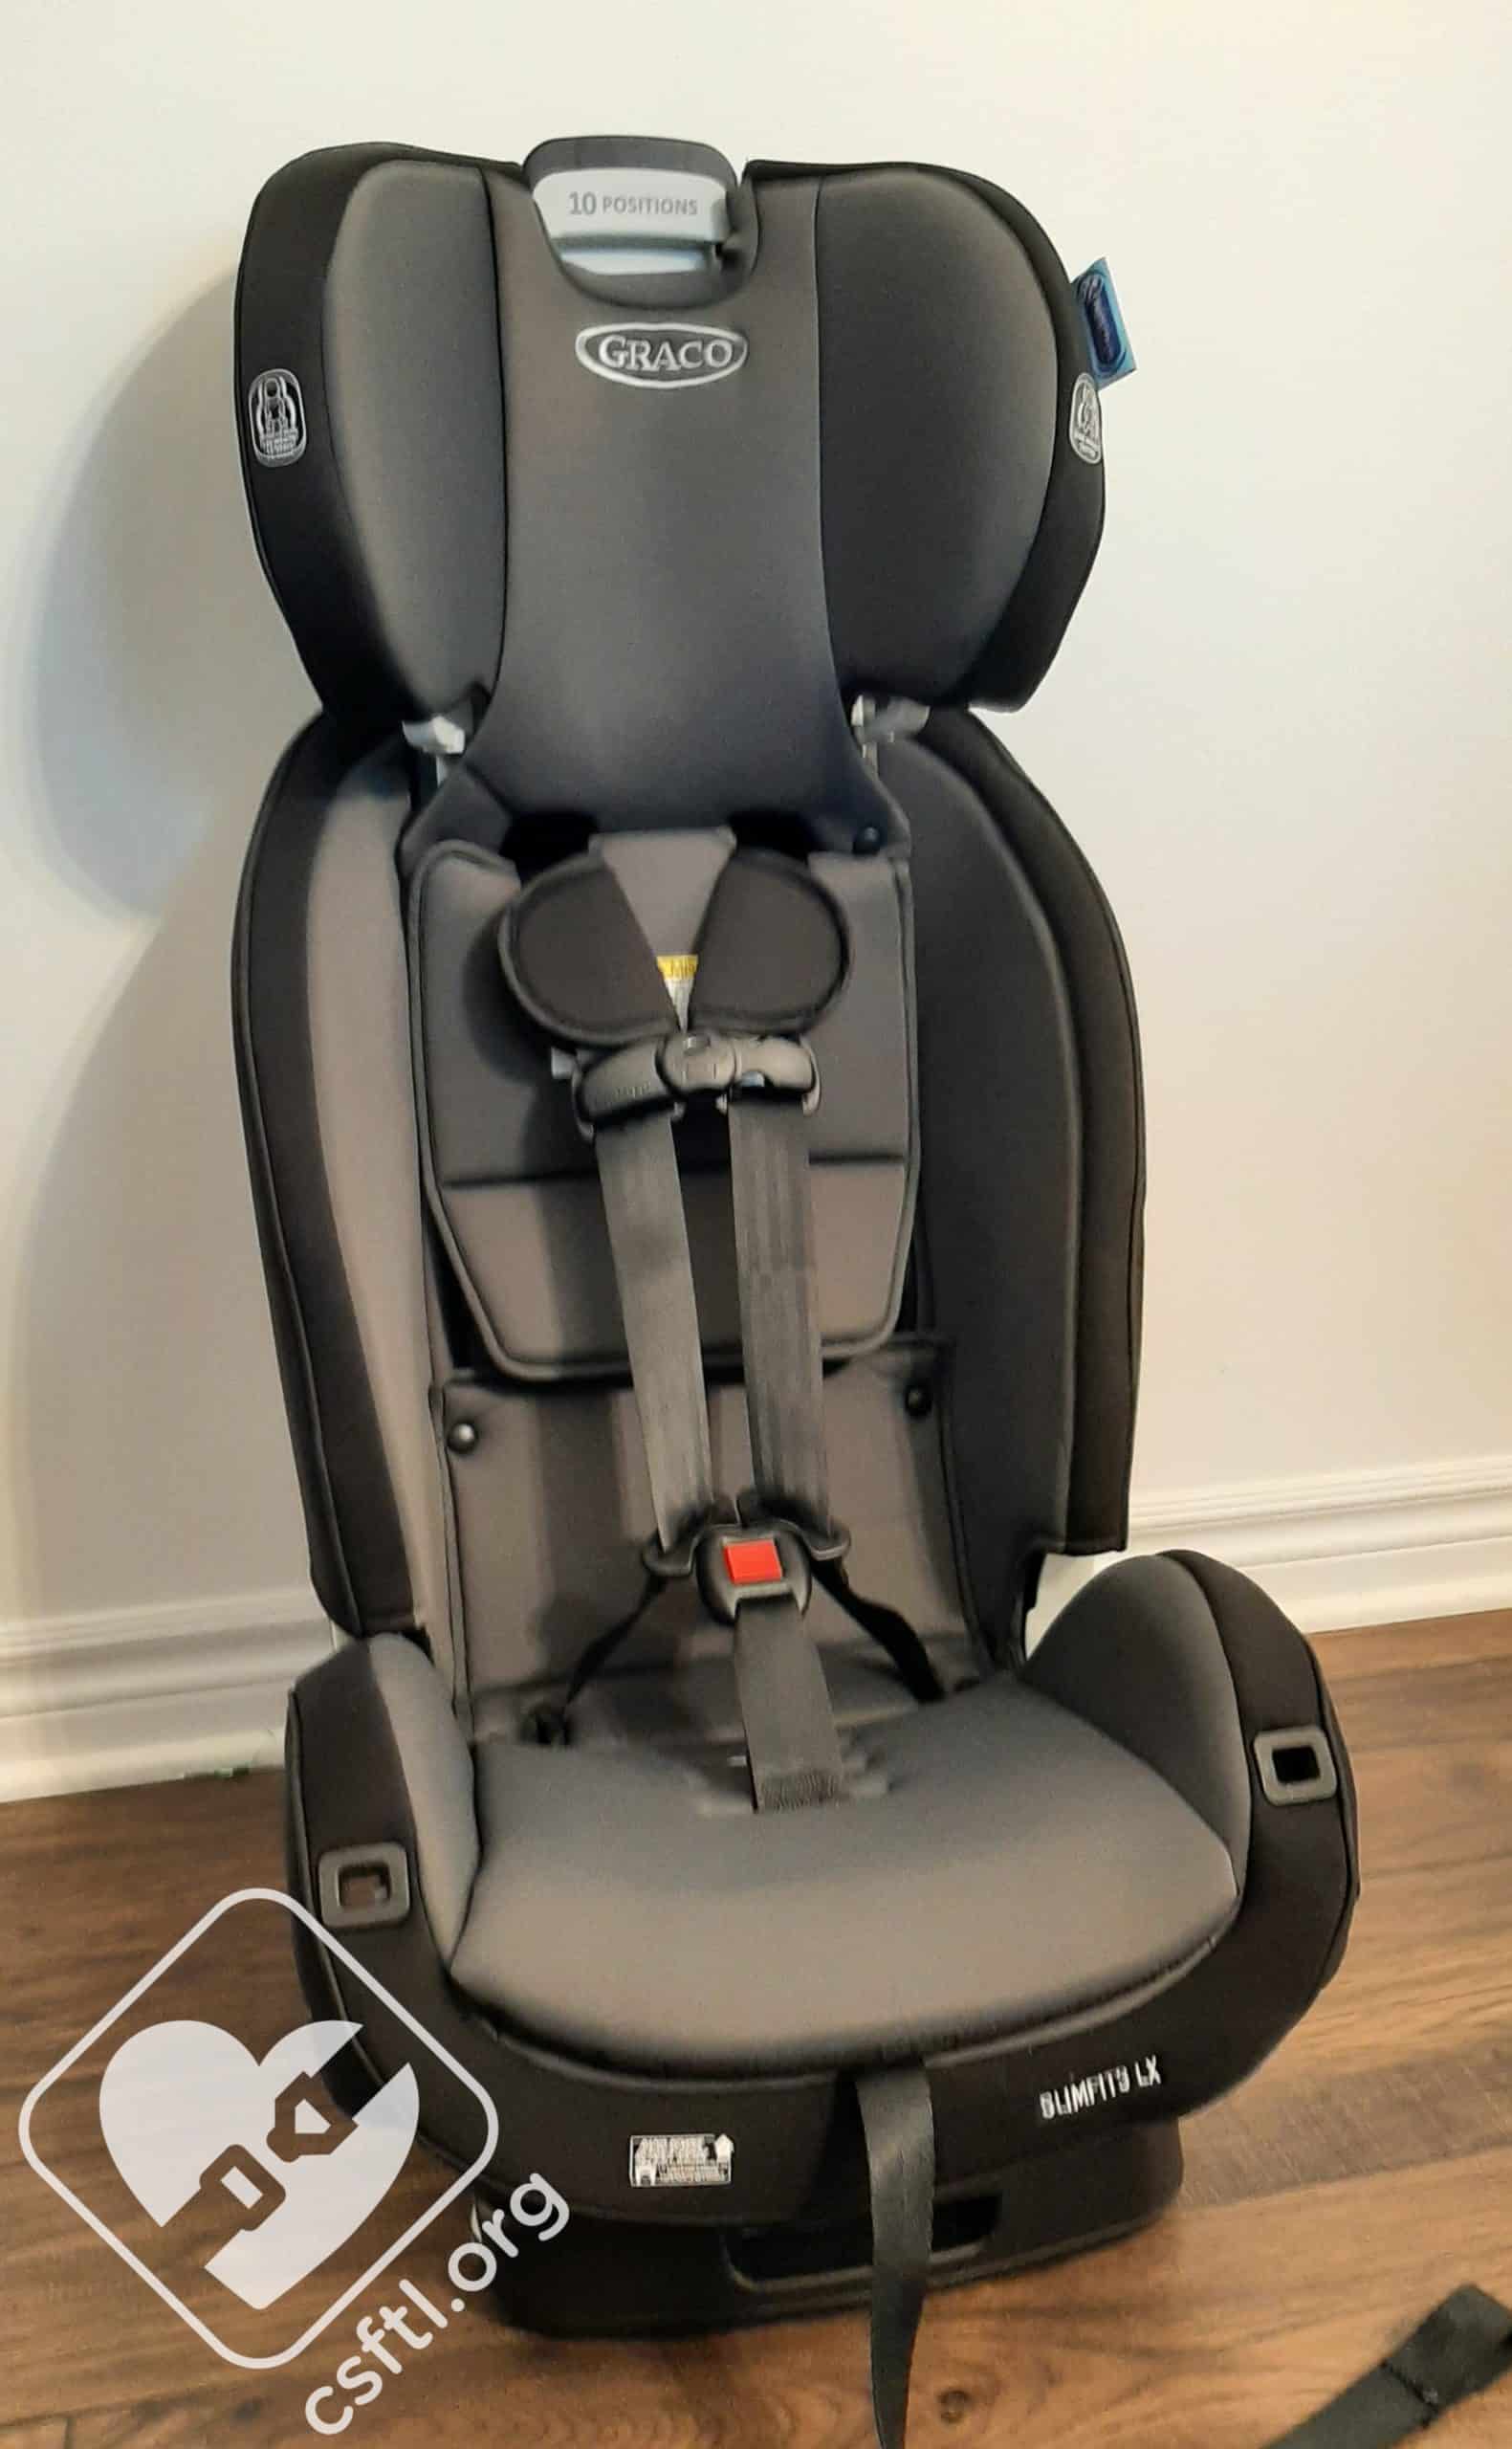
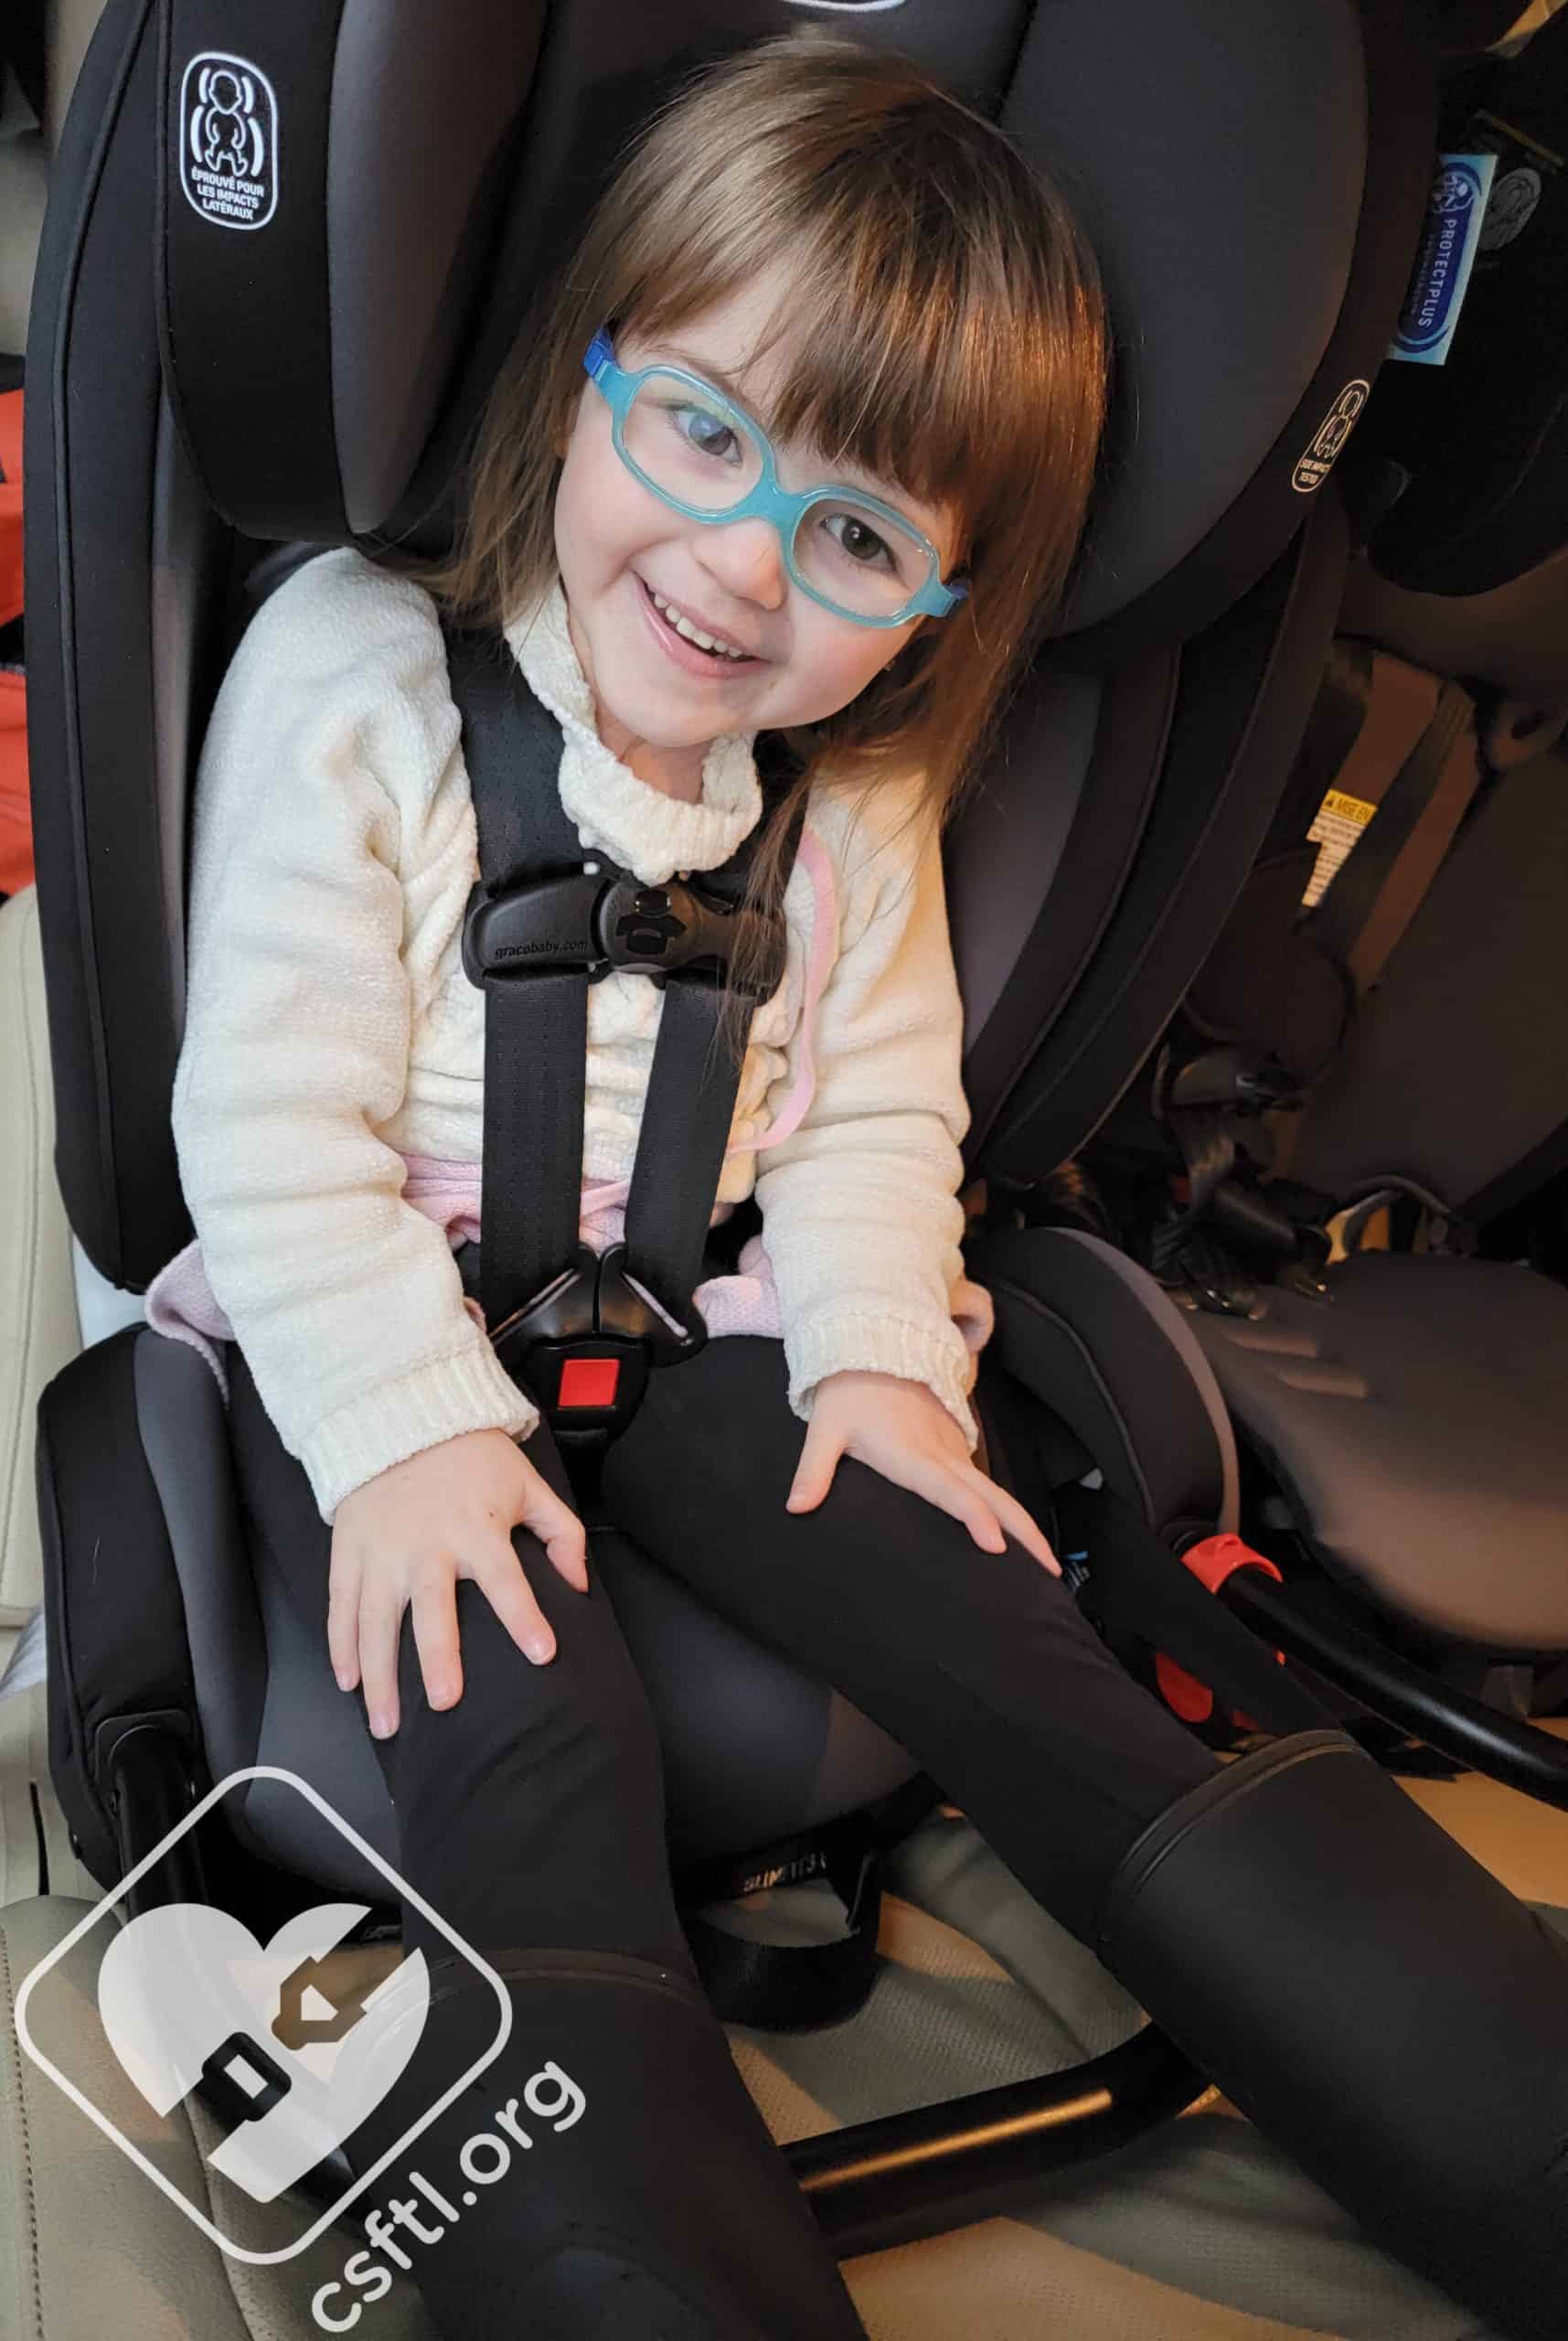
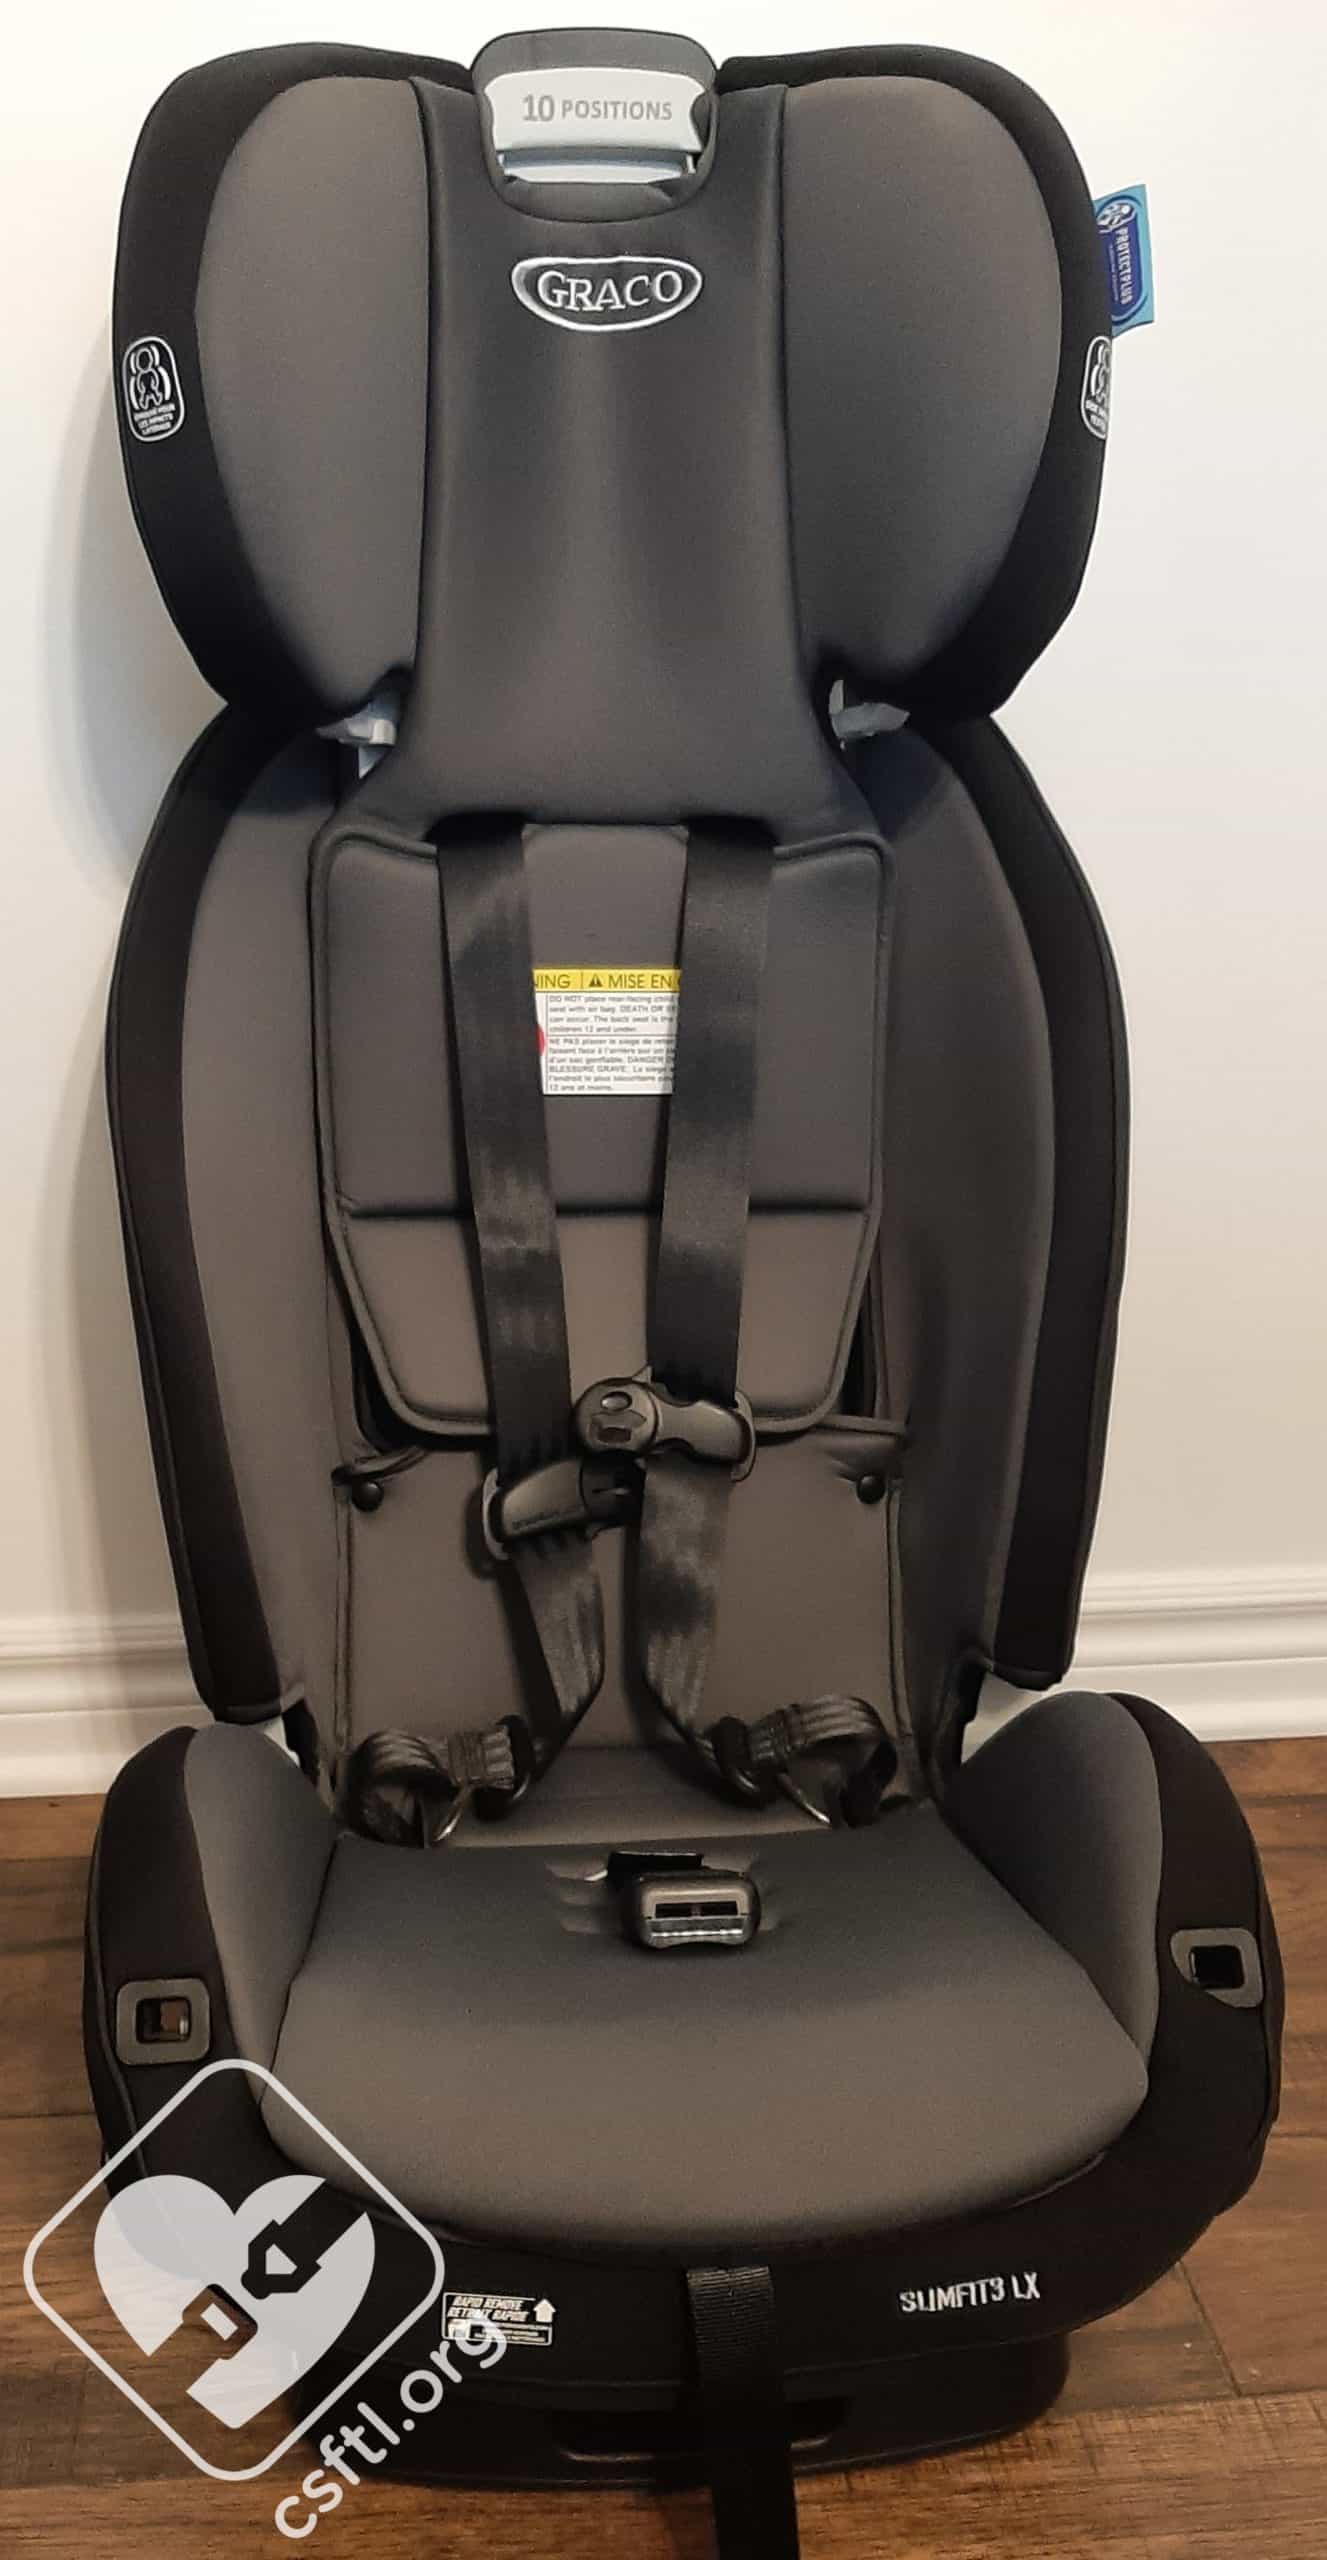
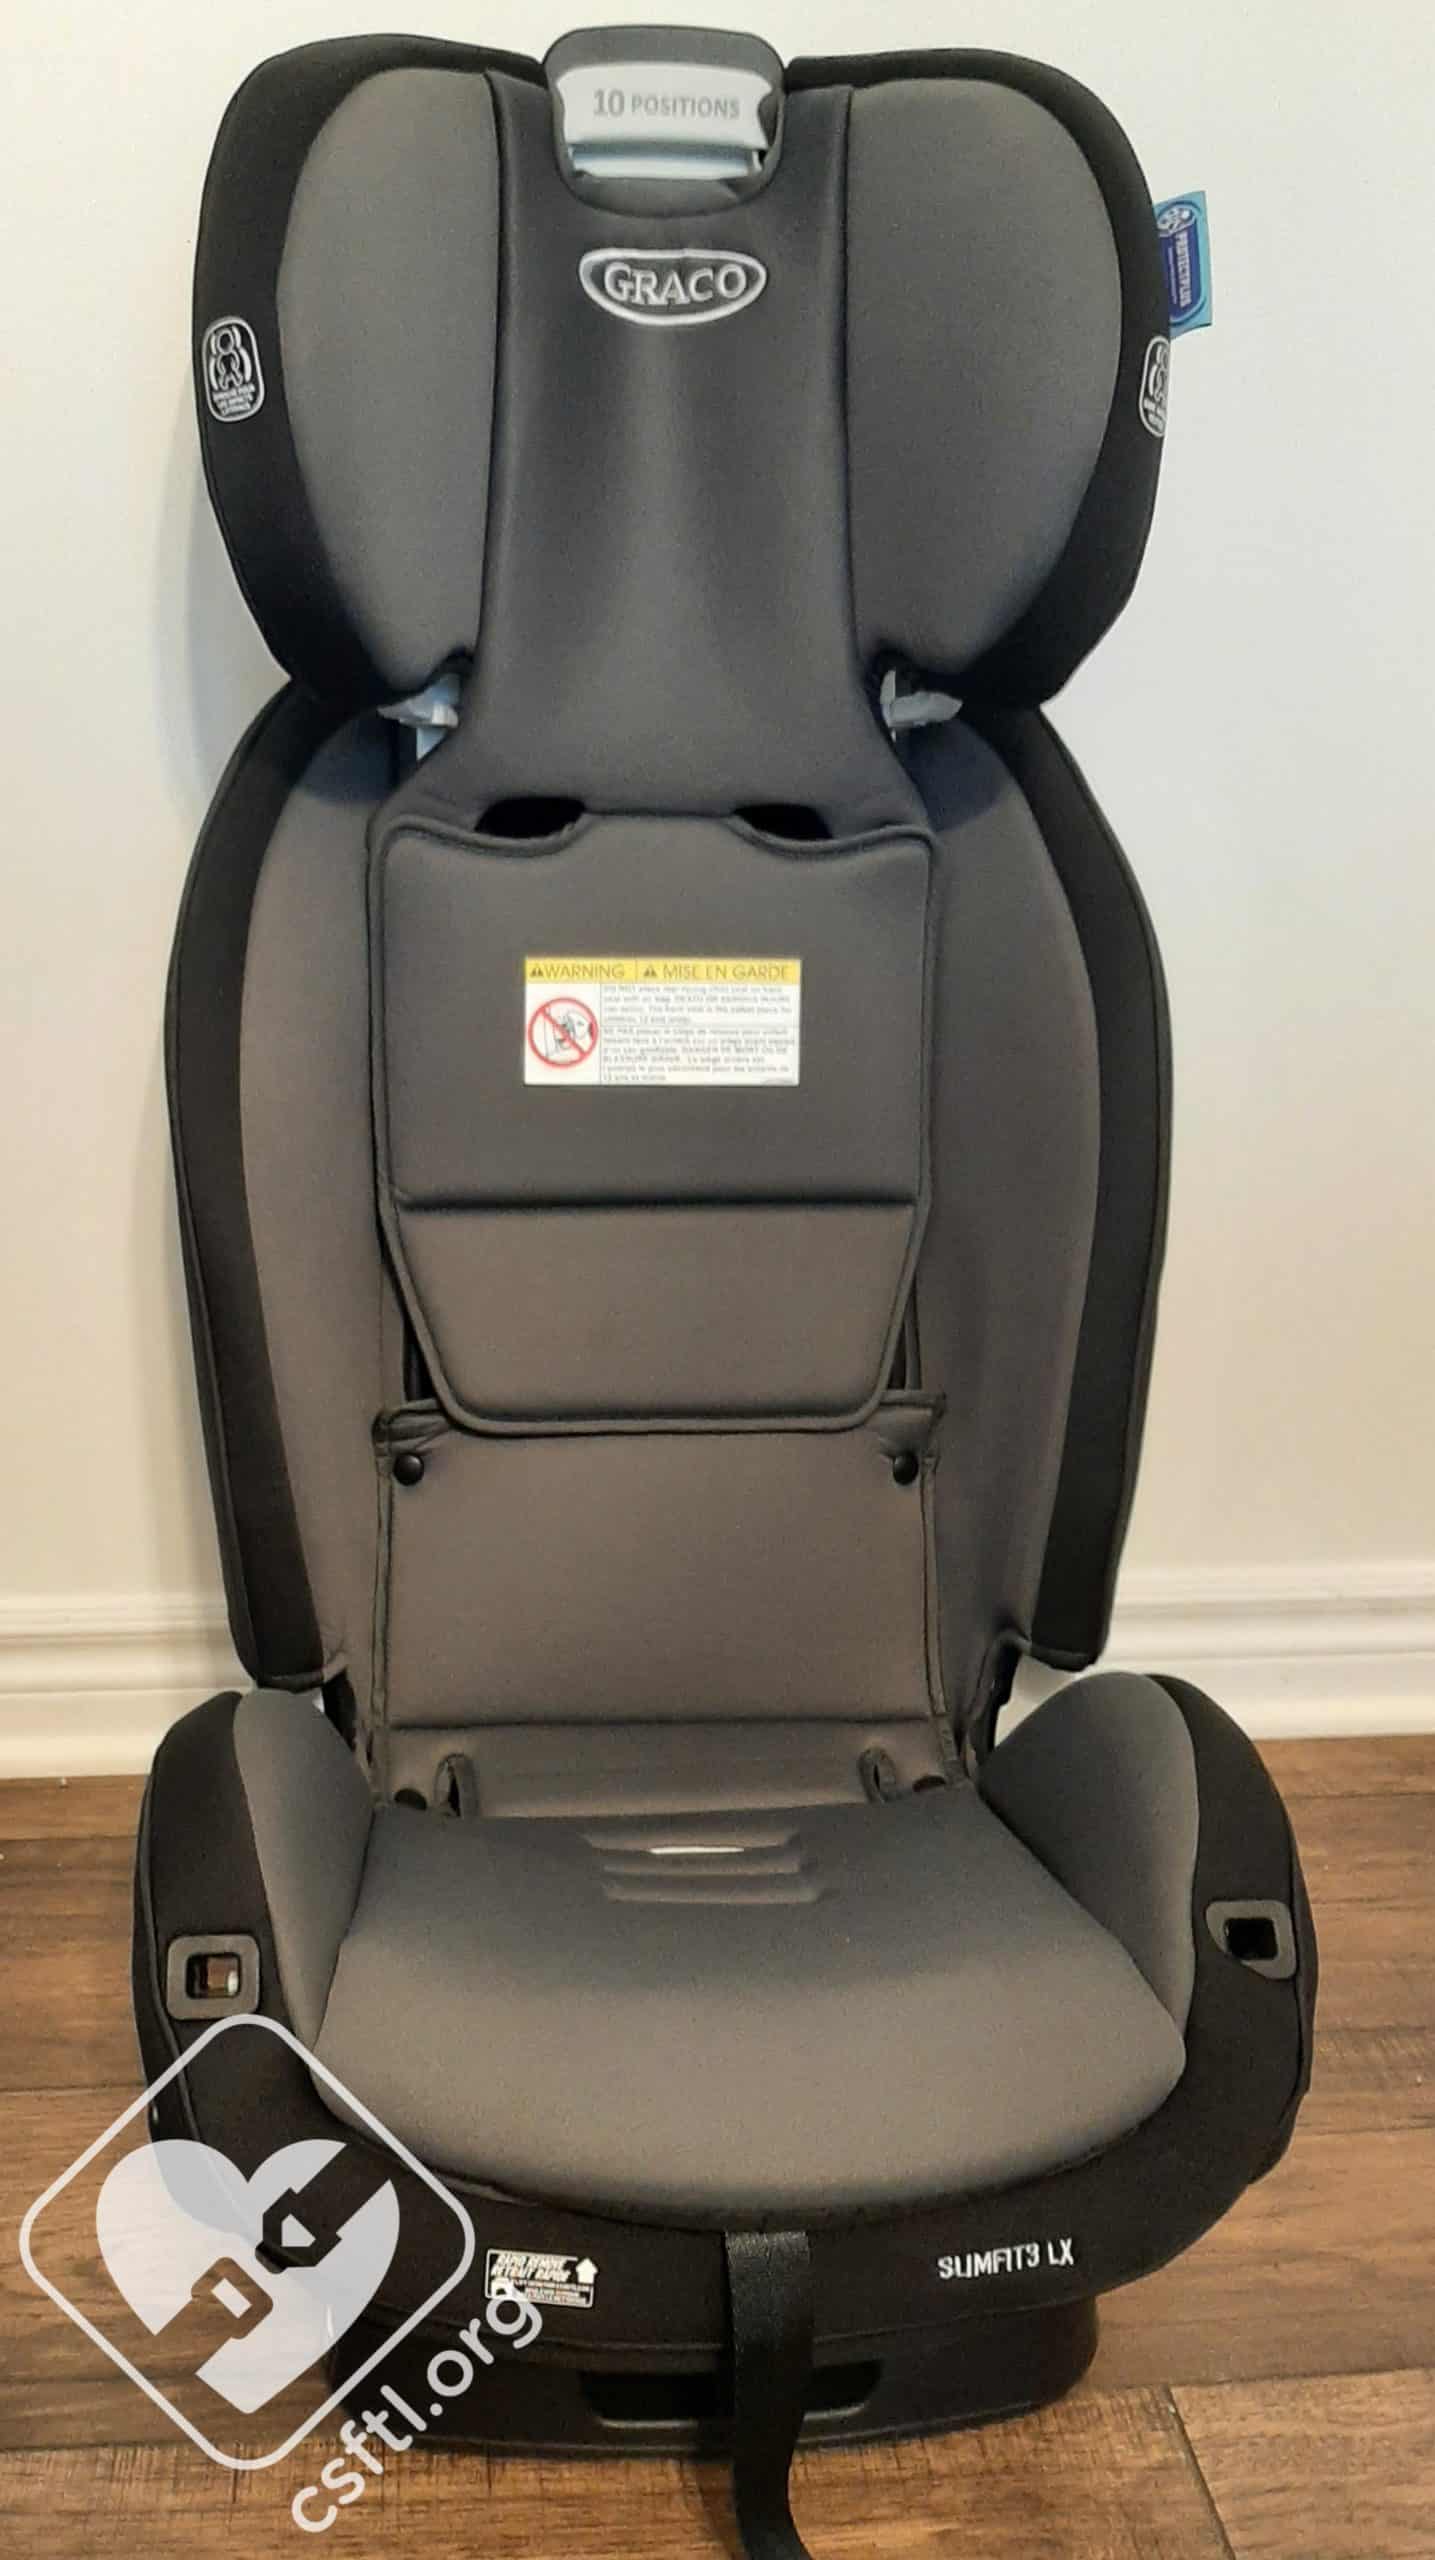
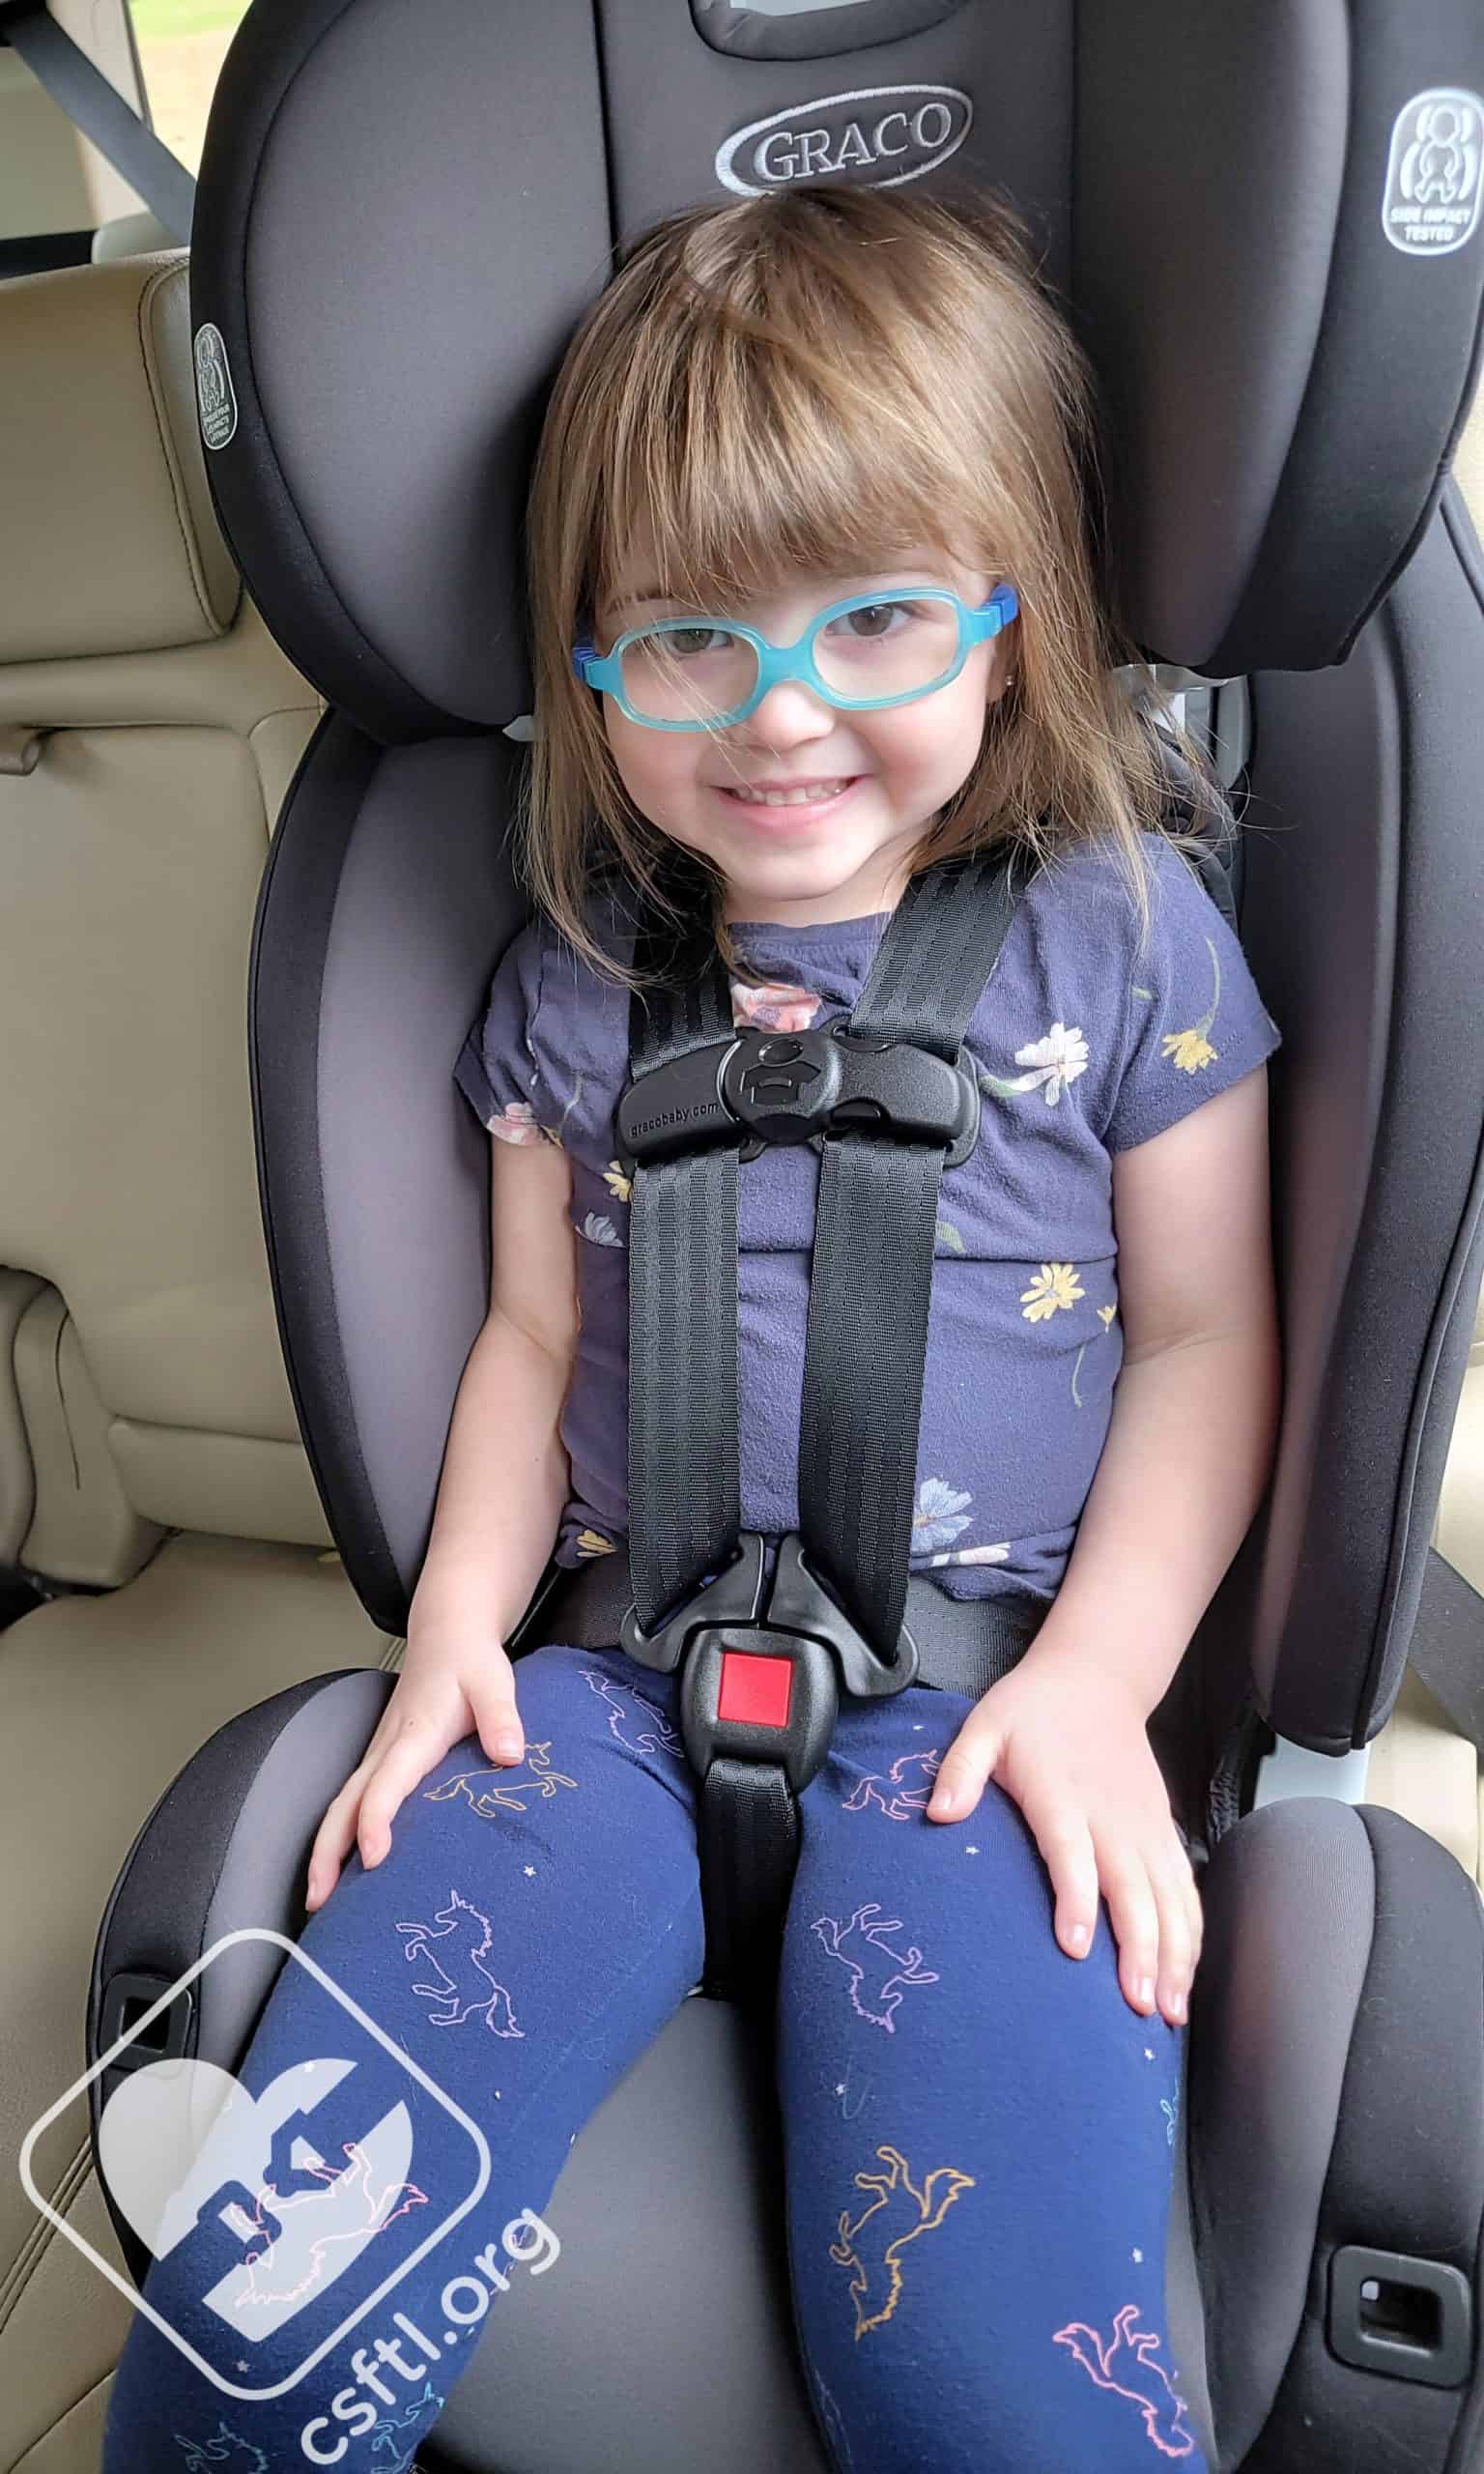
Graco SlimFit3 LX
Our readers from Canada know all too well that the options for narrow child restraints available in Canada are quite slim (pun intended), so when we heard that Graco was releasing their SlimFit3 LX into the Canadian market, we practically begged Graco to allow us to review it.
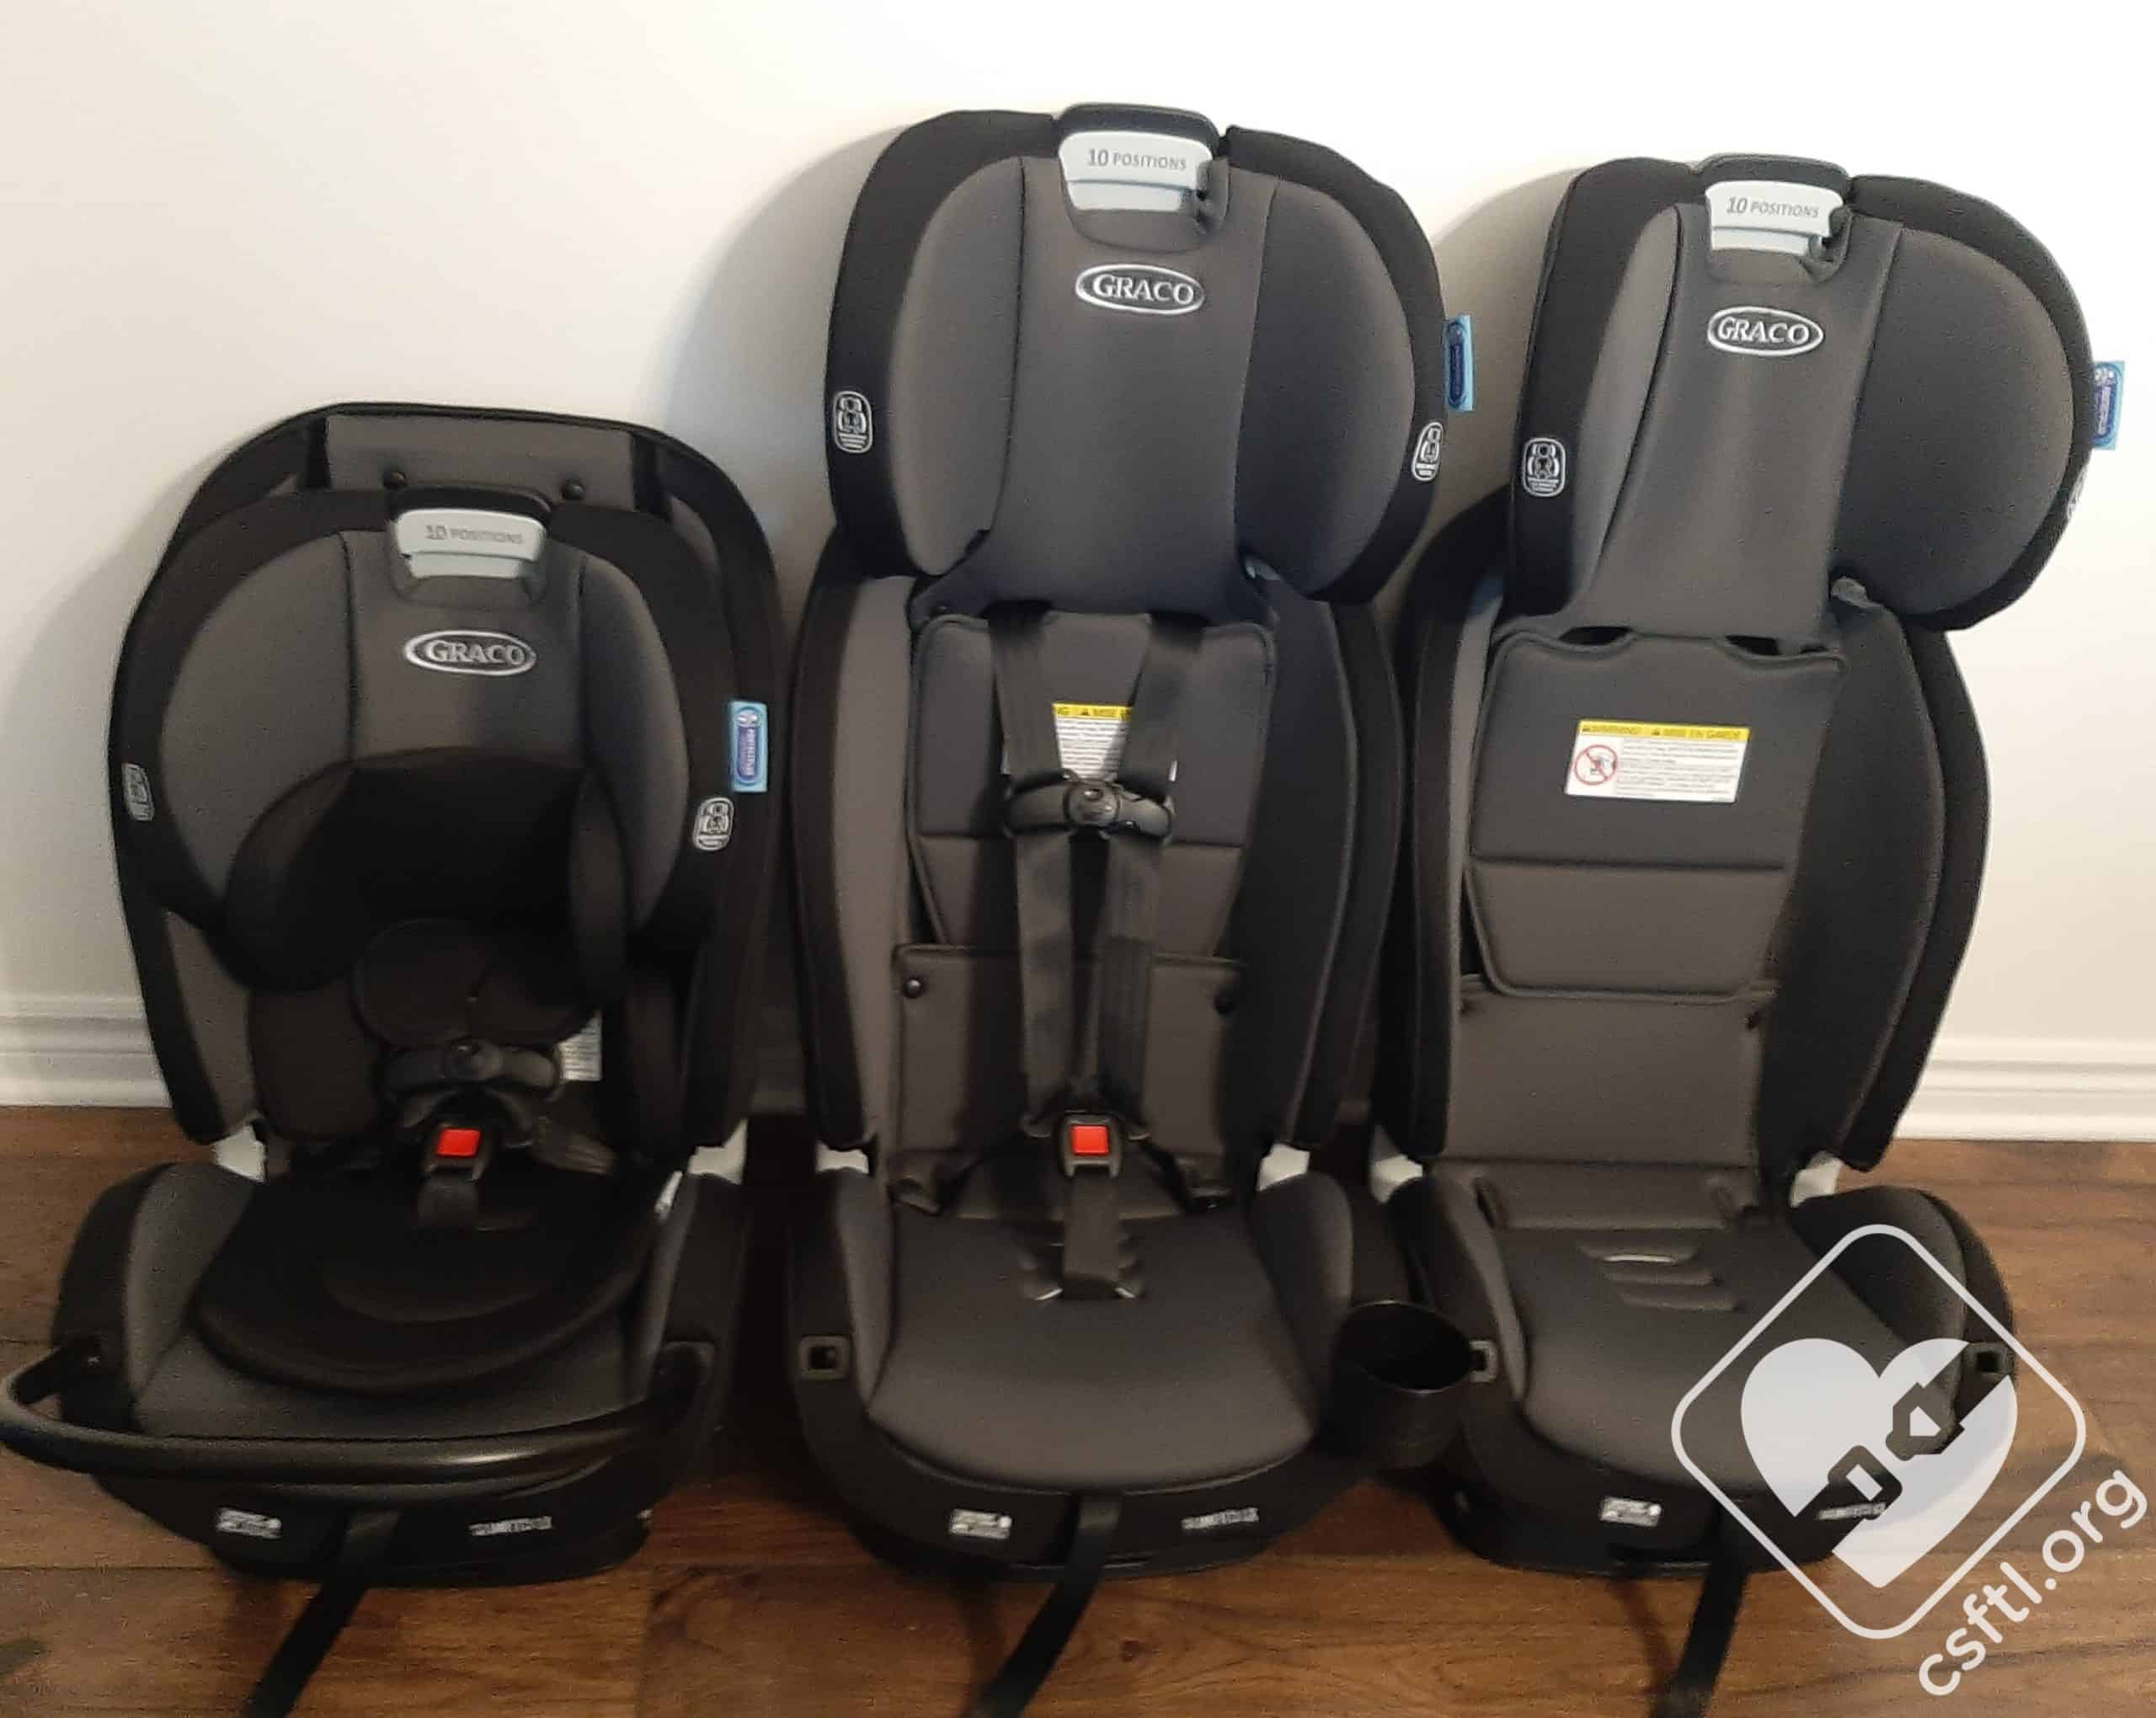
Graco SlimFit3 LX 3 in a row
The SlimFit3 LX is the first narrow rear facing convertible/multimode car seat in Canada with a no rethread harness – a feature that can be a lifesaver in situations where more than one child may be using the seat. This includes child care, grandparent vehicles or even when the seat is used as a spare. Let’s compare the Canadian Graco SlimFit3 LX with the version previously released in the United States!
CSFTL Quick Stats:
Graco SlimFit3 LX with head rest in lowest position and all padding used
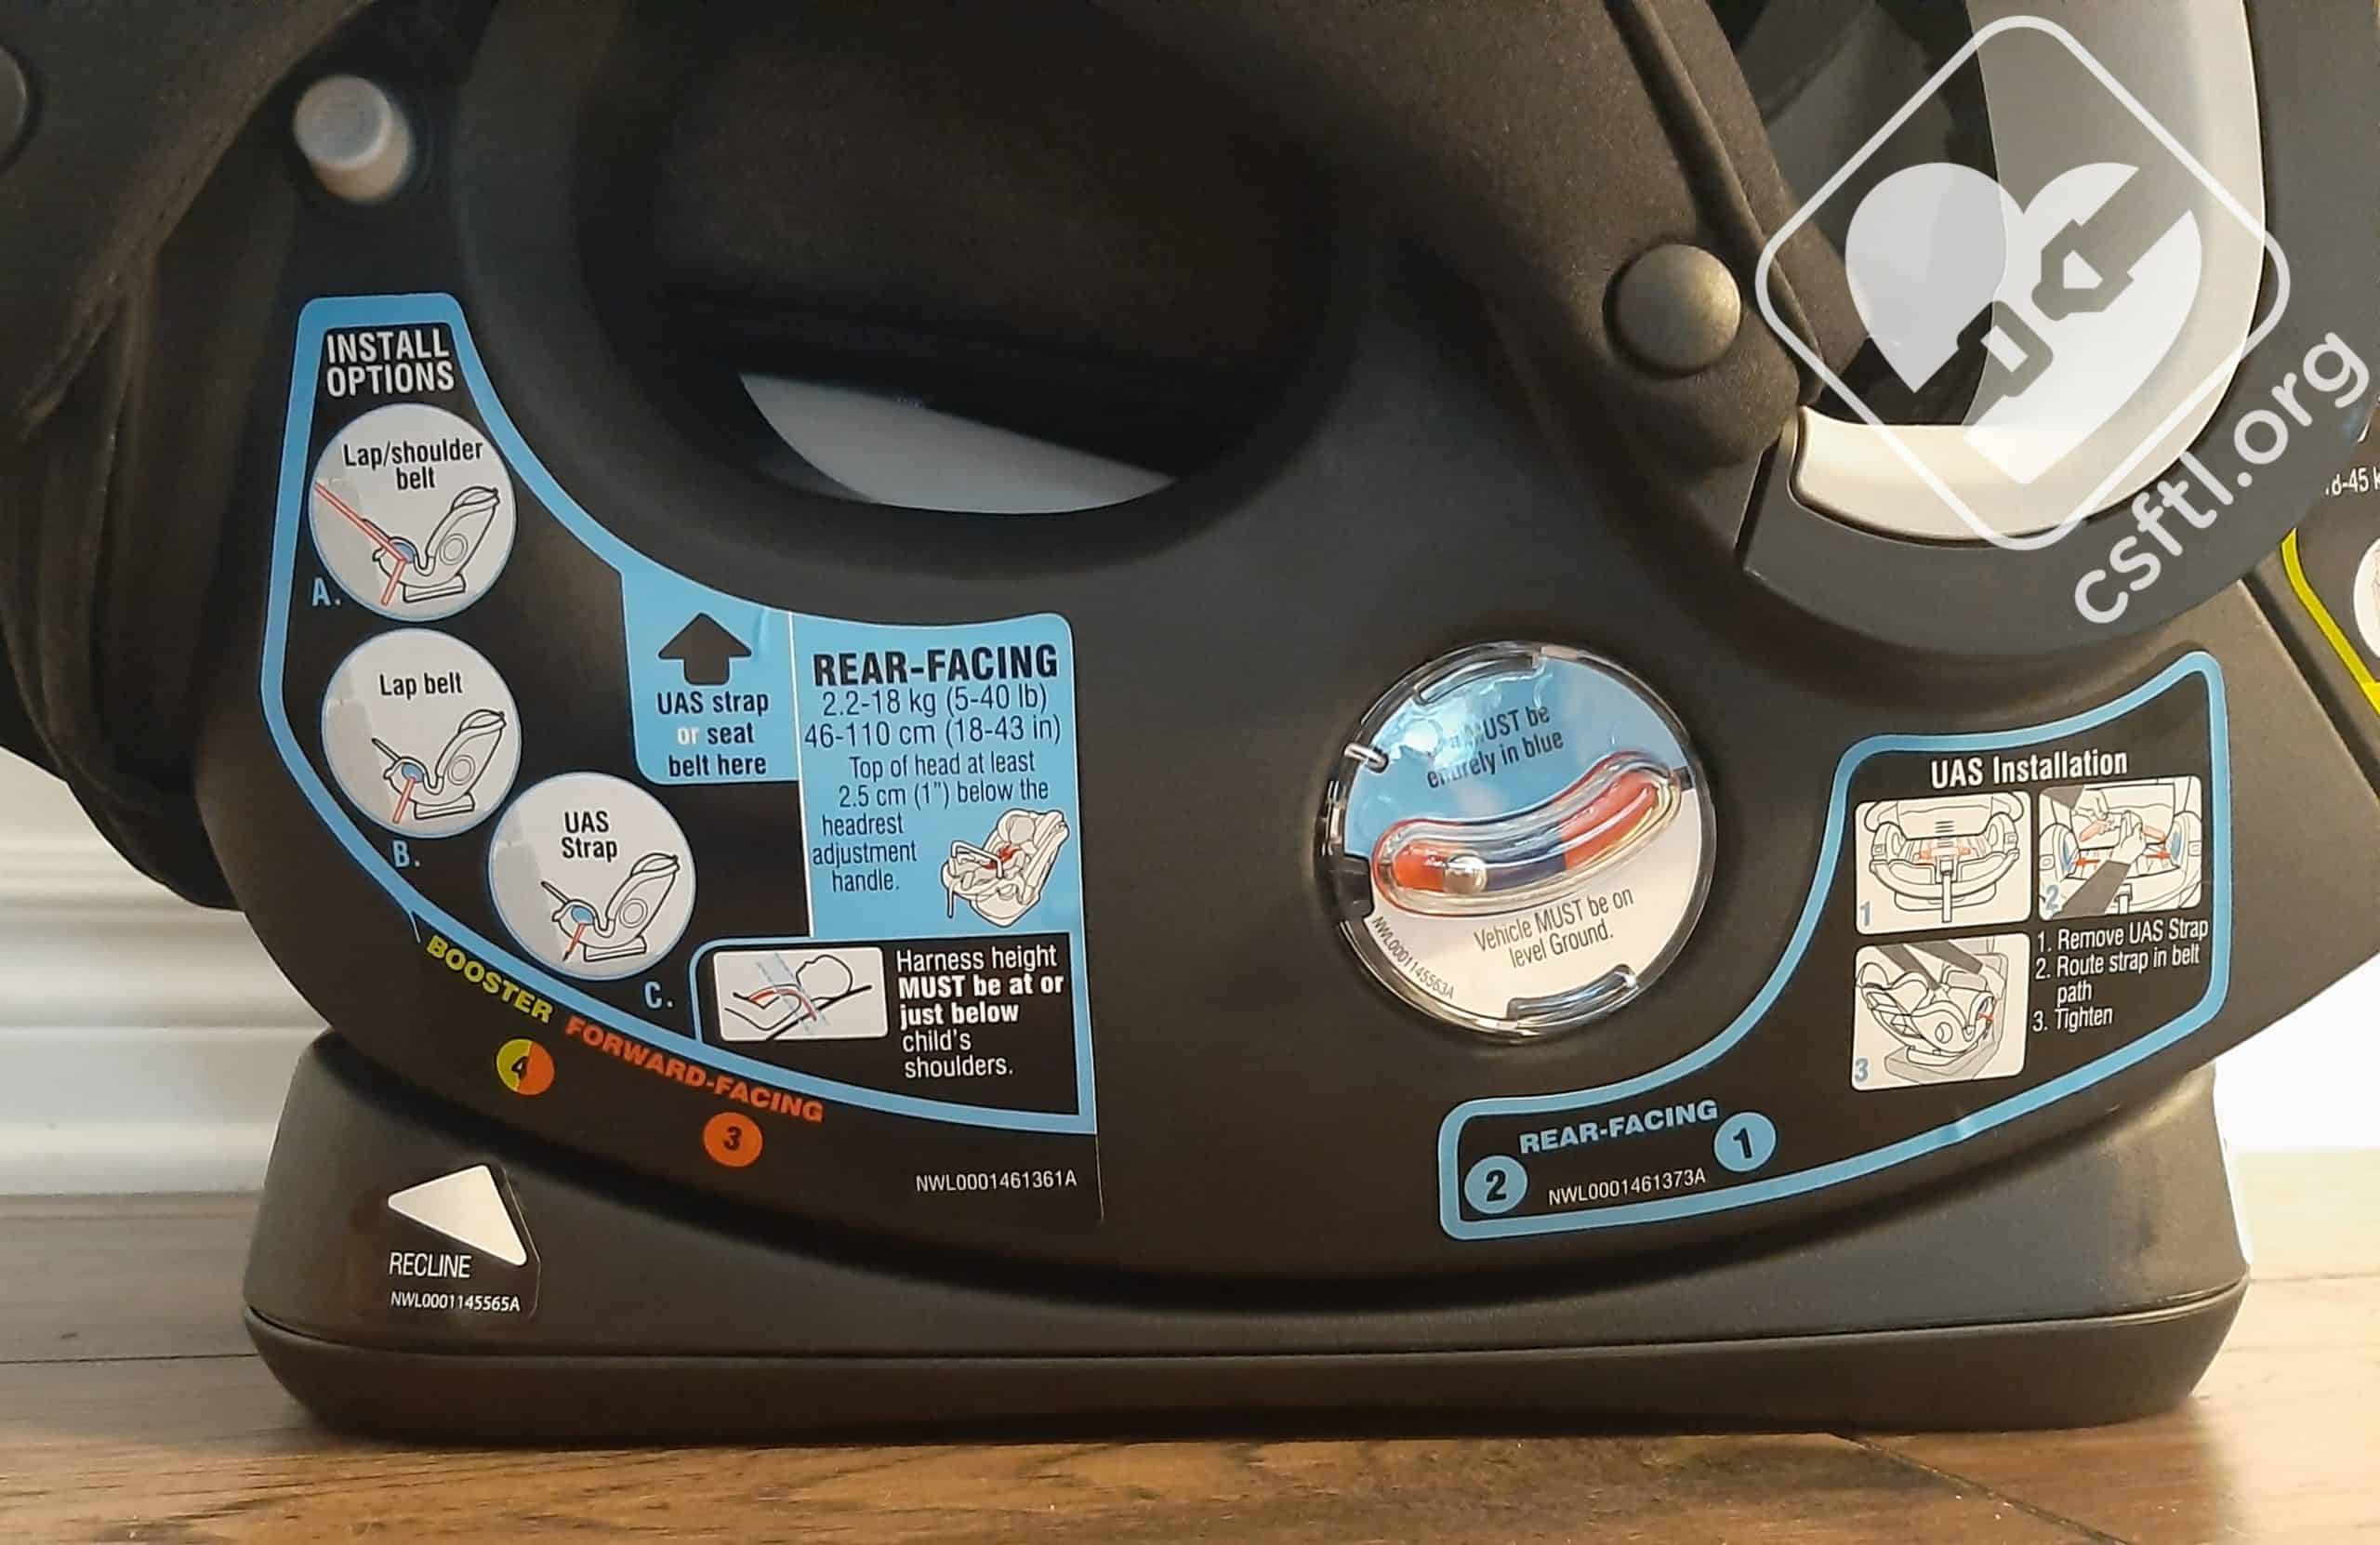
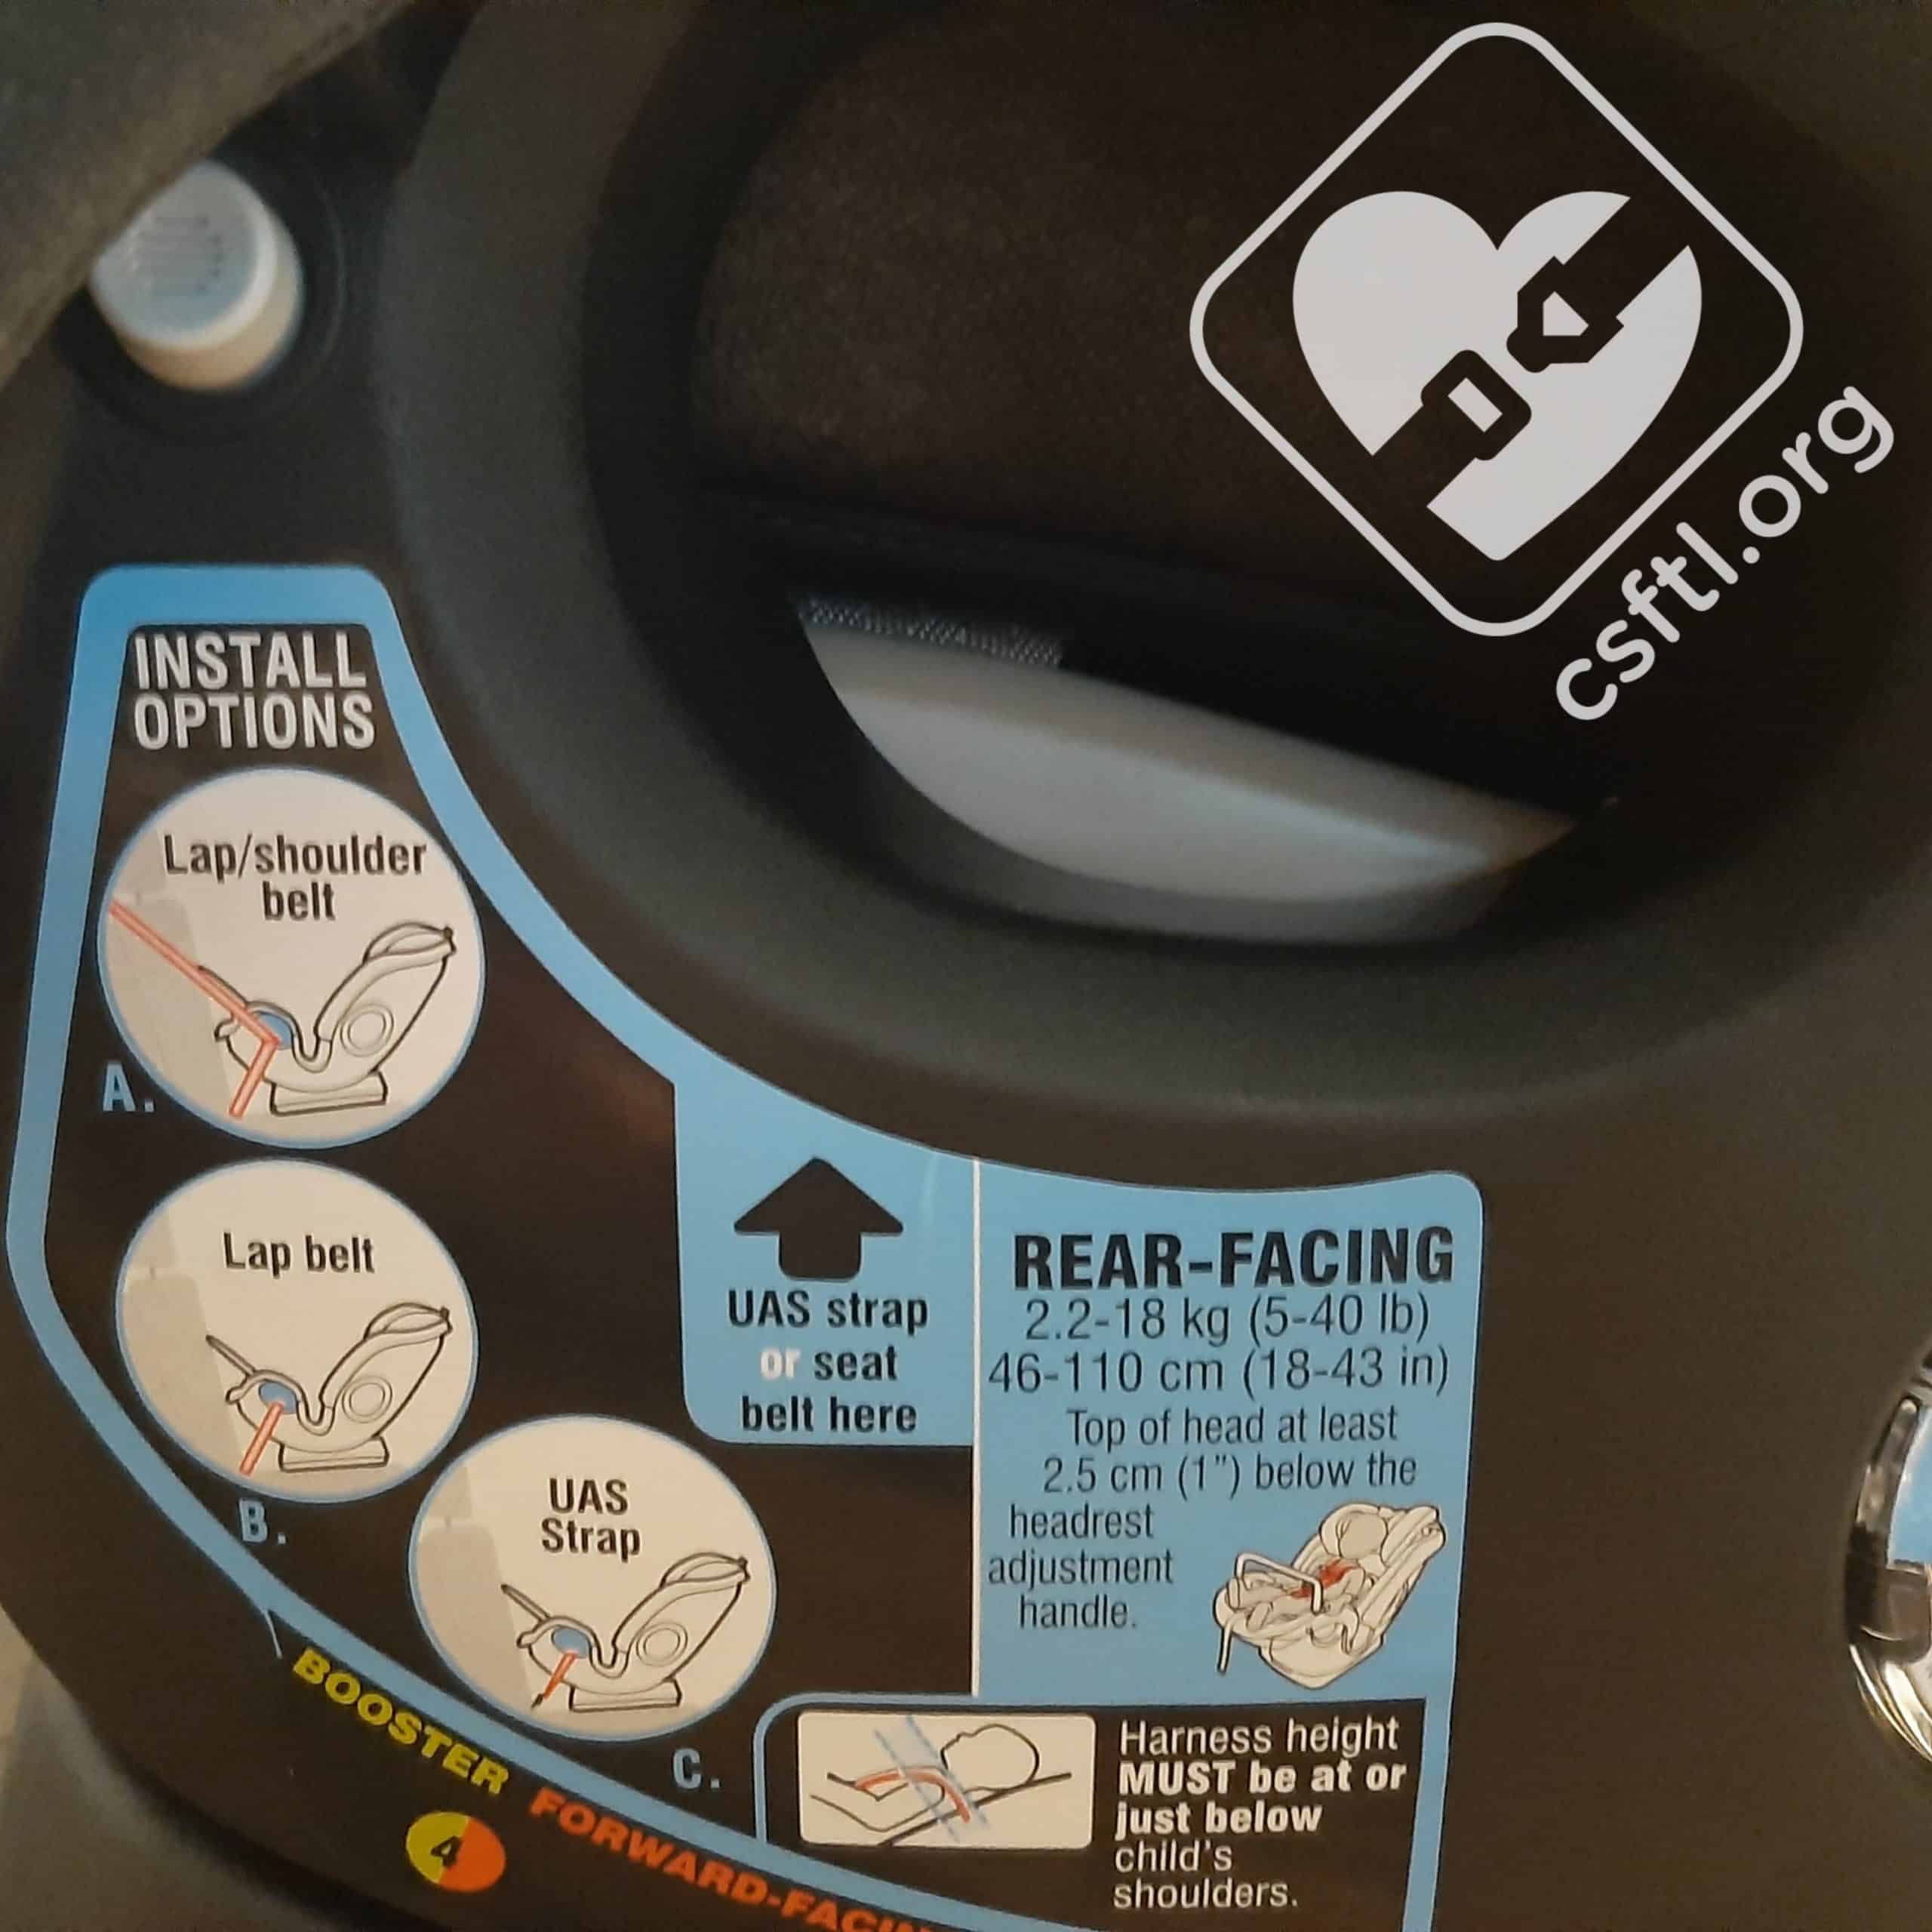
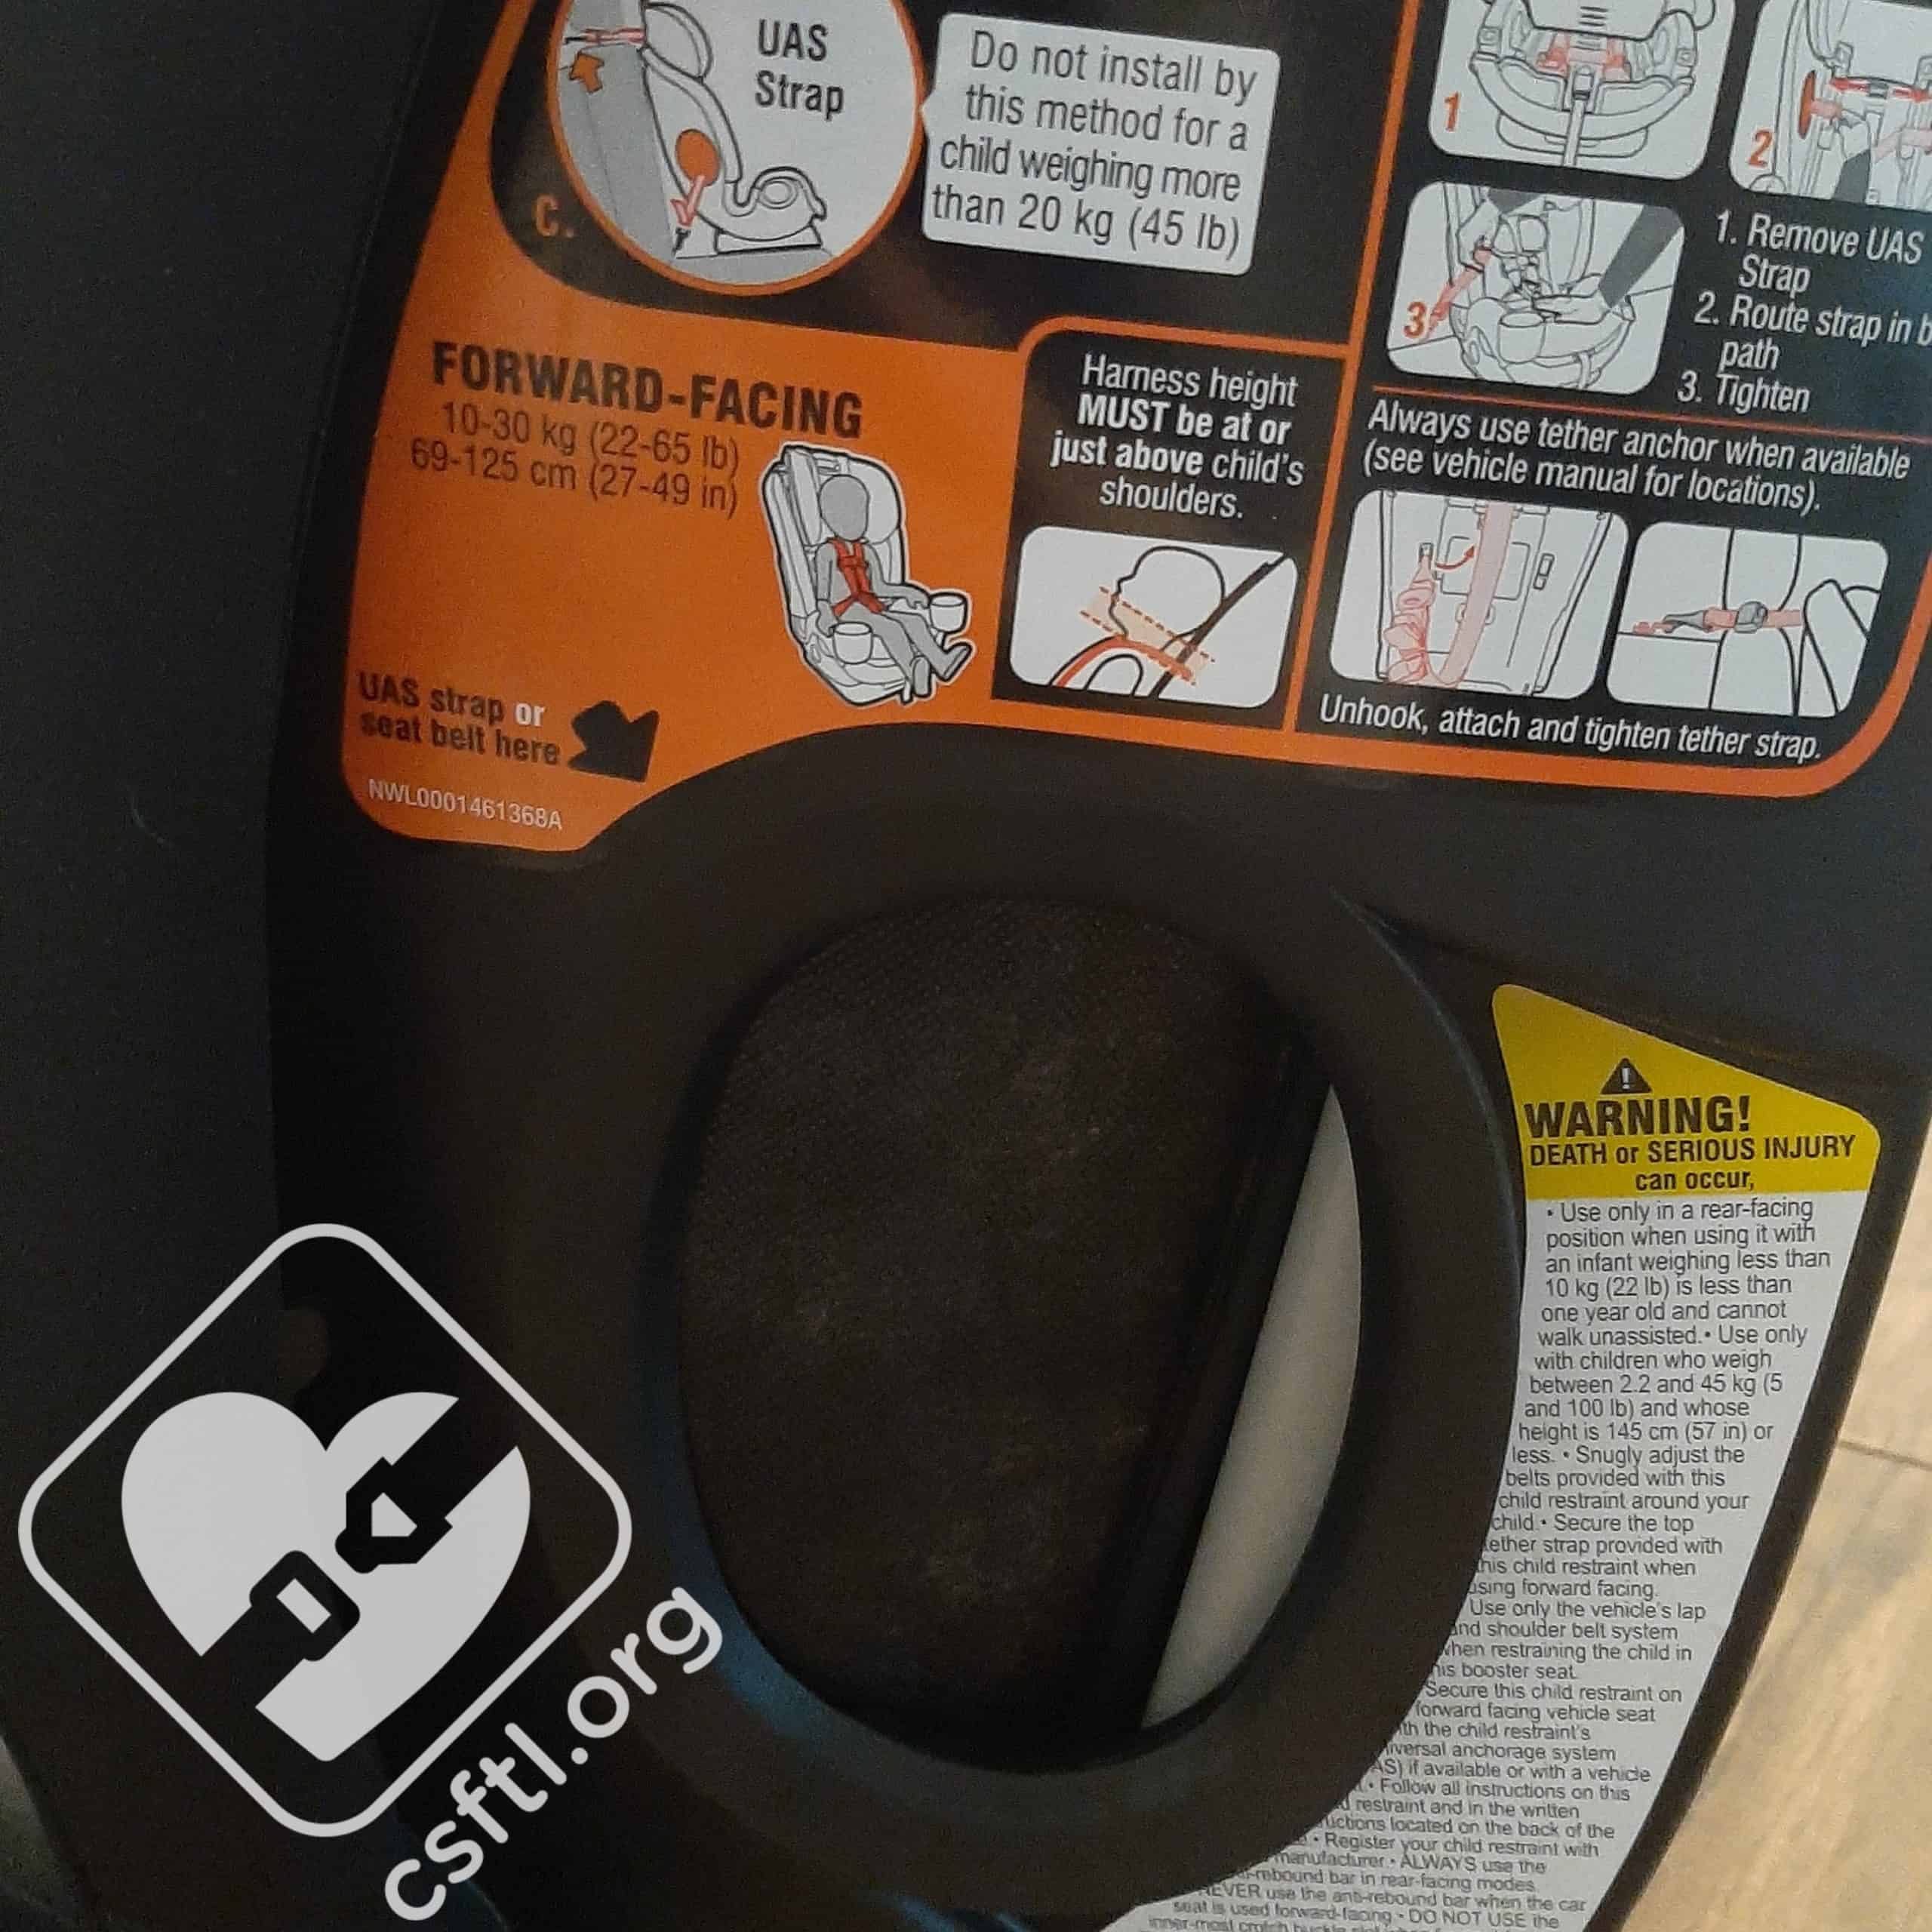
- Rear facing weight range: 5-40 pounds
- Rear facing height range: 43 inches or until the child’s head is 1 inch below the adjuster handle on the headrest when fully extended
- Forward facing weight range: 22-65 pounds
- Forward facing height range: 49 inches or less
- High back booster weight range: 40-100 pounds
- High back booster height range: 43-57 inches tall
- High back booster age minimum: 4 years (CSFTL advocates that children be at least 5 years old before using a booster seat)
- Expiration: 10 years
- Lower anchor weight limit: 45 pounds
- Forward Facing seat belt lockoff
- Premium lower anchors
- Lower anchors can only be used if the vehicle spacing is 11 inches (standard spacing)
- No rethread harness
- UAS permitted in booster mode
Measurements
Graco SlimFit3 LX with head rest in highest position
- Lowest harness position with insert: 6.5 inches
- Lowest harness position without insert: 7 inches
- Highest harness position: 17 inches
- Highest booster guide position: 19 inches
- Width at widest point (at the child’s shoulders): 16.25 inches
- Width at the seat’s base width: 11 inches
- Crotch buckle positions: 4, 5.5, and 7 inches from the back of the seat pan
- Seat pan depth: 13 inches
- Width of seating area: 10.5 inches
- Seat weight: 19.6 pounds with ARB and all optional inserts
- Seat weight: 18 pounds without ARB and optional inserts
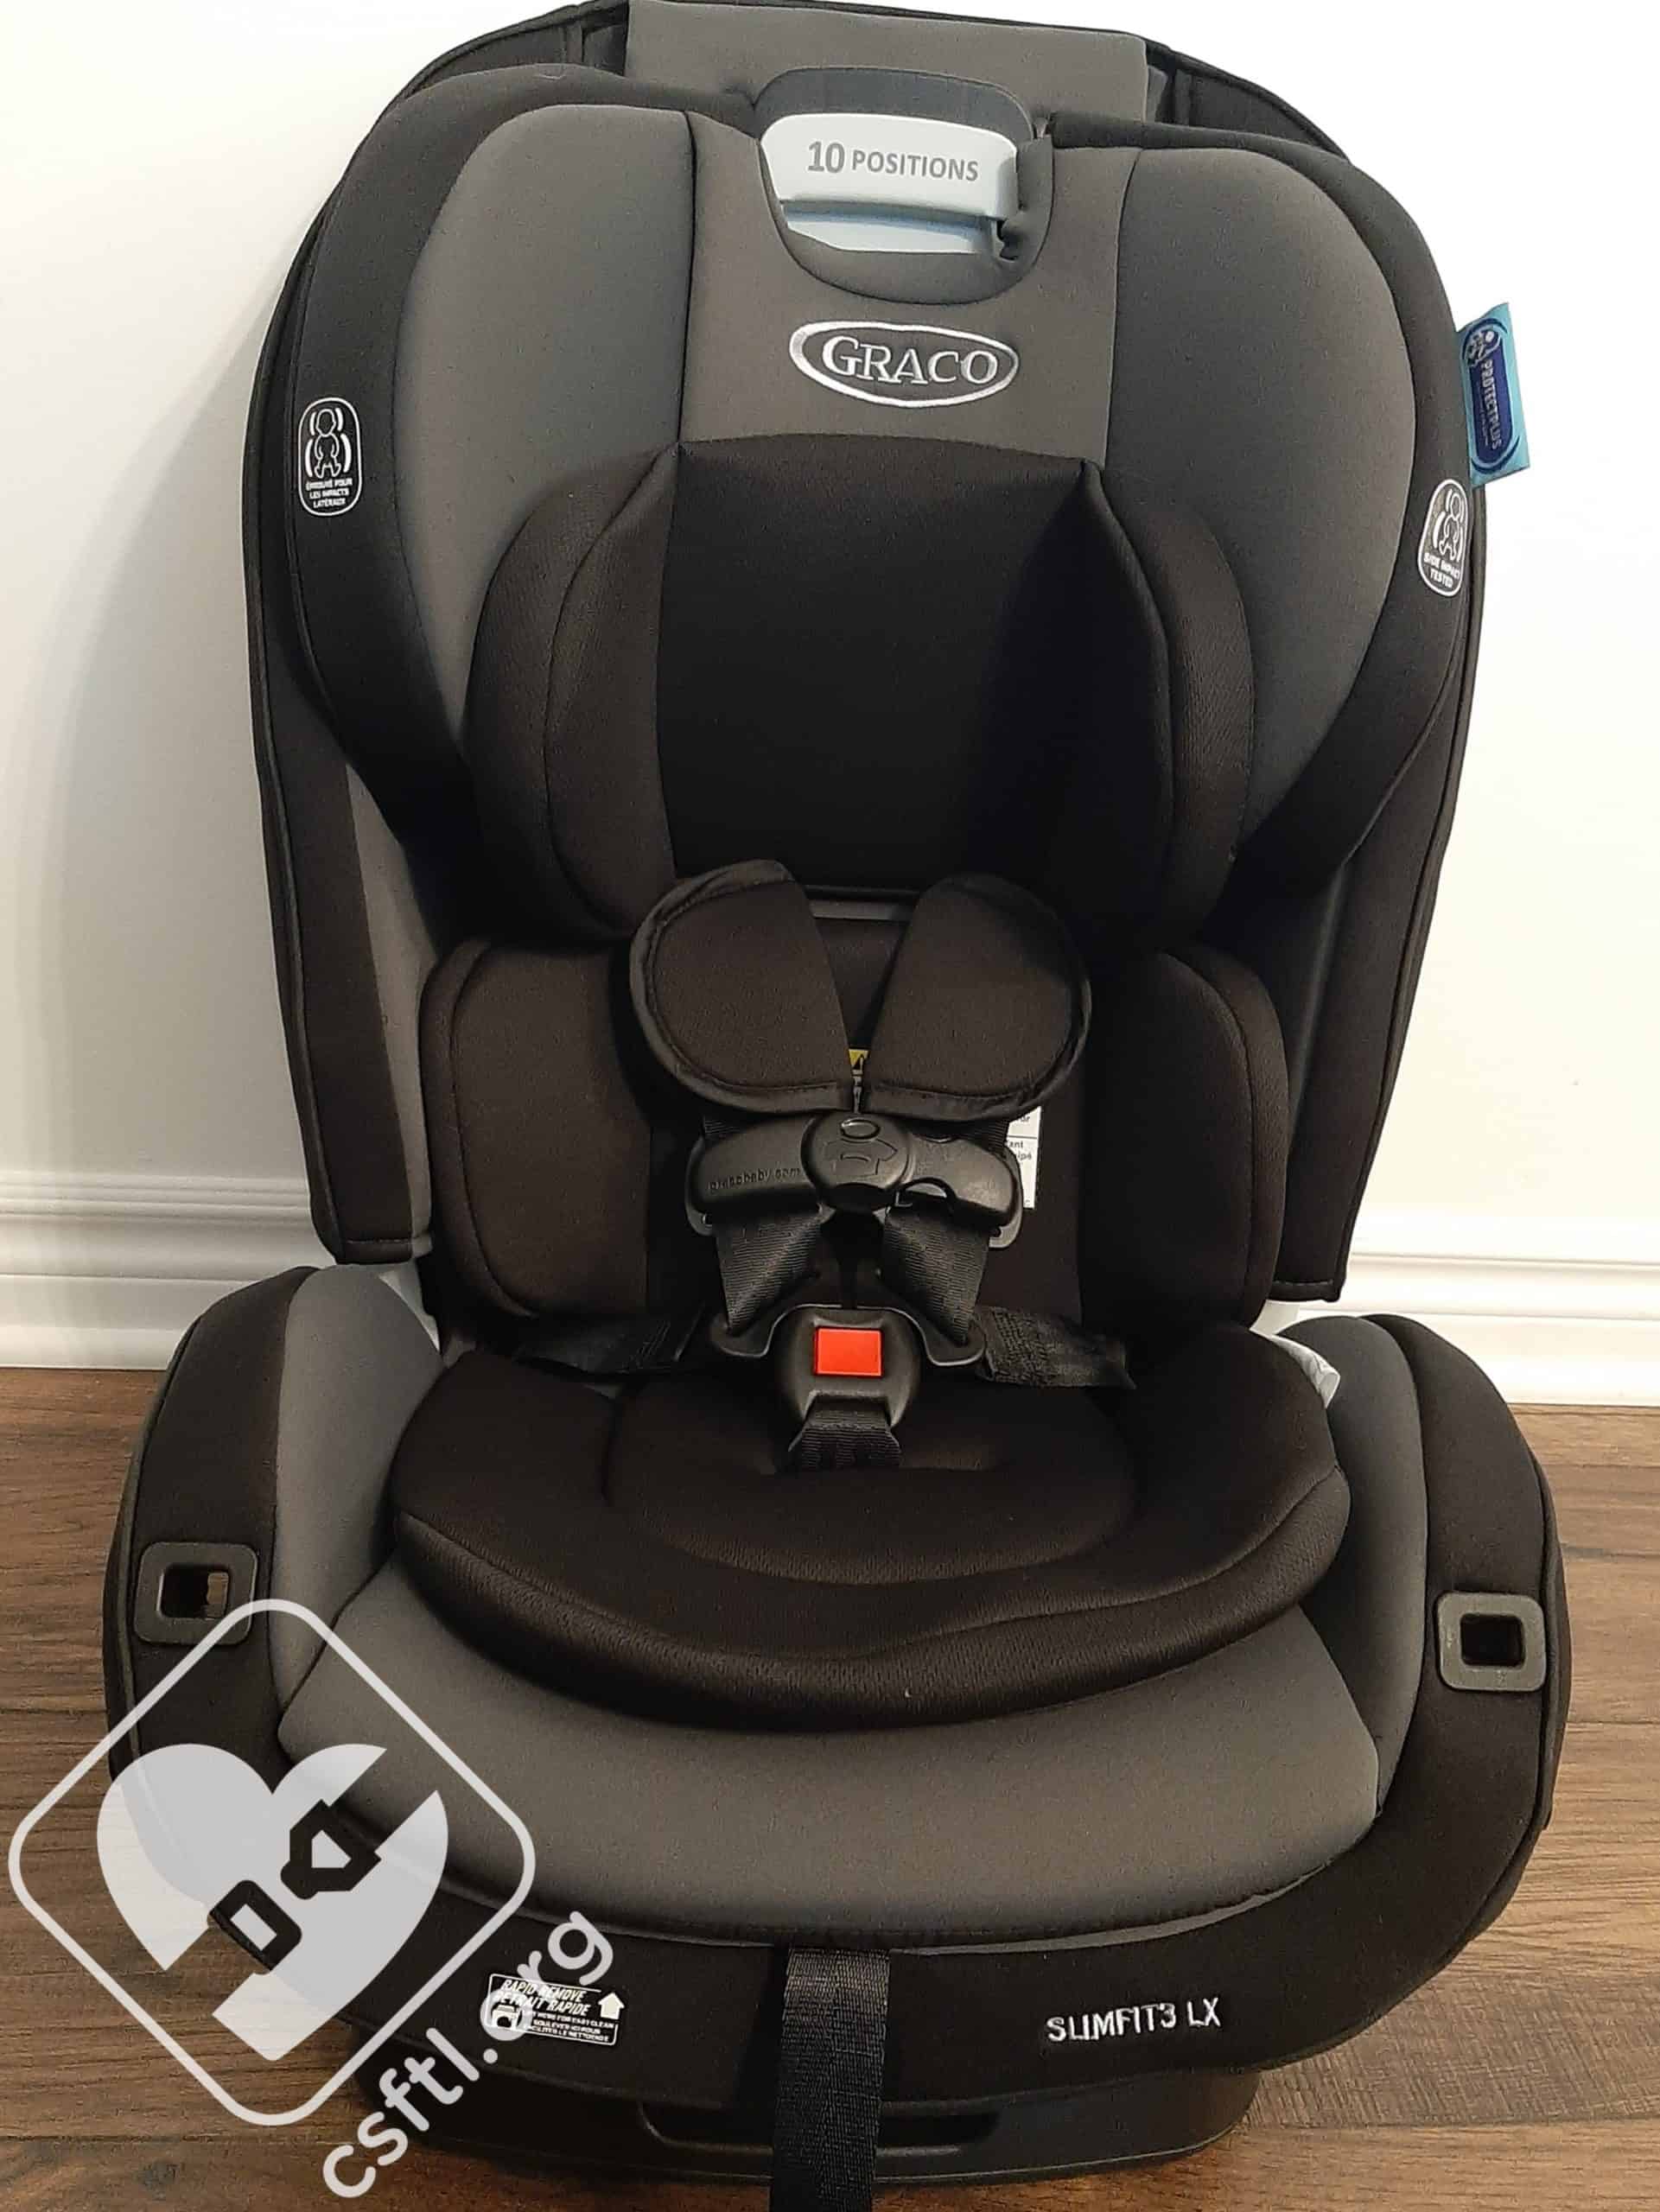
Inserts
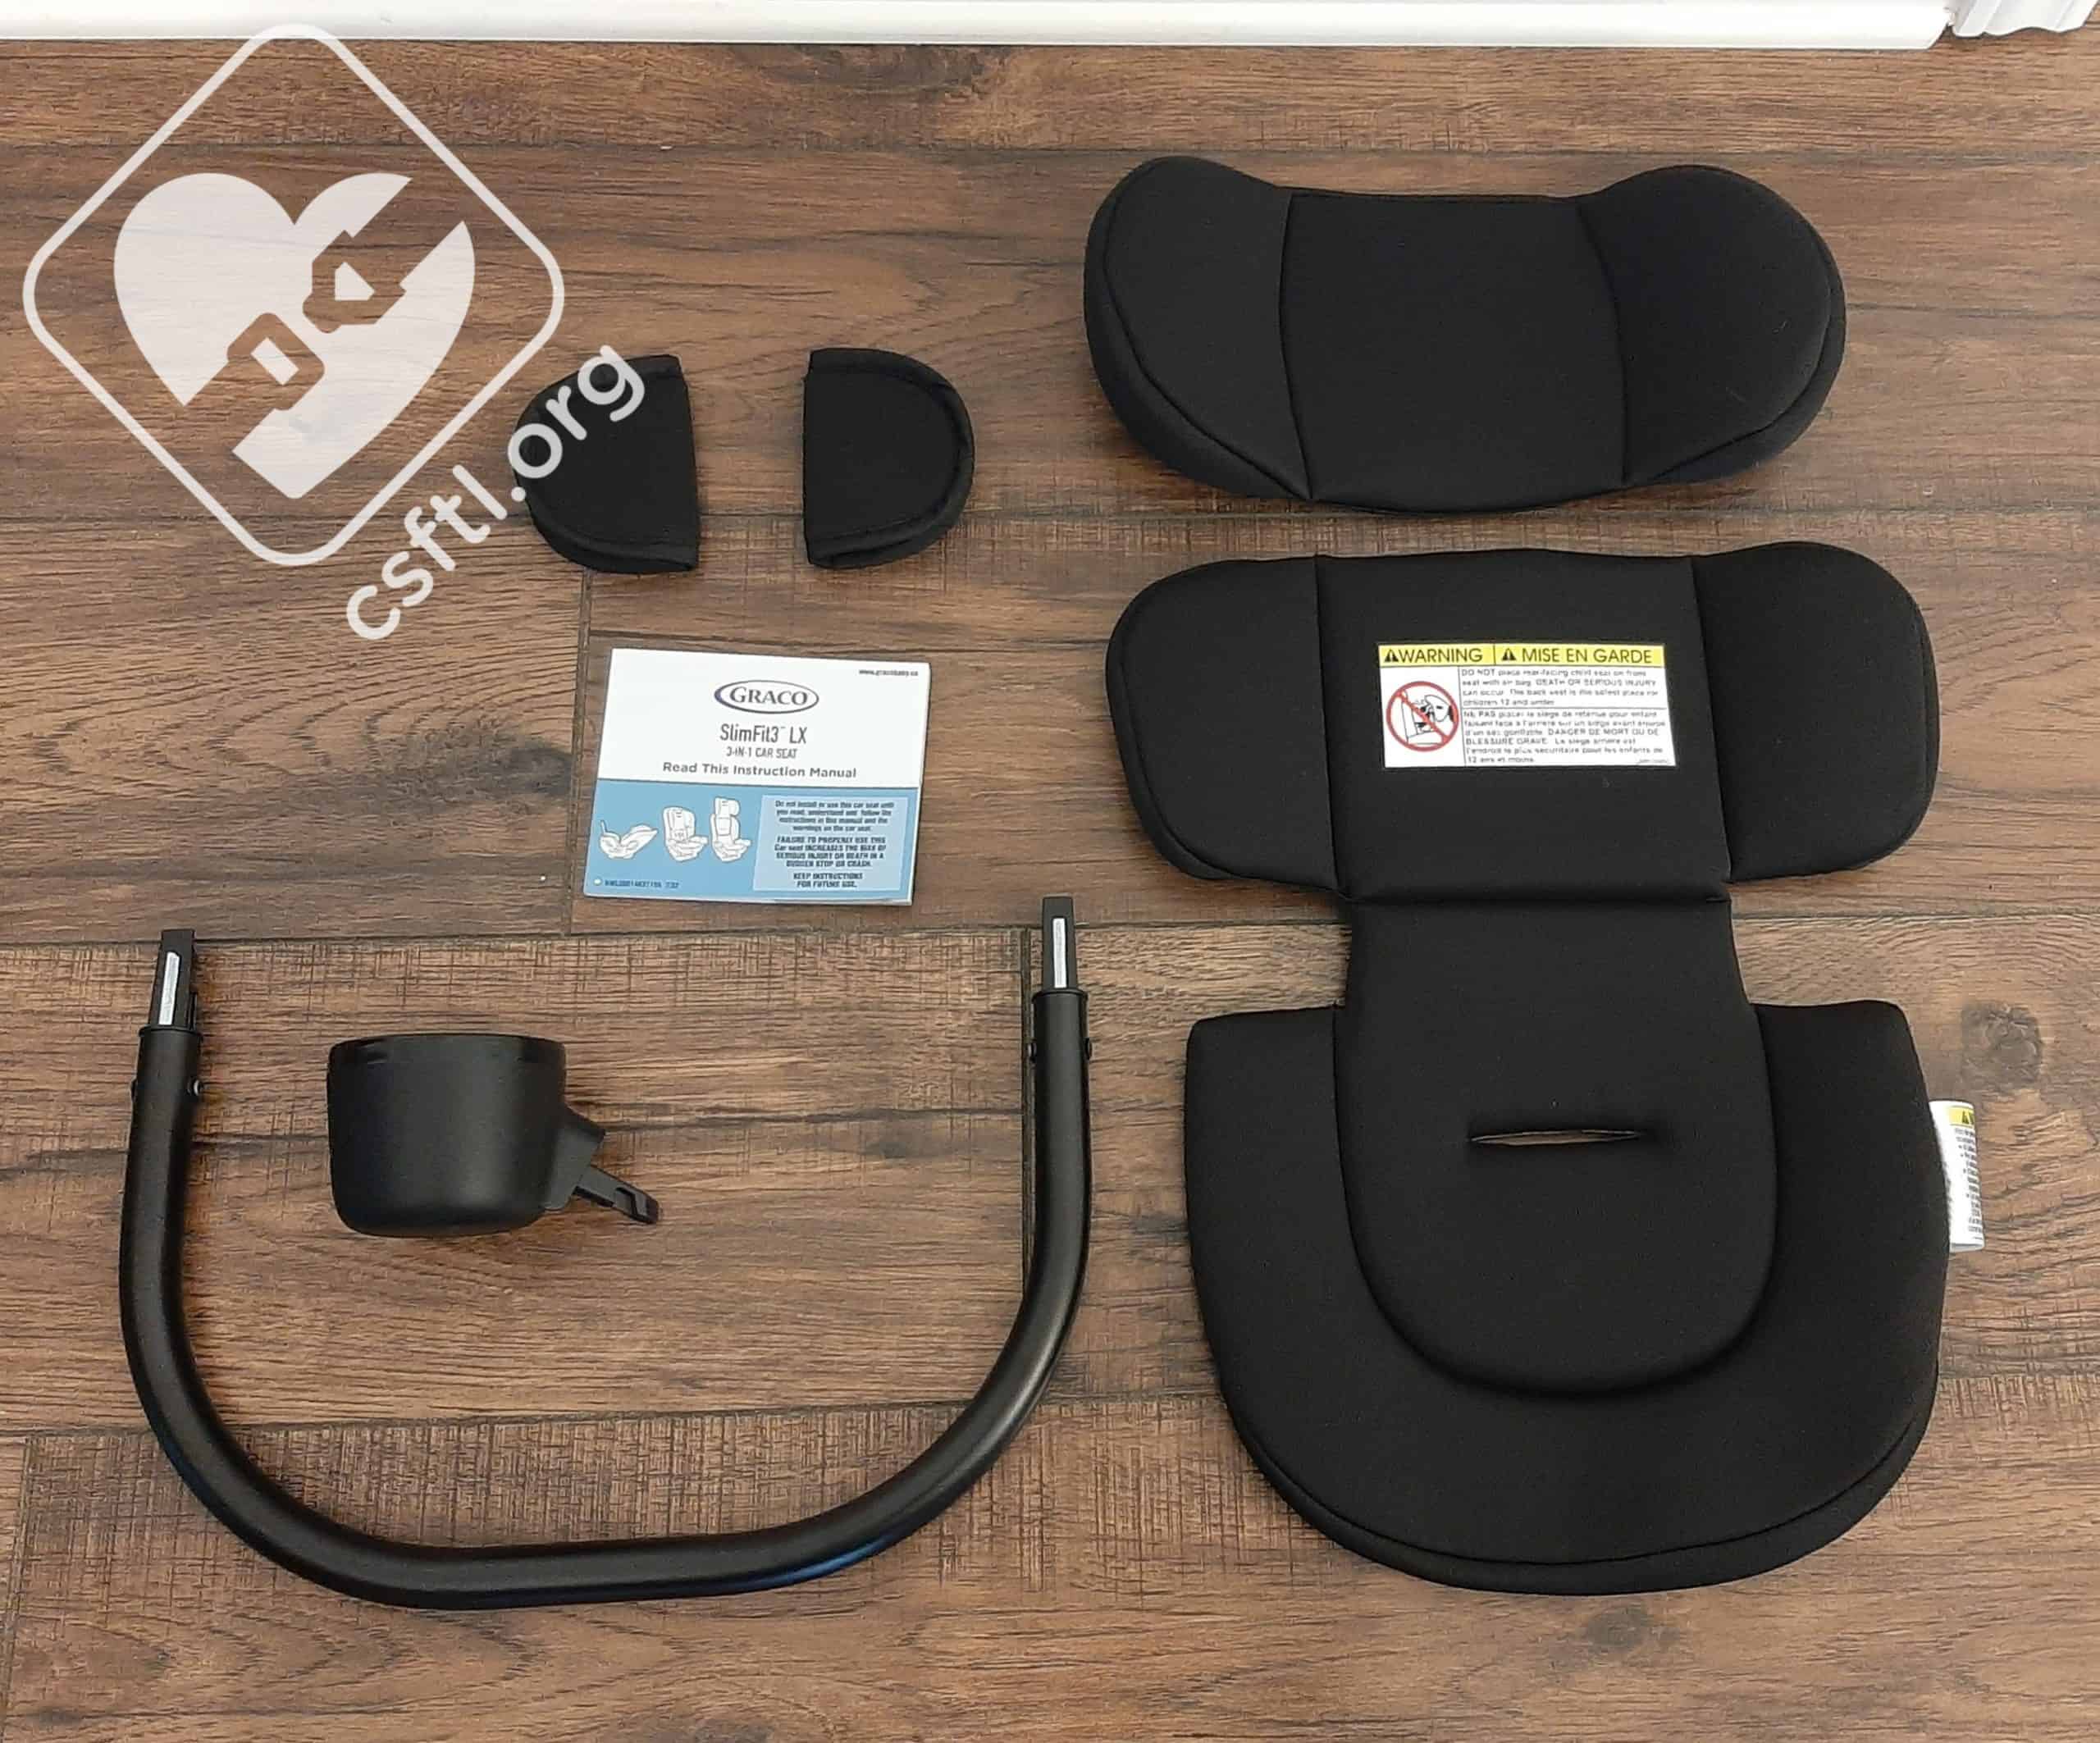
Graco SlimFit3 LX accessories
The SlimFit3 LX comes with an infant body support, a head insert, and harness covers.
The infant body support must be used if the lowest harness position is above a newborn’s shoulders. The insert may only be used rear facing and must be removed once the child weighs 20 pounds. The head insert can be used with or without the body support, but must be removed when the seat is forward facing, and the harness covers are optional for use both rear and forward facing.
Anti-Rebound Bar (ARB)

SlimFit3 LX with Anti Rebound Bar installed
This seat comes with an ARB that MUST be installed when using the SlimFit3 LX rear facing. The SlimFit3 LX’s ARB connects into the seat using the same holes that the cup holders use, which means that the cup holders cannot be used when the seat is installed rear facing.
We were happy to see that the ARB is impossible to miss in the box – it’s packed in the seat pan under the harness. The ARB attaches to the seat easily and can be removed by pressing the grey release buttons under the edge of the seat (which also double as the cup holder release buttons).
It is Compact!
Graco SlimFit3 LX – 16.25 inches wide!
The SlimFit3 LX is compact in more ways than one! We were very impressed with not only how narrow the seat is but also how compact it could be front to back. The SlimFit3 LX’s footprint is comparable to the Canadian Extend2Fit in some vehicles. We consider the Extend2Fit one of, if not the most, compact front or back rear facing option in Canada so it’s great to add the SlimFit3 LX to that fairly small list of seats.
Recline Settings
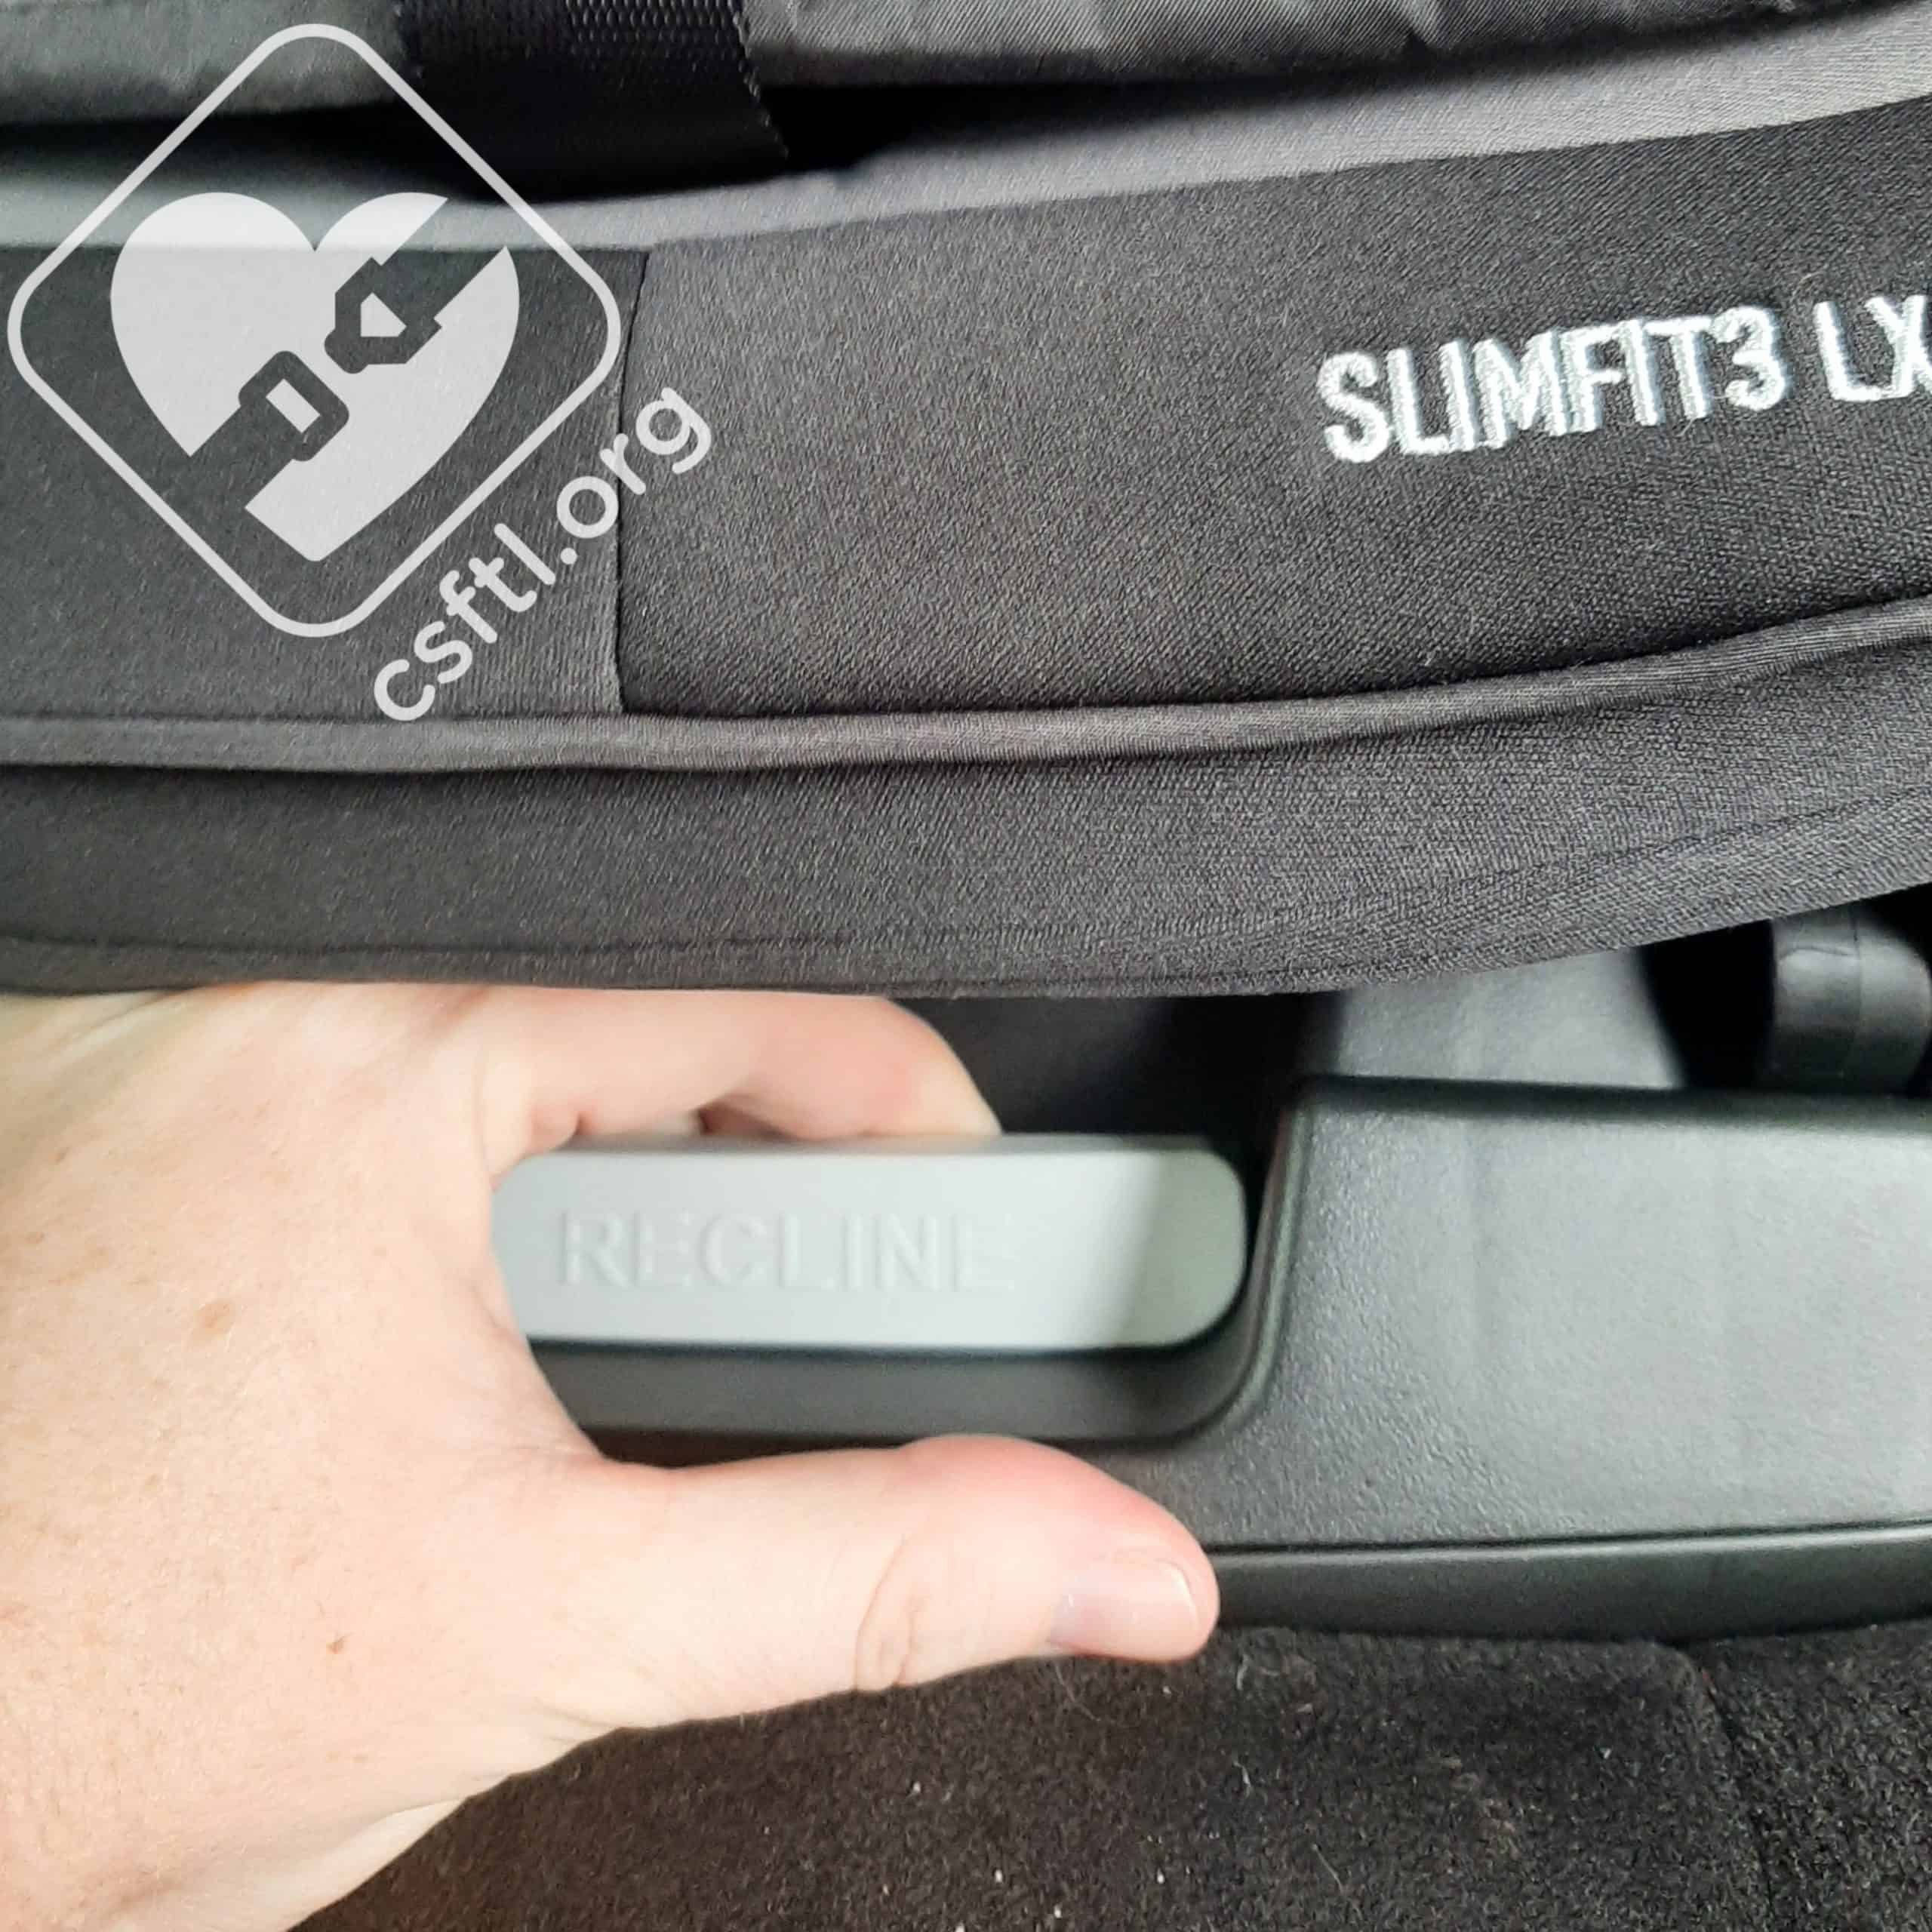
Graco SlimFit3 LX recline adjuster
The SlimFit3 LX adjusts easily between recline settings by pulling on the handle under the front of the seat and sliding the seat back more upright / reclined
Graco SlimFit3 LX recline settings
The SlimFit3LX uses four recline settings: Reclines 1 and 2 are for rear facing, reclines 3 and 4 are for forward facing, and recline 4 is for booster mode.
Recline Indicator

Graco SlimFit3LX recline indicator
The Graco SlimFit3 LX includes a ball level recline angle indicator. The ball must be fully within the blue when the seat is installed rear facing and the vehicle parked on level ground.
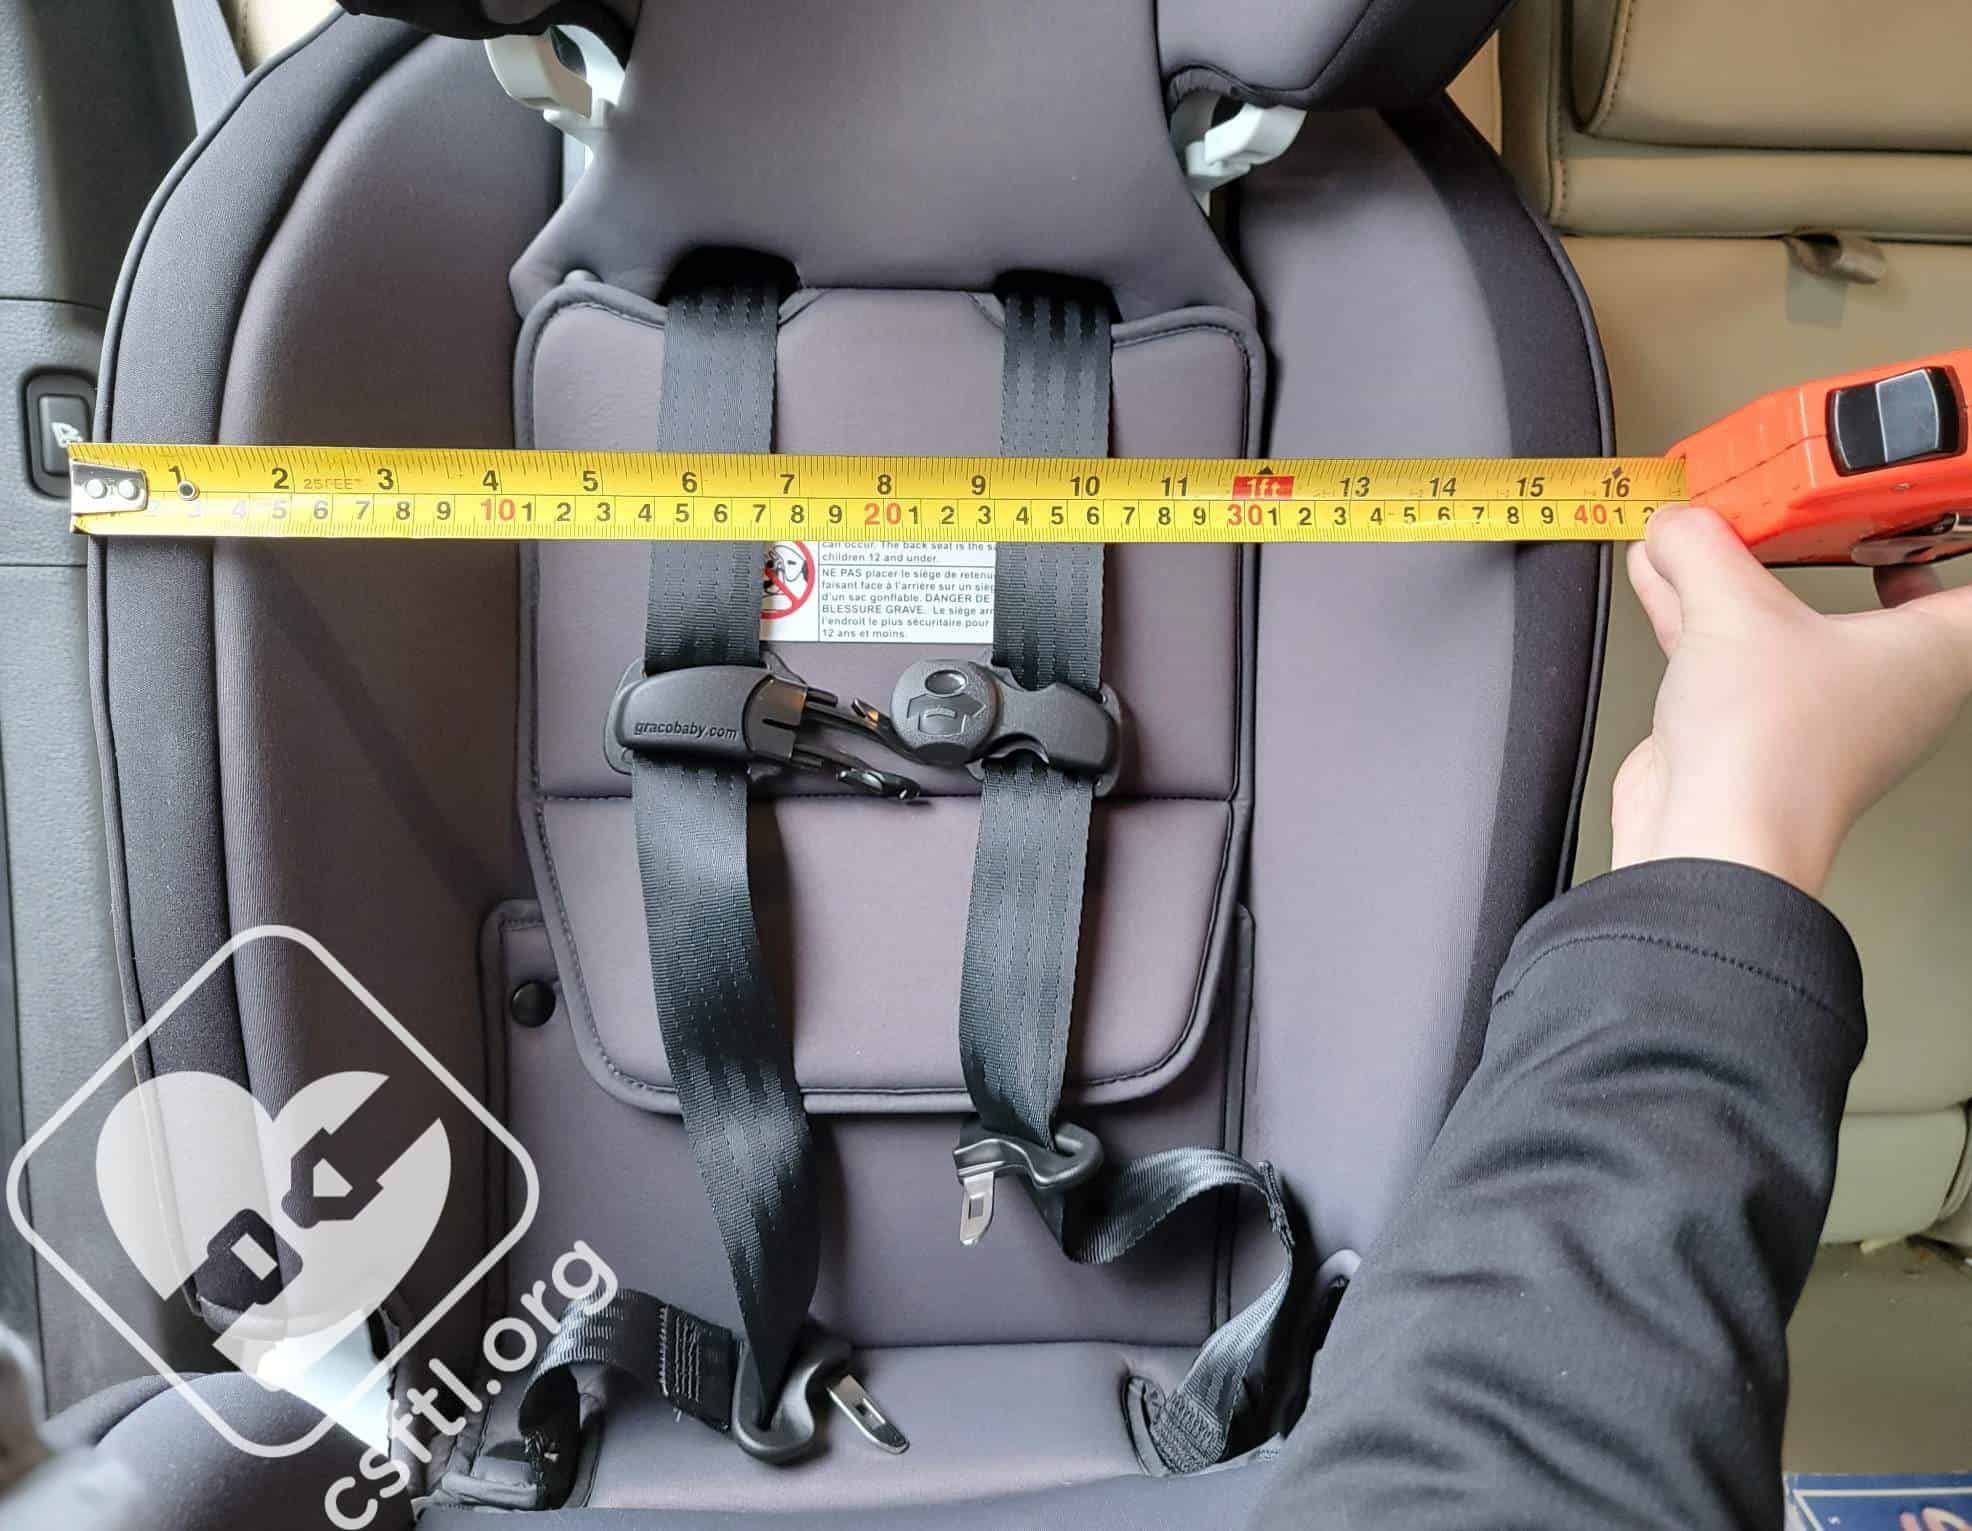
Harness Adjustment
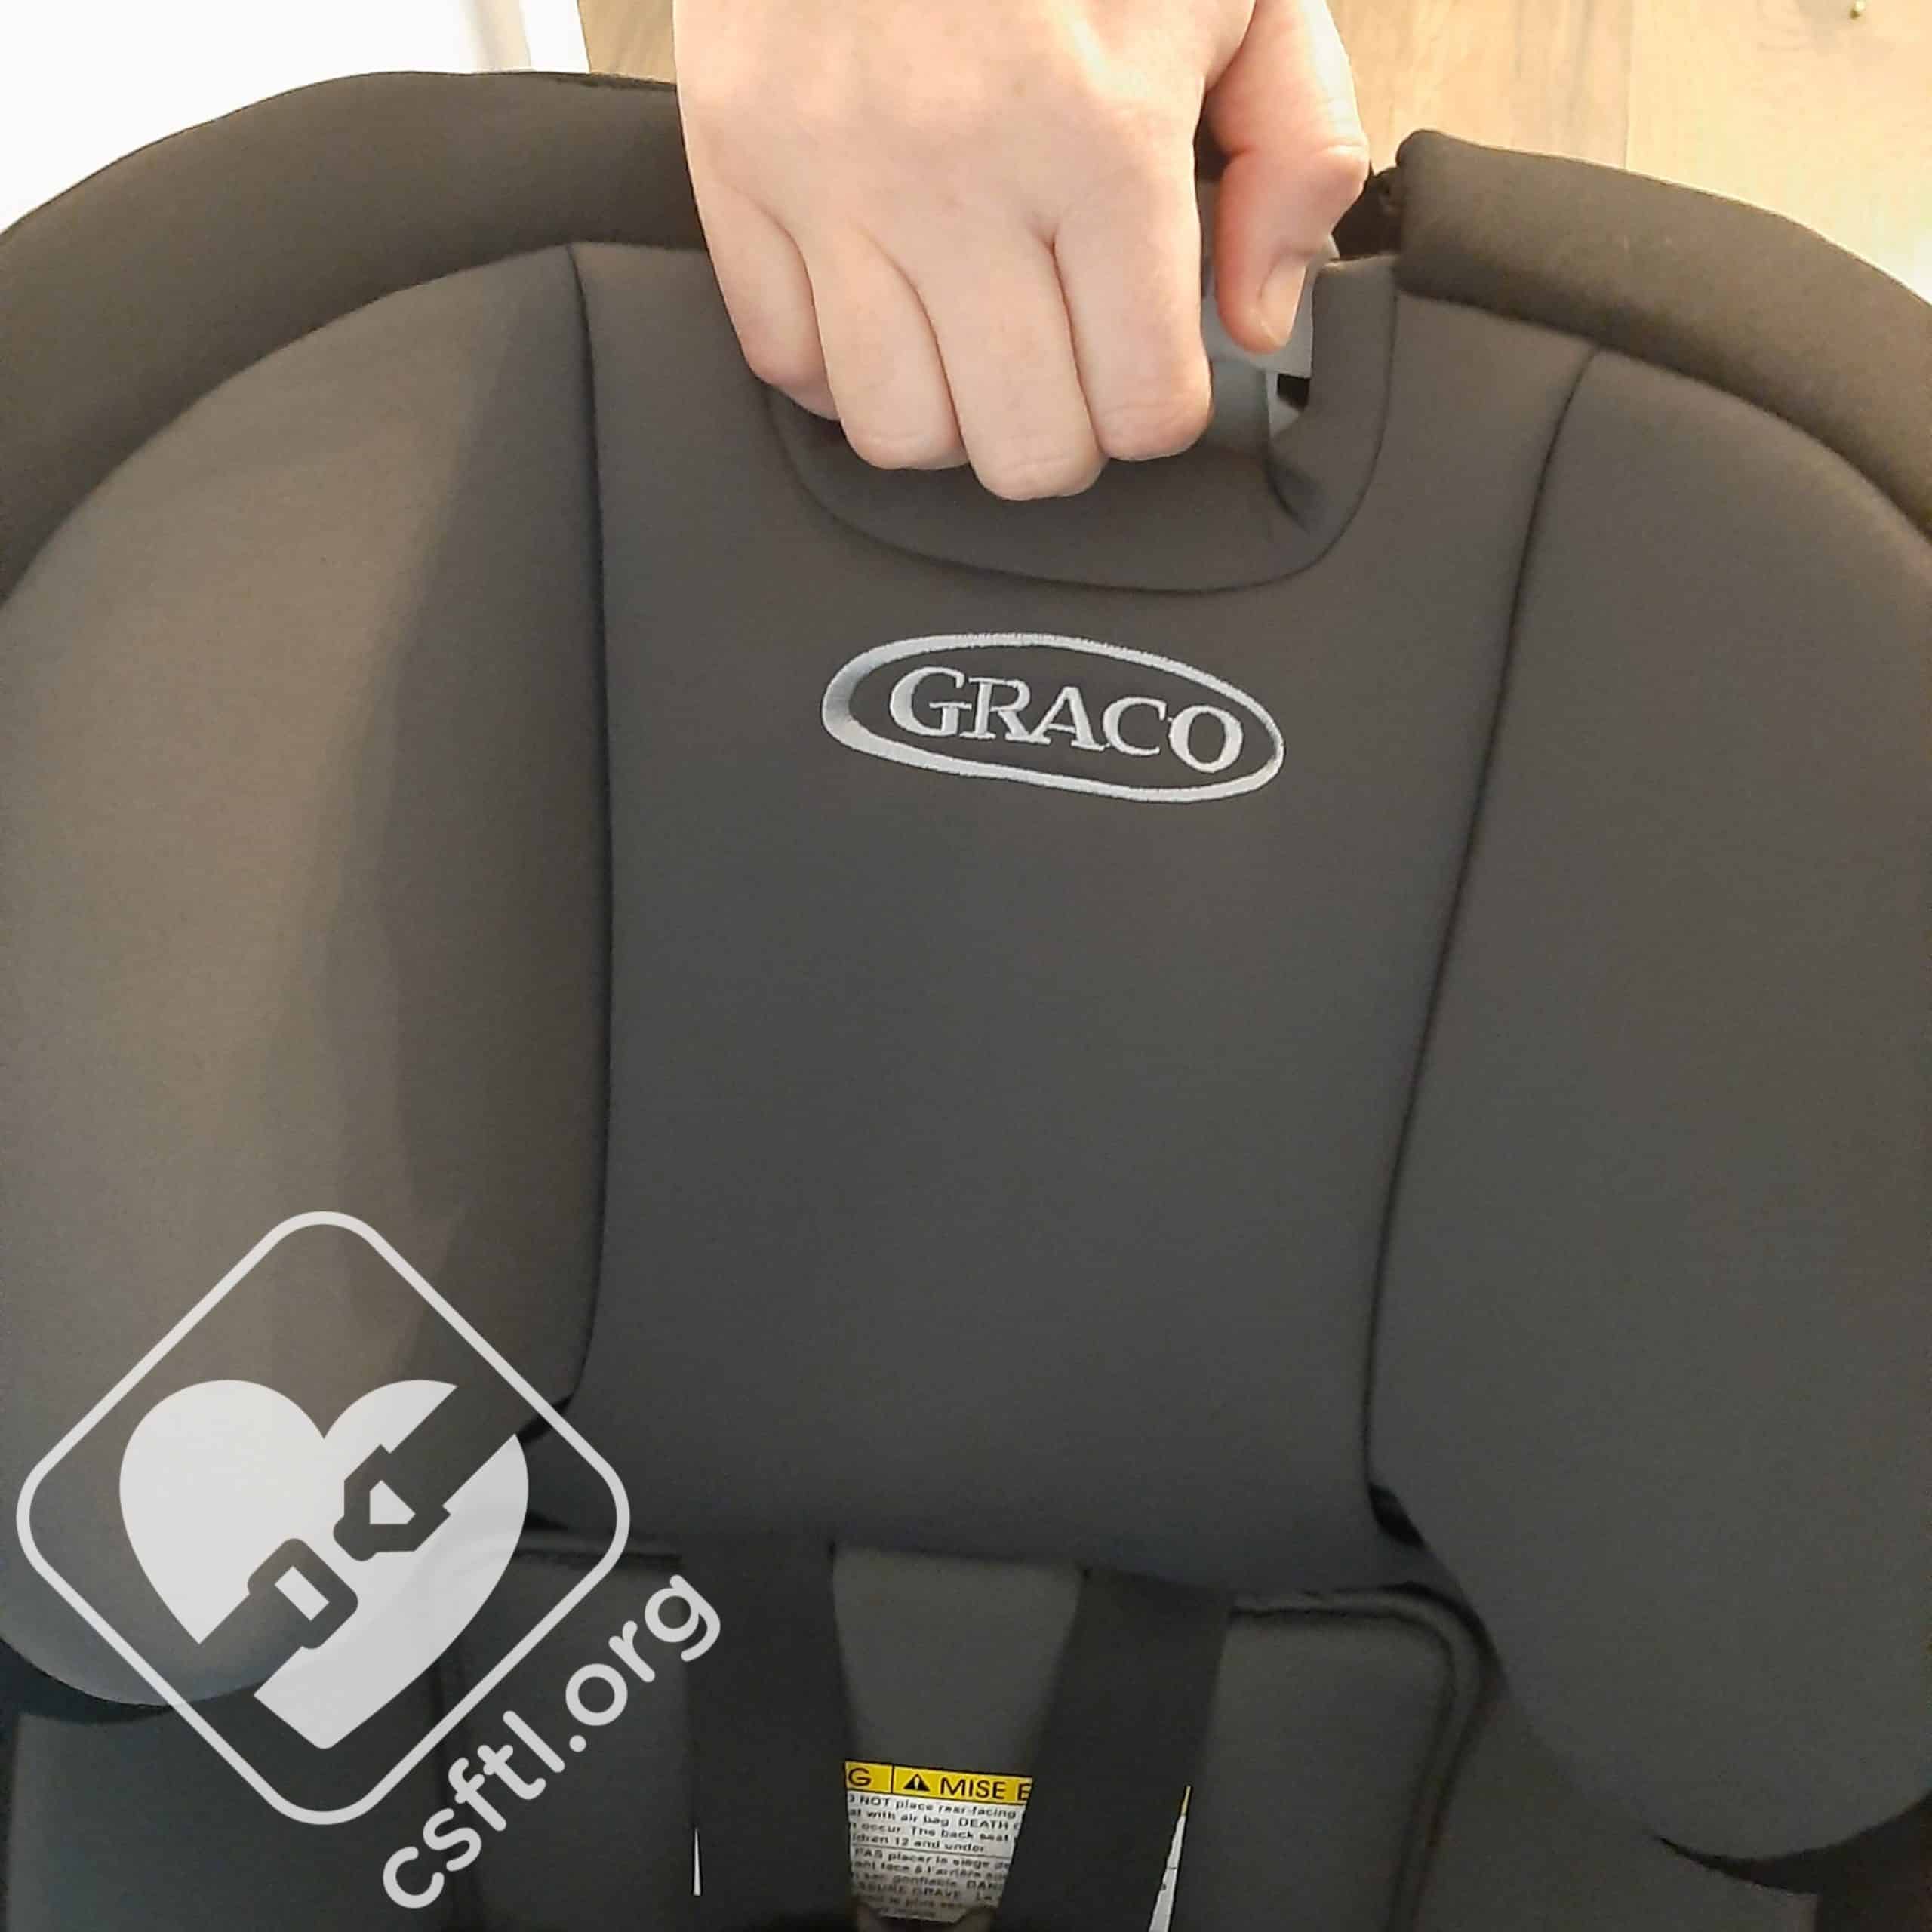
Graco SlimFit3 LX harness height adjustment
The SlimFit3 LX harness height adjusts by squeezing the harness adjustment handle at the top of the headrest and moving the headrest up and down.
Rear facing: The headrest should be positioned so that the harness is at or just below the child’s shoulders
Forward facing: The headrest should be positioned so that the harness is at or just above the child’s shoulders
Booster mode: The headrest should be positioned so that the shoulder belt guide is at or just above the child’s shoulders.
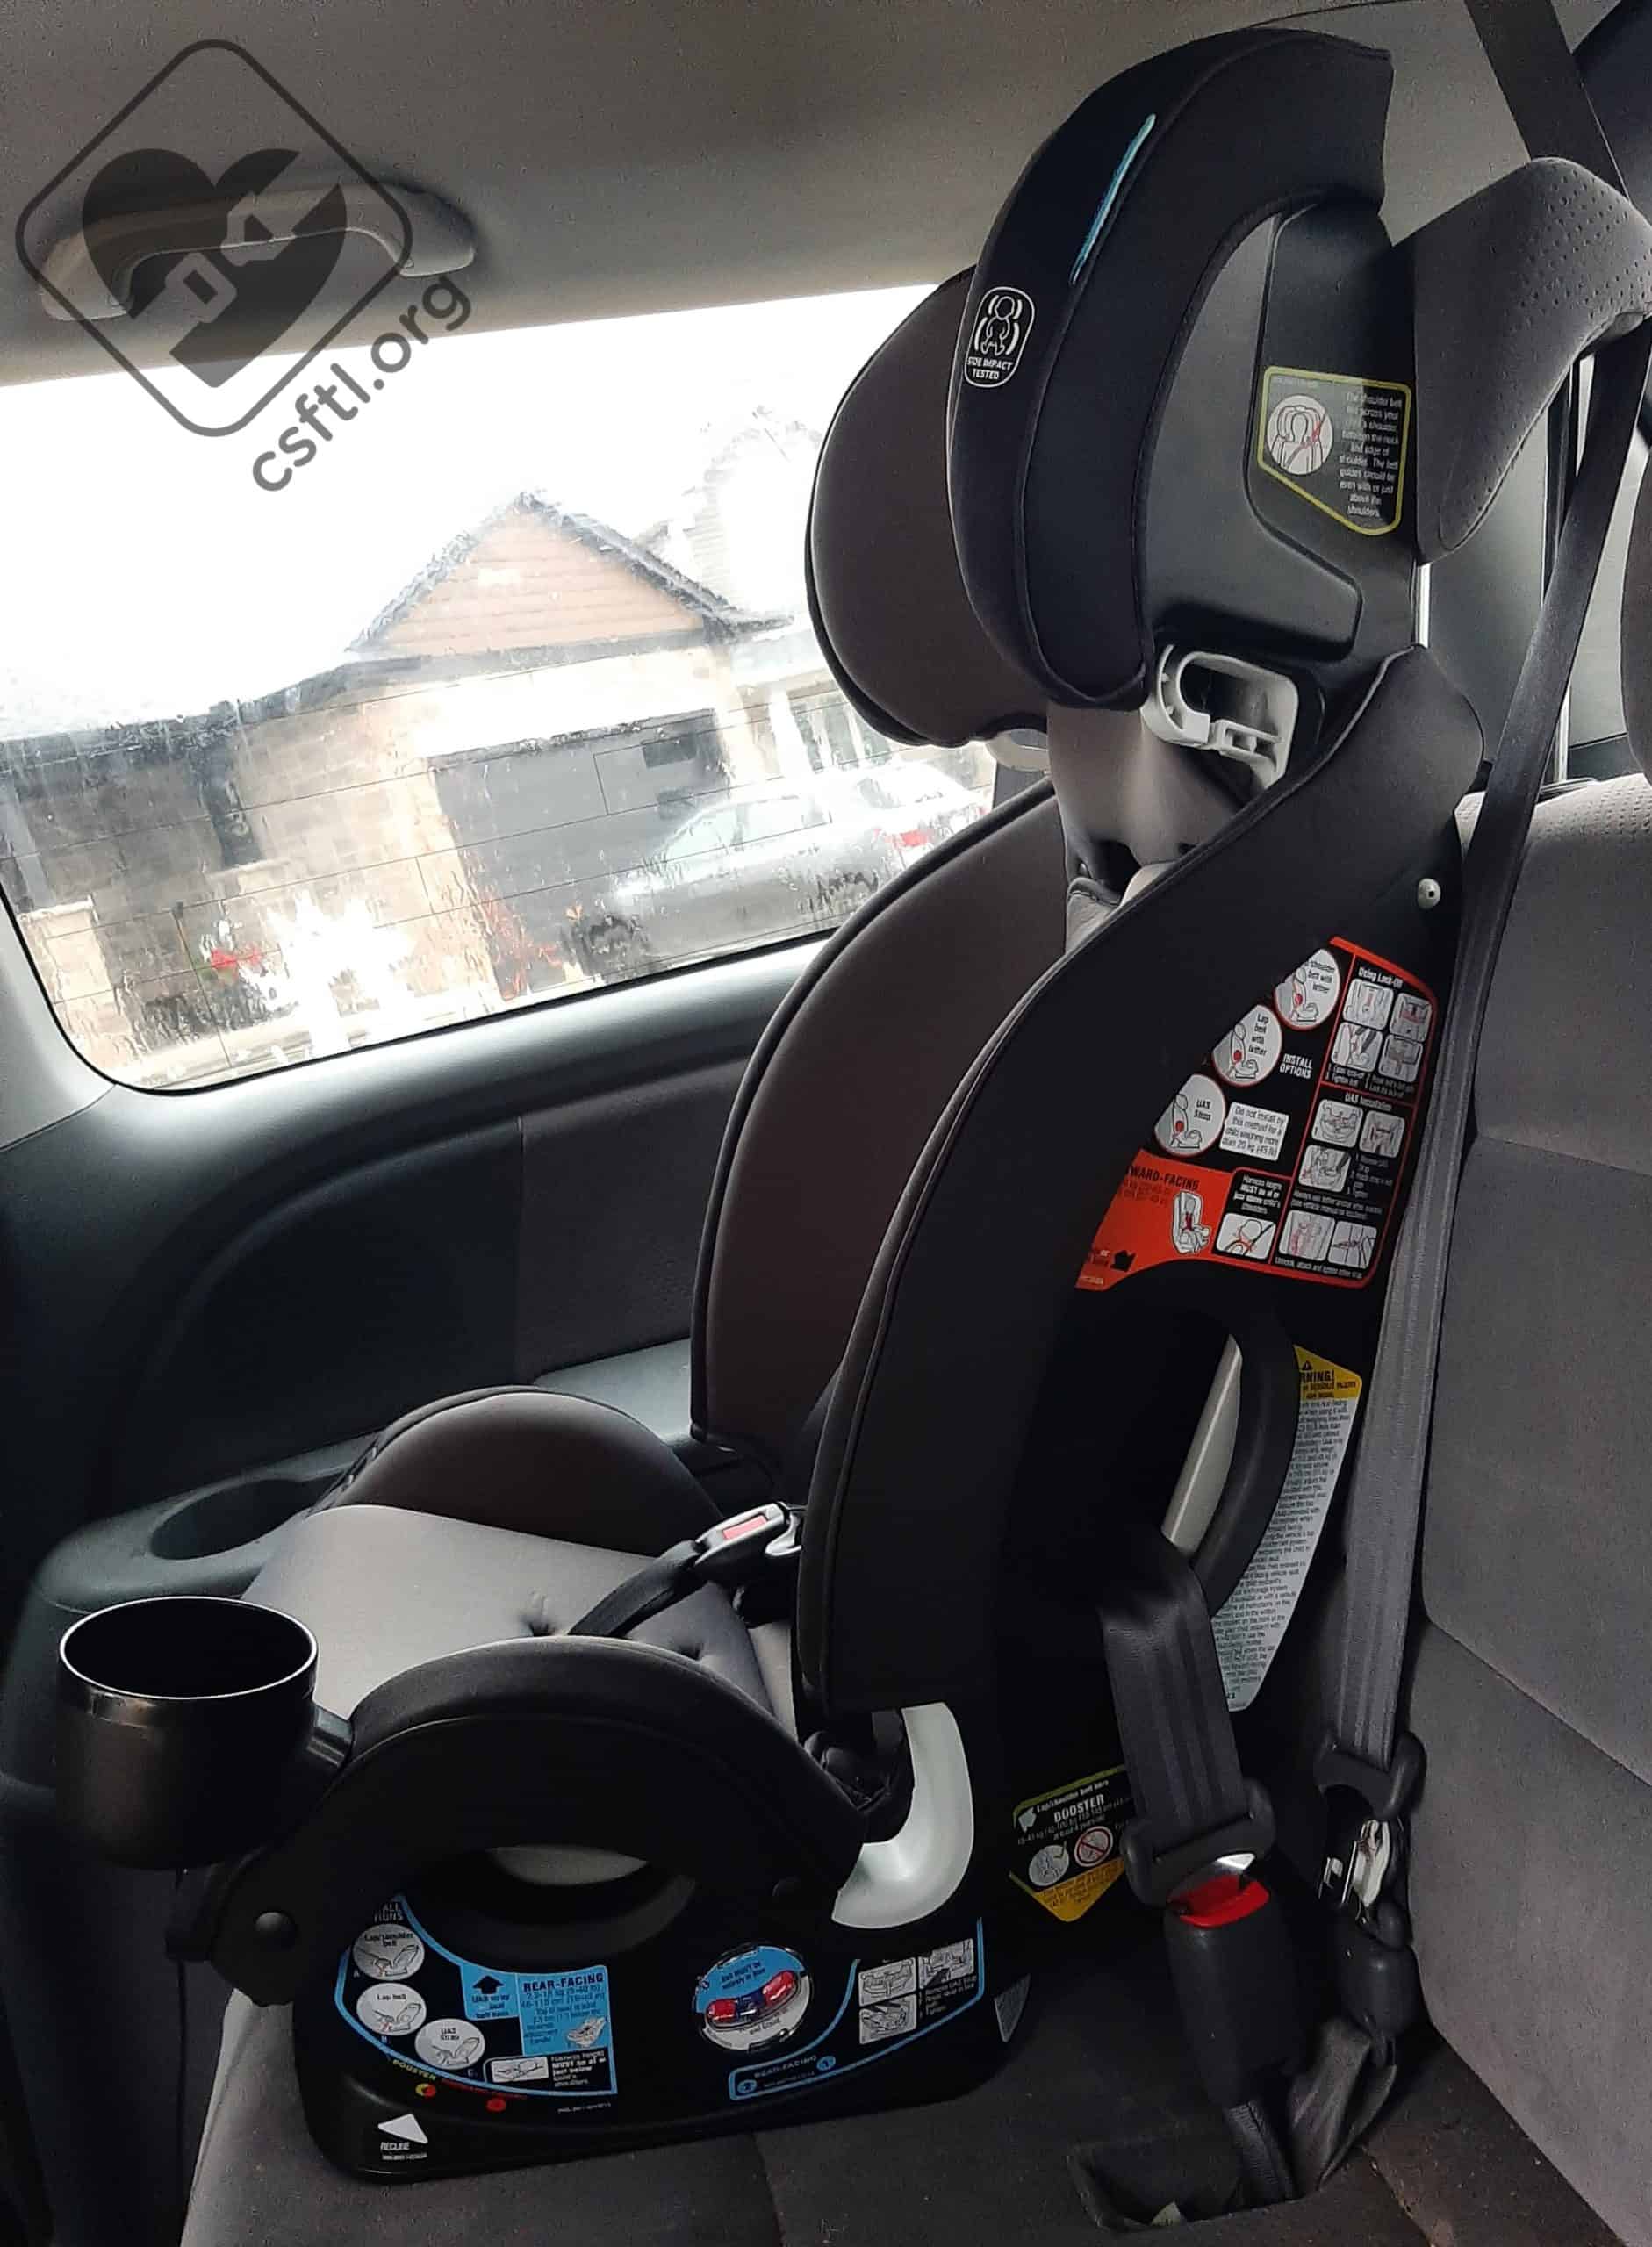
Installation: Rear Facing
Graco SlimFit3 LX rear facing belt path – marked with blue stickers
Installing the SlimFit3 LX rear facing was very simple regardless of whether we were using the vehicle seat belt or the lower anchors.
First: the anti rebound bar MUST be installed. Position the ARB along the front of the seat, lining up the edges of the bar with the holes in the SlimFit3 LX, and push the bar into the seat until it clicks.
Unsnapping the seat pad of the Graco SlimFit3 LX
To access the rear facing belt path: unsnap the 4 snaps that hold the lower cover to the back of the seat, and lift the seat pad towards you. This will expose the belt path (rear facing is marked with blue stickers).
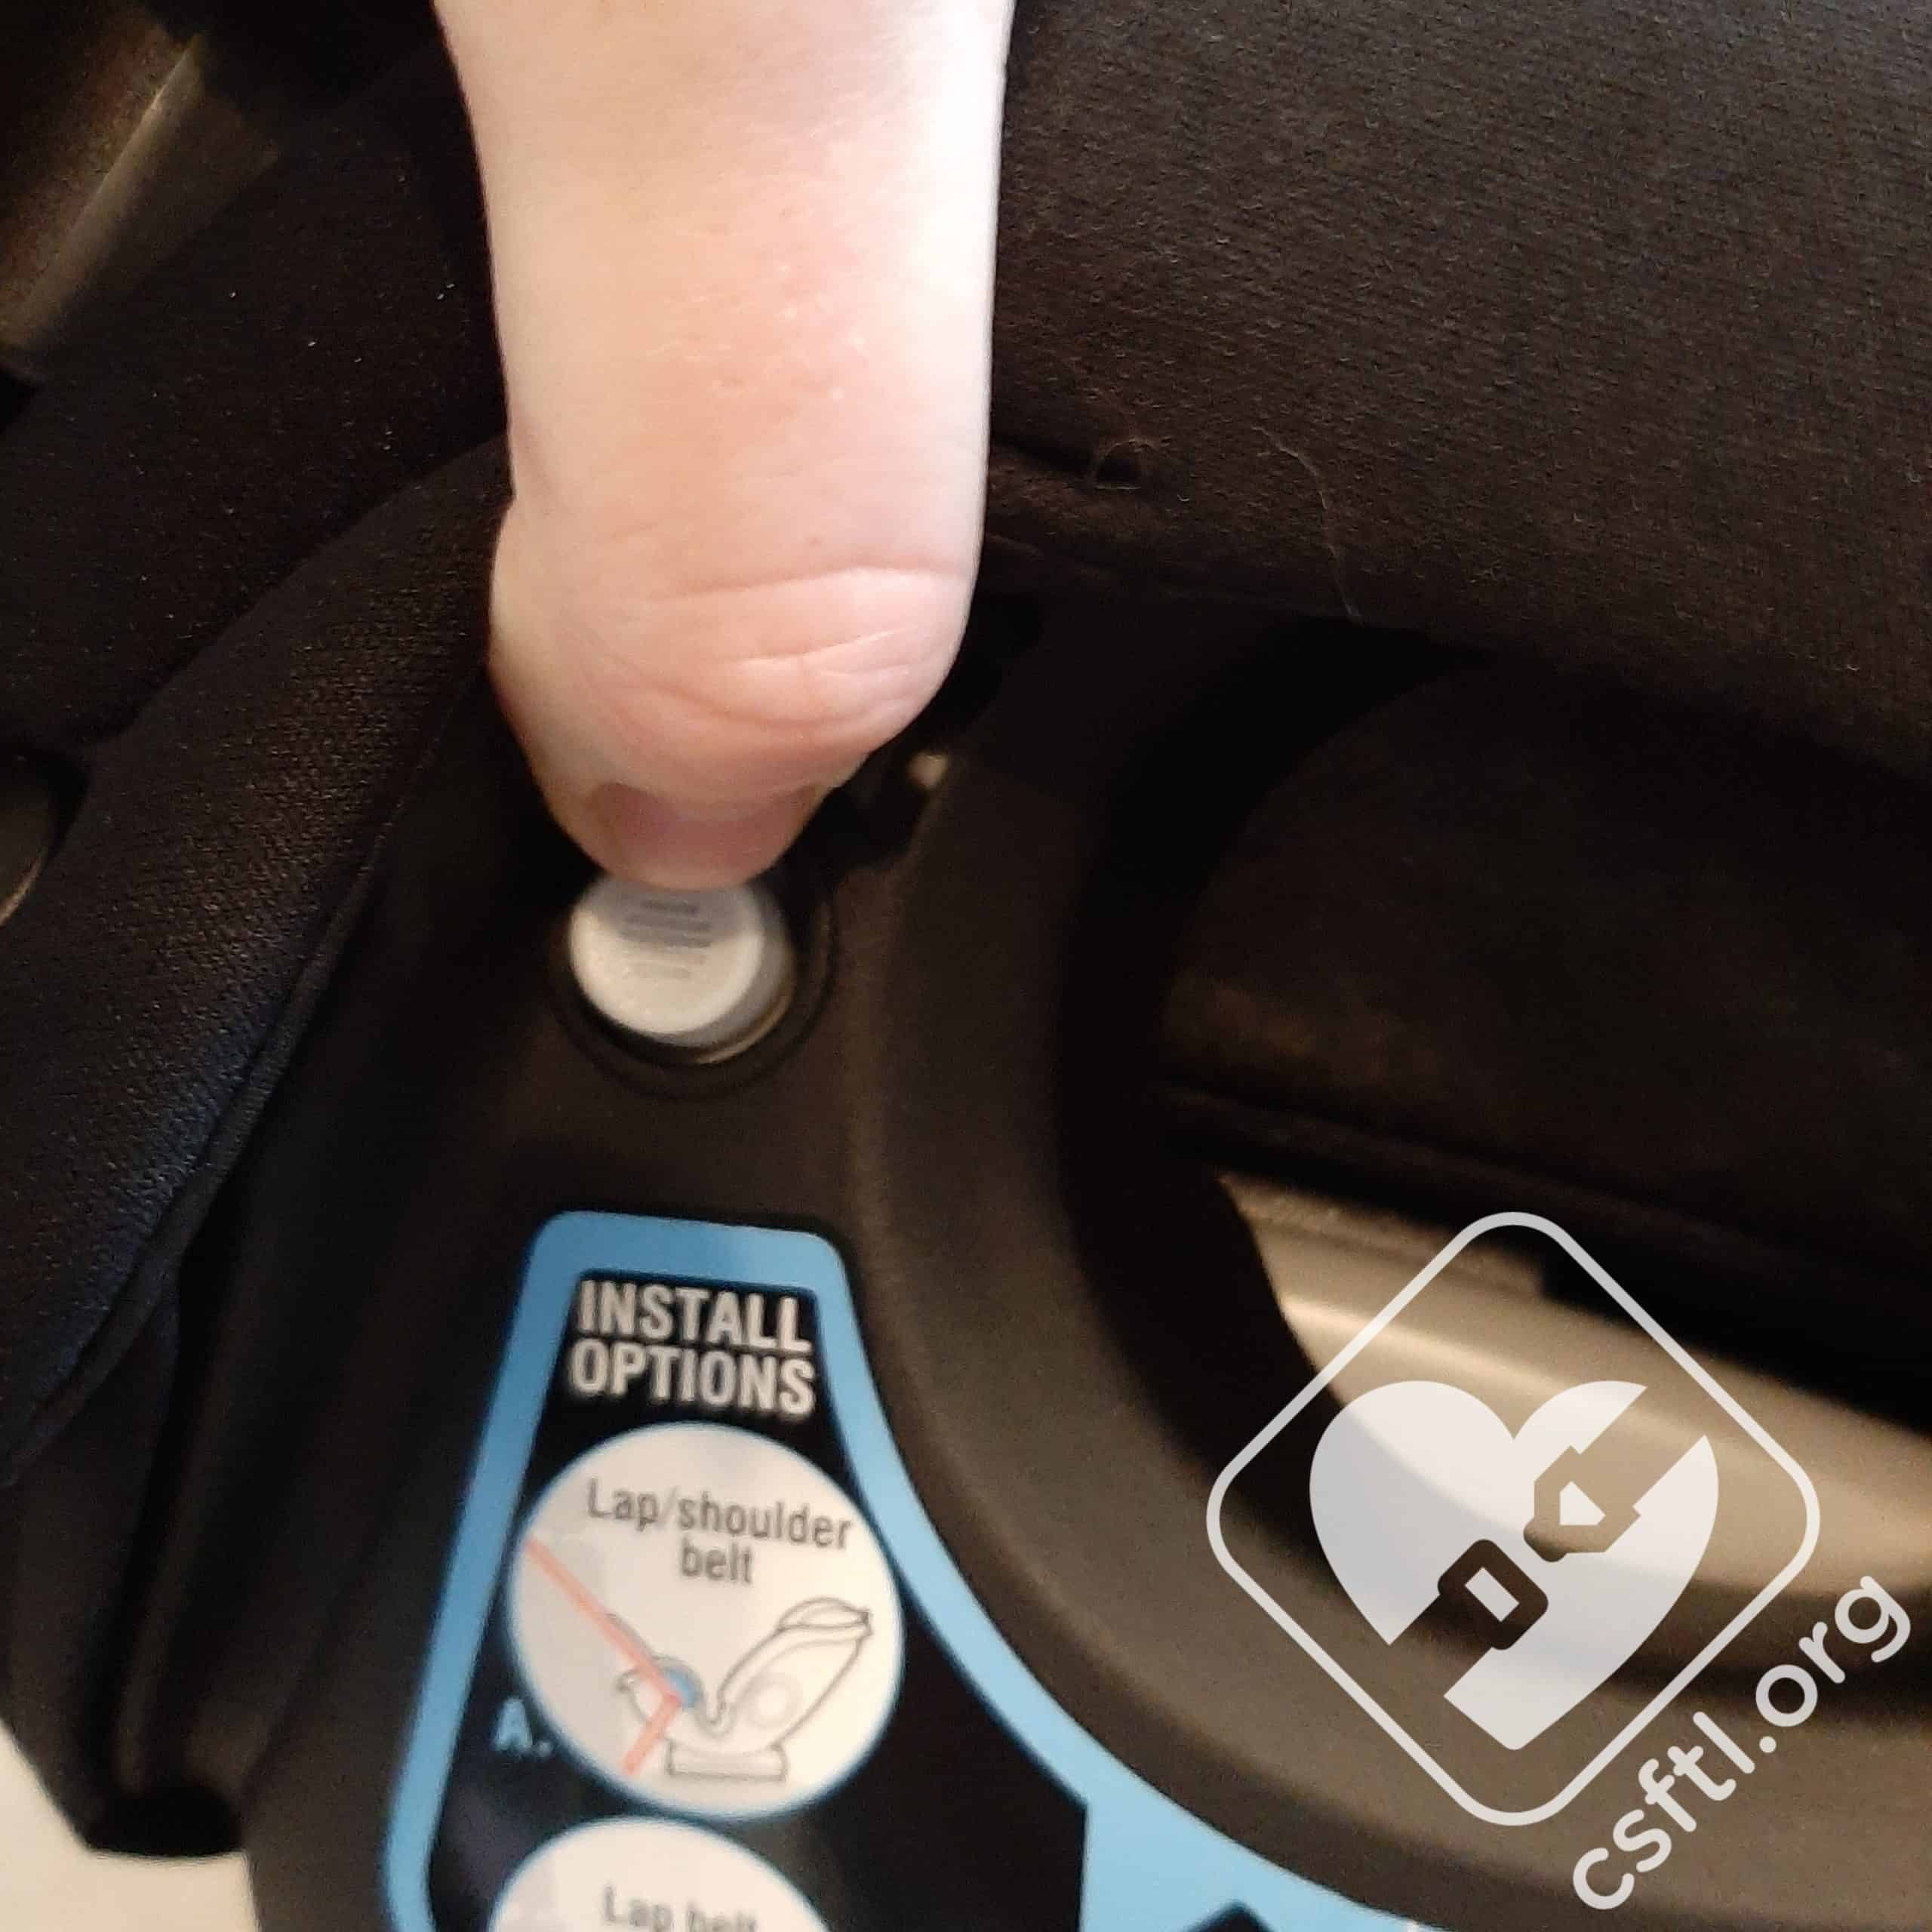
Lower Universal Anchorage System (LUAS)
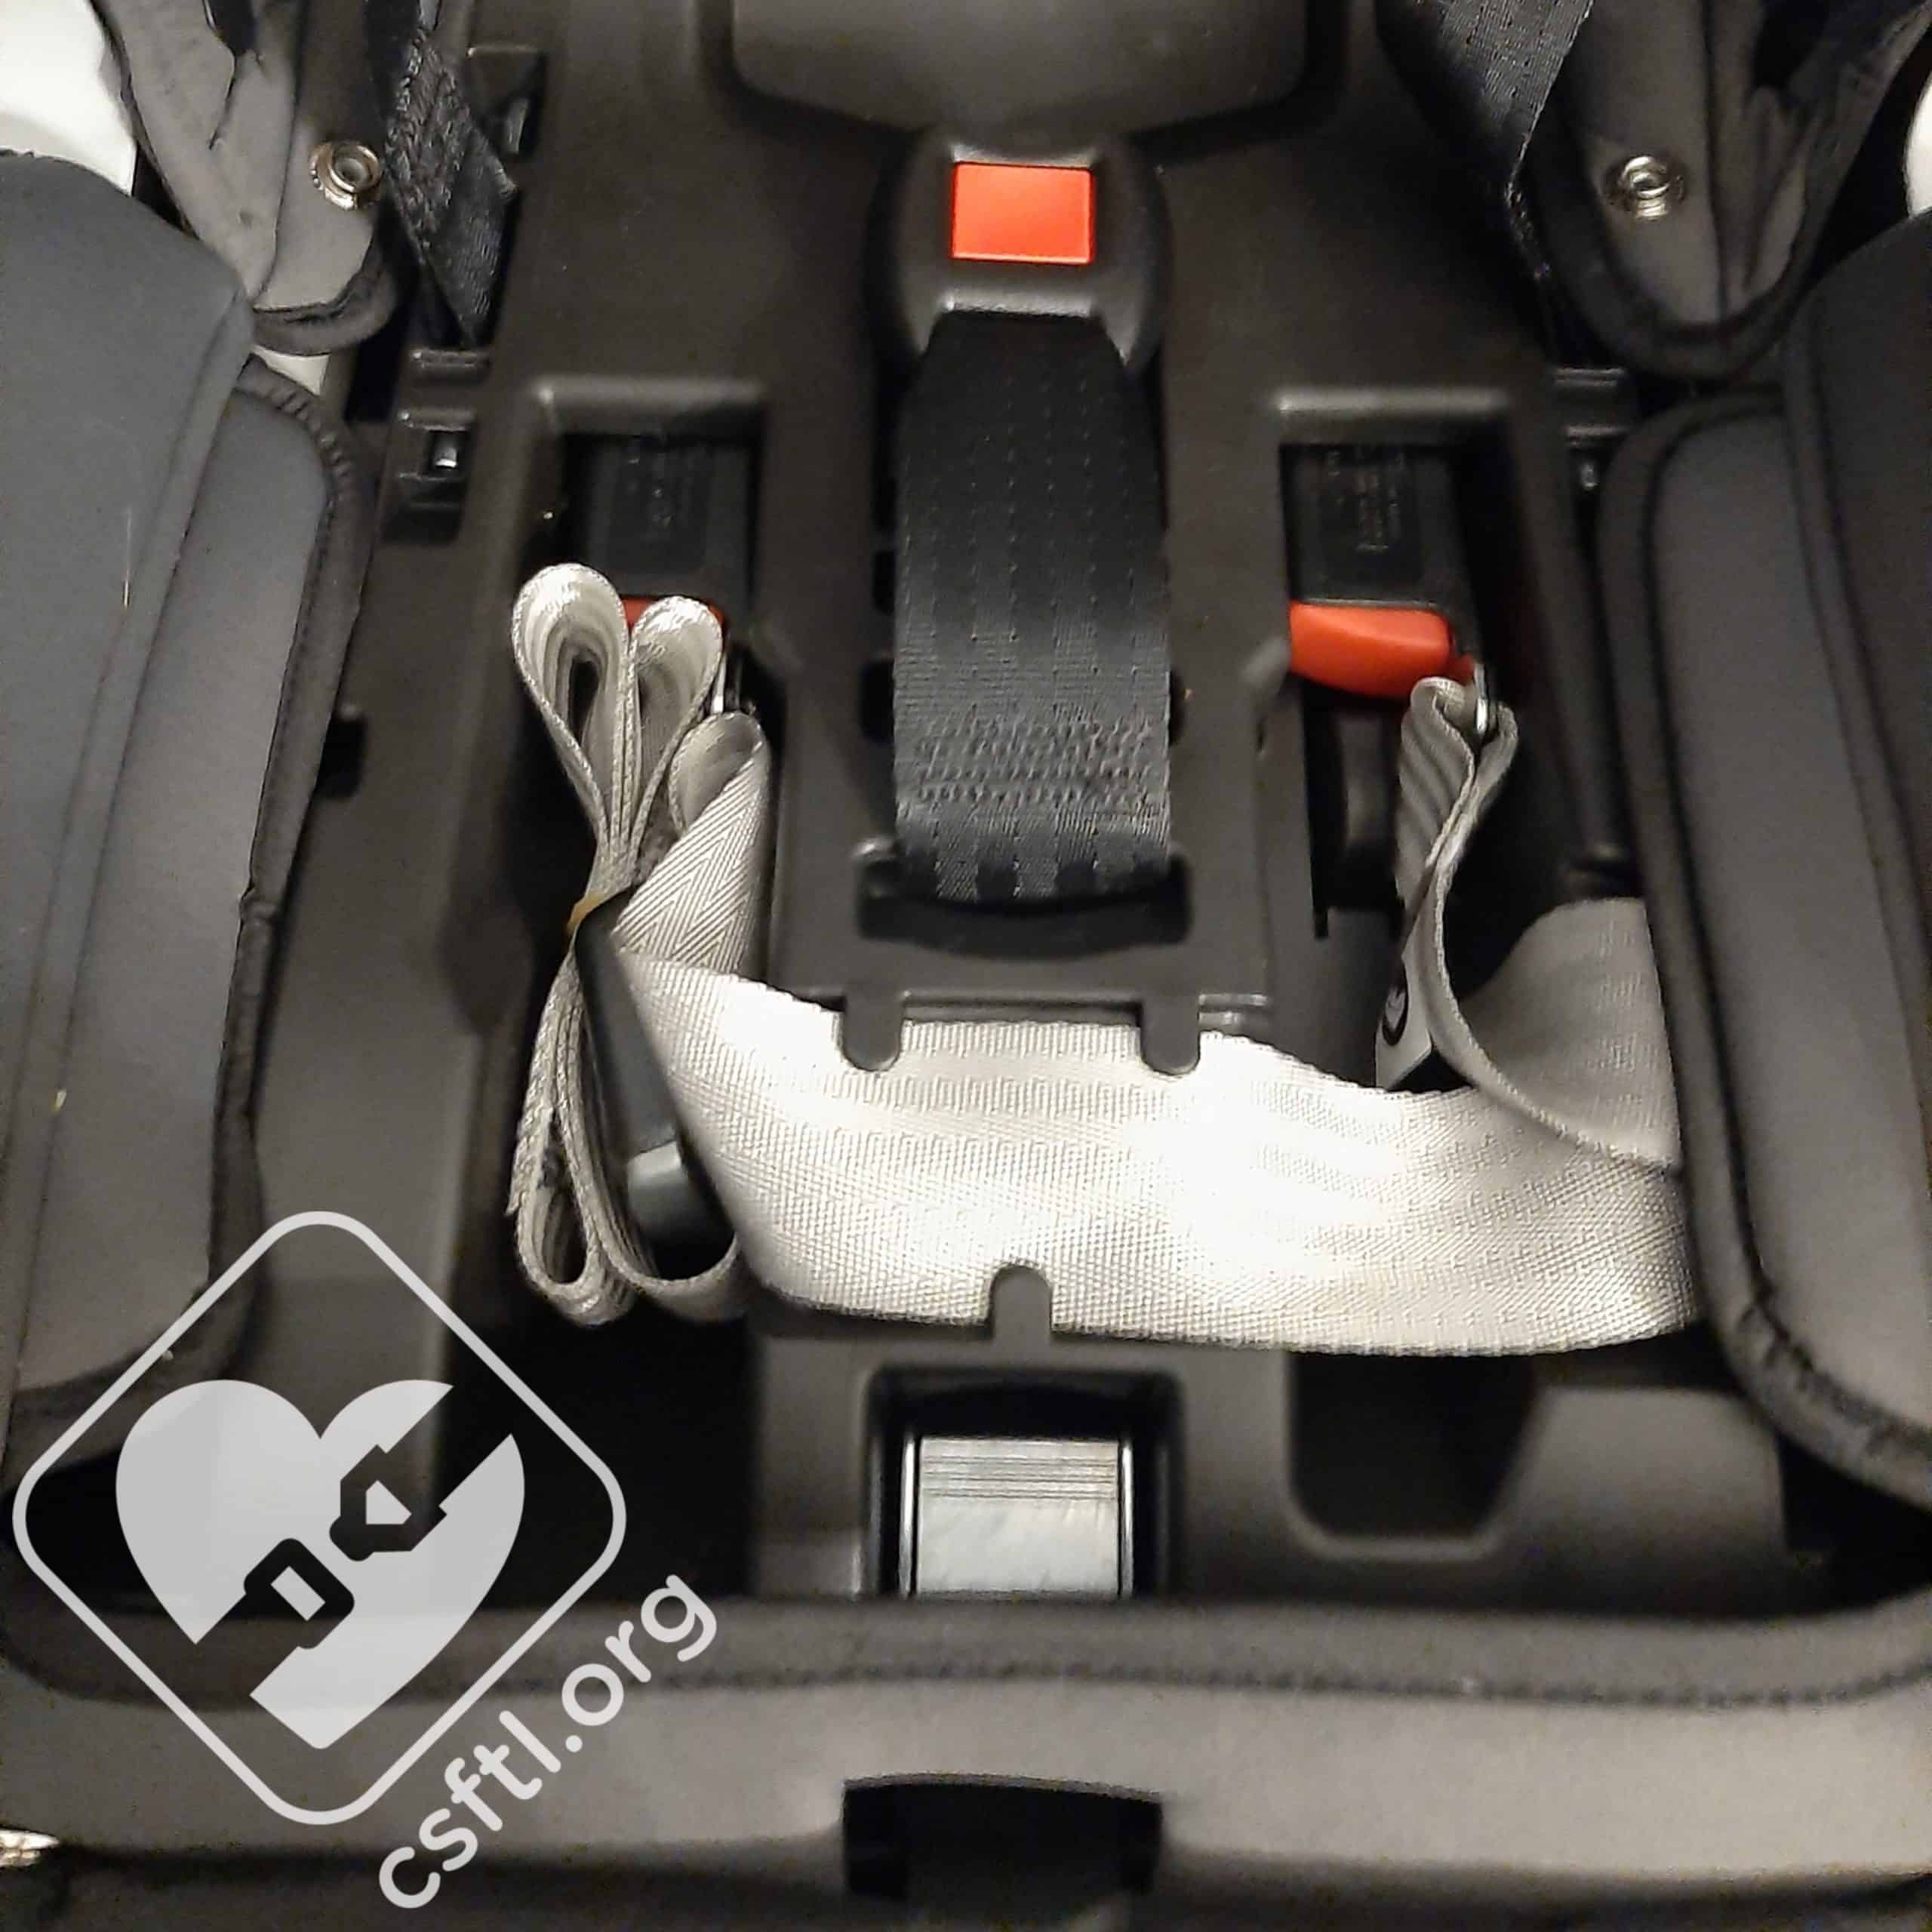
Graco SlimFit3 LX lower anchor storage
To install the SlimFit3 LX rear facing with LUAS, remove the LUAS webbing from its storage position under the seat pad. Place the SlimFit3 LX on the vehicle seat and ensure that the seat is set to the correct recline position when the base is flat on the vehicle seat. Positions 1 and 2 may be used when rear facing – and either may be used as long as the level indicator shows the ball in the blue zone when the vehicle is parked on level ground. If recline 1 is too upright, a rolled towel or pool noodle may be used under the seat’s base to recline it more (again ensuring that the ball is within the blue).
Graco SlimFit3 LX installed rear facing with LUAS
Route the webbing through the seat’s rear facing belt path, ensuring there are no twists or snags. If the crotch buckle is in the innermost or middle position, the LUAS webbing should route in front of the buckle. If the crotch buckle is in the outermost position, the LUAS webbing should route behind the buckle. Attach the lower anchor connectors to the vehicle’s lower anchors, ensuring that the arrows on the connectors are facing up.
Ensure that the recline angle is correct, and tighten the lower anchors by pulling on the on the “tail” of the LUAS webbing while pushing down on the SlimFit3 LX to create the counterpressure that will ensure there is no slack in the webbing .
Check for tightness by ensuring that the seat moves less than one inch at the belt path side to side and front to back. If the seat moves less than one inch at the belt path, the recline indicator ball is in the blue, and at least 80% of the SlimFit3 LX’s base is supported by the vehicle seat, the seat is installed correctly.
Vehicle Seat Belt
Before installing the Graco SlimFit3 LX with the vehicle seat belt, the LUAS webbing must be stored under the seat pad.
Graco SlimFit3 LX installed rear facing with vehicle seatbelt
Place the SlimFit3 LX on the vehicle seat and ensure that the seat is set to the correct recline position when the base is flat on the vehicle seat. Positions 1 and 2 may be used when rear facing, either position is allowed as long as the level indicator shows the ball in the blue zone when the vehicle is parked on level ground. If recline 1 is too upright, a rolled towel or pool noodle may be used under the seat’s base to recline it more (again ensuring that the ball is within the blue zone).
Seatbelt in rear facing belt path – Graco SlimFit3 LX
Thread the vehicle seat belt through the rear facing belt path and buckle it. Ensure the seat belt lies as flat as possible and does not have any twists (if needed, lift the seat pad up to expose the rear facing belt path). If the crotch buckle is in the innermost or middle position, the seat belt should route in front of the buckle, and if the crotch buckle is in the outermost position, the seat belt should route behind the buckle. Lock the vehicle seat belt (most will lock at the retractor, which means the shoulder belt will need to be pulled all the way out and then slowly let go back in. If this does not lock your vehicle’s seat belt, refer to your vehicle’s owner manual and/or our article on seat belts).
Check for tightness by ensuring that the seat moves less than one inch at the belt path side to side and front to back. If the seat moves less than one inch, the recline indicator ball is in the blue, and at least 80% of the SlimFit3 LX’s base is supported by the vehicle seat, the seat is installed.
Fit to Child – Rear Facing
Newborn Huggable Images Doll

Graco SlimFit3 LX – newborn Huggable Images doll
Our newborn doll weighs 7 pounds and is 17 inches long. With the infant insert in the seat, the head pad removed, we adjusted the headrest to the lowest position and the crotch buckle to the inner slot. The harness fit on our doll is exactly what we are looking for – the harness is below the shoulders and we were easily able to tighten the harness to pass the pinch test. While not all babies are built the same as our doll, it’s worth noting that the SlimFit3 LX should fit an average newborn nicely.
10 Month Old
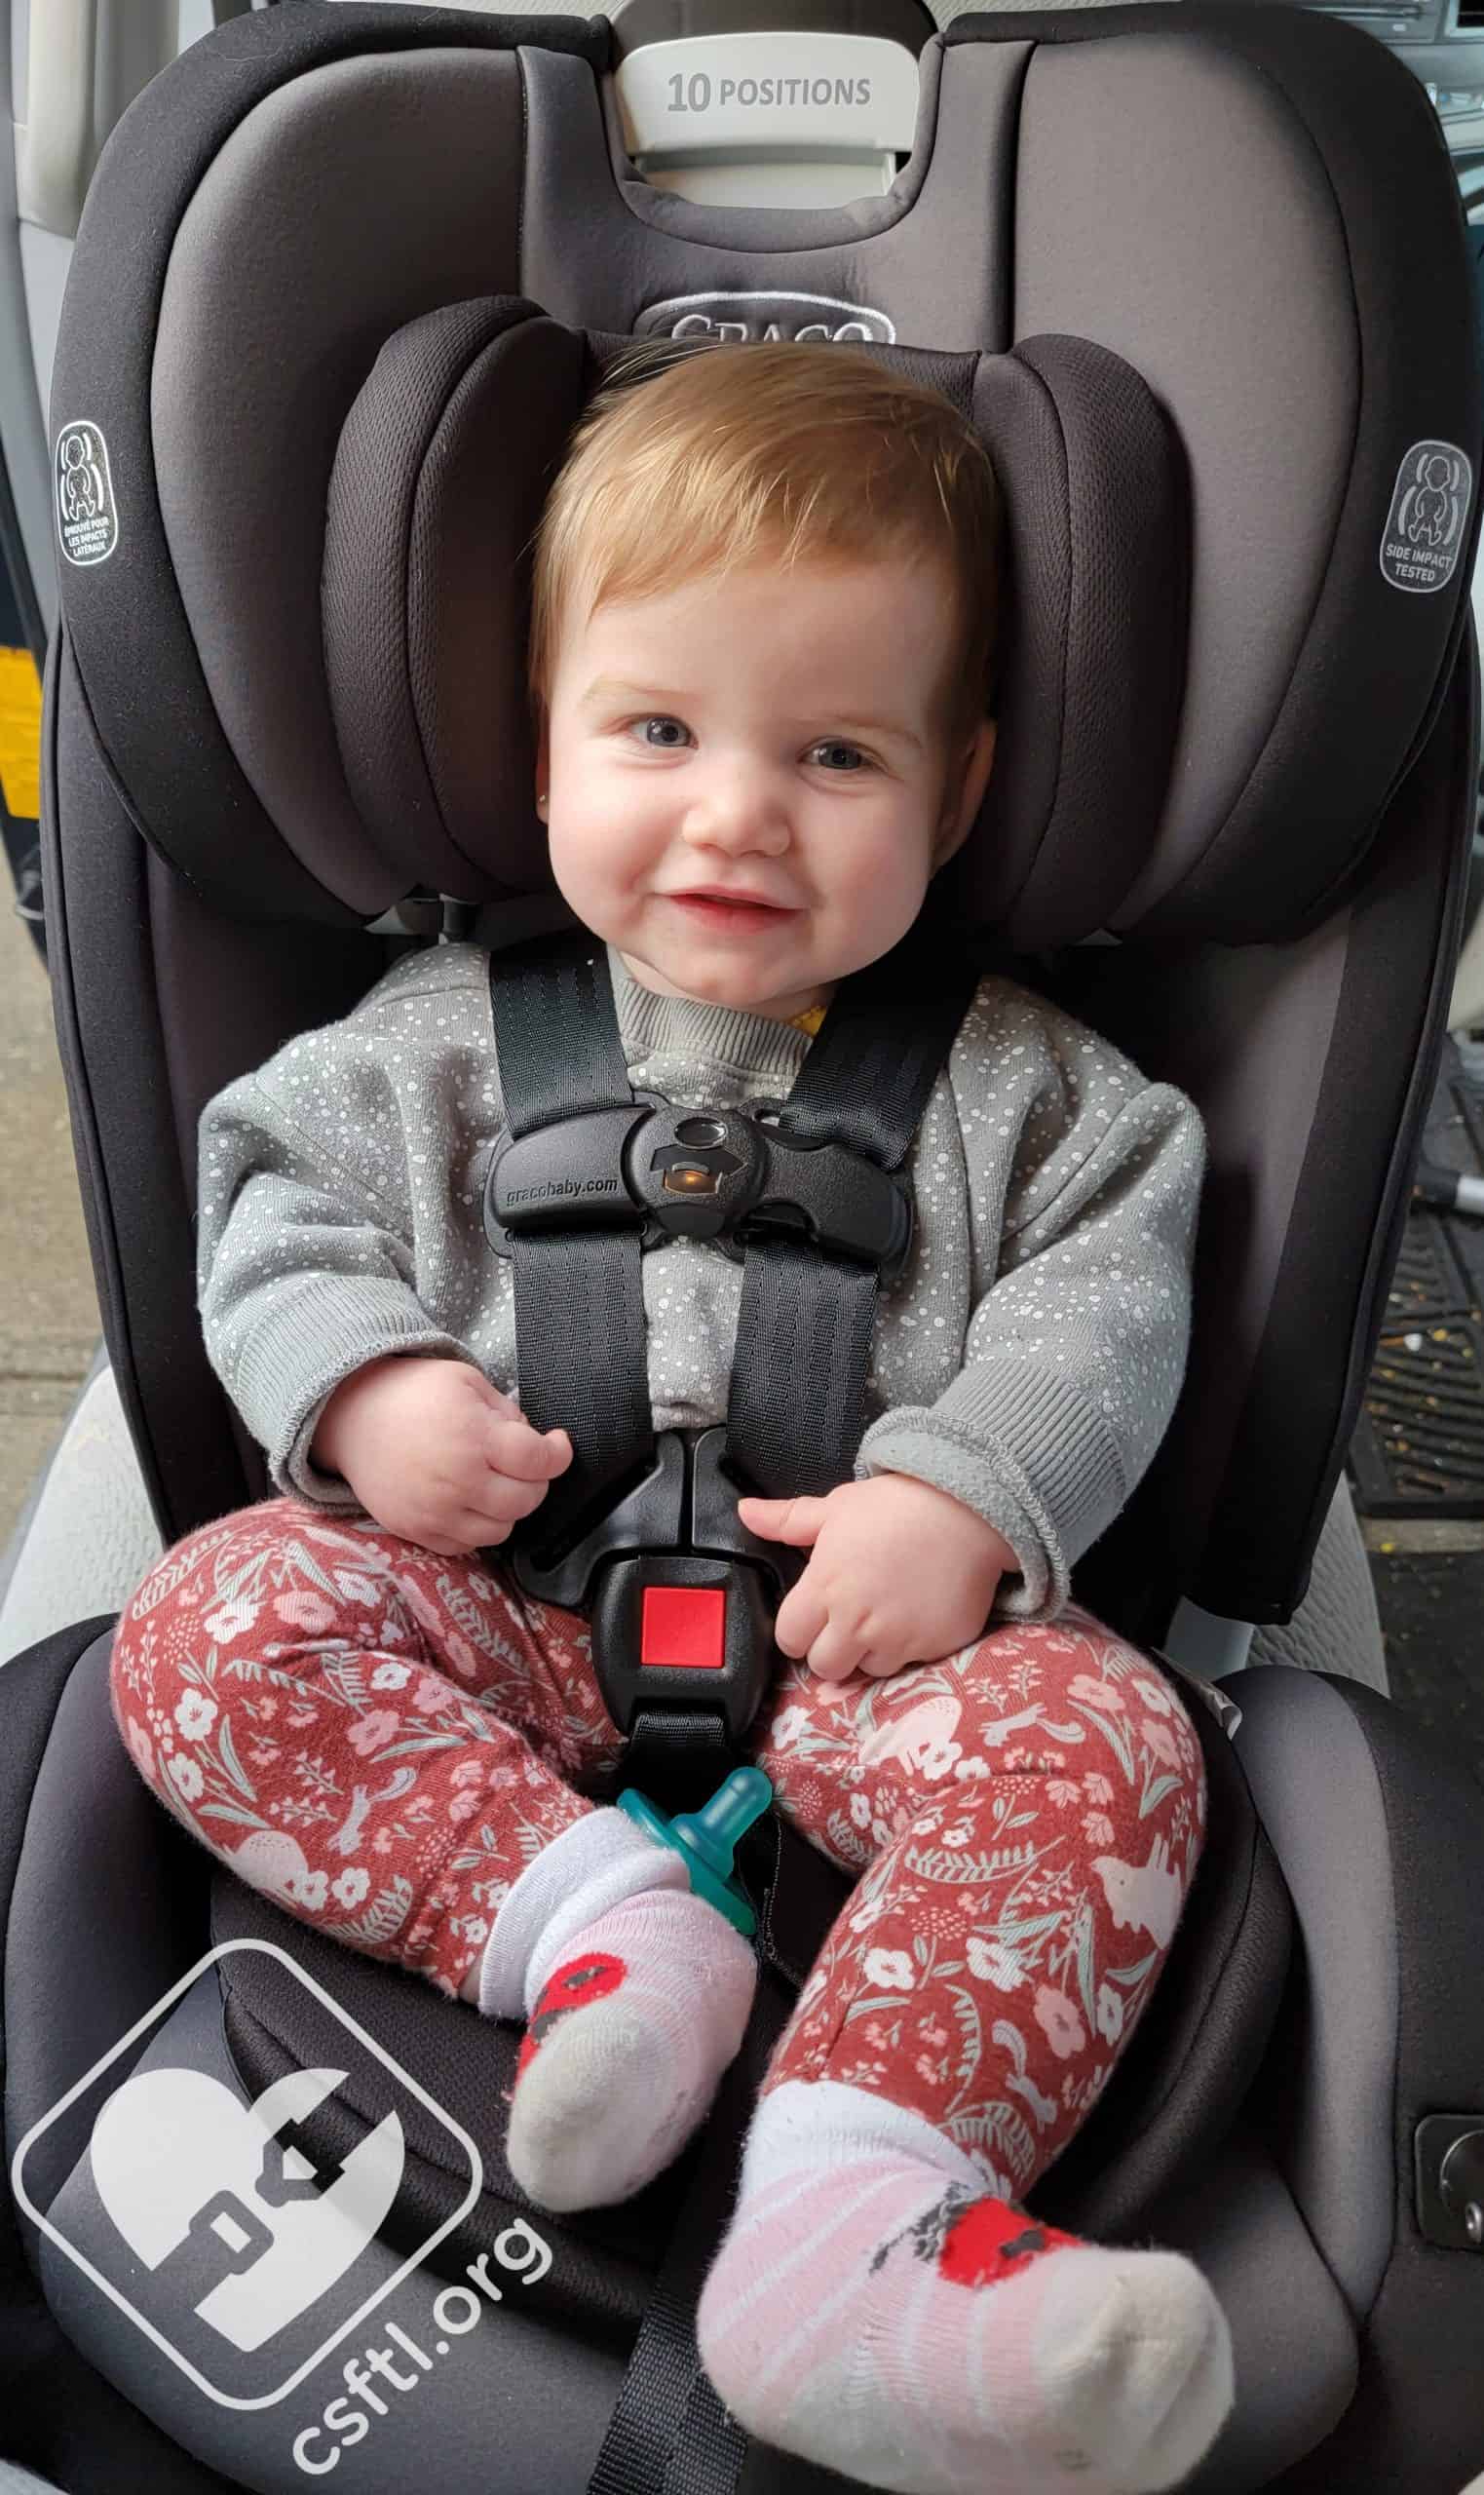
Graco SlimFit3 LX – 10 month old
This model is ten months old, she is 29 inches tall and weighs 18 pounds. While she is under the twenty pound limit of the infant insert and may use it, she seemed more comfortable without it. We installed the SlimFit3 LX on recline 2, which in this vehicle placed the ball in the middle of the recline range.
3 Year Old

Graco SlimFit3 LX – 3 year old
This model is nearing her third birthday. She is 36 inches tall and weighs 32 pounds. She is happily riding rear facing and has plenty of room to grow in the seat. She is excited that the low narrow sides mean she is able to climb in independently. Here, we’re using recline position 2, the car seat is compressed into the vehicle seat to install it as upright as allowed.
5 Year Old
Graco SlimFit3 LX – 5 year old
This model just turned five. She is on the small side at 41 inches and 35 pounds. Though she has plenty of space to grow and is happy rear facing, she is approaching the rear facing standing height limit of 43 inches. After she hits that maximum height, she will have to ride forward facing in this seat. The SlimFit3 LX is installed using recline position 2.
Installation: Forward Facing
Anti Rebound Bar / Cup Holder release button on Graco SlimFit3 LX
The anti rebound bar must be removed when installing the SlimFit3 LX forward facing. To remove the ARB, push on the Anti-Rebound bar release buttons located on the side of the seat’s shell, near the front edge. While the ARB isn’t spring-loaded like the Canadian TrioGrow SnugLock, it does release smoothly and easily.
Now that the ARB has been removed, the optional cup holder can be added to either side of the seat.
Top Tether storage on Graco SlimFit3 LX
Before installing the SlimFit3 LX forward facing, be sure to unhook the tether from the storage location at the back of the seat – it is required to be used when forward facing on all seats in Canada.
Graco SlimFit3 LX forward facing belt path – marked with orange stickers
Adjust the recline of the SlimFit3 LX to one of the forward facing recline settings (3 or 4), and place the child restraint forward facing on the vehicle seat with the base flat on the seat.
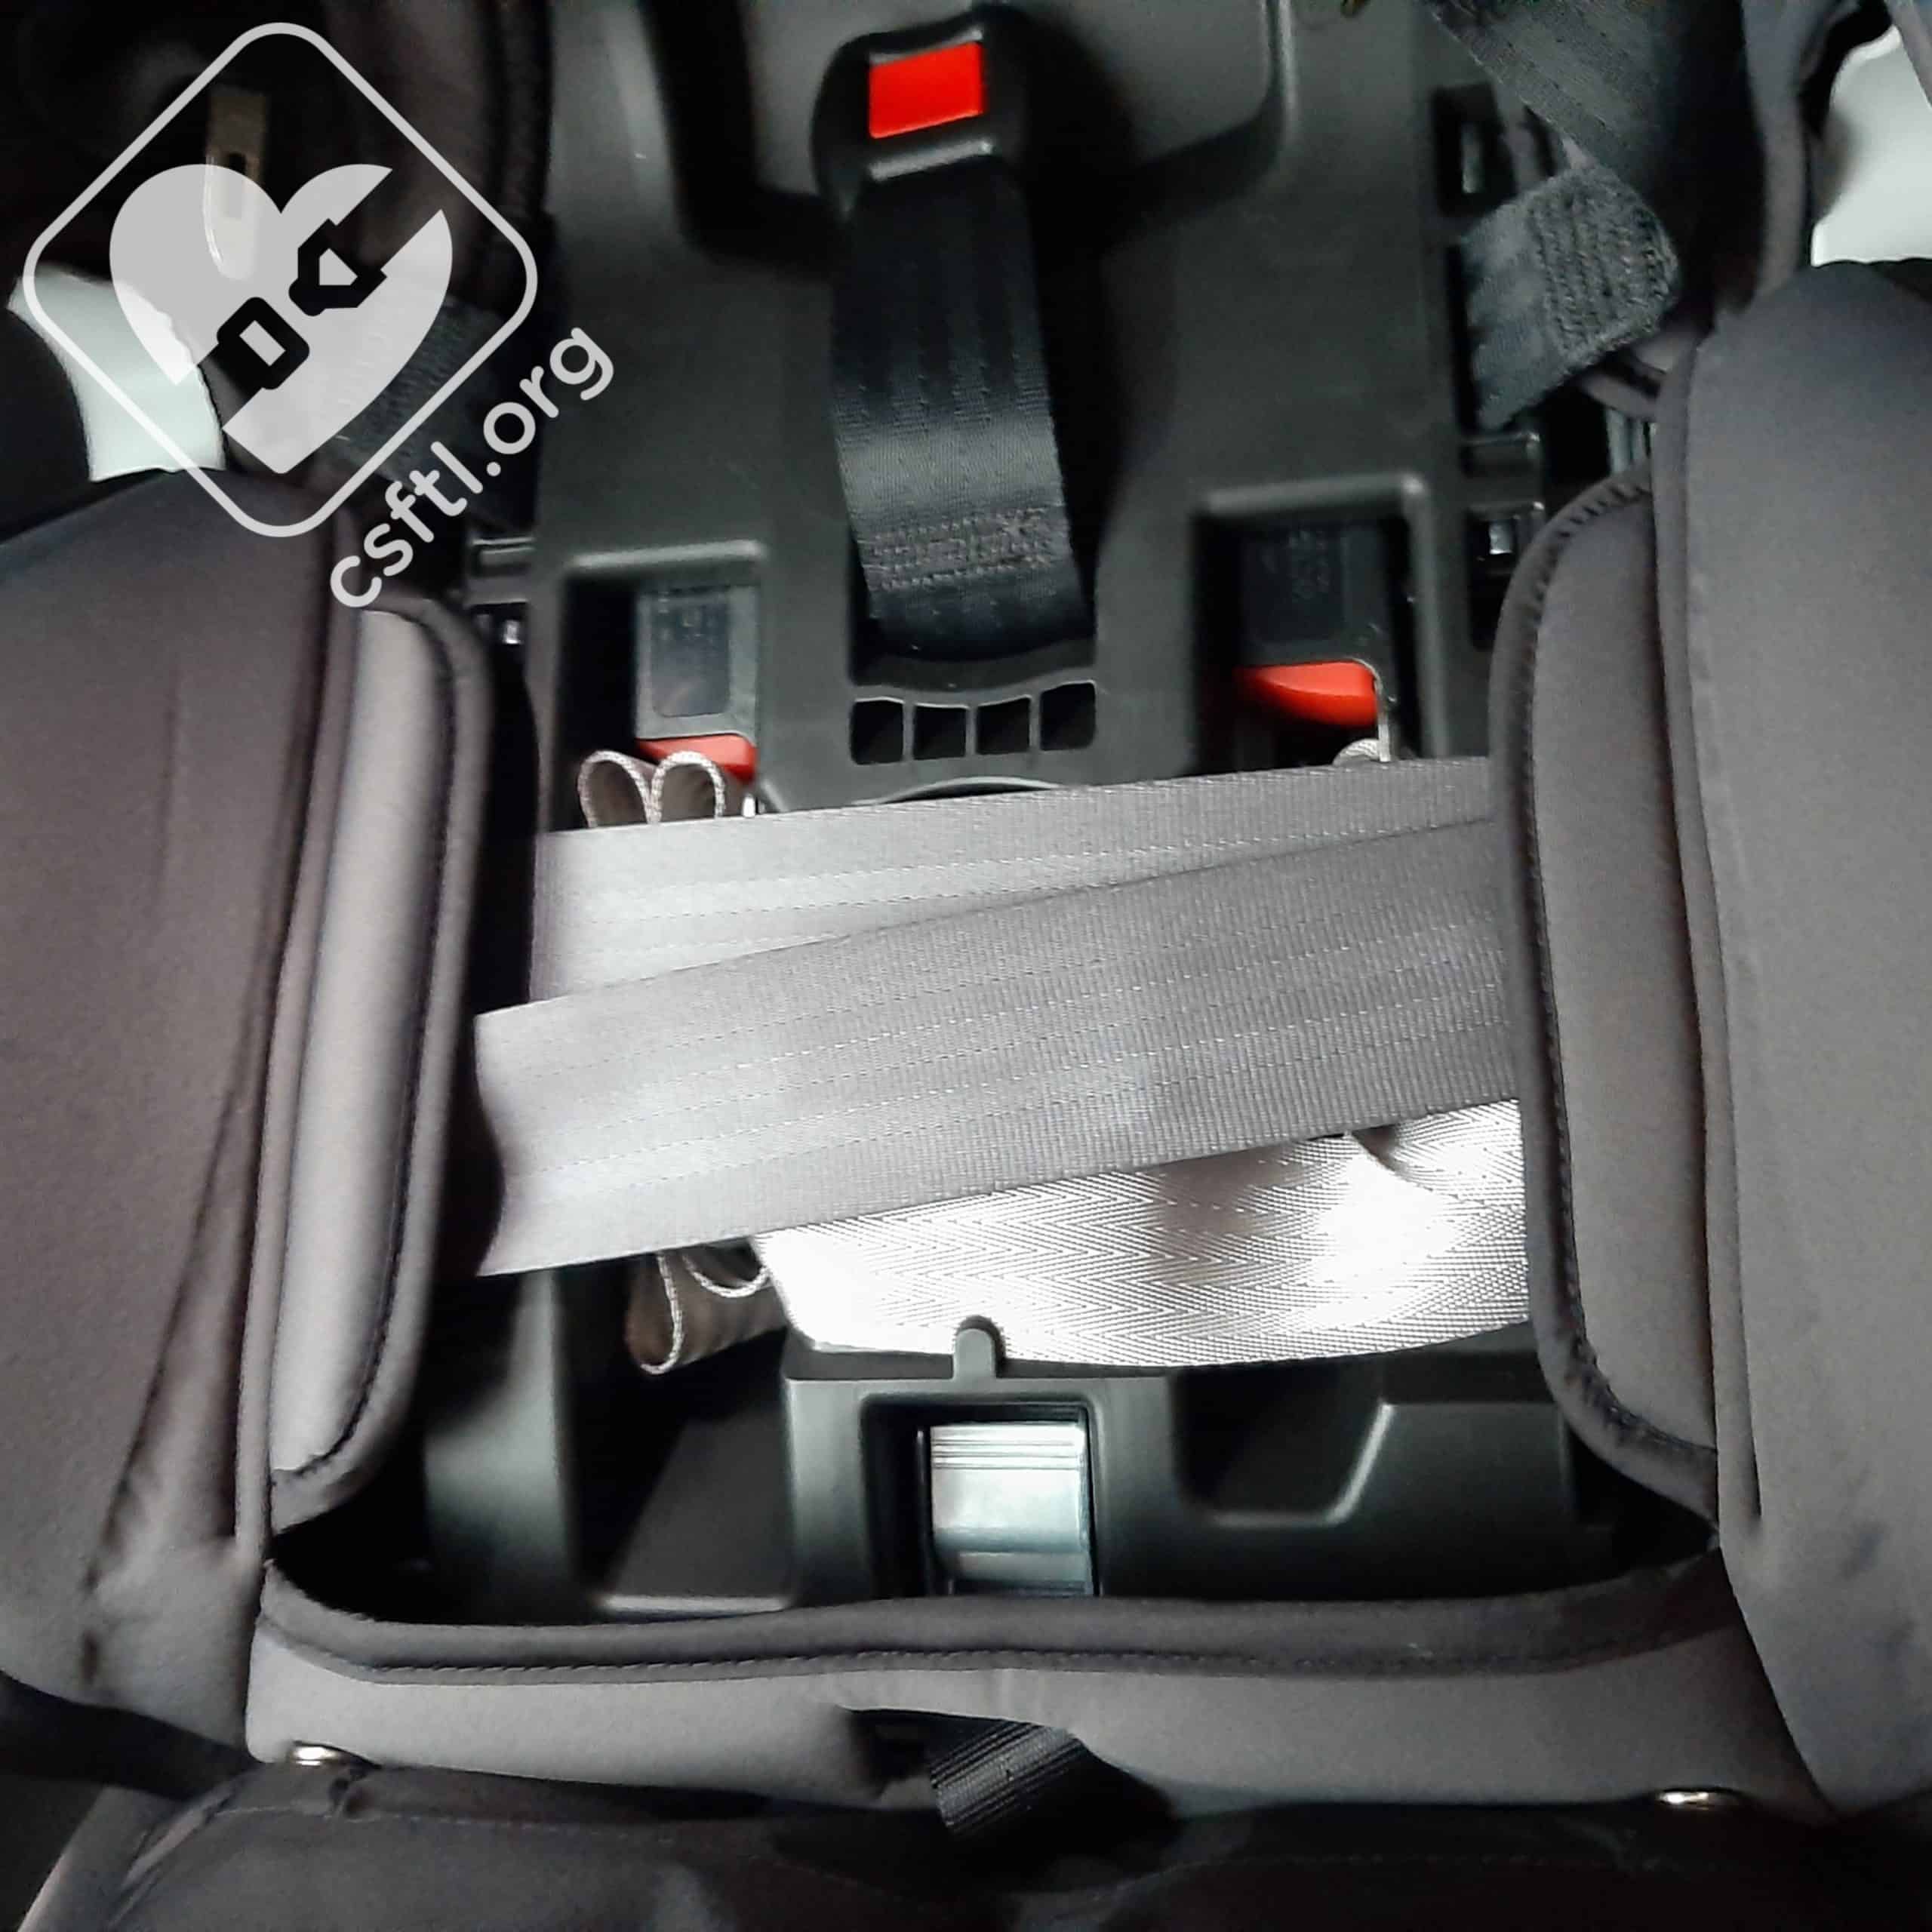
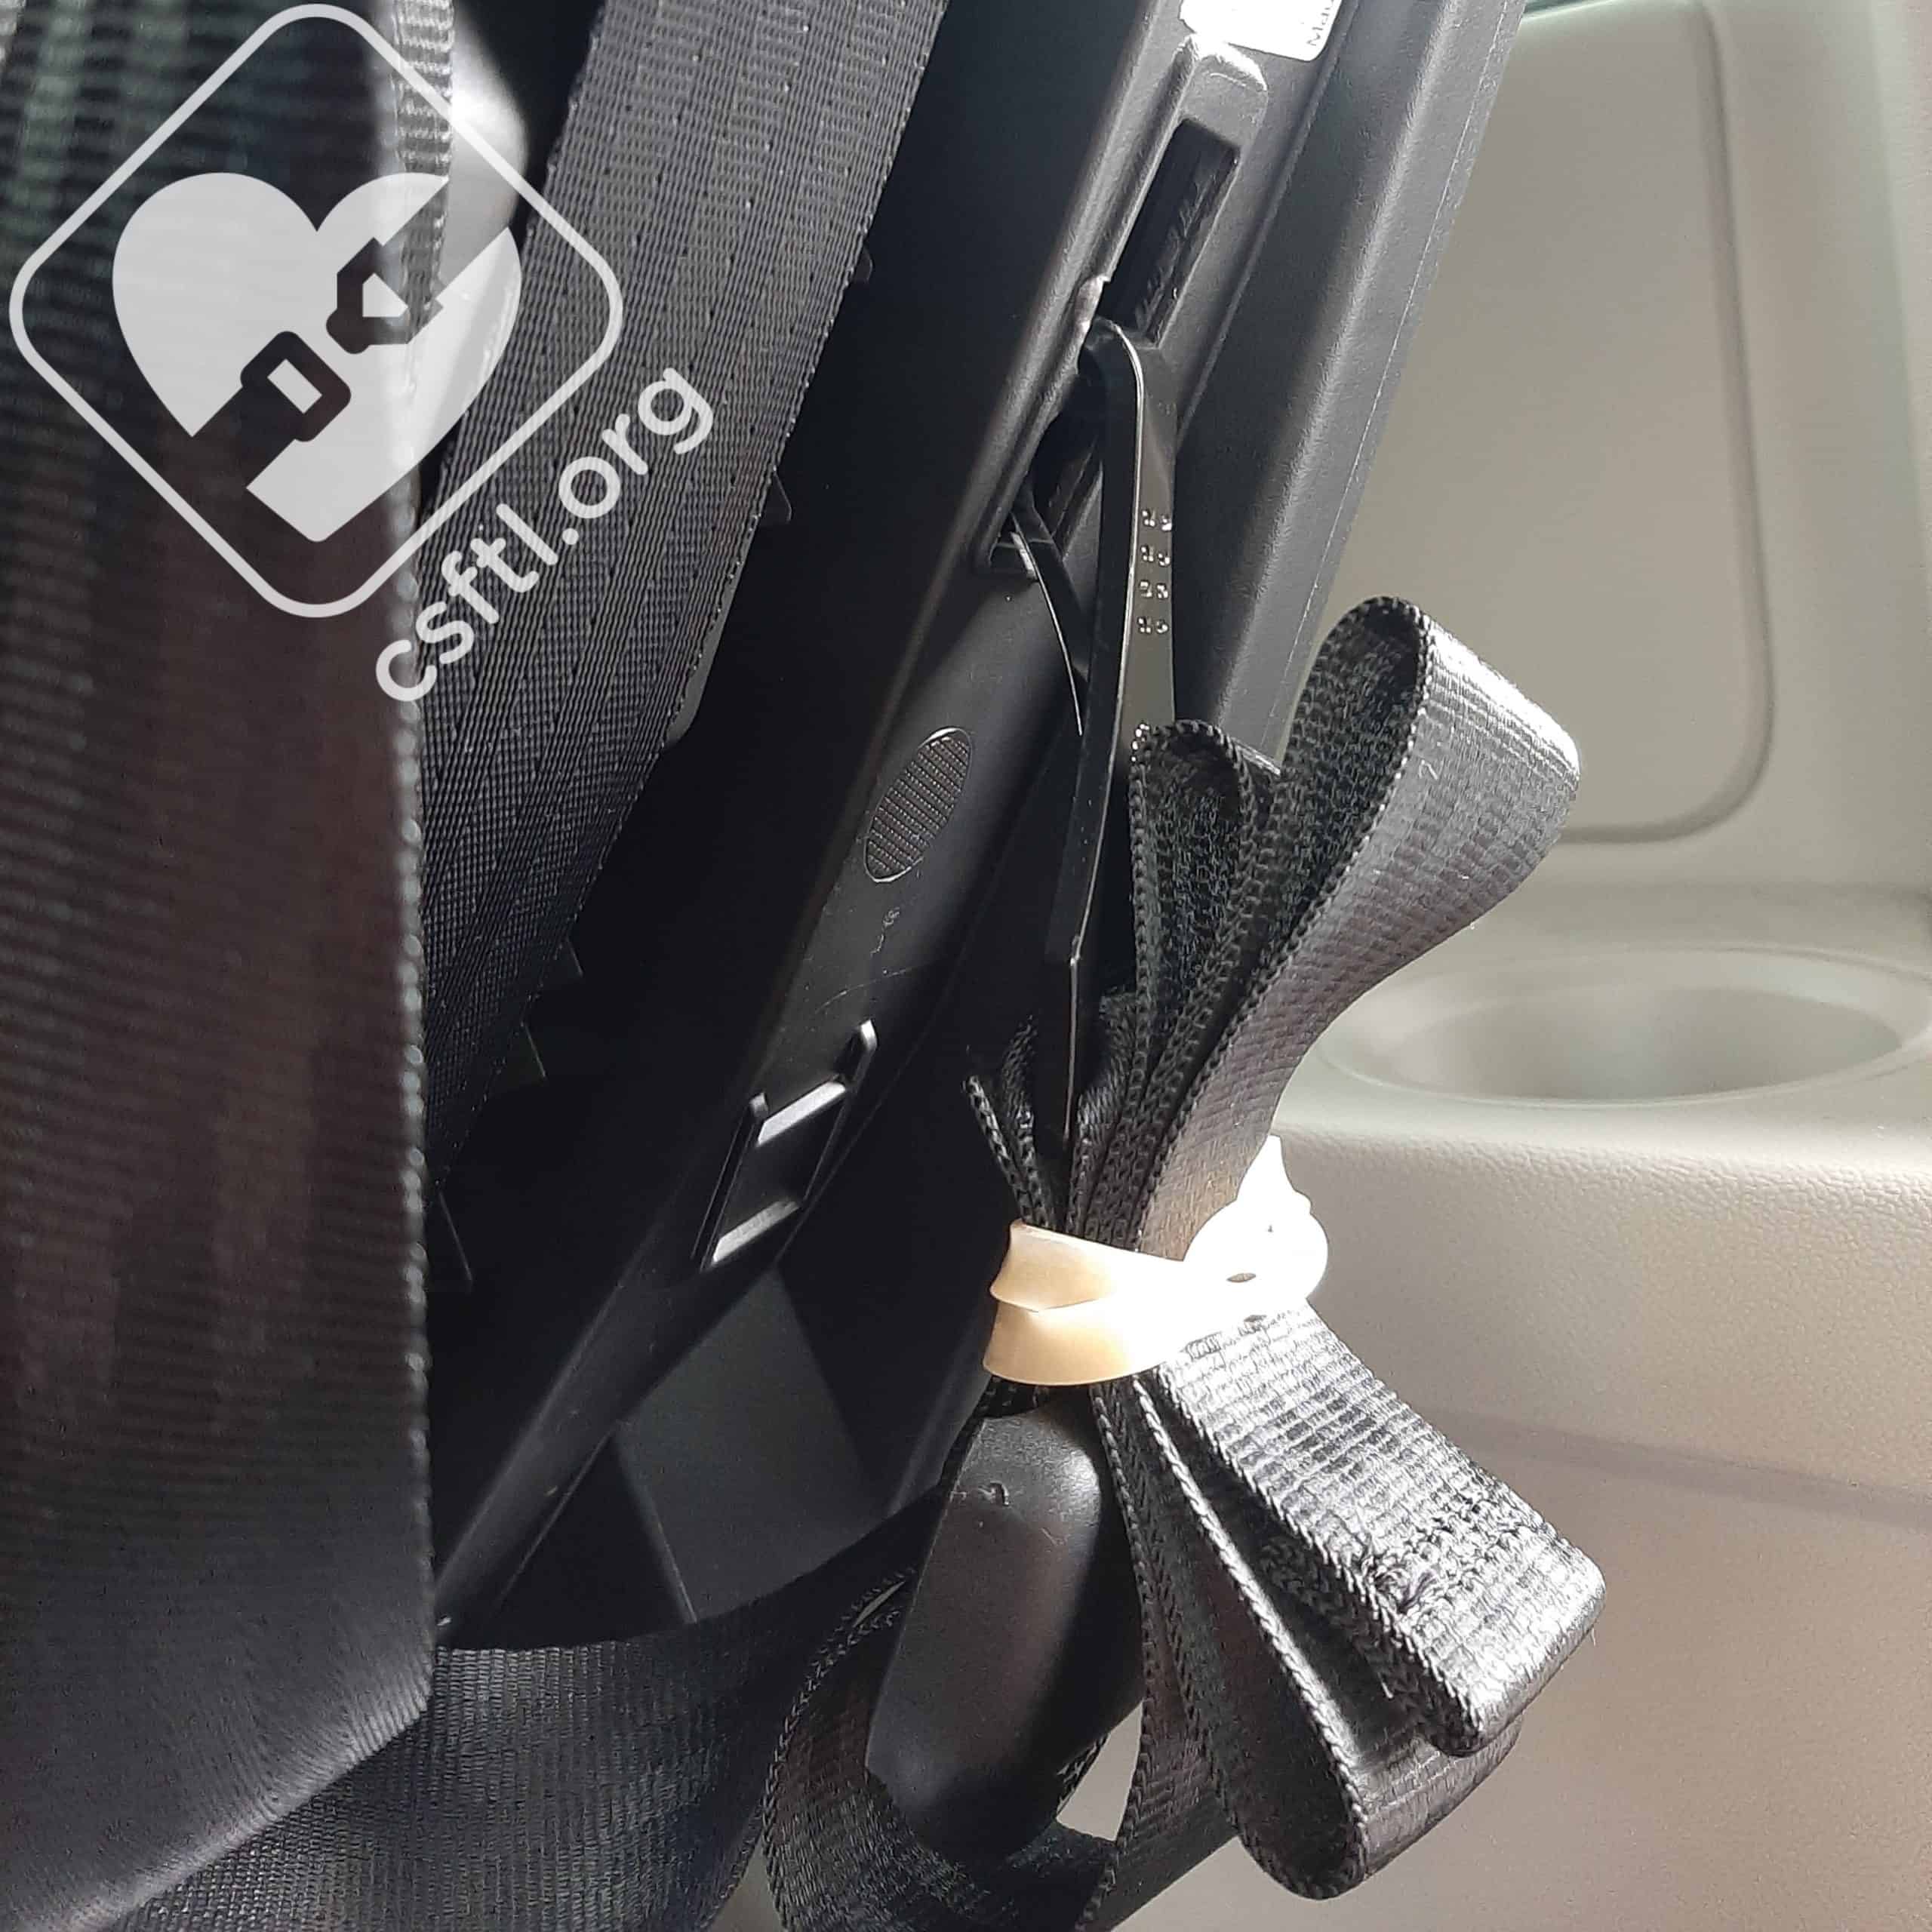
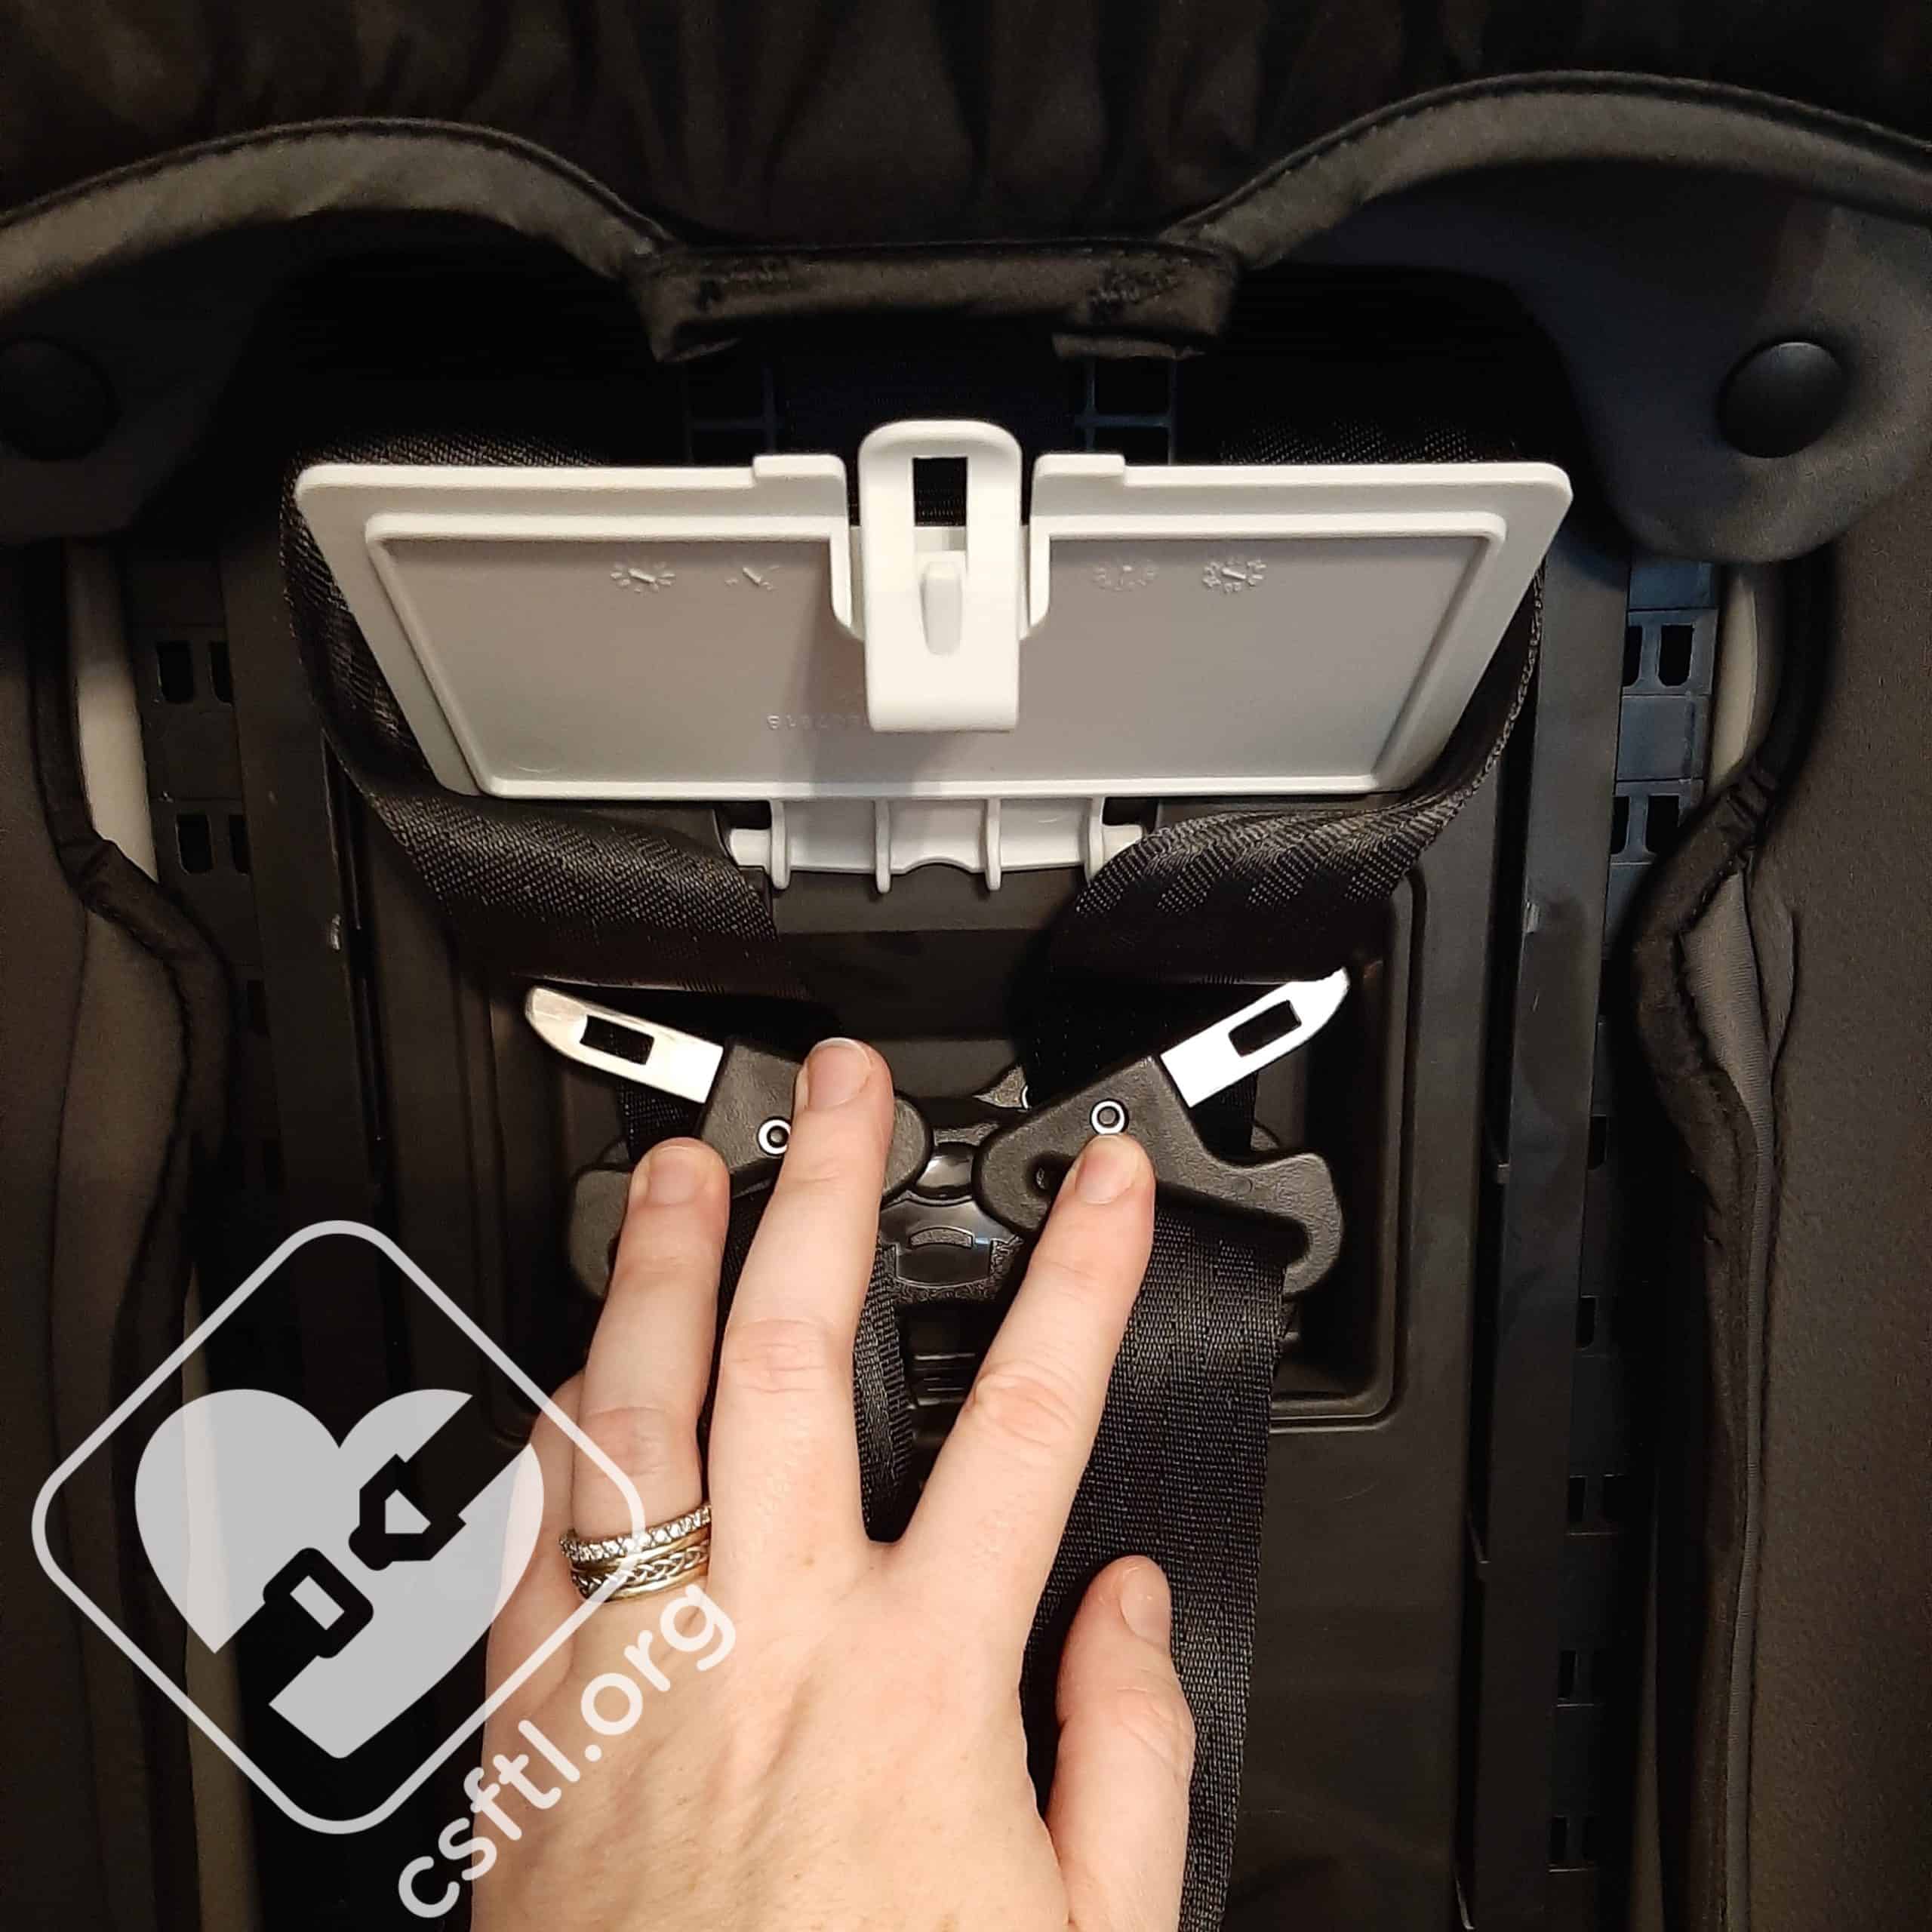
Lower Universal Anchorage System (LUAS)
Do not use this installation method for a child who weighs more than 45 pounds.
Moving the LUAS

Graco SlimFit3 LX forward facing with LUAS
Graco has included an entire section in the manual (Section 8) with step by step instructions on how to move the LUAS between the rear facing and forward facing belt paths. This is a step that is often overlooked by caregivers – it is not uncommon to have caregivers reaching out to a CPST for help because their lower anchor webbing is “too short” to reach the vehicle anchors. This is always caused by the lower anchor webbing being routed through the incorrect belt path, so we are grateful that Graco has included a section on moving the anchors – it will hopefully help to prevent installation using the incorrect belt path of the SlimFit3 LX.
To move the lower anchors from the rear facing belt path to the forward facing belt path:
- Loosen the harness and raise the headrest to the highest position
- Unbuckle the chest clip and buckle
- Unsnap the seat cover to expose the LUAS
- Slide the entire LUAS webbing along the metal bar on the child’s left hand side of the seat’s shell (your right hand side when looking at the seat)
- Push the LUAS connectors out through the forward facing belt path in front of the lockoff (marked with an orange label), ensuring there are no twists or snags
- Replace the seat cover
Installing the Seat
To install the SlimFit3 LX forward facing with lower anchors, extend the LUAS webbing by pressing on the grey button and pulling on the webbing. Attach the lower anchor connectors to the vehicle’s lower anchors, ensuring that the arrows on the connectors are facing up. Press down firmly in the center of the car seat while pulling on the tail to tighten the LUAS webbing. If needed, unsnap the seat cover for better access to the belt path.
Attach the tether to the vehicle’s tether anchor (extend the tether by lifting up on the tether lock) and tighten by pulling on the webbing tail.
Check for tightness by ensuring that the seat moves less than one inch at the belt path side to side and front to back. If the seat moves less than one inch the top tether is connected and tight, and at least 80% of the SlimFit3 LX’s base is supported by the vehicle seat, the seat is installed.
Vehicle Seat Belt
Graco SlimFit3LX installed forward facing with seatbelt
Before installing the Graco SlimFit3 LX with the vehicle seat belt, the LUAS webbing must be stored under the seat pad.
With the SlimFit3 LX base flat on the vehicle seat, ensure the headrest is raised to the highest position and loosen the harness straps. Unbuckle the chest clip and crotch buckle.

Graco SlimFit3 LX forward facing lockoff
Unsnap the seat cover and lift the headrest pad flap up to expose the lockoff.

Opening the Graco SlimFit3 LX forward facing lockoff
Open the lockoff by flipping the lower (grey) tab down while holding the upper (red) latch in position.

Graco SlimFit3 LX forward facing lockoff with vehicle seatbelt
Route the vehicle seat belt through the forward facing belt path (marked with an orange label) and buckle the seat belt, ensuring the seat belt is lying as flat as possible with no twists or snags. Tighten the vehicle seat belt by pressing down firmly in the center of the car seat while pulling on the shoulder belt. When the belt is tight, close the lockoff on top of the seat belt, ensuring both the lap and shoulder belt portions are under the lockoff. When using the lockoff you do not need to lock the vehicle seat belt itself – the lockoff locks the seat belt.
Replace the headrest pad and seat pads, and attach the tether to the vehicle’s tether anchor (extend the tether by lifting up on the tether lock). Tighten by pulling on the webbing tail.
Check for tightness by ensuring that the seat moves less than one inch at the belt path side to side and front to back. If the seat moves less than one inch the top tether is connected and tight, and at least 80% of the SlimFit3 LX’s base is supported by the vehicle seat, the seat is installed.
The SlimFit3 LX manual does not include instructions for forward facing without using the lockoff. Graco does not allow their lockoffs to be used with an inflatable seat belt, so if your vehicle features Ford inflatable seat belts, we confirmed with Graco that you will install over top of the lockoff and will lock the vehicle belt. The SlimFit3 LX is currently not approved for installation with Mercedes inflatable seat belts.
Converting to Booster mode
Graco SlimFit3 LX with headrest extended
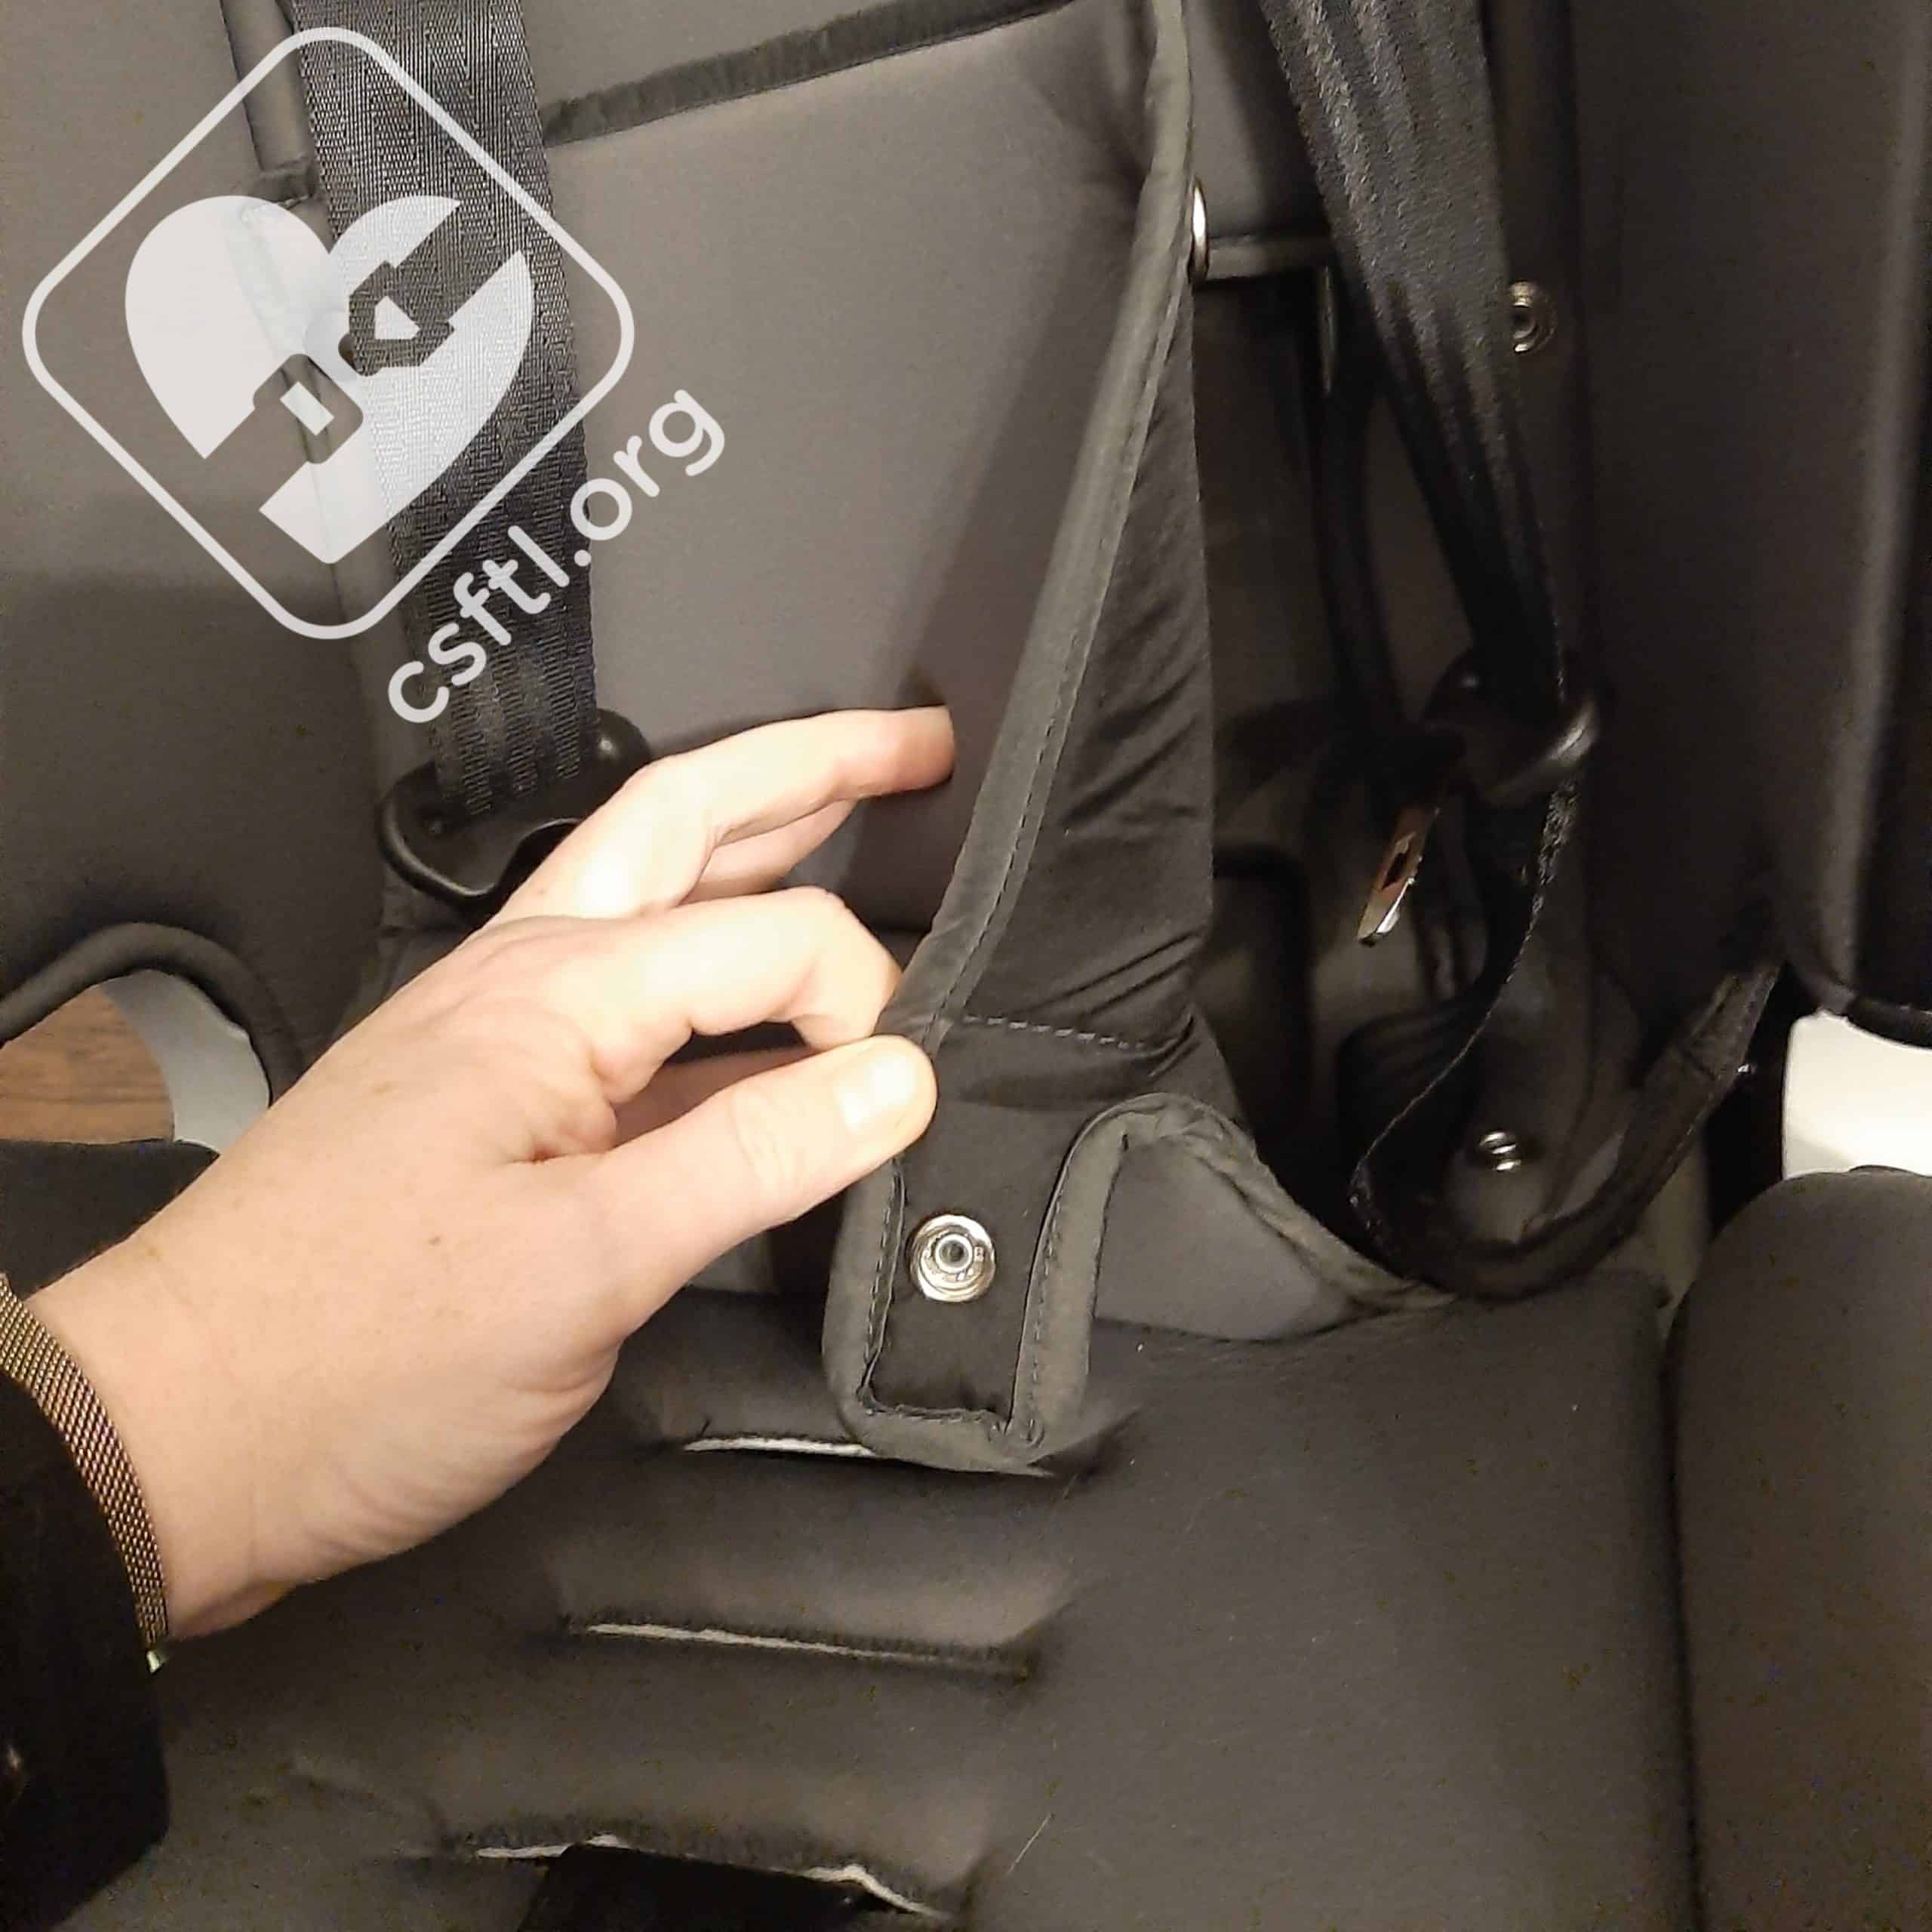
To use the SlimFit3 LX as a booster, the harness needs to be stored. First, raise the headrest to the highest position and loosen the harness straps. Unbuckle the chest clip and crotch buckle and remove the harness covers (if in use).
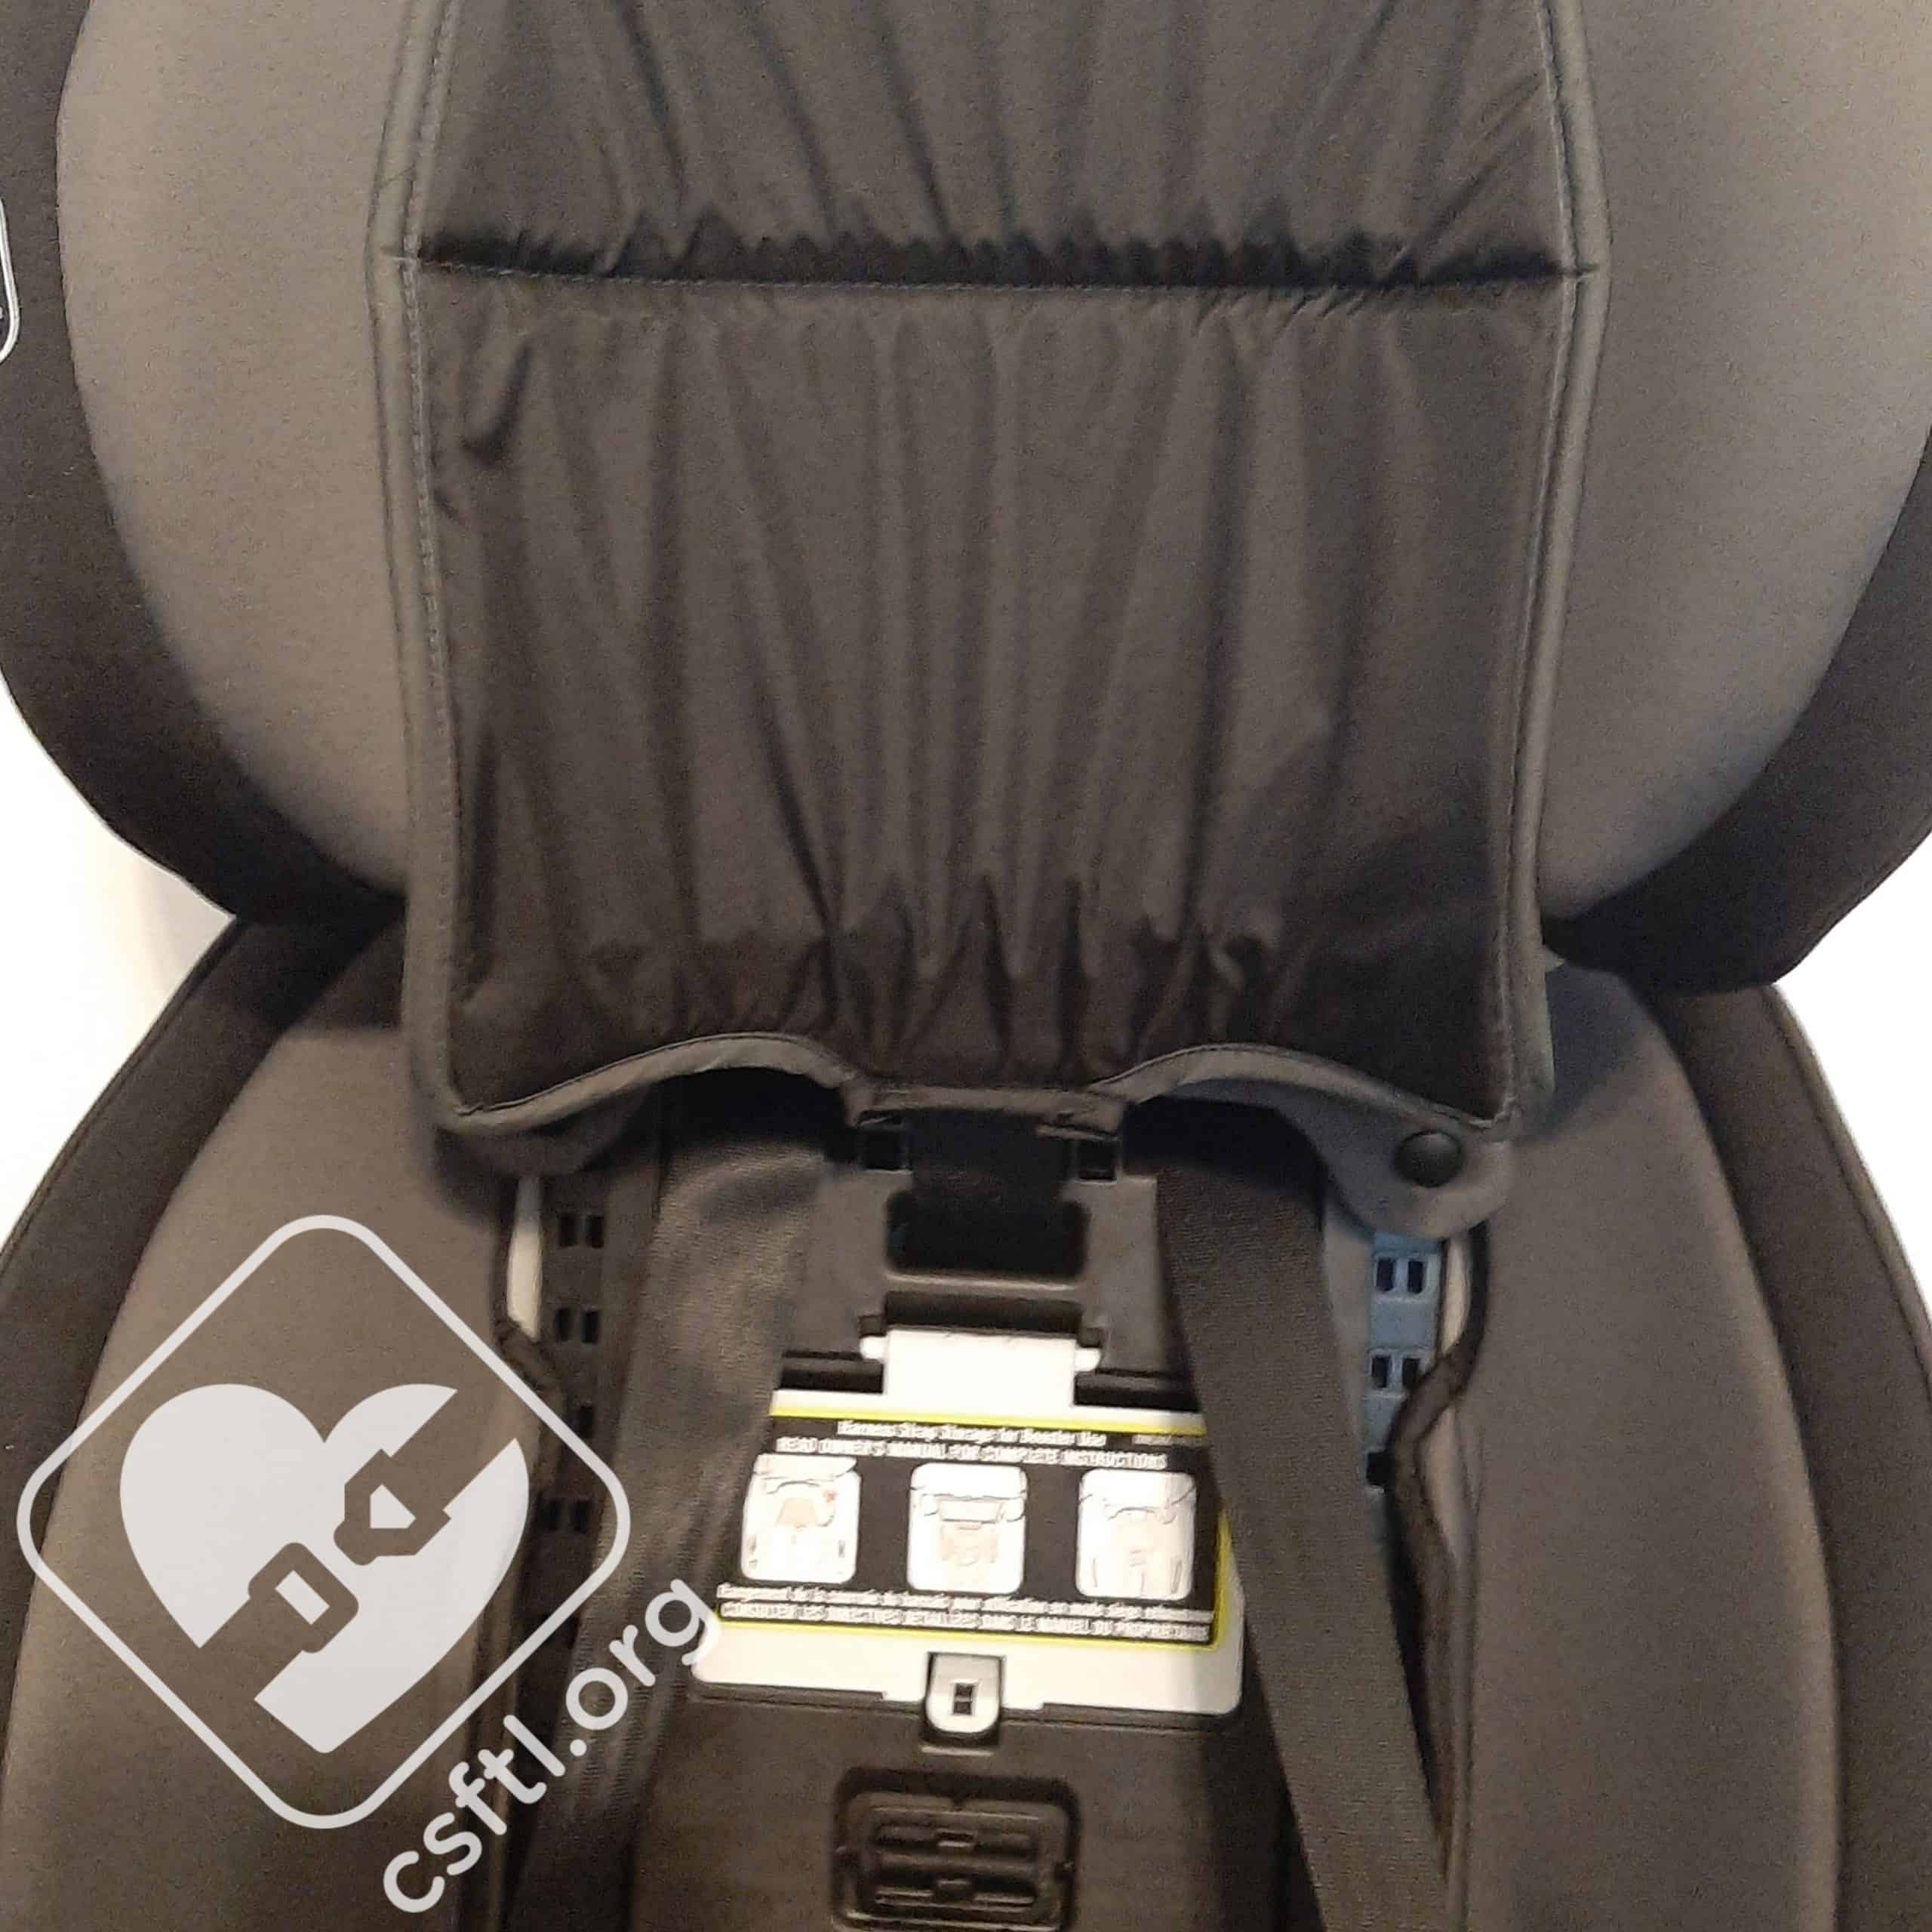
Lift the headrest pad of the SlimFit3 LX
Lift the headrest pad flap up and out of the way.

Opening the harness storage door of the Graco SlimFit3 LX
Open the harness storage door and place the chest clip and buckle tongues inside.
Storing the chest clip and buckles on the Graco SlimFit3 LX
Close the door (it will click when closed correctly). Note: we found that gravity was not our friend when converting the SlimFit3 LX to booster mode, and it was much easier to close the storage door when the seat is flat on its back vs upright, because the buckle tongues want to fall out and can cause the storage door not to latch.

Storing the crotch buckle on the Graco SlimFit3 LX
Unsnap the seat pad and move the crotch buckle to the innermost slot. Store it inside the pocket in the seat’s shell.
Graco SlimFit3 LX in booster mode
Adjust the recline of the SlimFit3 LX to the booster recline setting (4), and place the child restraint forward facing on the vehicle seat with the base flat on the seat. The front of the booster seat MUST NOT hang over the vehicle seat in booster mode.
Installation: Booster Mode
Graco allows the use of the UAS system when using the SlimFit3 LX in booster mode as long as the vehicle manufacturer allows it and the UAS connectors do not interfere with any vehicle seat belts or buckles.
If the UAS connectors interfere with the vehicle seat belts or if the chosen seating position does not have lower anchors, you MUST store the LUAS in the seat and the tether on the back of the seat.
When installing the booster seat with the UAS system, there is no need to check for movement. Attach the LUAS to the vehicle lower anchors, ensuring no twists or snags, and remove the slack. Do the same with the top tether – attach it to the vehicle’s tether anchor and remove the slack.
Ensure that the vehicle headrest does not create a gap at the back of the SlimFit3 LX when used as a booster (if there is a gap and the vehicle allows for the removal of the headrest, remove the headrest) and that the base of the SlimFit3 LX is fully supported by the vehicle seat (no overhang is permitted in booster mode).
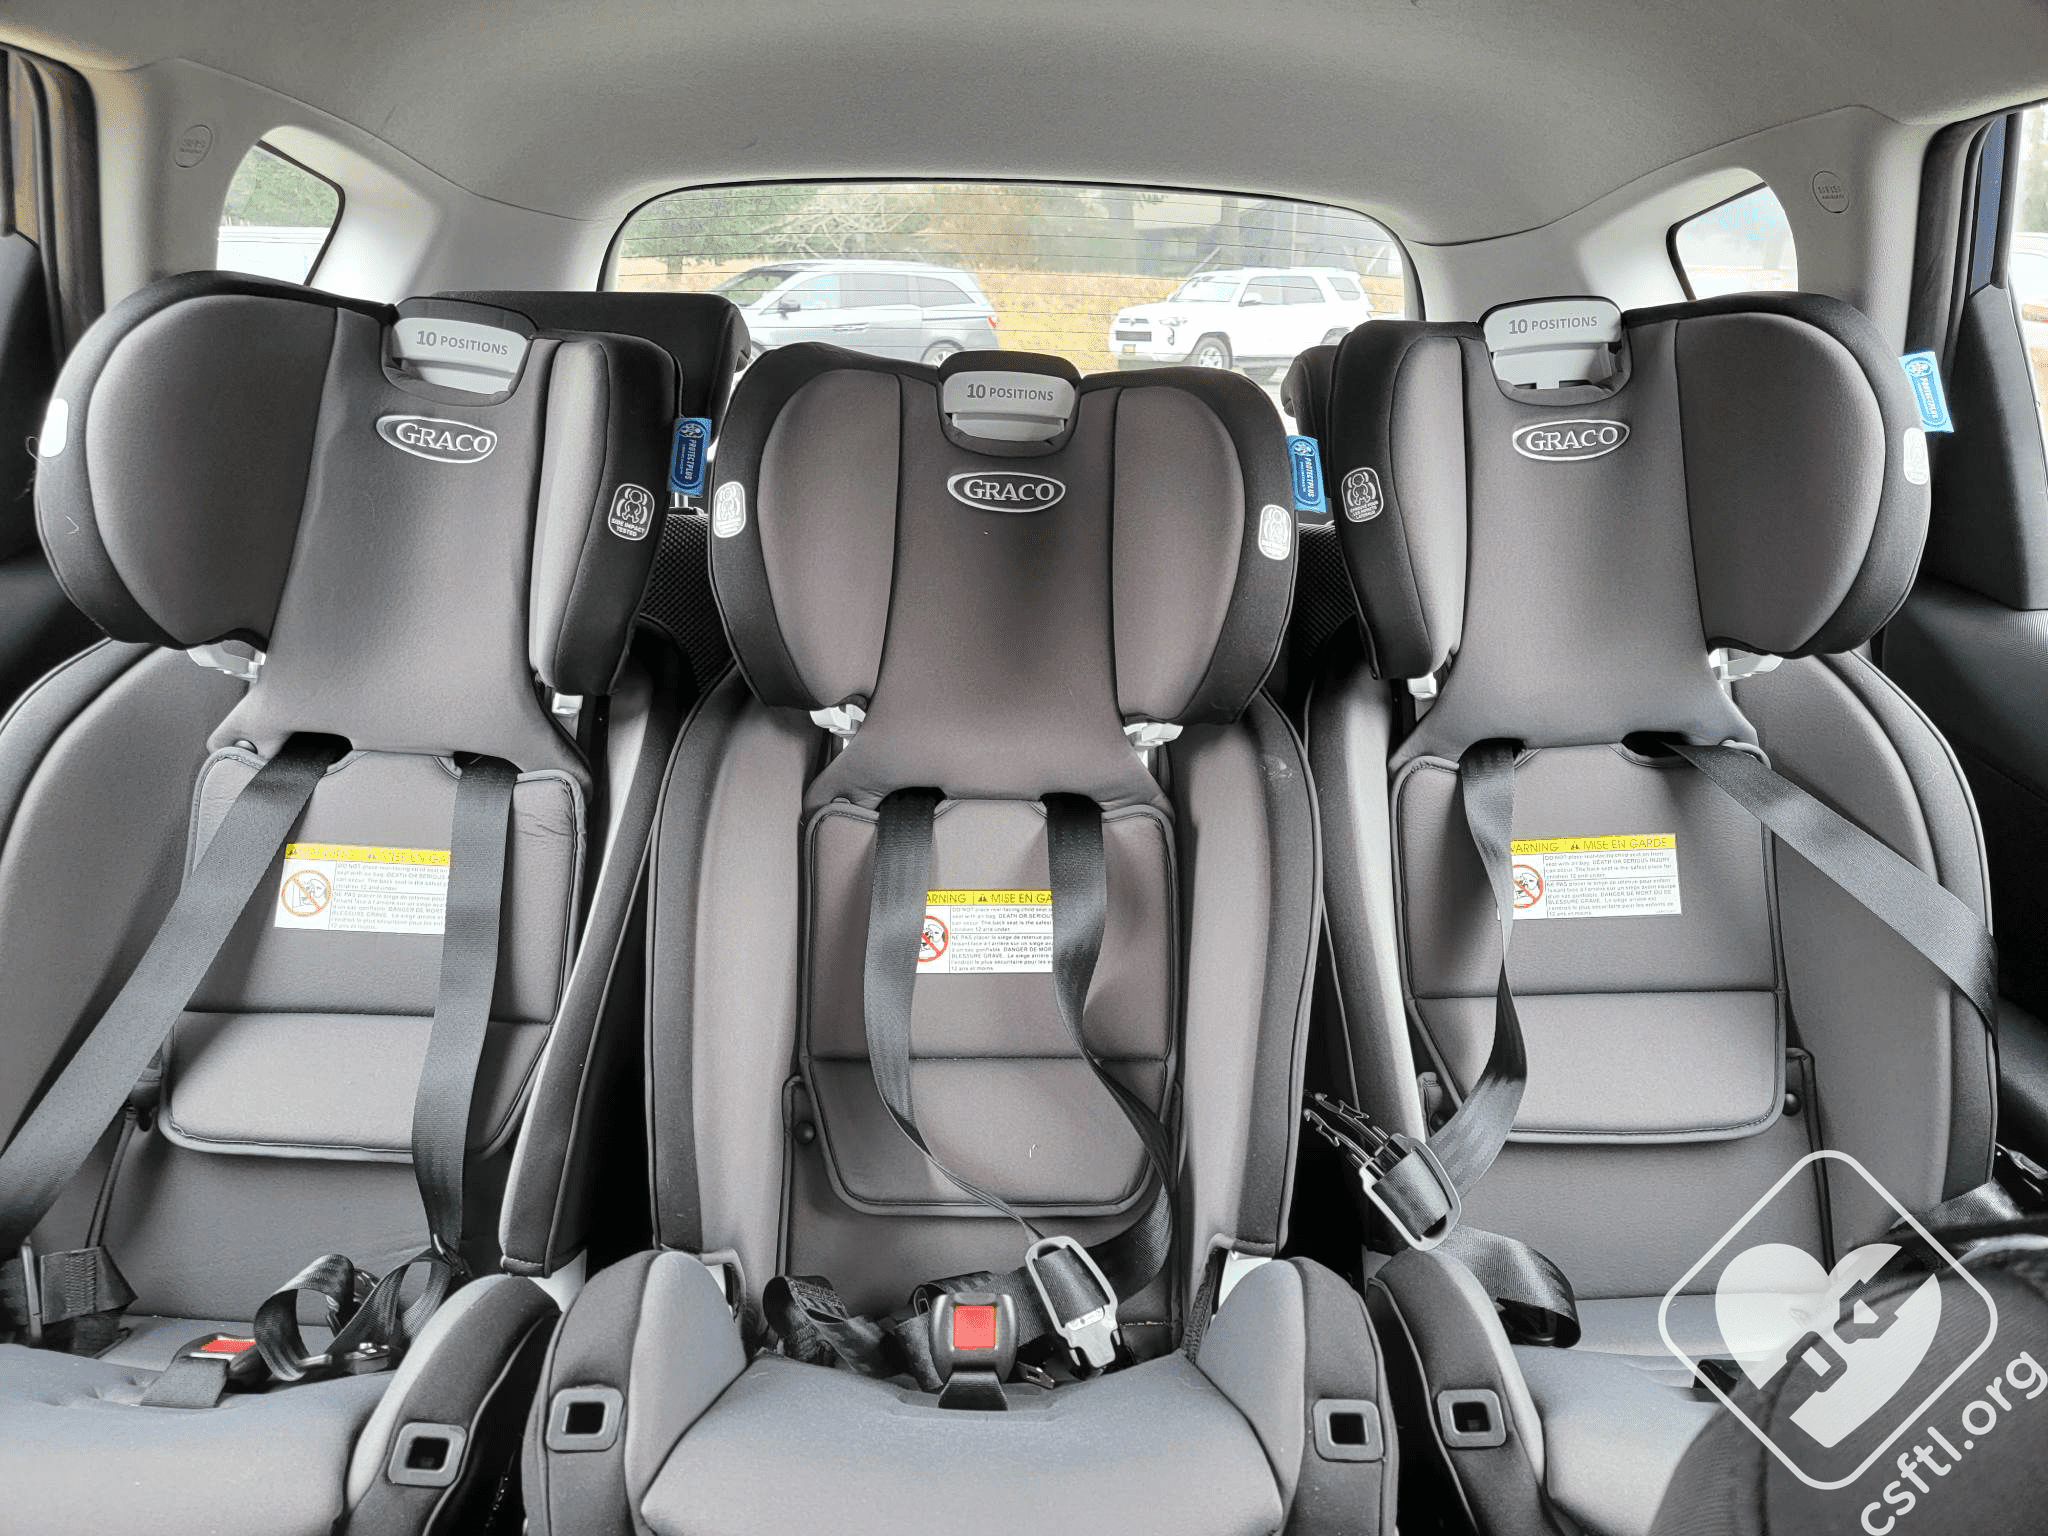
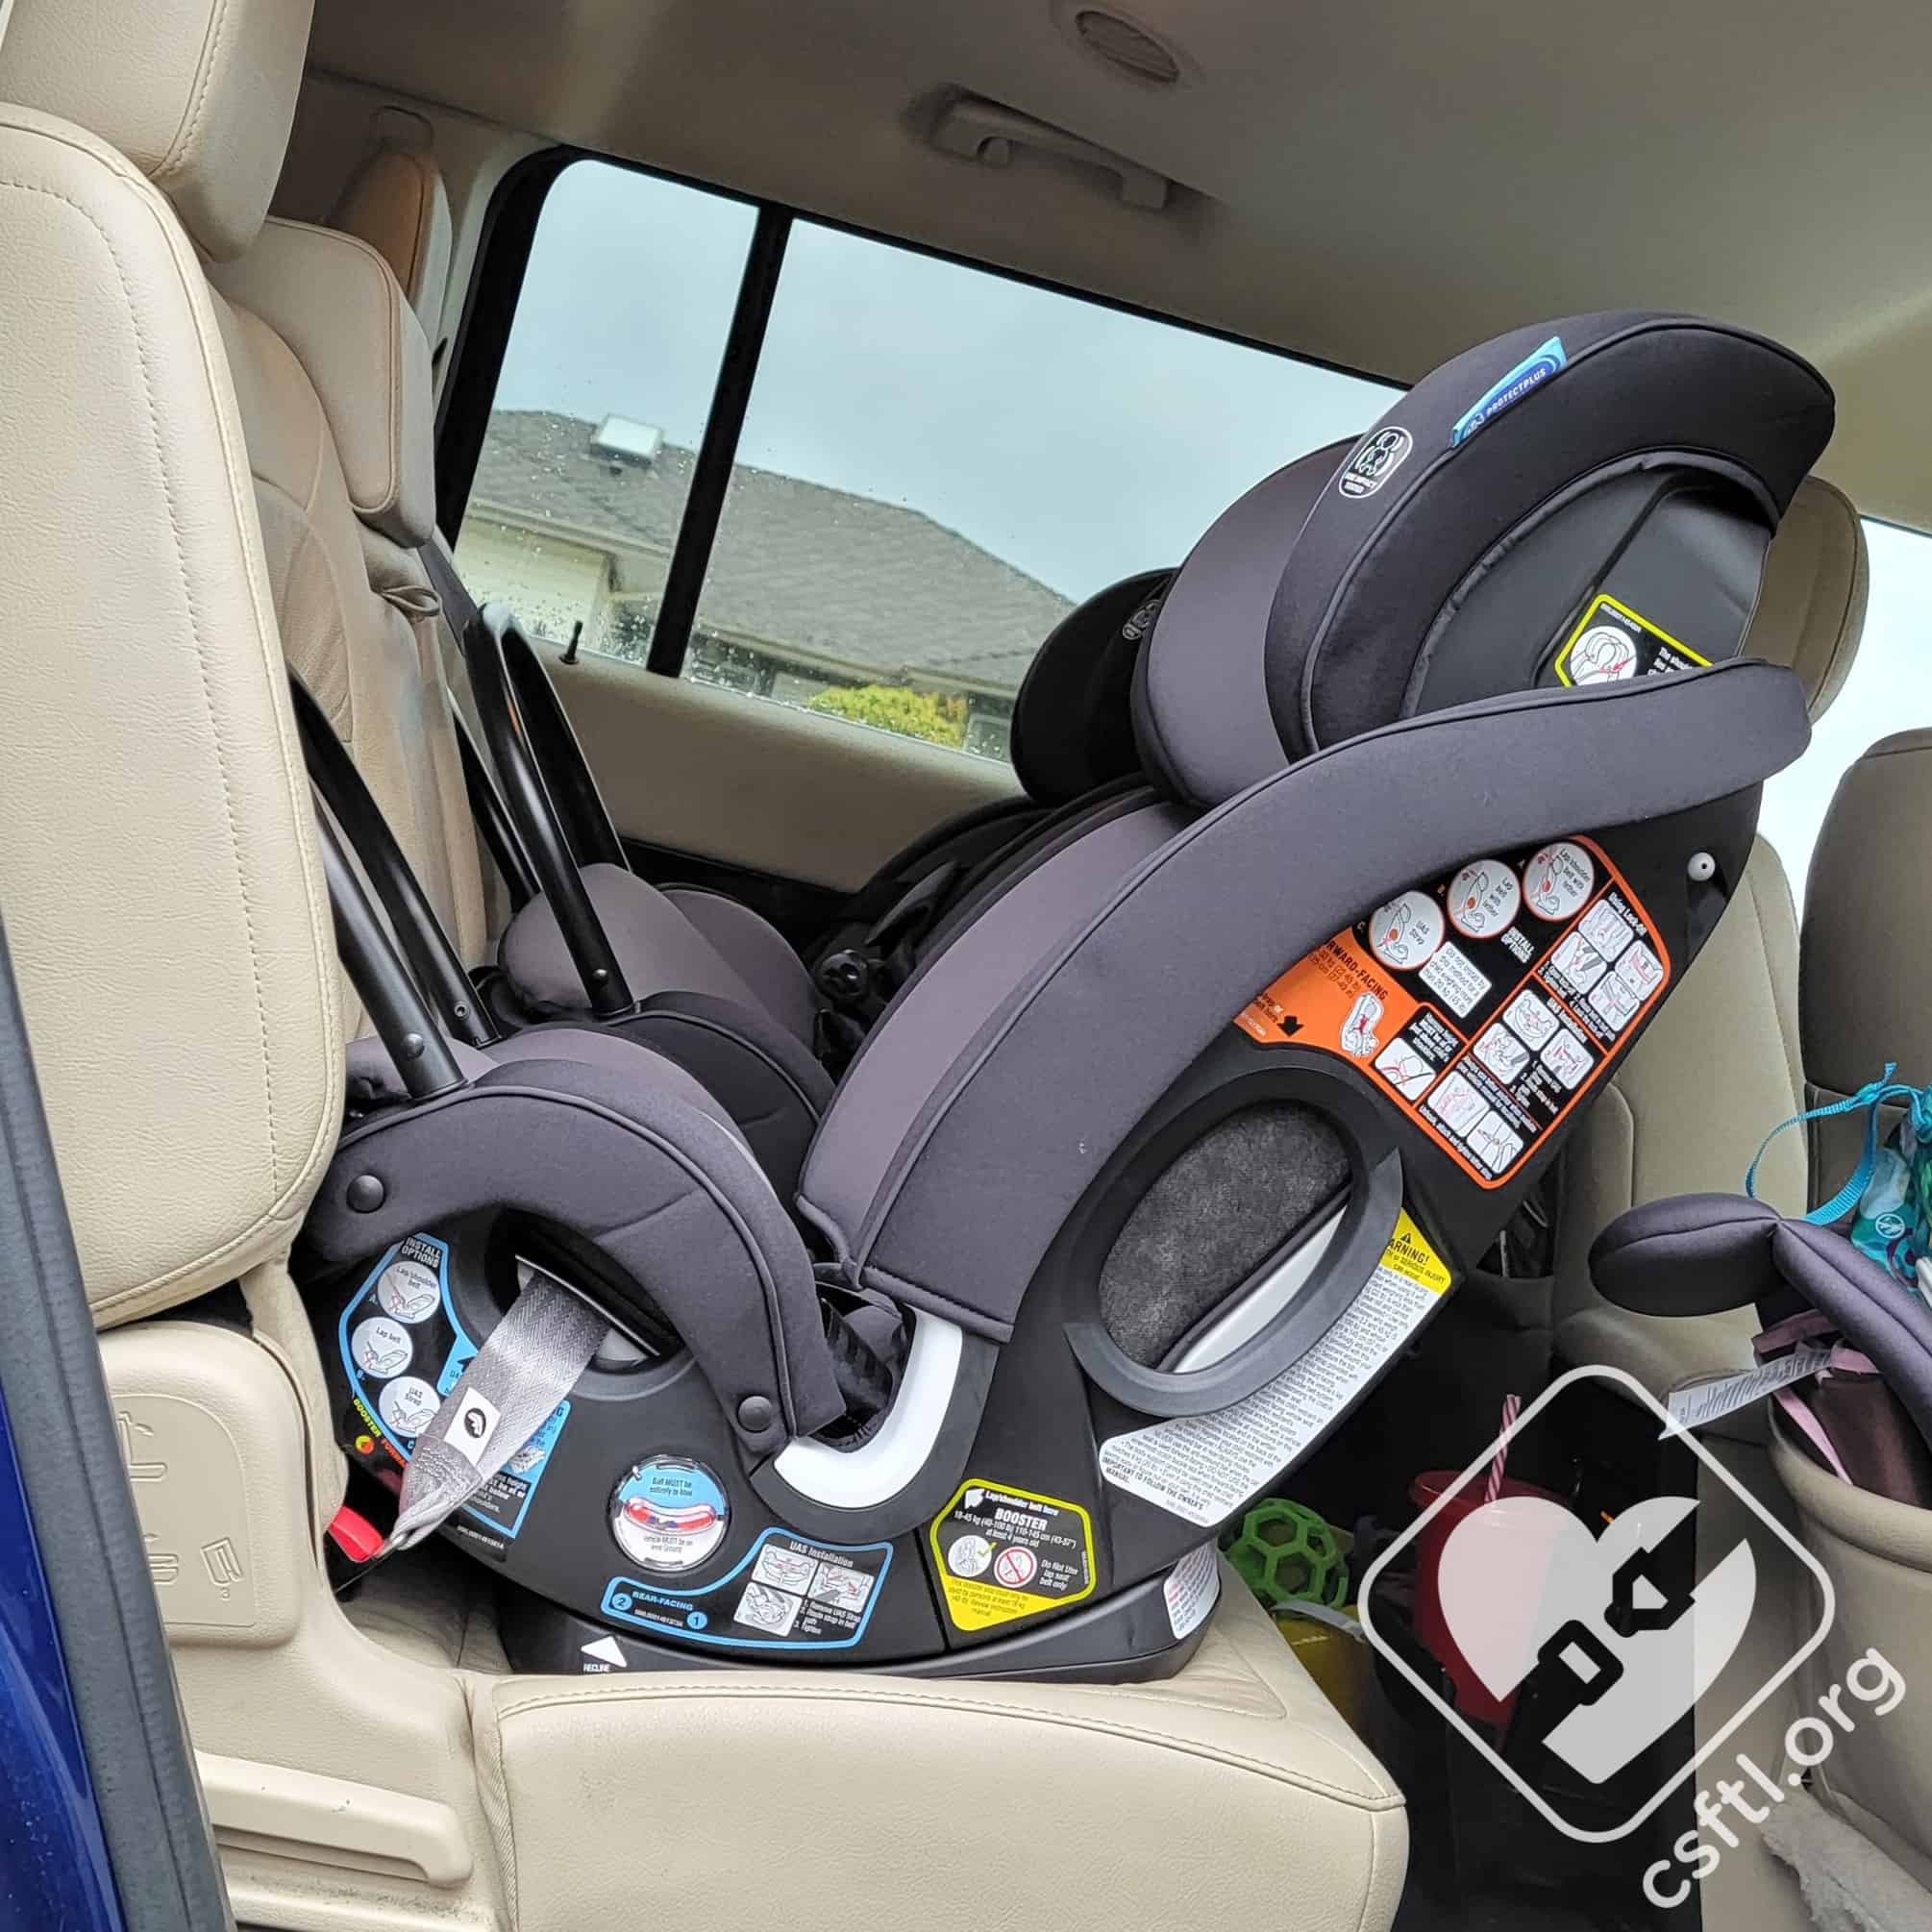
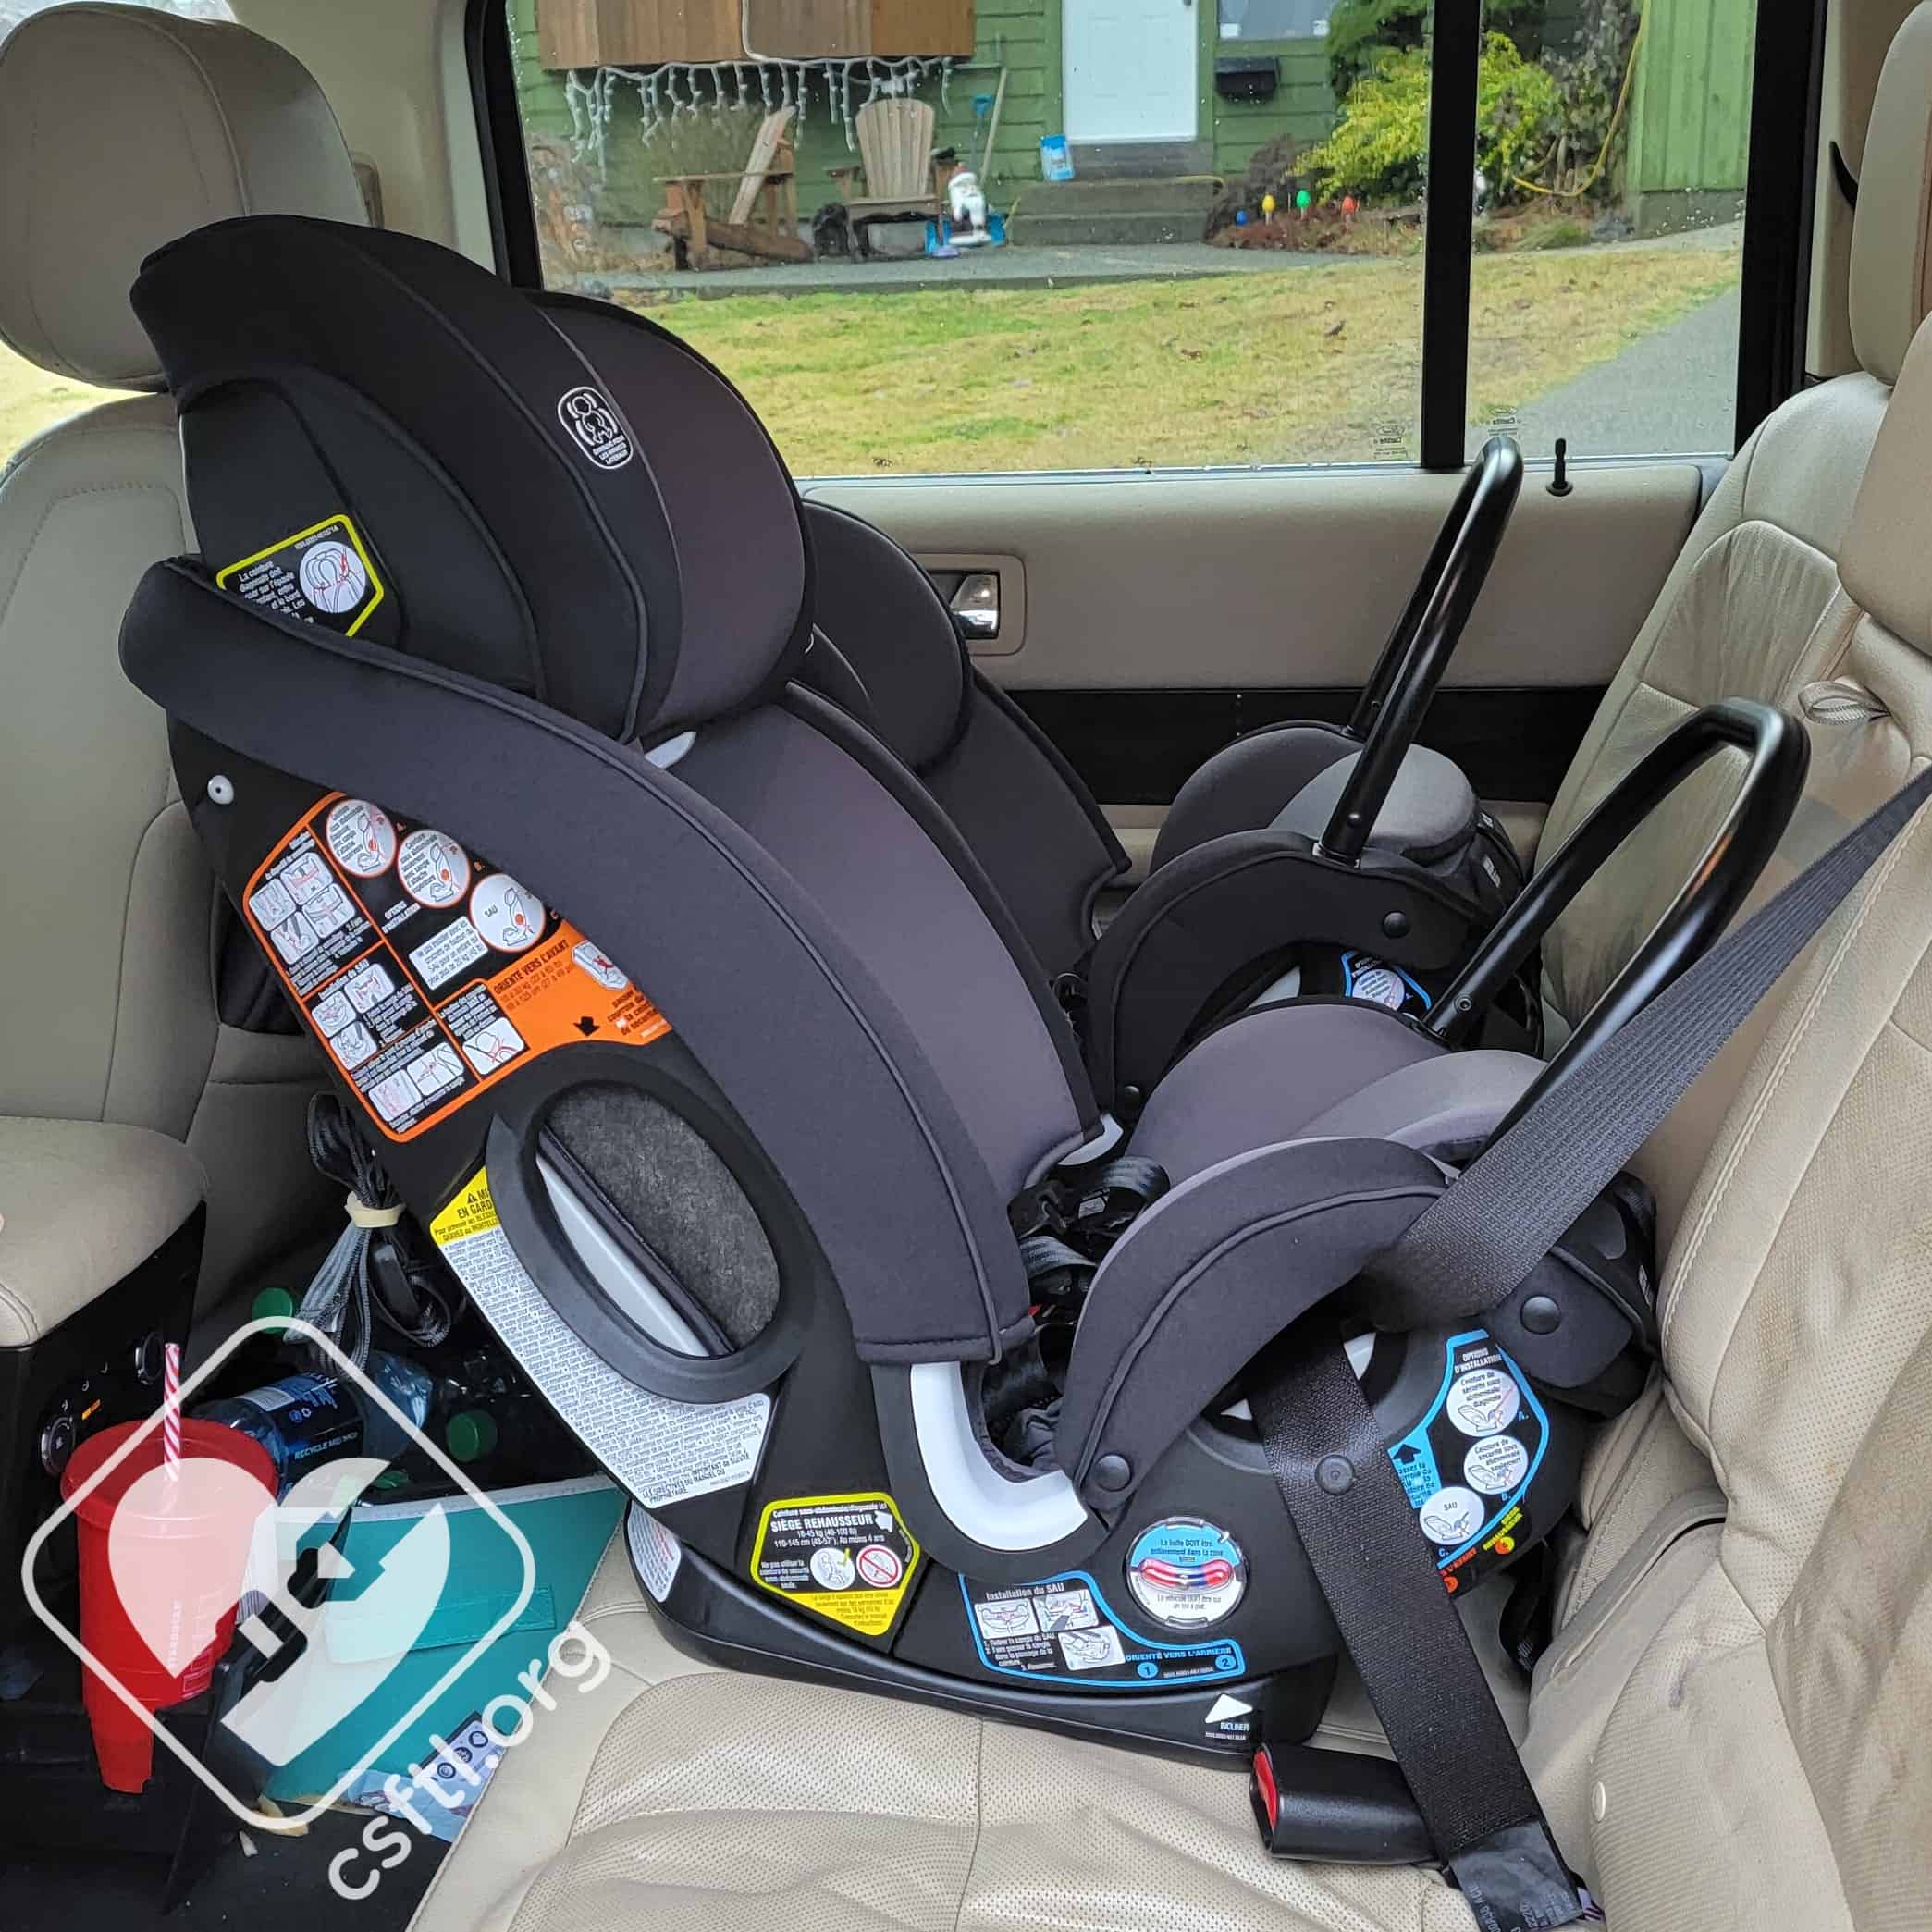
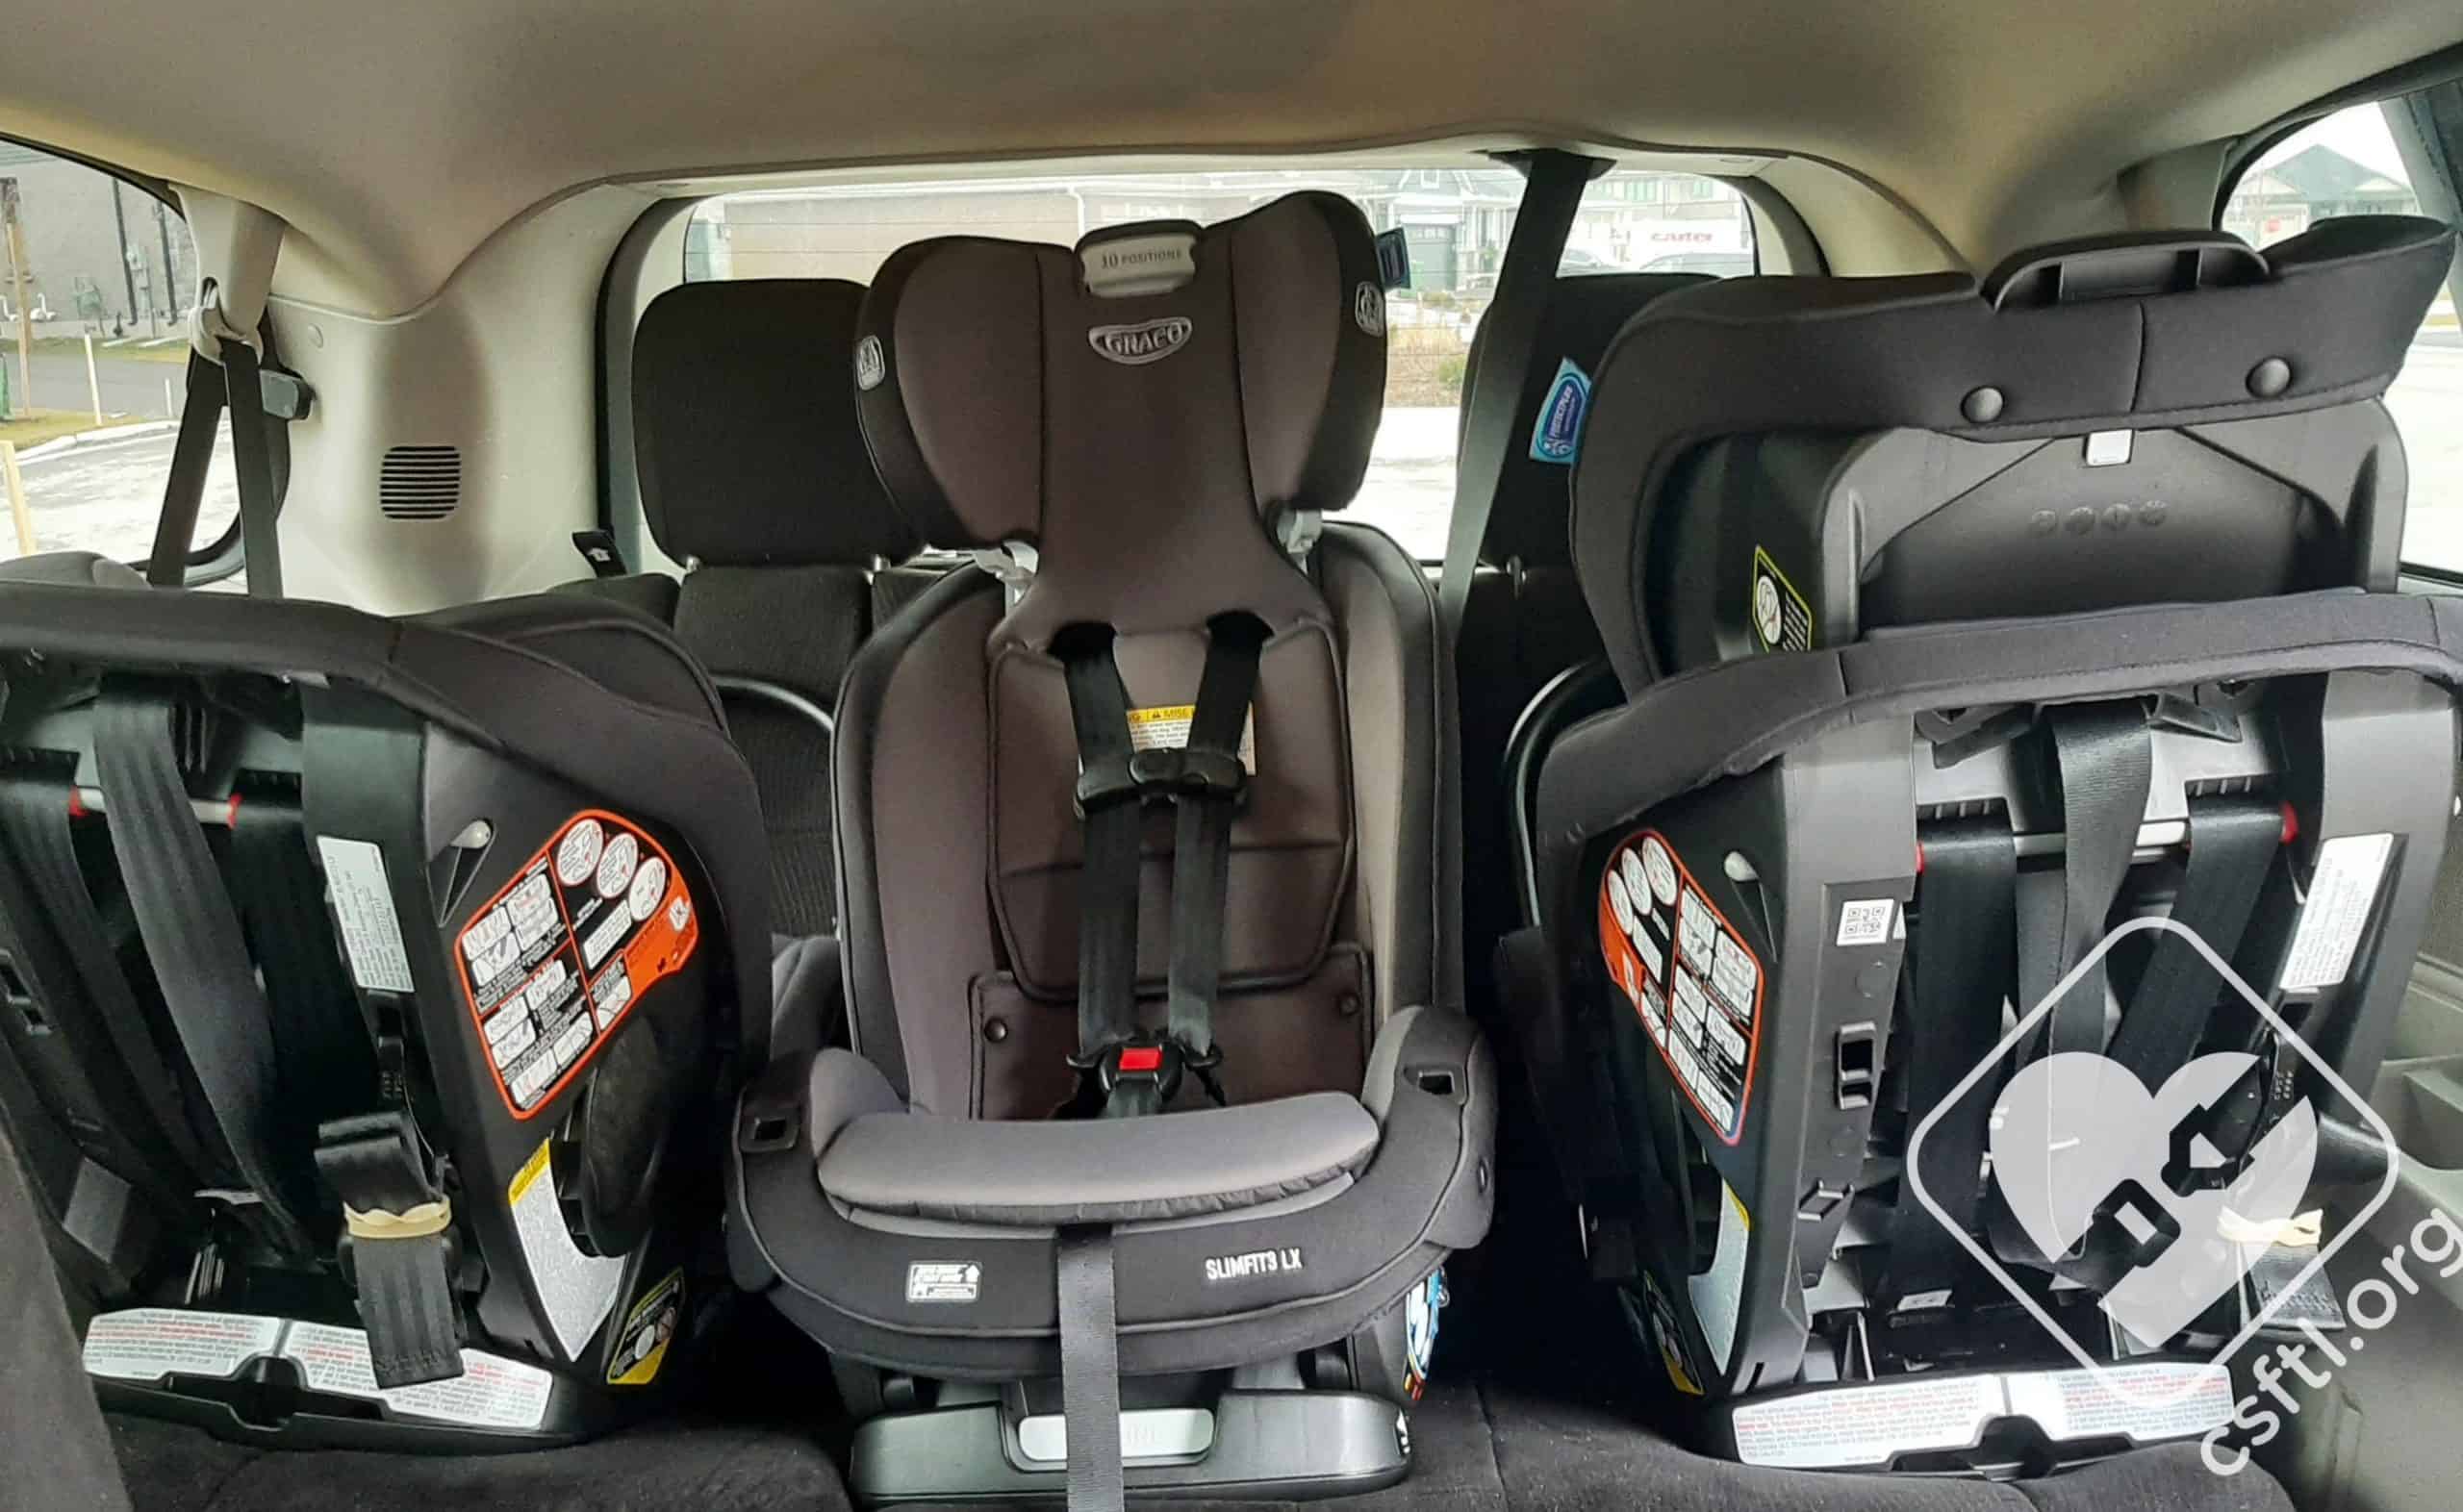
Three Car Seats in a Row/Other Tight Spaces
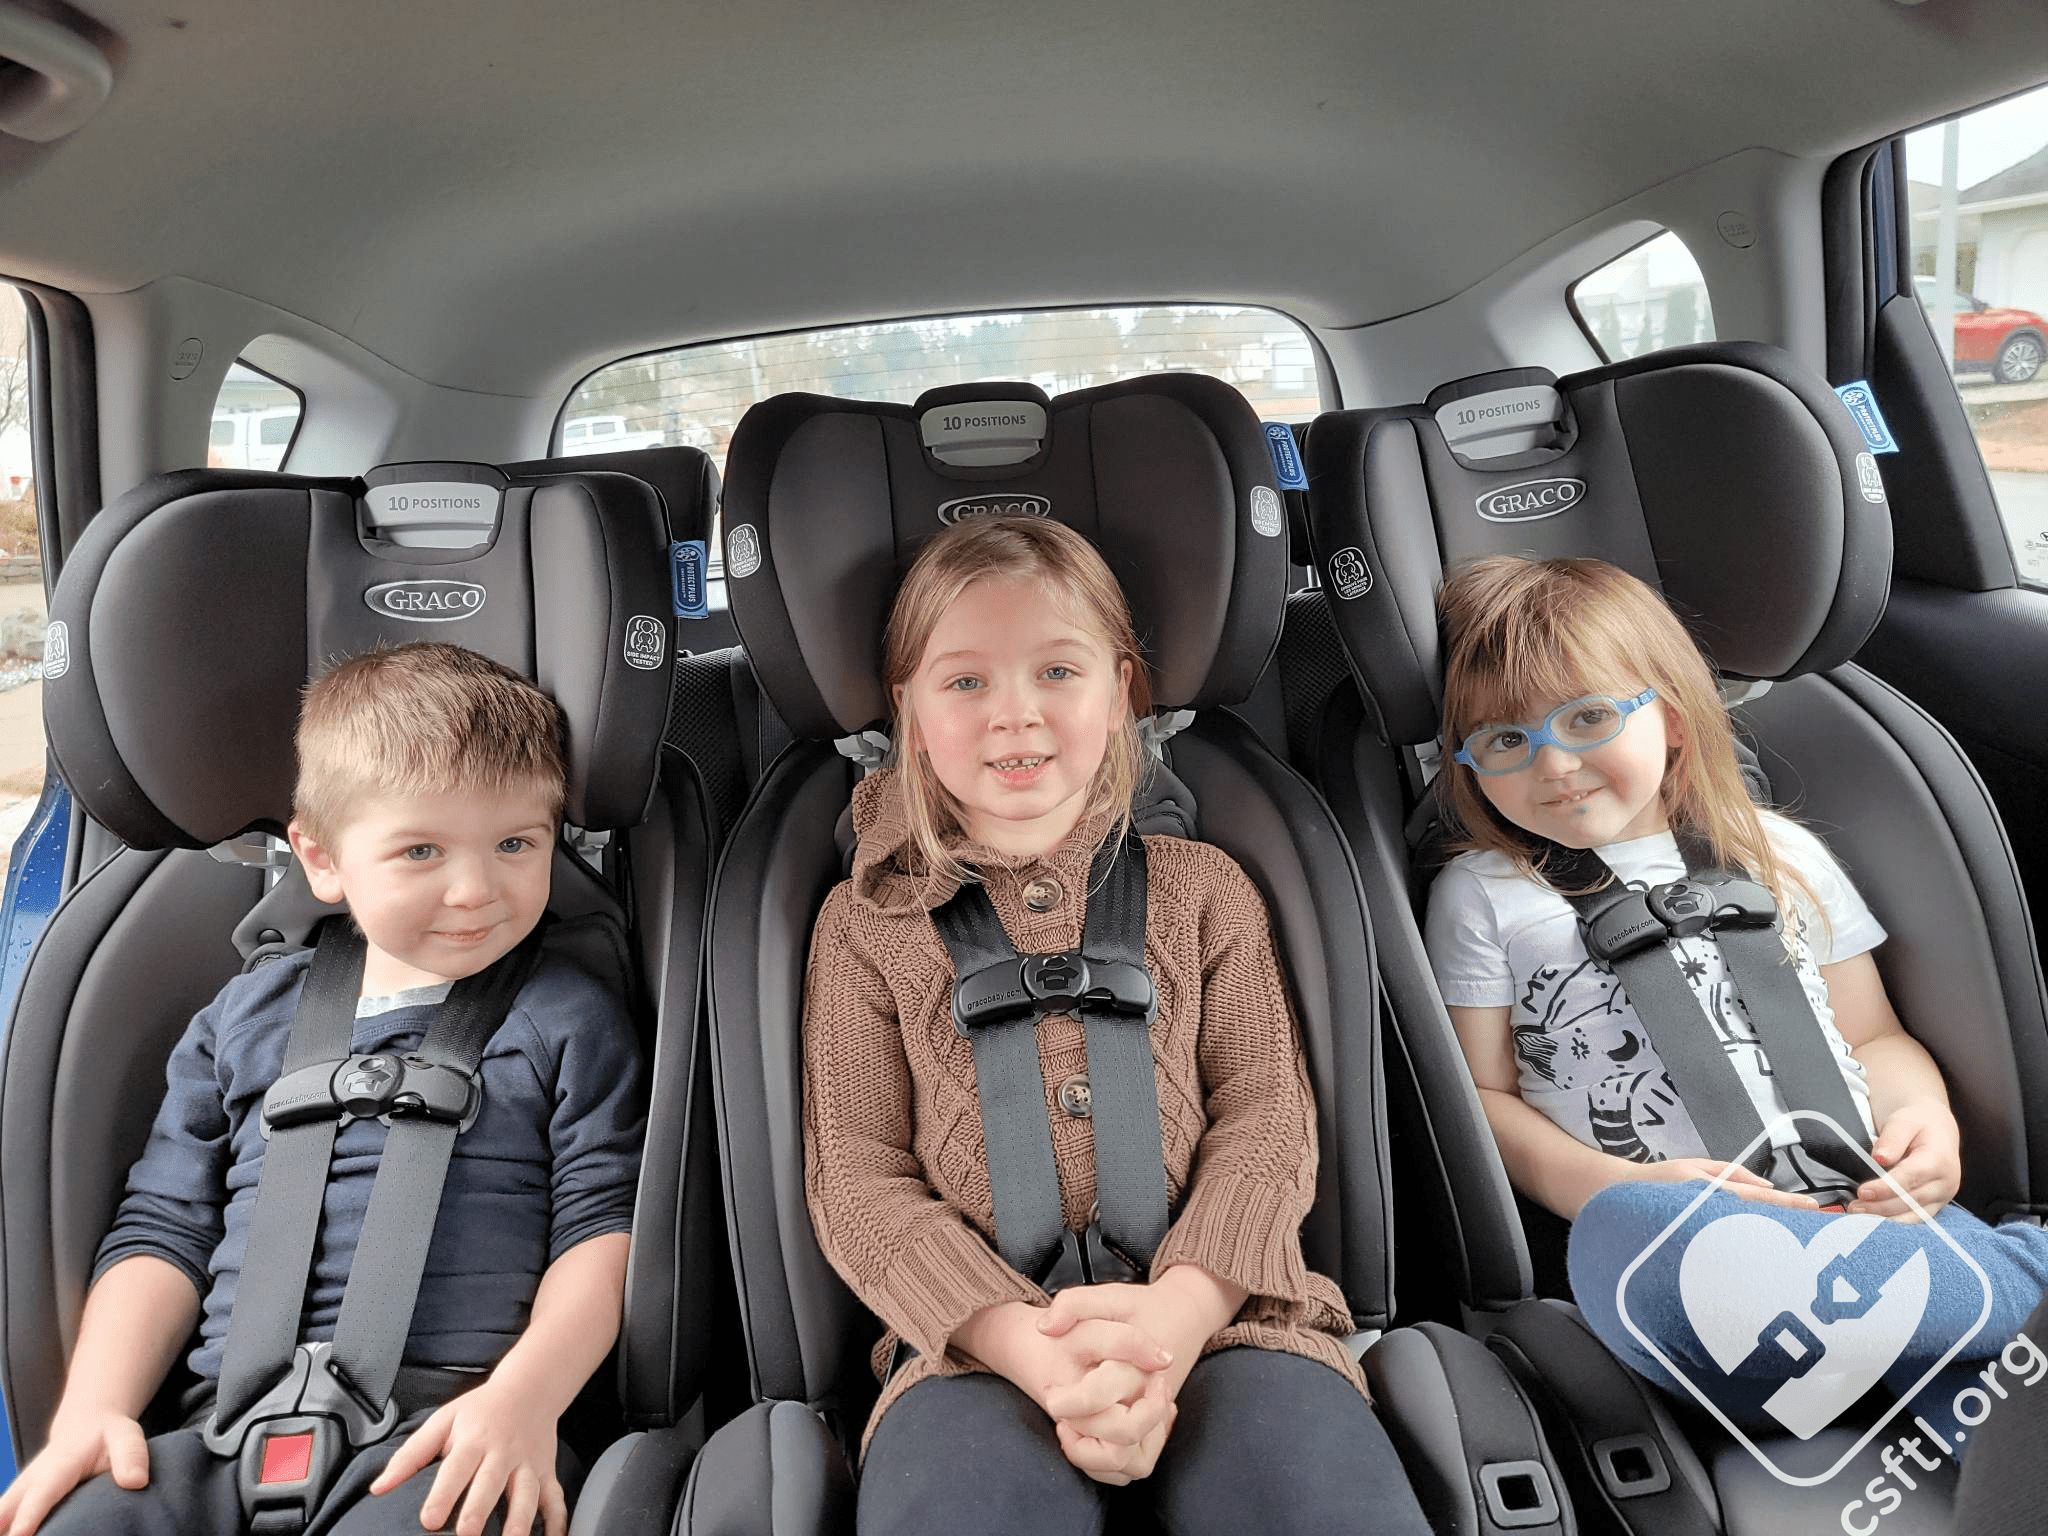
Graco SlimFit3 LX three across
The SlimFit3 LX is marketed as a seat that fits 3 across in most vehicles, and with it being the narrowest convertible/combination seat available in Canada (and the US), we wanted to test that claim in a few different vehicles.
We talk a lot about the challenges associated with installing multiple car seats or booster seats in one row. We’re pleased to share that the SlimFit3 LX made every scenario we tried pretty simple. This is very consistent with what our American colleagues have found.
We will note that even though the cup holders may be used when the SlimFit3 LX is installed forward facing, the manual indicates that if the cup holder is interfering with installing the seats side-by-side, that the user should remove the cup holder for a better fit.
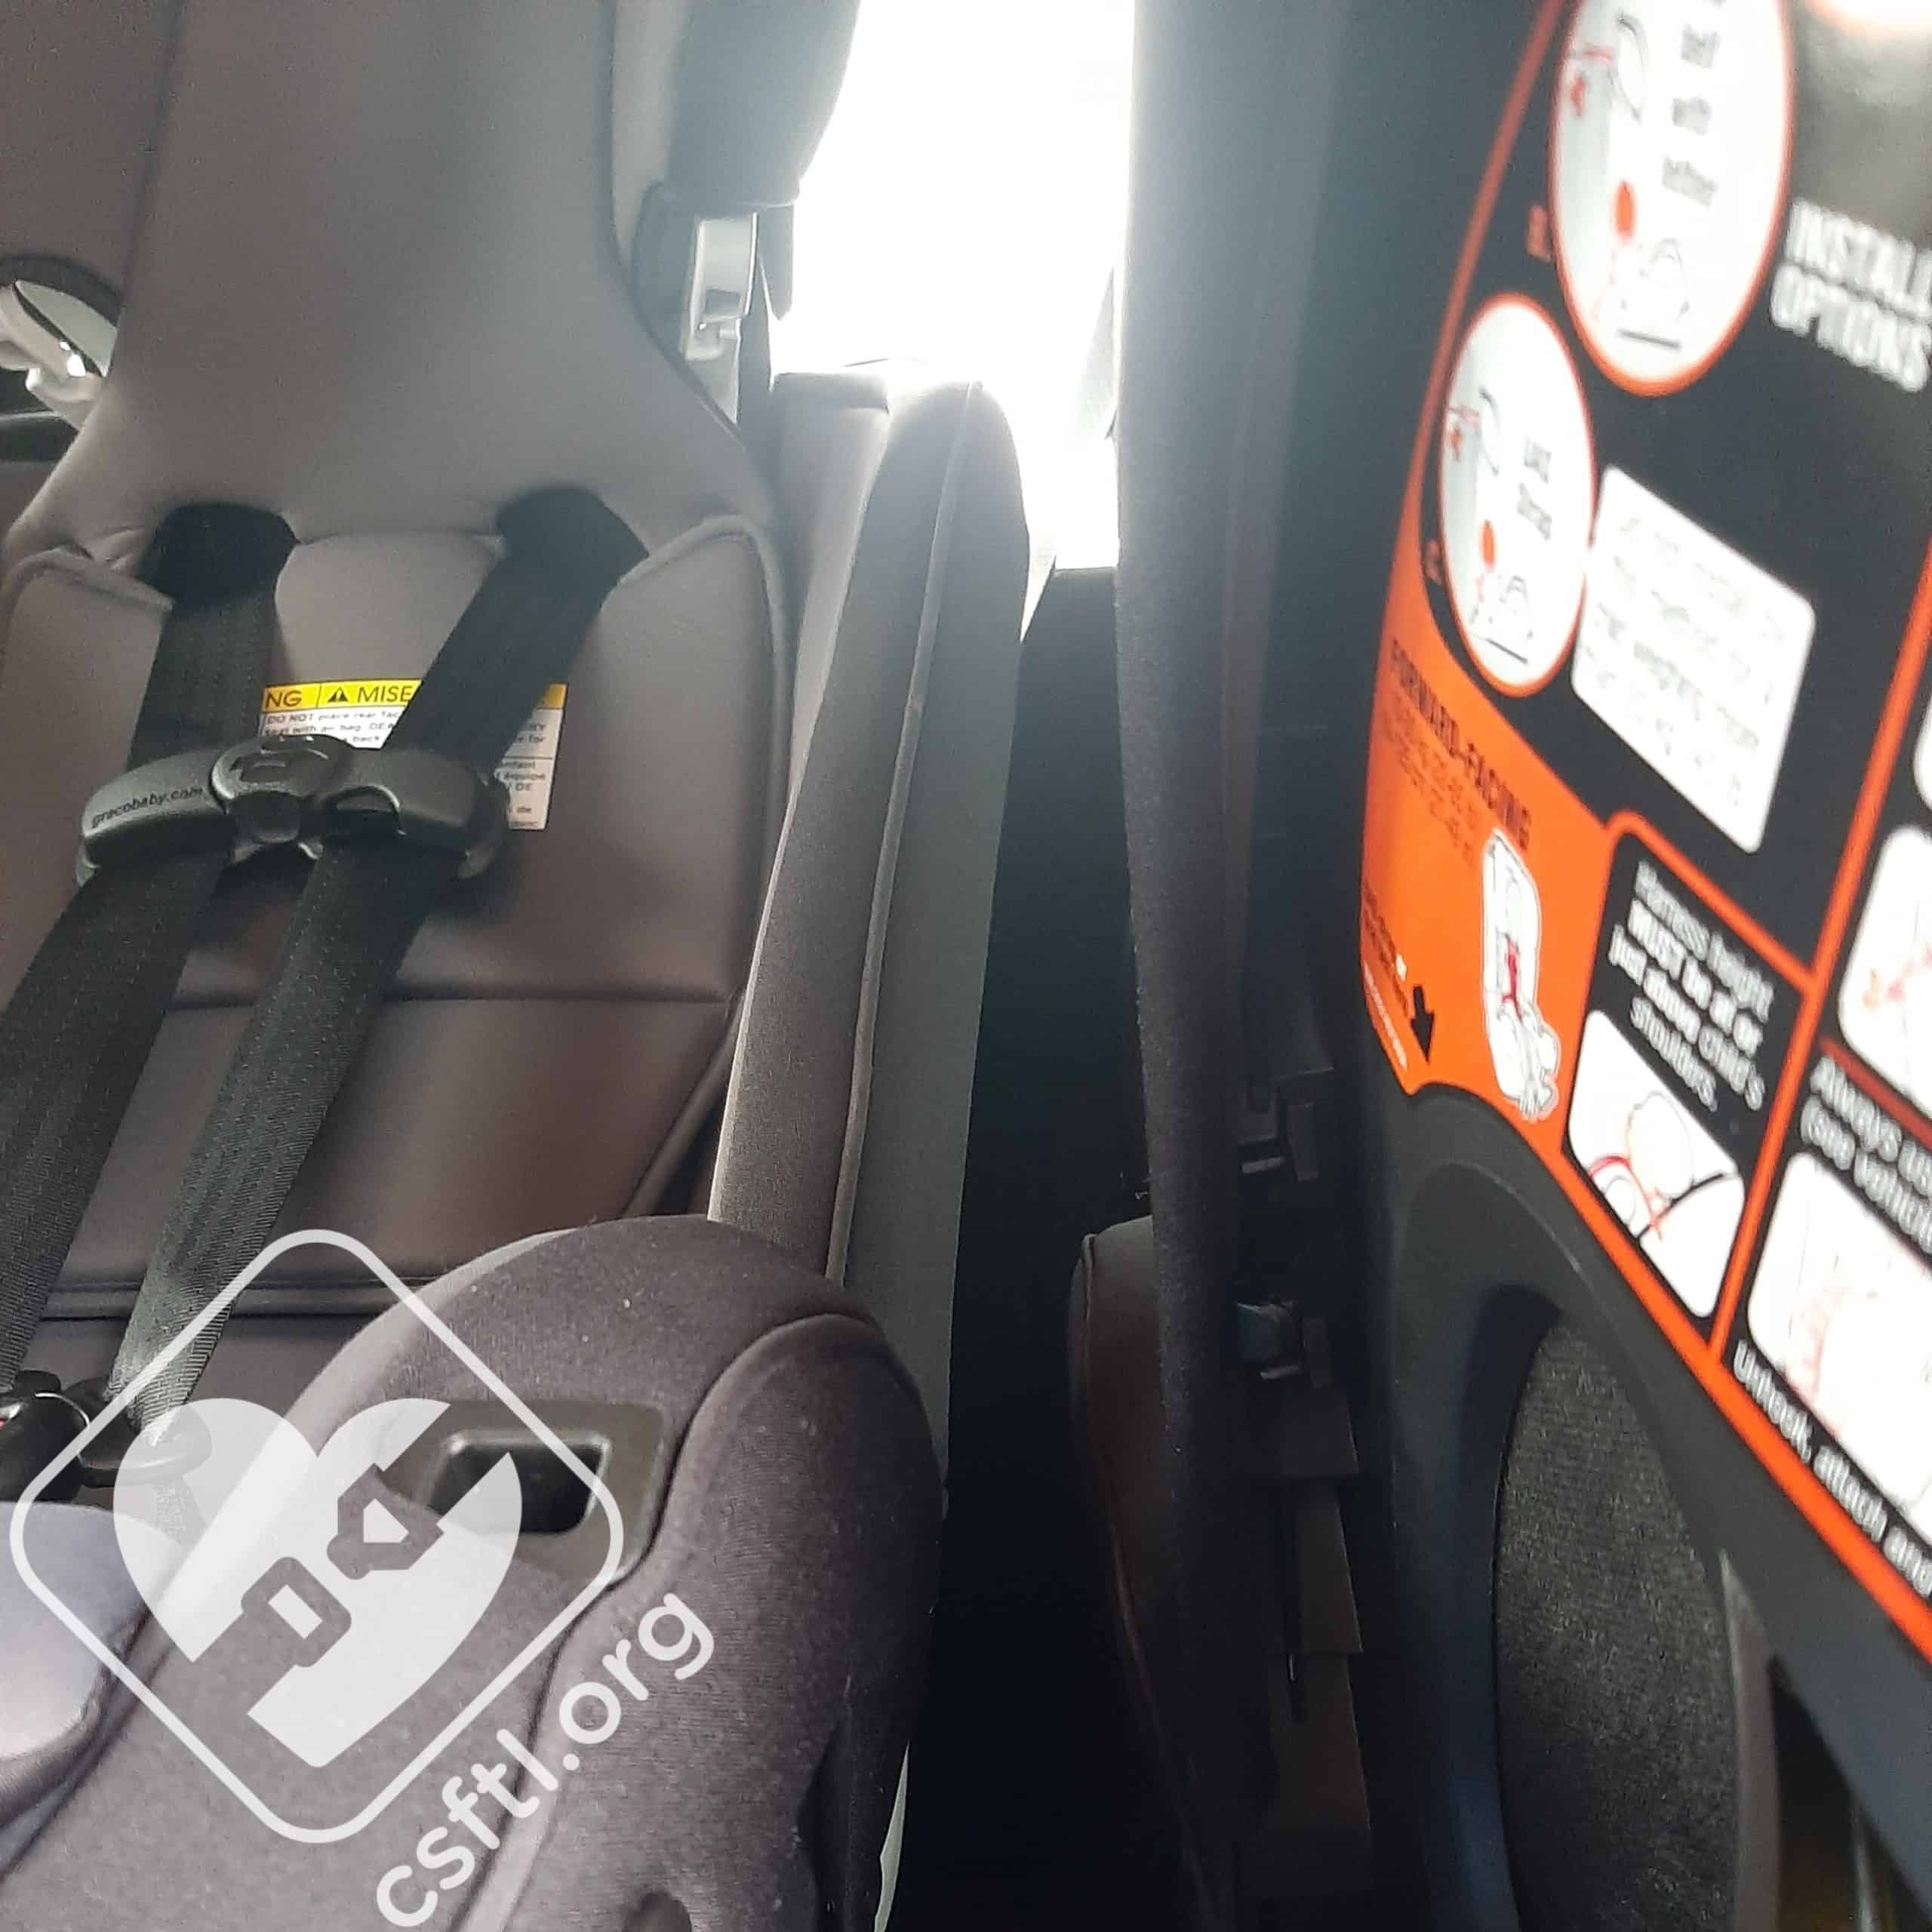
Graco’s instruction for a three across (or side by side installations) is expressed clearly on page 35 of the SlimFit3 LX ‘s manual: “Car seats can touch, but should not overlap. Make sure the base and seat are touching the vehicle seat firmly when installed”. Graco has confirmed with us that “no overlap” extends along the entire side of the seat – no portion of the seat should overlap the adjacent seat.
2007 Honda Odyssey Third Row
We have featured this vehicle in quite a few of our Canadian reviews and it always poses a challenge for three across in the third row (and until the SlimFit3 LX was released, each successful scenario achieved thus far included a seat that has since been discontinued).
We started with the passenger side seating position because it’s the smallest seating position and we wanted to ensure all 3 seats would fit. The seat belt installation with lockoff was easy and we flew through the second seat’s installation forward facing with seat belt lockoff as well.
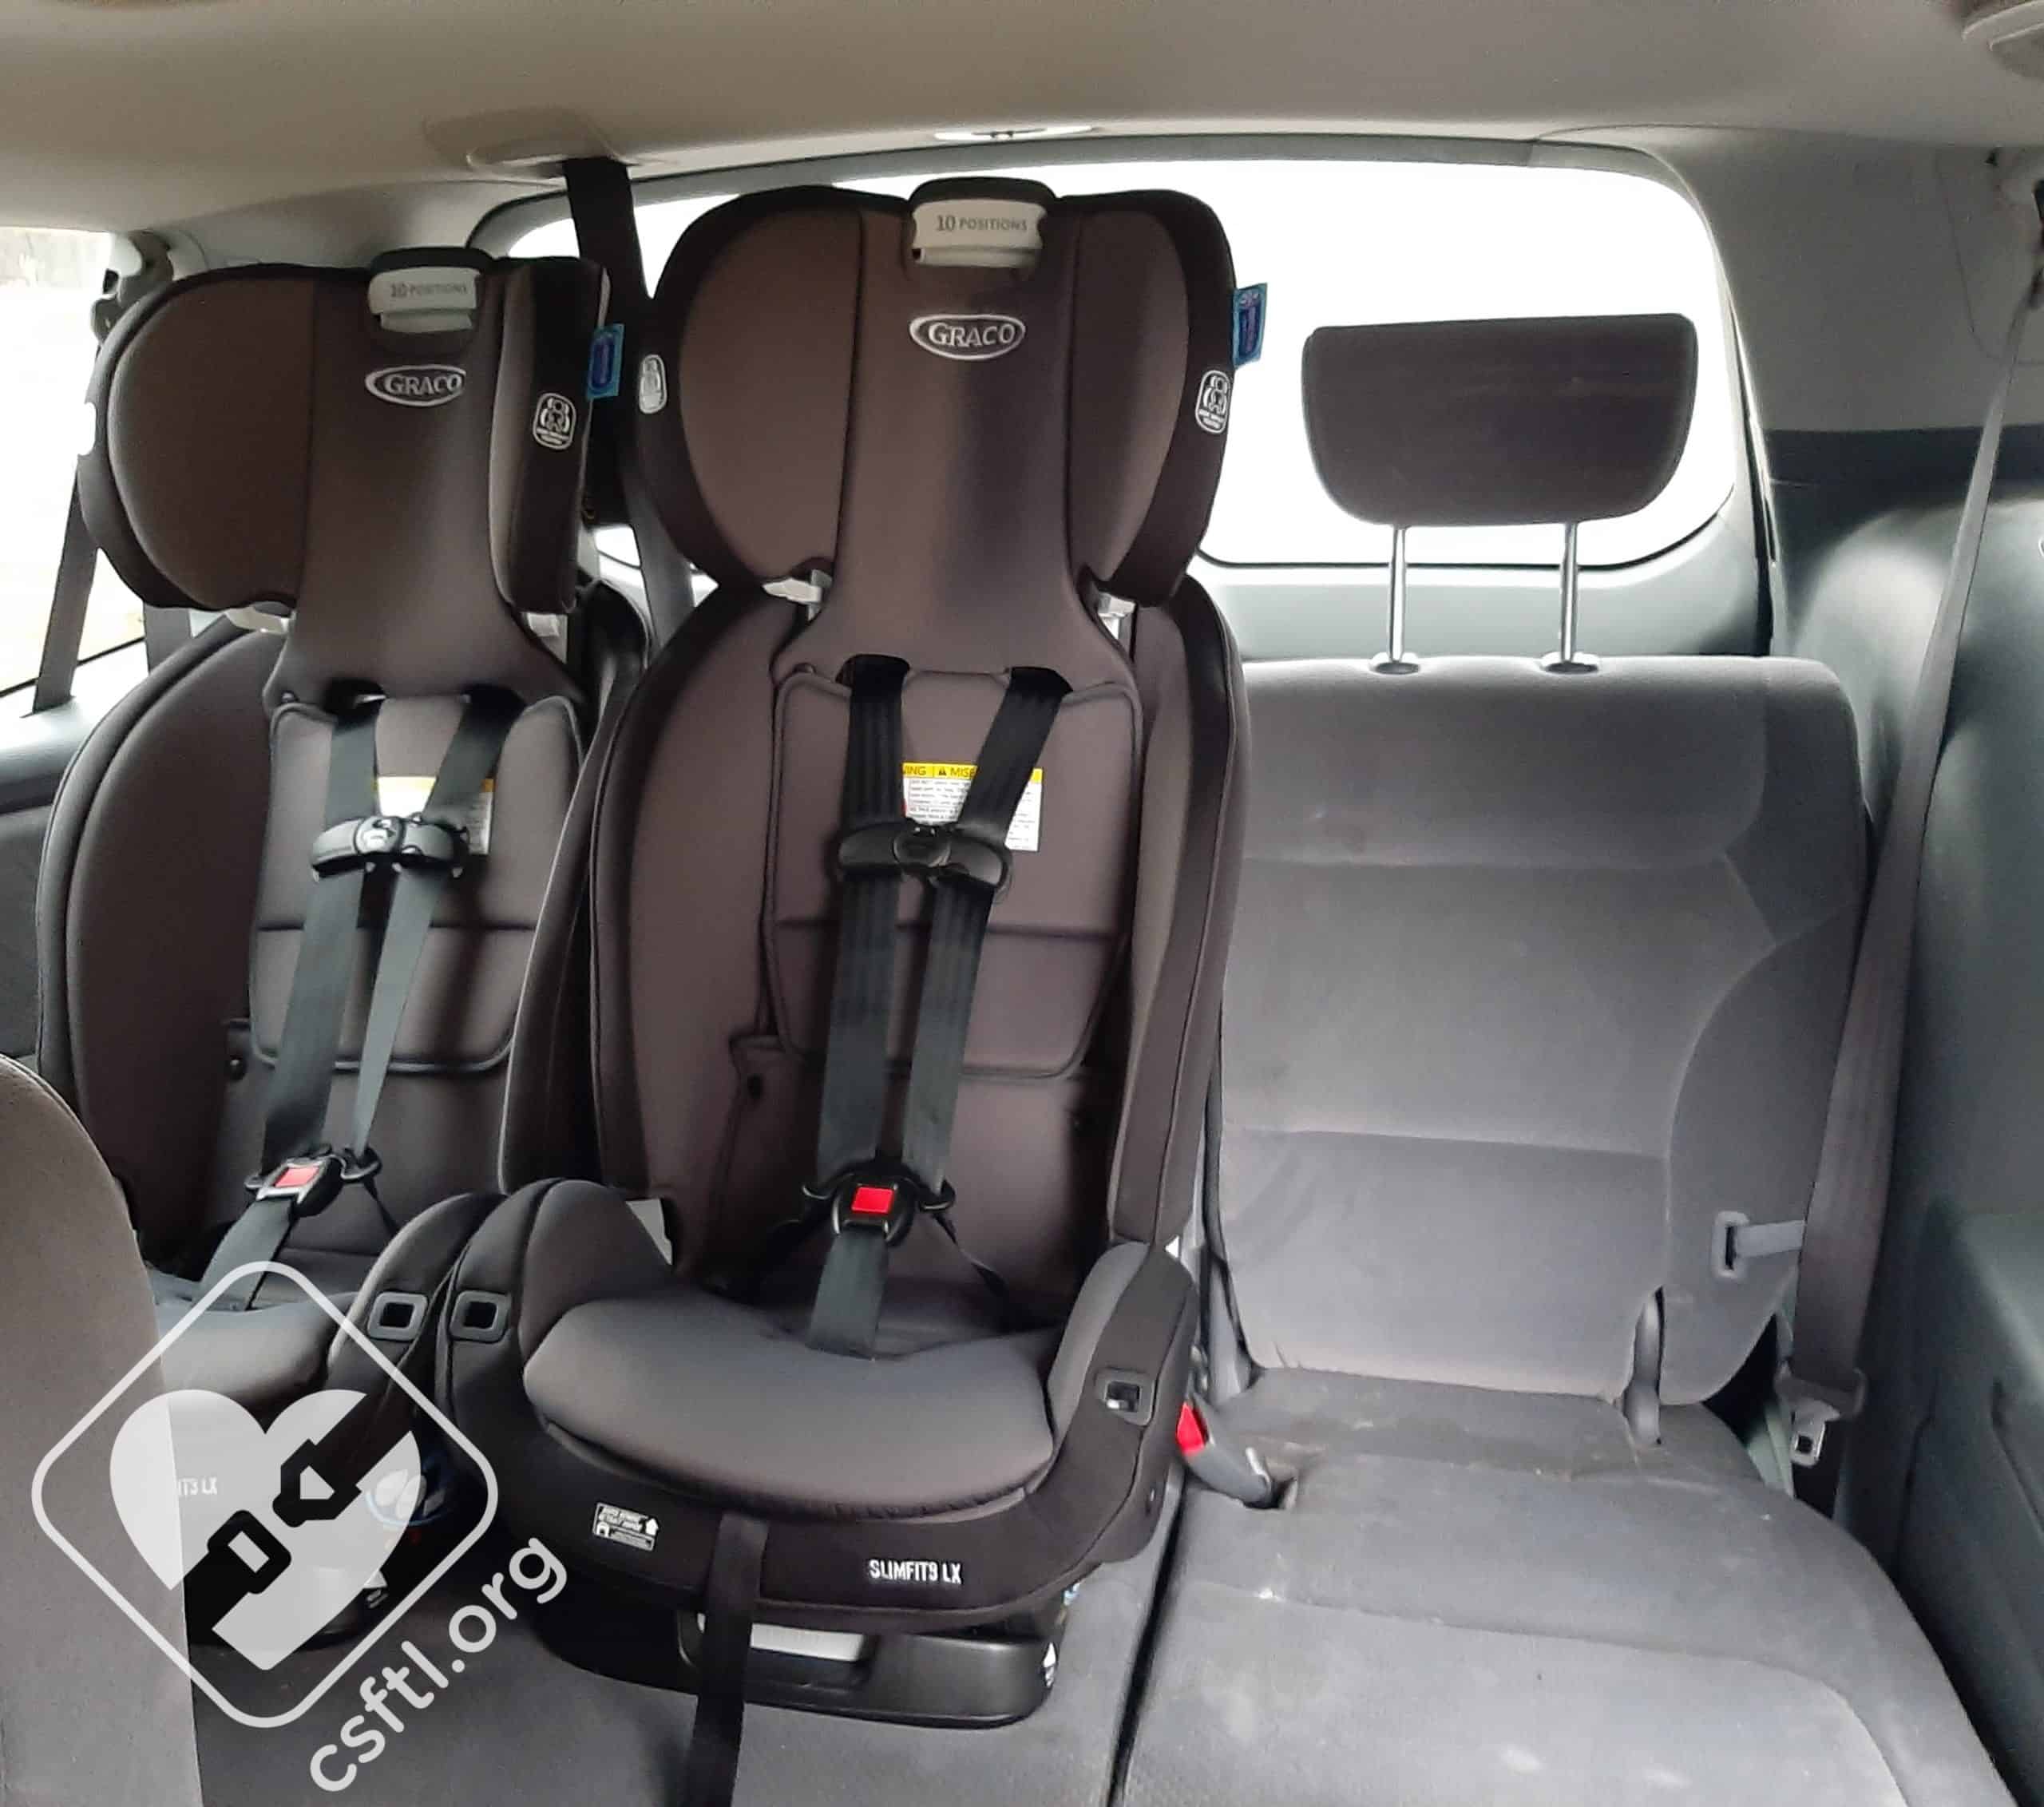
Two Graco SlimFit3 LX seats installed in a 2007 Honda Odyssey third row
Check out how much space was left for the driver’s side seating position! A narrow seat wouldn’t be needed here, that is a shocking revelation!
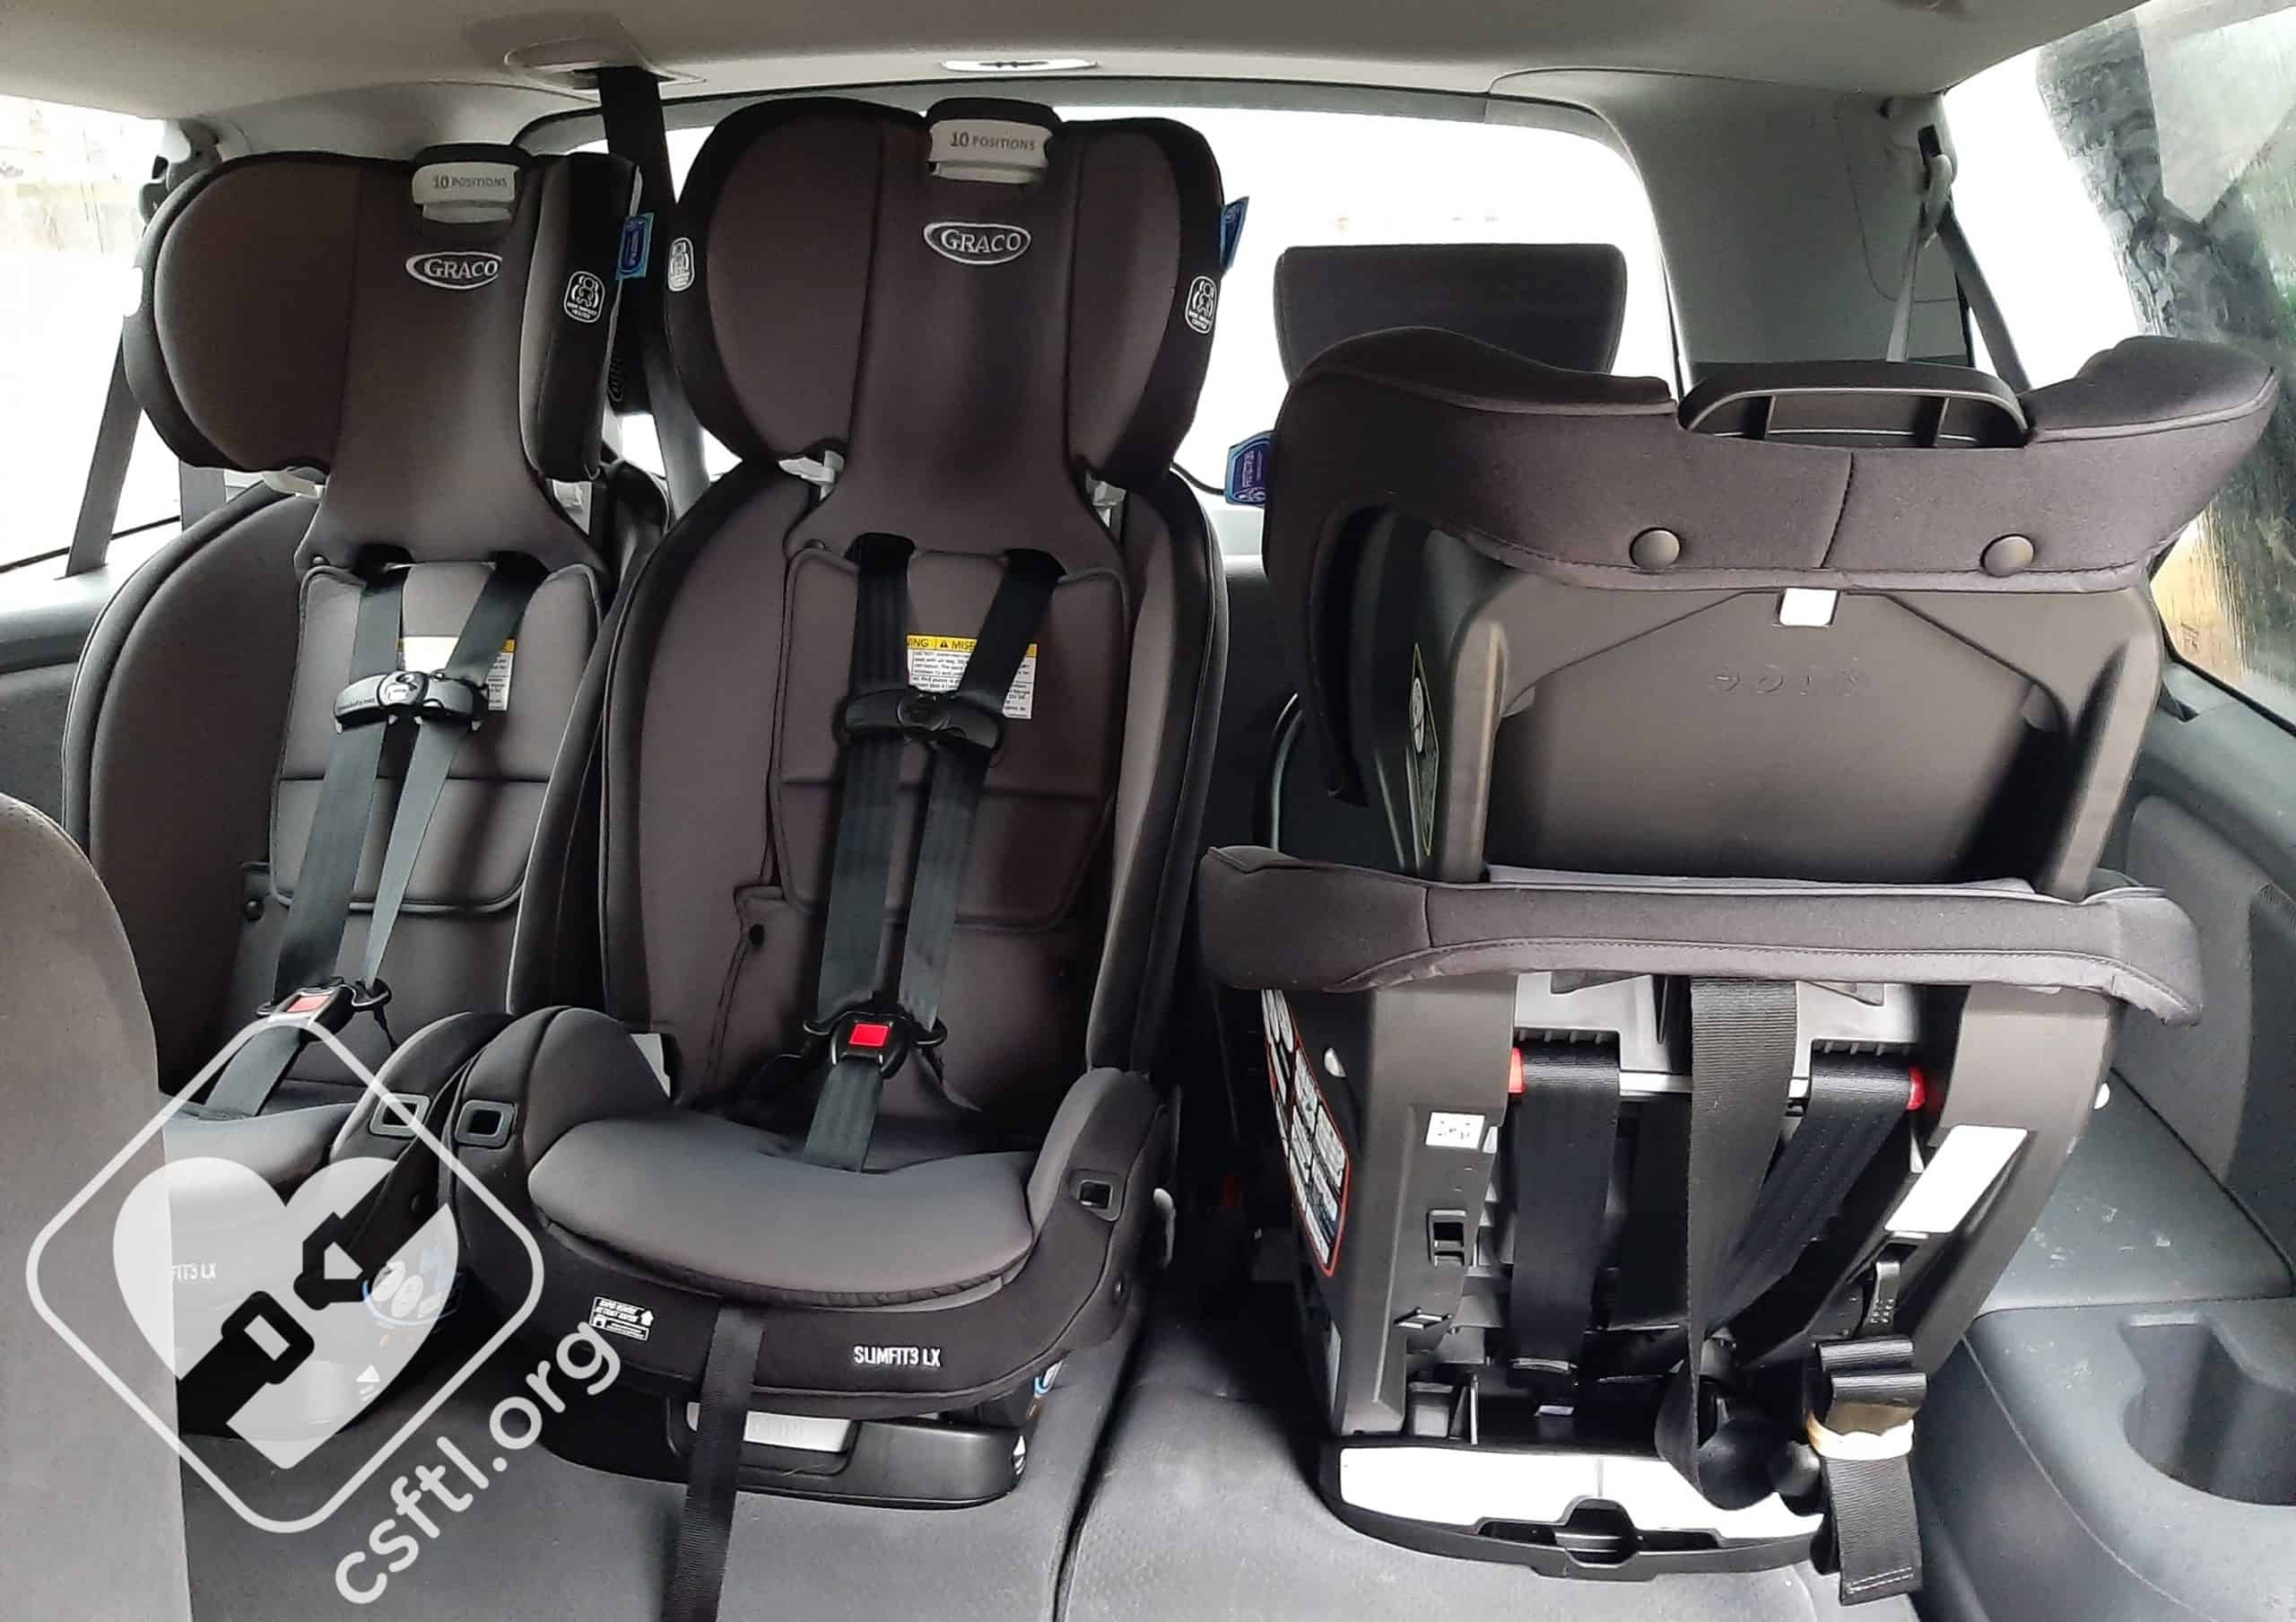
Three Graco SlimFit3 LX seats in a 2007 Honda Odyssey third row
We installed the third SlimFit3 LX rear facing on the driver’s side and there was plenty of room for a wider seat if necessary. Because third rows in vans aren’t well known for having much front to back space, we moved the 2nd row captain’s chair all the way back and were excited to see that the rear facing SlimFit3 LX fit behind it rear facing.
Being able to work 3 across in this third row (or with two SlimFit3 LX seats and another narrow seat) opens up our options as a family for safely carpooling, which is very exciting news as a CPST.
2012 Dodge Caravan with Stow N Go Seating Third Row
If you are a member of our Facebook group, you’ll likely be aware of the challenges that this “family friendly” vehicle (and its clones the Chrysler Town & Country and Volkswagen Routan) poses – especially for families with 4 or 5 children. One of the biggest challenges is being able to fit 3 seats in the third row – especially since there are only three top tether anchors in this van and again – they are required to be used when forward facing in Canada.
Three Graco SlimFit3 LX seats installed in the third row of a 2012 Dodge Caravan
We tried the obvious setup of one forward facing SlimFit3 LX installed in the middle seating position (where the tether anchor is located) and two rear facing SlimFit3 LXs installed outboard. All three seats were installed with the vehicle seat belt and we were amazed to see that there was SPACE between the middle and driver’s side seats!
SPACE between Graco SlimFit3 LX seats in the third row of a 2012 Dodge Caravan
No CPSTs following along will be surprised to hear that buckling the seats in was the hardest part of this 3 across. We started with the passenger side installation and worked our way across the back seat. When installing the driver’s side SlimFit3 LX, ensuring there was a lot of slack in the seat belt and tipping the seat allowed access to the buckle.
We tried installing 3 SlimFit3 LX seats with the passenger side rear facing, middle seat forward facing, and the driver’s side in booster mode. This scenario worked but buckling the booster rider was quite tight. Because there are no lower anchors in the outboard seating positions, the SlimFit3 LX will need to be buckled in when not in use. This might be a scenario where if a booster is required in the outboard seating position, leaving the seat buckled at all times and having the child climb in carefully through the fastened seat belt may be the best option.
2014 Toyota Sienna
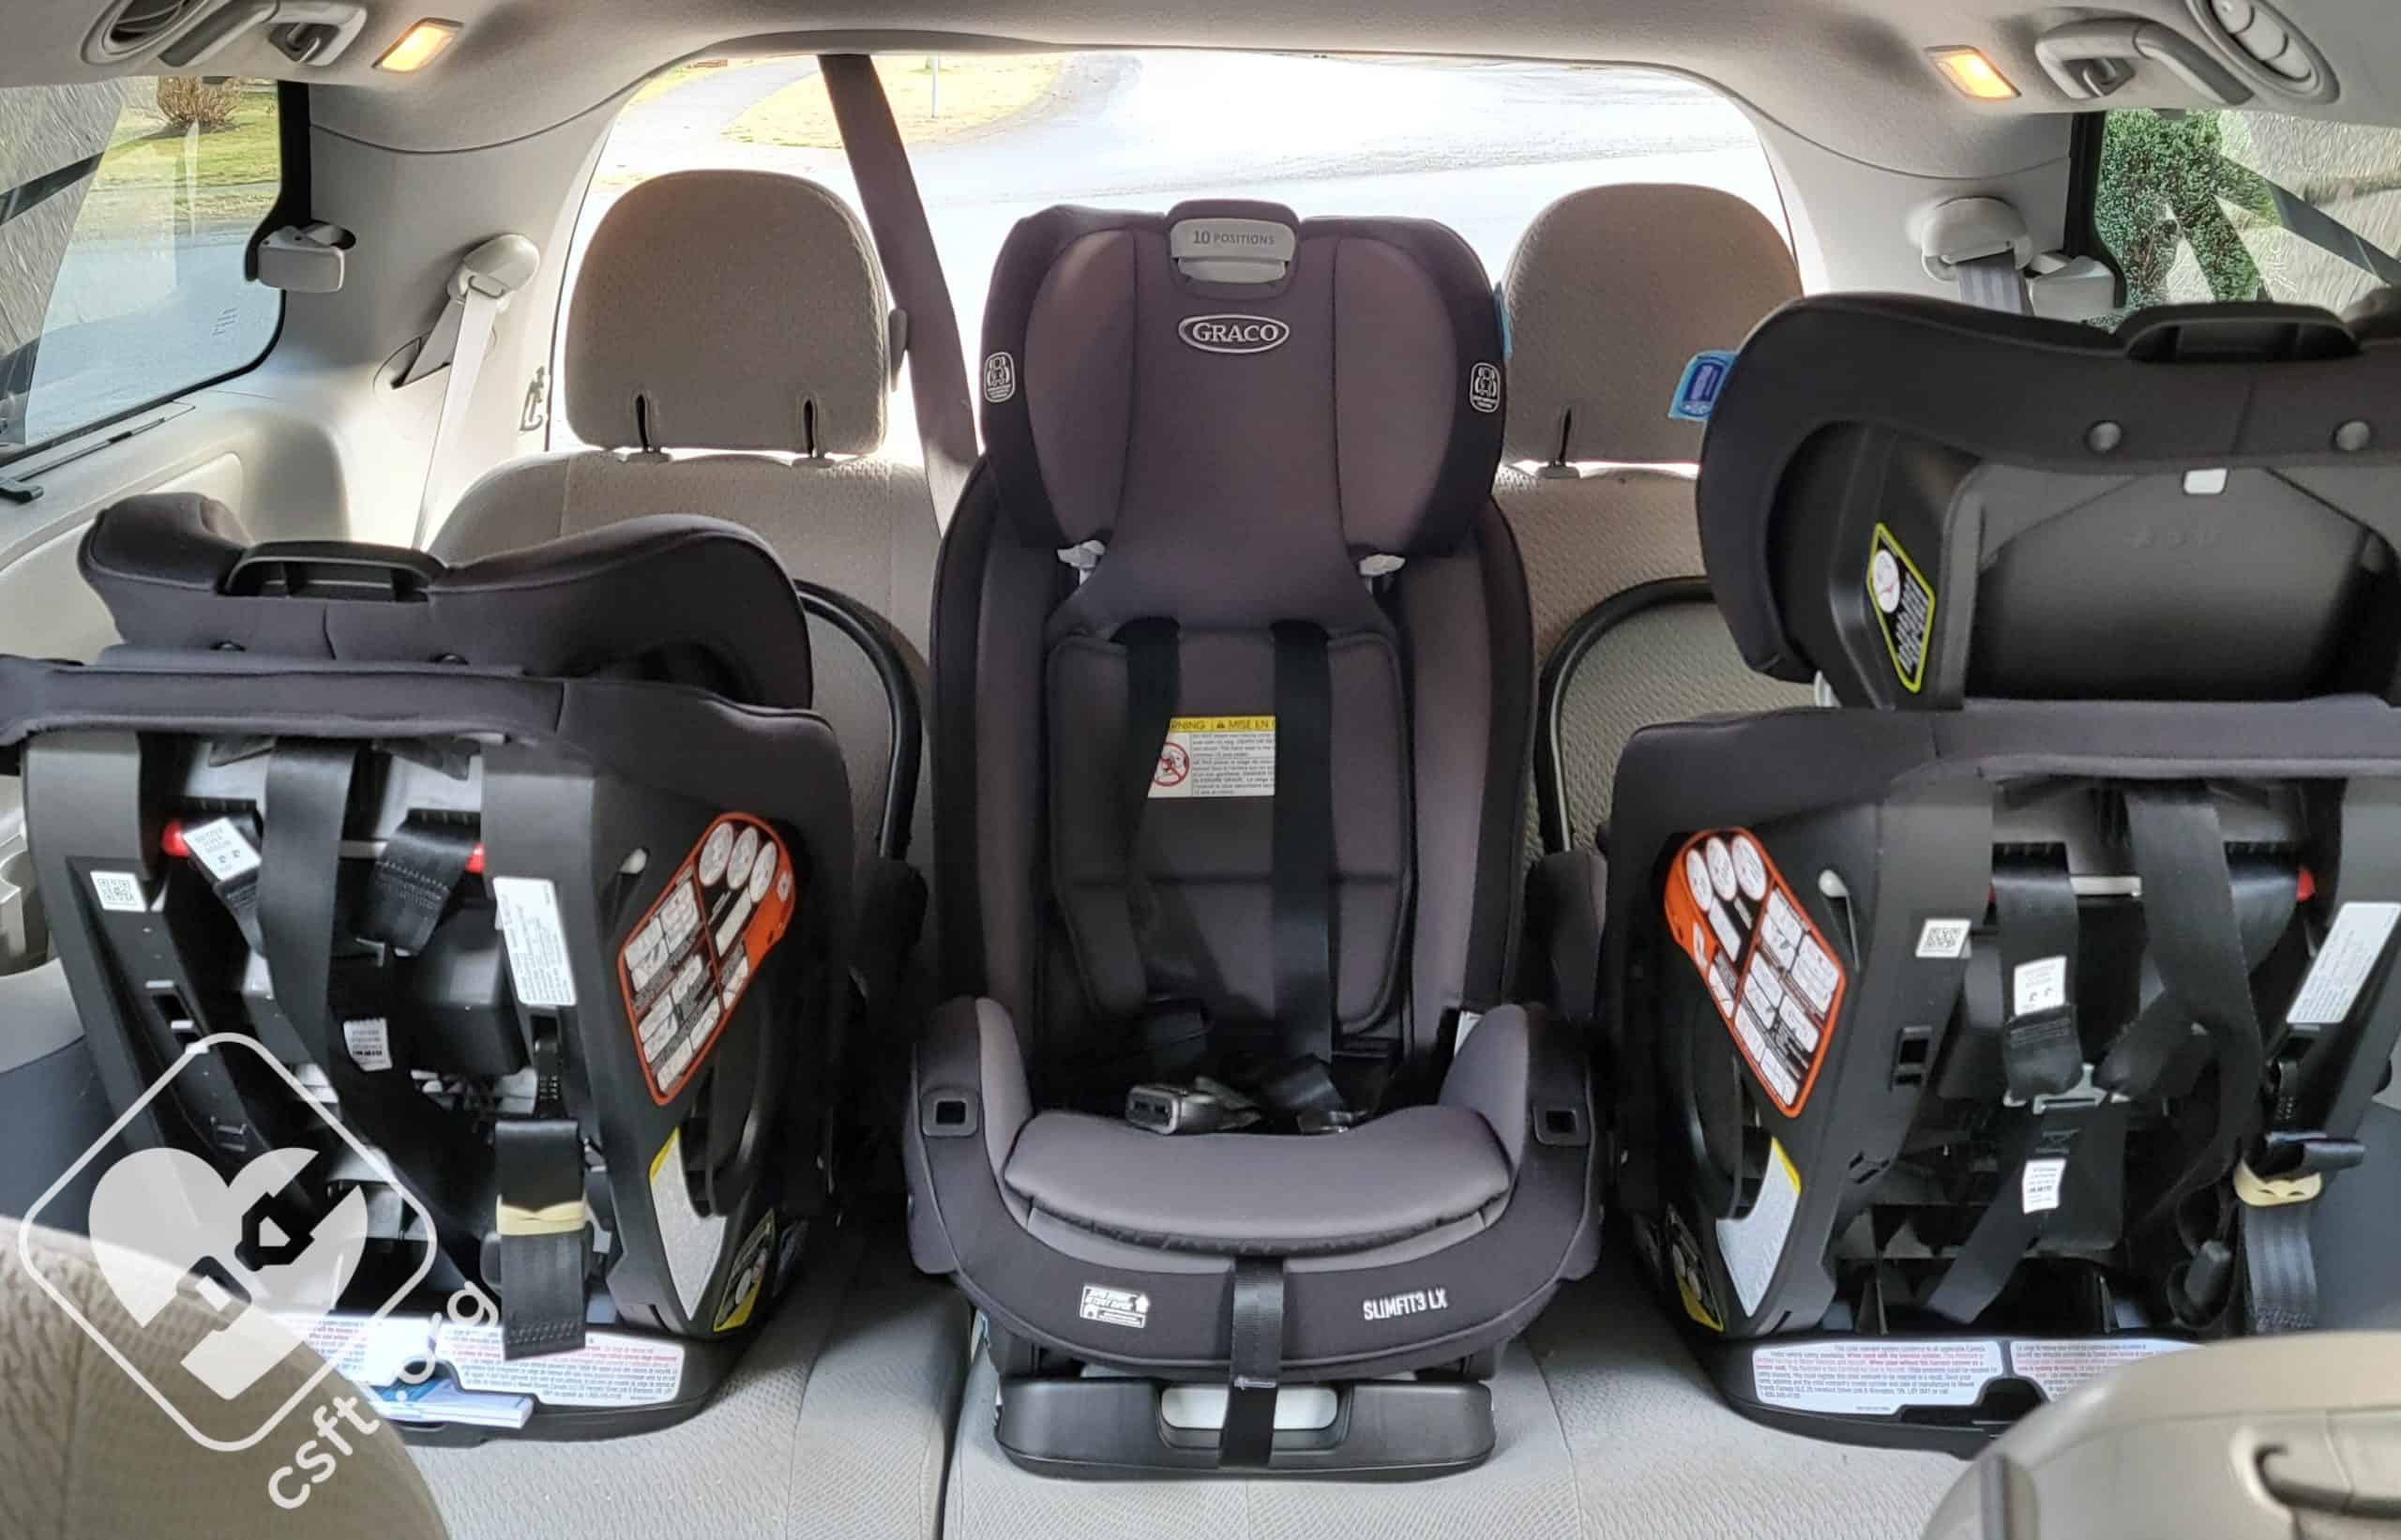
Three Graco SlimFit3 LX seats installed in a 2014 Toyota Sienna third row
We were able to quickly and easily install three across the third row of this Sienna. Only the middle seat has a top tether, so the outboard seats must be rear facing. The three SlimFit3 LXs were all installed with the vehicle seat belts and they fit with ample space between one another.
2013 Ford Flex Second Row
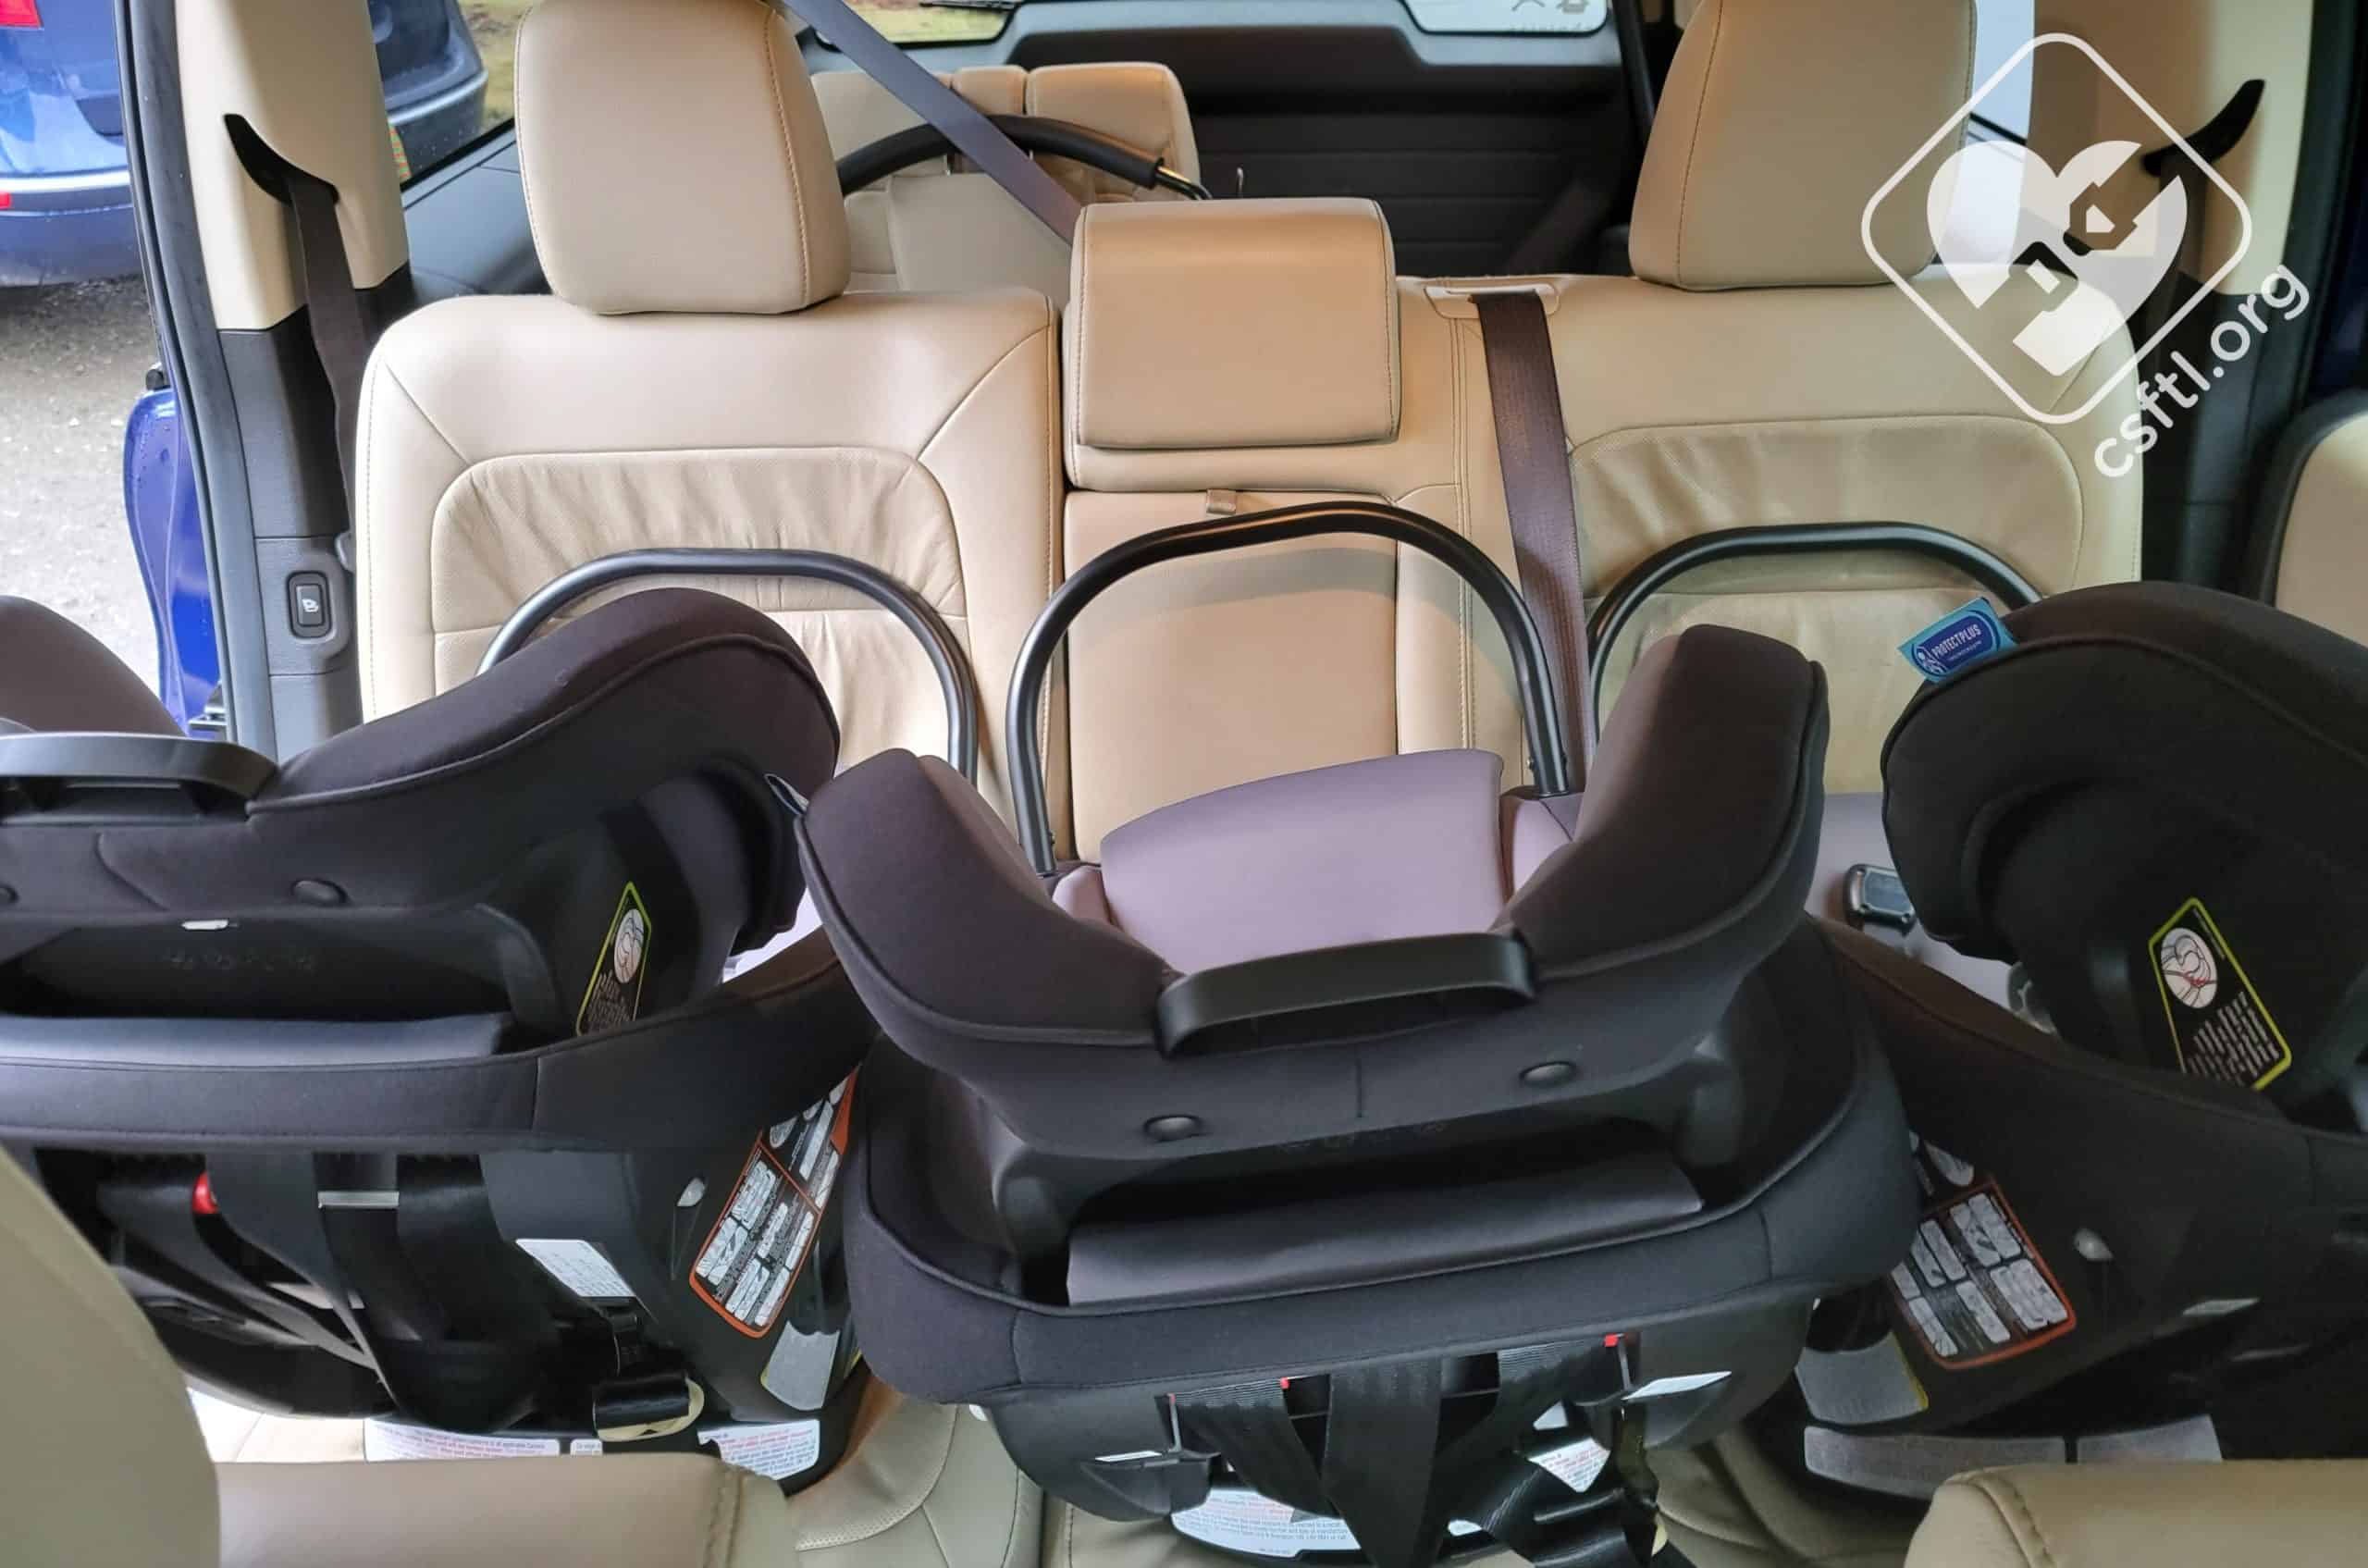
Three Graco SlimFit3 LX seats installed in a 2013 Ford Flex
In most tight spaces, we find that the vehicle seat belt helps with spacing the car seats or booster seats correctly, because it allows the seats installed on the sides to be pulled toward the doors, which gives the middle seat more space. Armed with this knowledge, we were quite surprised and pleased to discover we could install two out of three Graco SlimFit3 LX seats with lower anchors in this 2013 Ford Flex.

2013 Ford Flex – passenger side
We installed the SlimFit3 LX in the middle vehicle seat using the vehicle seat belt (this was the trickiest part, since the middle seat is narrow, very firm, and flat), and we then installed the additional 2 SlimFit3 LXs outboard with the lower anchors. The fit was tight but it was a successful setup, with each seat independently secure.

2013 Ford Flex – driver side
Because photographing a three across in such a tight vehicle is difficult, we have included close up photos of the passenger and driver’s side installations to show that the three Graco SlimFit3 LX seats do not overlap at all in this vehicle.
Fit to Child – Forward Facing
3 Year Old

Graco SlimFit3 LX – 3 year old
Our three year old model remains 36 inches and 32 pounds. She rides rear facing day to day but was happy to sit in this seat forward facing for this photo. The SlimFit3 LX is installed on recline 4.
5 Year Old
Graco SlimFit3 LX – 5 year old
Our five year old model remains 41 inches and 35 pounds. This is her first experience forward facing, and as you can see she is quite excited about that. She carries most of her height in her torso, and is at the second to last harness position. This gives her about two inches of torso growth before the 16.75 inch limit, with torso growth averaging about an inch per year, that should give her plenty of time to reach forty pounds and booster readiness.
Fit to Child – Booster Mode
7 Year Old

Graco Slimfit3 LX – 7 year old in booster mode
Our booster model is 7 years old, 52 inches tall, and weighs 55 pounds. We tried her in the SlimFit3 LX’s booster mode and she JUST fit. The shoulder belt guide is at her shoulder, which means that she is a sneeze away from outgrowing this seat’s booster mode, since the shoulder belt needs to be positioned at or above the child’s shoulder.
Our model is over the 90th percentile for height and has a fairly long torso, so we would expect that most 7 year olds would fit in the SlimFit3 LX’s booster mode (but we will note that Littles come in all shapes and sizes, so it’s possible that a shorter kiddo will have a longer torso than our model, or vice versa). For a multi-mode seat, fitting a tall seven year old is an awesome accomplishment so we aren’t complaining.
Important Information: Where to Find
Graco SlimFit3 LX manual storage
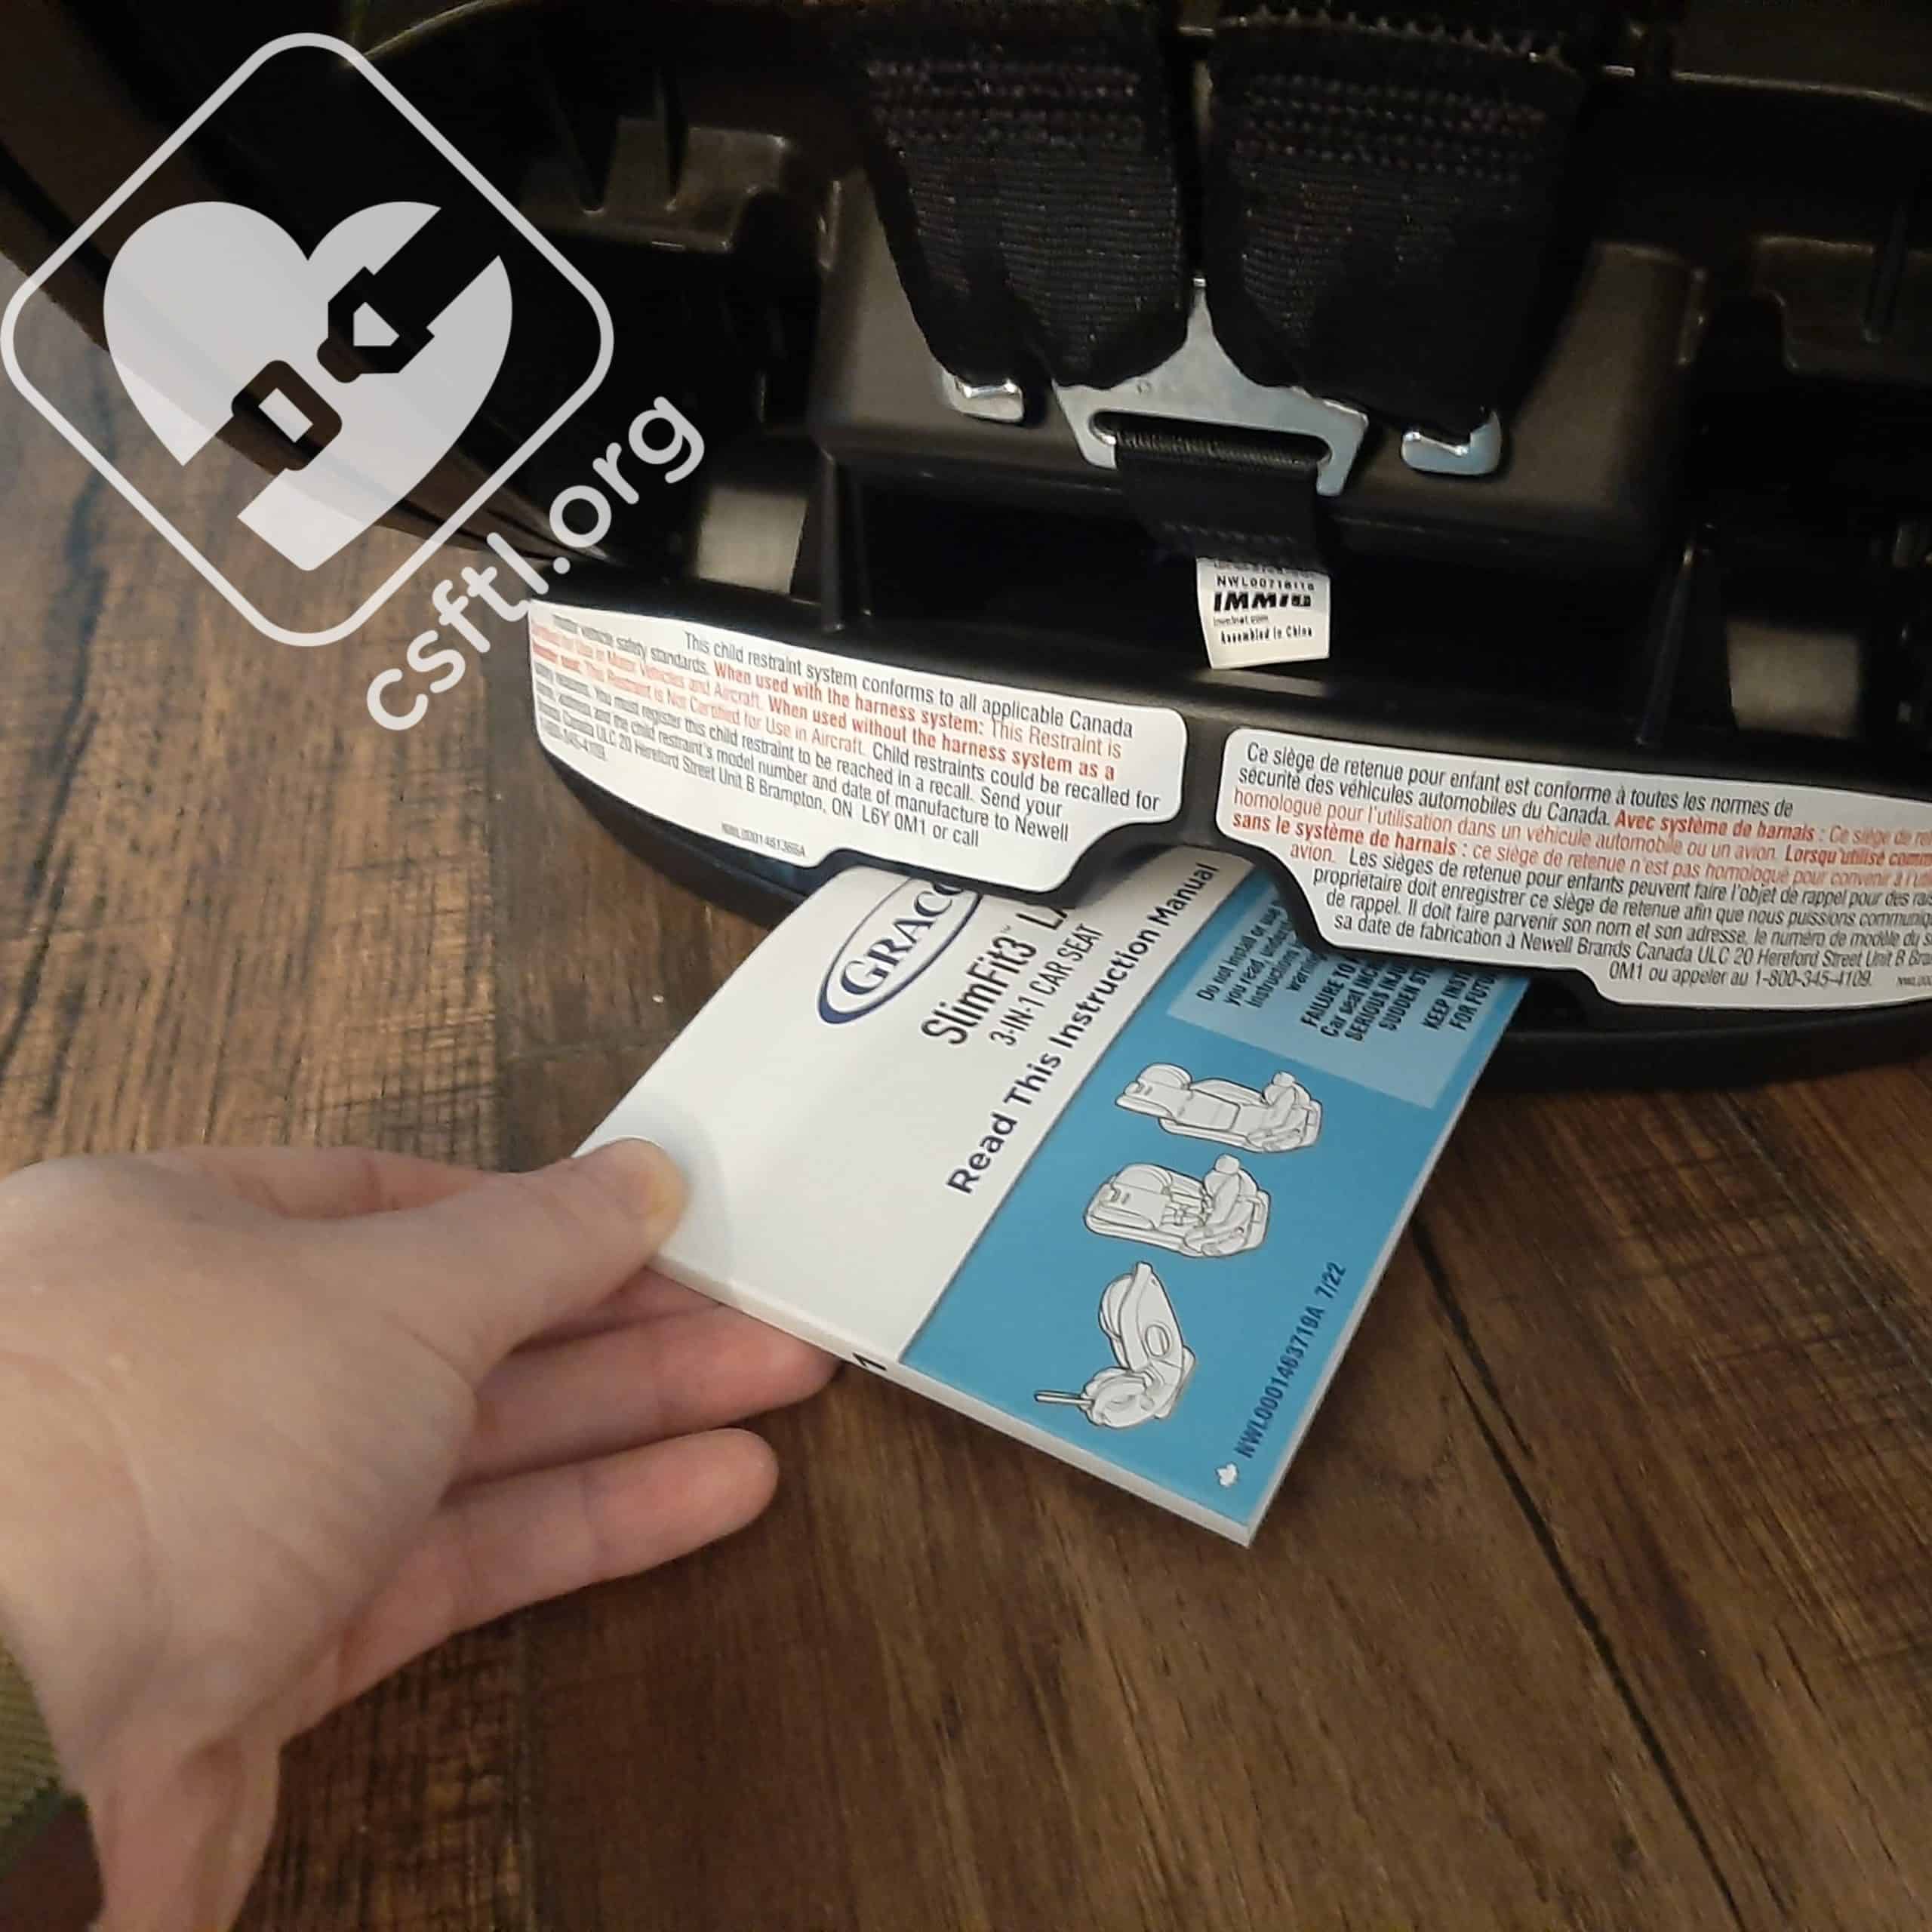
Manual storage: the instruction manual fits in a slit at the back of the base of the SlimFit3 LX
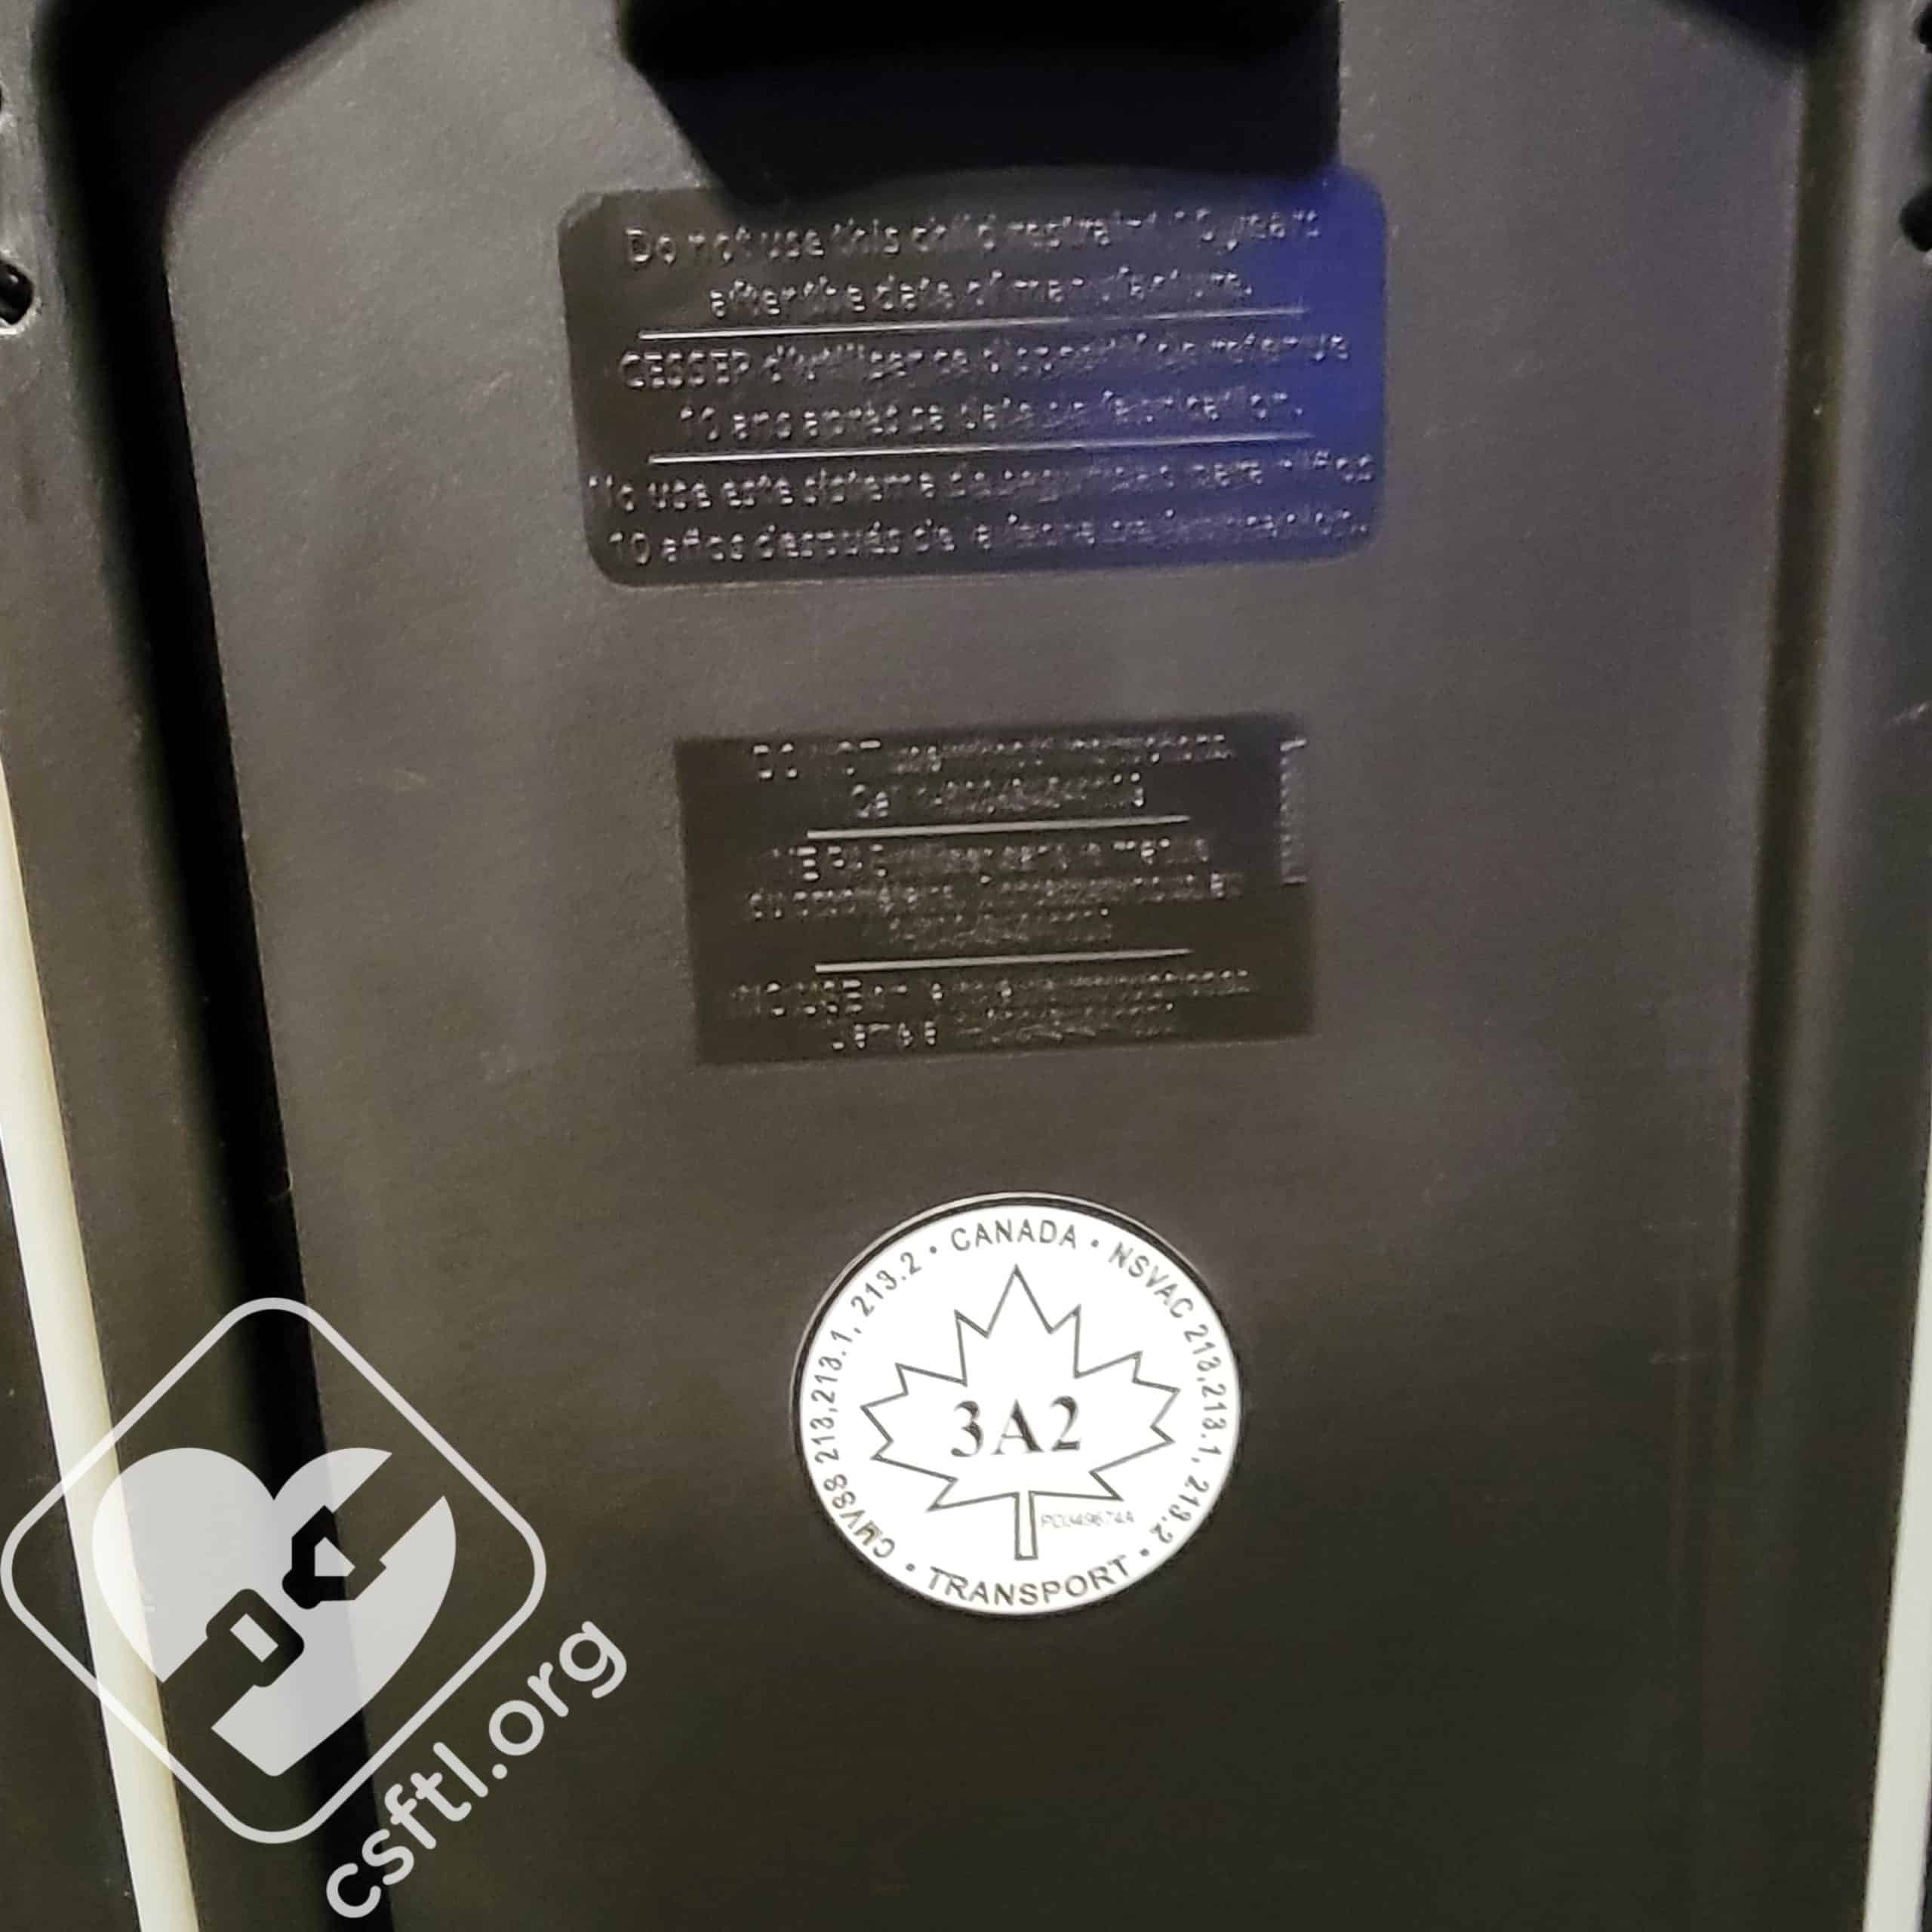
Graco SlimFit3 LX NSM and expiration
National safety mark and expiration: the National Safety Mark (required when using this seat either rear or forward facing on a plane) is located at the back of the seat, below a message stamped into the plastic indicating that seat cannot be used 10 years after the date of manufacture.
Graco SlimFit3 LX date of manufacture label
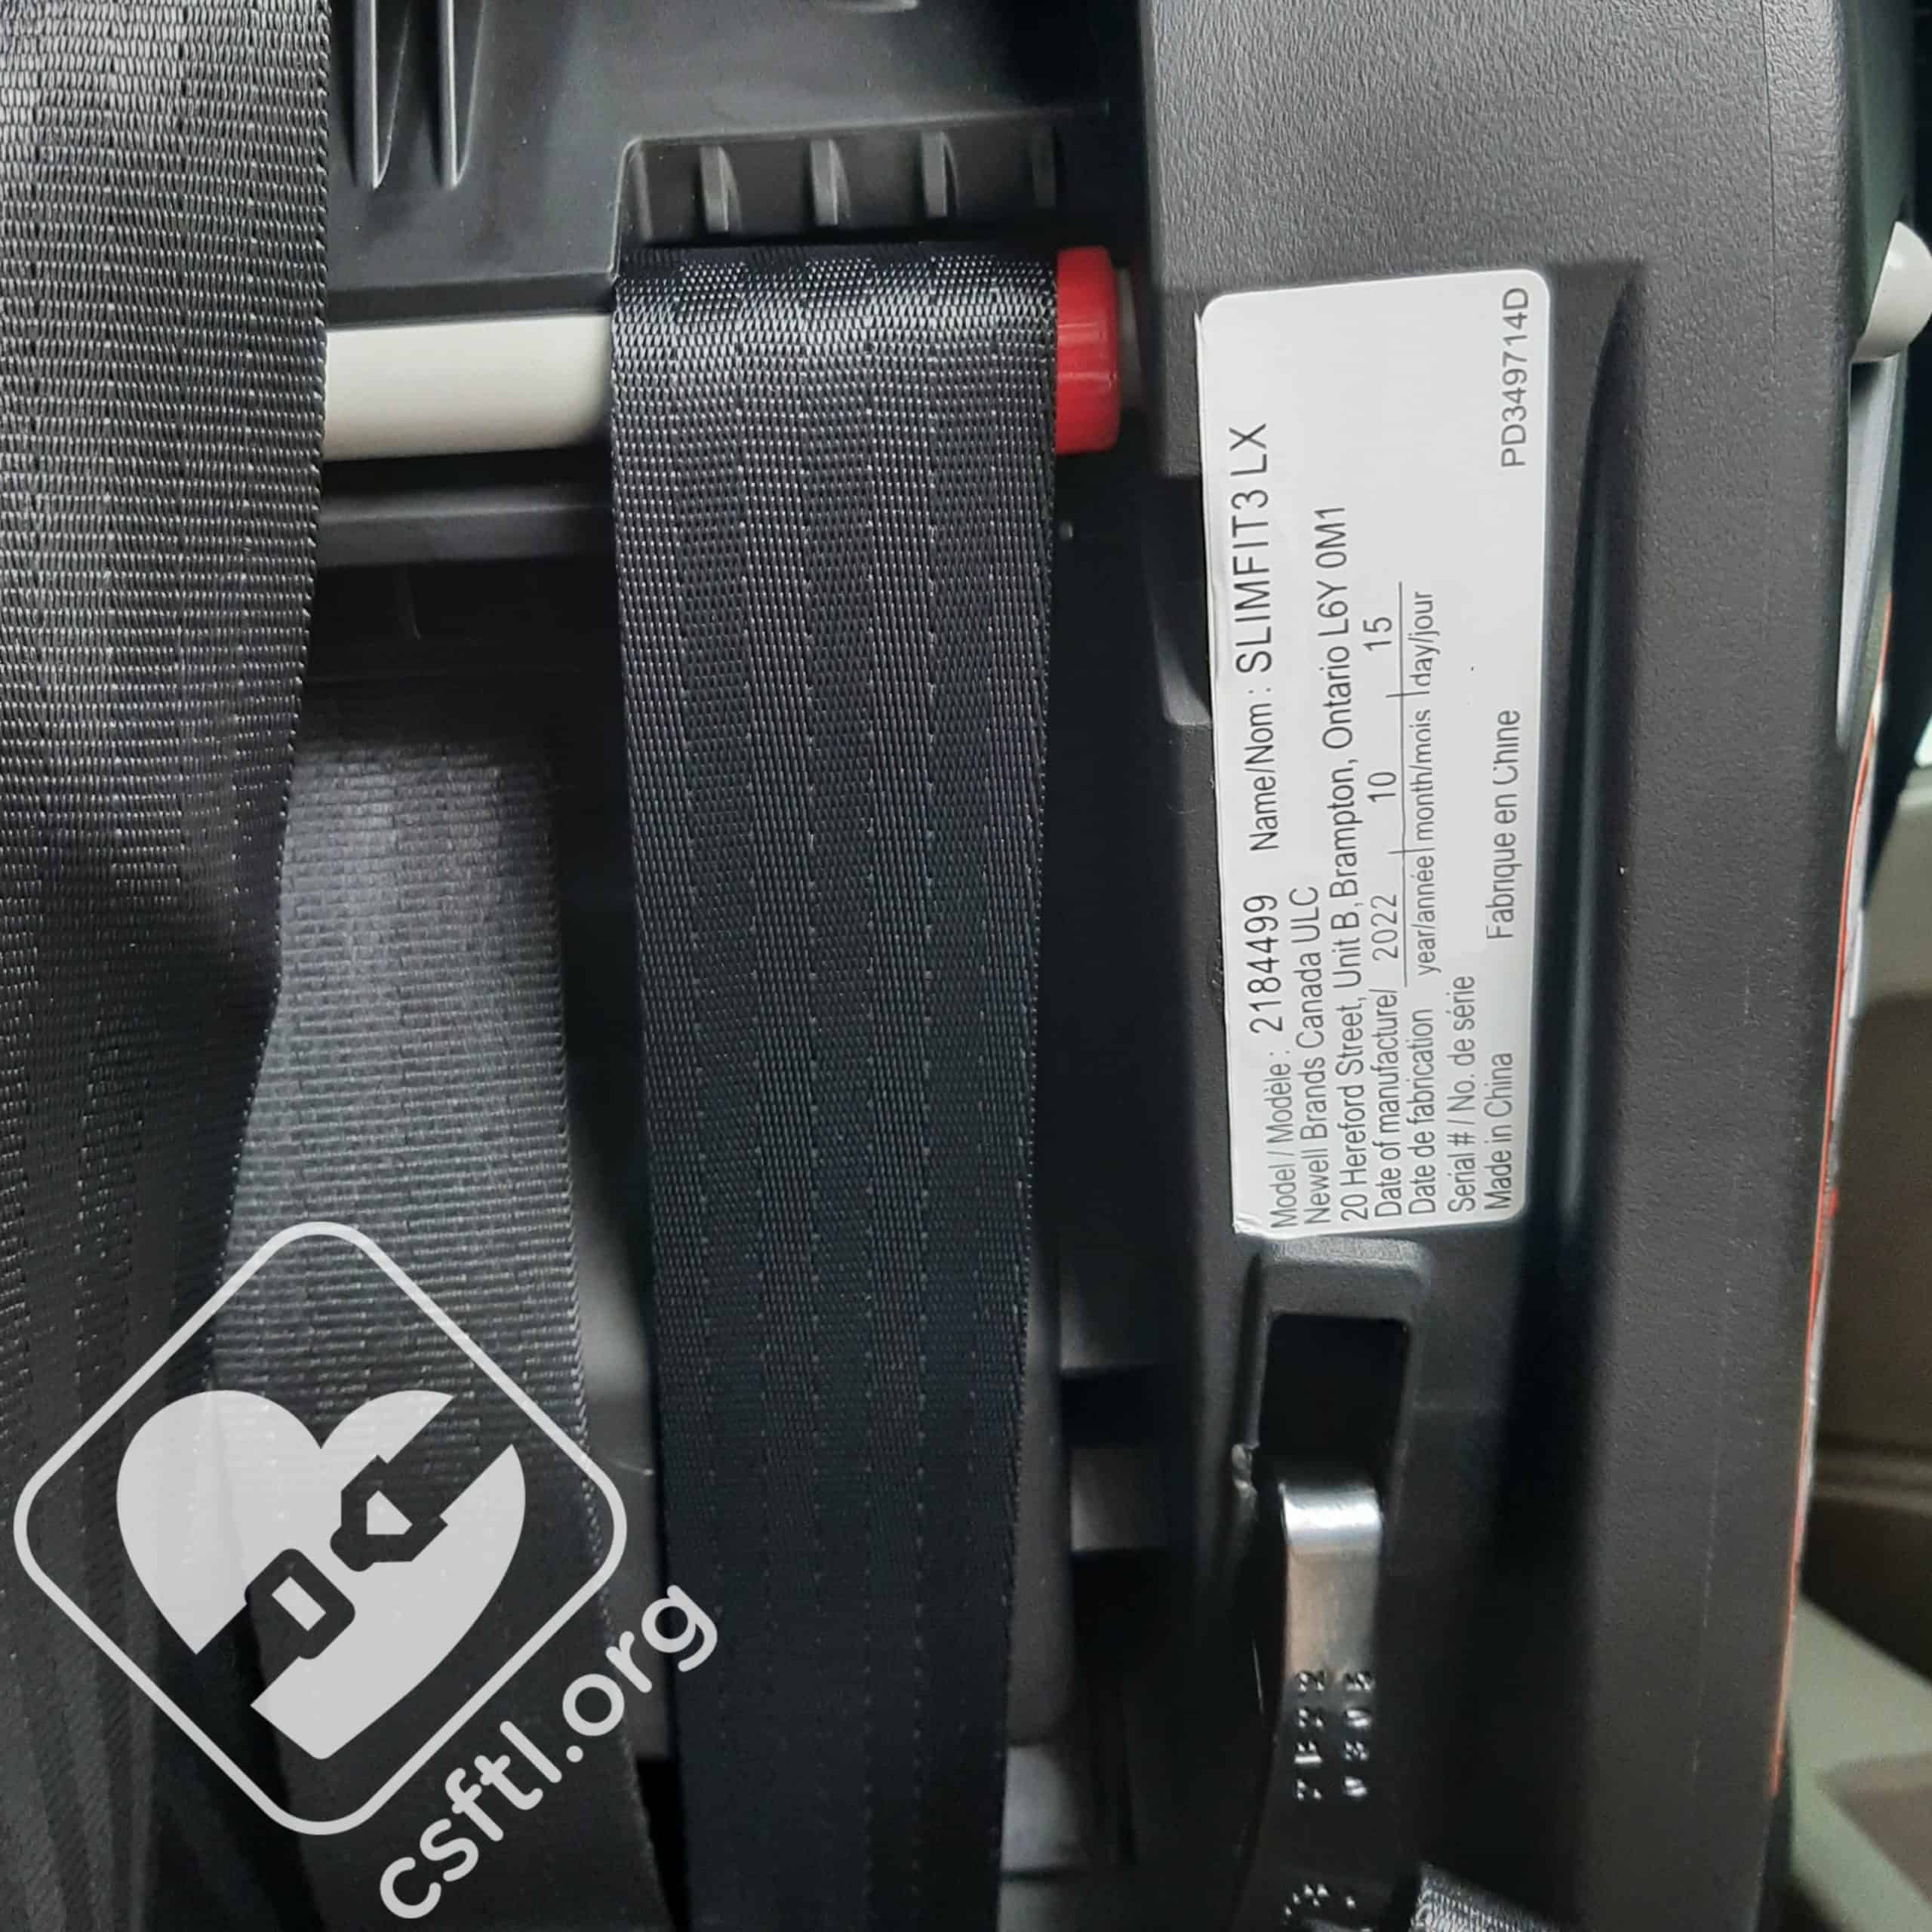
Date of manufacture label: The date of manufacture label is located on the back of the seat’s shell.
Overall Thoughts
We were extremely excited to hear that the SlimFit3 LX was coming to Canada, and the seat did not disappoint us! From the ease of install, to ease of adjustment, to the compactness, and of course the narrowness, this seat is a very welcome addition to the Canadian market and will undoubtedly become a favourite for child care providers who need a slim option that adjusts easily to fit a variety of children.
While it may not be the longest lasting booster seat, the ability to fit from a newborn baby to a 7 year old child AND fit 3 across in so many vehicles makes the Graco SlimFit3 LX a seat that we can’t help but sing the praises of. Even families who don’t need the slim profile can find in the SlimFit3 LX a long lasting, easy to use and adjust child restraint that will work for their child(ren) for years.
The Graco SlimFit3 LX will be available to purchase online in Canada on January 19, 2023 and the in store launch date is April 1, 2023.
Giveaway!
Our friends at Graco Canada are giving away one SlimFit3 LX to a lucky reader in Canada. Please read our terms and conditions then enter below for your chance to win.
a Rafflecopter giveaway