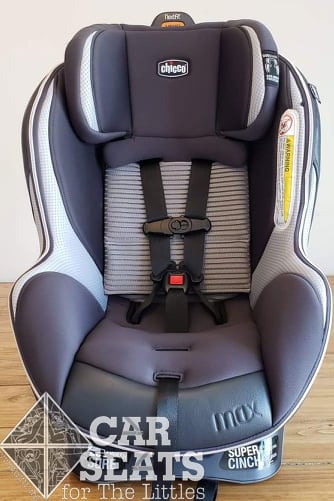
Chicco NextFit Max
Our team here at Car Seats for the Littles have been fans of the Chicco NextFit line since it was first released. Both the original Chicco NextFit and the Chicco NextFit iX Zip have some terrific ease of use features that we’re very fond of, so naturally we are excited to have the opportunity to spend some time with the newest member of the Nextfit family – the Chicco NextFit Zip Max.
This car seat’s full name is the NextFit Zip Max Extended-Use Convertible Car Seat. That’s a mouthful. This long-named, extended-use convertible car seat maintains many features found on previous NextFit models while also adding some exciting new features to improve comfort and accommodate a new range of child sizes. Let’s see how much extended use the Max in NextFit Zip Max provides!
Chicco NextFit Max!
CSFTL Quick Stats
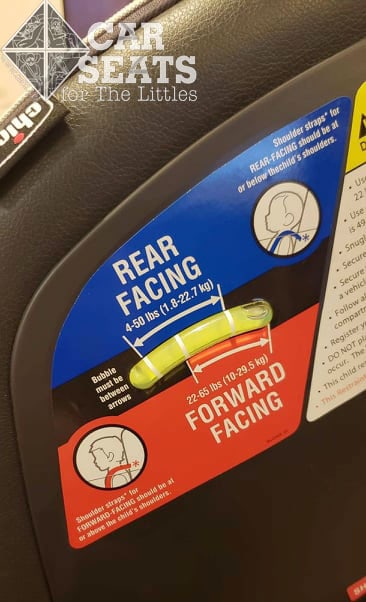
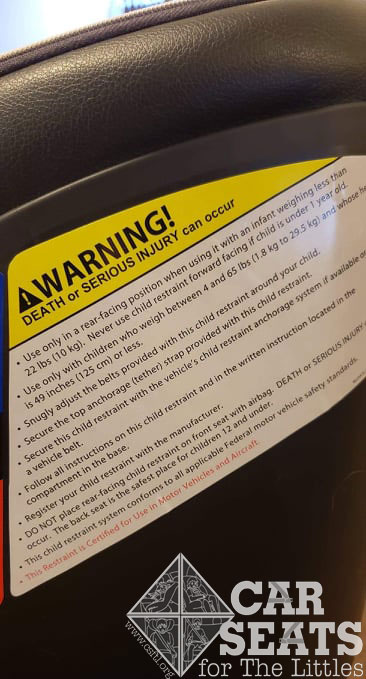
- Rear facing weight range: 4-50 pounds
- Rear facing height range: less than 49 inches tall (seats made after March 2019 have a 43 inch height limit)
- Forward facing weight range: 22-65 pounds
- Forward facing height range: less than 49 inches tall OR when the top of the child’s ears exceed the top of the headrest
- Expiration: 8 years
- Lower anchor weight limit: 35 pounds rear facing, 40 pounds forward facing
- Age range: birth to age 6
Measurements
- Lowest harness position: 6.5 inches with insert
- Highest harness position: 17 inches
- Crotch buckle positions: 5 inches, 7 inches
- Shell height: 26 inches with headrest fully extended
- Width at widest point: 19 inches at the child’s shoulders
- Seat weight: 26.6 pounds
- Front to back footprint: 31 inches – most reclined without headrest extended
This measurement was taken on a flat surface. The actual front to back footprint will vary depending on the vehicle.
Unique Features
50 Pound Rear Facing Weight Limit
The Chicco NextFit Zip Max boasts a 50 pound rear facing weight limit! We are strong advocates for extended rear facing, and welcome car seats with higher rear facing limits that can make longer rear facing possible even for those children who hang out at the very top of the growth charts!
Extended Leg Room
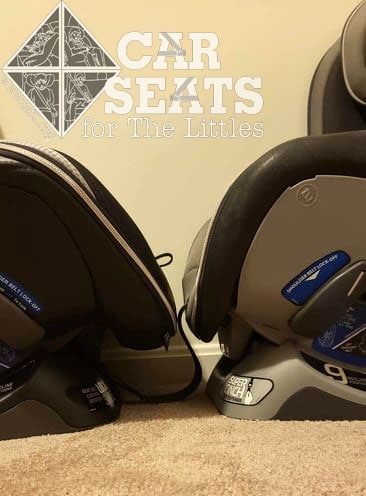
Chicco NextFit Max compared to a Chicco NextFit
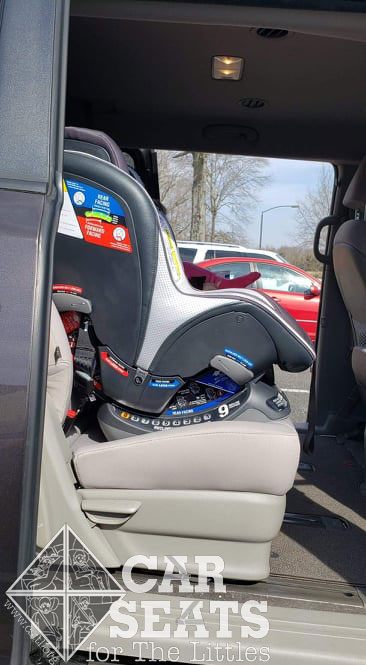
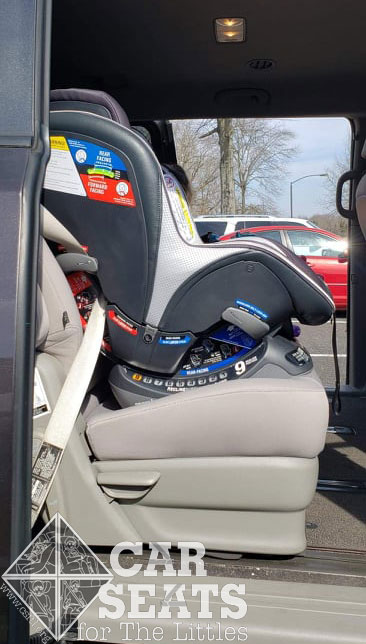
The Chicco NextFit Zip Max boasts another very interesting change that can go a long way for extended rear facing – more legroom! Chicco states that the NextFit Zip Max has 25% more legroom than previous NextFit versions. This extra rear facing legroom is created by the front of the seat’s shell extending out, and it also provides additional calf support for children who ride forward facing. While rear facing legroom is not a safety concern, we realize that may caregivers may find this extra legroom a compelling reason to keep those littles rear facing as long as possible, so we welcome it!
Expanded Legroom in Action
The NextFit Zip Max’s most unique feature is that extra legroom so we wanted to show you how that legroom works with our model. We also want to issue our standard disclaimer that it’s fine and safe for a kiddo’s legs to be bent while they’re riding rear facing — car seats are designed to protect their head and neck. She’s 2 years old (almost 3!) and 38 inches tall. We’ll see more of her later but here we’ll see her feet showing the difference in legroom between the NextFit and the NextFit Max.
Legroom in the NextFit
Chicco NextFit rear facing legroom
First, let’s look at our model in the NextFit. She’s got some legroom but not a lot. While this doesn’t present a safety concern since her head and neck are still well protected by the seat’s shell, her legs are well over the edge of the car seat.
Legroom in the NextFit Zip Max
Chicco NextFit Zip Max rear facing legroom
Here’s our same fabulous model showing us how that 1.5 inches of extra legroom works for her in the NextFit Zip Max. It’s a significant change — here we can barely see her little feet! Again, legroom isn’t a safety concern for rear facing passengers but we wanted to illustrate the key difference between these two flavors of the NextFit.
Lockoffs
Chicco NextFit Max rear facing lockoff

Chicco NextFit Max forward facing lockoff
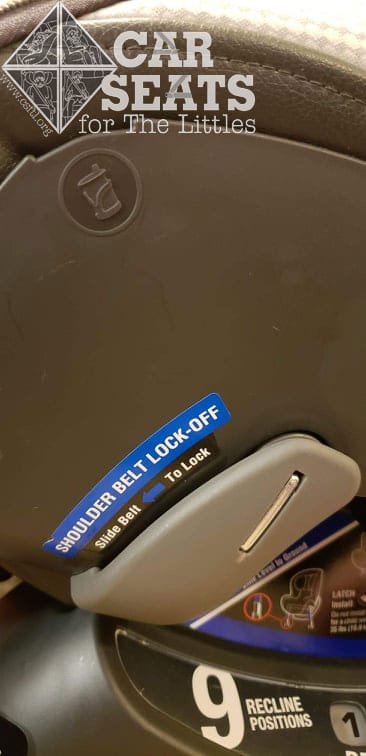
The vehicle belt lockoffs on the Chicco NextFit Zip Max are the same as those that we first met with the Chicco NextFit iX Zip. These lockoffs are also similar to those found on other Chicco car seats – the KeyFit and Fit2 – and are very simple to use! Once you thread the vehicle seat belt through the belt path and remove the slack from the seat belt, just slide the shoulder portion of the vehicle belt into the lockoff on the opposite side from the vehicle seat belt buckle. These lockoffs make vehicle seat belt installations a breeze!
Easy Remove Cover
Chicco NextFit Max 3D AirMesh Panel
The Chicco NextFit Zip Max has the same easy remove cover that other Chicco Zip series car seats have – they zip right off without needing to uninstall the seat. This feature can be especially helpful for families who have potty training children or children prone to motion sickness – anyone who requires frequent washing may find that zipper pretty handy! In addition to the zip off feature, this cover also has a breathable “3D AirMesh” panel along the backrest that helps with airflow and keeps children cooler while they’re riding in the seat.
Accessories
“Cupfolders”

Chicco NextFit Max cupfolder

Chicco NextFit Max cupfolder opened
The Chicco Nextfit Zip Max includes two detachable cupholders – Chicco cleverly calls these “cupfolders.” The cupfolders can be used on either side of the seat. The outer half of the cupholder is flexible and able to fold in on itself. At the time of this review’s writing, the cupfolders were very stiff and did not stay folded very well. Perhaps over time they will lose some of that stiffness and remain folded rather than popping back open.
Padding

Chicco NextFit Max with infant padding
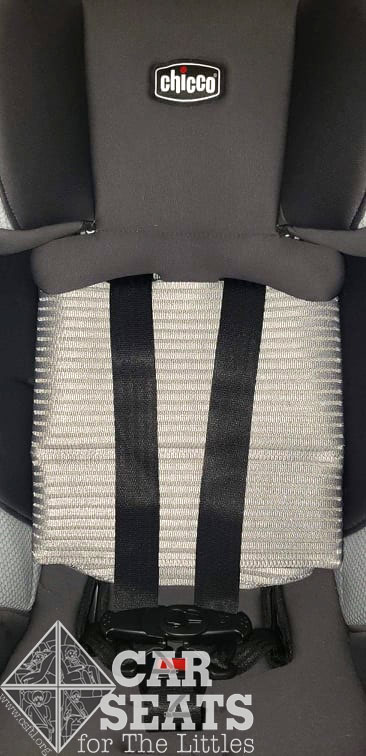
Since this seat has a new 4 pound weight minimum, it isn’t surprising that it has redesigned padding to help fit even the smallest, squishiest babies. All of the padding accessories – including the harness covers, crotch buckle pad, and waist belt pads – are optional. The newborn positioning insert and head insert are both limited to use only when the child weighs between 4 and 11 pounds. The crotch buckle pad must be removed while the body insert is used.
Two Position Chest Clip
Chicco NextFit Max chest clip
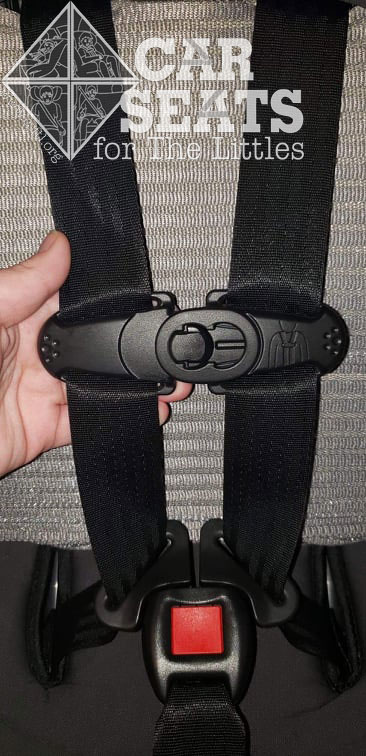
The chest clip on the NextFit Zip Max goes back to the two position chest clip that we saw on the original NextFit. This type of chest clip has a smaller and a larger setting that will position the harness straps a little closer together or a little farther apart, respectively. This can be helpful when using the seat with a small baby to prevent the harness straps from sliding off of the baby’s shoulders. As the child grows, moving to the outer position could help with comfort by preventing the harness straps from rubbing on the child’s neck.
Don’t be afraid to experiment with the chest clip to figure out which setting works best – there are no requirements about when each setting must be used.
Rear Facing Installation
Recline Angle Indicator
Chicco NextFit Max recline angle indicator
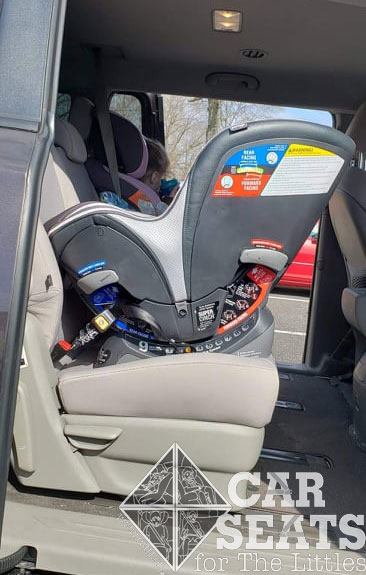
The Chicco NextFit Zip Max has a recline angle indicator for both rear facing and forward facing installations. When installing the seat rear facing, any recline number (1-9) can be used as long as the bubble on the recline indicator is fully within the blue rear facing area.
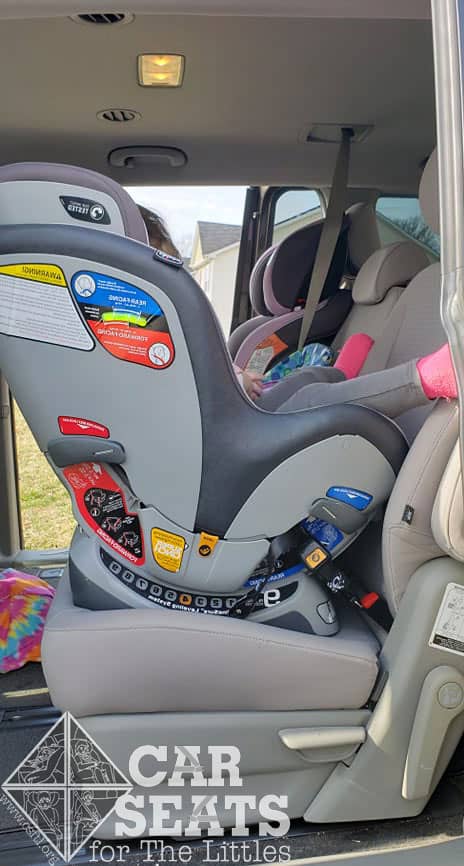
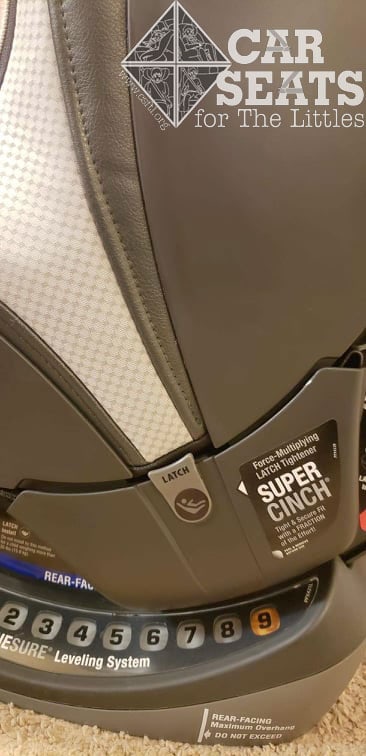
Lower Anchor Installation
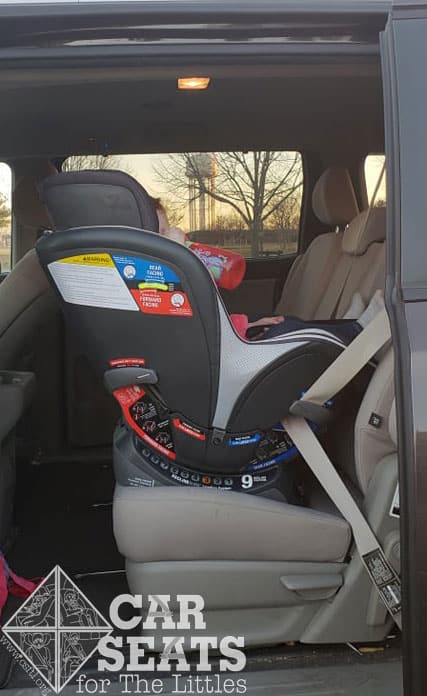
Chicco NextFit Max rear facing with lower anchors
The Chicco NextFit Zip Max has lower anchor webbing adjusters on both sides of the car seat. This is the same system that we have seen on previous versions of the NextFit.
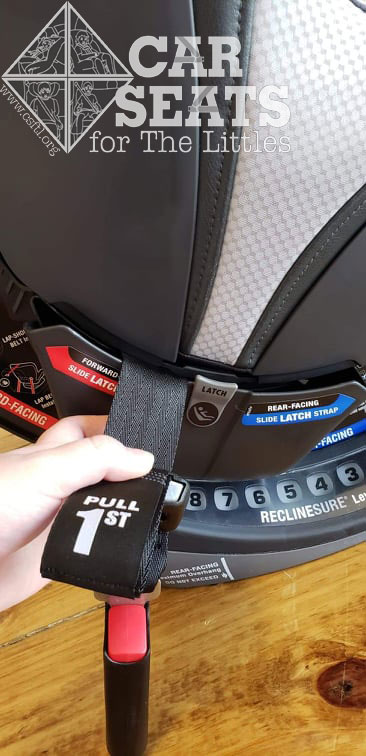
To install the NextFit Max with the lower anchors, first make sure the lower anchors are in the rear facing belt path. Place the car seat facing backwards on the vehicle seat, and ensure that the bubble on the recline angle indicator is fully in the rear facing area. Then, attach each lower anchor connector to the corresponding lower anchor in the vehicle seat bight.
Locate the adjuster strap that says Pull 1st, and pull that side tight while applying firm pressure into the seat. Pro tip: Unzip the cover and pull the adjuster straight up through the belt path to get the proper angle. Another pro tip: pull a teeny bit more slack from the webbing than you think is necessary. Doing that removes just enough slack from the webbing to make adjusting the other side of the webbing struggle-free.
Next, move to the Pull 2nd adjuster strap and pull it to tighten while applying firm pressure into the seat. This side has the SuperCinch adjuster rather than a traditional adjuster – it will pull to tighten at any angle. Once the Pull 2nd strap is snug, check your work by giving the car seat a firm handshake at the belt path – it should not move more than 1 inch in any direction. Zip the cover back up and the seat is ready to ride!
Vehicle Seat Belt Installation
First, Store the Lower Anchor Connectors
Chicco NextFit Max lower anchor storage manual
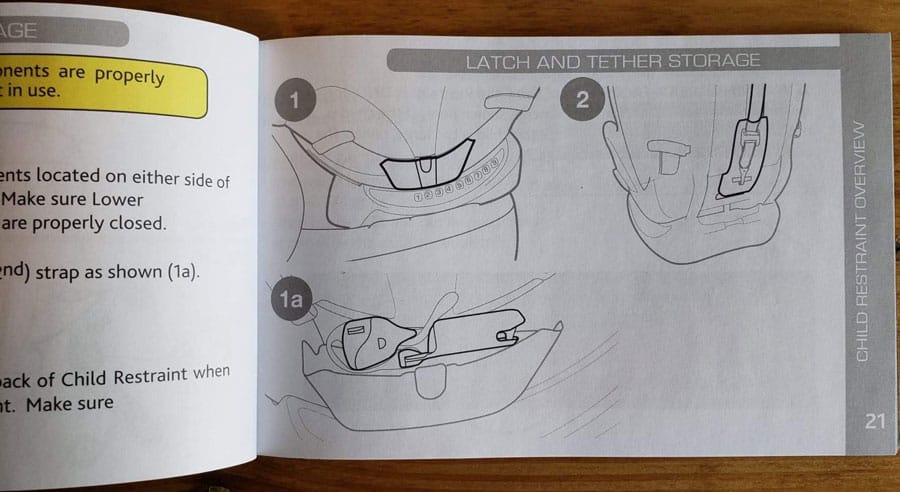
The Chicco NextFit Zip Max ships with the lower anchor connectors NOT stored on the car seat — they’re just hanging loose. When installing with the vehicle seat belt, you’ll need to store the lower anchor connectors prior to installation. The lower anchor connectors store in small compartments located on each side of the seat, conveniently labeled with the lower anchor symbol.
To store the lower anchors, insert one connector into each compartment and firmly close the compartment. The SuperCinch tightener – located on the “pull 2nd” side – is a little tricky to fit into the compartment. Chicco has included a helpful graphic in the car seat manual that shows how to fold the tightener onto the lower anchor connector to allow the compartment to fully close.
Chicco Nextfit Max rear facing with vehicle seat belt
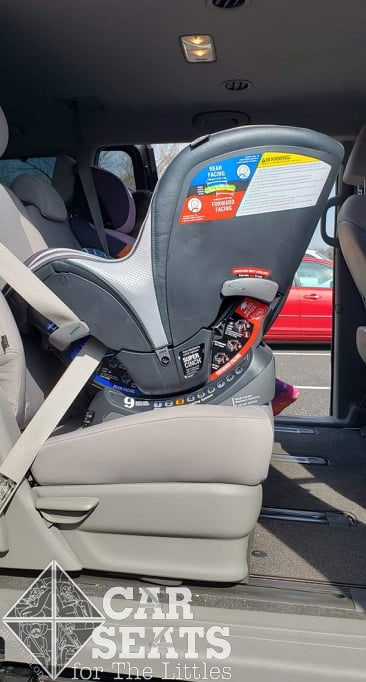
We found that the lockoffs made installing the Chicco Nextfit Zip Max with the vehicle seat belt pretty simple. Start by placing the car seat facing backwards on the vehicle seat, then check that the bubble on the recline angle indicator is fully within the blue rear facing range.
Unzip the cover to expose the rear facing belt path, then thread the vehicle seat belt through the belt path and buckle it in. Zip the cover back up before starting to remove the slack from the seat belt – it was much easier to zip the cover at this stage than at the end of the installation process.
Next, apply pressure firmly in the seat while pulling the seat belt tight to remove any slack. Finally, slide the shoulder portion of the seat belt into the blue rear facing lockoff on the opposite side of the car seat from the seat belt buckle. Check your work by giving the car seat a firm handshake at the belt path – it should not move more than 1 inch in any direction. Once the seat is installed correctly, join us in a chorus of ZIP ZIP, HOORAY!
NOTE: Installation with a lap only seat belt follows the same instructions as installation with a lap/shoulder vehicle belt but without the final step of sliding the seat belt into the rear facing lockoff.
Fit to Child
Preemie Doll
Chicco Nextfit Max
Here we have the preemie size Huggable Images doll modeling the NextFit Zip Max with the the newborn positioner and headrest in place. The lowest harness position is just low enough to place the harness straps below our doll’s shoulders. Unfortunately, there is a significant gap between the doll and the crotch buckle. That gap, combined with the wedge shape of the newborn positioner could potentially lead to the baby slouching down into the seat. This setup could cause the harness straps to end up above the child’s shoulders. We’d like caregivers to take this possible scenario into consideration before selecting a NextFit Zip Max for their preemie baby.
We spoke at length with Chicco regarding the preemie fit in the Nextfit Zip Max during the writing of this review. As always, the manufacturer was responsive to our questions and offered some great background information:
“…during all of our development of the NextFit Zip MAX newborn positioner with the small 4-11 lbs babies that we Fit Tested, we always ended up having a snug fit at the crotch buckle (no gap issues), and sometimes had to raise the headrest up 1 slot to improve the child fit and never ran into an issue with child shoulder height not being high enough. I say this because, we design our car seats using real child fit test results and the UMTRI Anthropometric Child Measurement Data, and do not design to the Huggable Images Dolls, as they are not the best indicator of true to life fit. I understand, huggable images dolls are a helpful tool as 4-11lbs babies are not always available for CPST fit testing.
I also want to mention, we care deeply about correct child fit, and we actually travel into hospitals and meet with practitioners to ensure we are continuing to be the “Fit” experts in car safety. So much so, that the NextFit Zip MAX wedge insert was designed to position a baby as though they would be sitting in the KeyFit30. Geometrically, we used CAD data to help design the shape and contour of the foam to mirror the interior of the KeyFit30 with newborn insert, so that Chicco can be trusted as providing a wonderful fit for 4-11 lbs babies no matter what type of car seat they are using.”
This conversation was a great reminder for us that while our Huggable Images dolls are amazing training tools, they represent the fit on one type of baby. The way a car seat fits an actual baby out there in the real world can be dramatically different so we encourage caregivers to check the fit for their children.
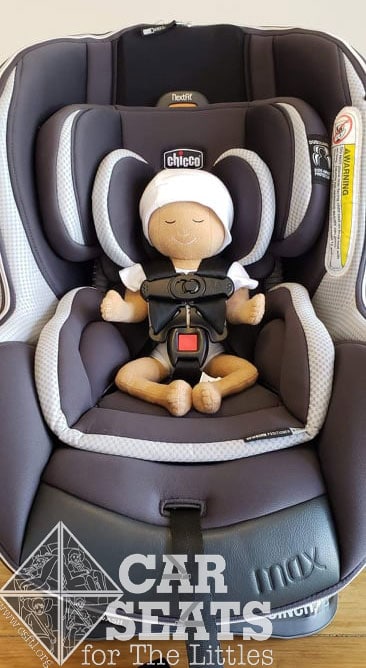
Newborn Doll – with Infant Inserts

Chicco NextFit Max newborn with infant padding
This is the newborn Huggable Images doll modeling with the newborn positioner and headrest in use. As we can see with the close up photo, the harness straps do curve over the doll’s shoulders to provide a proper fit. The gap between the doll and crotch buckle that we saw with the preemie doll is still present, though it is not as severe with the larger newborn doll.
Newborn Doll – without Infant Inserts
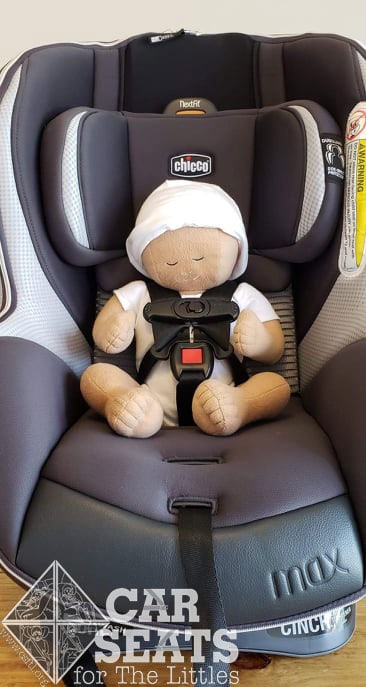
Chicco Nextfit Max
Here we see the same newborn Huggable Images doll, this time without the newborn positioner and head insert in the seat. In this case, the harness straps are too high to provide a safe fit. Harness straps always need to be at or below the shoulders while rear facing. We would be hard pressed to recommend the Chicco NextFit Zip Max for use with a newborn without the newborn padding. But that’s why newborn padding is included with the seat – to improve the fit!
5 Months Old

Chicco NextFit Max
Here we see our 5 month old model. She weighs 13 pounds and is 24 inches tall. The newborn positioner and headrest are no longer in the seat because she’s over the weight limits to use the padding. She was very happy modeling in the Chicco NextFit Zip Max and we found that it fit her well overall.
2 Years Old
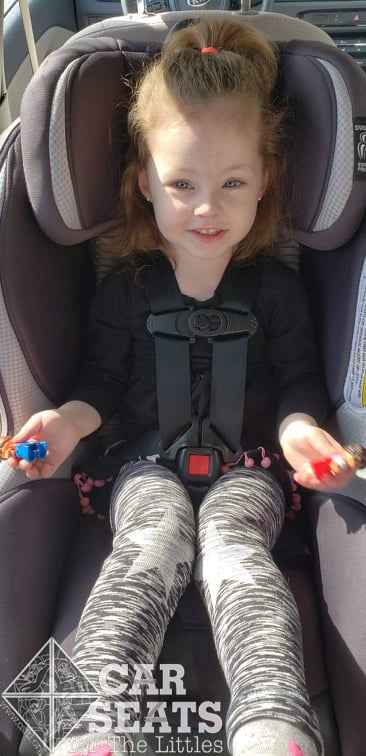
Chicco NextFit Max rear facing 3 years old
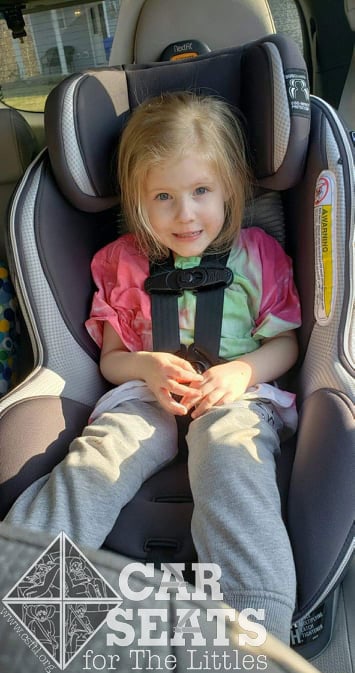
This model is 2 years old. She weighs 30 pounds and is 38 inches tall. She is fairly average for weight but is on the higher end of the growth charts for height. We are happy to see that she still has plenty of room left to grow while rear facing in the Chicco NextFit Zip Max! While we know that cramped legs are not a safety concern, the extra leg room found on this seat is a welcome addition for this taller child.
Forward Facing
Recline Angle Indicator
Chicco NextFit Max recline angle indicator
The Chicco Nextfit Zip Max has a recline angle indicator for both rear and forward facing. When installing the seat forward facing, any recline position (1-9) can be used as long as the bubble on the recline indicator is fully in the red forward facing area.
Moving the Lower Anchors
Chicco NextFit Max lower anchor storage
Moving the lower anchors from the rear facing belt path to the forward facing belt path, or vice versa, is a quick and easy process. First, the lower anchor connectors need to be out of the storage compartments and the storage compartments need to be open. Then, hold one lower anchor connector and slide it along the path over the top of the storage compartment. Repeat the same motion with the other lower anchor connector. Finally, close the storage compartments.
Lower Anchor Installation
Chicco NextFit Max forward facing with the lower anchors
Before starting to install the Chicco NextFit Zip Max forward facing with the lower anchors, they’ll need to be moved to the forward facing belt path. Move the lower anchors by sliding them along the channels on the outside of the seat’s shell until they’re in the forward facing belt path.
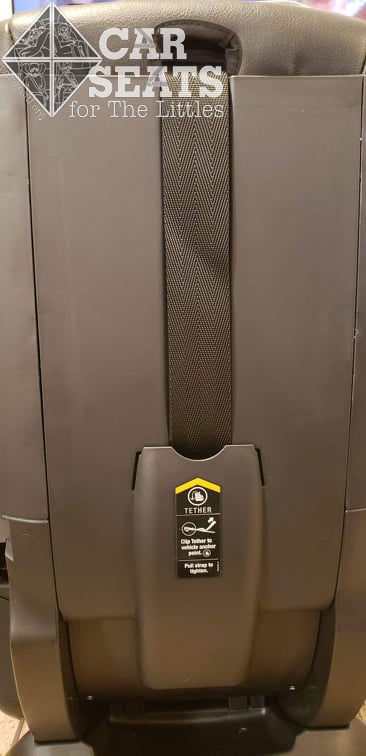
Next, place the car seat on the vehicle seat with the harness facing the front of the vehicle, then drape the top tether webbing over the back of the vehicle seat for easy access later. Adjust the recline until the recline angle indicator bubble is fully in the red forward facing range. Then, attach the lower anchor connectors to the vehicle’s lower anchors. Locate the side of the lower anchor adjuster webbing that says Pull 1st. Grab that webbing with one hand and pull it straight up while applying firm pressure into the seat pan with your other hand.
Next, grab the other side of the lower anchor webbing – this is labeled Pull 2nd. Pull this webbing straight up from the seat bight until the seat is secure. This piece of webbing runs out of slack as it cinches up so it’s pretty easy to tell when all of the slack is removed. Finally, check your work by giving the seat a firm handshake at the belt path. The seat should not move more than 1 inch in any direction. Once the installation is secure, attach the tether to the vehicle tether anchor and pull the tail to remove any slack.
Vehicle Seat Belt Installation
Chicco NextFit Max forward facing with the vehicle seat belt
Much like the rear facing installation with the vehicle seat belt, the lockoffs help to make forward facing installation a breeze! To install forward facing with the vehicle seat belt, start by setting the car seat on the vehicle seat so that the harness is facing the front of the vehicle and place the tether strap over the back of the vehicle seat.
Next, determine what recline angle you will be using. Any recline setting is allowed as long as the base is flat on the vehicle seat and the bubble of the recline indicator is fully within the forward facing range. Once you have the recline set, thread the vehicle belt through the forward facing belt path and buckle the belt. Pro tip – the back panel on the cover can be raised to allow easy access to the forward facing belt path while threading the vehicle belt.
Now that the vehicle belt is buckled, apply firm pressure straight down into the seat while pulling the vehicle belt to remove any slack, then slide the shoulder portion of the vehicle belt into the forward facing lockoff on the side of the seat opposite from the belt buckle. Test for movement by giving the seat a firm handshake at the belt path – it should not move more than 1 inch in any direction. Once the installation is secure, attach the tether to the proper tether anchor and pull to remove slack.
Fit to Child
3 Years Old
Chicco NextFit Max forward facing 3 years old
This very shy model is 3 years old, 31 pounds and 39 inches tall. She is a similar size to the 2 year old rear facing model, and could ride either rear facing or forward facing in the Chicco NextFit Zip Max. Here we see her with a good forward facing harness fit.
Important Information: Where to Find

Chicco NextFit Max date of manufacture label
Date of Manufacture and Expiration: The date of manufacture label can be found on the bottom of the car seat. The expiration is also conveniently stated on this same label.
Chicco NextFit Max manual storage
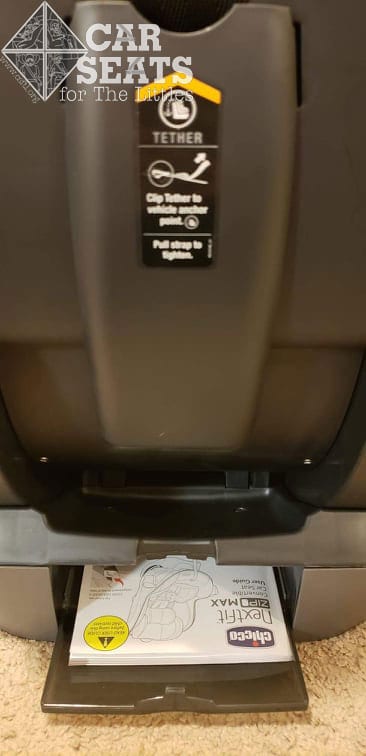
Manual Storage: The car seat manual stores in a small compartment located on the back side of the car seat’s base.
Chicco NextFit Max FAA approval label
FAA Approval: The Chicco NextFit Zip Max is approved for use on board aircraft. The FAA approval statement can be found on a label located on either side of the seat, towards the top of the shell.
Chicco NextFit Max Super Cinch
Lower Anchor Storage: The lower anchors store in small compartments on either side of the seat.
Chicco NextFit Max top tether storage
Tether Storage: The tether anchor stores in a compartment located on the back of the seat.
Other NextFits
The NextFit family now includes a range of options! Here’s a handy chart of those seats.
| Car Seat Name | Rear Facing Weight Limits | Rear Facing Height Limits | Forward Facing Weight Limits | Forward Facing Height Limits | Lower Anchor Weight Limits | Items to Note | MSRP | Infant Insert |
| NextFit Sport | 12 to 40 pounds | Check your seat’s manual for height limit | 22 to 65 pounds | Up to 49 inches tall with the harness straps at/above the shoulders and the tops of the ears contained in the headrest | 40 pounds | Basic cupholders | 249.99 | No |
| NextFit Zip | 5 to 40 pounds | Check your seat’s manual for height limit | 22 to 65 pounds | Up to 49 inches tall with the harness straps at/above the shoulders and the tops of the ears contained in the headrest | 40 pounds | Updated cupfolder, EZ zip and wash | 299.99 | Yes |
| NextFit Zip Air | 5 to 40 pounds | Check your seat’s manual for height limit | 22 to 65 pounds | Up to 49 inches tall with the harness straps at/above the shoulders and the tops of the ears contained in the headrest | 40 pounds | Updated cupfolder, EZ zip and wash, ComfortFlex, 3D Air Mesh | 329.99 | Yes |
| NextFit Zip Max | 4 to 50 pounds | Check your seat’s manual for height limit | 22 to 65 pounds | Up to 49 inches tall with the harness straps at/above the shoulders and the tops of the ears contained in the headrest | 40 pounds | Updated cupfolder, EZ zip and wash, ComfortFlex, 3D Air Mesh, Integrated leg extension, 2 position chest clip to help with preemie and newborn fit | 369.99 | Yes |
Overall Thoughts
The Chicco NextFit Zip Max combines many of the ease of use features from the other NextFit models with some new features to create another well rounded seat in their lineup. Perhaps the most appealing feature of this seat is the new rear facing weight range with a lowered 4 pound minimum weight and an increased 50 pound maximum weight. While we found that the preemie fit could be inconsistent, we are glad to see the wider weight range to provide a safe option for children who fall on the lower or higher ends of the growth charts. The extended leg room – while not necessary from a safety standpoint – may also appeal to caregivers with taller children. Overall, the NextFit Zip Max is another strong car seat in Chicco’s lineup.