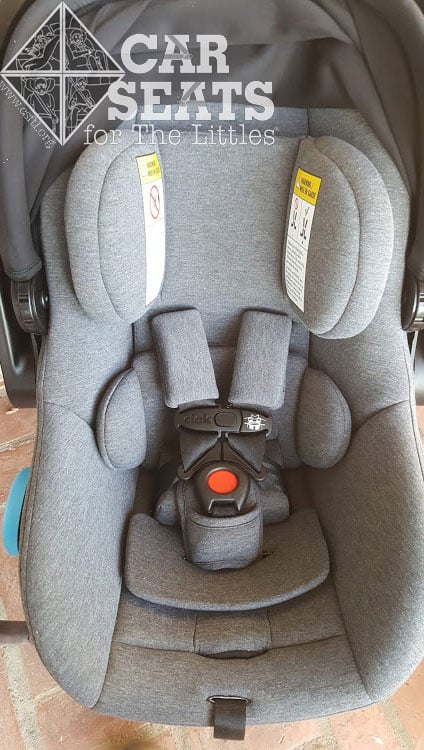
Meet the Clek Liing
We first met the Clek Liing at the ABC Kids show in 2018. It was quite the fan favorite at the show so we were eager to see how the production model turned out. We were able to spend a little time with this little Liing before it had to return to Clek. This car seat is available in the United States and in Canada.
Note: this seat is also sold without a base, in which case it’s called the Clek Liingo.
CSFTL Quick Stats
- Weight range: 4-35 pounds
- Height range: up to 32 inches long
- Height limit: if the load leg is not in use, then the Liing is outgrown when there is less than 1 inch above the top of the child’s head. If the load leg is in use, then the child may continue using it until the top of the head is even with the top of the shell. Note: this information is not currently in the manual but is posted on the Liing FAQ page.
- Head support and body insert MUST be used with infants who weigh 11 pounds (5 kg) or less and if the top of their shoulders are below the lowest shoulder harness slots.
- UPDATE: If your Liing was manufactured after January 31, 2024 the head support is required at all times.
- Replace after any crash
- 9 year expiration
- Can be installed with inflatable seat belts when installed without the base
Measurements
- Width at widest point (carrier handle): roughly 17 inches
- Footprint, front to back with recline sled fully reclined: roughly 27 inches (base + carrier on a level indoor surface. This measurement will vary in the vehicle and will decrease when the recline sled is more upright for an older child.)
- Base length: 24 inches
- Base width at widest point: 13.5 inches
- Harness slots without the infant padding: 5.5, 7, and 9 inches
- Lowest harness slot with padding: roughly 4 inches
- One crotch buckle position: 5 inches from the back of the seat pan
- Seat pan depth: 11 inches
- Carrier weight:10.5 pounds (With infant padding in and canopy on, Clek lists 9 pounds on their website.)
- Base weight: 17 pounds
Features
- Manual rethread harness
- Load leg
- Rigid lower anchor connectors
- Belt tensioning plate
- Generous canopy with a windowshade
- Recline Sled allows adjustable recline positions for children who weigh between 4-35 pounds
- 1 year warranty (extends to 3 years when the seat is registered within 90 days of purchase)
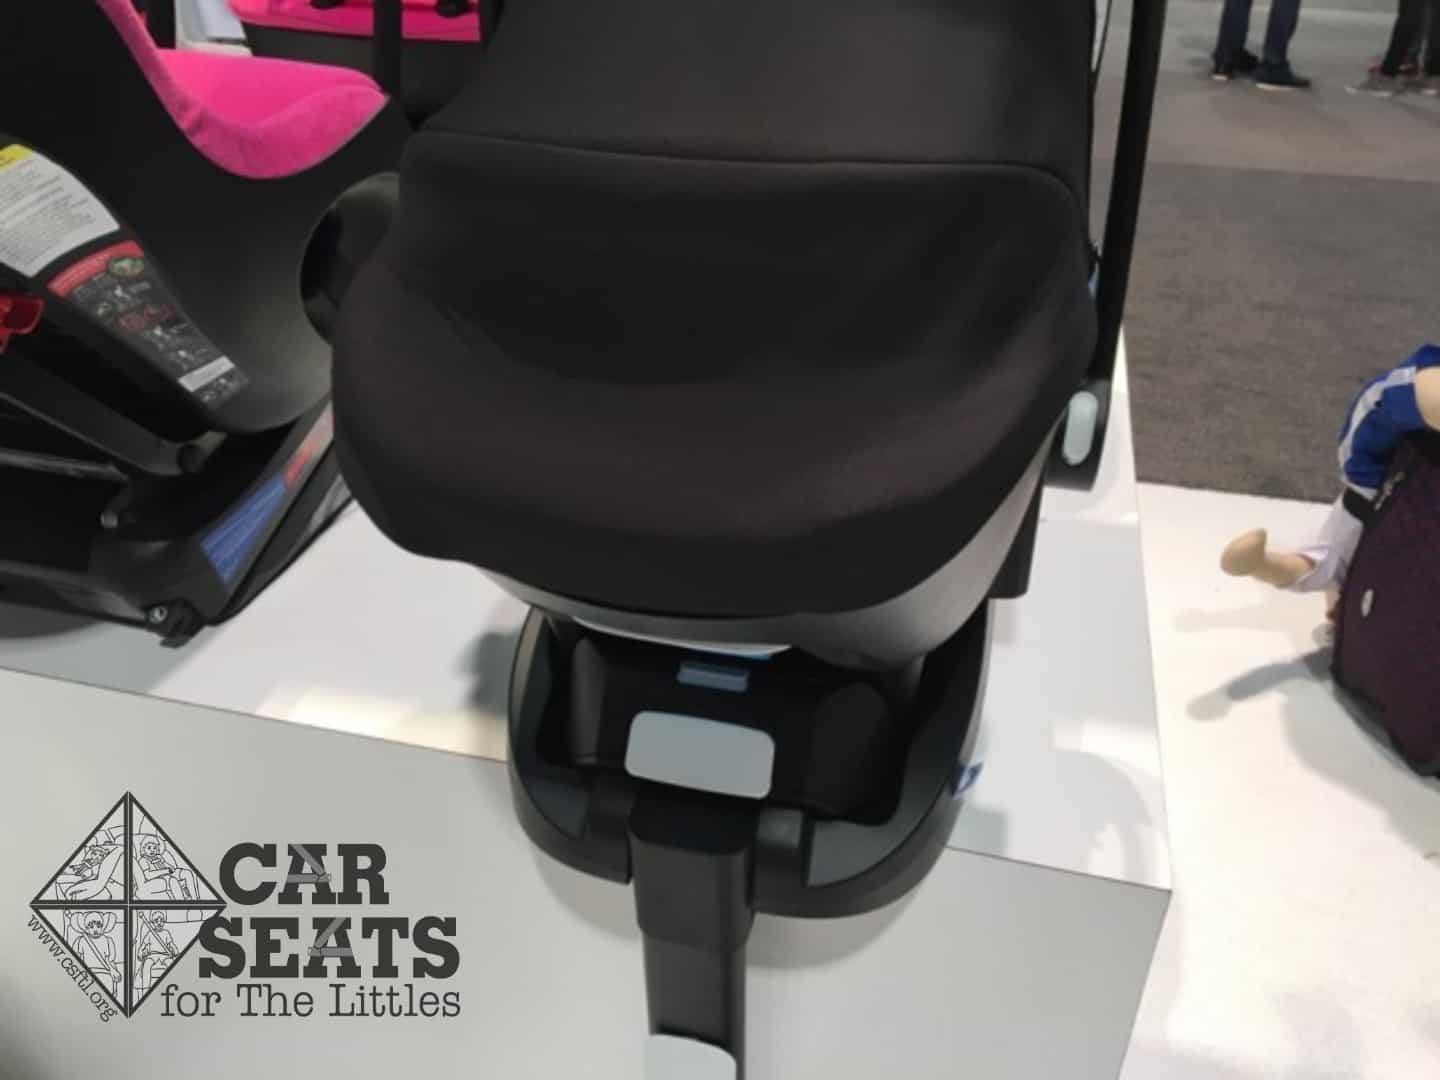
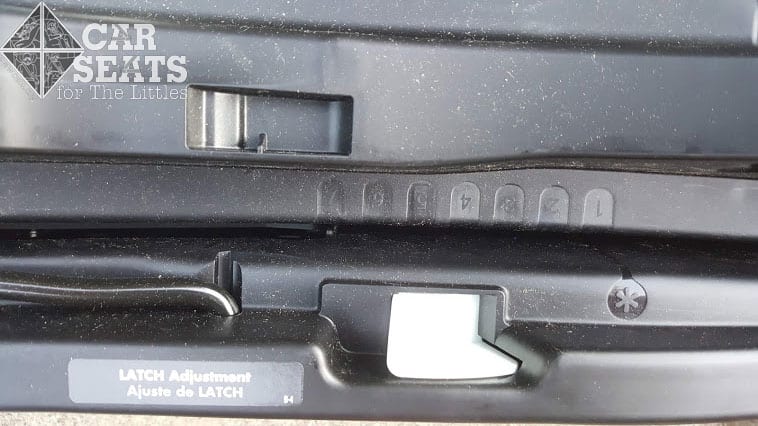
Rigid Lower Anchor Connectors

Clek Liing rigid lower anchors
This type of lower anchor connector is a bit of an anomaly here in the United States. They are just like the name sounds — a rigid piece that contains a lower anchor connector. It just clicks right onto the lower anchor, so they tend to make for a simple, secure install. These extendible lower anchor connectors make it fairly simple to reach the lower anchors in a wide variety of vehicles.
The main drawback to them is that they add a fair bit of weight to the car seat — in this case, they’re adding that weight to the base. Since most families don’t move their car seat bases around that often, this may not be a big deal to most but it ensured that I got a bonus workout when moving the seat around for this review.
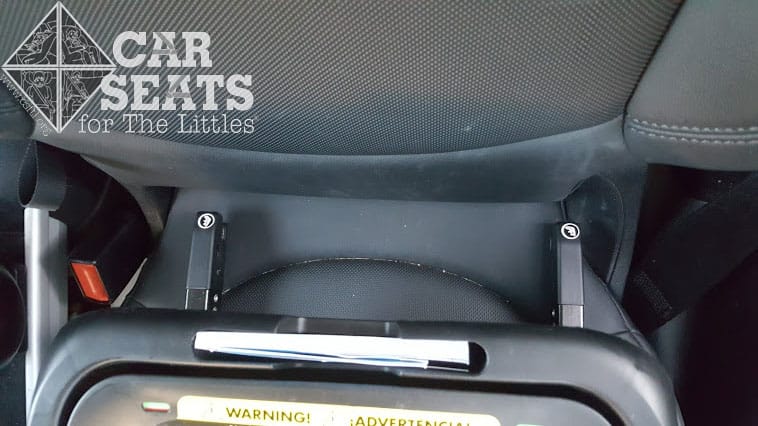
Inserts and Padding
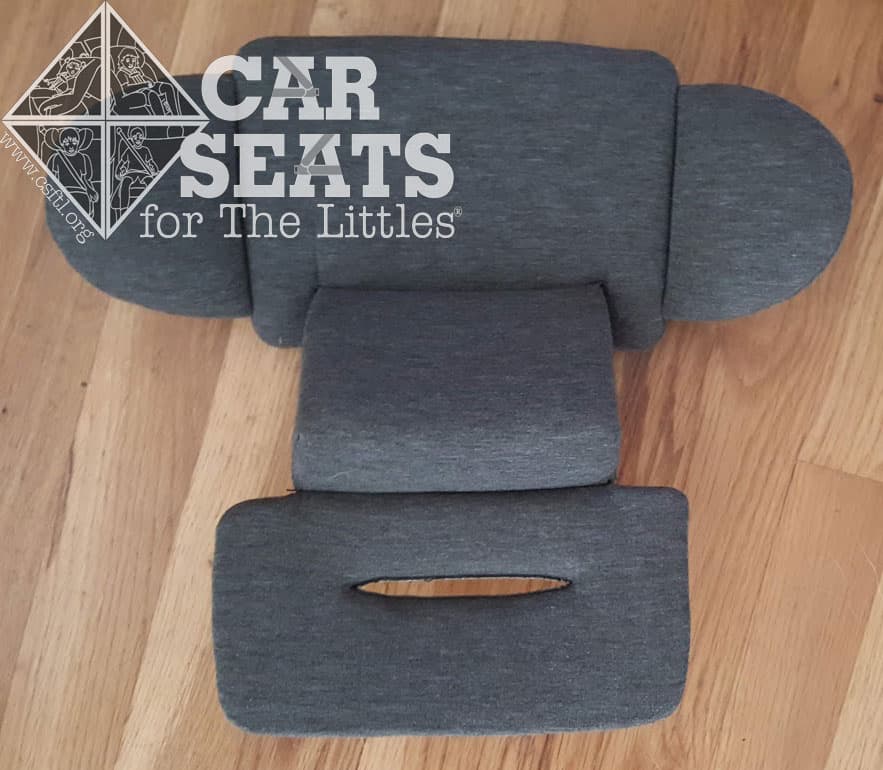
Clek Liing body support
The Liing includes a two piece insert and thickly padded harness covers. The full insert (headrest and body cushion) must be used until baby reaches 11 pounds and until the child’s shoulders are no longer below the bottom harness slot. After that, the insert is optional until the child’s shoulders reach the top harness slot — when this happens, the body cushion must be removed. The headrest may continue to be used until the seat is outgrown.
The insert has a kind of a shelf that goes right under the baby’s bottom. We found that this shelf had a bit of a learning curve to it — our preemie doll and our preemie models both tended to slide down the shelf and get out of place. We confirmed with Clek that the baby should sit on the “step” part of this insert. We had to really tuck their rear ends in to the crease of the insert for them to fit properly.
The harness covers are always optional, but they must be removed if they prevent the chest clip being properly positioned at armpit level or if they prevent the harness from being snug.
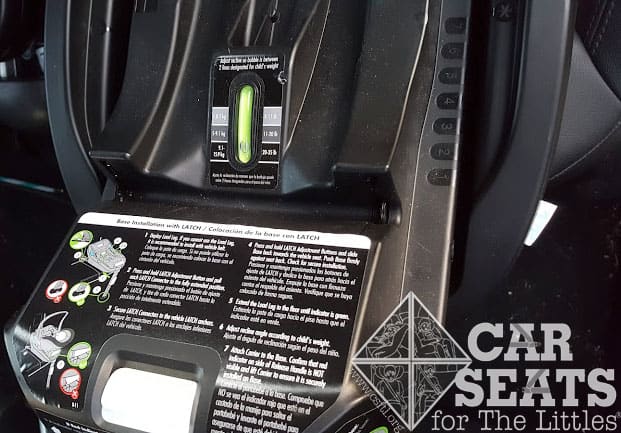
Labels
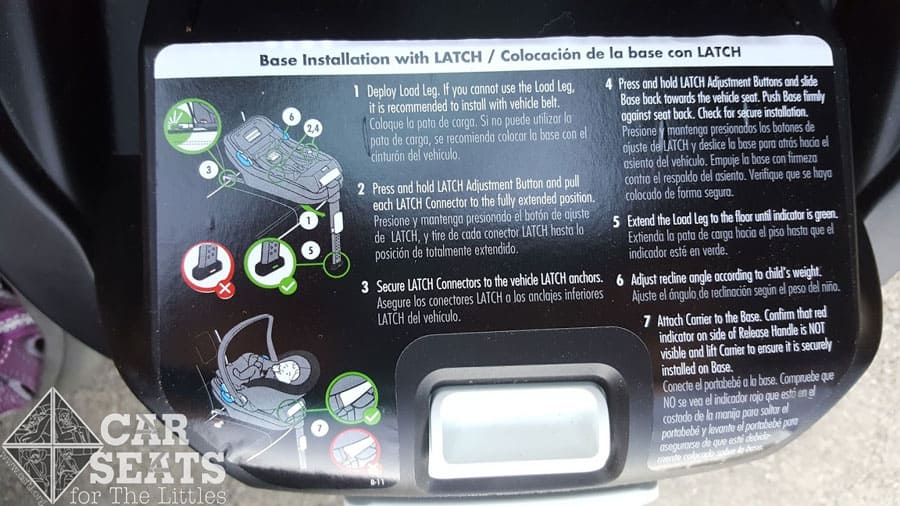
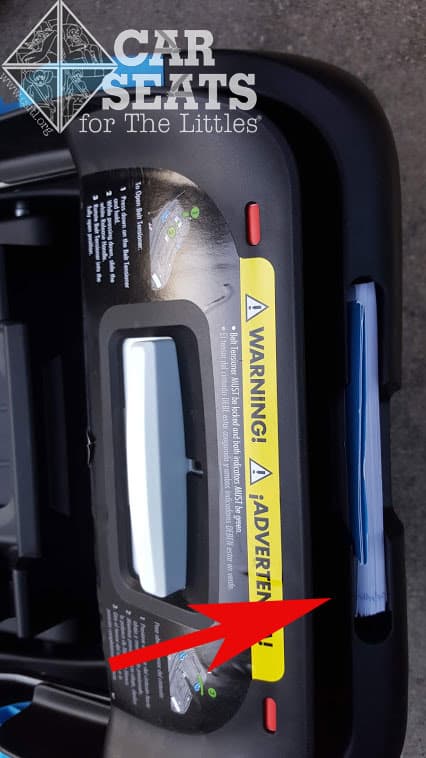
Clek Liing base installation label
Like Clek’s other car seats, the Liing includes some clear labelling, including this one from the seat’s base that describes how to install the base and use the load leg. We’re always a fan of anything that makes a car seat easier for a caregiver to install and use properly so we certainly applaud the Liing’s label collection!
Canopy
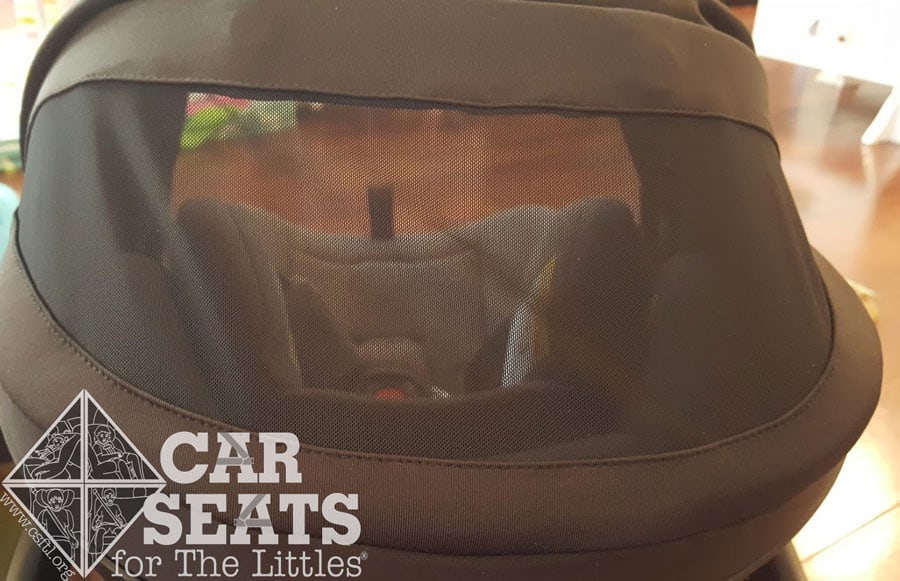
Clek Liing canopy mesh panel
Also included with the seat is a fairly large canopy with a nice feature — a windowshade on the back! This mesh area can be covered or uncovered to peek at baby when you’re on the move but out of the car.
When fully extended, the edge of the canopy can be unzipped to cover almost the entire carrier.
Load Leg
Clek Liing load leg
First off, here’s what a load leg does: load legs work to reduce the initial movement towards the point of impact in a crash. By reducing that movement forward, load legs also reduce rebound as the crash continues: less movement forwards means less rebound as the crash continues. Vehicles with under-floor storage where the load leg sits cannot use the load leg unless the vehicle manual permits it.
In the United States, all load legs are optional. The Liing’s can be tucked away when not in use.
Now, to the Liing… the Liing’s load leg unfolds from the bottom of the base, then is extended until the bottom of the load leg reaches the vehicle floor. I found adjusting the load leg’s length a bit challenging — it adjusts via a big white plastic paddle that says “pull” on it. Looking at that paddle, it’s hard to tell that it’s the thing you need to pull. But once I confirmed the paddle’s purpose in the manual, I gave it a pull and it extended to the vehicle floor. The load leg has an indicator to show when it’s at the correct tension.
The manual indicates that if, for some reason, the load leg can’t be used, Clek recommends installing the base with the vehicle seat belt. The manual also indicates that the load leg must be stored when it’s not in use.
Load Leg — Canada
The Liing has some specific rules around load leg use in Canada. Here’s a summary: the load leg is strongly recommended for all Liing passengers, regardless of weight, but is required for children who weigh more than 22 pounds. If the load leg can’t be used for some reason, the Liing must be installed without the base for children who weigh more than 22 pounds.
Three Across
Measuring roughly 17 inches wide at the widest part (the carrier handle), the Liing could be a great option for many three car seats across situations. We always suggest trying to install the seats in question before making a purchase, but families who need a few car seats or booster seats in one row should find the Liing a solid option for that configuration.
Installation and Use
Handle Position

Clek Liing handle position label
The Liing’s handle must be locked in position 1 — straight up — when it’s in the vehicle. The handle can be in any position when the carrier is out of the vehicle but must be locked in place before the carrier is moved. There’s a handy label on the side of the handle that illustrates this rule.
Recline Sled
Clek Liing recline sled
The Liing’s base has a pretty fancy recline adjuster — it’s called the Recline Sled. Basically, it moves a piece of the base up and down to accommodate children who fall into different weight ranges.
Unlike most other rear facing only car seats, the recline angle can only be adjusted after the Liing is installed.
To adjust the Recline Sled, squeeze the handle toward the front of the base and move the Recline Sled into the correct position. The recline angle adjuster is on the Recline Sled, and it lists different weights for each recline position.
The manual states:
Only use this car seat with the Recline Sled adjusted to the position which places the bubble between the two lines of the Recline
Indicator appropriate for the child’s weight.
– A seat too upright could result in an infant’s head falling forward, which could restrict the ability to breath.
– A seat too reclined can increase the risk of injury in a crash.
Since many rear facing only car seats have some type of recline adjuster that helps the seat’s base fit into the vehicle seat, we asked the manufacturer how that would work with the Liing. Clek leveraged an extensive database of vehicle seat shapes and angles when designing the Liing — they anticipate very few, if any, issues with installing the Liing’s base at the correct angle for a newborn. Should this rare occasion happen to you, customer service can review the situation to determine if a different allowance is available.
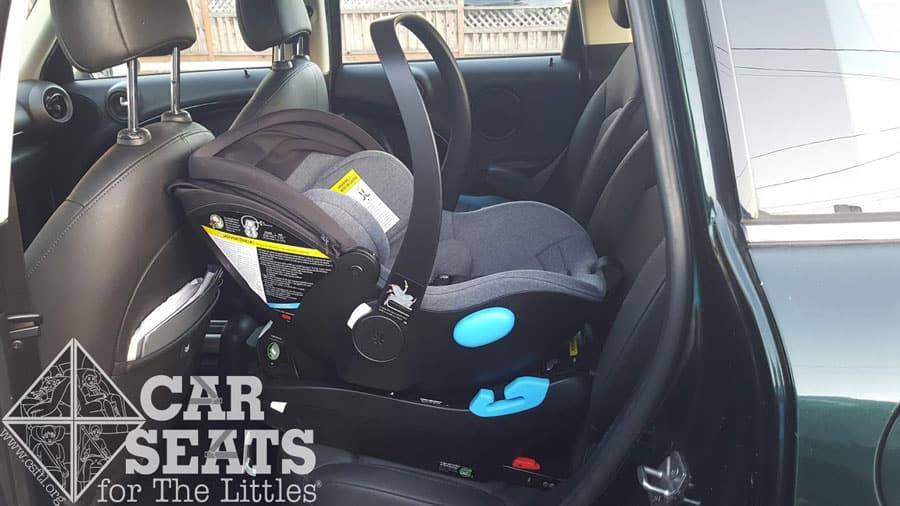
Removing the Carrier from the Base
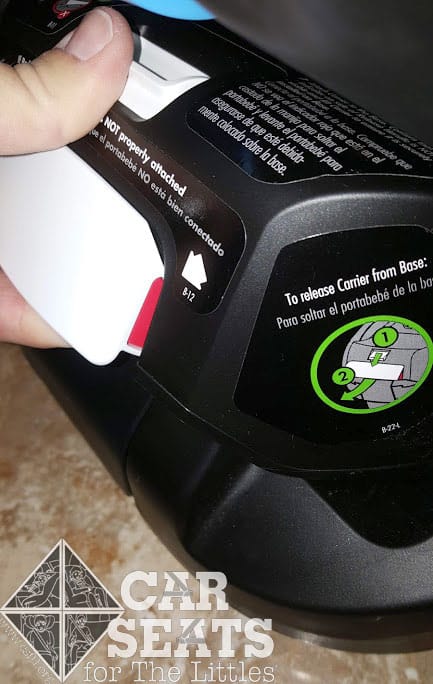
Clek Liing removing carrier from the base
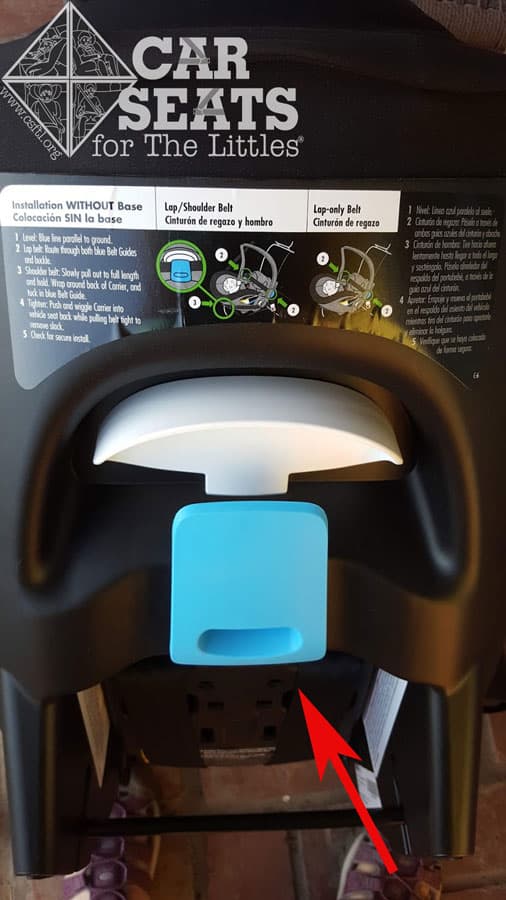
Removing the Liing from the base is a little different than many rear facing only car seats on the market — the release mechanism is on the base itself. Releasing the carrier requires two motions — first, use your thumb to pull the smaller lever on top of the base toward the front of the vehicle. While holding that lever down, squeeze the larger lever at the end of the base. Once the carrier is released, lift it up and out of the base.
Clek Liing carrier indicator
There’s a small indicator on the base that shows whether or not the carrier is secured onto the base. The red area on the release handle’s side disappears when the carrier is securely attached. If the red area remains visible, the carrier isn’t properly secured. While this is a nice feature, I did find that indicator a bit hard to see when the Liing was installed in the vehicle.
Early models of the Liing were impacted by a Customer Satisfaction Notice stating “…in rare cases, the Clek Liing infant seat carrier may become stuck on the Clek Liing infant seat base when exposed to high humidity. This issue has no impact on the safety performance of your child seat, but may impact the convenience of being able to easily remove the carrier from the base. This potential issue may affect products manufactured before May 19, 2019.”
If your product is affected by this notice, you may continue to safely use the seat with the base. If the carrier were to ever get stuck on the base, video instructions to remove the carrier from the base can be found on their website.
Installation With the Base
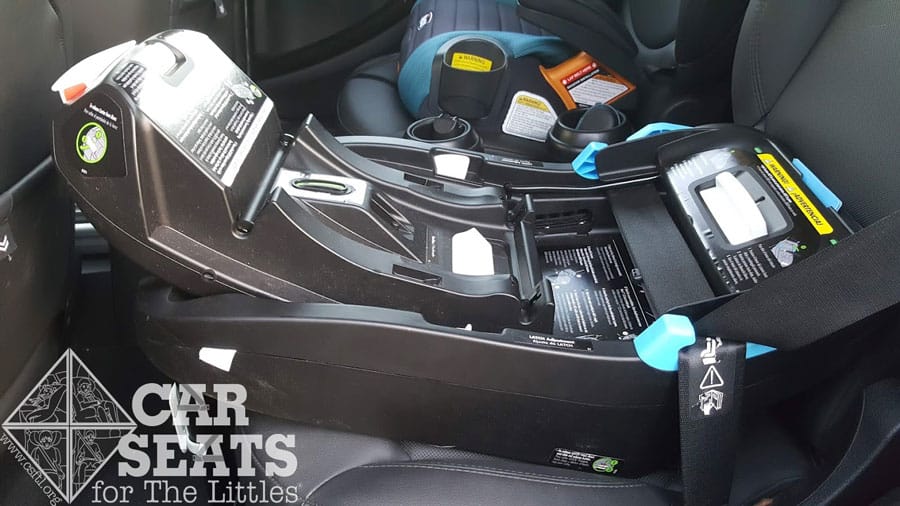
Lower Anchors
Clek Liing lower anchor release
The Liing includes ratcheting rigid lower anchor connectors that extend out from the base during installation. That means these little beauties click right into the lower anchors in the vehicle, making for a rock-solid installation with very little effort.

Clek Liing lower anchor release
To install the Liing with those lower anchors, first, unfold the load leg from the bottom of the base. Next, turn your attention to the top of the base, where you’ll extend each lower anchor connector by sliding the white tab on the top of the base — one for each side — then, with your other hand, slide the lower anchor connector out from the bottom of the base.
Clek Liing lower anchors extended
Line each connector up with the lower anchor in the vehicle, then move each connector forward over the lower anchor bar until it clicks into place. Once the connectors are connected, the indicators on the outside of each connector will turn from red to green.
Clek Liing installed with lower anchors
Push the base toward the vehicle seat back, then check for movement at the belt path. As a final step, pull on the white paddle that’s mounted on the load leg to extend it to the vehicle’s floor until the load leg indicator turns from red to green.
Vehicle Seat Belt
Clek Liing base installed with the vehicle seat belt
The Liing also includes a very nice belt tensioning panel for use with the vehicle seat belt. To install the base via this method, first unfold the load leg from the bottom of the base. Then, turn your attention to the top of the base. Push down on the belt tensioner, then squeeze the big white handle at the back of the base (it’s toward the vehicle seat back when the load leg is extended) to open the tensioning panel. Thread both portions of the vehicle seat belt through the clearly marked blue belt guides, buckle it in, remove most of the slack from the belt, then close the tensioning panel.
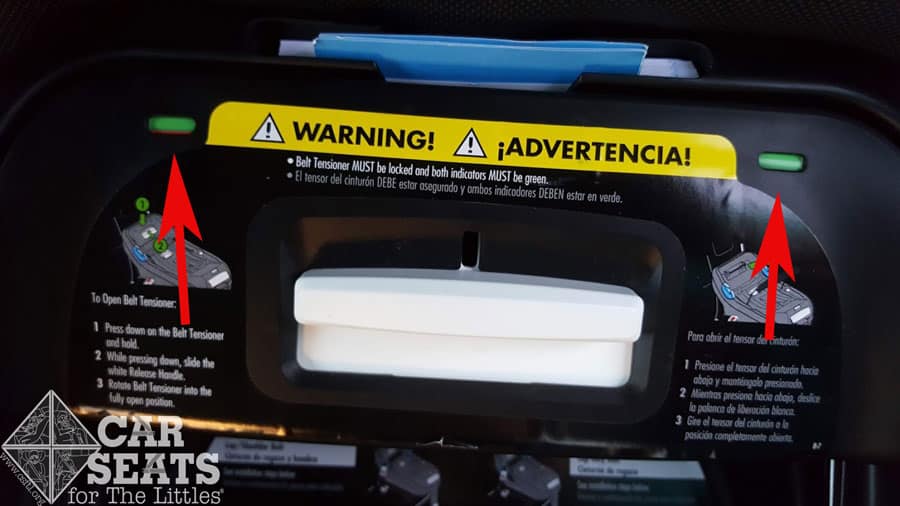
Clek Liing belt tension indicators
As a final step, pull on the white paddle that’s mounted on the load leg to extend it to the vehicle’s floor until the load leg indicator turns from red to green. Check for movement at the belt path — if the Liing’s base moves less than an inch at the belt path and the tension indicators are green, it’s installed securely and ready for your tiny passenger to ride!
Note about uninstalling: unbuckle the vehicle seat belt first, then push down on the tensioner and squeeze the handle to remove the base.
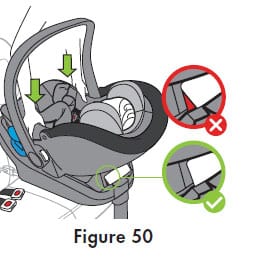
Installation Without the Base
Clek Liing baseless shoulder belt guide
Installing the Liing without the base is pretty straightforward. Unlike some other rear facing only car seats, the Liing’s baseless belt guides are clearly indicated via some large blue plastic pieces. The Liing also includes Euro routing — where the shoulder portion of the vehicle seat belt wraps around the shell of the seat and is threaded through a plate at the back.
I was able to thread the lap portion of the vehicle seat belt through the belt guides but I had a hard time getting the shoulder portion of the seat belt around the back of the seat and through the plate before it locked into automatic locking retractor mode, leaving me with no webbing to work with. Eventually, I was able to VERY SLOWLY AND CAREFULLY pull my vehicle seat belt out, thread it first through the lap belt guides, then around the back of the seat’s shell. At that point, the belt once again locked in place but since I had the belt threaded around the entire seat already, I just had to remove the remaining slack for a secure installation.

Clek Liing baseless installation
One additional method: thread the seat belt through the lap portion of the base, then tilt the carrier toward the vehicle seat back to create some extra slack in the seat belt. Thread the vehicle seat belt around the shell of the carrier, then tip the seat back to the correct recline angle.
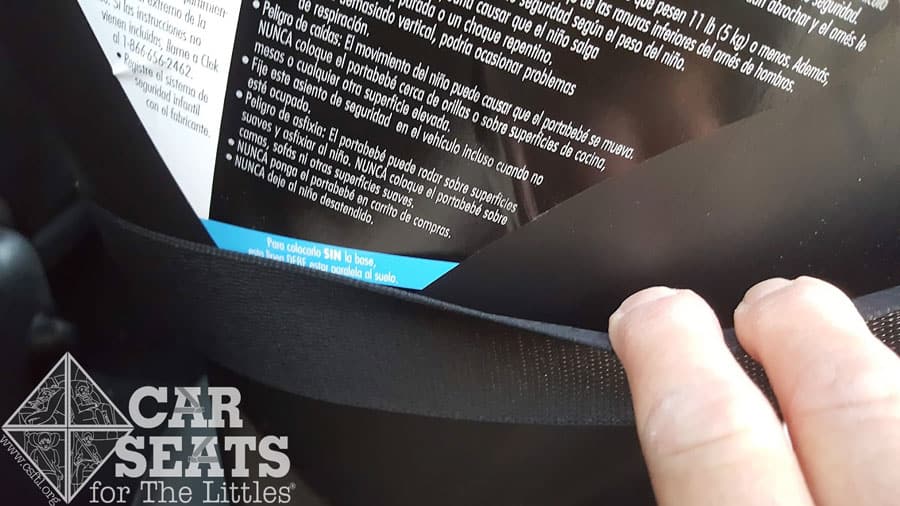
Clek Liing baseless recline angle indicator covered by the vehicle seat belt
Once I’d installed the seat, I noticed that the vehicle seat belt was covering the baseless recline indicator. That made eyeballing the recline angle even more challenging than usual. There are indicators on both sides of the shell so it’s possible, if less convenient, to check this angle from the other side of the vehicle.
Harness Adjustment

Clek Liing back of carrier
The Liing’s harness is a rethread harness. That means that as the child grows, the harness must be manually moved between the harness positions. The harness should always be at or below the child’s shoulders.
The manual contains instructions on how to adjust the harness to the next position as the child grows.
Note: the harness webbing must be below both of the metal bars on the back of the seat — there’s one at the bottom and another at the top of the seat.
Chest Clip
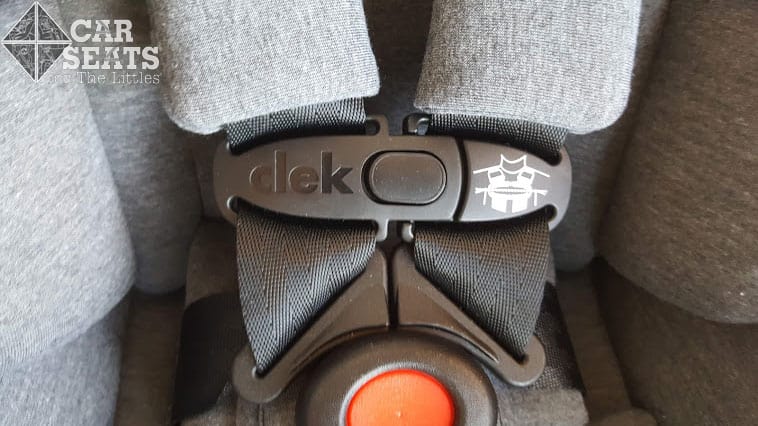
Clek Liing chest clip
During our time with the Liing, we found the chest clip very hard to move up and down. Clek recommends positioning each side separately, then clipping it together as a final step.
Future versions of the seat will have a different version of the chest clip that slides more easily.
Harness Tension
Adjusting the harness was quite easy — the harness slid very smoothly, making it pretty simple to secure all of our models into the seat.
Fit to Child
Preemie

Clek Liing preemie fit
This baby weighs 5 pounds and is 19 inches long. He was born a few weeks early. Even at his small size, the lowest harness slots were well below his shoulders when the insert was used. Here’s our model all ready to ride in the seat. The Liing fits him well and he’s got a bit of room to grow in the seat. Based on his fit and our preemie doll’s fit in the seat, we can assert that the Liing would likely fit a 4 pound baby well.
Preemie Doll — With Padding
Clek Liing preemie doll
Our Huggable Images preemie doll weighs 4 pounds and is 17 inches long. Here we’ve used the head insert and the body insert — together, they offer a nice harness fit for this tiny model.
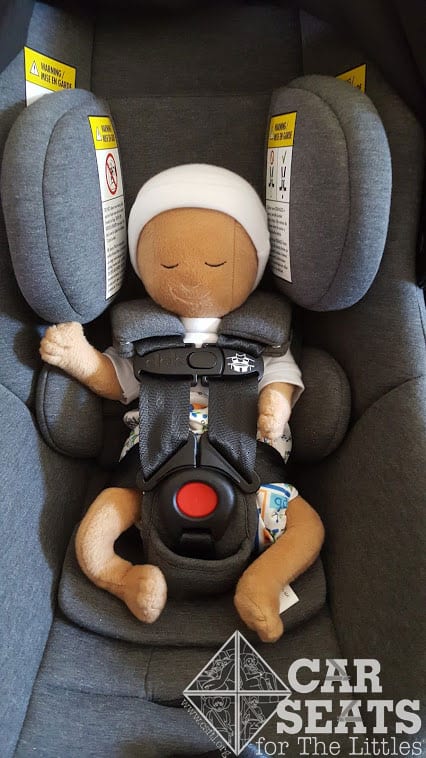
Newborn — Body Insert and Head Support

Clek Liing 3 week old fit
This little guy is 3 weeks old. He weighs 9 pounds and is 21 inches long. His family was kind enough to let us try him in the Liing with all configurations of padding. Here we see him with both the head and body supports in place. The harness fits him well, but he seems a bit cramped with all of that padding. So…
Newborn — Head Support Only

Clek Liing 3 week old fit
We removed the body insert and left the head support in place. The harness still fits him well, but he still seems a bit cramped. So…
Newborn — No Head Support or Body Insert

Clek Liing 3 week old fit
Finally, we removed both the head support and the body insert. This configuration, plus the all-important Wubbanub fit him the best.
The manual states: To prevent ejection in crash, the Newborn Support System MUST be used with infants less than 11 lb (5 kg) and when top of shoulders are below lowest Shoulder Harness Slots.
Newborn Doll — Head Support and Body Insert
Clek Liing newborn doll with padding
Here’s our Huggable Images newborn doll. Our doll weighs 7 pounds and is 17 inches long. The harness fits the doll well in this configuration.
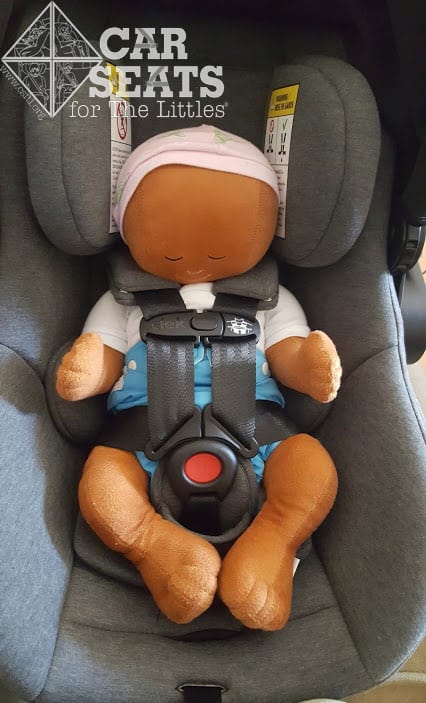
4 Months Old — Head Support Only

Clek Liing 4 months old with head support
Our 4 month old model weighs 14 pounds and is 24 inches long. We tried her with the head support and without it. She was rather cramped on the sides in both configurations because the interior of the seat is a bit narrow.
4 Months Old — No Head Support or Body Insert

Clek Liing 4 months old
Here we see our 4 month old model without the head support and though she’s still a bit squished on the sides, she does seem more comfortable with the head support removed.
8 Months Old

Clek Liing 8 month old fit
Here we have an adorable 8 month old. He weighs 22.5 pounds and is 28.5 inches tall. We can see that the seat is outgrown by shell height, though he fits well.
The manufacturer let us know that if the load leg is not in use, then the Liing is outgrown when there is less than 1 inch above the top of the child’s head, so this little guy would have outgrown the seat already. However, if the load leg is in use, the manufacturer permits the child to continue using it until the top of the head is even with the top of the shell so he’d have just a bit of growing room left. We look forward to seeing these clarifications around the height limit included in the manual.
16 Months Old

Clek Liing 16 month old doll
At 31 inches tall, our 16 month doll is right under the maximum height for the seat. While we doubt most families would use the Liing for quite this long, our doll was happy to model how the seat would fit. Our doll has a teeny bit of room to grow in the Liing, though he’s pretty squashed on the sides.
Important Information: Where to Find

Clek Liing FAA approval label
FAA Approval: the Liing’s carrier is approved for use on aircraft. The FAA approval label is on the underside of the shell.

Clek Liing date of manufacture label — carrier
Date of Manufacture label: the Liing expires 9 years after the date of manufacture. The label on the carrier portion of the seat is underneath the shell, right below the where child’s right hip would be.
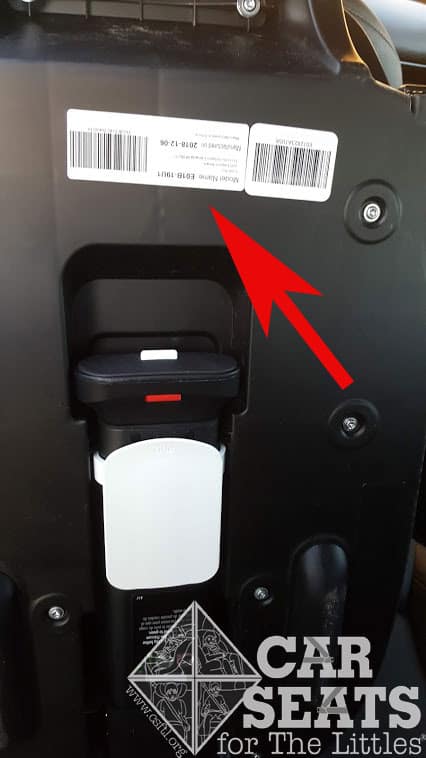
Clek Liing date of manufacture label — base
There’s a separate date of manufacture label for the base. That’s found on the bottom of the base, near the load leg storage. The date on the base may be different than the date found on the carrier.
Clek Liing manual storage
Manual Storage: the manual stores on in a tidy little slot on the top of the base.
Overall Thoughts
Our models seemed to find the Liing comfortable and it fit our tiniest models, including both the preemie human and the preemie doll well. That’s no small thing — preemie fit is a challenge that we see a lot and the Liing absolutely hits the mark there! We’re not totally sure how long the Liing will last since our 8 month old model was at the height limit and our 4 month old model was a bit cramped on the sides.
The Liing definitely offers some nice installation and ease of use features — beautiful baseless belt guides, Euro routing, rigid lower anchors, and a belt tensioning plate. It’s also pretty narrow so families who are working with tight spaces could find a great option in the Liing. All of these features add up to a fairly high price point but we could see where families who want a narrow seat that’s simple to install correctly might find the Liing a great option.