
Graco 4Ever DLX
Graco boasts an extensive lineup of car seats. Our team here at CSFTL has spent time with, reviewed, and ultimately become big fans of many of these seats because almost every car seat in their lineup has a consist child-fit and relative ease of use. Given this history, we were excited when Graco offered us the opportunity to check out one of their newest offerings — the Graco 4Ever DLX. This multimode car seat has a rear facing mode, a forward facing mode, a high back booster mode, then converts to a backless booster seat. It’s quite similar to the Graco 4Ever and the Graco Grows4Me, but with some exciting differences!
Note: an additional version of this seat, the 4Ever® DLX SnugLock, has been added to the lineup. This version of the seat includes the great features mentioned in this review, plus the SnugLock installation that we’re quite fond of.
CSFTL Quick Stats
- Rear facing weight range: 4-40 pounds
- Rear facing height range: Until the child’s head is 1 inch below the adjuster handle on the headrest when fully extended
- Forward facing weight range: 22-65 pounds
- Forward facing height range: Less than 49 inches tall
- High back booster weight range: 40 -100 pounds
- High back booster height range: 43- 57 inches tall
- Backless booster seat weight range: 40 -120 pounds
- Backless booster height range: 43 – 57 inches tall
- Lower anchor weight limit: 45 pounds
Measurements
- Crotch buckle positions: 5 and 7 inches from the back of the seat pan
- Lowest harness position: 6 inches (with insert), 7.5 inches (without insert)
- Highest harness position: 18 inches
- Highest booster belt guide position: 19 inches
- Width at widest point (at the cupholders): 19.5 inches
- Seat weight: 22 pounds
- Seat weight, backless booster mode: 9.6 pounds
- Expiration: 10 years
- Replacement after any crash
Out of the Box

Graco 4Ever DLX out of the box
Your new Graco 4Ever DLX has arrived! Woohoo! What should you see when you open the box? The car seat, of course! Along with the seat, you should find a plastic bag including: two cupholders, a backless booster belt positioning clip, a registration card, a quick start guide, an English manual, and a Spanish manual. All of these items play an important role with this seat.
Be sure to register the seat either by mailing in the included card or by visiting Graco’s website — registration allows the manufacturer to notify consumers in the event that there is a recall for the specific seat.
Some Installation Required — CUPHOLDERS ARE REQUIRED
Graco 4Ever DLX cupholder
The Graco 4Ever DLX requires that the cupholders be firmly installed onto the car seat before the car seat is installed in the vehicle. To install the cupholders, first check the bottom of each one for either “R” (right) or “L” (left) – this will correspond with which side of the car seat the cupholder installs on. Then, line the cupholder up with the groove on the car seat, and push down firmly until you hear a satisfying “Click!”. Once installed, these cupholders are not meant to be removable – attempting to do so could damage them in the process.
Accessories
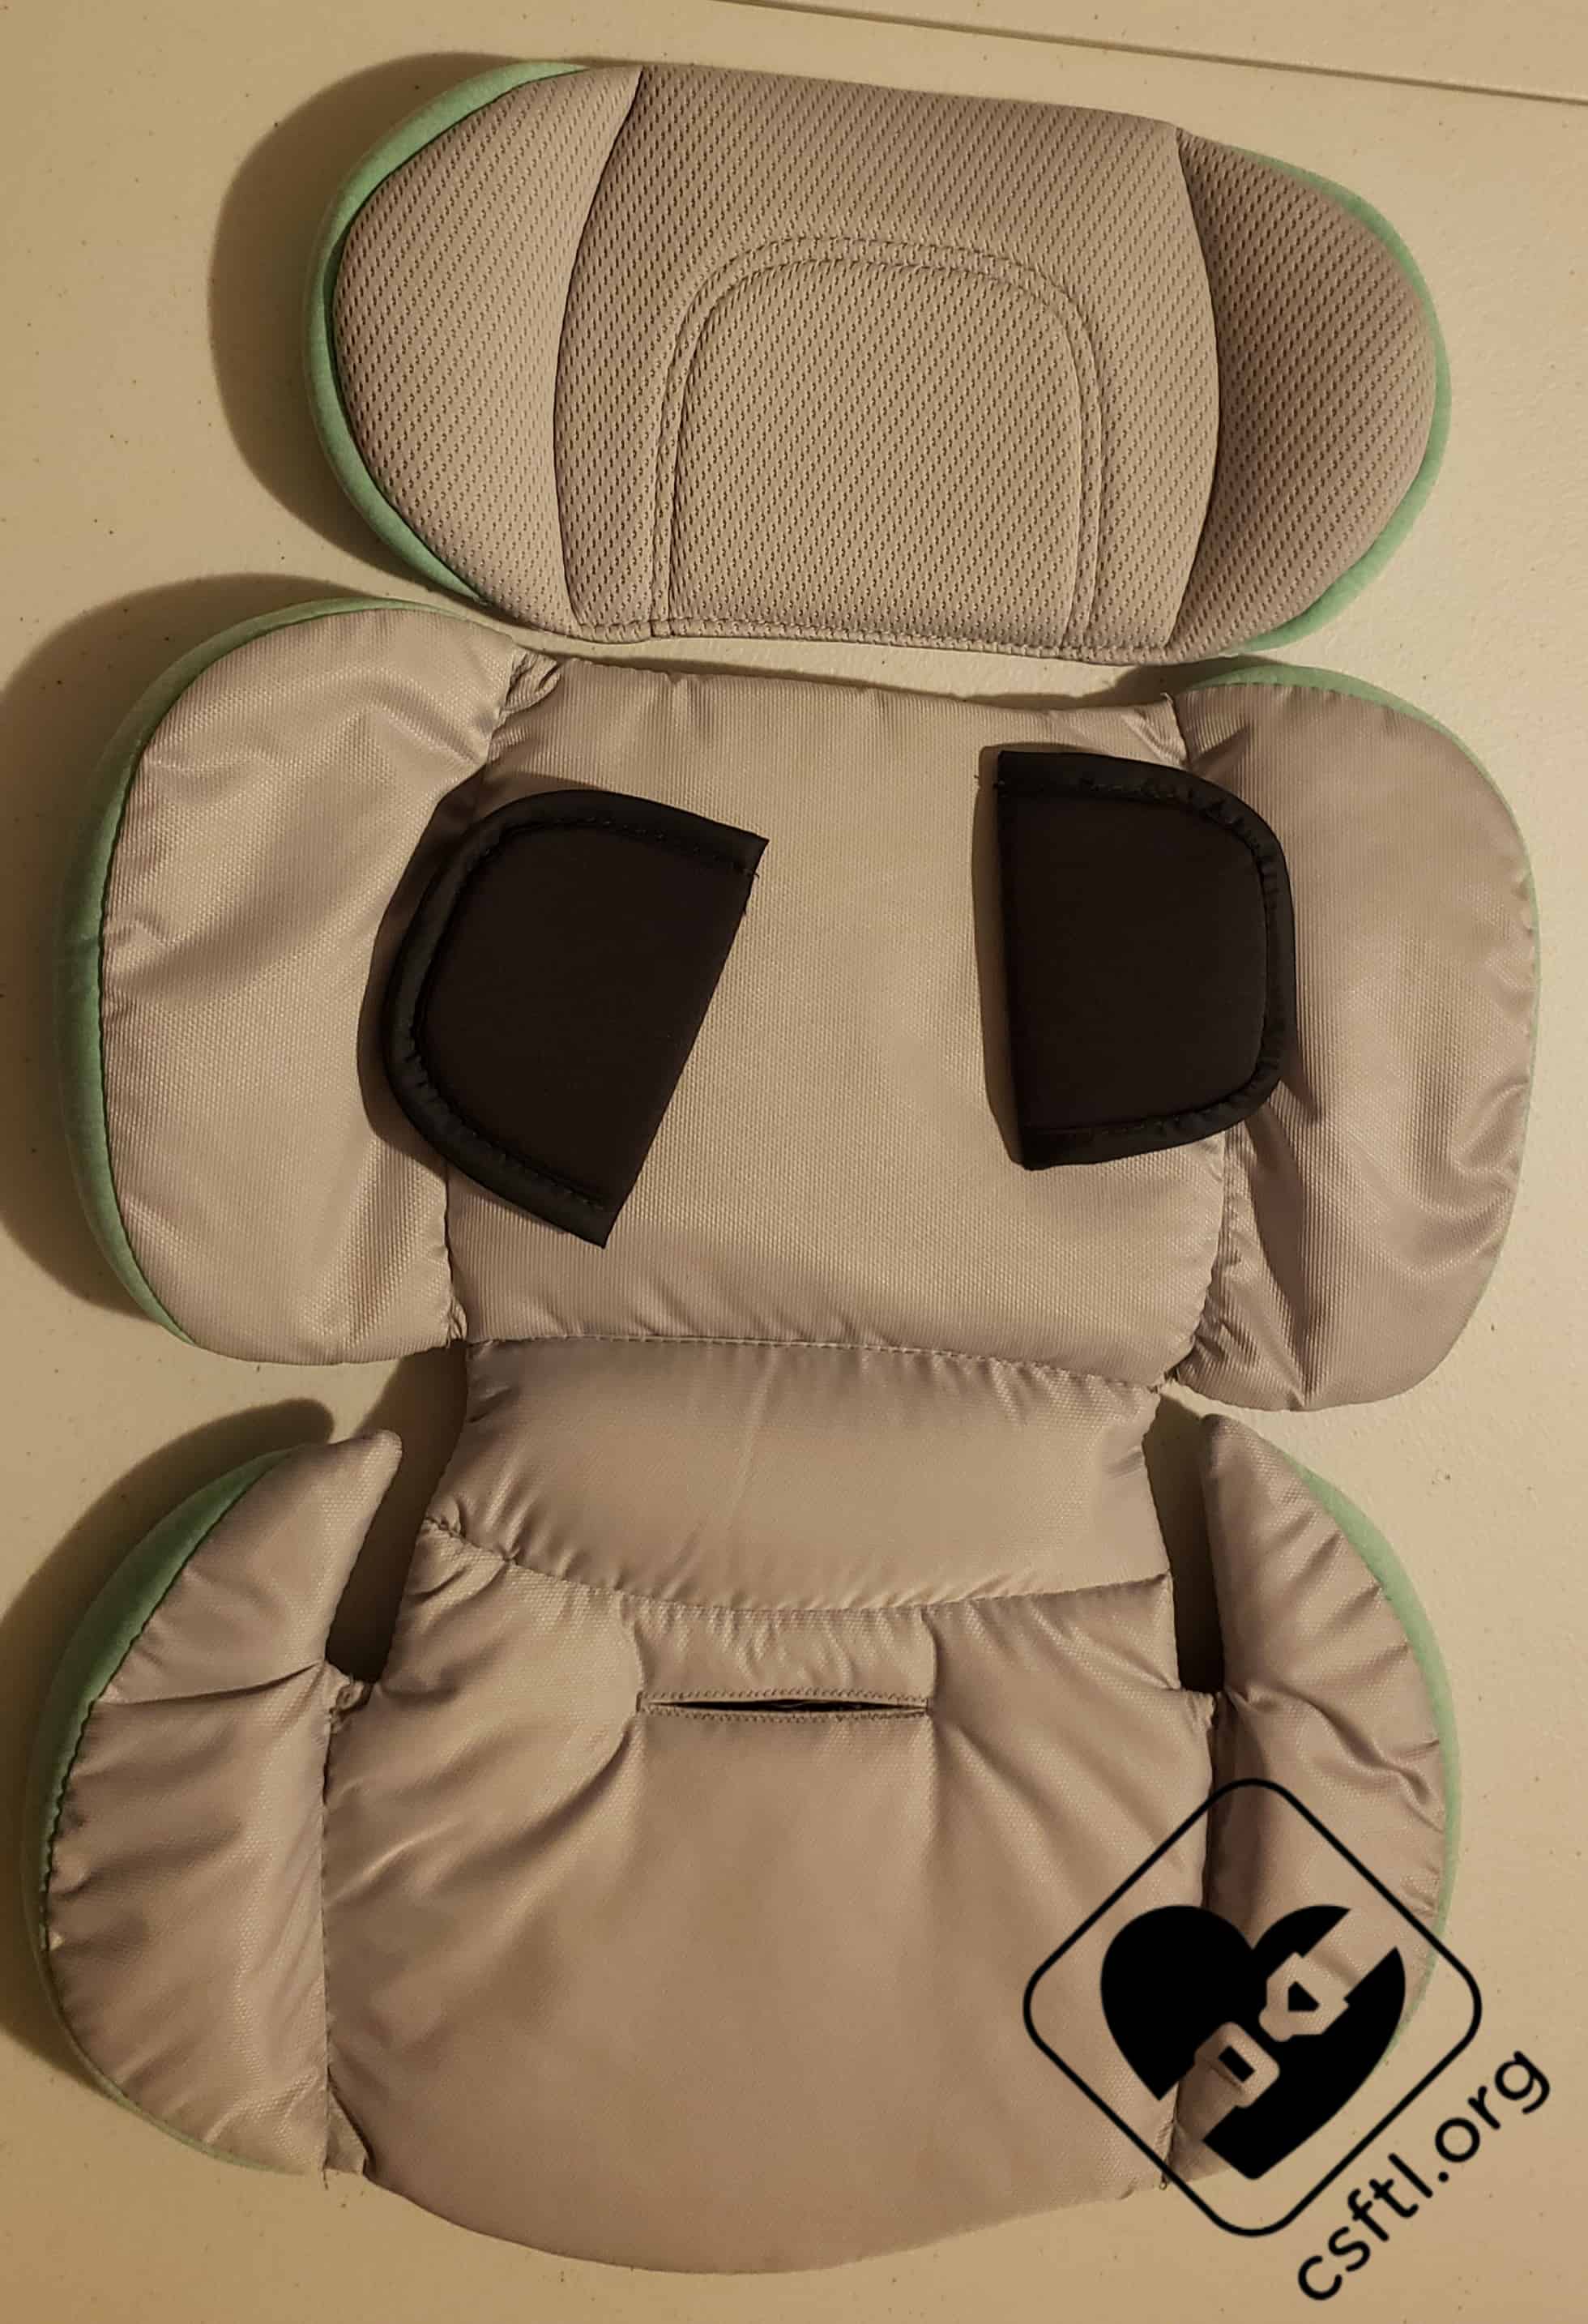
Graco 4Ever DLX accessories
The 4Ever DLX includes a set of harness covers, a head insert, and a body insert that are designed and tested with this seat.
The harness covers are optional at any time with this seat. For smaller babies, it may be necessary to remove them until the child is large enough for the harness covers to not interfere with proper chest clip placement.
The head insert is optional while rear facing and must be removed once the child is forward facing. It can not be used without the body insert.
The body insert must be used for smaller children if their shoulders are below the lowest harness position. Once the harness is able to come from at or below the shoulders without the insert, it is optional while rear facing and must be removed when forward facing. It can be used with or without the head insert.
RapidRemove Cover
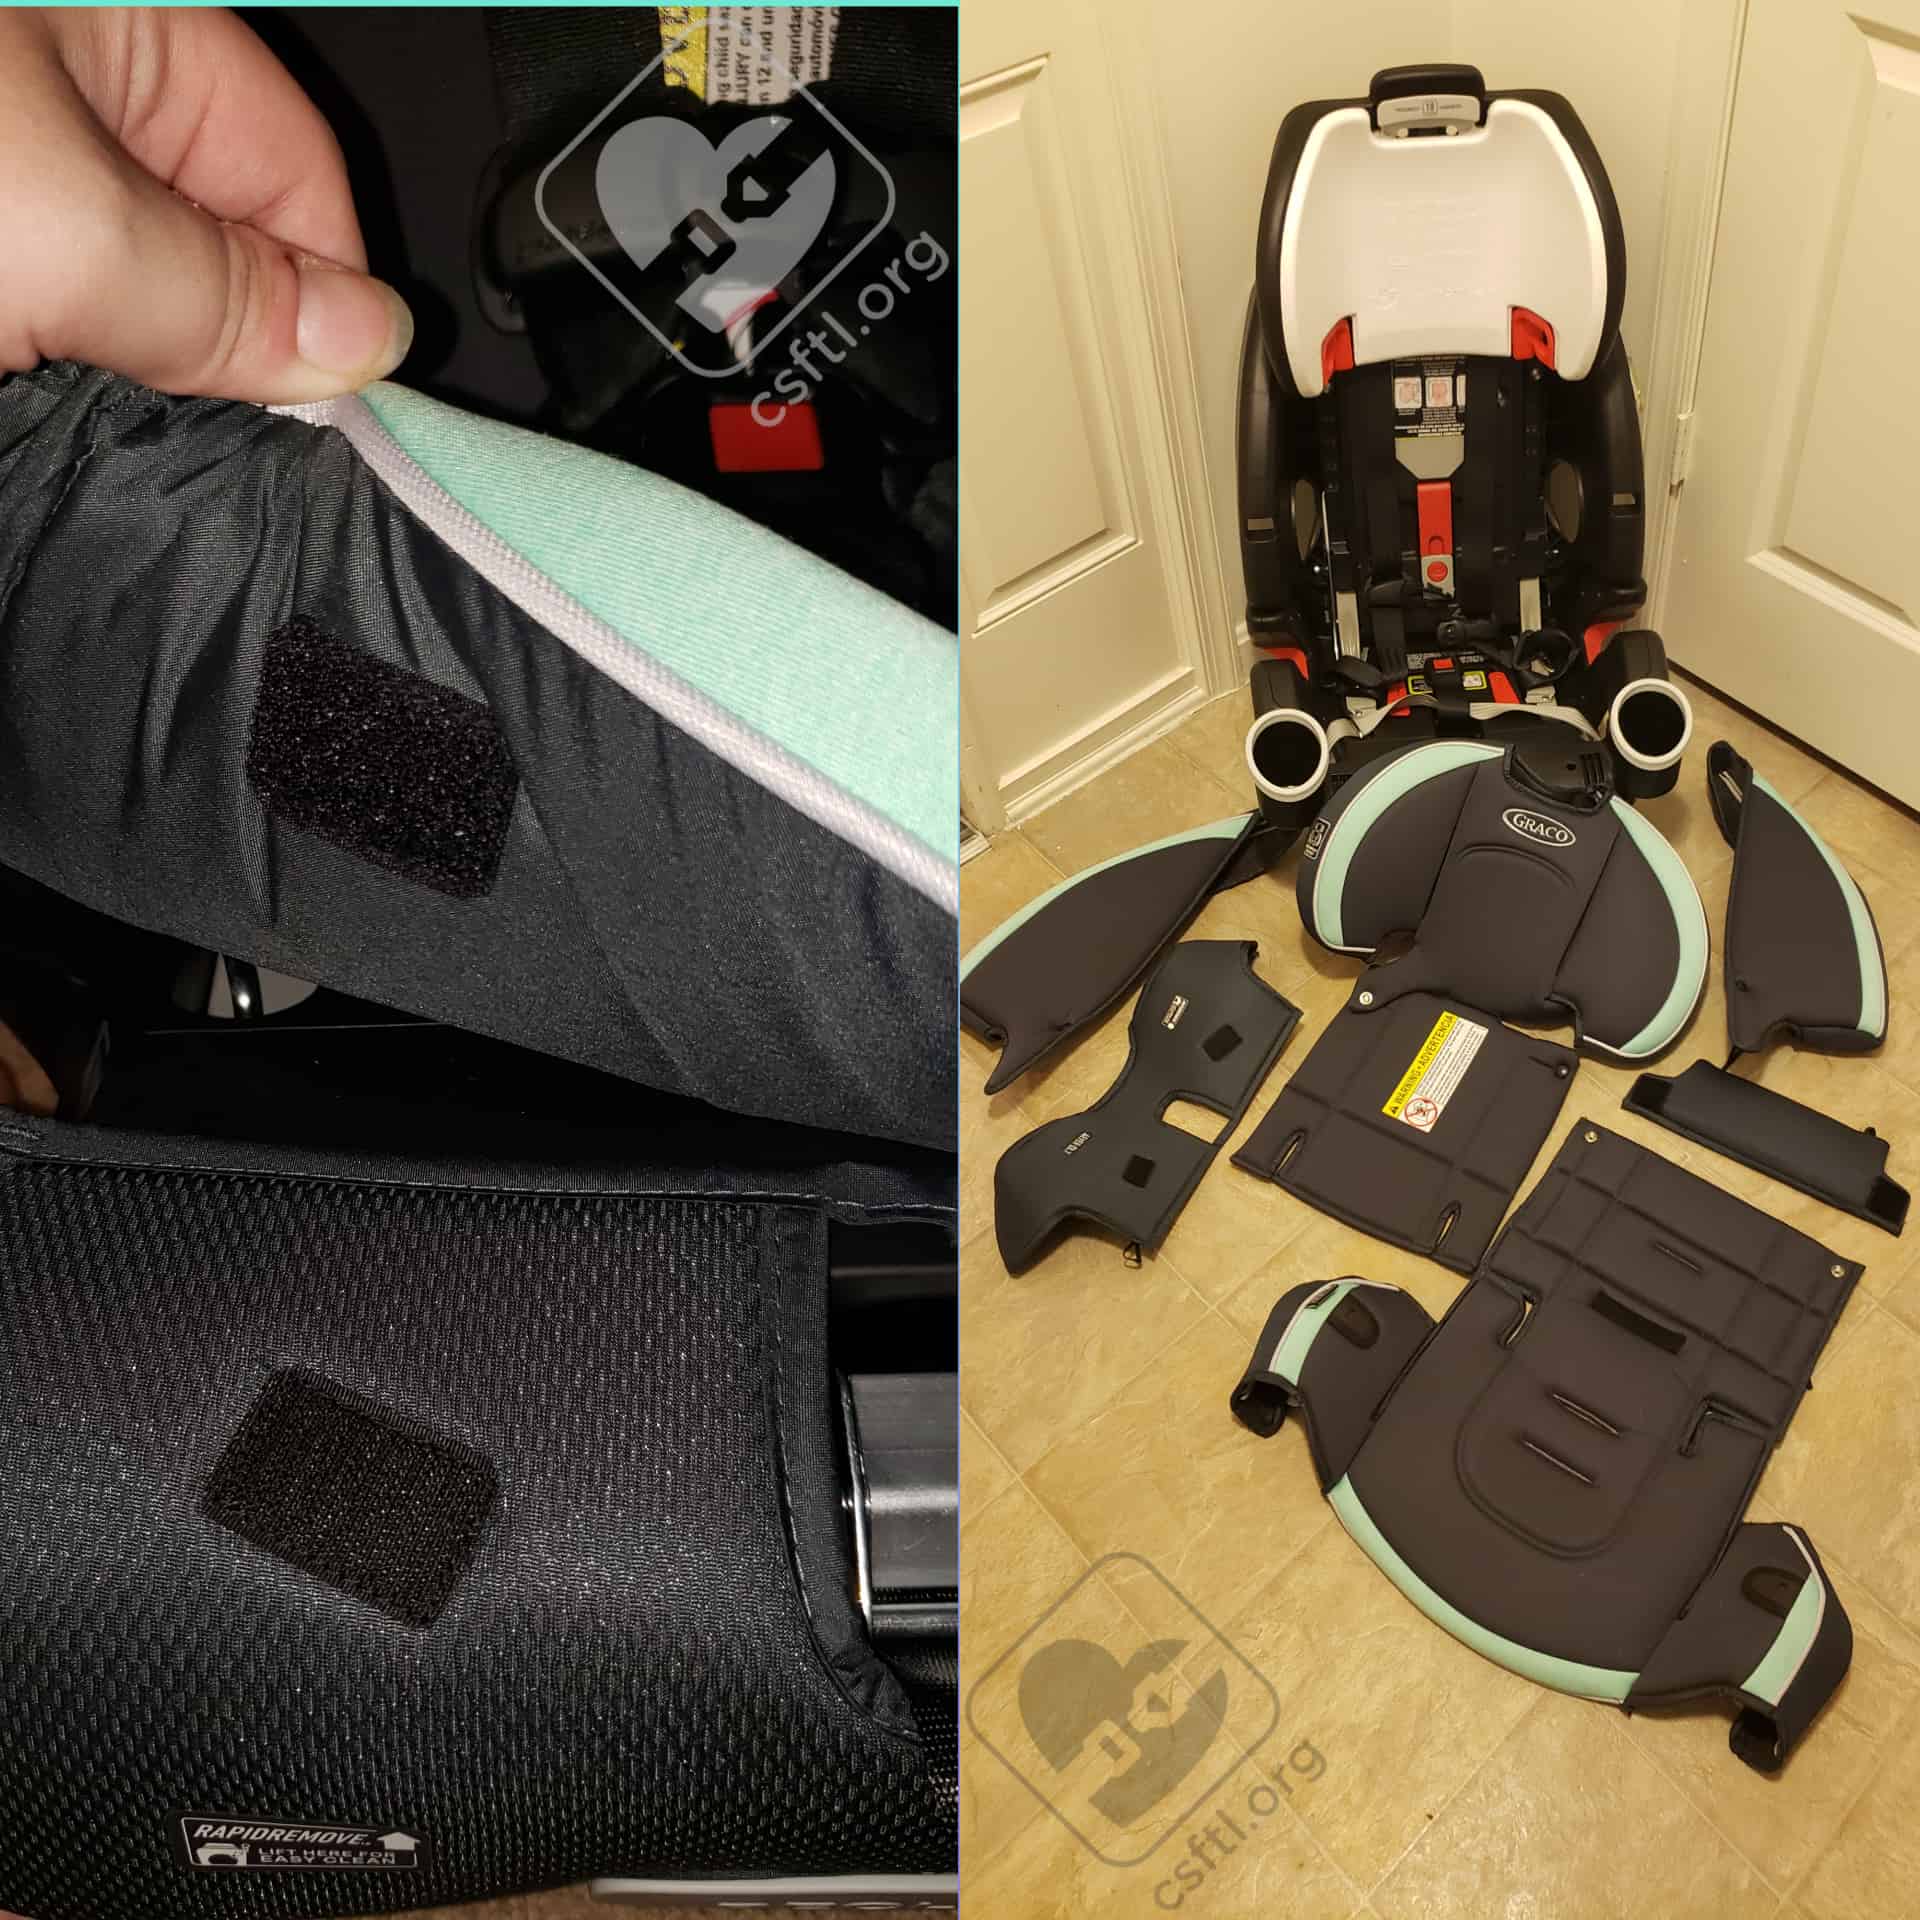
Graco 4Ever DLX RapidRemove cover
The 4Ever DLX includes some ease of use features that aims to make this seat, well, easier to use! One of these features is Graco’s RapidRemove cover system. The RapidRemove cover on the 4Ever DLX is made of five separate sections that are removed independently from one another, with the body and side sections being held on primarily by velcro. One major benefit of this system is the ability to remove only those sections that need cleaning rather than having to remove the whole cover. A disadvantage to this system, though, is having more pieces to put back together if you do need to fully disassemble for cleaning.
Preparing for Installation
Lower Anchor Storage
Graco 4Ever DLX lower anchor storage
There are two separate storage areas for the lower anchor connectors depending on which direction the seat is facing. For rear facing, the lower anchor connectors should be threaded through the forward facing belt path and clicked on to the two small bars on either side of the top of the shell, near where the child’s shoulders may be. For forward facing, the lower anchor connectors should be threaded through the rear facing belt path and clicked on to the two small bars on the front of the seat, near where a child’s feet may be.
Unfortunately, these storage locations aren’t very clearly explained in the manual, so we had to reach out to Graco to confirm the proper storage area for each direction. Graco has stated that they will be looking into updating the 4Ever DLX manual to be more clear. We applaud them for taking our feedback seriously and working on an improvement!

Graco 4Ever tether storage
When not in use, the top tether stores on one of two small bars on the back of the seat, directly above the red harness rollers.
Moving the Lower Anchor Webbing
Graco 4Ever DLX lower anchor webbing
When preparing to move the lower anchor webbing from one belt path to the other, Graco starts by providing these helpful steps in the manual: “A. Loosen the harness webbings. B. Raise the headrest to the highest position. C. Unbuckle the chest clip. D. Unbuckle the buckle.”
Once those steps are complete, unsnap the cover and pull it back to reveal the lower anchor webbing. Then, pull each lower anchor connector into the seat pan. Slide the lower anchor webbing along the metal bar until it reaches the desired belt path openings, and push the connectors out through each opening. Finally, replace the cover and adjust the harness back to the appropriate setting for the child.
Installation: Rear Facing
Recline Angle Indicator
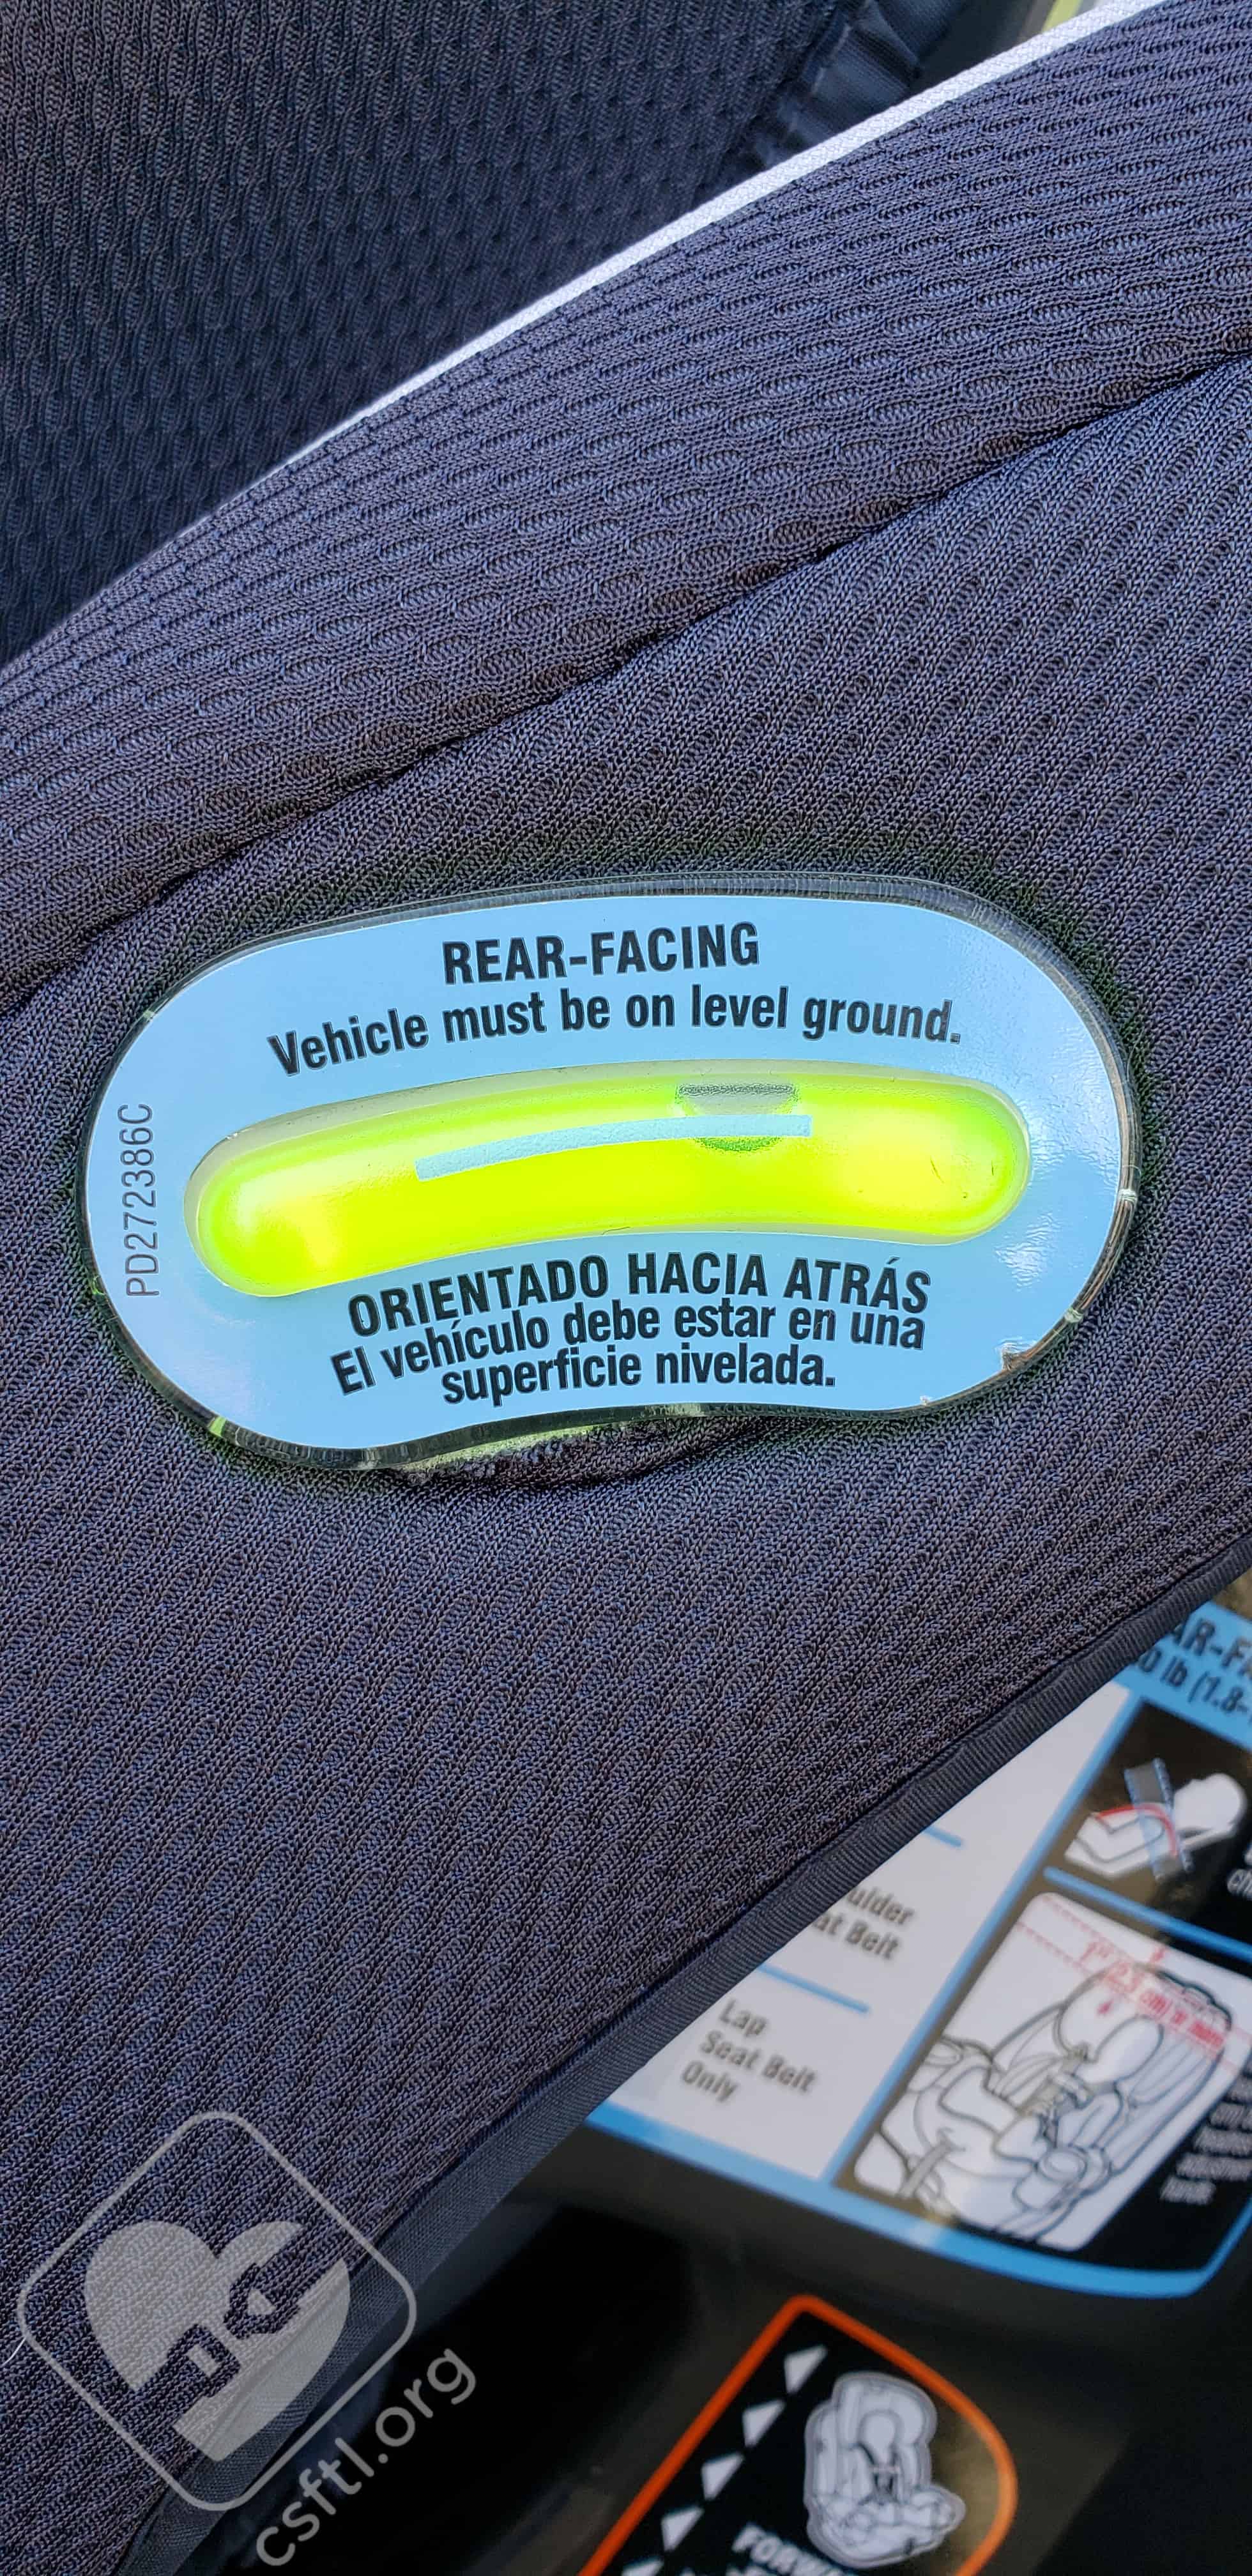
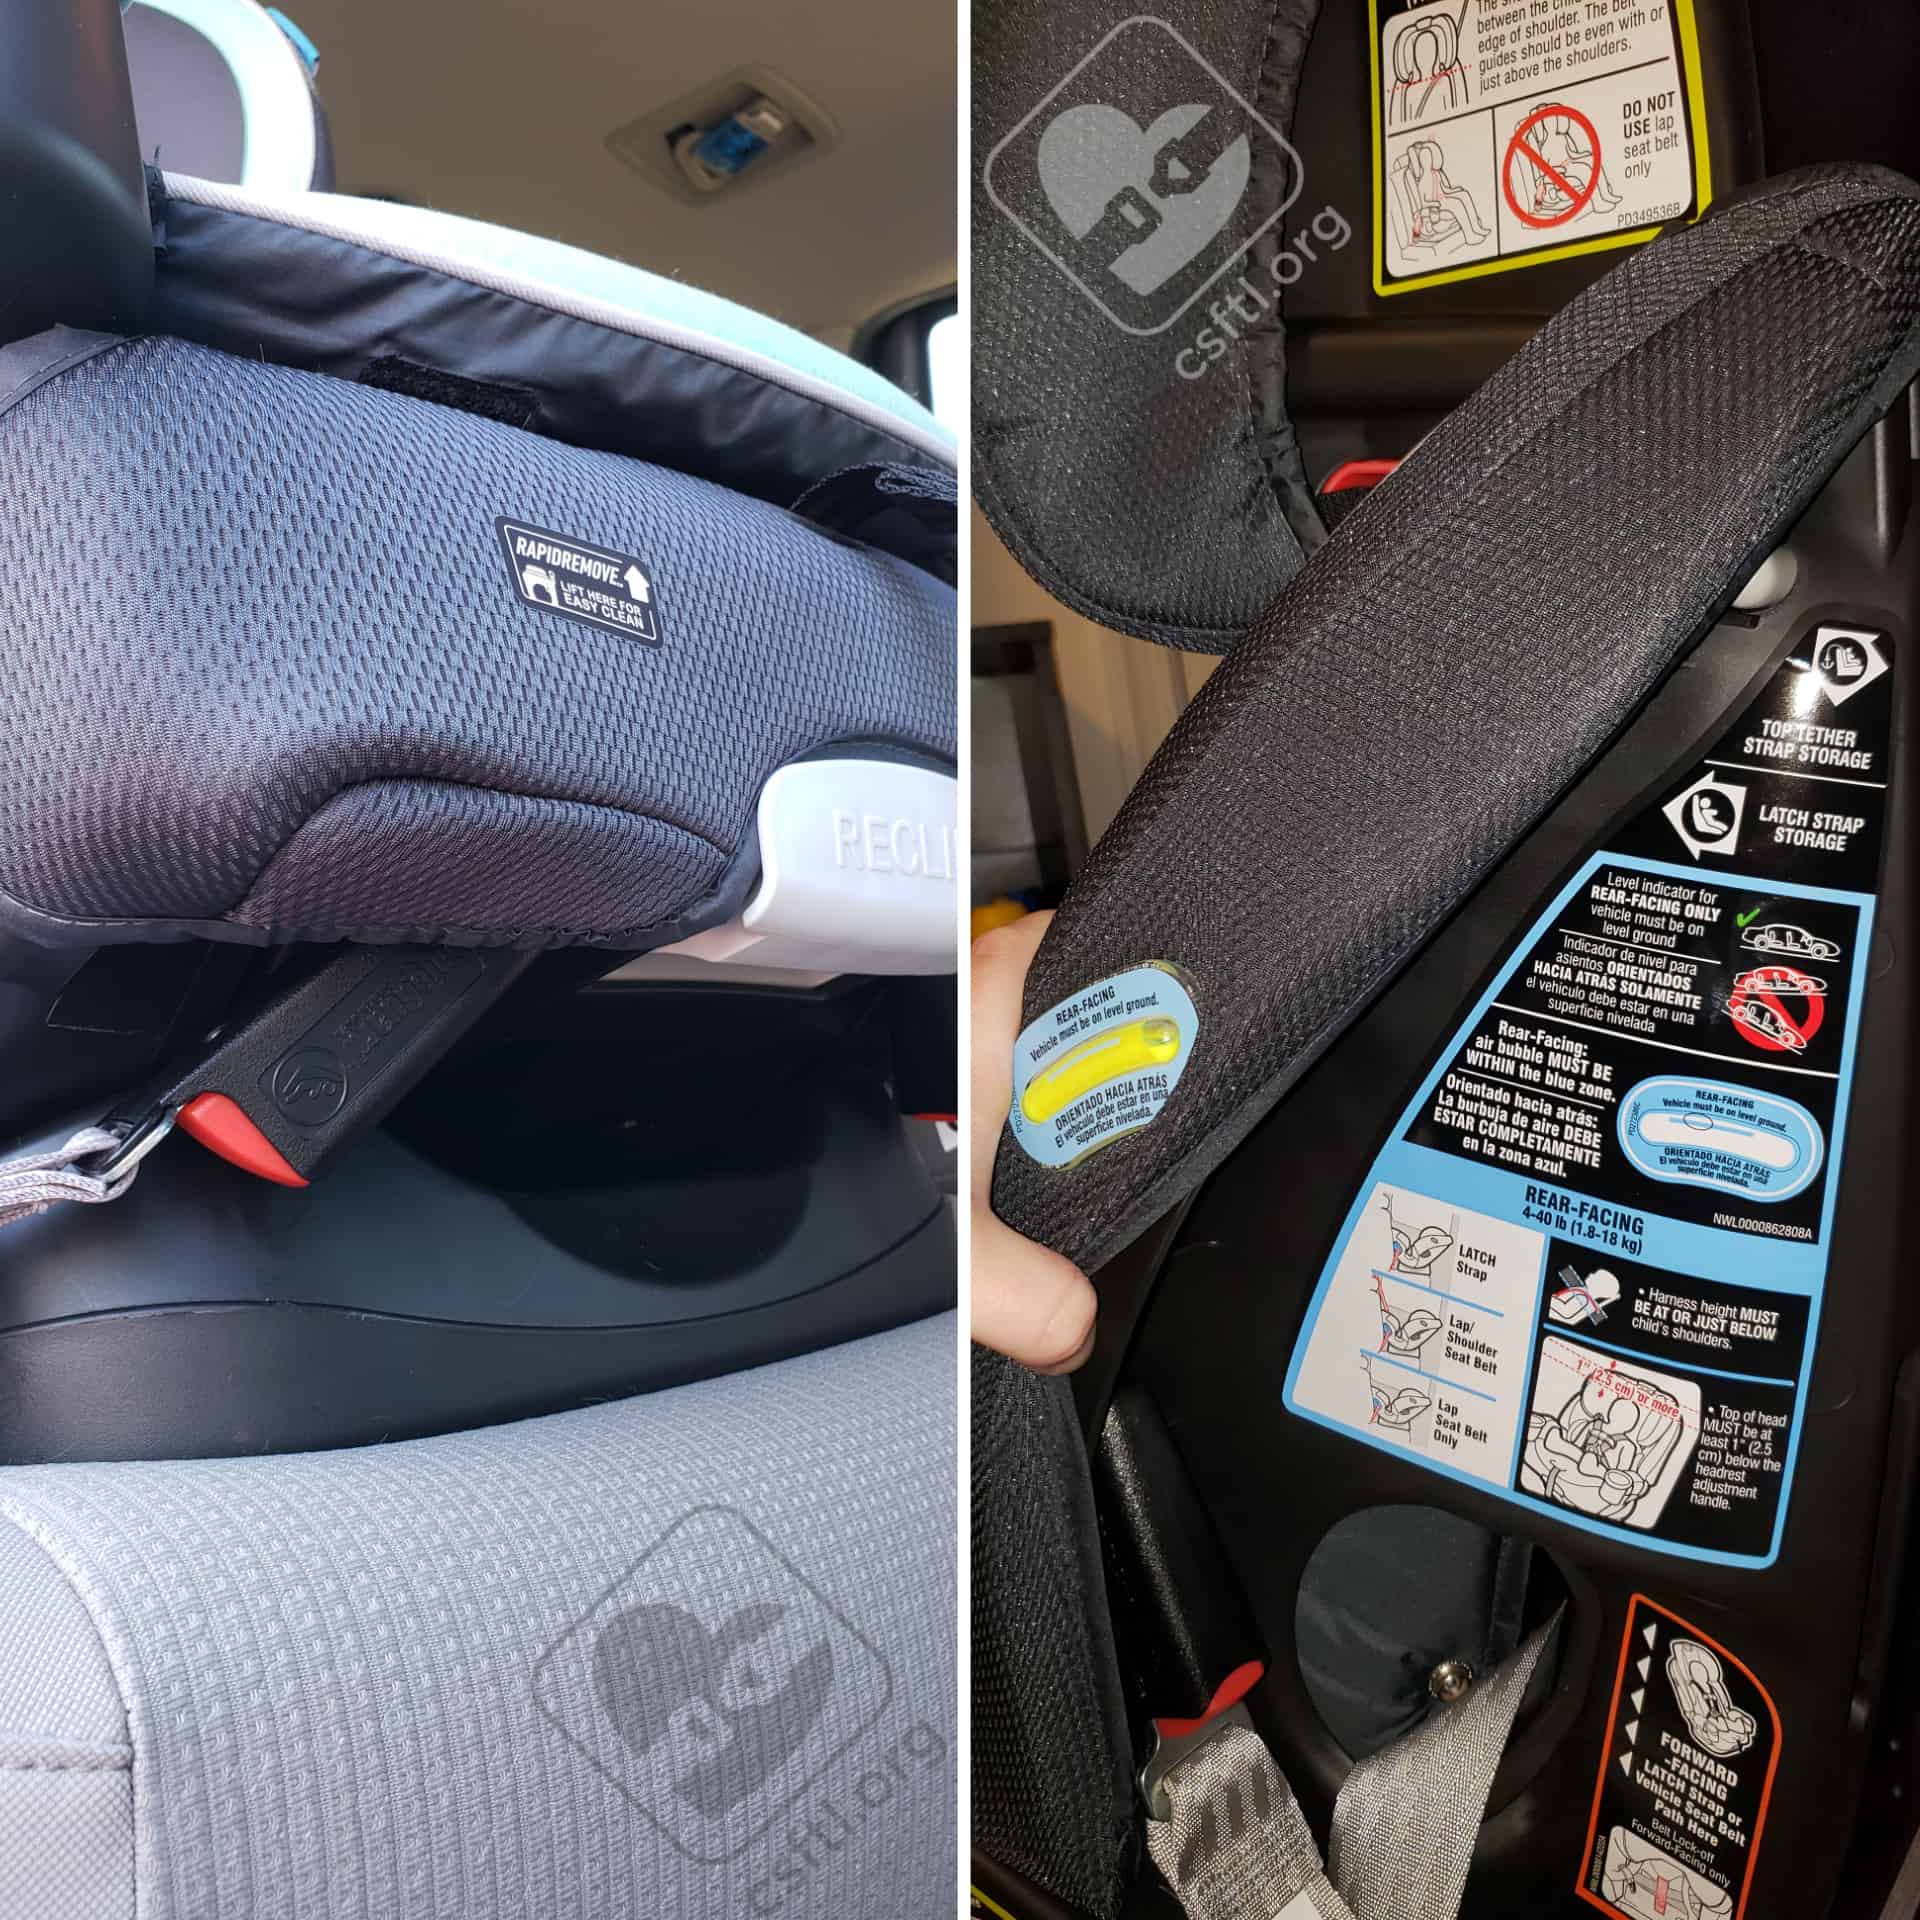
Graco 4Ever DLX recline angle indicator
The Graco 4Ever DLX has three rear facing recline positions. They’re labeled in blue on the base of the seat. There’s also a bubble recline angle indicator on the outside of the seat, at the child’s left shoulder. When installing rear facing, this seat can use any of the three rear facing recline positions as long as the bubble in the recline indicator stays fully on the blue line. If the seat is not reclined enough for the tiniest of passengers when it’s in the most reclined position, Graco does permit the use of a rolled towel or pool noodle to further recline the seat. A more upright installation will position the bubble towards the front of the vehicle — which would be appropriate for older infants and children who do have strong head and torso control.
Lower Anchors
Graco 4Ever DLX rear facing with lower anchors
To install the Graco 4Ever DLX rear facing with the lower anchors, first check that the lower anchor webbing is in the rear facing belt path. That belt path is clearly marked on the outside of the car seat’s shell with a blue label on the side of the seat. To move the lower anchor webbing from one belt path to the other, pull the lower anchor connectors into the seat pan and then slide them along the metal bar until you reach the desired belt path.
Once the lower anchor webbing is in the rear facing belt path, push the grey adjuster button on the lower anchor webbing and pull to loosen it. Set the car seat on the vehicle seat facing the rear of the vehicle and adjust the recline until the bubble on the recline angle indicator is fully in the permitted range.
Locate the lower anchors within your vehicle, and push each lower anchor connector firmly onto the lower anchor bar. There should be a light “click” when the connector is fully attached to the lower anchor bar. Next, pull the tail on the lower anchor webbing to tighten the webbing while pushing firmly down into the seat pan area.
Pro Tip: There is a convenient opening in the cover. This spot allows the lower anchor webbing’s tail to be fed through and pulled straight across the belt path for a secure installation.
Finally, confirm that the recline angle indicator is still correct, and check your work by testing for movement with a firm handshake at the belt path. Once installed, the seat should not move more than one inch in any direction.
Vehicle Seat Belt
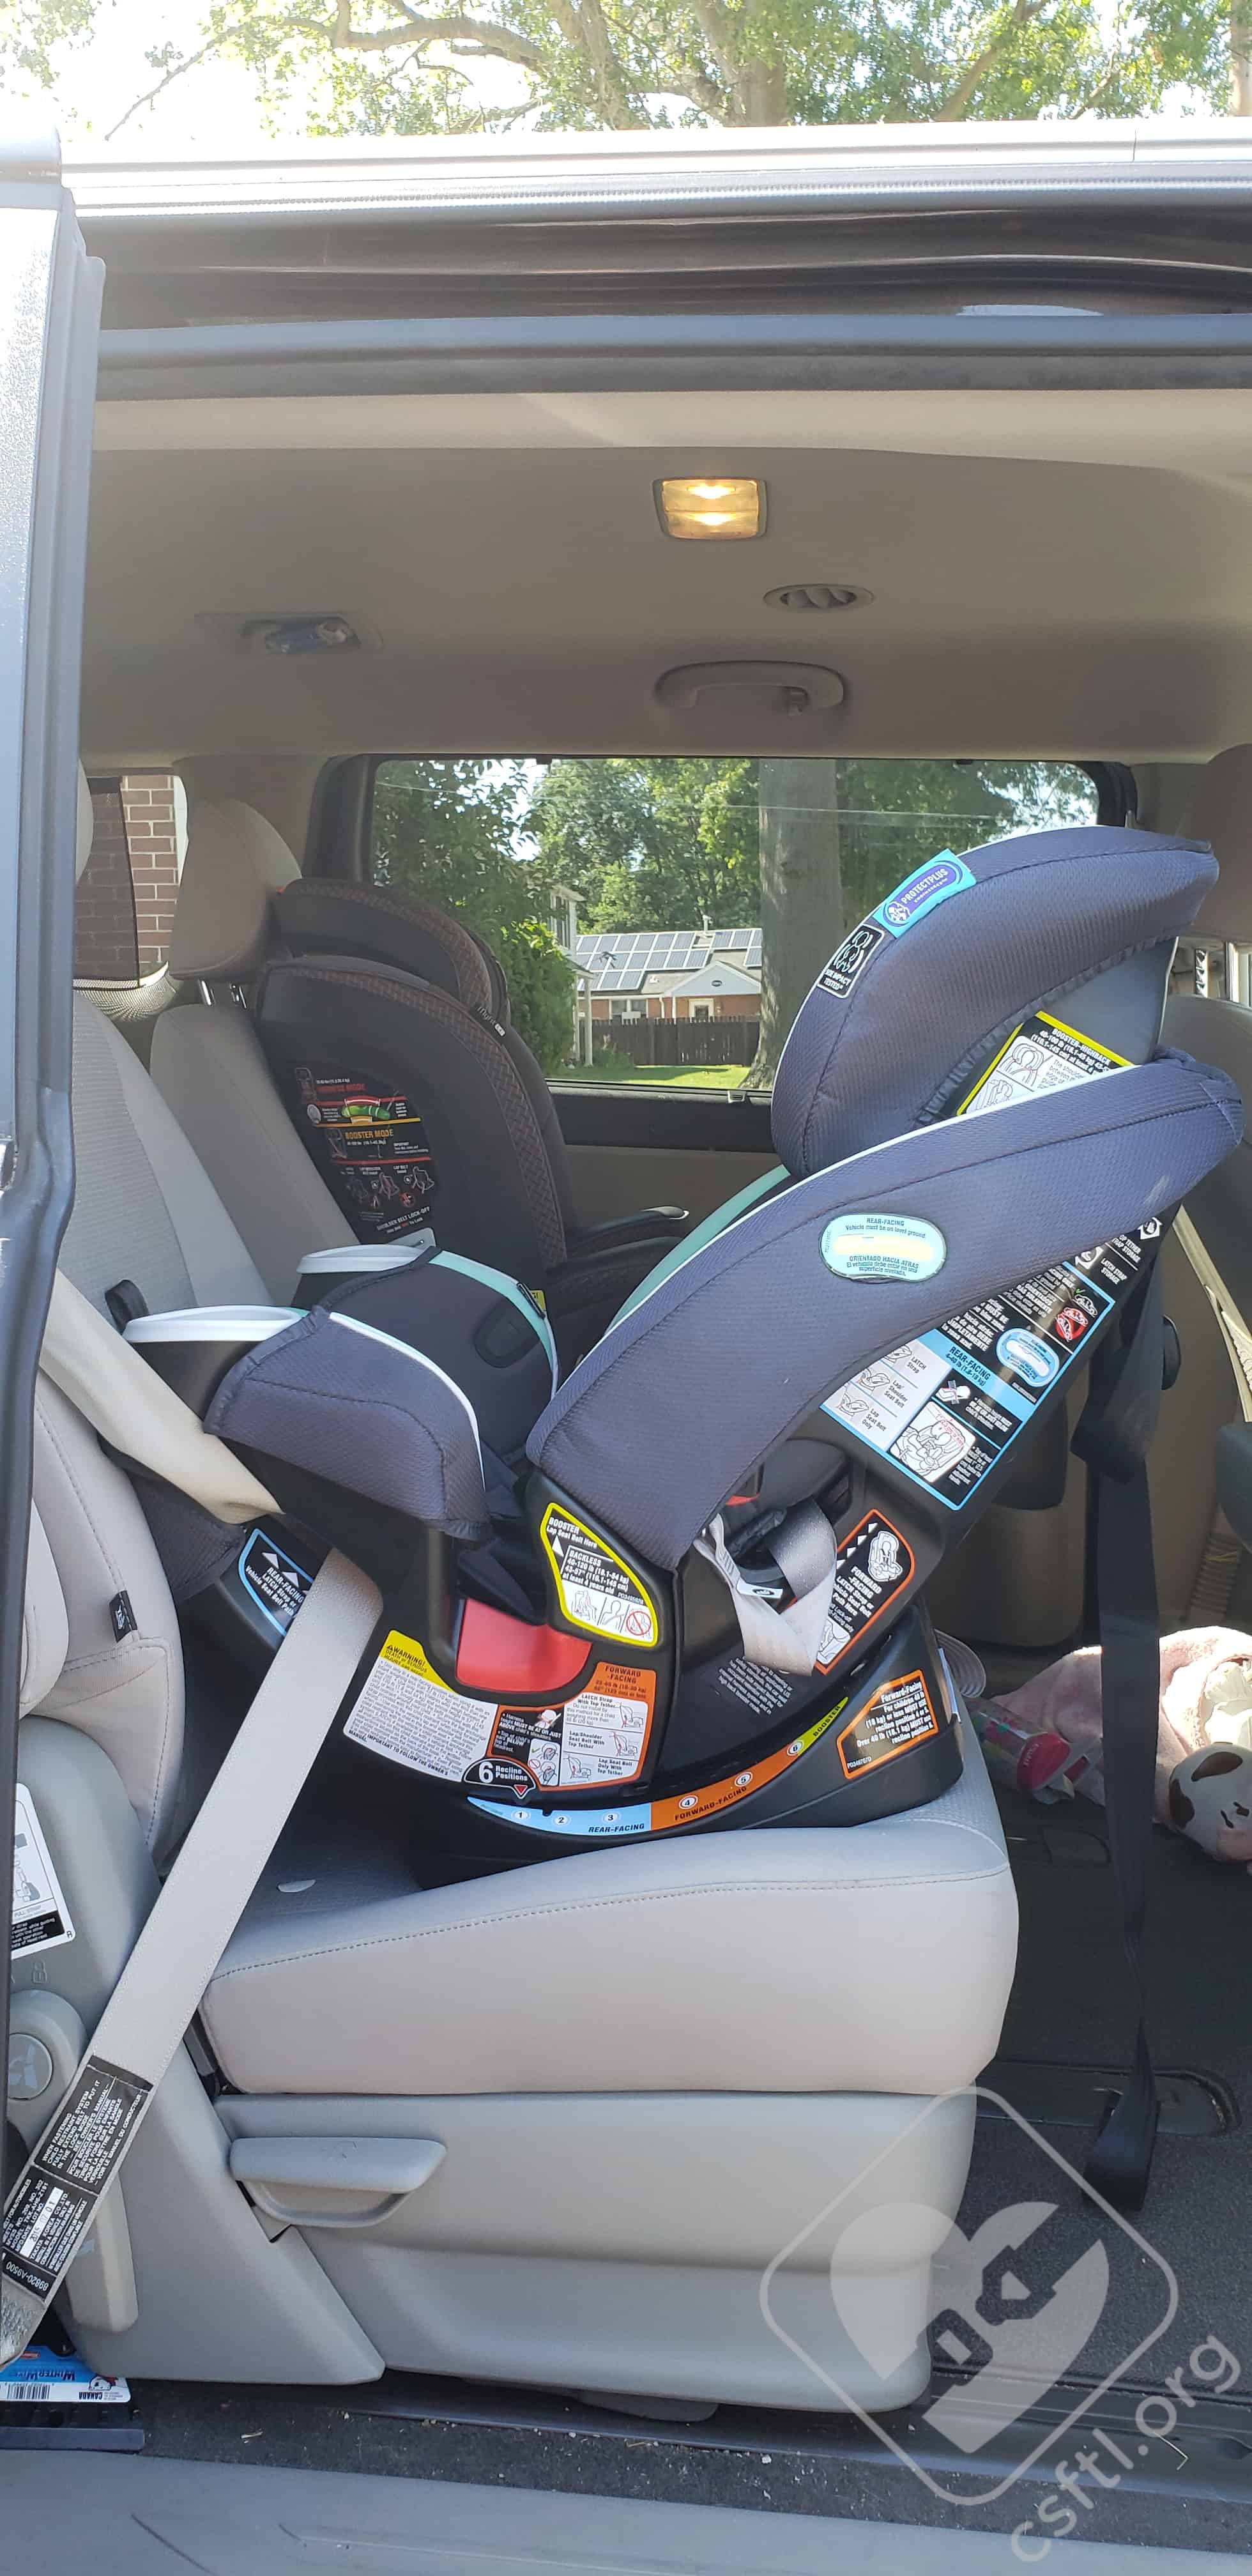
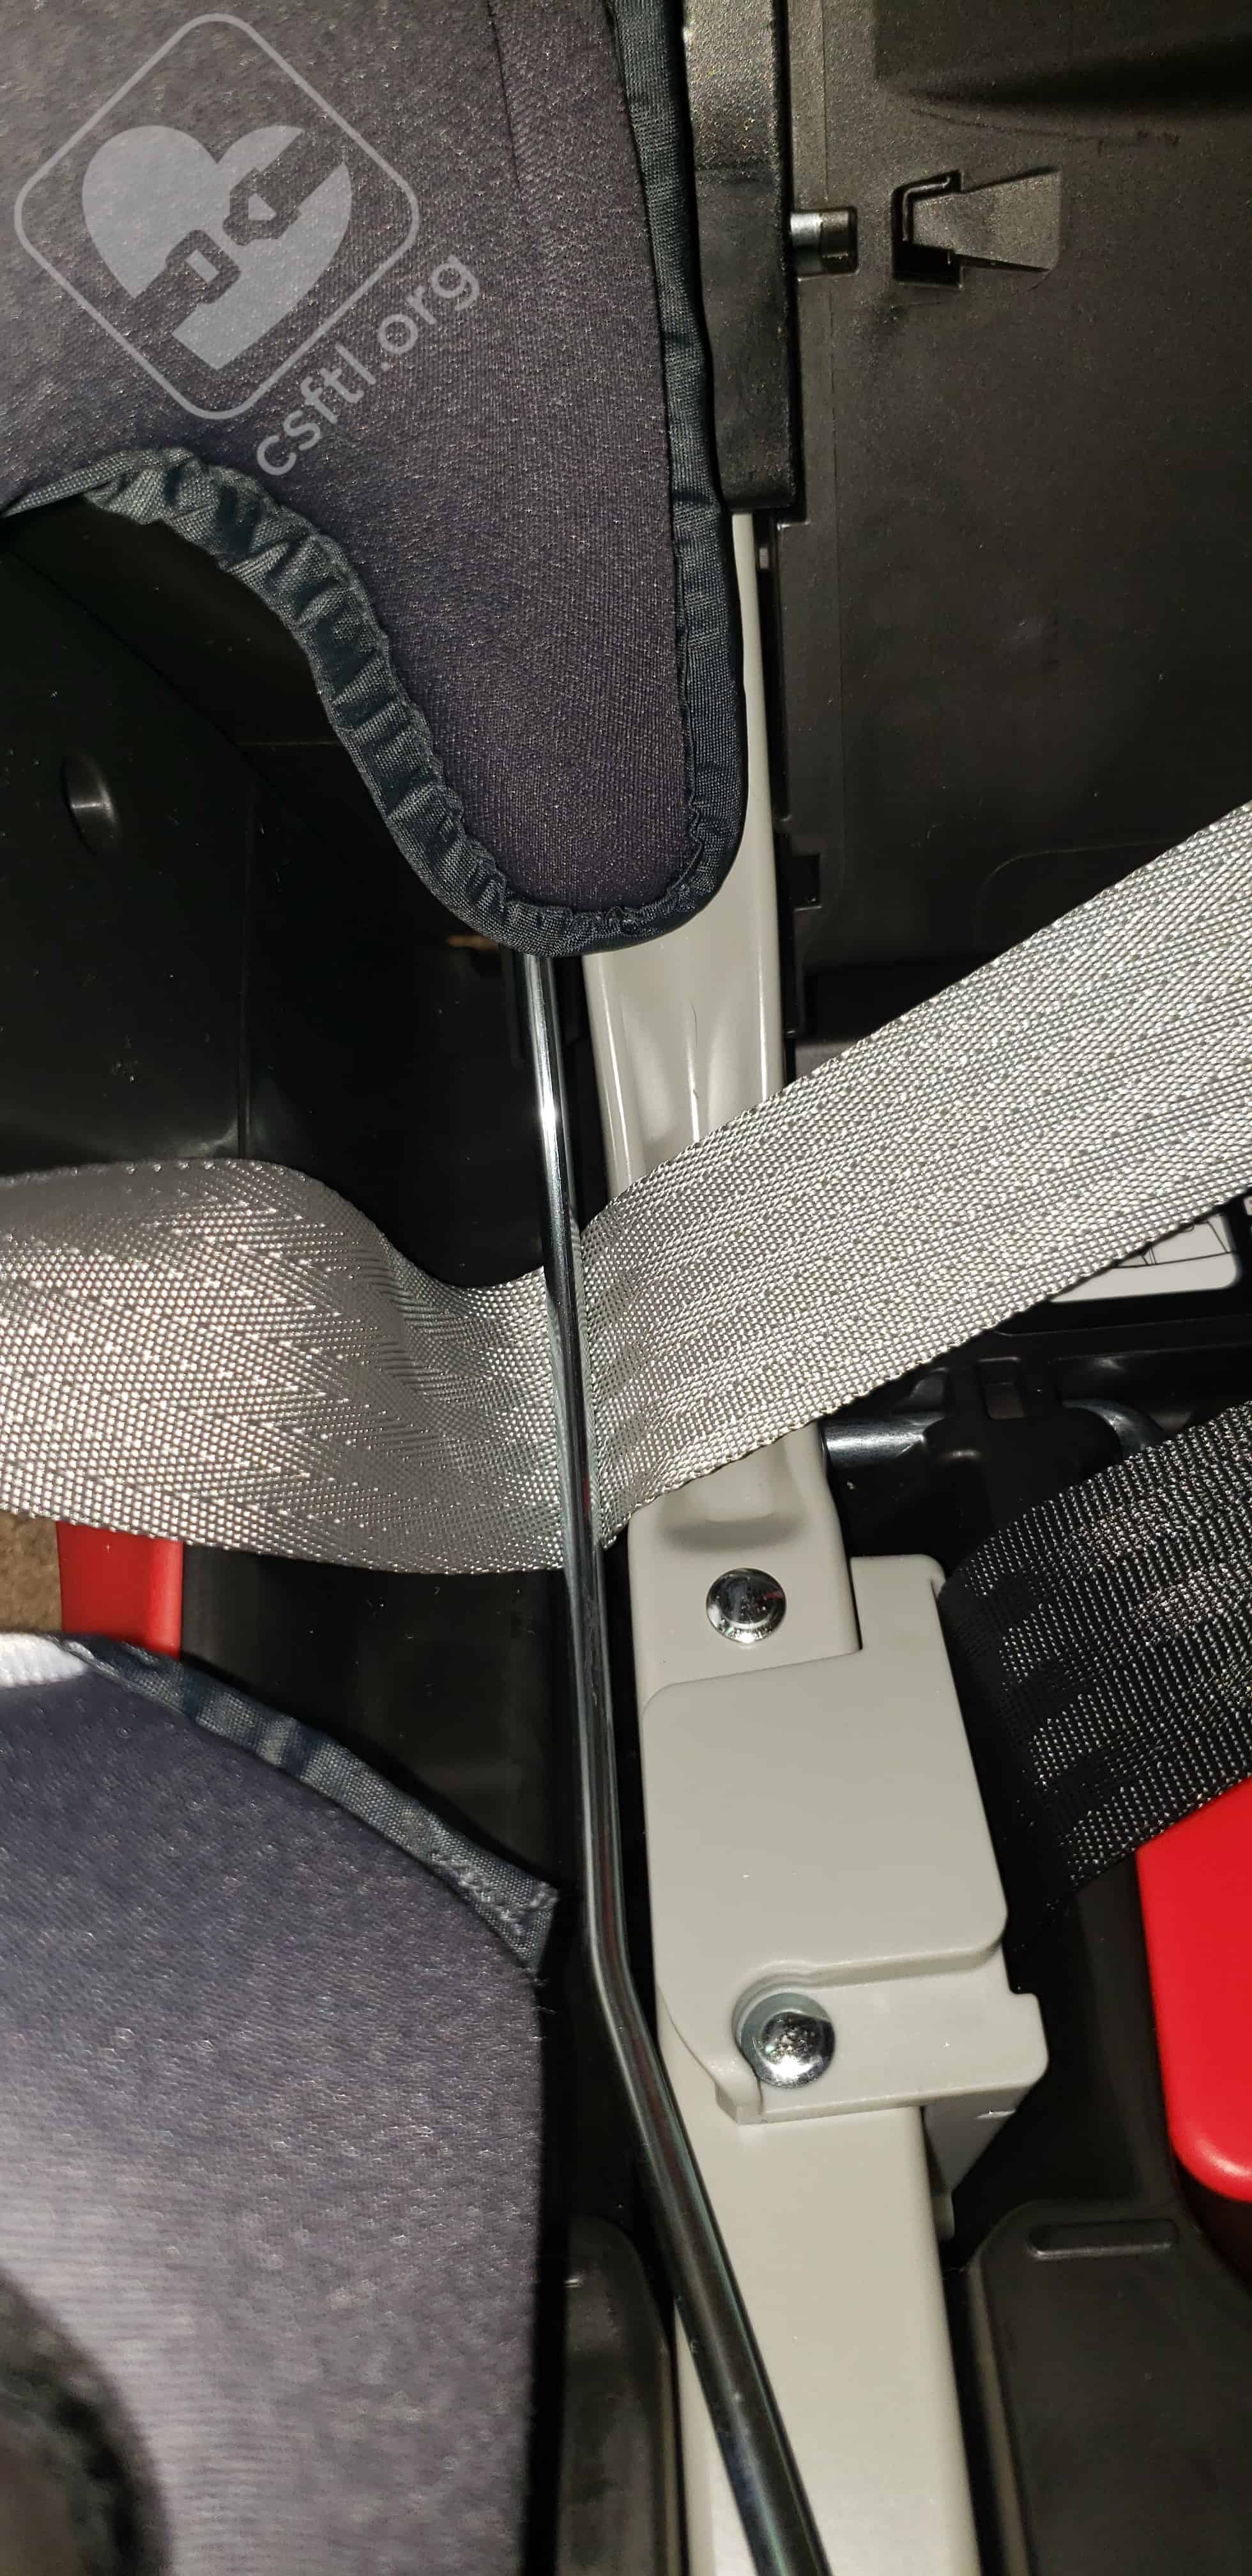
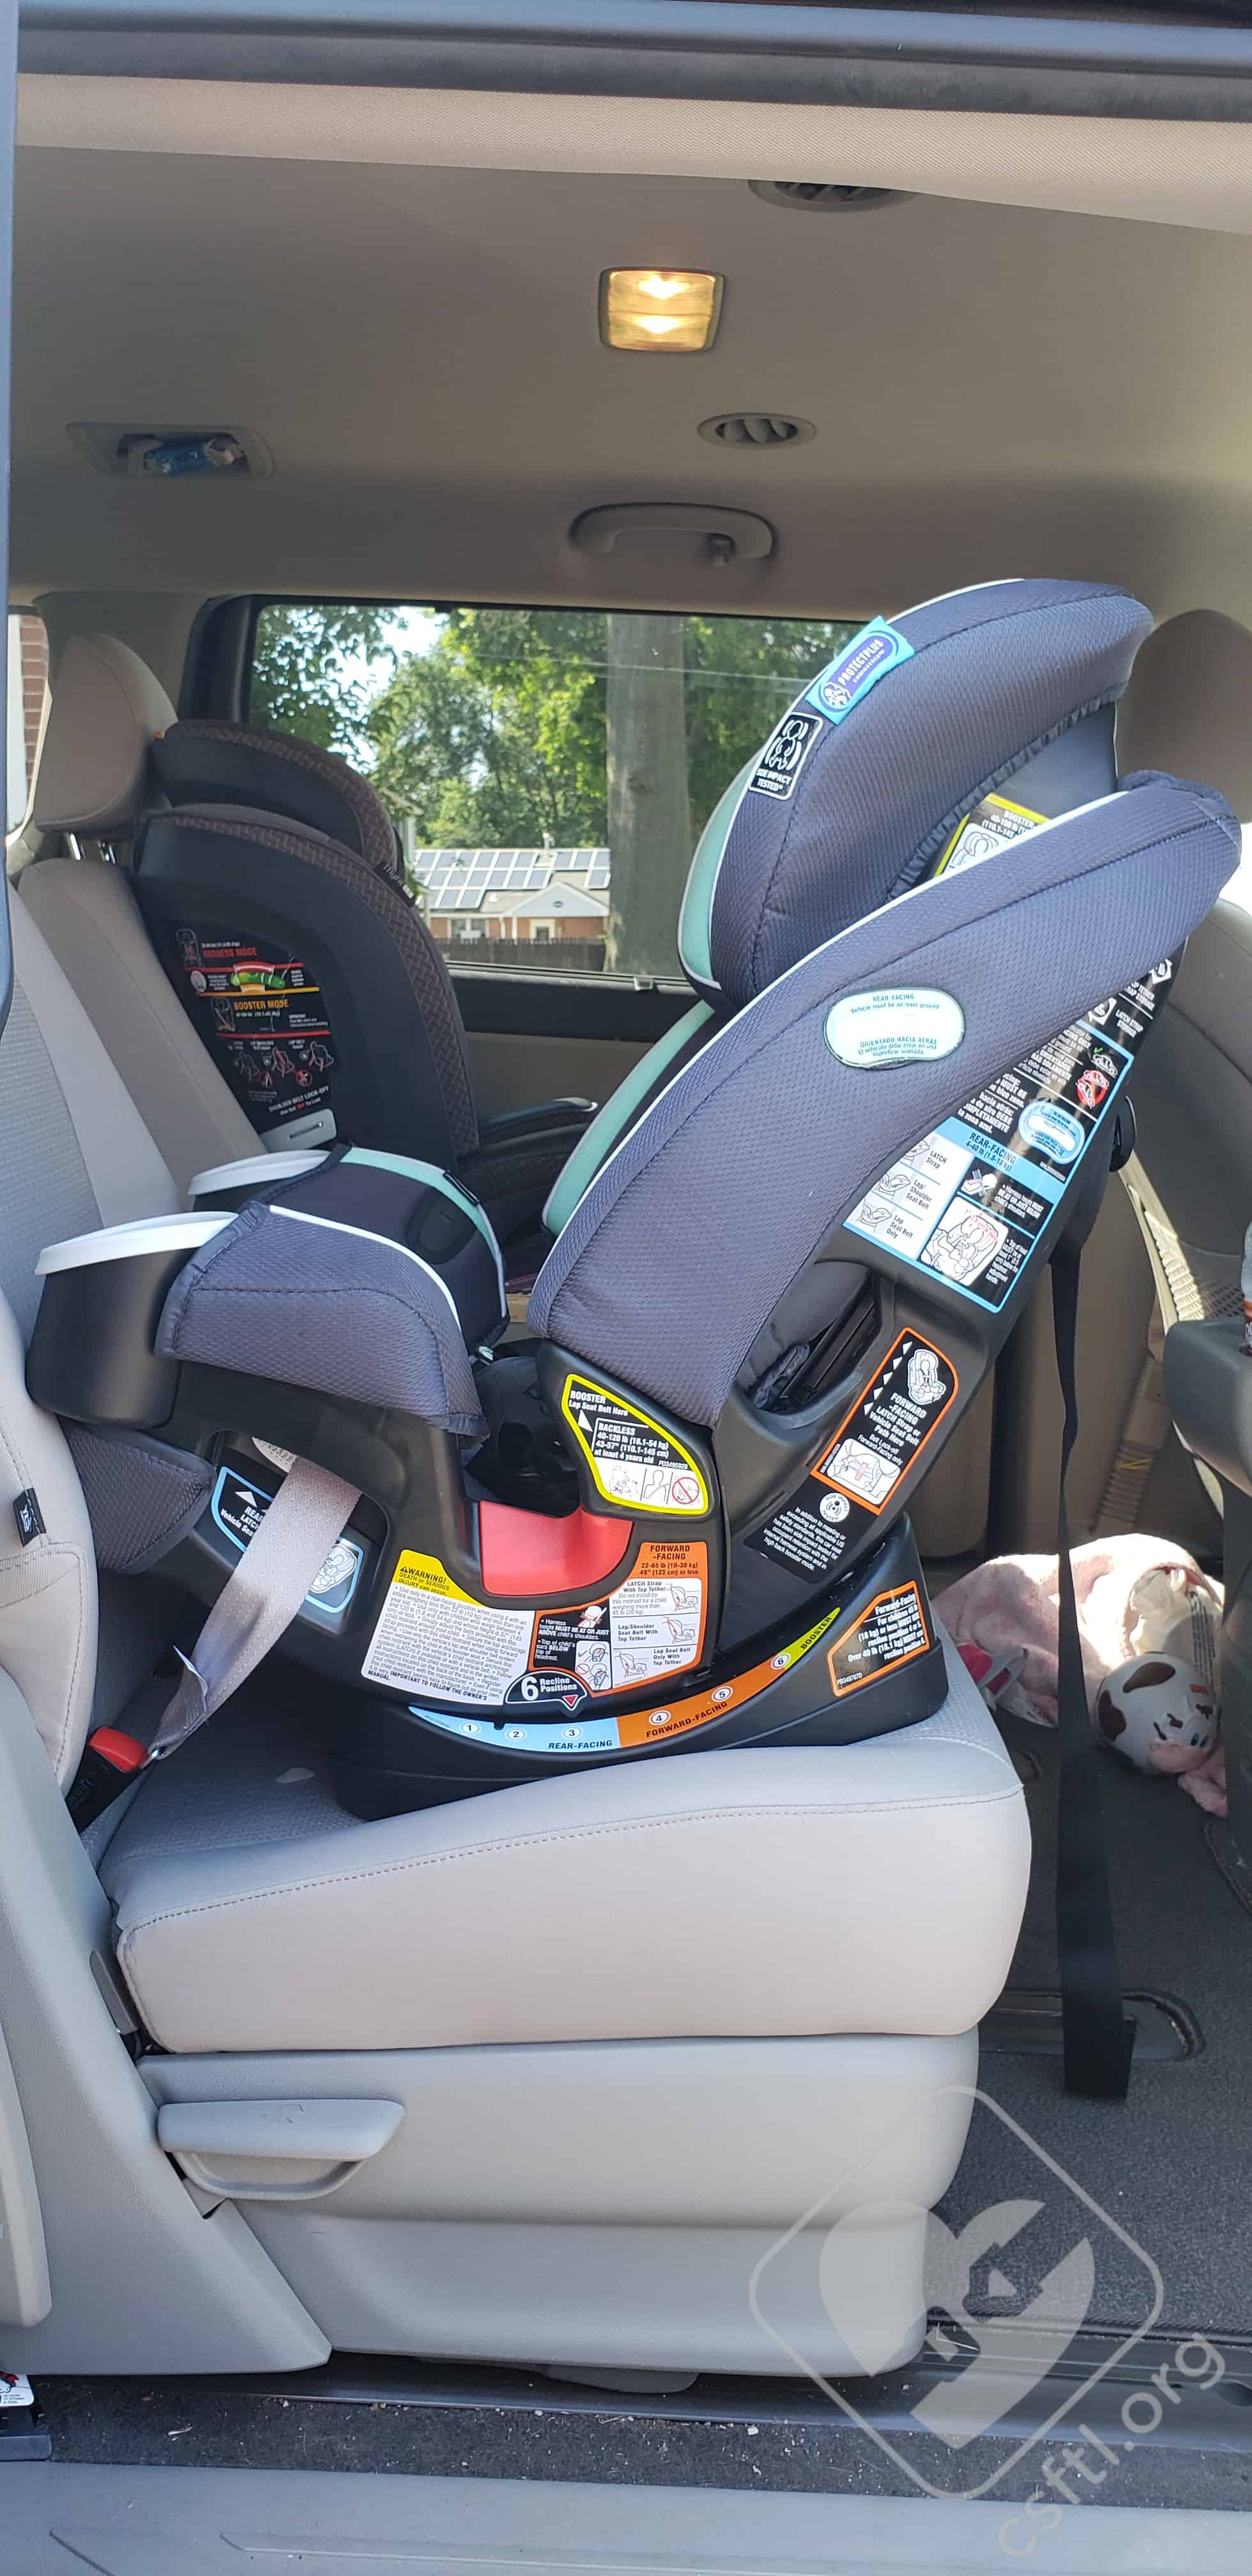
Graco 4Ever DLX rear facing with the vehicle seat belt
The first step to installing the Graco 4Ever DLX with the vehicle seat belt is to store the lower anchor connectors by clicking them on to the two small bars located on either side of the car seat near the child’s shoulders, with the webbing through the forward facing belt path.
Next, place the car seat on the vehicle seat facing the rear of the vehicle and adjust the recline position until the bubble on the recline indicator is in the appropriate area. Thread the vehicle seat belt through the rear facing belt path and buckle.
Pro Tip: Pull the cover back to expose the rear facing belt path for easier threading.
Once the vehicle seat belt is threaded through the belt path and buckled, engage the locking mode for the vehicle seat belt. Pull the seat belt to tighten while applying firm pressure to the seat pan area. Finally, confirm that the bubble on the recline indicator is correct, and check your work by giving the seat a firm handshake at the belt path. It should not move more than one inch in any direction.
Fit to Child: Rear Facing
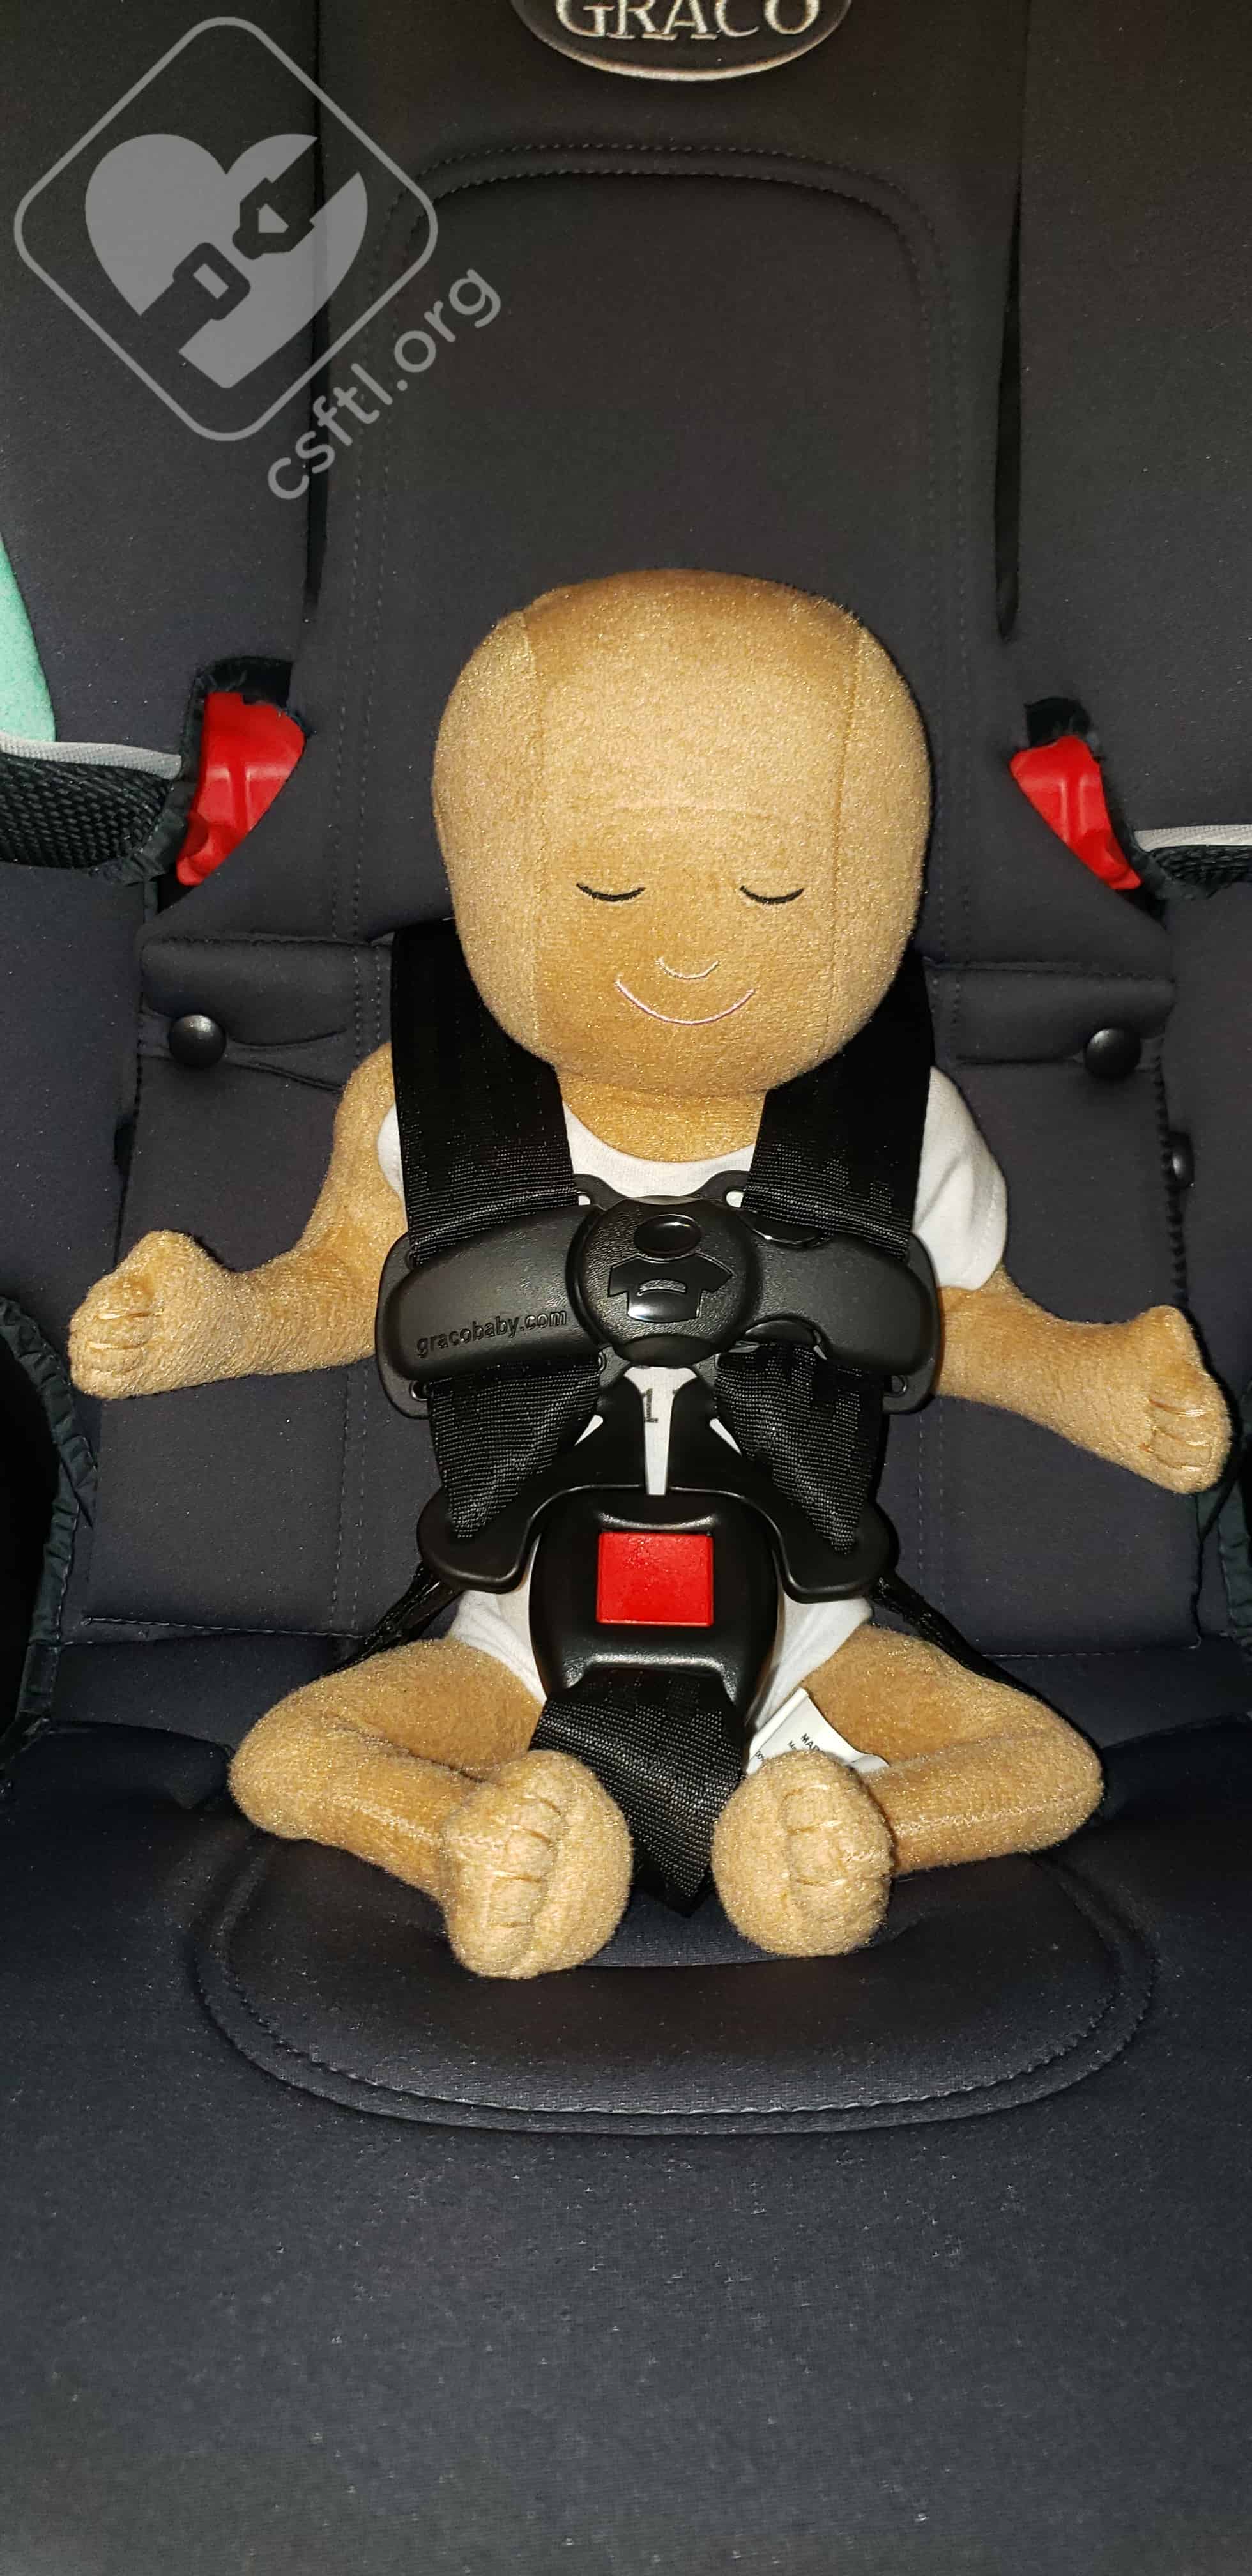
Preemie Doll with Insert

Graco 4Ever DLX preemie doll with inserts
Our preemie size Huggable Images doll weighs 4 pounds and is 17 inches long. The doll is modeling a good fit in the 4Ever DLX with the insert in use. The body insert boosts the doll up just enough that the harness is just a touch below the shoulders – which is what we want to see for rear facing! As was the case here, caregivers may find that they need to remove the harness covers when using the 4Ever DLX with smaller babies – the harness covers should be removed if they interfere with proper harnessing.
Preemie Doll without Insert
Graco 4ever DLX Preemie doll without inserts
Here is the preemie size Huggable Images doll, this time we’ve removed the inserts. It’s easy to see that a proper fit was not possible without the inserts because the harness is no longer at or below the doll’s shoulders. We would not recommend this seat for preemies without the inserts in use.
Newborn Doll with Insert
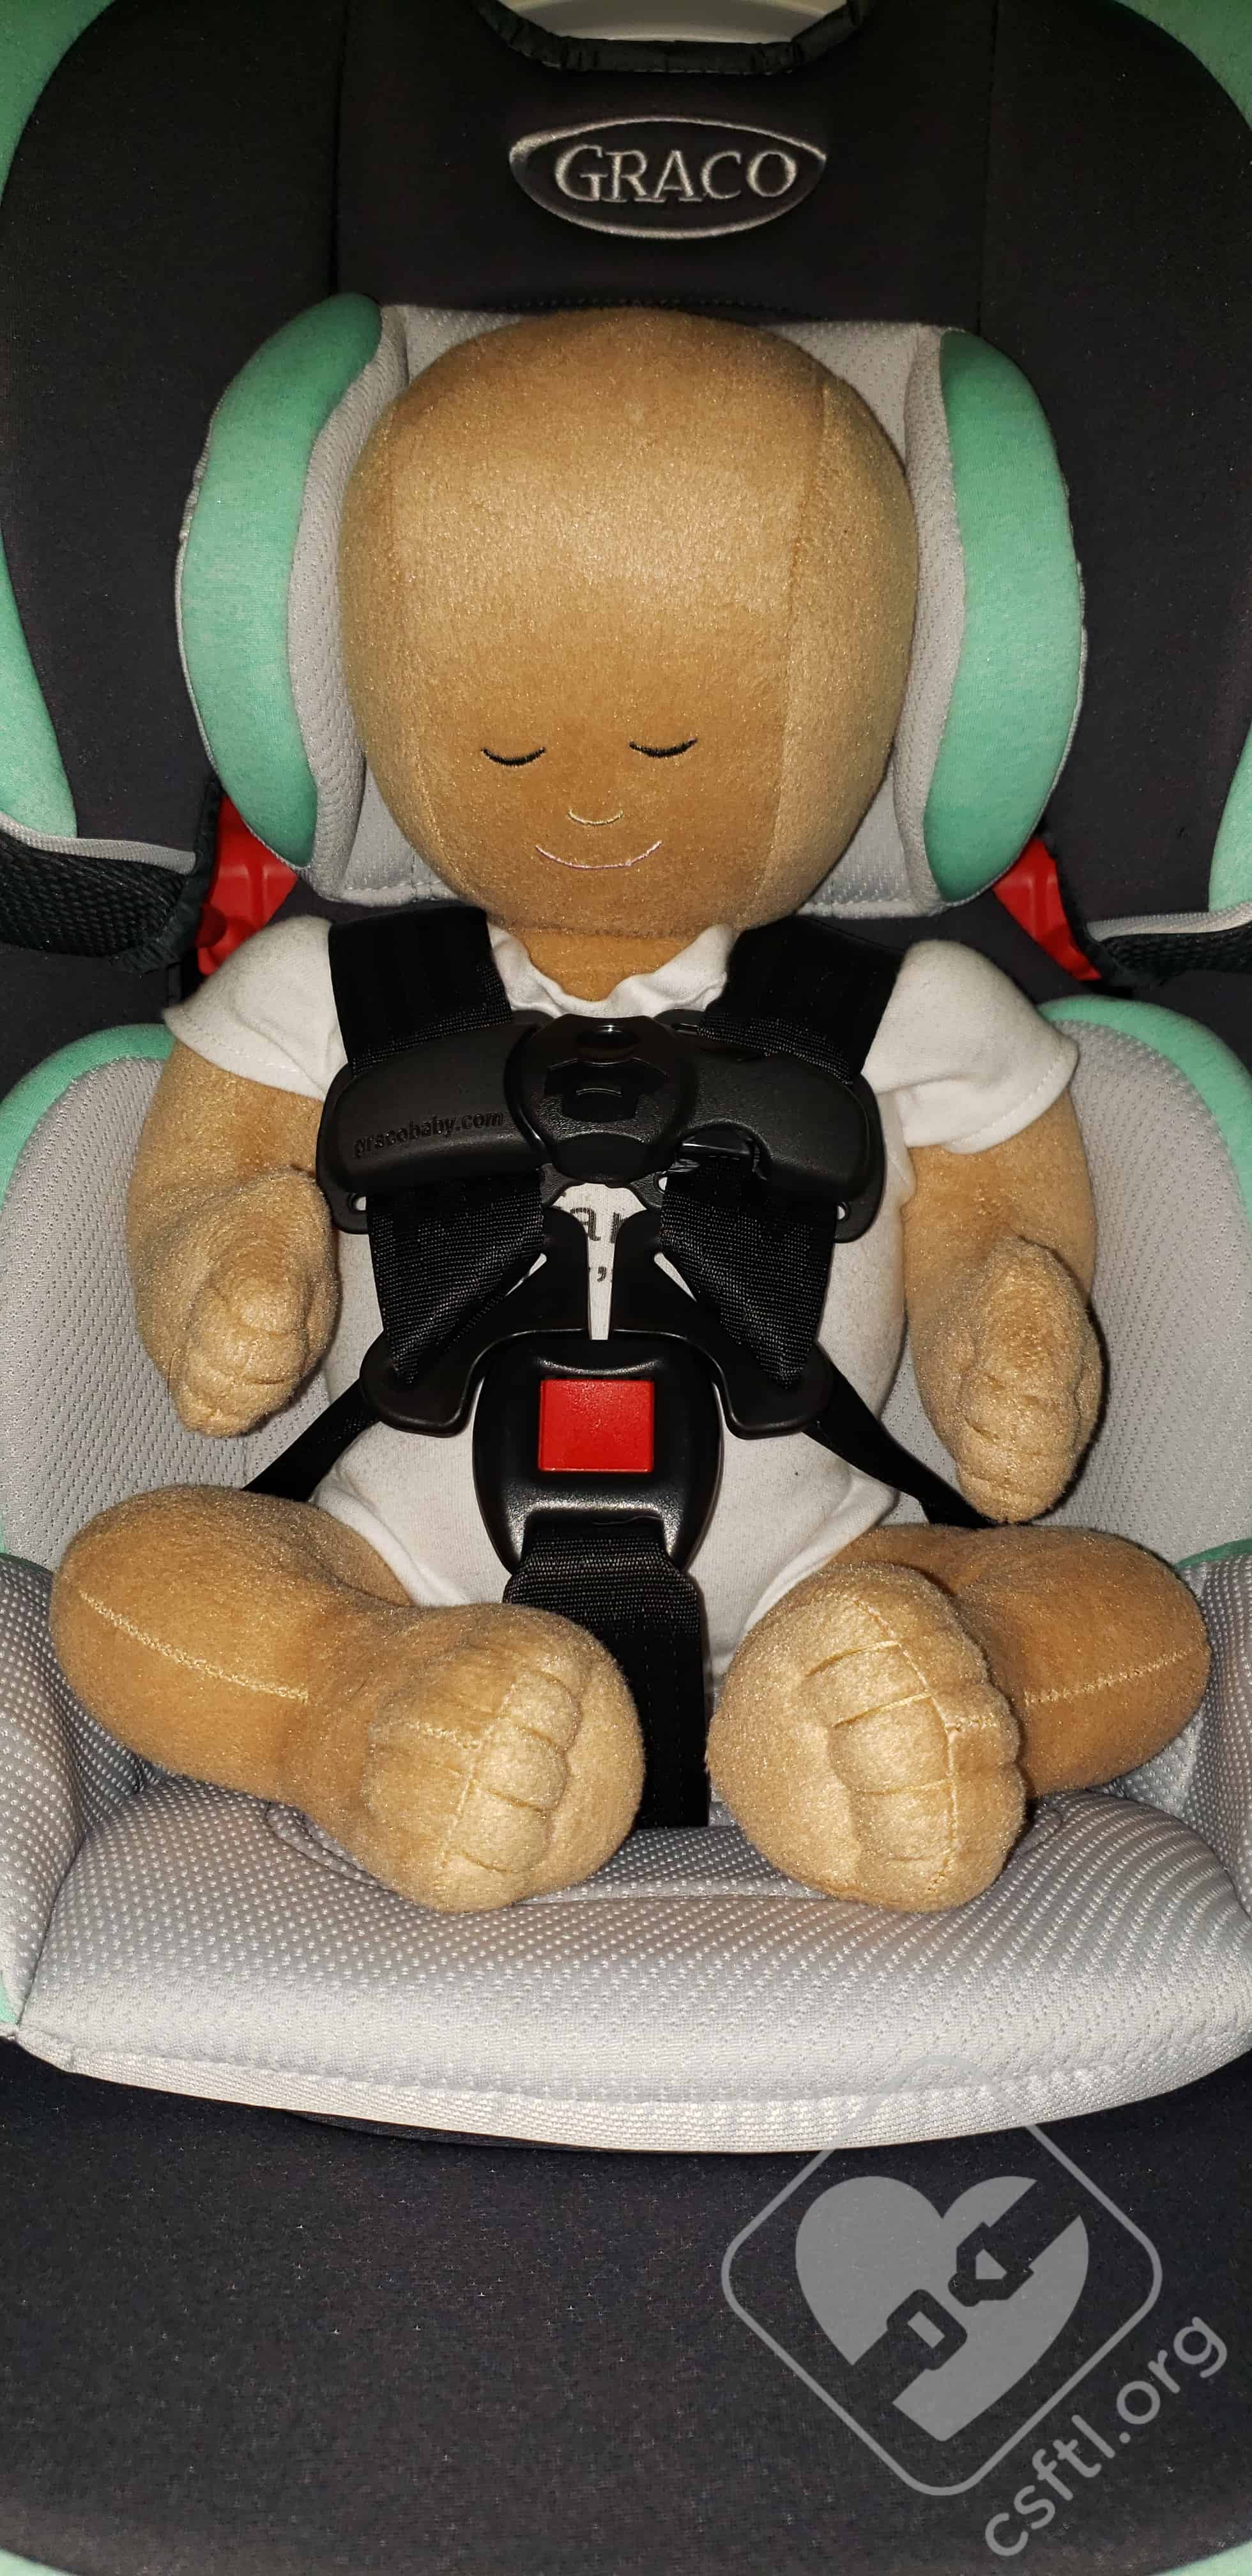
Graco 4Ever DLX Newborn doll with inserts
This Huggable Images doll is sized to represent a newborn baby — it weighs 7 pounds and is 17 inches long. Here the doll is pictured with the inserts in use. We’ve removed the harness covers as well.
The harness fit on our doll is very good — the harness is below the doll’s shoulders and the doll fits well in the seat. This doll represents a child who could grow into the 4Ever DLX and potentially use it for just about all of their car seat or booster seat days.
Newborn Doll without Insert
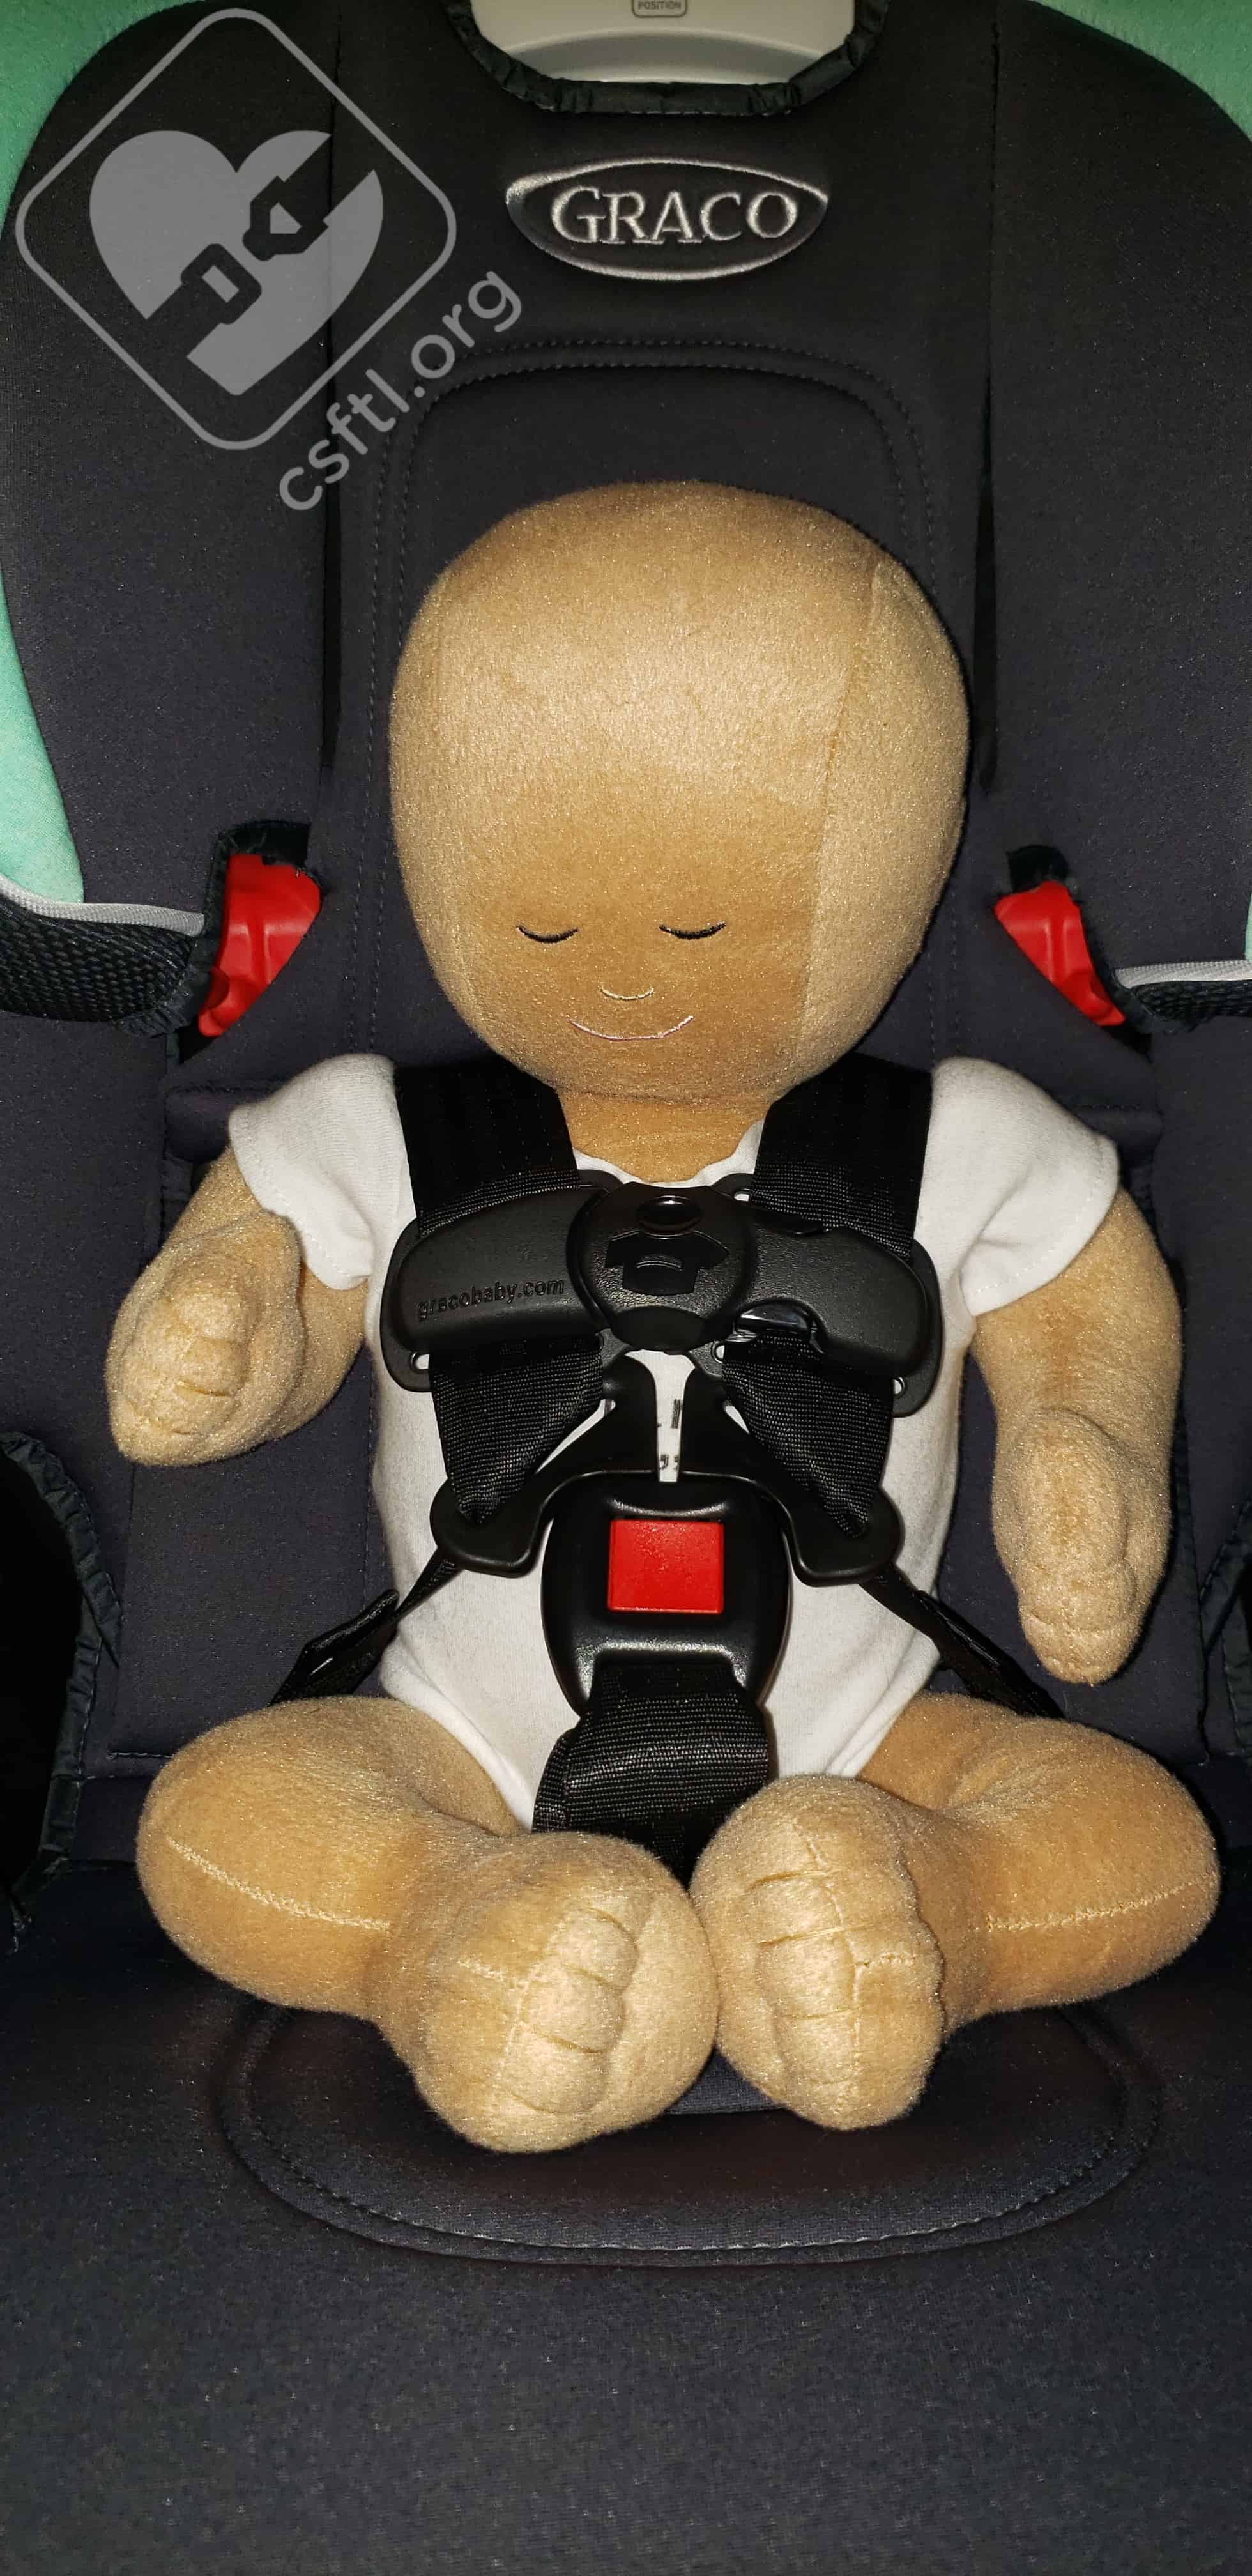
Graco 4Ever DLX Newborn doll without inserts
Here we see the newborn size Huggable Images doll again, this time without the inserts in use. Even without the inserts, the harness was still a hair below the doll’s shoulders. We would caution caregivers that smaller babies may or may not fit this seat properly without the insert, especially if there is a gap between the crotch buckle and the child that could potentially cause the child to slouch forward in the seat.
10 Months Old

Graco 4Ever DLX 10 months old
This model is 10 months old, 27 inches tall, and weighs 19 pounds. While she was a little apprehensive about testing out a new car seat, she fit very well in the 4Ever DLX and calmed easily once she was secured in the seat. She’s got plenty of room to grow here.
3 Years Old
Graco 4Ever DLX 3 year old rear facing
Here we see a 3 year old model who is 38 inches tall and weighs 31 pounds. She has been the long term model for this seat and has enjoyed it! She fits well rear facing in the 4Ever DLX and like our other model, she’s got some room to grow in this seat.
Installation: Forward Facing
Recline Angles
Graco 4Ever DLX forward facing reclines
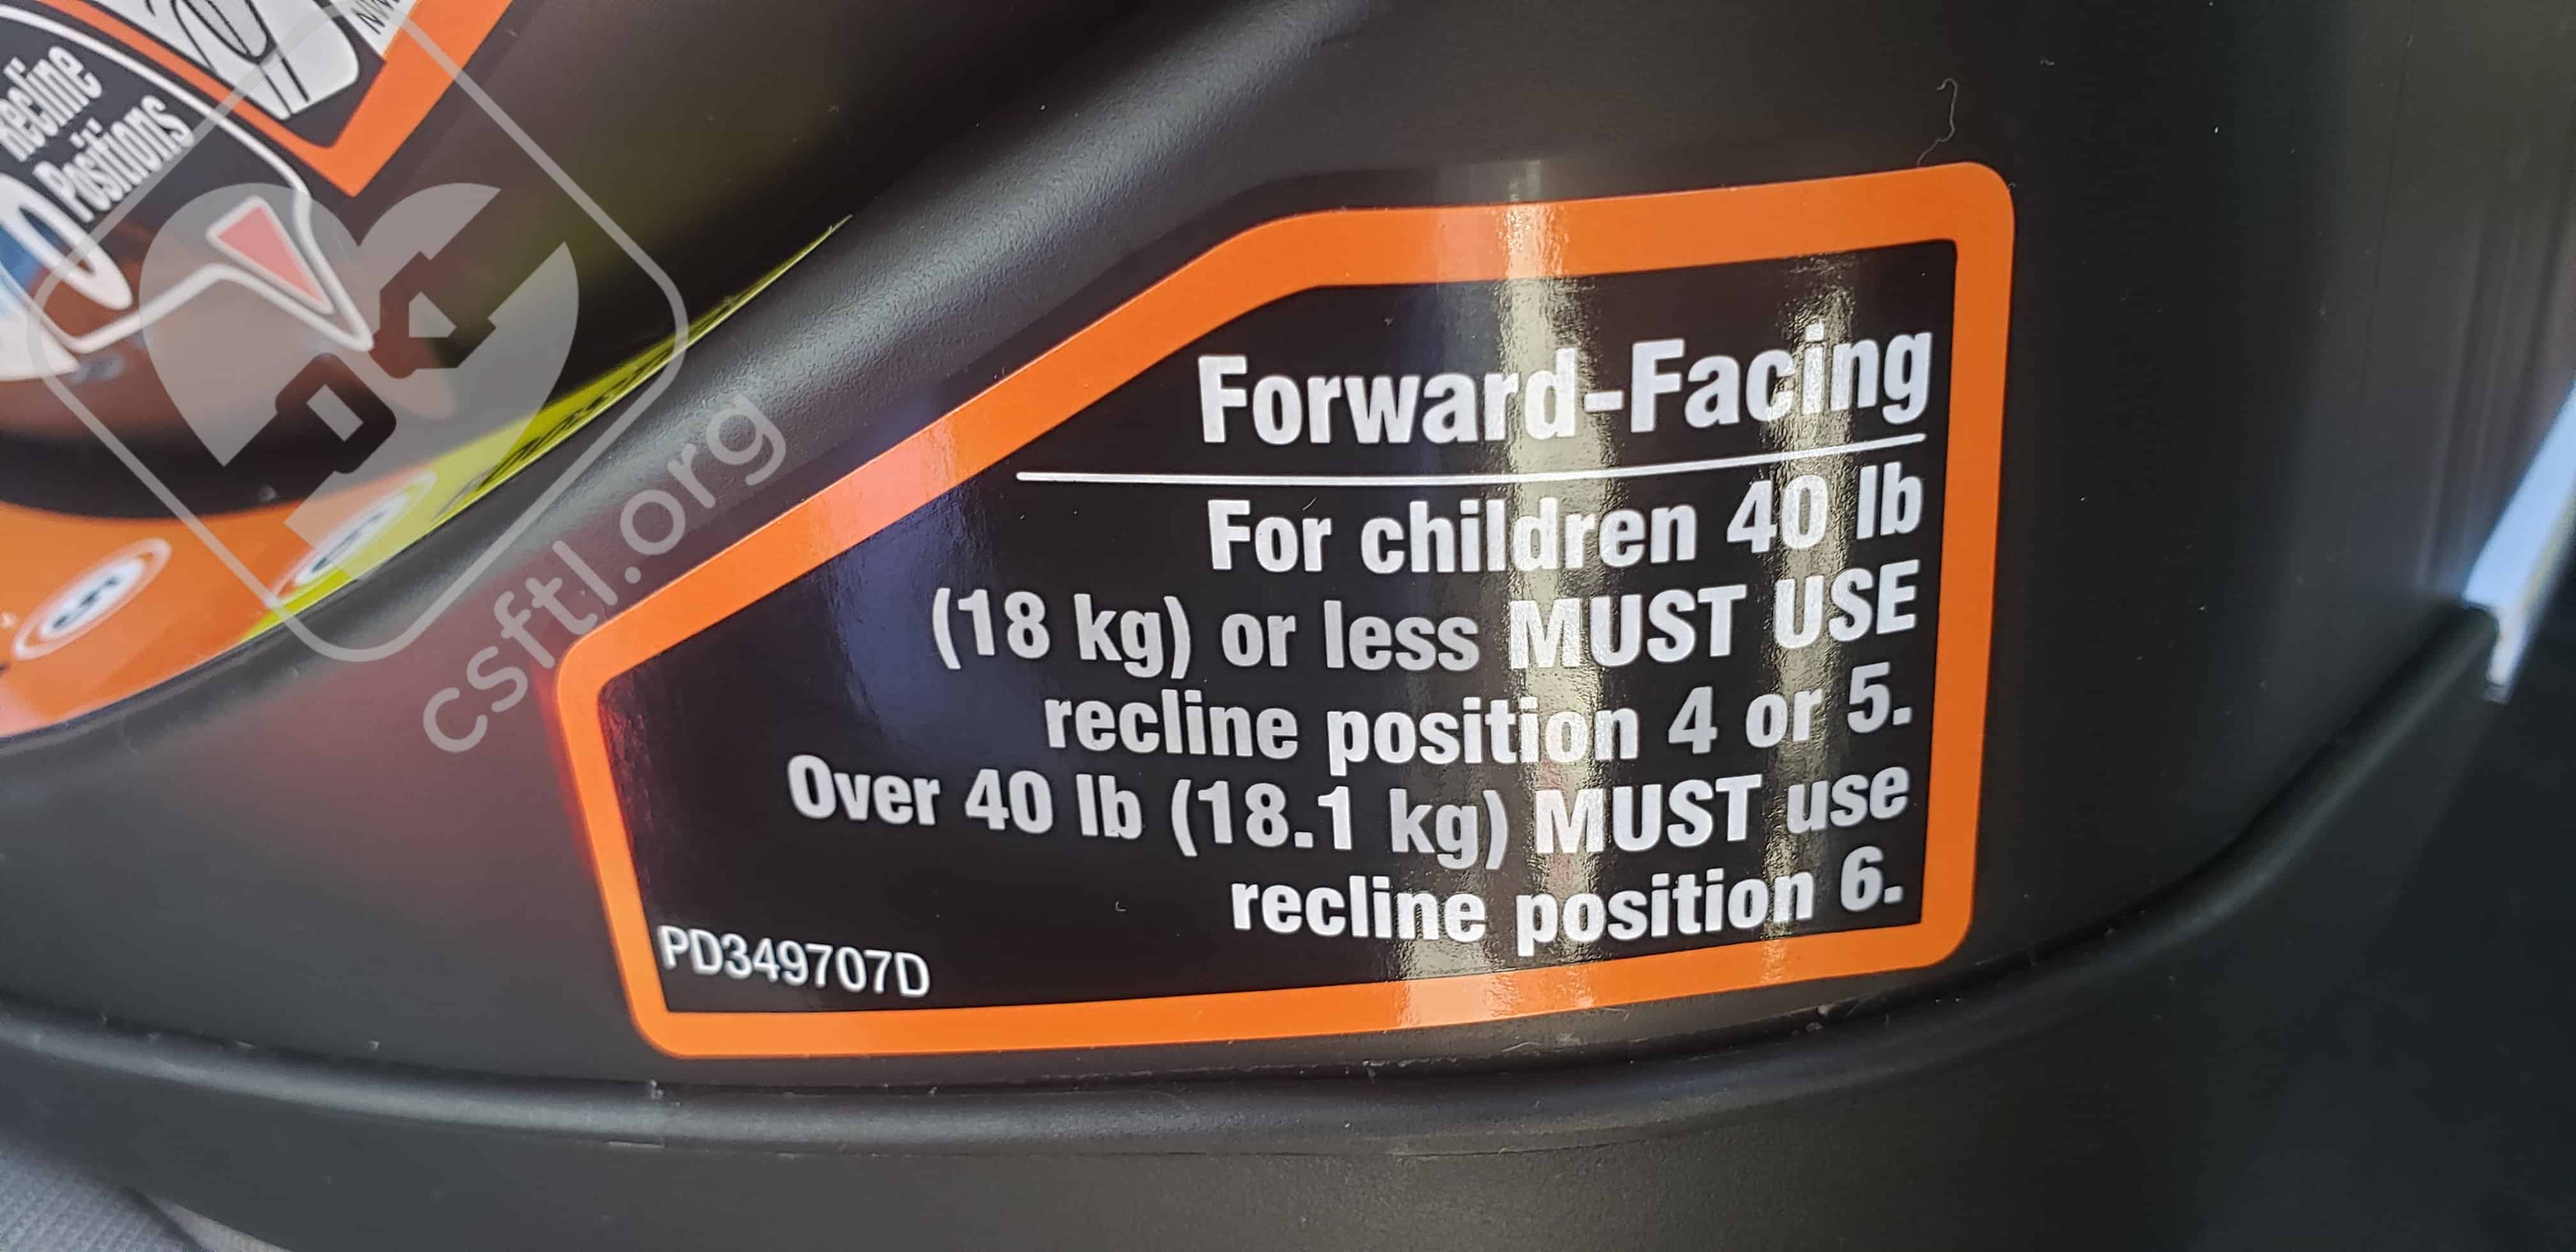
The 4Ever DLX has a recline angle indicator for rear facing but not for forward facing installations. However, the 4Ever DLX does have some pretty specific forward facing recline positions, depending on the child’s weight.
Here’s a quick rundown of those recline positions:
- Forward facing children who weigh 40 pounds or less, the 4Ever DLX must be installed on either position 4 or 5.
- For forward facing children who weigh more than 40 pounds, the 4Ever DLX must be installed on recline position 6.
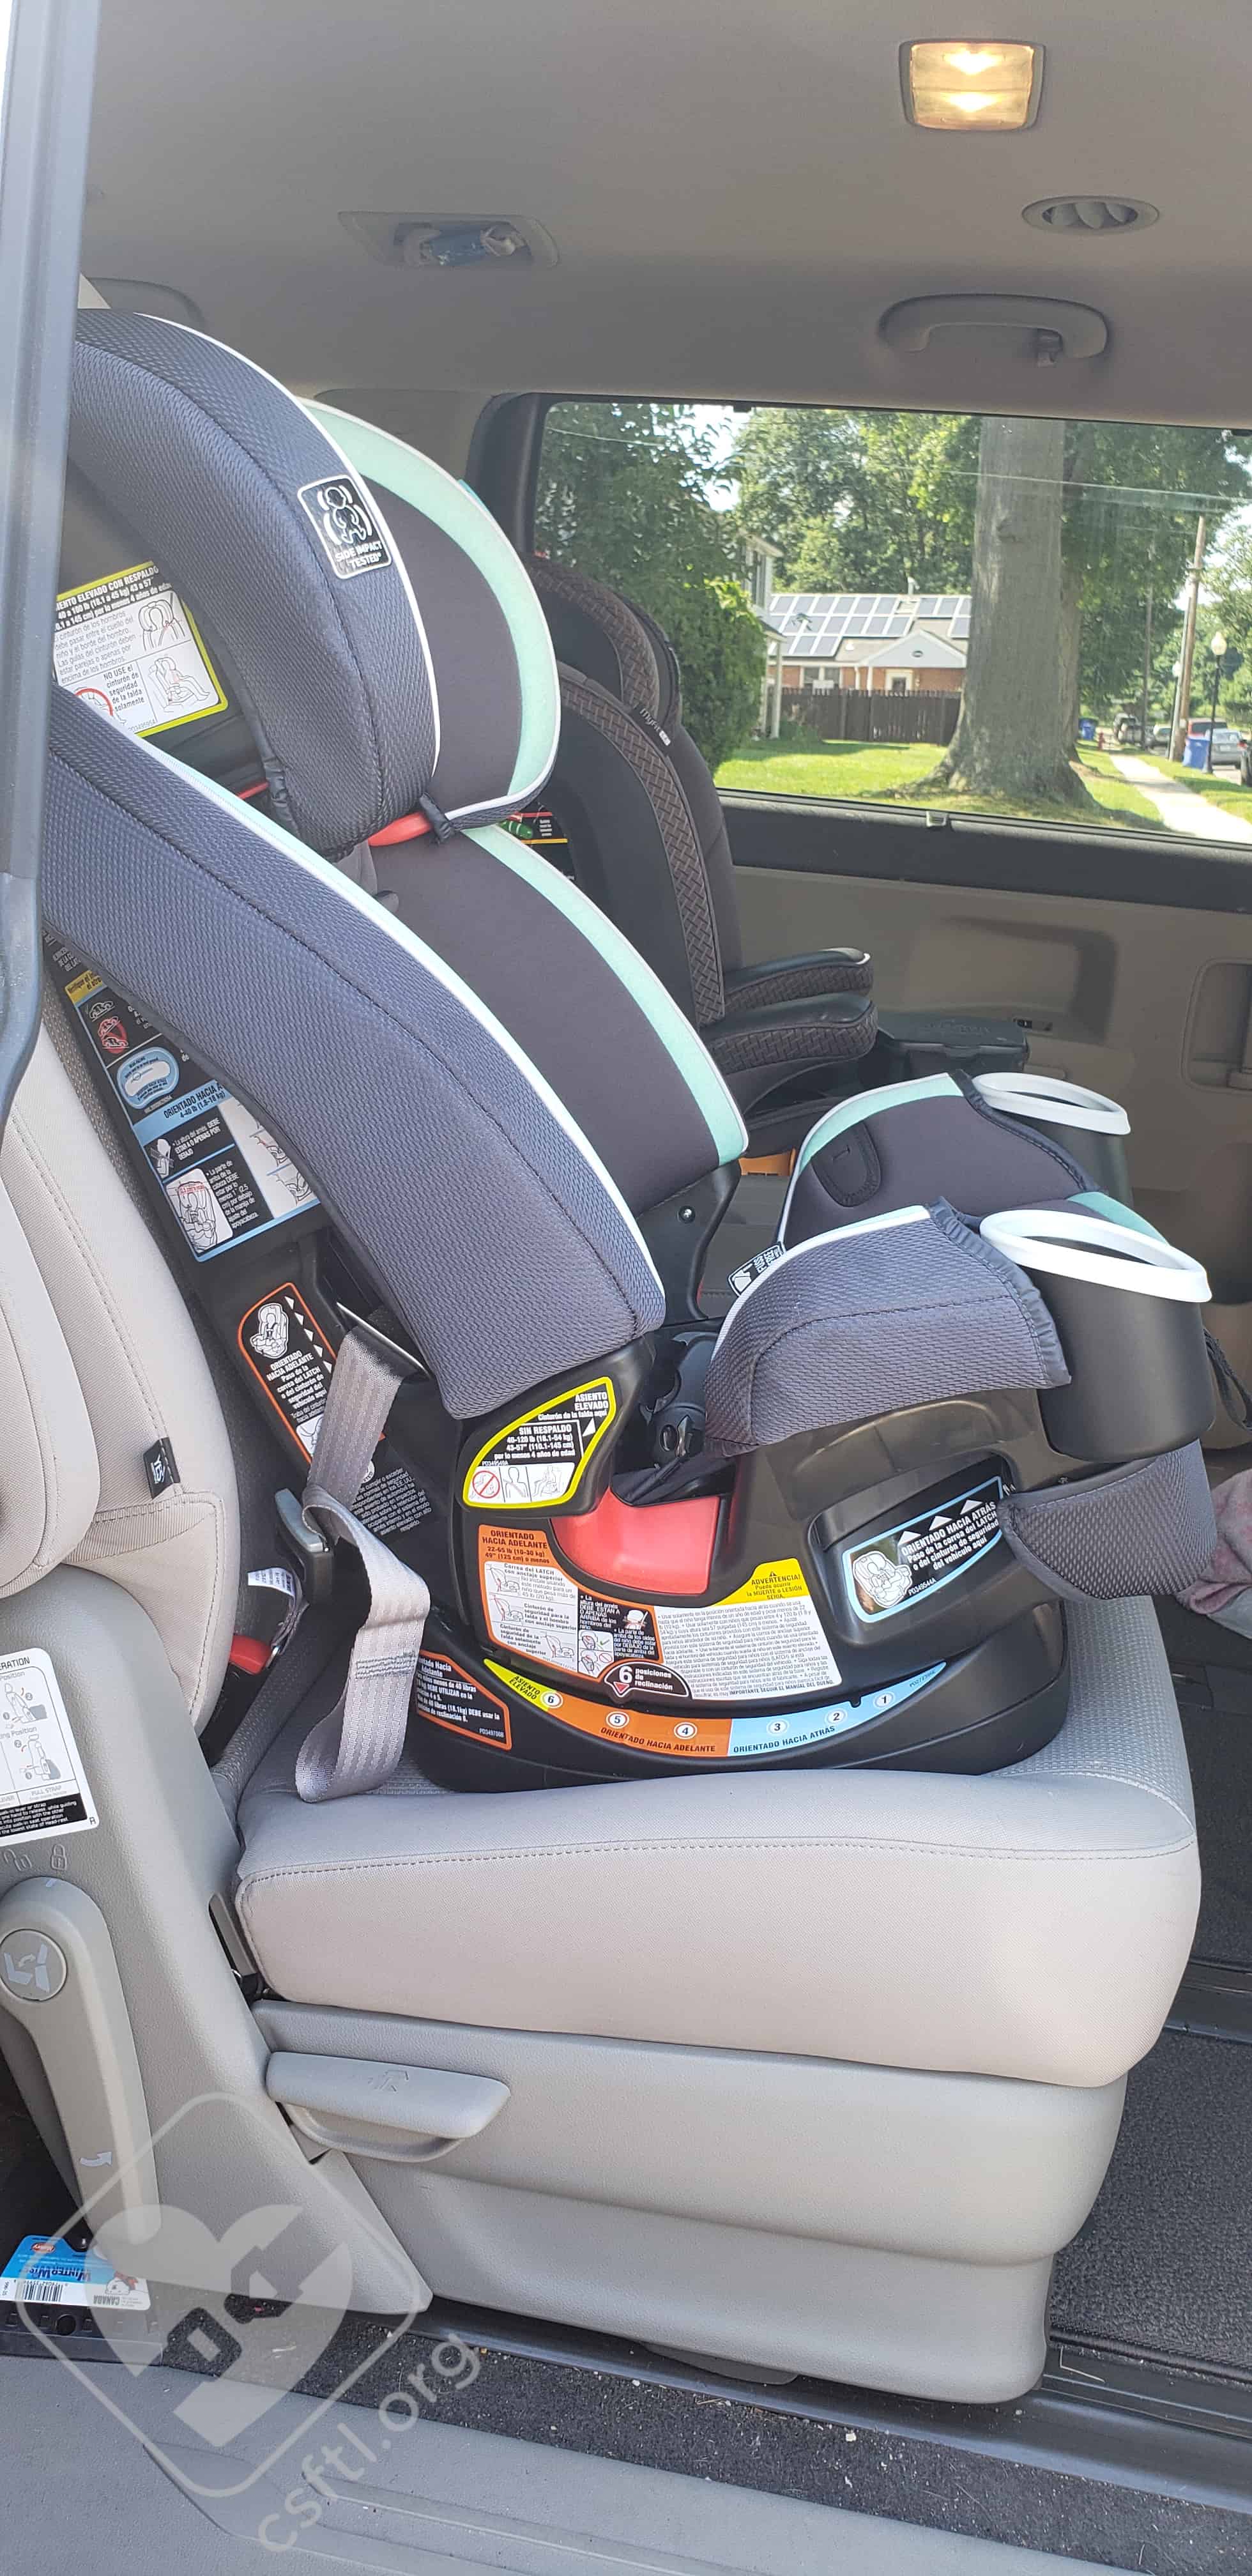
Depending on the vehicle, some caregivers may find that the required recline angles cause a gap to be present between the car seat and the vehicle seat — and that is okay! A gap is permitted as long as the 4Ever DLX’s base is flat on the vehicle seat.
Unfortunately, our reviewer did find that having the 4Ever DLX on the required recline position for children who weigh less than 40 pounds caused the car seat to sit at an angle that caused the car seat headrest to impact the vehicle headrest when raised, which would prevent proper harnessing for taller forward facing children who are not yet 40 pounds. This is problematic because our vehicle and many other vehicles don’t permit removing the vehicle headrest to accommodate a car seat.
Lower Anchors
Graco 4Ever DLX forward facing with lower anchors
To install the Graco 4Ever DLX forward facing with the lower anchors, first ensure that the lower anchor webbing is in the appropriate forward facing belt path. If not, move the lower anchor webbing to the forward facing belt path following the instructions outlined earlier in this article – as well as in the car seat’s manual.
Once the lower anchor webbing is in the forward facing belt path, sit the car seat on the vehicle seat facing the front of the vehicle and drape the tether webbing over the back of the vehicle seat for easy access later. Adjust the recline angle until it is on the proper setting for the child’s weight. Next, connect each lower anchor connector to the appropriate lower anchor bars for the seating position within the vehicle. Apply firm pressure to the seat pan of the car seat while pulling on the lower anchor webbing tail to tighten.
Pro tip: lifting the back flap of the cover slightly and feeding the tail through the belt path opening to pull straight across the seat can make tightening the seat easier.
Once the slack is removed, check your work by giving the seat a firm handshake at the belt path – it should not move more than one inch in any direction. Finally, pull the top tether anchor webbing to remove all slack from the tether.
Vehicle Seat Belt

Graco 4Ever DLX Forward Facing with Vehicle Seat Belt
Another ease of use feature on the 4Ever DLX is the lockoff that can be used when installing this seat forward facing with the vehicle seat belt. When installing a car seat with the vehicle seat belt, the seat belt must be locked in some way – either with a locking mechanism on the seat belt, a locking mechanism on the car seat, or by using a locking clip. The lockoff on the 4Ever DLX serves the purpose of locking the vehicle seat belt during installation, but the lockoff can be bypassed if desired — in which case the vehicle seat belt would need to be locked in another way.
To install the seat forward facing with the vehicle seat belt, start by making sure that the lower anchors are properly stored with the webbing in the rear facing belt path and the connectors clicked on to the two small bars on either side of the seat, under where the child’s feet would be.
Next, place the car seat on the vehicle seat facing towards the front of the vehicle. Drape the tether webbing over the back of the vehicle seat for easier access later in the installation. Then, adjust the car seat to the proper recline for the child’s weight. Lift the back flap on the cover and pull down the lower portion to expose the forward facing belt path and the forward facing lockoff. If using the lockoff, open the lockoff, thread the seat belt through the belt path, and buckle. Remove any slack from the belt, then close the lockoff over both the lap and shoulder portions of the vehicle seat belt. If bypassing the lockoff, thread the vehicle seat belt through the belt path and over the closed lockoff, buckle, then lock the seat belt and pull to tighten while compressing the car seat into the vehicle seat. Check your work by giving the seat a firm handshake at the belt path — it should not move more than an inch in any direction. Finally, attach the tether and pull the tail to remove any slack.
Fit to Child: Forward Facing
3 Years Old
Graco 4Ever DLX 3 years old forward facing
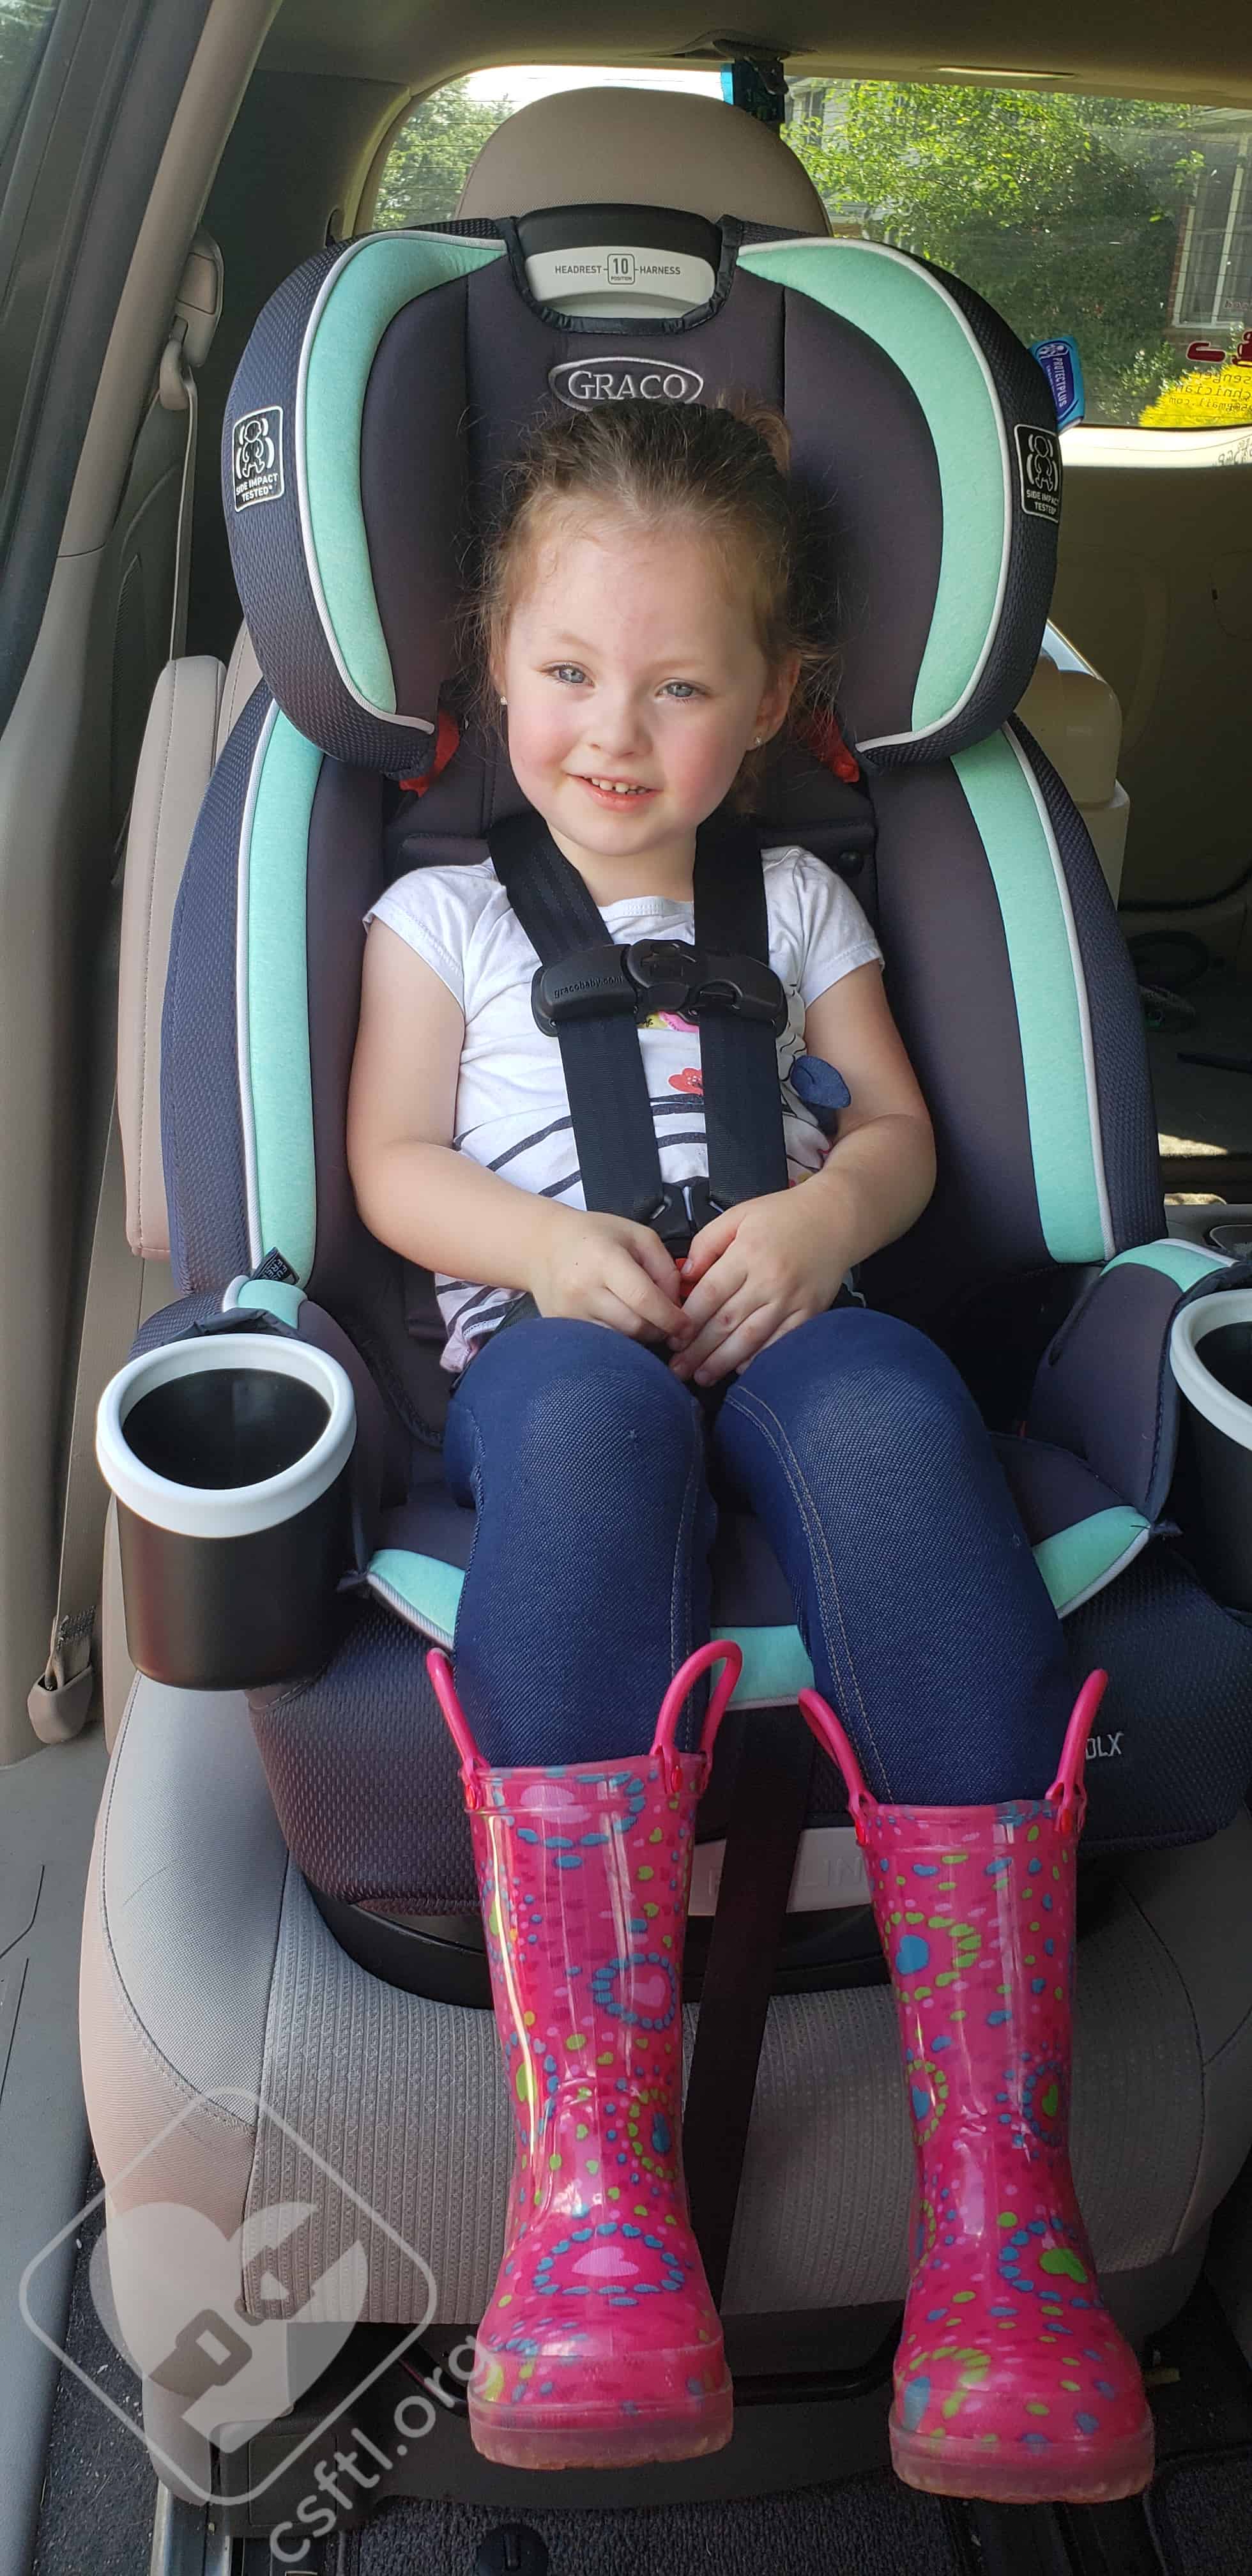
Here we see our 3 year old model again, this time she’s riding forward facing. She is still 38 inches tall and weighs 31 pounds. She is fairly new to forward facing, but still finds this seat comfortable and she fit well in the harness. Since she weighs less than 40 pounds, the 4Ever DLX must be on recline position 4 or 5 for her.
Unfortunately, I found that the more reclined forward facing installations in her 2016 Kia Sedona caused the car seat’s headrest to angle towards the vehicle headrest. While the seat was able to be properly installed for this child at this specific size, the 4Ever DLX’s headrest couldn’t be raised any higher due to interference from the vehicle headrest.
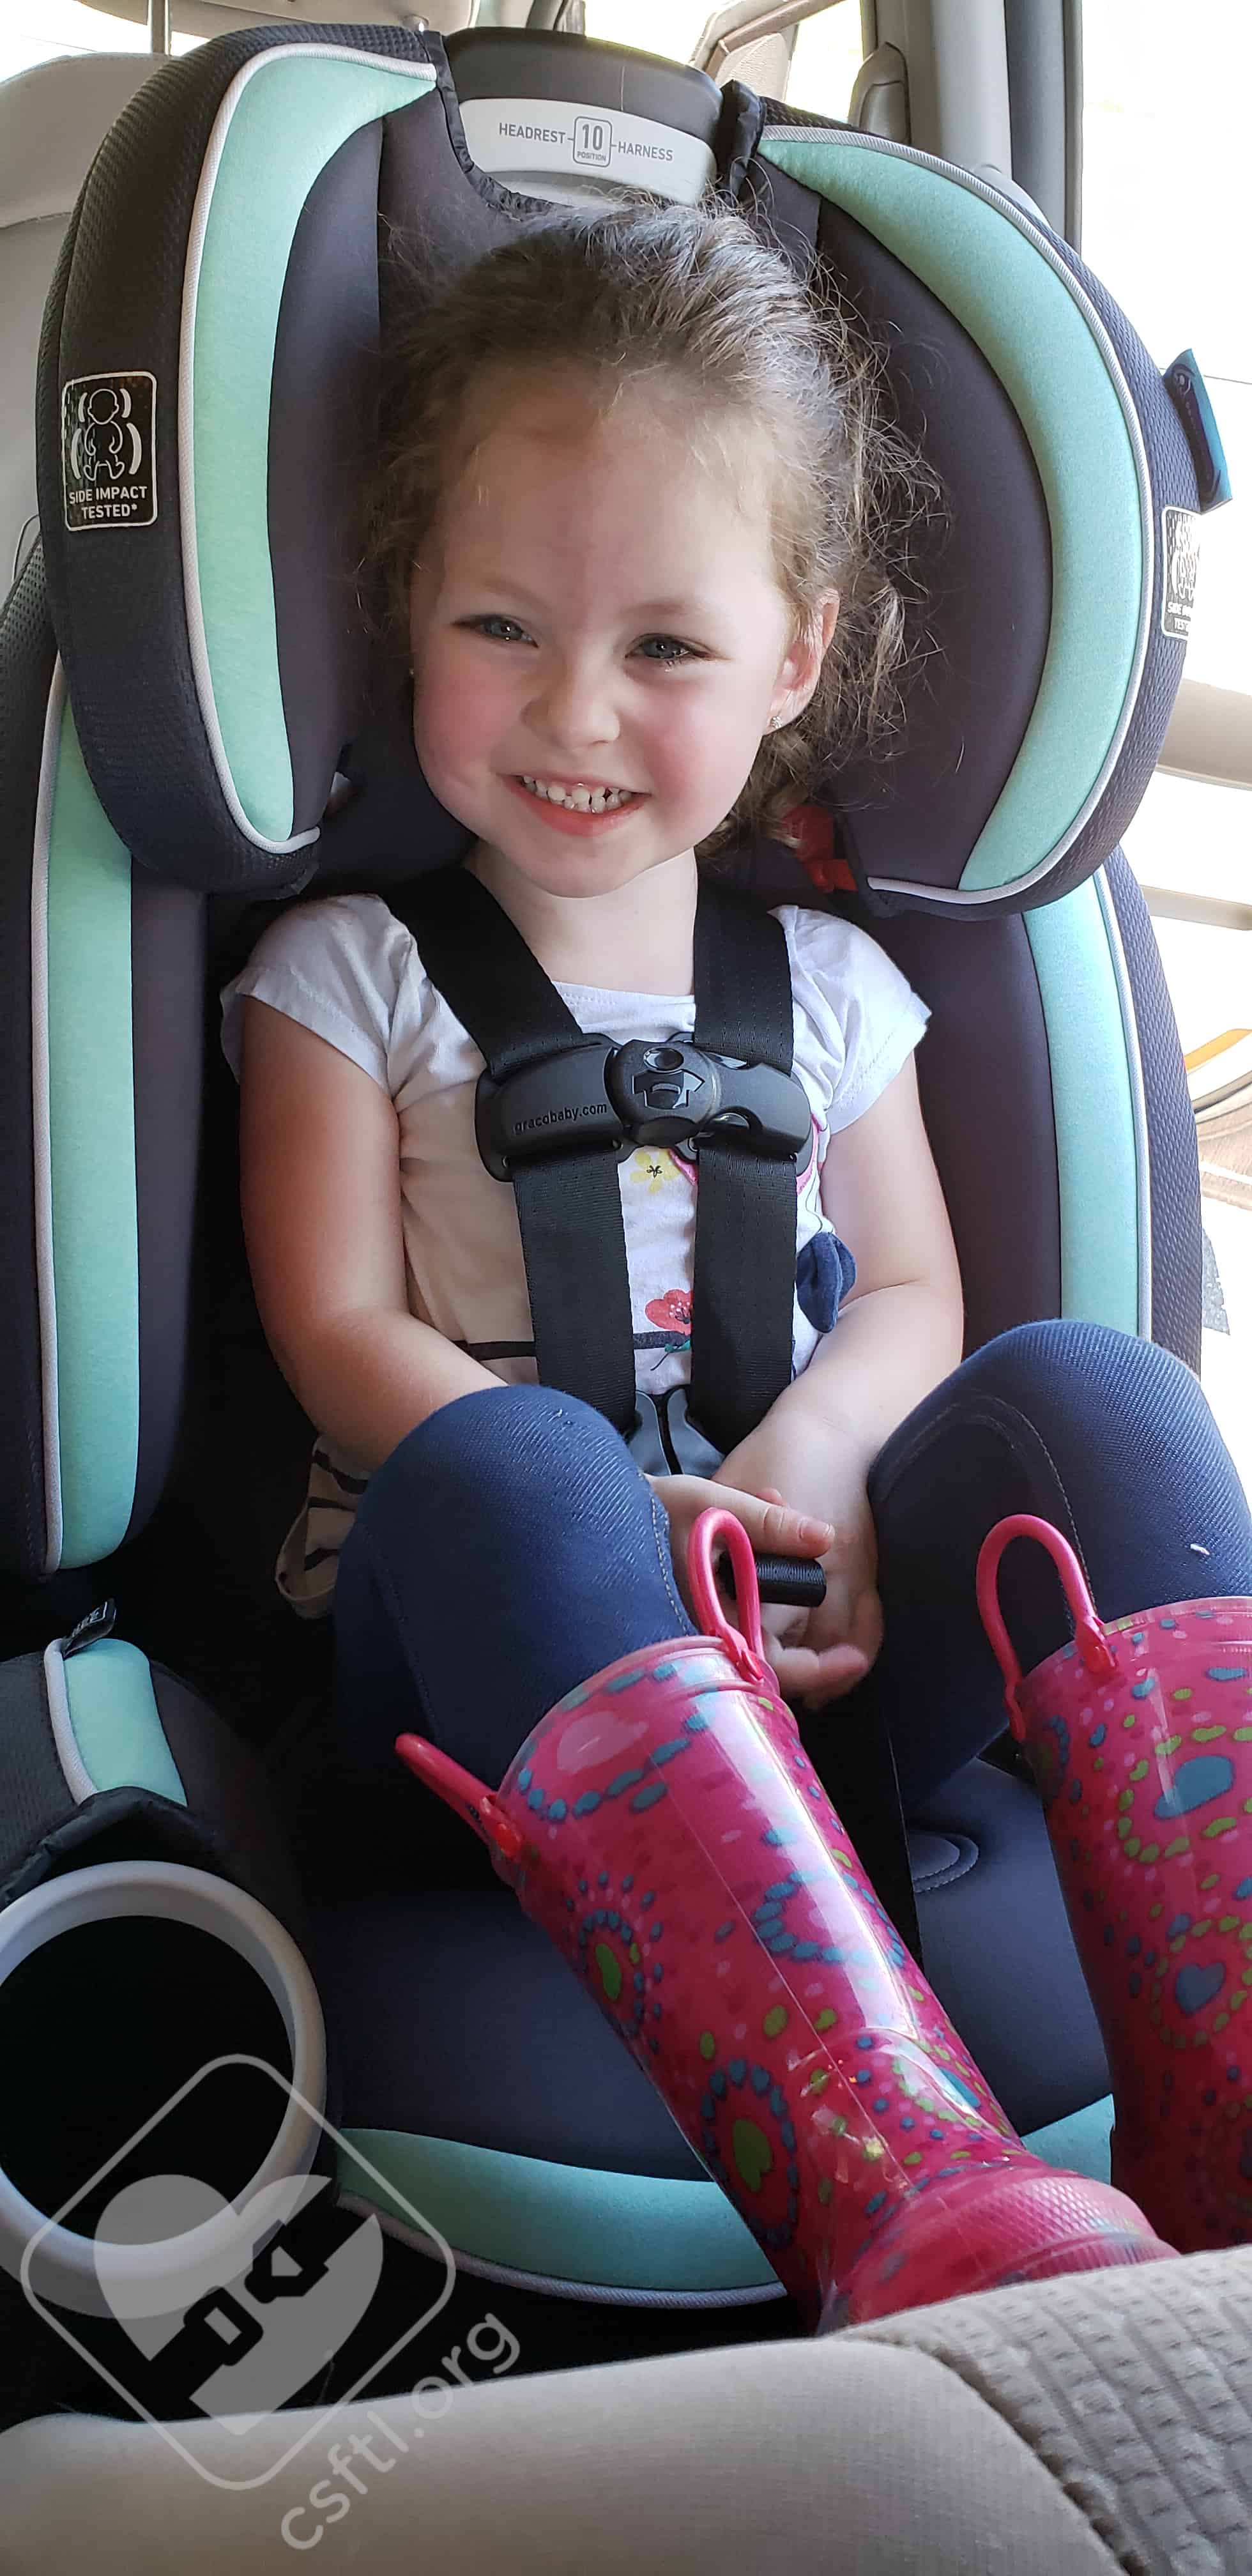
6 Years Old
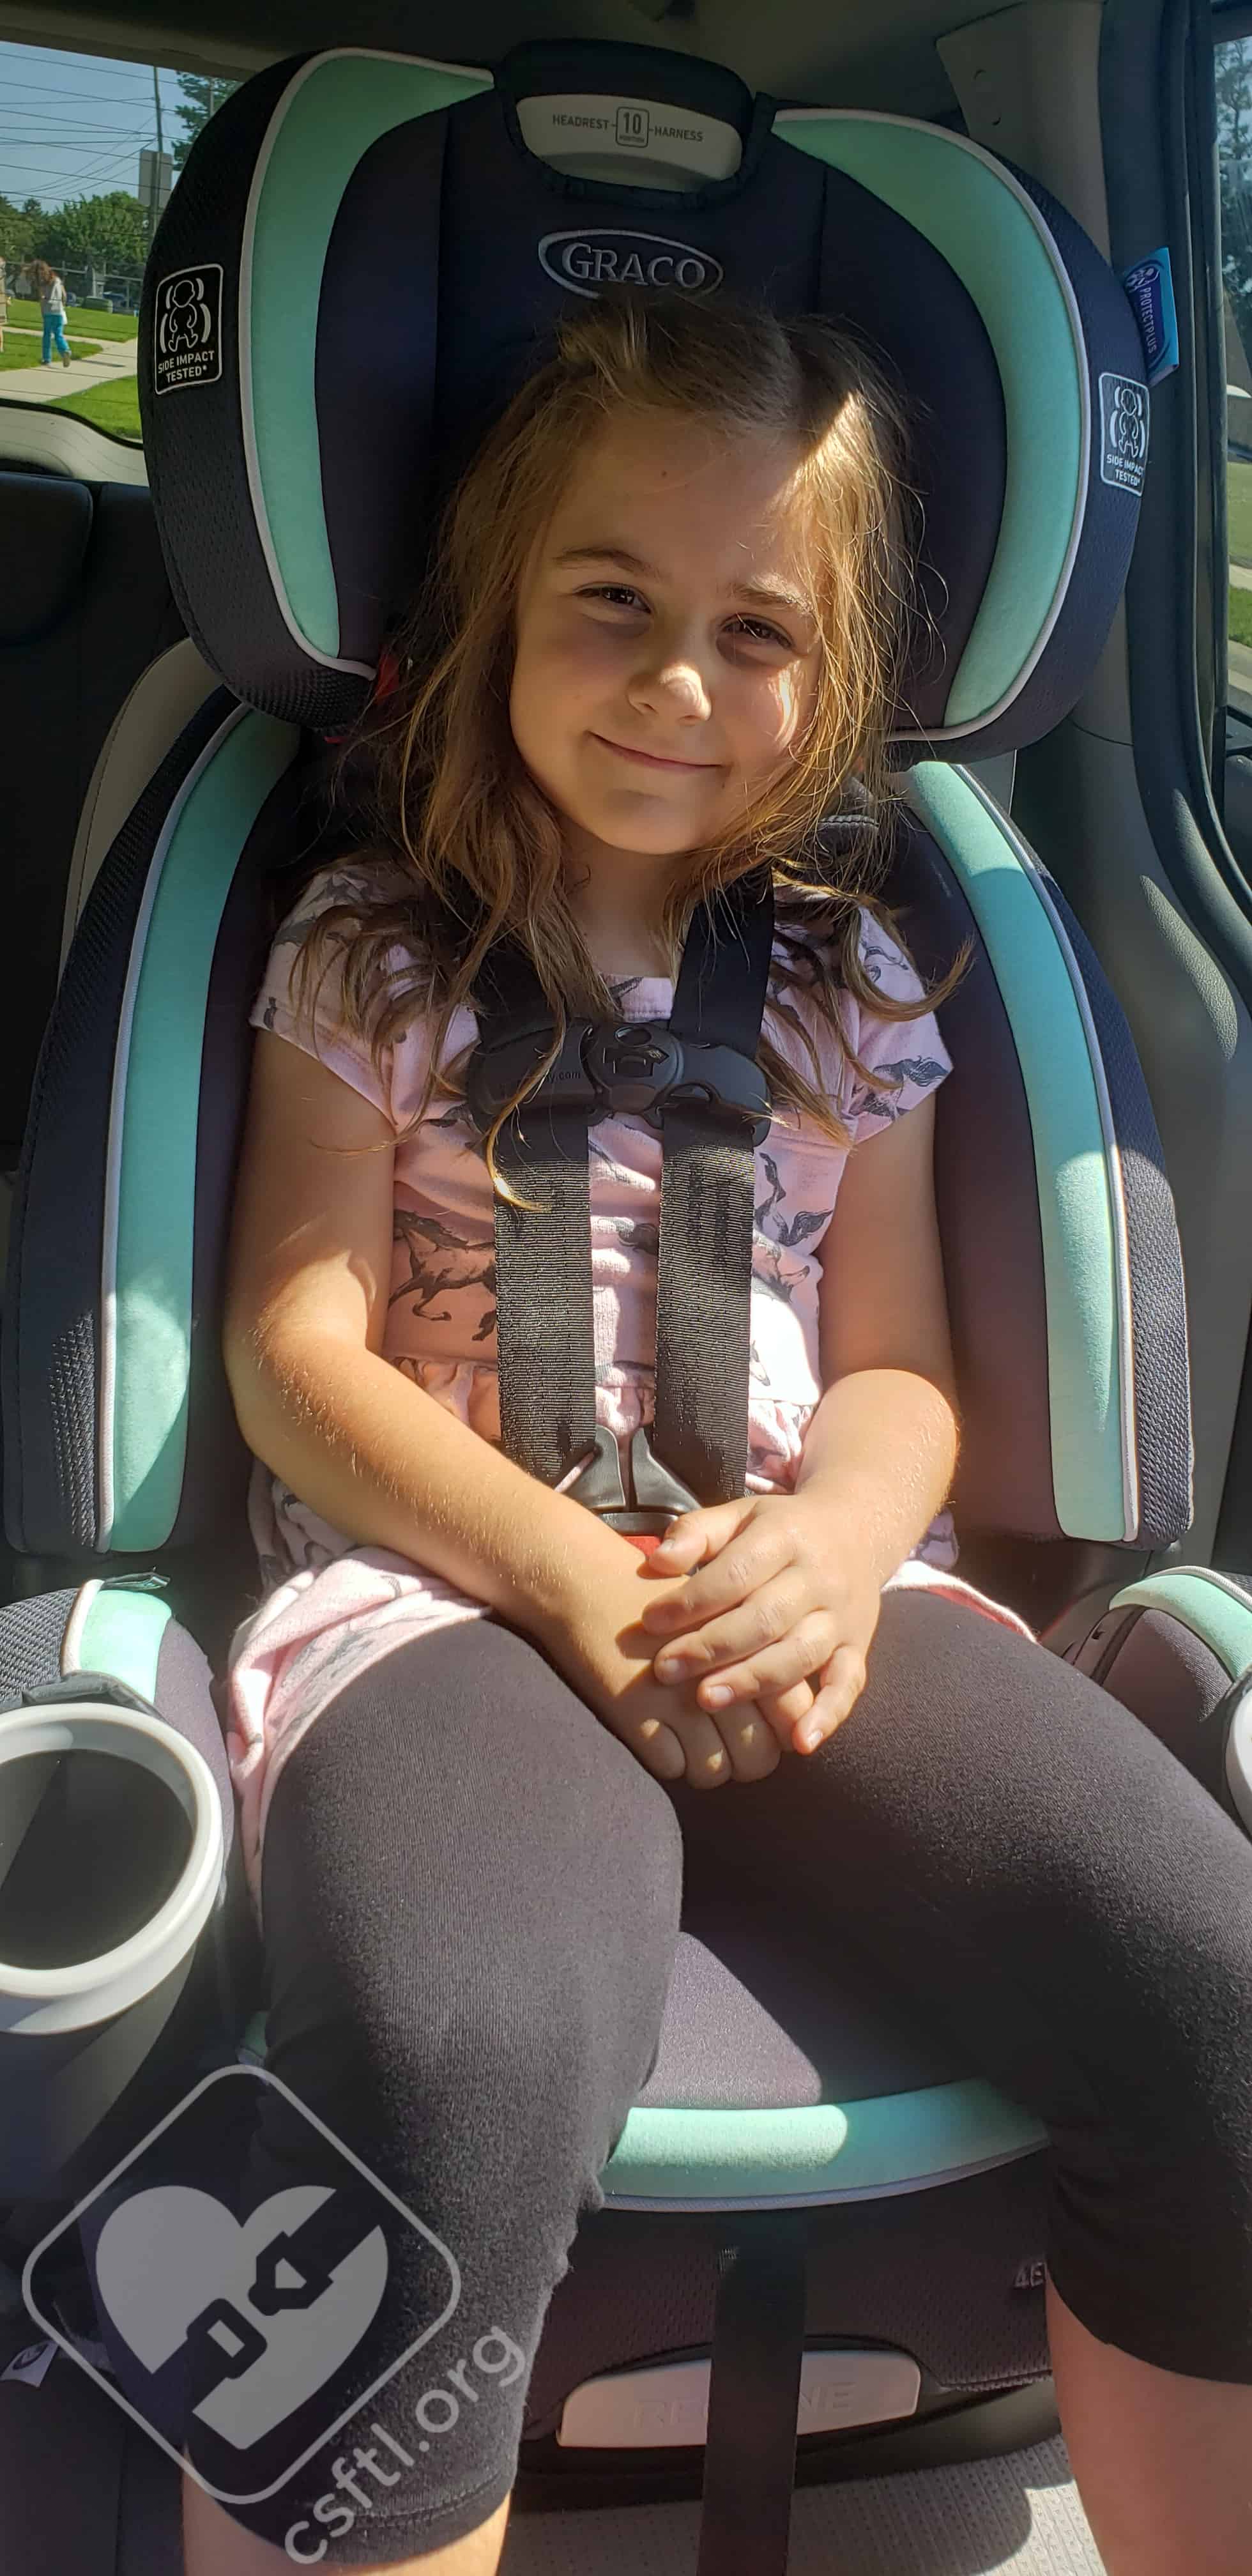
Graco 4Ever DLX 6 years old
This model is 6 years old, 47 inches tall, and weighs 51 pounds. She is technically old enough to ride in a booster seat, but she remains harnessed in her regular car seat. In the 4Ever DLX, she was very comfortable and the harness fit her well with room left to grow before she’d outgrow the harness.
Installation: High Back Booster
Storing the Harness
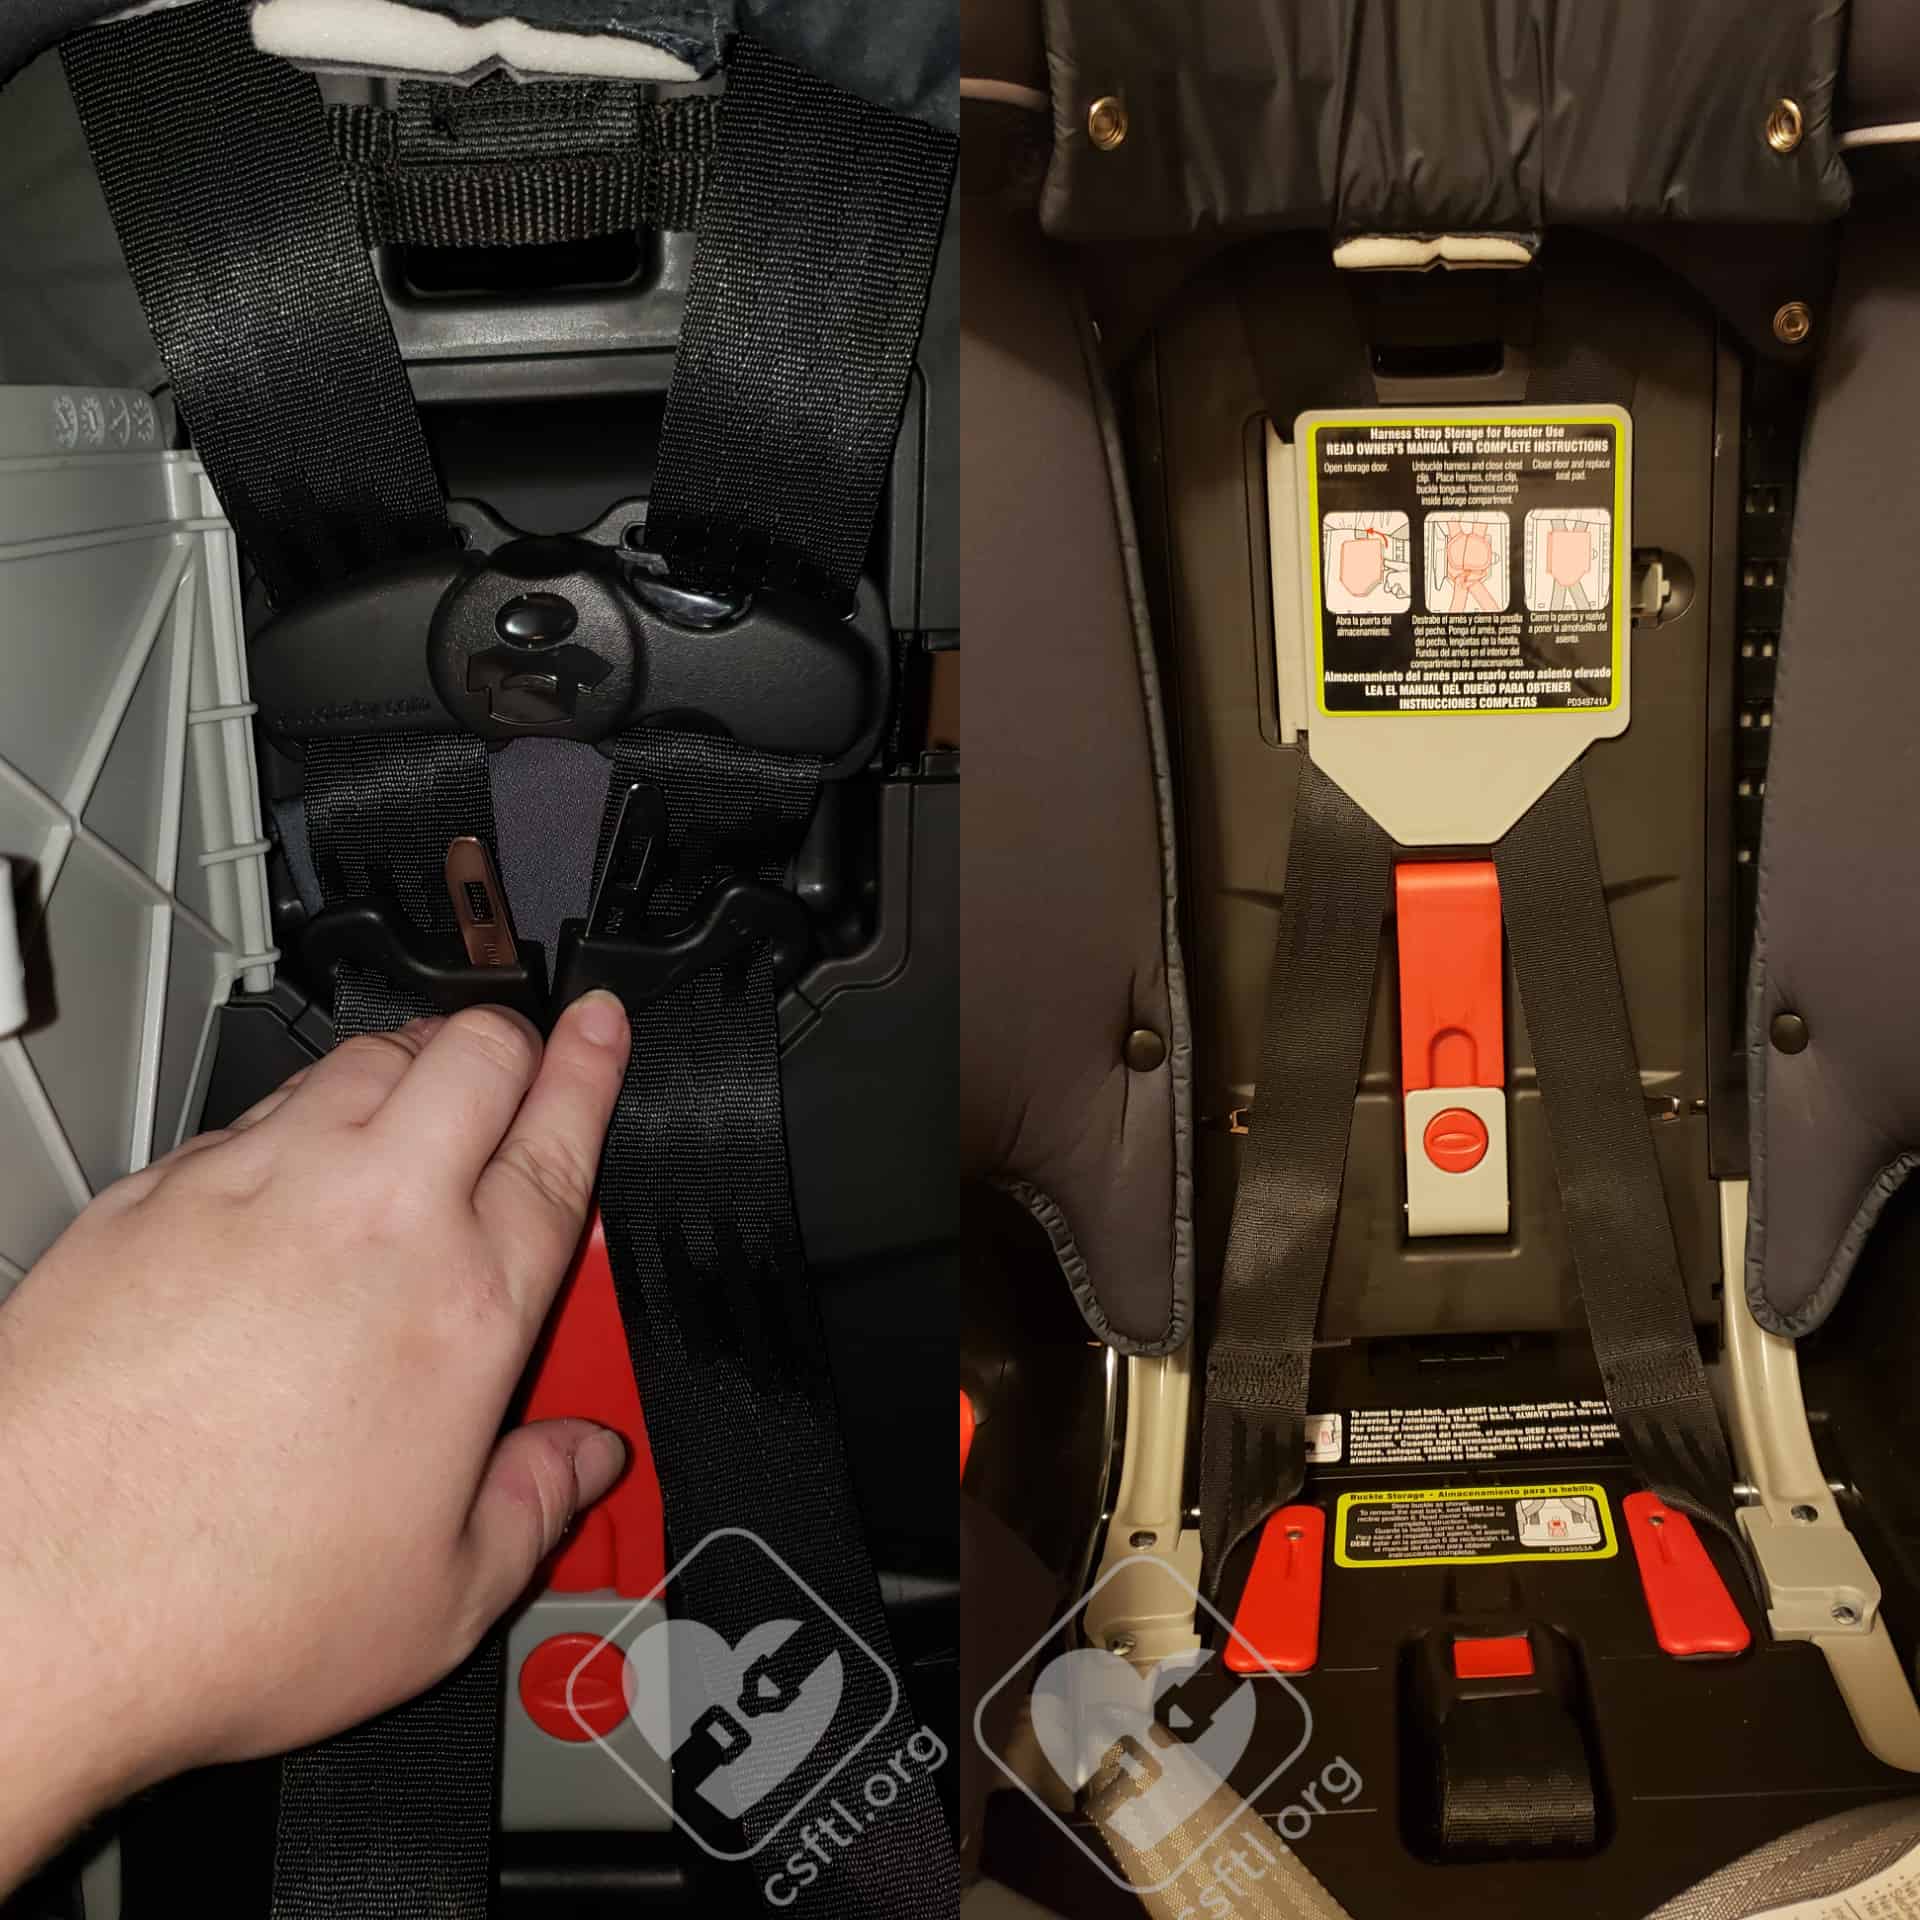
Graco 4Ever DLX harness storage
When using the 4Ever DLX in the high back booster mode, the first step is to store the harness. The harness conveniently stores within a small compartment on the seat itself — there is no need to remove it from the seat! This can help with preventing lost parts.
To store the harness, first start by pulling back the cover to expose the back of the shell. Locate the grey door for the harness storage compartment and pull it open. Buckle the chest clip together, then place the chest clip, harness covers, and buckle tongues into the compartment – shutting the door to secure them all inside. The crotch buckle then stores in a groove on the bottom of the seat.
Within the Vehicle
The base of the Graco 4Ever DLX must be set to recline position 6 when used in either of the booster modes.
In high back booster mode, caregivers can use the lower anchors and tether on the 4Ever DLX as a connection point between the booster and the vehicle seat. While the seat belt will secure the booster and the child in the event of a crash, using the lower anchors and tether can prevent an unoccupied booster seat from becoming a projectile and causing injury to other passengers. If the lower anchors and tether are not used while in booster mode, the vehicle seat belt should be buckled around the unoccupied booster to minimize the projectile risk.
Fit to Child: High Back Booster
6 Years Old
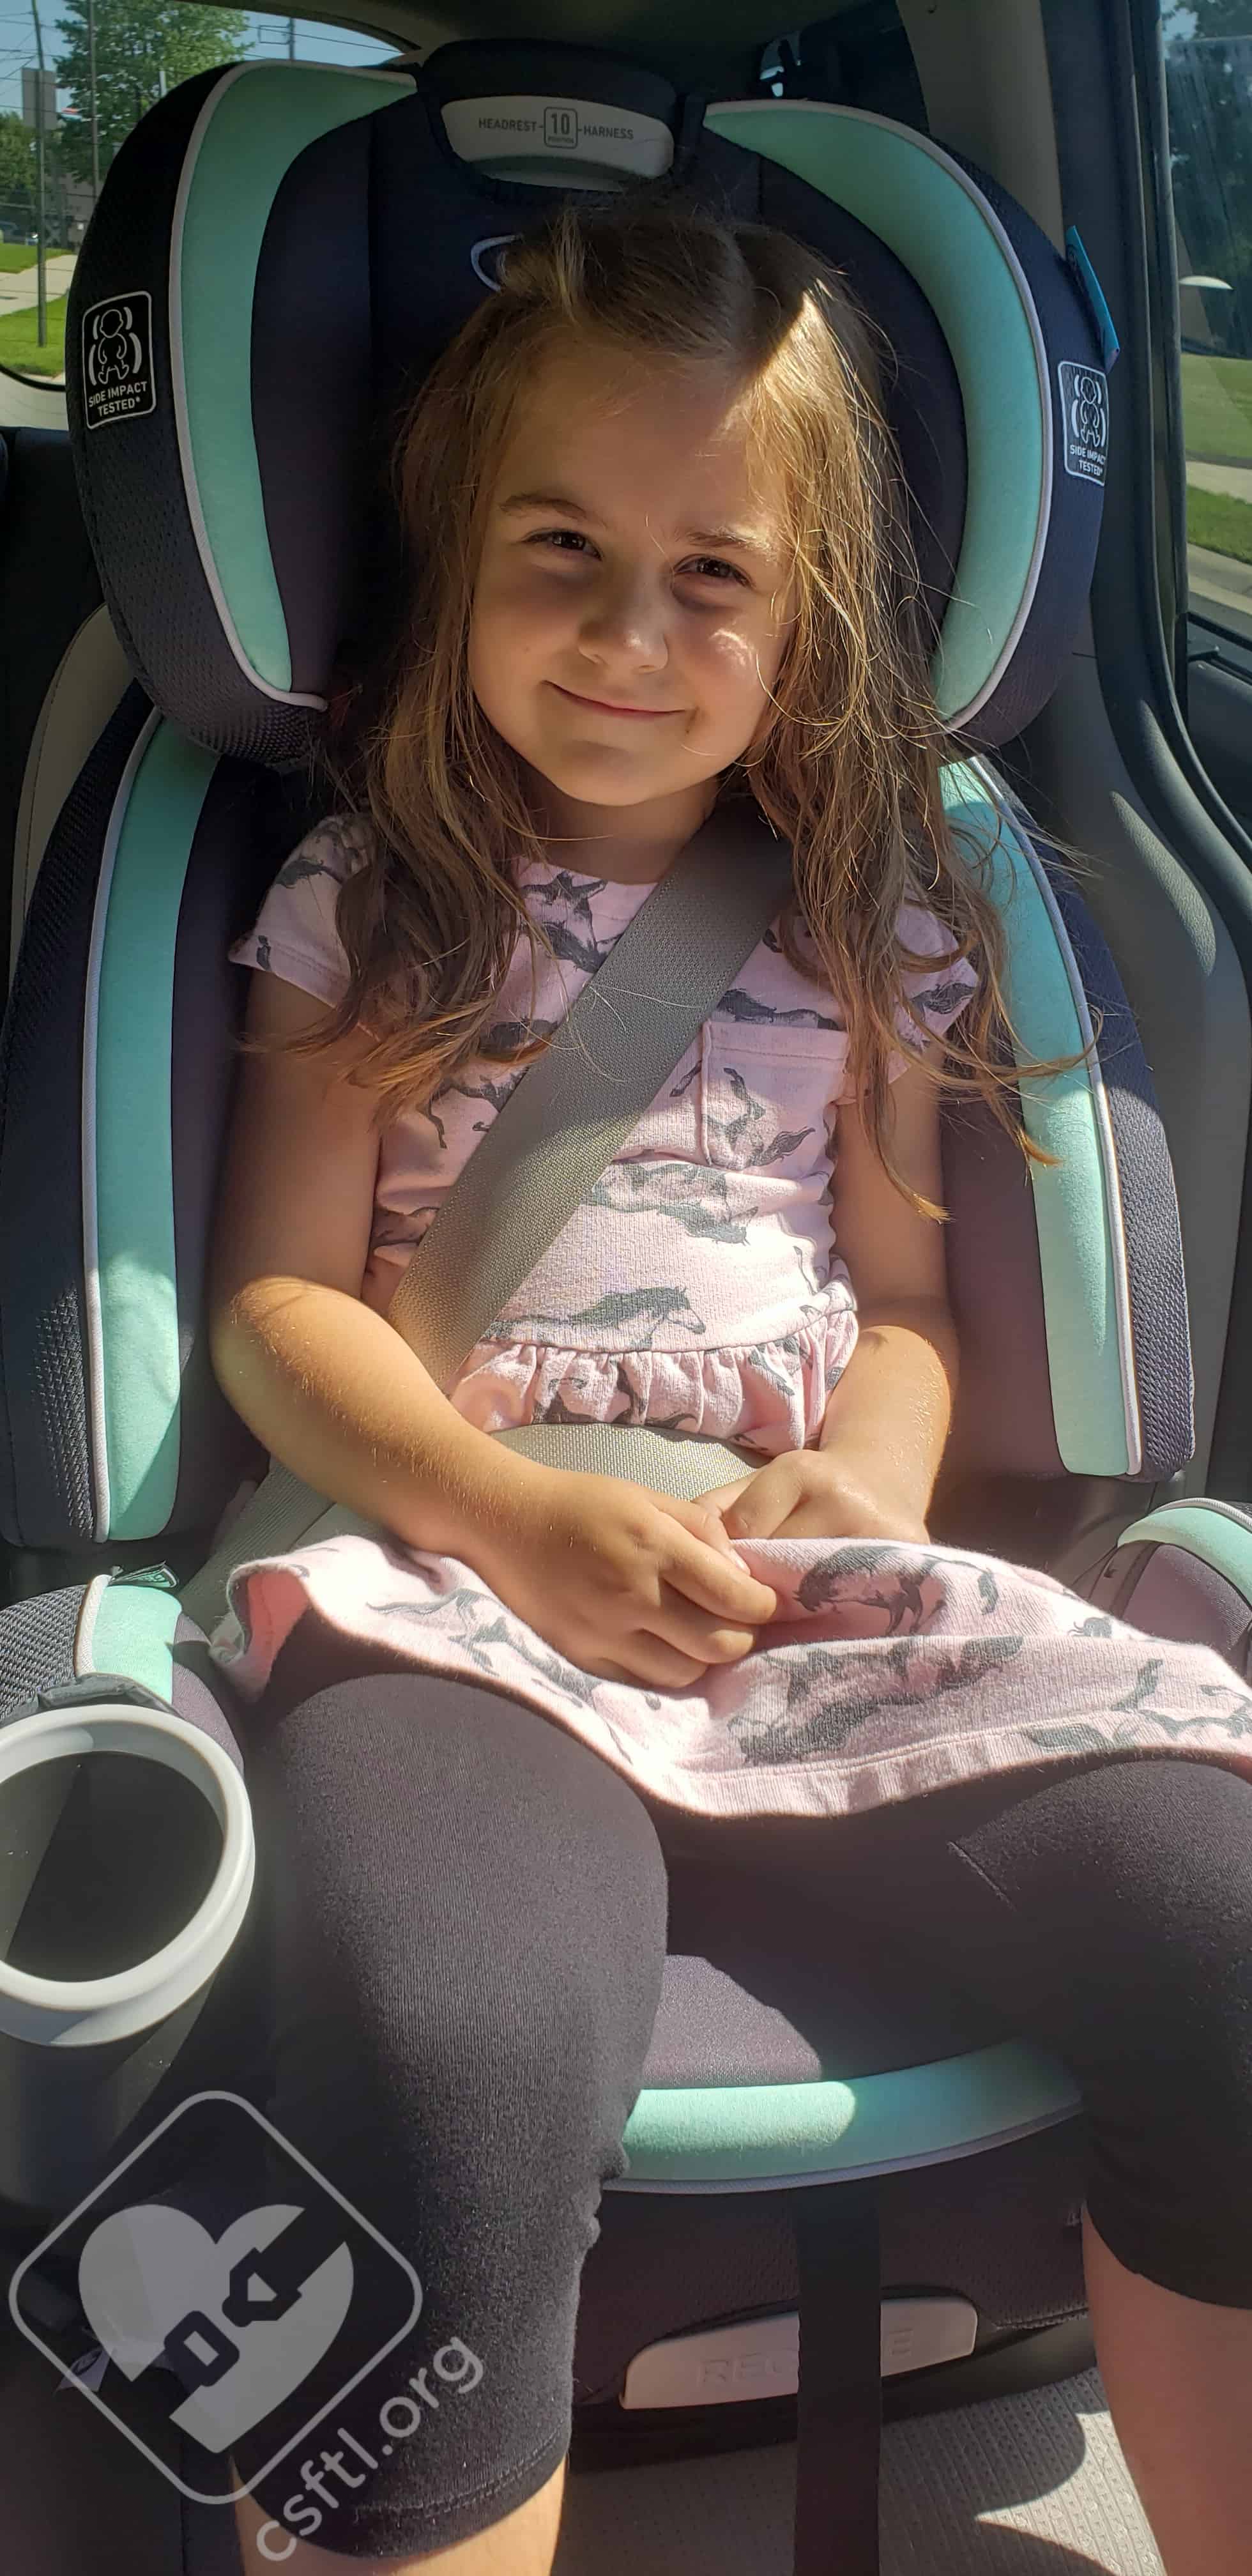
Graco 4Ever DLX 6 year old high back booster
Here we see our 6 year old model again, this time using the 4Ever DLX in high back booster mode. She is still 47 inches tall and weighs 51 pounds. She achieved a great fit with a lot of room left to grow, and had no difficulties within this seat.
8 Years Old
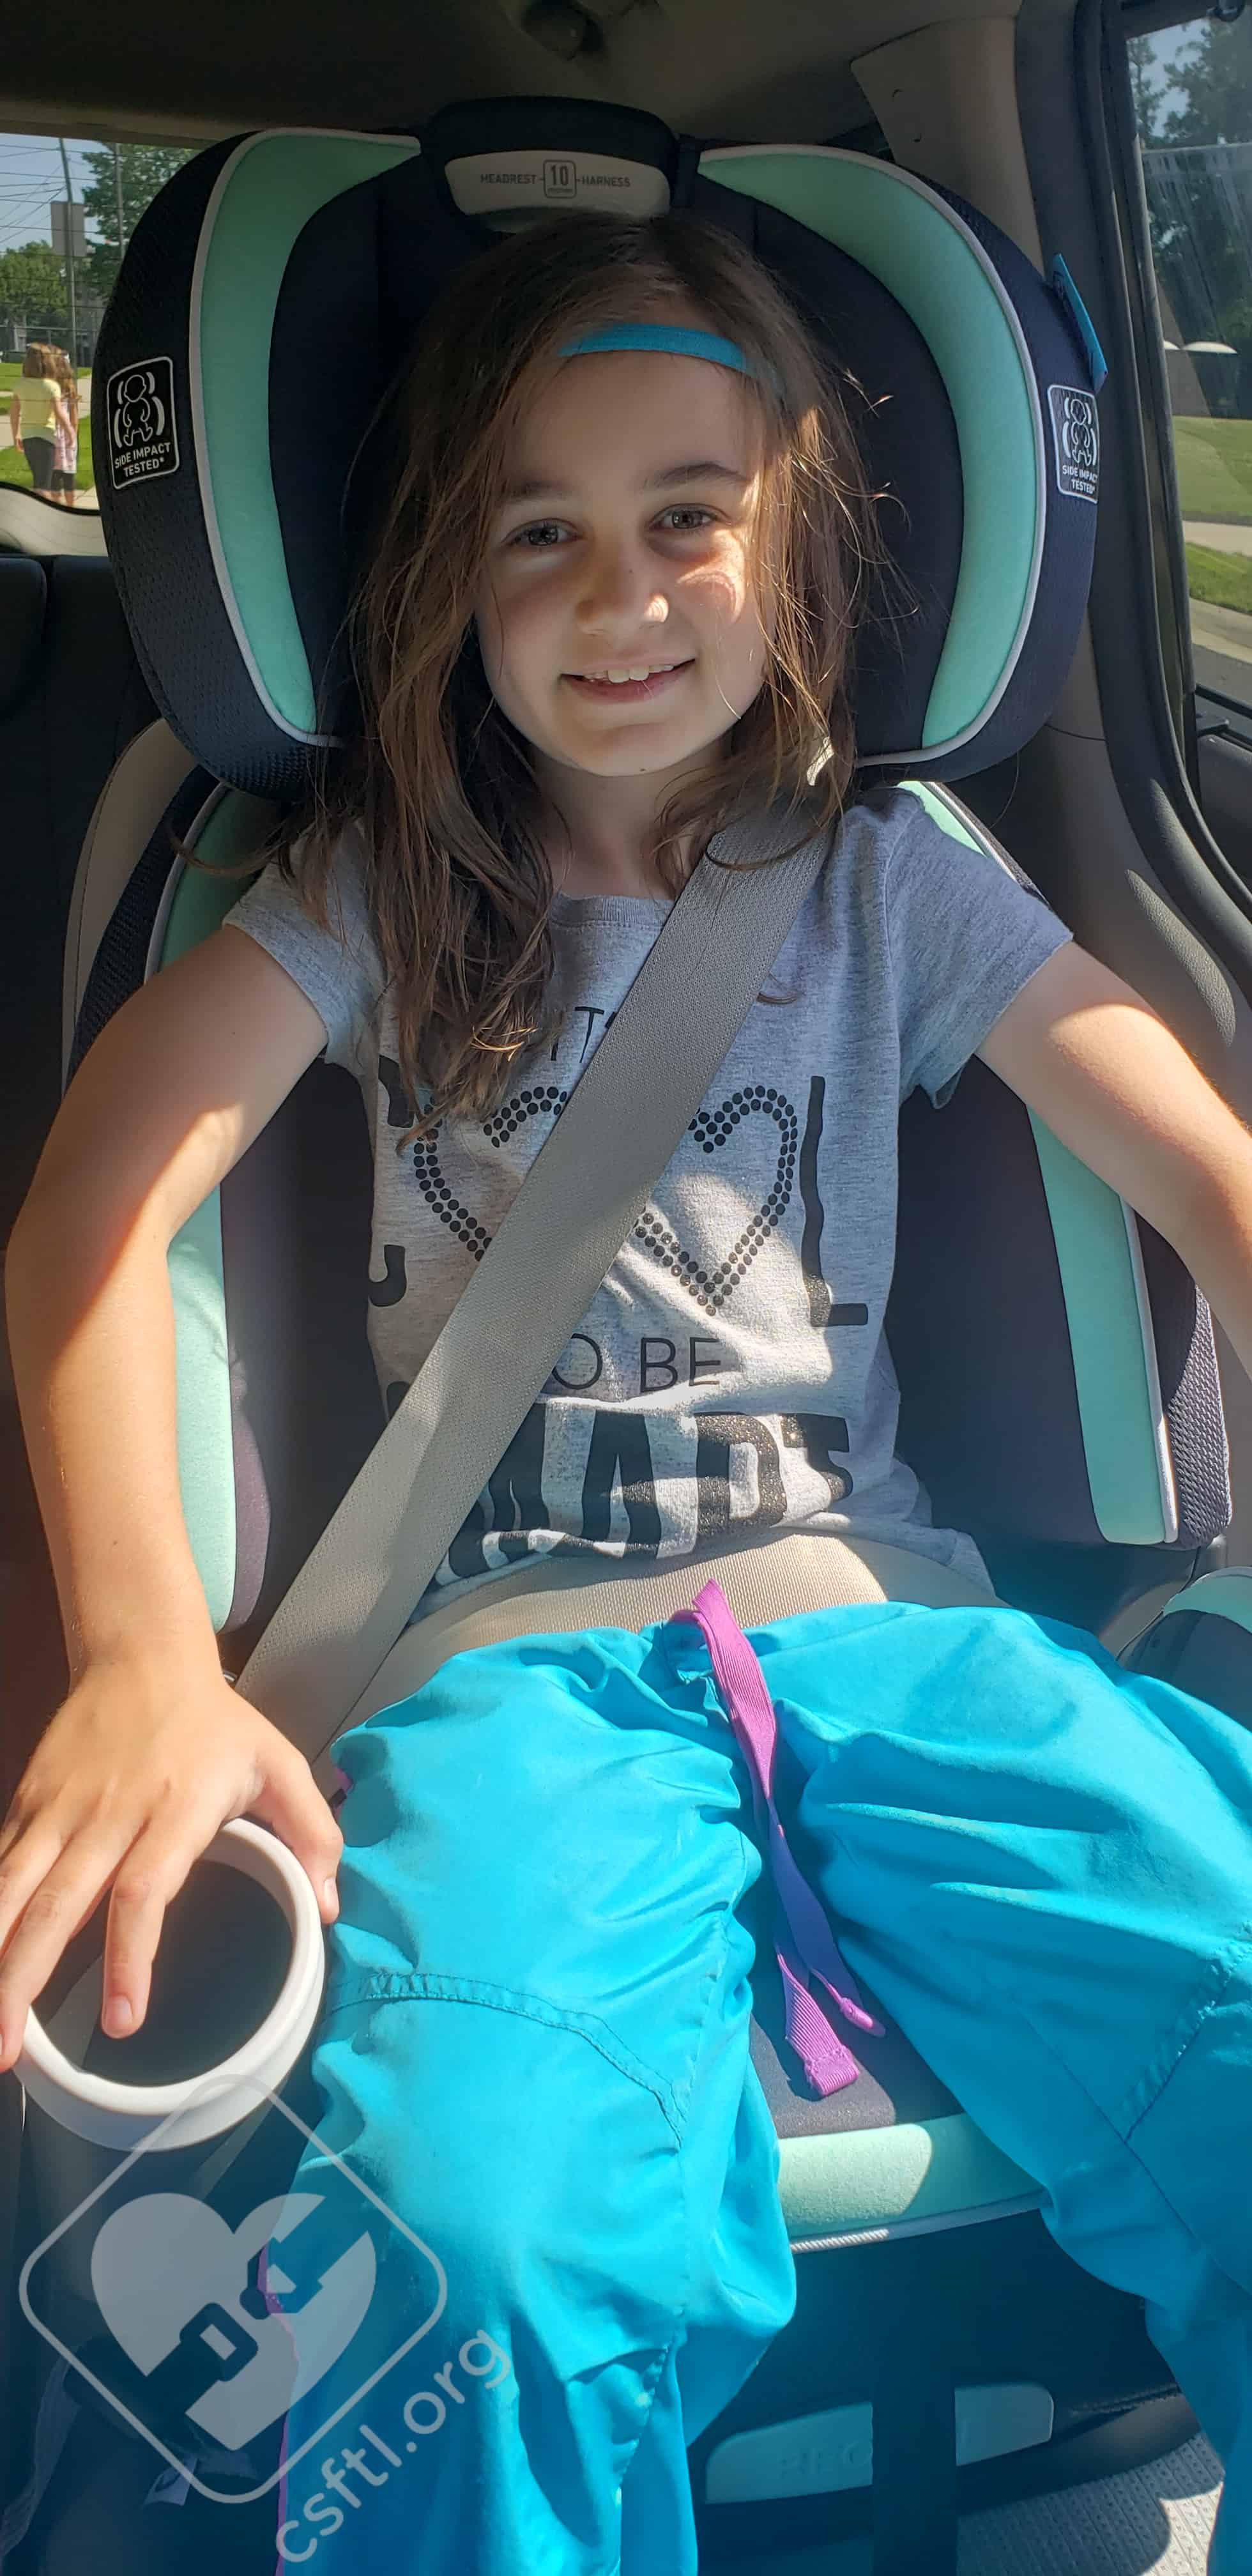
Graco 4Ever DLX 8 year old high back booster
This model is 8 years old, 51 inches tall, and weighs 51 pounds. She needed the headrest adjusted to the highest setting in order to fit her properly. She had approximately another inch of torso growth left to grow before the booster’s shoulder belt guide would no longer be above her shoulders – which would mean approximately a year left in the high back booster mode of this seat. She found the seat comfortable and especially enjoyed the bright color on the cover!
Installation: Backless Booster
Break it Down
Graco 4Ever DLX coverting to backless booster mode
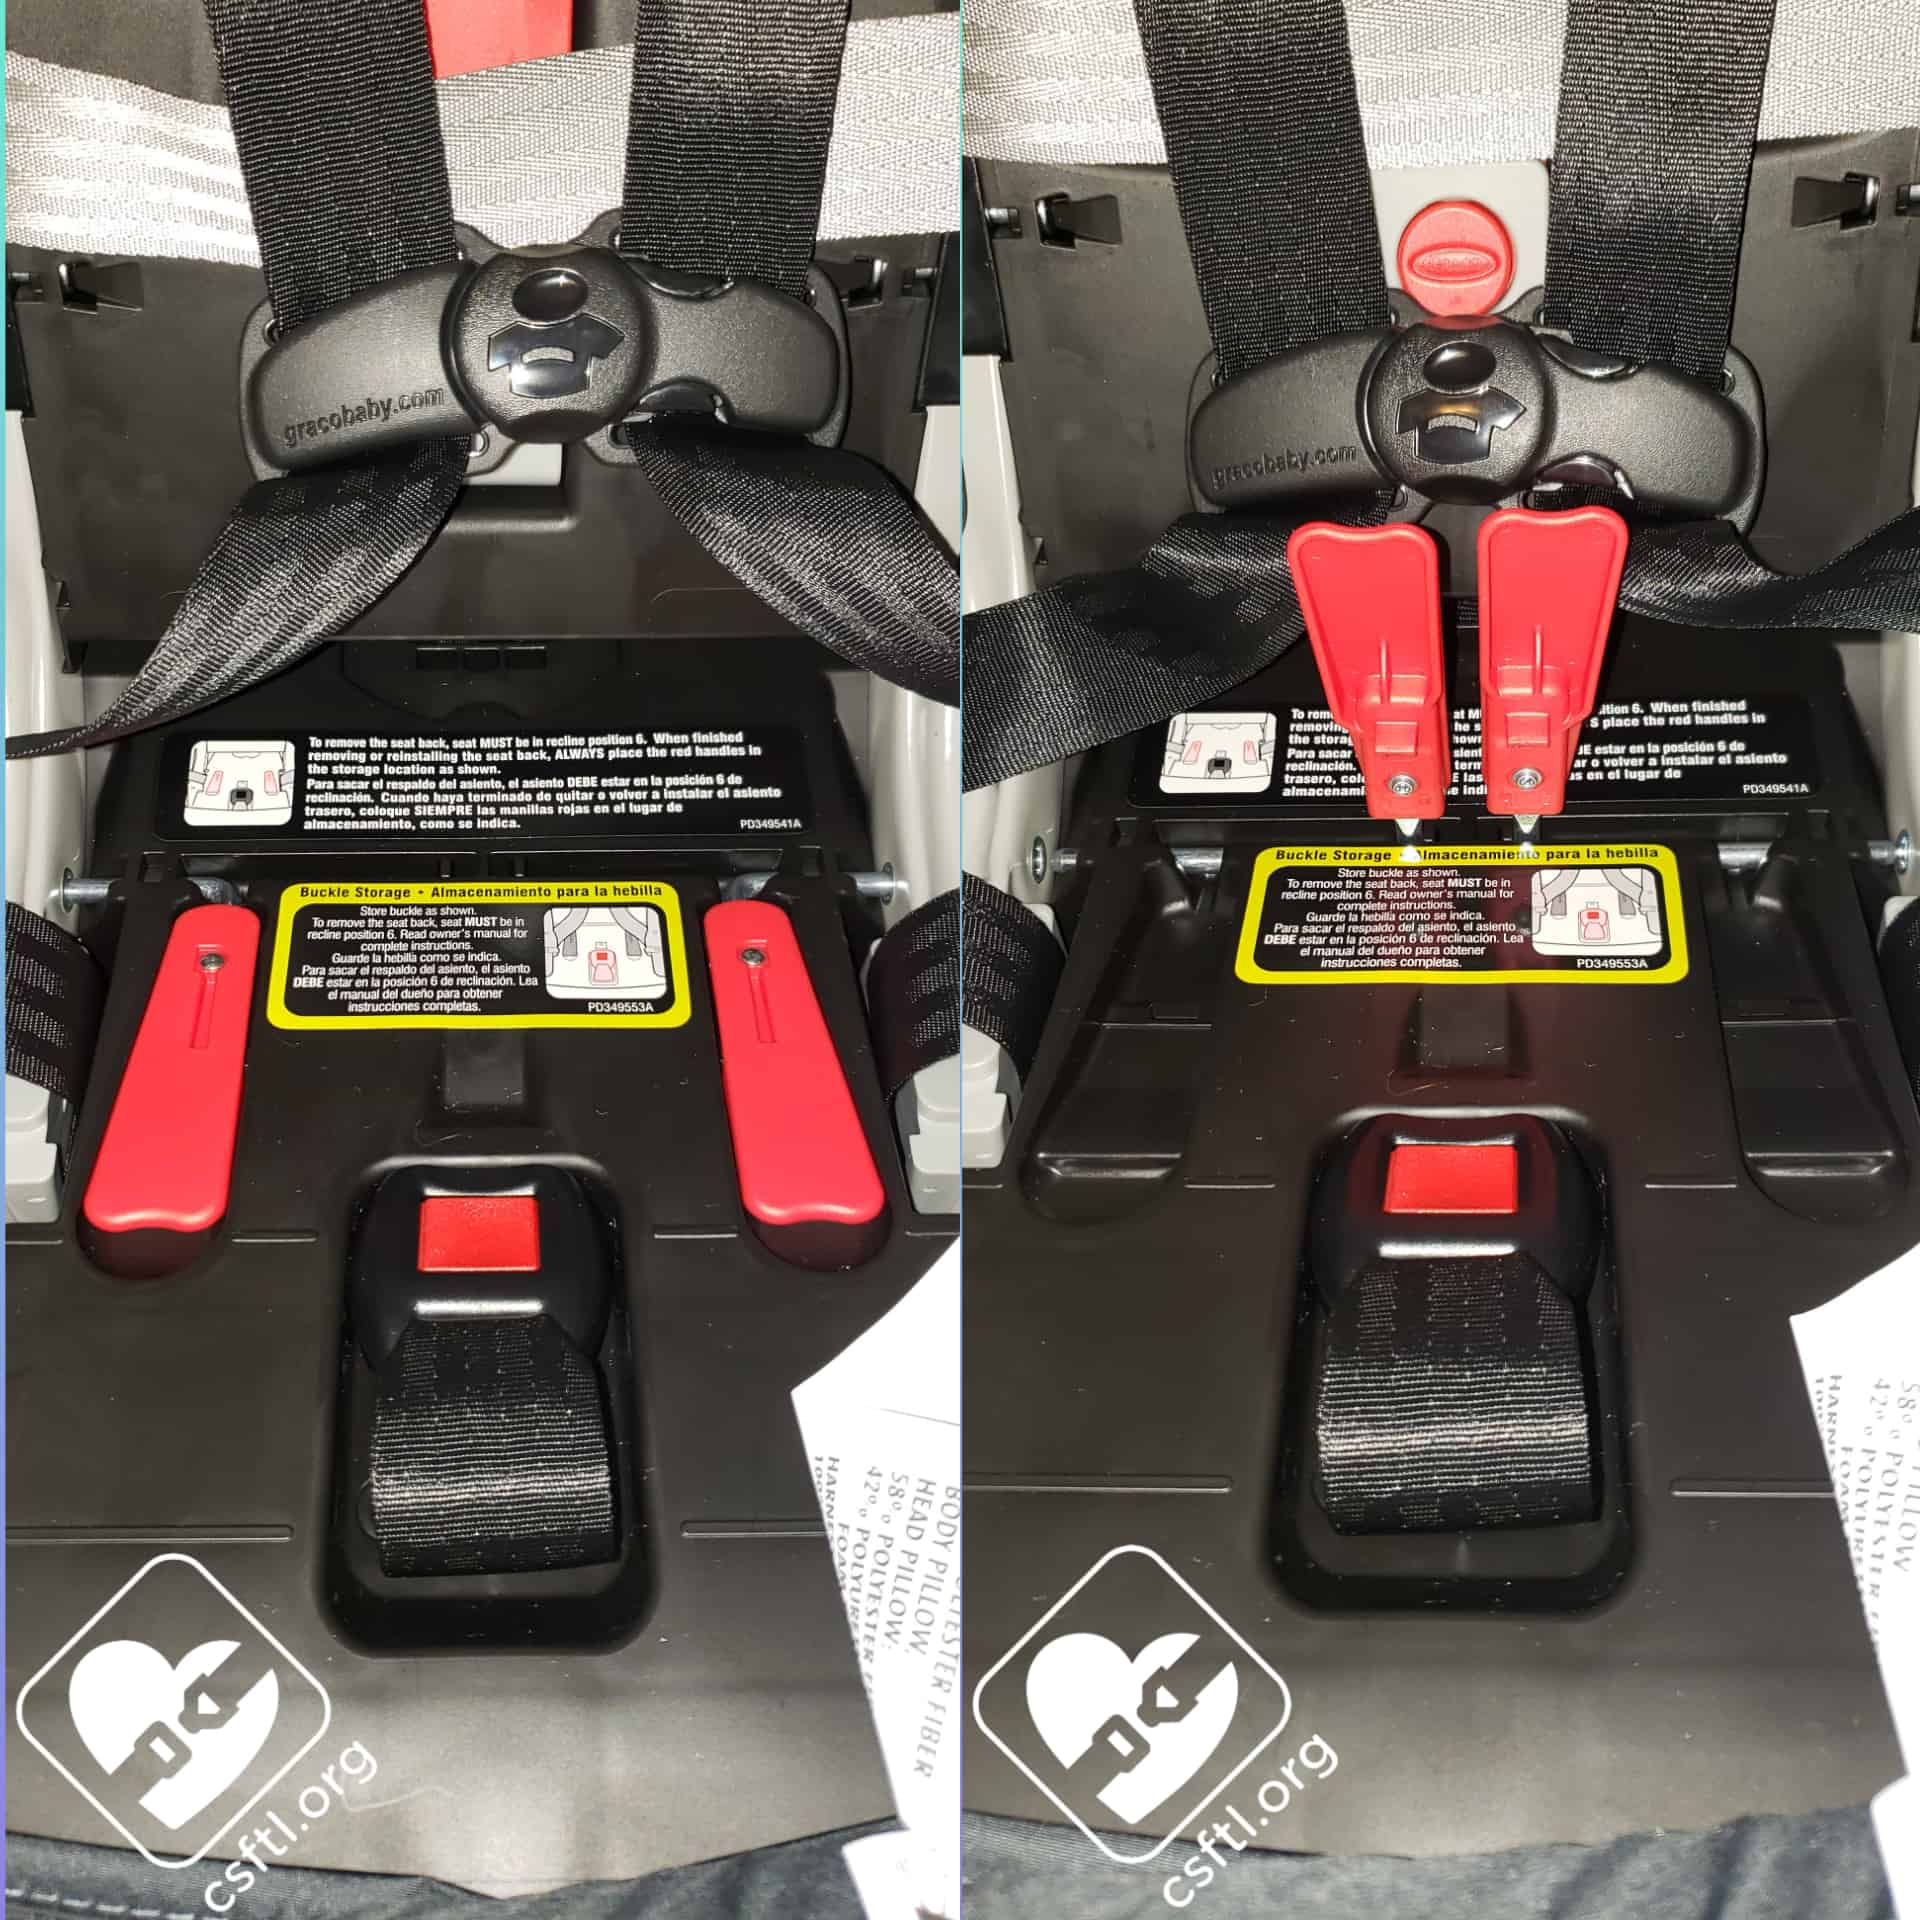
Transitioning the 4Ever DLX from high back booster mode to backless booster mode is a very straightforward process. First, set the recline to position six and make sure the lower anchors are stored in the forward facing belt path. Next, detach the harness webbing from the splitter plate on the back of the seat.
Pull the cover back to expose the interior of the shell and locate the two red levers. Rotate those two red levers up and push them together, then lift the entire back off of the bottom of the seat. Push the red levers back into their original position and store the splitter plate in the small grove on the back of the seat pan. Two small elastic loops will attach the cover back to the shell, and the excess cover should tuck behind the seat while in the vehicle.
Minimizing the Projectiles
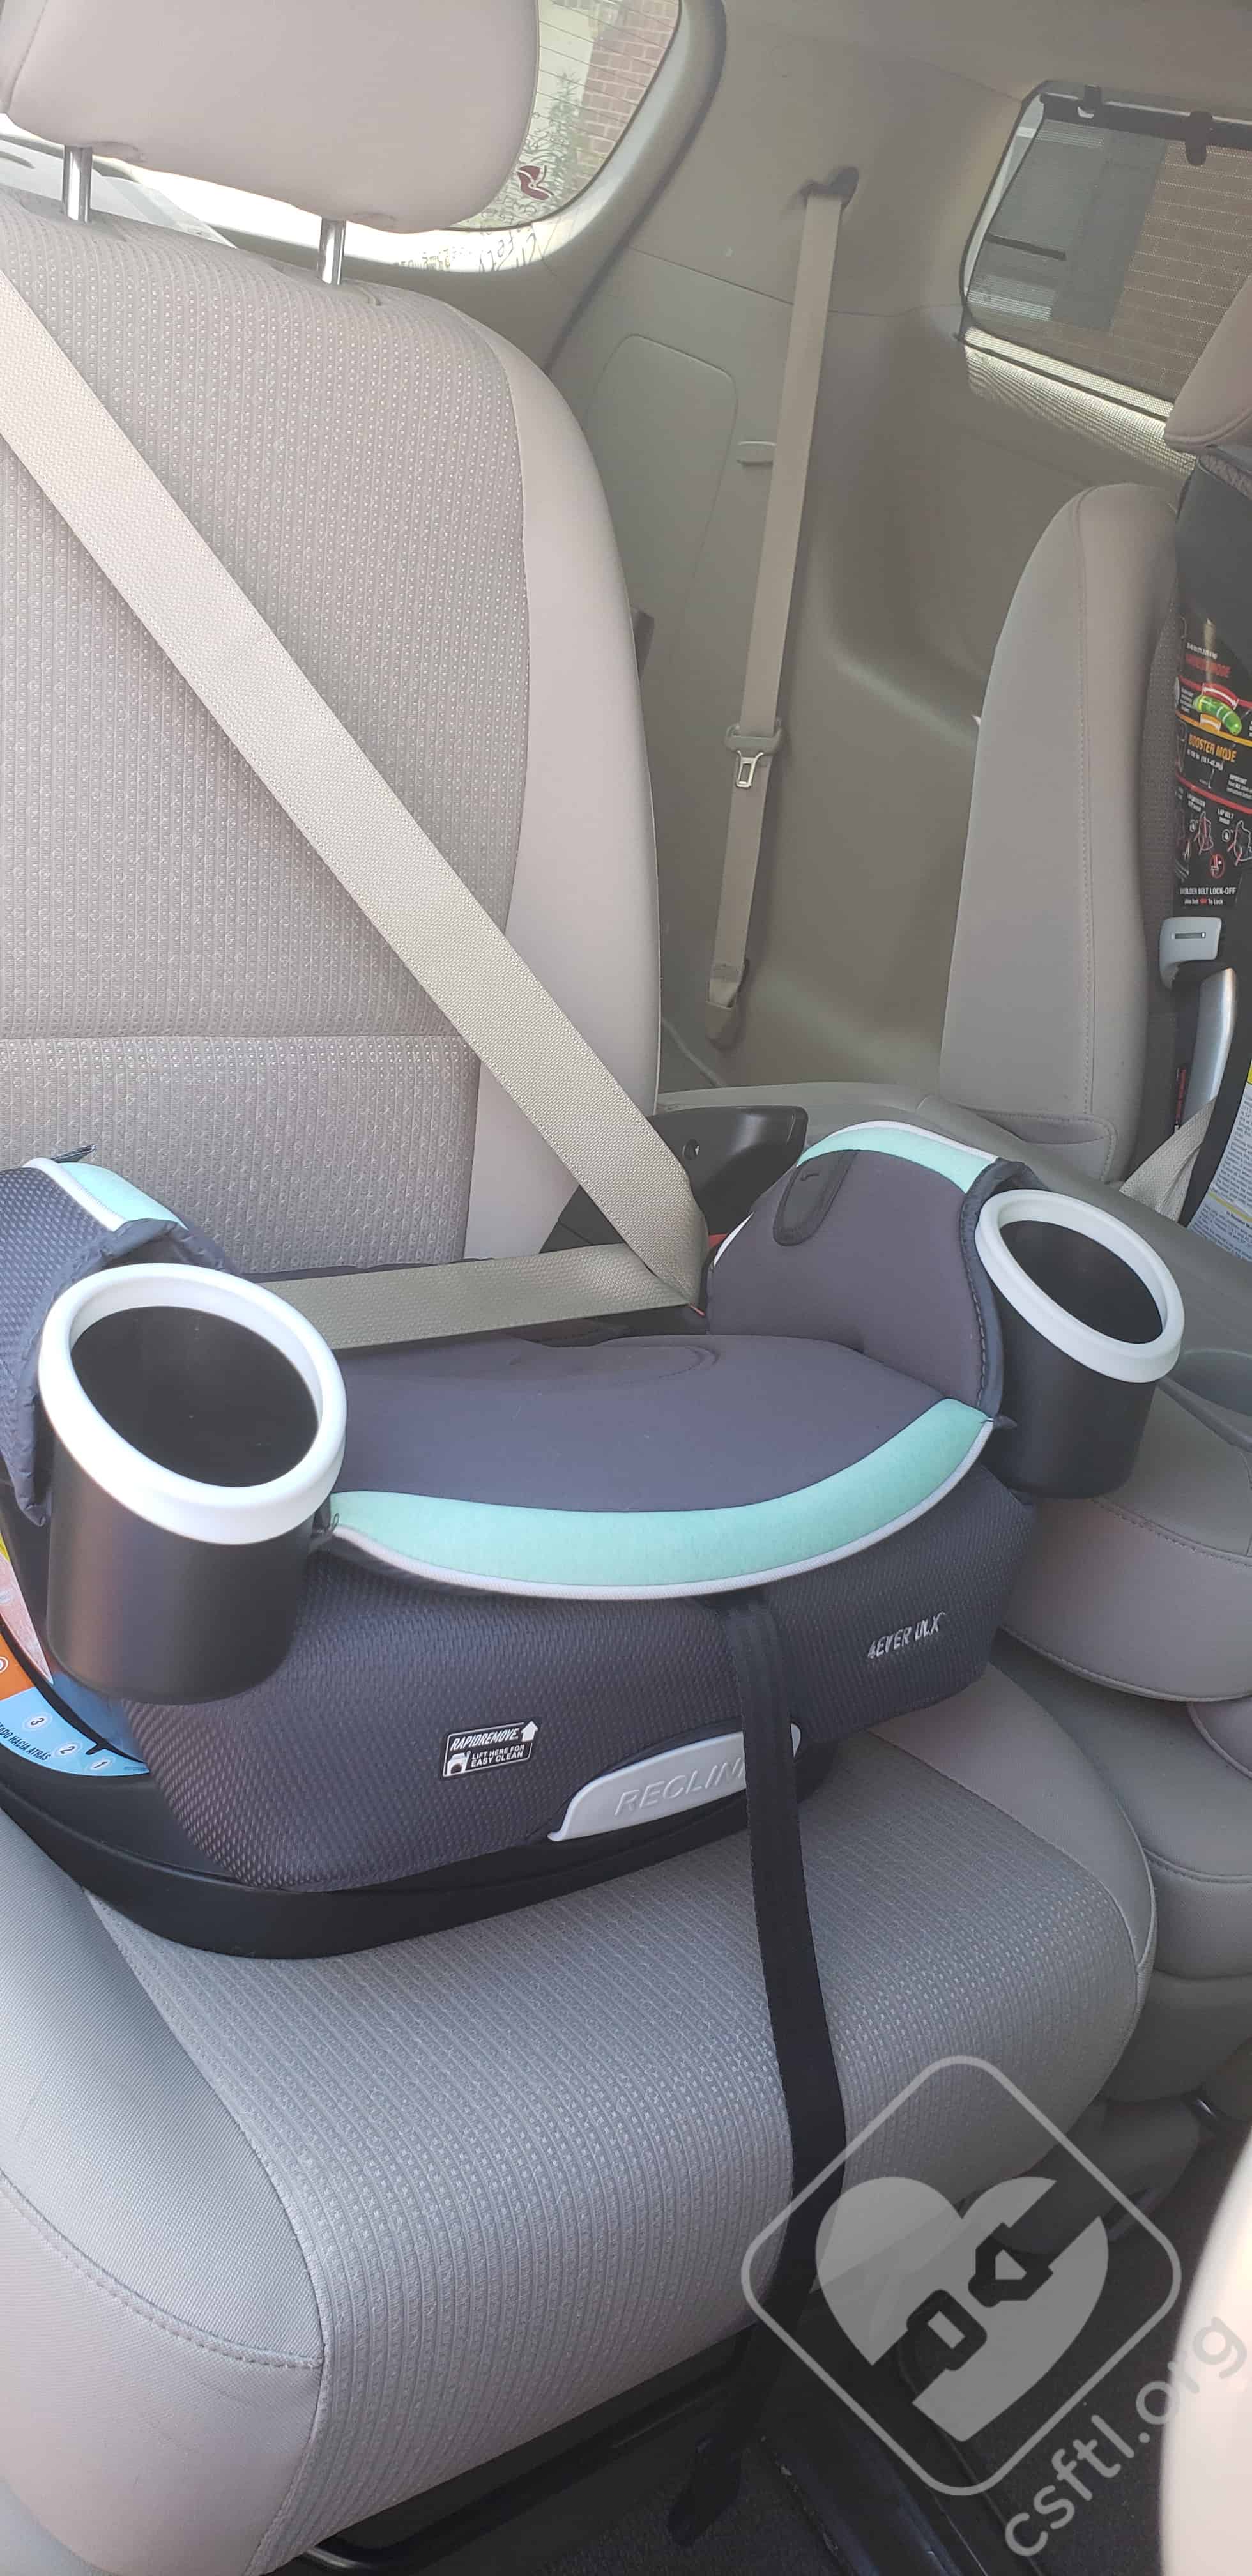
Graco 4Ever DLX backless booster mode
Unlike when used in high back booster mode, it is not possible to use the lower anchors and tether to prevent the unoccupied booster from becoming a projectile during a crash. To minimize the risk of injury from projectiles, it is important to buckle that empty booster seat.
Optional Shoulder Belt Guide Adjuster
The Graco 4Ever DLX includes an optional shoulder belt guide adjuster – a small red clip attached to a black webbing. This belt guide can be used to adjust the vehicle’s shoulder belt fit for a backless booster rider.
Fit to Child: Backless Booster
10 Years Old
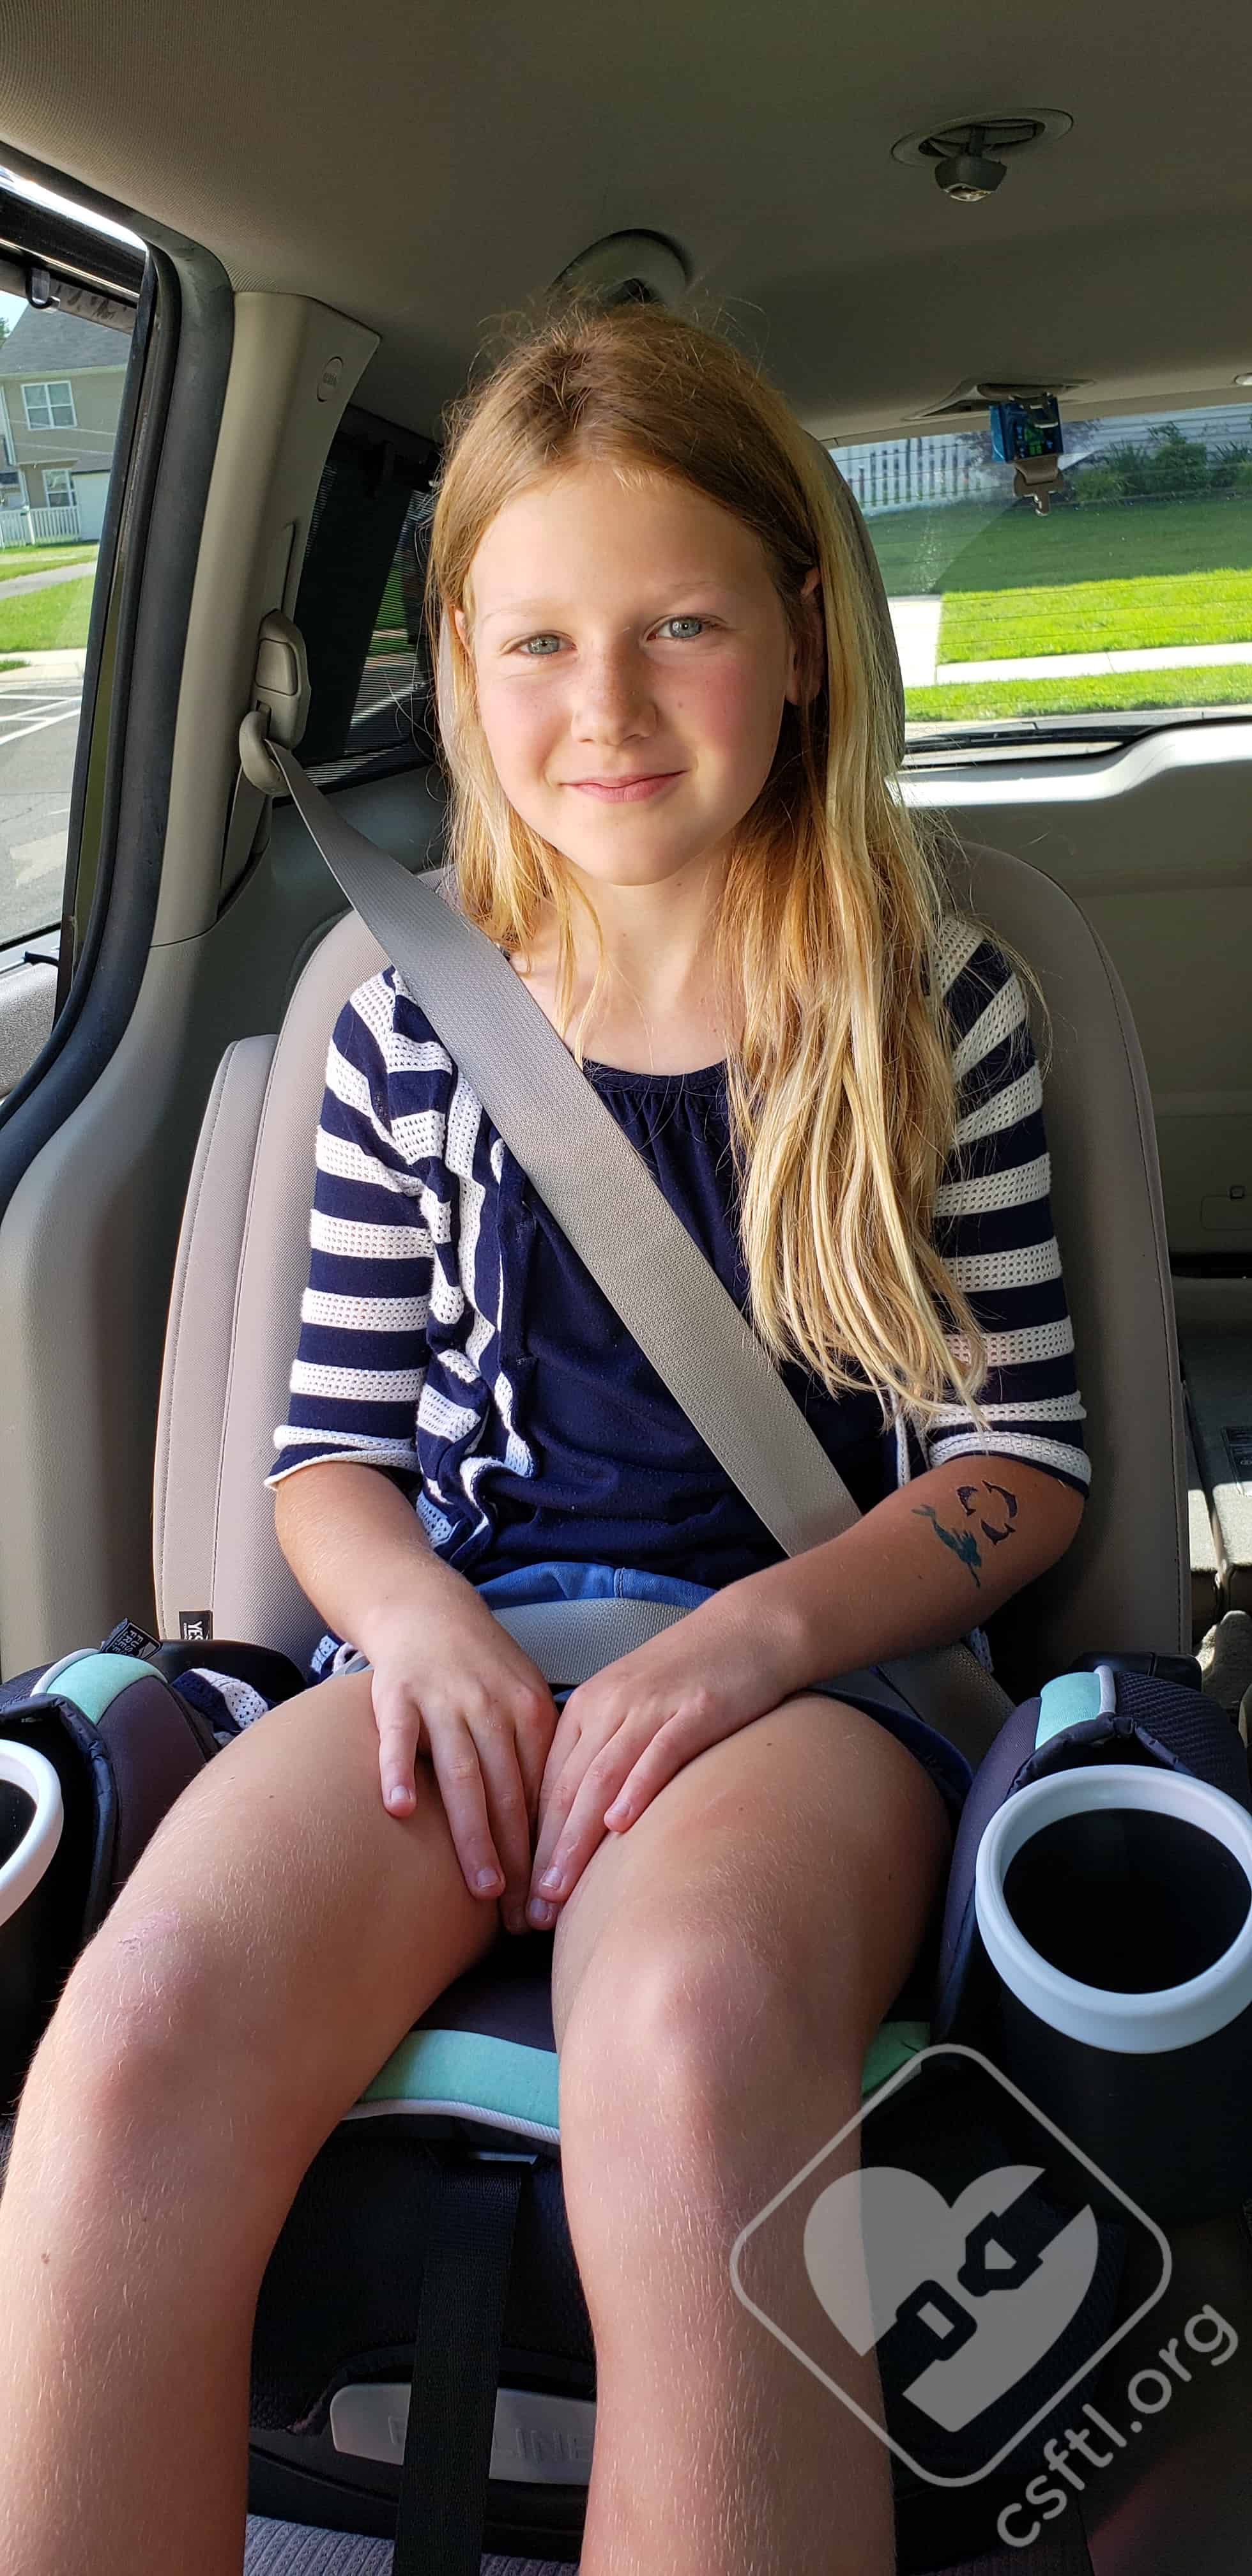
Graco 4Ever DLX 10 year old backless booster
This model is 10 years old, weighs 67 pounds, and is 52 inches tall. The 4Ever DLX fit her very well in this mode — the shoulder portion of the vehicle seat belt is across the middle of her collarbone and the lap portion of the belt is over the tops of her thighs. She found that while it was comfortable, the booster sits higher than some other boosters and it was a little challenging to buckle on her own.
Important Information: Where to Find
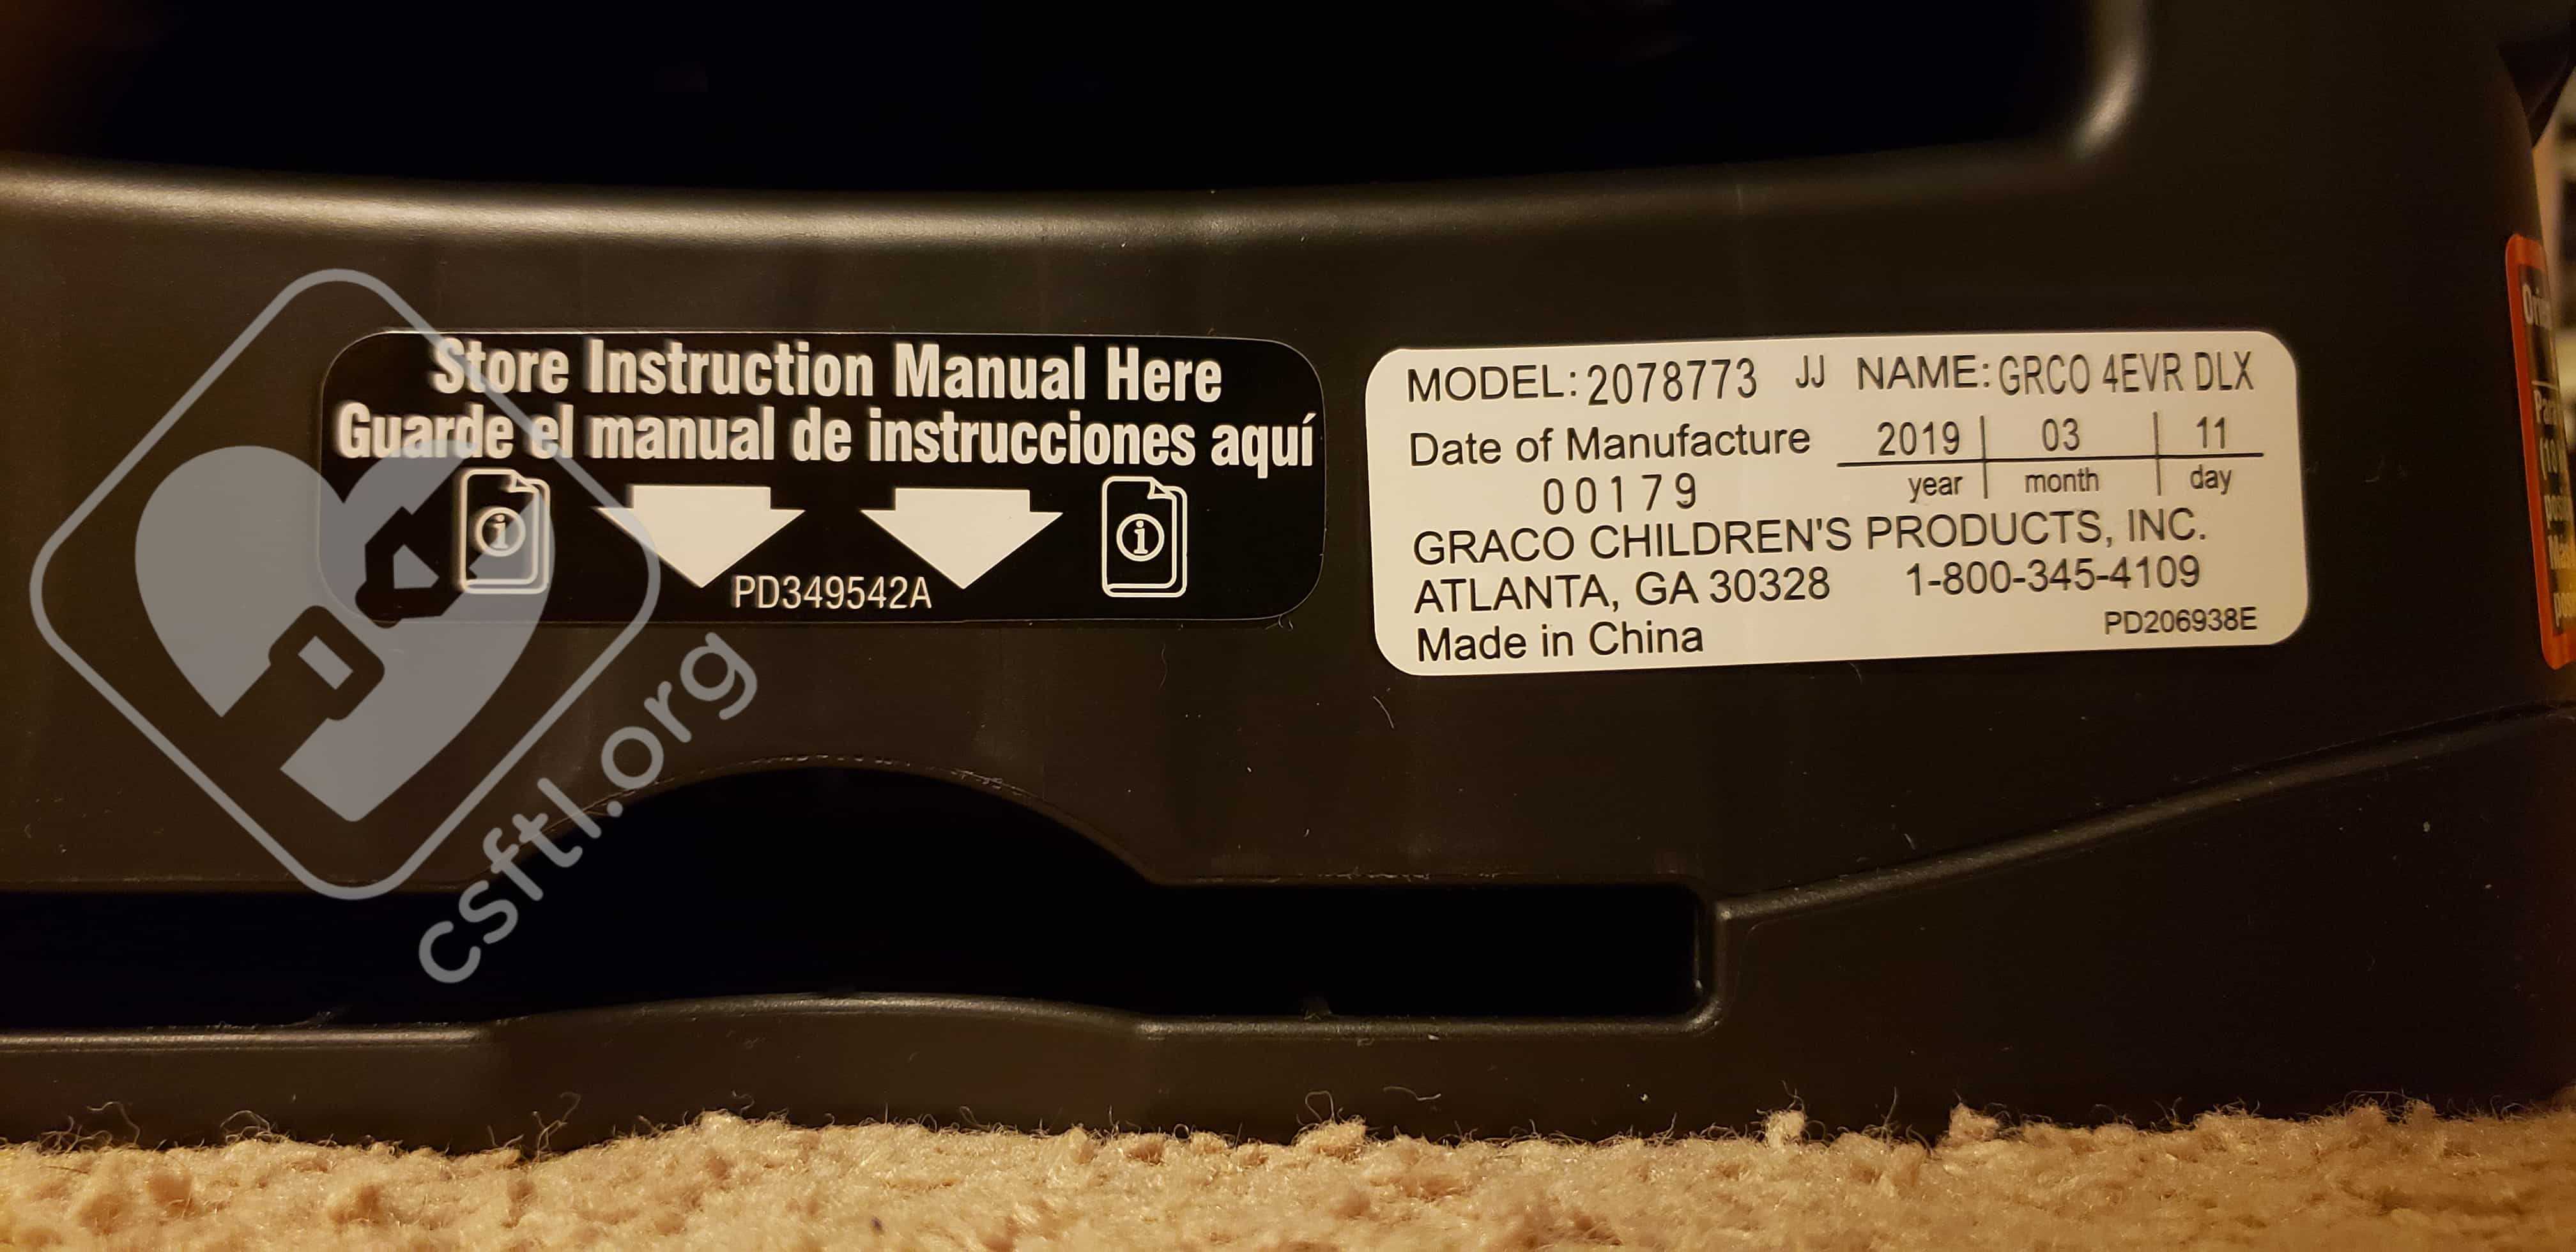
Graco 4Ever DLX Date of Manufacture Label
Date of Manufacture: The date of manufacturer label is located on the back of the seat’s base, right next to the manual storage slot.
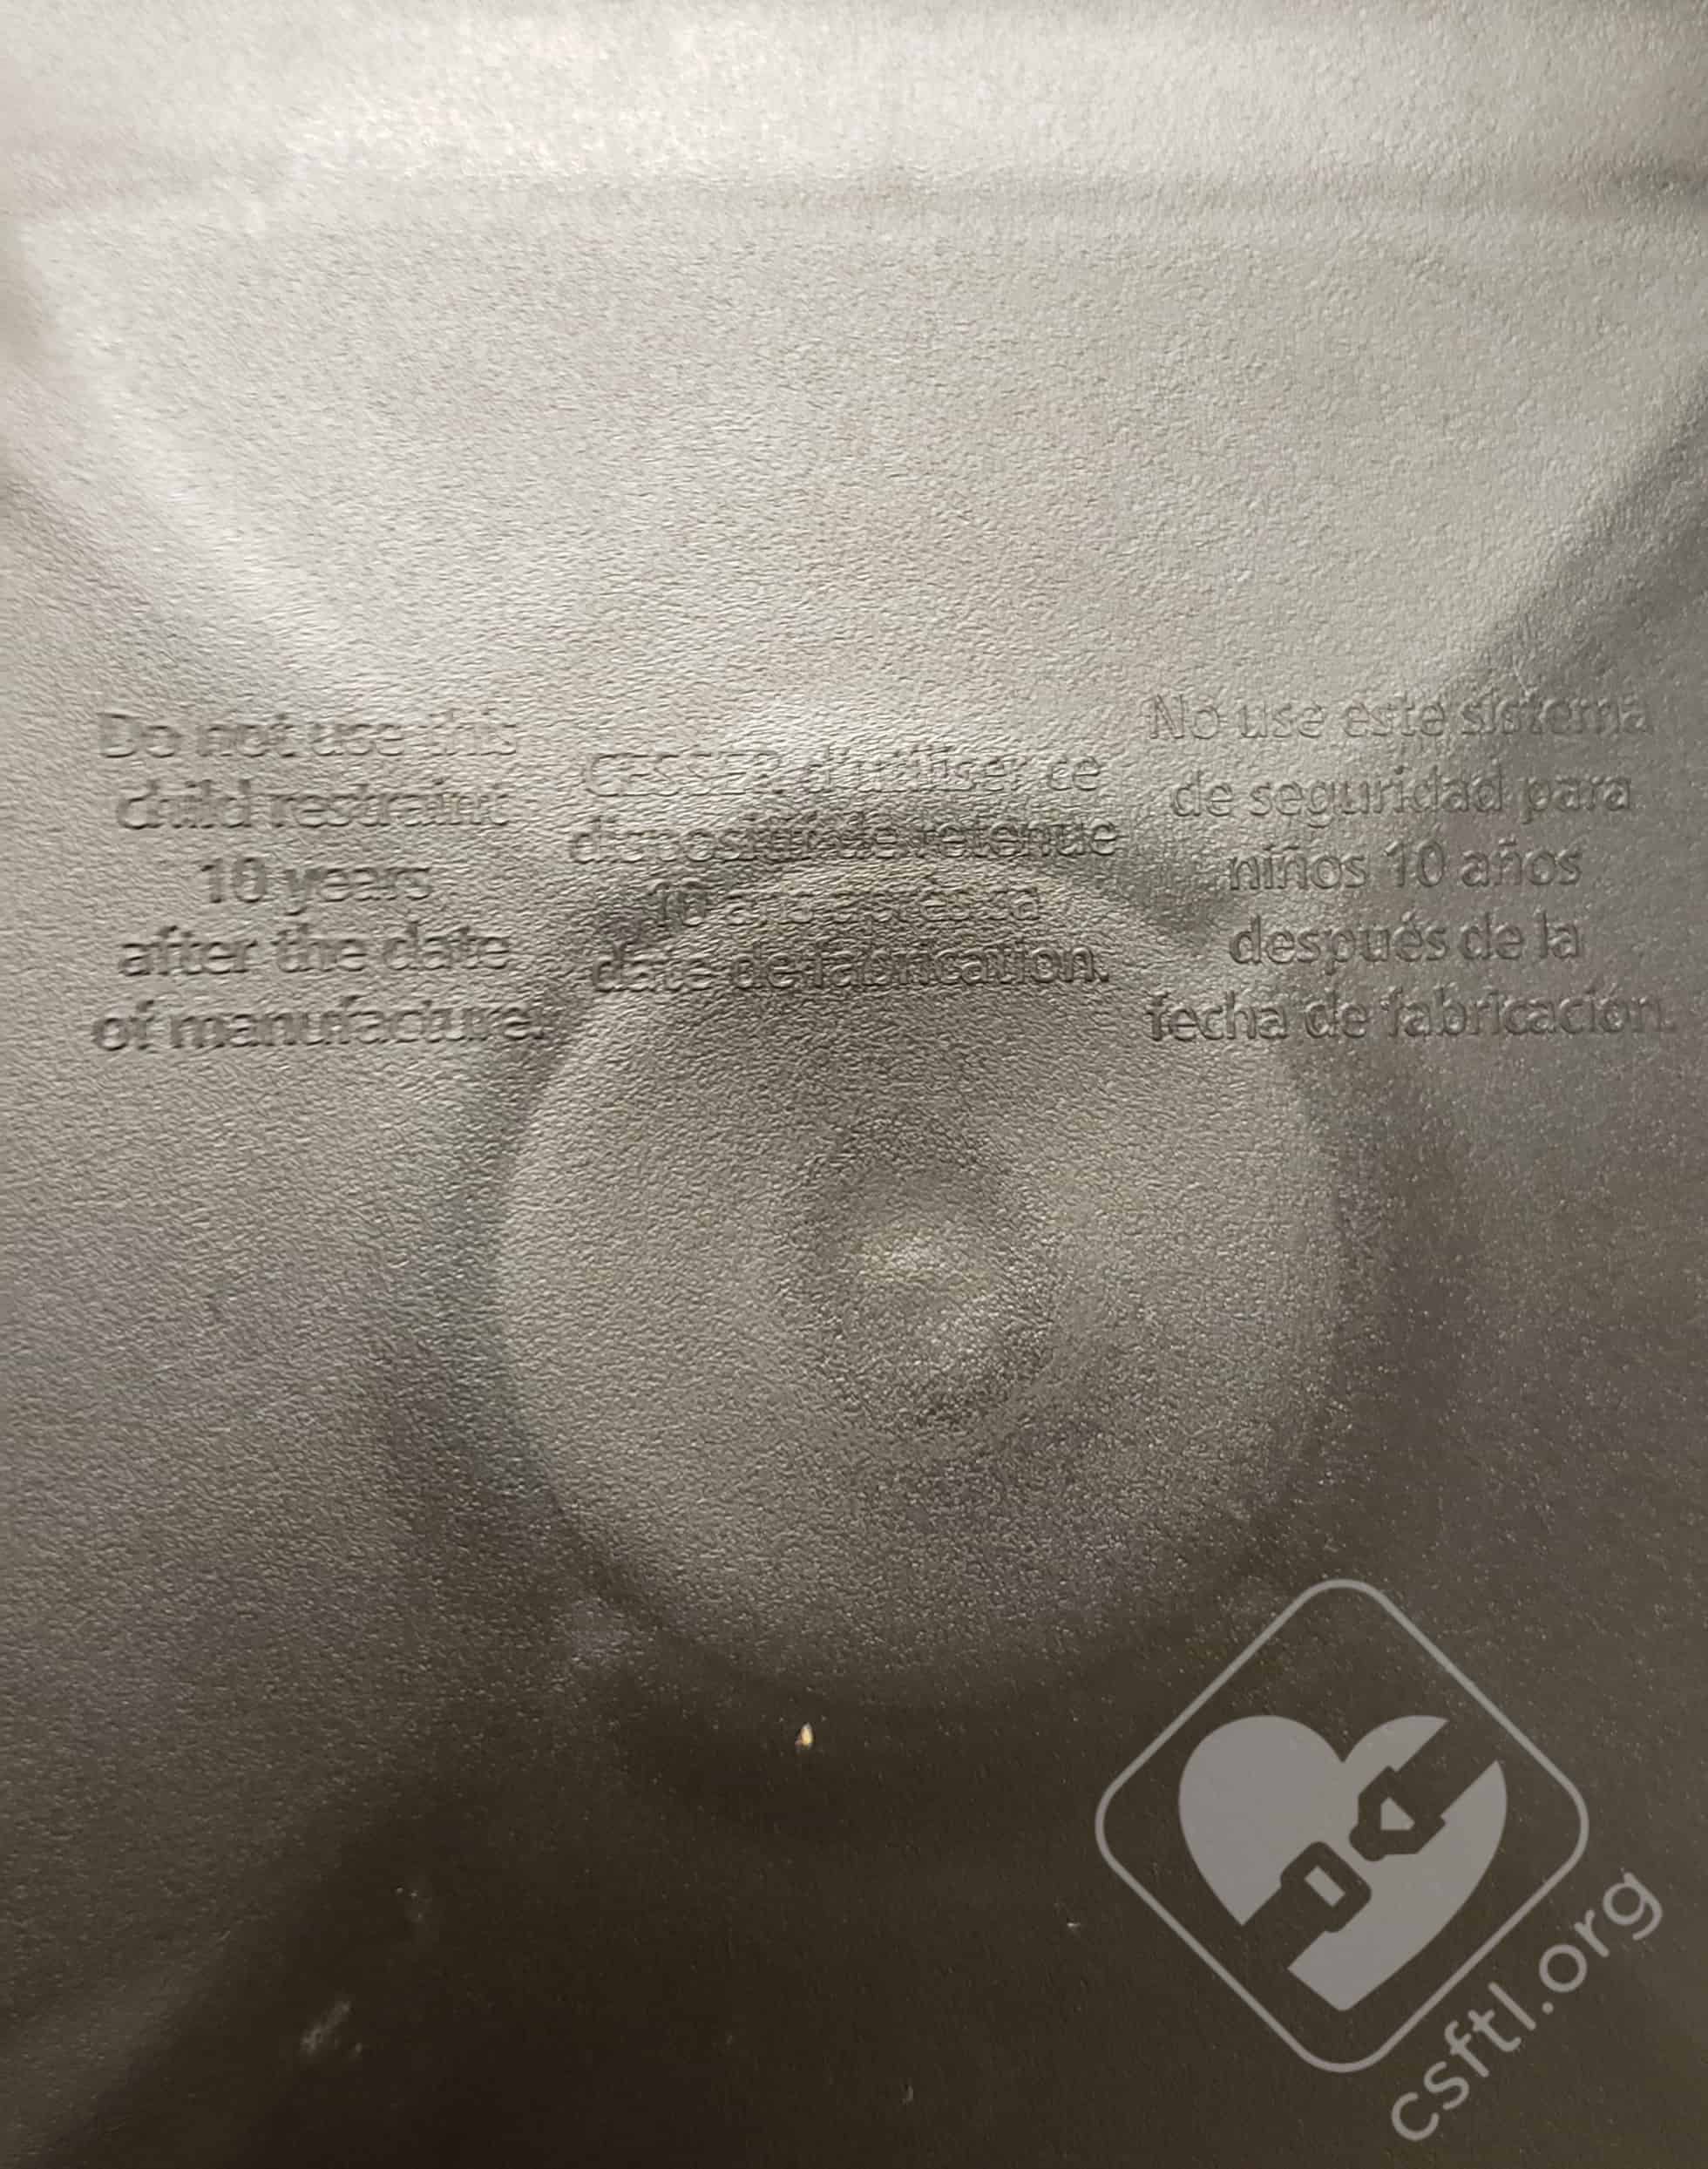
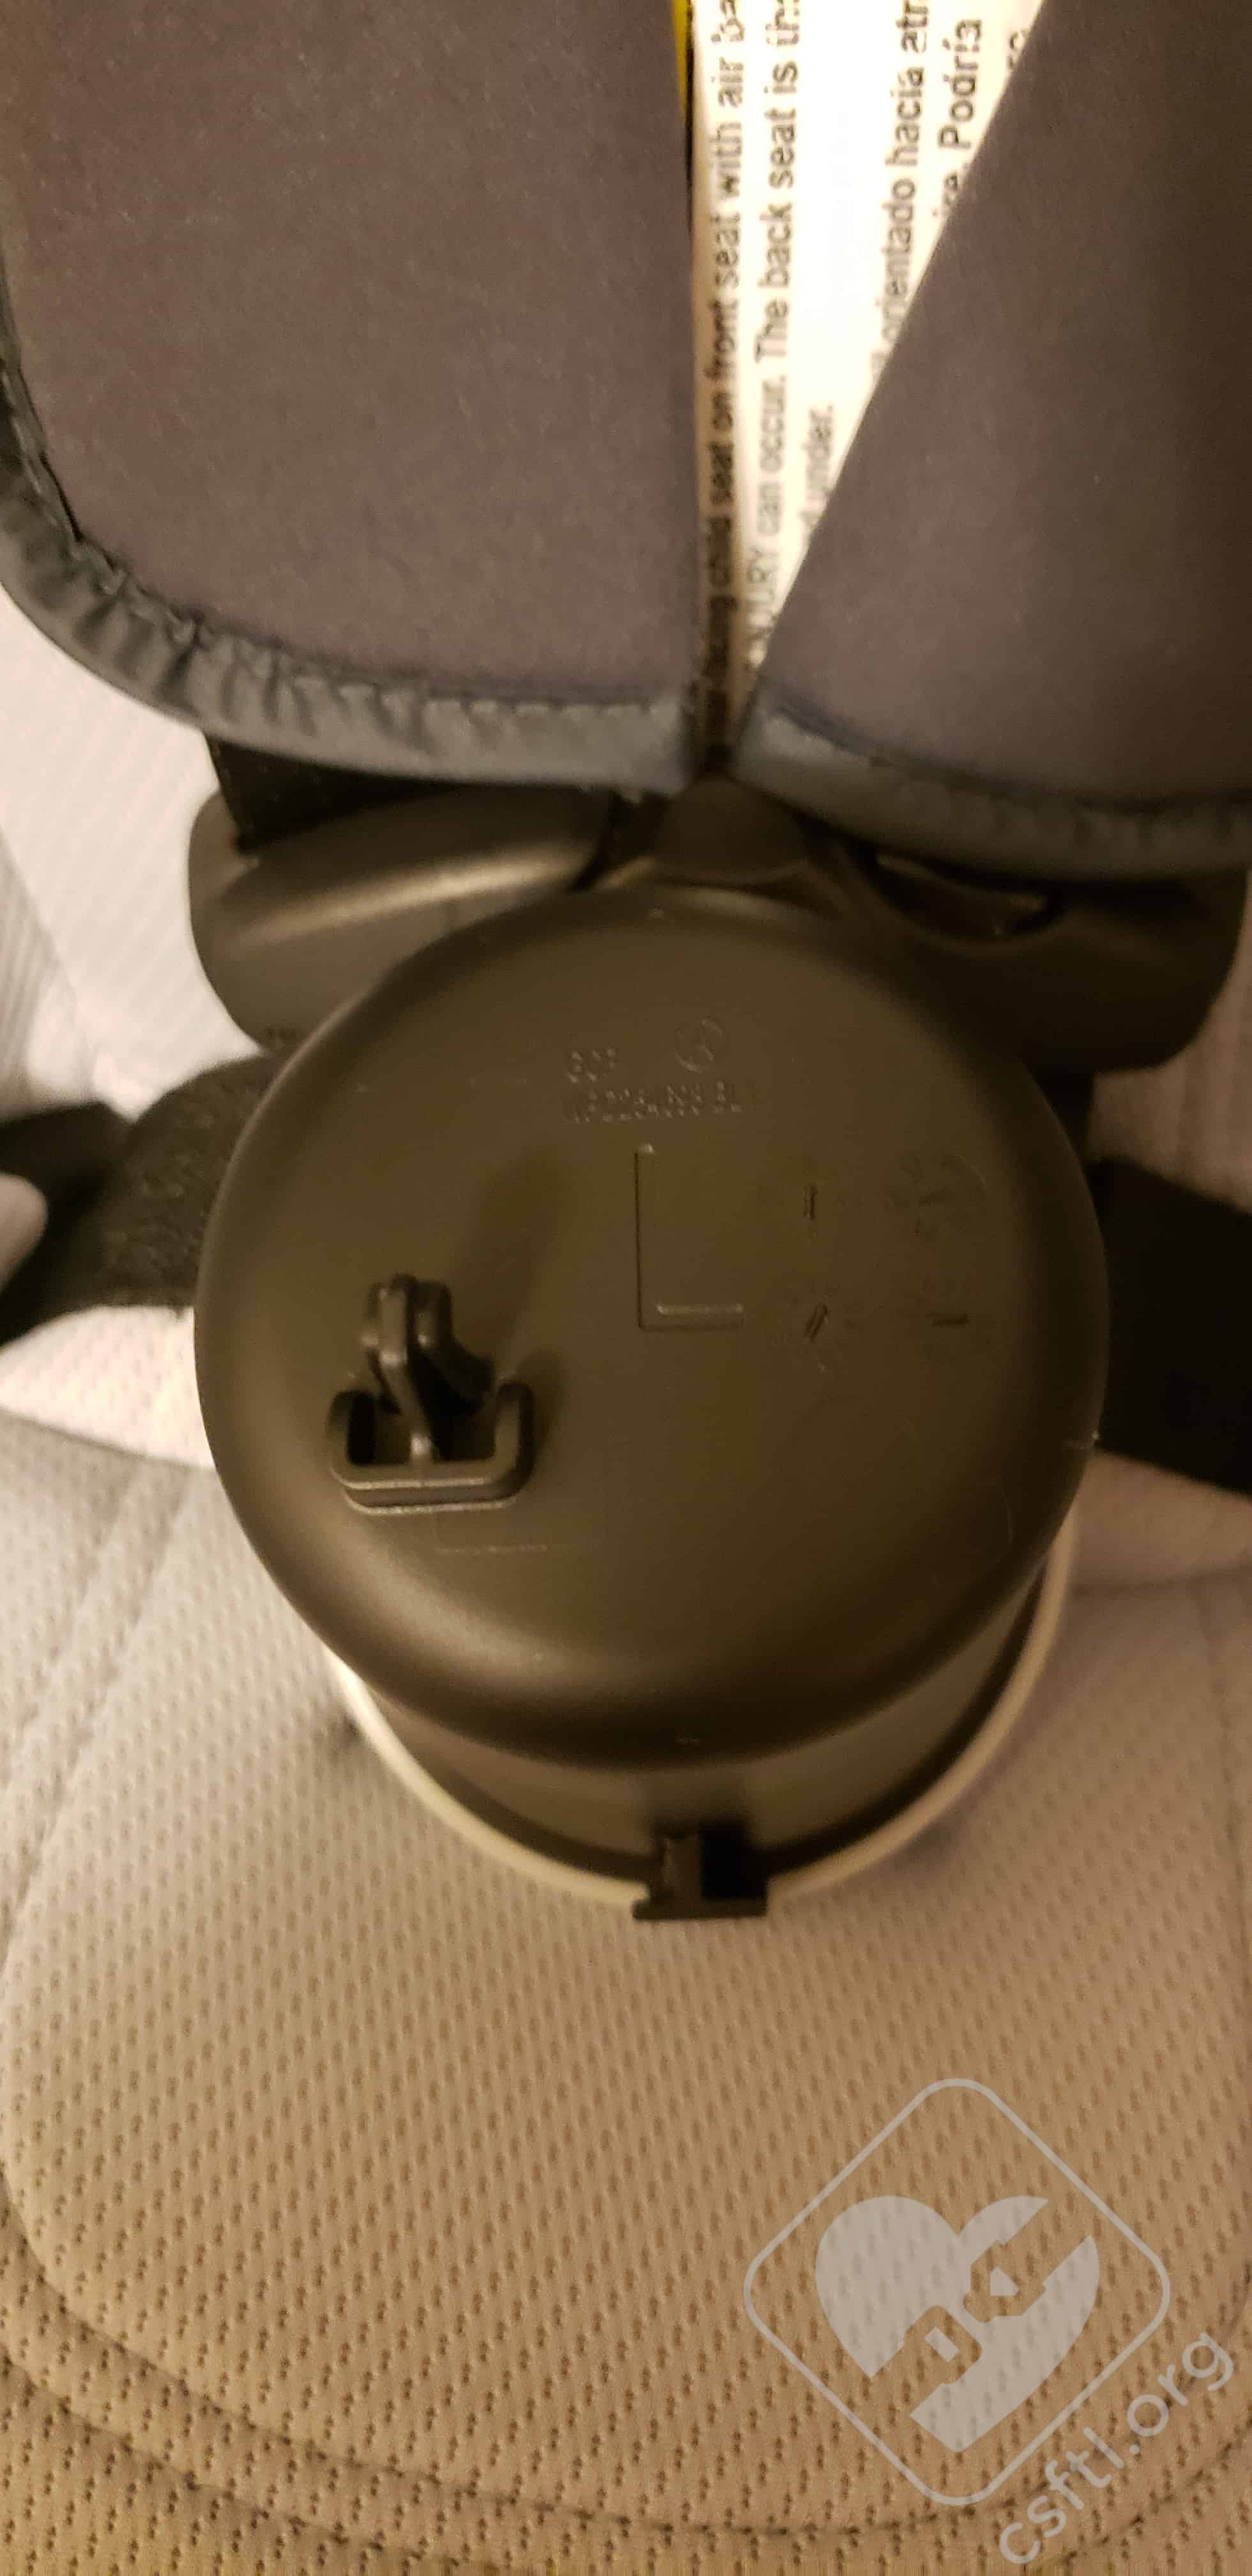
Graco 4Ever DLX date of expiration stamp
Expiration: The expiration can be found in small font stamped into the bottom of the seat.

Graco 4Ever DLX FAA approval
FAA Approval: The FAA approval label is located on a white label on the inside of a pillar on the back of the seat. The 4Ever DLX is FAA approved for use on board aircraft when the harness is in use. Like all booster seats, the 4Ever DLX is not approved for use on board aircraft when used as a belt positioning booster due to the plane’s lap-only belt.
Graco 4Ever DLX lower anchor storage
Lower Anchor Storage: There are two separate locations for lower anchor storage on the 4Ever DLX, depending on which belt path the lower anchor webbing is in. For the rear facing belt path, the lower anchor connectors store on two small bars located on the front of the seat, near where the child’s feet would be. For the forward facing belt path, the lower anchor connectors store on bars located on either side of the seat, near the top where the child’s shoulders may be.
Graco 4Ever top tether storage
Top Tether Storage: The tether for the Graco 4Ever DLX stores on one of two small bars located at the top of the back of the seat, just above the red harness rollers.
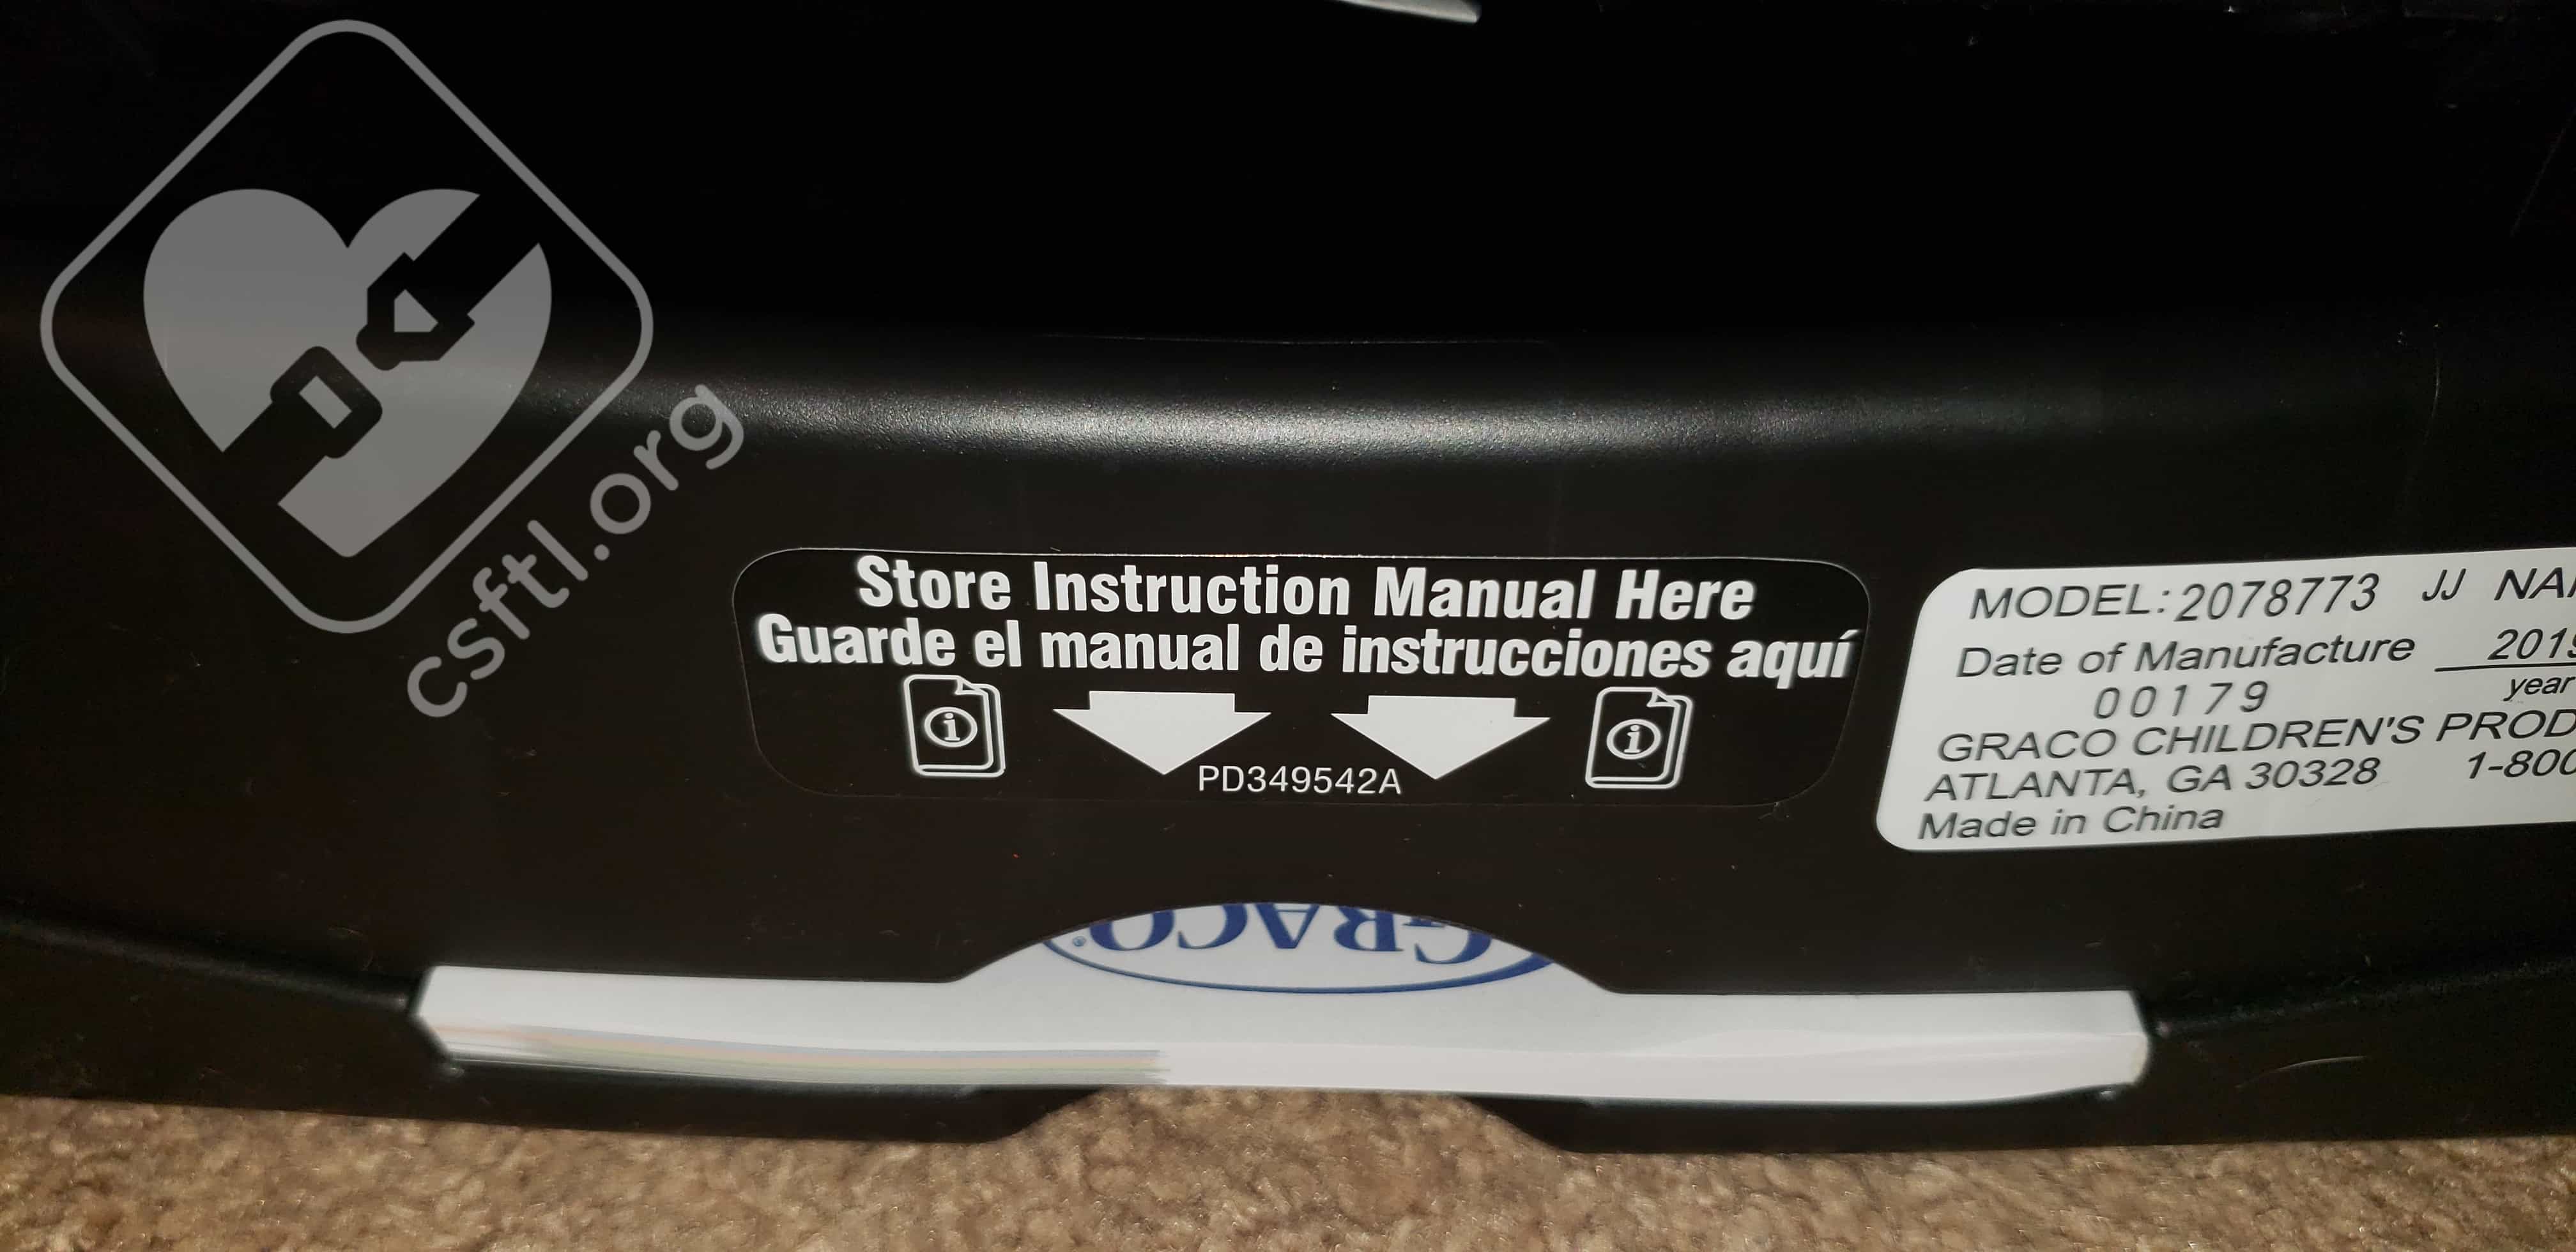
Graco 4Ever DLX manual storage
Manual Storage: The owner’s manual stores in a slot on the back of the seat’s base, next to the date of manufacture label.
Overall Thoughts
Overall, the Graco 4Ever DLX is another solid option in Graco’s ever-growing lineup. This well-designed seat is easy to use and provides a good fit for children of many sizes, from preemie up to booster age!
The addition of the RapidRemove cover and forward facing lockoffs are much appreciated touches that add to the appeal of this seat. While it may not be the last seat you’ll ever need — since children tend to be between 10-12 years old before they pass the five step test to ditch the booster — it is certainly a solid choice that should give caregivers years of reliable use!
CSFTL Celebration Giveaway!
Our friends at Graco are offering one 4Ever DLX to a lucky reader from the United States. Please read our terms and conditions, then enter below for your chance to win.
a Rafflecopter giveaway