
Graco SlimFit3 LX Graco Slimfit3 LX
A very common scenario that we see in our Facebook group and during in-person car seat checks is the need to install three car seats or booster seats across. As families grow and change, the direction of the seats in the vehicle changes along with the type of seat required for each child. We’ve seen a growing number of narrow car seats marketed toward mutli-child families and we’re pleased to see manufacturers taking this need to heart and responding with new options for these families.
We were excited to learn that the team at Graco has taken on the three across conundrum and produced a new seat with a spin on a seat name we already knew. The Graco Slimfit3 LX (also known as the True3Fit LX) is a multimode car seat with rear facing, forward facing, and booster capabilities.
Note: though they may share part of their names, the SlimFit3 LX is not to be confused with the Graco SlimFit. Let’s see if this new seat continues Graco’s trend of making user-friendly car seats.
Not to be Confused with….
Since the SlimFit and the SlimFit3 LX/True3Fit LX share part of their name, we’ve made this handy chart to show the differences between the seats:
Major Differences Between the SlimFit and the SlimFit3 LX/True3Fit LX
| Difference | SlimFit (Original) | SlimFit3 LX/True3Fit LX |
| Width at widest point (at the child’s shoulders): | 19 inches | 16.7 inches |
| Cupholders | Retractable cupholders | Removable cupholders that are designed to work well with other car seats installed next to them |
| Lockoff? | No lockoffF | Forward facing lockoff |
| Highest harness position | 17.5 inches | 16.75 inches |
| Highest booster belt guide position | 18.75 inches | 18.5 inches |
CSFTL Quick Stats
The seat in our review is from the time before the 2025 FMVSS update. If you’re purchasing this seat today, please note that there are some differences between the seat in our review and a seat that’s available now.
2025 FMVSS updates
- Rear facing weight range: 5-40 pounds, 49 inches or less
- Forward-Facing: 26.5-65 pounds , 49 or less
- Booster mode: 40-100 pounds, 43-57 inches tall, and at least 4 years old.
- Head support and body supports can be used only for children who weigh less than 20 pounds
Stats from our original review seat
- CSFTL Recommended Seat
- Rear facing weight range: 5-40 pounds
- Rear facing height range: 49 inches or until the child’s head is 1 inch below the adjuster handle on the headrest when fully extended
- Forward facing weight range: 22-65 pounds
- Forward facing height range: 49 inches or less
- High back booster weight range: 40-100 pounds
- High back booster height range: 43-57 inches tall
- Expiration: 10 years
- Lower anchor weight limit: 45 pounds
- Premium lower anchors
- No rethread harness
- LATCH permitted in booster mode
Measurements
- Lowest harness position with insert: 7 inches
- Lowest harness position without insert: 7.5 inches
- Highest harness position (without insert): 16.75 inches
- Highest booster guide position: 18.5 inches
- Width at widest point (at the child’s shoulders): 16.7 inches
- Base width: 11.5 inches
- Crotch strap positions: 4.25, 5.75, and 7 inches
- Seat pan depth: 13 inches
- Width of seating area: 10.5 inches
- Seat weight: 18 pounds
Features
Narrow Shell — Fits in Tight Spaces
Graco SlimFit3 LX three across a Ford Econoline E350 with lots of room to spare
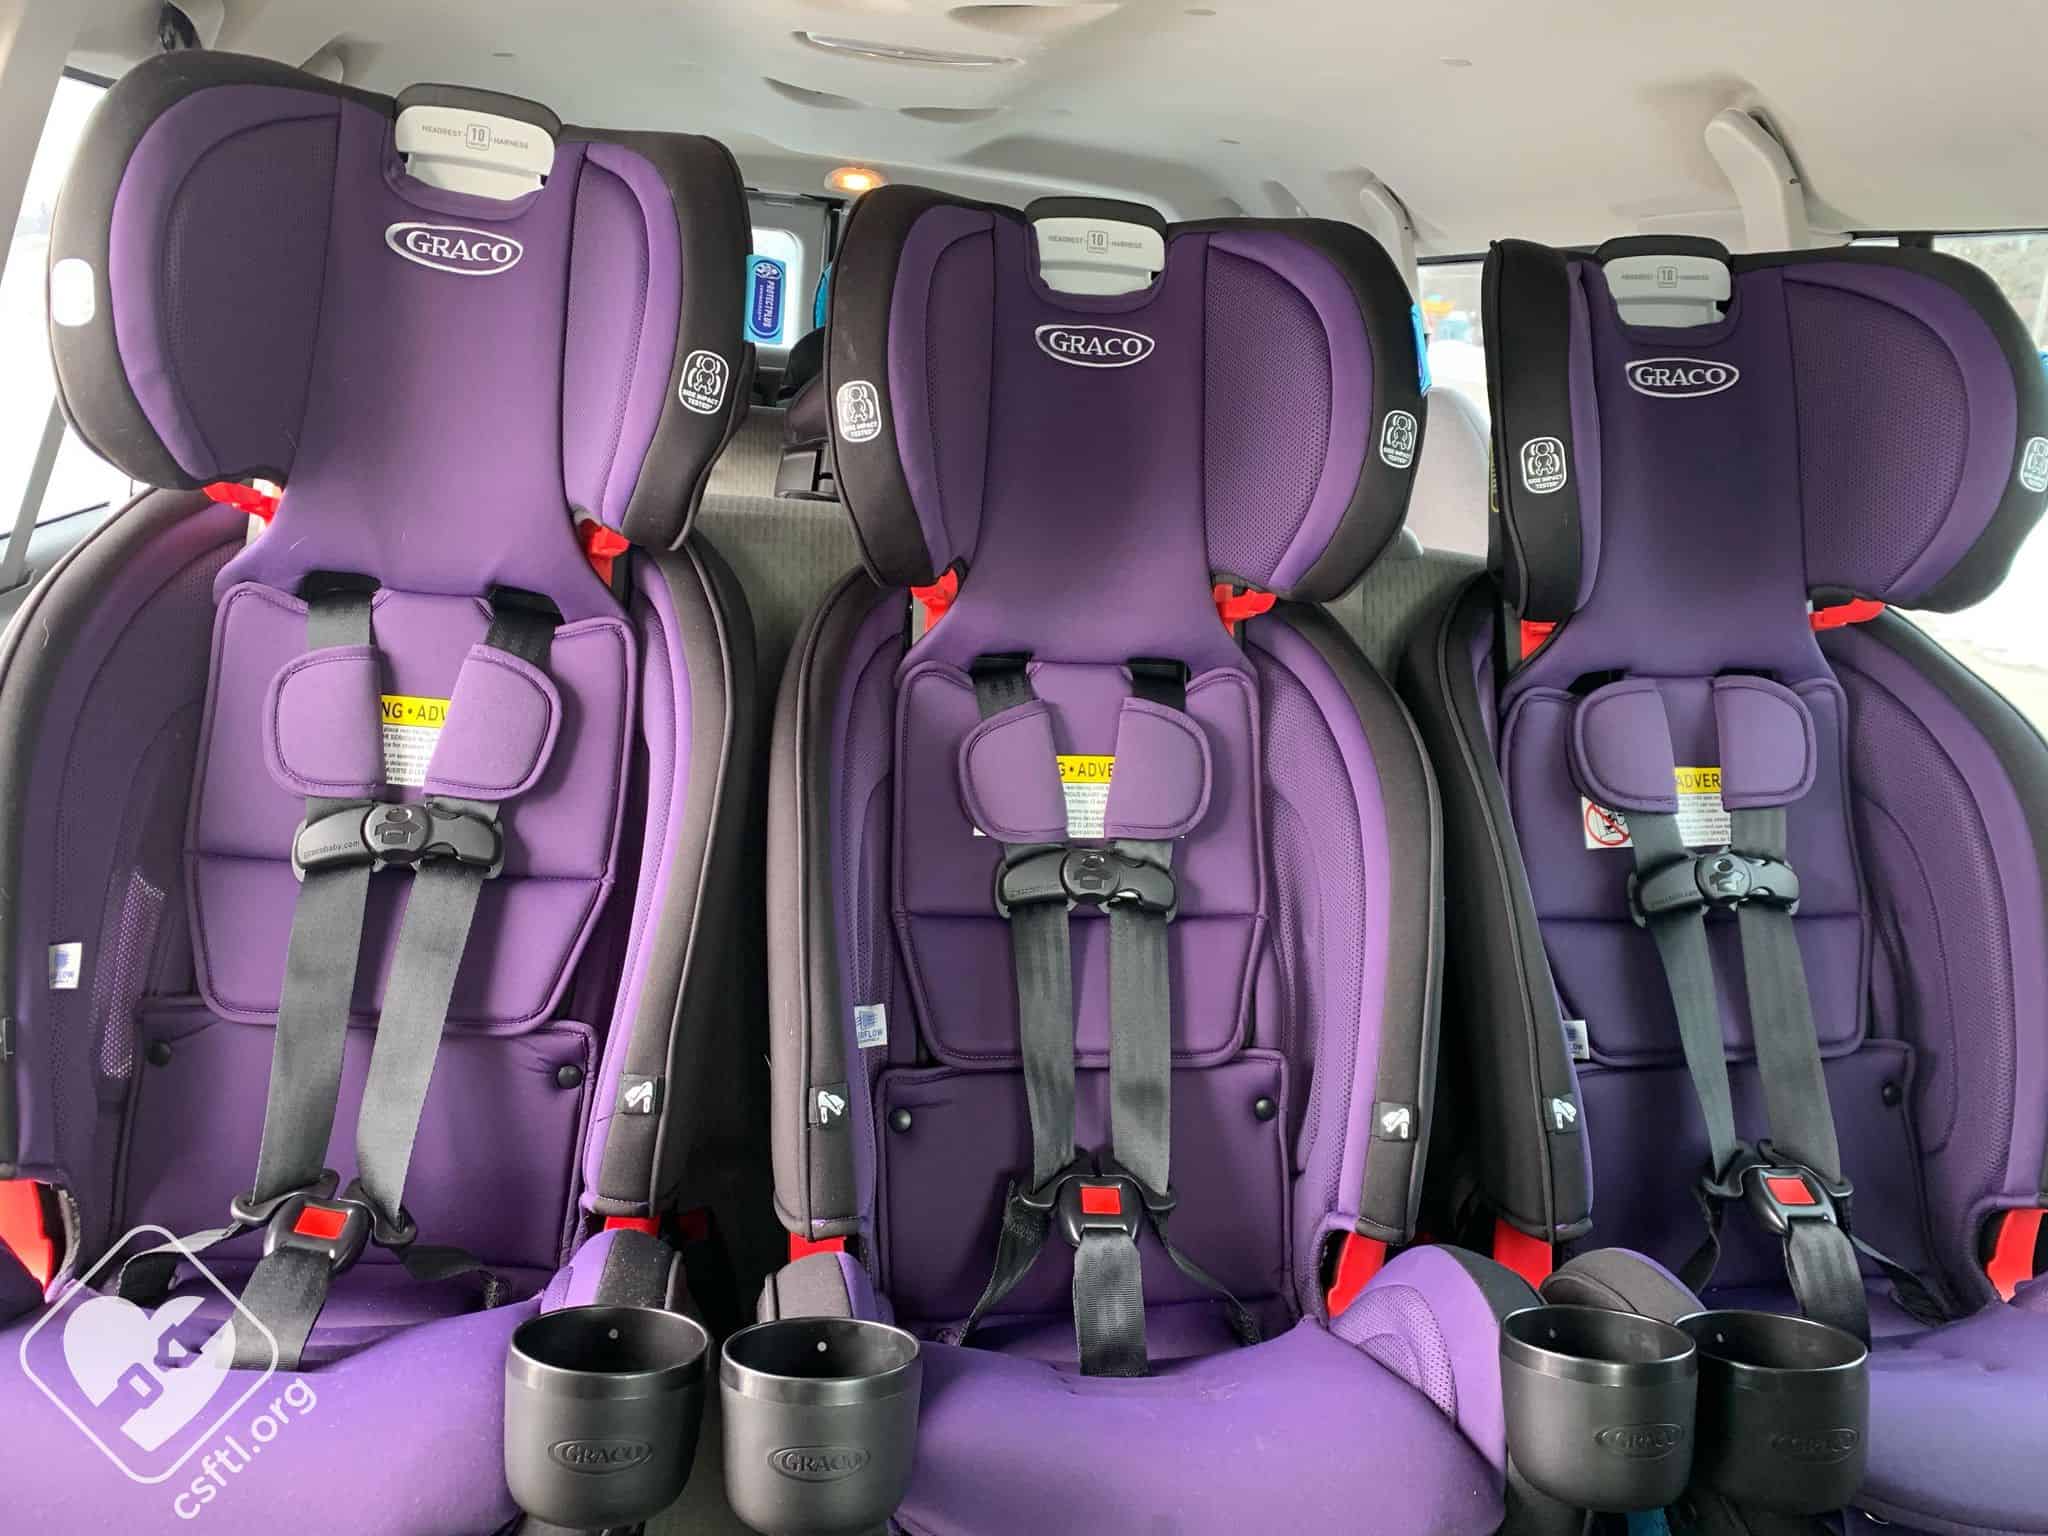
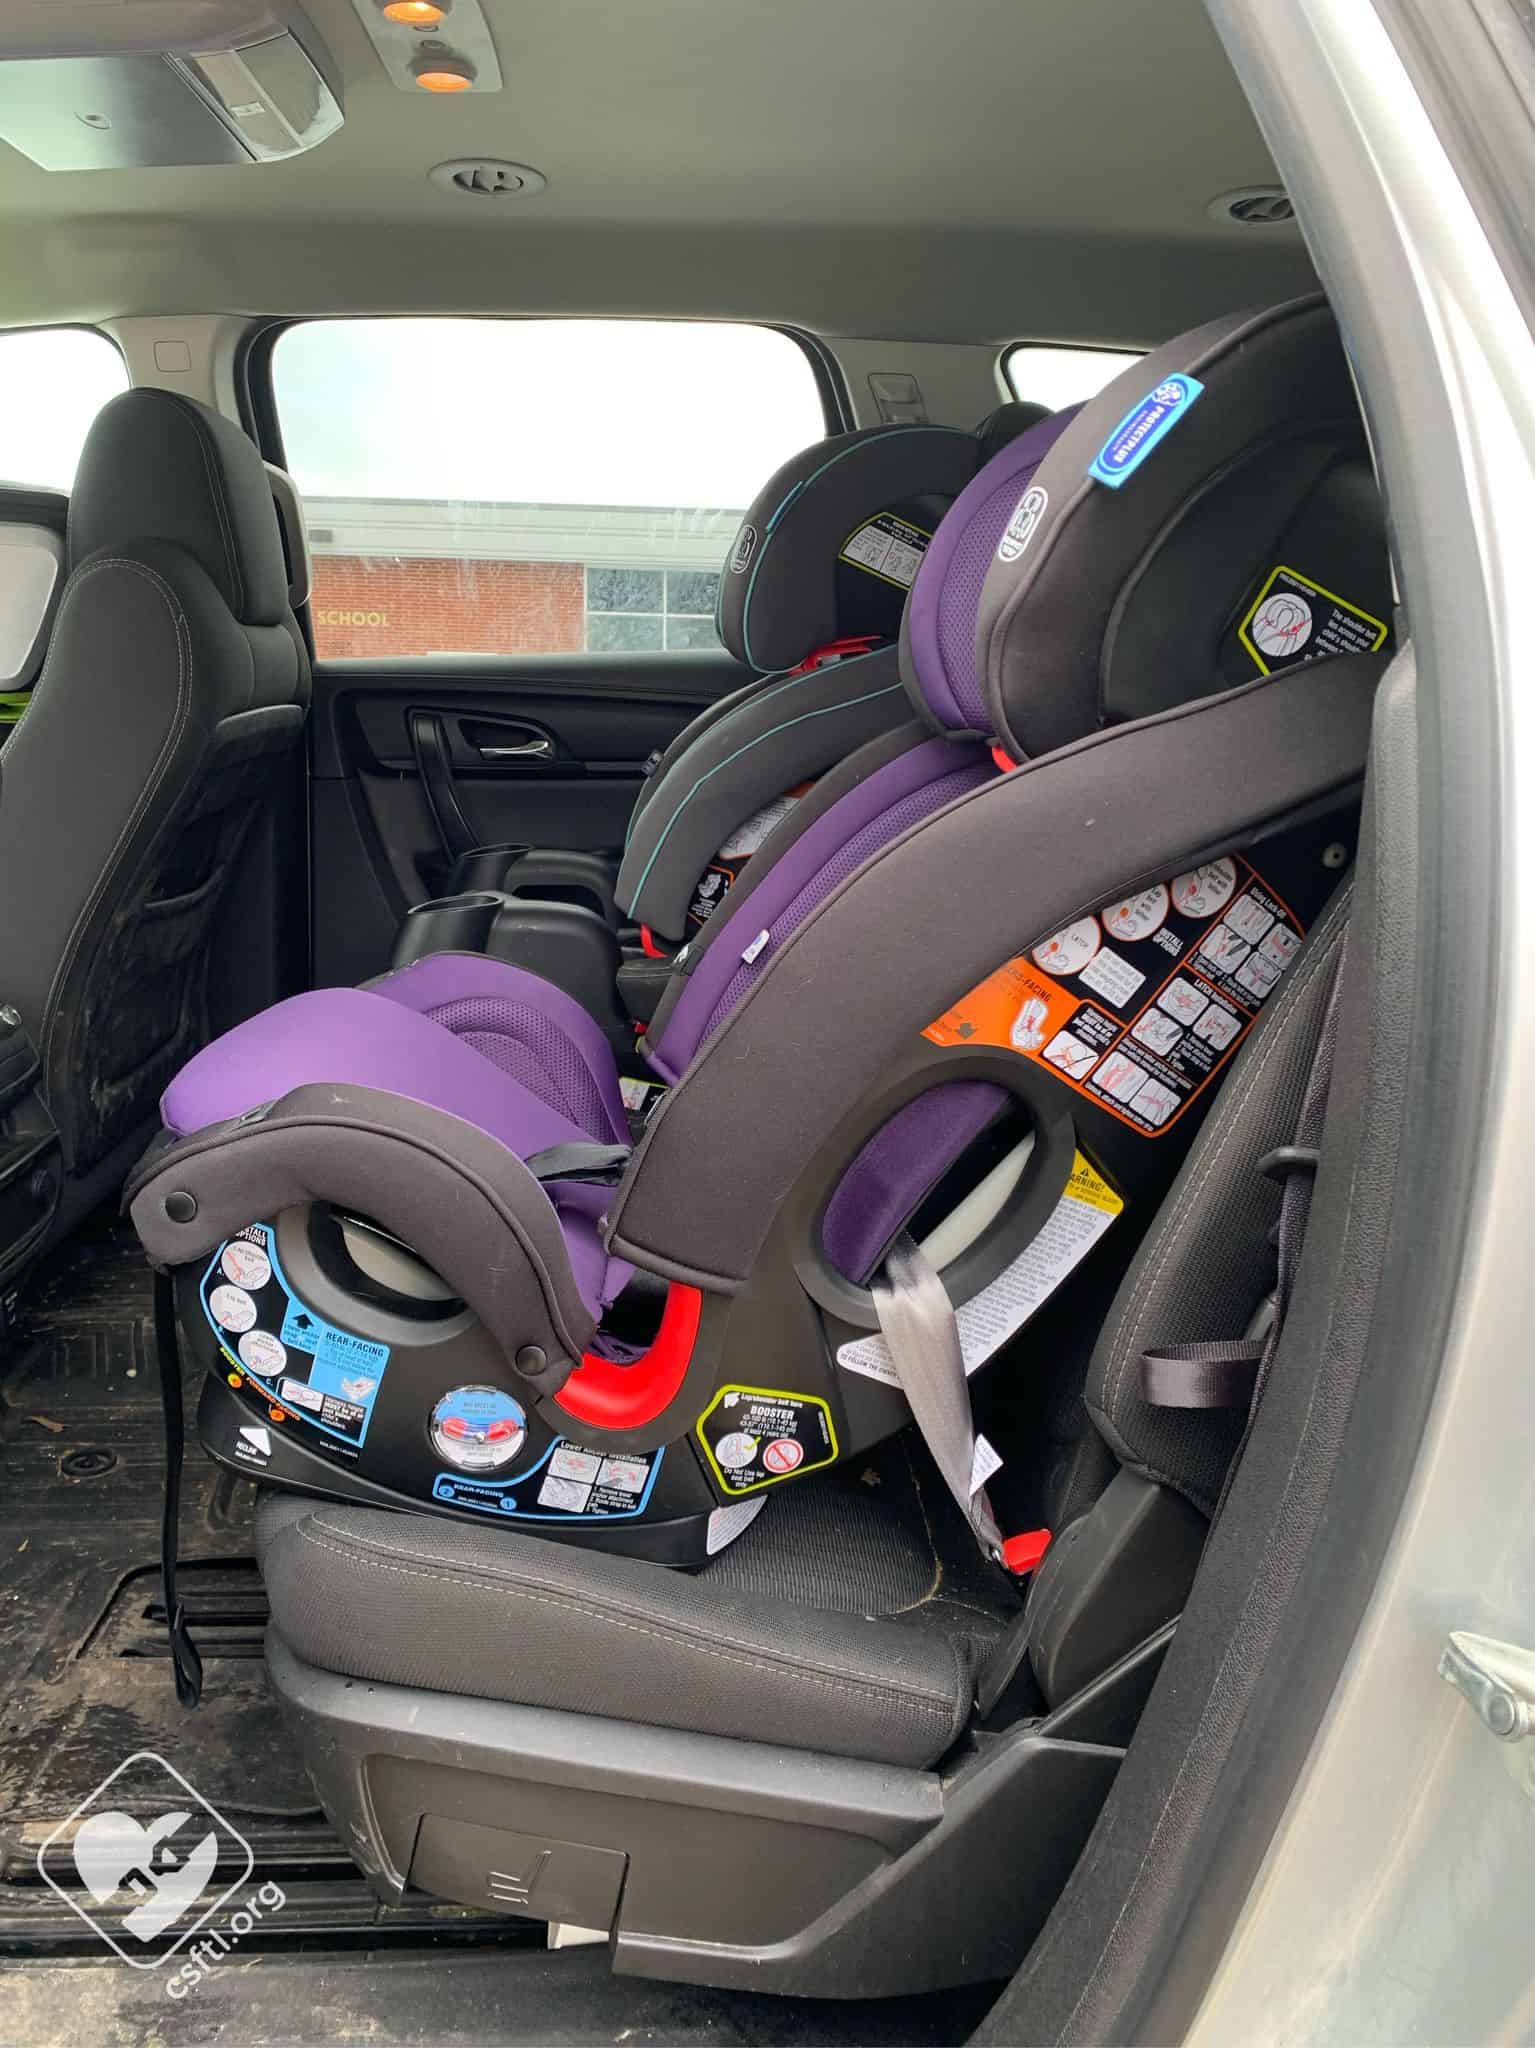
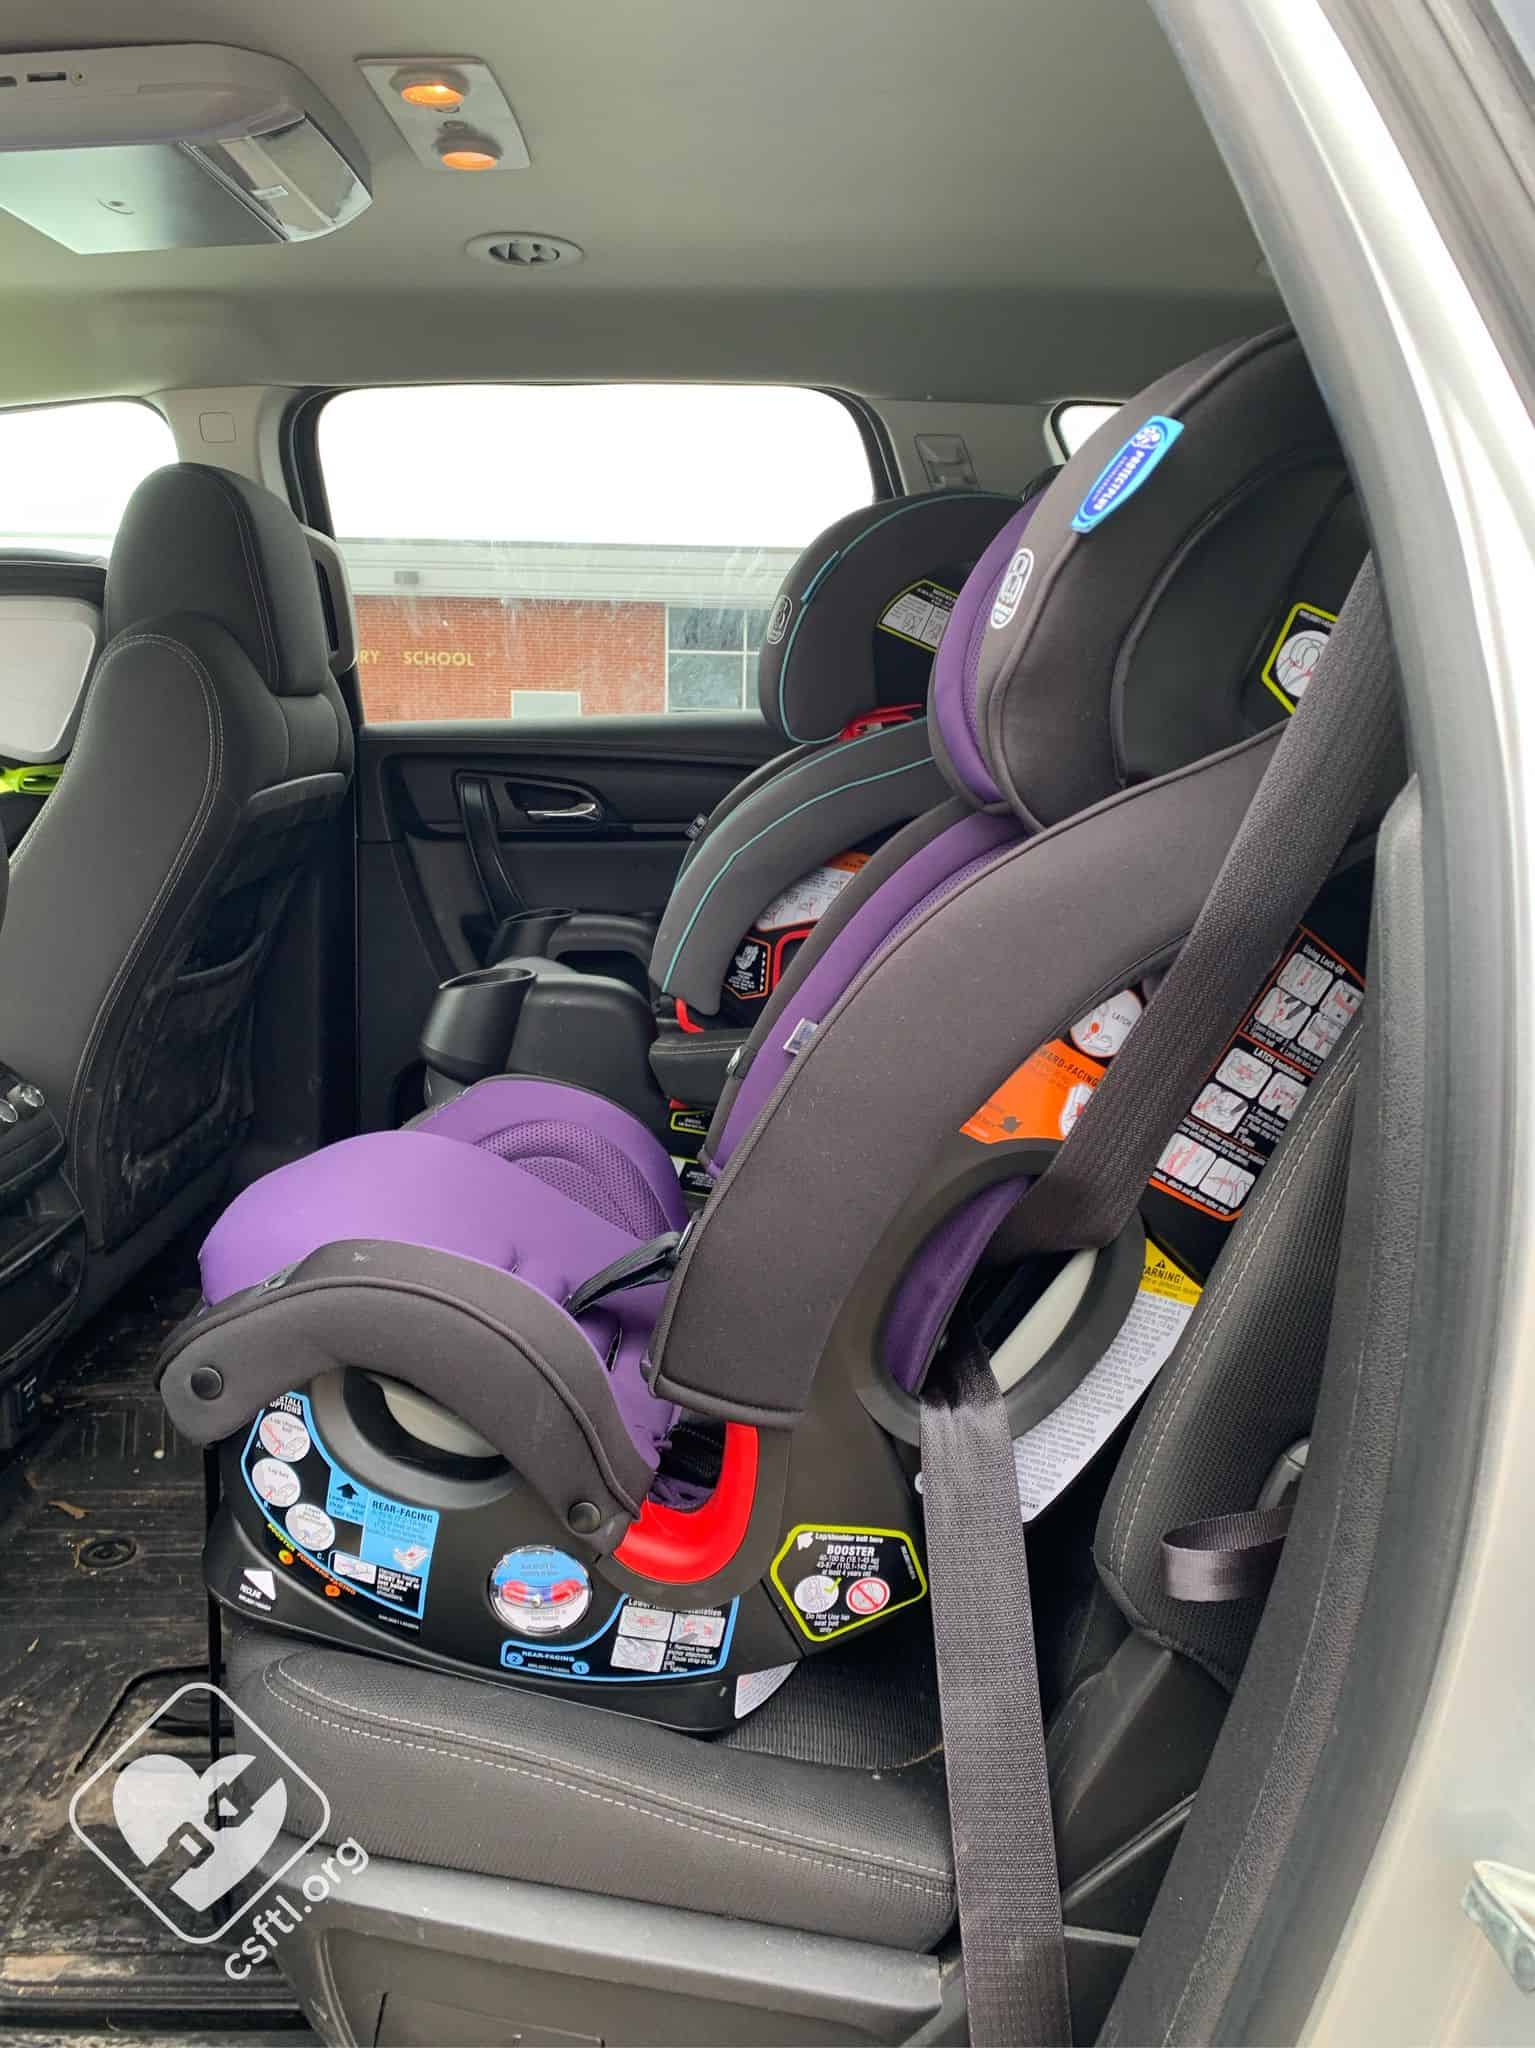
At just 16.7 inches wide, the narrowness of the seat makes installing three seats across possible in many situations. In our E350 Ford Econoline and 2011 Chevy Equinox, we were able to install three of these seats in a row without issue. That’s not something we get to say very often or take lightly.

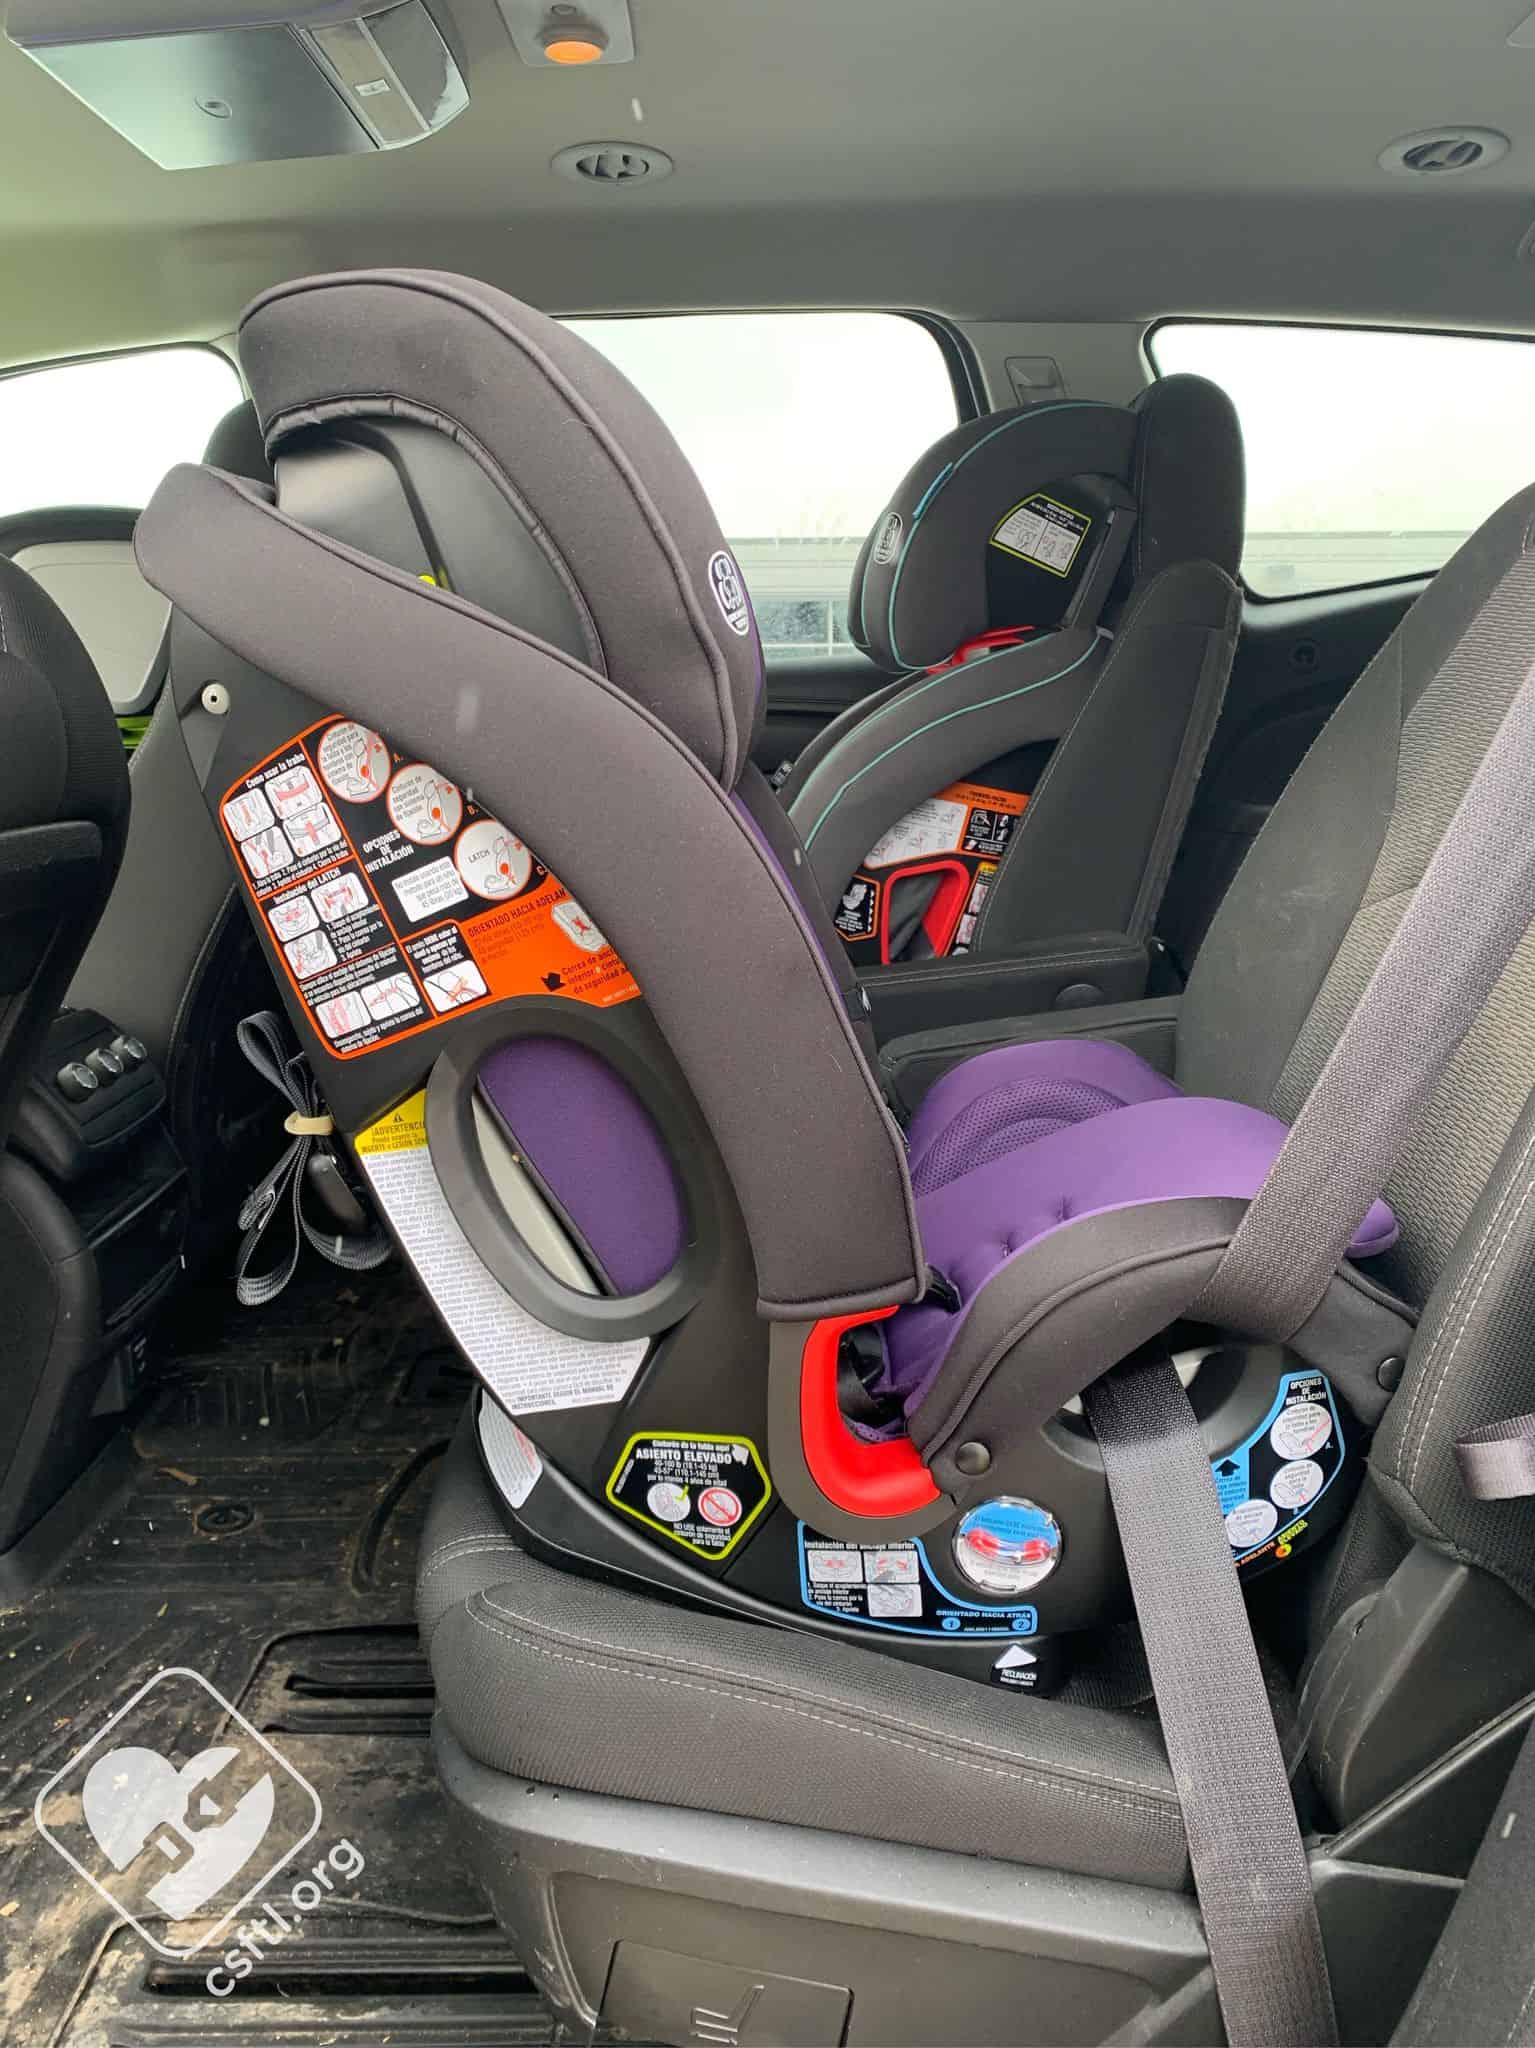
Graco SlimFit3 LX three across
We put our trio of seats through the paces. We installed some rear facing, some forward facing, some in booster mode but always all 3 in a row. In all of the vehicles we tried, we were able to get all 3 seats installed without too much issue (in our largest vehicle, there was hardly any struggle involved at all!) The one scenario that presented a challenge isn’t surprising — ensuring that a booster rider can reach between the seats to buckle themselves in. When another car seat or booster seat is next to the booster, it’s often difficult for the child to reach between the seats to access the buckle. The SlimFit3 LX was no exception so we’d issue one note of caution around using this seat in booster mode when it’s next to another car seat. One option is to leave the seat belt buckled in and have the child climb under the seat belt on their way into the seat.
RapidRemove Cover

Graco SlimFit3 LX Rapid Remove cover
The Rapid Remove cover comes apart in several pieces. This is a huge perk when you only need to wash one portion of the cover. The cover must be drip dried. Graco was kind enough to create an official video that walks through the process.
Multiple Recline Settings

Graco SlimFit3 LX recline settings
The Slimfit3 LX has 4 recline settings. Each one is for a specific mode of use. There are no weight-based restrictions for the recline angle positions. This also means that if a child has good head control, the seat can be fairly compact when it’s in rear facing mode.
- Recline 1 and 2 are for rear facing
- Recline 3 and 4 are for forward facing
- Recline 4 is booster mode
Cupholder Magic
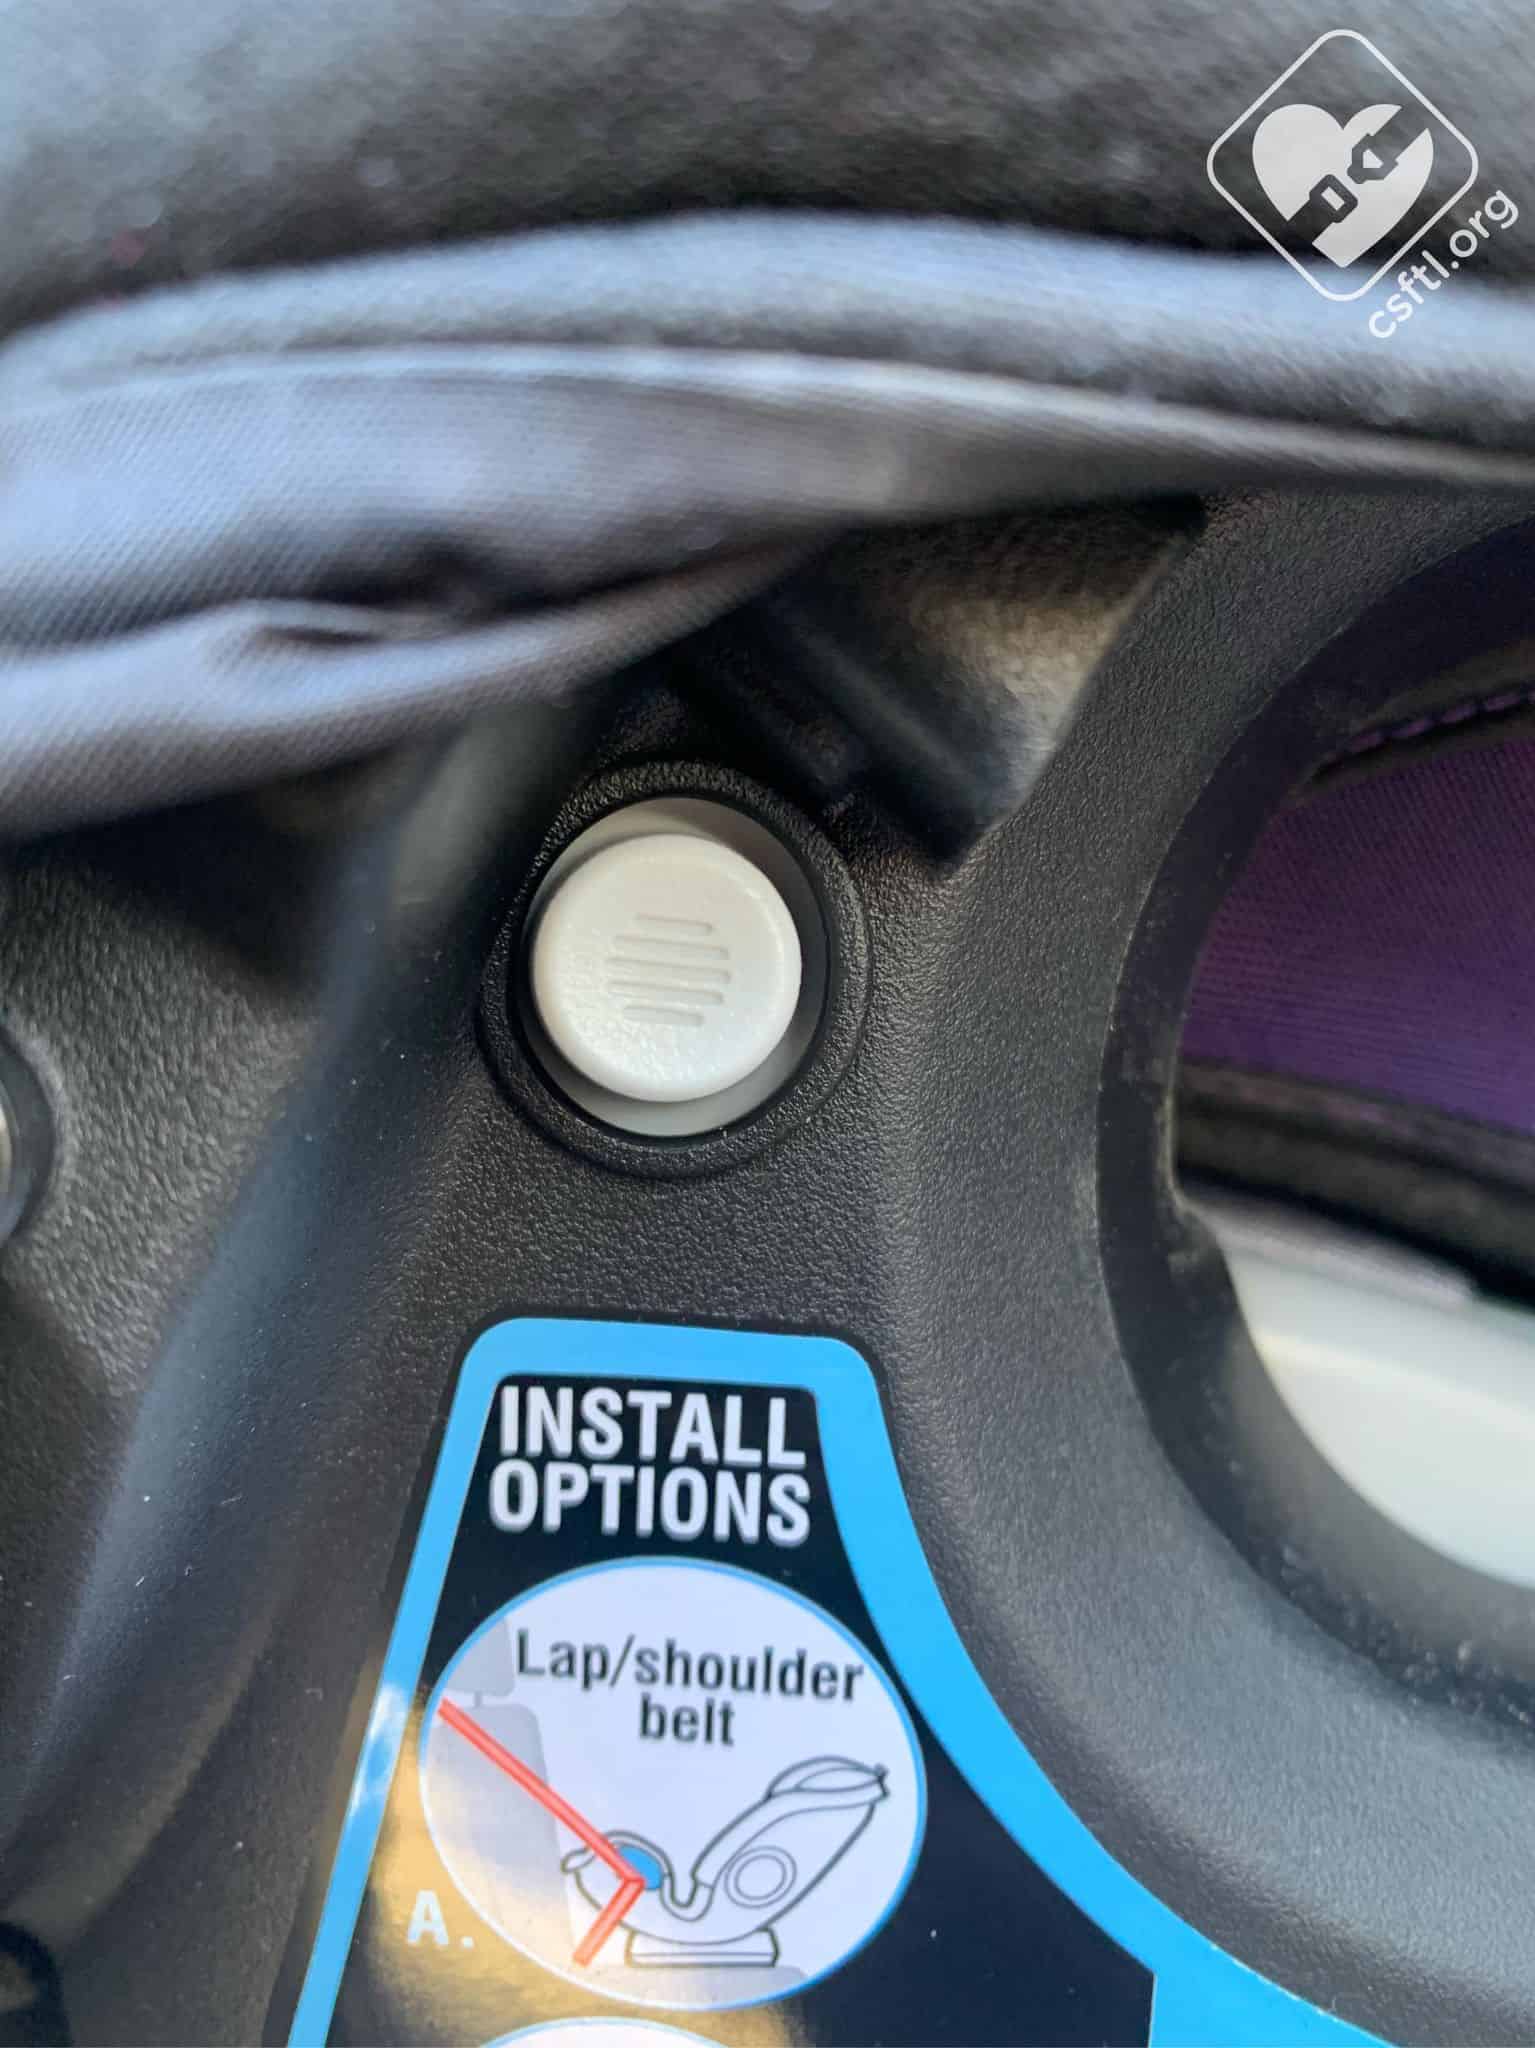
Graco SlimFit3 LX Graco SlimFit3 LX cupholder removal button
The optional cupholders make enough room to help with tight spots when it comes to installation. This sounds like a small thing but these are pretty unique — Graco spent some time thinking through the cupholder problem and coming up with an elegant way to make them work in tight spaces. The push button release on the side of the seat means children can’t pull the cupholders out at inopportune moments.
Airflow Channels
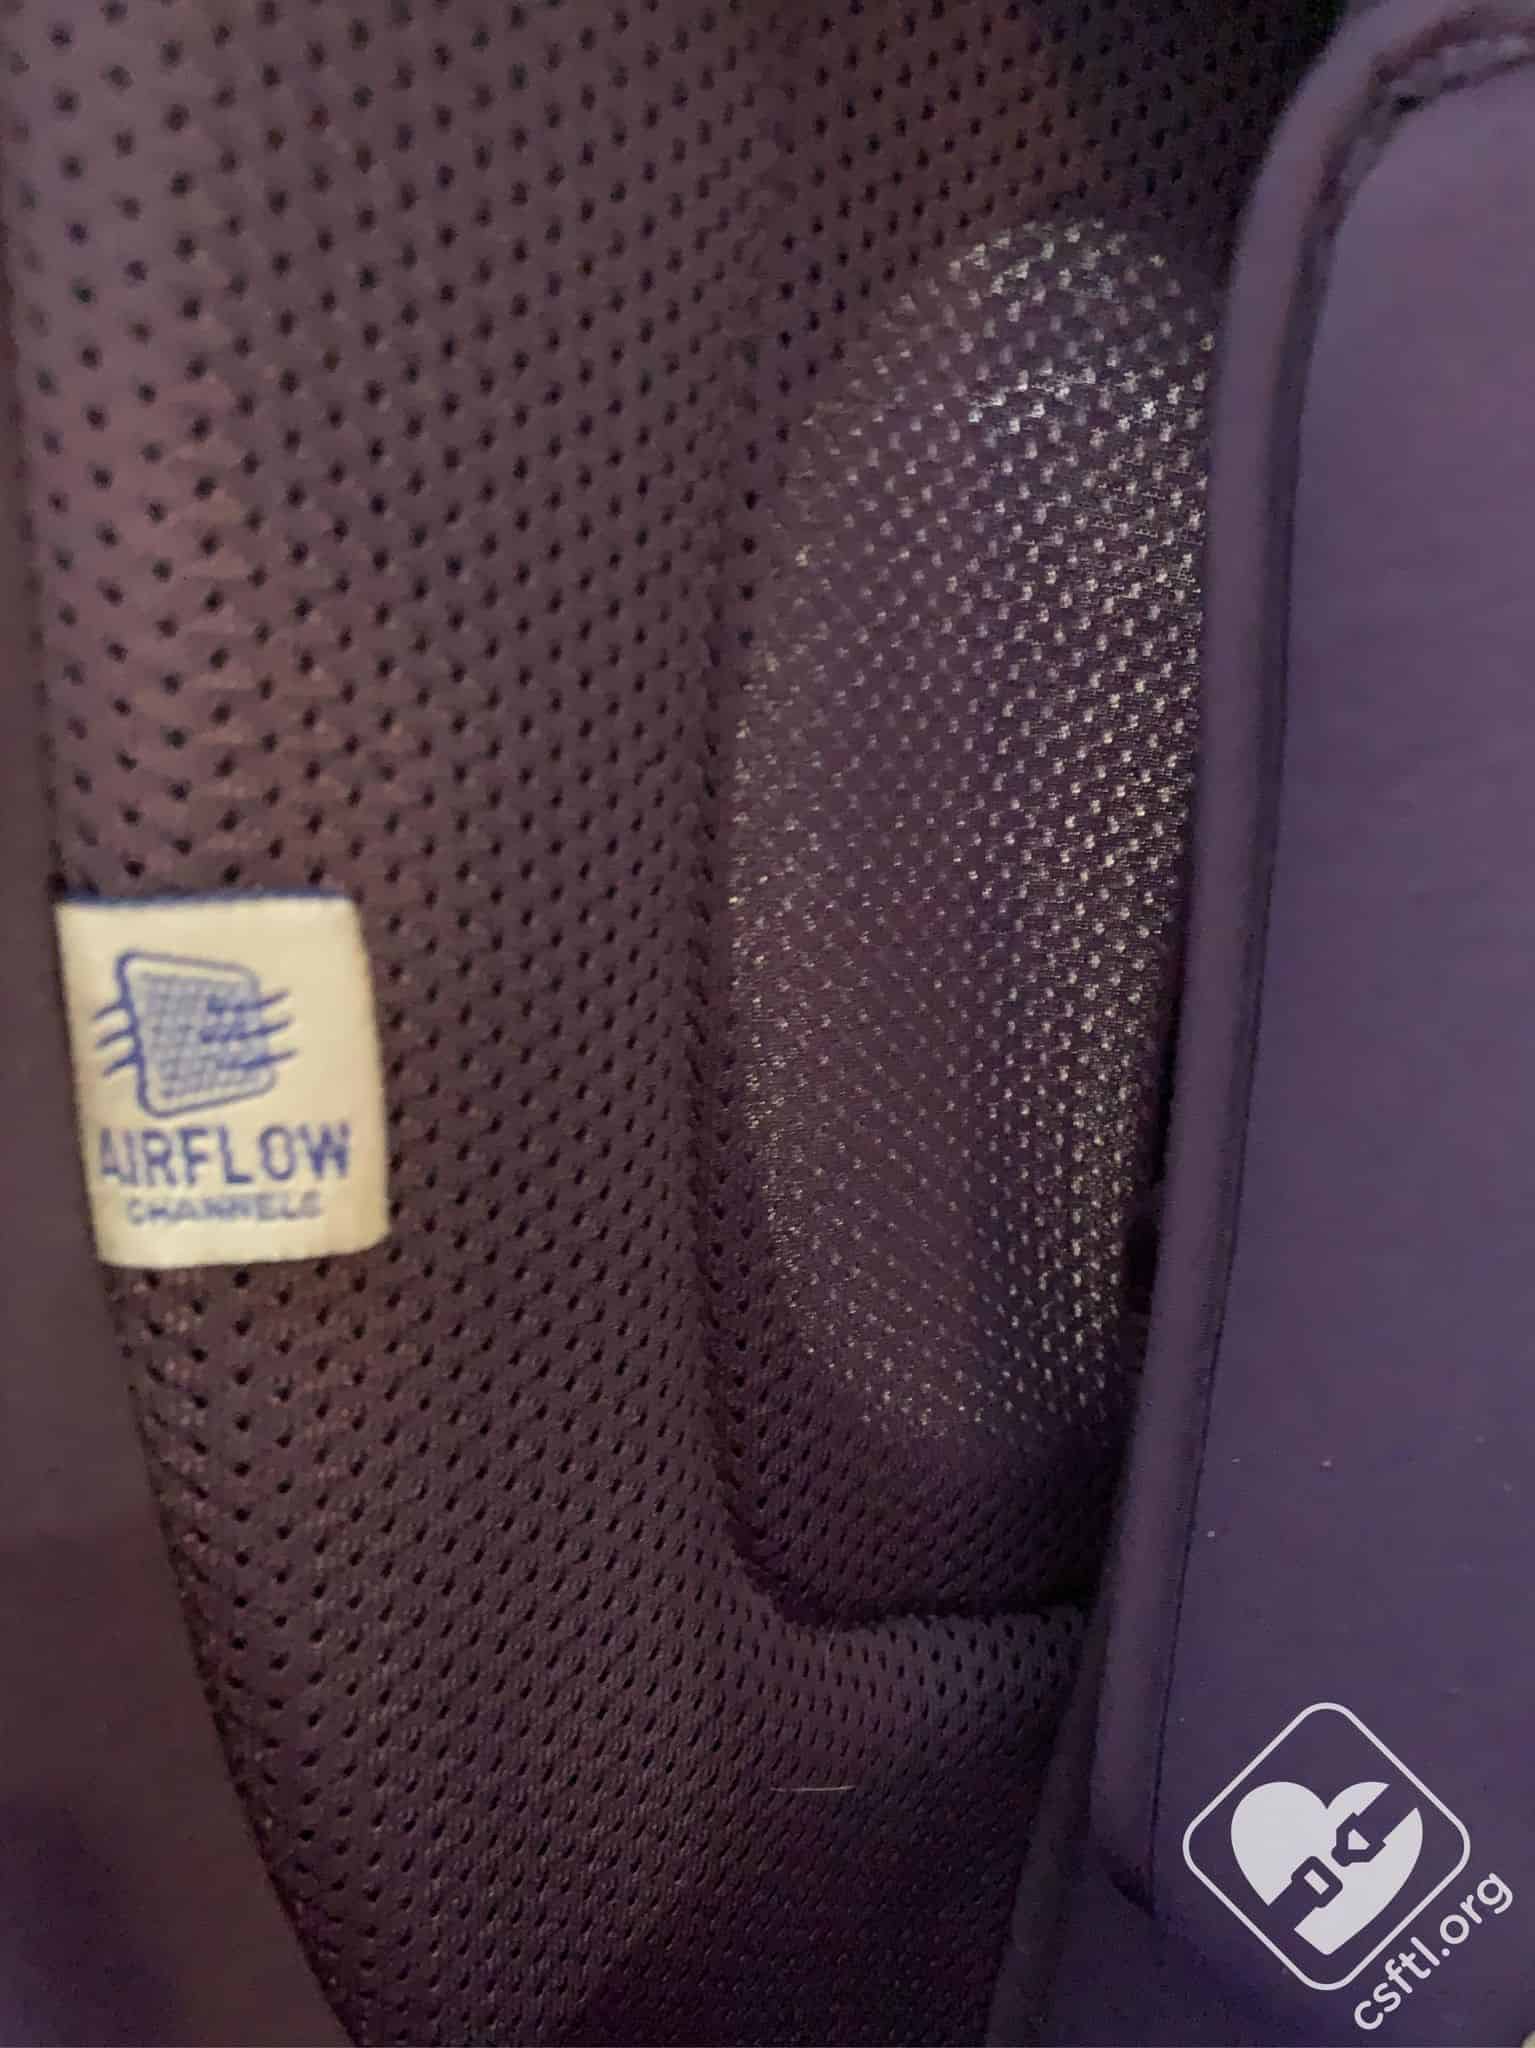 The Graco Slimfit3 LX has airflow channels in the shoulder area and seat pan that allow air to flow around the child. These are a great feature for hot-natured children.
Harness Storage
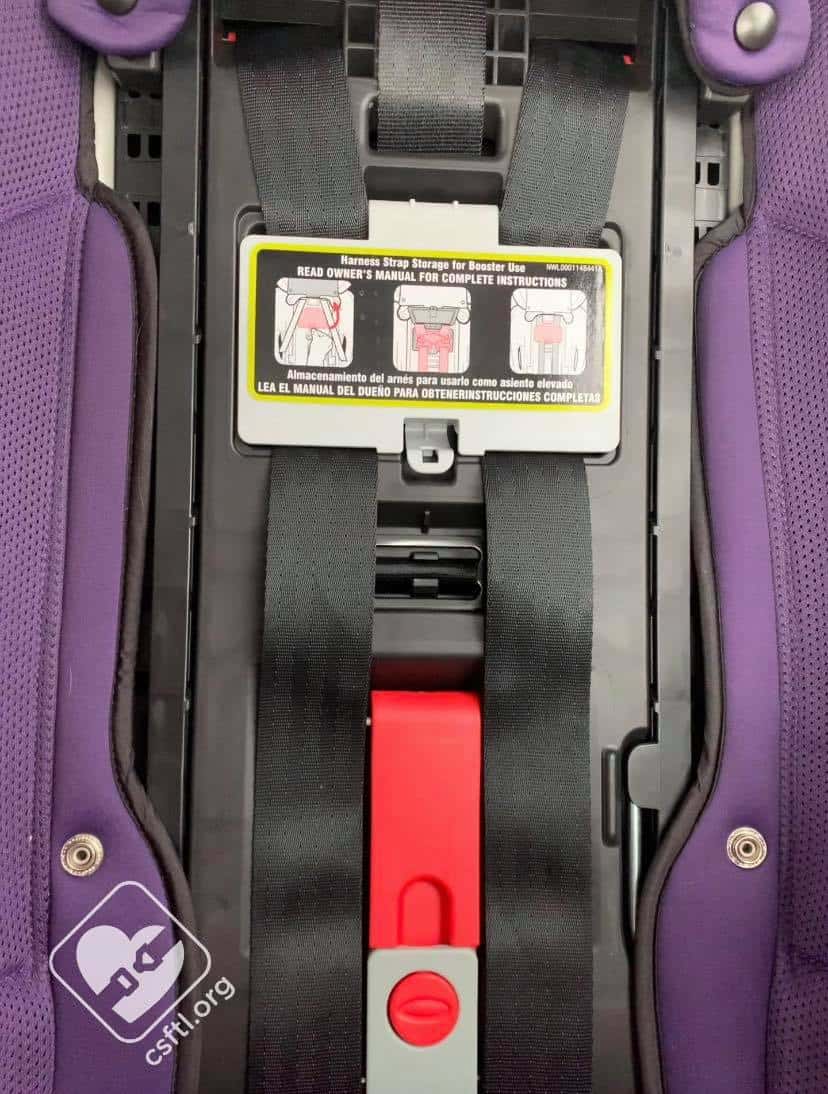
Graco SlimFit3 LX Graco SlimFit3 LX Harness storage door
When the seat is in booster mode, the harness stores right on the seat in a handy compartment. This is helpful for a few situations: not losing the harness when it’s not being used and for families with children booster training. Sometimes, a child who is new to booster seat use needs to return to using a harness during the process, that’s easy to do for a few rides if the harness is still attached and it’s easy to convert the seat between modes.
Belt Path Access
Both the rear and forward facing belt paths are easy to access.
Translation: they’re so wide and open, we didn’t scrape a single knuckle during the writing of this review.
This openness makes installation even easier than on some other seats. The upper and lower covers on the seat lift up to expose the belt path.
Lower Anchor Storage
Graco SlimFit3 LX Lower anchor storage
The lower anchors store in the seat pan. This tucks them out of the way and helps to keep the seat narrow enough for those tight spaces. While this is nice, we did find that removing the lower anchors from this spot was a bit difficult but putting them back in was fairly painless.
Harness Loops
Graco SlimFit3 LX Graco SlimFit3 LX Fuss Free harness loops
Fuss free harness loops keep the harness out of the way for easier buckling. Just tuck the buckle tongues into these pockets when loading or unloading the child.
Quick Start Guide
Graco provides a handy Quick Start guide along with the seat. It isn’t a replacement for reading the manual entirely, but its a great place to start.
Overlap/Air Sharing
A hot topic in the world of car seats is overlap/air sharing between car seats. This means the seats can touch, but can not share air space. Imagine being able to slide a piece of cardboard between the car seats, vertically. If the cardboard bends, the seats are sharing air space. Graco has specifically stated they do not want their seats to share air space with an adjacent car seat. This is addressed in the Slimfit3 LX manual. The cupholders can share space with a car seat, but the shell of the seat can not.
Installation: Rear Facing
Moving Lower Anchors into the Correct Belt Path
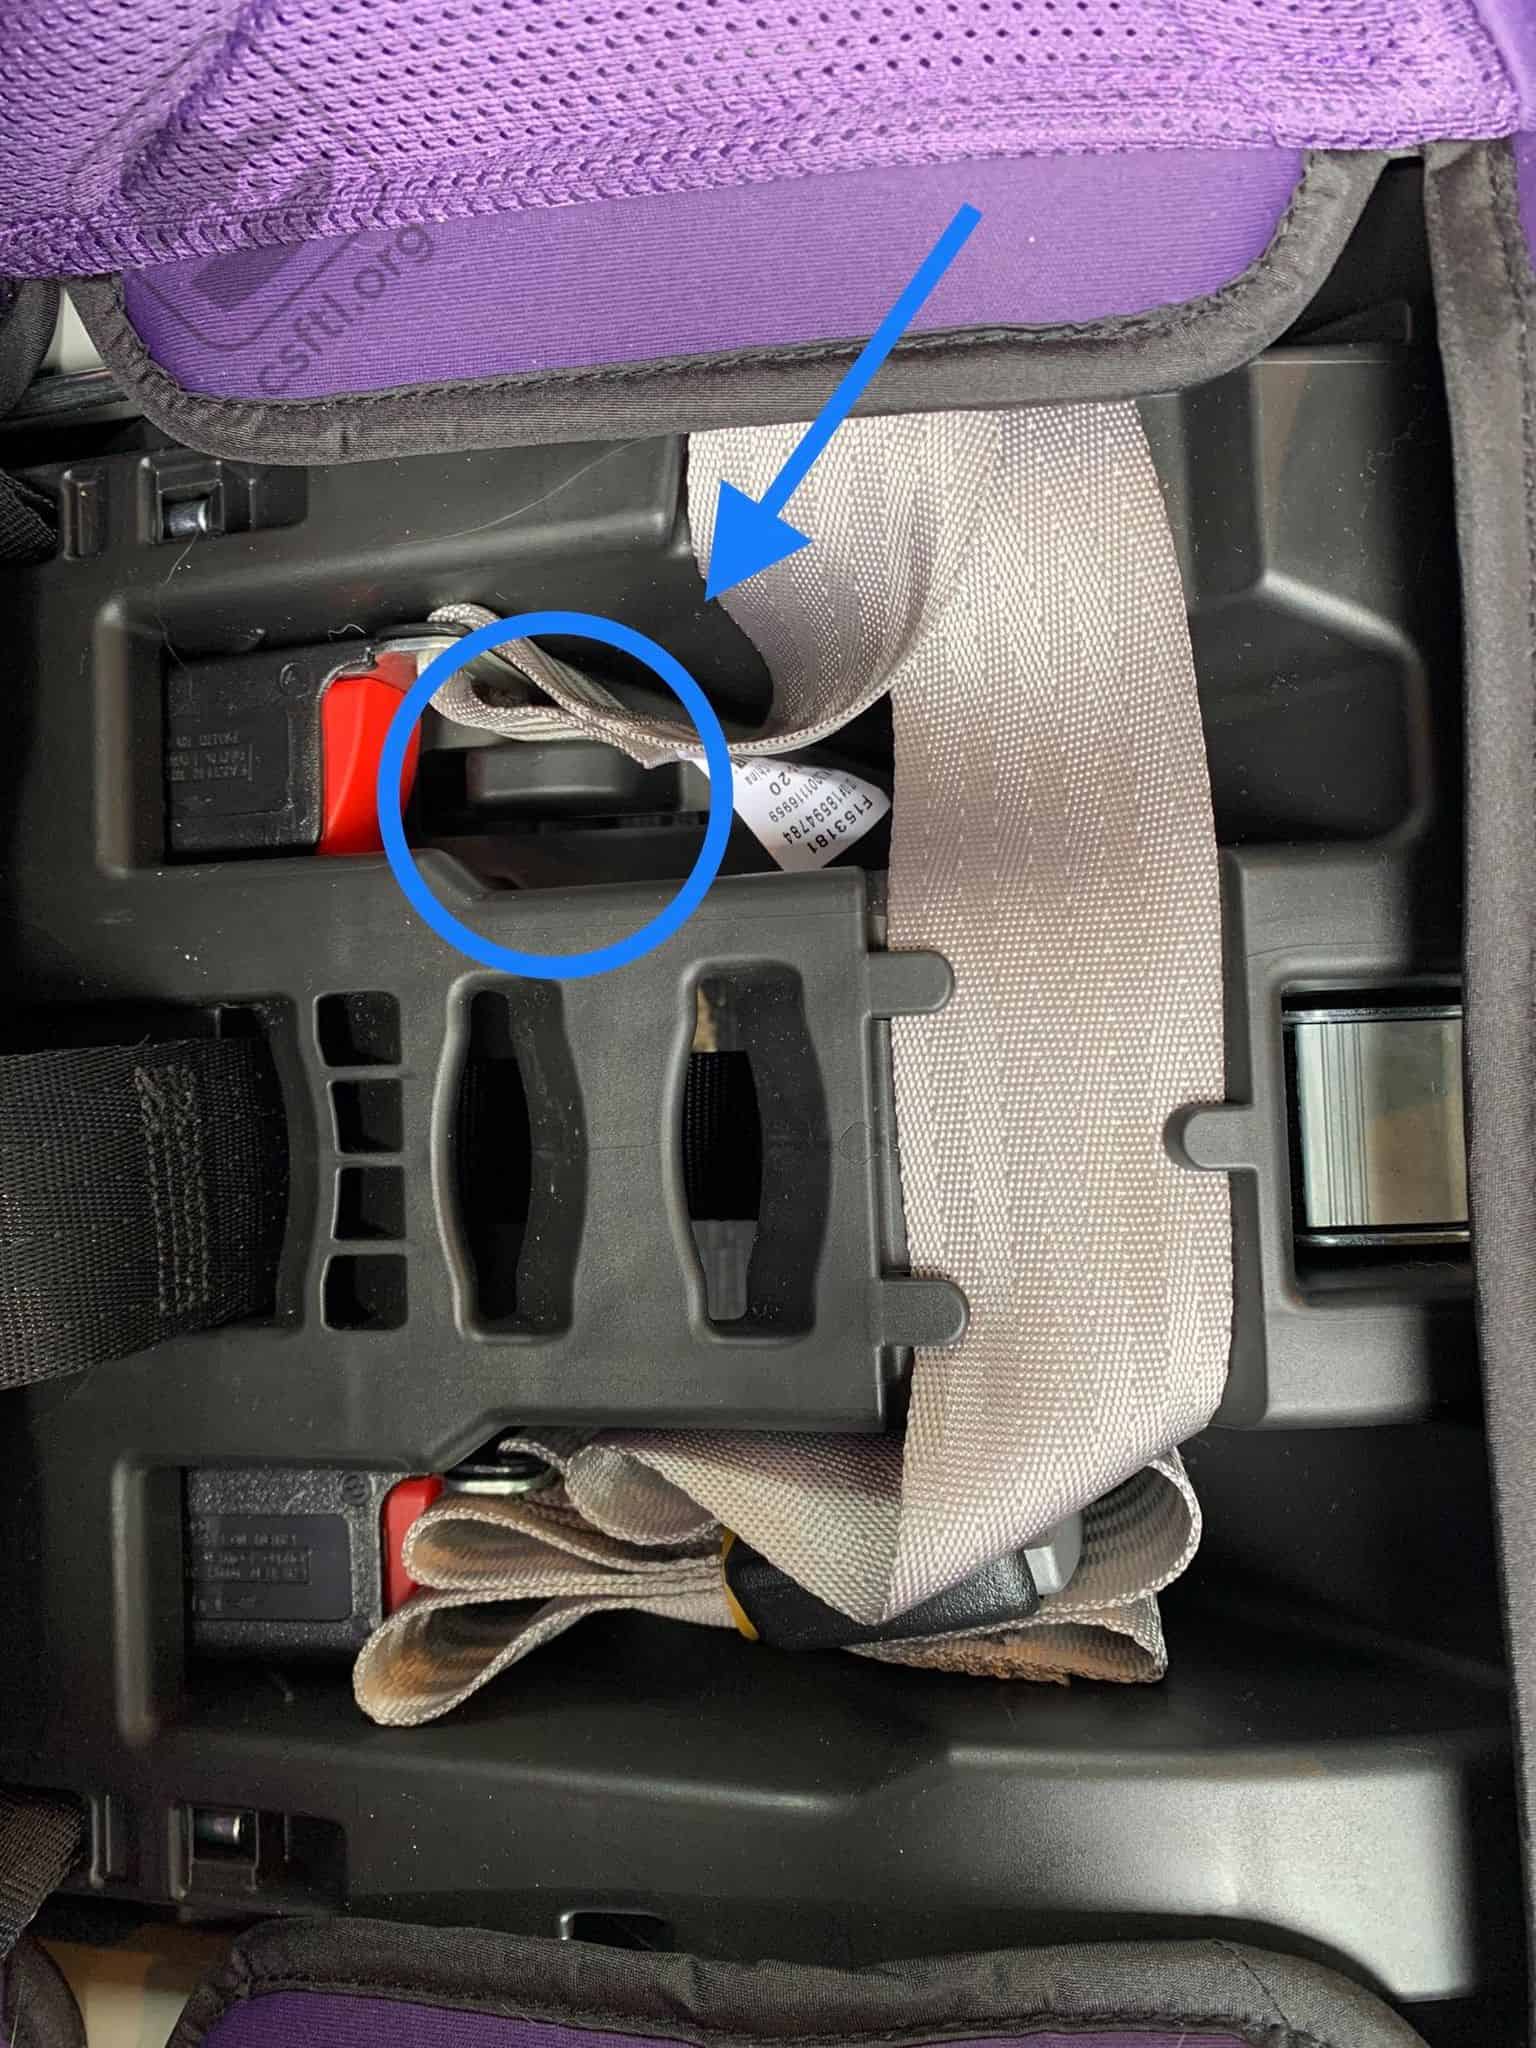
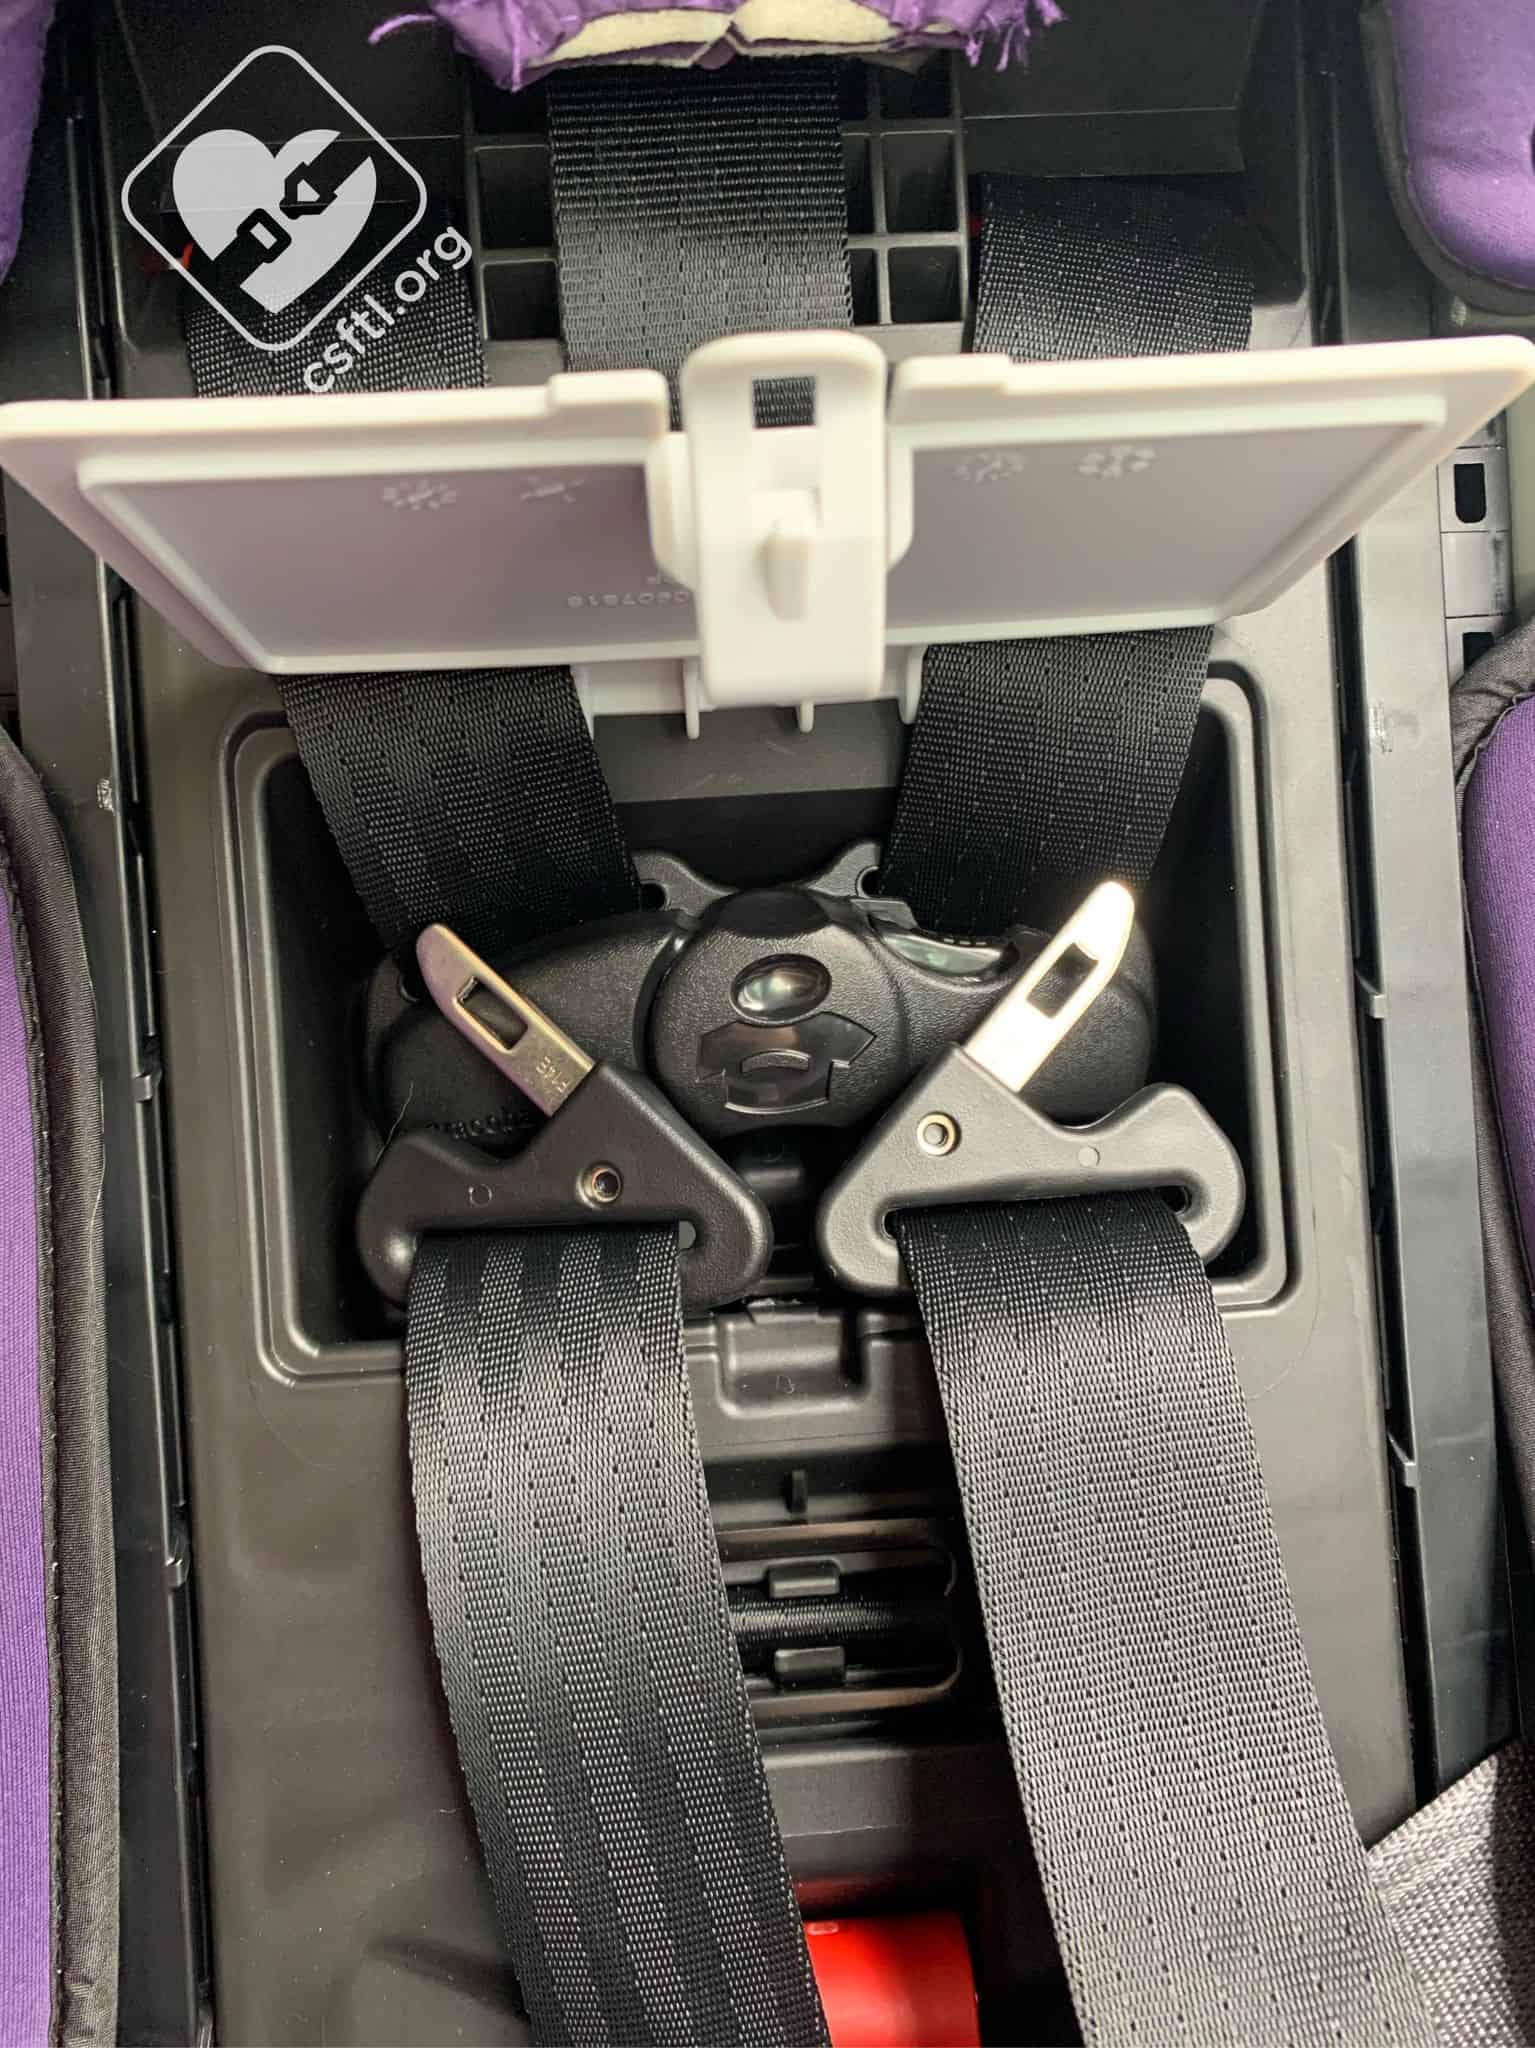
Graco SlimFit3 LX lower anchor storage
The seat ships with the lower anchors tucked tidily away under the seating area. Getting them out of those spots was a bit finicky. Here’s how to do it: lift the back and bottom flap of the seat pad to expose the inside of the seating area. Remove the lower anchors from their storage location, by pushing down on the little bump in the seat shell that’s directly behind the lower anchor and slide it out of the storage location. We found that little bump a bit hard to find so we’ve added a handy photo for your reference.
Once the lower anchors are removed from their storage spots, keep both sides of the lower anchors on the same side of the seat. Slide the lower anchor webbing along the metal bar and past the hip harness. Then, route the lower anchors through the correct belt path.
Recline Angle
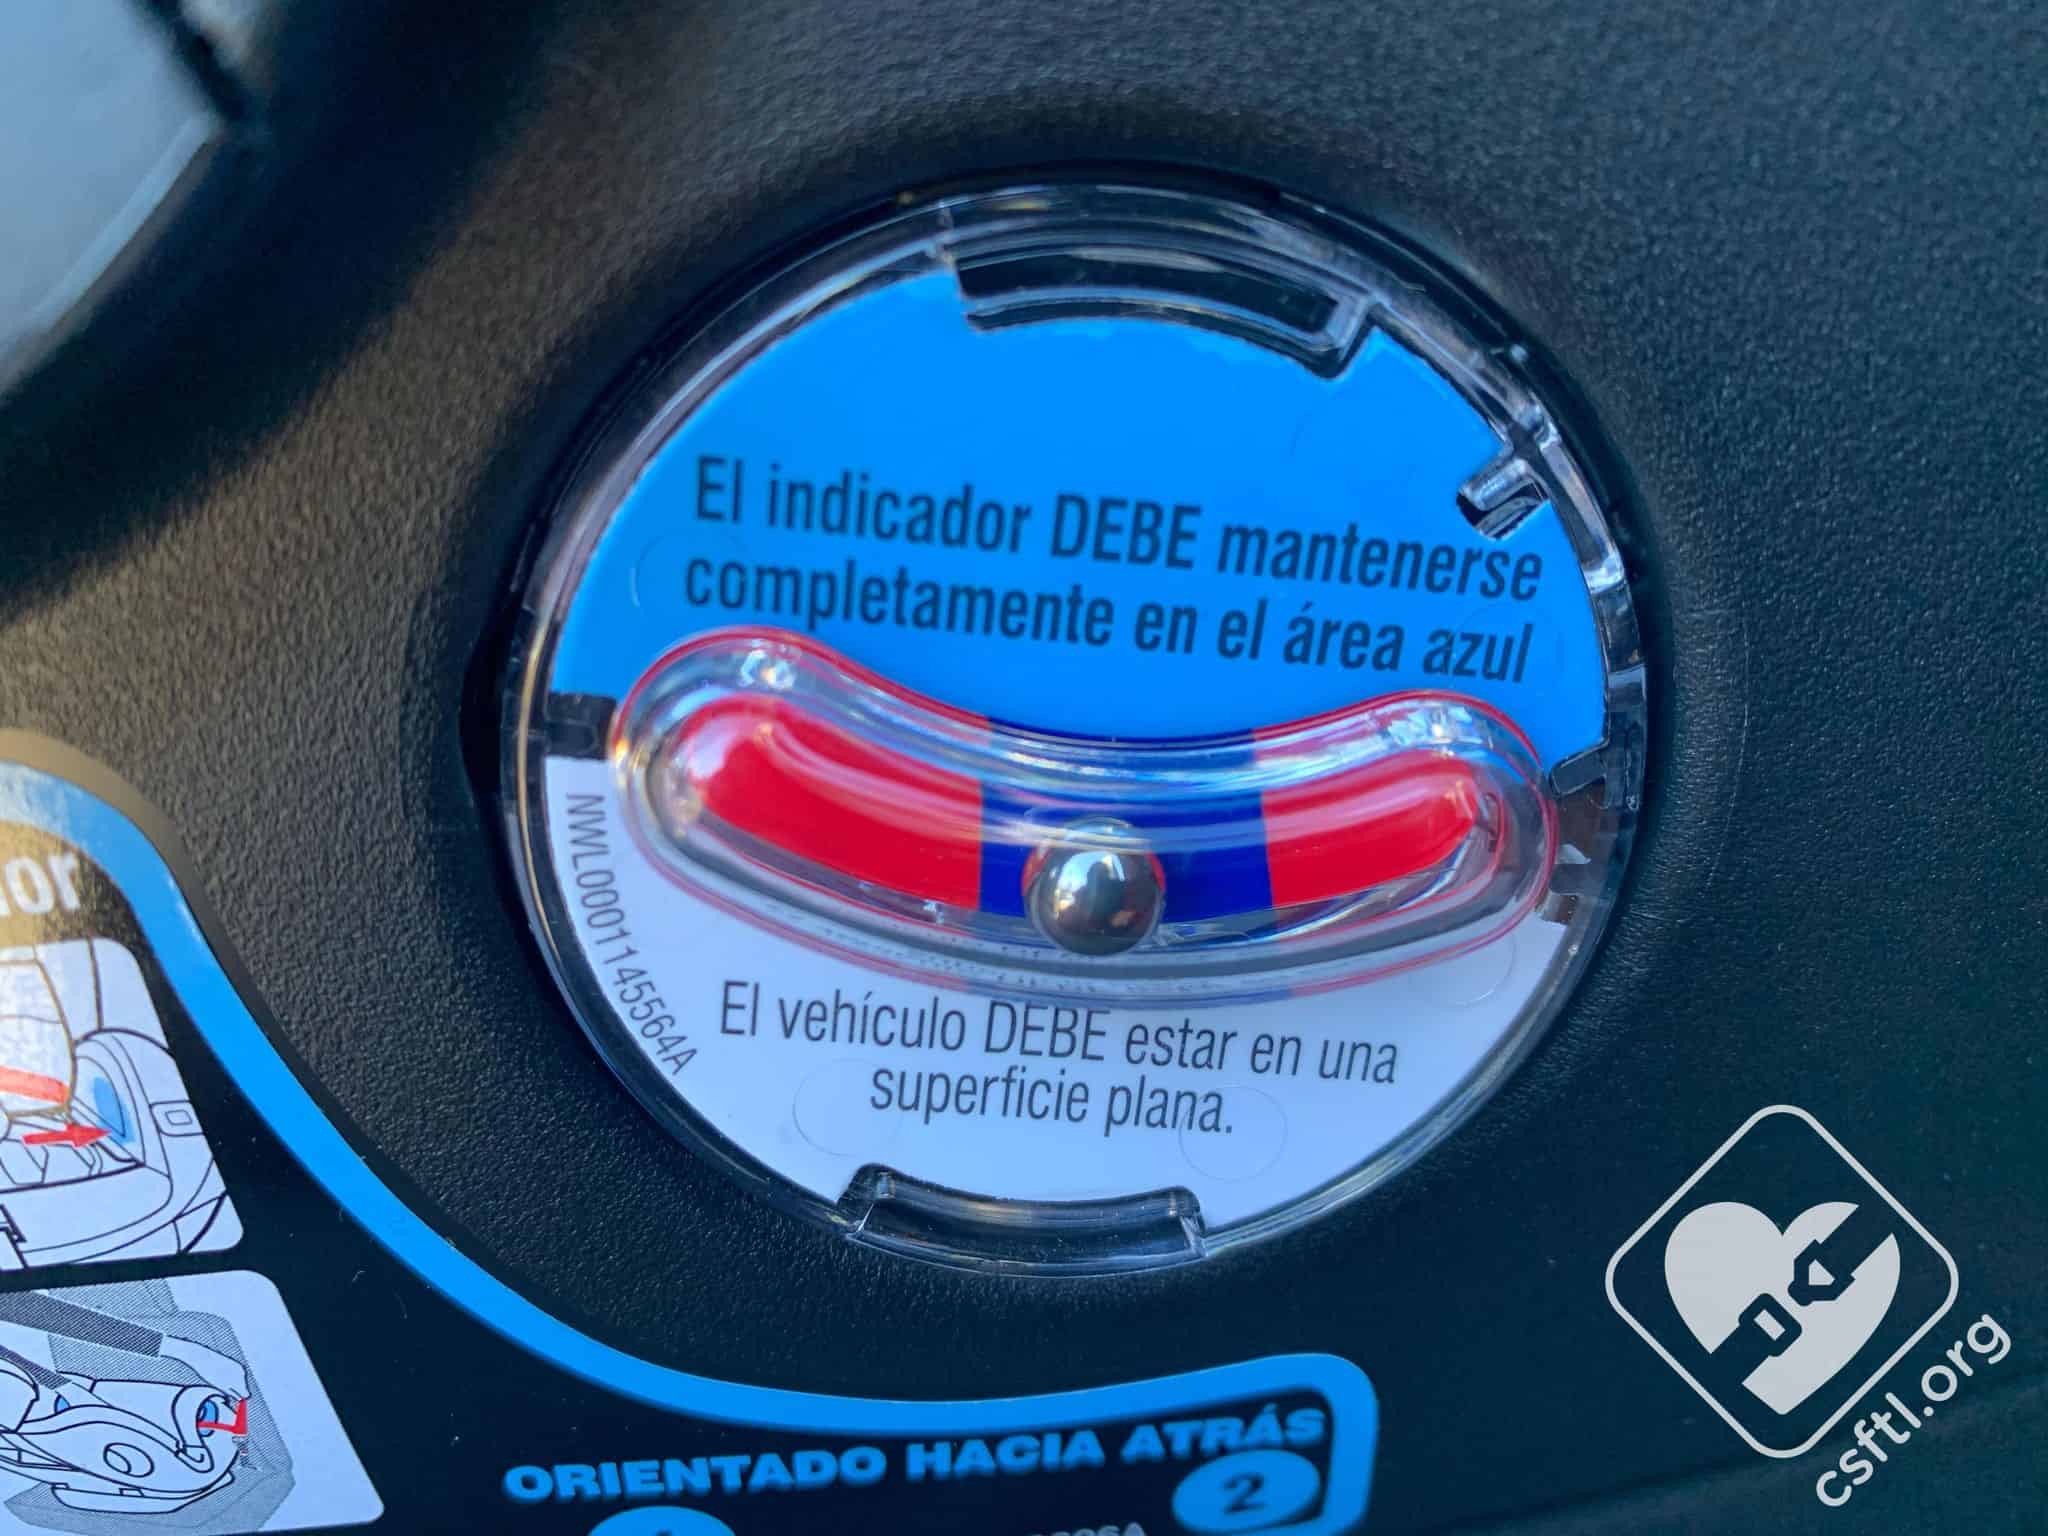
recline indicator on the Slimfit3 LX
Recline positions 1 and 2 can be used for rear facing installations. When the SlimFit3 LX is installed rear facing, the recline ball must be completely in the blue portion of the indicator. We also very happily discovered that the recline indicator is on both sides of the base. This is particularly useful in a three across installation!
Vehicle Seat Belt
Graco SlimFit3 LX rear facing with the vehicle seat belt
To install the SlimFit3 LX rear facing with the vehicle seat belt, choose recline 1 or 2, whichever places the level ball completely in the blue once the seat is installed. Set the SlimFit3 LX on the vehicle seat with the harness facing the back of the vehicle, the bottom flap of the car seat cover to expose the belt path. Thread the seat belt through the belt path, buckle the seat belt, and lock the seat belt. Use one hand to compress the car seat into the vehicle seat and the other hand to pull the slack out of the seat belt.
Graco SlimFit3 LX Rear facing, as upright as allowed, installed with the seat belt
Here we see the SlimFit 3 LX installed rear facing, as upright as it is allowed to be. This type of recline angle would be most appropriate for a rear facer who has good head and neck control.
Lower Anchors

Graco SlimFit3 LX rear facing with lower anchors
To install the SlimFit3 LX rear facing with the lower anchors, choose recline 1 or 2, whichever places the level ball completely in the blue once the seat is installed. Set the SlimFit3 LX on the vehicle seat with the harness facing the back of the vehicle, then lift the bottom flap of the car seat cover to expose the belt path. Route each lower anchor into the corresponding belt path on each side. Connect each lower anchor to its respective anchor in the vehicle seat with the red button facing up. Once they are connected to the vehicle, you’ll hear a satisfying “click.” Use one hand to compress the Slimfit3 LX into the vehicle seat and the other to pull the slack out of the lower anchor webbing.
Check your Work
Once the seat is installed, give it a firm handshake at the belt path, make sure the seat moves less than an inch at the belt path.
Fit to Child
Rear Facing
Newborn Doll
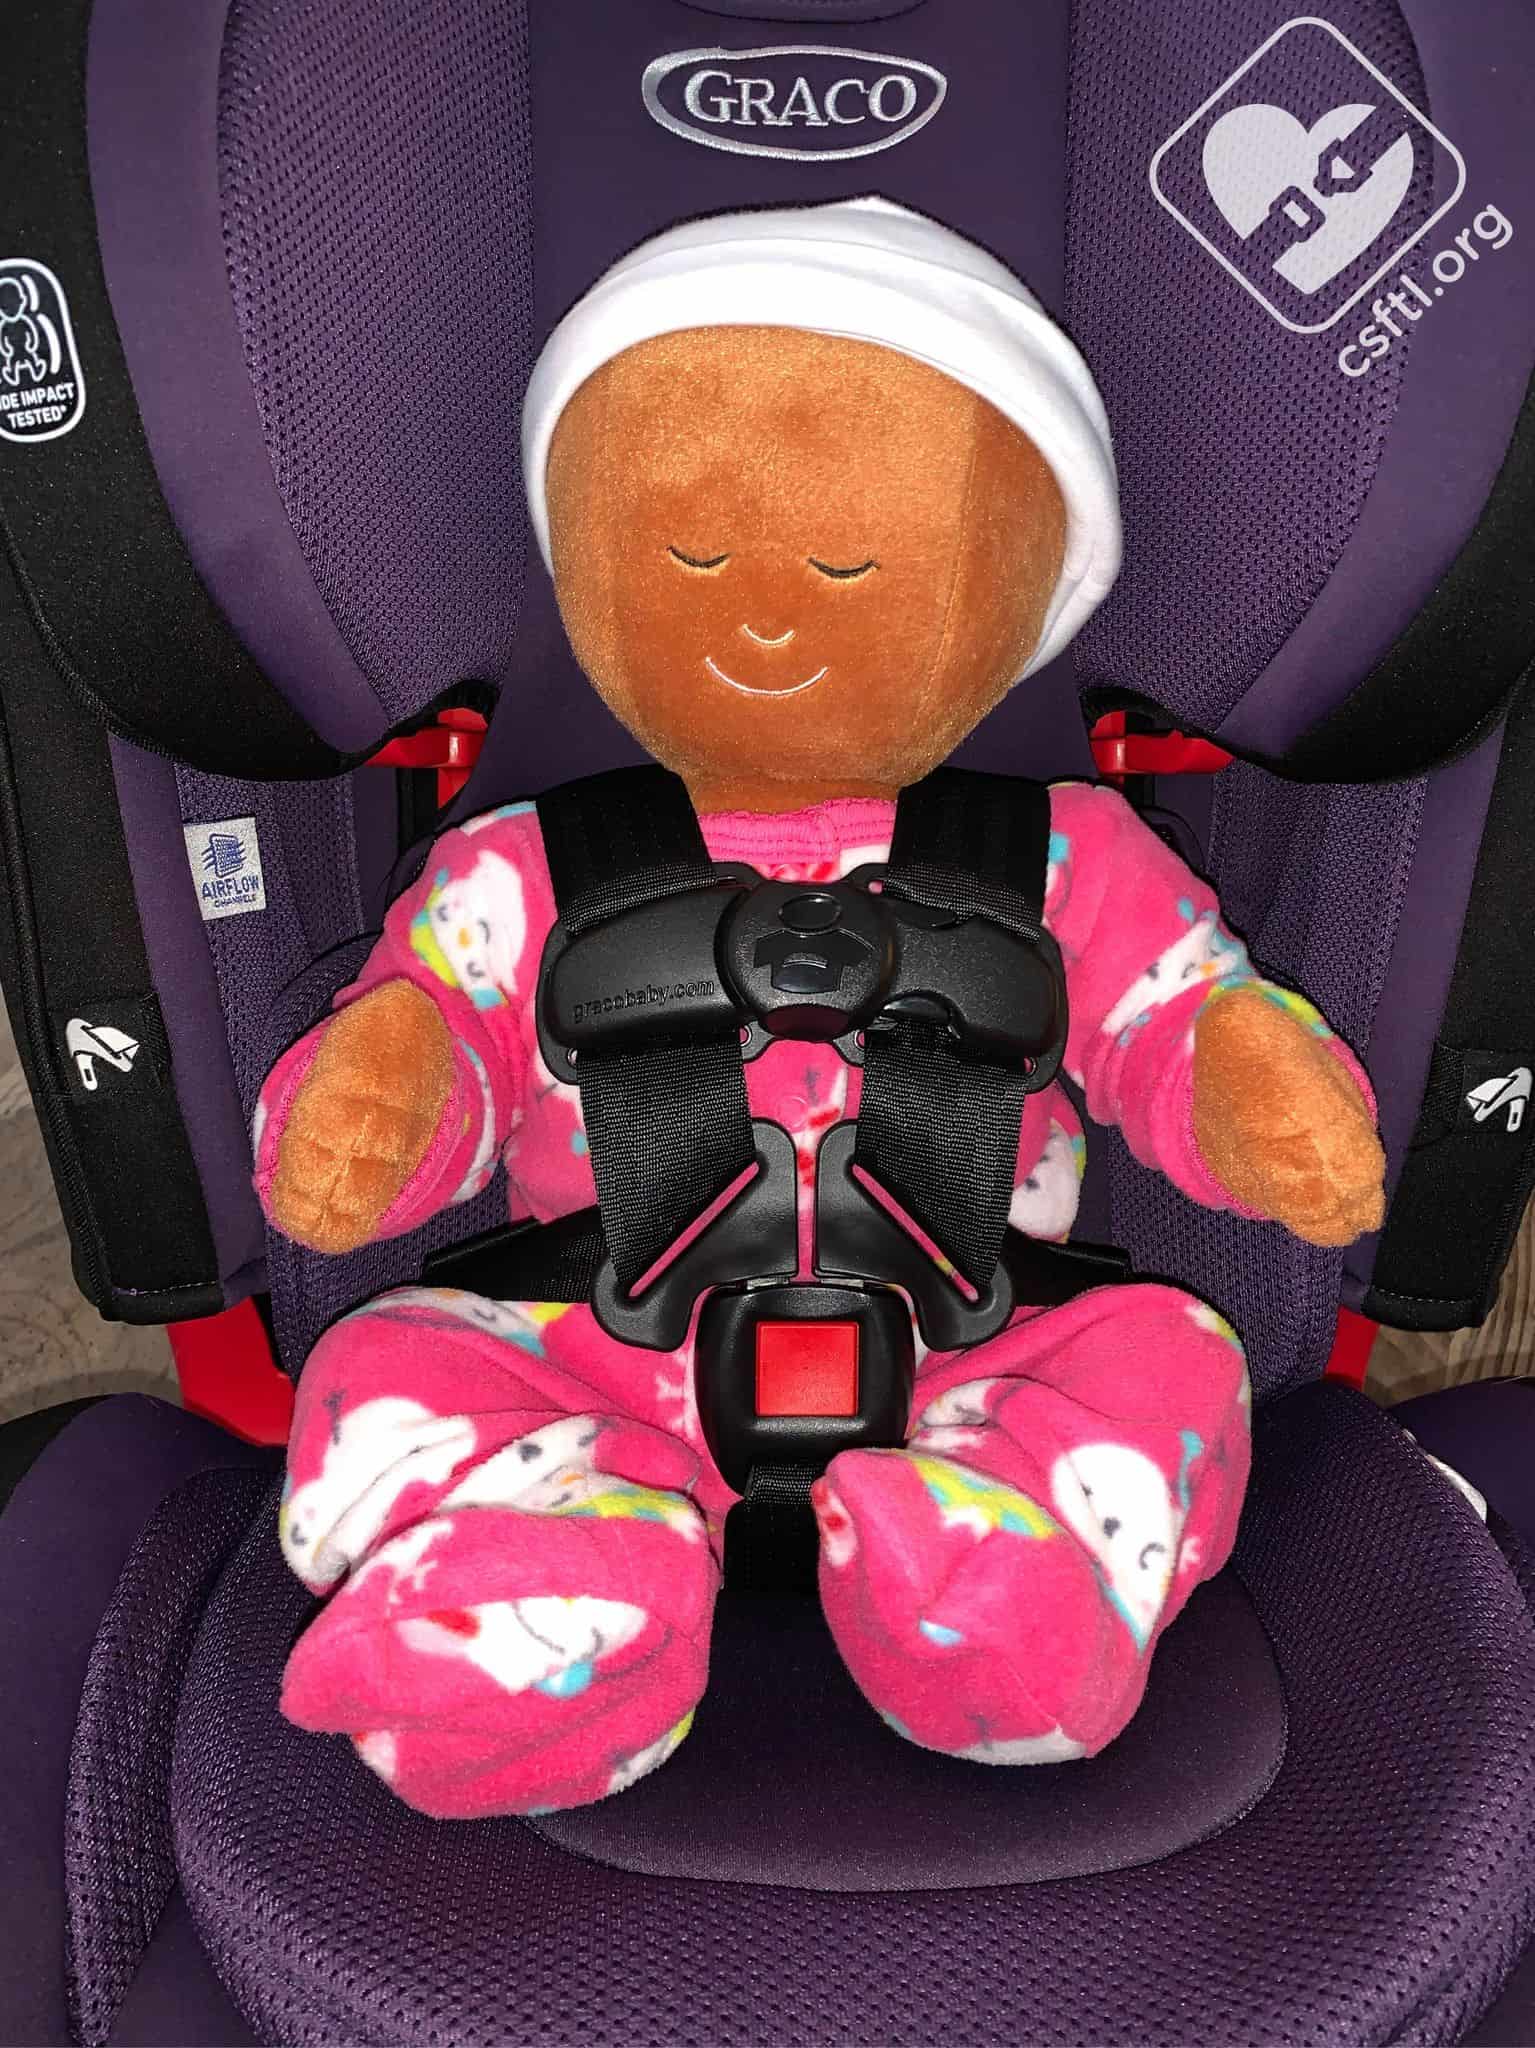
Graco SlimFit3 LX Newborn doll with insert
Our Huggable Images doll weighs 7 pounds and is 17 inches long. Our doll was kind enough to model this seat both with and without the infant insert.
With insert: The newborn Huggable Images doll fits nicely with the insert. The harness is below the shoulder and the crotch buckle is in the innermost slot.
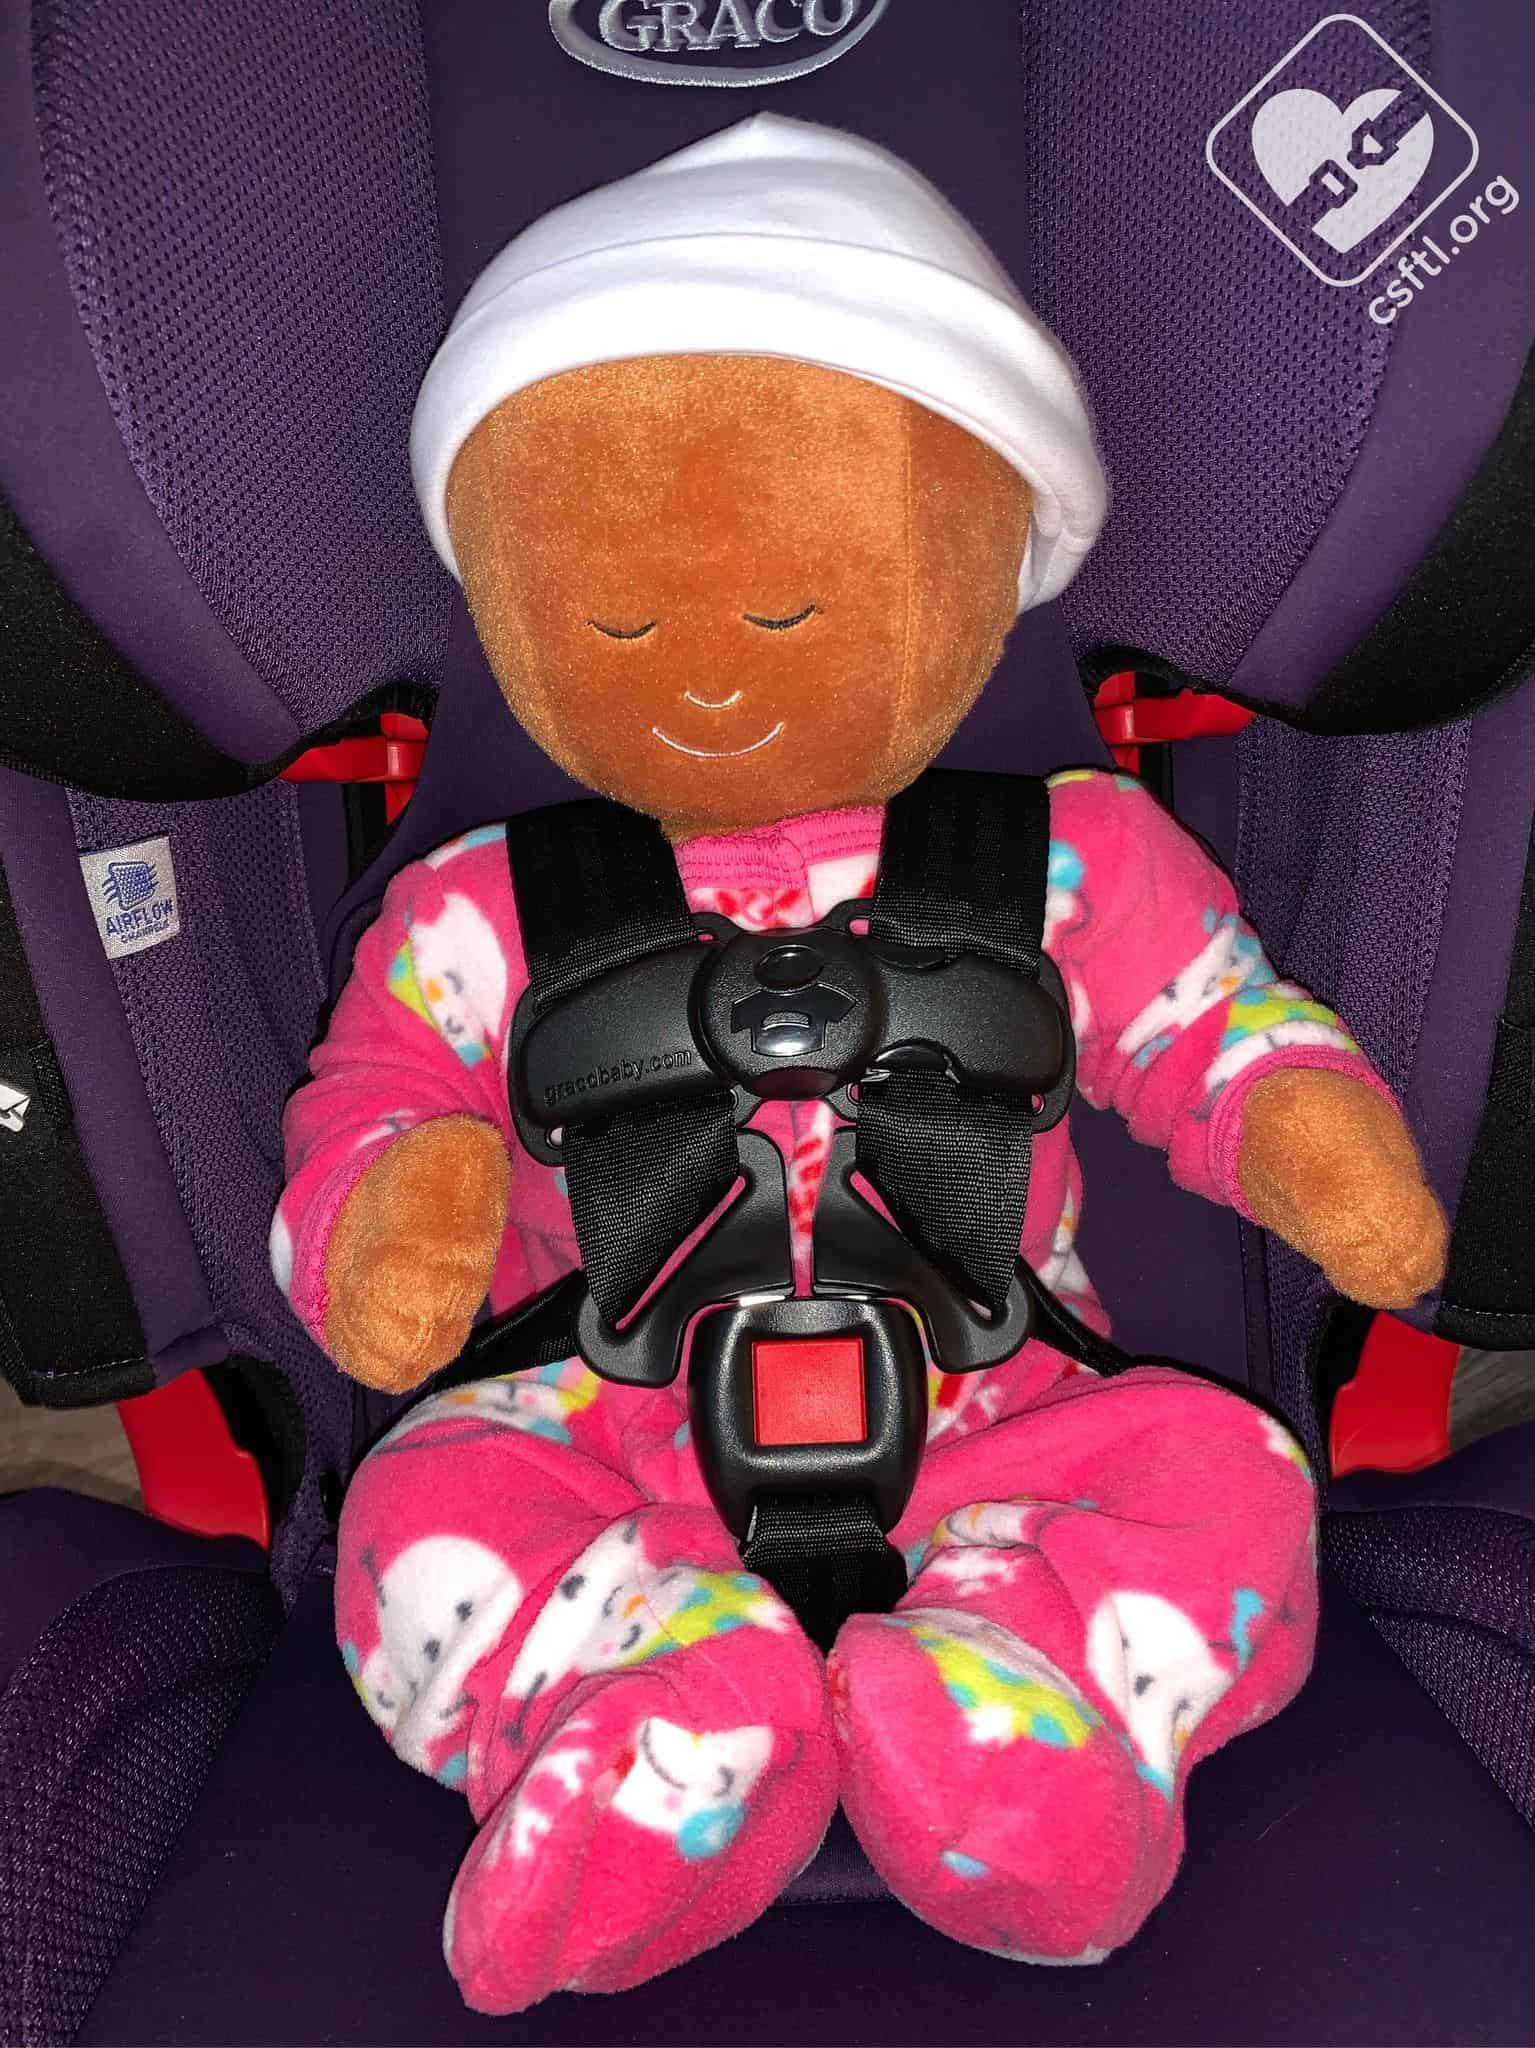
Graco SlimFit3 LX Newborn doll without the insert
Without insert: The doll fits the harness well. However, there is some noticeable head slump without the insert. We would highly recommend you use the insert until the child has good head control or until there is no head slump without the insert.
2 Years Old

Graco SlimFit3 LX 2 years old
This model is 2 years old, weighs 27 pounds and is 33.5 inches tall. She was quite happy to model this seat. The harness is below her shoulders and the crotch buckle is in the middle position. She has plenty of time left to rear face in this seat.
Installation: Forward Facing
Installation with Lower Anchors
Graco SlimFit3 LX forward facing with lower anchors
To install the seat forward facing, choose recline position 3 or 4. Set the SlimFit3 LX on the vehicle seat with the harness facing toward the front of the vehicle. Lift the back flap of the cover to expose the belt path from the inside of the seat. Route the lower anchors through the forward facing belt path. Connect each lower anchor to its respective anchor in the vehicle seat with the red button facing up. Use one hand to compress the Slimfit3 LX into the vehicle seat and the other to pull the slack out of the lower anchor webbing.
Installation with the Vehicle Seat Belt
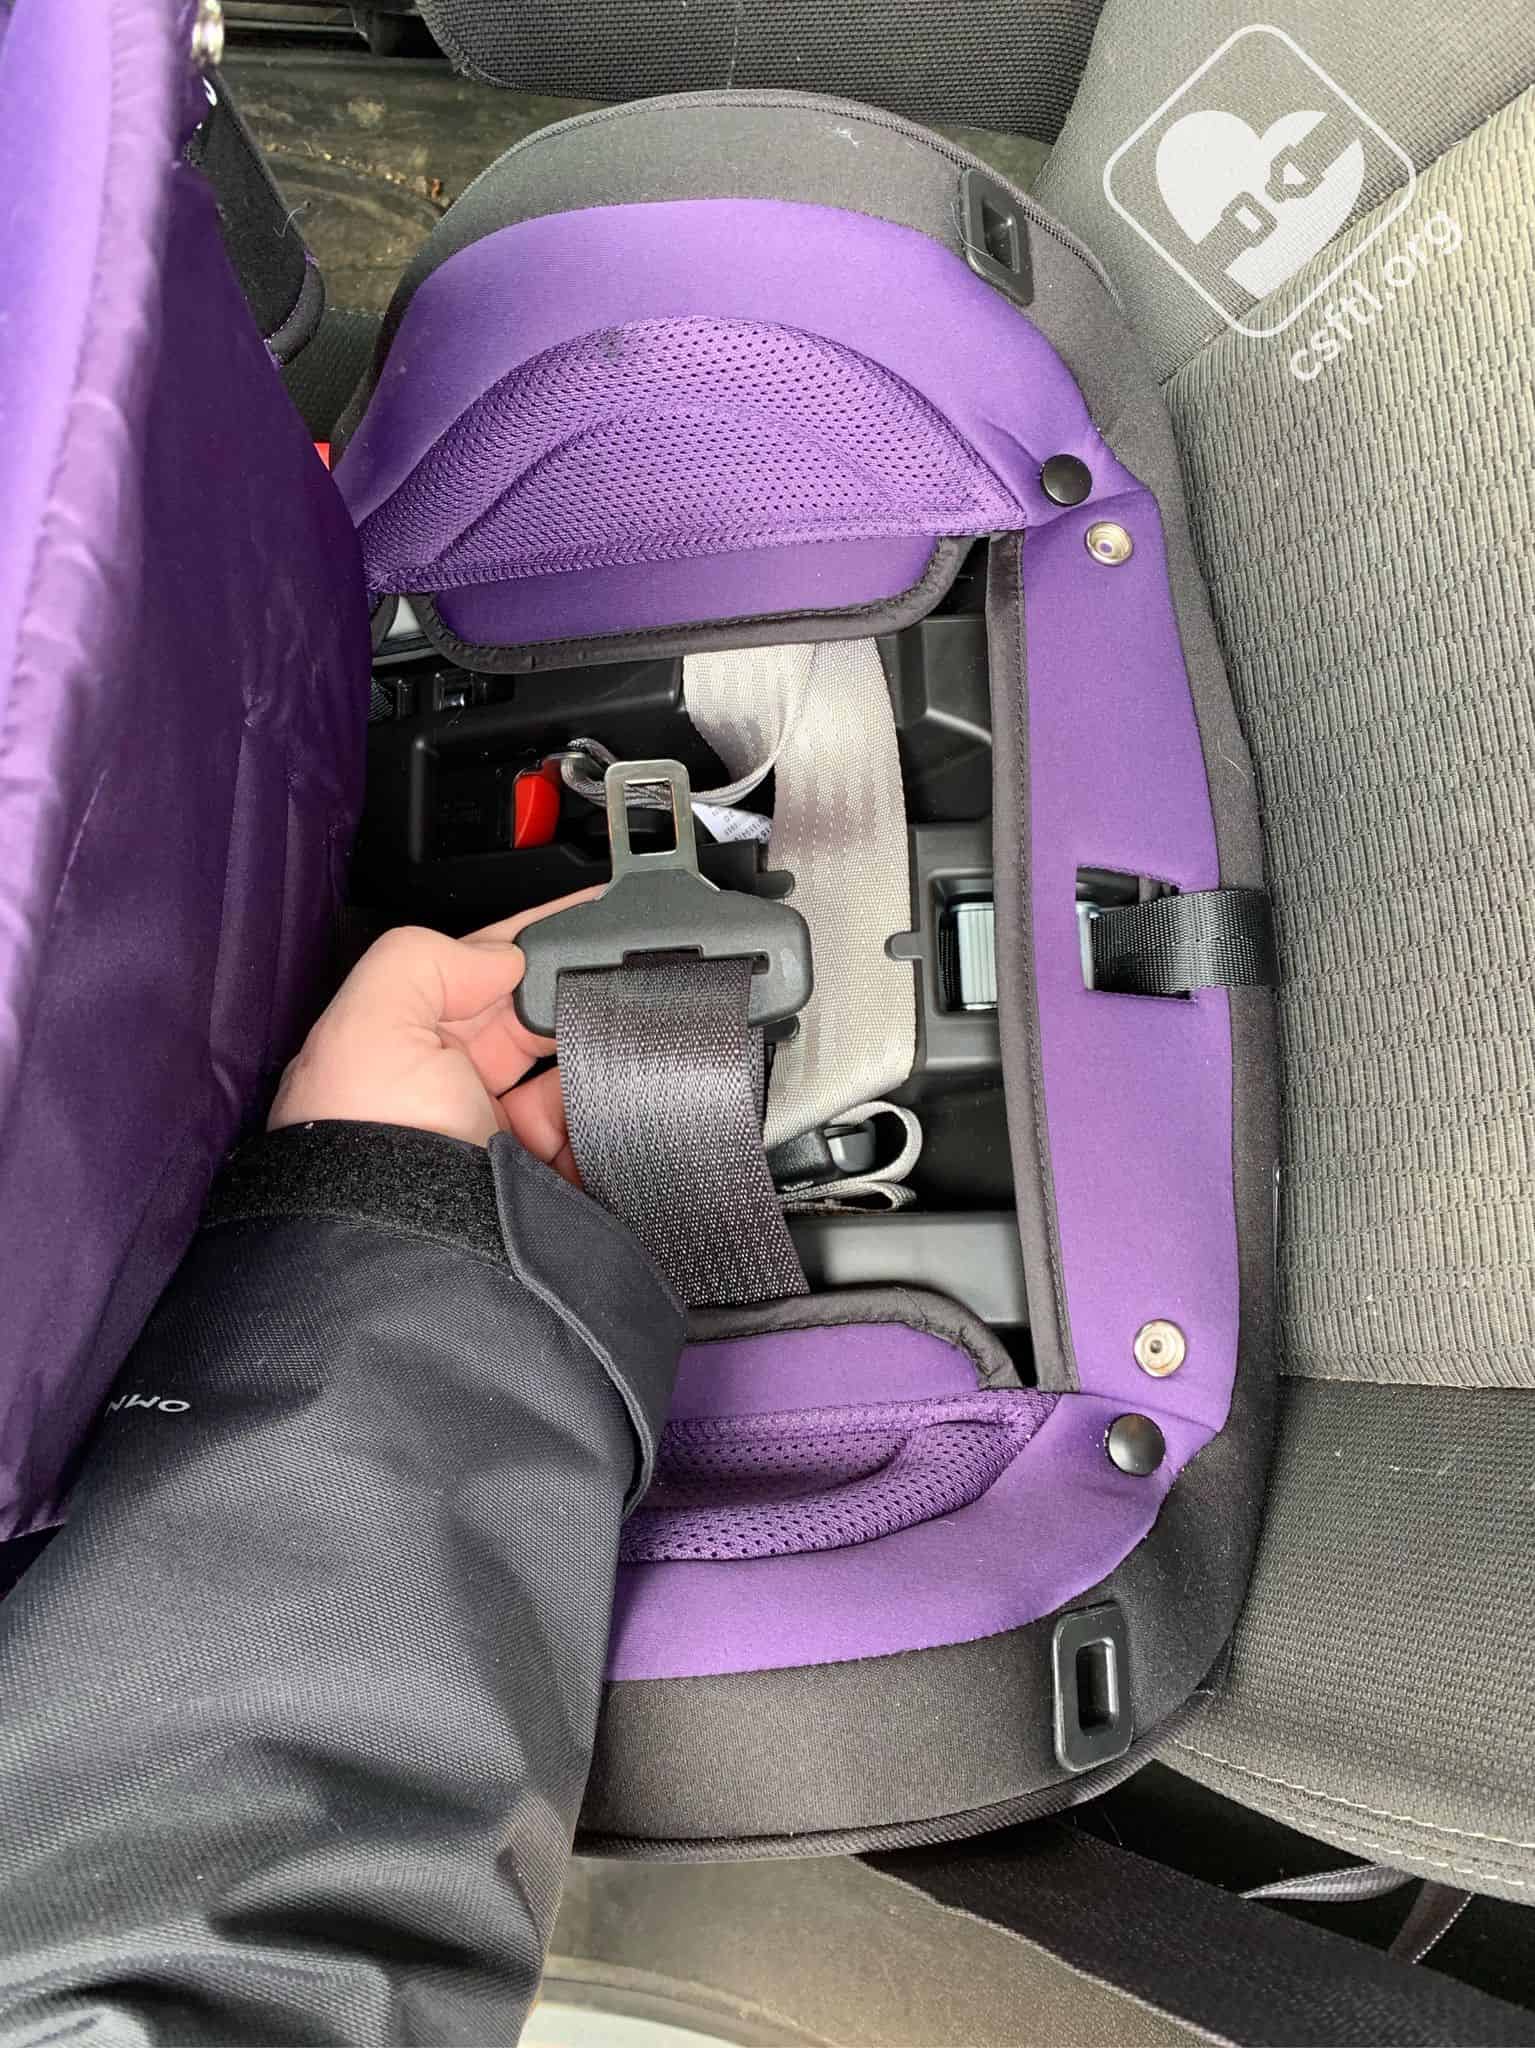
Graco SlimFit3 LX Forward facing, recline 4, installed with the seat belt
To install the seat forward facing, choose recline position 3 or 4. Set the SlimFit3 LX on the vehicle seat with the harness facing toward the front of the vehicle. Lift the back flap of the cover to expose the belt path from the inside of the seat, then lift the seat cover off of the lower portion of the seat as well. Once the entire belt path is exposed, open the seat belt lockoff on the back of the seating area.
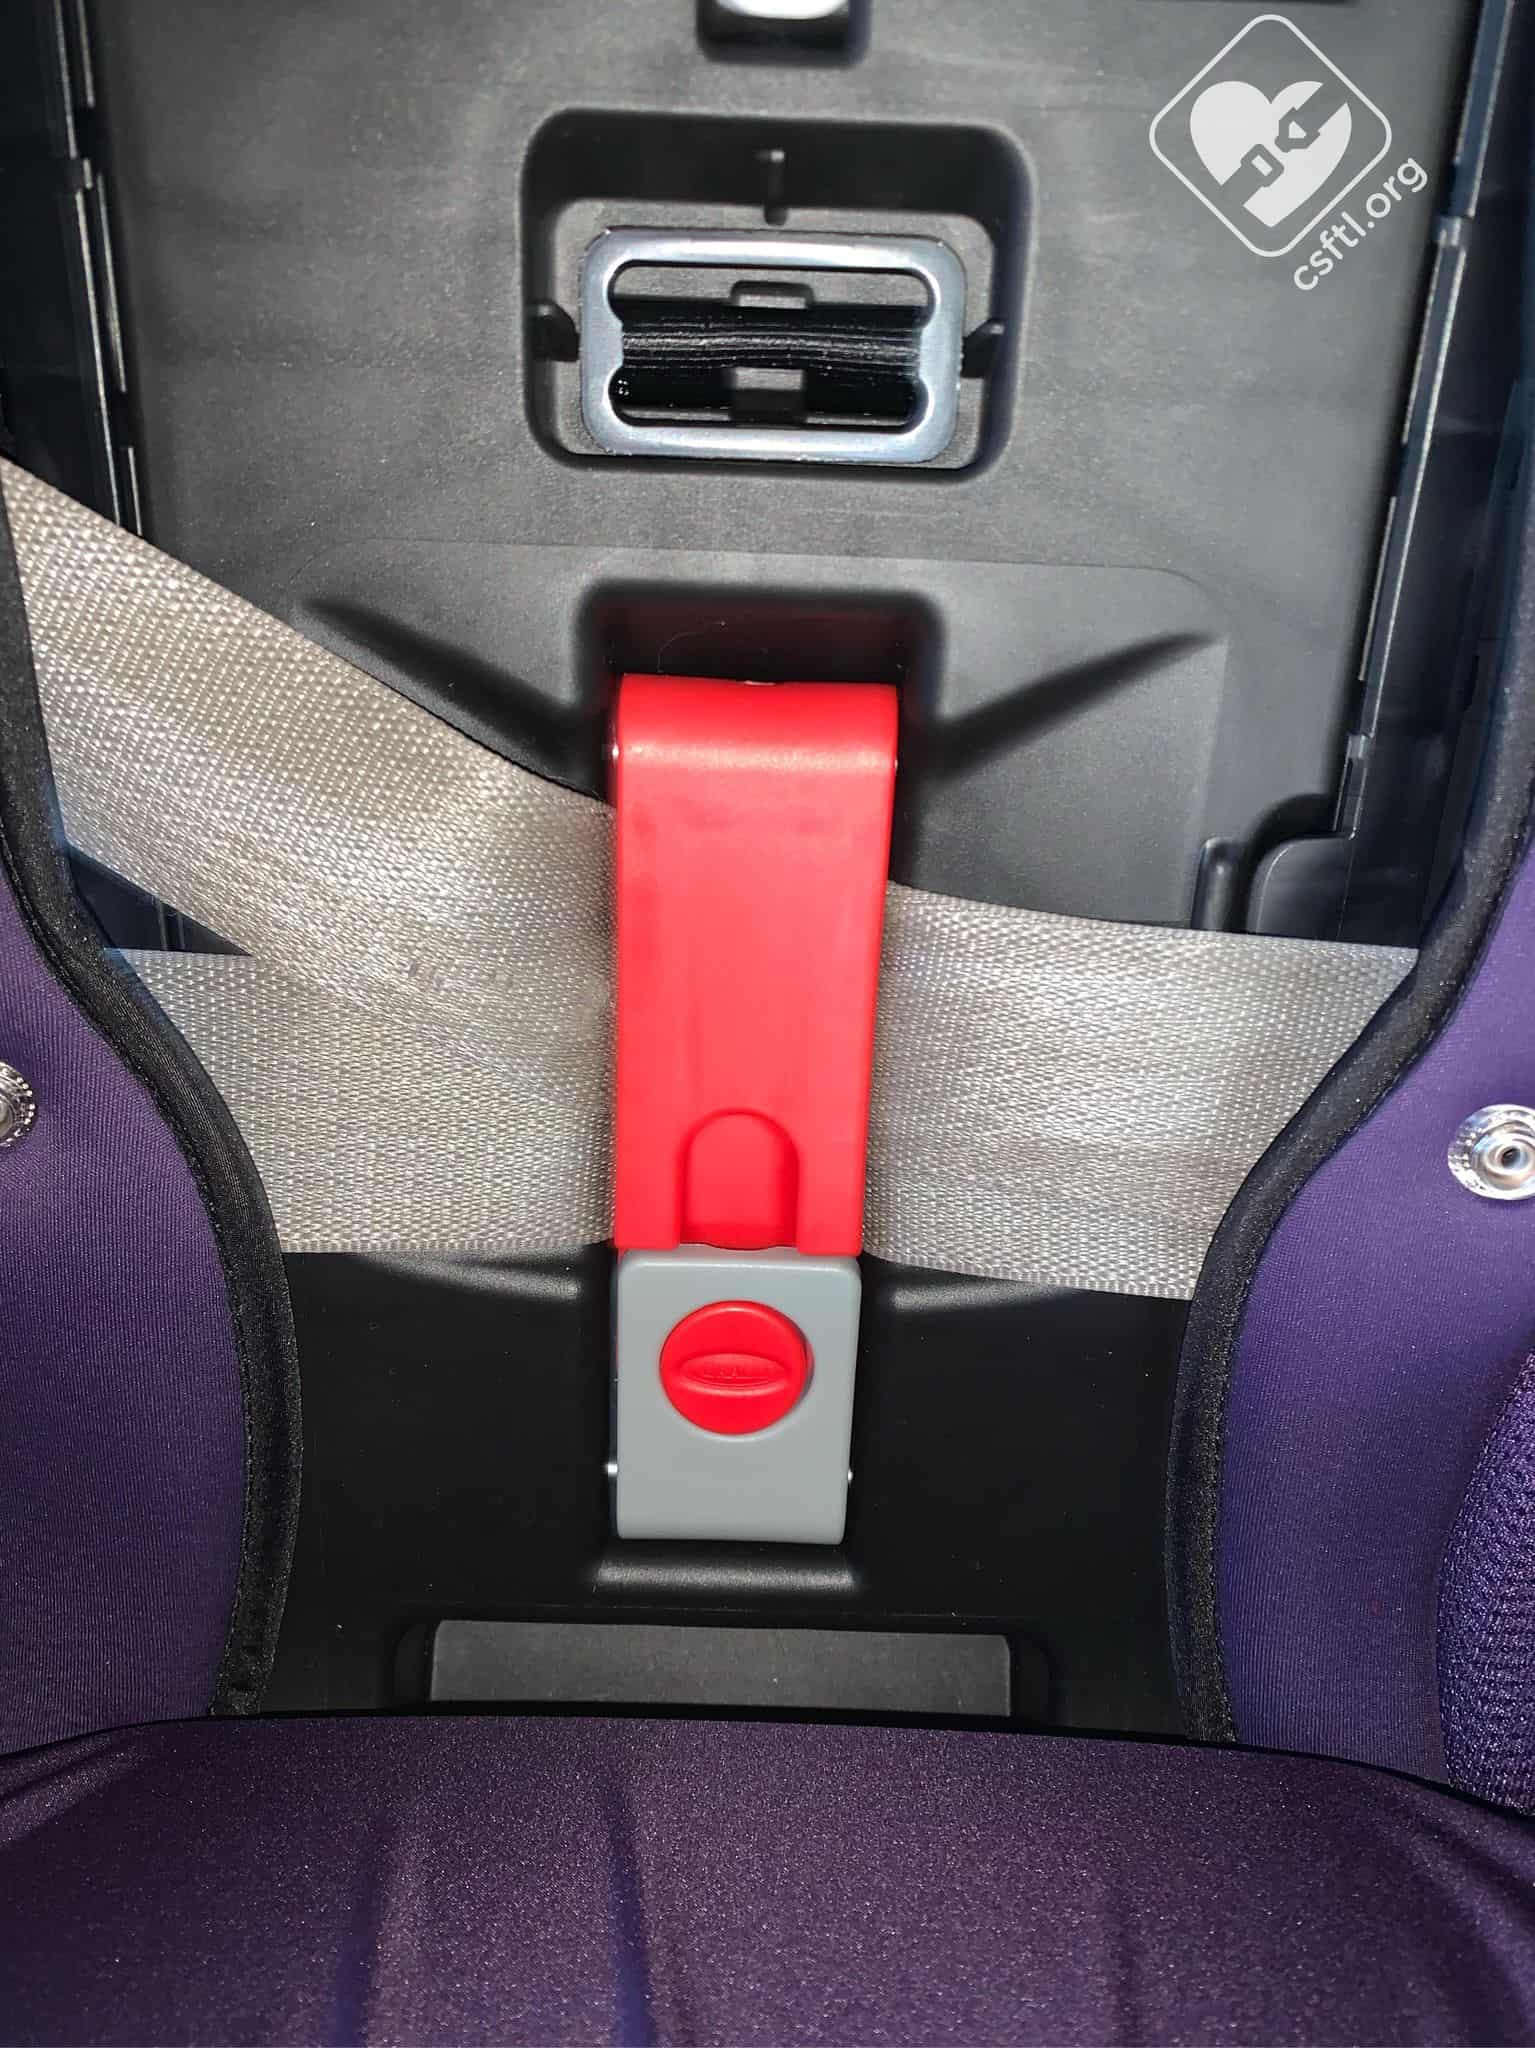
Graco SlimFit3 LX Seat belt lockoff for forward facing
Thread the seat belt through the lockoff, buckle the seat belt, remove the slack from the vehicle seat belt, then close the lockoff. We found that we needed to push down on the seat quite a bit to remove the slack from the vehicle seat belt before closing the lockoff.
Check your Work
Once the seat is installed, give it a firm handshake at the belt path, make sure the seat moves less than an inch at the belt path.
Harness Covers
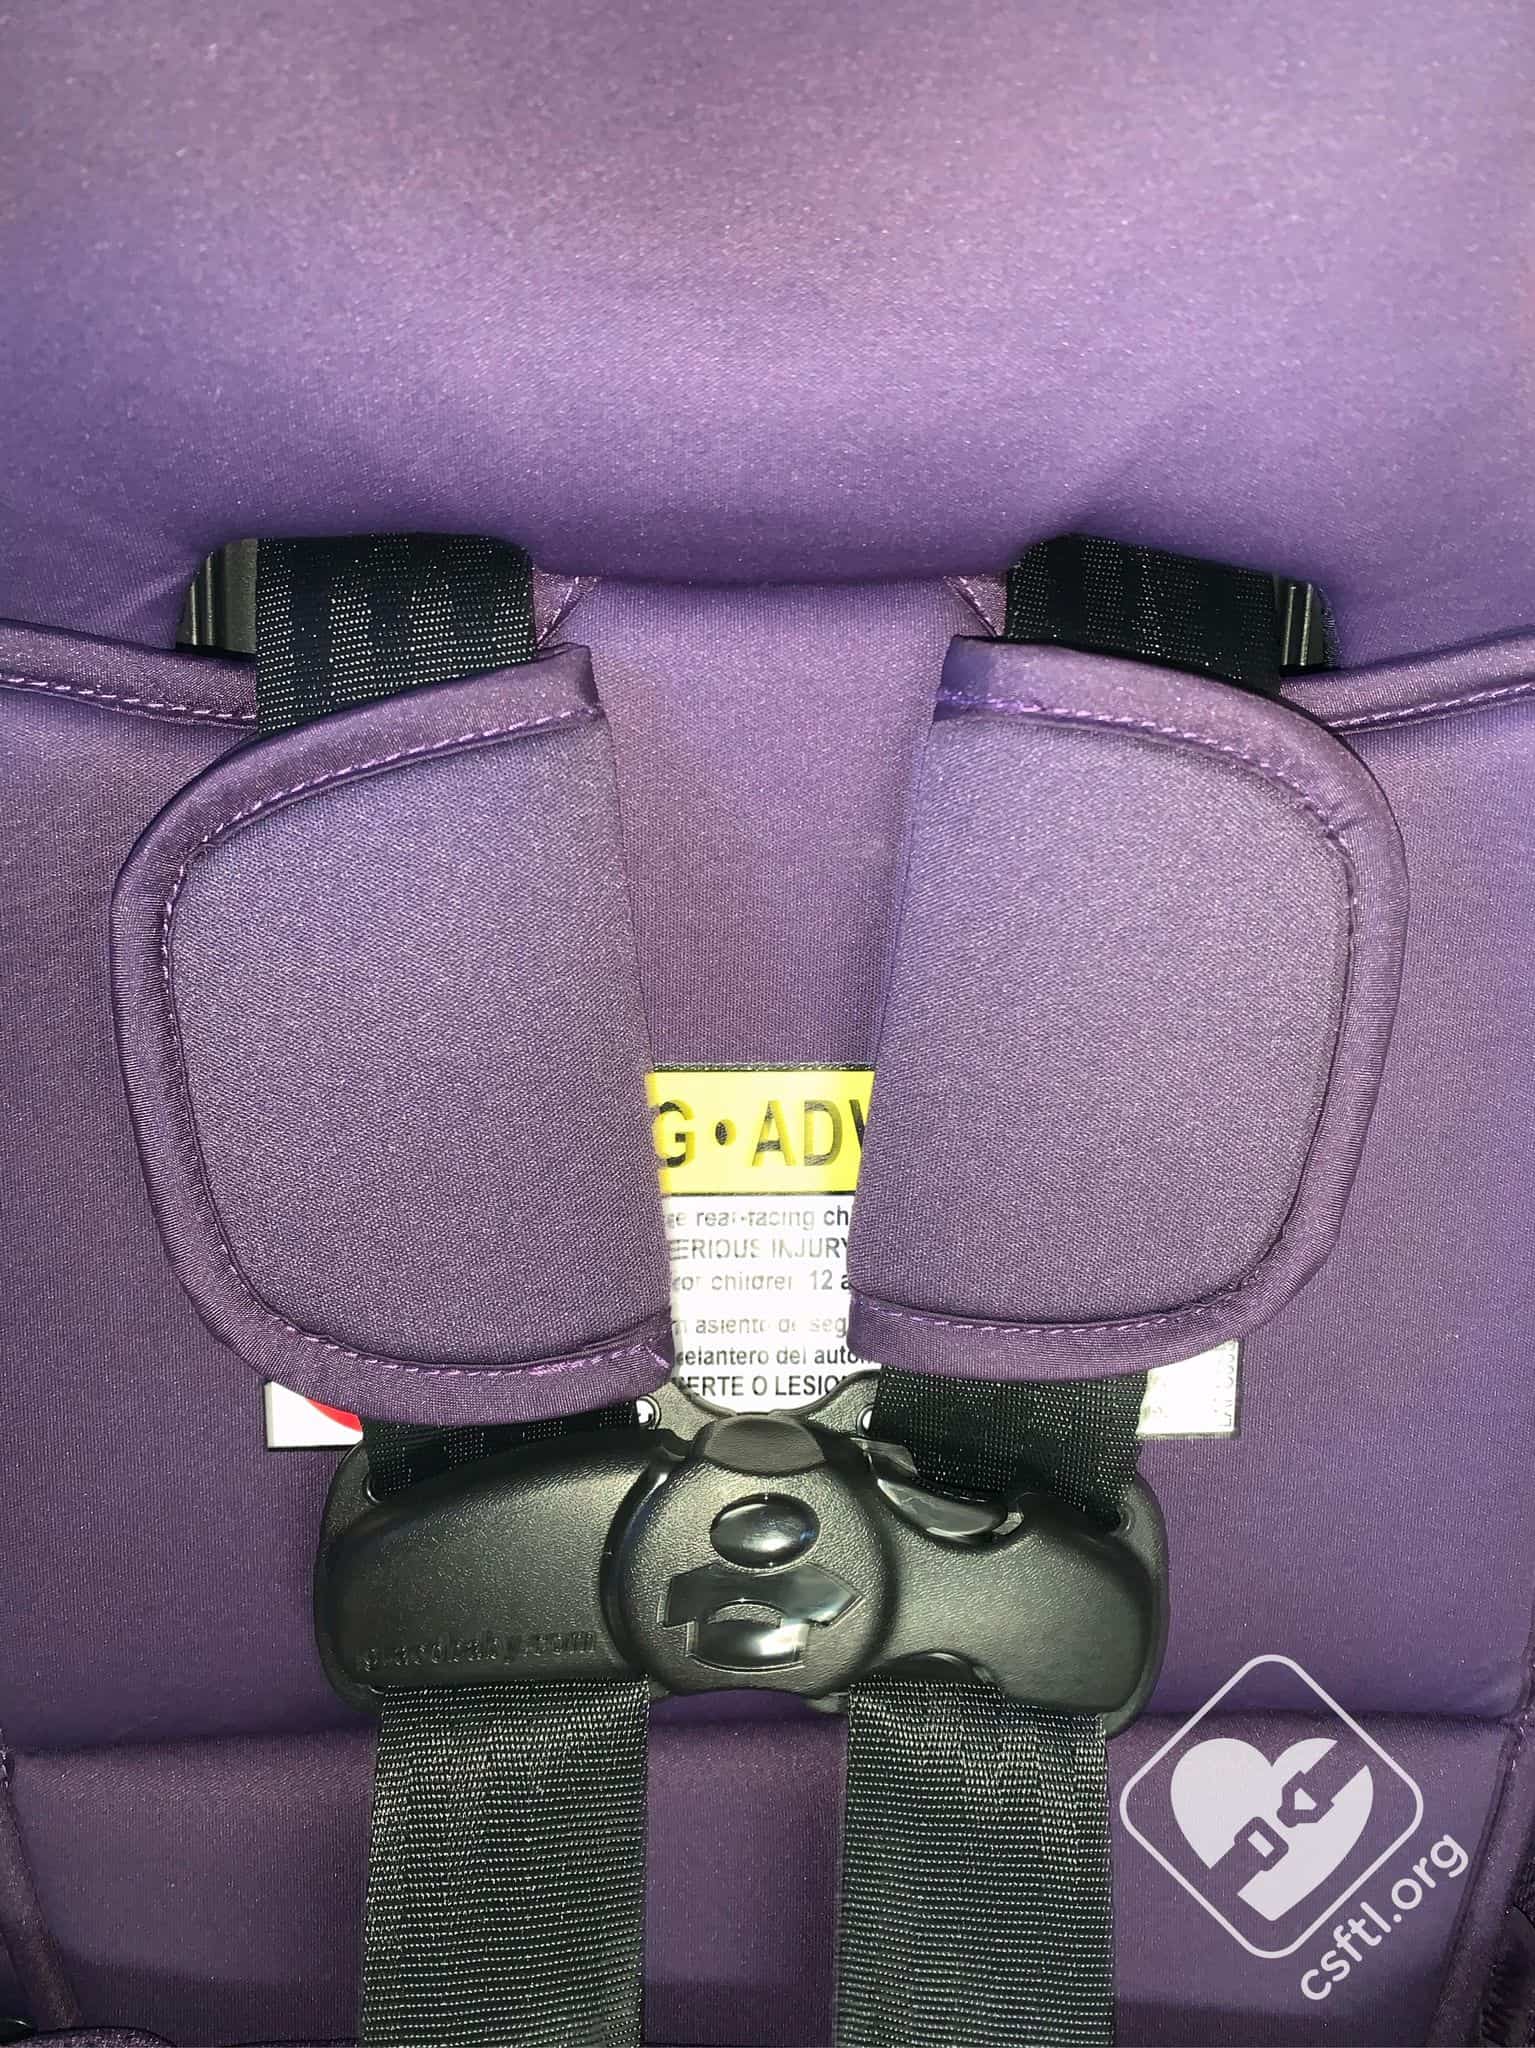
Graco SlimFit3 LX Harness covers on Graco Slmfit3
The harness covers are required when the child is forward facing and weighs between 22 and 25 pounds. They are optional in all other scenarios.
Fit to Child
4 Years Old
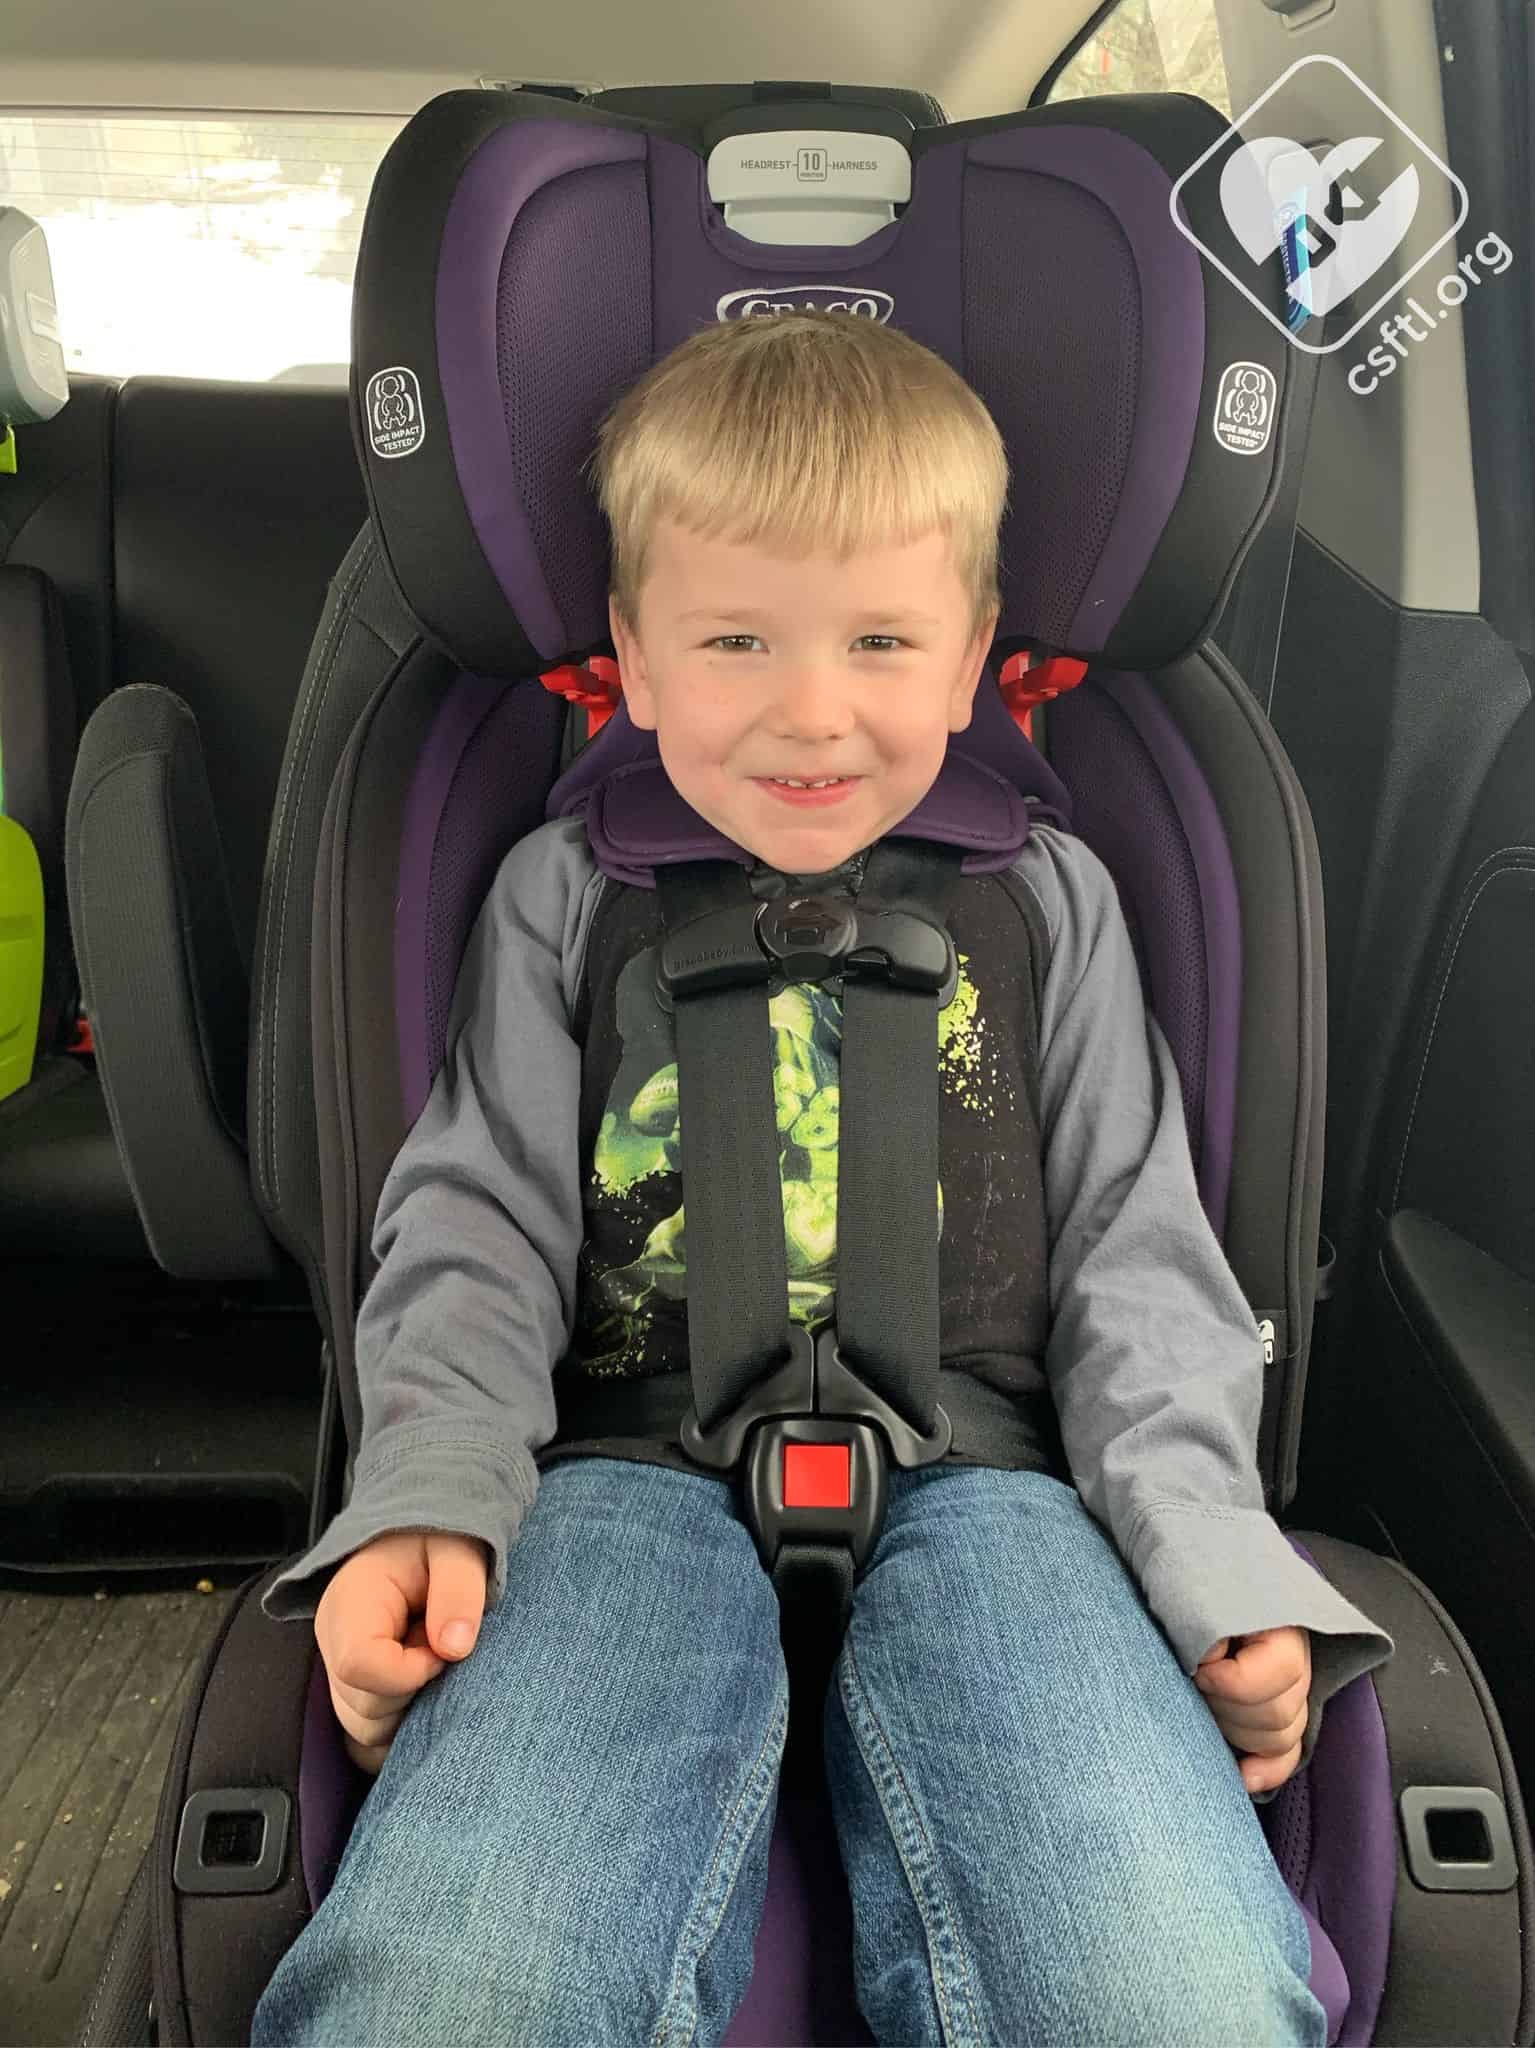
Graco SlimFit3 LX 4 years old
Our 4 year old model weighs 45 pounds and is 42 inches tall. He is on the second to last harness setting for height. The harness is just above his shoulder and the crotch buckle is in the outermost slot. He thought the seat was comfortable and easy to climb into by himself. Thanks to the fuss-free harness loops, he was able to easily buckle himself into the seat.
Booster Mode
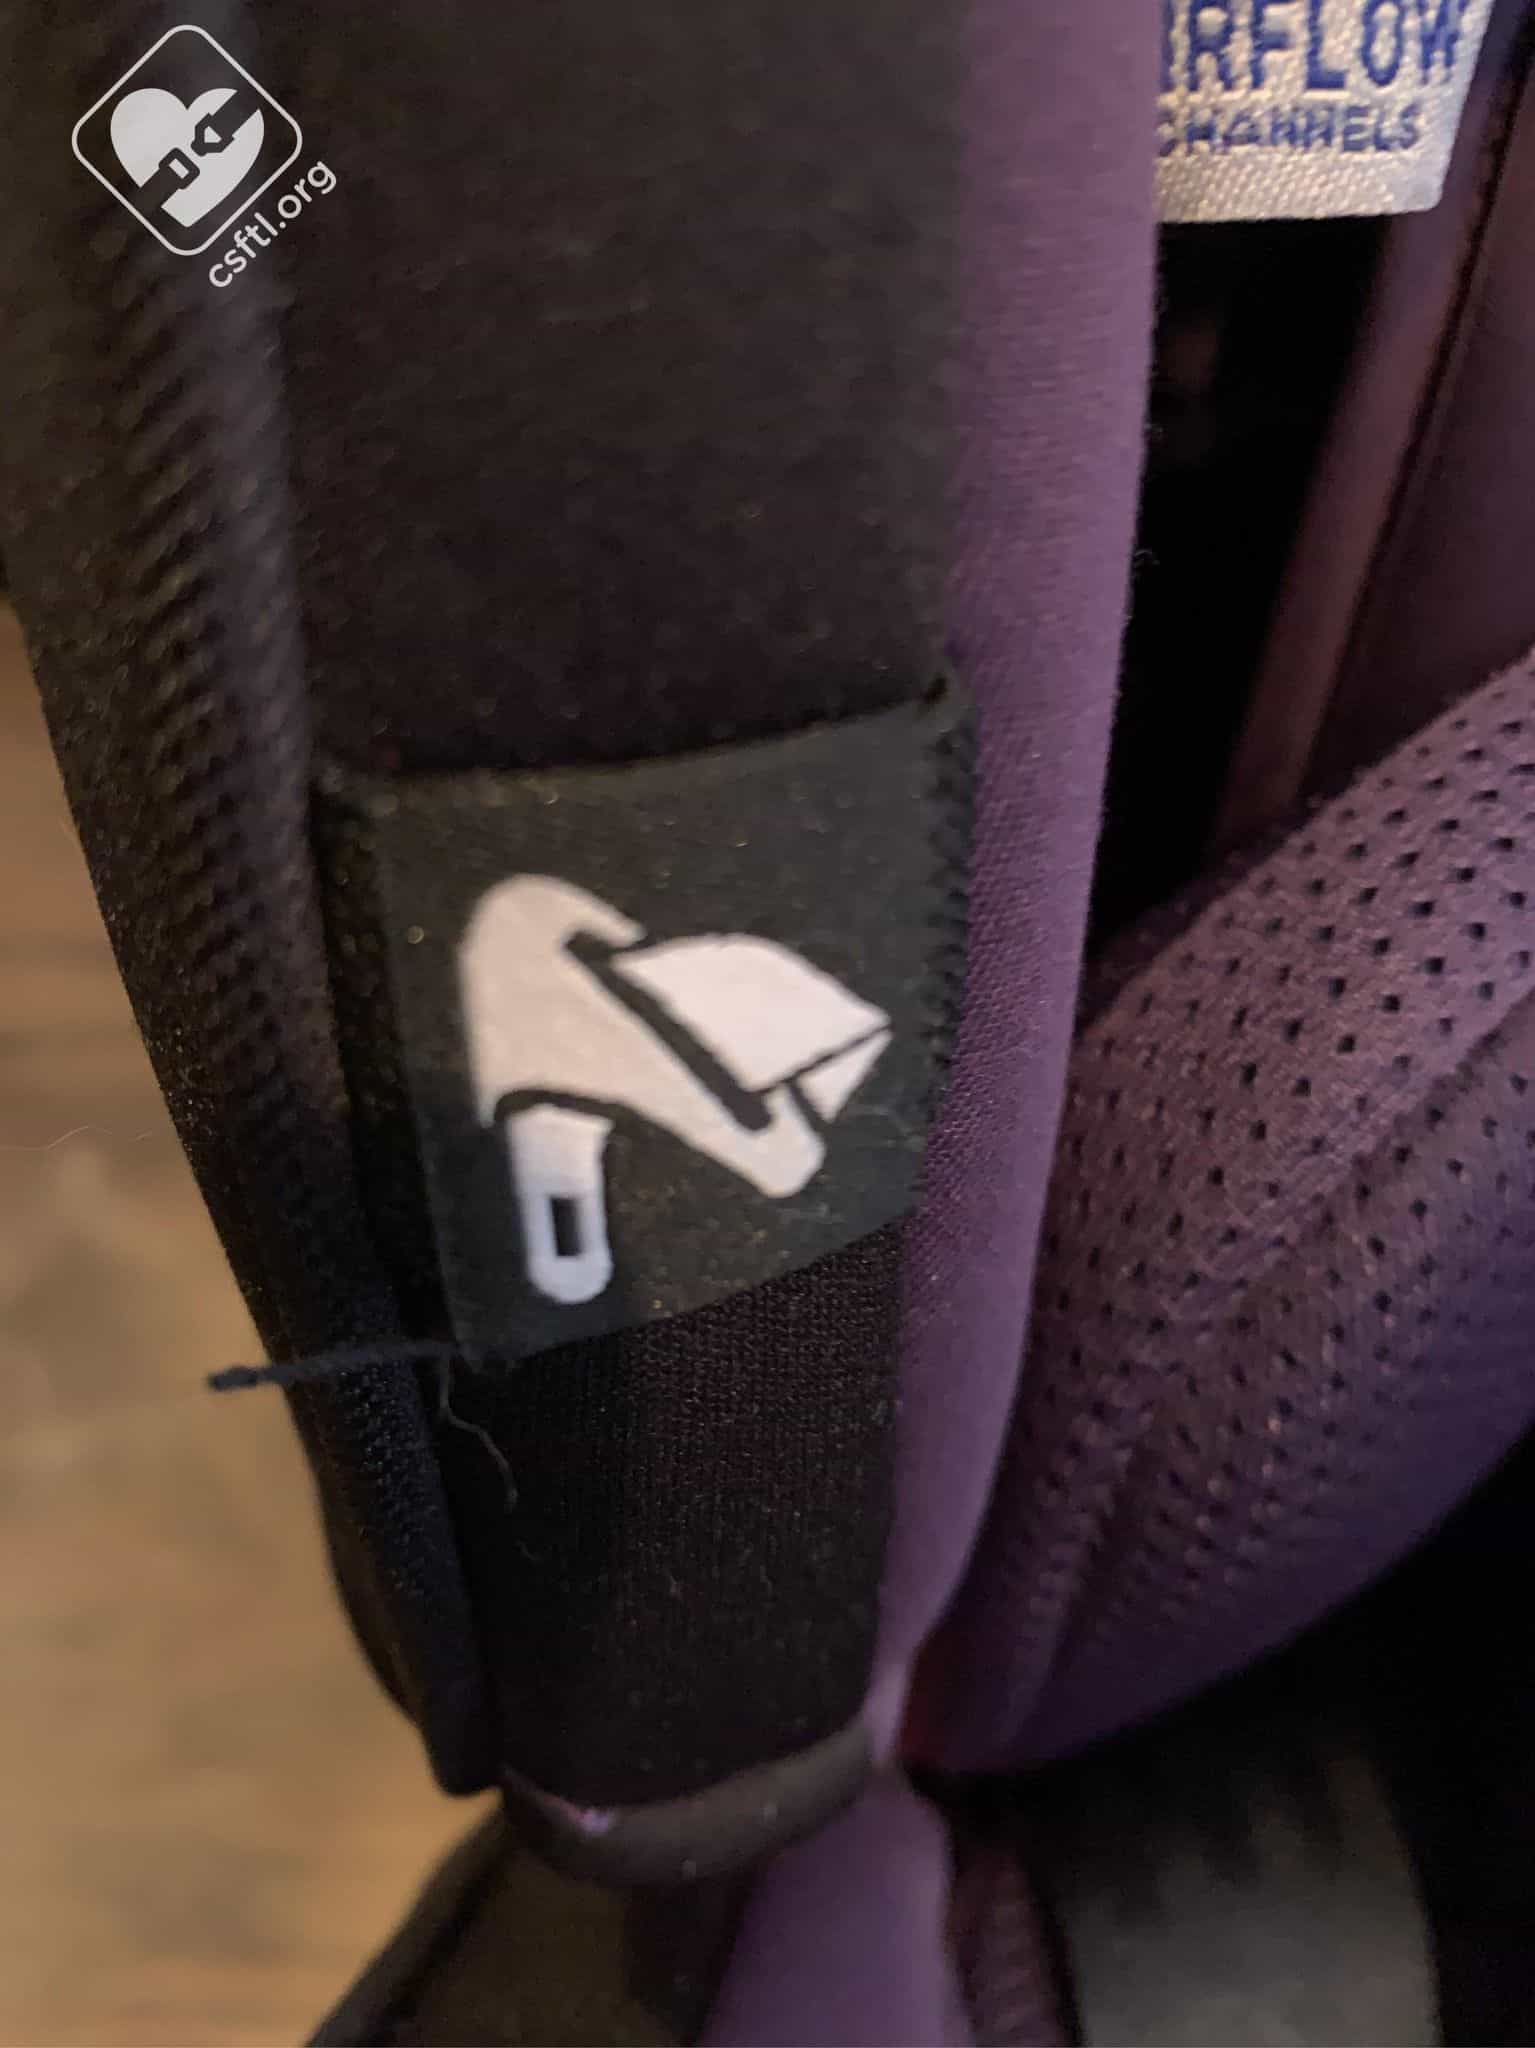
Converting to Booster Mode – Storing the Harness
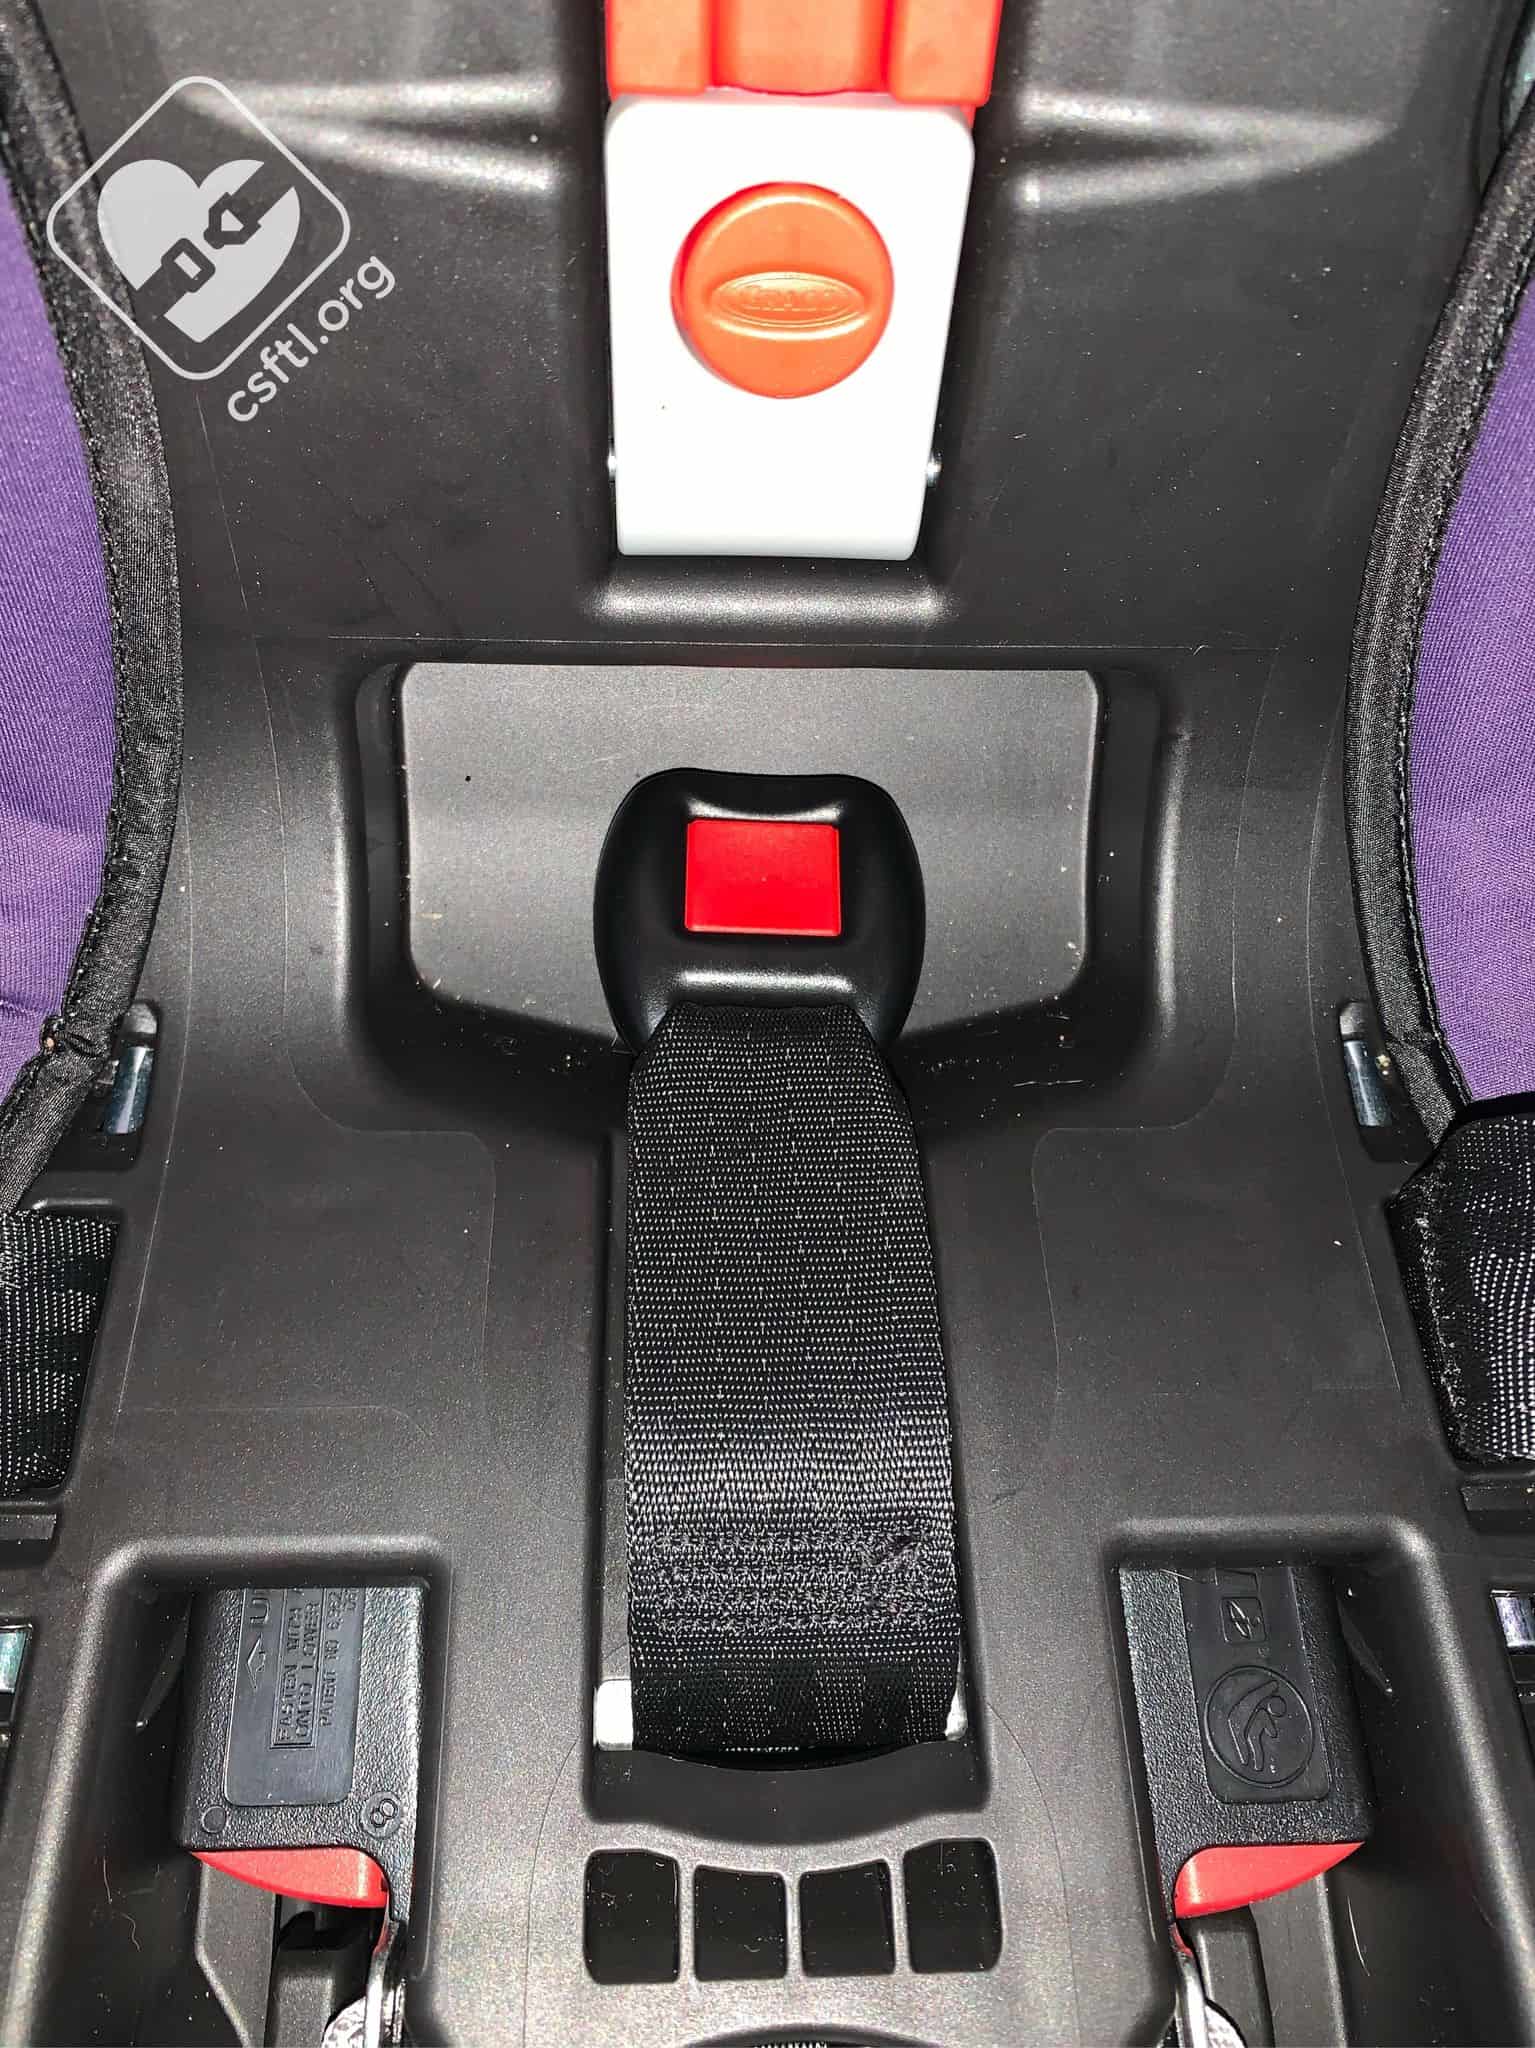
Graco SlimFit3 LX chest clip and buckle tongues in the storage compartment
The harness stores right on the seat itself so there are no parts to lose! Here’s how to convert the SlimFit3 LX to from harness to booster mode: lift the back flap of the cover, and open the small door in the seat’s shell. The little door is clearly labelled for harness storage. Slide the harness under the sides of the door. Place the chest clip and crotch buckle tongues in the door, then close it.
Graco SlimFit3 LX Crotch buckle storage
The crotch also stores right on the seat. To store it, move the crotch buckle in the innermost slot, then store it in the depression in the back of the seat pan.
Using LATCH in Booster Mode
If you choose to use LATCH in booster mode, both the lower anchors and the top tether are required.
Fit to Child
7 Years Old

Graco SlimFit3 LX 7 years old booster mode
This model is 7 years old, weighs 57 pounds, and is 47.5 inches tall. The shoulder belt is slightly above his shoulder and the lap belt sits nice and low on the hips, touching his thighs. He has some growing room in booster mode.. He did notice the gap in the padding behind his back — with the headrest raised to the highest positions, there’s a small gap between the sets of padding — and stated it was a little uncomfortable. He did find the seat belt difficult to route properly and buckle by himself.
10 Year Old

Graco SlimFit3 LX 10 years old
Our newly ten year old model weighs 65 pounds and is 52.5 inches tall. He is on the tallest setting for booster mode. He will outgrow this seat in the very near future. Since he does not pass the 5 Step Test to use the adult seat belt alone, he will need to ride in a dedicated booster seat for some time yet.
Important Information: Where to Find

Graco SlimFit3 LX Manual storage compartment
Manual storage: the manual is stored in the back of the base in a clearly marked compartment.
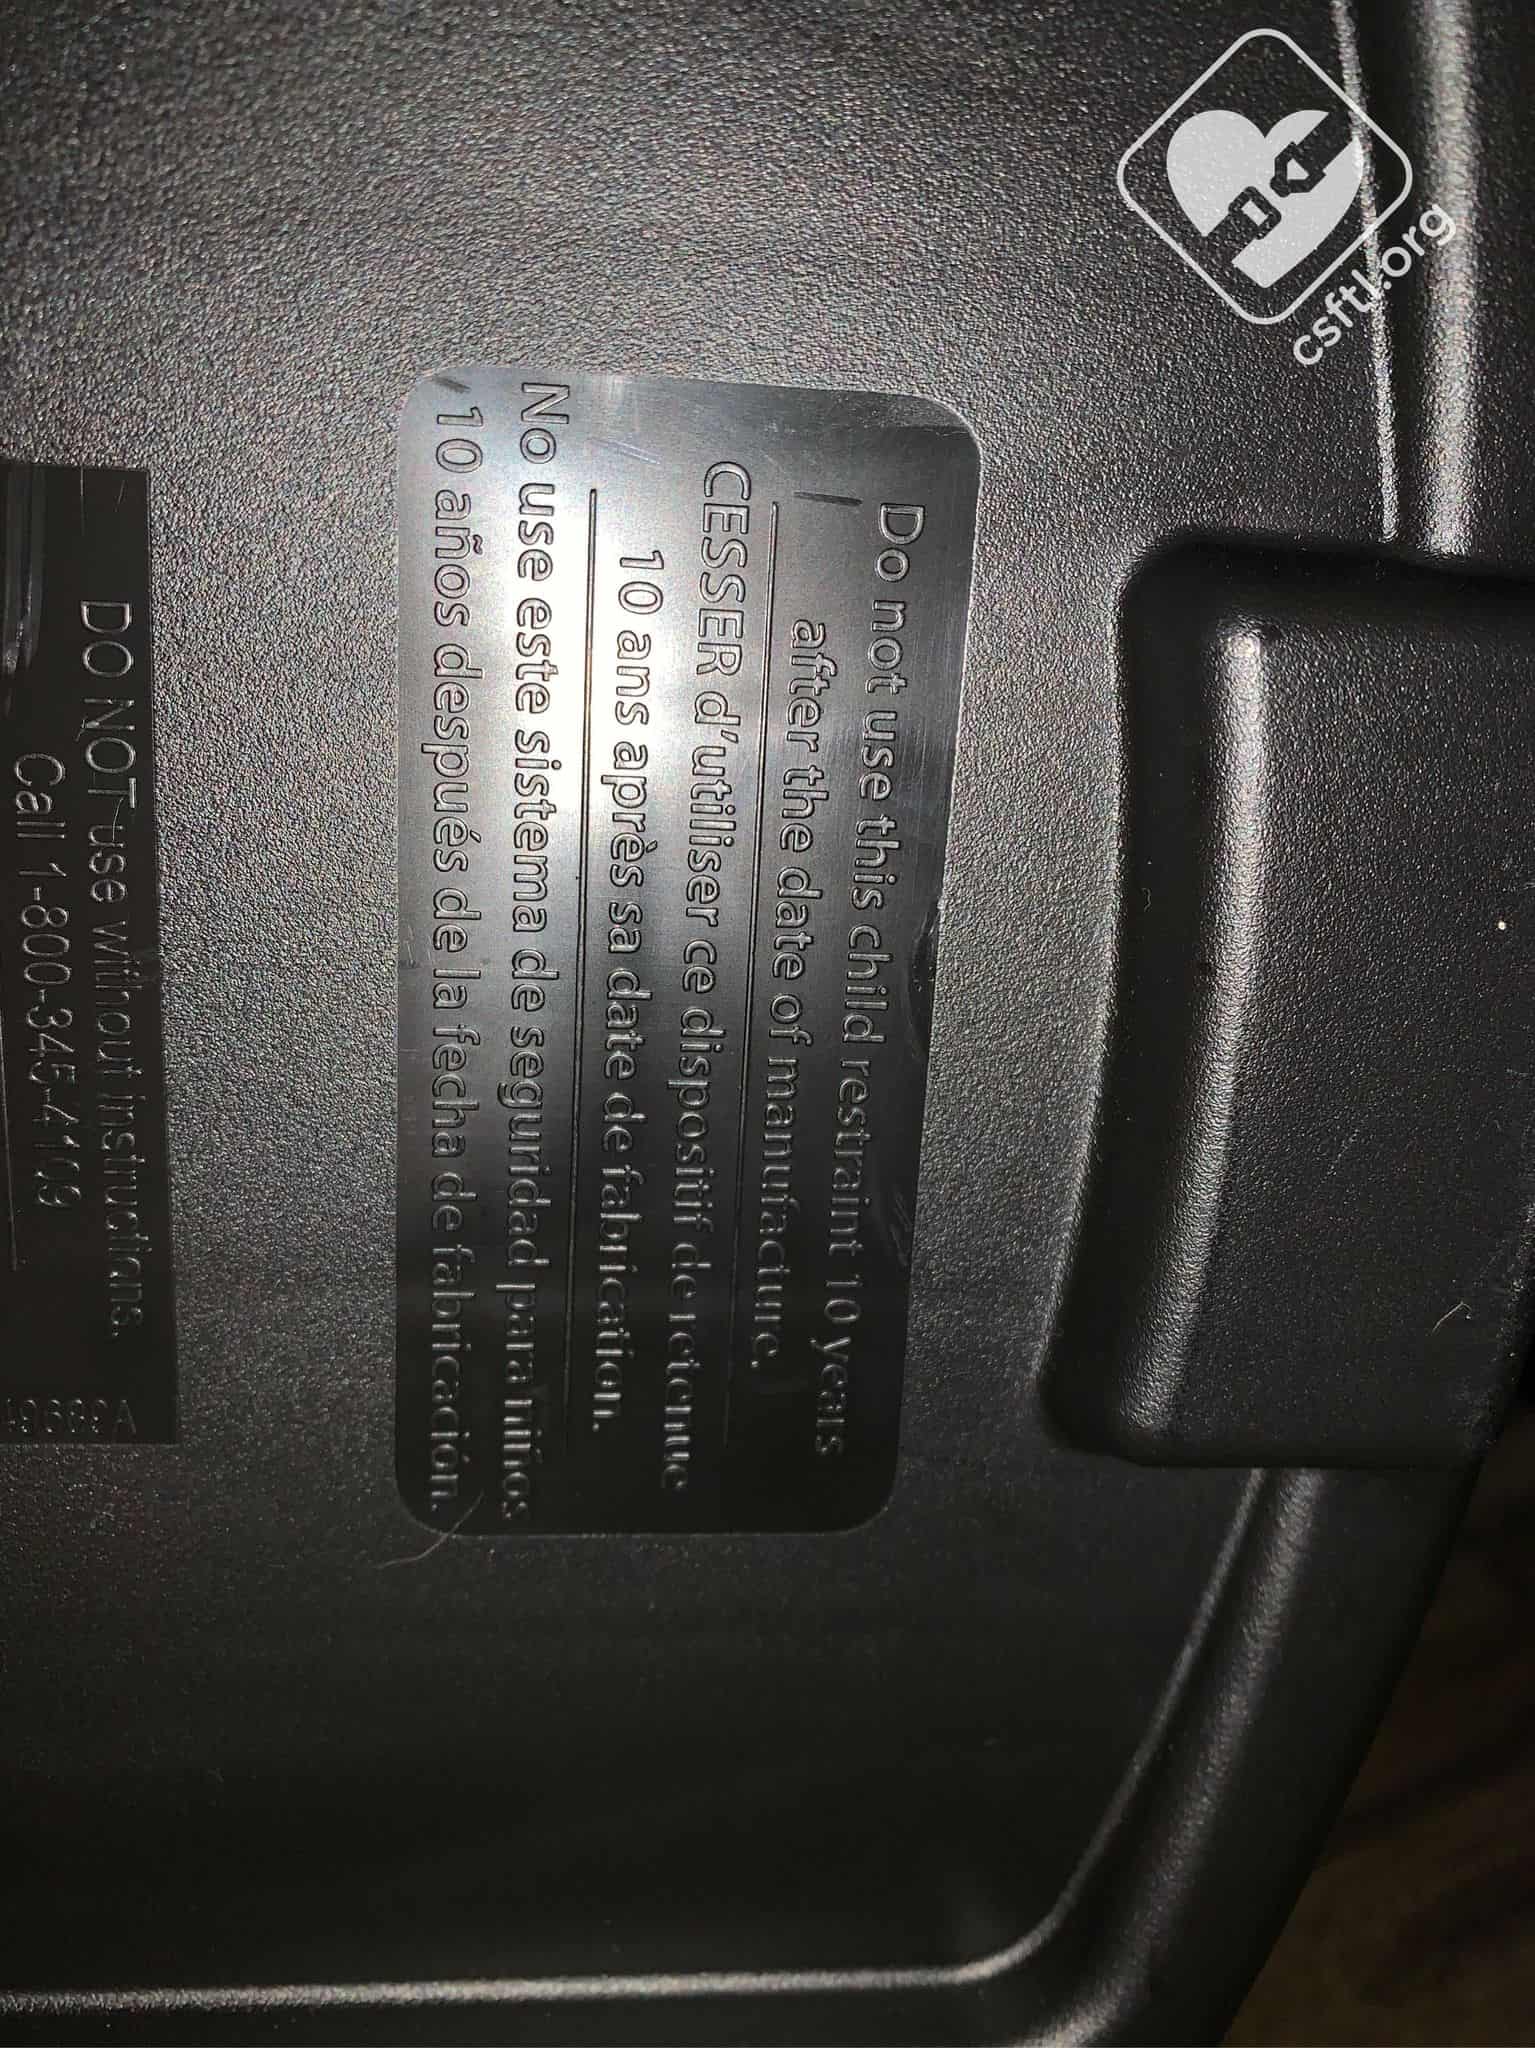
Graco SlimFit3 LX Expiration date stamp
Expiration: the SlimFit3 LX has a 10 year lifespan, the expiration date is stamped into the bottom of the base.
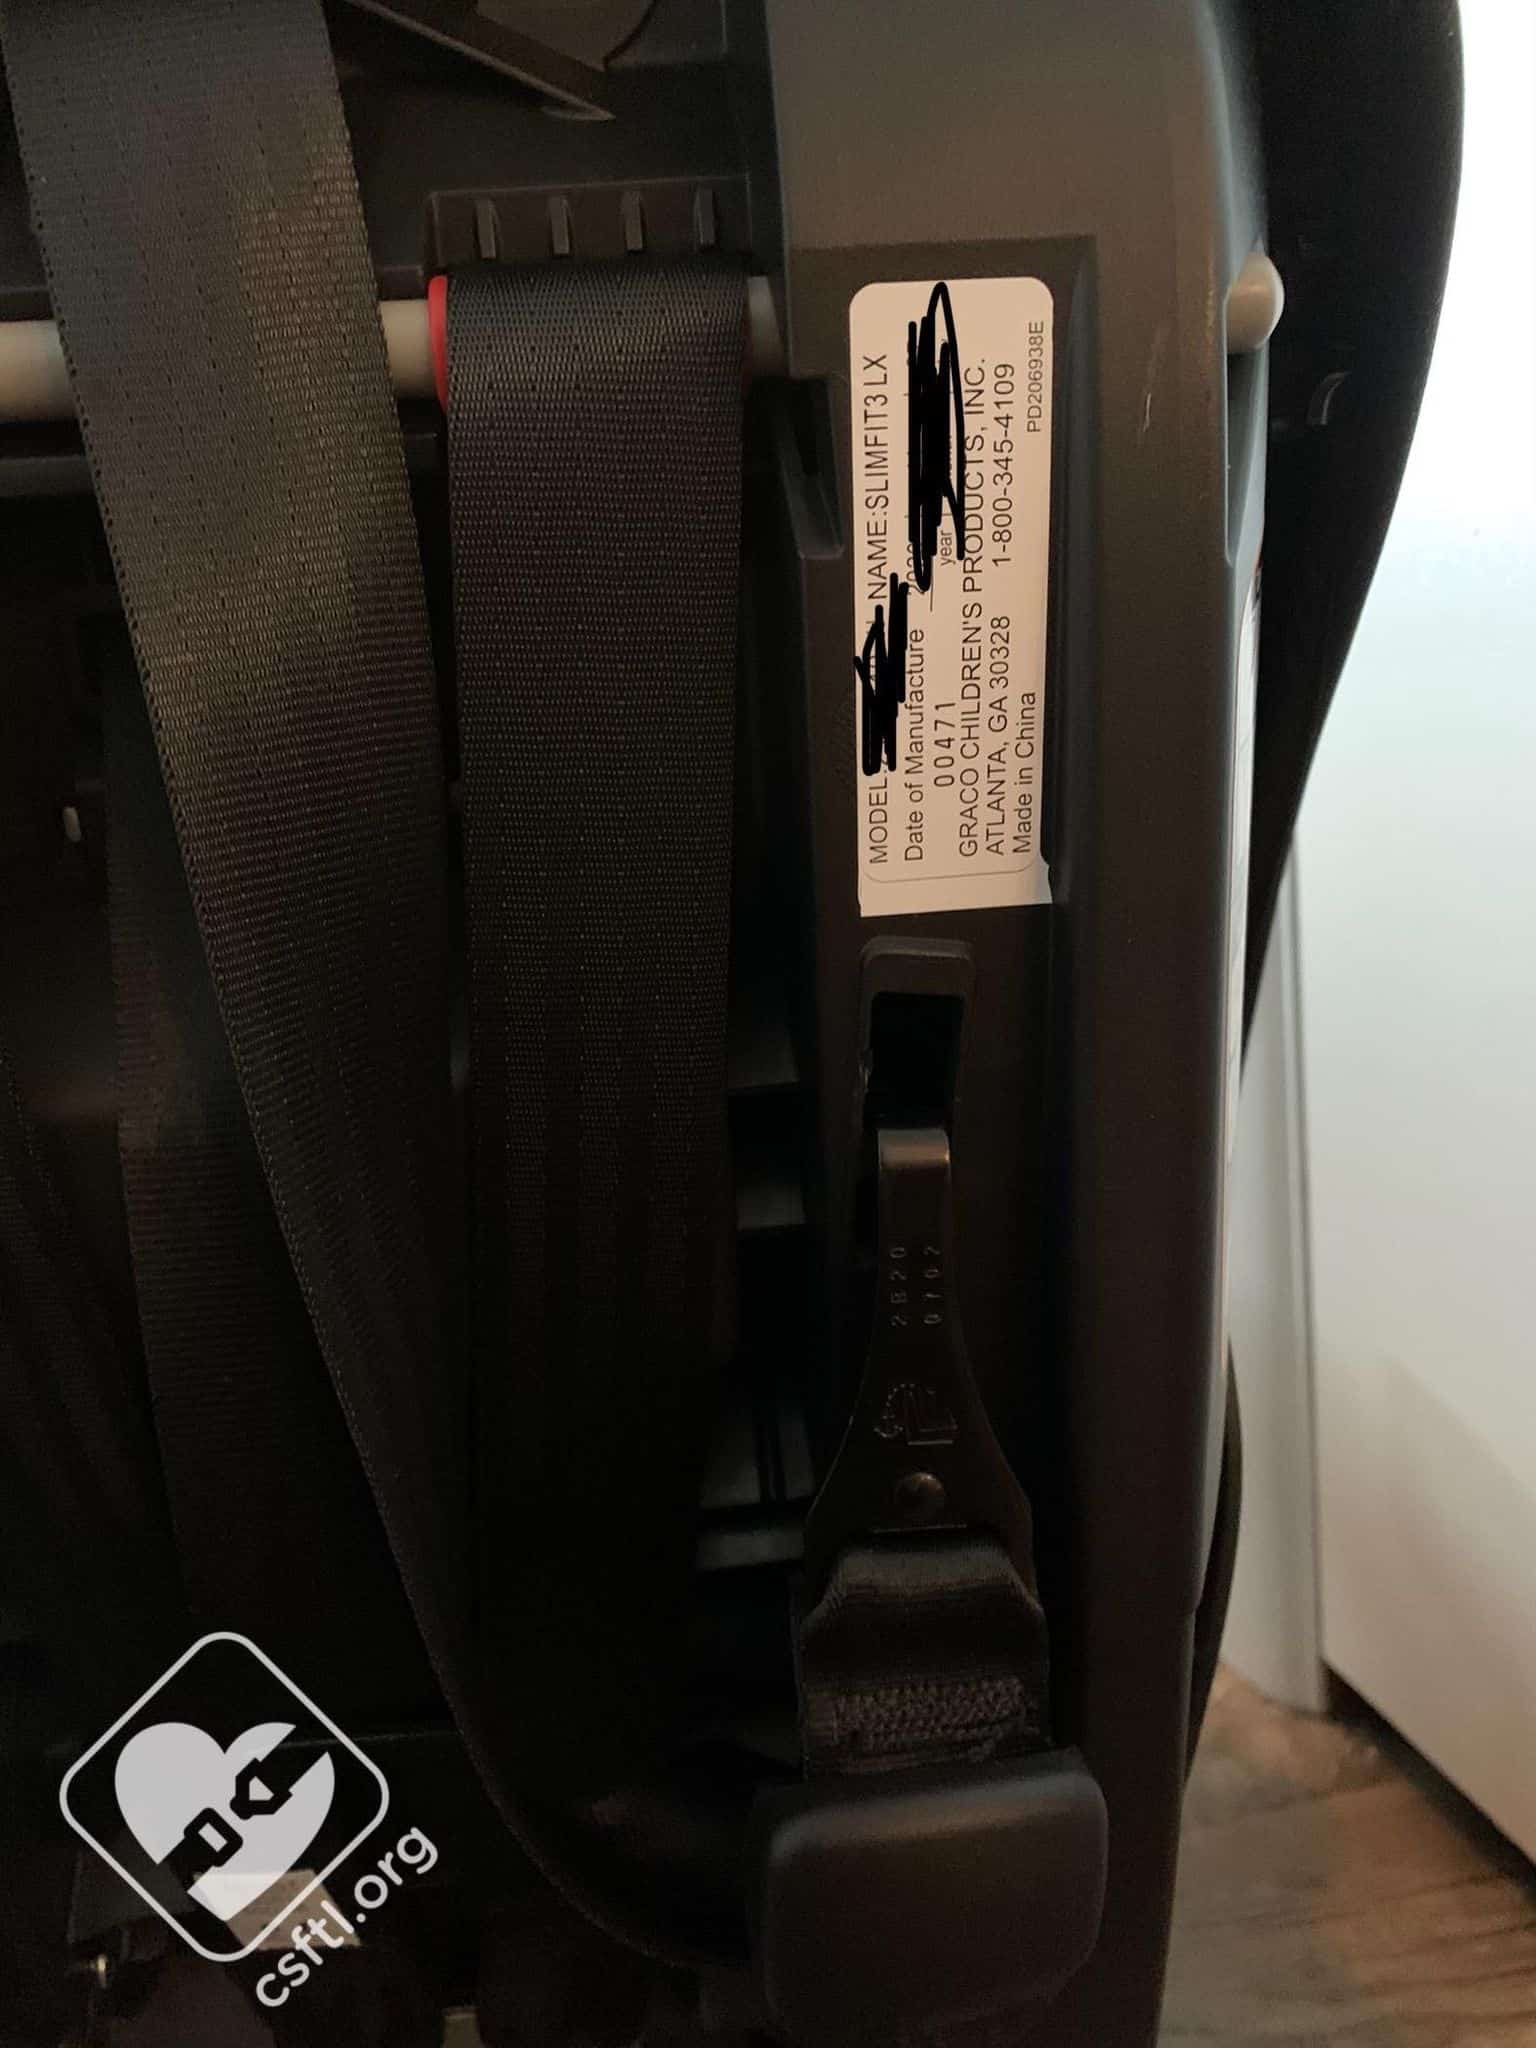
Graco SlimFit3 LX Date of manufacture label
Date of manufacture label: the date of manufacture label is located on the back of the seat behind the child’s right shoulder.
Graco SlimFit3 LX FAA approval for harness mode
FAA approval label: the Slimfit3 LX is approved for use in an aircraft in harness mode only, the sticker is located on the back of the base of the seat. Note: this location is hidden when the seat is attached to many popular travel carts. You may need to remove the travel cart to display the label when boarding a plane.

Graco SlimFit3 LX Top tether storage
Top tether anchor storage: located on the back of the seat.
Overall Thoughts

3 Graco SlimFit3 LX seats in a row!
This seat definitely does what it’s marketed to do: accommodates 3 car seats across. It’s narrow enough to take the worry out of fitting all 3 seats, yet our models found the internal seating area wide enough to be comfortable. The features were so carefully considered that we can’t find a single thing that was overlooked. We’re so fond of this seat that we added it to our Recommended Seats list before this review even went live!
CSFTL Celebration Giveaway!
As part of our 400,000 Facebook Group Member celebration, Graco is giving away one SlimFit3 LX to a lucky reader in the United States. Read our terms and conditions, then enter below for your chance to win:
a Rafflecopter giveaway