Peg Perego Primo Viaggio 4-35 Nido
Peg Perego has introduced a new version of their rear facing only Peg Perego Primo Viaggio 4-35 car seat — the 4-35 Primo Viaggio Nido. This update offers some additional features on both the base and the carrier. Let’s take a look!
CSFTL Quick Stats
- Weight range: 4-35 pounds
- Lowest harness position: About 7-7.5 inches with the stage 1 insert in the seat
- Height range: 32 inches or less
- Expiration: Seven years from the date of manufacture listed on the label
- Handle position: The handle must be aligned with the top of the car seat when the Nido is installed with the base
- Toys are not allowed to be hung from the handle
Measurements
- Weight of carrier: 11 pounds with both inserts
- Shell height: 19 inches without inserts (the curvature of the seat makes this an approximate measurement)
- Width at widest point: 17 inches
Features
- Load leg base with anti-rebound bar
- “Right tight system” to install base
- Extendable canopy
- Dual stage inserts
Unique Features
Canopy
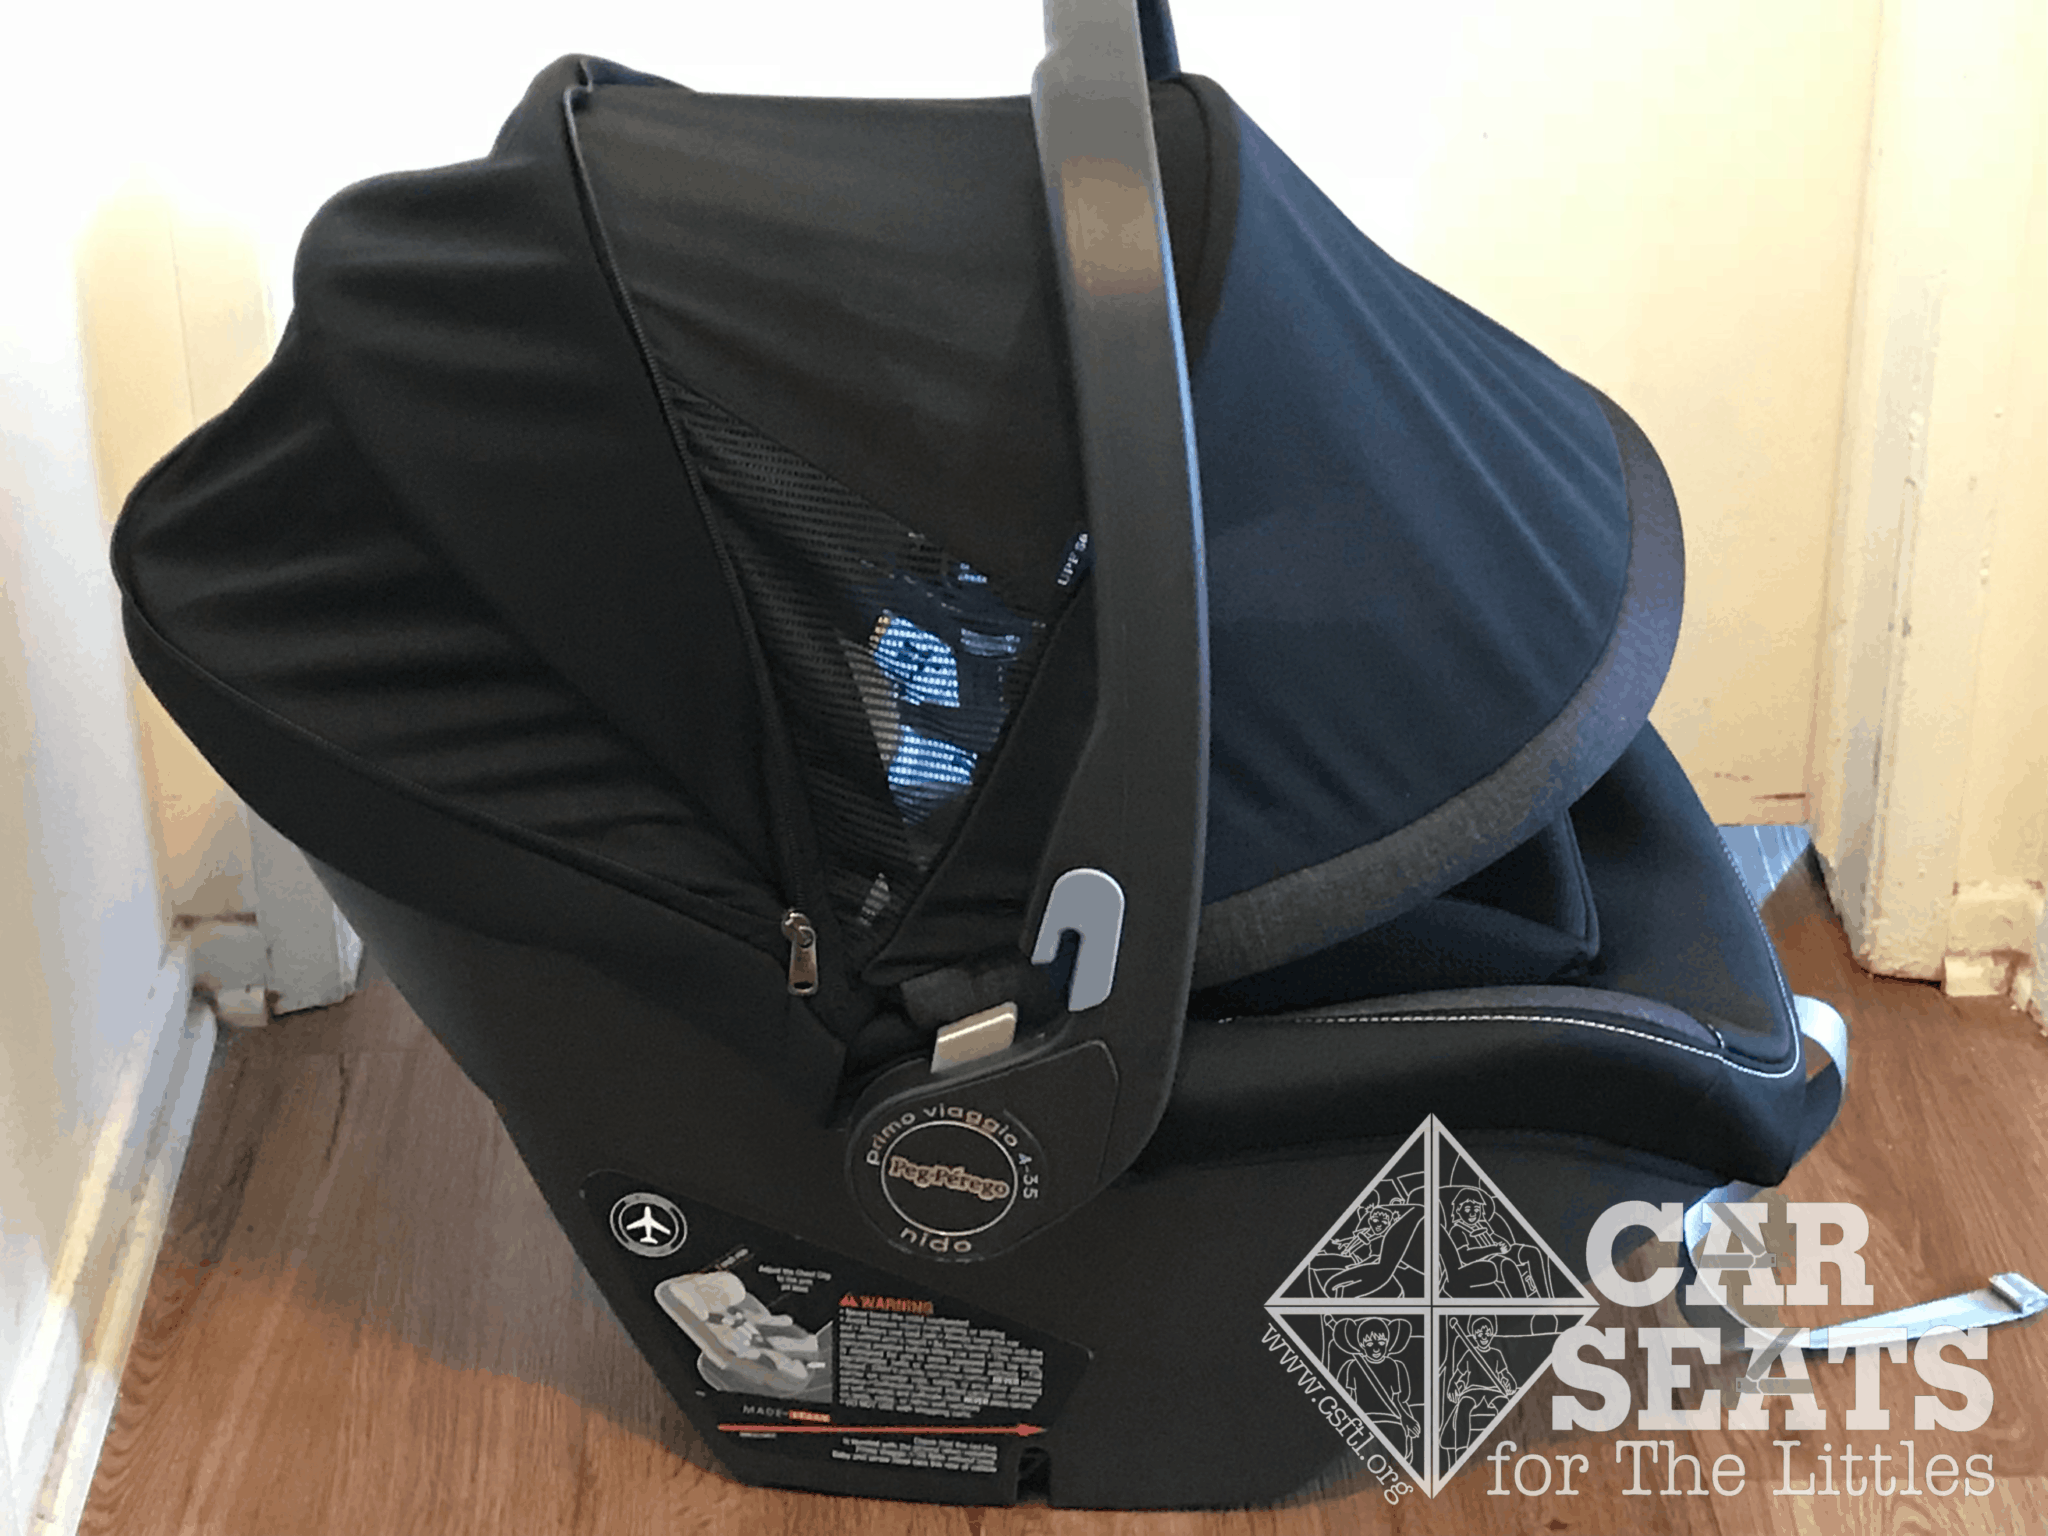
Peg Perego Primo Viaggio 4-35 Nido canopy
The Nido includes a huge canopy with an additional zip-out section and vents on the sides.
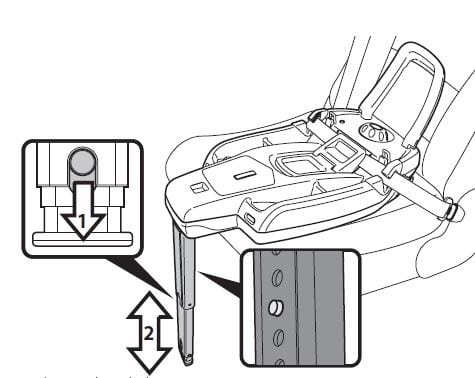
Load Leg
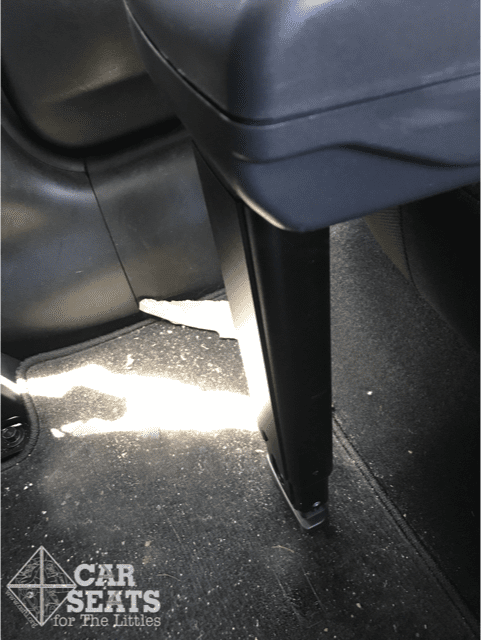
Peg Perego Primo Viaggio 4-35 Nido load leg
The Nido’s other unique feature is a load leg that’s attached to the base. I want to tell you a secret: I found this load leg easier to use than the load leg on the Cybex Aton 2, the Cybex Aton Q, or the Nuna Pipa. The mechanism to lower the Nido’s load leg was smooth and intuitive, and the leg didn’t lower on its own when I was installing the base.Once the leg was extended, I found it difficult to extend that “one last click” that’s sometimes necessary to extend the leg all the way to the vehicle floor.
Peg Perego Primo Viaggio 4-35 Nido load leg instructions
To lower the load leg, squeeze a specially designed button on the leg itself. Peg Perego allows a small space between the underside of the Nido base and the vehicle seat due to the height setting of the load leg.
Installation: With the Base
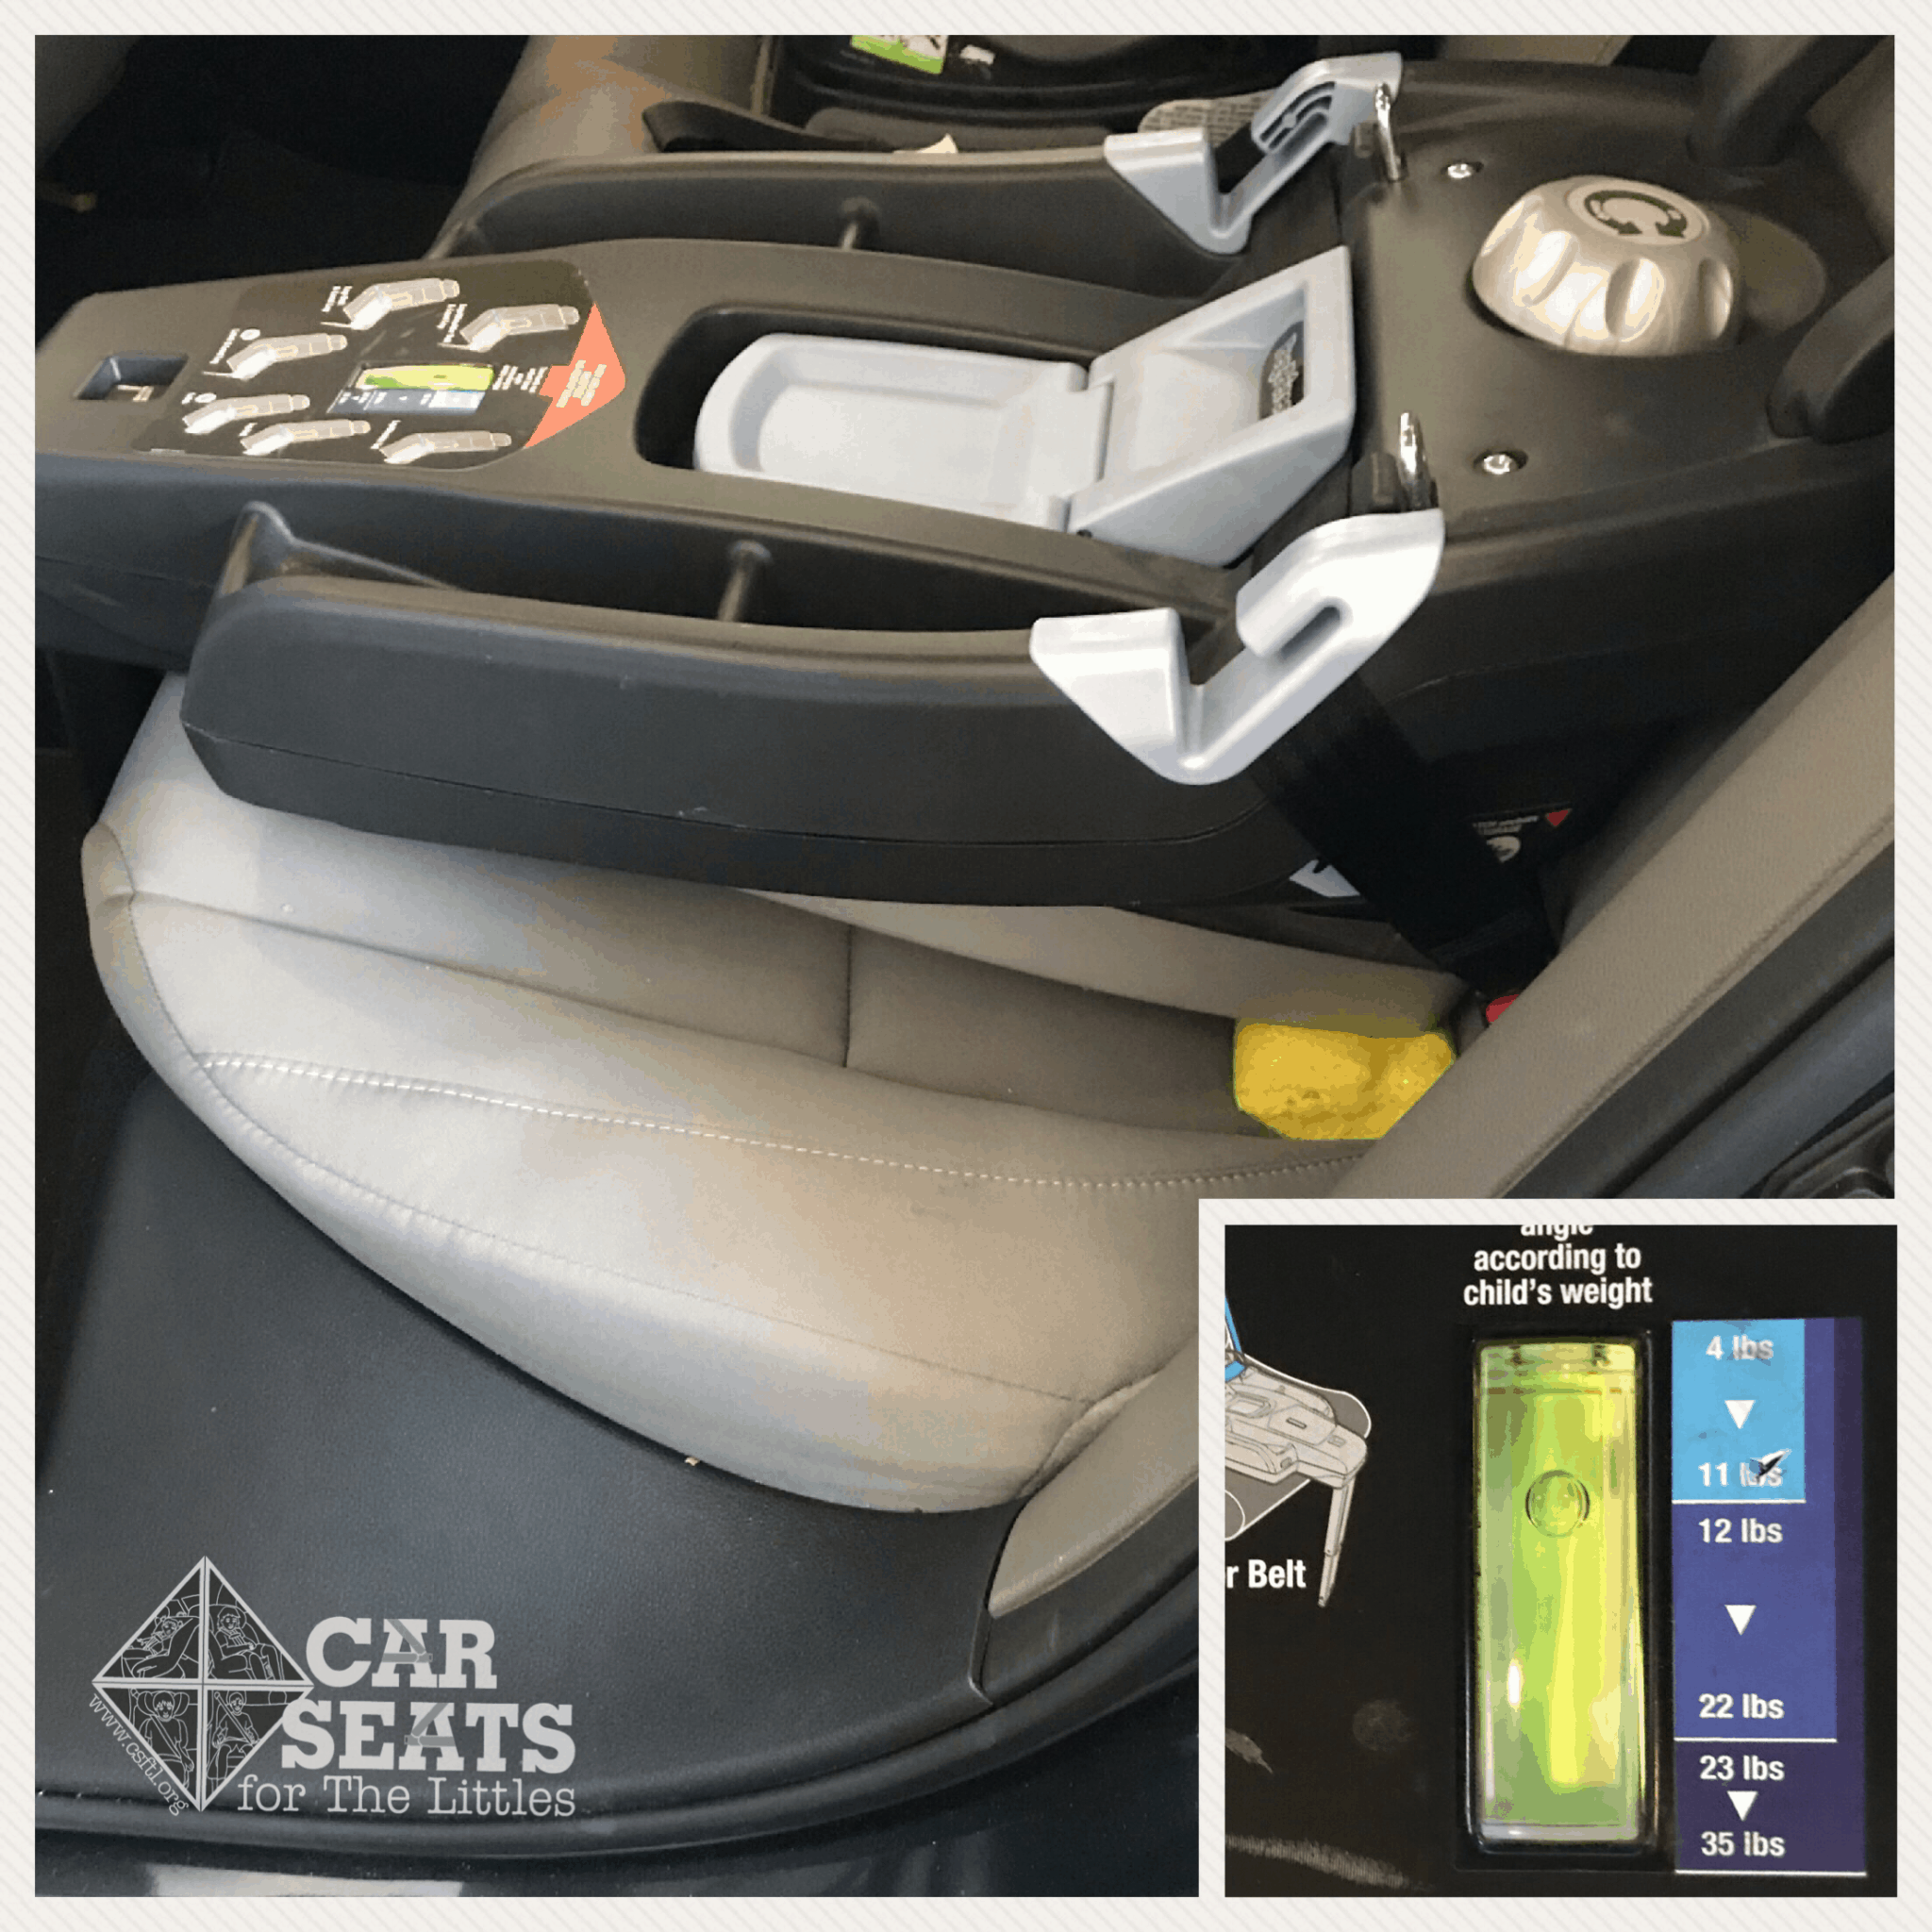
Recline Angle Indicator/Concerns around Recline

Peg Perego Primo Viaggio 4-35 Nido recline indicator
The Nido base’s recline angle is based on the weight of the baby. The base has a clear indicator that shows which recline angle should be used for each weight range. This was troubling to me; two of my three children were born above 9 pounds, and one of them might have been 11 pounds by the time he left the hospital. That would mean that after a week or two, he would have been ready to “graduate” to the next recline level on the base, but he would have had minimal to no head and neck control to support that more upright angle.With that in mind, we asked Peg Perego if there were ever a circumstance in which the seat could be more reclined for a bigger baby, as I would have had to do for my son. They responded that “the recline bubble is just a guide” and that a newborn should indeed have more of a recline.
While that answer means a newborn of any weight can still be in a safe position to maintain his or her airway, assuming the recline can be achieved (see below), it is a bit troubling that the manual just says to follow the guide. This lack of clarity could result in parents putting their newborns in a more upright and dangerous position. We encourage Peg Perego to update the manual and/or the recline indicator to reflect the flexibility in determining which position should be used.
We also had trouble installing the Nido at the correct recline angle. My 2017 Honda Civic has relatively flat seats, yet I still could not get the recline bubble much past the borderline between the two lower ranges. Peg Perego has informed us that we may use a rolled towel or a pool noodle to further recline the base, and that we may use this whether or not the recline foot is also in use. Learn more about this installation and its feasability below. The regular 4-35 had this issue as well, and it is disappointing that it was not resolved with this new base.
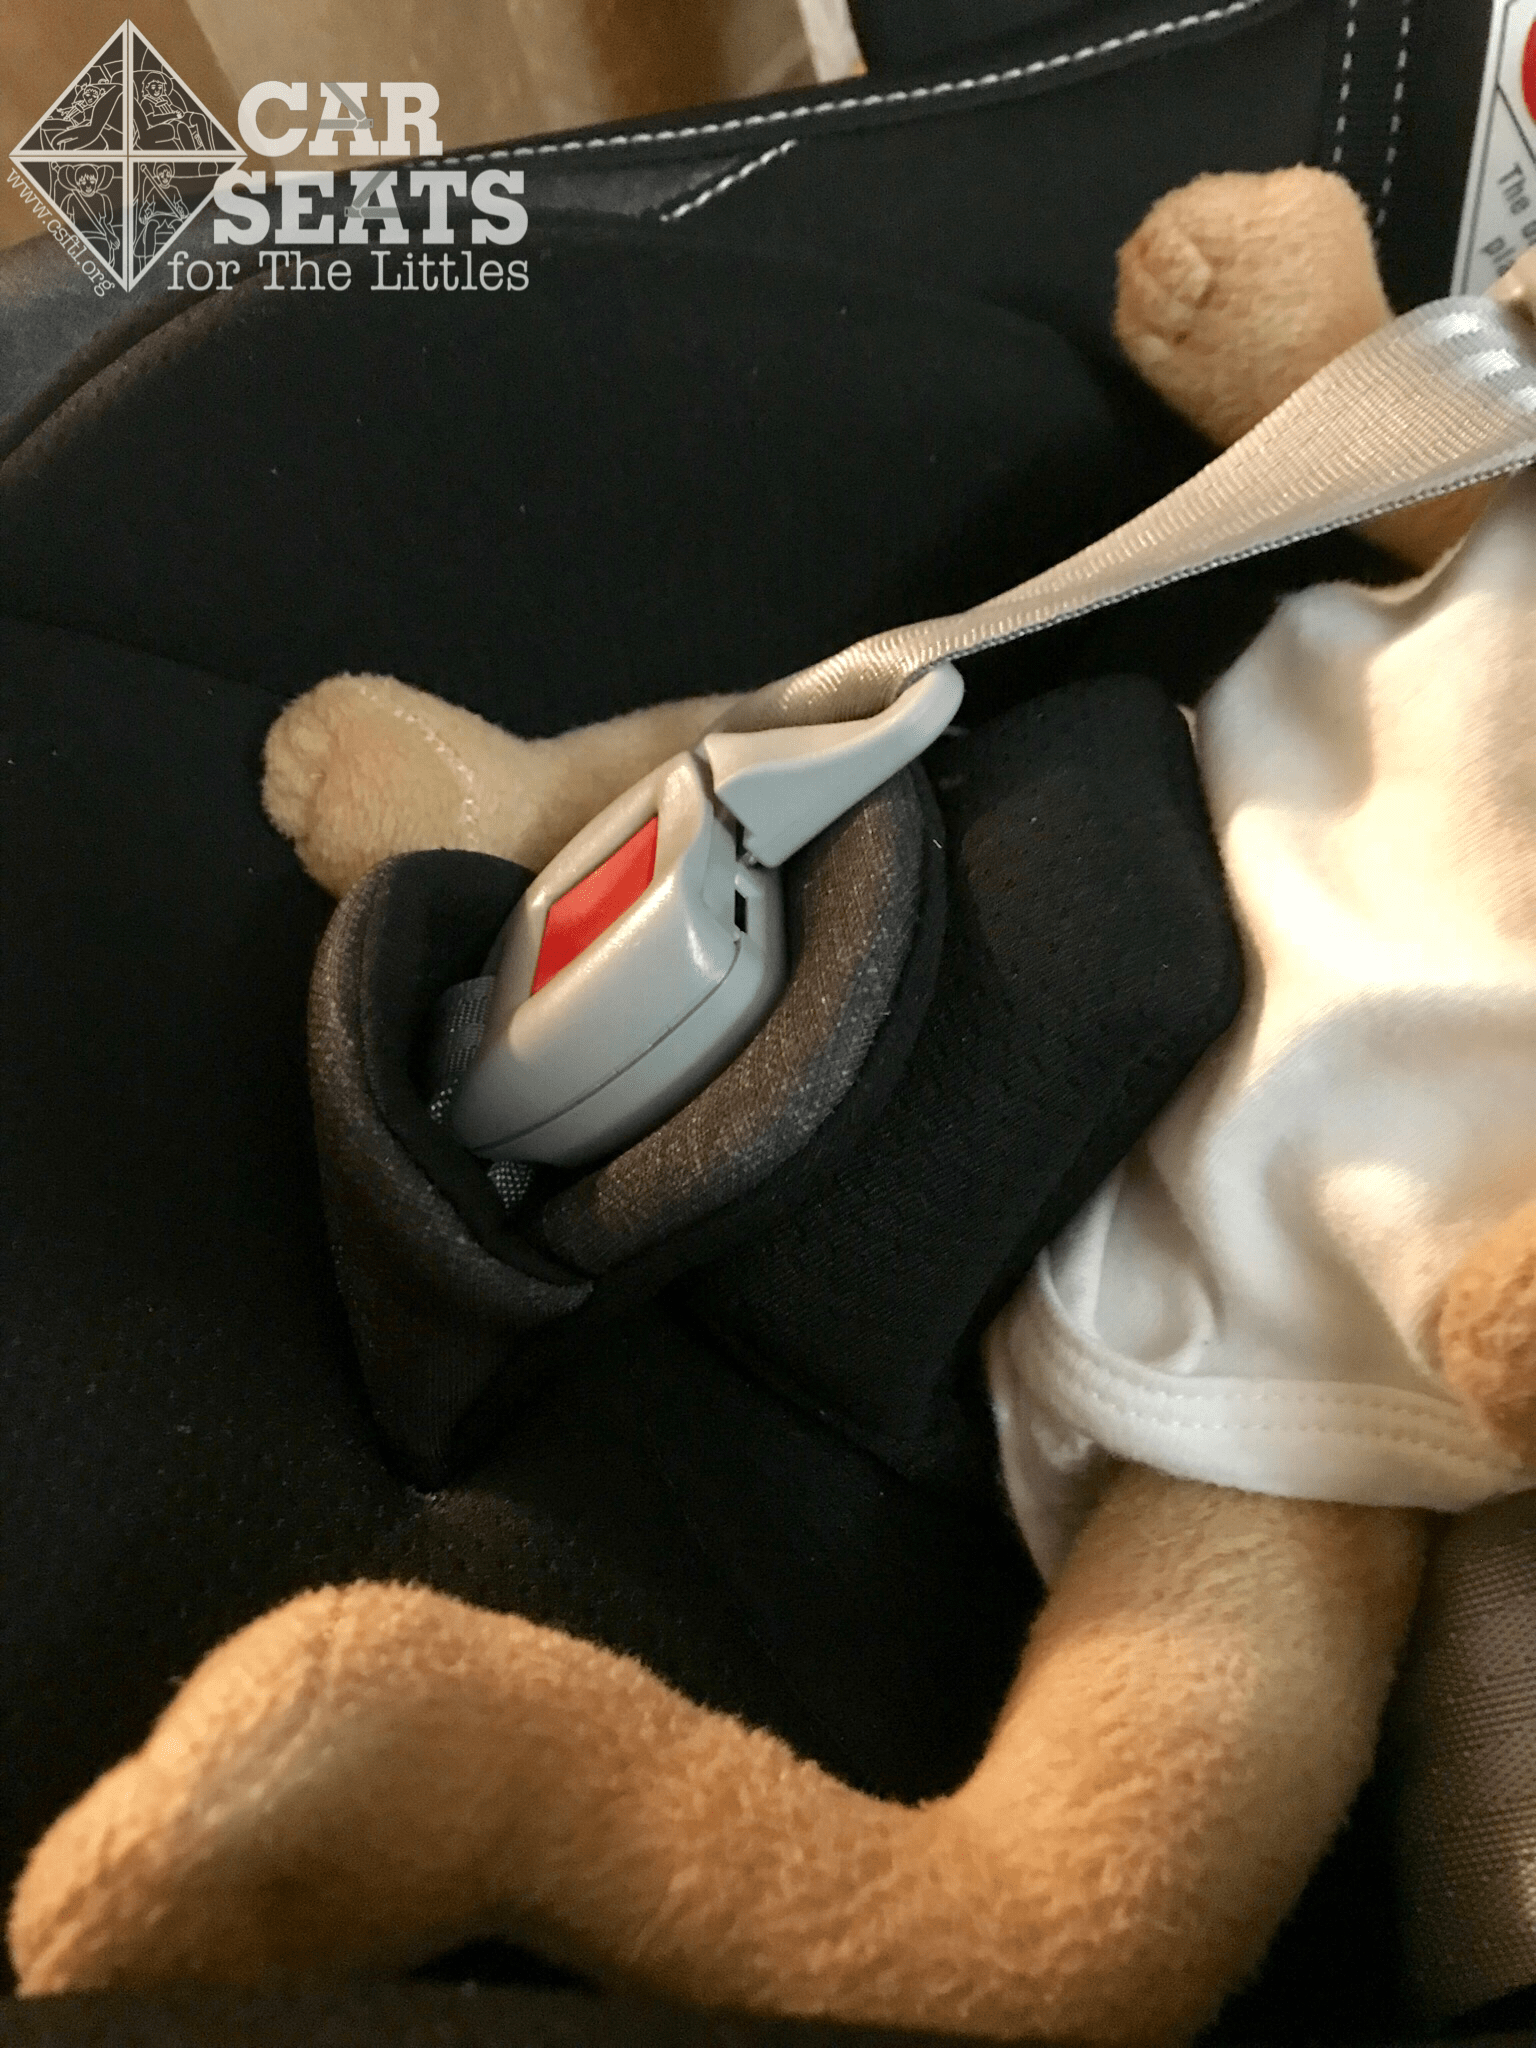
Carrier Attachment Red/Green Indicator
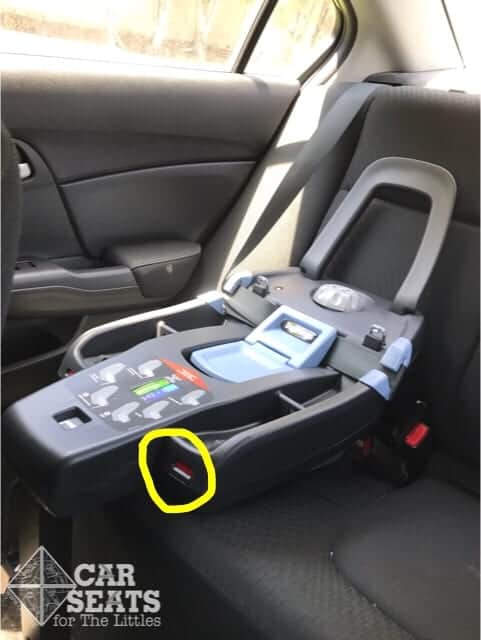
Peg Perego Primo Viaggio 4-35 Nido Carrier Attachment Indicator
The Nido base features a red/green indicator which shows whether the carrier is attached to the base. The manual says to check that the carrier is securely clicked in, then check the indicator. However, most people will naturally check the indicator first, and this is where there’s an issue. If the carrier is resting on the base but not securely clicked in, the indicator may still show green. Always, always pull up firmly on the handle to ensure that the carrier is attached. Do not rely on the indicator alone.
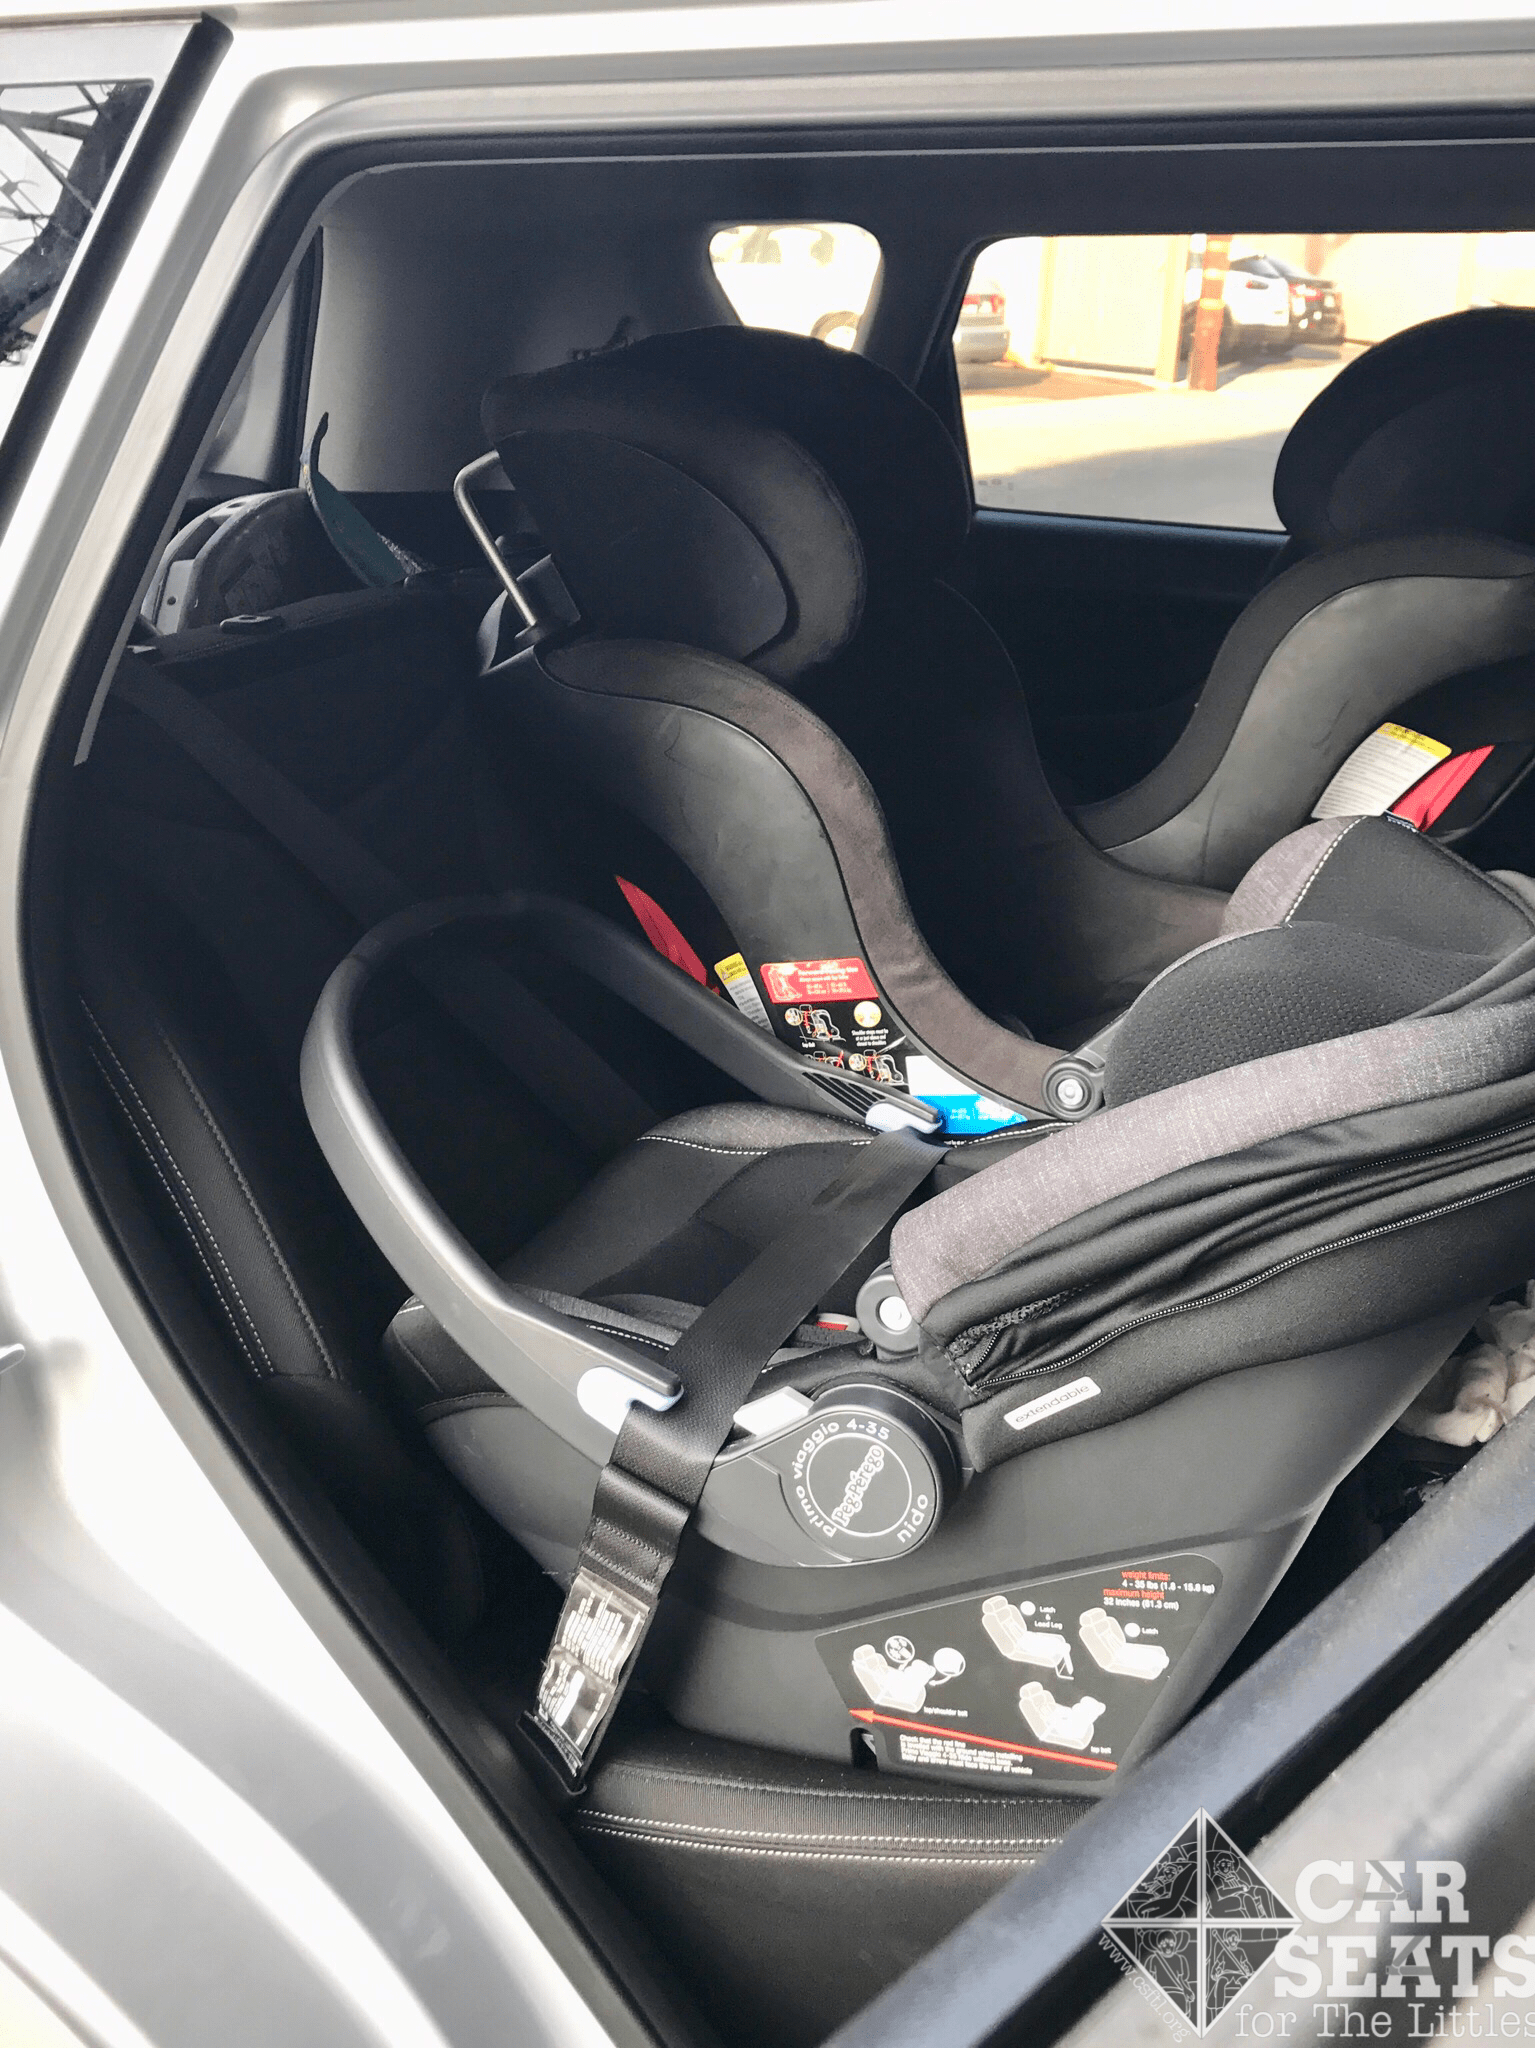
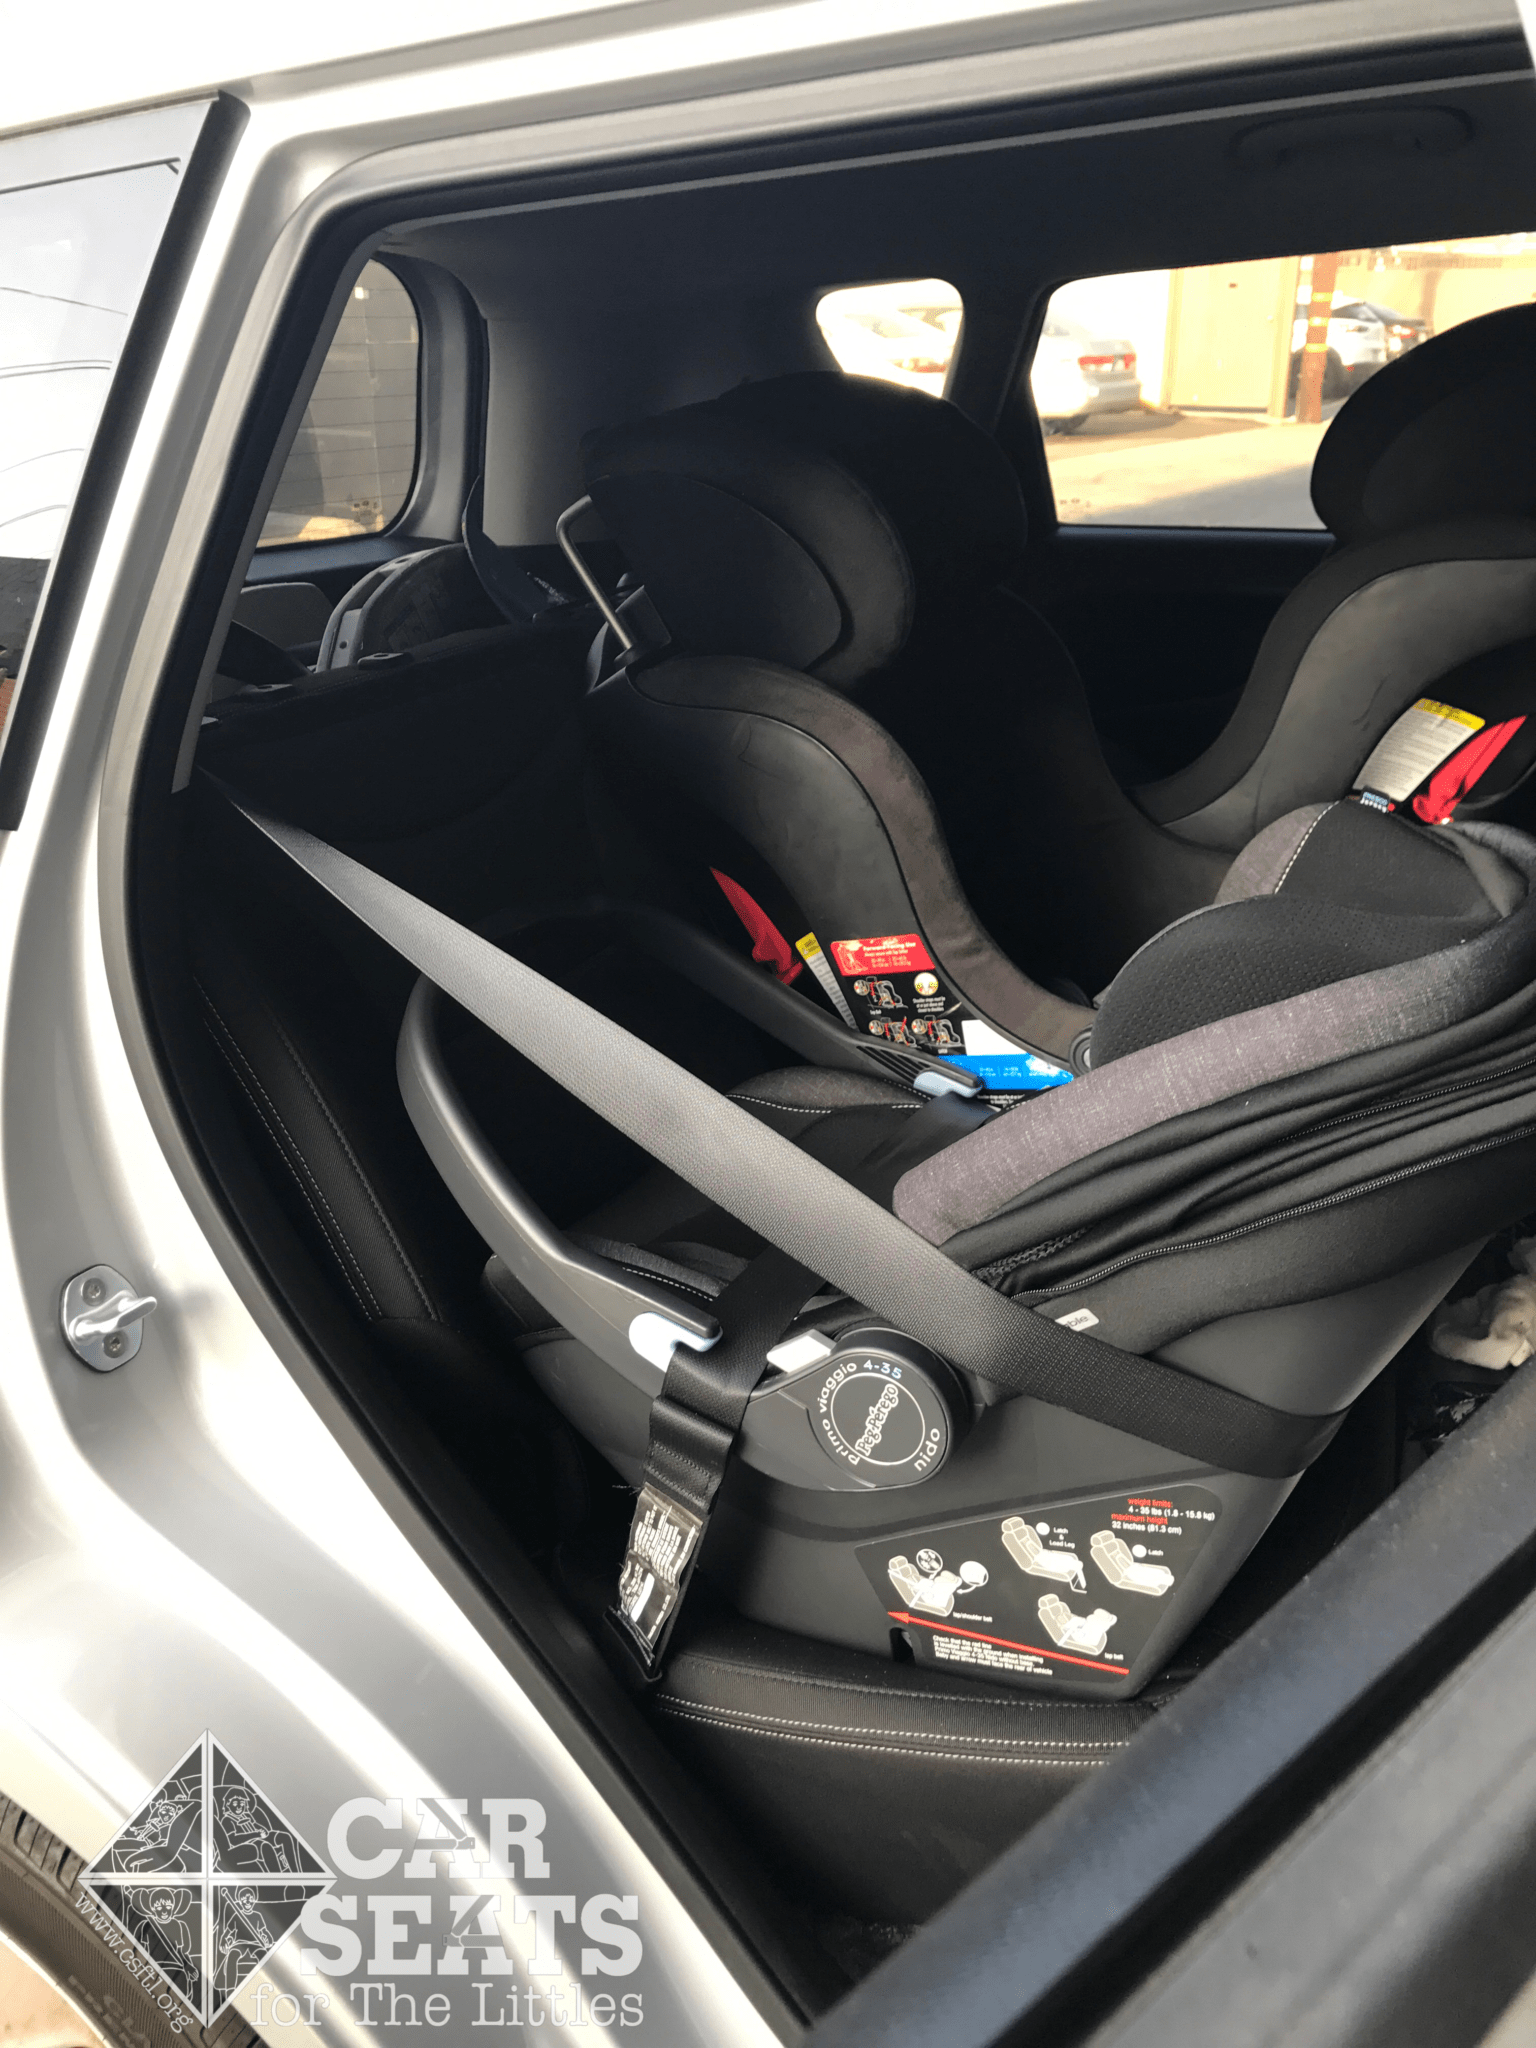
Installation: Lower Anchors
Peg Perego Primo Viaggio 4-35 Nido: Lower anchor strap goes through the lockoff
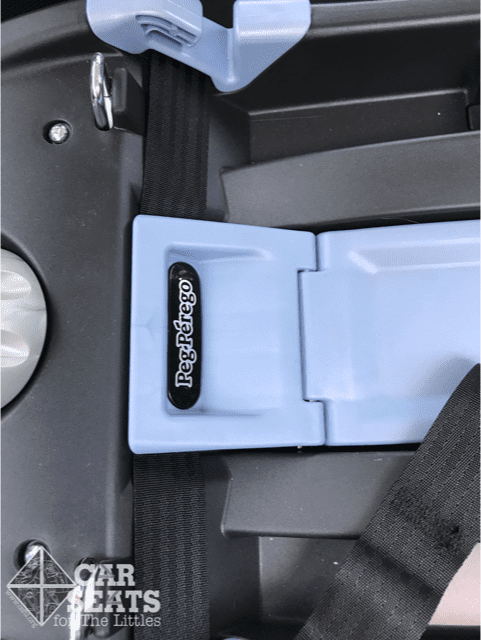
The Nido does allow lower anchor borrowing, where the base is installed in the center seating position in the vehicle using the innermost lower anchors from the outboard seating positions. Despite this permission from Peg Perego, the Nido’s manual doesn’t include a reminder to check the vehicle owner’s manual to verify that using the center latch position is allowed; many vehicle manufacturers do not allow this.The lower anchor connectors are stored in a plastic compartment. Unfortunately, the plastic compartment door came off in my hand. It was easy enough to reattach.
Peg Perego Primo Viaggio 4-35 Nido installation with pool noodle
Installation with the lower anchors without using a pool noodle to adjust the recline angle was straightforward; I connected the lower anchors and opened the lockoff. I removed the slack from the webbing and then closed the lockoff on the base. The lockoff removes an additional bit of slack from the webbing.When I attempted to add the pool noodle under the base, the installation became difficult. I had trouble keeping the pool noodle positioned under the recline foot. My car has what’s called a “waterfall seat bight,” a small hump above the seat crack, which may have caused the issues. When I was able to position the lower anchor connectors correctly then tighten them, I found that I had only gained a minuscule amount of recline! And this was with the recline foot extended all the way. Perhaps a pool noodle pyramid would have helped.
We asked Peg Perego about this, and they suggested pulling up slightly on the anti-rebound bar after the base is installed. While this may help nudge the bubble into the acceptable range, especially in vehicles with flatter seats, it’s not possible (nor helpful) in all vehicles. We are pleased to report that Peg Perego will be updating the manual with the suggestion to use a pool noodle.
Installation: Vehicle Seat Belt
Peg Perego Primo Viaggio 4-35 Nido seatbelt installation
Installing the Nido with the vehicle seat belt and no pool noodle was straightforward. I opened the lockoff, threaded both the lap and shoulder portions of the vehicle seat belt through the blue belt guides and through the lockoff. I then removed the slack from the vehicle seat belt and closed the lockoff.
Installation: Without the Base
Peg Perego Primo Viaggio 4-35 Nido American routing
The manual includes a warning to only install the seat without the base when necessary to avoid incorrect installation. We can see why they’d say that; installing without the base generally means installing the seat over and over every time that a family heads out for a trip.However, installation without a base is a safe and convenient option in many situations, such as where a narrower installation might be needed, or when traveling by taxi or Uber.
Peg Perego Primo Viaggio 4-35 Nido with European belt routing
The Nido allows for either the American or European belt routing for baseless installs. American style baseless seat belt routing threads the lap portion of the belt through the belt guides and places the shoulder portion of the vehicle seat belt against the vehicle’s seat back. European routing threads the lap portion of the belt through the belt guides and routes the shoulder portion of the vehicle seat belt around the back of the carrier portion of the seat.The belt guides for the lap portion of the belt are on the carrier’s handle. The handle must be flipped towards the back of the vehicle. I find that this particular configuration allows for an even more secure installation than European routing which is not through the handle. I was surprised that the handle did not touch the vehicle seat back; it looks like it would touch on only the most upright vehicle seats.
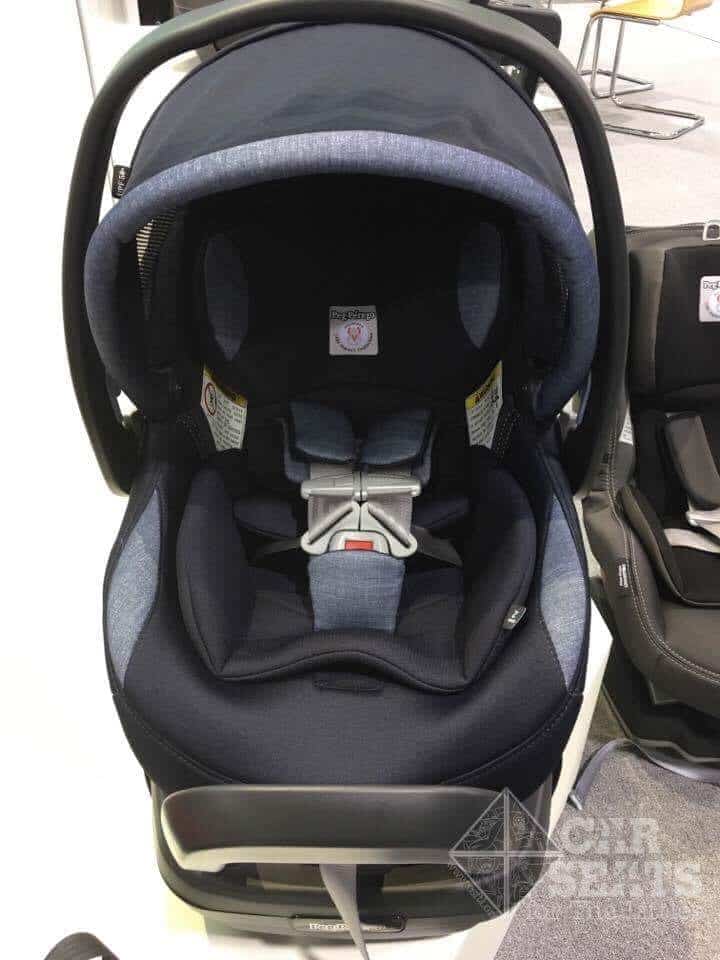
Fit to Child
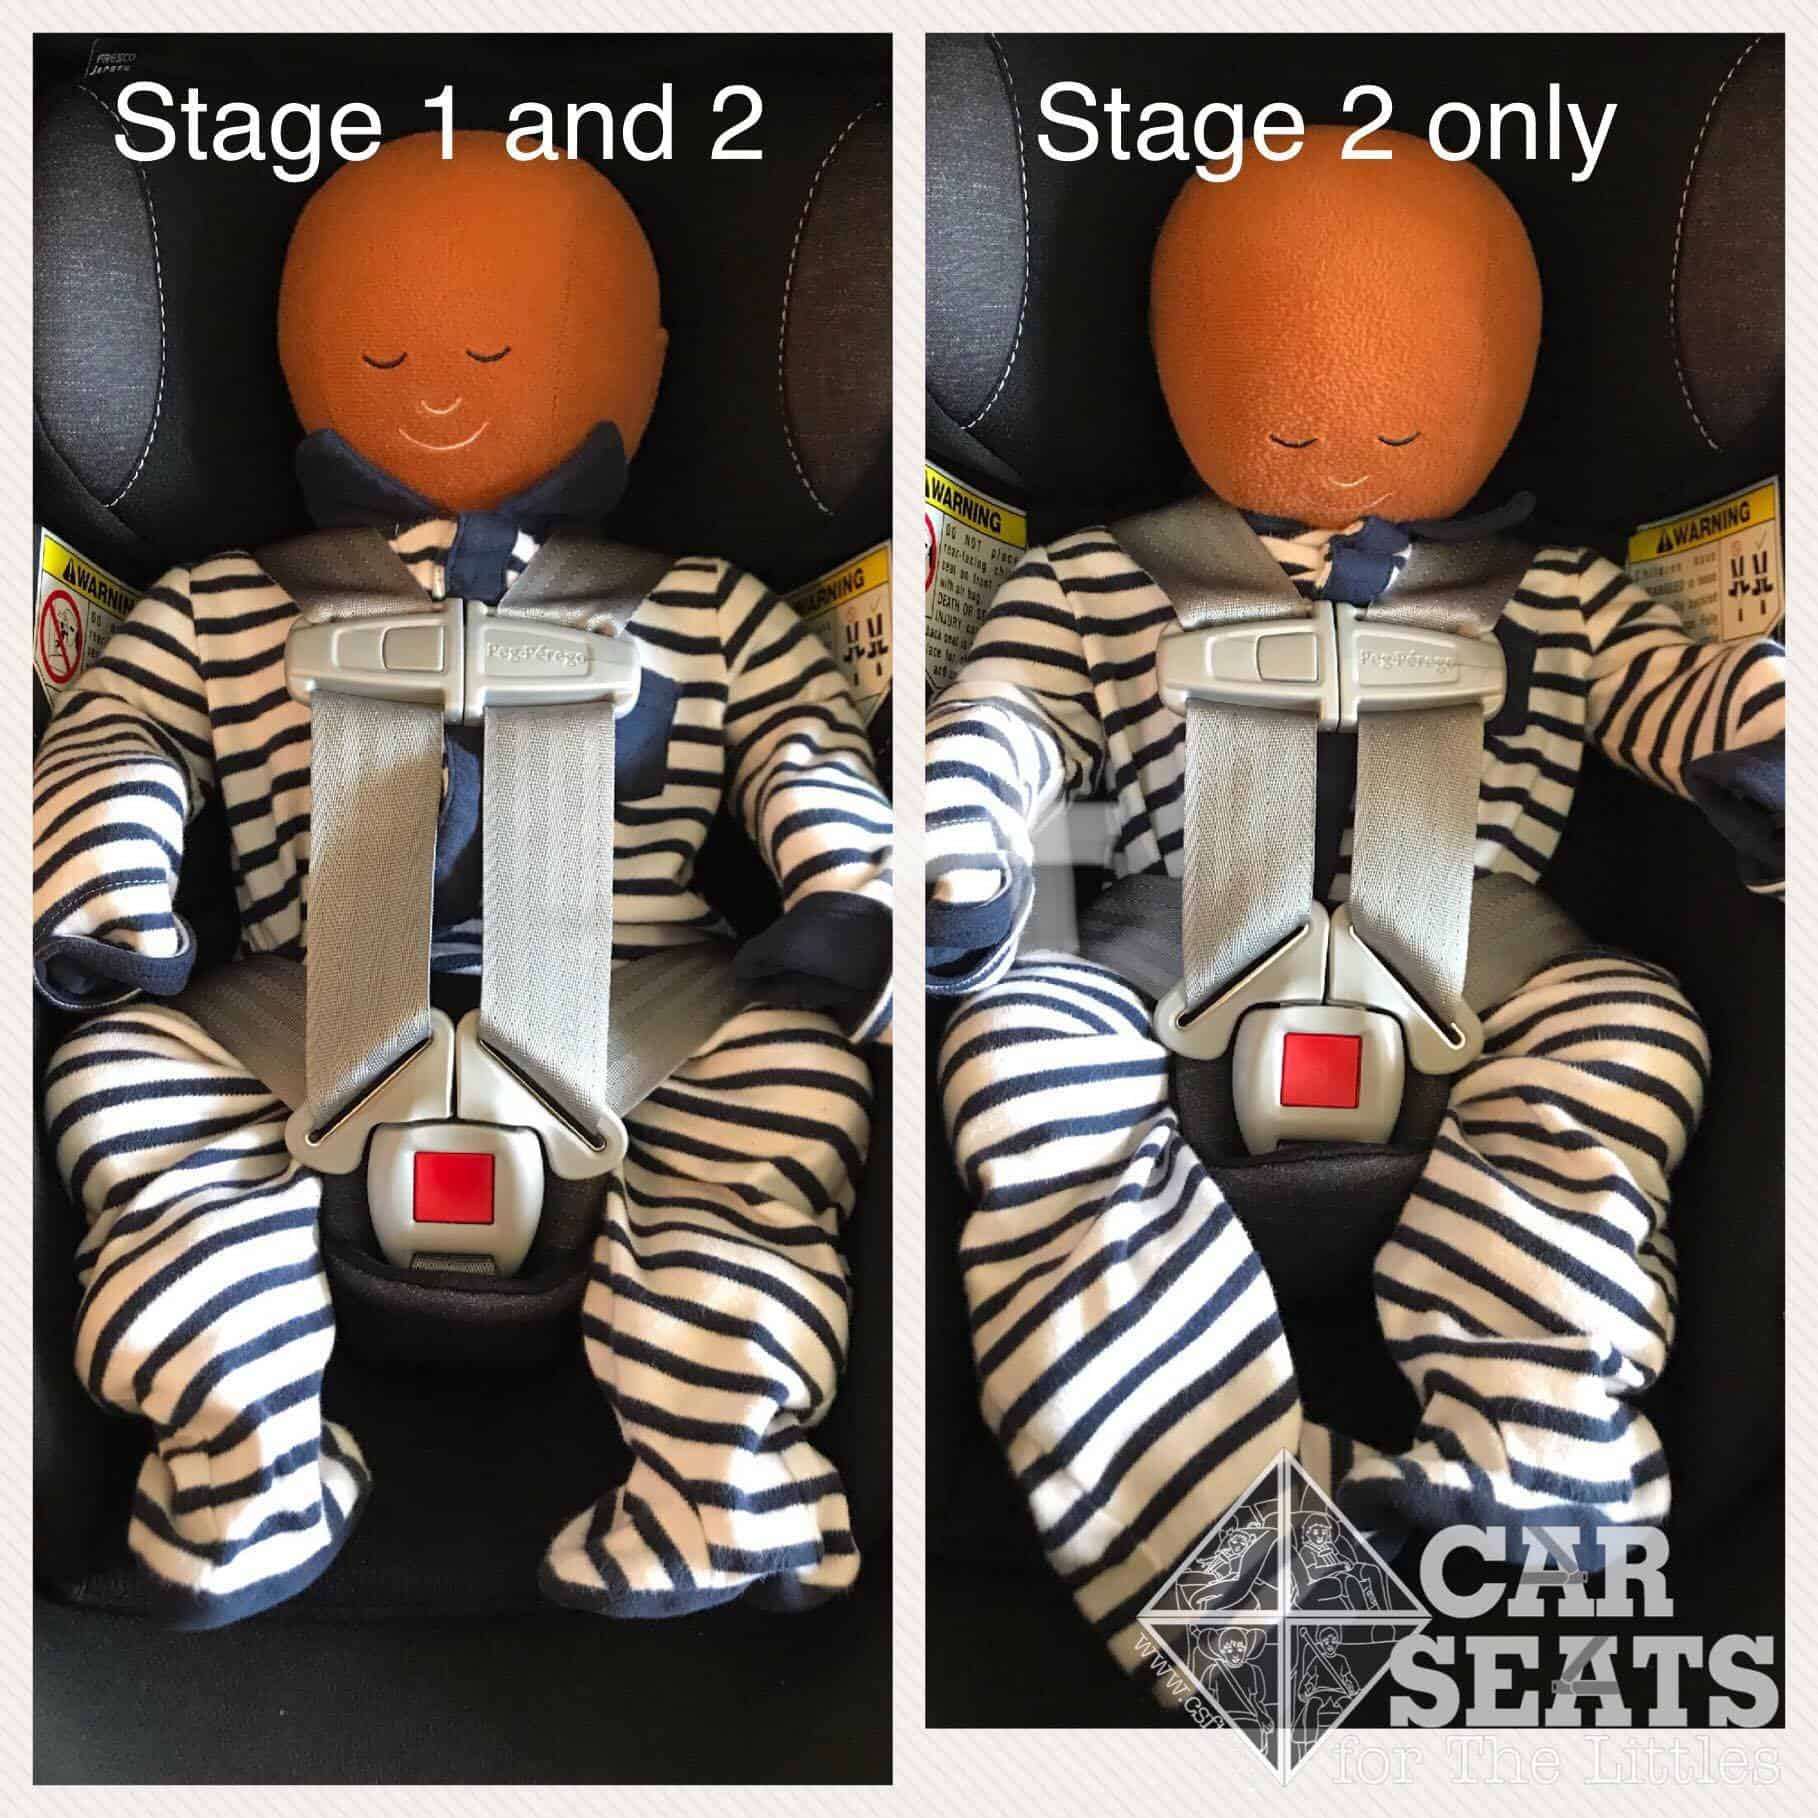
Stage 1 and Stage 2 inserts
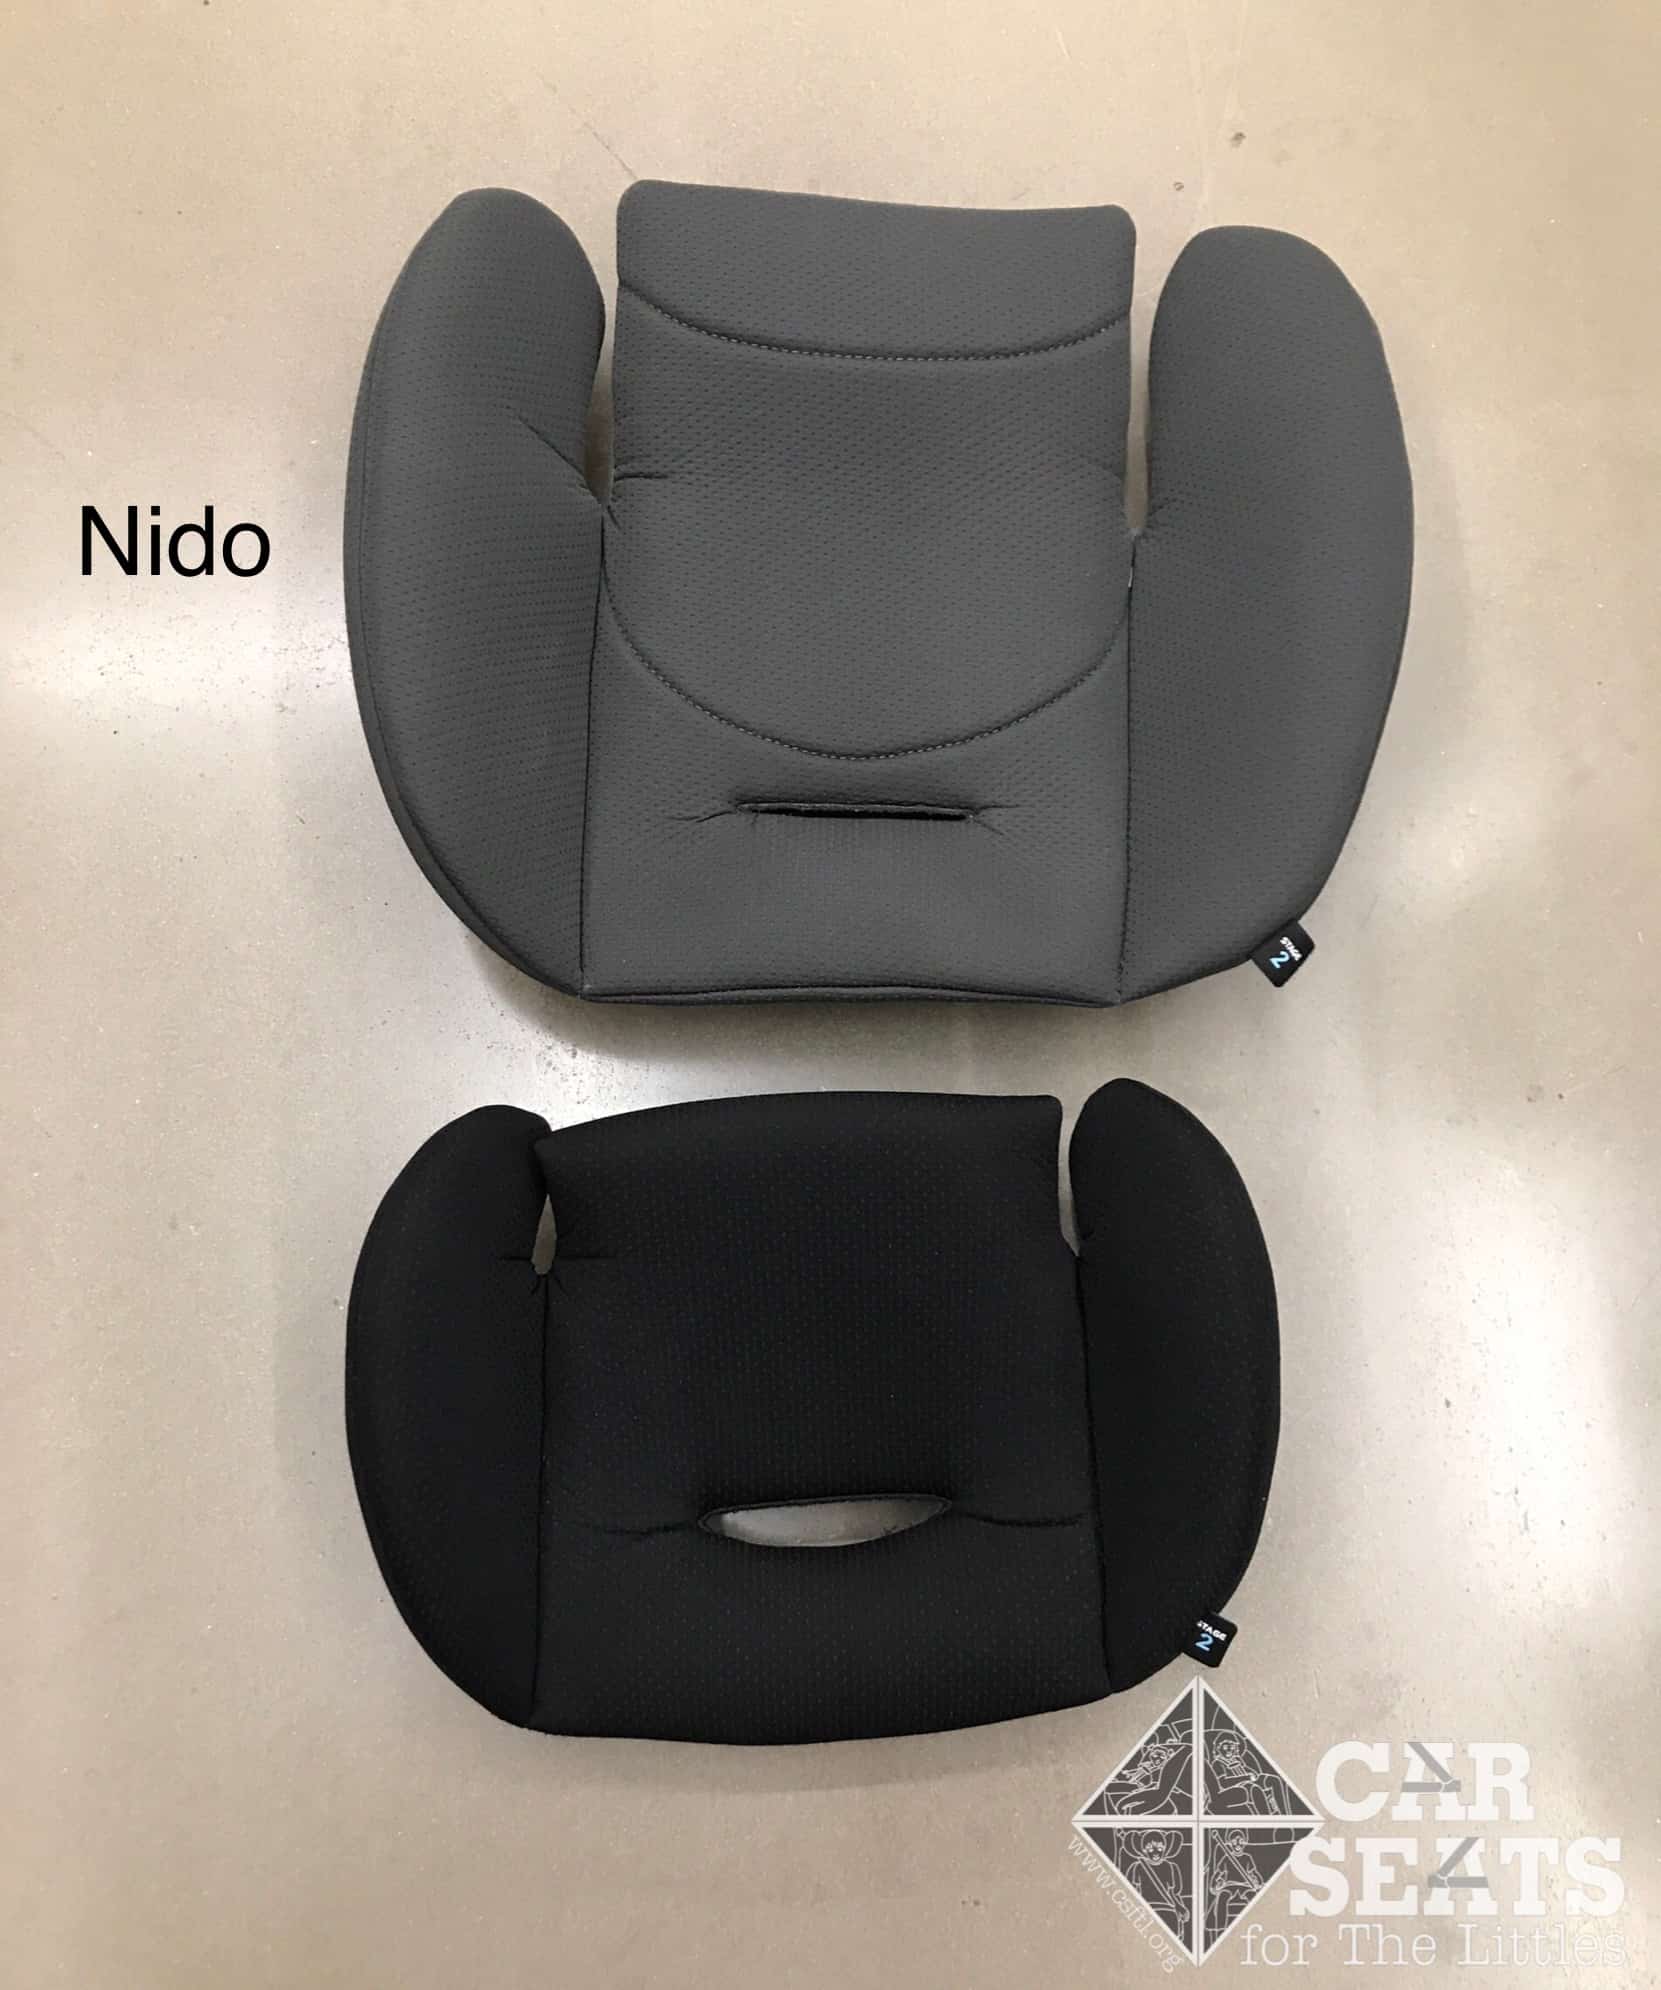
Peg Perego Primo Viaggio 4-35 insert comparison
The Nido comes with two inserts, as does the Primo Viaggio 4-35. The stage 2 insert is bigger on the Nido than on the Primo Viaggio 4-35.
The stage 2 insert, which goes below the stage 1 insert, does not have any guidelines for use in the manual. According to the manual, the stage 1 insert should be used until around 8 pounds, or when the baby’s torso fills the gap between the crotch buckle and the straps. In other words, the straps need to be coming from below the shoulders.
With the babies I tried in the seat, I found that many of them got a better fit with the stage 1 insert, but they weren’t within the range mentioned in the manual to use this insert. They were above 8 pounds, and the straps would still have been below the shoulders without the insert.
We asked Peg Perego about this and were told that the stage 1 insert could be used as long as needed, with the caveat that the crotch buckle might become uncomfortable or not fit well. This is because the stage 1 insert sits above the crotch buckle.
Preemie Doll
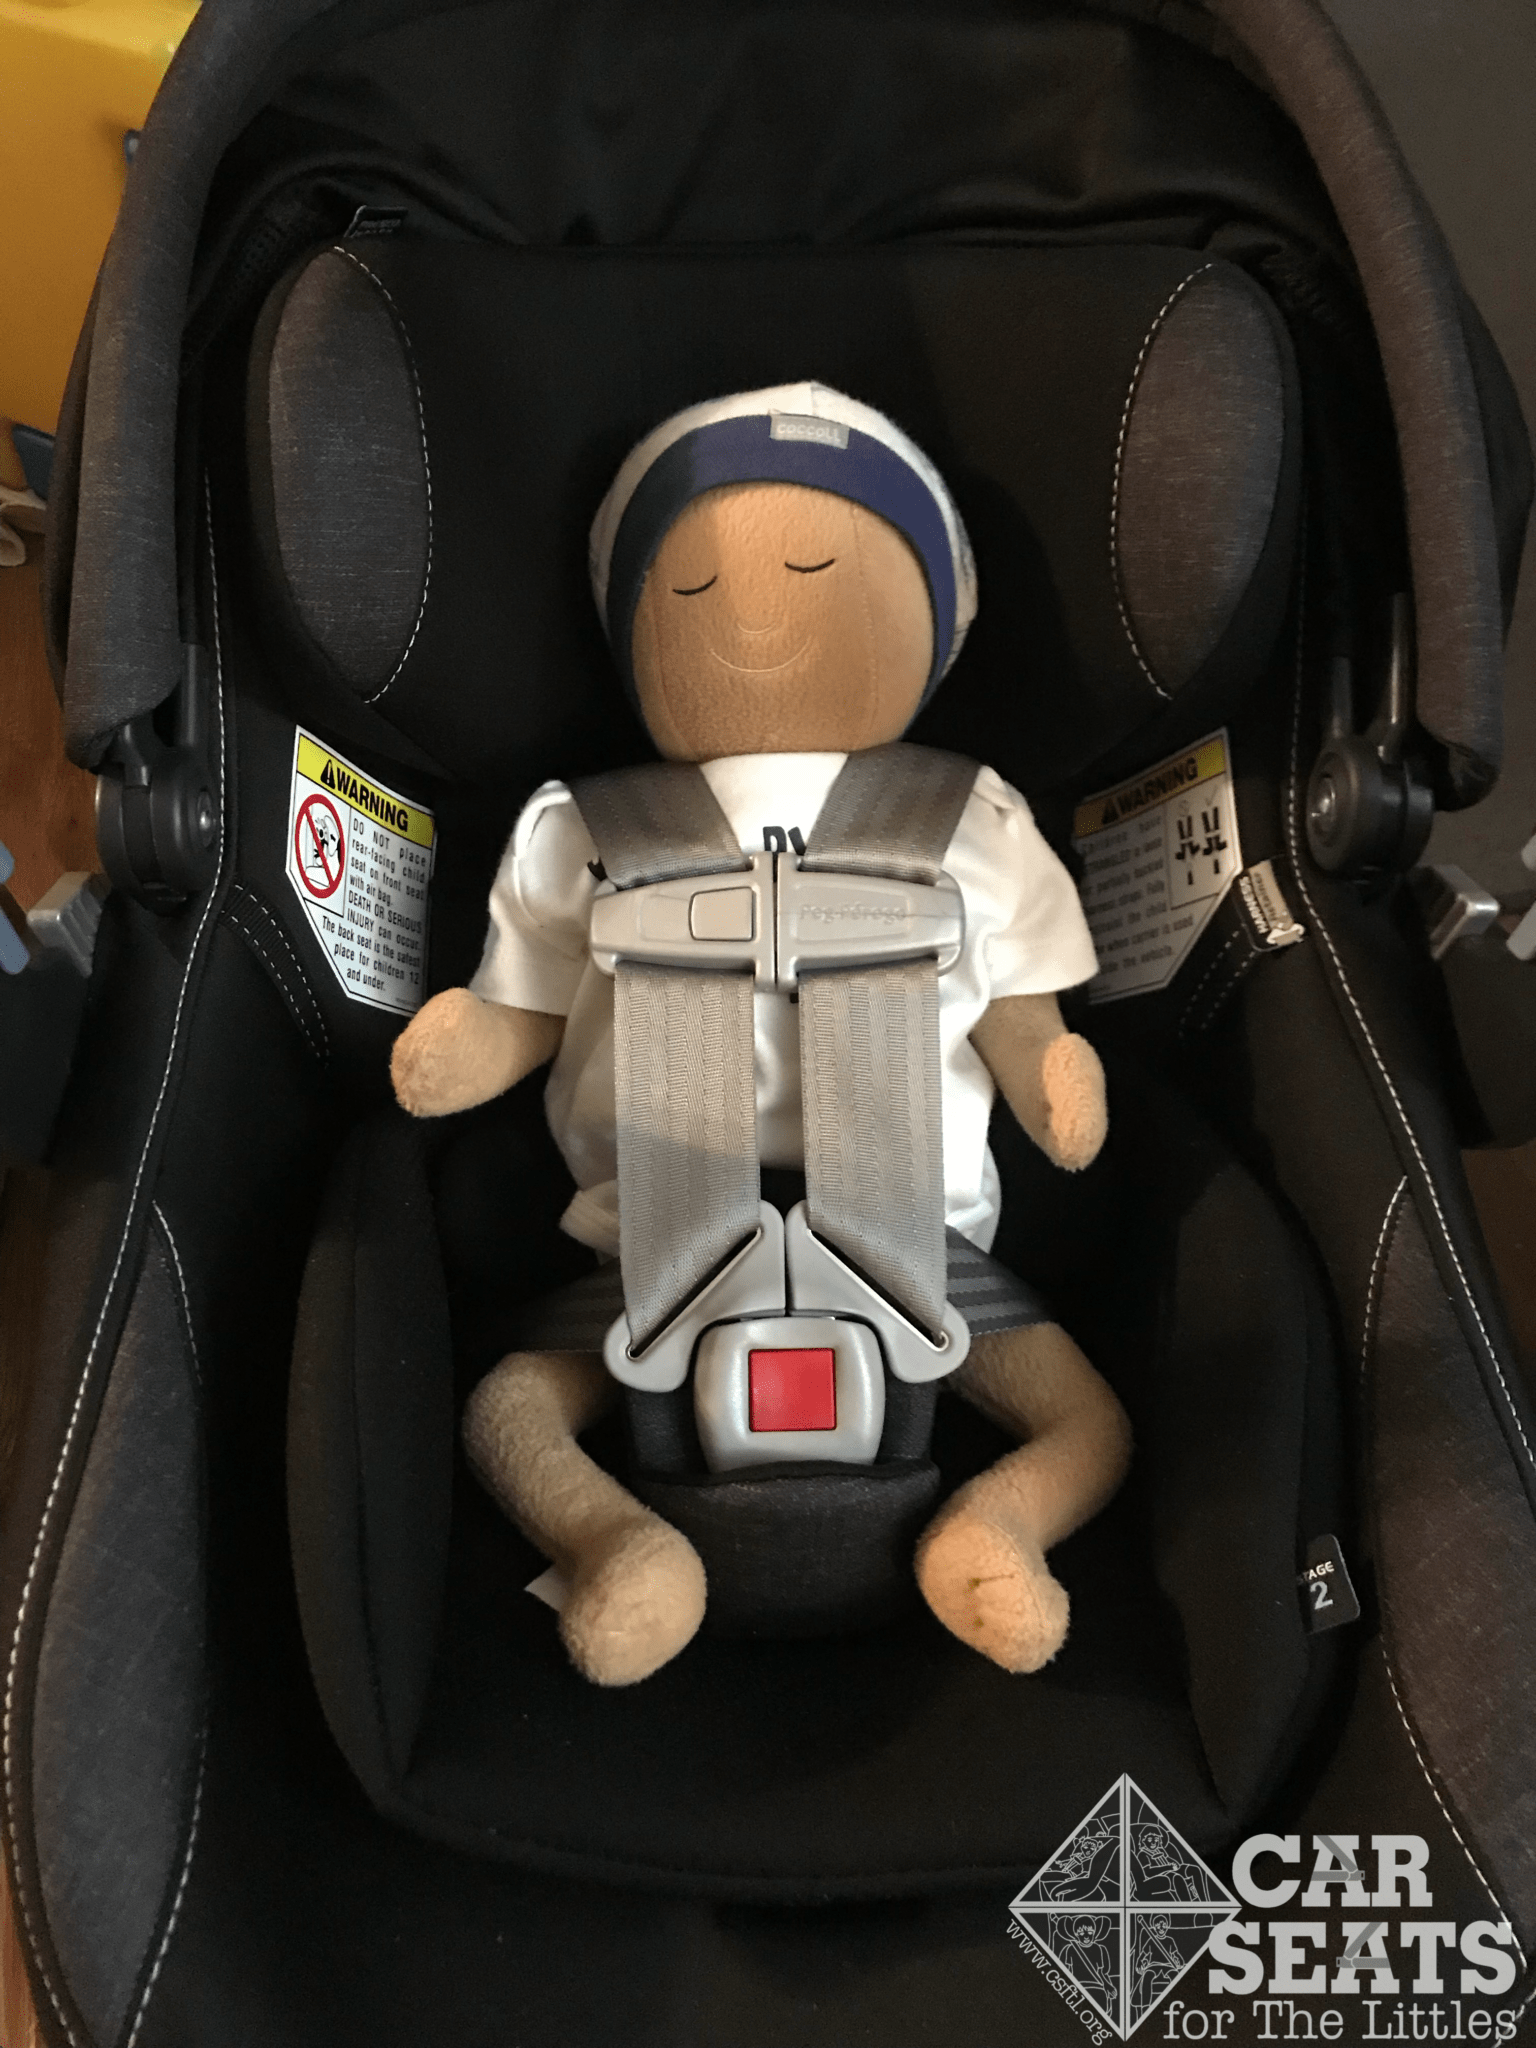
Peg Perego Primo Viaggio 4-35 Nido preemie fit
Peg Perego Primo Viaggio 4-35 Nido stage 1 insert
Our preemie doll fits the seat well with the stage 1 insert in. I had some trouble positioning the insert correctly. According to the manual, the flap of the stage 1 insert goes in front of the baby, not below.
Newborn Doll
Peg Perego Primo Viaggio 4-35 Nido newborn fit
I had trouble getting a fit I was comfortable with on our newborn doll. With the stage 1 insert, the crotch buckle was below the knees. This may be uncomfortable for the baby, and more important, it may be dangerous as the baby may be able to pull his or her knee up through the strap.Without the stage 1 insert, we had head slump because of the large gap at the crotch buckle (even on our neckless doll).
10 Week Old Infant #1

Peg Perego Primo Viaggio 4-35 Nido infant fit
This little princess is 10 weeks old. She’s 24 inches and almost 13 pounds. She fits beautifully with the stage 2 insert in.
10 Week Old Infant #2

Peg Perego Primo Viaggo 4-35 Nido infant fit
The next model is my son at 10 weeks old. He weighed approximately 13 pounds and was 22 inches long. He has a long torso and unlike our model above, he did not have much head control at 10 weeks. I had a lot of trouble getting a fit I was comfortable with on him. Without the stage 1 insert, he had too much head slump. His chin was on his chest, and the positioning of the headrest caused his head to be tilted down. When I added the stage 1 insert back in, the sides of the crotch buckle were under his knees.
4 Month Old
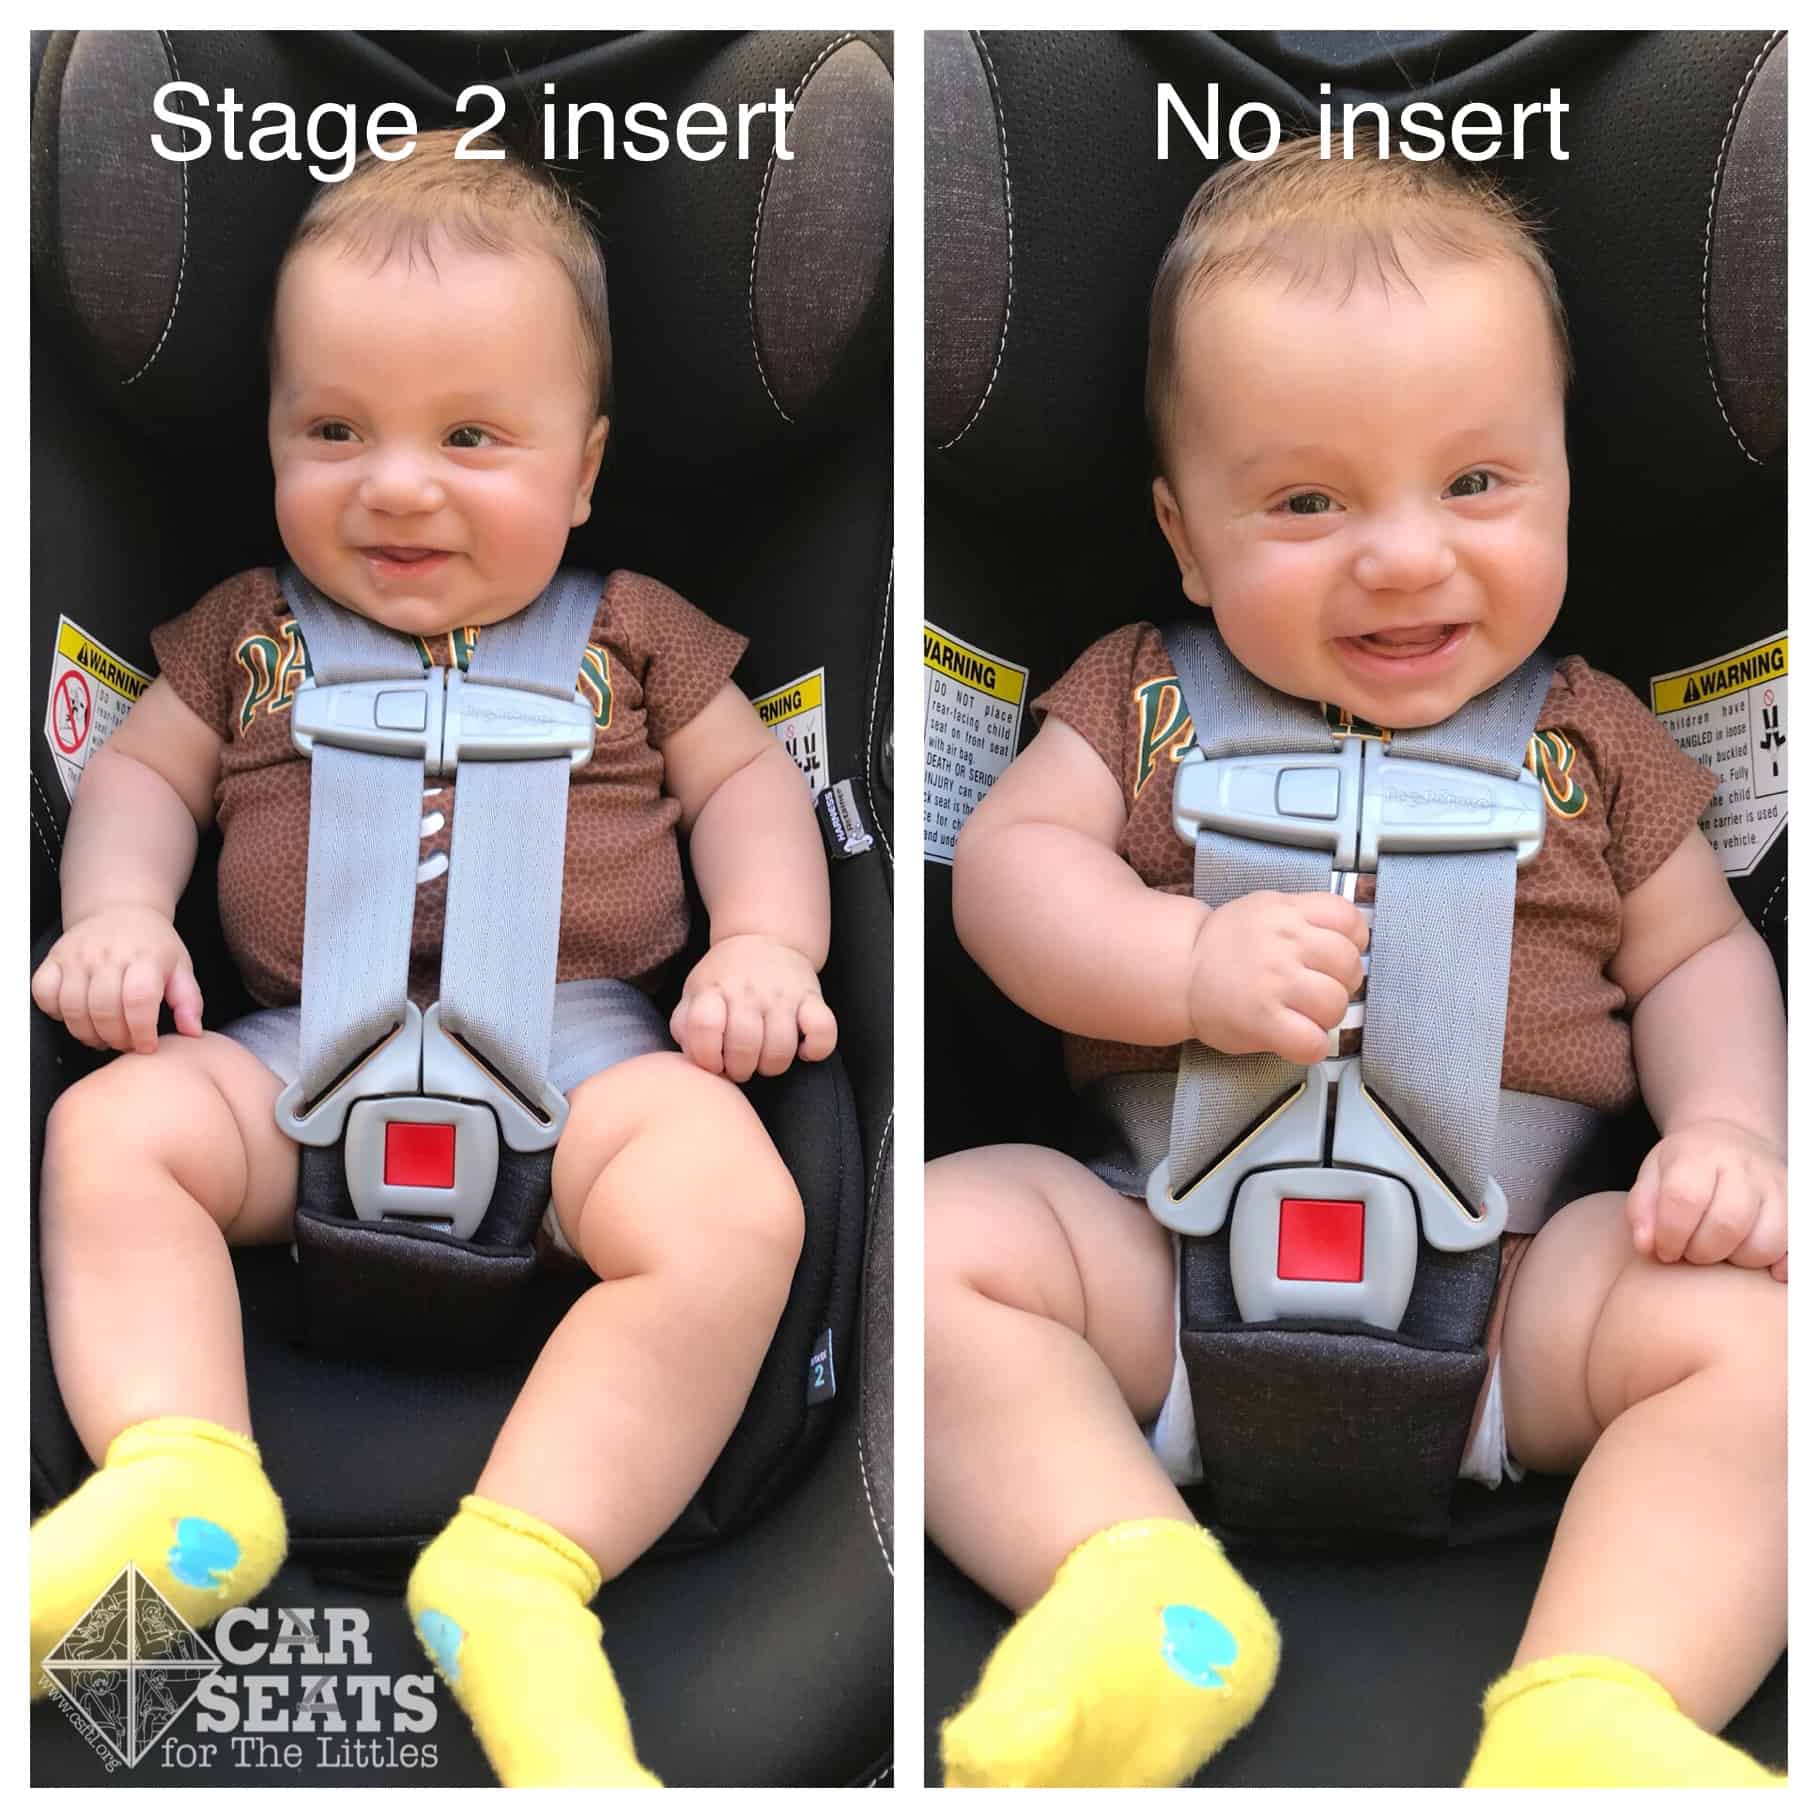
Peg Perego Primo Viaggio 4-35 Nido 4 month fit
This little guy is 4 months old, weighs about 16 pounds, and is 25 inches long. We tried him with and without the stage 2 insert. With the insert, the sides of the buckle dug into his thighs. Without the insert, his chin was pressed toward his chest, and he was unable to lean his head back and straighten out.
7 Month Old

Peg Perego Primo Viaggio 4-35 Nido 7 month fit
Here is my son again at 7 months old. He weighs about 18 pounds and is 29 inches tall. He’s just started sitting up, but he doesn’t have firm torso control yet. He has outgrown the stage 2 insert; the sides of the buckle dug far into his thighs. His head is still a bit slumped without any of the inserts in place.
9 Month Old

Peg Perego Primo Viaggio 4-35 Nido 9 month fit
This young man is 9 months old, 21 pounds and 29 inches. He fits well in the seat without either insert.
Toddler Doll
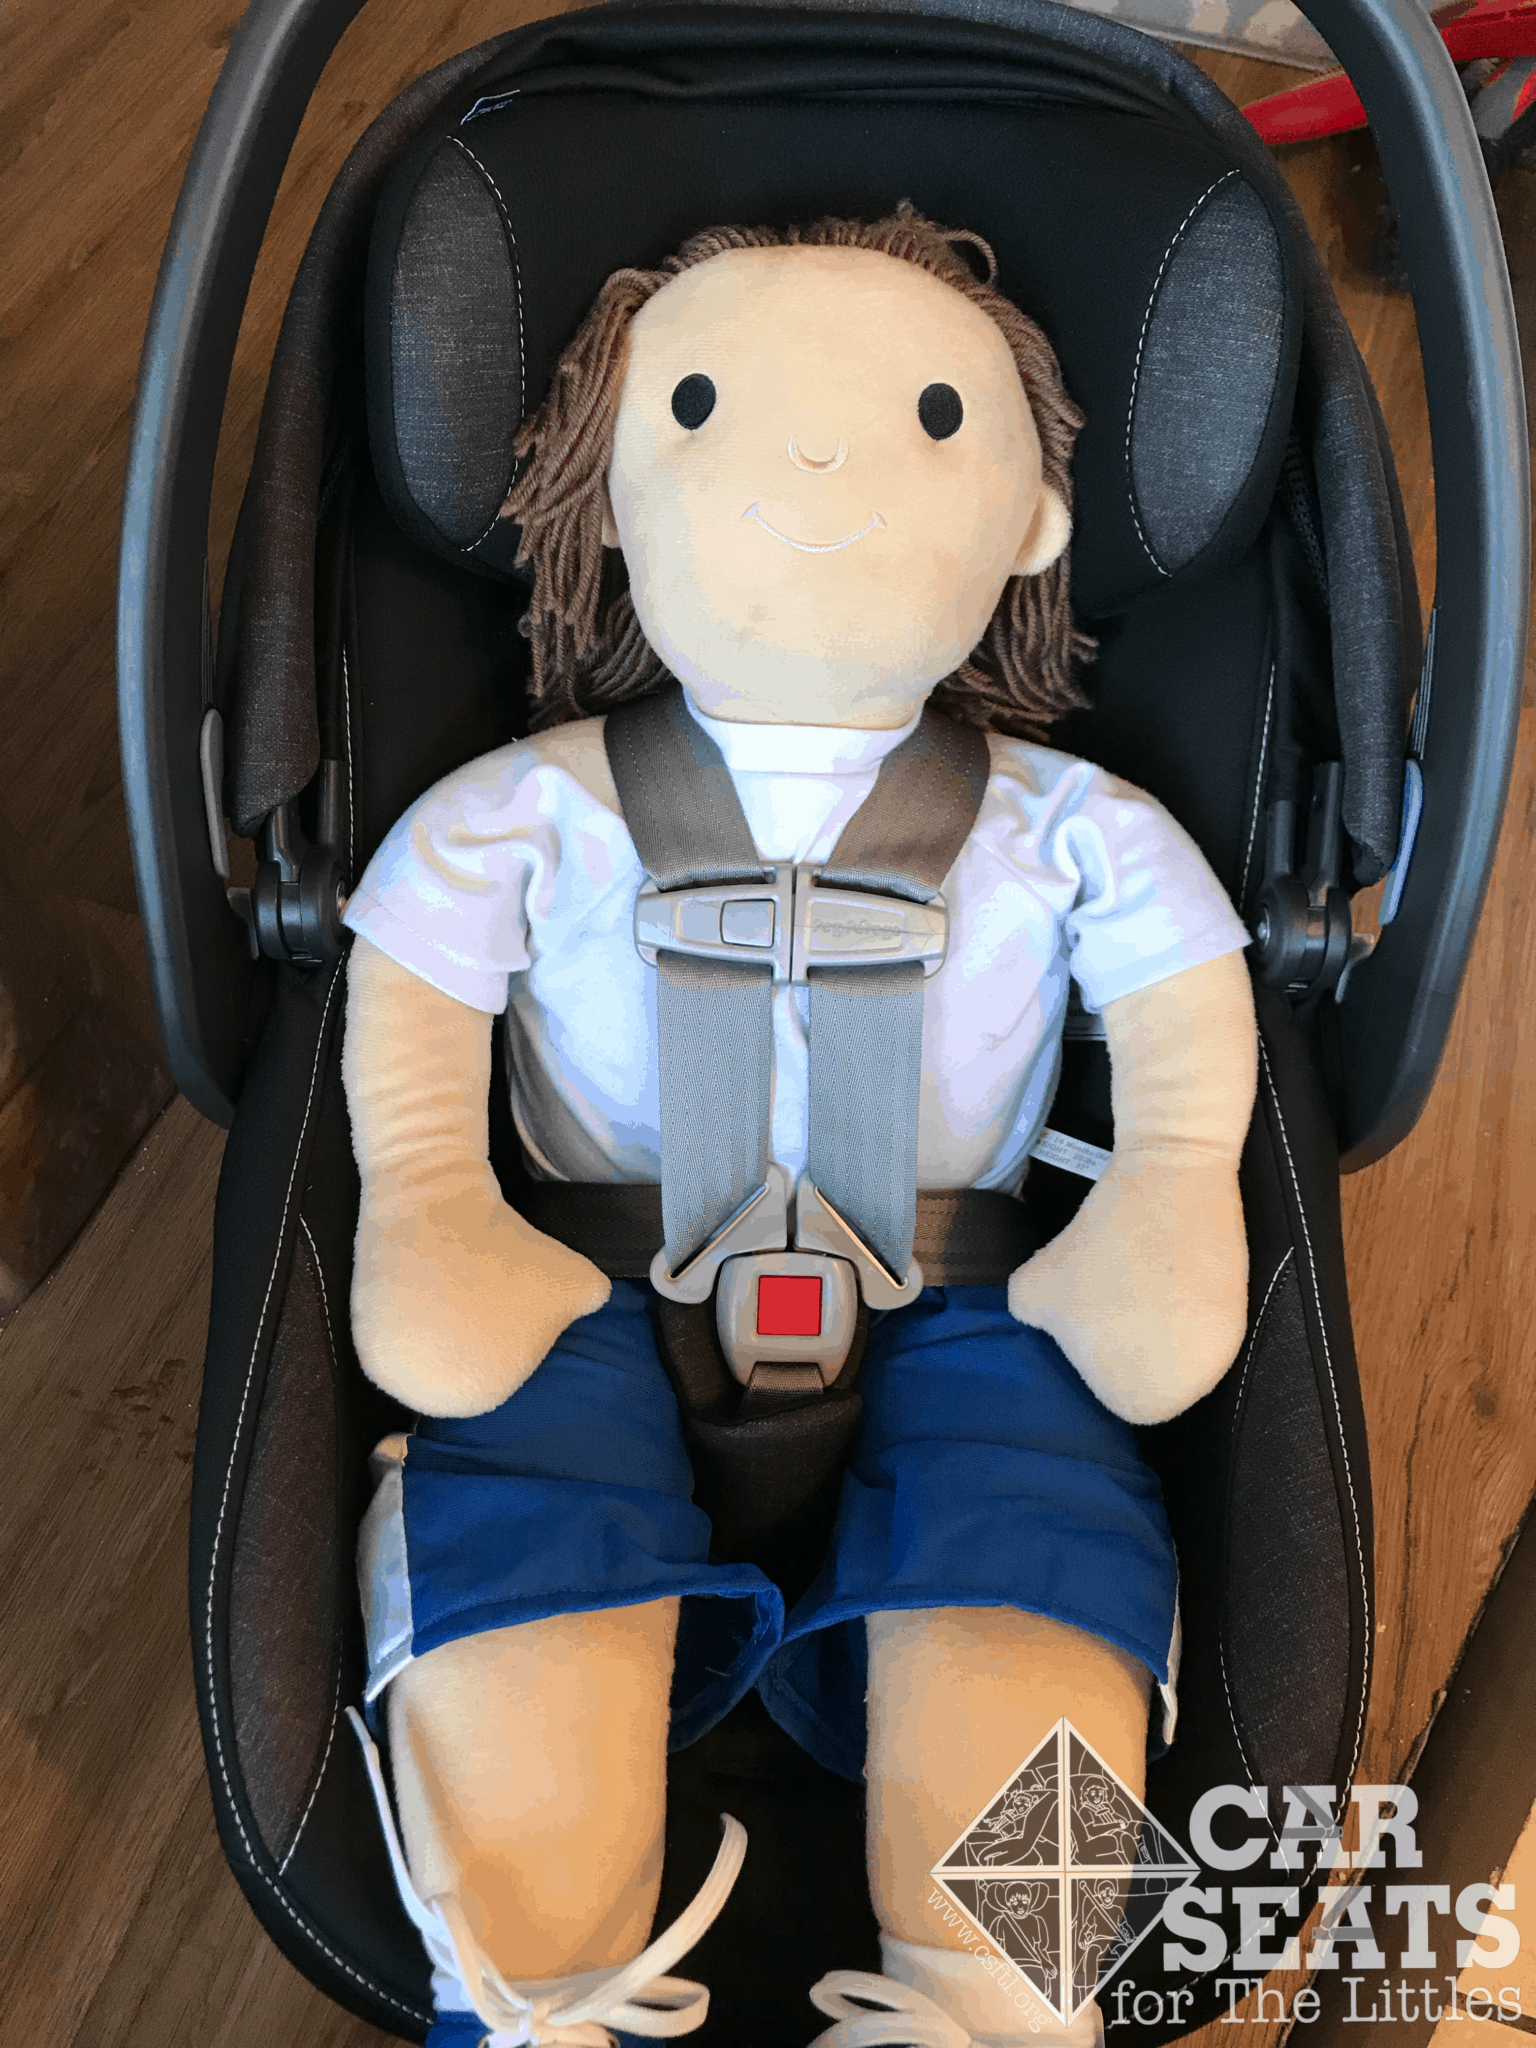
Peg Perego Primo Viaggio 4-35 Nido toddler fit
Our toddler doll has an excellent fit with room to spare! This indicates that this seat may be usable past the first birthday, of course depending on the size of the baby.
Important Information: Where to Find
FAA Approval
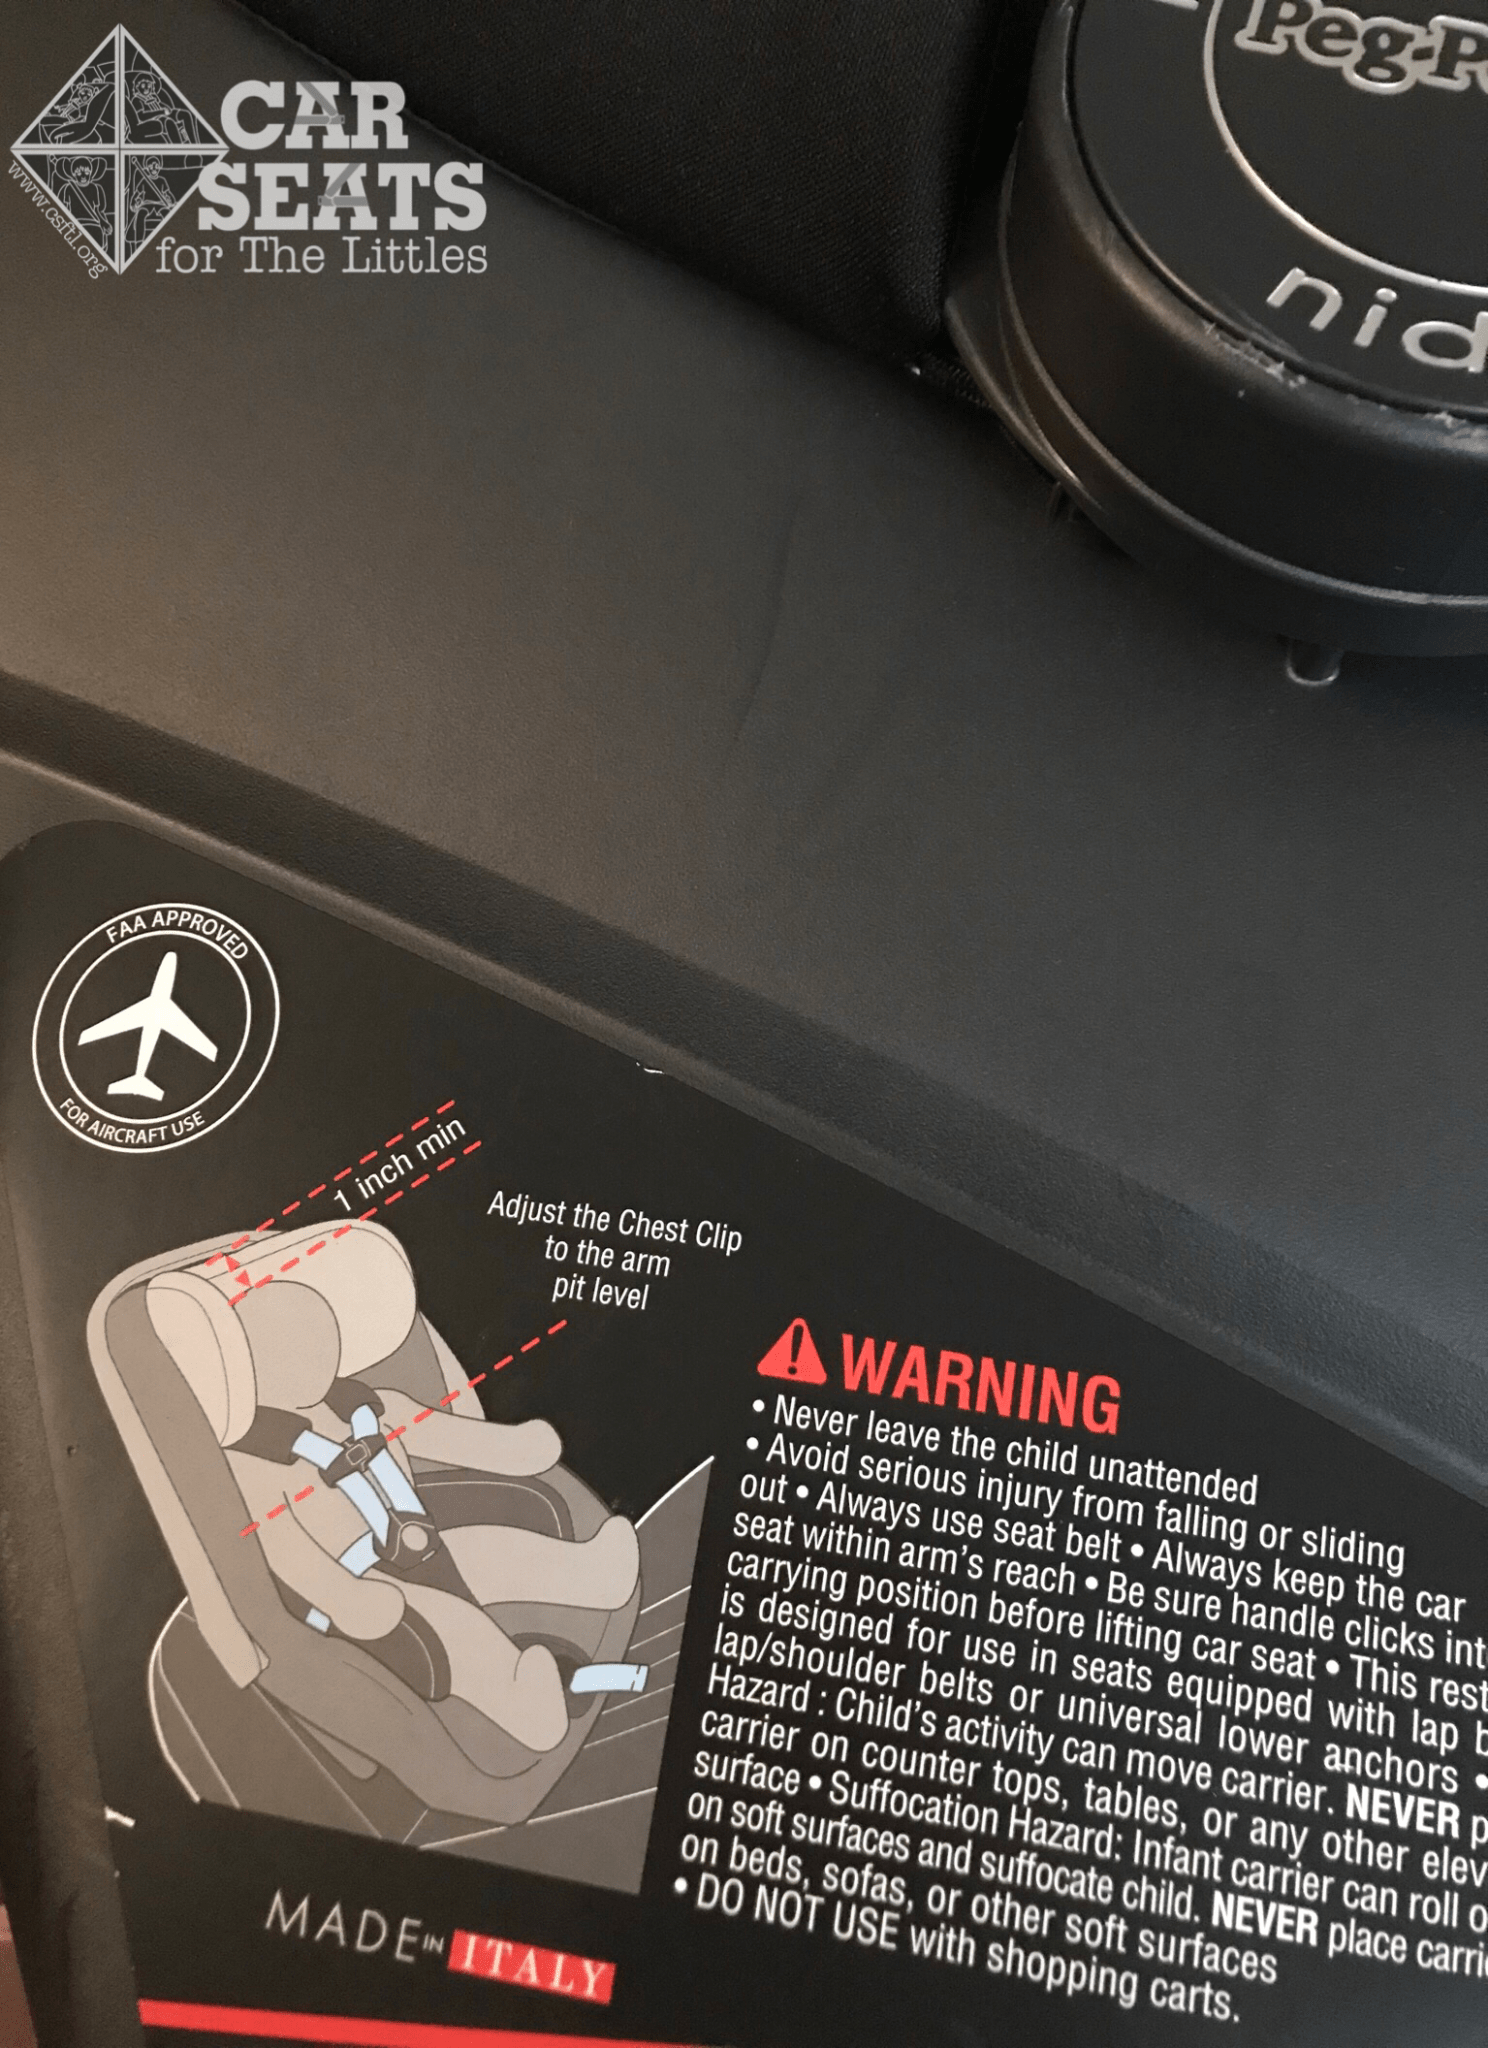
Peg Perego Primo Viaggio 4-35 Nido FAA approval
The FAA approval is marked clearly on the side of the seat. The base cannot be used on an airplane.
Manual Storage
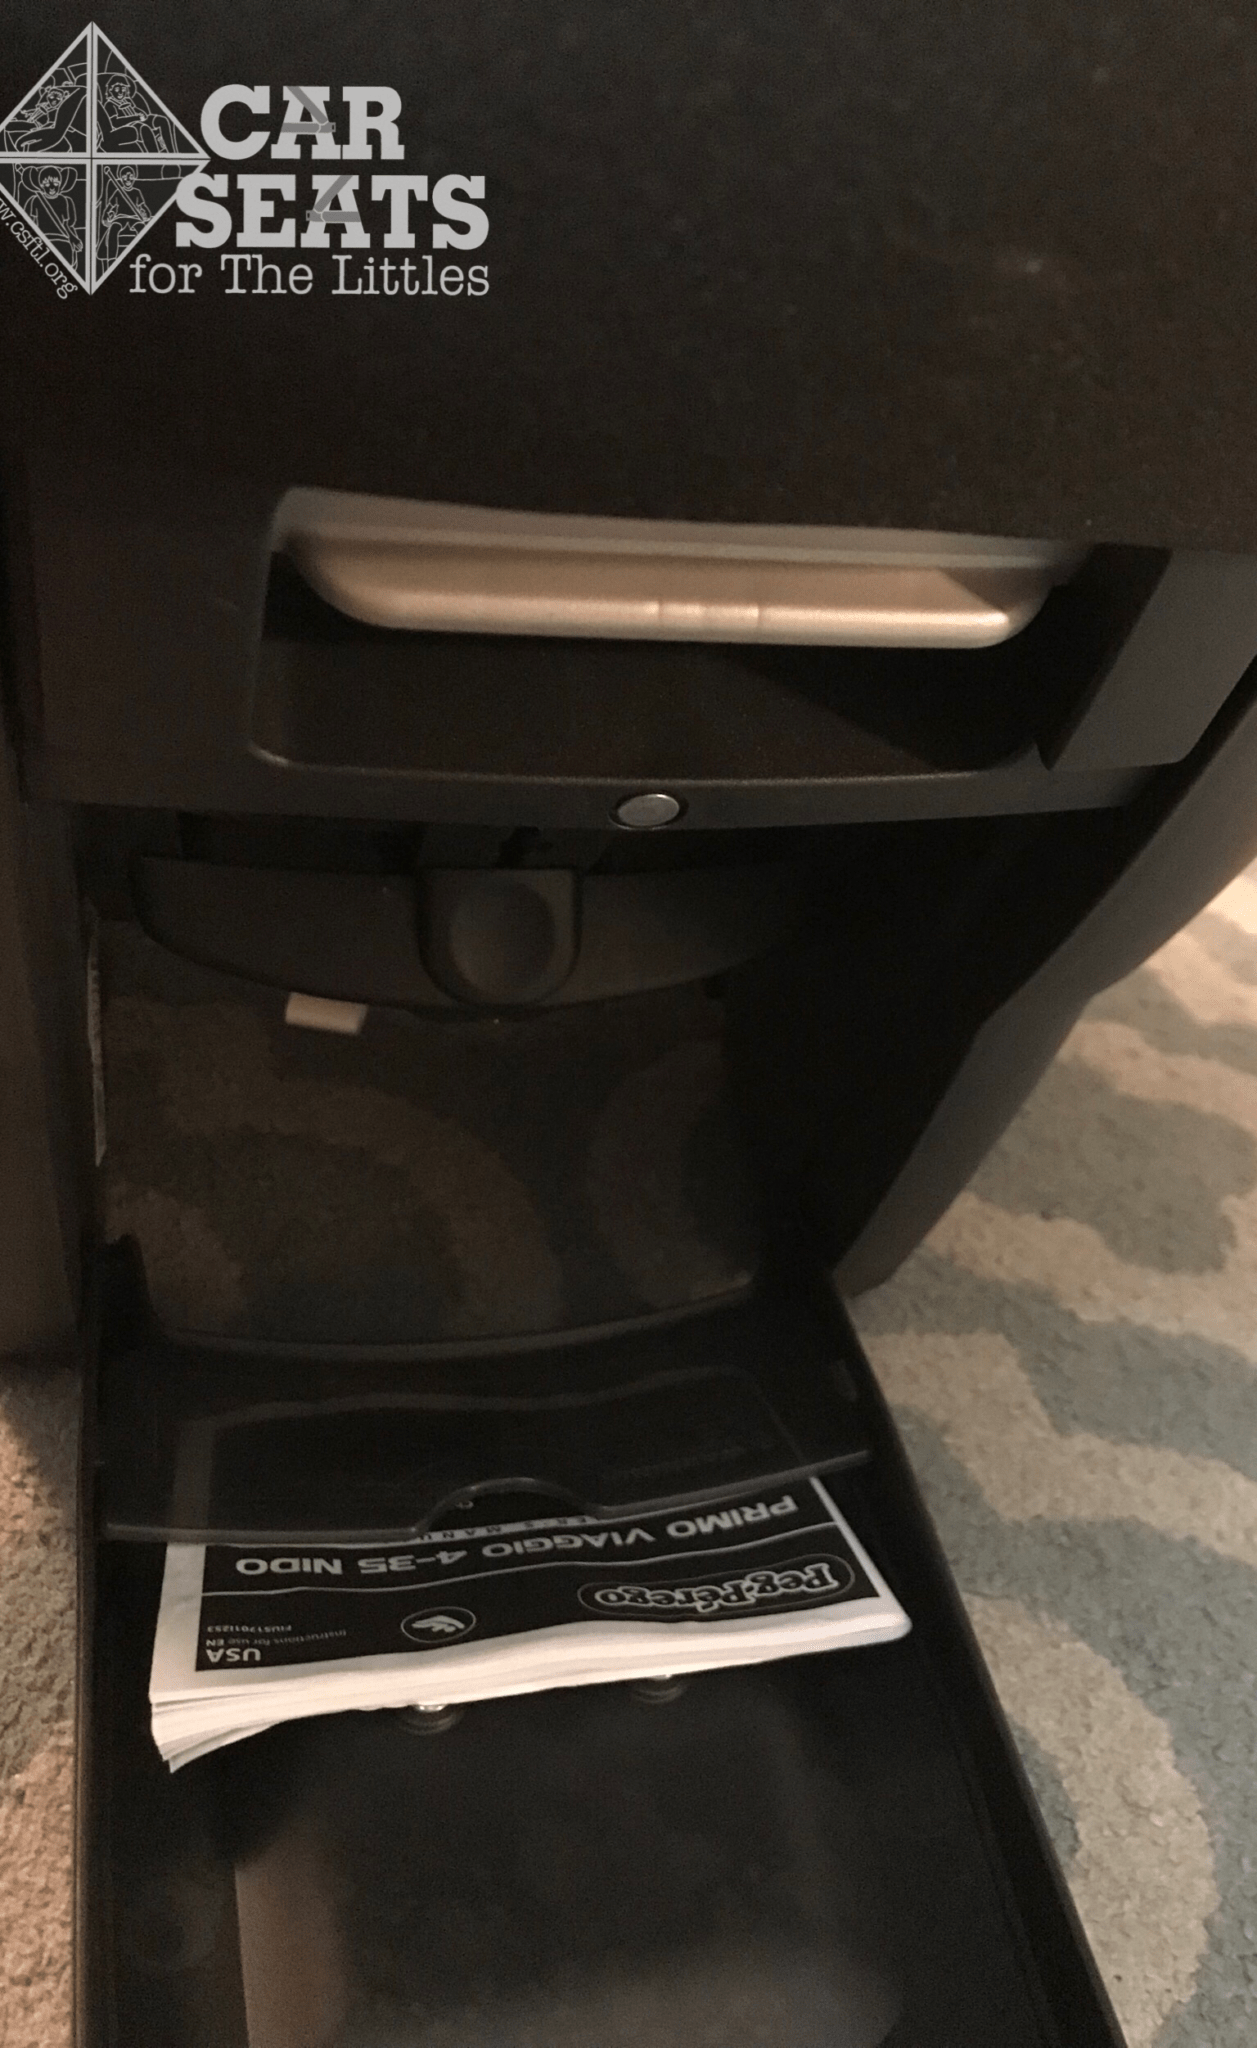
Peg Perego Primo Viaggio 4-35 manual storage
The manual can be stored in the compartment that comes down from the back of the carrier. This is a convenient location as the manual can be accessed while the seat is in the vehicle.
Expiration

Peg Perego Primo Viaggio 4-35 Nido expiration
Both the base and the carrier feature stickers with the date of manufacture. As the stickers indicate, the seat and base expire 7 years after the date of manufacture.
Final Thoughts
The Nido is a stylish addition to the Peg Perego line of seats. Unfortunately, its benefits seem to be outweighed by its drawbacks in many situations. In most cars, a pool noodle (or more) will be required to achieve the correct recline angle, which makes installation difficult. Also, especially with larger babies or babies with long torsos, there may be head slump in the time period between when the stage 1 insert is outgrown and when the baby has head and torso control. While we appreciate the additional safety features of a load leg base with anti-rebound bar, the two drawbacks listed above make it difficult for us to recommend this seat.