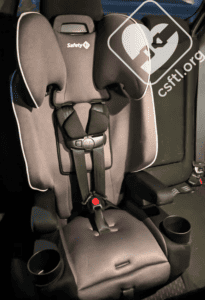
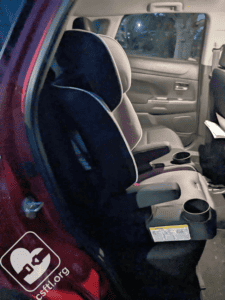
Our friends at Safety 1st have been really busy, adding a bunch of new car seats to store shelves recently. We’re doing our level best to keep up and make sure we know these new additions well enough to speak to caregivers about them. The Comfort Ride combination car seat is a lightweight, easy-to-use, VERY reasonably priced addition that we have quickly become fond of. Join us for a closer look.
CSFTL Quick Stats
- Forward facing harness mode weight range: 30 – 65 pounds
- Forward facing harness mode height range: 34 – 49 inches and the tops of the child’s ears MUST be below the top of the car seat’s headrest
- Forward facing lower anchor weight limit: 55 pounds
- High back booster mode weight range: 40-100 pounds
- Backless booster mode weight range: 40–100 pounds
- Booster mode height range: 43-57 inches tall
- Expiration: 10 years
- 2 crotch buckle positions, 5 and 6.5 inches from the back of the seat pan
Measurements
- Seat weight, harness mode: 11 pounds
- Seat weight, high back booster mode:
- Seat weight, backless booster mode:
- Lowest harness position: 11 inches
- Highest harness position: 16 inches
- Highest shoulder belt guide position: 19 inches
- Width at widest point: 18 inches at the cupholders
- Seat pan depth: 13 inches
Features
- The seat grows with your child and easily converts from one mode to the next. Kids will love the dual cup holders and parents will love the 7-position headrest, narrow seat design, and lightweight portability.
Crotch Buckle Position Rules
The seat has two positions for the crotch buckle with some pretty straightforward rules: use the position that’s closest to the child. The buckle should not be underneath the child.
Assembly
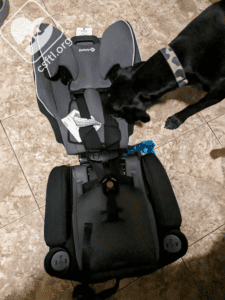
The seat ships in two pieces, with the harness connecting them both. Align the hooks on the bottom of the high back portion of the seat with the holes in the backless portion of the seat, then move the backed portion upright until it clicks into place. I did note that the fabric on the backless portion was desperate to be a nuisance during this process, the solution seemed to be to make sure it was moved out of the way before moving the back into the upright and locked position.
Once assembled, it didn’t actually want to stay assembled unless the hooks on the end of the backed portion of the seat were perfectly aligned with the holes in the backless booster portion of the seat. Though I did learn this the hard way when the seat fell apart, it was easily remedied and hasn’t happened since.
Installation
Lower Anchors
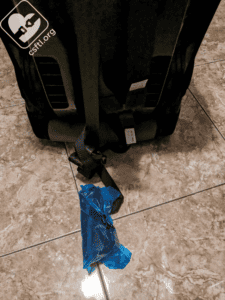
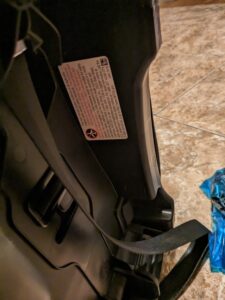
There’s a teeny bit of setup required to use the seat with lower anchors. The anchor connectors themselves ship in a little blue bag. You have to remove them from that bag and thread them through the belt path.
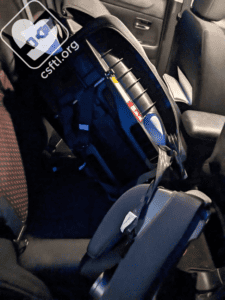
I found installing the seat with lower anchors pretty straightforward. Remove the lower anchor connectors from the plastic pouch that they ship in, thread them through the forward facing belt path on the seat, then attach them to the lower anchors in the vehicle. Remove part of the cover to expose the belt path, then pull straight up while pushing down on the seat to remove slack.
Vehicle Seat Belt
Like many lightweight car seats, installing with the vehicle seat belt is also pretty straightforward. Thread the vehicle seat belt through the belt path, then remove the slack from the shoulder portion of the seat belt. Pull the seat belt all the way out until it clicks, then feed the belt back into the vehicle’s retractor.
Fit to Child
Three Year Old Doll
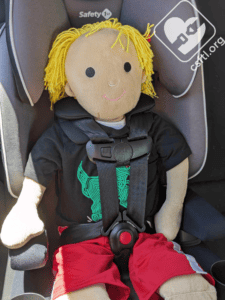
Our 3 year old Huggable Images doll is 38 inches tall. The seat fits the doll well and if our doll was actually able to grow (first, that would be weird) the seat would last for quite a while yet.
Six Year Old Doll
At 48 inches tall, our 6 year old doll is at the high end of the stated harness height and our doll didn’t really fit. Once again, our six year old doll comes through. Unfortunately, the seat didn’t because our doll is a bit too tall for the harness. If I squashed the doll down, the shoulders were right at the highest harness position but since that’s not a thing you can do with actual children, we’re going to say that our doll didn’t fit. As always, please check the fit for your child in every seat before heading out for a ride.
Converting to Booster Mode
The hardest part about converting this seat to high back booster mode is making sure that you don’t lose the chest clip and buckle tongues. Because, trust me, it is very easy to do this!
Loosen the harness, then undo the buckle and chest clip. Remove the harness from the splitter plate on the back of the seat, pull the ends of the harness towards you and away from the seat. Once the entire harness is removed, store it in a location that’s easy to remember. We suggest putting the harness into a plastic bag and labelling it in a way that makes sense to the you of the future so you know which car seat it belongs to.
Note for when you put it back together: the buckle tongues only work on one side. If you put them on the wrong side of the harness, they won’t click into the buckle. I suggest testing to make sure you’ve got the right buckle tongue on the correct side before attaching them to the harness.
High Back Booster Mode
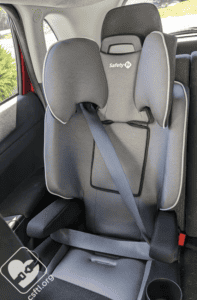
With the harness removed, the seat is now in high back booster mode and ready for a passenger.
Fit to Child
Six Year Old Doll
In high back booster mode, the doll is at the top end of the height range for this seat but still fits well. The shoulder belt lies flat across the doll’s neck and the lap portion of the seat belt is across the tops of the doll’s thighs.
Converting to Backless Booster Mode
This was also quite straightforward — tilt the high back portion of the booster seat back, then remove it from the backless portion of the booster seat.
Backless Booster Mode Lap Belt Routing
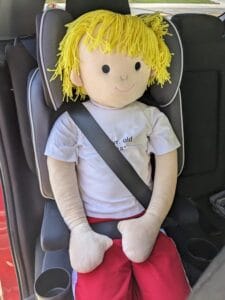
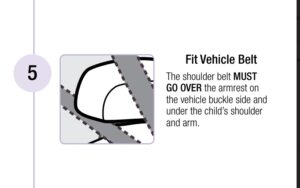
Backless booster mode has a different routing than high back booster mode. This is so unusual that I missed it at first! The shoulder belt must go OVER the armrest instead of under it.
Fit to Child
Six Year Old Doll
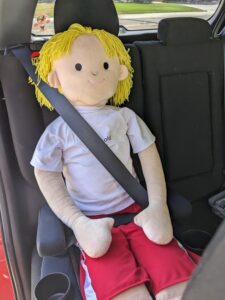
Safety 1st Comfort Ride 6 year old doll backless booster mode, incorrect belt routing, see manual for instructions
Note: the belt routing here isn’t correct. The shoulder belt should be over the armrest, not under.
Our doll makes a final appearance to model the seat in backless mode. The booster boosted the child into the correct position, the vehicle seat belt was flat across the tops of the child’s thighs and lay across the middle of the child’s shoulder. However, the shoulder portion of the seat belt is a little high on the child’s neck. This pretend kiddo would probably get a better fit if the seat included a shoulder belt guide adjuster, which it, unfortunately, does not.
Important Information: Where to Find
FAA Approval label: the seat is approved for use on aircraft in harnessed mode. Like all booster seats, it’s not approved for use on aircraft in booster mode since booster seats require a lap and shoulder belt and most airplane seats have only a lap belt.
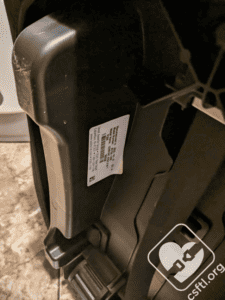
Date of manufacture label: the seat has a 10 year expiration period. The date of manufacture label is on the bottom of the backless portion of the seat.
Manual storage: the manual stores under the top part of the cover in the backless booster portion of the seat.
Overall Thoughts
In a world that’s increasingly full of complicated car seats, the Comfort Ride is a refreshing change. It’s simple, it’s lightweight, it installs without much fuss, and will last quite a while for most children. It’s so lightweight, it could be a fantastic option for travel!
