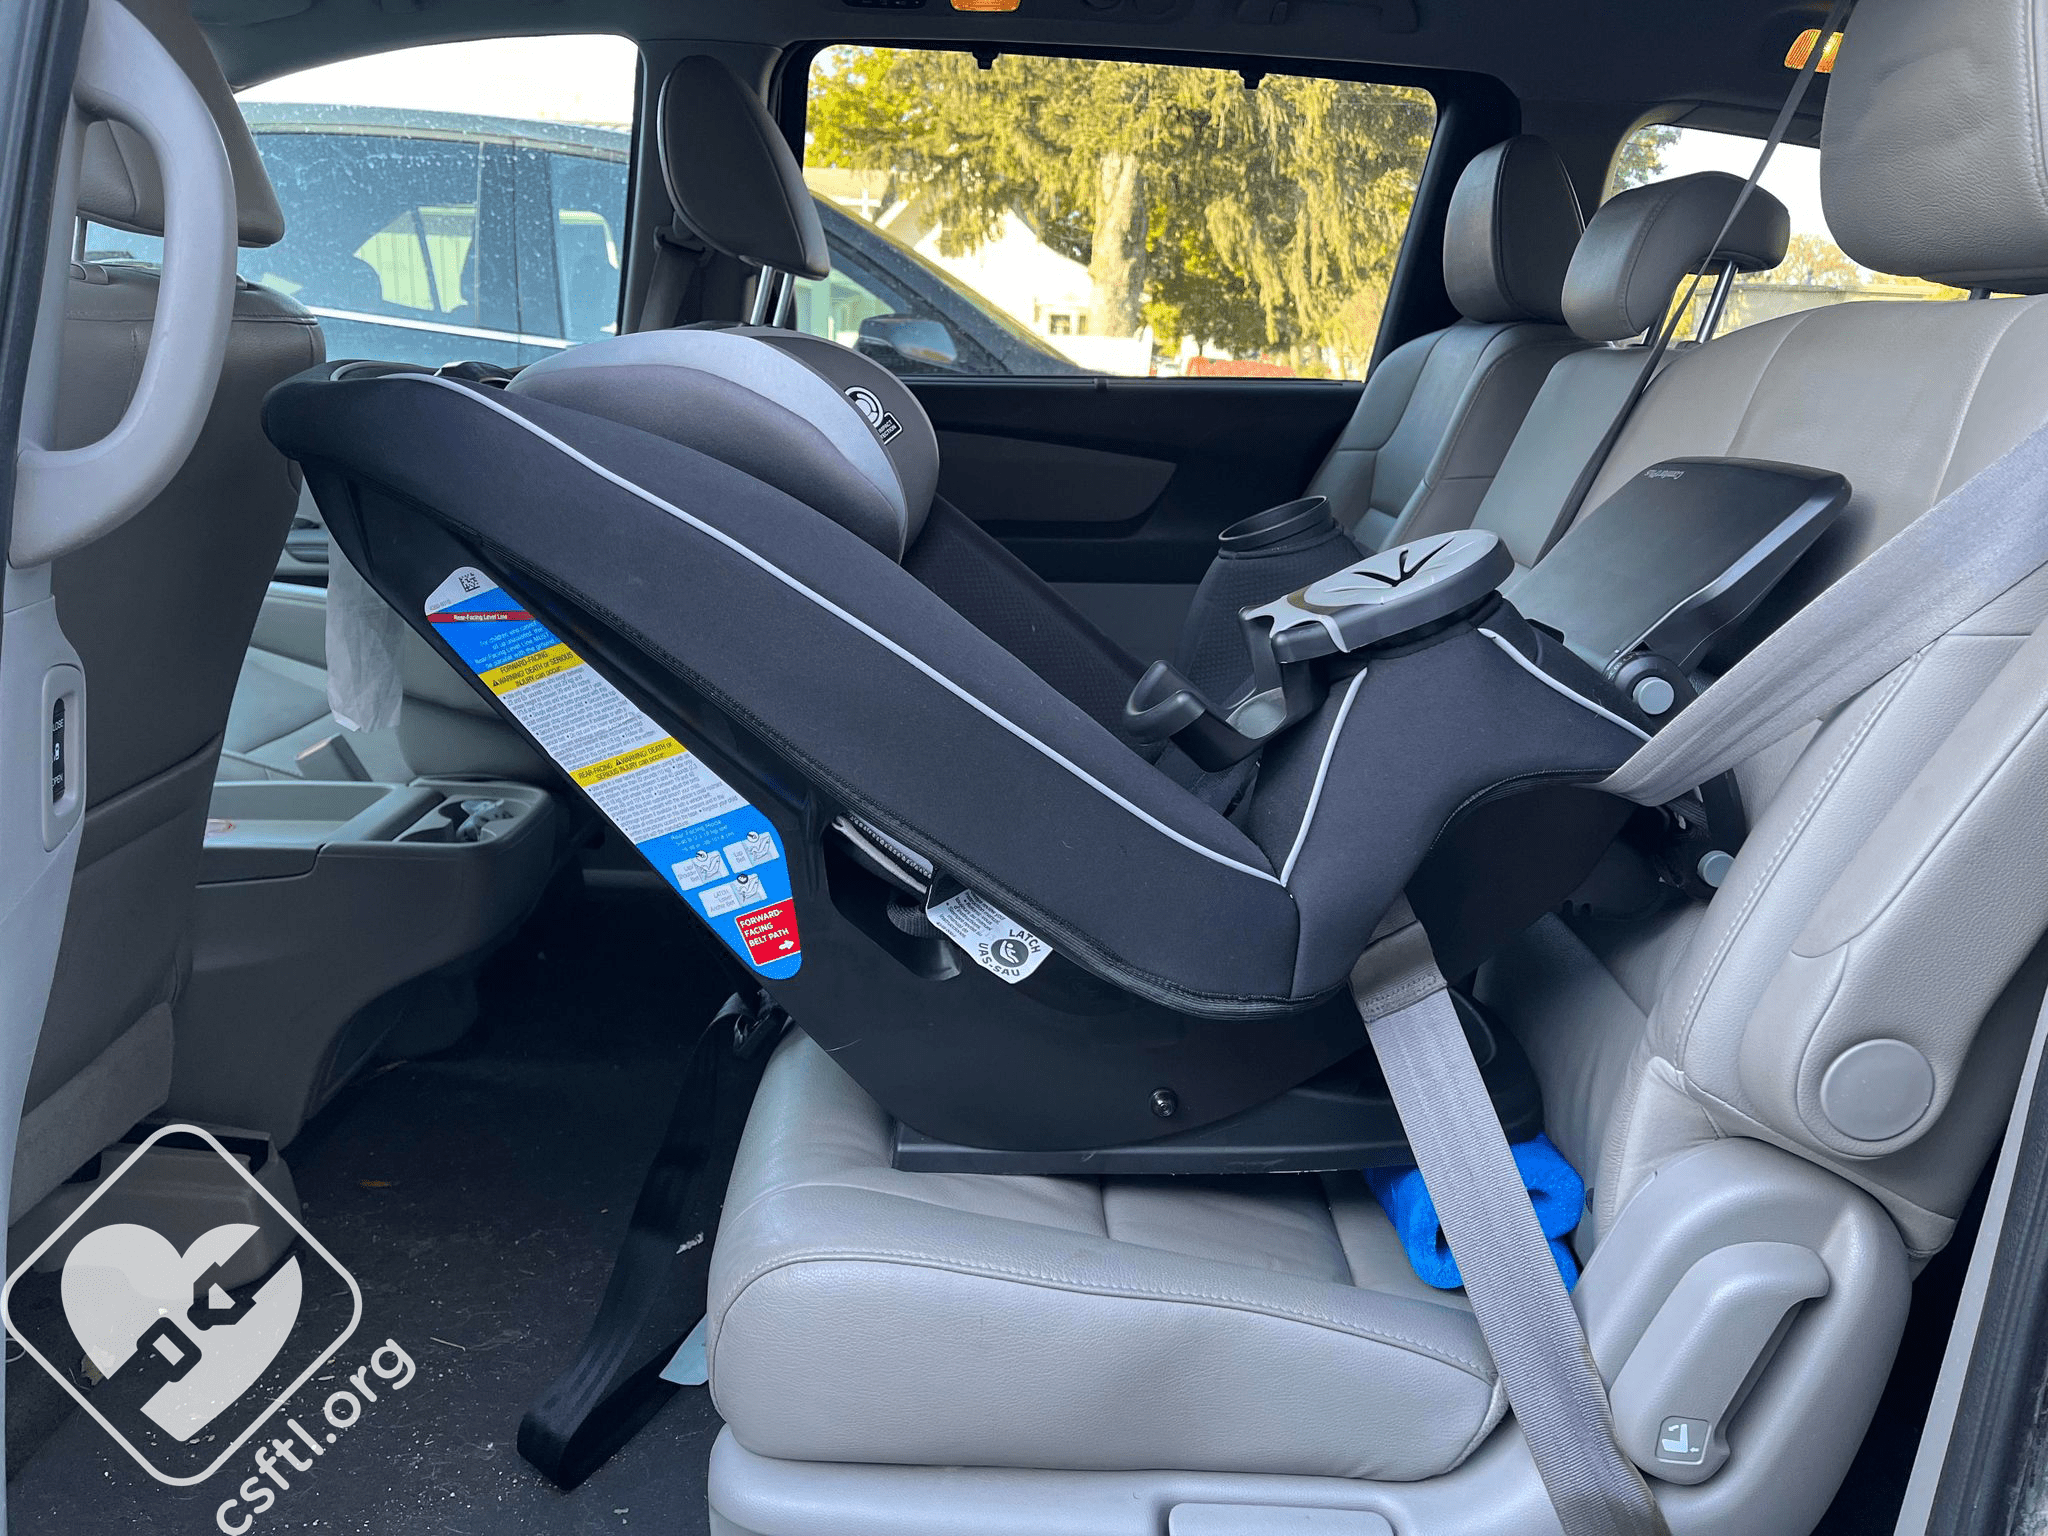
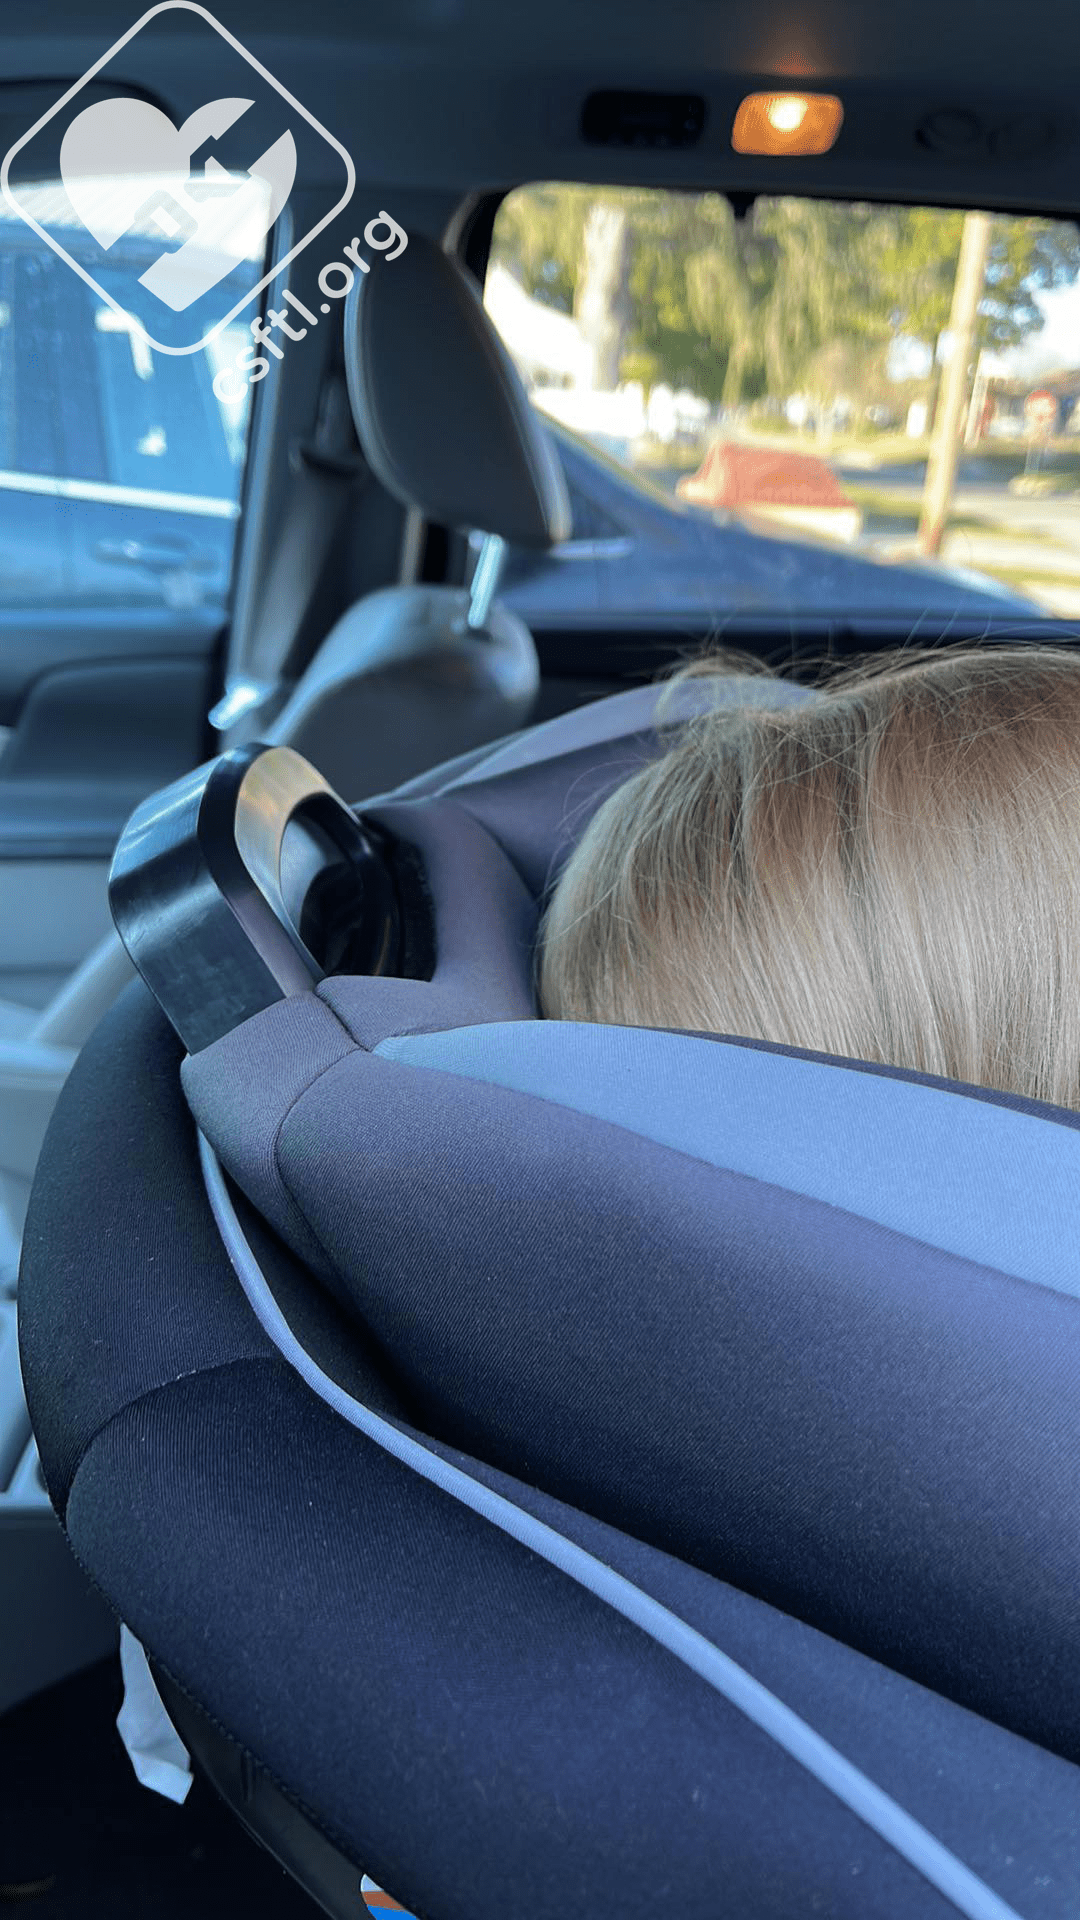
Safety 1st Grow and Go Extend ‘n Ride LX installed rear racing with seat belt
The Grow and Go family of multimode car seats has grown again. Safety 1st has listened to caregivers who are looking for extra leg room for their kiddos and created the Grow and Go Extend ‘n Ride LX, which includes a leg extension panel. That same panel becomes a footrest for forward facing children, which is something we often see caregivers ask for to keep their child’s legs from dangling in a forward facing car seat. Now that we know what makes this seat unique, let’s take a closer look.
CSFTL Quick Stats
- Rear facing weight range: 5-40 pounds
- Rear facing height range: 19-40 inches tall
- Forward facing weight range: 22-65 pounds
- Forward facing height range: 29-49 inches tall
- High back booster weight range: 40-100 pounds
- High back booster height range: 43-52 inches tall
- Top tether anchor: required for forward facing mode
- Standard, j-hook lower anchor connectors
Measurements
- Lowest harness position: 5.75 inches with insert. This is a separate harness position. The harness must be threaded separately into this slot when it’s being used.
- Lowest no rethread harness position: 10 inches
- Highest harness position: 16.5 inches
- Highest booster guide position: 18 inches
- Lower anchor weight limit: 40 pounds
- Expiration: 10 years
- Width at widest point (at child’s shoulders and cupholders): 18.5 inches
Unique Features
- Foot panel that can be used in forward facing mode as a footrest. It adds extra legroom when the seat is in rear facing mode.
- No-rethread harness when not using the newborn setting
- The harness easily adjusts by raising and lowering the headrest
Newborn harness routing for smaller children
If the harness cannot be adjusted to be small enough for a tiny passenger, there are harness loops that create a smaller setting. The harness must be manually re-routed to use this setting.
To use this routing, lower the headrest to the lowest setting, loosen the harness all of the way, then flip the seat over and remove the harness from the splitter plate. Pull the harness out from the front of the car seat.
Place the head and body insert into the seat, ensuring the crotch buckle is in the same slot in the shell, seat pad, and body insert. Then, thread the harness into the lowest slots in the body insert, seat pad, and shell of the car seat. Attach the 2nd set of harness loops to the splitter plate.
Note: when using this harness routing, the head and body inserts MUST be used.
When the child is large enough to fit in the regular harness setting, reverse this process to re-thread the harness and move it back into the other slot.
2 Cupholders
The cupholders are required for use, they are removable and can be washed in the dishwasher on the top rack only. To remove them, twist the cup holder counterclockwise and lift it straight up out of the shell of the car seat.
While the cupholders are in the dishwasher (or otherwise not attached to the seat), the seat cannot be used so make sure to plan your trips around clean cupholders!
Snack Tray

Safety 1st Grow and Go Extend ‘n Ride LX snack tray
The snack tray is removable and can be washed on the top rack of the dishwasher. Squeeze the tabs on the underside of the seat and pull the tray up to remove it.
Head and Body Pillows

Safety 1st Grow and Go Extend ‘n Ride LX head and body pillows
The head and body pillows are for use in the rear facing mode only and MUST be used together. They also MUST be used when using the harness routing for smaller children.
Buckle CoverThe buckle cover is optional at all times and can be used in rear and forward facing modes.
Easy Out Harness Covers
The harness covers can be used both in rear and forward facing mode and are optional at all times. If you can not get the chest clip in the proper position when using the harness covers, remove them until the child is larger.
To remove the covers, undo the snaps on the hardest pad and undo the hook and loop closure on the harness pads. Then, slide the harness covers out from behind the head pad.
To reinstall the harness covers, undo the snaps on the headrest pad. Slide the harness covers behind the headrest pad with the back of the covers facing you. Fold the harness covers down towards the harness straps and place the harness straps inside the harness covers. Reattach the hook and loop closure on the harness covers, over the harness straps.
Multiple Crotch Buckle Positions
There are three crotch buckle positions. The crotch buckle should be close to your child, but not under their bottom. The slots can be used as follows:
Rear Facing (with routing for smaller children) – 1 and shortened by routing back through slot 2
Rear Facing (with no re-thread harness) – 1 or 2
Forward Facing – 1, 2 or 3
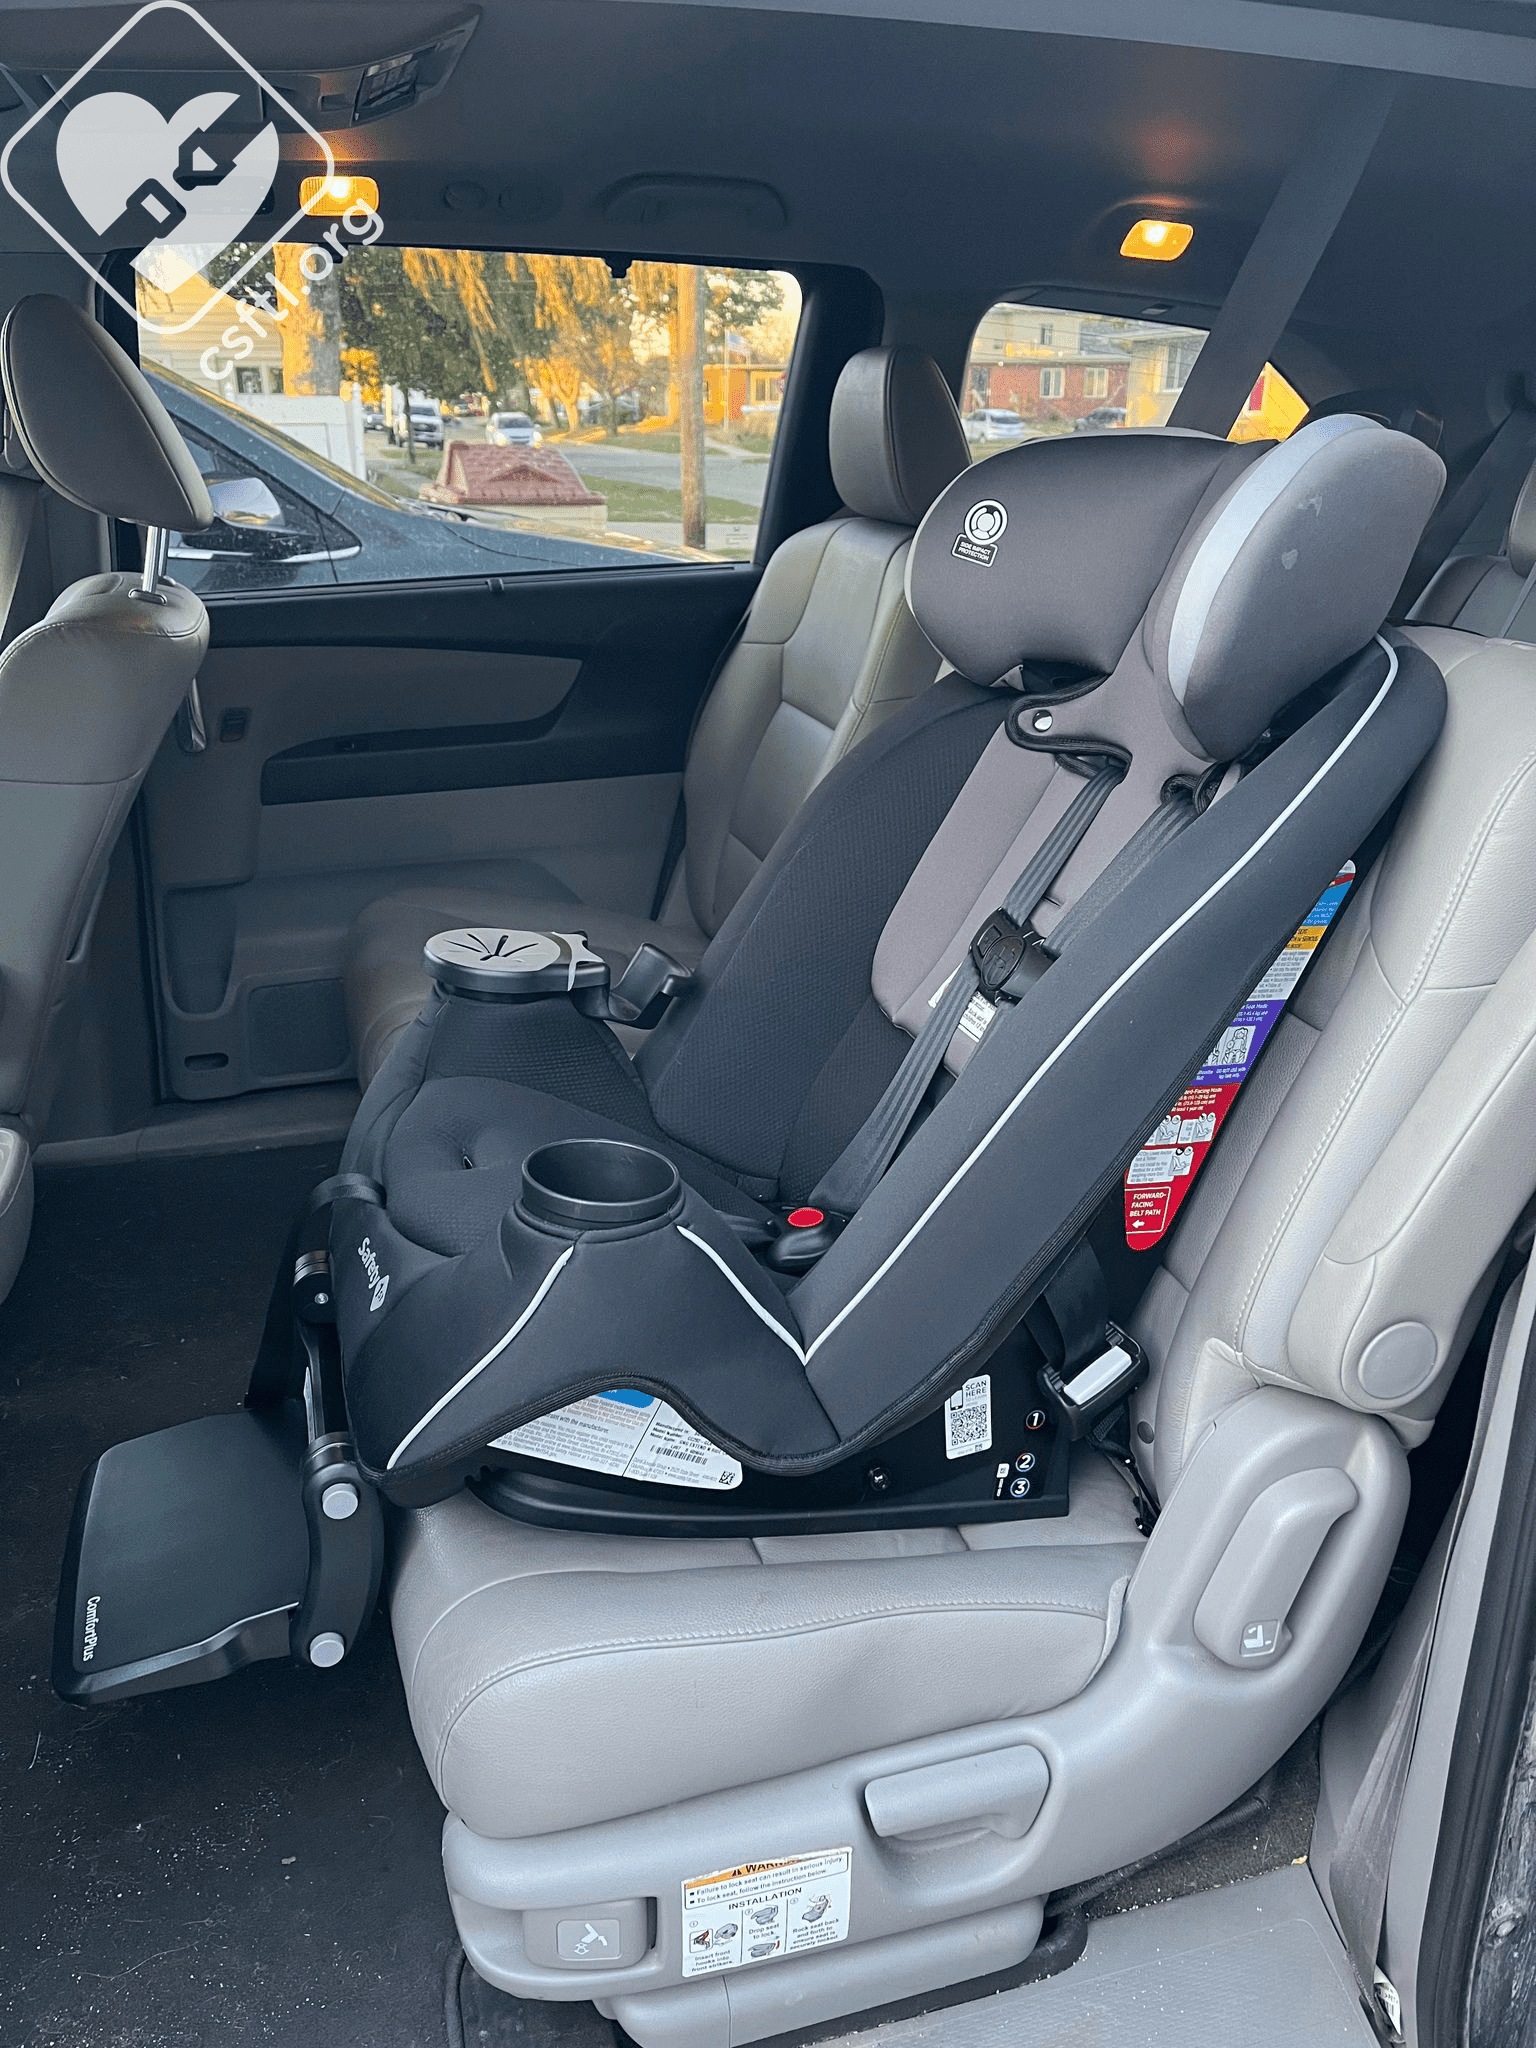
Adjustable Footrest

Safety 1st Grow and Go Extend ‘n Ride LX footrest storage position
The footrest provides extra legroom when the seat is installed rear facing, it becomes a handy footrest when the seat is used in forward facing harnessed mode or as a booster seat. The footrest does have some rules, here’s a quick summary.

Safety 1st Grow and Go Extend ‘n Ride LX footrest rules
The footrest can be used in the following positions:
Rear facing: positions 1A, 1B, 1C

Safety 1st Grow and Go Extend ‘n Ride LX footrest setting indicators
Forward facing: positions 1D, 1E, 2 and 3, the child’s knees can NOT pass the top of the cupholders/snack tray (store the footrest if this happens).
Booster mode: 2 and 3, the child’s knees can NOT pass the top of the cupholders/snack tray (store the footrest if this happens)
Rear Facing
Installation: Lower Anchors
To install the Extend and Ride, rotate the footrest up and out of the way. Place the car seat on the vehicle seat with the harness facing the back of the vehicle.
Recline Position Rules:

Safety 1st Grow and Go Extend ‘n Ride LX recline positions
Use recline position 3 if the child can NOT sit unassisted or recline position 2 or 3 if the child CAN sit unassisted.
Then, route the lower anchor webbing through the rear facing belt path, ensuring that the lower anchor webbing is in front of the crotch buckle webbing. Attach the lower anchor connector to the designated lower anchor point in the vehicle seat bight.
Place your hand where the child’s bottom goes. While pressing down and back with your hand towards the vehicle seat back, remove the slack from the lower anchor webbing.
Check your work. There should be 1 inch or less movement at the belt path. The red level line should be parallel to the ground for children that can not sit unassisted.
Lastly, adjust the footrest to the allowed position that places the footrest as flush as possible with the back of the vehicle seat. A small gap is allowed between the footrest and the vehicle seat back.
Installation: Vehicle Seat Belt
Safety 1st Grow and Go Extend ‘n Ride LX installed rear racing with seat belt
To install the Extend and Ride with the vehicle seat belt, store the lower anchor connectors in their proper place and rotate the footrest up and out of the way.
Choose a rear facing recline. Recline 3 is used for children that can NOT sit unassisted. Recline 2 or 3 can be used for children that CAN sit unassisted. Place the car seat on the vehicle seat with the harness facing the rear of the vehicle.
Thread the vehicle seat belt through the rear facing belt path and buckle the vehicle seat belt. The vehicle seat belt webbing should lie in front of the crotch buckle webbing. Press down and back towards the back of the vehicle seat with one hand while removing the slack from the vehicle seat belt webbing with the other, then lock your vehicle seat belt.
Check your work. There should be 1 inch or less movement at the belt path. The red level line should be parallel to the ground for children that can not sit unassisted. Lastly, adjust the footrest to the allowed position that places the footrest as flush as possible with the back of the vehicle seat. A small gap is allowed between the footrest and the vehicle seat back.
Fit to Child
Newborn
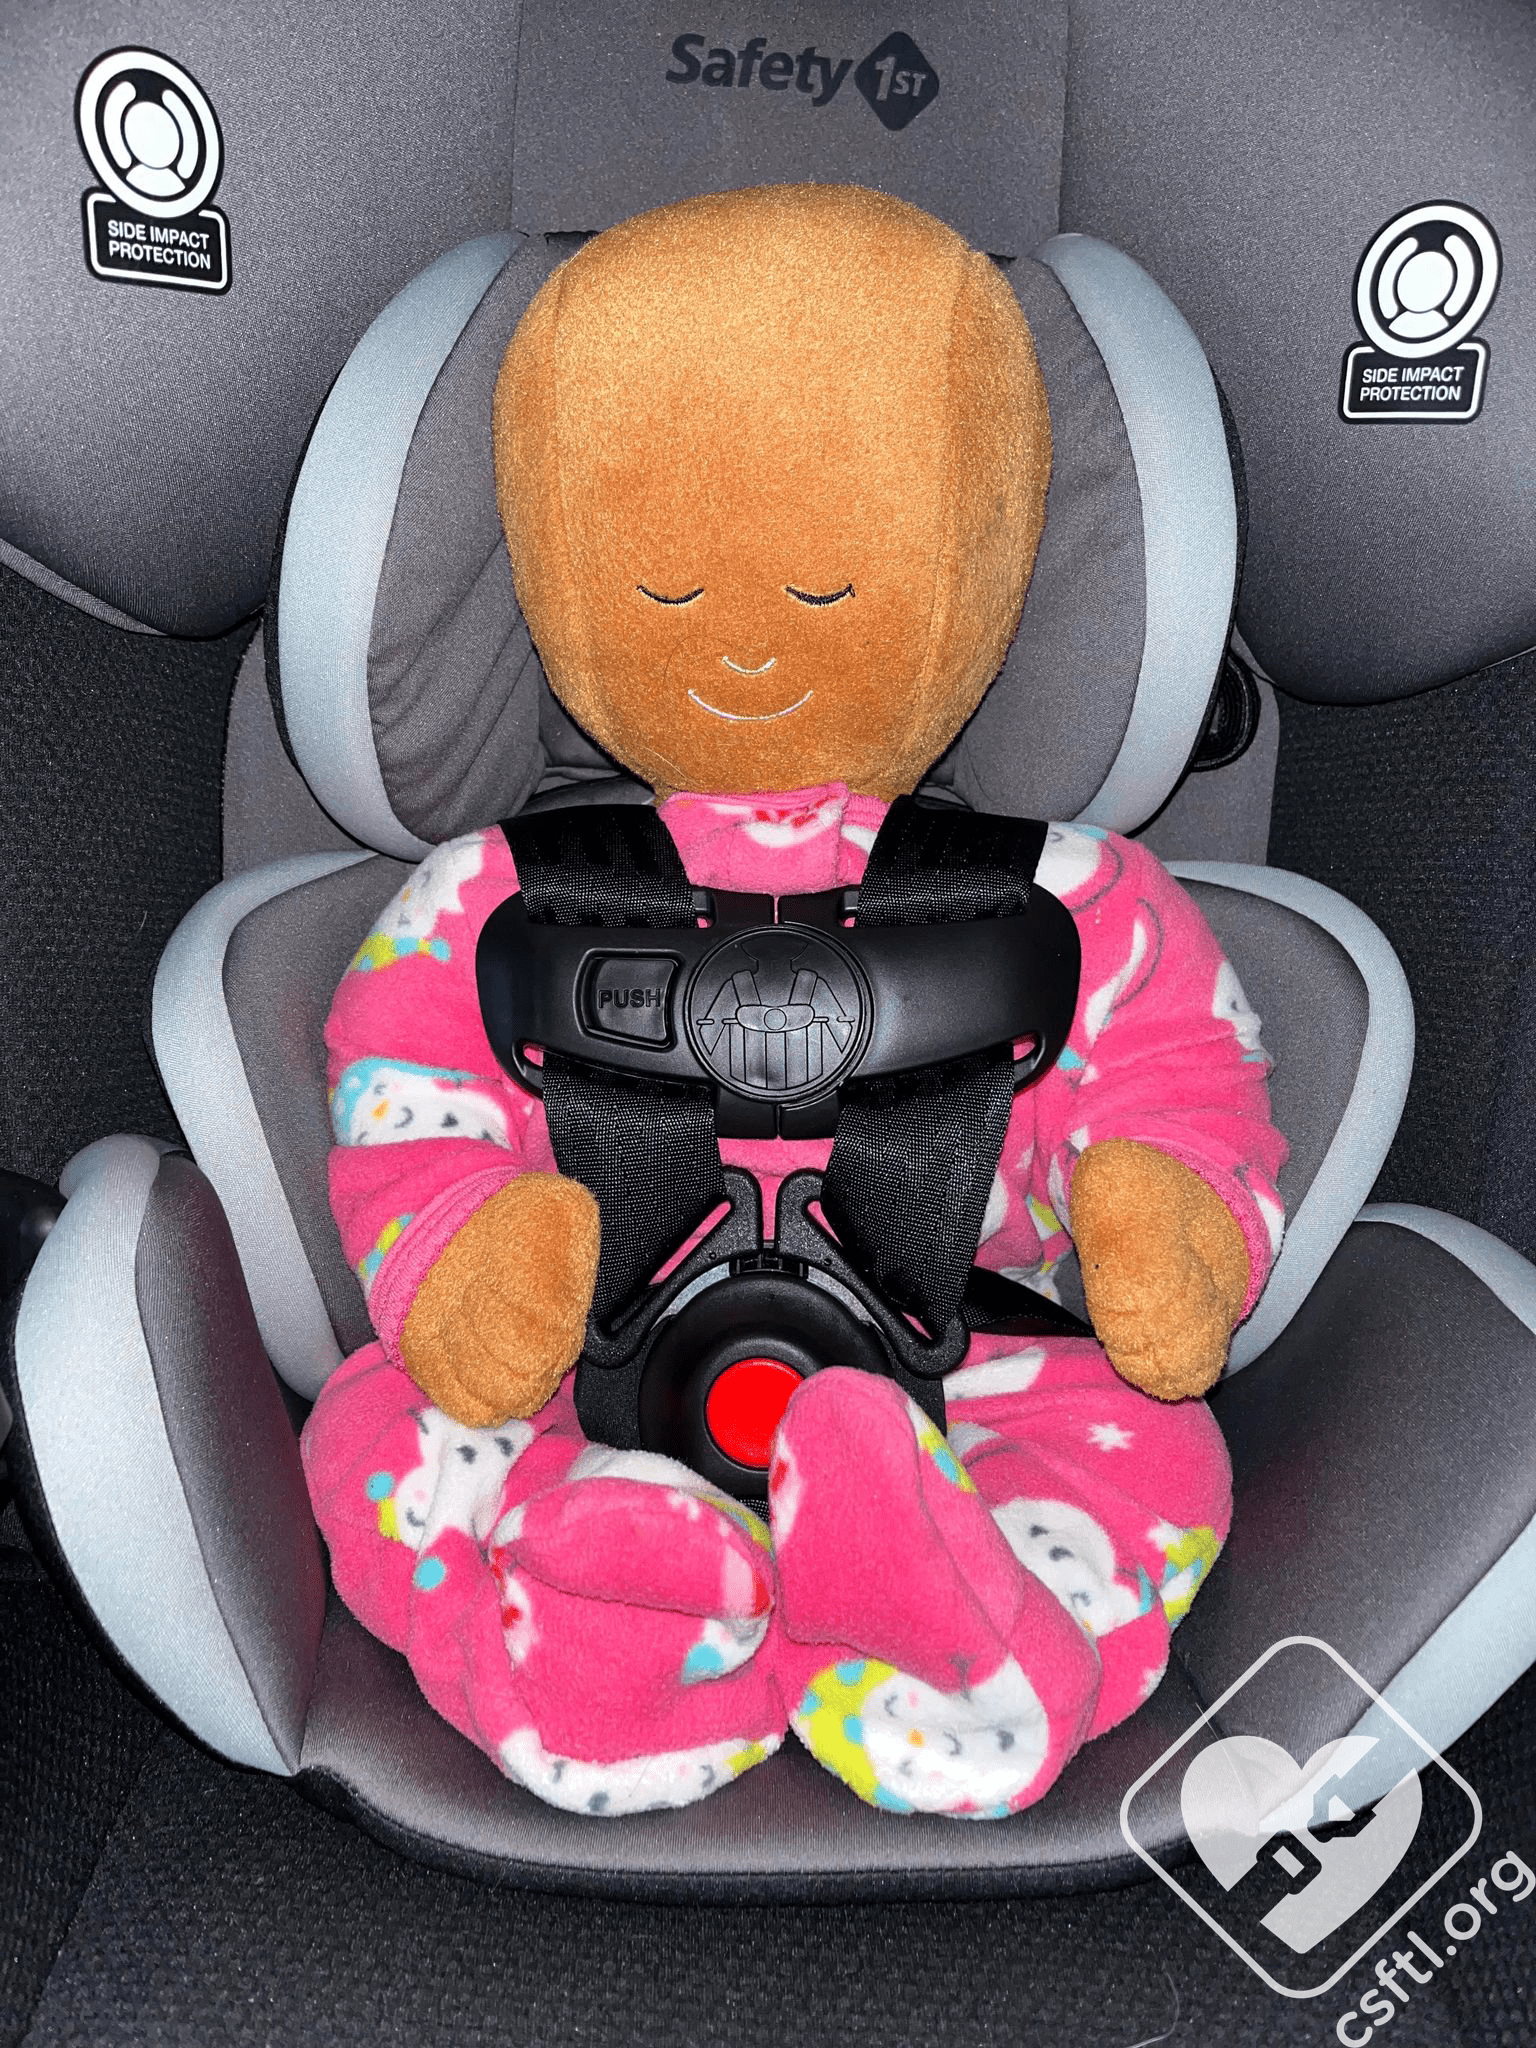
Safety 1st Grow and Go Extend ‘n Ride LX Newborn fit
This newborn Huggable Images doll weighs 7 pounds and is 17 inches long. The harness is routed for smaller children and the first crotch buckle slot is in use. Per the manual, we used both the head and body inserts. The harness fit the doll well here, it’s always a bonus when a multimode or convertible car seat could fit the tiniest of passengers well!
18 Month Old
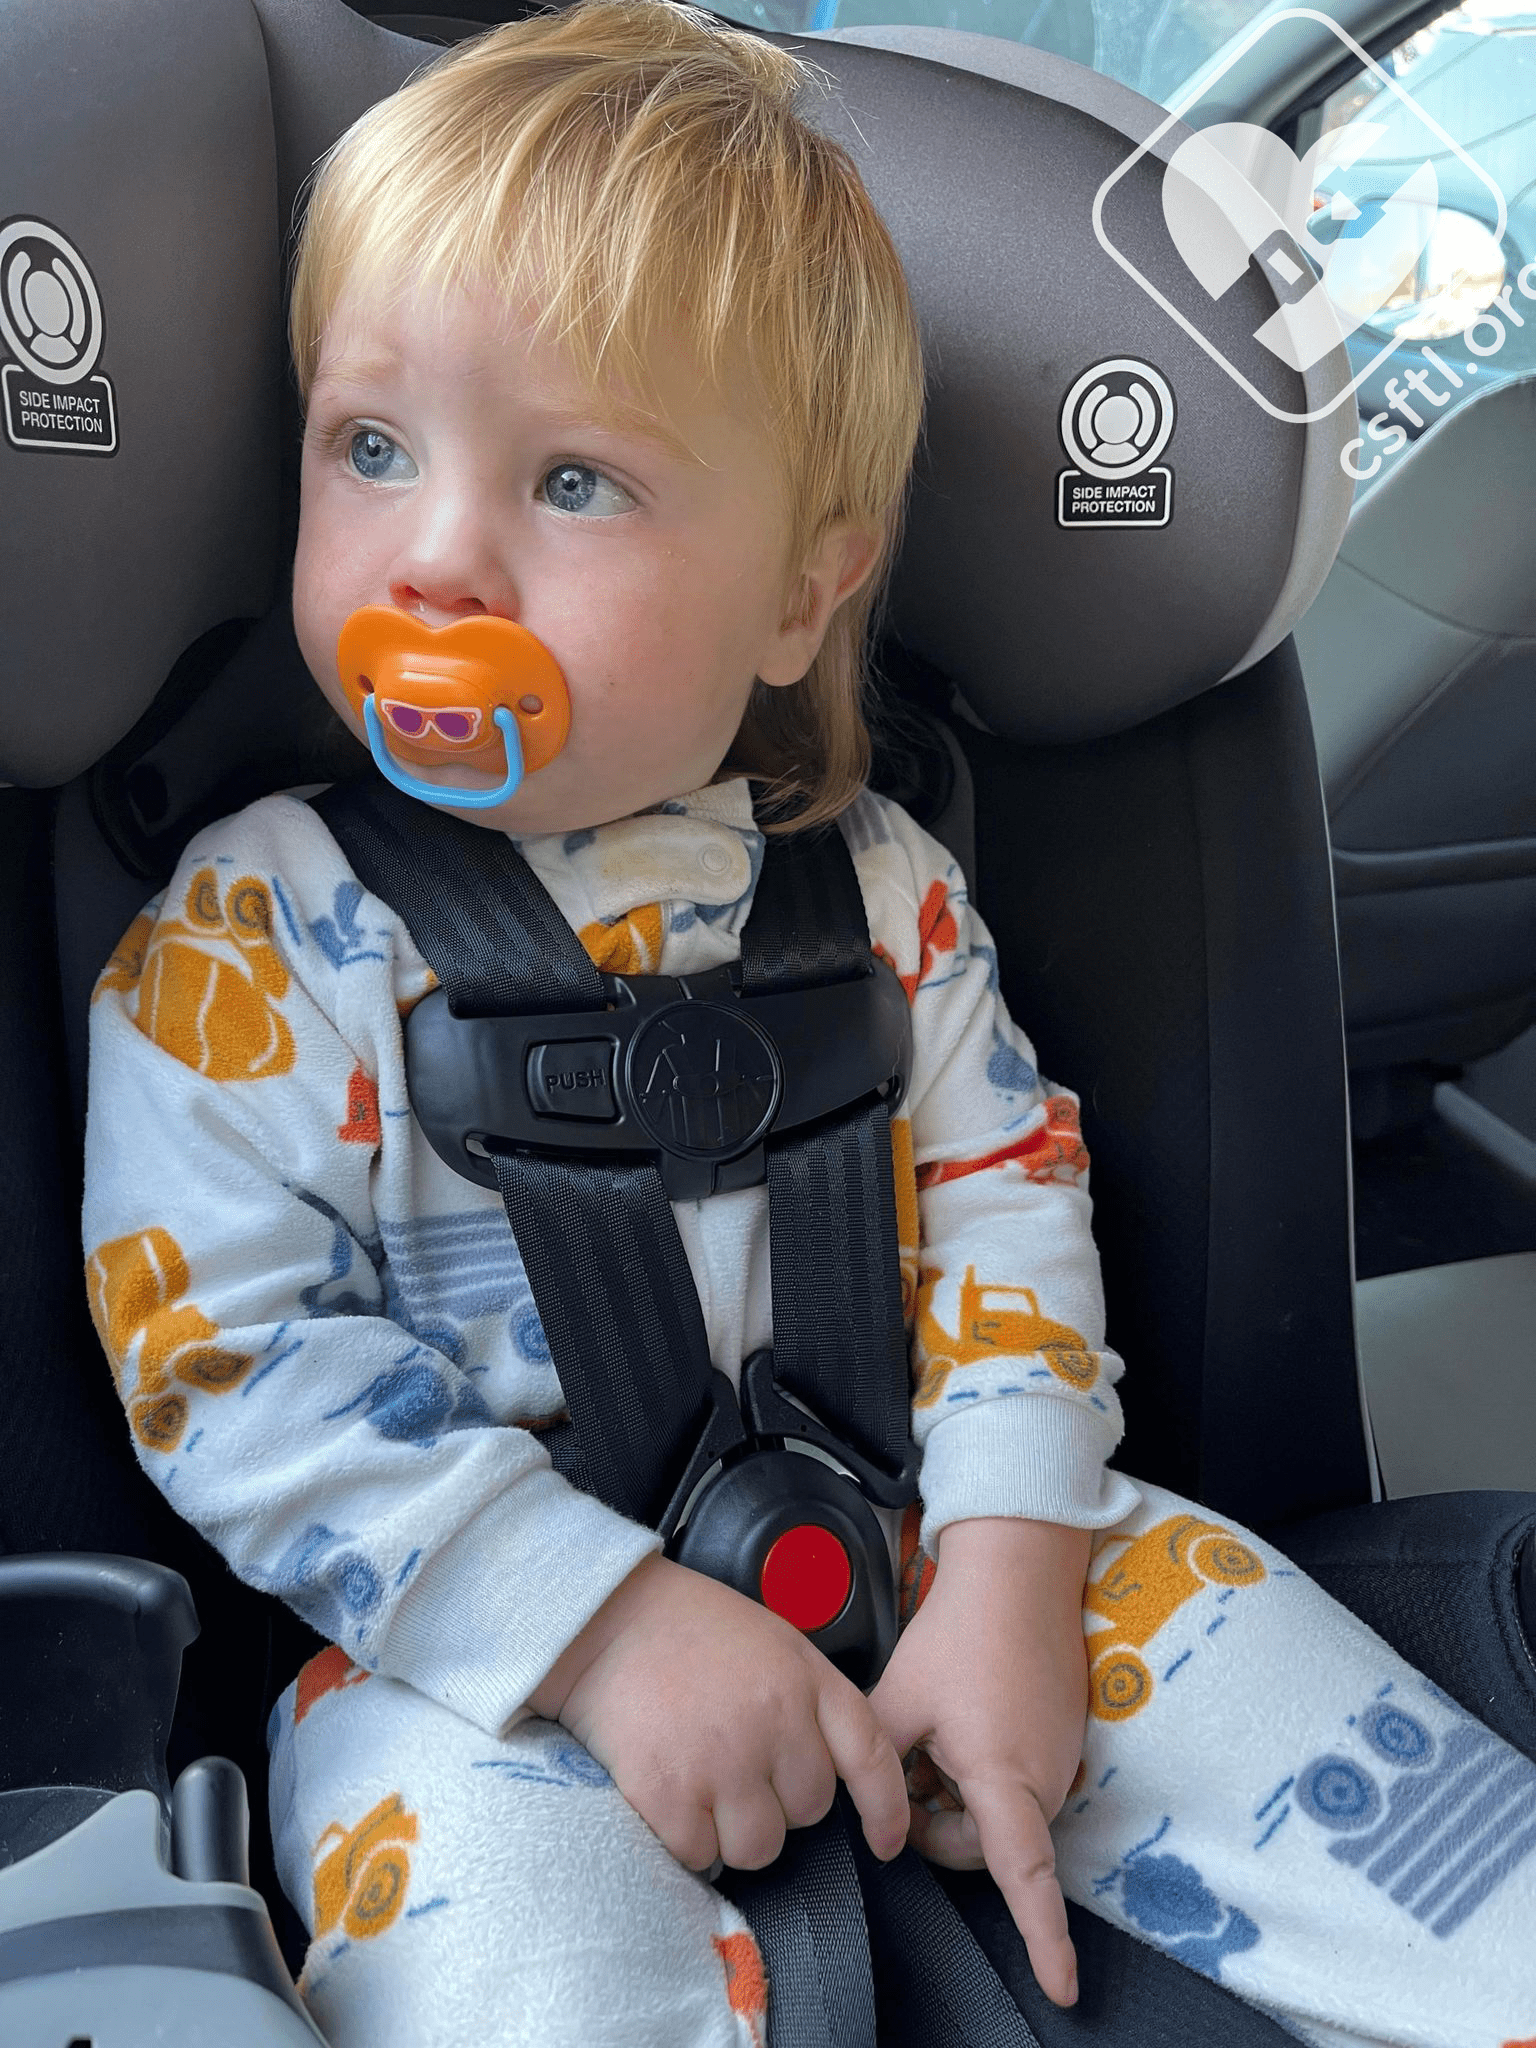
Safety 1st Grow and Go Extend ‘n Ride LX 18 months old, rear facing
Our 18 month old model, weights 25 pounds and is 33 inches tall. He fits well without the head and body insert. The harness sits just below the shoulder and he is using the second crotch buckle slot. He was not a fan of the harness covers, so we removed them. He was fascinated by the snack tray.
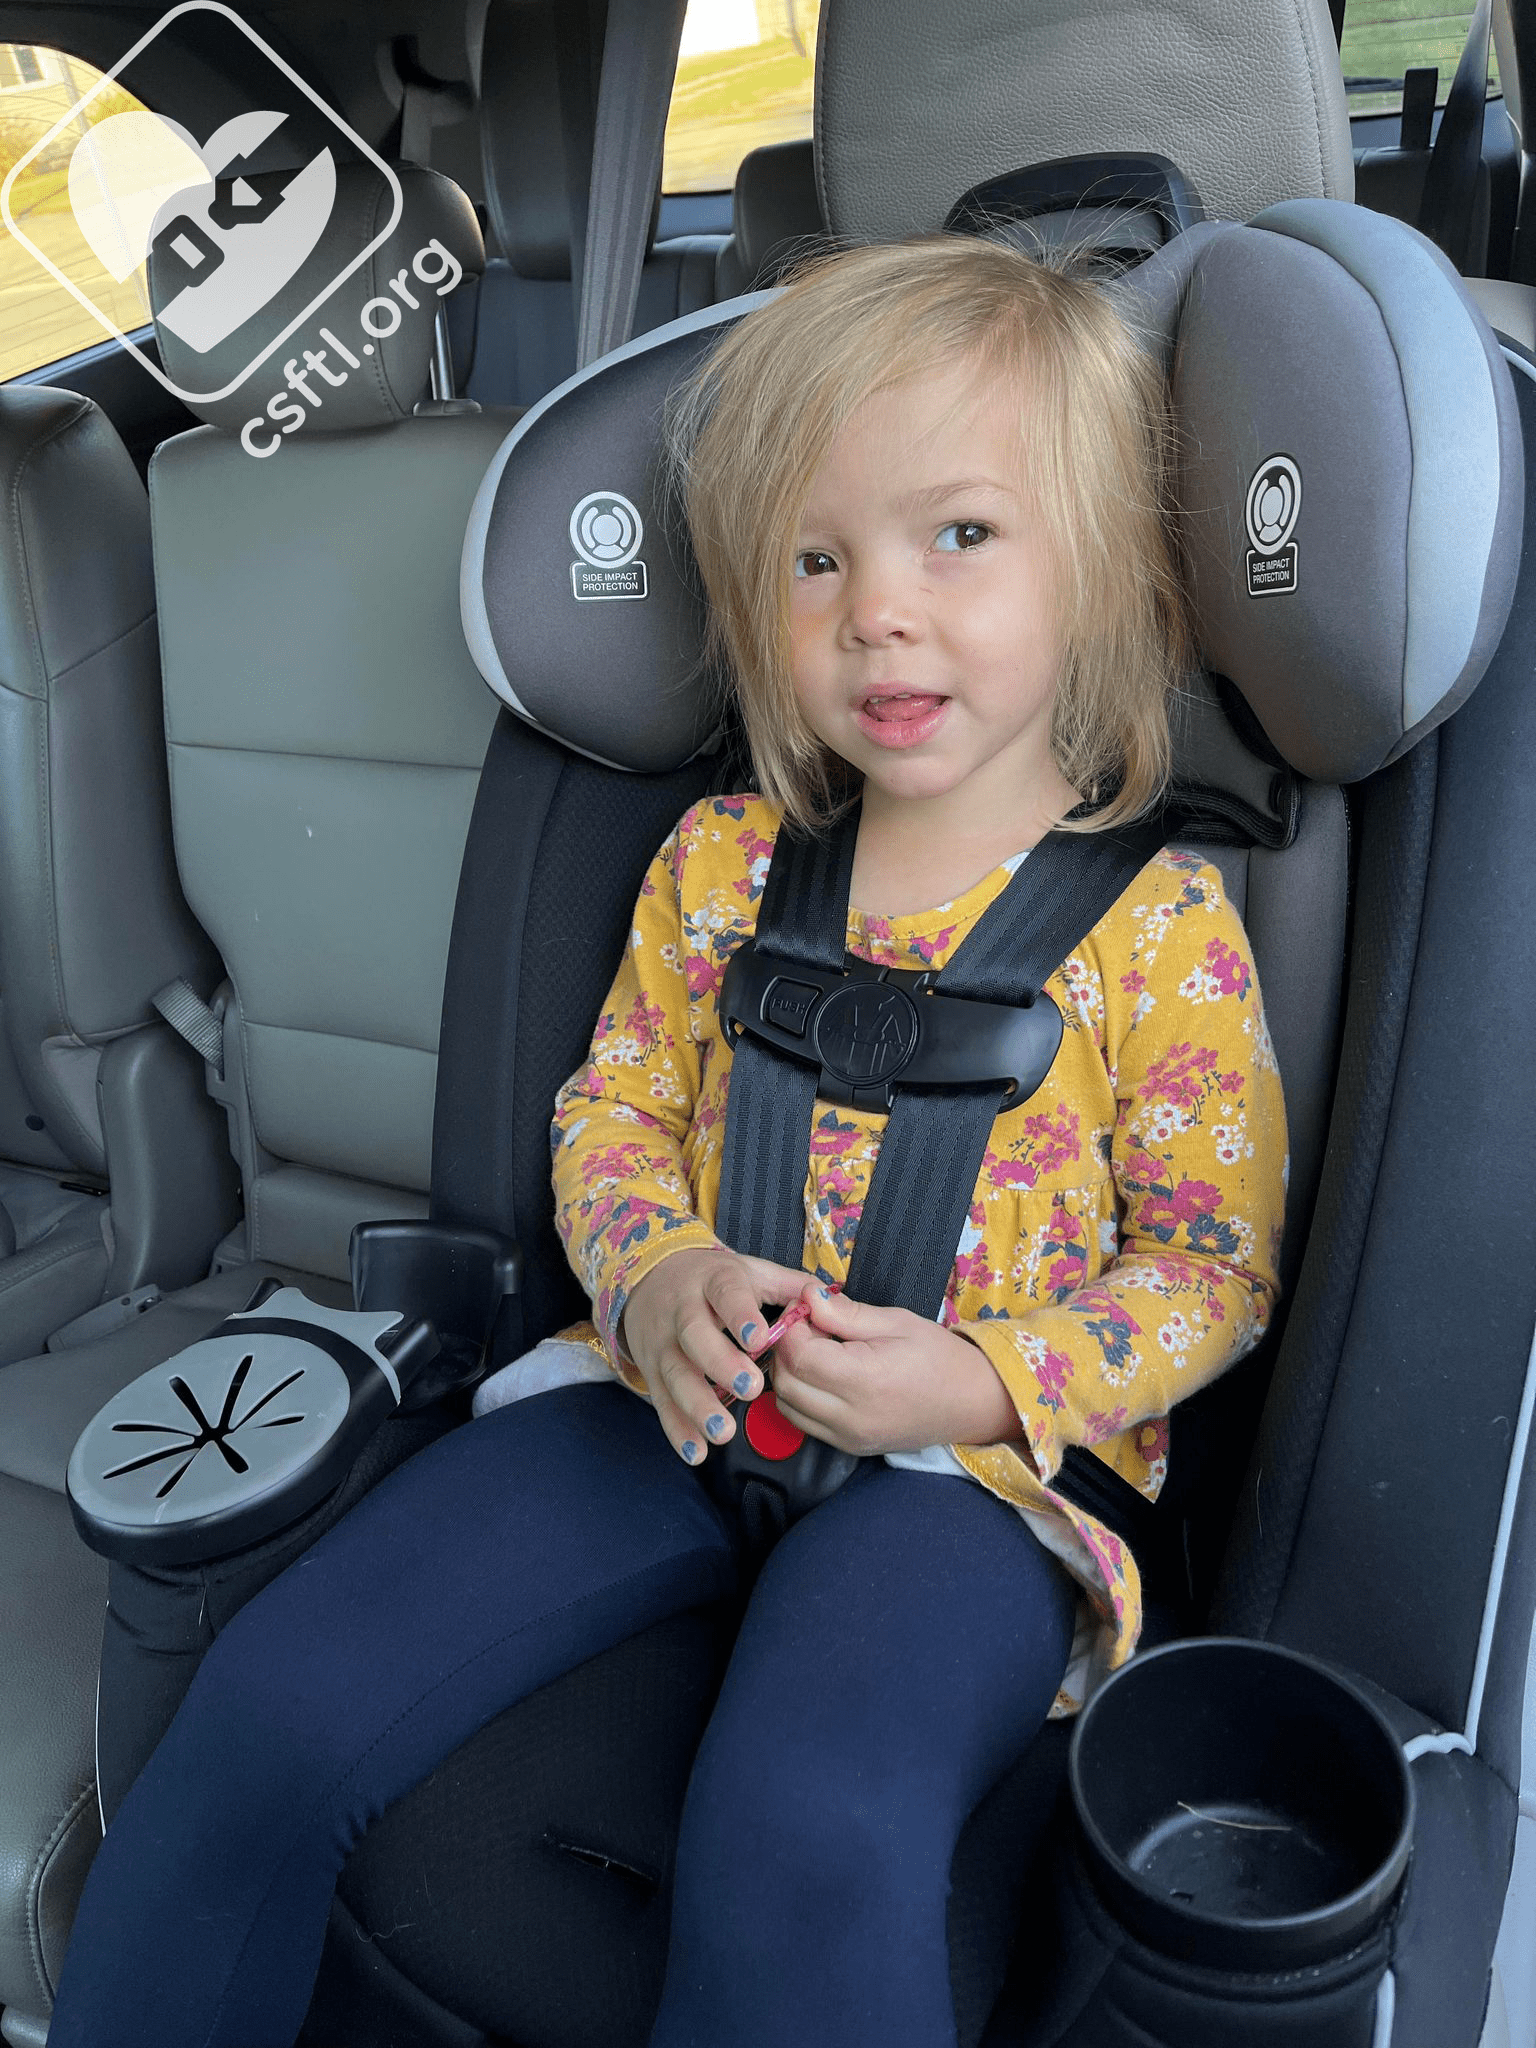
4 Year Old
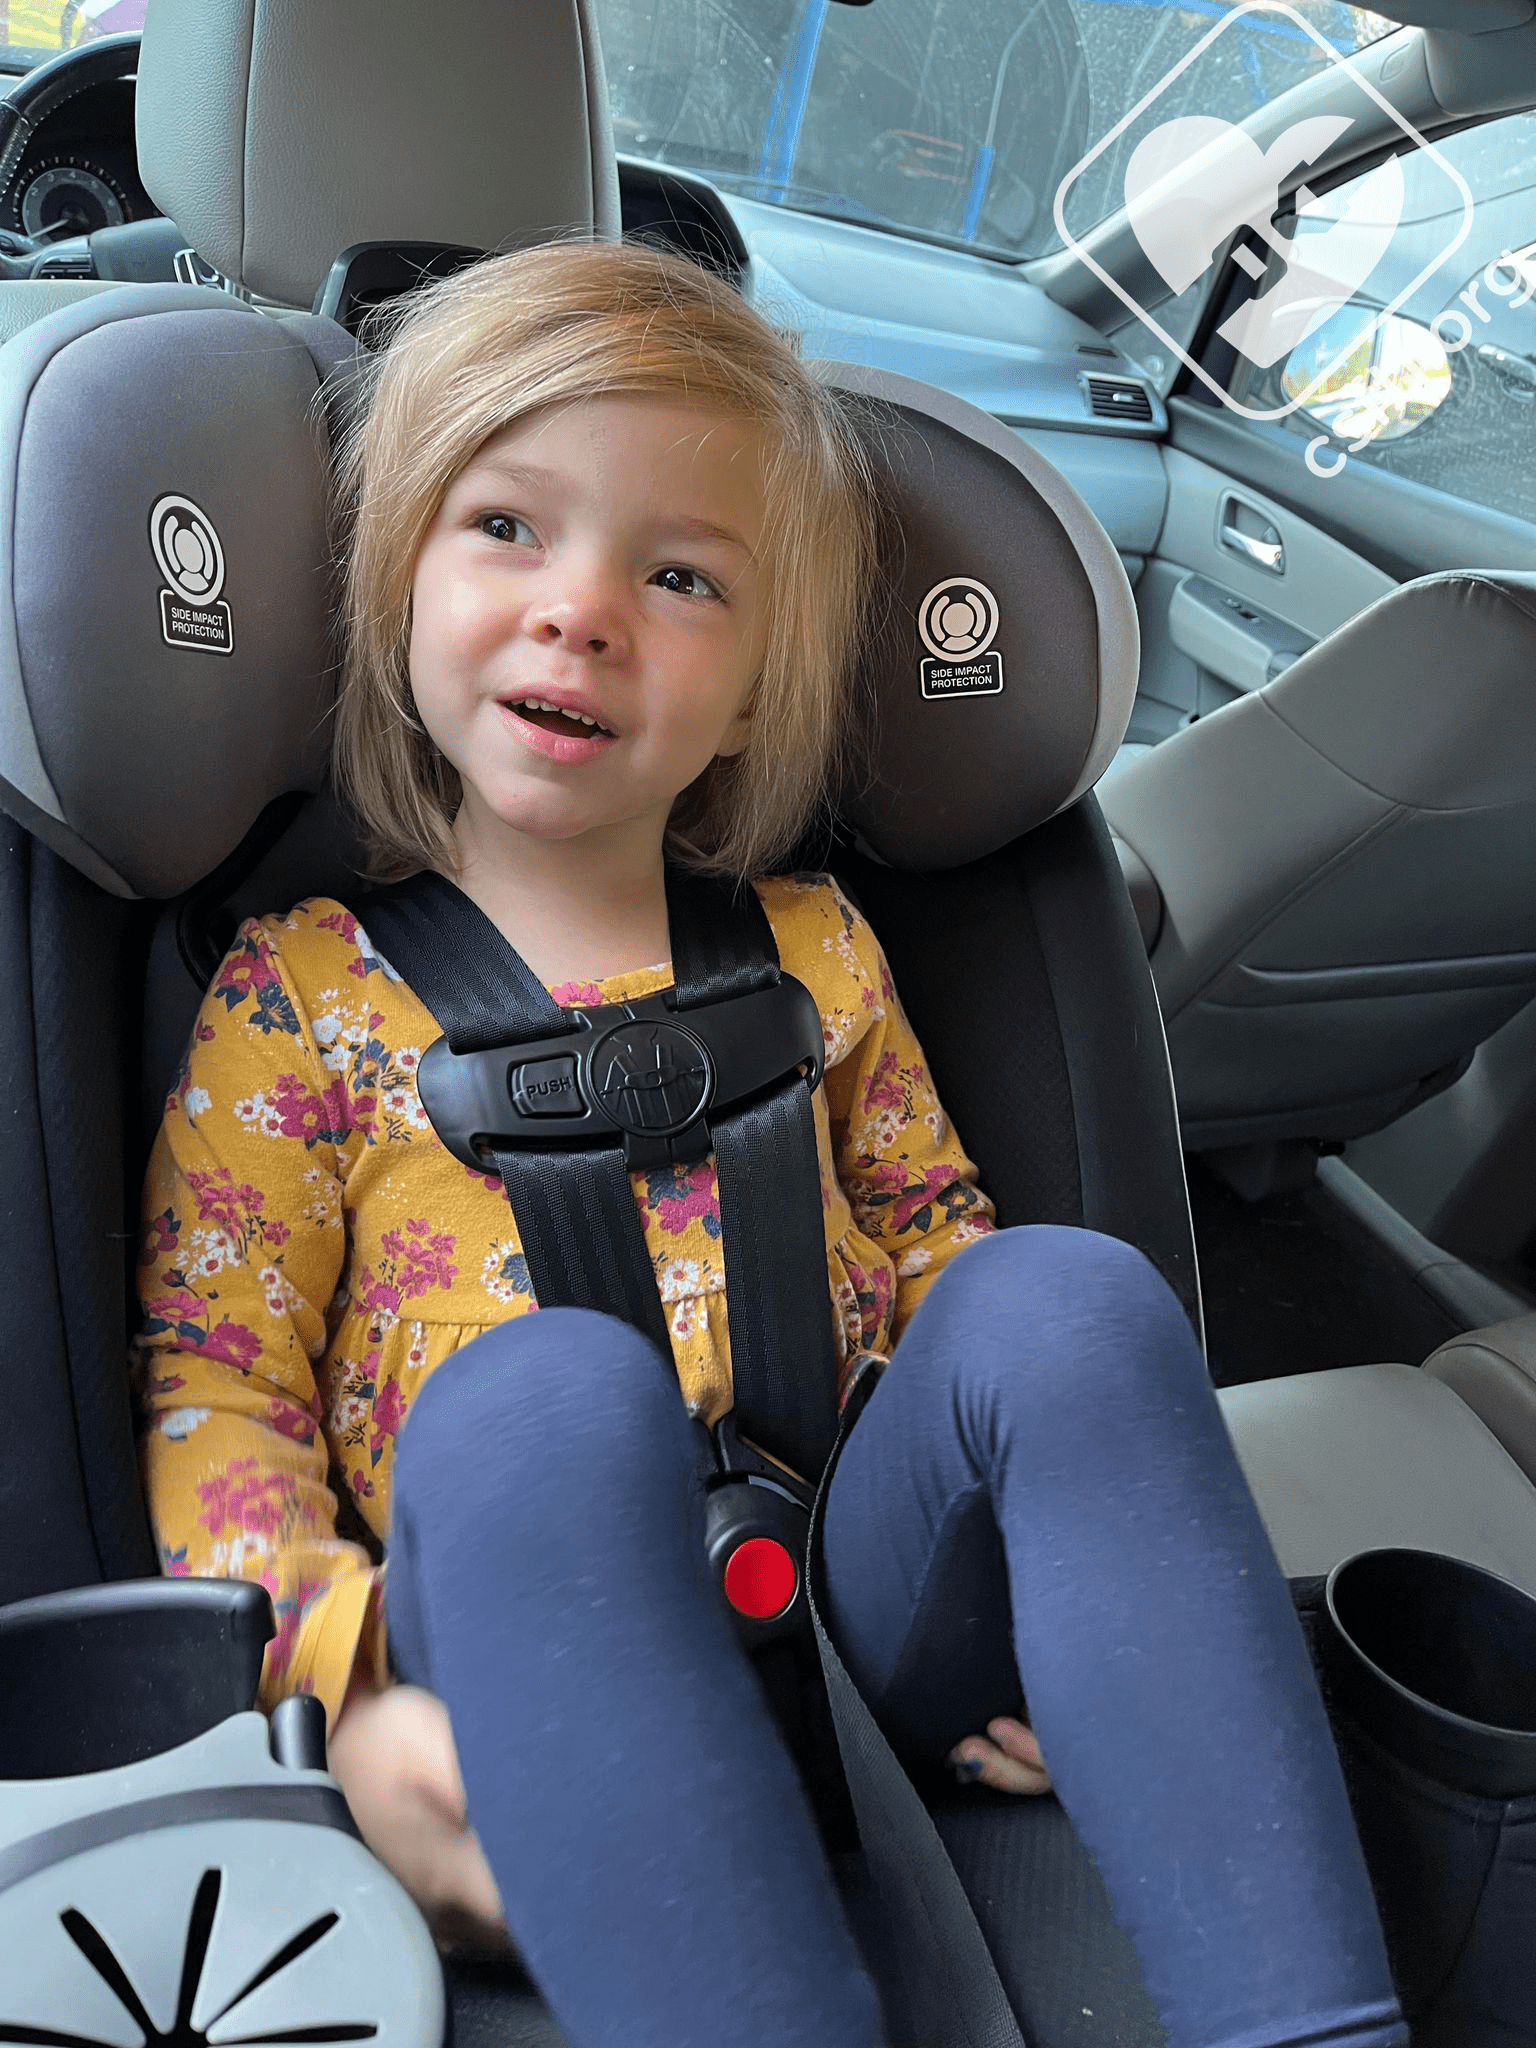
Safety 1st Grow and Go Extend ‘n Ride LX 4 year old rear facing
This model is 4 years old, weighs 32 pounds, and is 39 inches tall. She is nearing the height limit for rear facing in the this seat. She is using the second crotch buckle slot. She found the seat to be comfortable. She also wasn’t a fan of the harness covers, so we removed them since they aren’t required.
Safety 1st Grow and Go Extend ‘n Ride LX space above the 4 year old’s head
In the photo above, it appears her head does not have 1 inch of clearance above the top of the head. However, we did measure and confirm that she has plenty of space above her head, shown here.
Forward Facing
Installation: Lower Anchors
Safety 1st Grow and Go Extend ‘n Ride LX, installed with lower anchors and top tether
To install the Extend ‘n Ride LX forward facing, squeeze the recline handle and place the car seat in recline position 1.
Recline position 2 may be used if necessary to install the car seat flush against the vehicle seat back. If the vehicle headrest interferes with installing the seat flush against the vehicle seat, the vehicle headrest must be removed (if permitted) or you must choose a new seating location. This car seat does not allow installation with a gap between the car seat and the vehicle seat.
Set the car seat on the vehicle seat with the harness facing the front of the vehicle. Remove the top tether from the storage location and loosely connect it to the top tether anchor location behind the vehicle seat. Thread the lower anchor webbing through the forward facing belt path and connect the lower anchor connectors to the lower anchors in the vehicle seat. Place your hand where the child’s bottom goes and push down and back toward the back of the vehicle seat while using the other hand to remove the slack from the lower anchor webbing. Remove the slack from the top tether webbing.
Check your work. There should be 1 inch or less movement at the belt path when tested with the force of a firm handshake. Lastly, adjust the footrest into one of the permitted forward facing positions.
Installation: Vehicle Seat Belt
To install the seat forward facing with the vehicle seat belt, first move the Extend and Ride panel to recline position 1. Note: recline position 2 can be used if it’s needed to provide a flush install with the vehicle seat back.
Remove the top tether from the storage location on the car seat and loosely attach it to the tether anchor location behind the vehicle seat. Place the car seat on the vehicle seat with the harness facing the front of the vehicle. If the vehicle headrest causes a gap between the car seat and the vehicle seat back, the vehicle headrest must be removed if permitted or you must choose a new seating location.
Thread the vehicle seat belt through the forward facing belt path and buckle the vehicle seat belt. Determine how your vehicle seat belt locks and lock it. Press one hand down and back into the vehicle seat while pulling the slack out of the vehicle seat belt with the other hand. Remove the slack from the top tether webbing.
Check your work. There should be 1 inch or less movement at the belt path when tested with the force of a firm handshake. Finally, adjust the footrest into an approved forward facing position.
Fit to Child
4 Year Old
4 year old, forward facing
Our 4 year old model still weighs 32 pounds and 39 inches tall. The harness is just above her shoulder, with plenty of room to grow. She is using the second crotch buckle slot. She was able to have her legs extended with the footrest in position 1D and 1E. With the footrest in position 2, she was unable to reach the footrest.
Booster Mode
Converting to Booster Mode
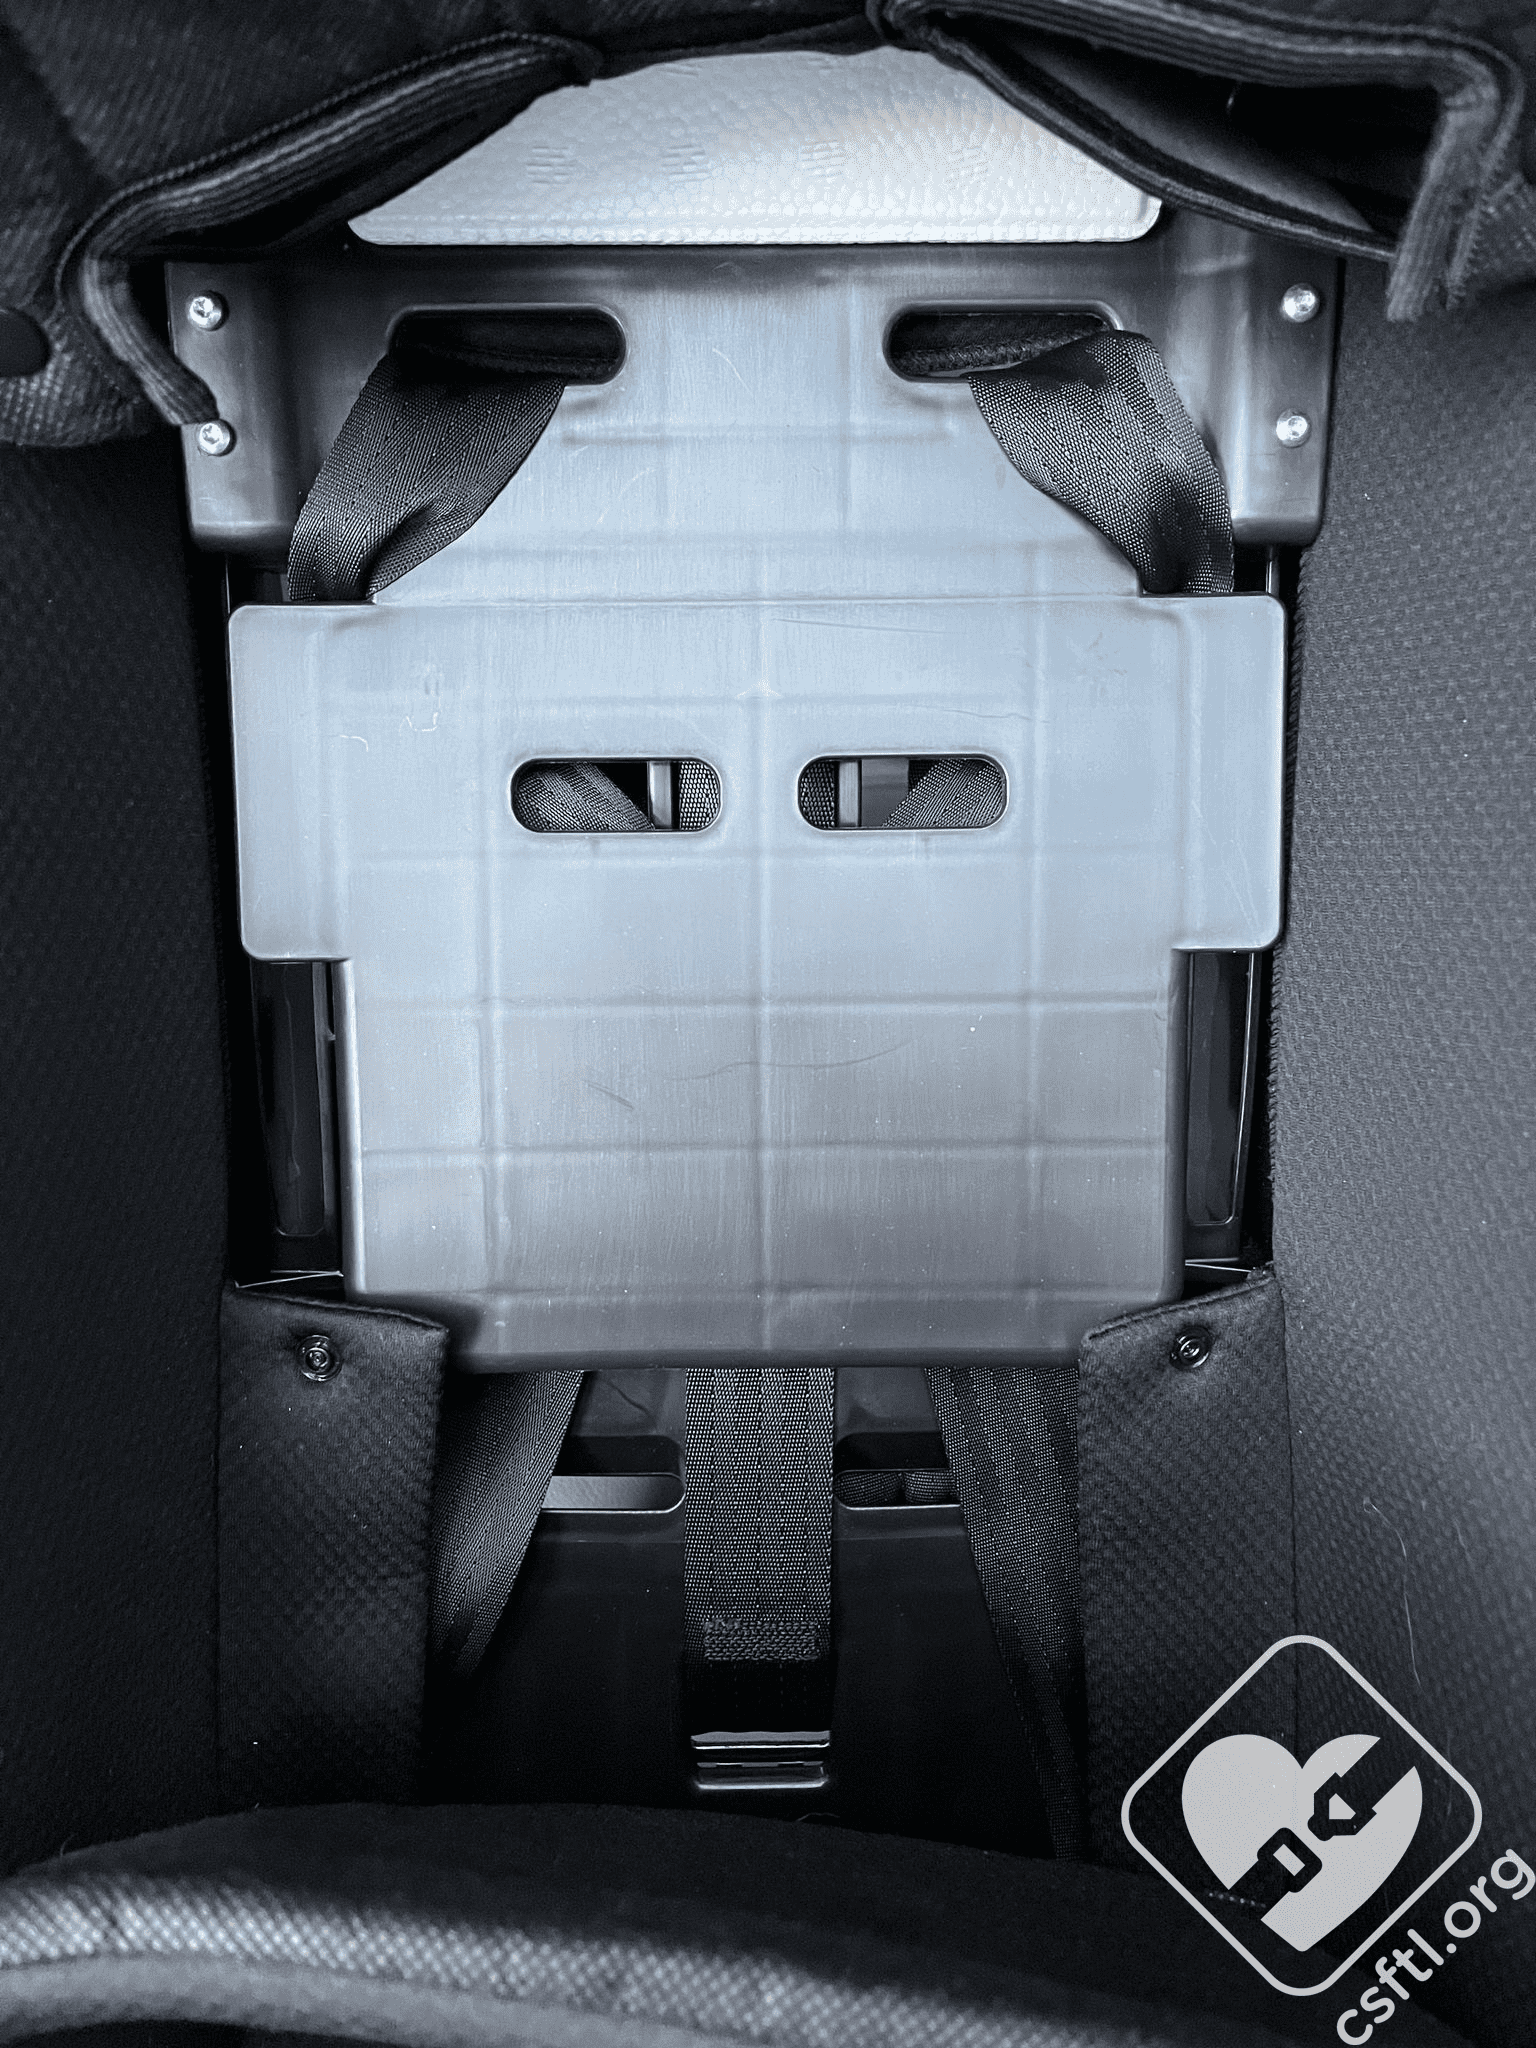
Safety 1st Grow and Go Extend ‘n Ride LX harness storage for use in booster mode
To convert the Extend and Ride to booster mode, fully loosen the harness straps and undo the crotch buckle. Recline the car seat and rotate the metal retainer and push it up out of the car seat shell. Store the buckle and buckle cover in a safe place for later use. Raise the headrest to the highest position. Undo the snaps on the headrest pad and seat pad. Lift the bottom of the headrest pad up to expose the back of the seat. Thread the harness straps into the slots on the sides of the headrest. Place the chest clip and buckle tongues behind the headrest. Remove the slack from the harness and replace the headrest pad and seat pad. LATCH is not permitted in booster mode. The lower anchors and tether anchor must be stored for booster mode use.
Booster Mode Setup
Place the Extend and Ride on the vehicle seat facing the front of the vehicle. If the vehicle headrest creates a gap between the vehicle seatback and the car seat, remove the vehicle headrest if permitted or choose a different seating location. Thread the vehicle seat belt through the seat belt guides located on the headrest of the car seat. Adjust the footrest into the proper position for booster mode use.
Fit to Child
6 Year Old

Safety 1st Grow and Go Extend ‘n Ride LX 6 year old, booster mode
This model is 6 years old, 67 pounds, and 44 inches tall. The booster fit is not good on this model.

Safety 1st Grow and Go Extend ‘n Ride LX 6 year old, booster mode
We also tried a different 6 year old model and the fit was poor. The lap belt is too high on the belly. We also experienced significant vehicle seat belt retraction issues. The belt guide is tucked inside the shell of the seat, even with the headrest fully raised, which causes it to not retract at all when pulled out to buckle the vehicle seat belt. In addition to the fit issues, this is the last click of the headrest so the booster is nearly outgrown and this child just barely meets the minimum height limit for booster mode.
Important Information: Where to Find
FAA Approval
The Extend and Ride is airline approved when used in harness mode. The approval label is on the shell of the seat, near the child’s left knee.
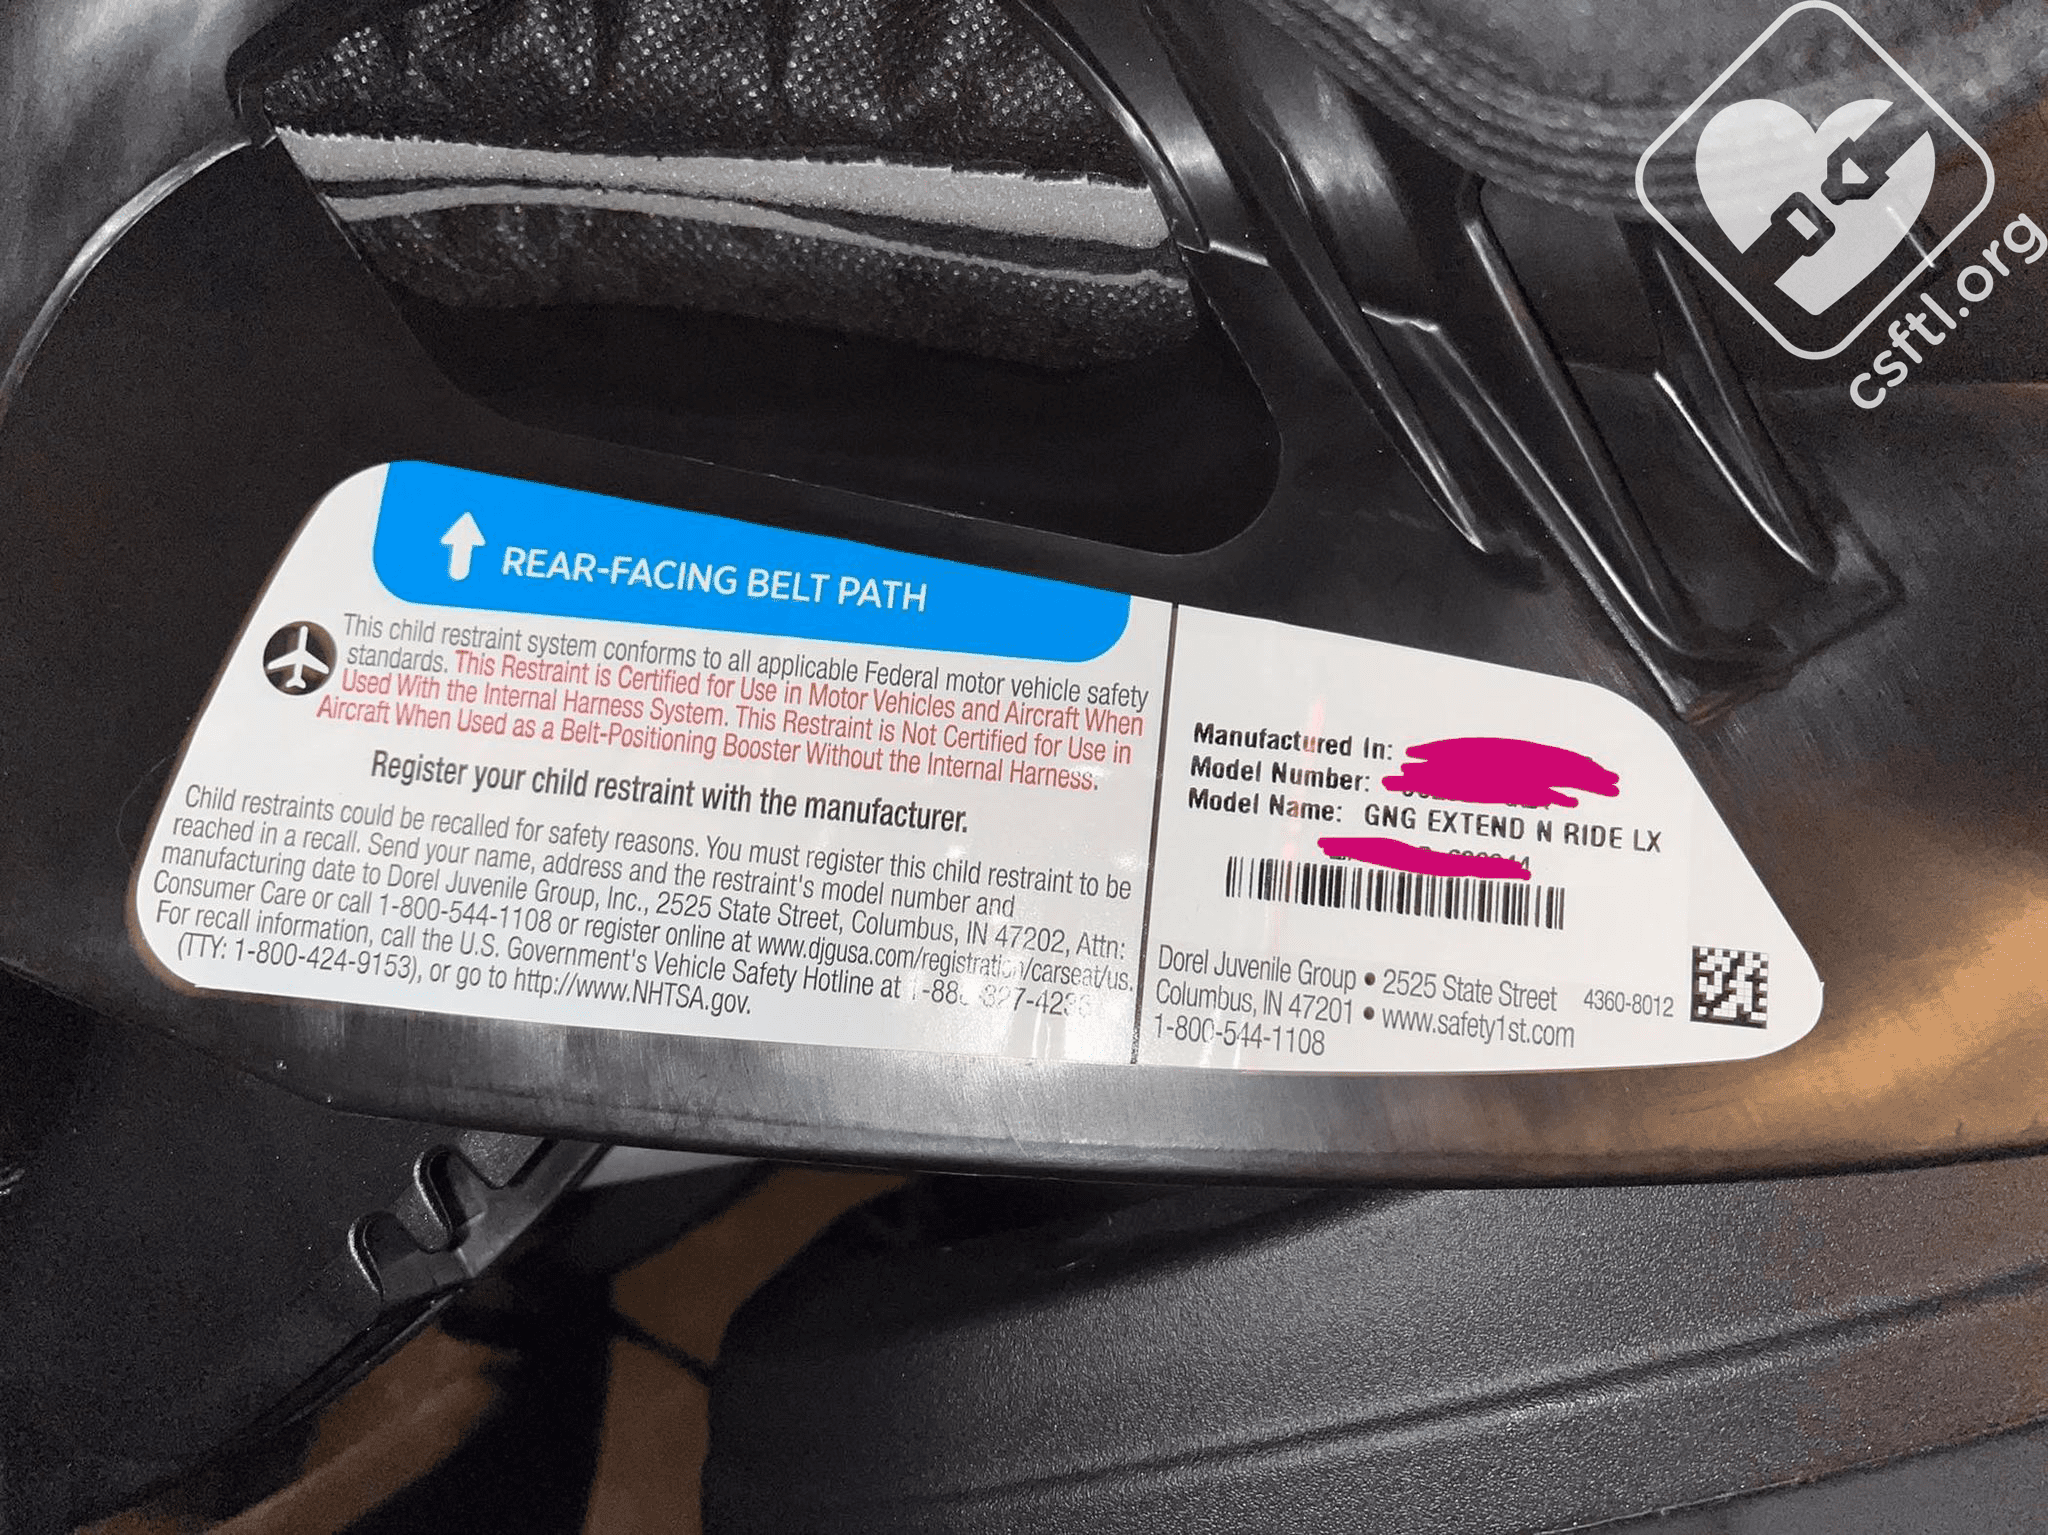
Safety 1st Grow and Go Extend ‘n Ride LX FAA approval label
Date of Manufacture
The date of manufacture label is located on the shell of the seat, near the child’s left hip.
Safety 1st Grow and Go Extend ‘n Ride LX FAA approval label, Date of manufacture label
Expiration
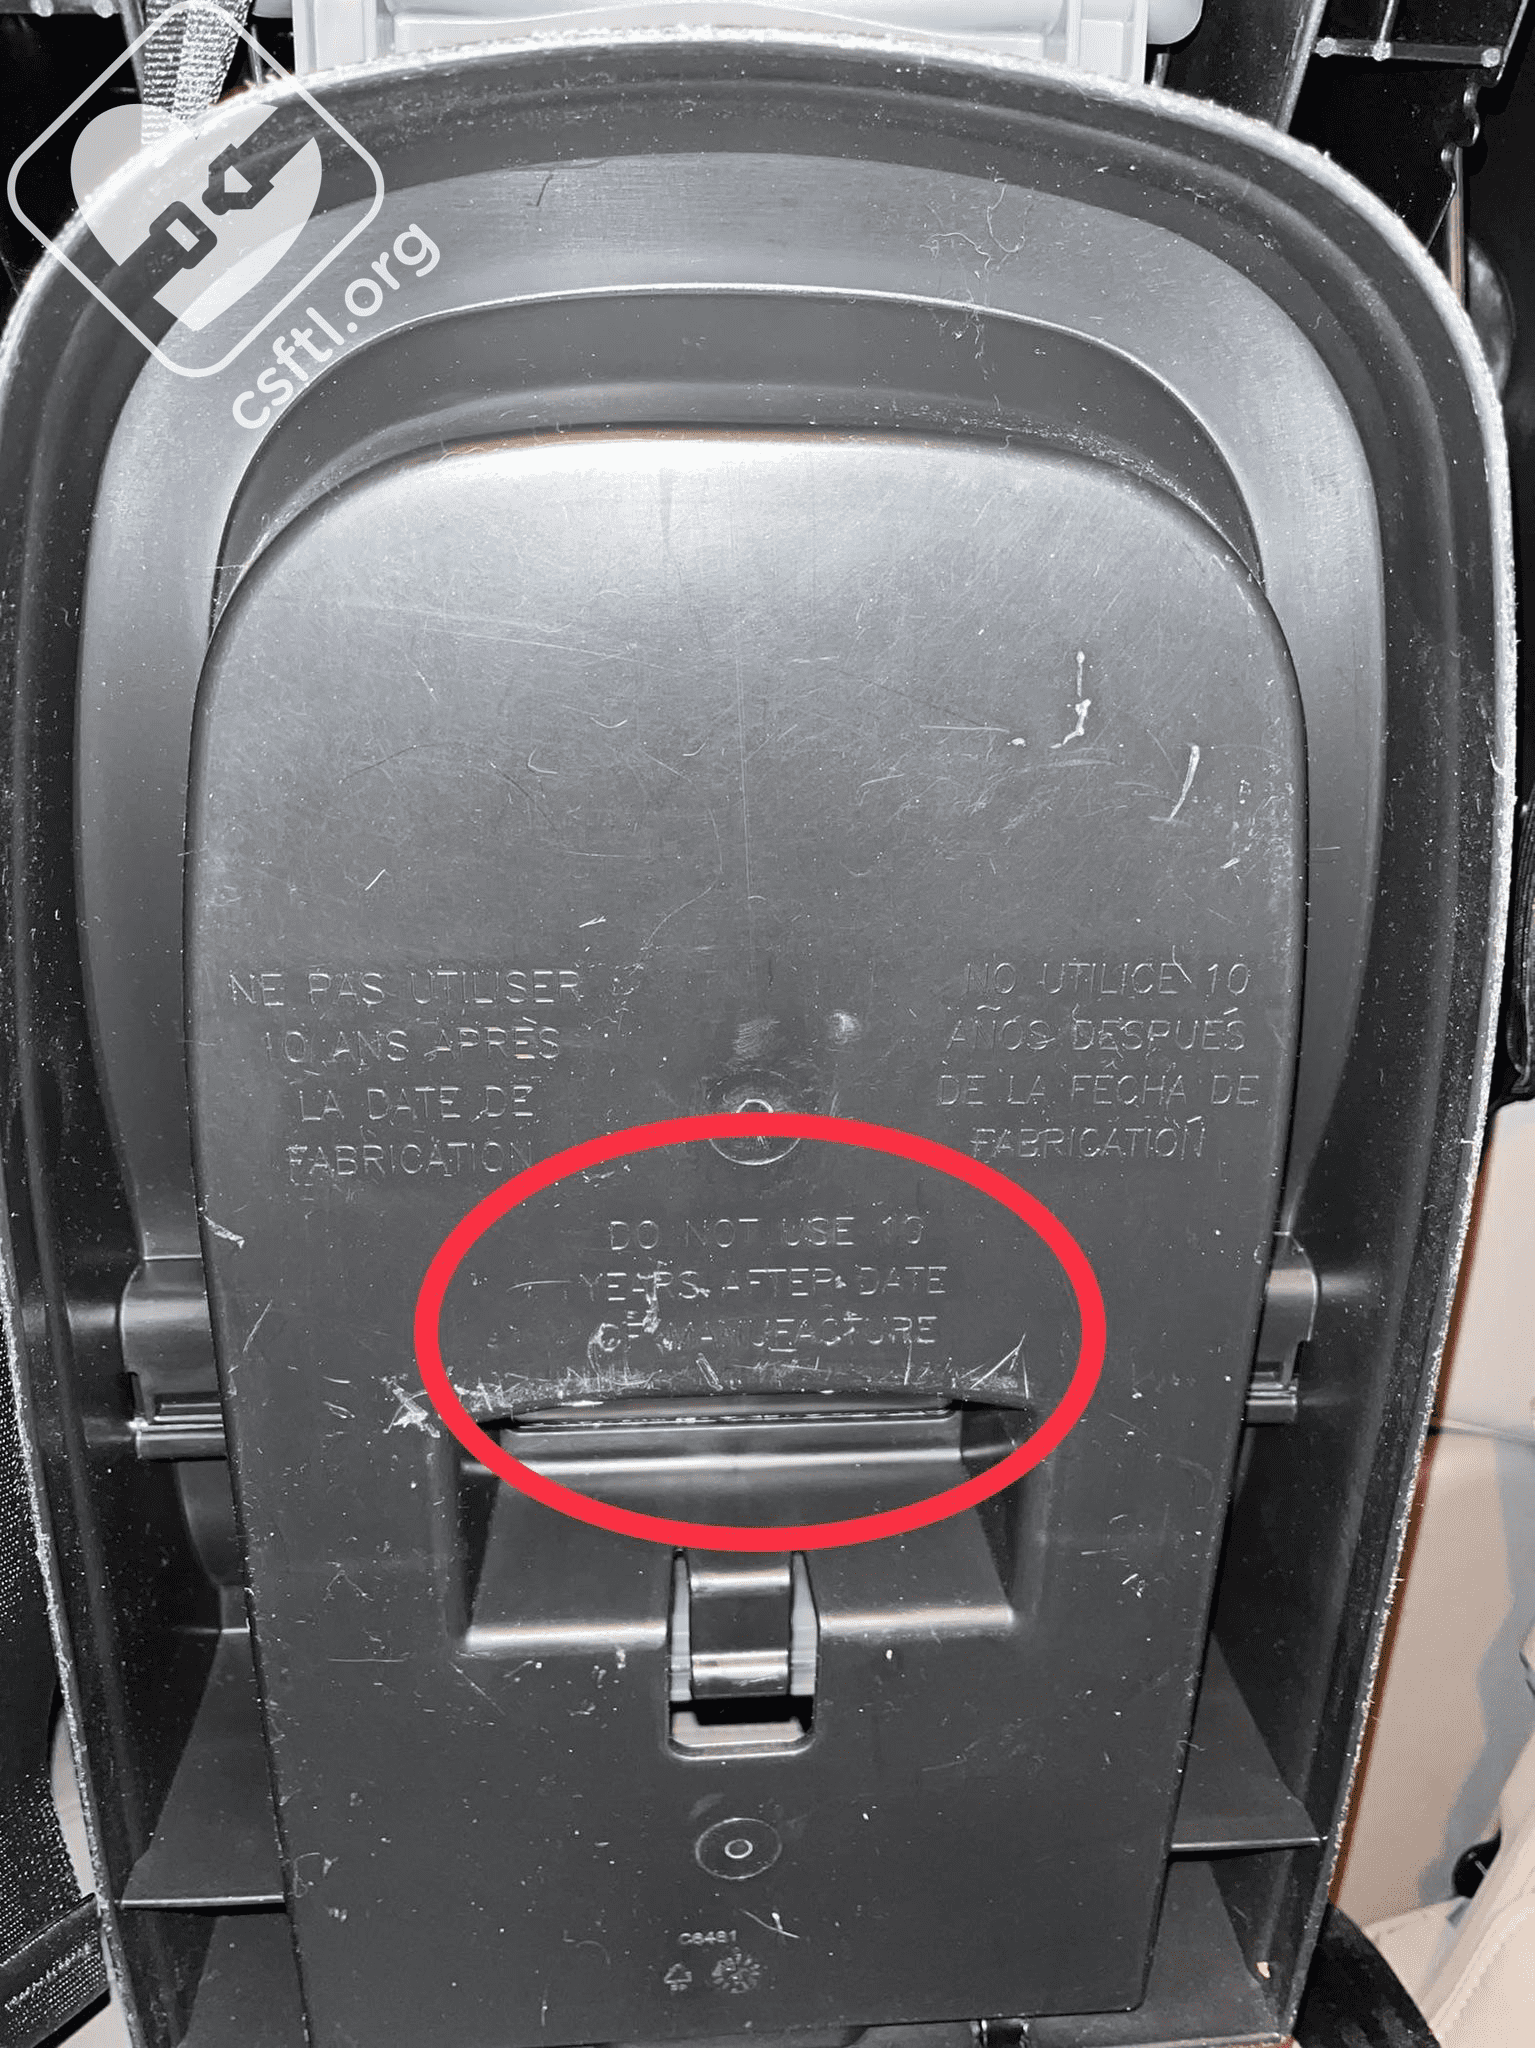
Safety 1st Grow and Go Extend ‘n Ride LX expiration date stamped into the base
The expiration date is 10 years after the date of manufacture. This date is also listed on page 63 in the manual and is stamped into the base of the seat.
Manual Storage

Safety 1st Grow and Go Extend ‘n Ride LX manual storage, lower anchor storage
The manual storage location is in the base of the seat.
Top Tether Storage
The top tether stores on a notch at the back, bottom of the base of the seat right near the manual.
Lower Anchor Storage
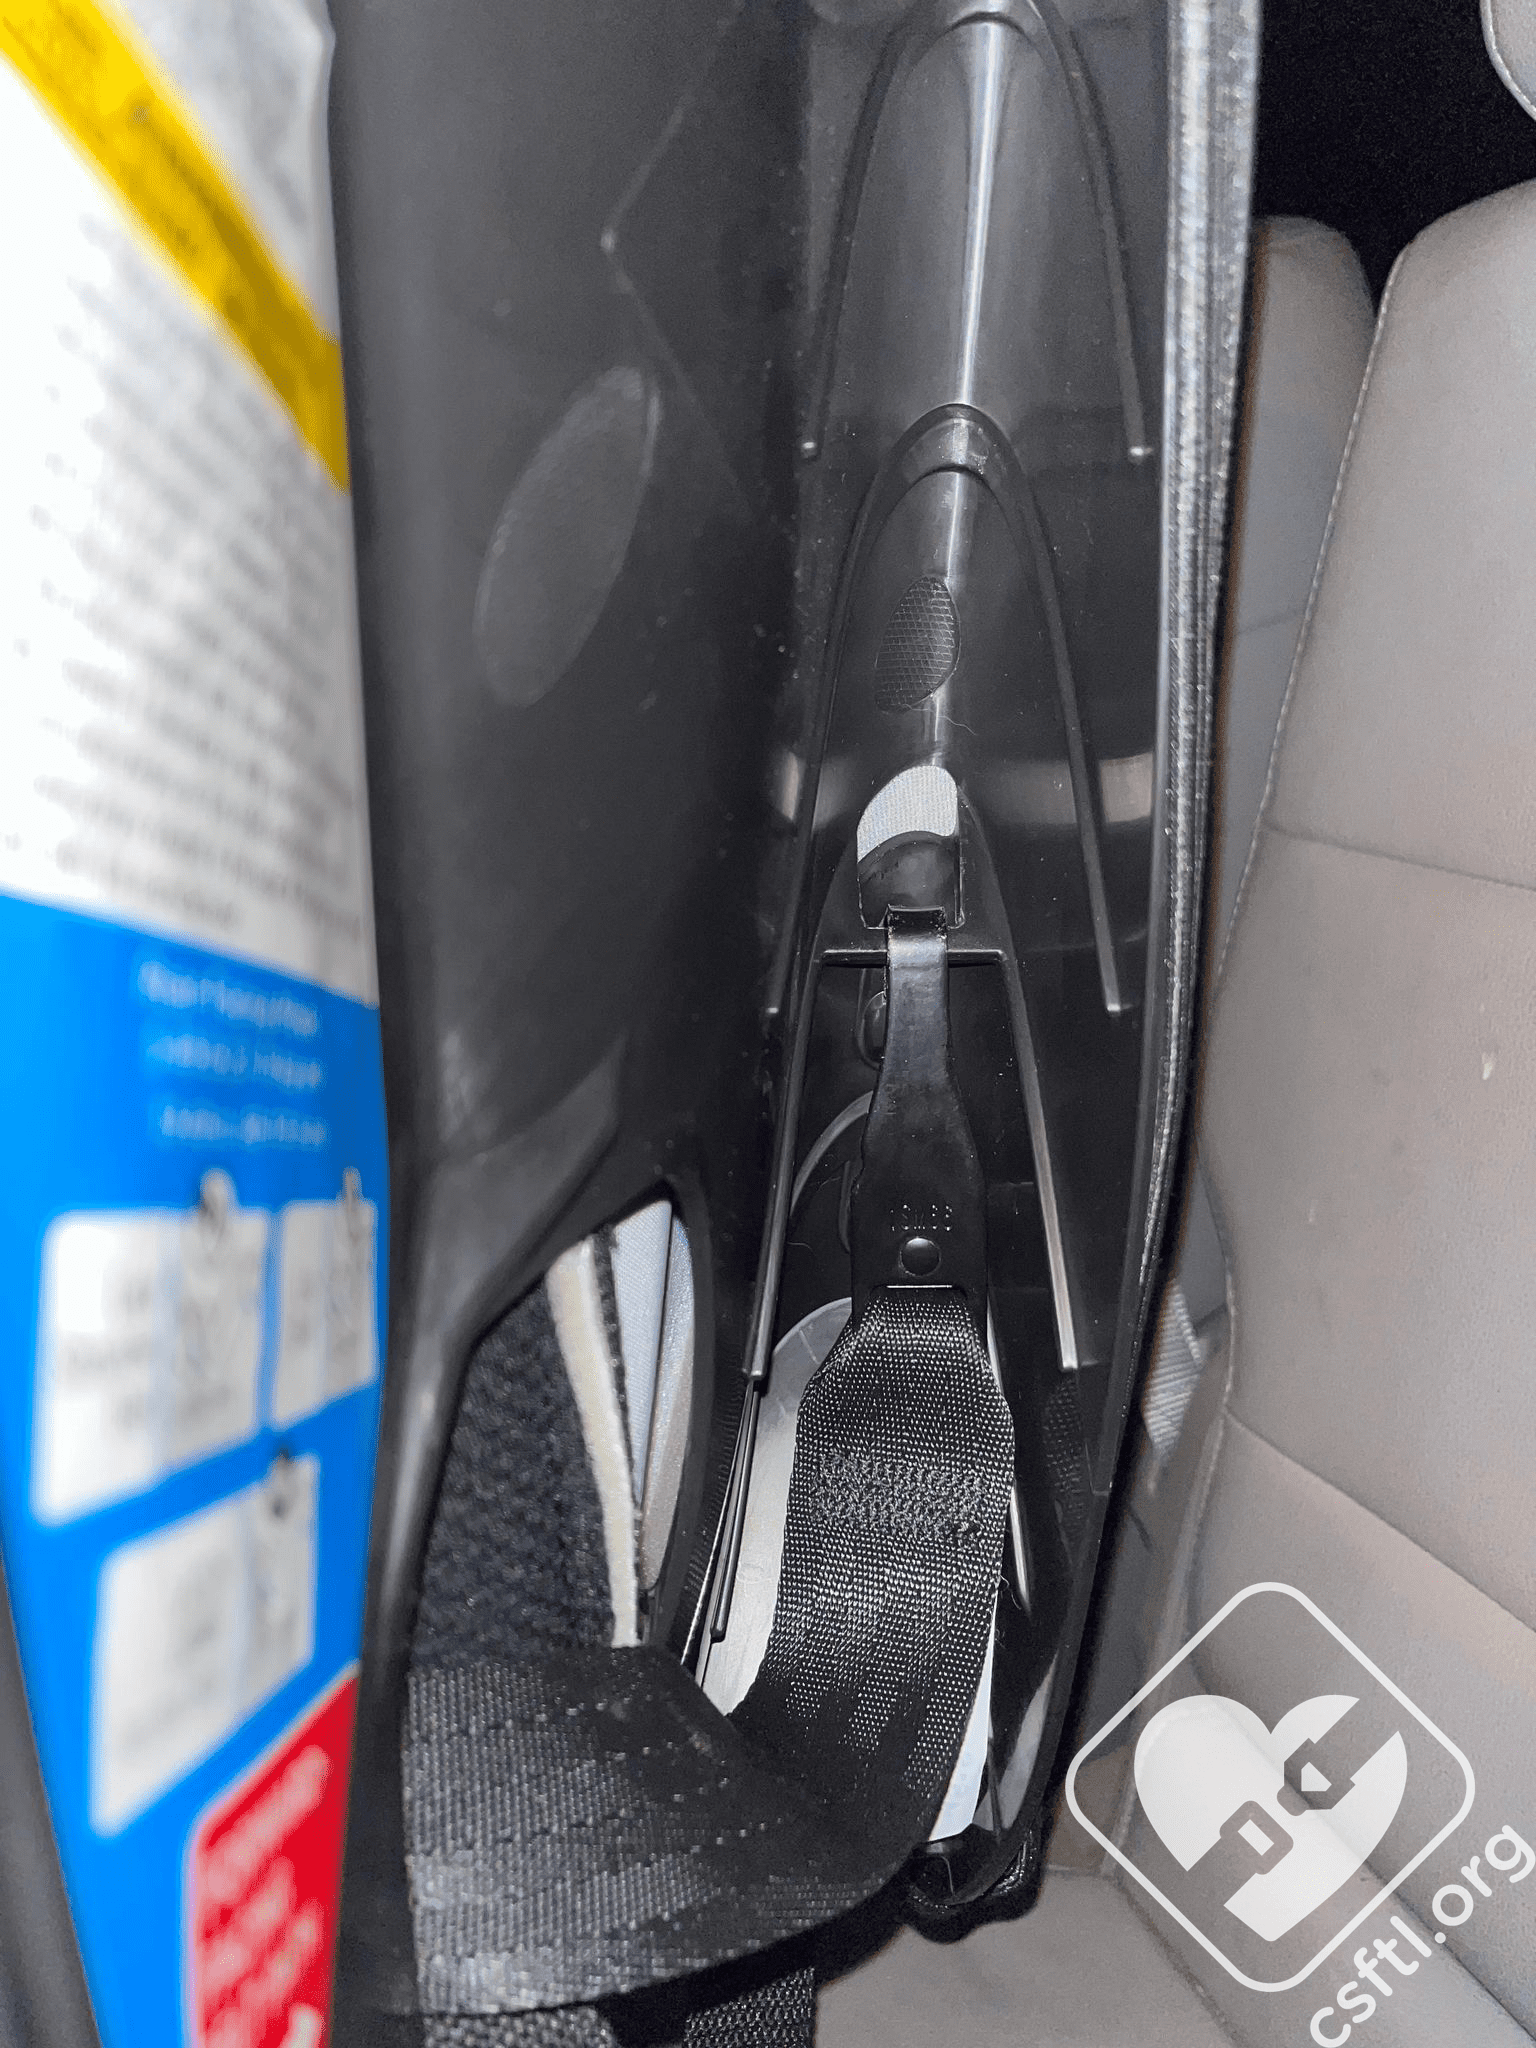
Safety 1st Grow and Go Extend ‘n Ride LX lower anchor storage
The lower anchors store under the lip of the seat, next to each shoulder.
Overall Thoughts
We love the idea of a forward facing footrest to help with dangling legs. We appreciate that the harness stores on the seat when using the seat in booster mode. However, since the crotch buckle doesn’t store on the seat, there’s a chance of misplacing it when not in use. The fit in booster mode is also a concern. Overall, the seat was easy to use and adjust. The labeling on the footrest makes it easy to be sure the caregiver is using the proper setting.