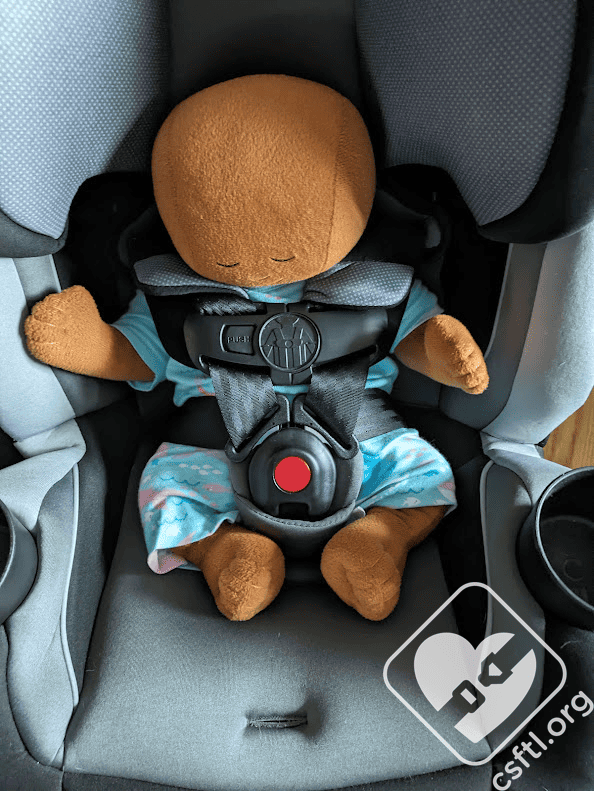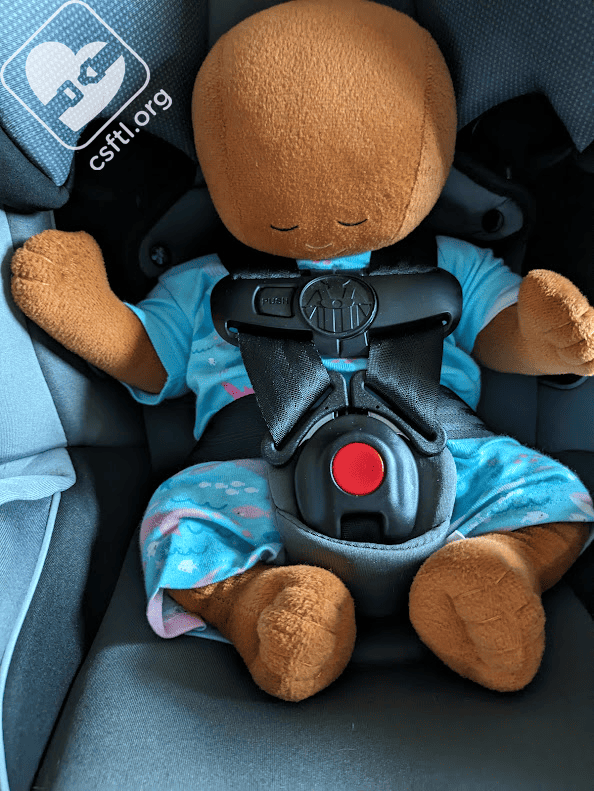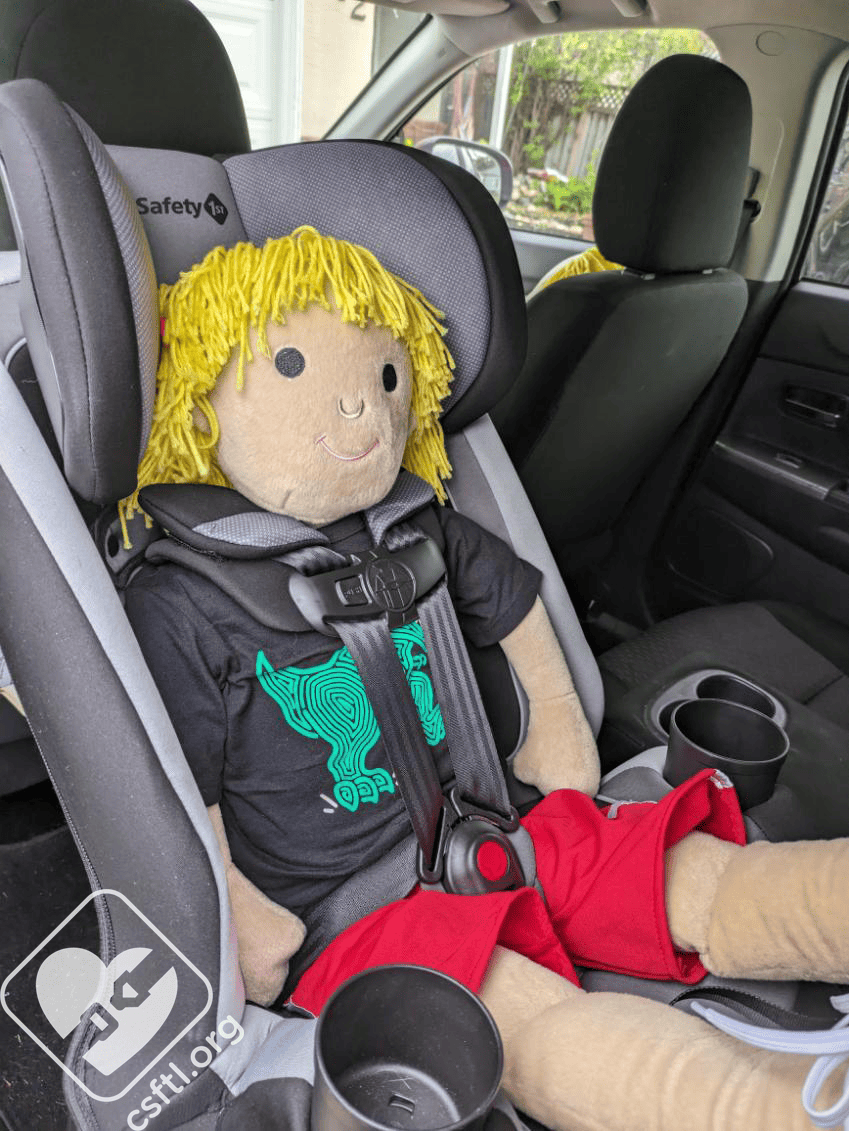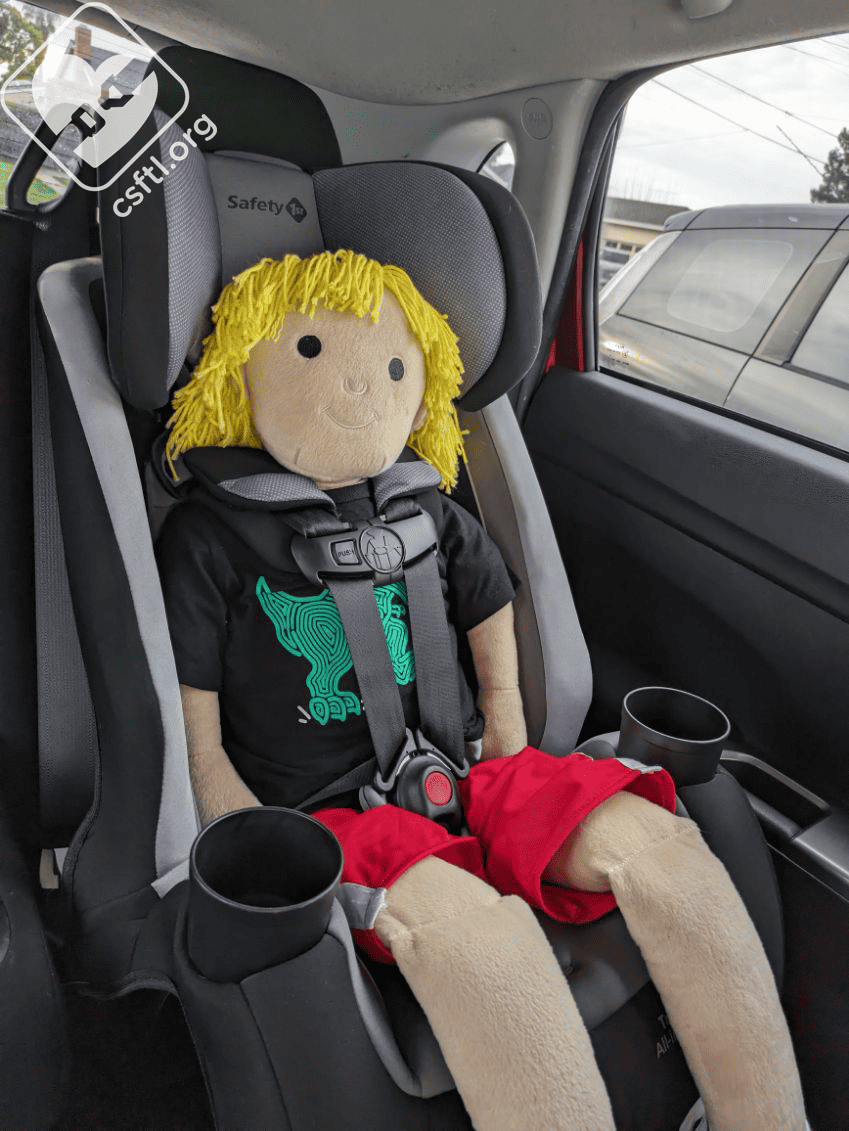
Safety 1st TriMate 3 year old doll forward facing
Safety 1st offers many multimode and convertible car seats that are widely available in a variety of larger stores. This family of products continues to grow as different retailers request different features or price points. The latest addition to an already large family is the TriMate/TriFit multimode car seat. Come along as we put this seat through the paces.
CSFTL Quick Stats
- Rear facing weight range: 5-40 pounds
- Rear facing height range: 19-40 inches tall
- Forward facing weight range: 22 – 65 pounds
- Forward facing height limit: 29-49 inches tall
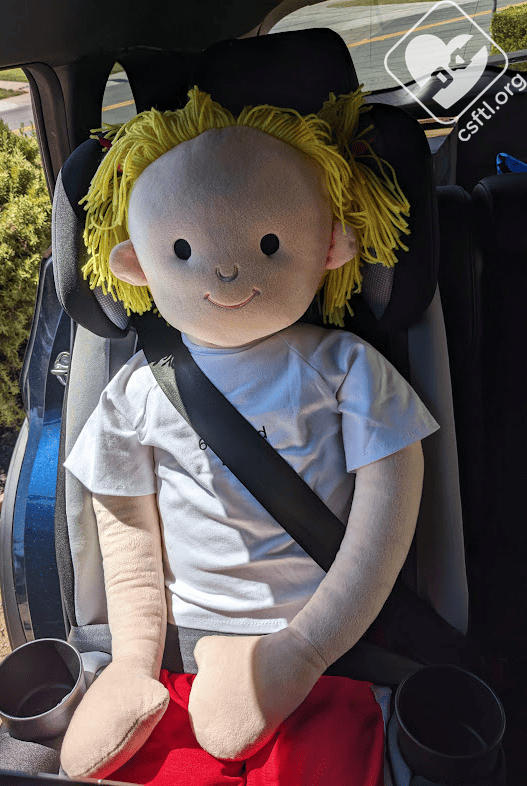
- Booster mode weight range: 40 to 100 pounds and at least 4 years old. CSFTL advocates that children be at least 5 years old before moving to a booster seat
- Booster mode height range: 43-52 inches tall
- Lower anchor weight limits: rear facing: 40 pounds, forward facing: 55 pounds
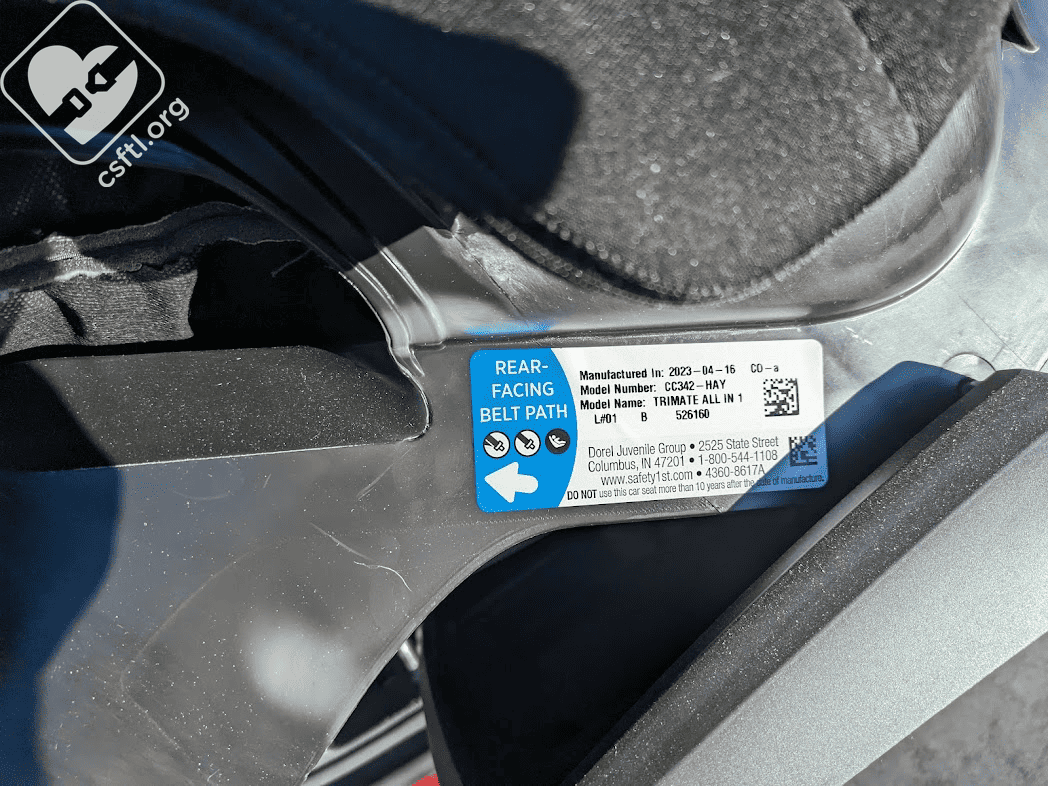
- Expiration: 10 years from date of manufacture
- Crotch buckle: 3 positions — use the position closest to the child. The buckle should not be behind or underneath the child. The outermost position is only for forward-facing
- Optional body pillow is used for rear-facing only
Features
- No rethread harness
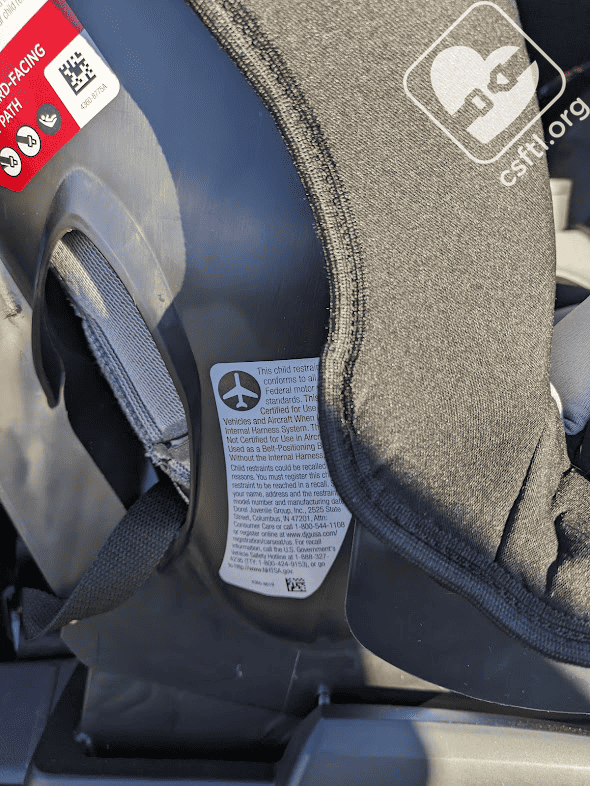
- Inflatable seat belt installation prohibited
Measurements
- Lowest harness position: 9 inches
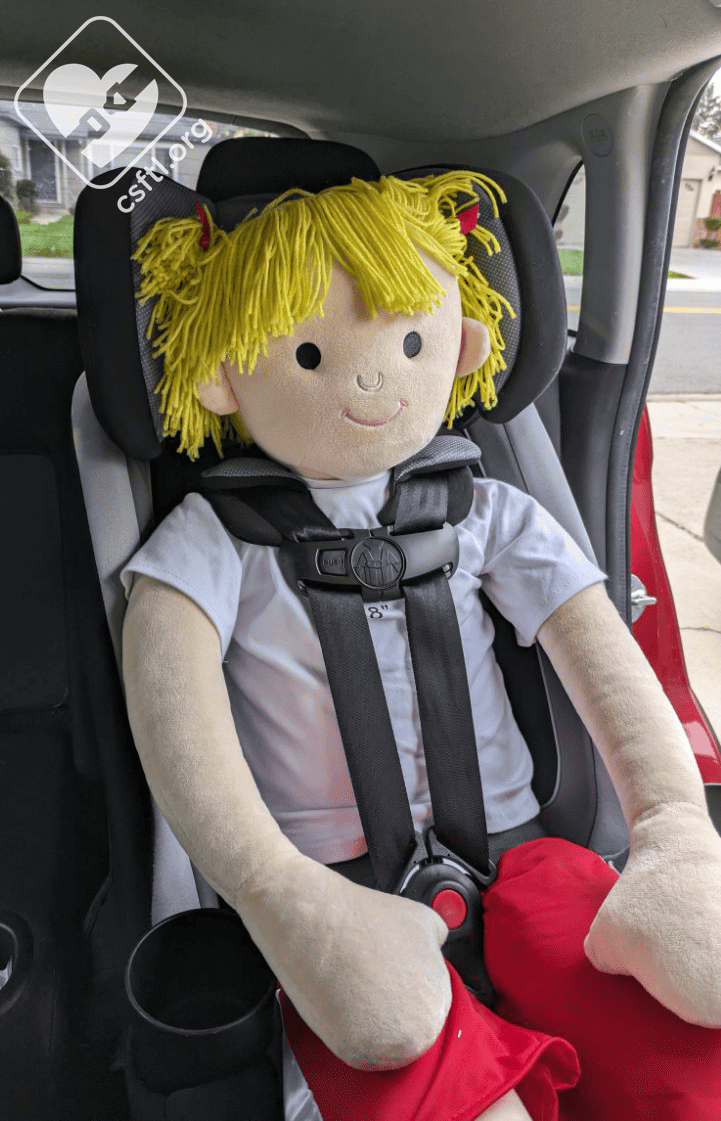
- Highest harness position: 15.5 inches
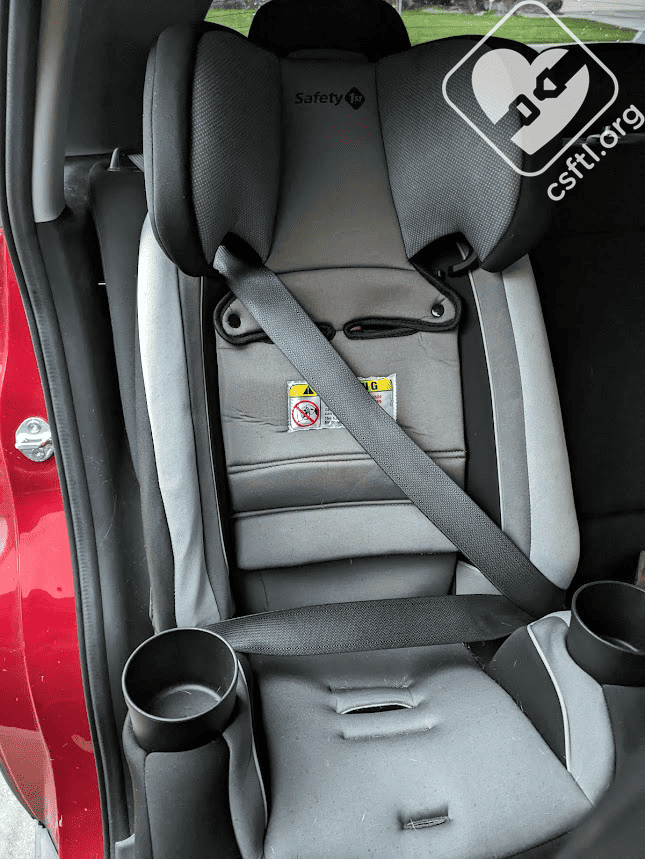
- Highest shoulder belt guide position: 17 inches
- Width at widest point:
- Seat weight: 12 pounds
- Crotch buckle positions: 5, 6.5, and 8 inches from the back of the seat pan
Rear Facing Setup and Use

Safety 1st TriMate recline angle indicator
The TriMate has 3 recline positions. Positions 2 and 3 are for rear-facing, positions 1 and 2 are for forward-facing/booster modes. In rear facing mode, the level line must be parallel to the ground if the child cannot sit up unassisted. However, if the child has adequate head/neck control, the line does not have to be even with the ground. This could mean that the seat can be installed more upright for children who fall into that category — sometimes that extra front-to-back space is a very useful thing!
Adjusting the Recline Position
Safety 1st TriMate stuck between recline positions
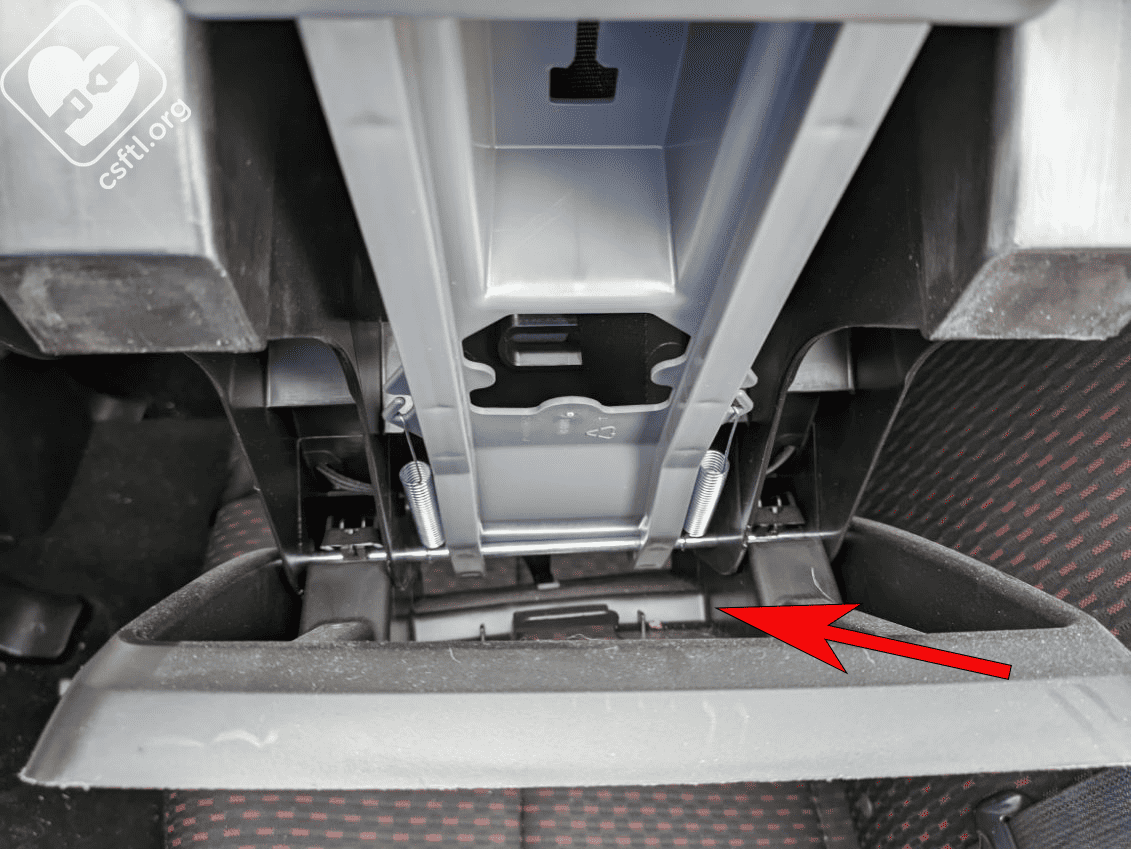
Normally, I don’t go very in depth about adjust a seat’s recline angle aduster but the TriMate presented a unique challenge. The seat really resisted moving between the different positions. I would have expected to squeeze the handle on the bottom of the seat’s shell with one hand, then use my other hand to move the shell into the desired position. But it took a lot more effort than that and on many occasions, I wasn’t sure the seat had moved into the next position because the adjuster was so stiff.
Recline Adjuster Stuck
I suspect that the next section (and the section above) is in direct relation to the fact that on our seat, the recline adjuster kept getting stuck. After some discussion with the manufacturer, I finally found something that worked: I had to squeeze the handle with both hands and lean on the seat’s shell with my upper body to release the adjuster. That seemed to release whatever mechanism was stuck and the recline adjuster flowed freely between positions for a while after that.
However, it wasn’t too long before that free flowing stopped and the handle got stuck in the forward facing position again. The big difference in this case was that I knew how to release it.
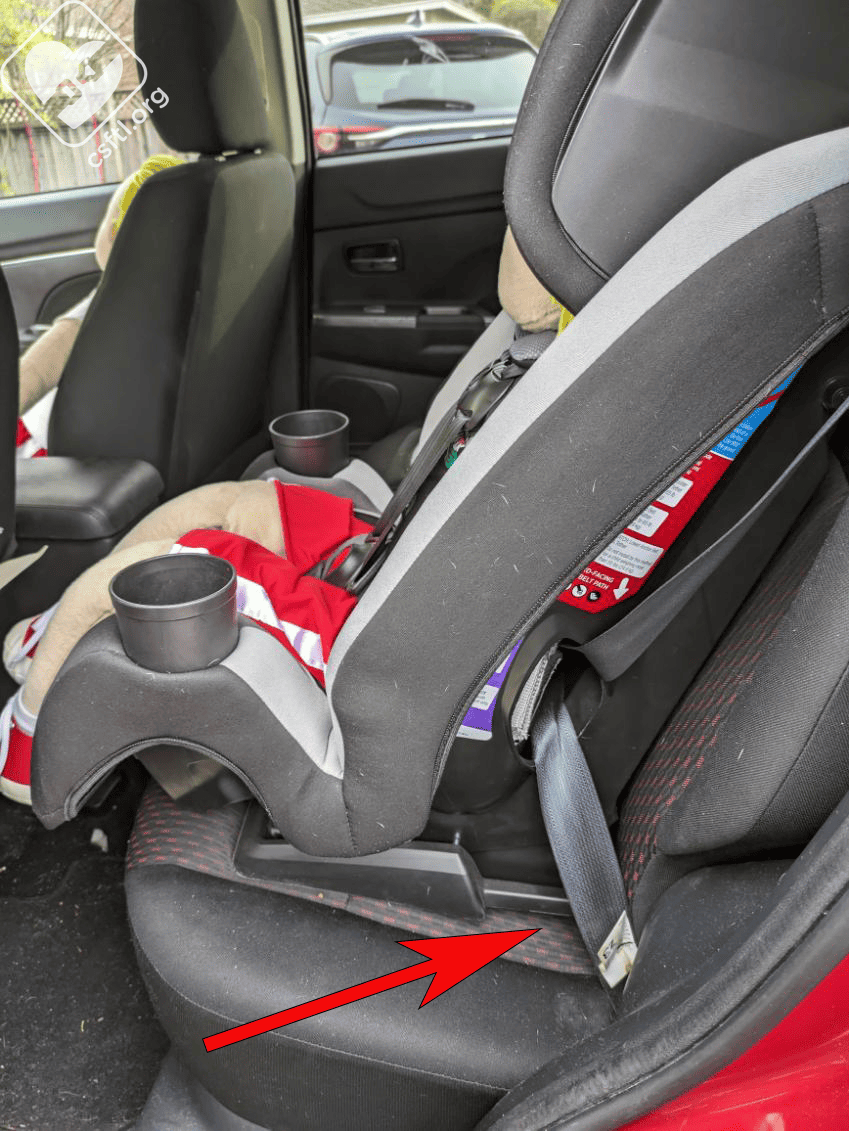
Flush with the Vehicle Seat

Safety 1st TriMate not flush on the vehicle seat
In many cases, placing the car seat on the vehicle seat isn’t much of a problem — you’d just set it down. But the TriMate has a rather narrow base that seems to always want to tip to one side or the other. So just getting the seat into a stable position and ready for installation was oddly difficult. And then, in forward facing mode, I was unable to install the seat with the base level to my vehicle seat. My vehicle seats are fairly flat so this is concerning, it makes me question how difficult it could be for caregivers to install this seat properly. I know I struggled more than I would have expected to. Apparenty this situation is directly related to our misbehaving angle adjuster though I assert that it’s also related to the aggressive side bolsters on my vehicle seats because the seat did sit flat on a flatter vehicle seat in a different car.
Tipping
I grew up in the Midwest and though I never participated, I heard many a tale of cow tipping. The TriMate brings my childhood back as the seat tips side to side no matter how securely I installed it. This tipping situation happened in rear and forward facing modes and it made the seat almost unusable in booster mode because it won’t sit upright as the child climbs in or buckles themselves.
At Least it’s Lightweight
The TriMate’s most redeeming quality is the fact that it isn’t particularly heavy, it only weighs 12 pounds. If it was fairly easy to install the seat well on a consistent basis, I’d suggest this as a terrific car seat for travel. But….I had so many issues installing it correctly that I can’t make that suggestion in good conscience.
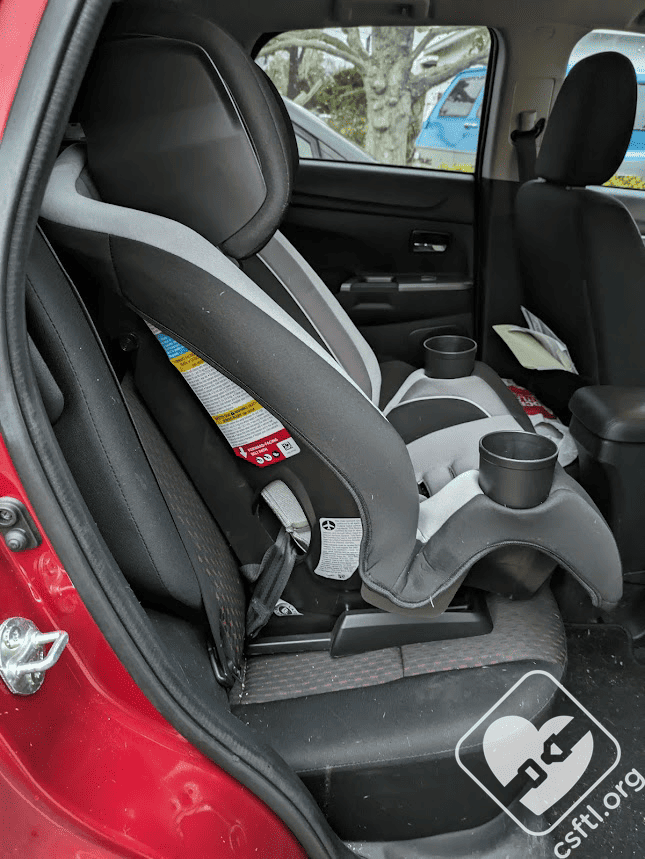
Installation: Rear Facing
Vehicle Seat Belt
Safety 1st TriMate rear facing not flush with the vehicle seat
The first thing I noticed when installing this seat is that the base is so narrow, it really wants to tip over when it’s installed rear facing. I’ve got a few installation tricks up my sleeve — I tried them all and this seat still wants to tip over. So please keep that struggle in mind if you’re considering this seat.
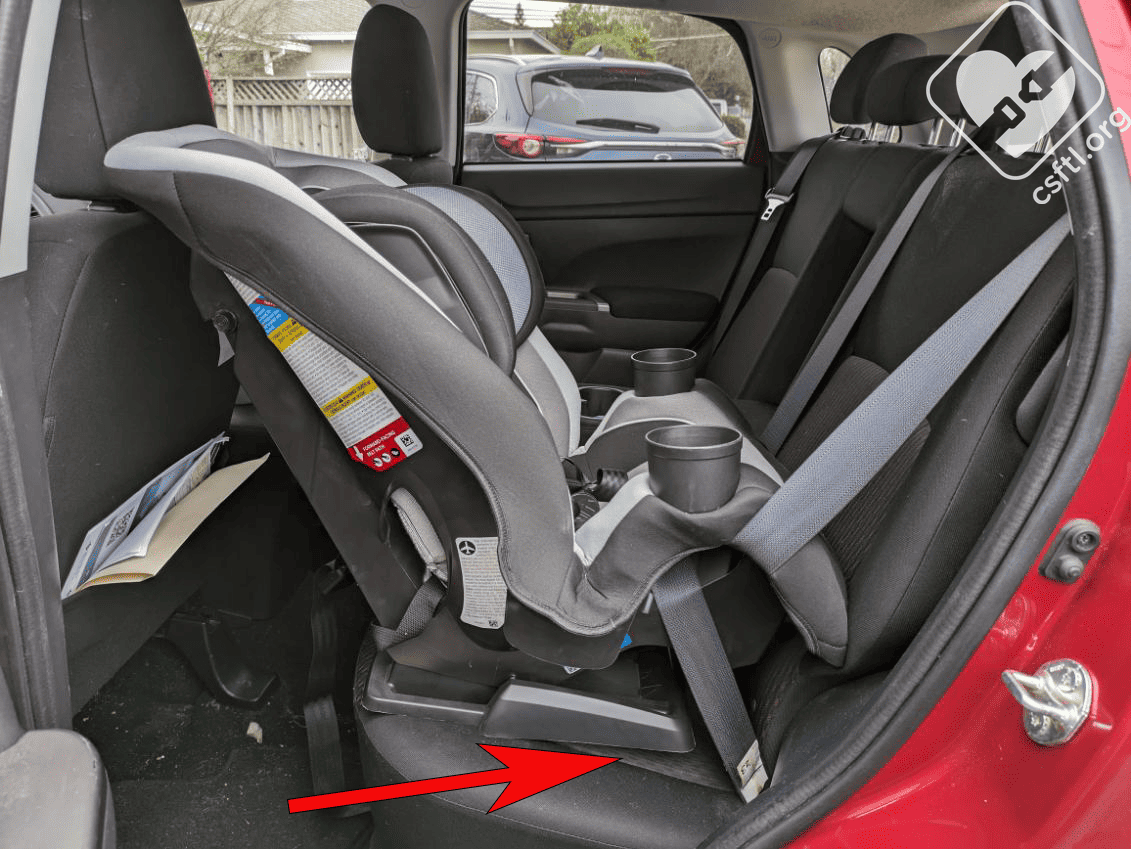
Safety 1st TriMate rear facing not flush with the vehicle seat
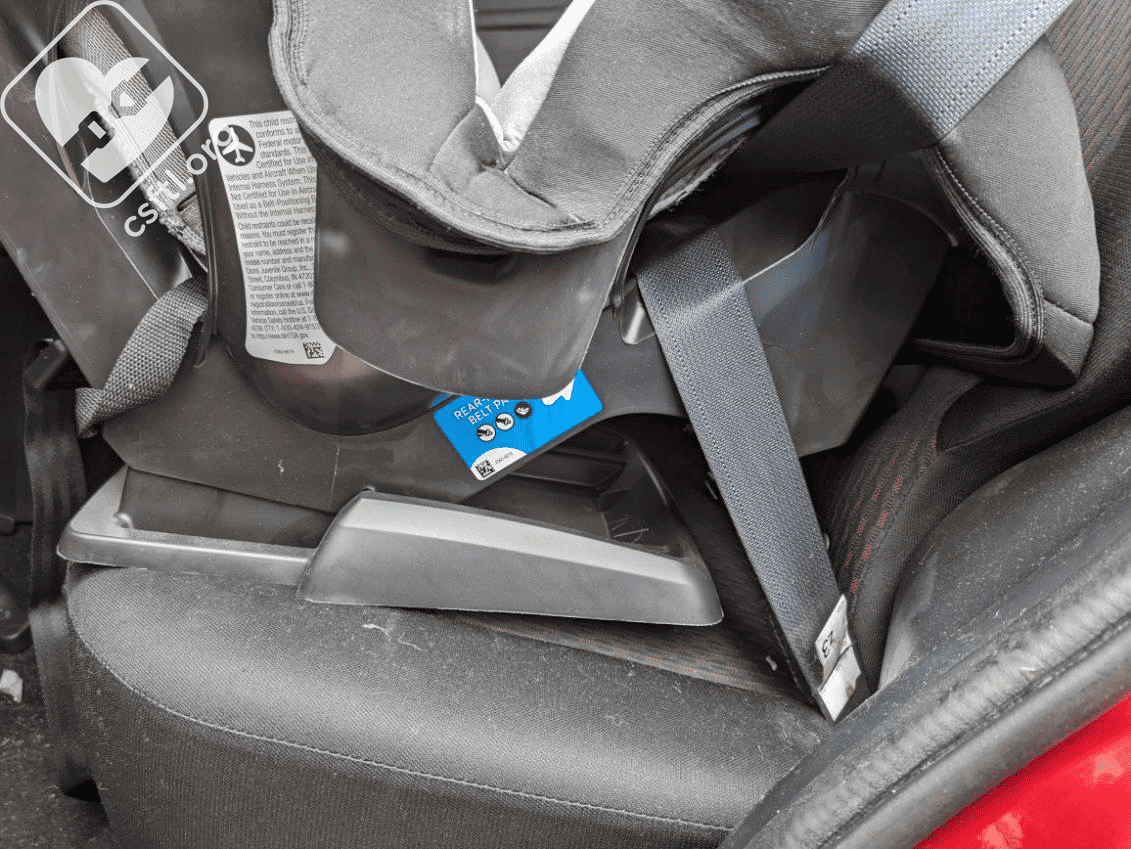
To install the TriMate rear facing, set it on the vehicle seat with the harness facing the back of the vehicle. Thread the vehicle seat belt through the rear facing belt path (under the child’s legs, marked on the side of the seat’s shell) and buckle the belt. Pull the shoulder portion of the seat belt tight, then lock the belt and feed it back into the retractor. Check your work by giving the seat a firm handshake at the belt path — it shouldn’t move more than an inch in any direction.
The install you see here is solid, the seat doesn’t move when I check for movement at the belt path. However, the seat is not flush with the vehicle seat and the seat tips when I go to put my lightweight doll child into it.
Lower Anchors
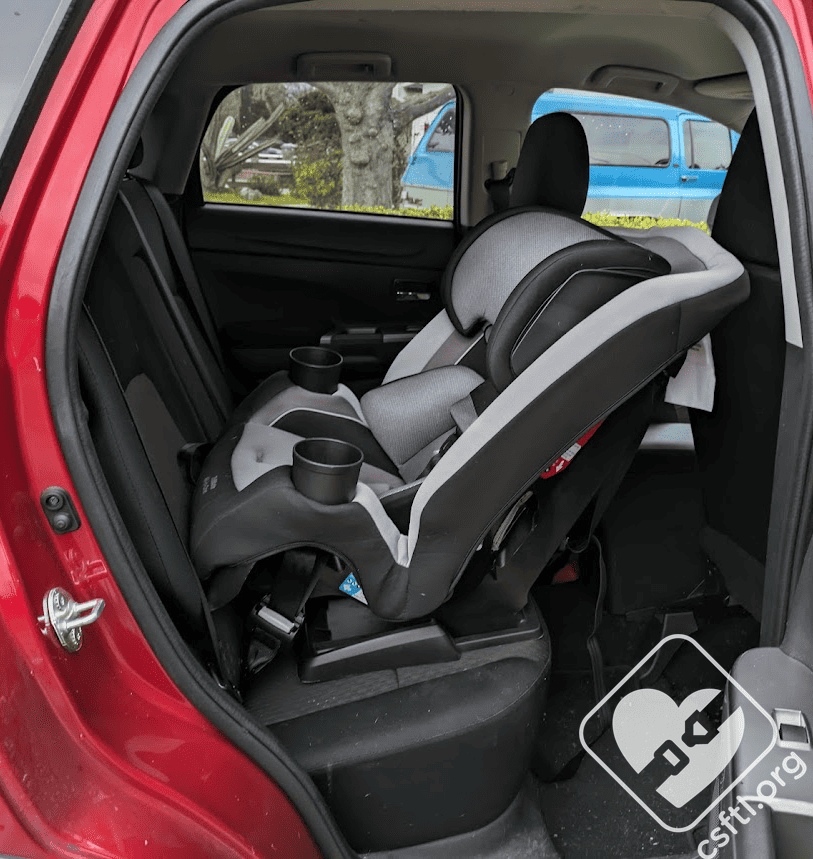
Safety 1st TriMate installed rear facing with lower anchors
To install the TriMate rear facing with the lower anchors, set it on the vehicle seat with the harness facing the back of the vehicle. Thread the lower anchor connectors through the rear facing belt path (under the child’s legs, marked on the side of the seat’s shell) and connect them to the anchors in the vehicle. Pull the tail of the webbing straight up while pushing down on the car seat, remove as much slack as possible. Check your work by giving the seat a firm handshake at the belt path — it shouldn’t move more than an inch in any direction.