We’ve all seen and made jokes about how hard it can be to install car seats. One meme suggests that installing car seats in the summer is a good substitute for a workout. Your mileage may vary on that one, but if you’re not into Bikram Car Seats, there are ways to work smarter and not harder when installing your child’s car seat.
Leverage and Counter Pressure
Leverage is a critical piece of any car seat installation. Figuring out where to apply counter pressure in order to remove all of the slack from either the lower anchor webbing or the vehicle seat belt can be the most challenging part of an installation.
Car seat manuals and handy installation videos from the manufacturer make it seem so simple — connect the lower anchors, compress the car seat and remove all of the slack from the webbing, then you’ve got an amazingly secure installation in seconds. And you didn’t even break a sweat!
It sounds so easy but we know that’s not always the case.
If you’re not pulling the lower anchor at the right angle, it can be decidedly athletic to get that lower anchor webbing tight enough so that when you test for a secure installation at the belt path there’s less than one inch of movement.
The secret to an easier install is leverage. And that leverage starts with accessing the belt path.
Pull From Inside the Seat
Many convertible car seats don’t allow easy access to the entire belt path. This can create a situation where it’s nearly impossible to pull the lower anchor webbing tight enough for a secure installation because the tail of the webbing can’t be pulled parallel to the strap.
The key to a secure installation with lower anchors is to pull the lower anchor webbing’s tail parallel to the portion of the strap that’s securing the anchors. This is easier to show in pictures than explain with words so we offer the following visual aids.
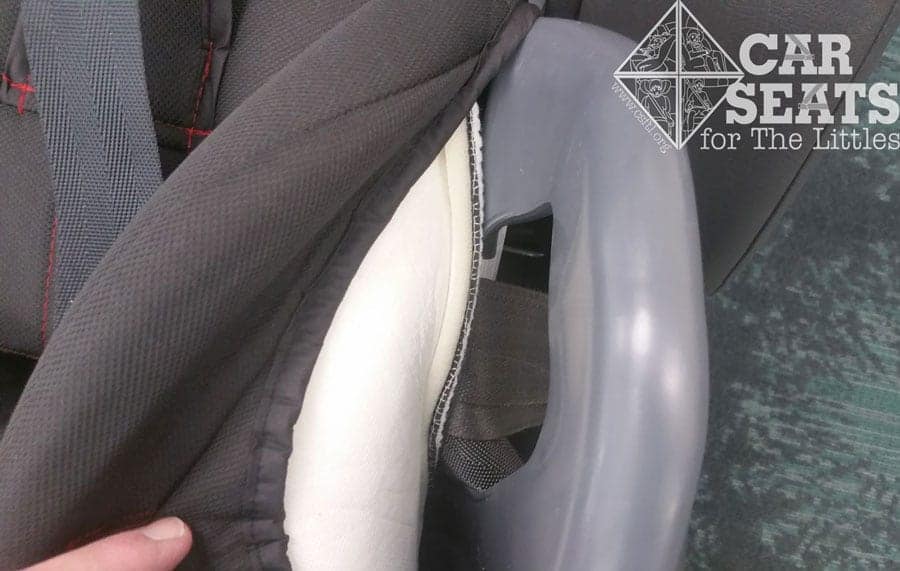
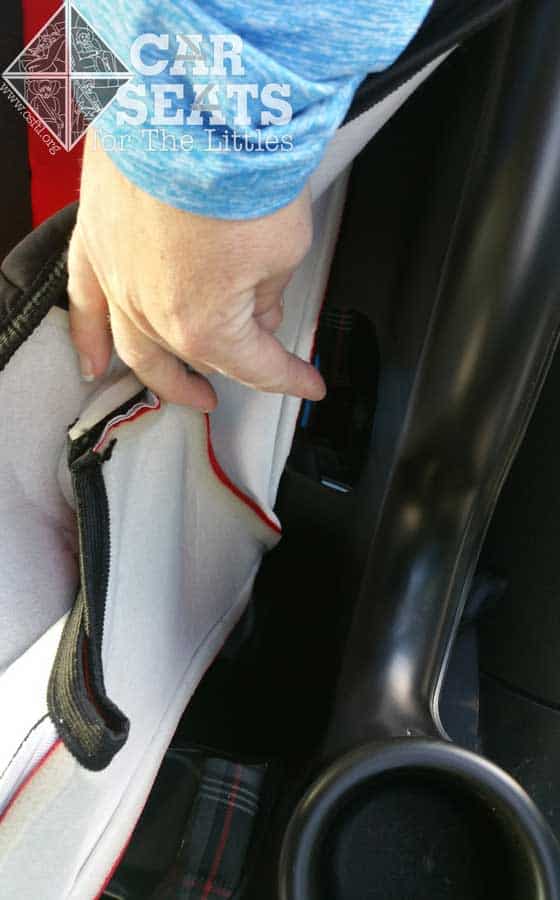
Pull the car seat cover away from the shell of the car seat to expose the belt path
One of our favorite tips is to peel back the portion of the cover that’s closest to the belt path.
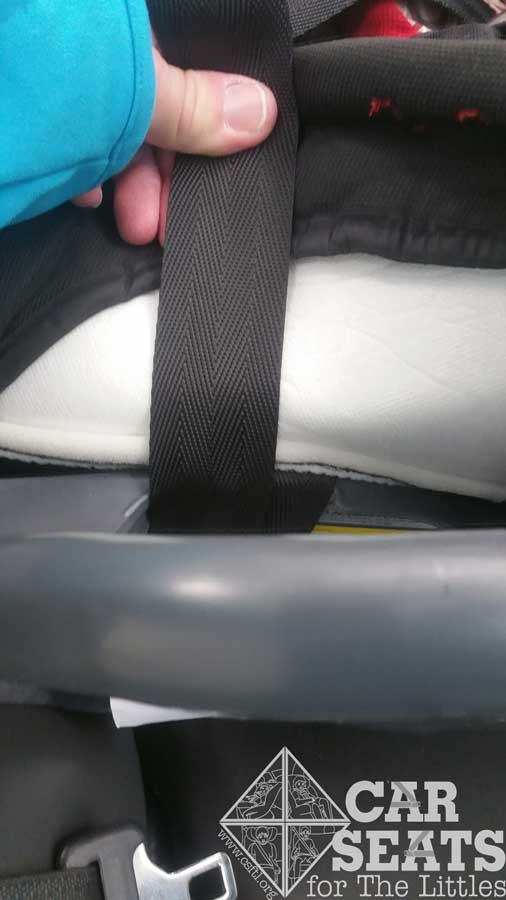
Once the belt path is exposed, pull the webbing straight up while applying pressure to the seat pan
This allows easy access to the entire belt path. From this point, pull straight up on the webbing while pressing down on the seat pan with your opposite hand.
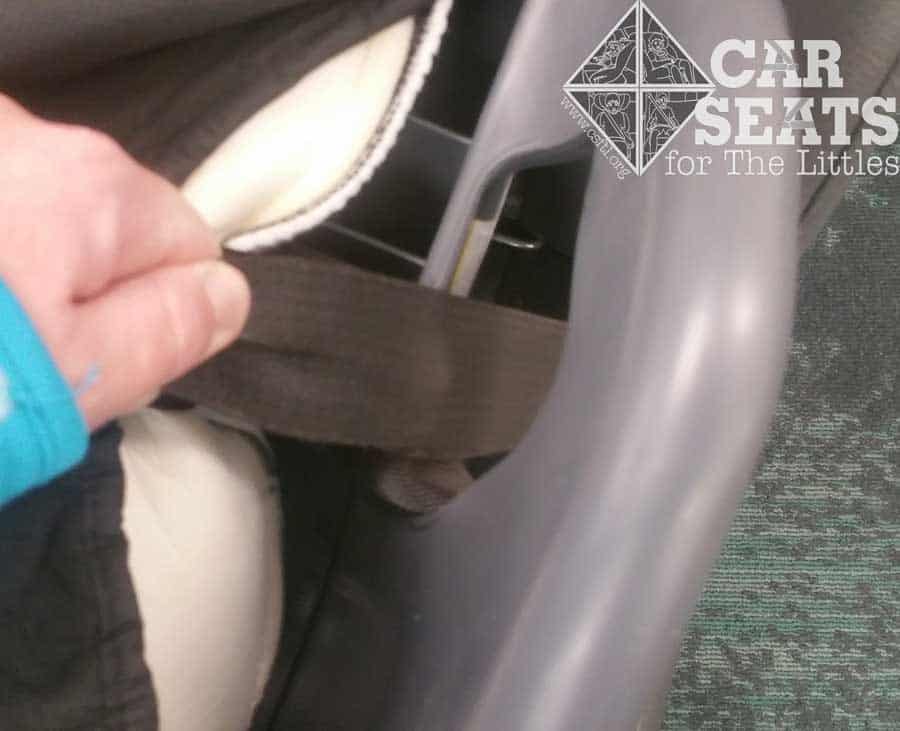
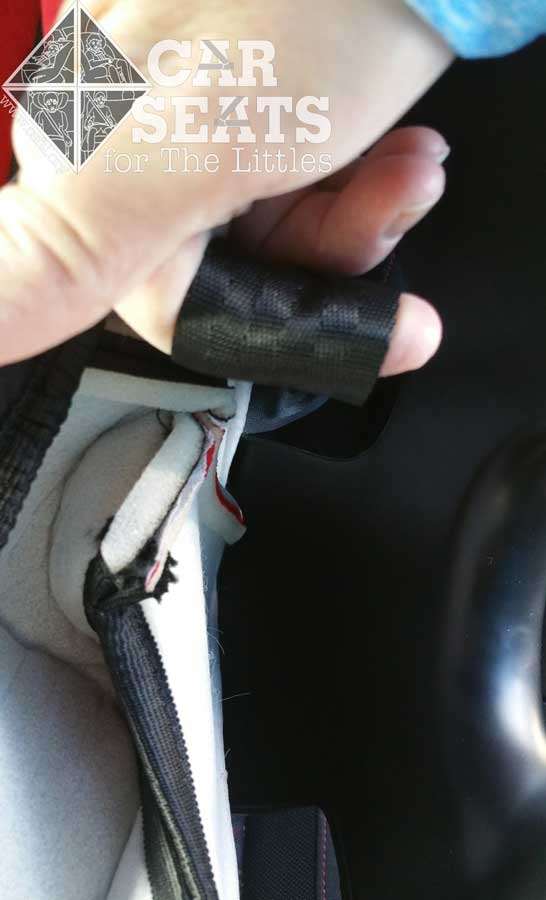
Pull the lower anchor webbing through the belt path
Pull the tail of the lower anchor strap toward the center of the car seat while applying pressure to the car seat with your other hand. Generally, the best spot to apply the pressure is where the child’s bottom would be.
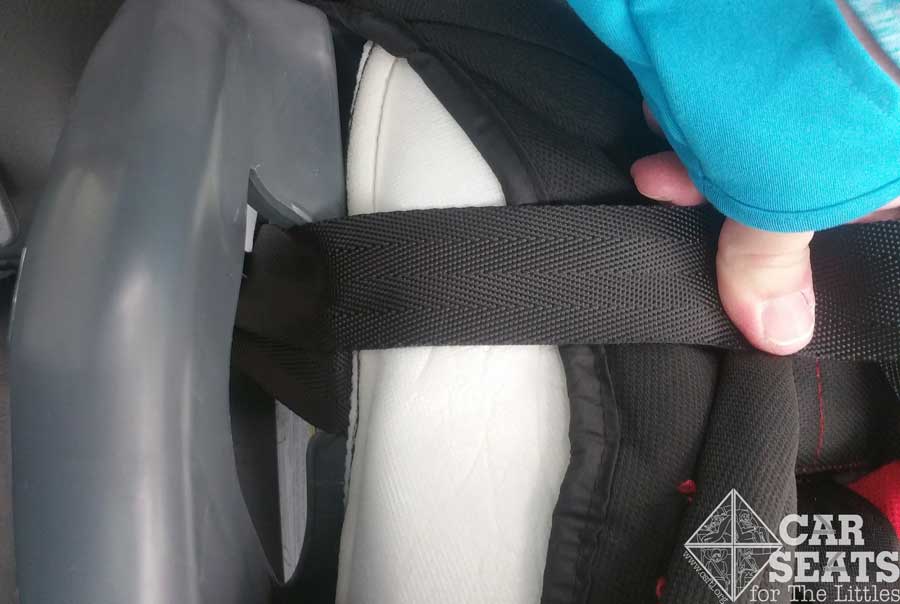
Pull the webbing across the belt path while applying pressure to the seat pan
Then, pull the tail of the lower anchor webbing straight across the top of the belt path, over the lower anchor strap and get a solid install.
Sometimes, you can incorporate an exercise program into the installation as well! Grab the lower anchor webbing’s tail from inside the belt path, then squat outside the vehicle. Apply counter pressure to the outside of the car seat’s shell while pulling that tail straight across the belt path.
Naturally, different car seats have different ways of getting your hands into the correct location, but peeling back the cover nearly always helps. Sometimes it will allow you to not break a sweat or use any adult words.
Stand Over the Car Seat
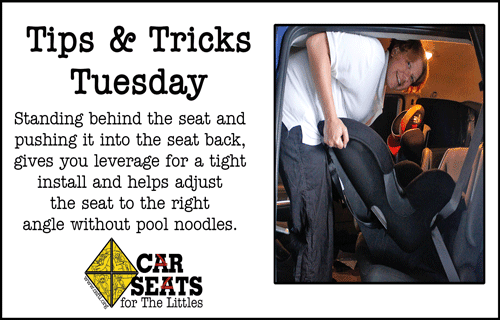
Noodle-less Install
When the space in the vehicle allows, stand behind a rear facing car seat then grab the lower anchor strap or straps from inside the car seat’s shell. Apply counter force to the seat’s shell with your hips while pulling the slack out of the lower anchor webbing.
When combined with pulling from inside the car seat, these tricks can make installing even notoriously difficult convertible seats a breeze.
Forward Facing
Remove the cover to expose the forward facing belt path
Forward facing installations require the same type of leverage and belt path access. Start by removing the cover from in front of the belt path. This is easier on some car seats than others.
Pull the lower anchor webbing straight out while pushing the seat’s shell back into the vehicle seat
Pull the lower anchor webbing straight out from the car seat’s shell, compressing the car seat straight back into the vehicle seat as you tighten the lower anchors. Removing the cover to allow access to the belt path should allow for a solid install.

Forward facing installation after removing the cover to access the belt path
After checking for movement, attach and tighten the top tether, step calmly out of the car and brush off compliments from all the awe-struck parents watching you.
Or possibly head inside, grab an iced coffee and take a break. You earned it!
All of these tips rely on getting the most leverage in the right places. Figuring out where to apply counter pressure is key to a secure installation. Once you’ve mastered that, installation should be a breeze!