
Baby Trend Ally 35
Baby Trend has long been known for their well-priced rear facing only infant car seats. We’ve often struggled with the fact that they just don’t always fit the smallest newborns correctly because the lowest harness slot is quite high for a newborn. Since the harness straps on rear facing car seats need to be at or below the child’s shoulders, this can present quite a problem for the tiniest of passengers.
Given those years of struggle, we were very excited to see that there’s a new Baby Trend on the block — with very low harness strap slots available! Meet the Ally 35, based on a car seat that some of you may remember, the First Years Via. Let’s take a closer look.
CSFTL Quick Stats
- Weight range: 4-35 pounds
- Height range: 32 inches or less
- Lowest harness position: 5 inches
- Expiration: 6 years from date of manufacture
- Handle Position: Rebound position is recommended, toward the back of the car
Measurements
- Weight (carrier only): 8.8 pounds with insert
- Width of carrier at widest point: 17.5 inches
- Width of base at widest point: 15 inches
- Shell height: 20 inches
- Crotch buckle slots depth: 3.5, 4.75, and 6 inches from the back of the seat pan
Features
- Reversible infant insert
- Deep side wings with EPS foam
- Four position height adjustable base
- Dual bubble level indicators
- 6 position crotch belt adjustment
Manual Issues
There’s an elephant in the room here, and we’d like to identify it at the outset. We had a great number of challenges using this seat, because the manual we received contained a number of issues and key omissions. We’ve reached out to Baby Trend about these issues, and they’ve assured us that fixes are on the way. We don’t yet have a date for those updates. We’ll explain more about these issues below.
Installation with the Base
Vehicle Seat Belt

Baby Trend Ally 35 Lower Anchor Connector Storage
Before you install the Ally’s base with the vehicle seat belt, make sure to store the lower anchor connectors on the clearly marked storage hooks.

Baby Trend Ally 35 Recline Level Indicators
The Ally 35 has two different recline level indicators on the carrier: a level bubble for 4 to 22 pounds, and a level line for over 22 to 35 pounds. The bubble must be centered between the lines.

Baby Trend Ally 35 installed
Installation of the base with the vehicle seat belt is fairly straightforward, with one small caveat. The level indicators are not on the base, but on the carrier itself.

Baby Trend Ally 35 vehicle seat belt installation
I found that this method worked best: first, place the carrier on the uninstalled base on the vehicle seat. Then, press down with your hand near where the baby’s feet would go, to simulate the angle it would be at when installed and tightened.
Adjust the recline position if needed, then remove the carrier from the base and install the base. When installing the Ally for a child who weighs between 4 and 22 pounds, acheiving the correct recline can be a bit difficult because the level bubble must be in exactly the correct position.
Put the lap and shoulder belt together through the belt path, then buckle the belt.
Unfortunately, the manual omits the next crucial step which is to lock the vehicle seat belt.
In most cars, the vehicle seat belt locks by pulling the shoulder belt out all the way, then listening for a clicking sound when it retracts. Always consult your vehicle owners manual for your vehicle’s specific instructions. Baby Trend confirmed for us that they will be adding this step to the next version of the manual – we’re eager to see that change!
Lower Anchors

Baby Trend Ally 35 lower anchor Installation
Lower anchor installation was generally easy as well. I followed the same method I used at the start of the seat belt installation, that is, putting the carrier on the uninstalled base and then pressing down on the carrier near the vehicle seat back and adjusting the angle based on that. Then I removed the carrier from the base, hooked on the lower anchor connectors and tightened. The Ally 35 has standard j-hook lower anchor connectors, but they’re pre-routed through the belt path and under a plastic tab. This nice feature streamlines things a bit.
Pool Noodles
Baby Trend Ally 35 – Pool noodle allowed under rear of base
The Ally 35 allows the use of a pool noodle if the correct recline cannot be achieved with the recline foot. The Ally 35 also allows something we don’t often see, which is a pool noodle under the end of the base near the front of the car. This may be necessary on flatter vehicle seats, especially for the over 22 pound recline angle.
Installation Without the Base
Manual Errors
The manual contains a few errors regarding baseless installation that are worth mentioning here.
First of all, the baseless installation section is not separate from the section about installation with the base. The diagrams that show how to tighten the base are under the section about the base, and they show how the vehicle seat belt should be routed for a baseless installation.
We’d urge Baby Trend to clarify that the belt routing for installation with the base and without the base are two separate installation methods and can never be used together.

Baby Trend Ally 35 Incorrect European Routing Diagram
Second, the diagram in the manual for European belt routing (see below for information on European routing) has a significant error. The lap portion of the vehicle seat belt is also shown wrapped around the carrier. Baby Trend will be updating this illustration in an upcoming version of the manual. They shared the new illustration with us, but the incorrect manual is still on their website. UPDATE: Baby Trend has made the correction in the manual, but unfortunately it’s under the header for installation with the base. European belt routing is used without the base.
Third, a diagram given in the manual for “correct use of the lap belt” shows the shoulder belt on the back of the seat and is not that clear. However, the illustration on the back of the seat itself is very clear, and if a parent or caregiver is wrapping the belt around the back of the seat, they are almost certain to see this illustration.
European Belt Routing

Baby Trend Ally 35 baseless install with European seat belt routing
Baby Trend recommends the use of European belt routing for installation without the base. This is accomplished by putting the lap portion of the belt through the belt guides then wrapping the shoulder portion of the belt around the back of the carrier. Then lock the belt as per the instructions in your vehicle manual. The illustration on the seat shows the belt going under one plastic bolster on the back of the seat and then over the one next to it. The configuration of some vehicles may make this somewhat difficult. For example, in my 2017 Honda Civic, the belt kept slipping down and off of the lower portion. A European routing belt clip or hook on the back of the seat, like we see on many other seats with European routing, would have prevented this issue.

Baby Trend Ally 35 baseless European routing belt path
As a last step, adjust the Ally to the correct recline angle. This angle is easier to tweak when the seat is installed without the base than when the base is used. Simply pull up or push down on the area of the seat near the child’s feet while checking the angle indicator.
American Routing

Baby Trend Ally 35 baseless American belt routing
Although Baby Trend recommends European routing for baseless installations, American belt routing is also an option on the Ally 35. To install the Ally this way, thread the vehicle seat belt through the belt guides, lock the vehicle seat belt, then remove the slack from the seat belt while pushing down on the carrier until there’s less than an inch of movement at the belt path. Then check the recline angle indicator and adjust the seat to the correct angle.
Handle Position
Baby Trend recommends that the handle be in the rebound position, toward the back of the vehicle.
Fit to Child: Adjustments
Crotch Buckle Routing

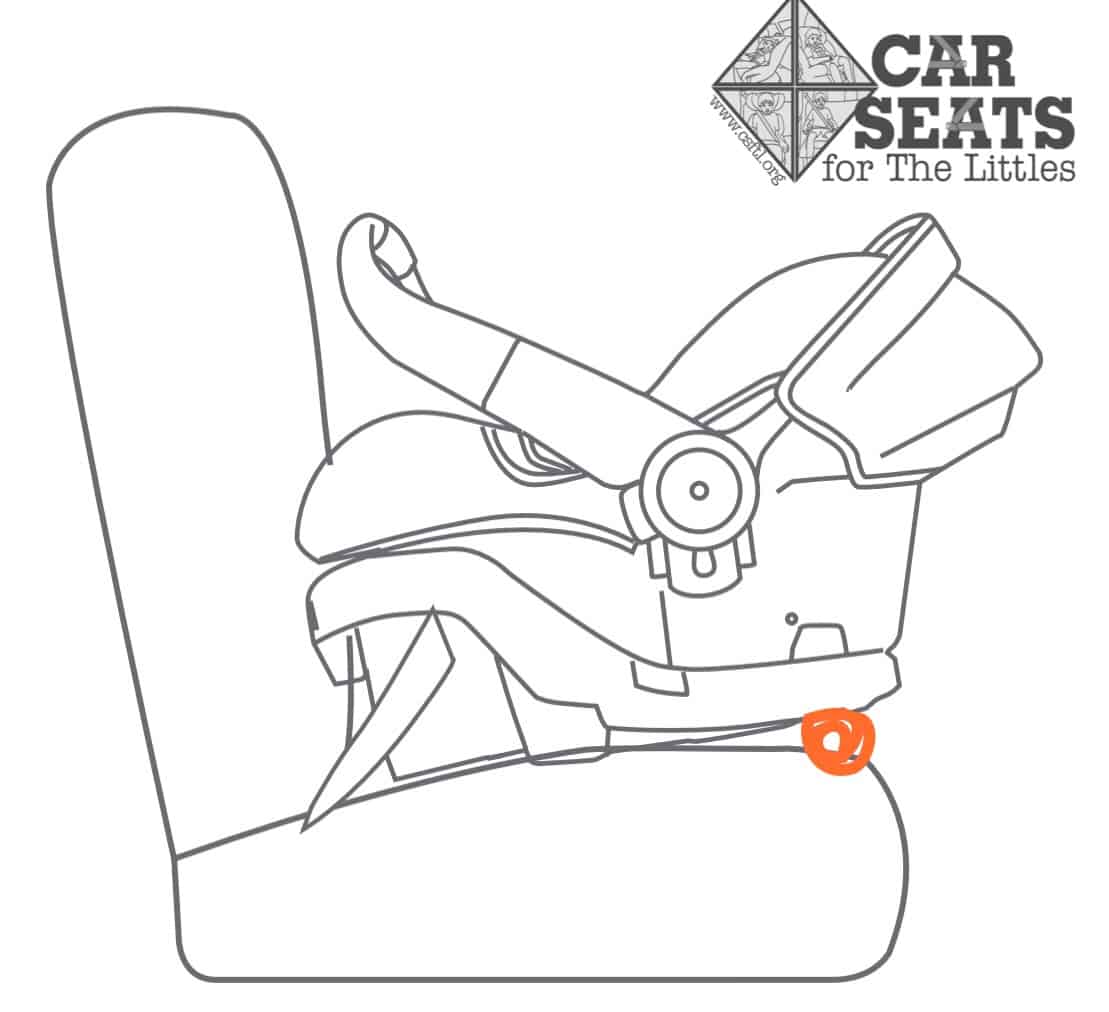
Baby Trend Ally 35 crotch strap shortening clip
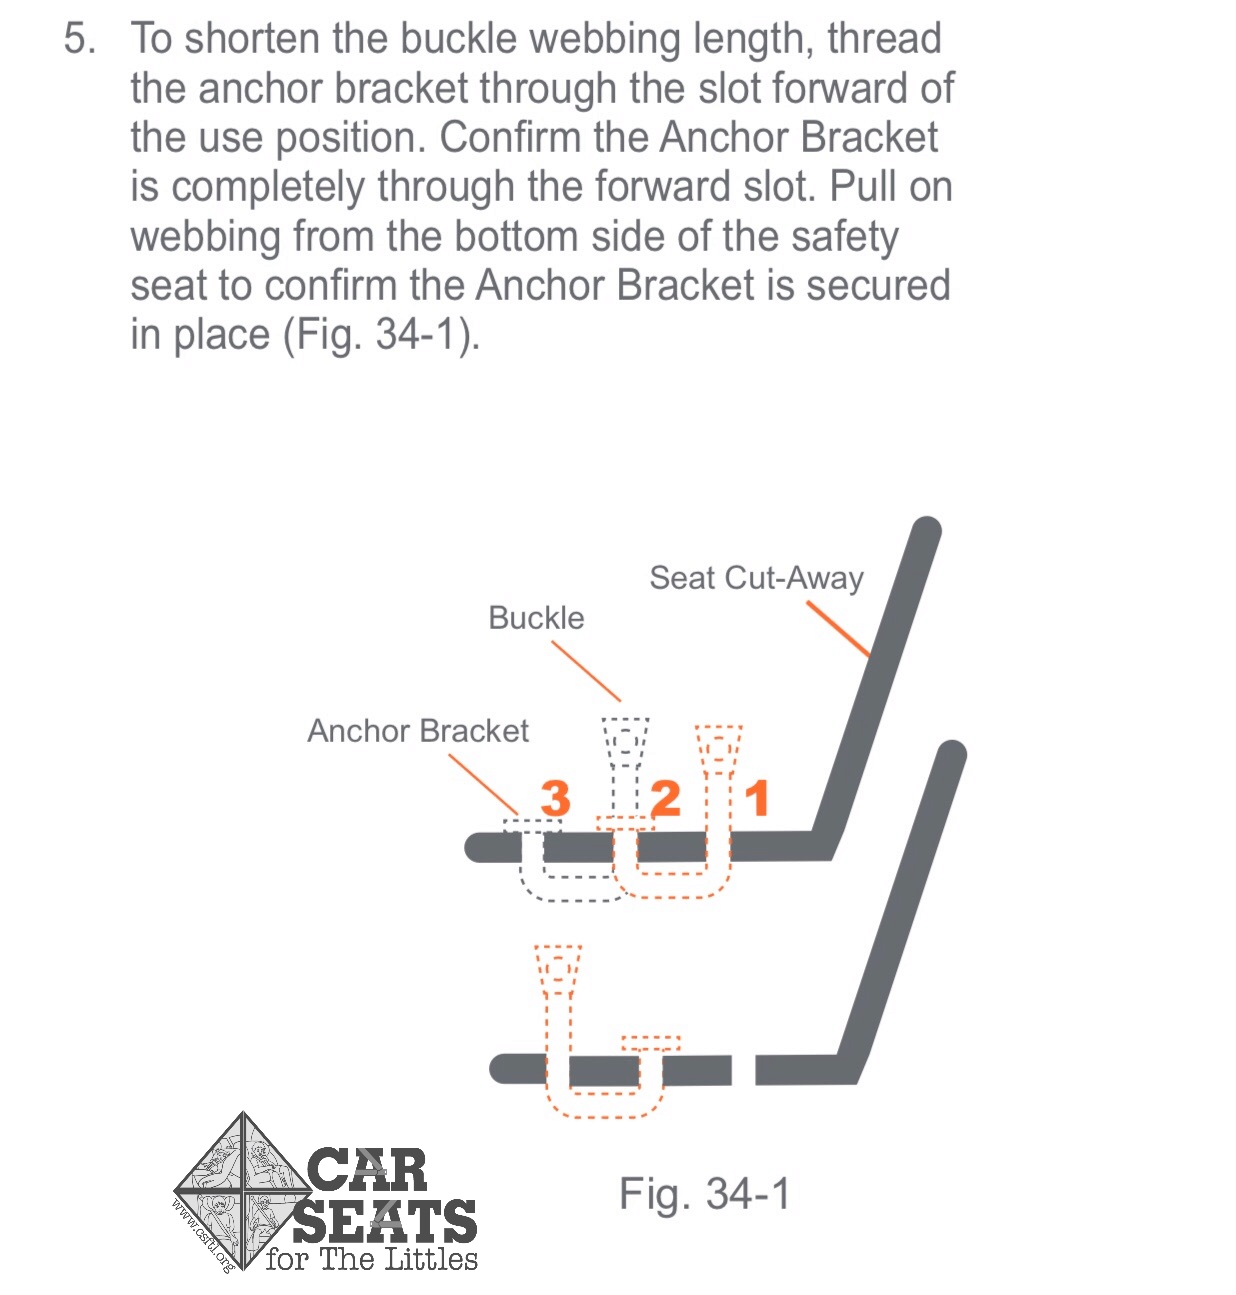
The Ally 35 comes with an interesting way to shorten the crotch buckle for its smallest occupants: a mini locking clip that attaches to the crotch buckle under the seat. The seat comes delivered with this attached. It can only be used when the crotch buckle is in the first slot closest to the back of the seat.
Harness Straps

Baby Trend Ally 35 threading tool
The Ally 35 comes with an innovative belt threader, which looks like a ruler without any numbers.

Baby Trend Ally 35 splitter plate
Though I found it easier to thread the straps without this tool, we always welcome any accessory which makes manipulating the car seat parts easier, especially for those who may have limited dexterity. Unfortunately, however, there isn’t a tool to help with their splitter plate, the metal part on the back of the seat where the straps connect. The manual and illustrations on the carrier seem to show that one strap should go inside the other, like on Diono car seats. However, the seat was delivered with the straps side by side on the splitter plate, and the straps do not fit one into the other because of the loops.
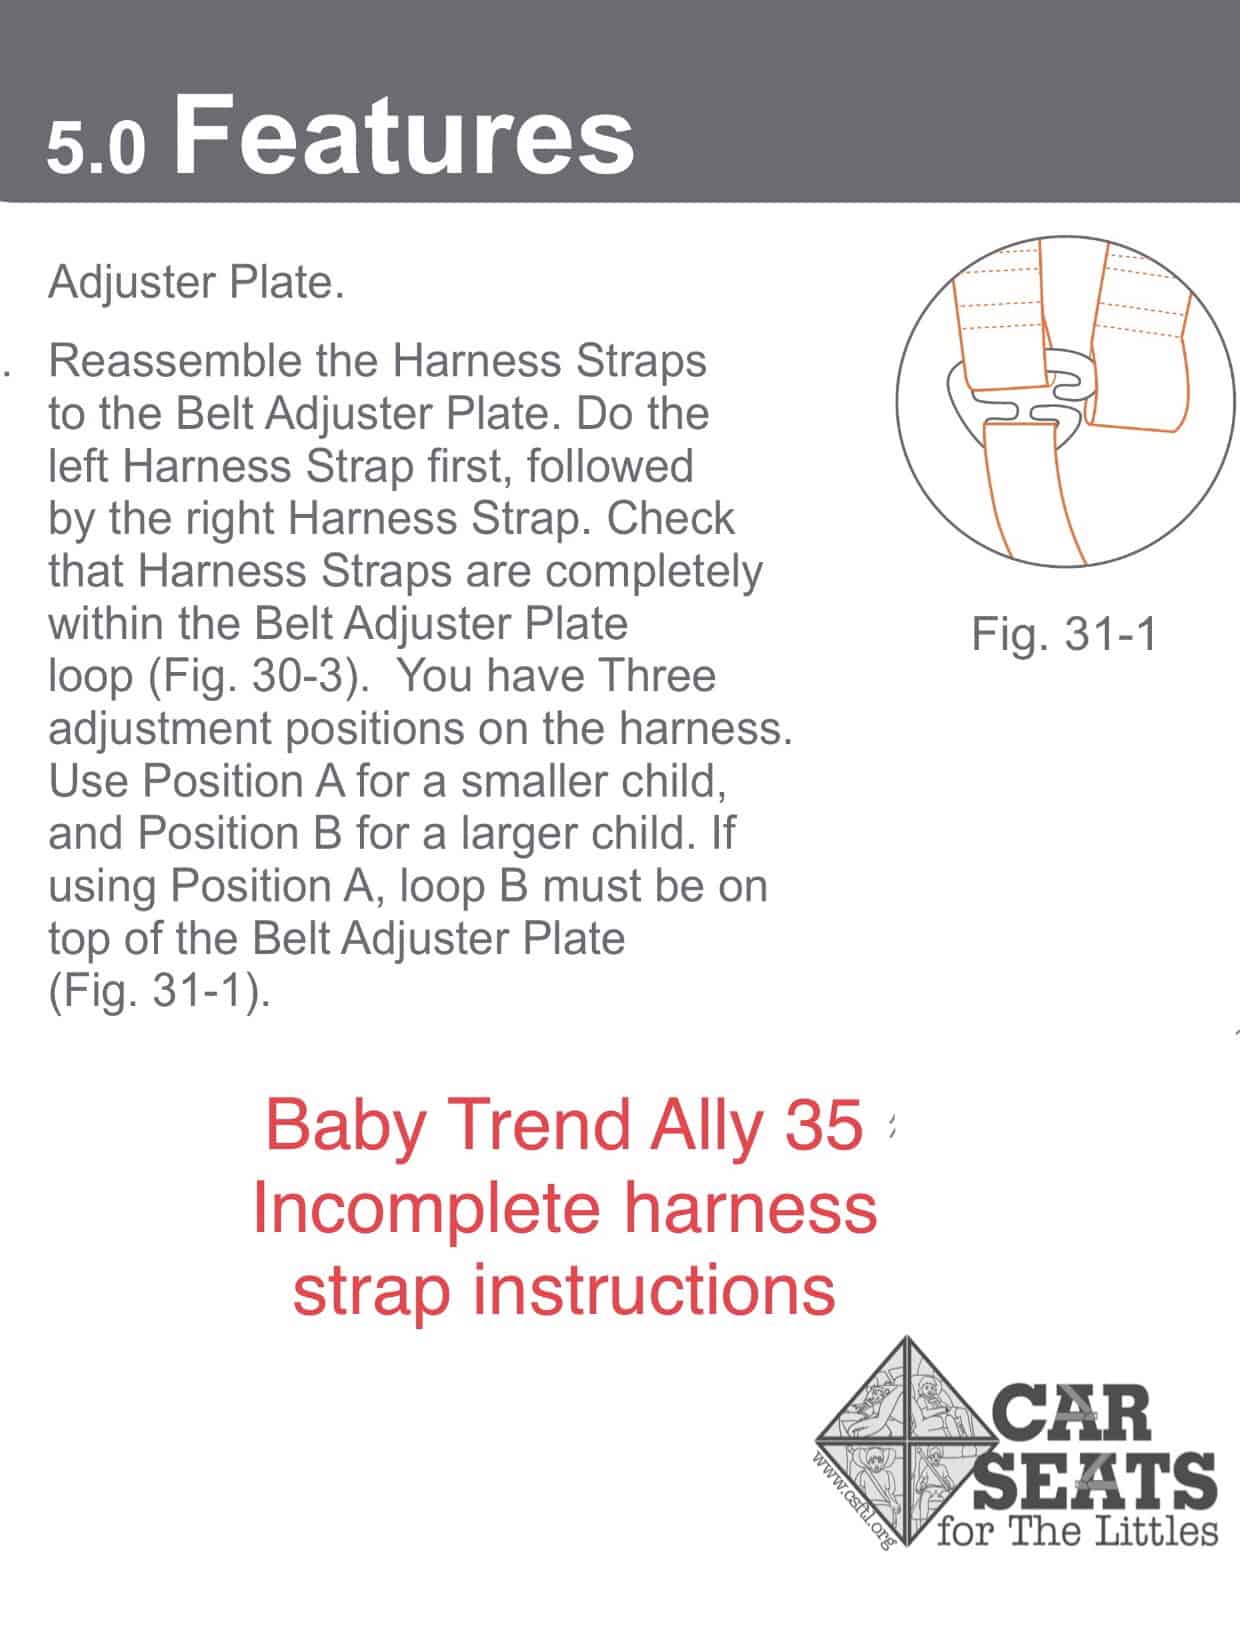
Baby Trend Ally 35 Incomplete Harness Strap Instructions
There are three loops on each strap. These are used to adjust the harness length. The manual mentions only two loops. We asked Baby Trend if there are two or three because on some other models of car seats, what looks like a middle loop is just the space between the other loops.
Baby Trend said they’d clarify in the next manual revision, but they did tell us that there are no height or weight restrictions for which loops are used when.

Baby Trend Ally 35 excess harness hook and loop
The excess strap should hang on top of the splitter plate. The straps have velcro to move the excess out of the way.
Fit to Child: Newborn

Baby Trend Ally 35 Newborn fit
At the time of this picture, this young man was 4 days old. He weighs 7.5 pounds and is 21 inches long. As expected, the Ally 35 fit him beautifully. The newborn crotch routing was used. However, when we adjusted the carrier to the correct angle using the level bubble, the top of his head fell forward, and his chin hit the chest clip. This is concerning because he doesn’t yet have the head control to pick his head back up. In contrast, the Urbini Sonti, another seat that fits preemies and small babies very well, has more of a recline available and does not have this issue.
Infant and Older

Baby Trend Ally 35 seat fitting troubles
We ran into a glitch when we tried to put babies older than the newborn stage into the Ally 35. The manual does not give instructions for adjusting the crotch buckle past the newborn routing. We asked Baby Trend, and they told us that the sides of the buckle should be 1/2 to 1 inch above the thighs, like on other Baby Trend seats. However, other Baby Trend seats have a different type of crotch buckle slot, where the crotch buckle can be rolled up within the slot. The Ally 35 does not have this.
Baby Trend told us that the shortening clip could only be used for the first slot, and that there were “6 crotch buckle positions” that can be used. They will be updating a future version of the manual with the information on how to make the adjustments. Until we learn how to achieve those 6 positions, with 3 slots, we aren’t able to put a baby in the seat. As those of you who regularly read our Facebook page and Facebook group know, there’s not much guessing allowed in car seats! It’s important to follow the instructions in the manual to the letter, as that’s how the seat was crash tested. We hope Baby Trend will clarify these instructions soon.
UPDATE: Baby Trend has added a graphic to the Ally 35 manual showing the various crotch buckle positions. We would still caution caregivers to contact Baby Trend if any clarification is needed — for example, if none of these positions achieves a snug fit with the buckle sides 1/2 inch to 1 inch above the thighs.
Baby Trend Ally 35 Crotch Buckle Positions
Important Information: Where to Find

Baby Trend Ally 35 FAA approval label
FAA Approval Label: The Ally 35 carrier is approved for aircraft use, but the base is not. The approval label is located on the underside of the carrier.
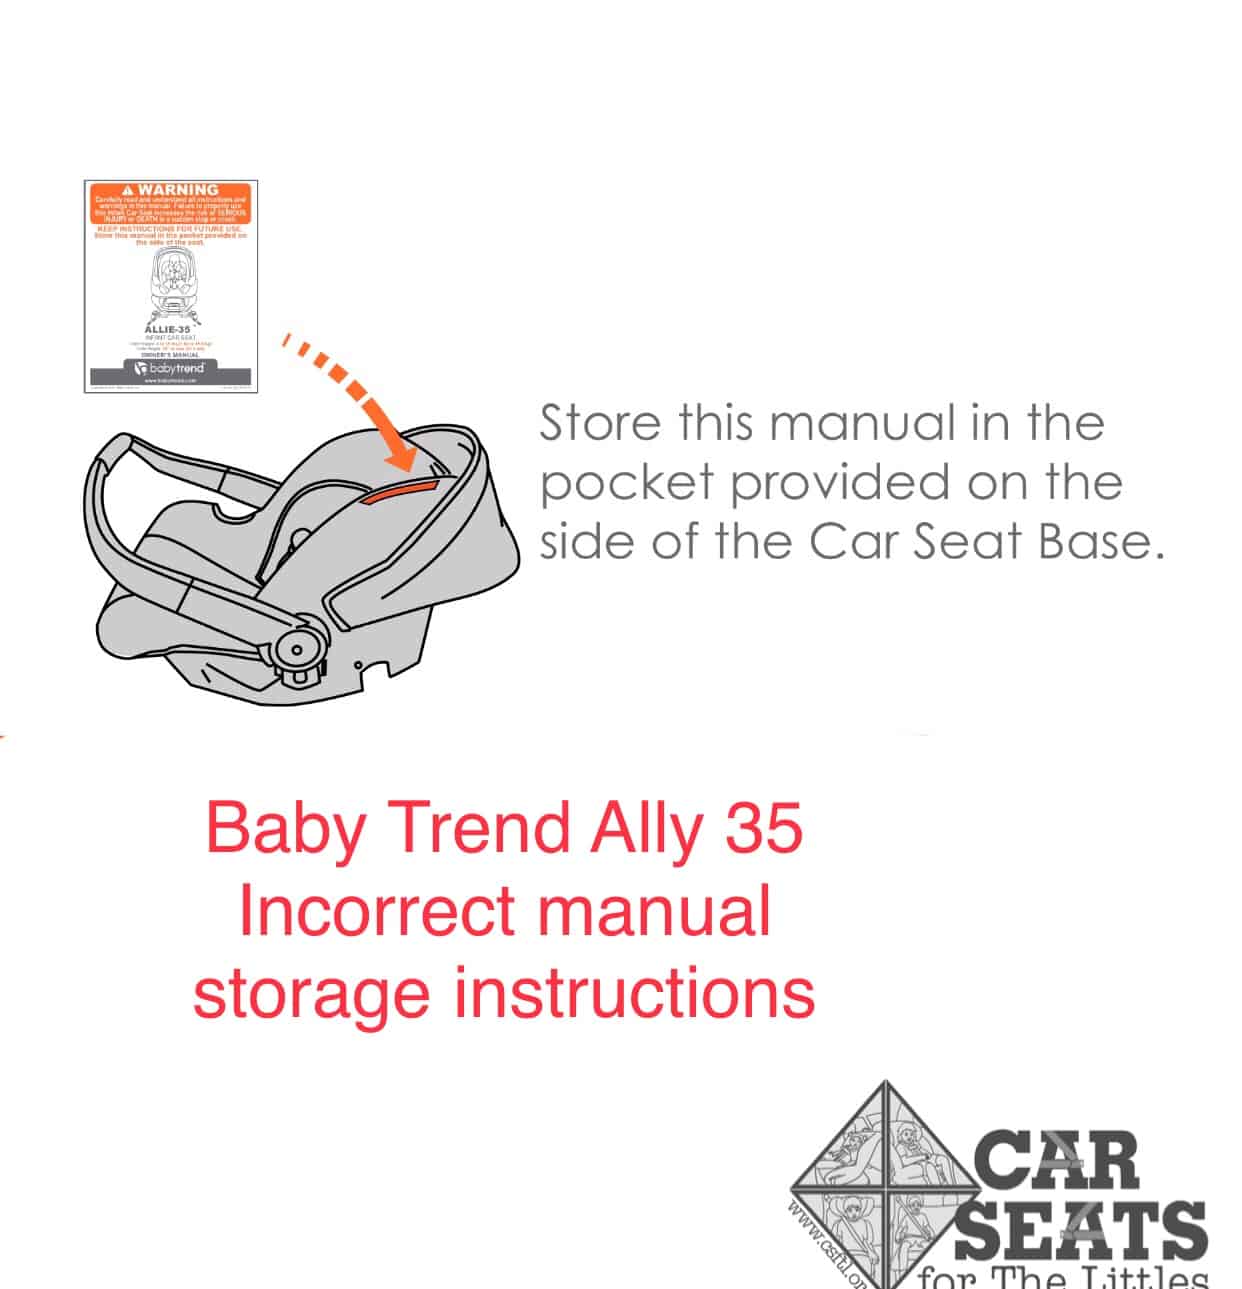
Baby Trend Ally 35 Incorrect manual storage instructions

Baby Trend Ally 35 manual storage
Manual Storage: It took me a while to find the manual storage location. The manual says “Store this manual in the pocket provided on the side of the car seat base”, with a graphic pointing to the carrier. But I couldn’t find the pocket. Then I noticed a label on the side of the carrier which seemed to be indicating to store the manual under the cover on the side. But that didn’t work. Finally I lifted the cover and found it! There’s a space behind the white foam under the cover where the manual can be stored.

Baby Trend Ally 35 date of manufacture Label
Expiration: The Ally 35 expires 6 years after the date of manufacture. The date of manufacture can be found on a sticker on the underside of both the carrier and the base.
Overall Thoughts
The Ally 35 seems promising in many ways. The low strap height will fit infants well, and the European routing method of baseless installation and relatively light carrier weight make it a good choice for travel. However, we are very discouraged that it’s already in stores with no instructions on how to adjust the crotch buckle, and the upright angle makes us less likely to recommend it for preemies and low birthweight babies, who would fit well in it otherwise. We’d love to take a further look at the Ally 35 once the instructions in the manual are clarified.