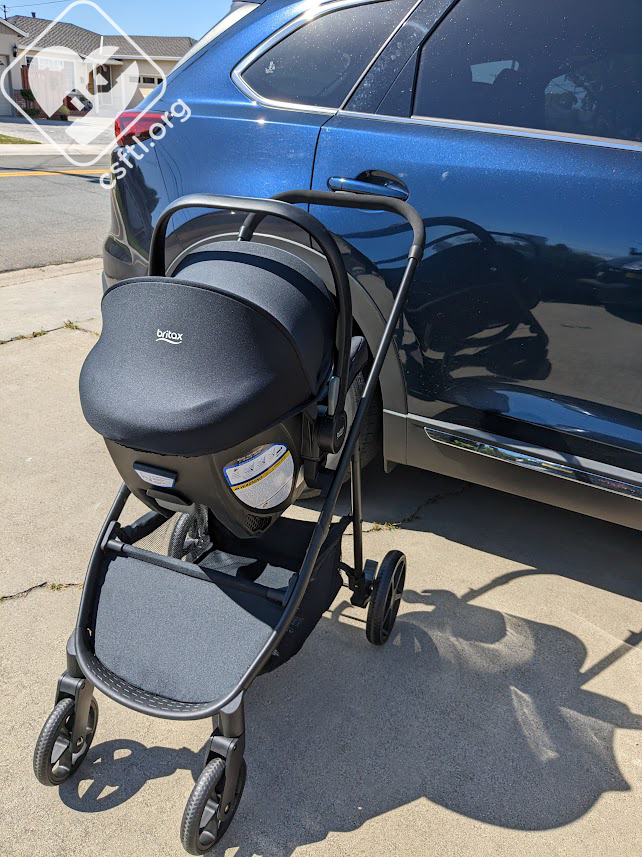
Britax Willow Brook travel system
Britax first introduced ClickTight technology in 2013 (the same year this website was born!), they added this easy-to-use installation system to convertible car seats fairly soon after the Frontier was launched but didn’t add a rear facing only option to the product line — until now! We do find the non-ClickTight rear facing only Britax seats pretty easy to install so the lack of a ClickTight infant carrier in the lineup wasn’t a cause for panic. Britax has filled that gap with the Willow Brook Travel System, which consists of three parts with their own names: the Willow car seat, Aspen car seat base, and Brook stroller. We were sent the full package of items, which arrived in the largest box that did not formerly contain an appliance I’ve ever seen.
As you may know, we’re not Strollers for the Littles so our review of the stroller won’t be very in depth. I doubt you came to this review looking for stroller details so we’re probably fine to move forward.
First, some definitions. This travel system includes 3 parts: Willow car seat, Aspen car seat base, and Brook baby stroller. In this review, I’ll refer to them as carrier or infant carrier (that’s the Willow car seat), base (the Aspen car seat base), and only briefly as the stroller.
CSFTL Quick Stats
- Lowest harness slots: 5.5 inches
- Highest harness slots: 11.5inches
- Weight range: 4 – 30 pounds
- Height range: 32 inches or less, and the top of the child’s head is 1 inch or more below the top of the shell, and the harness straps are located in the
closest harness slot below the child’s shoulders. This is different from most rear facing car seats. - Crotch buckle positions: 2.25 and 5.5 inches from the seat back. This buckle should be in the slot closest to, but not under the child.
- 2 harness slots at the hips: the optional inner slot has a maximum child weight of 11 pounds, the outer slot can be used from 4 – 30 pounds. The hip straps should NOT sit under the child.
- Seat pan depth 12 inches from the seat back
- Seat pan width: 9.5 inches
- Carrier weight: 9 pounds
- Base weight: 9 pounds
- Stroller weight: 22 pounds
- Expiration: 6 Years
- Machine wash and dry
- Warranty: 1 Year
Unique Features
- ClickTight installation on the base
- Chemical-free fabrics
Here’s the Stroller
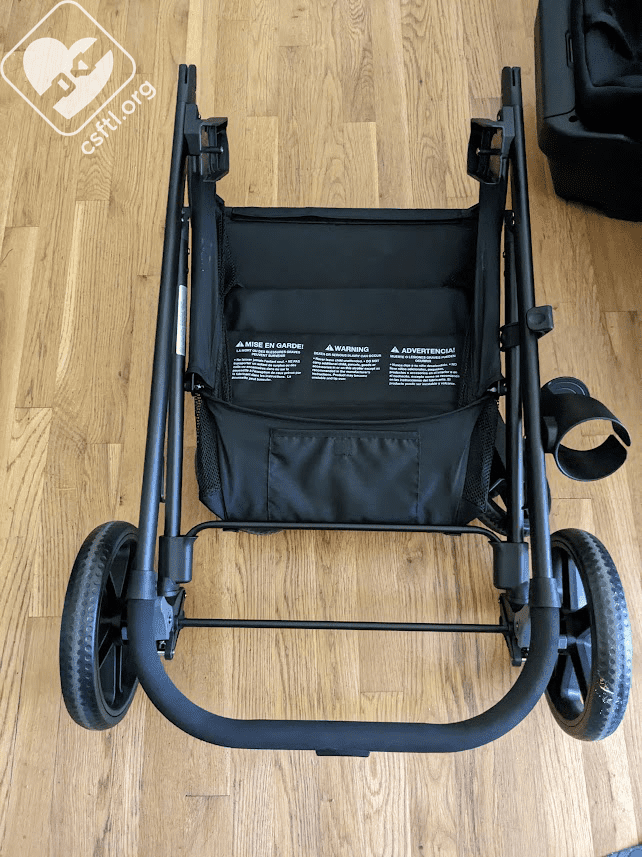
Britax Brook stroller folded
As I understand it, these three items (base, carrier, stroller) are only sold as a set. The seating part of the stroller can swap with the car seat carrier. It’s pretty lightweight and steers pretty easily. I wouldn’t say it’s small, it seems like it folds down to its actual size. This may totally work for some families but I wouldn’t suggest it for those who have vehicles with small trunks.
Using the ClickTight
Do not lock/switch the vehicle belt retractor. ClickTight replaces the need for a locked/switched vehicle belt.
Adjusting the Harness
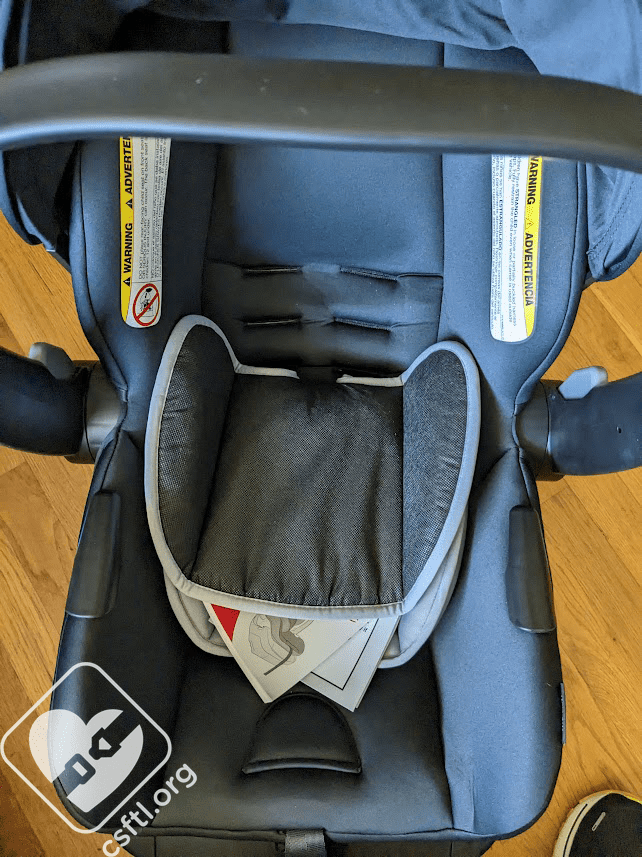
Britax Willow out of the box
I have a lot of opinions about car seats (the main one is ALWAYS that caregivers should know how to install and use their child’s car seat properly, regardless of price point or included features, this is the only thing that really matters), one of them is that car seats of a certain price point should have certain features. Which is a long way of saying I was surprised that the carrier’s harness requires manual rethreading as the child grows. I really expected a no-rethread harness here. And buckle tongue holders.
Fresh out of the box, the carrier’s infant padding flopped over in kind of a sad way. It was easily fixed but naturally, we worry that if the padding is prone to flopping, caregivers could think this is how it’s supposed to work and put their child right on top of it.
Infant Padding
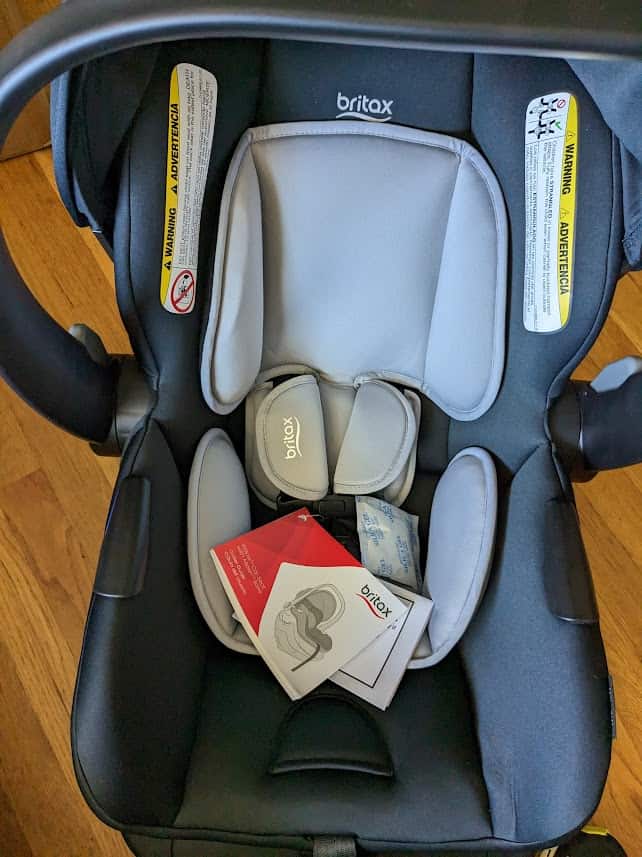
Britax Willow infant padding looking tidy
The carrier includes has two pieces of padding — one that goes behind the child’s head and another that goes behind the child’s torso. The manual doesn’t list any weight restrictions on the head padding but does limit the use of the body pillow to 11 pounds or less.
Hip Harness Slots
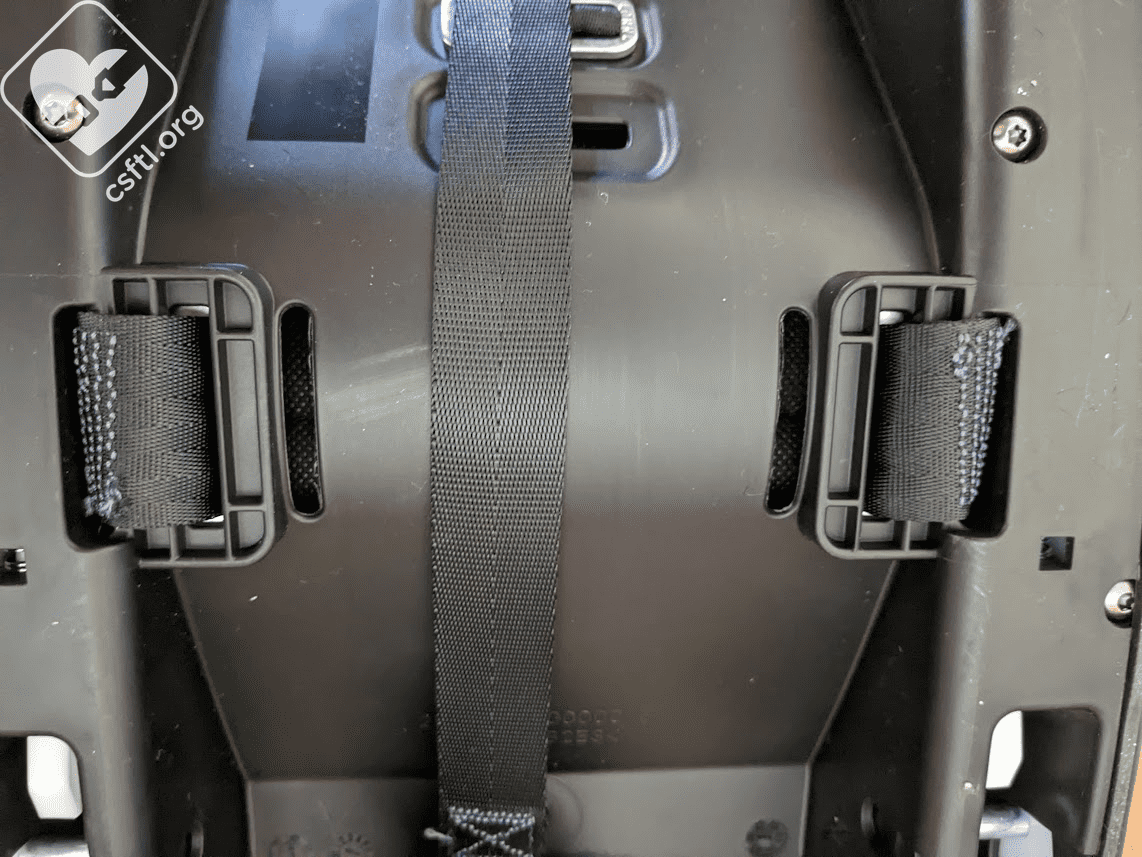
Britax WIllow hip harness slots
The carrier has 2 sets of slots at the child’s hips. The innermost slot is optional and CAN be used to fit babies who weigh less than 11 pounds. The outer slot can be used from 4-30 pounds. There’s also a center slot but that’s only to be used as a way to anchor the retainer in place. Moving these straps is perhaps not the easiest or most necessary task since the outer slots are available for the entire weight range of the seat. But since we’re us, I will walk through the adjustment process.
Unbuckle the harness and remove the carrier shell cover (full directions for this are in the manual). Find the hip strap retainer under the cover, pull it away from the car seat’s shell to loosen it. Angle the retainer so the short side will go through the slot in the carrier shell. Push the hip strap retainer through the slot under the seat’s shell, following the current path of the hip strap. Push the hip strap through the appropriate slot in the seat’s shell, then push the retainer up through the center anchor
slot. Repeat the process on the other side of the harness. Replace carrier shell cover.
When the child weighs 11 pounds, you must switch back to the outer hip slots.
Carry Handle Position
Britax Willow carrier release handle
The carrier’s handle must be in any locked position when the seat is used in a vehicle. Although I can’t see any real use for NOT having it in a locked position at other times. The manual suggests using position 1 (most upright) in the vehicle. That’s because ReboundReduce helps reduce the car seat’s rebound in the event of a crash.
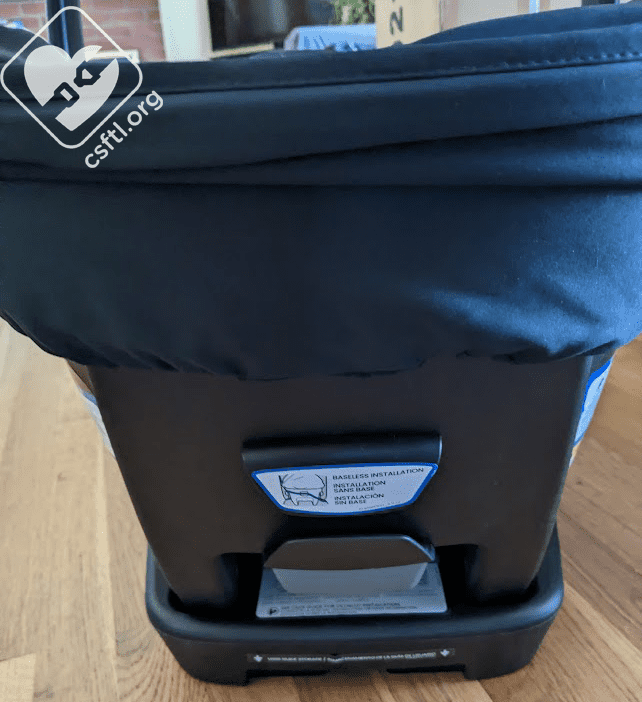
Removing the Carrier from the Base
I often joke that for new parents, one of their first tests is to remove the car seat carrier from the base. While most models are fairly similar (press a button either on the base or squeeze a handle on the carrier, then lift the carrier off the base) this new skill isn’t exactly obvious to someone who has never dealt with a car seat before. The Willow releases via a handle on the carrier. It’s right below the Euro routing bracket.
Recline Angle Indicator
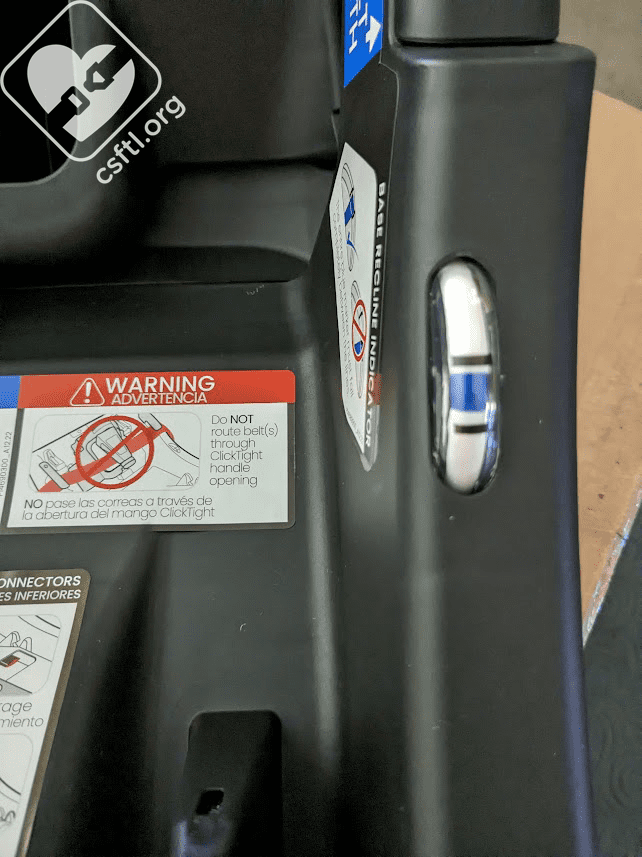
Britax Willow recline angle indicator
The entire blue marker must be completely visible between the two lines on the recline angle indicator.
ClickTight Tension Indicator

Britax Aspen ClickTight indicator green
The ClickTight indicator window will be ENTIRELY GREEN (a) when the ClickTight is fully open and (b) when it is closed correctly. This warning appears several times in the manual so we know it’s important.
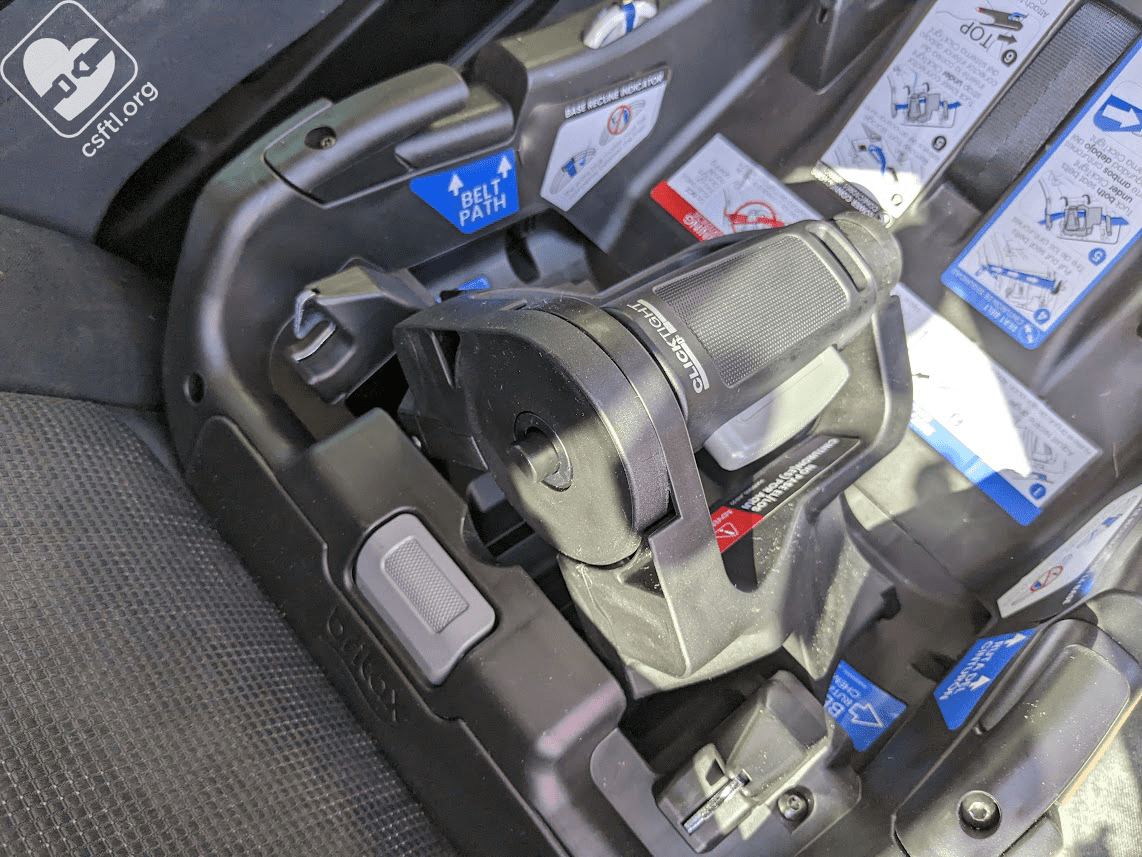
Britax Aspen ClickTight
I struggled with the vehicle seat belt install far more than I’d have expected to with a ClickTight. The mechanism itself is a bit unwieldy — lining the little tabs at the top and bottom up with the slots on the base was easier to mess up than I would prefer.
Getting that indicator entirely into the green was more difficult than the promotional videos led me to expect. Like the other seats with ClickTight (and other similar lockoff devices from other brands, lest you think I’m just calling out Britax on this) I found that there was a very small sweet spot in terms of how much vehicle seat belt (or lower anchor webbing) tension that would turn the indicator to green. It was bit of trial and error to find that sweet spot, hold the belt in place, and get the ClickTight handle to align with the right spot in the base to close it. I found that the lower anchors were far easier to use in terms of getting that indicator into the green.
Our friends at Britax suggested that we keep the vehicle seat belt fairly loose when installing this way. That’s not mentioned in manual but it was quite helpful.
Installing with the Base: Vehicle Seat Belt
Britax Willow and Aspen installed with the vehicle seat belt
Before we begin this section, I’ll share a few notes, the volume of these warnings sort of reminds me of Happy Fun Ball and IMHO don’t really reflect how simple the installation is in the end:
- ClickTight replaces the need for a locked/switched vehicle belt. Do not lock the vehicle seat belt.
- Avoid routing the seat belt through the ClickTight handle opening.
- Both the lap and shoulder belts must be tucked completely under the ClickTight.
- If the seat belt is overtightened, the ClickTight may not be able to close.
And now, on with the show! To install the seat with the base, set the base on the vehicle seat with the belt path toward the vehicle seat back. Open the ClickTight, grab the handle, and squeeze the button. Lift the ClickTight handle. The indicator window will be green when ClickTight is fully open and the button is released.
Make sure the vehicle seat belt isn’t twisted, then pull the lap/shoulder belt across the base. Tuck the vehicle belt under the ClickTight and belt guides and buckle the vehicle belt. Remove the slack from the vehicle seat belt. Push down on the ClickTight handle to close it. Confirm that the indicator is showing entirely green. At this point, a click helps confirm the ClickTight is secure.
Installation with the Base: Lower Anchors
Britax Willow and Aspen installed with the lower anchors
Installing with the lower anchors has its own set of warnings as well:
- The lower anchor webbing must be completely tucked under the ClickTight.
- Make sure that the connector strap is not blocking ClickTight’s locking point.
- If the lower anchor webbing is overtightened, the ClickTight may not be able to close.
To install the seat with the base, set the base on the vehicle seat with the belt path toward the vehicle seat back. Open the ClickTight, grab the handle, and squeeze the button. Lift the ClickTight handle. The indicator window will be green when ClickTight is fully open and the button is released.
Open the storage compartment lid, remove the lower connectors, and extend the webbing. Close the storage compartment lid and thread the lower webbing under the ClickTight and belt guides. Push the lower connectors onto the vehicle’s lower anchors until you hear a click — that means the lower anchor connector is attached to the vehicle. Pull the lower connectors to verify that they are secure, then pull on the tail end of the webbing to remove the slack. Finally, close the ClickTight by pushing down on the handle.
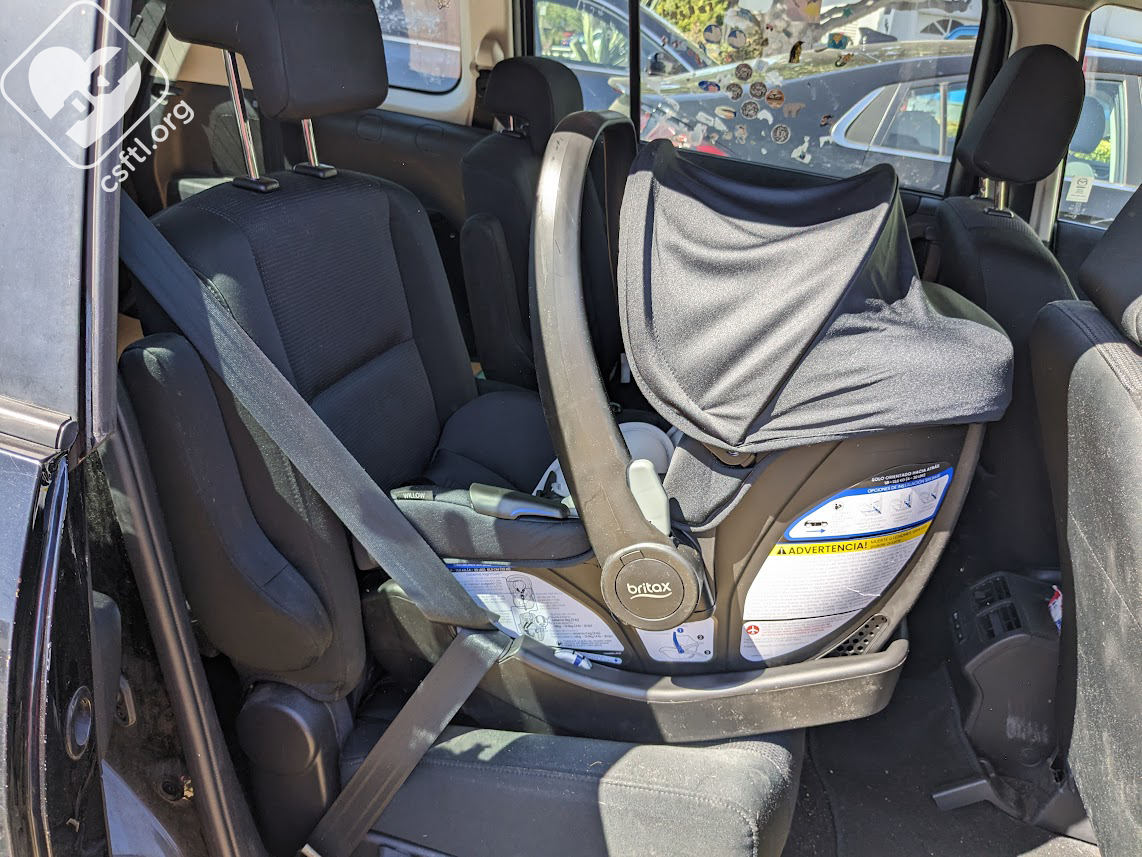
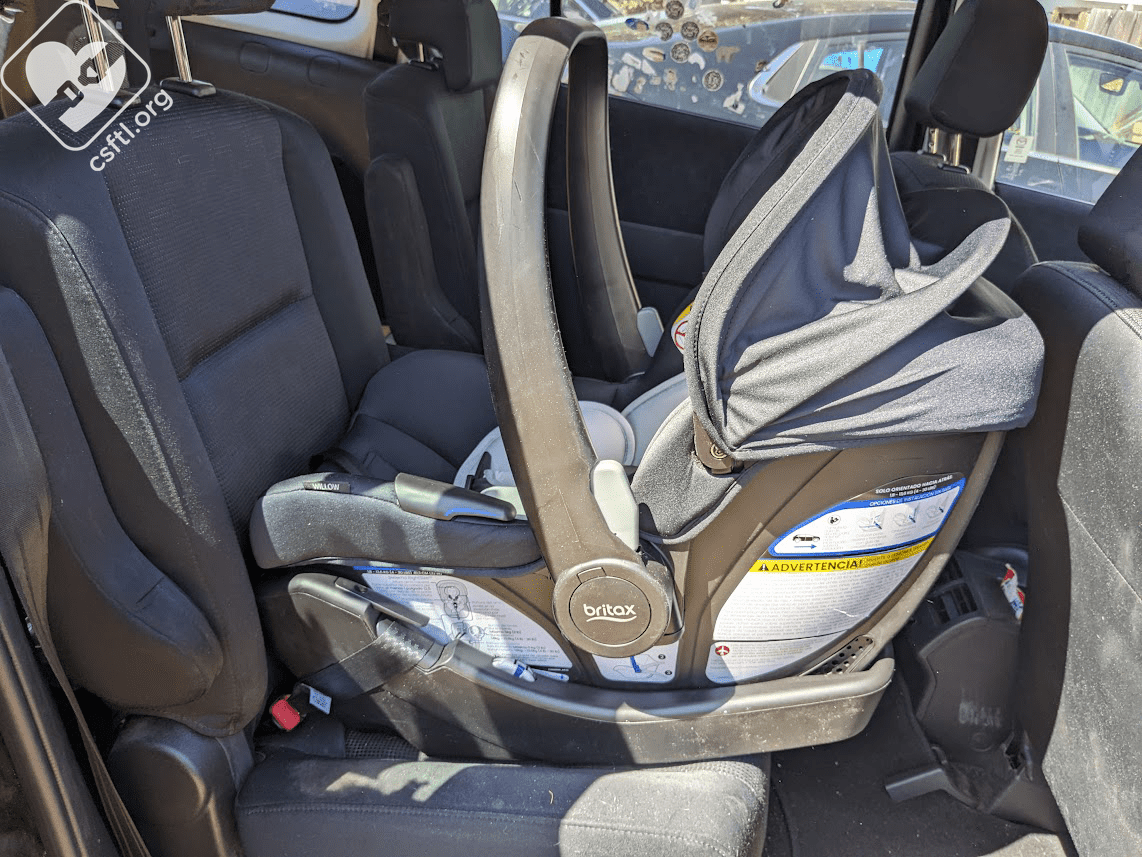
Installation without the Base
Britax Willow installed without the base
The carrier can be installed without the base using Euro routing, or not. We tend to find that Euro routing makes for a very secure installation without the base so we’d suggest trying that option first if possible. To install the carrier, set it on the vehicle seat with the harness facing the rear of the vehicle, then thread the vehicle seat belt through the belt guides and buckle the seat belt. Then, slowly and with great caution, pull the shoulder portion of the belt out and thread it around the back of the carrier shell. Insert the shoulder belt into the belt guide on the back of the carrier before the retractor engages.
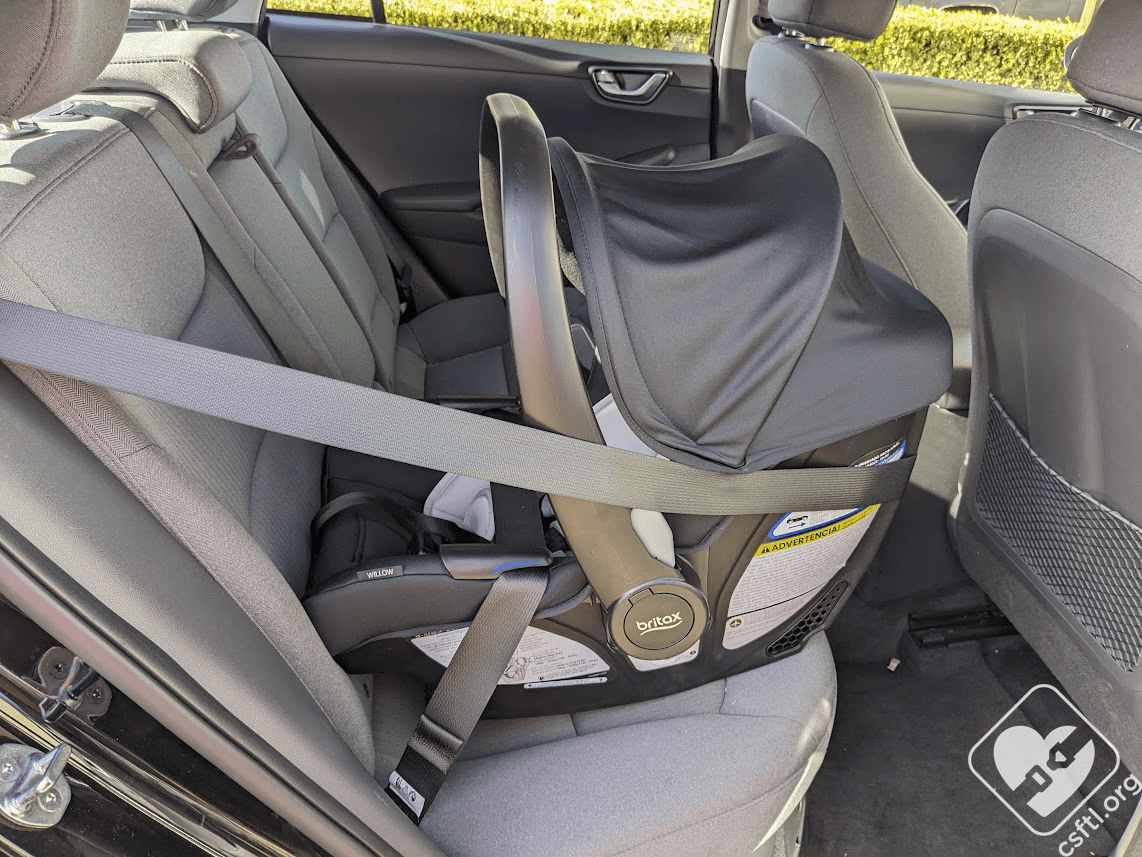
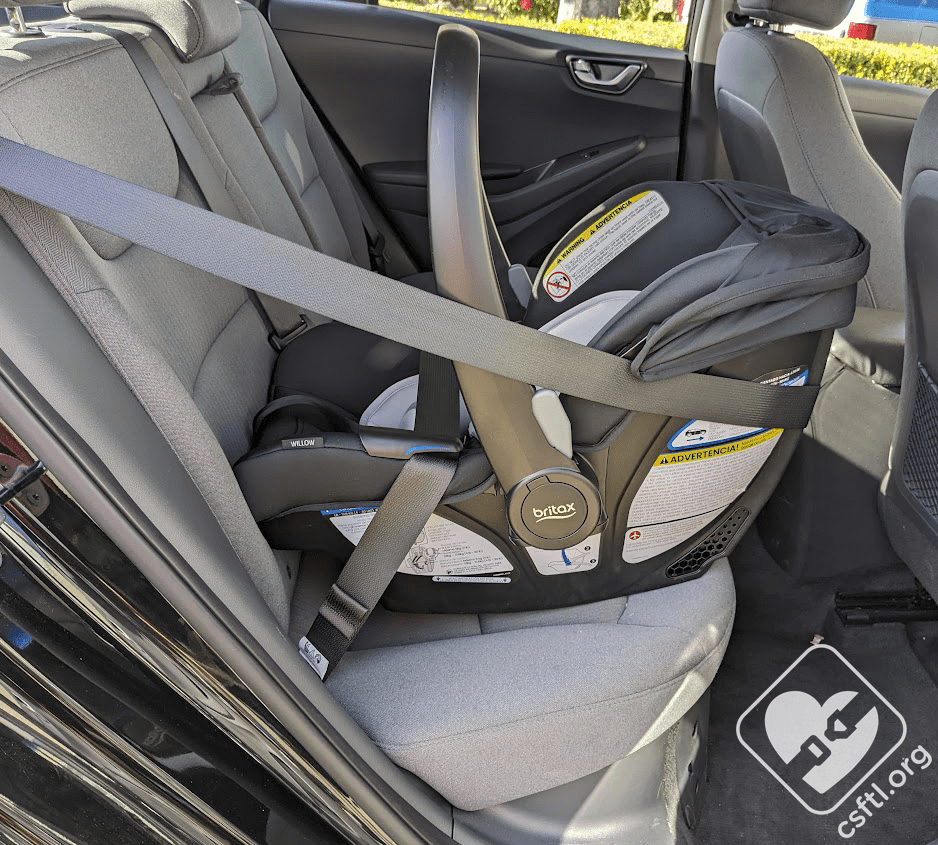
Britax Willow baseless canopy extended
Once the belt is threaded through all 3 belt guides, if it isn’t locked already, pull the remaining slack out from the retractor until the seat belt starts clicking, then feed the slack back into the retractor. Here we can see the carrier with the canopy extended.

Britax Willow baseless belt guides
Note: the belt guides are really terrific. They’re easy to identify and use properly. They’re also a convenient place to tuck the ends of the harness before you start loading your kiddo into the carrier.
Check your Work
Give the base or carrier (if installing without the base) a firm handshake at the belt path and confirm that it moves less than an inch.
Fit to Child
Preemie Doll
With Infant Insert
Britax Willow Brook preemie doll with insert
Since Willow Brook is rated from 4 pounds, we tasked our Huggable Images preemie doll with modelling the seat for us. The doll weighs 4 pounds and is 19 inches long. The Willow Brook does not have a minimum height so our preemie was fine to give the seat a whirl. Here’s our doll with the infant padding in place. This is an excellent fit and leads us to assert that this seat would be a solid option for the tiniest of young passengers.
Without Infant Insert

Britax Willow preemie doll no insert
The infant insert isn’t required (though it cannot be used after the child weighs 11 pounds) so we also tried the doll without the insert. It’s a bit hard to see since the harness is black and the seat is black but the harness fit was also excellent without the insert. We’re always glad to see seats that fit preemies well so the carrier is absolutely a win when it comes to tiny babies.
Newborn Doll
With Infant Insert
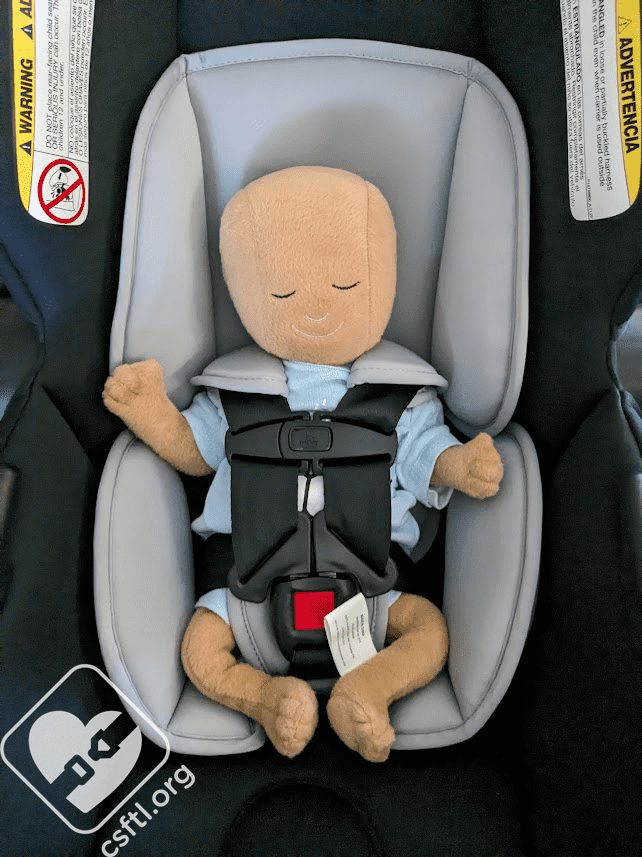
Britax Willow newborn doll with insert
Our doll weighs 7 pounds and is 19 inches long. Since our doll weighs less than the 11 pound maximum weight for the insert, here is our doll with the insert in the seat. Like the preemie doll, we saw an excellent harness fit.
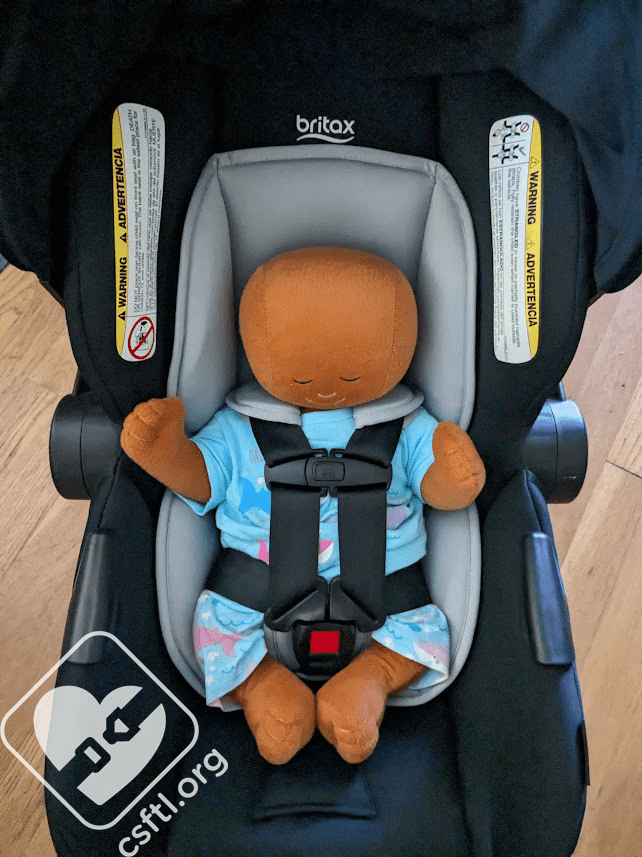
Without Infant Insert
Britax Willow newborn doll without insert
However, we had to try both ways, so our doll hopped back into the seat to show how it fits. The doll had another great fit and has plenty of room to grow!
16 Month Old Doll
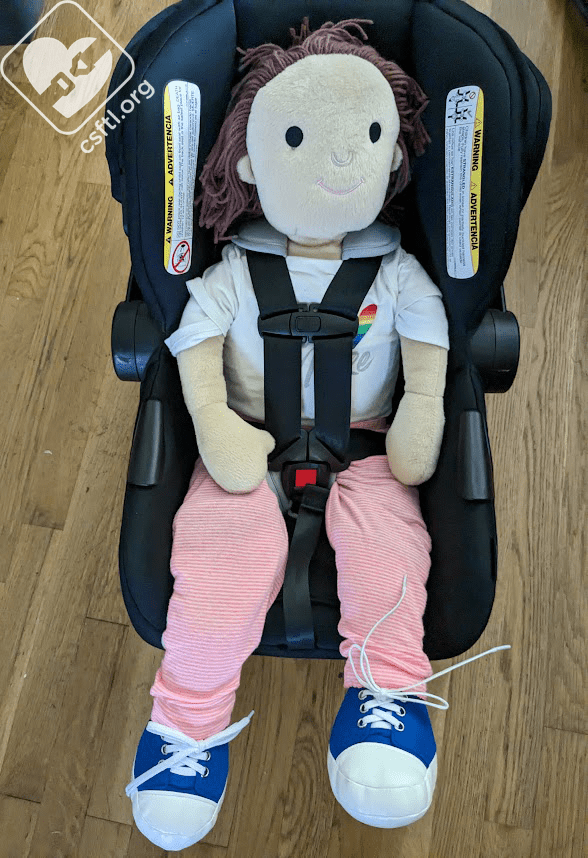
Britax Willow 16 month old doll
This doll is 31 inches tall — one inch below the seat’s stated maximum height limit. But will our doll also match these criteria: the top of the child’s head is 1 inch or more below the top of the shell, and the harness straps are located in the closest harness slot below the child’s shoulders.
Important Information: Where to Find
Manual storage: there are two locations, one under the cover of the Willow car seat and one on the end of the Aspen base.
FAA approval label: the manual explains that “Baseless Installation with Lap Belt (see page 40)” — instructions for using the carrier without the base are on page 30 and these instructions are actually on page 38. Also, the manual contains this note: “Your child may experience discomfort if the buckle is located in the seating area of the child restraint after installation.” since the carrier should be installed with the lap only belt going over the child, I’m not sure this applies.
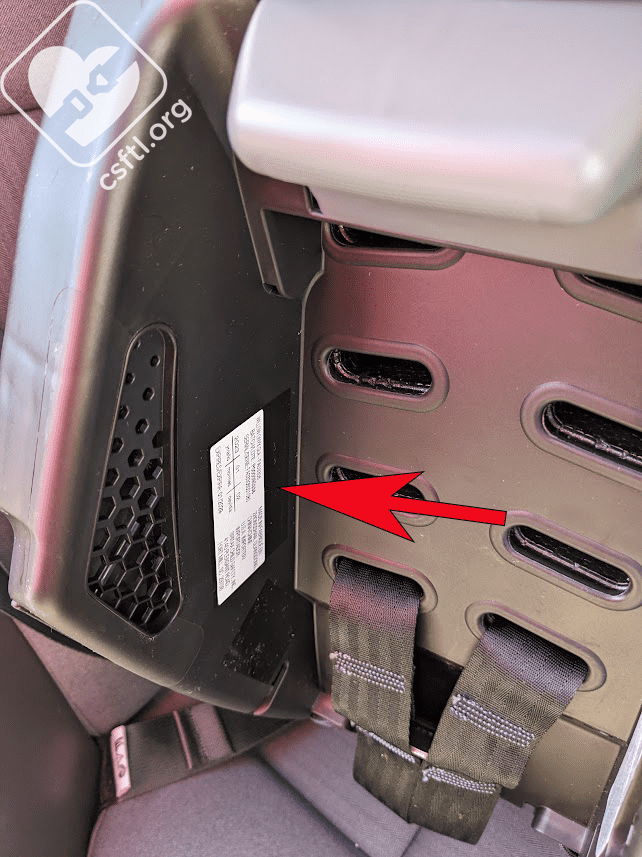
Britax Willow date of manufacture label
Date of manufacture label: this label is tucked onto the deepest part of the carrier’s backside.
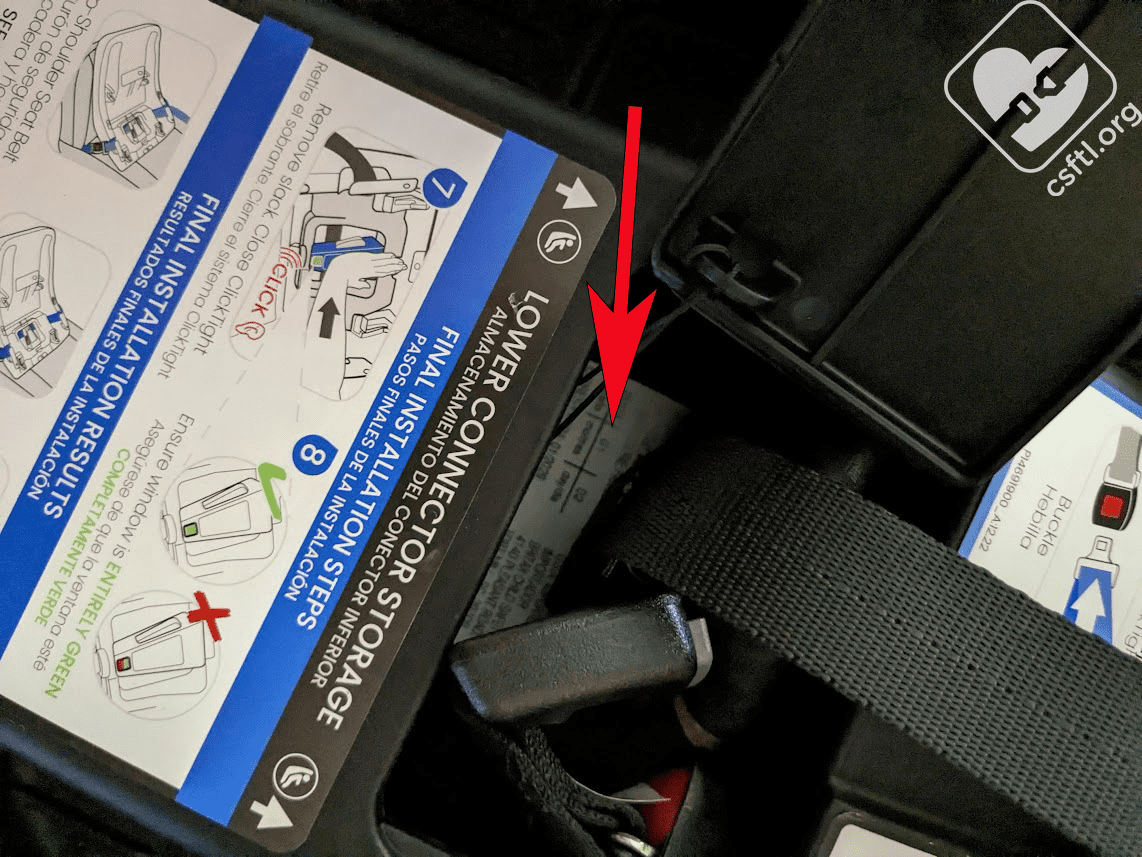
Britax Willow date of manufacture label on the base
There’s a second date of manufacture label hidden inside the lower anchor compartment on the base. While I appreciate the sleek look of a base with fewer labels, many technicians struggle to find labels that are hidden like this. More than once, I’ve been called over during a car seat check event to help other technicians find a Britax label. I’m sure that will be the case when a Willow rolls in.
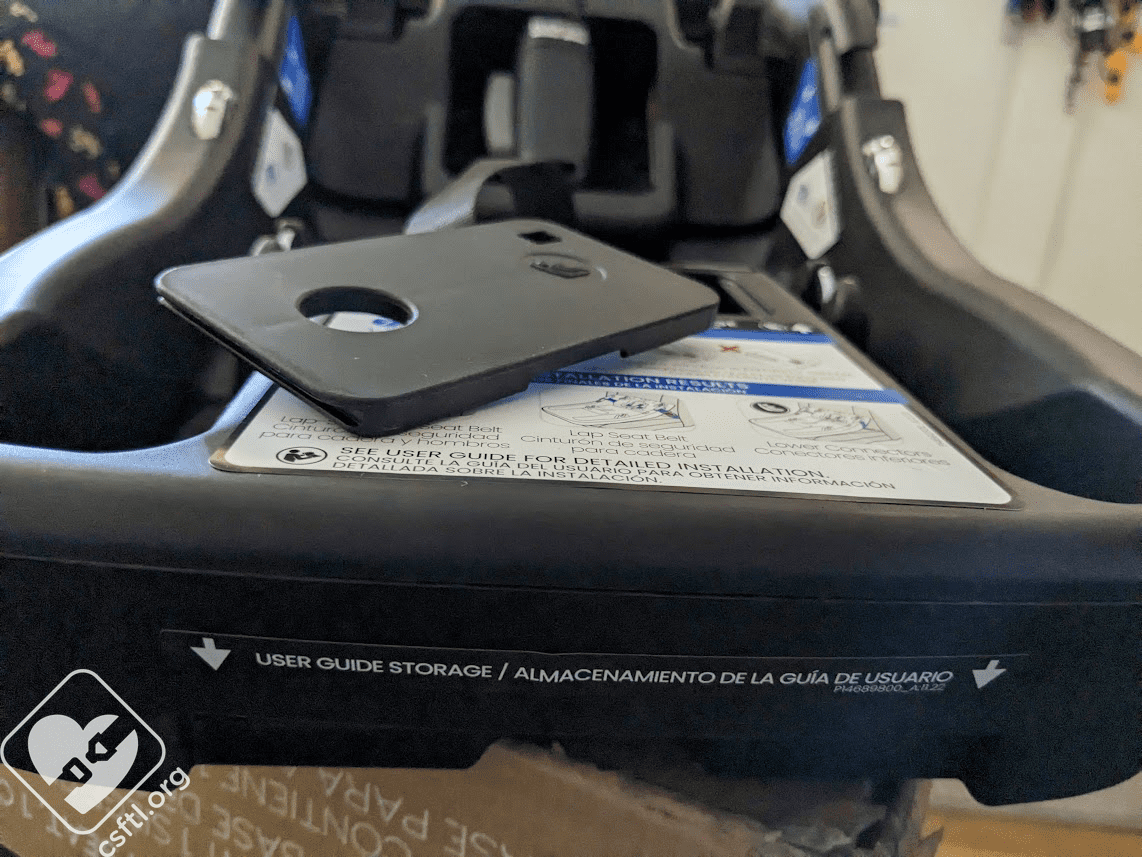
Britax Willow Aspen manual storage
Manual storage: the manual stores in a handy slot at the back of the base.
Overall Thoughts
This set of products (mostly the base and carrier since I remain Not a Stroller Expert) makes up a solid option in the world of travel systems. I’m kind of hard pressed to think of scenarios where I might suggest it over other options but hey, nobody is asking me about strollers, anyway. The carrier itself is perfectly fine, it has a plush cover, appears to be fairly long-lasting since the top harness slot is 11.5 inches, and has baseless belt guides that are easy to find and use. That said, I’d expect a few more features for this price point — buckle tongue holders and a no-rethread harness top my list.