More than a few times, we’ve seen caregivers struggle to install their child’s convertible or multimode car seat securely. It’s often a matter of that last little bit of tension in the lower anchors or vehicle seat belt. One of the easiest ways to minimize this struggle and maximize the secure-ness of an install is to remove any barriers between you and the seat belt. In this case, we’ve got a couple of options for you.
Rear Facing
Remove the cover to expose the belt path
First, thread the vehicle seat belt through the belt path, then remove the cover to expose the belt path while completing the installation.
Sometimes, this sounds as daunting as installing a car seat for the very first time.
Covers may contain hook and loop closures, snaps, elastic pieces that attach to nothing (this is literally a thing), or plastic boning that helps the cover keep its shape but makes removing the cover a challenge.
Other car seats make accessing the belt path by removing the cover quite easy — the seats either have a shower cap style cover that we’ll show here or the seat covers have a zipper or snaps that are there by design to help caregivers install their child’s car seat correctly.
The seat we’re using for this example has a very easy-to-remove cover. We agree that it’s sort of cheating but it also makes showing this process pretty painless and easy to show in this article.
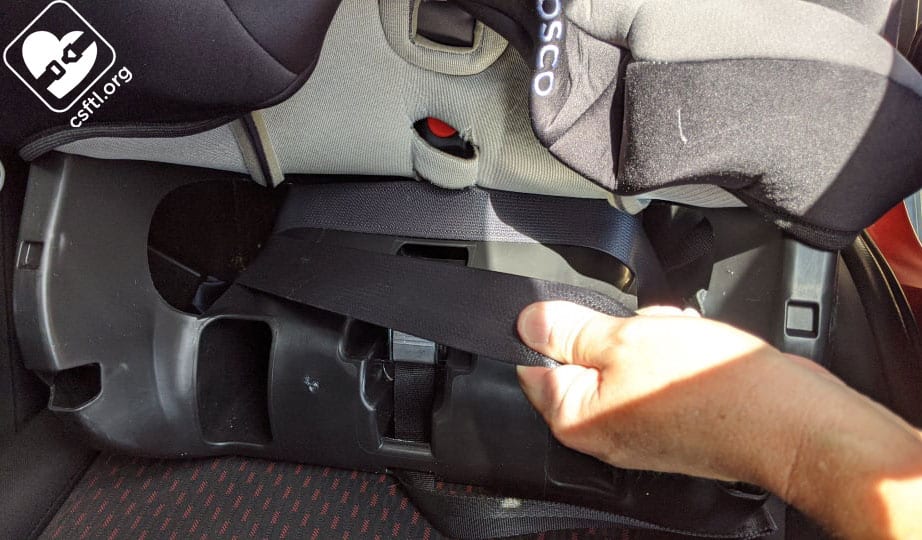
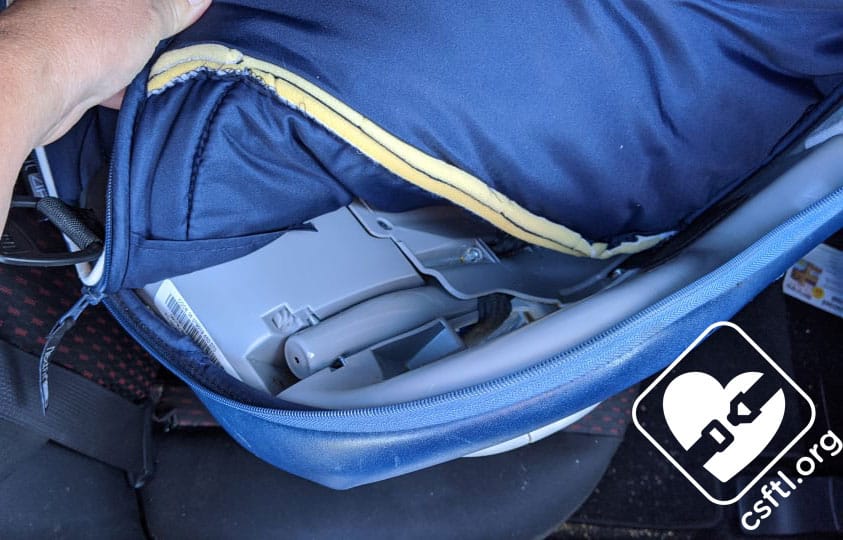
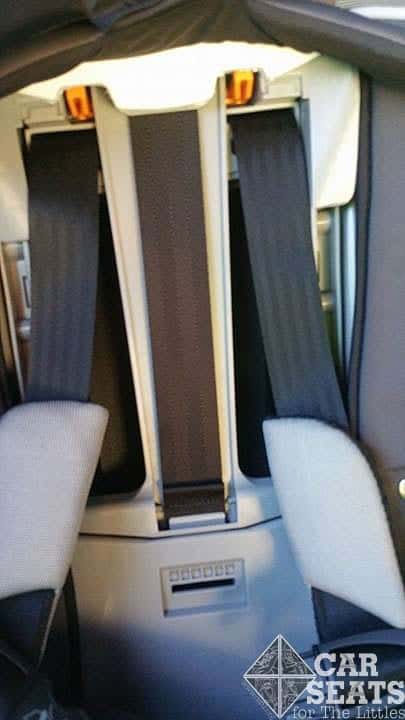
We threaded the vehicle seat belt through the rear facing belt path, taking care to make sure that it is not overlapping the crotch buckle, then buckled the belt, and removed the bottom part of the cover to expose the entire belt path. At this point, we had a LOT of room to work because the cover was out of the way.
Pull up on the shoulder portion of the seat belt
Once the cover is pulled back and the belt path is fully visible, it’s time to secure the seat. Press down on the car seat, roughly where the child’s bottom would rest.
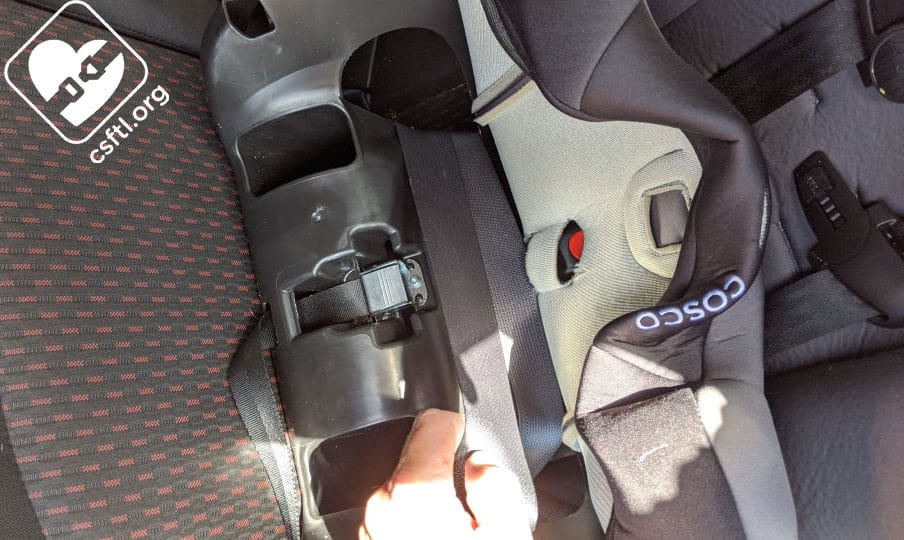
Pull up on the shoulder (top) section of the vehicle seat belt with one hand while pushing down on the car seat with your other hand. Once all of the slack is removed, use your spare hand to hold the belt in place and keep the tension constant, then lock the vehicle seat belt. (Some caregivers choose to lock the vehicle seat belt first, then tighten. In this case, that method could result in the seat tipping to one side.)
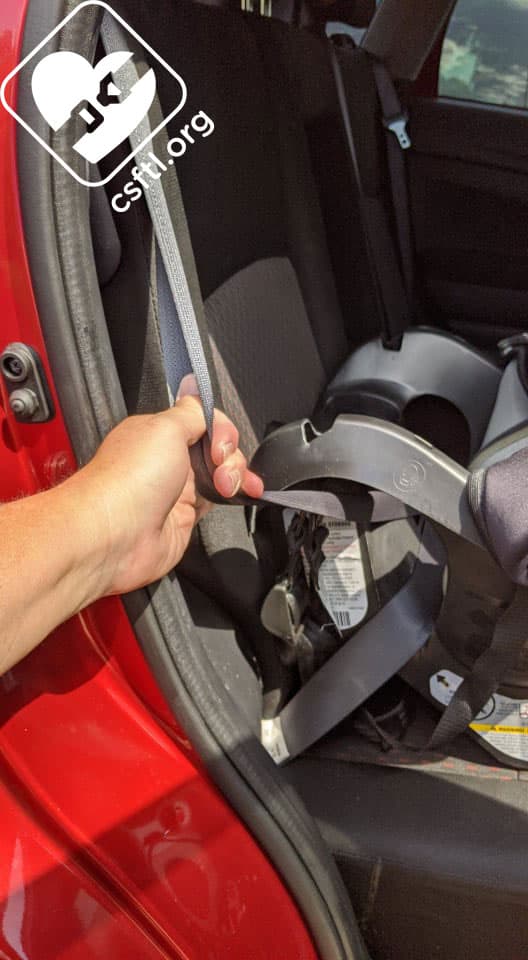
From the outside of the car seat, pull the portion of the vehicle seat belt that’s closest to the car’s frame all the way out until you hear a click. That click confirms that the retractor has engaged and the seat belt will remain locked. Feed the seat belt back into the vehicle until all of the slack is removed from the belt.
Check your work by giving the car seat’s shell a firm handshake at the belt path (aka the only place where the car seat is attached to the vehicle). Make sure the seat moves less than an inch in any direction.
Remove the remaining slack by tightening the belt from outside of the seat’s shell
If there’s still some movement, move outside the vehicle and pull the vehicle seat belt out and down, away from the car seat. Keep feeding the belt back into the car until there’s less than an inch of movement at the belt path.
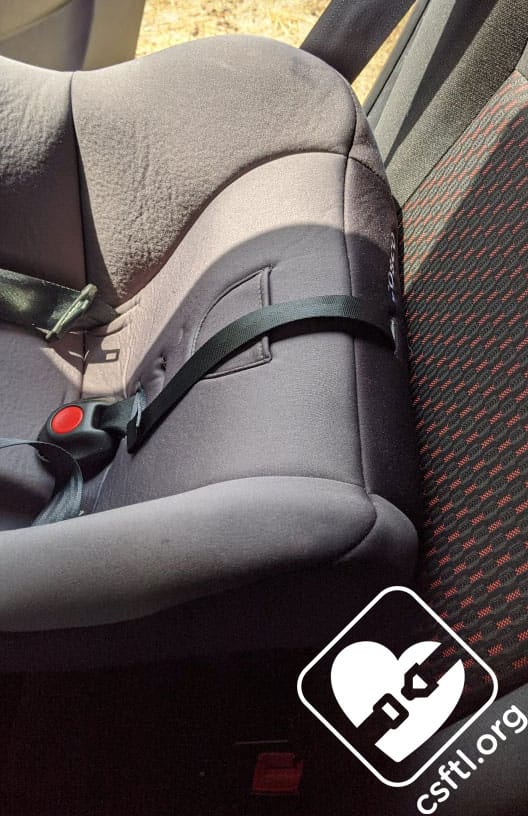
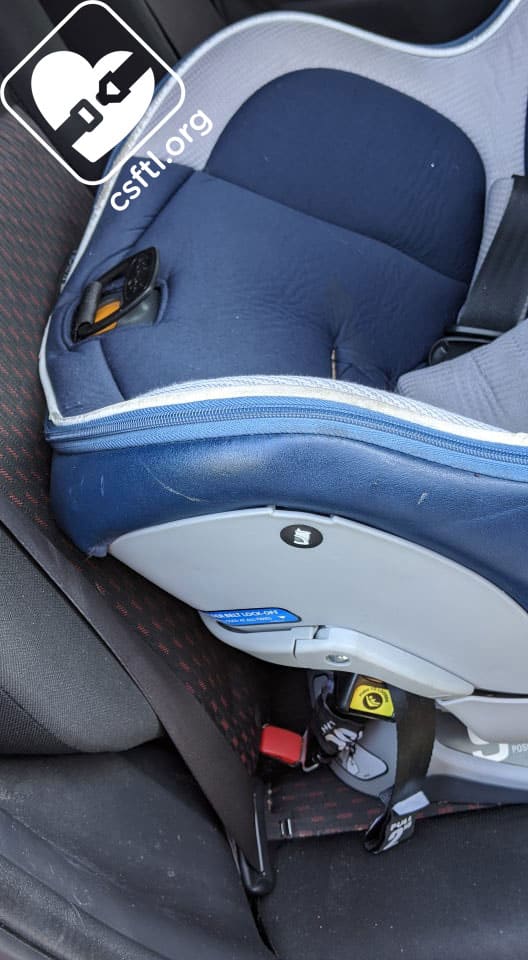
Cover is back in place after installation
Tuck the cover back into place. Our seat is once again tidy and ready for use. The cover on our model seat is like a shower cap so getting it back on didn’t present much of a challenge.
Lower Anchors
Remove the car seat cover to expose the belt path
Here’s a car seat that has a cover with a giant zipper around it. This zipper allows for easy removal to wash the cover but also to access the belt path. Just zip, zip, zip, and the seat pan is exposed.

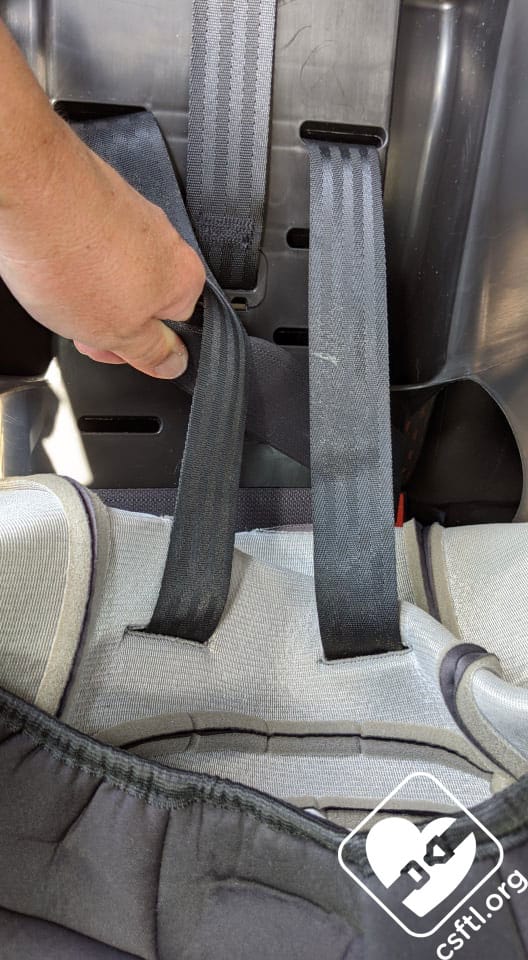
Pull the lower anchor webbing from inside the car seat’s shell
Attach the lower anchor connectors to the lower anchors in the vehicle, then pull enough slack from the lower anchor webbing so that it extends up into the seat pan. Pull the webbing from inside the seat pan while pressing down on the seat shell to remove the slack from the webbing.
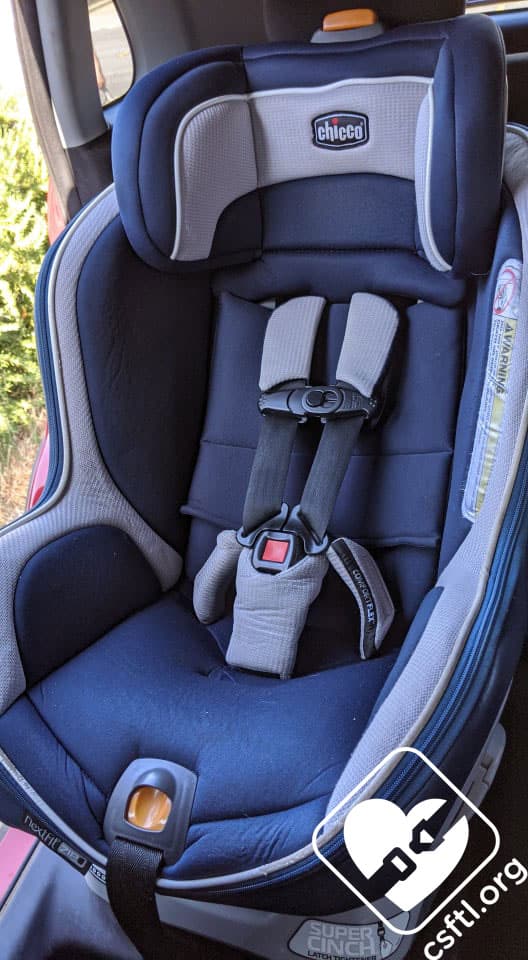
Chicco NextFit rear facing
Once the installation is complete and the seat moves less than an inch at the belt path, replace the cover. In this seat’s case, the cover zips back on and the seat looks nice and tidy again.
Forward Facing
Vehicle Seat Belt
Remove the car seat cover to expose the belt path
The same concept applies to forward facing installations. Once again, we’ll be pulling the cover down to expose the belt path.
This picture sort of looks like I’m pulling on the harness but I’m not. I’m pulling on the shoulder portion of the vehicle seat belt while shoving the seat’s shell directly back and into the vehicle seat. This removes the slack from the seat belt.
Once the belt is as short as I can get it to be, it’s time to lock the belt. Hold the now-very-short-and-secure seat belt in place from inside the seat’s shell with one hand, then use the other hand to pull the remaining slack from the seat belt on the outside of the seat’s shell until the belt starts to click. Feed the seat belt back into the vehicle until no slack remains. It’s highly likely you may need to remove that final bit of slack from the locked seat belt by pulling on the belt from outside the vehicle.
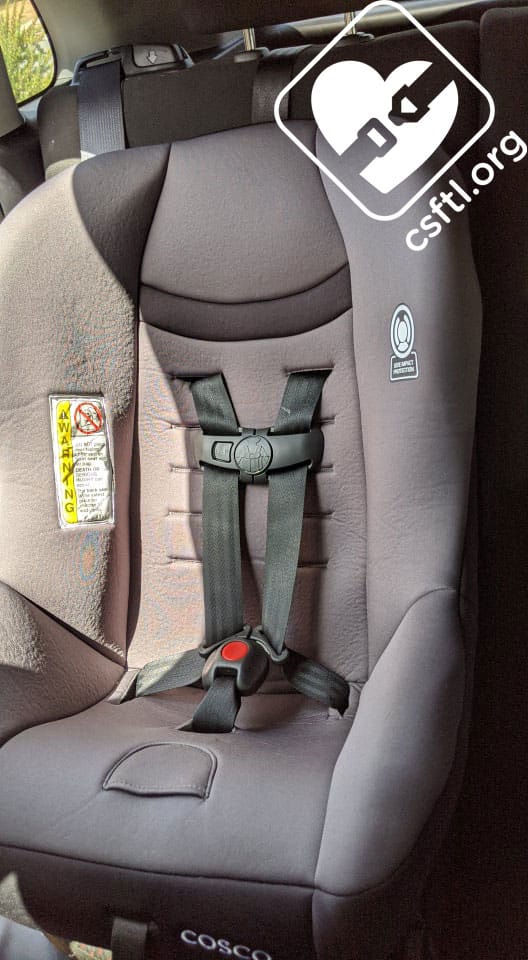
Cosco Scenera forward facing
Once all of the slack is removed from the seat belt, put the cover back into place, secure the top tether, and your kiddo is ready to ride!
Lower Anchors
We’ll demonstrate this process in forward facing mode with the lower anchors using our same seat with the zip cover.
Take the top tether and place it inside the seating area so it’s accessible for the final step in this process.
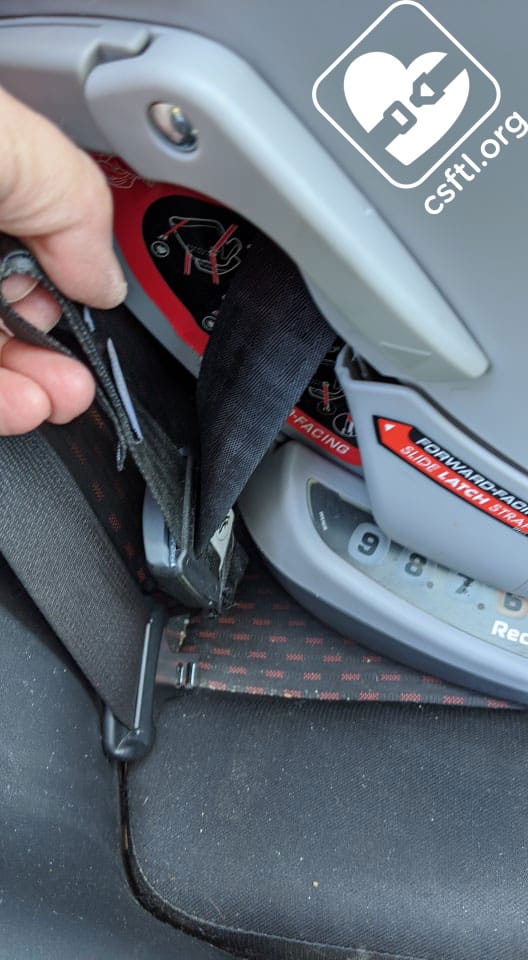
Chicco NextFit iX Zip forward facing belt path
In addition to the portion of the cover that zips off, this seat has some strategically placed snaps that make accessing the forward facing belt path a snap!
Here’s how that works: first, move the lower anchors into the forward facing belt path. Then unsnap the cover and tuck the flap into the front of the headrest. The forward facing belt path will be nice and open.
Remove the slack from the webbing outside of the shell
Connect the lower anchor connector to the lower anchor in the vehicle and pull a bit of slack from the webbing on the outside of the seat. This will create enough slack to move the webbing into the seat’s shell.
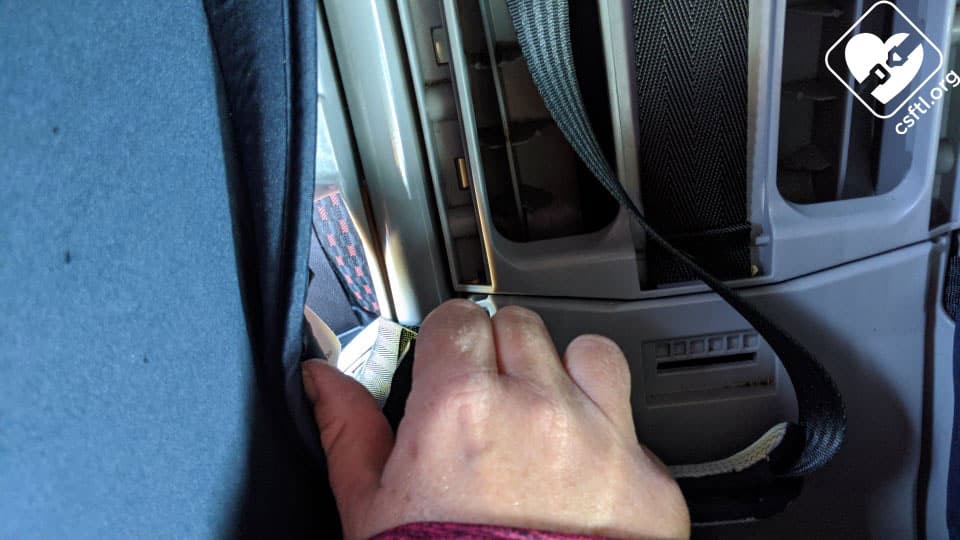
Pull the lower anchor webbing tight
Once the tail end of the webbing is moved into the seat’s shell, push the seat itself back into the vehicle seat while pulling the webbing tight.
Chicco NextFit forward facing
There’s more room to work than this picture would make it appear. Once all of the slack is removed from the webbing, the seat doesn’t move more than an inch in any direction, and the top tether is secured, your seat is ready to ride.