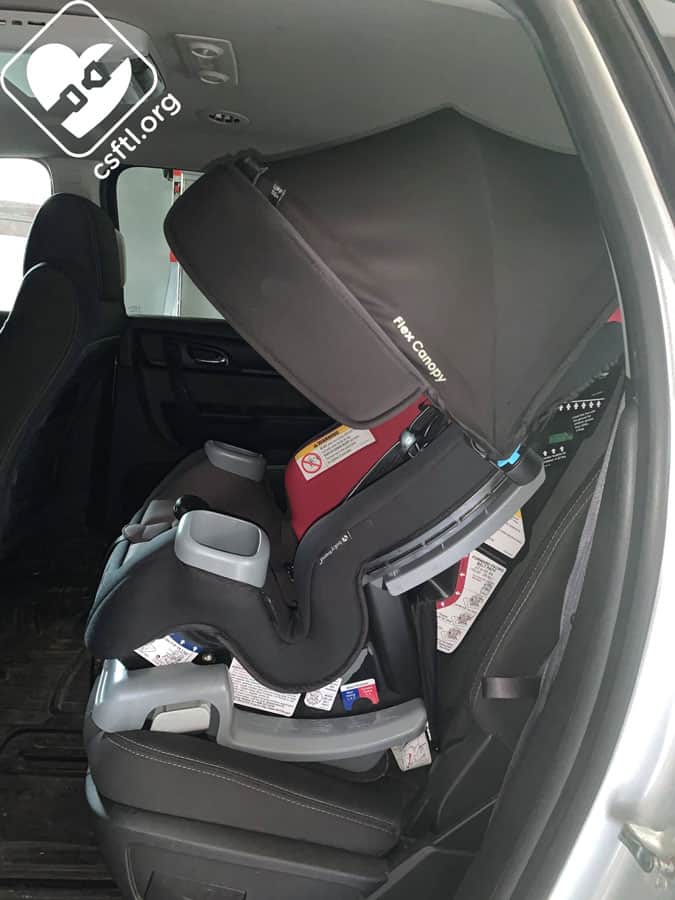
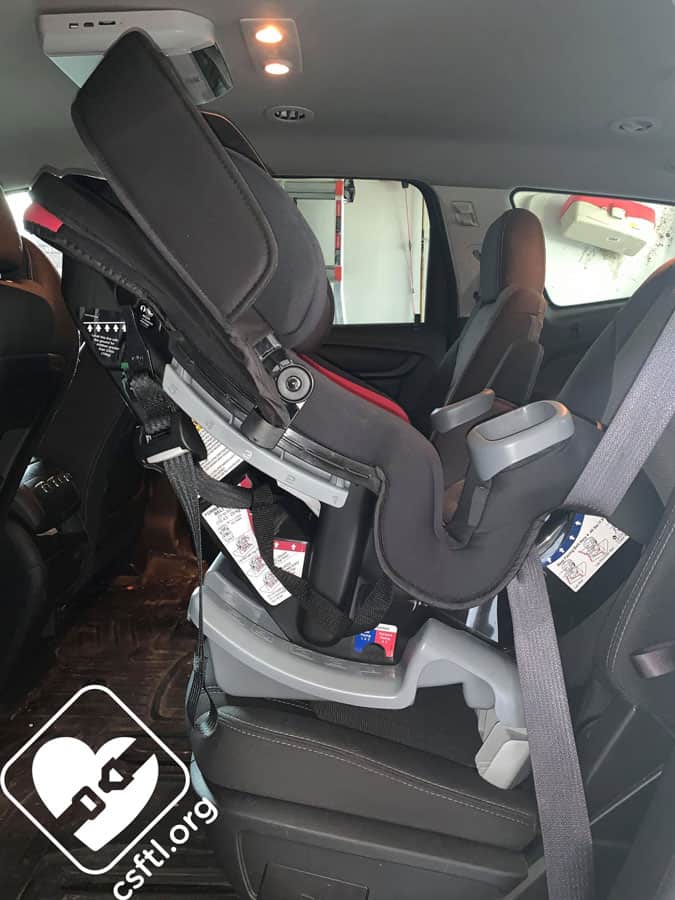
Baby Trend Cover Me with cover extended
Baby Trend has made many car seats in some cool colors over the years, everything from rear facing only infant car seats to convertible car seats and booster seats. Among the convertible car seats is the narrow Trooper that we reviewed earlier this year. The Cover Me is the cousin to the Trooper, and it has a rather large canopy that can be used in all modes of use, including booster mode.. While the Trooper and the Cover Me have many similarities, they also have some big differences!
CSFTL Quick Stats
- Rear facing weight range: 4-40 pounds
- Rear facing height range: can be used in rear facing mode until the child’s head is 1 inch below the top of the seat back.
- Note: no minimum height is listed, the manufacturer has confirmed that is correct.
- Forward facing weight range: 23-65 pounds
- Forward facing height range: 50 inches or less
- Booster weight range: 40-100 pounds
- Booster height range: 44-57 inches
- Expiration: 7 years in harness mode, 9 years in booster mode from the date of manufacture
- Forward facing lower anchor weight limit: 45 pounds
- Rear facing lower anchor weight limit: 40 pounds
- Infant insert can be used when the child weighs between 4-18 pounds
Measurements
- Lowest harness position: 5 inches with insert
- Lowest harness position: 5.5 inches without insert
- Highest harness position: 17.25 inches
- Highest booster belt guide position: 18 inches
- Crotch buckle positions: 3.5 and 5 inches (without insert) from the back of the seat
- Seat weight: 19 pounds
- Width at widest point: 19 inches at the canopy
Features
Canopy
Let’s start this review with the elephant in the room: the giant, multi-position canopy that adjusts along with the headrest as the child grows Baby Trend did some research that showed that the sun getting in their child’s eyes was a very common concern with caregivers, so they designed the Cover Me to address that need.
Baby Trend Cover Me canopy positions
The canopy adjusts by pushing the blue buttons on either side of the seat shell and sliding the canopy up or down.
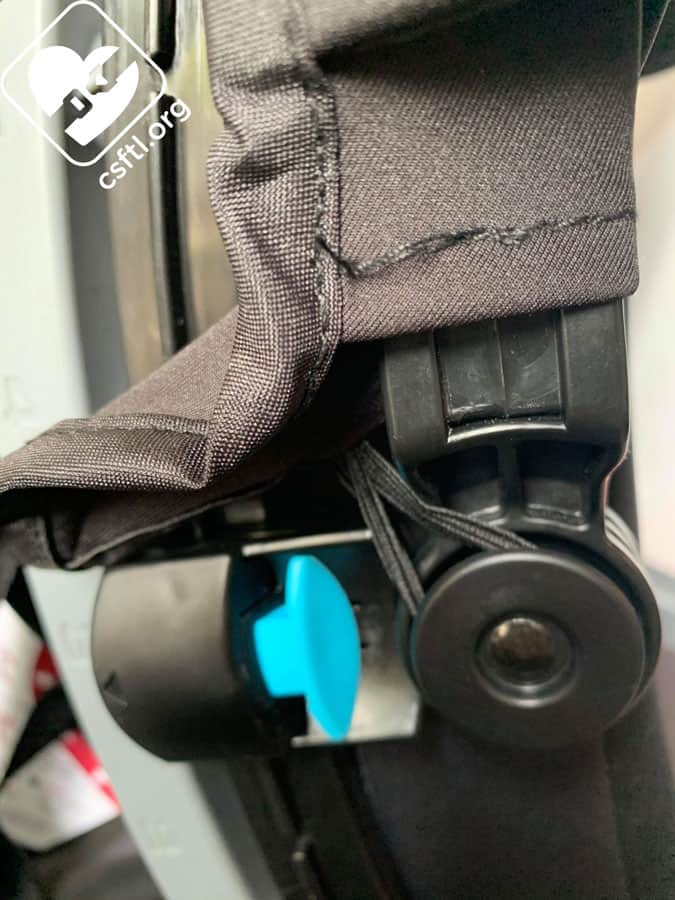
Baby Trend Cover Me canopy adjustment button
The canopy covers a large portion of the seat when extended outward all the way. During the course of the review, our models enjoyed playing with the canopy quite a bit. They flipped it forward and back quite often. While this isn’t dangerous, it was a bit distracting for the driver.
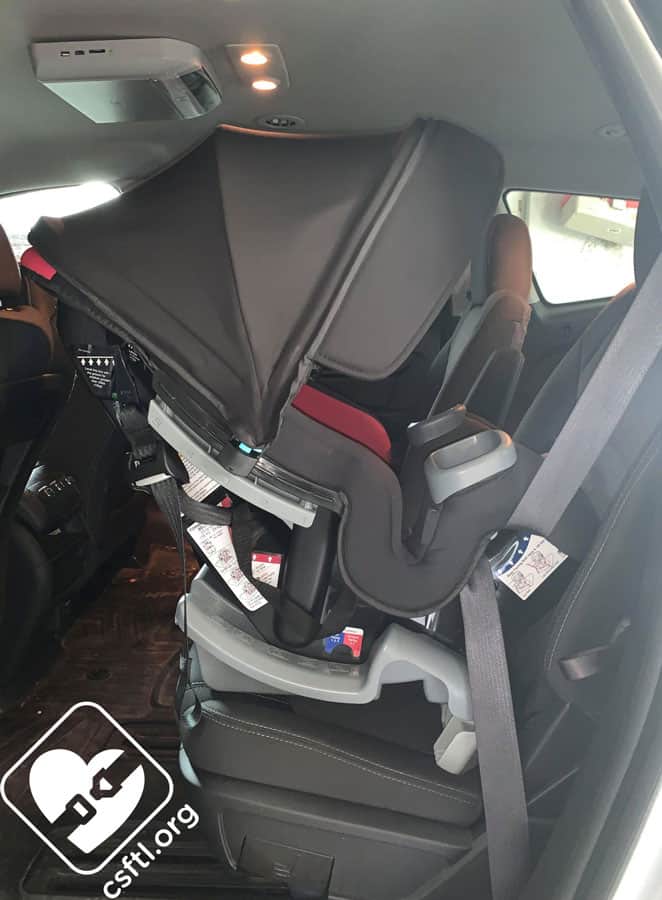
Baby Trend Cover Me canopy extended completely
Full disclosure: in the decade that our rather active Facebook group has been around, we have rarely seen caregivers of toddlers and preschoolers ask about a canopy for their convertible or multimode car seat. It is, however, (in our experience) a somewhat common question among parents who are shopping for a seat for their newborn.
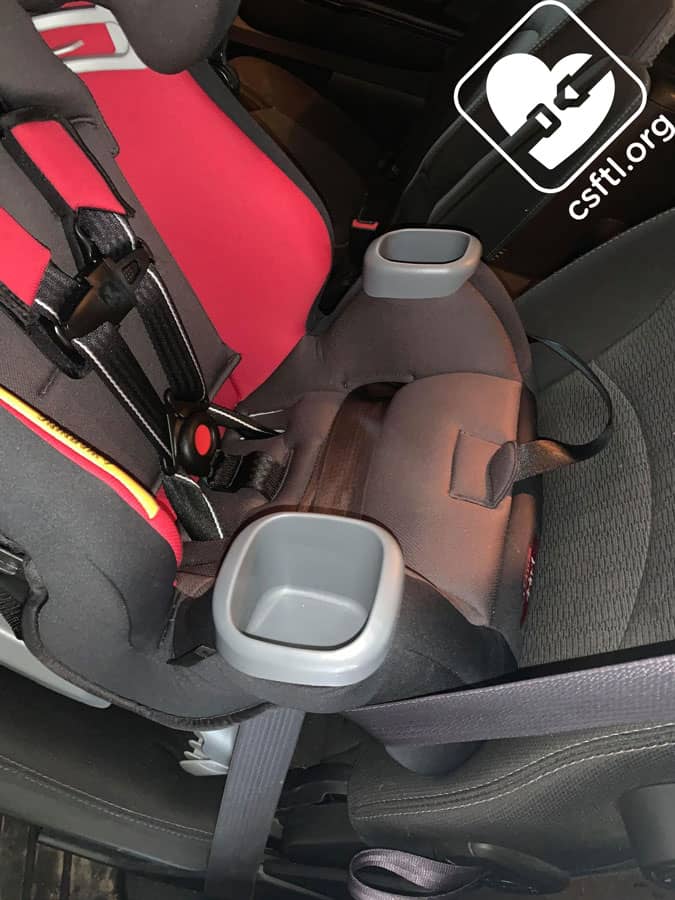
Cupholders
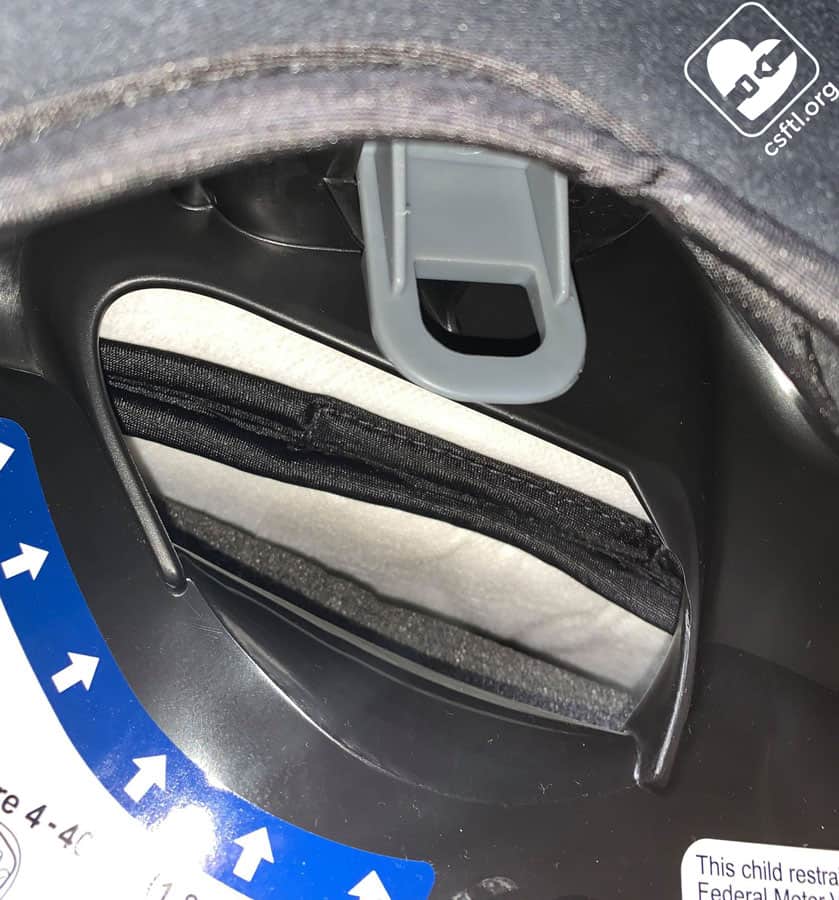
Baby Trend Cover Me cup holder release tab near rear facing belt path
The Cover Me has two cupholders that must be removed when installing the seat in rear facing mode. These cupholders are NOT dishwasher safe.
Infant Insert
The infant insert can be used for children weighing between 4 and 18 pounds. The insert is optional, unless it is needed to provide a proper fit with the harness at or below the child’s shoulder. We do find that in many cases, the tiniest of babies can fit better without the optional insert so we always suggest checking to see which option (insert or no insert) provides the best fit.
Head Pillow
The head pillow is for rear facing use only and can be used with or without the infant insert. It can NOT be used with the low birthweight routing.
Low Birthweight Harness Routing

Baby Trend Cover Me low birthweight harness position
The Cover Me offers a low birthweight harness routing for the tiniest of kiddos. While this routing can help the seat fit better in some cases, we struggled a bit with getting the routing set up. We’ll go into more depth about this process later in the review. The manual includes some helpful diagrams beginning on page 70.
Harness Covers
Baby Trend Cover Me required harness covers
The harness covers are required for use both rear and forward facing, however they can NOT be used with the low birthweight routing. The harness covers use hook and loop closures to attach to the harness. We found this to be problematic because our two year old model discovered she could easily take them off.
Harness Webbing Twist Indicator Stripe
There is a white line of stitching that runs the entire length of the harness webbing. This line helps indicate if the harness straps have become twisted.
Crotch Buckle Positions
The Cover Me has 2 different crotch buckle positions. Position 1 is toward the back of the seat and position 2 is toward the front of the seat.
The buckle tongues must be ½ inch to 1 inch above the child’s thighs. While we appreciate the specificness of this requirement, we’d like to note that this is the only seat manufacturer we know of that has such a specific requirement for the buckle tongue location.
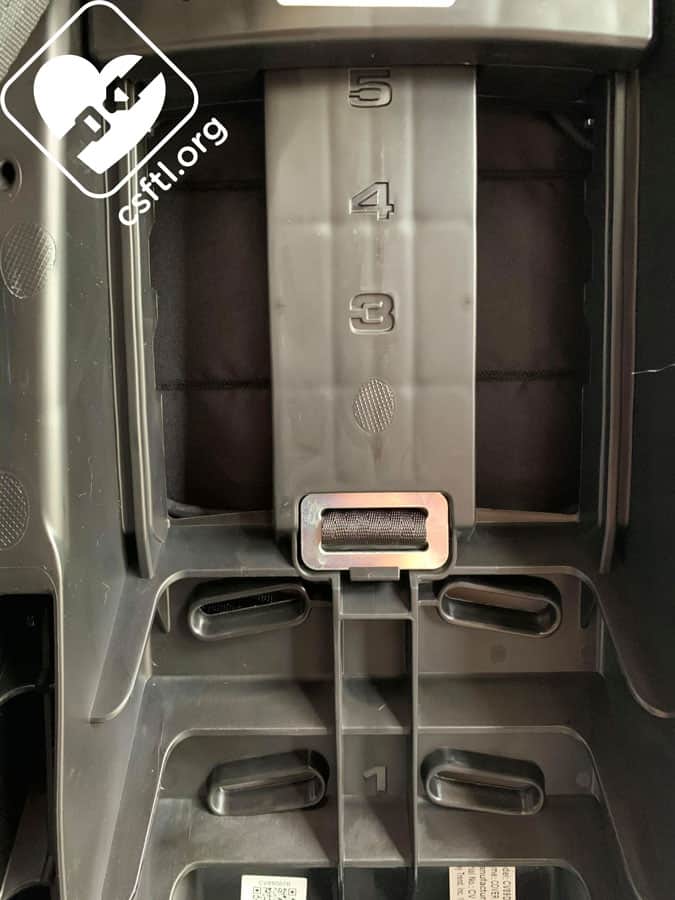
Multiple Hip Harness Slots

Baby Trend Cover Me hip adjustment
The Cover Me has 3 hip harness slots.
- Slots 1 and 3 are for the Low Birthweight Harness Routing ONLY.
- Slot 2 is for all other uses.
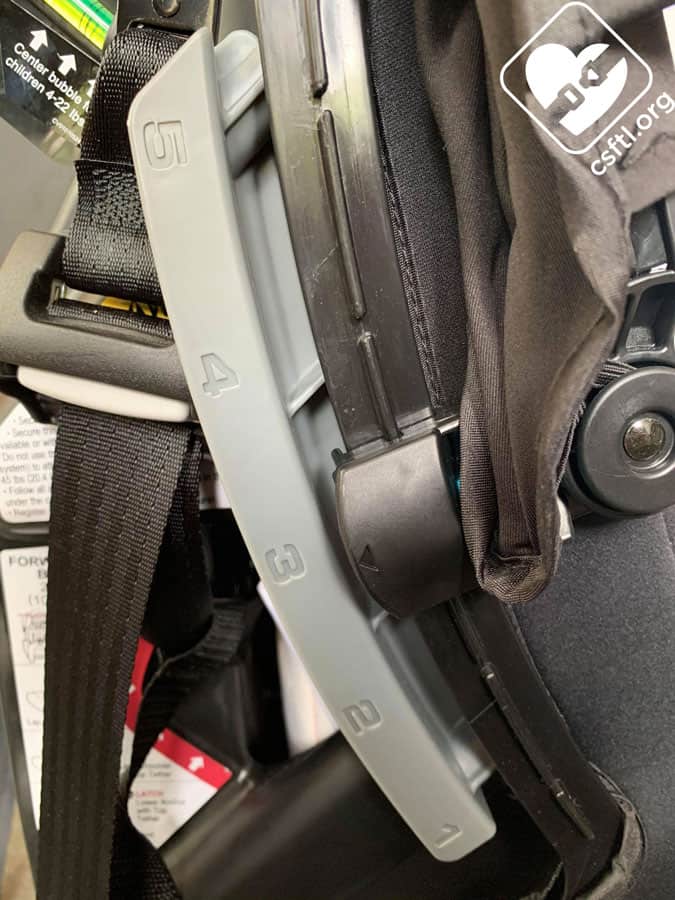
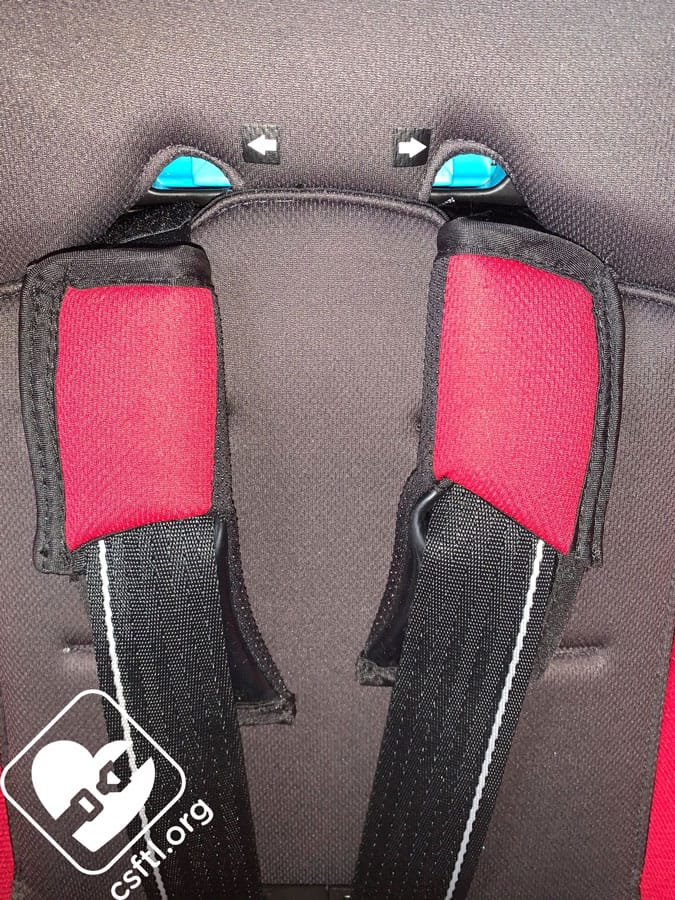
7 Harness Positions
Baby Trend Cover Me harness positions
The Cover Me has 7 harness positions. When using the lowest 2 settings, the harness must be re-threaded to raise or lower them. In the upper 5 settings, the harness moves with the headrest. To adjust the harness in the upper 5 settings, squeeze the two blue tabs located just above the harness lots. Arrows indicate where these are located.
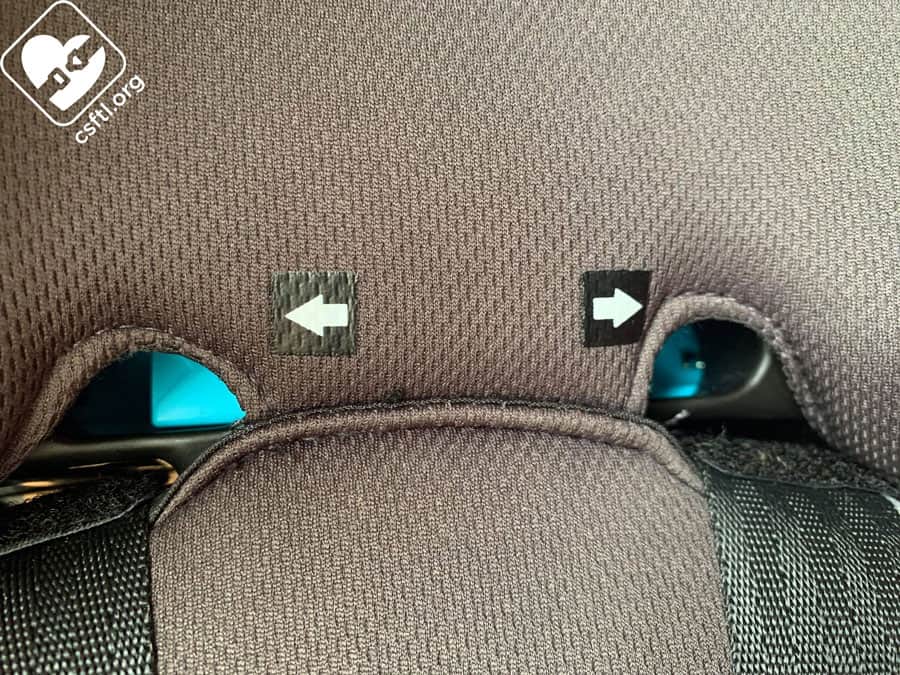
Baby Trend Cover Me harness adjuster
- Harness positions 1-4 are for rear facing
- Harness positions 5-7 are for forward facing
Installation
Rear Facing
Shortening the Crotch Buckle
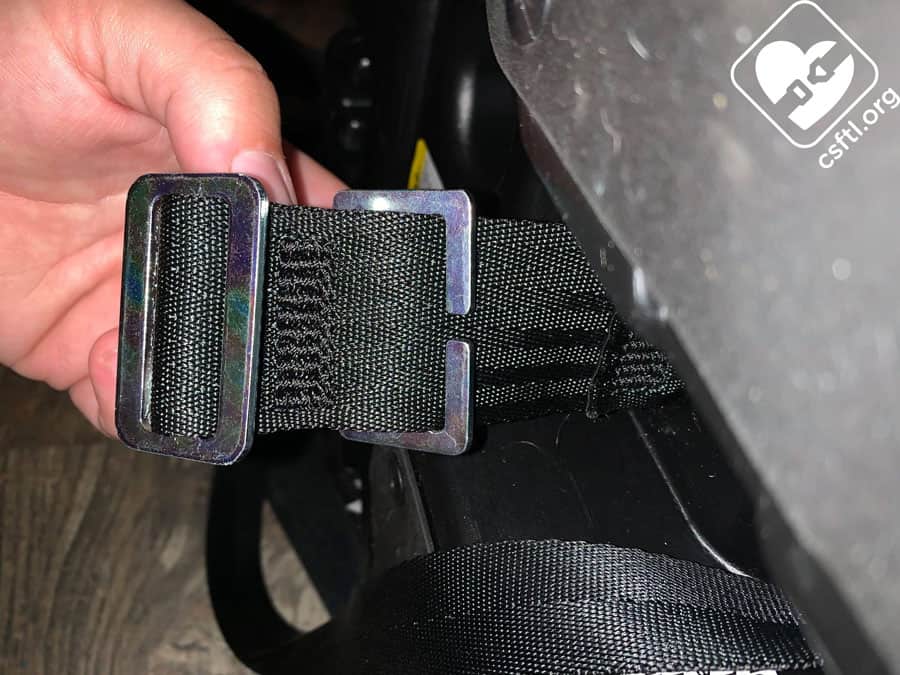
Baby Trend Cover Me crotch buckle j-hook routing
There are two different ways to shorten the crotch buckle. Thread the metal retainer through slot 1, and back up through slot 2. Or thread the metal retainer through slot 2 and back up through slot 1. Neither of these “J” routing methods are required, except when using the newborn routing.
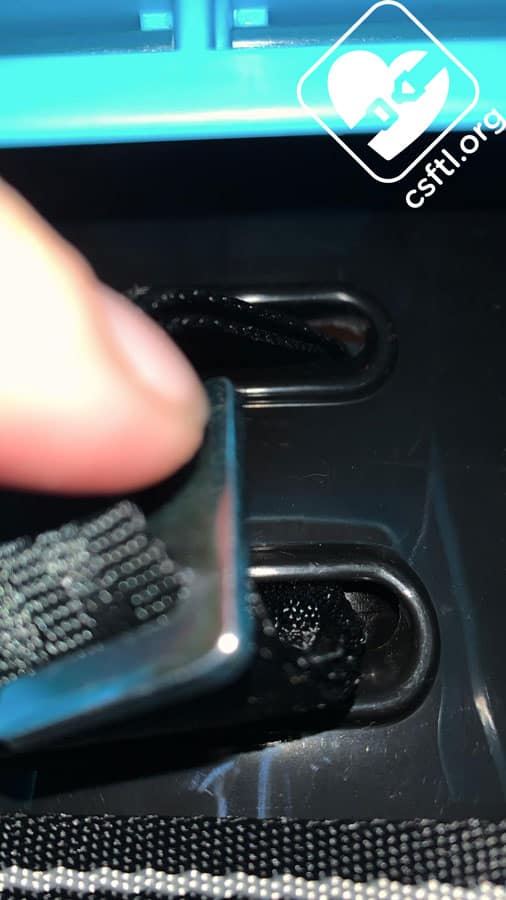
Baby Trend Cover Me shorten crotch buckle
When using the newborn routing, the crotch buckle must be shortened by threading the metal retainer through slot 1 and back through slot 2 and using a unique belt shortening clip that’s exclusive to this seat for the crotch buckle.
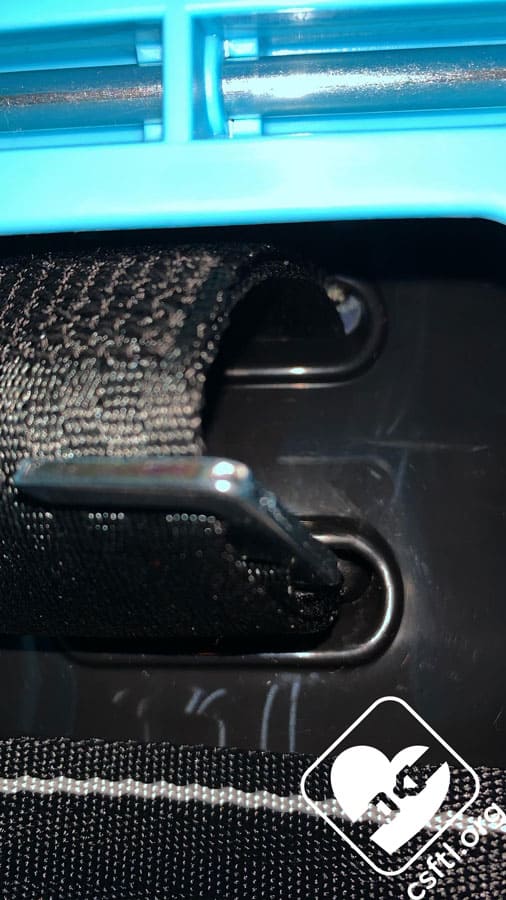
Baby Trend Cover Me shorten crotch buckle
Unfortunately, this clip is not included with the seat. The caregiver must call Baby Trend and obtain an approved belt shortening clip from the manufacturer. This is a bit disappointing since the manual indicates it is required when using the newborn routing. If a specific part is required for use, we’d always prefer that it’s included with the seat.
There is no dedicated place to store the crotch buckle shortening clip. It is rather small and I lost it three times while writing this review.
Low Birthweight Harness Routing
Baby Trend Trooper low birth weight harness routing
The Cover Me offers a low birthweight harness routing for the tiniest of kiddos. While this routing can help the seat fit better in some cases, we struggled a bit with getting the routing set up. We’ll go into more depth about this process later in the review. The manual includes some helpful diagrams beginning on page 70.
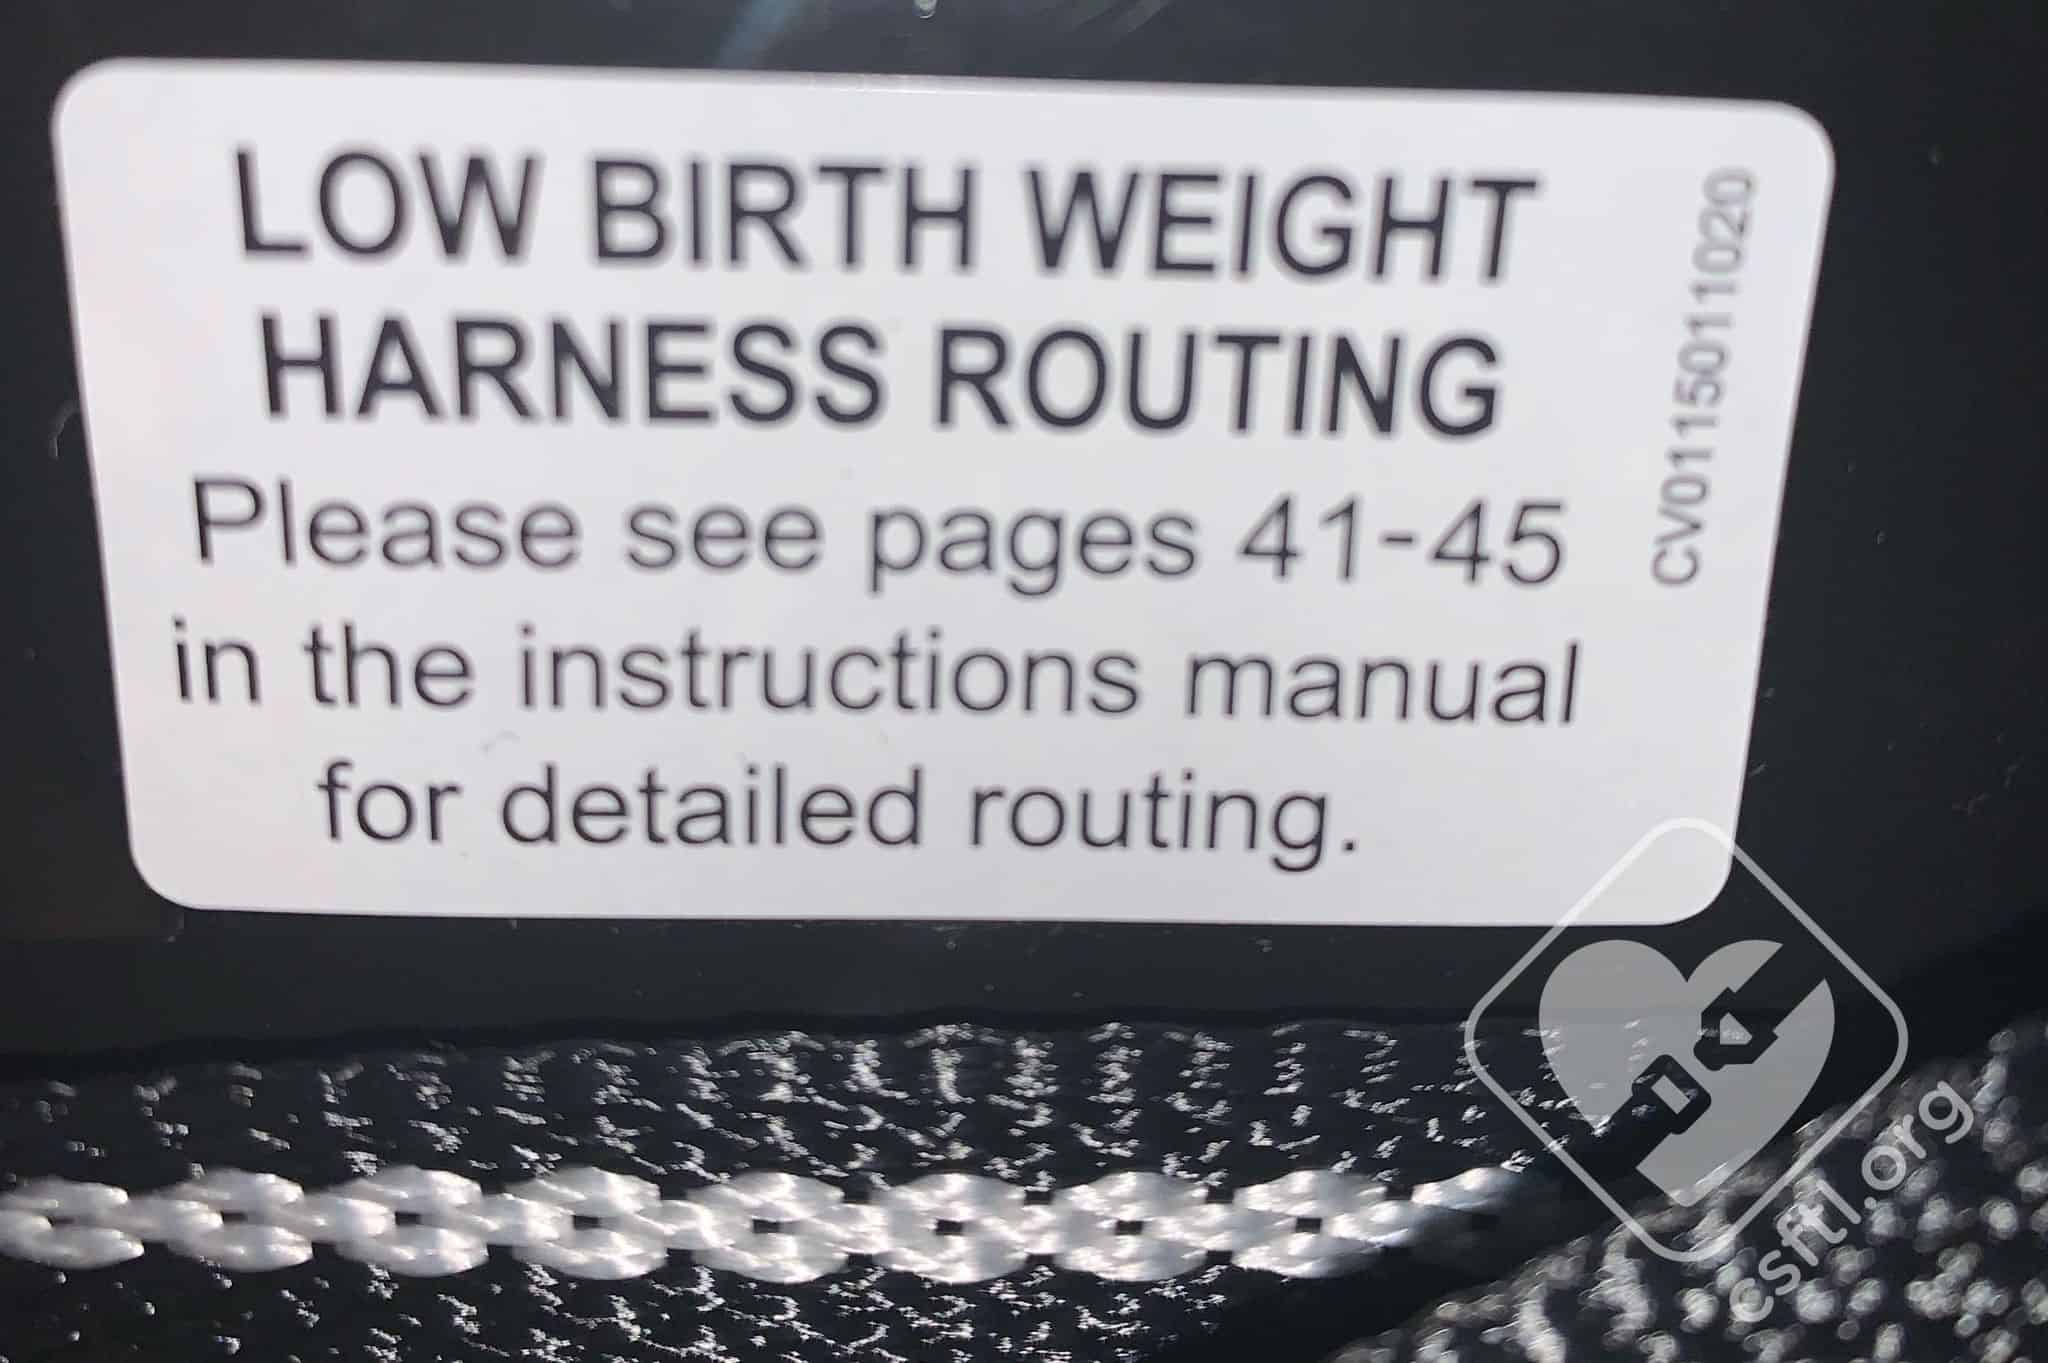
The harness can be routed into a pretty tiny length to fit the tiniest of passengers. There’s a handy label on the underside of the seat’s shell directing caregivers to the correct page in the manual for the instructions. This is a very similar process to shortening the harness on the similar Baby Trend Trooper so we’ll borrow some of our own content for this section.
Start by removing the head pillow and harness covers, storing them in a safe place for future use. Then, remove the harness ends from the splitter plate at the back of the seat and pull the harness through to the front of the seat.
Remove the chest clip and buckle tongue on the child’s left side. Remove the body pillow and both cupholders and set all to the side. Completely remove the harness by pulling up on the child’s right side. Remove the seat cover fabric. Do not remove the headrest fabric. Fully recline the seat, thread the metal retainer through slot 1, place the belt shortening clip on the crotch strap webbing, and thread the metal retainer through slot 2.

Baby Trend Trooper harness
Here’s how it works: unhook the harness from the splitter plate. Remove the harness cover, chest clip, and crotch buckle tongue from the harness webbing on one side. Unthread that strap from the seat completely. Following the diagram in the manual, weave the harness through the hip slots in the bottom of the shell. Then replace the crotch buckle tongue and chest clip. Rethread the harness in the lowest or second lowest slot in the back of the seat and hook the harness to the uppermost harness loop.
Eventually, I discovered this method: Before threading the harness through the harness slots in the back of the shell, ensure the straps are the same length.
Once both sides of the harness are the same length, thread them through the harness slots in the shell and hook the harness end loop to the splitter plate on the uppermost harness webbing loops. Make sure both sides are fully on the splitter plate. Then, attach the velcro on the end of the harness end loops to the velcro at the top of the harness end loops. This keeps the ends of the harness out of the way.

Baby Trend Trooper harness

Baby Trend Trooper harness
For the harness routing, place the seat upright with the harness facing toward you. Thread the harness through slot 1. Then turn the seat over and thread the harness through slot 2. Turn the seat back upright and feed the harness through slot 3. For the opposite side, do the previous steps in reverse. I did find it easier to ensure both sides of the harness were the same length at this part in the process.
Replace the seat cover, threading the harness through the inner-most slots in the seat cover. Thread the buckle though slot 1 in the seat cover. Lower the headrest completely so slots 1 and 2 in the cover line up with slots 1 and 2 in the seat back. If you need to use the infant insert to provide a proper fit, place it in the seat now. Thread the harness through the hip slots in the insert and the crotch buckle through slot 1 in the insert. Replace the buckle tongues and chest clip on both sides of the harness. If using harness slot 1 and the insert, thread the harness through the slots in the insert and through slot 1 in the seat back. If using harness slot 2 and the infant insert, do not use the slots in the insert.
Reattach the harness to the splitter plate, using slot A on the harness ends. Be sure the harness is fully secured on the splitter plate by sliding the splitter plate inside the loops. Fold the ends of the harness webbing over and secure to itself using the hook and loop closures.
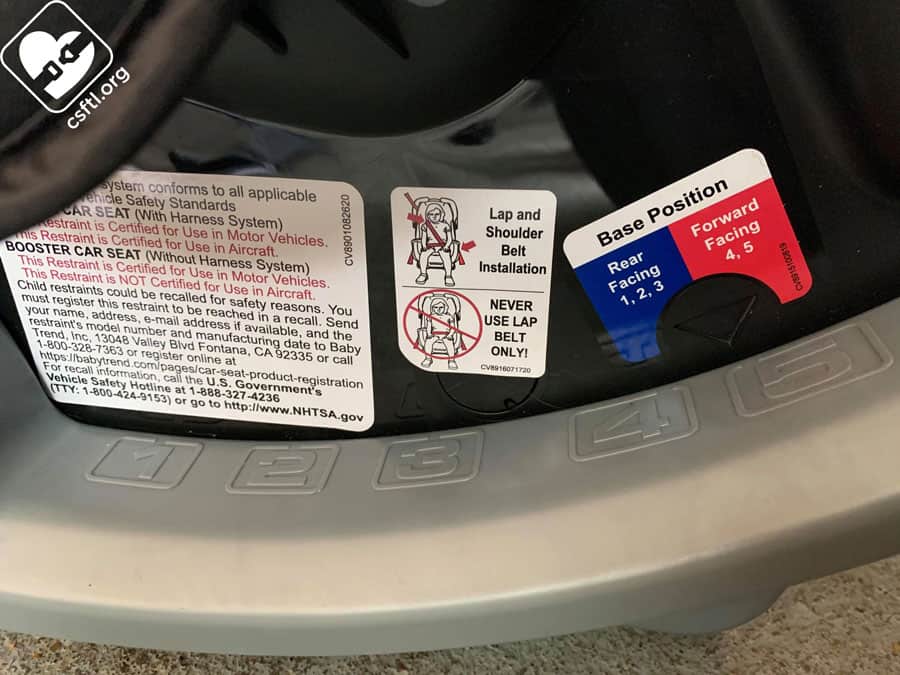
Recline Angle Indicators

Baby Trend Cover Me recline angle indicators
The Cover Me has two separate recline angle indicators, one for smaller children and a line for children who weigh more than 23 pounds. The line must be parallel to the ground for children weighing more than 23 pounds, the bubble must be centered between the lines for children who weigh less than 23 pounds.
We’re not sure why a seat that doesn’t detach like a rear facing only car seat detaches from a base needs two indicators, especially if those indicators are next to each other, but here they are.
Recline Positions
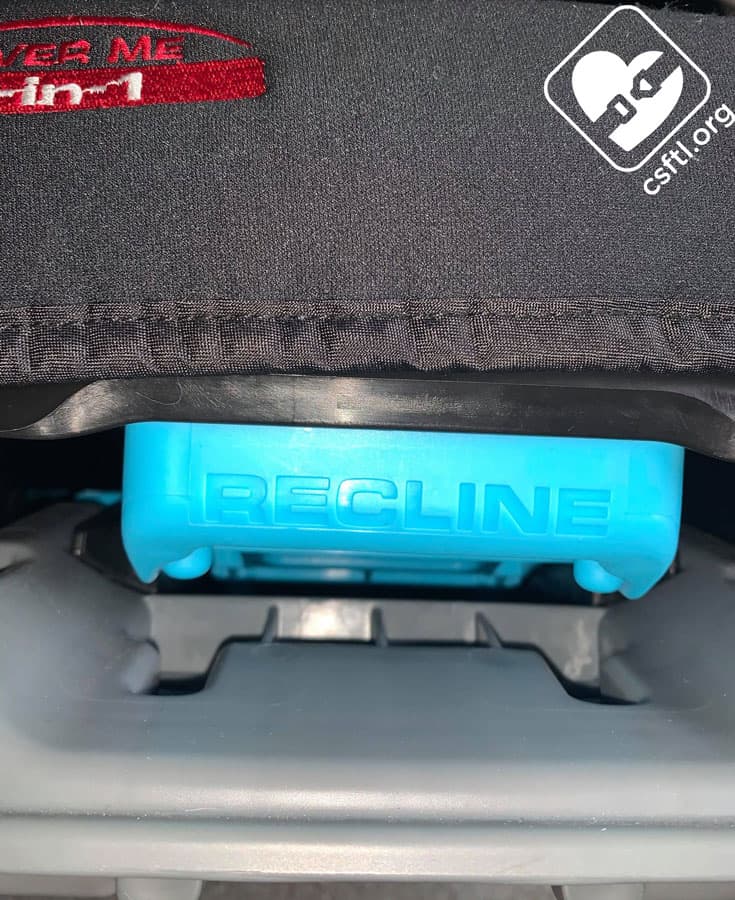
Baby Trend Cover Me recline angle adjuster
Recline positions 1 through 3 can be used for rear facing installations.
Baby Trend Cover Me recline positions
Adjust the recline position by squeezing the blue handle at the front of the seat, then rotating the seat back until its in the proper position.
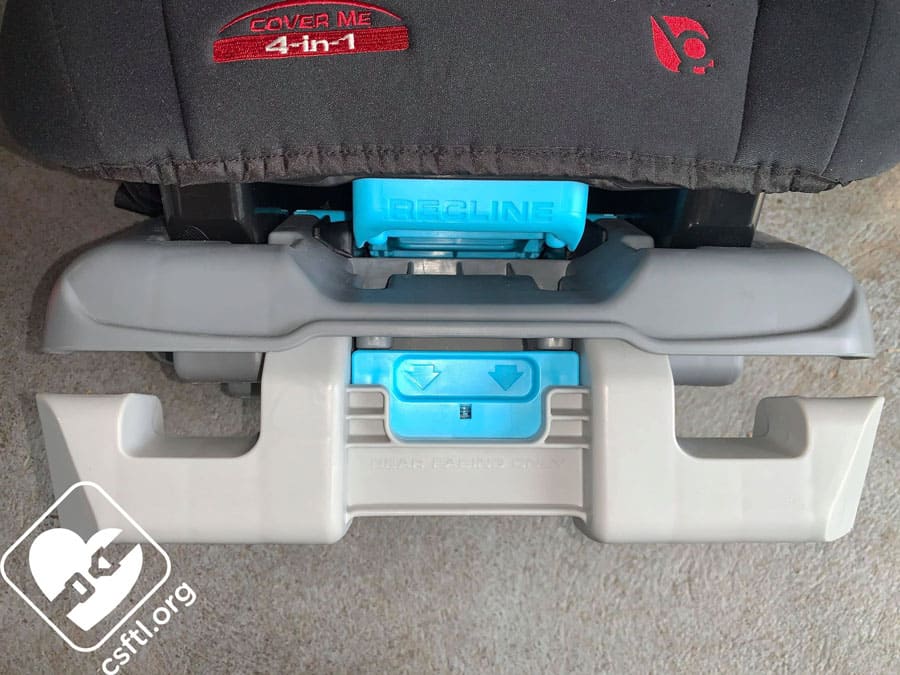
Installation: Lower Anchors

Baby Trend Cover Me rear facing foot release
To install the Cover Me rear facing using the lower anchors, extend the rear facing foot by squeezing the blue lever on the bottom of the seat, then flipping it downward. Choose the rear facing recline position that places the necessary recline indicator in the proper place by squeezing the blue recline handle at the front of the seat. Remove both cupholders by pressing the release tab on the underside of the seat and pull the seat pad back to expose the rear facing belt path.
Baby Trend Cover Me rear facing belt path
Yes, the manual states that the cupholders must be removed every time the seat is installed rear facing, then reinstalled once the seat itself is ready to go.
Set the Cover Me on the vehicle seat with the harness facing the rear of the vehicle. Thread the lower anchor hook and webbing through the rear facing belt path and connect each hook to the lower anchors in the vehicle seat. Replace the seat pad and reinstall the cupholders. Press down with one hand where the child’s bottom goes and remove the slack from the lower anchors.
Check your Work

Baby Trend Cover Me installed with the lower anchors
Once the seat is installed, give it a firm handshake at the belt path, make sure the seat moves less than an inch at the belt path. Ensure the recline angle is correct based on the child’s weight.
Installation: Vehicle Seat Belt
Baby Trend Cover Me recline angle adjuster and rear facing foot
To install the Cover Me rear facing using the vehicle seat belt, first extend the rear facing foot by squeezing the blue handle on the underside of the seat. Choose the rear facing recline that places the necessary recline indicator in the proper place, by squeezing the blue recline handle at the front of the seat. Remove both cupholders by pushing the retention tab and lifting them off the seat. Then, pull the seat pad back to expose the rear facing belt path.
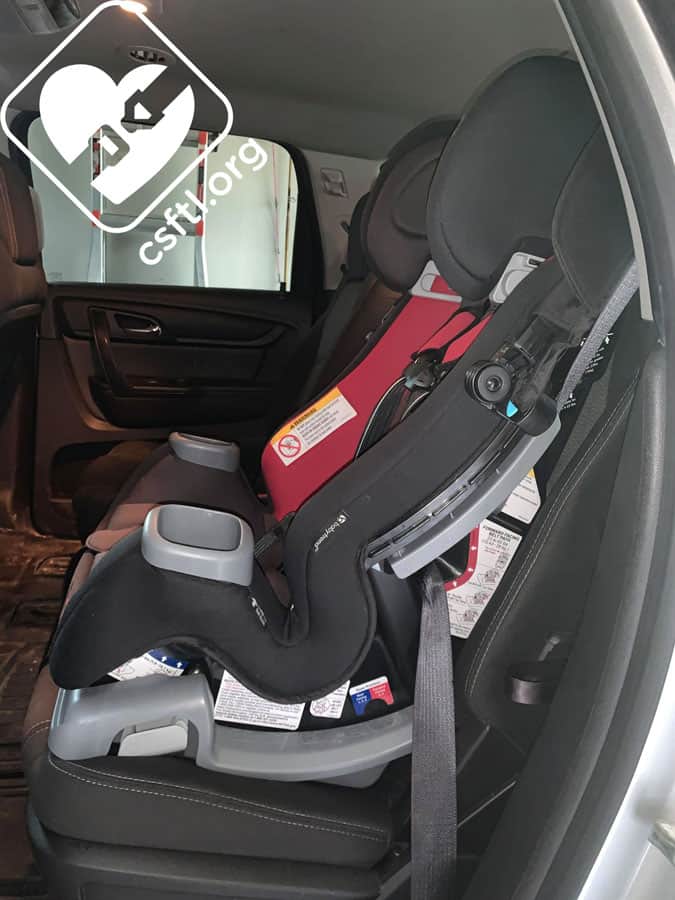
Baby Trend Cover Me installed with the vehicle seat belt
Place the Cover Me on the vehicle seat with the harness facing the rear of the vehicle. Thread the vehicle seat belt through the rear facing belt path and buckle it. Replace the seat pad and both cupholders. Next, determine how the seatbelt locks and lock it. Apply pressure where the child’s bum goes and remove the slack from the vehicle seat belt.

Baby Trend Cover Me rear facing belt path
One of the unique features of the Cover Me is that the vehicle seat belt can be routed over or under the cover when installing the seat rear facing. While this adds another option for caregivers, it’s a pretty unique feature among car seats that are sold in the United States so we worry that having this option could create confusion for caregivers who may try to install their child’s next seat by routing the belt over the cover.
Check your Work
Once the seat is installed, give it a firm handshake at the belt path, make sure the seat moves less than an inch at the belt path. Ensure the recline angle is correct based on the child’s weight.
Fit to Child
Preemie Doll
Baby Trend Cover Me preemie fit without insert
Our preemie Huggable Images doll weighs 4 pounds and is 17 inches long. The preemie doll gets an excellent fit both with and without the optional rear facing insert.
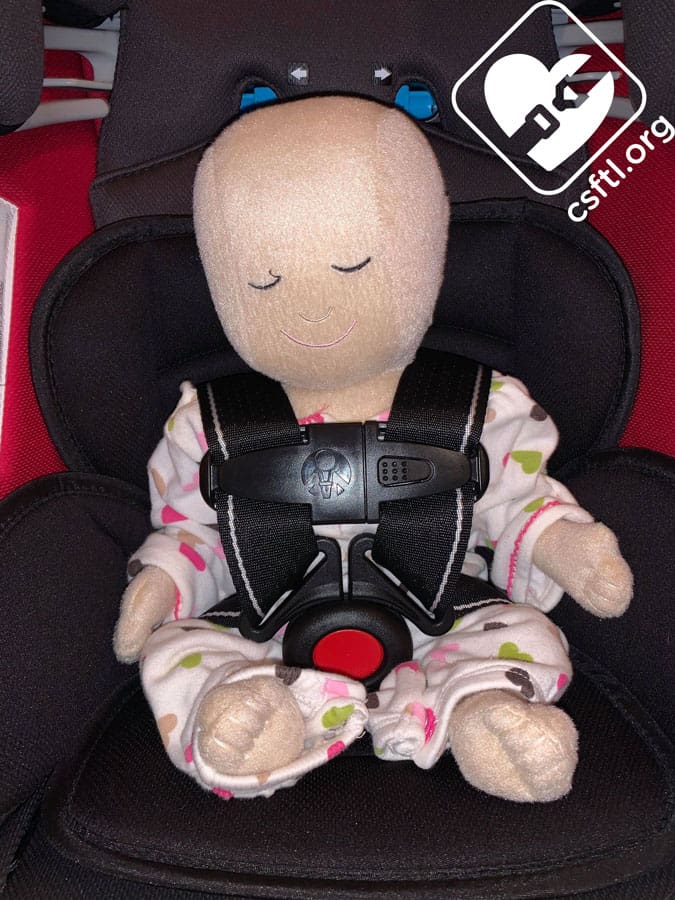
Baby Trend Cover Me preemie fit with insert
The harness is routed in the low birthweight routing, the crotch buckle is “J” routed and has the required shortening clip attached. The crotch buckle tongues are ½ inch above the child’s thighs. The harness pads and head insert are removed as indicated per the manual when using the low birthweight routing.
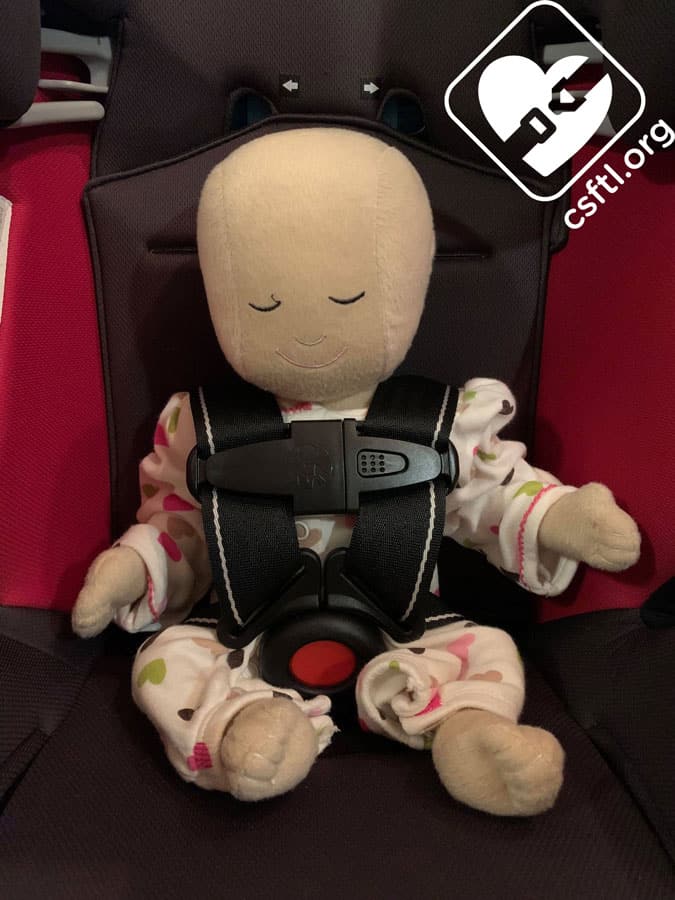
Newborn Doll

Baby Trend Cover Me newborn fit
This Huggable Images doll is 7 pounds and 17 inches long. Unfortunately, our newborn doll doesn’t fit properly in this seat. In order to get the harness tight enough, the newborn doll required the low birthweight harness routing, which means the crotch buckle must be “J” routed and the shortening clip must be used. This places the crotch buckle tongues less than ½ inch above the child’s thighs. The manual states the crotch buckle tongues need to be ½ inch to 1 inch above the child’s thighs.
2 Years Old
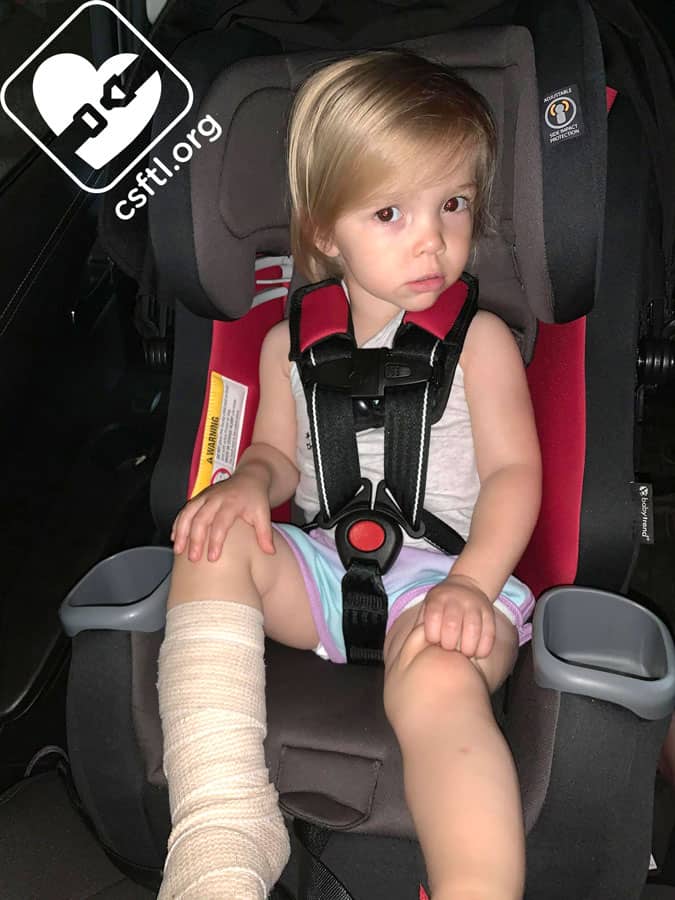
Baby Trend Cover Me 2 years old rear facing
Our 2 year old model weighs 28 pounds and is 34 inches tall. She fits well in the Cover Me with room to grow. The harness is just below the shoulder. She quickly discovered that the required harness covers came off very easily and they went flying to the back of my vehicle. She also enjoyed folding and unfolding the canopy since there is no way to “anchor” it in place. While this isn’t a safety issue, it was quite distracting to the driver.
It’s a little hard to tell from this photo, but she is, in fact, rear facing here. We didn’t get to use the seat much until she decided to be sassy and remove the required strap cover and toss it into an unknown location, so we were unable to update the photo because we were missing a required part. This whole situation — having a removable part that’s required for use and having our model throw it away is disappointing. Until we can get a replacement part from the manufacturer, this seat is now unusable for her.
Installation: Forward Facing
Choose the Correct Recline Position
Baby Trend Cover Me recline positions
Recline positions 4 or 5 can be used when forward facing in harness mode.
Lower Anchors
Baby Trend Cover Me installed with lower anchors
To convert the Cover Me from rear facing to facing mode, move the rear facing recline foot to the stored position. Choose the forward facing recline position that is correct for your child, and set the Cover Me on the vehicle seat with the harness facing the front of the vehicle. Remove the top tether anchor hook from its storage location on the seat. Loosely connect the top tether anchor to the top tether anchor location in the vehicle.Fully loosen the harness and lift the seat back fabric flap to expose the forward facing belt path. Thread the lower anchors through the forward facing belt path and connect the anchor hooks to the lower anchors in the vehicle seat bight. Apply pressure down and back where the child’s bum goes and remove the slack from the lower anchor webbing. Tighten the top tether webbing to remove the slack.
Check your Work
Once the seat is installed, give it a firm handshake at the belt path, make sure the seat moves less than an inch at the belt path.
Vehicle Seat Belt
To convert the Cover Me from rear facing to forward facing mode, move the rear facing recline foot to the stored position. Choose the correct forward facing recline setting for your child and place the Cover Me on the vehicle seat with the harness facing the front of the vehicle. Remove the top tether anchor from its storage spot on the seat and loosely attach it to the designated top tether location in the vehicle. To expose the rear facing belt path, completely loosen the harness and lift the back flap of the seat pad. Thread the vehicle seat belt through the forward facing belt path and buckle it. Determine how the vehicle seat belt locks. Lock the vehicle seat belt and remove the slack from the vehicle seat belt while putting pressure where the child’s bum goes. Remove the slack from the top tether anchor webbing.
Check your Work
Baby Trend Cover Me forward facing with the vehicle seat belt
Once the seat is installed, give it a firm handshake at the belt path, make sure the seat moves less than an inch at the belt path.
Fit to Child
Forward Facing
5 Years Old
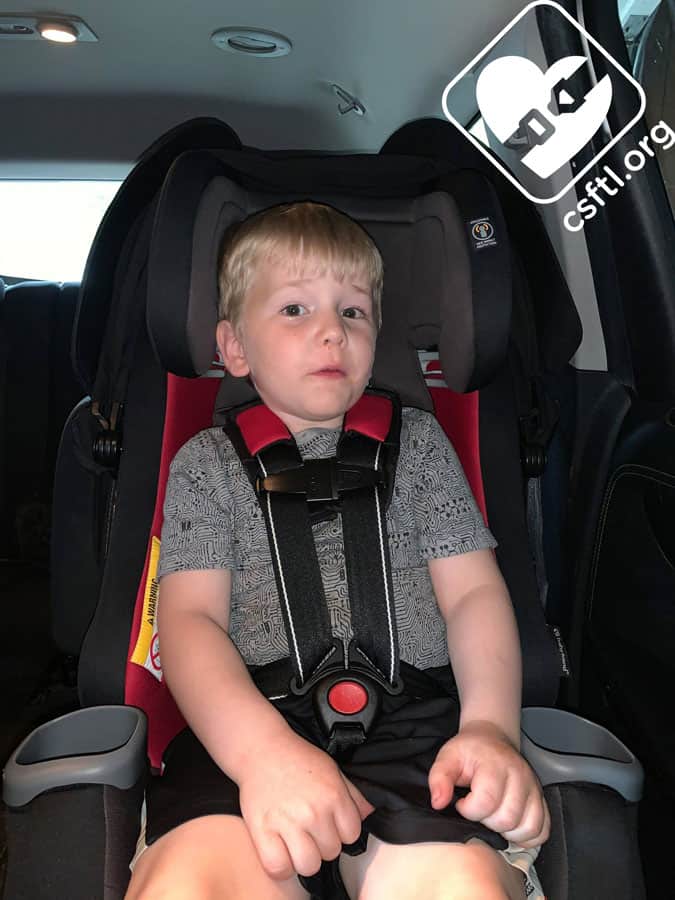
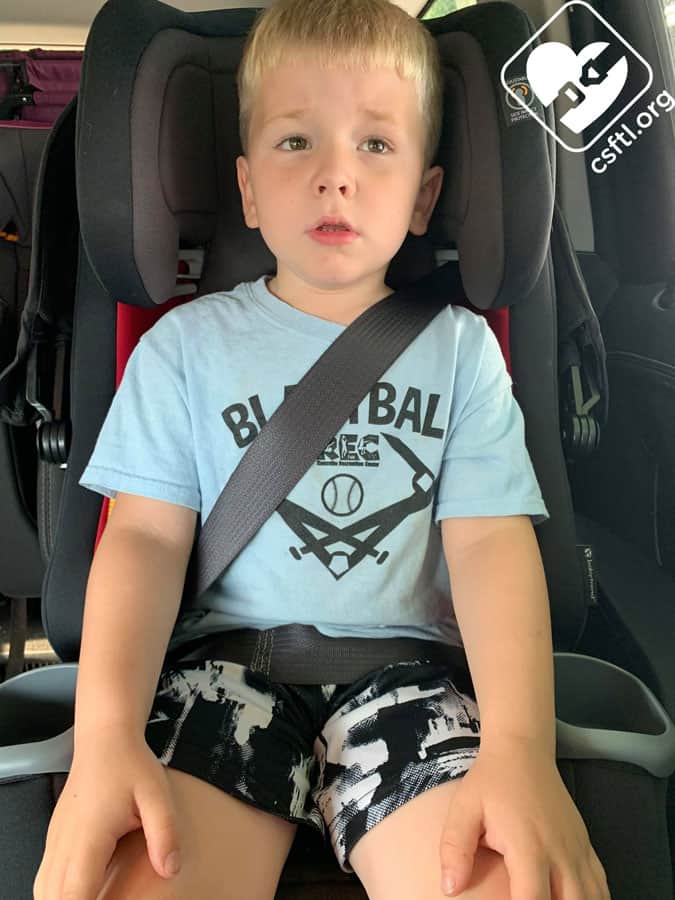
Baby Trend Cover Me 5 years old
Our 5 year old model is 43 inches tall and weighs 48 pounds. He was a little unsure about this seat, as you can tell! He decided it was comfortable but wasn’t a fan of the required harness covers. He is using the top harness slot and the harness is just above the shoulder.
In our experience, kids grow about an inch in their torso each year, so based on that, we would guess that he has about 6 months or so left to grow in harness mode.
Booster Mode
The manual did not specify that using LATCH is permitted in booster mode. We will take that to mean it’s not permitted.
Converting to Booster Mode
Converting the Cover Me to booster mode requires several steps. Unfortunately, the manual lists these steps in kind of a backward order, starting with instructions for buckling the child into the booster, then it describes how to convert the seat to booster mode.
You probably guessed this, but we’d prefer to see instructions on how to convert the seat to booster mode before those instructions on putting the child into the seat.
To start the conversion process, turn the seat around and remove the ends of the harness from the splitter plate. Remove the harness cover, chest clip and crotch buckle from the child’s left side. Buckle the crotch buckle at the child’s right side only. Then, pull the harness from the right side of the seat, leaving the harness threaded through the right side crotch buckle tongue. Set the harness assembly in the seat and recline the seat fully by squeezing the blue recline lever at the front of the seat. Turn the metal retainer sideways and remove the crotch buckle from the seat shell. Next, buckle the right side buckle tongue into the crotch buckle and thread the harness through it. Thread the harness through the chest clip and harness cover. Store all unused parts in a cool, dry place for future use. We always suggest putting the harness into a bag or container that can be labeled.
Canopy Use in Booster Mode
The canopy is optional in booster mode. The way the vehicle seat belt is routed depends on whether or not the canopy is being used.
If you choose to use the canopy in booster mode, the vehicle seat belt needs to be routed under it. To do this, remove both canopy hoops from the canopy mechanism on the vehicle shoulder belt side of the seat. Thread the vehicle shoulder belt under the canopy and through the belt guide.
If the canopy is NOT used in booster mode, it can either be removed completely and stored in a cool, dry place or it can be stored in the collapsed position behind the Cover Me headrest.
Shoulder Belt Guide
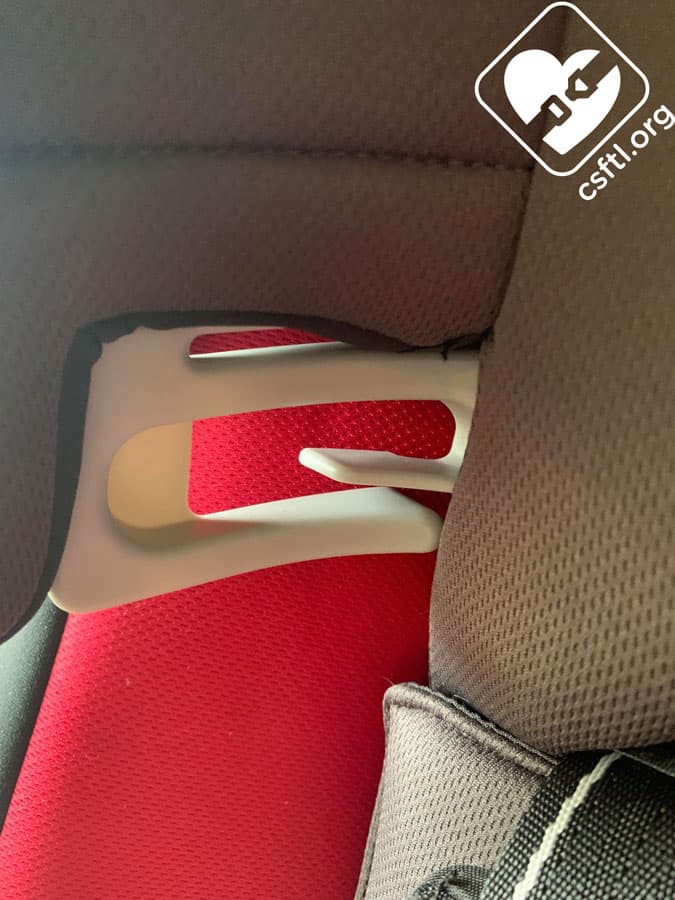
Baby Trend Cover Me booster mode shoulder belt guide
The Cover Me’s shoulder belt guide is quite nice — it’s open enough that it’s easy to get the vehicle seat belt in there without issue and we didn’t have any issues with the seat belt retracting properly.
Belt Path
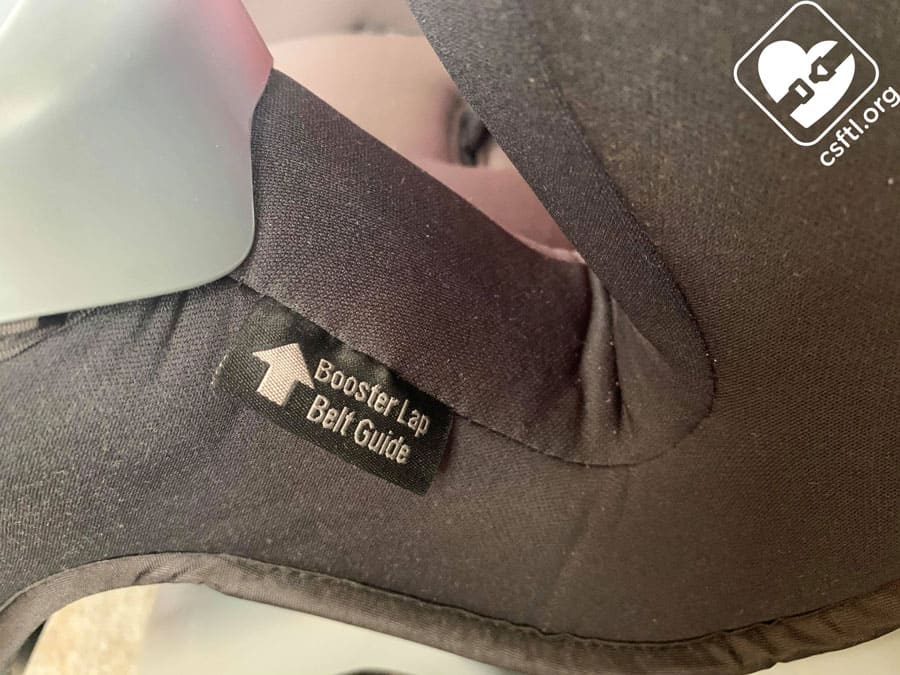
Baby Trend Cover Me booster mode lap belt guide
The lap belt guide is indicated by a tab on the cover.
Fit to Child
Booster Mode
Five Years Old
Baby Trend Cover Me 5 year old booster mode
Our typical booster models — a 7 year old and a 10 year old — found themselves to be too large to fit in the Cover Me in booster mode, despite being within the stated height and weight limits for the seat. They have both outgrown it by torso height, which puts the shoulder belt guide below their shoulders so you won’t see them here but we will show how well the seat fits our 5 year old model in booster mode. This model is on the young side for full-time booster riding, he probably won’t be ready to make the move from a harnessed car seat for a while yet but he found modelling the Cover Me a novel experience!
Here’s our 43 inches tall, 48 pound model in the Cover Me in booster mode.
Important Information: Where to Find

Baby Trend Cover Me manual storage
Manual storage: the manual storage is located under the cover at the child’s right shoulder.
Date of manufacture: the date of manufacture is on the back of the seat shell

Baby Trend Cover Me date of manufacture label
Expiration: The Cover Me expires 7 years after the date of manufacture in harness mode
The booster mode on the Cover Me expires 9 years after the date of manufacture
FAA approval: the FAA approval label is on the left side of the seat shell near the child’s knee

Baby Trend Cover Me FAA approval label
NOTE: this seat is FAA approved in harness mode ONLY. Booster seats are not FAA approved since they require a shoulder belt, and planes have a lap belt only
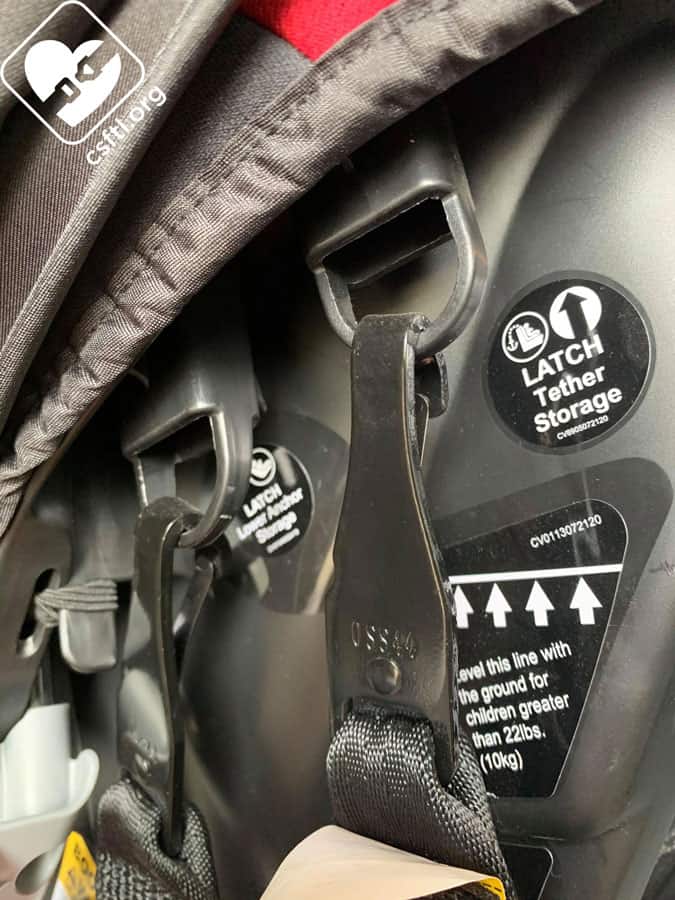
Baby Trend Cover Me lower anchor and top tether storage
Lower anchor storage: the lower anchors store on plastic loops on either side of the seat shell near the child’s shoulders
Top tether storage: the top tether anchor storage is located on a plastic loop on the seat shell near the child’s left shoulder
Overall Thoughts
We had high hopes for the Cover Me. The cover makes it kind of unique and we were eager to see how that worked.
We found that the seat fits preemies well but didn’t fit our newborn doll particularly well. The base made it easier to install than its cousin, the Trooper. The canopy is nice for children with a sun sensitivity or who don’t like the sun in their eyes. However, our models enjoyed playing with the canopy and removing the required harness covers far too often for our comfort level.
We struggled with the low birthweight harness routing and wonder why the required belt shortening clip isn’t included with the seat. We absolutely feel that having a required piece missing from the start will lead to misuse. The low birthweight harness routing was also difficult and the booster mode won’t fit the majority of booster ready children.
Where the Cover Me shined was in harness mode, both rear facing and forward facing. It fit our models well and the canopy could be a bonus for that group. Unfortunately, the challenges with installation, use and the short-lived nature of the seat make it a pretty niche option — it’s one we’d mainly find ourselves suggesting for families who need that extra sun protection for their child.