Chicco KeyFit 35
If you’ve ever worked a car seat check event, read our Recommended Seats page, or searched the internet for a great rear facing only car seat, it’s pretty likely that the Chicco KeyFit 30 or 22 made some type of appearance. It’s a well-featured, easy to use car seat that’s served many families well over the years (including many a CSFTL family). The KeyFit family has expanded to include the Fit2 and now, the newest member of the family, the KeyFit 35. In many ways, the KeyFit 35 is exactly what we’d expect if the KeyFit and Fit2 were merged into one seat. Let us show you the ways that it’s similar and how it’s different.
CSFTL Quick Stats
- Weight range: 4-35 pounds
- Height range: less than 32 inches AND the child’s head is no less than 1 inch below the top of the head rest
- Handle position: any locked position may be used when the car seat is in the vehicle
- Inflatable seat belts: not permitted
- Expiration: 6 years
- Chicco requires replacement after any crash
Measurements
- Crotch buckle position: 4 inches
- Lowest harness position: 6 inches (with insert), ~6.75 inches (without body insert)
- Width at widest point (carrier handles): 16.5 inches
- Seat weight (carrier): 10.1 pounds
- Base weight: 8.2 pounds
Unique Features
- KeyFit 35 base is compatible with the KeyFit, KeyFit30, and KeyFit 35 car seats (it is not compatible with the Fit2)
- Anti-rebound bar on base
- No rethread harness/adjustable headrest
- European routing for baseless installations
- LockSure lockoff reinforced with steel
- Optional to lock the belt after using the lockoff.
- Will be sold with the Corso LE travel system starting in fall 2020.
- Smaller by 1/2 inch than the Fit2 (at the handle).
Cover Fabrics
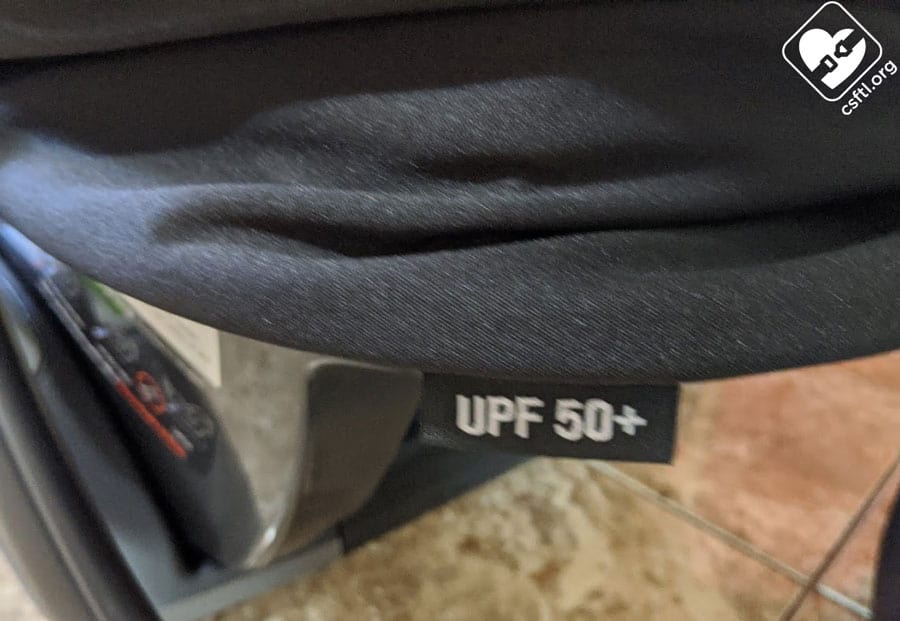
Chicco KeyFit 35 canopy sun protection
There are a number of unique things about the KeyFit 35’s cover and soft goods. The first thing I noticed was the UPF 50+ label on the outside of the canopy. That rating reflects a new level of protection that comes courtesy of two layers of interlock knit material (compared to increasing protection by adding any kind of chemical protectant).
Moving on to the cover itself, there are two types of fabric — a plush, ultrasoft knit fabric that covers the parts of the seat that are behind the baby. The portion of the cover that’s underneath the sections of the baby that are more prone to high use (foot and rump areas) is made from a more robust fabric.
The cover boasts a slightly new shape that mirrors the shape of the handle and adds a little space between the canopy and the handle. The handle on our seat didn’t get caught on the handle, not even one time!
Thicker foam throughout the seat.
Base sold separately for $109.99, which is $20 more than the KeyFit 30 base.
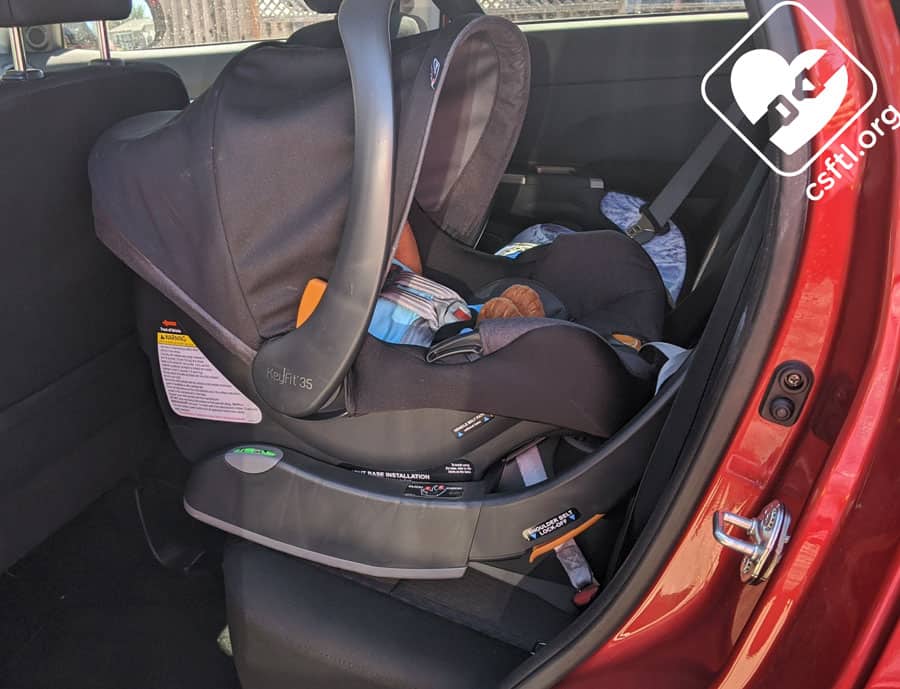
Front to Back Space
Another small but important way that the KeyFit 35 differs from the KeyFit 30 and 22 is the amount of space it takes up front to back. Chicco very cleverly adjusted the base height and the way the carrier sits in the base to adds about 1.5 inches of legroom for the child once the seat is installed. The anti rebound bar also helps to create this additional space.
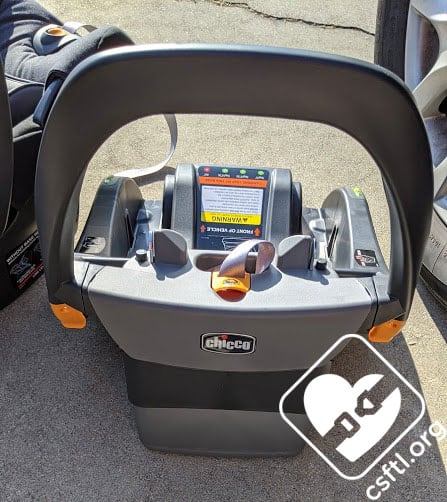
Anti-Rebound Bar
Chicco KeyFit 35 anti rebound bar
This bar is part of the base and adds additional dispersion of crash forces. The KeyFit 35 is among a small handful of seats that have such a bar but in my experience, it’s the only anti-rebound bar that sort of tucked into the vehicle seat (in all of the vehicles I tried the seat in) as if it was meant to be there all along.
Chicco KeyFit 35 anti rebound bar
The engineering team at Chicco had paid extra attention to the bar while designing this seat and it shows!! We celebrate that effort with this attempt at an arty picture of the base.
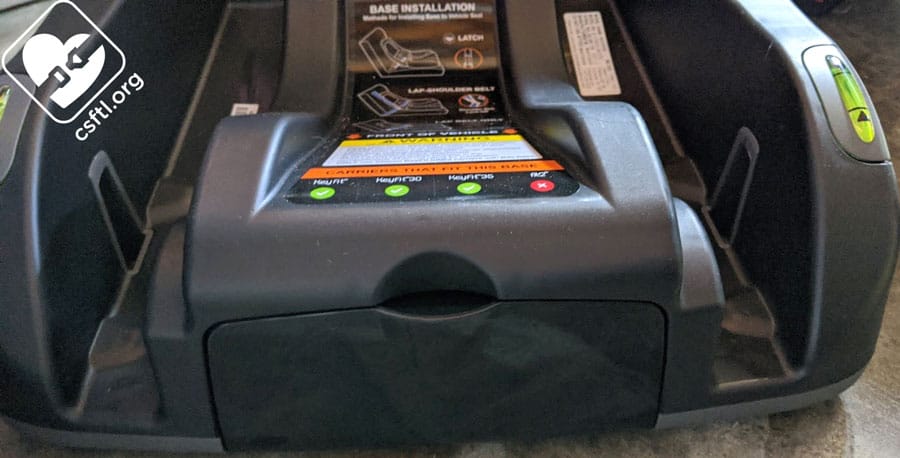
Base Compatibility
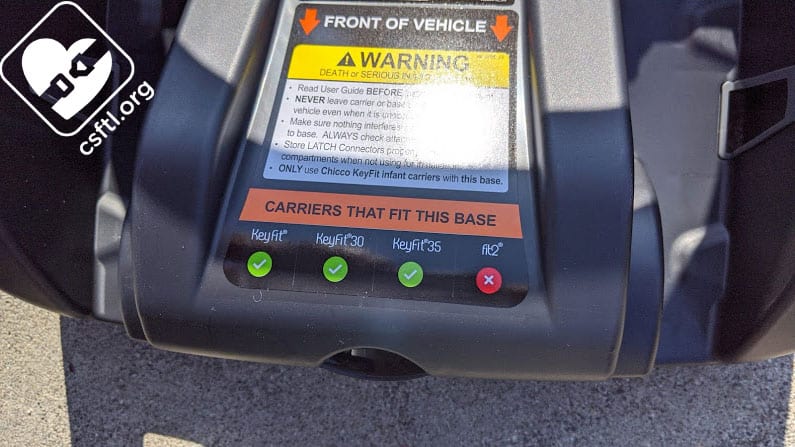
Chicco KeyFit 35 base compatibility
The KeyFit 35’s base can be used with the KeyFit 22, KeyFit 30, and of course, the KeyFit 35.
It cannot be used with the Fit2, nor can the KeyFit 22 or 30’s bases be used with the KeyFit 35. We are mentioning this twice in our review to ensure that this is not missed for anyone wondering about compatibility with other Chicco rear facing only seats and bases.
No Rethread Harness
Chicco KeyFit 35 harness adjuster
If you’d pressed me to find something about the original KeyFit that wasn’t ideal, the list of features that fall into that category would be pretty short. The most notable thing was the harness — it has to be manually moved between slots as the child grows. While this task isn’t terribly difficult, it is something that caregivers didn’t always do. We’d see bigger infants or even toddlers crammed into a seat with the harness on the lowest level because that’s how the seat emerged from the box.
Chicco KeyFit 35 harness adjuster
Now. We still see that scenario, even with a no rethread harness. But at least it’s slightly easier to remedy when the harness and a headrest move by squeezing a button. The KeyFit 35 has two orange buttons on the back of the carrier — they are sort of awkwardly placed just underneath the harness. I had to loosen the harness, move it out of the way to access the buttons, then squeeze them to move the headrest up or down. Once I was able to access them, adjusting the harness was quite easy.
The KeyFit 35’s harness must be positioned at or below the child’s shoulders at all times.
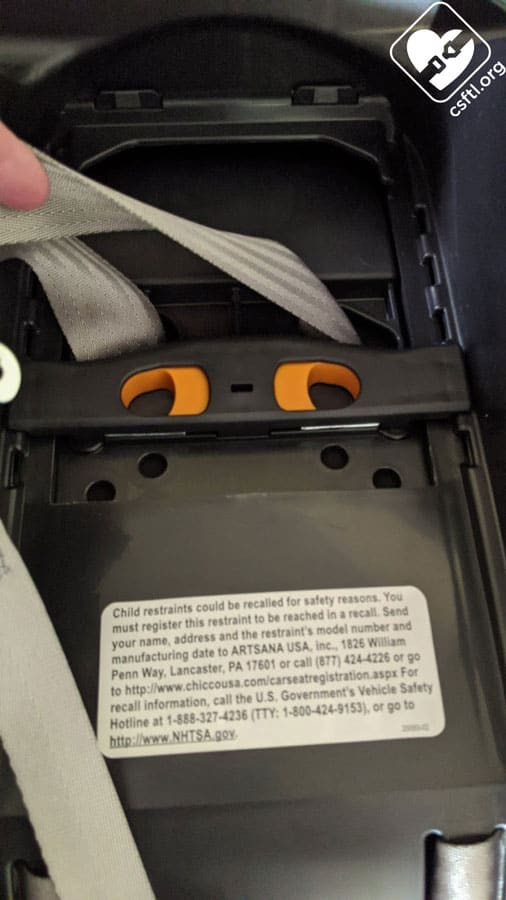
Recline Angle Adjuster

Chicco KeyFit 35 recline angle adjuster
Here’s one way that the KeyFit 35 is more like the Fit2 than the original KeyFit — the recline angle adjuster is on the top of the base (the original KeyFit’s adjusters are on both sides of the base). The Fit2 has a bar that flips up or down depending on the child’s age. We found that bar blocked access to the recline angle adjuster, which isn’t a huge deal because caregivers only need to adjust that recline once — when it’s first installed in the vehicle. The KeyFit 35’s adjuster is easy to access and adjusts by pulling up.
Pro tip: make sure the base isn’t being pressed into the ground when using the adjuster, otherwise it won’t adjust.
Recline Angle Indicator
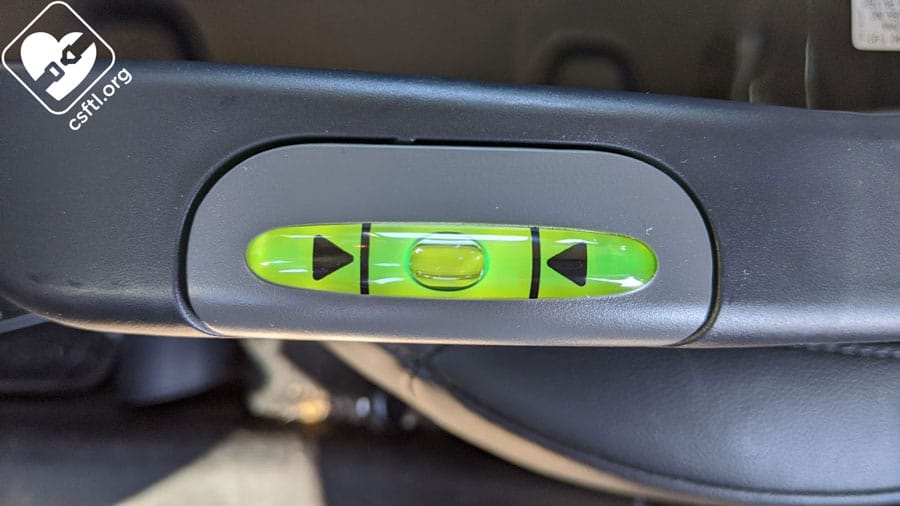
Chicco KeyFit 35 recline angle indicator
The recline angle indicator on the original KeyFit is pretty easy to read but with the KeyFit 35, Chicco has added some additional visibility to it by making it a bit brighter.
Updated Lockoff
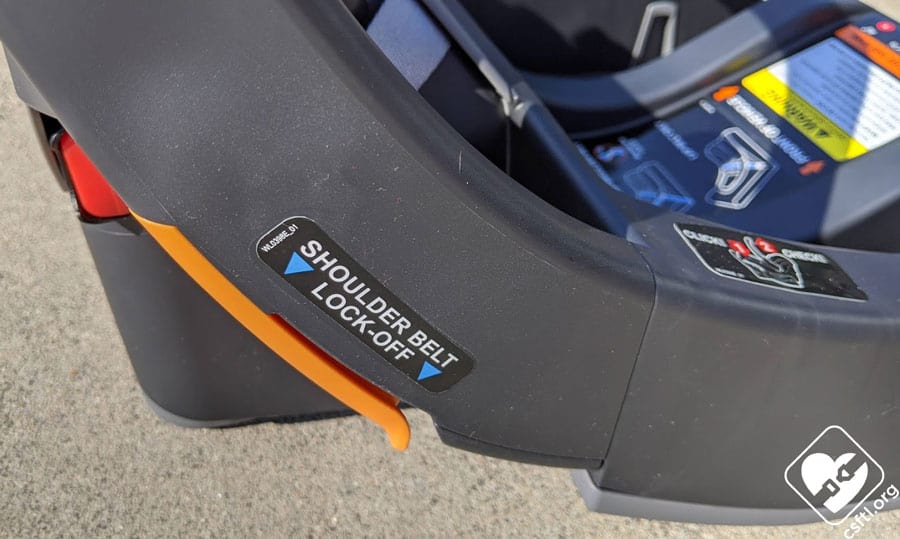
Chicco KeyFit 35 lockoff
In all these years of helping caregivers with their car seats, I’ve not had occasion to complain about the lockoff on the original KeyFit. That trend continues with the KeyFit 35, which has a very similar device. It differs from the original KeyFit in two ways: first, it’s at a slightly higher angle than the original. This change made a difference in the Mini Countryman because the top part of the vehicle seat belt wanted to slide into the lockoff on the buckle side. I had to consciously move it out of the belt path. Like almost every installation challenge that vehicle presented, I couldn’t replicate this struggle in any other vehicle.
The second way the lockoff differs is that it’s reinforced with steel. Steel isn’t part of the FMVSS213 federal regulation for car seats so we can’t say for sure what type of impact this reinforcement could make.
Infant Inserts
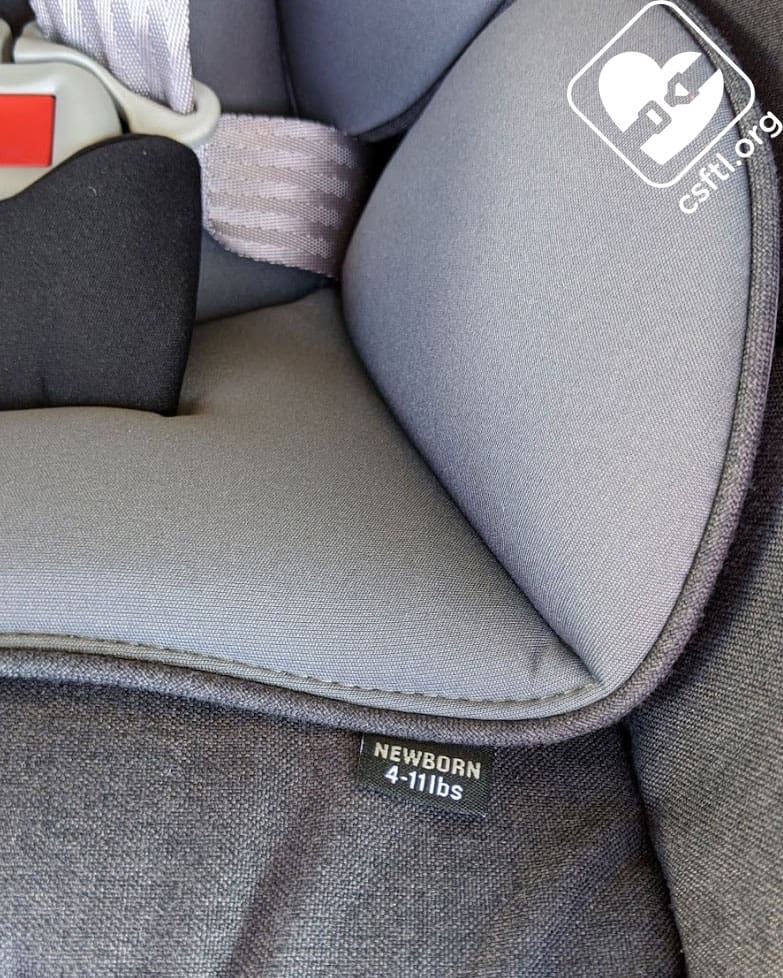
Chicco KeyFit 35 body insert
The KeyFit 35 includes a head and body support for smaller infants. The body insert is for children who weigh between 4-11 pounds. There’s a handy label on the insert itself listing this weight range. It’s subtle but wonderfully clear!
The headrest has a label that says “Chicco” on it. This sounds like a small thing but it’s pretty important because once those inserts come out, it’s easy to forget which seat the insert belongs to. This label offers a clue that will help caregivers get the seat ready for a new baby!
Three Across
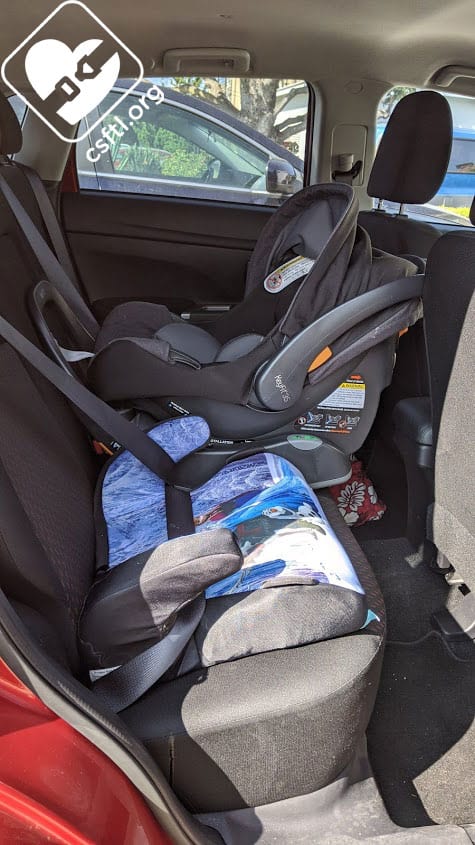
Three across KidsEmbrace booster and KeyFit 35
The KeyFit 35’s handle measures roughly 16.5 inches across. This is about an inch narrower than the original KeyFit, which could make this seat an excellent option for three car seats across in a vehicle. It worked in our sample setup here: a KidsEmbrace backless booster, a Graco TurboBooster TakeAlong, and the KeyFit 35.
Like any three across situation, we’d encourage caregivers to attempt the installation of all involved seats to see what works in their vehicle.
Stroller
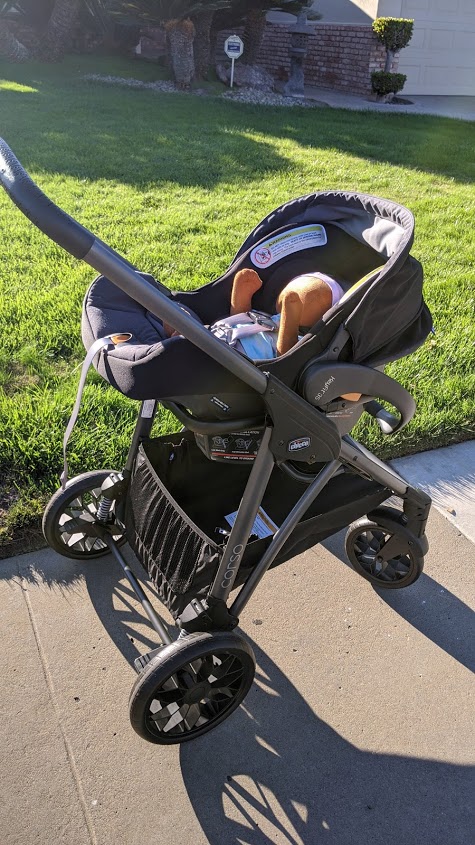
Chicco KeyFit 35 in stroller
The stroller is not included with the KeyFit 35 when it’s sold by itself but like many rear facing only car seats, it is also sold as part of a travel system so we wanted to give the Corso a mention. Now, we’re not Strollers for the Littles so we tend to merely acknowledge that strollers exist and can be a wonderful thing, then go back to the car seats. We had the rare opportunity to see how the KeyFit 35 works with the stroller it’s being sold with for this review. We found the stroller pretty easy to use and most importantly, it holds the car seat quite well. The KeyFit 35 works with all of the stroller adapters for the original KeyFit.
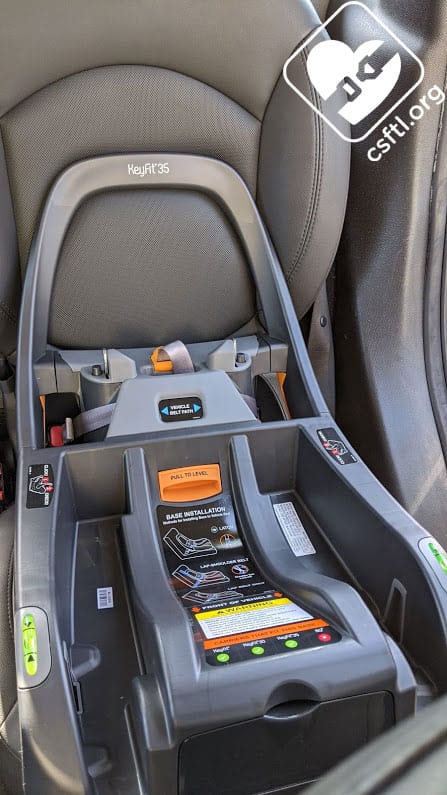
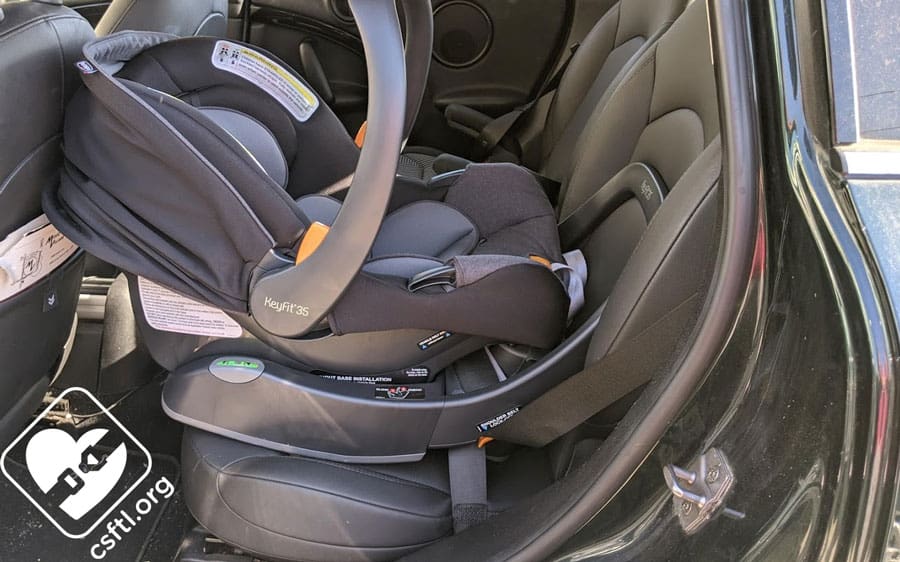
Installation with the Base
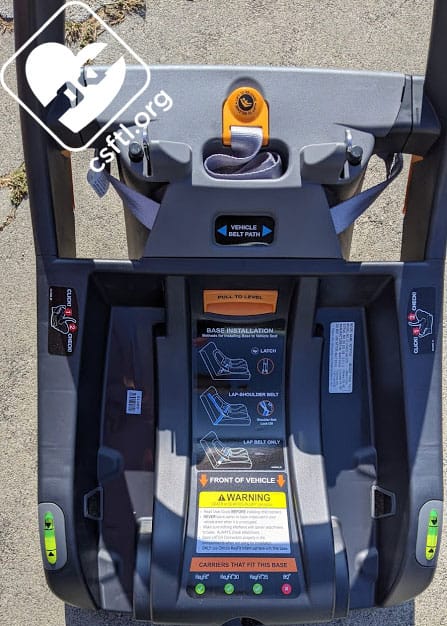
Chicco KeyFit 35 base
Like the KeyFit 30 before it the KeyFit 35’s base installs in pretty much the same way — either with some easy-to-use lower anchors or an easy-to-use lockoff. On the surface, these two mechanisms appear to be identical to the ones found on the KeyFit base we know and love but there are a couple of small differences. Because this base has an anti-rebound bar that angles up from the edge of the base, I found that this configuration put the lockoff in kind of an odd place in the 2011 Mini Countryman.
Please note that this car caused some variety of installation troubles for pretty much every harnessed car seat that I reviewed during the time I owned it so I wasn’t really surprised by this. The angle of the belt path was just high enough that the edge of the shoulder portion of the vehicle seat belt got caught underneath the lockoff on the buckle side, making unbuckling the base kind of a challenge. Once I figured out the issue, I moved the shoulder portion out of the lockoff on the buckle side (it shouldn’t have been there, anyway! The KeyFit’s lockoff should only be engaged on the side that’s opposite from the buckle.) and all was fine.
I was unable to replicate this particular challenge in either our 2012 Mazda CX-9 or in the 2019 Mitsubishi Outlander that joined our vehicle fleet during this review. I report zero installation challenges with either of those more mainstream vehicles.
Note: a rolled towel to help with the recline angle is not permitted when installing this seat with the base. Other note: the recline angle adjuster on the seat is often sufficient to install the base at the correct angle.
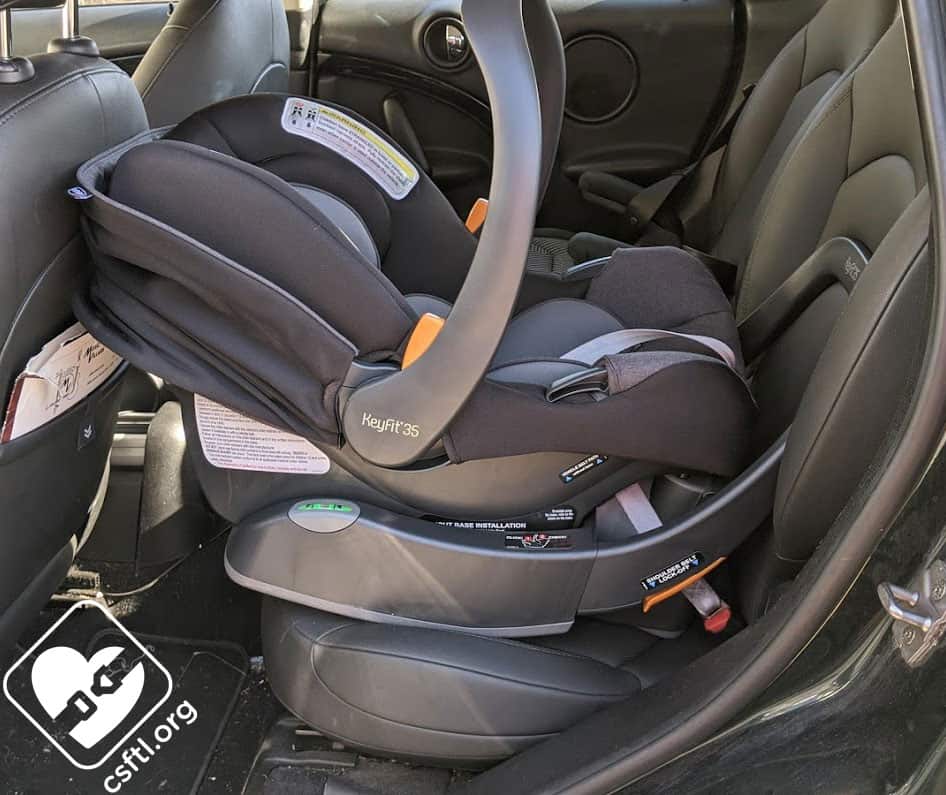
Vehicle Seat Belt
Chicco KeyFit 35 vehicle seat belt
Back to the process…to install the base with the vehicle seat belt, start by placing the base on the vehicle seat with the anti rebound bar tucked into the back of the vehicle seat. Thread the vehicle seat belt through the clearly marked belt path, then buckle it in. I like to use my knee to press the base back into the vehicle seat (note: I am NOT kneeling in the seat but using my knee as counterpressure to move the base into the back of the vehicle seat) while pressing down on the top of the base with one hand and pulling the slack out of the shoulder portion of the belt with my other hand. Once the base is nice and secure with all of the slack removed from the lap portion of the belt, slide the shoulder portion up into the lockoff on the side of the base that’s opposite the buckle. Check for movement by giving the base a firm handshake at the belt path. It shouldn’t move more than an inch side to side.
I find that installing the original KeyFit base with either the lower anchors or vehicle seat belt is one of the easiest installations to do. The KeyFit 35 operates in pretty much exactly the same easy-to-use fashion.
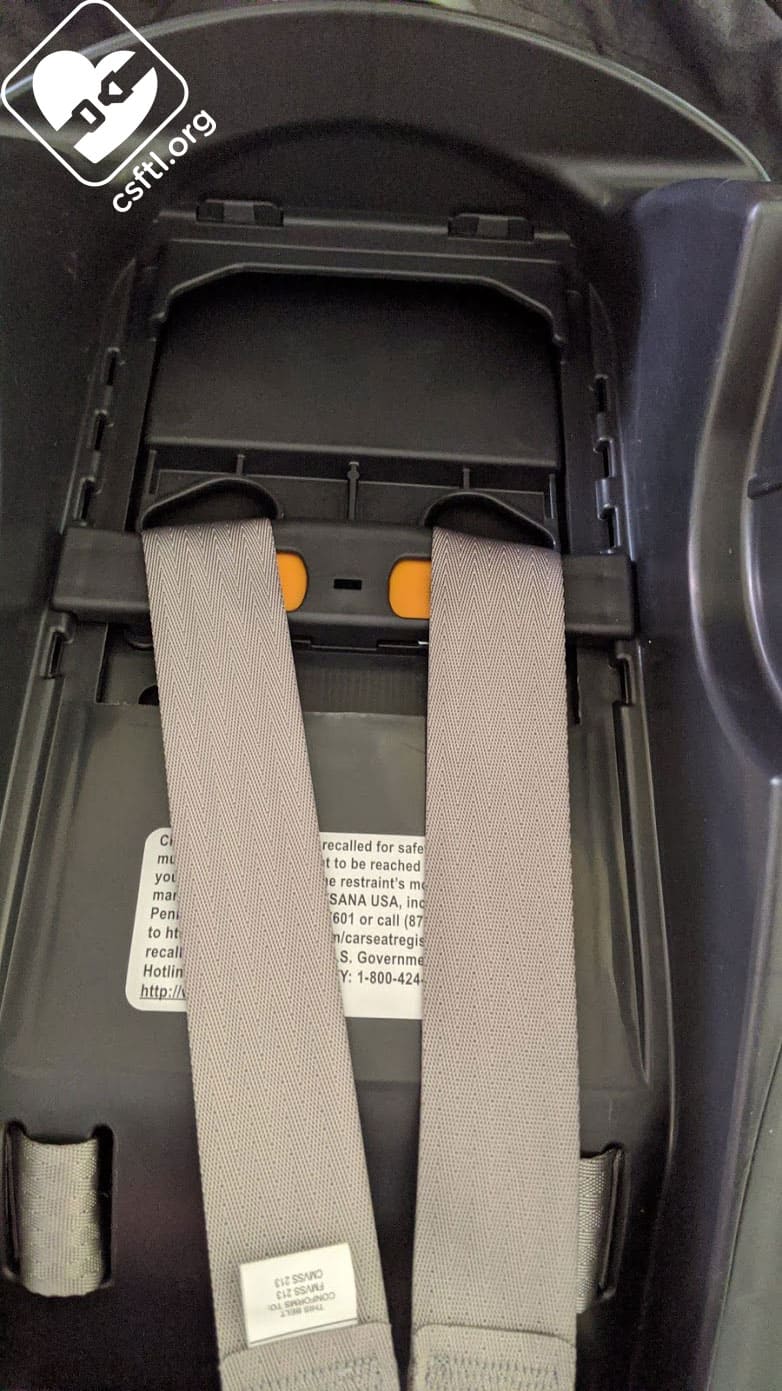
Lower Anchors

Chicco KeyFit 35 lower anchor webbing release
To install the base with the lower anchors, start by placing the base on the vehicle seat with the anti rebound bar tucked into the back of the vehicle seat. Remove the lower anchors from their clearly marked storage locations, lift the release handle on the top of the base, then pull each connector to extend the webbing. Connect each lower anchor connector to the lower anchor in the vehicle, then start to remove the slack from the webbing by pulling the webbing tail straight up.
Chicco KeyFit 35 lower anchors
I will use my knee to press the base back into the vehicle seat at this point. Note: I am NOT kneeling in the seat but using my knee as counterpressure to move the base into the back of the vehicle seat. At the same time that my knee is providing front-to-back counterpressure, I use one hand to press down on the top of the base and the other to pull the webbing tail straight up to remove that final bit of slack. As a final step, check for movement by giving the base a firm handshake at the belt path. It shouldn’t move more than an inch side to side.
Without the Base
Traditional Routing
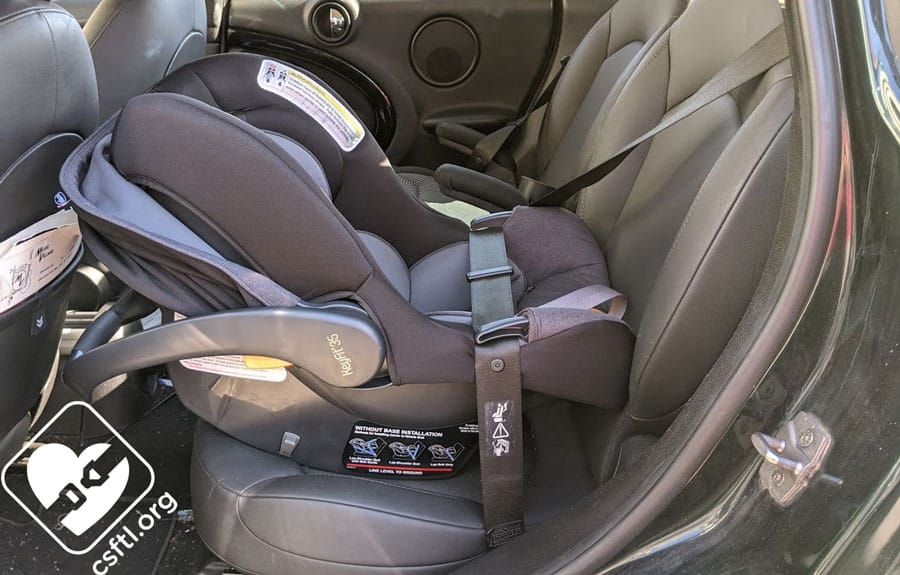
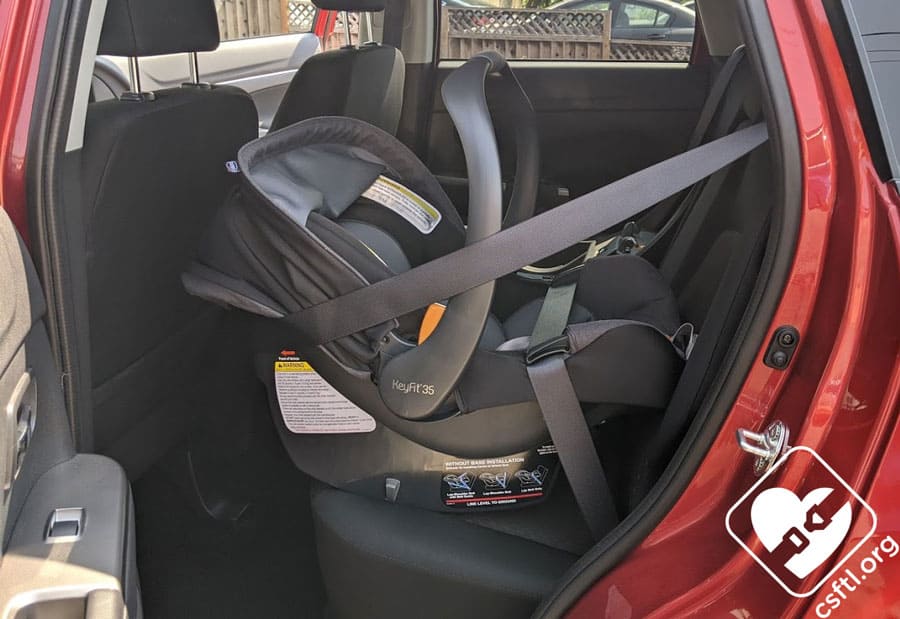
Chicco KeyFit 35 baseless with traditional routing
The KeyFit 35 has two different belt routings for baseless installations — the traditional routing where the lap portion of the vehicle seat belt goes through the belt guides while the shoulder portion of the belt lays snugly across the vehicle seat. In this type of installation, the recline angle indicator is the red line on the side of the carrier — it must be level with the street.
To install the KeyFit 35 via this method, set the carrier portion of the seat on the vehicle seat with the harness facing the back of the vehicle. Thread the lap portion of the vehicle seat belt through the belt guides on the sides of the carrier. I found that this was a bit challenging, especially when the seat was brand new and the padding was pretty poofy. The more times I did this installation, the more the cover compressed just a bit to make more room for the vehicle seat belt but it was never as easy as just sliding the belt in — I really had to work it in there.
Once the lap portion of the vehicle seat belt is threaded through the guides, buckle the seat belt in and press directly down on the carrier to help remove the slack from the seat belt. Pull the shoulder portion of the belt across the carrier until it’s nice and snug, then pull out the seat belt all the way to lock the retractor. Feed the seat belt back into the vehicle while pressing down on the carrier to remove as much slack as possible. Check your work by giving the seat a firm handshake at the belt path. It shouldn’t move more than an inch side to side.
This method worked well in all of the vehicles I tried the seat in, including the kind of finicky Mini.
Note: a rolled towel can be tucked into the portion of the carrier underneath the child’s feet to help with the recline angle is permitted when installing this seat without the base.
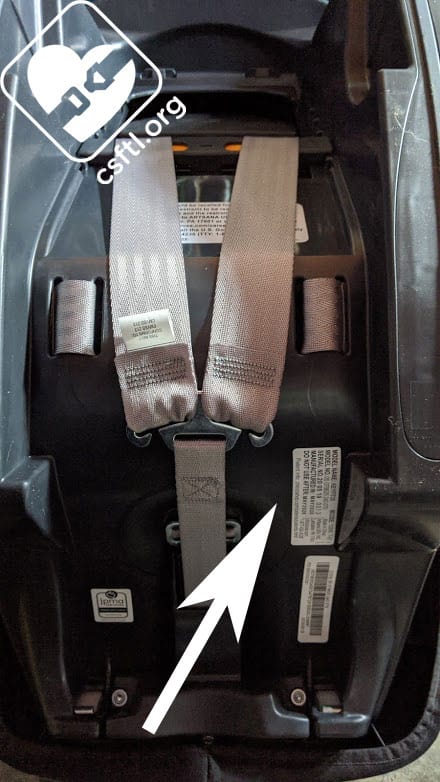
Euro Routing
Chicco KeyFit 35 Euro routing
The KeyFit 35 has an extra piece on the back of the carrier that allows for a second method of baseless installation where the shoulder portion of the seat belt wraps around the back of the carrier. In many cases, this installation is pretty snug because it uses just about all of the seat belt.
I did mention that almost every installation in the 2011 Mini Countryman had challenges. That was the case when I attempted this installation method in that vehicle. The seat belt was too short to wrap around the carrier, no matter how hard I tried to sort of move the carrier up or down to make room! I’d seen this phenomenon in our classroom — the switchable retractor on the test bench we use for teaching the CPST course as well as new caregivers during a car seat basics course also has a short seat belt that makes demonstrating Euro routing kind of a challenge.
So I quickly figured out that the traditional routing was better for the Mini but the Euro routing was great in the other vehicles used in this review.
Here’s how to install the KeyFit 35 using the Euro routing. First, set the carrier portion of the seat on the vehicle seat with the harness facing the back of the vehicle. Thread the lap portion of the vehicle seat belt through the belt guides on the sides of the carrier and buckle the seat belt. Next, carefully extend the shoulder portion of the seat belt and thread it around the back of the carrier, through the gray plastic piece on the back of the carrier. At this point, it’s very likely that the entire seat belt has been extended and the belt is in the locked mode. Just feed the shoulder portion of the seat belt back into the vehicle until the seat is snug. Check your work by giving the carrier a firm handshake at the belt path. It should move less than an inch side to side.
Pro tip: if you’re installing the seat without the base because you’re using a rideshare vehicle, leave the vehicle door open until you’re ready to go so the driver isn’t tempted to start driving before your child is secure.
Fit to Child
Somehow, we’re many months into this pandemic and our isolation from other families continues so our access to human models remains limited. Once again, our Huggable Images dolls are ready to save the day!
The original KeyFit has fit many, many babies and even young toddlers well over the years. Knowing how much time, effort, and research that Chicco puts into the fit to child for every car seat they make, we had high expectations around the way the KeyFit 35 would fit our models.
Preemie Doll
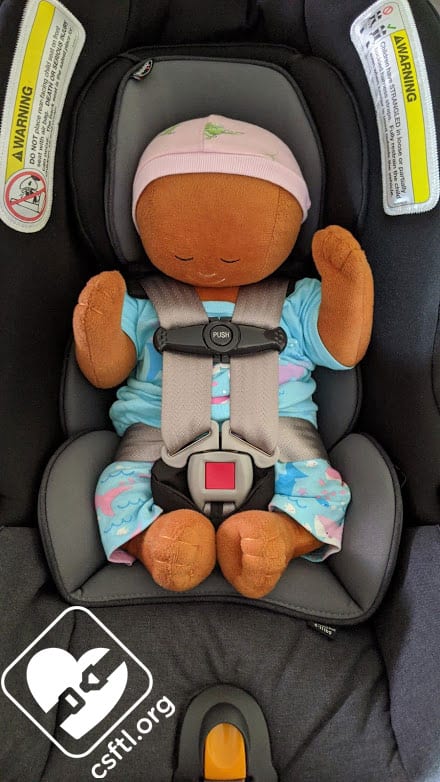
Chicco KeyFit 35 preemie doll
Our preemie doll weighs 4 pounds and is 17 inches long. With the head and body inserts in place, the seat fits the doll well. Here, the harness is on the lowest position so this doll has plenty of room to grow.
Of course, since it is a doll, it will probably remain the same height and weigh in perpetuity. But this is 2020, the year of one disaster after another so you never know.
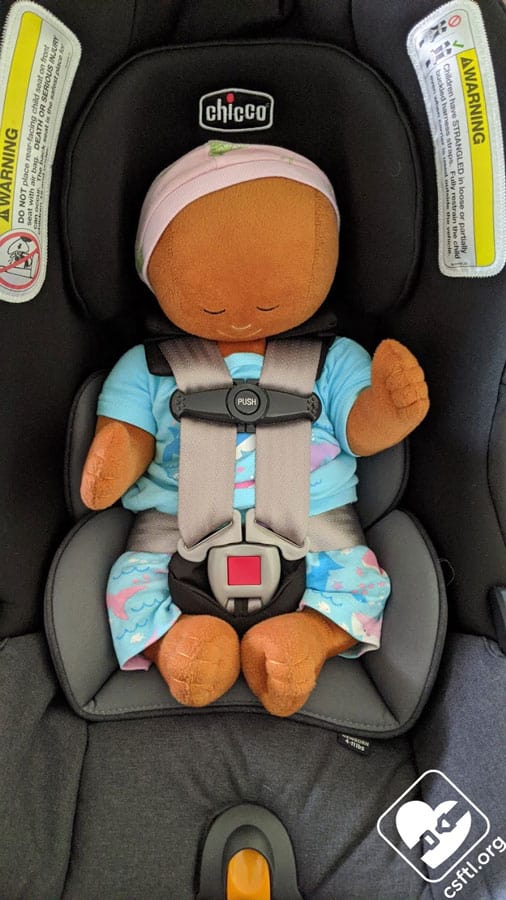
Chicco KeyFit 35 preemie doll
The head insert is optional at any stage so we tried our preemie doll in the seat with only the body insert in place. The harness fit remains excellent and our doll once again did not complain.
Newborn
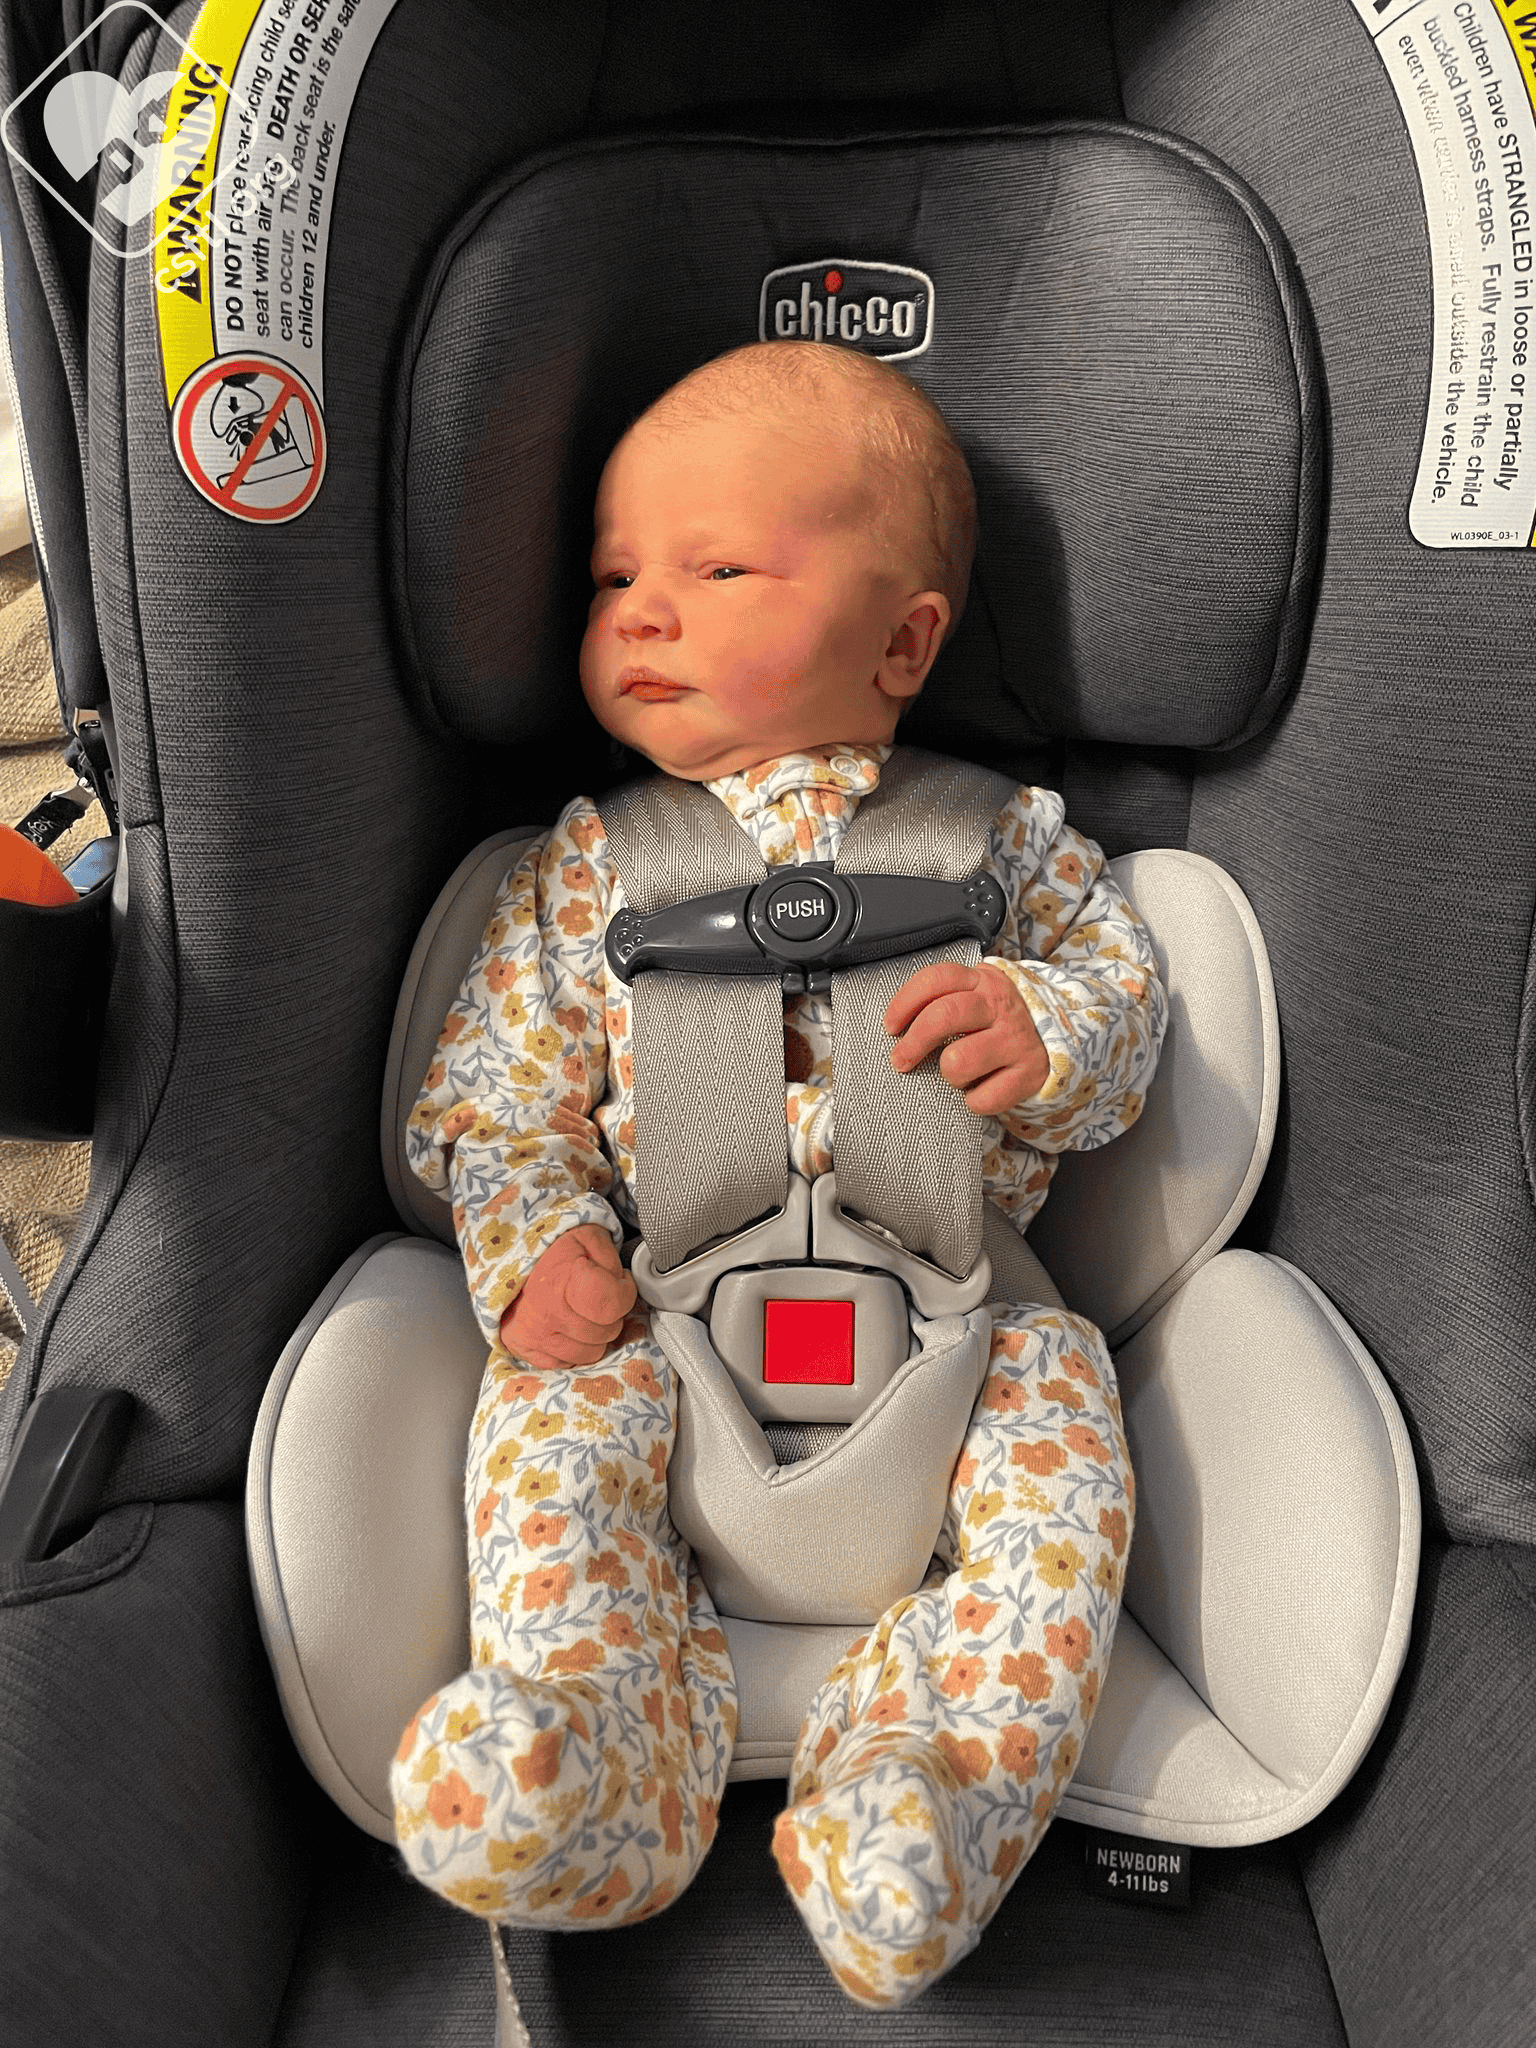
Chicco KeyFit 35 newborn
I’m thrilled to be updating this review with an actual newborn kiddo! This tiny model is 2 days old, she weighs 7 pounds, 11 ounces and is 19.75 inches long. The seat fit her well andshe had plenty of room to grow in this seat. She preferred to leave the head insert out, the body insert only worked best for her.
Newborn Doll
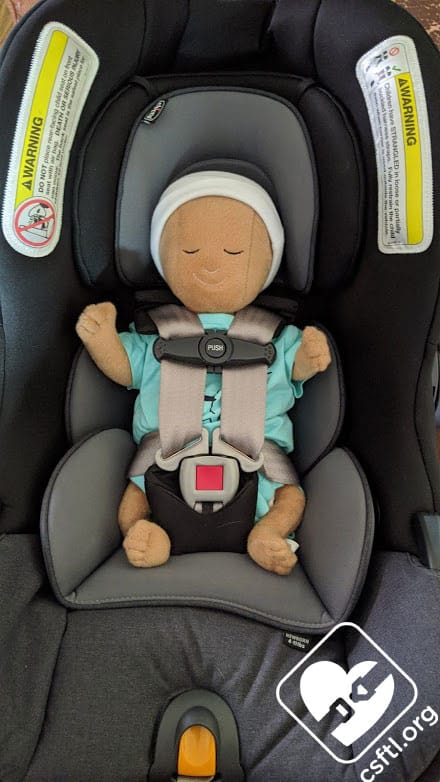
Our newborn doll weighs 7 pounds and is 17 inches long. Since the doll weighs less than 11 pounds, we tested the fit both with the infant inserts and without them. We found that the KeyFit 35 fit our doll equally well in both configurations.
Head and Body Inserts
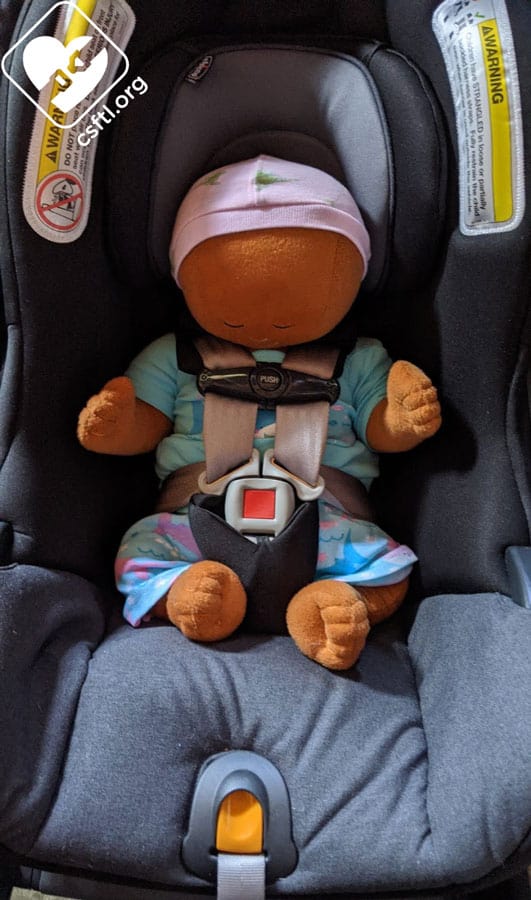
Chicco KeyFit 35 newborn doll
Here’s our newborn doll with both the head and body inserts in the seat. According to the manual, these inserts may be used for smaller infants. They aren’t required but the body insert maxes out at 11 pounds.
The harness fit is excellent the doll has plenty of room to grow. Sometimes, a particularly chunky newborn will fit better without the inserts — they’re optional but must be removed when the baby weighs more than 11 pounds– so we asked our very cooperative doll to model the seat without the inserts as well.
Body Insert Only
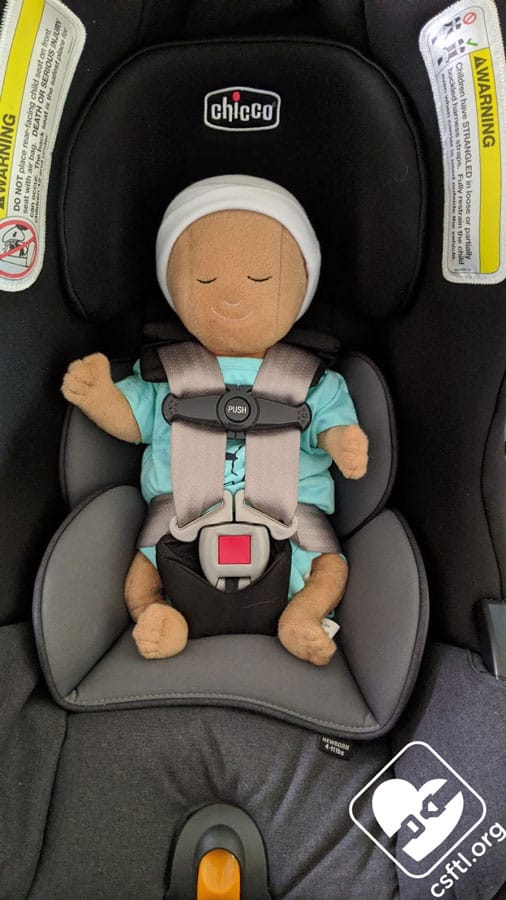
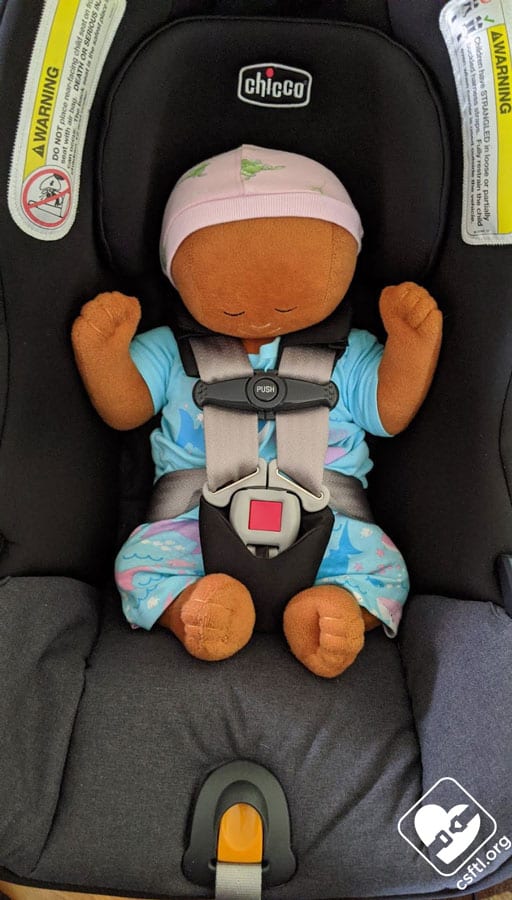
Chicco KeyFit 35 newborn doll
We left the body insert in the seat and removed the head insert, once again asking our doll to strike a pose. The KeyFit 35 still fits the doll well — the doll doesn’t appear cramped at all (not that we’d really expect a 7 pound doll to seem cramped in most car seats) and the head position remains excellent. We’d encourage families to try all three options for their tiniest newborn passengers and see which one fits best.
Head Insert Only
Chicco KeyFit 35 newborn doll
To round out our selection of inserts, we tasked our doll with modelling the seat with only the body insert in place. The seat still provides an excellent fit, so much so that I’m hard pressed to assert that any of these configurations are better than the other.
No Inserts
Chicco KeyFit 35 newborn doll
It’s kind of a rare thing when one of our models fits equally well without the inserts as with them in the seat. But that’s the case today — check out our newborn doll with neither the head nor the body insert in the seat.
Important Information: Where to Find
Chicco KeyFit 35 manual storage
Manual Storage: the manual stores in the same easily-accessible little storage compartment on the base that the original KeyFit has. We found that the door opens slightly easier at first than the door on the original model.
FAA approval label: the carrier portion of the seat is approved for use on aircraft. The FAA approval label is found on the outside of the seat’s shell. Note: in many cases, we suggest that caregivers use a carrier on board the aircraft and store the base in the overhead bin. However, the KeyFit 35’s anti rebound bar is so tall that we don’t see this as a reliable option.
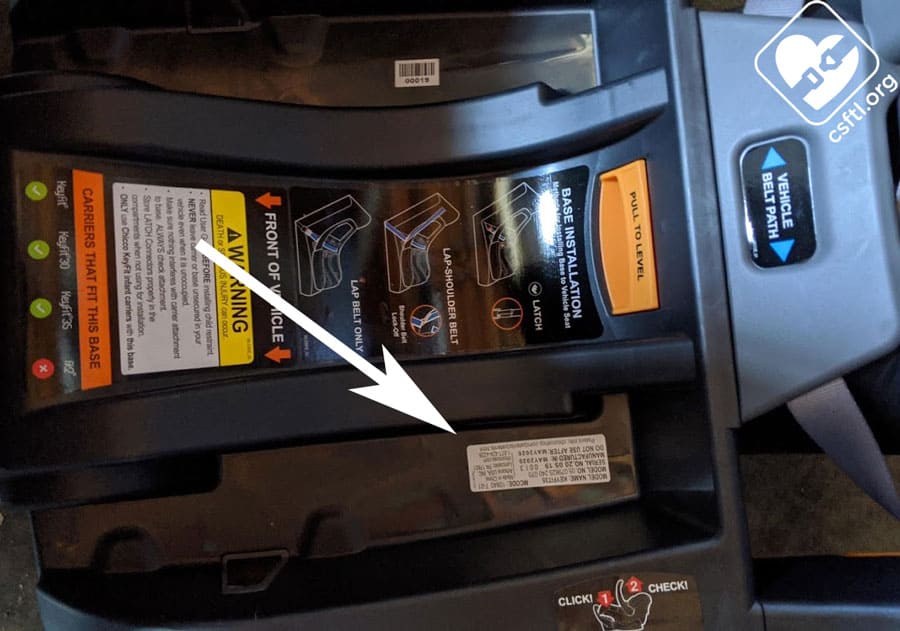
Chicco KeyFit 35 date of manufacture label
Date of Manufacture label(s): the KeyFit 35 expires 6 years after the date of manufacture.
Chicco KeyFit 35 date of manufacture label
There’s a label with the manufacture and expiration dates on both the bottom of the carrier and on the bottom of the base.
Overall Thoughts
Talk about not messing with what works! Chicco absolutely held onto the best parts of the original KeyFit but added some really nice features to a classic. We’d suggest this seat for families who want all of the great features from the original KeyFit but who would prefer a no rethread harness and an anti rebound bar.
We know that Chicco spends a lot of time fit-testing their seats with actual babies and that effort has paid off with the KeyFit 35!
Giveaway
Our friends at Chicco are giving away one KeyFit 35 in Onyx to a lucky reader in the United States. Read our terms and conditions, then enter for your chance to win!
a Rafflecopter giveaway