The Nuna PIPA is a much-loved rear facing only car seat that’s been sold in the United States for some time now. It fits preemies well, most babies are able to max out the seat by height and weight, and provides a fairly effortless installation. The seat underwent a few changes when the Canadian version was released (the Canadian version does not have a load leg), so let’s take a look at the Canadian Nuna PIPA!
CSFTL Quick Stats
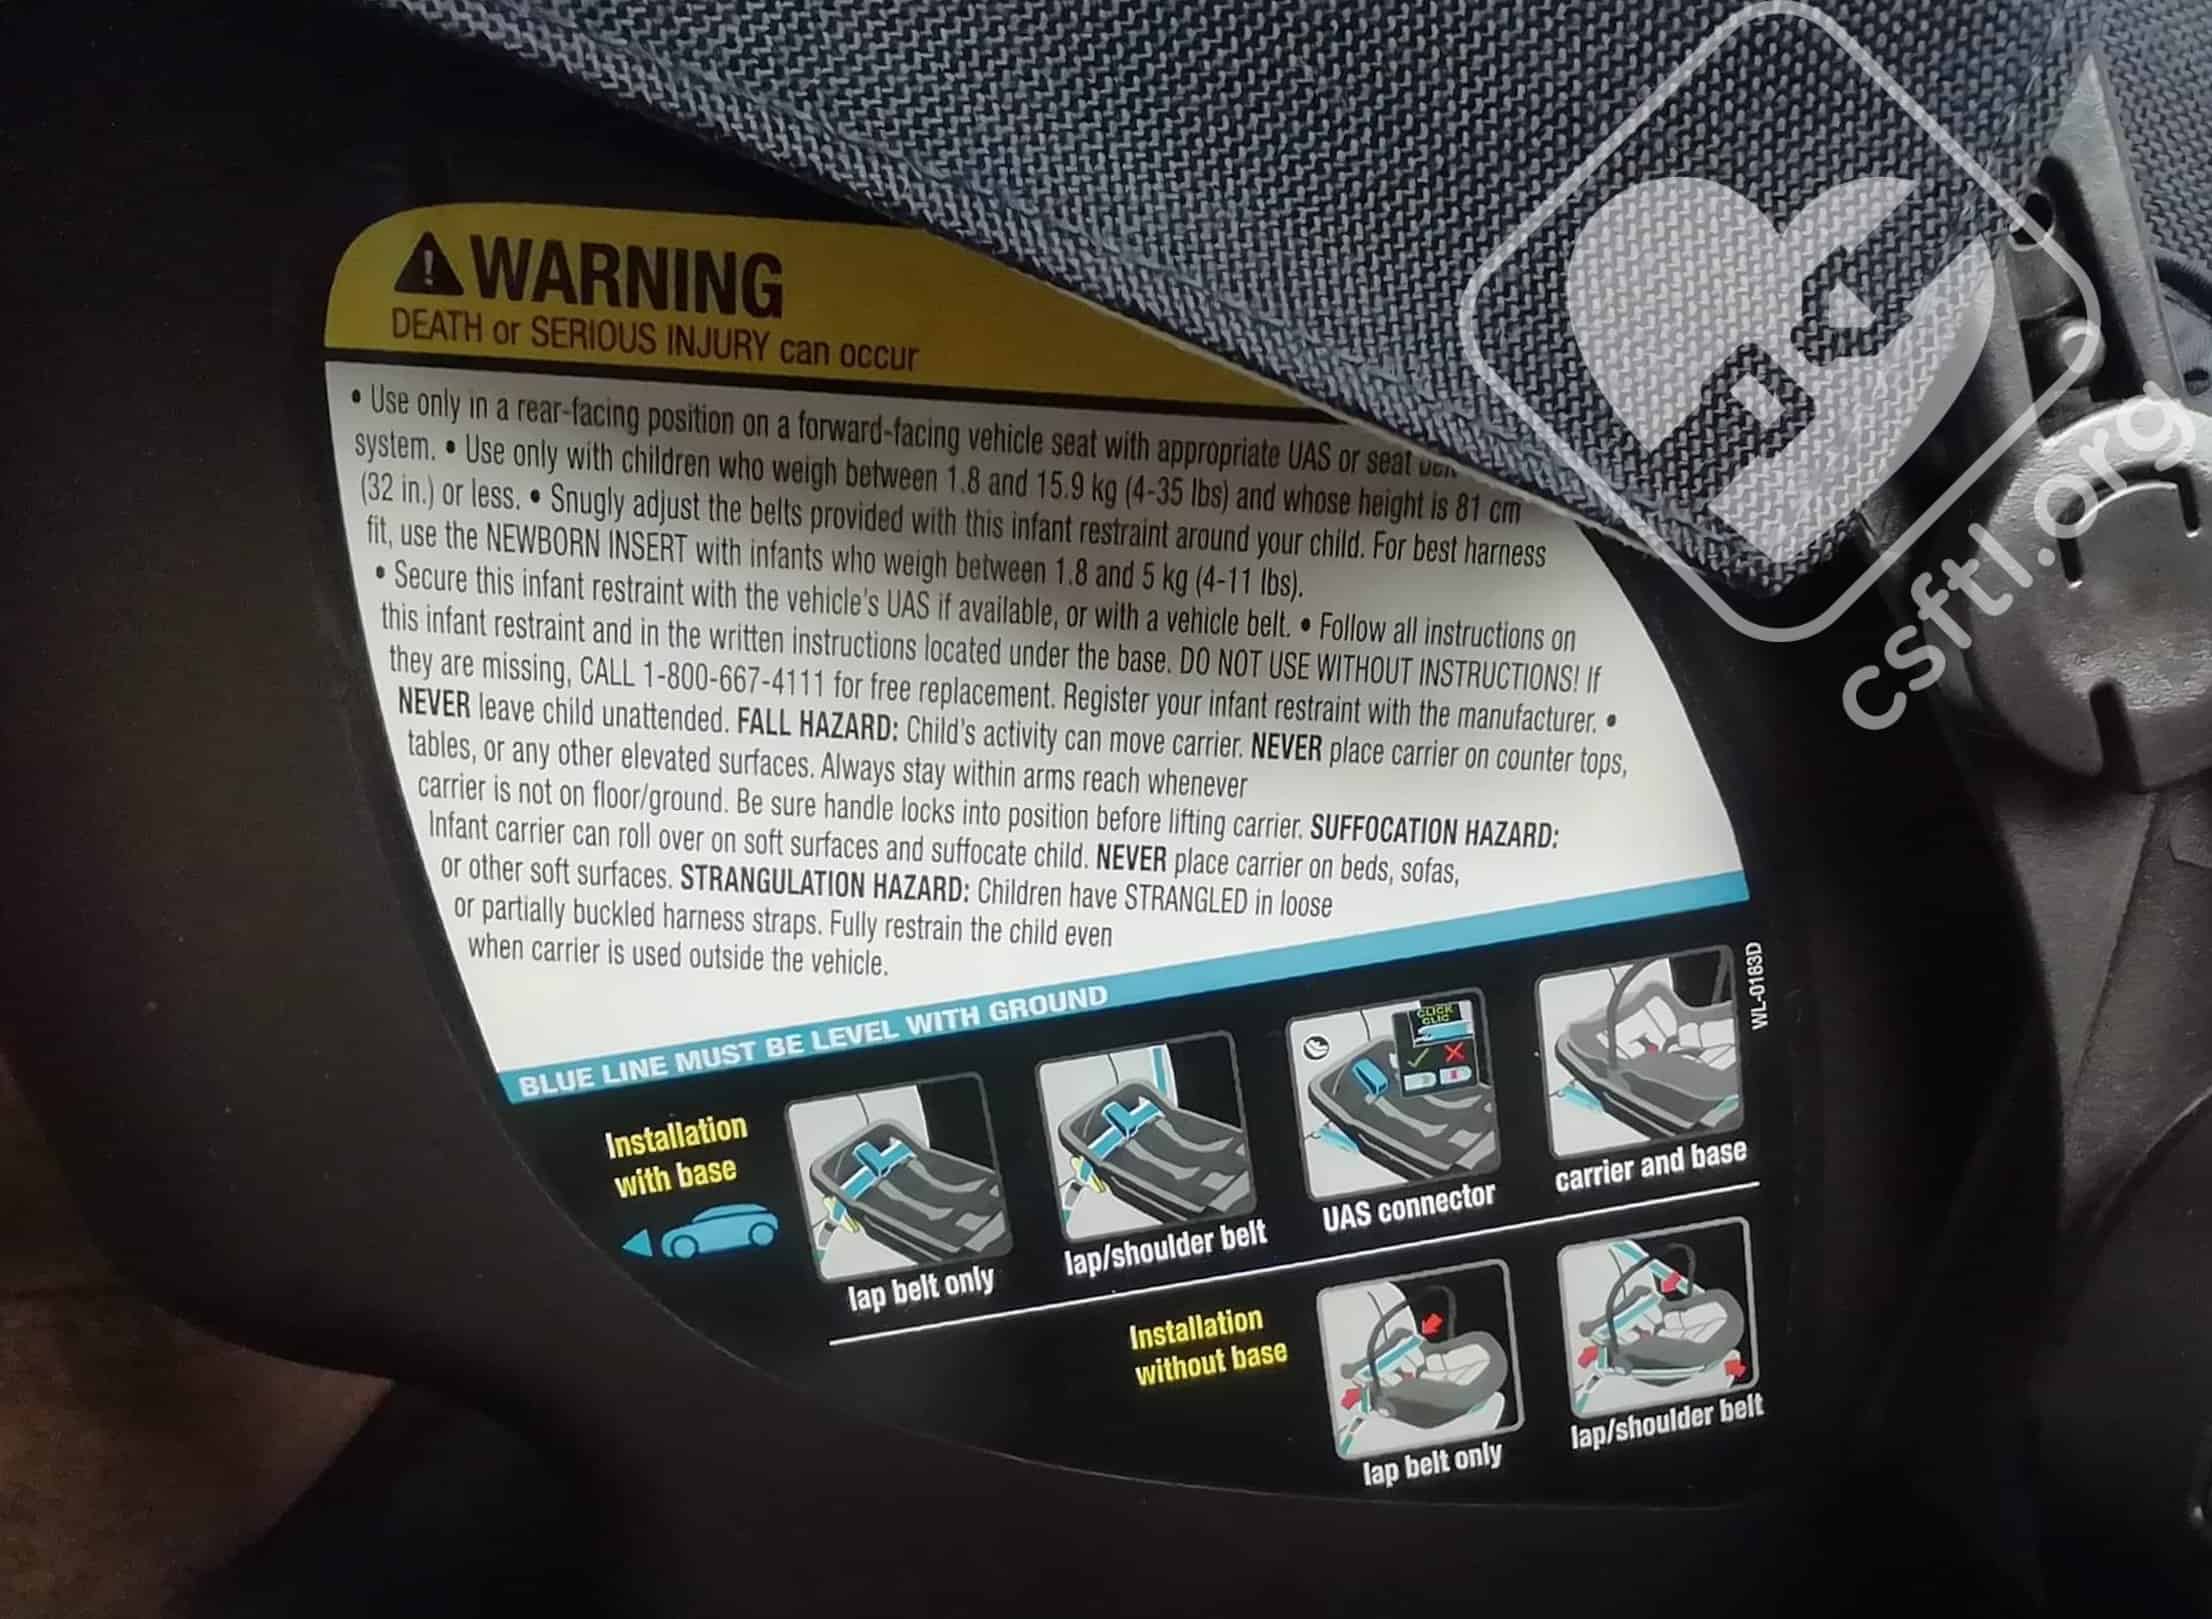
- Weight range: 4-35 pounds
- Height range: under 32 inches tall
- Expiration: 7 years from date of purchase. If the purchase date is unknown, then this seat expires 7 years from the manufacturing date.
Measurements
- Width at widest point of car seat: 17.5 inches (at the handles)
- Width at widest point of base: 13 inches (at the belt path)
- Weight: 20.2 pounds with base
- Weight: 9.5 pounds carrier only
- Lowest harness position: 6.5 inches with low birth weight cushion, 7.5 inches with insert no cushion, 8 inches without insert or cushion.
- Highest harness position: 11 inches without insert
- Two crotch buckle positions at 4 and 5 inches from the back of the seat.
Features/Important Information
- Low birth weight cushion
- Vehicle seat belt lockoff
- Single recline (level line) on seat carrier
- Allows installation of the base simultaneously with both vehicle seat belt and LUAS (if the vehicle allows)
Features
Boss, Easy-to-Use LUAS
Nuna PIPA Rigid UAS not connected to anchors
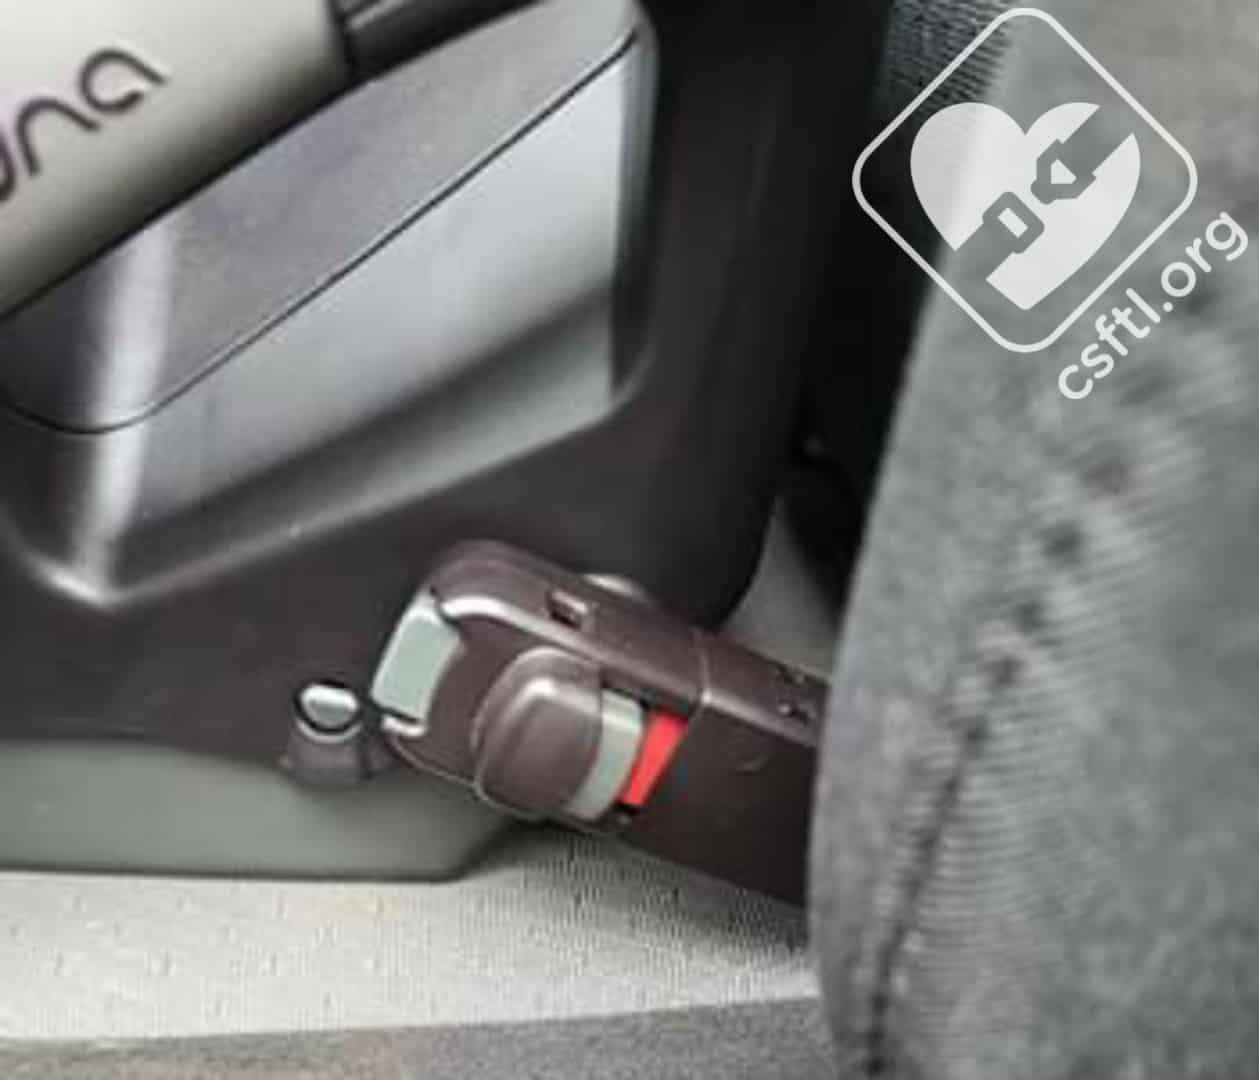
The PIPA features easy-to-use rigid lower anchors. These hard plastic arms with the anchor connector attached swivel down from the bottom of the base and connect directly onto the vehicle’s anchors. They do not require tightening once attached, which is quite handy! Because they are rigid, they cannot be used on non-standard spaced anchors, which means they cannot be used in most center seating positions.
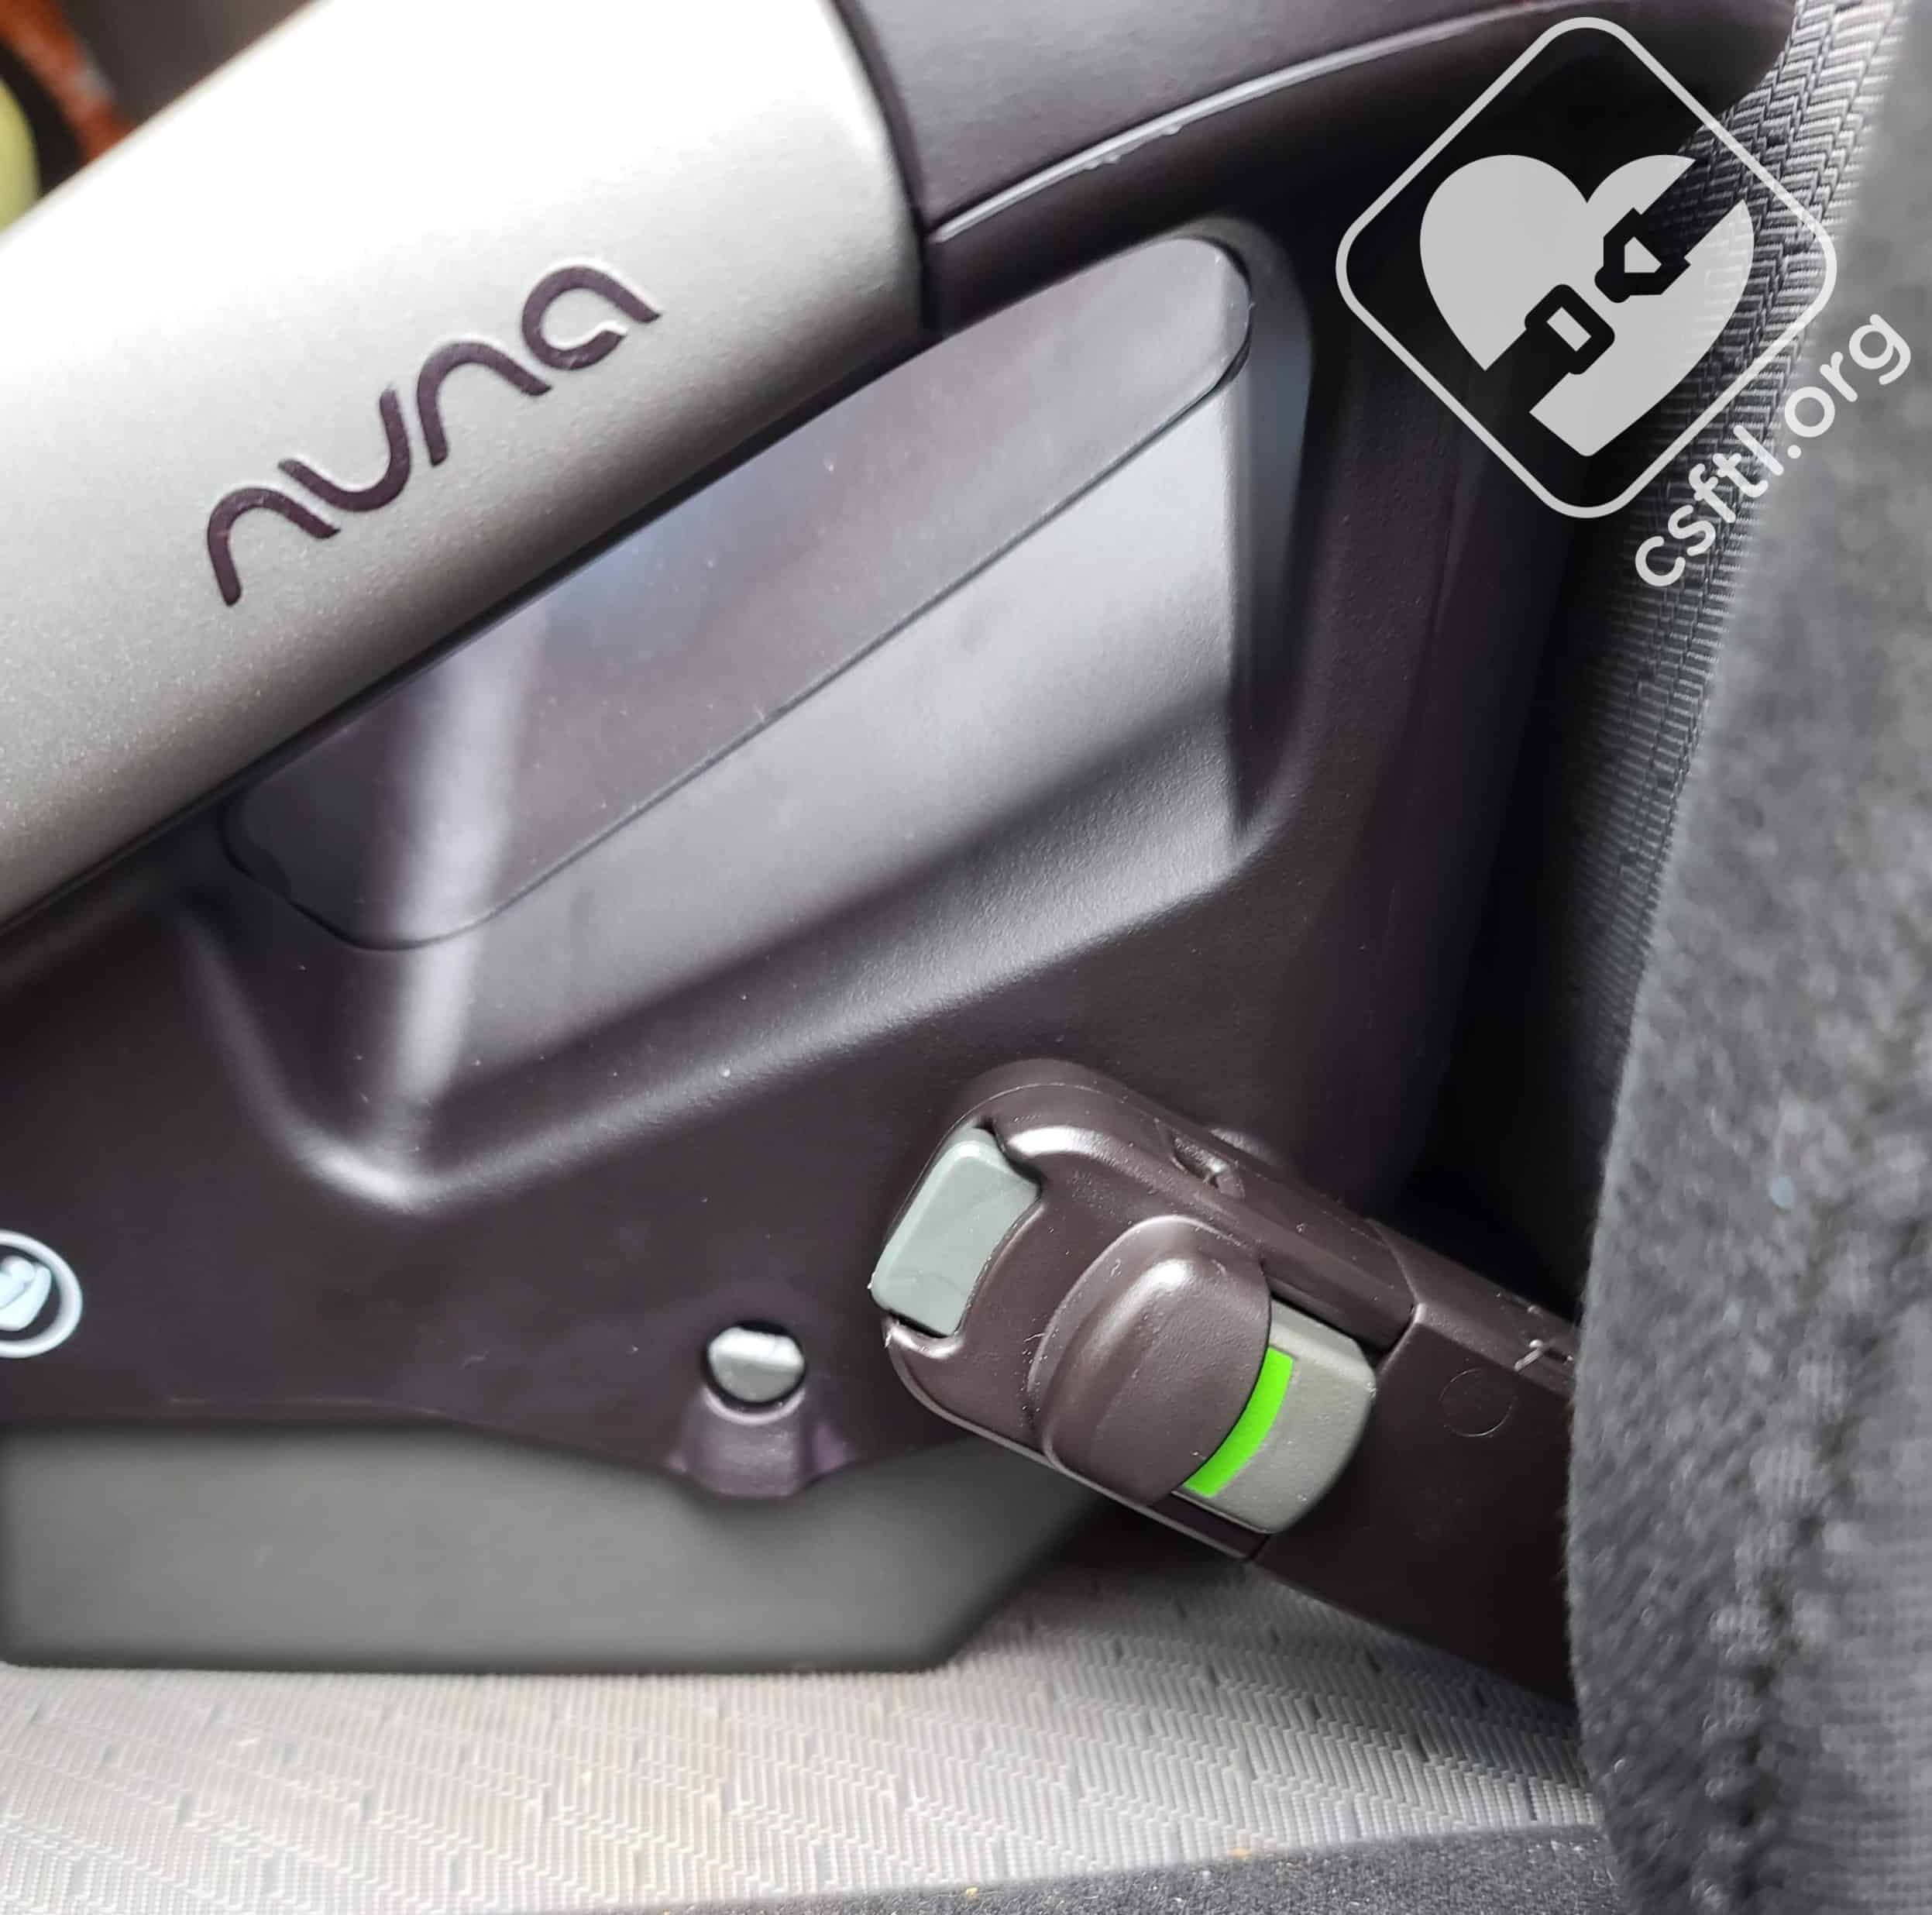
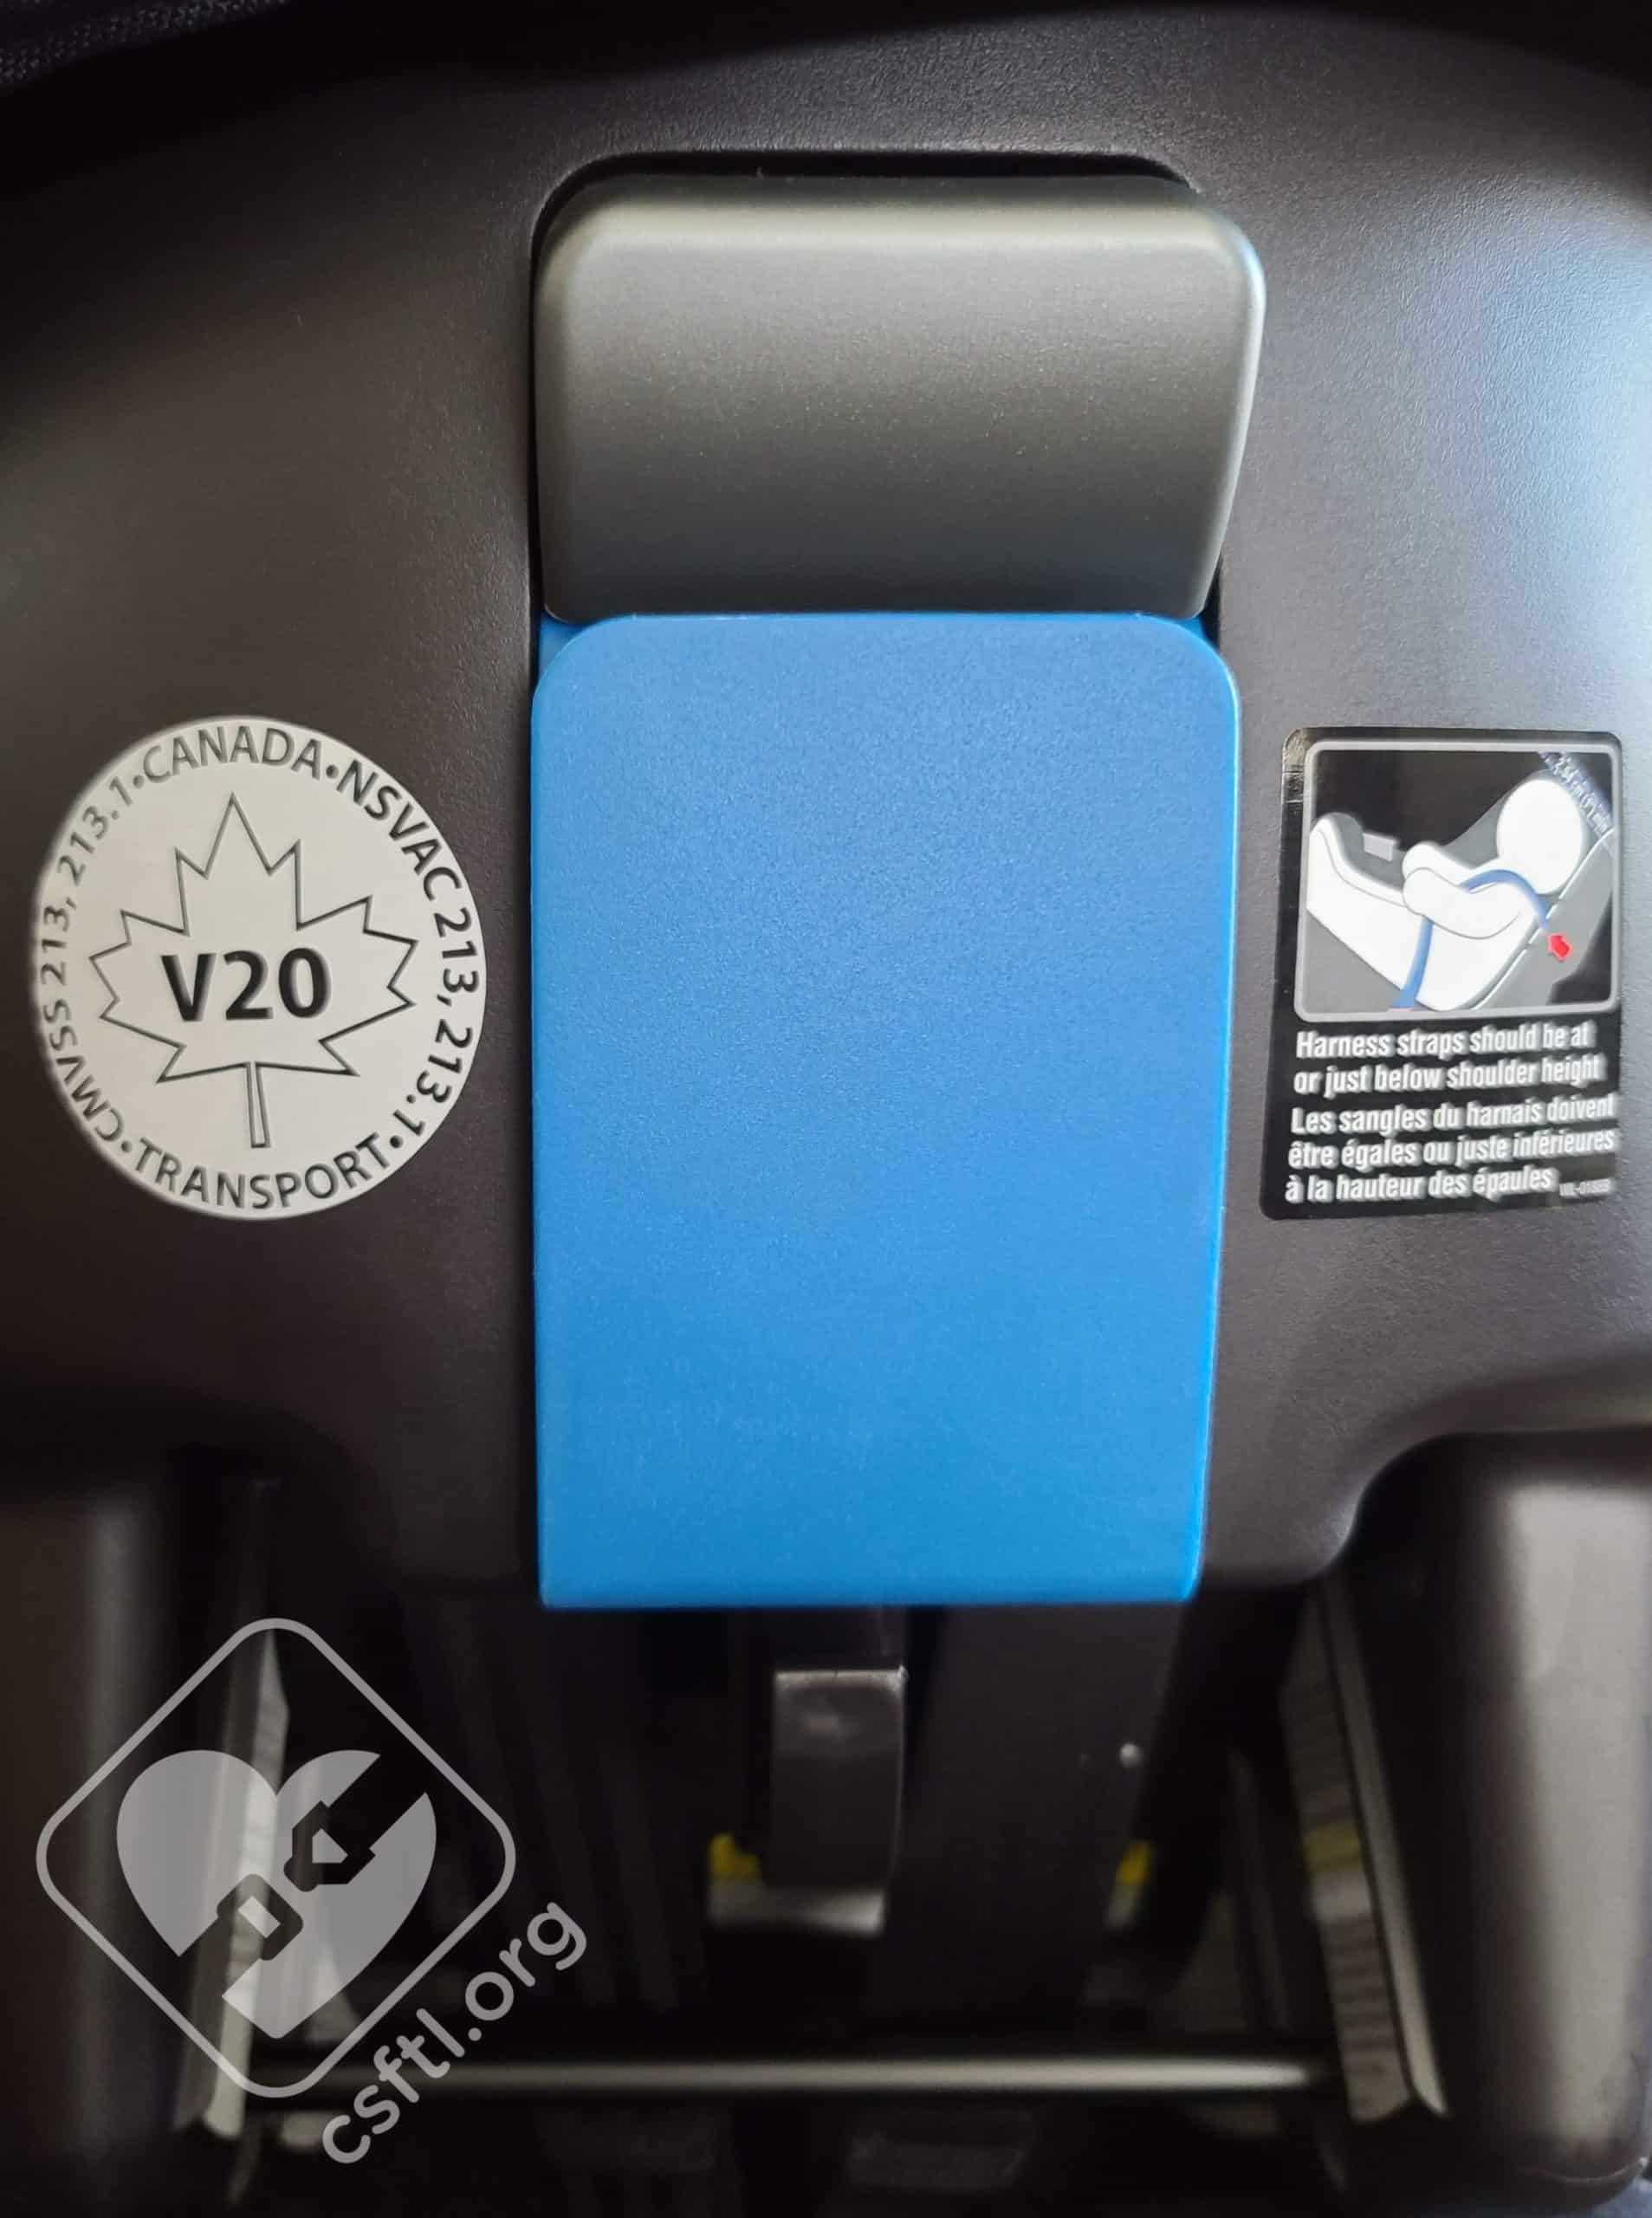
Nuna PIPA Rigid UAS fully attached to vehicle anchors, showing green indicator
Once the rigid lower anchors are firmly attached to the vehicle anchors the colour indicator turns from red to green. This change signals that the base is properly attached to the vehicle but does not mean the install is perfect. Caregivers will still need to check for less than one inch of movement at the belt path, and check the recline angle indicator.
Plush Cover
Dream Drape Canopy
Nuna PIPA Dream Drape in use
One of the nicest things about the Nuna PIPA is the Dream Drape. The Dream Drape is a fabric extension that rolls out of the canopy and connects with magnets to the bottom of the carrier by the baby’s feet. It has mesh side panels to allow air circulation and is soft to the touch. When connected to the magnets, the Dream Drape it almost completely covers the baby! We found this drape very handy in a variety of situations, like when the baby is asleep and it’s sunny out, or when it’s the middle of a global pandemic and you still need to take your baby to the doctor’s or into a store.
We wish the magnets were a bit stronger – now that our model is 6 months old and a bit more dexterous she has figured out how to unhook one corner of the Dream Drape with her foot so she can chew on it.
Challenges
While the version of this seat that’s sold in the United States (especially the new PIPA RELX base!) seems to install with very few issues, our Canadian version works a little differently and we found ourselves struggling in ways that our American counterparts don’t.
Over Recline
This is a pretty rare issue to run into – especially with a rear facing only car seat, but the Canadian Nuna PIPA seems to fairly consistently install with the level line over-reclined.
Nuna PIPA level line
To counter this struggle with too much of a recline, Nuna has approved adding a rolled towel to the front edge of the vehicle seat under the PIPA’s base to correct the over recline. That’s a VERY unique thing. We found this was necessary in all of the vehicles we installed in for this review. Note: This is a pretty unique fix and is not approved for other seats unless the manufacturer specifically indicates that this is allowed.

Nuna PIPA manual showing how to adjust the angle
Earlier versions of the Canadian manual did not include these instructions, but newer versions do. Nuna’s customer service has confirmed that the rolled towel underneath the base at the edge of the vehicle seat can be used for all versions of the Canadian Nuna PIPA.
Handle Position
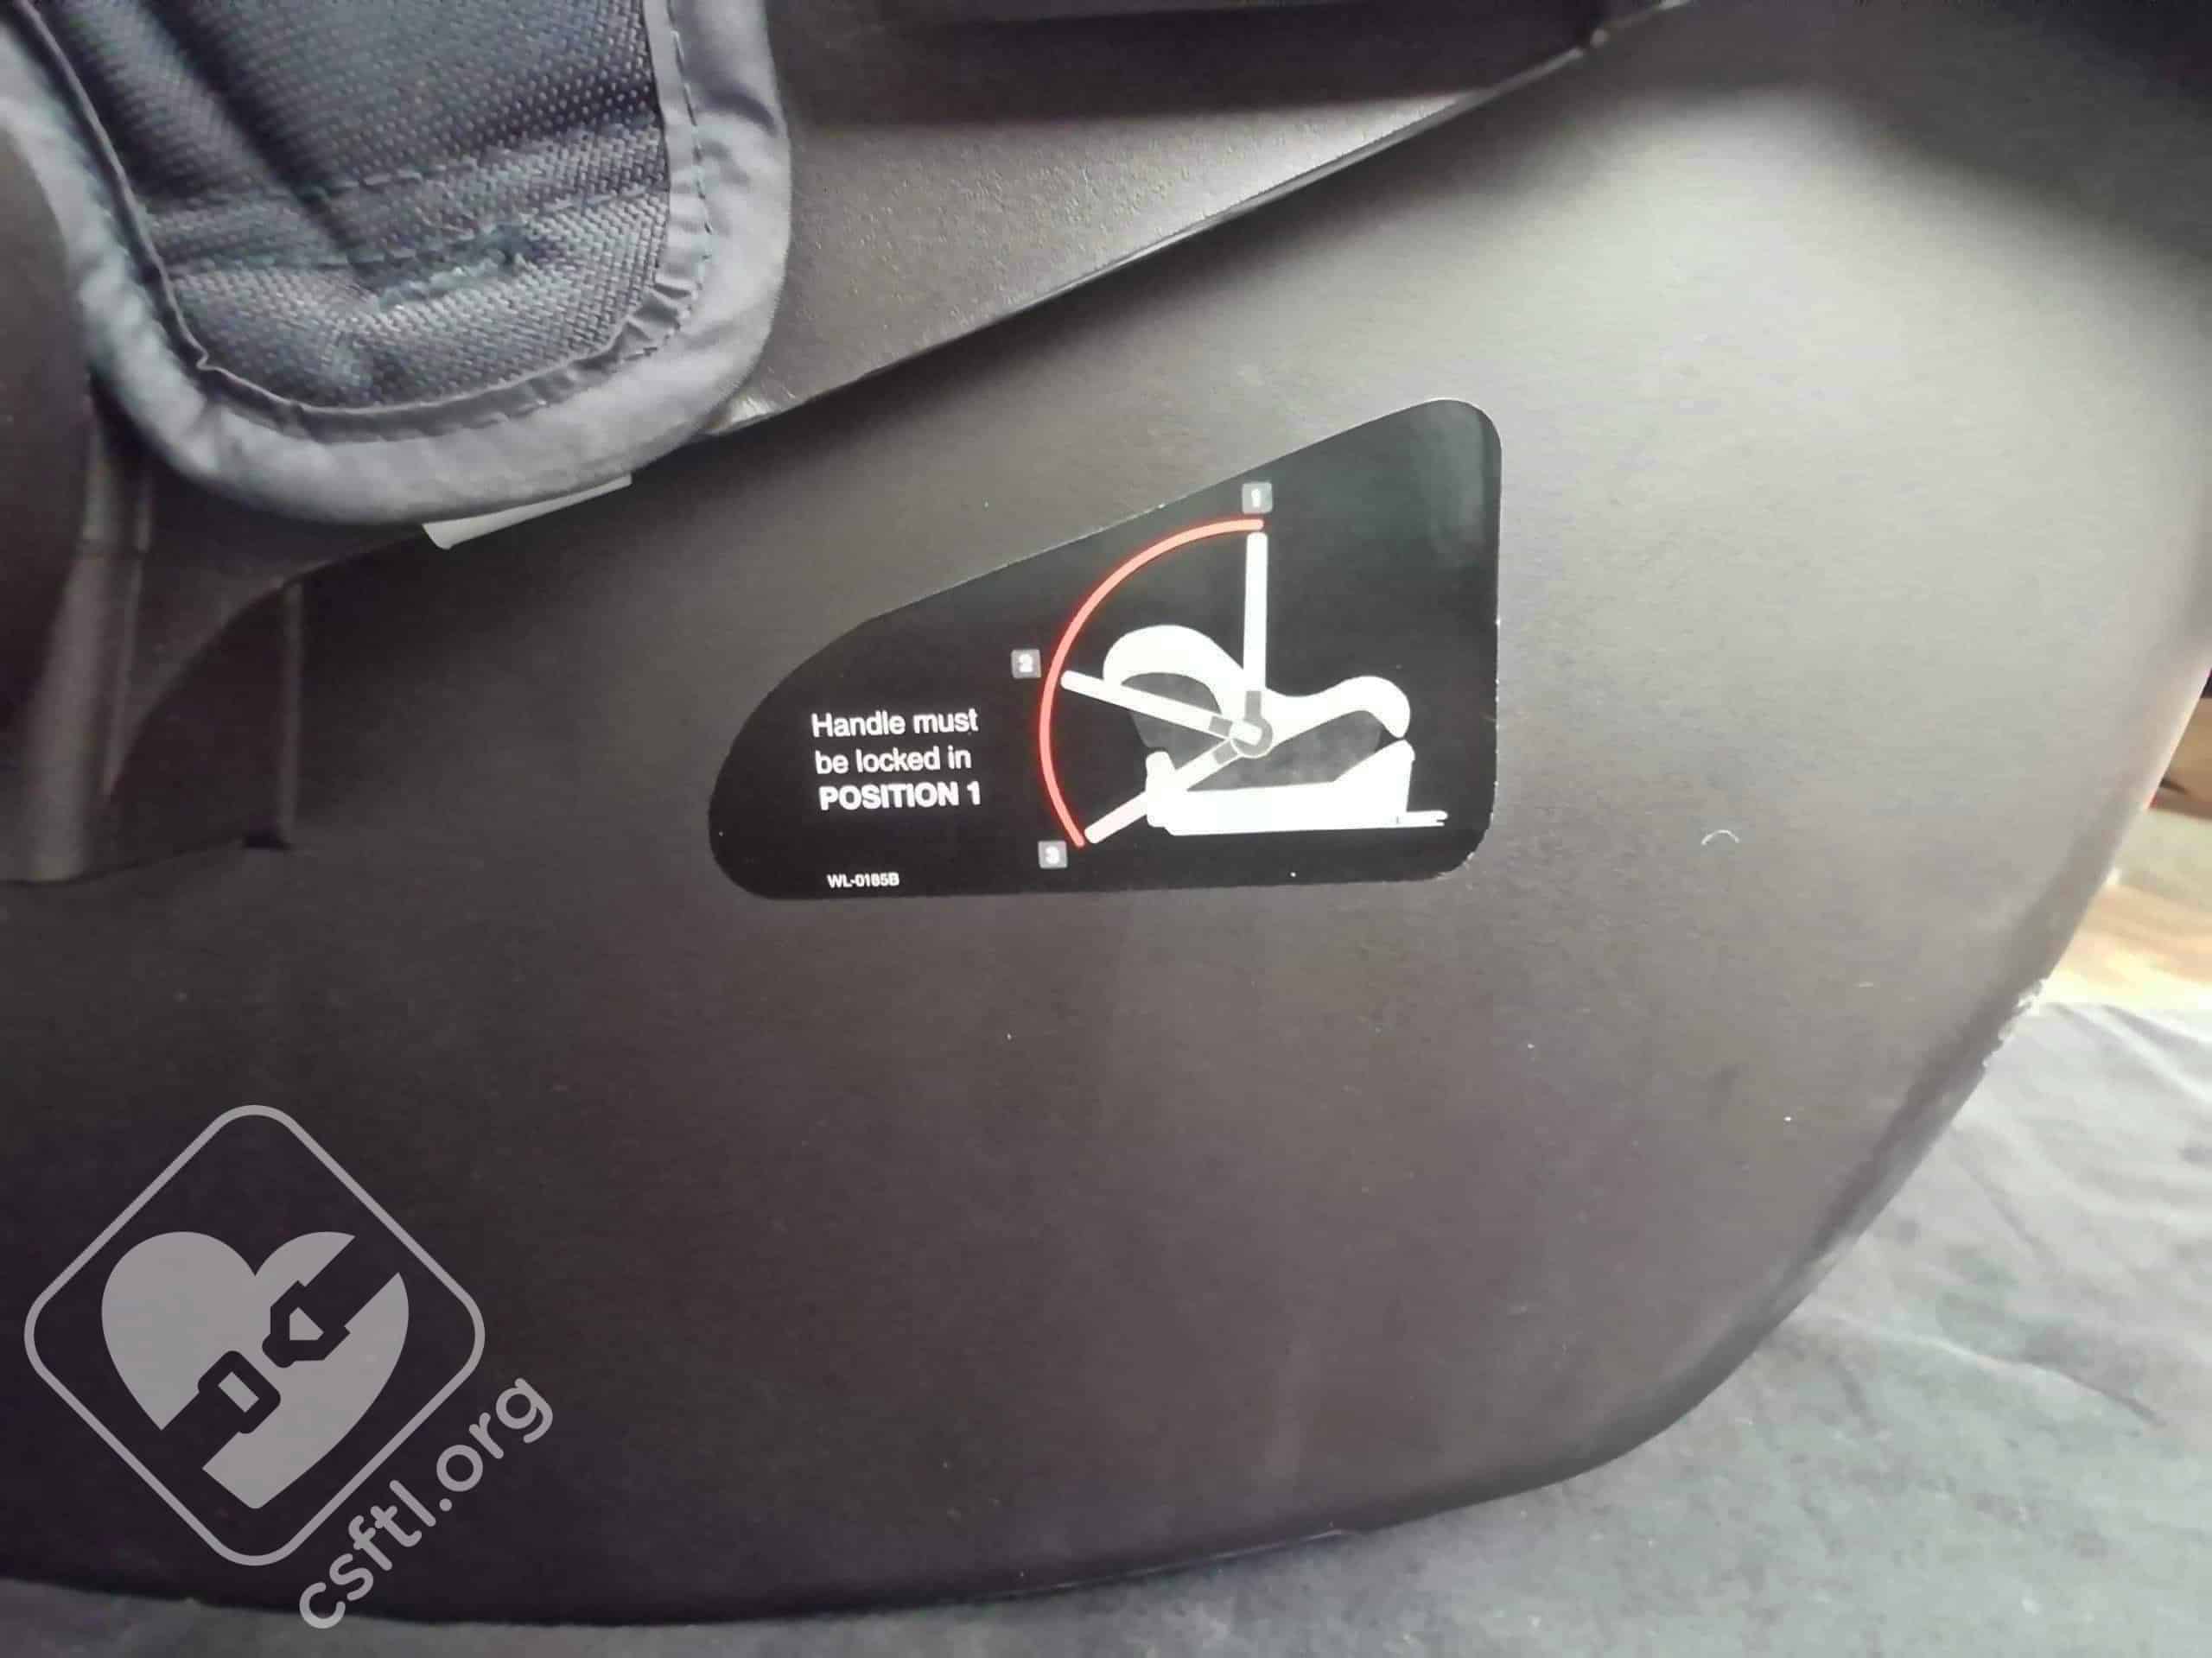
Nuna PIPA handle sticker
The Nuna PIPA requires that the handle be placed in the “carry” position when the seat is installed in the vehicle.
The handle can be locked in 3 different positions: the “carry position” (upright), the “baby chair position” (behind the seat, touching the ground), and the “rocking position” (behind the baby’s head).
Note: In some versions of the Canadian Nuna PIPA manual, the diagrams are switched for the “baby chair” and “rocking” positions. The “rocking” position is the position that rocks and the “baby chair” position is the stationary position.
We are concerned that the “baby chair” and “rocking” handle positions encourage caregivers to leave the baby in the seat longer than necessary. Car seats are not safe sleep surfaces. When the carrier is not in the vehicle or in an approved stroller, they should not be used for sleep.
Padding
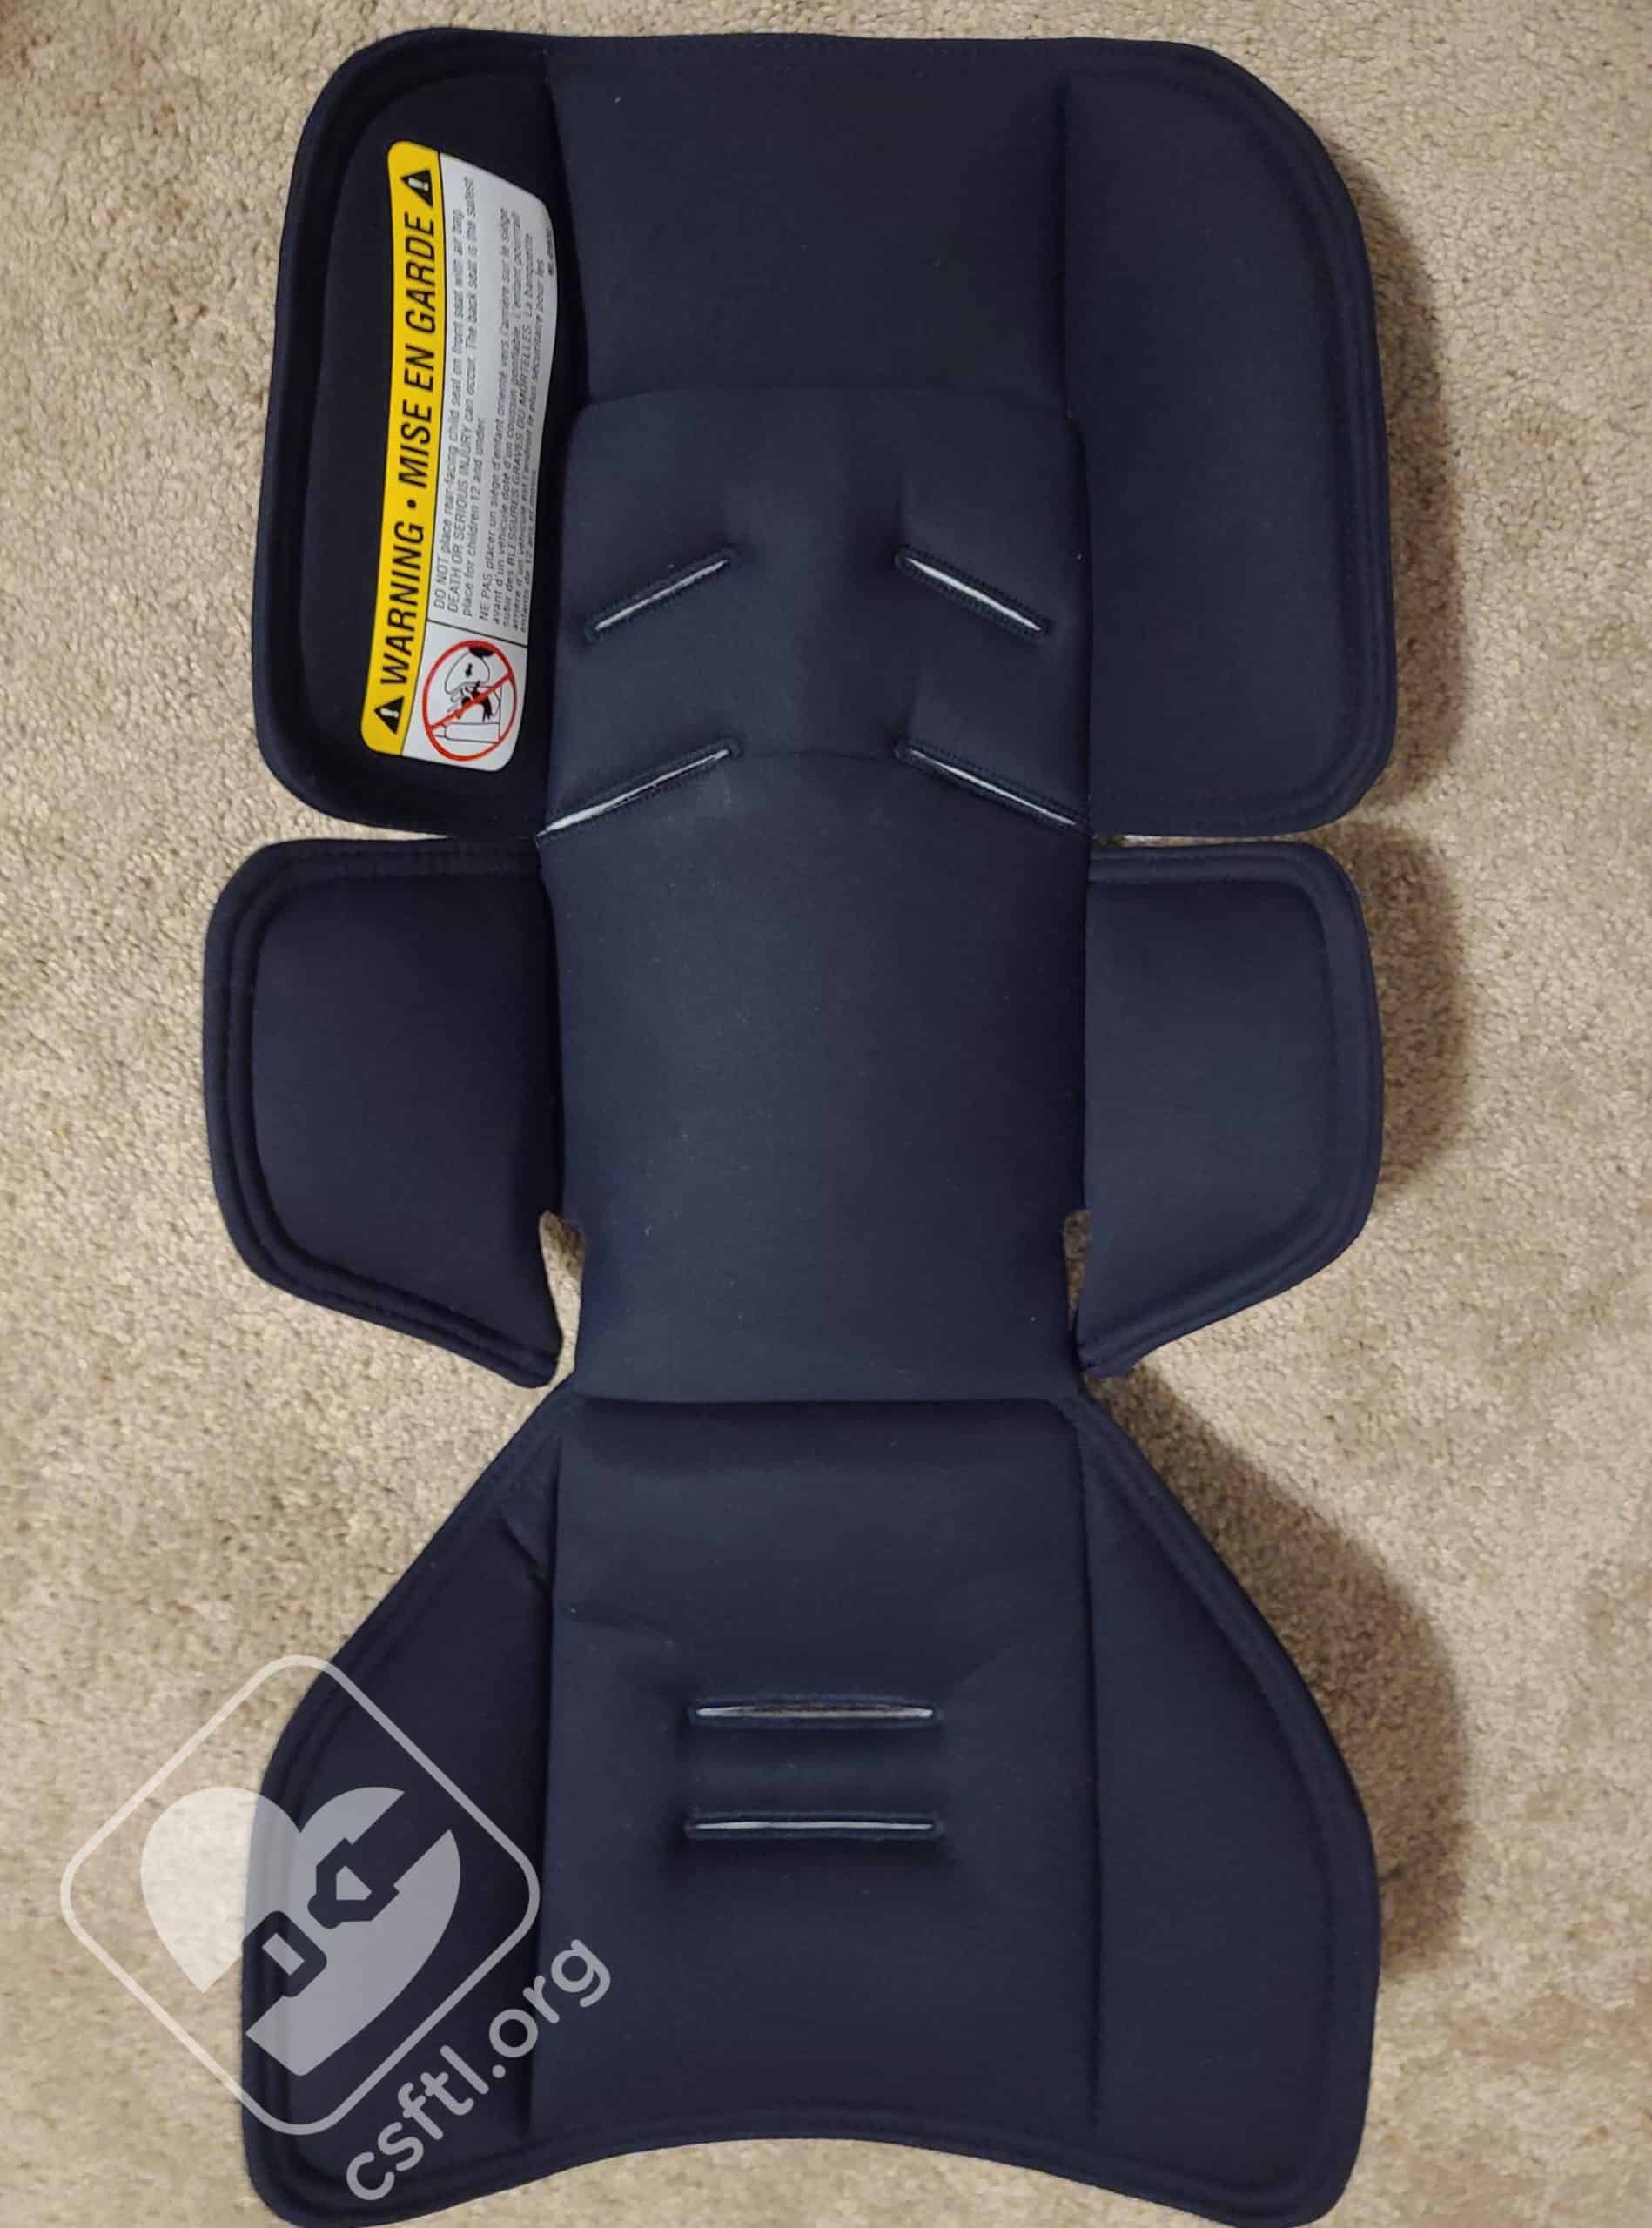
Nuna PIPA padding
The Nuna PIPA comes with infant padding, a low birth weight pillow, shoulder pads, and a crotch buckle pad. The shoulder pads are optional at all times, and the manual does not mention the crotch buckle pad at all, though it’s small and rather nice so we can’t see why anyone would want to remove it. The infant insert may be used as necessary to provide a snug fit, but the low birth weight pillow must be removed once the baby weighs approximately 11 pounds. This insert should be removed once it’s no longer necessary for a good harness fit.

Nuna PIPA’s low birth weight insert
We are concerned that the low birth weight pillow lacks any labeling on the insert itself. Our American counterparts have helped many caregivers remove this padding when the child weighs more than 11 pounds — it wasn’t at all obvious that it needed to be removed! Not only is the padding’s weight limit not clearly marked, it would be very easy for a caregiver to misplace the padding or not know which car seat it belongs to later. While we do enjoy a nice game of “which infant insert is this?” we’d rather see every removable insert have a label with the car seat name and the weight limits for the insert. We literally make this request of every manufacturer that we visit with at in-person events or via virtual meetings.
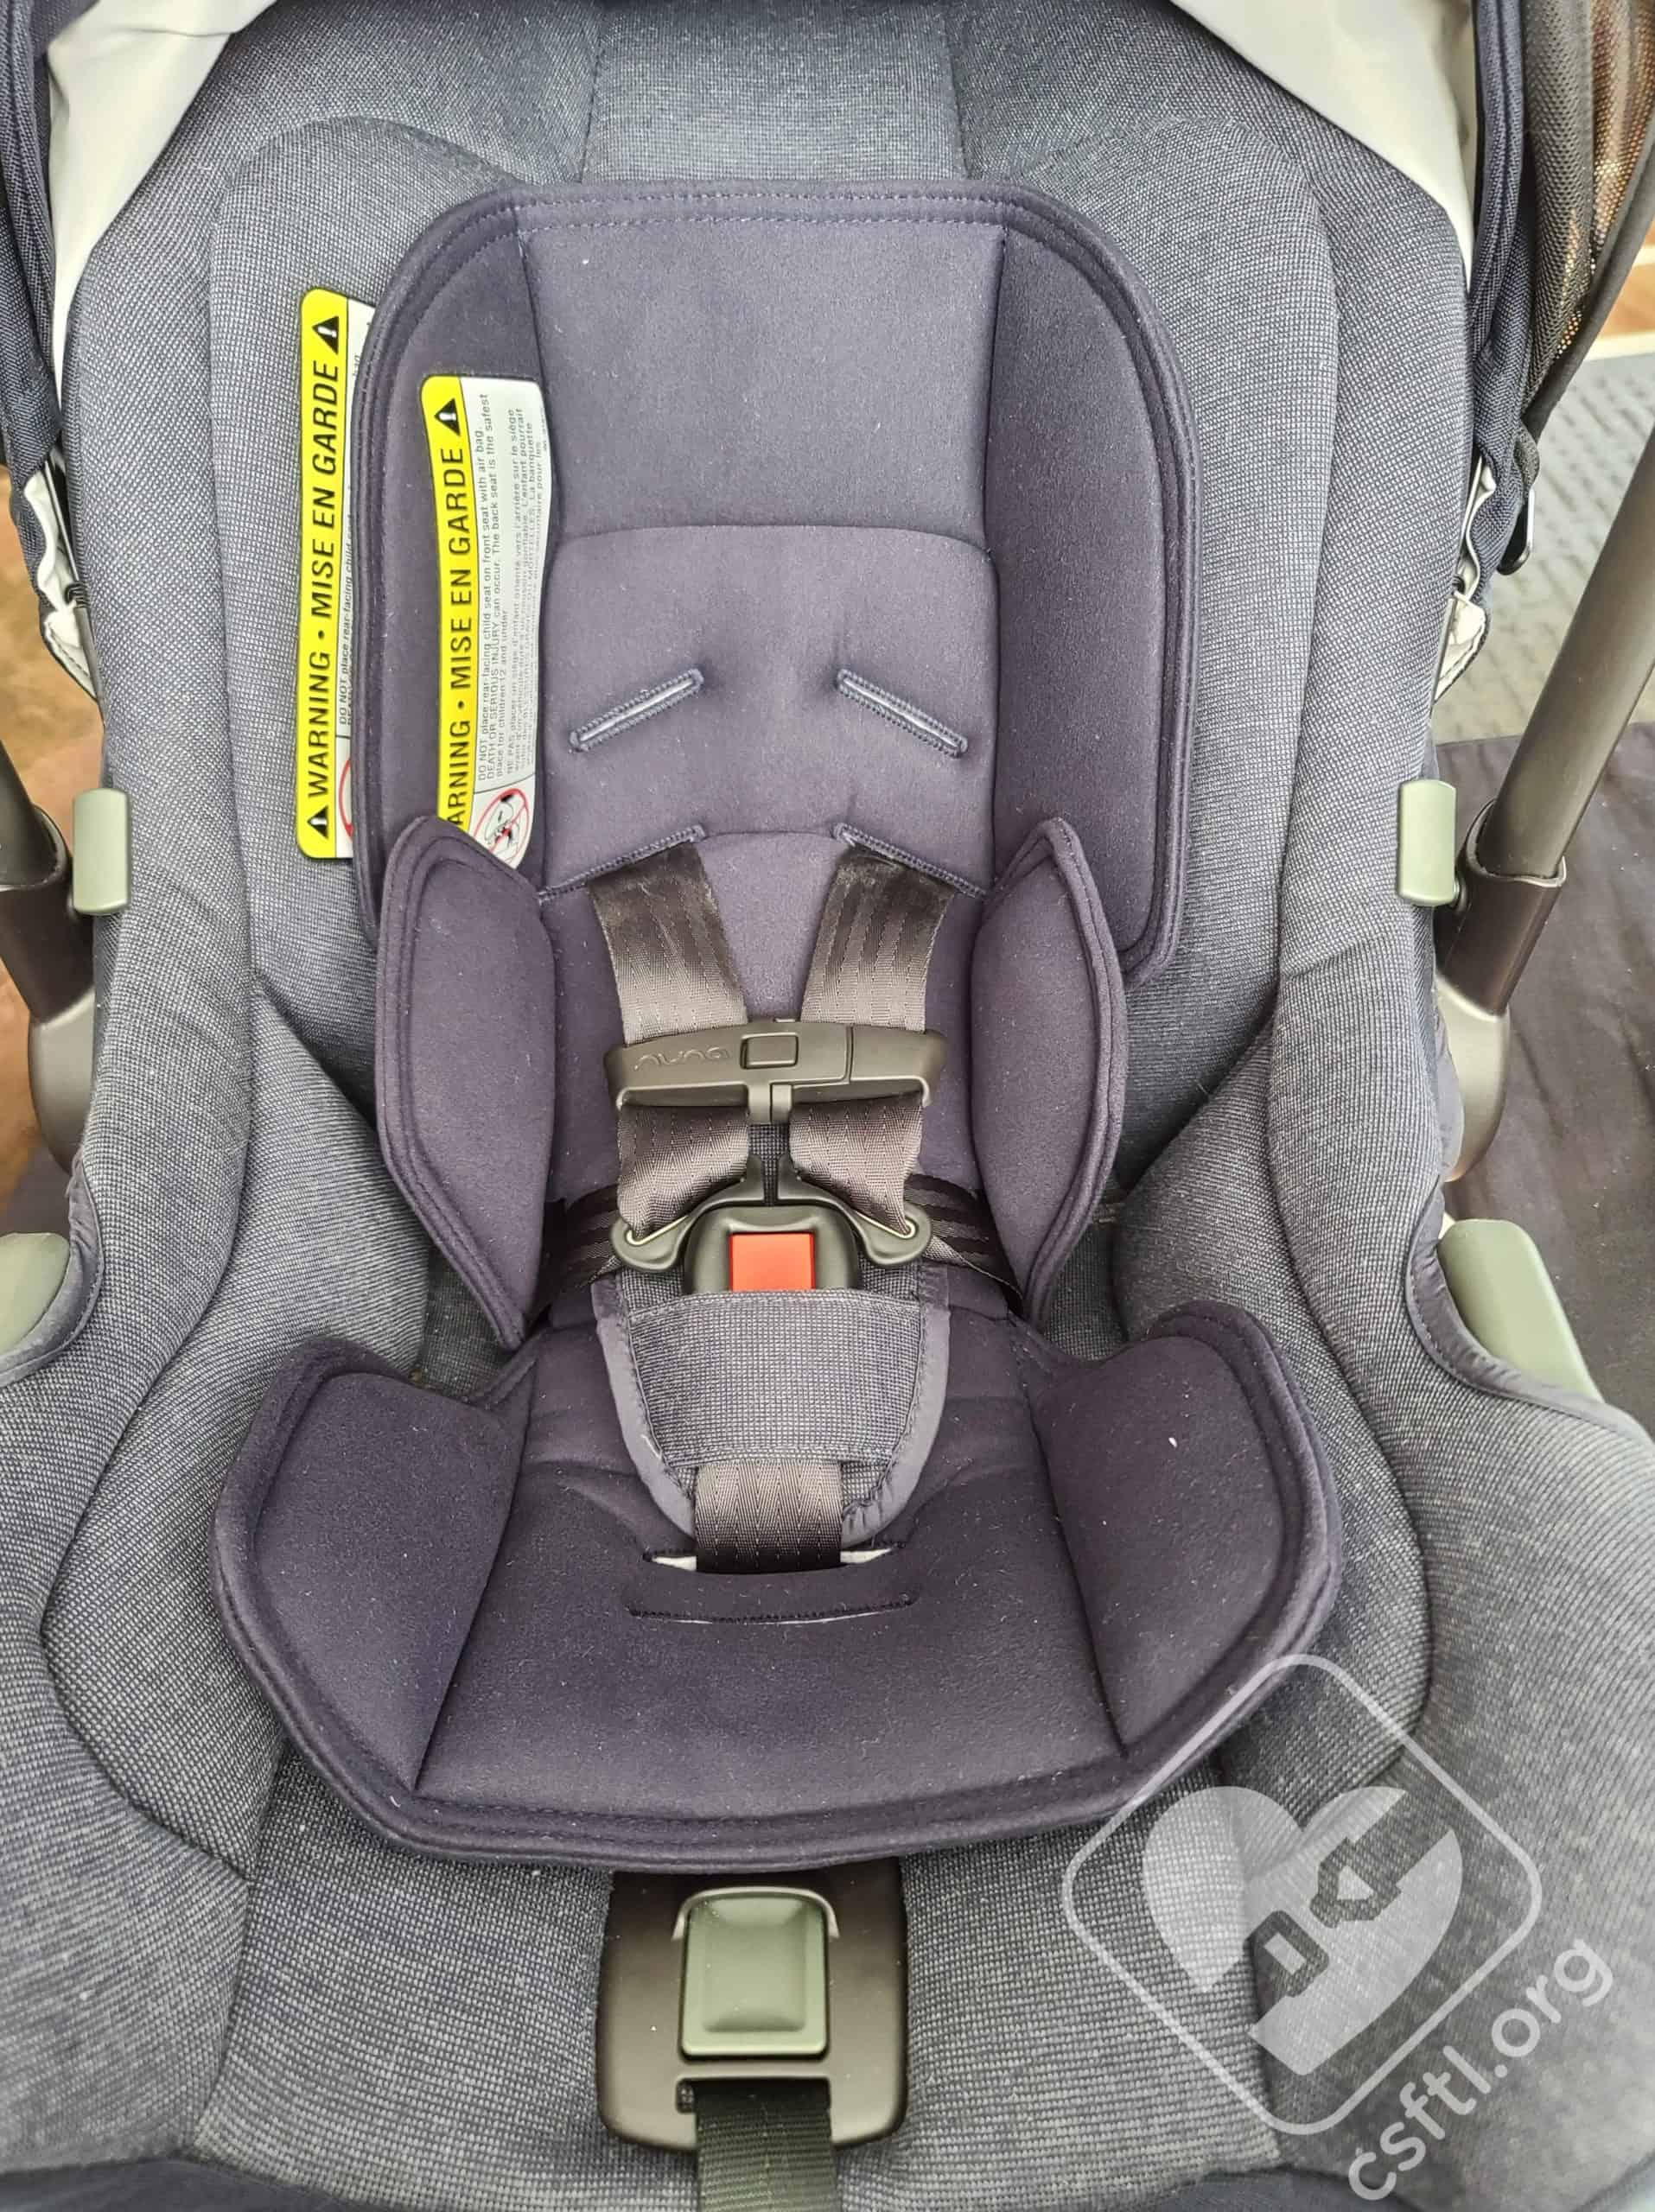
Crotch Buckle Positions
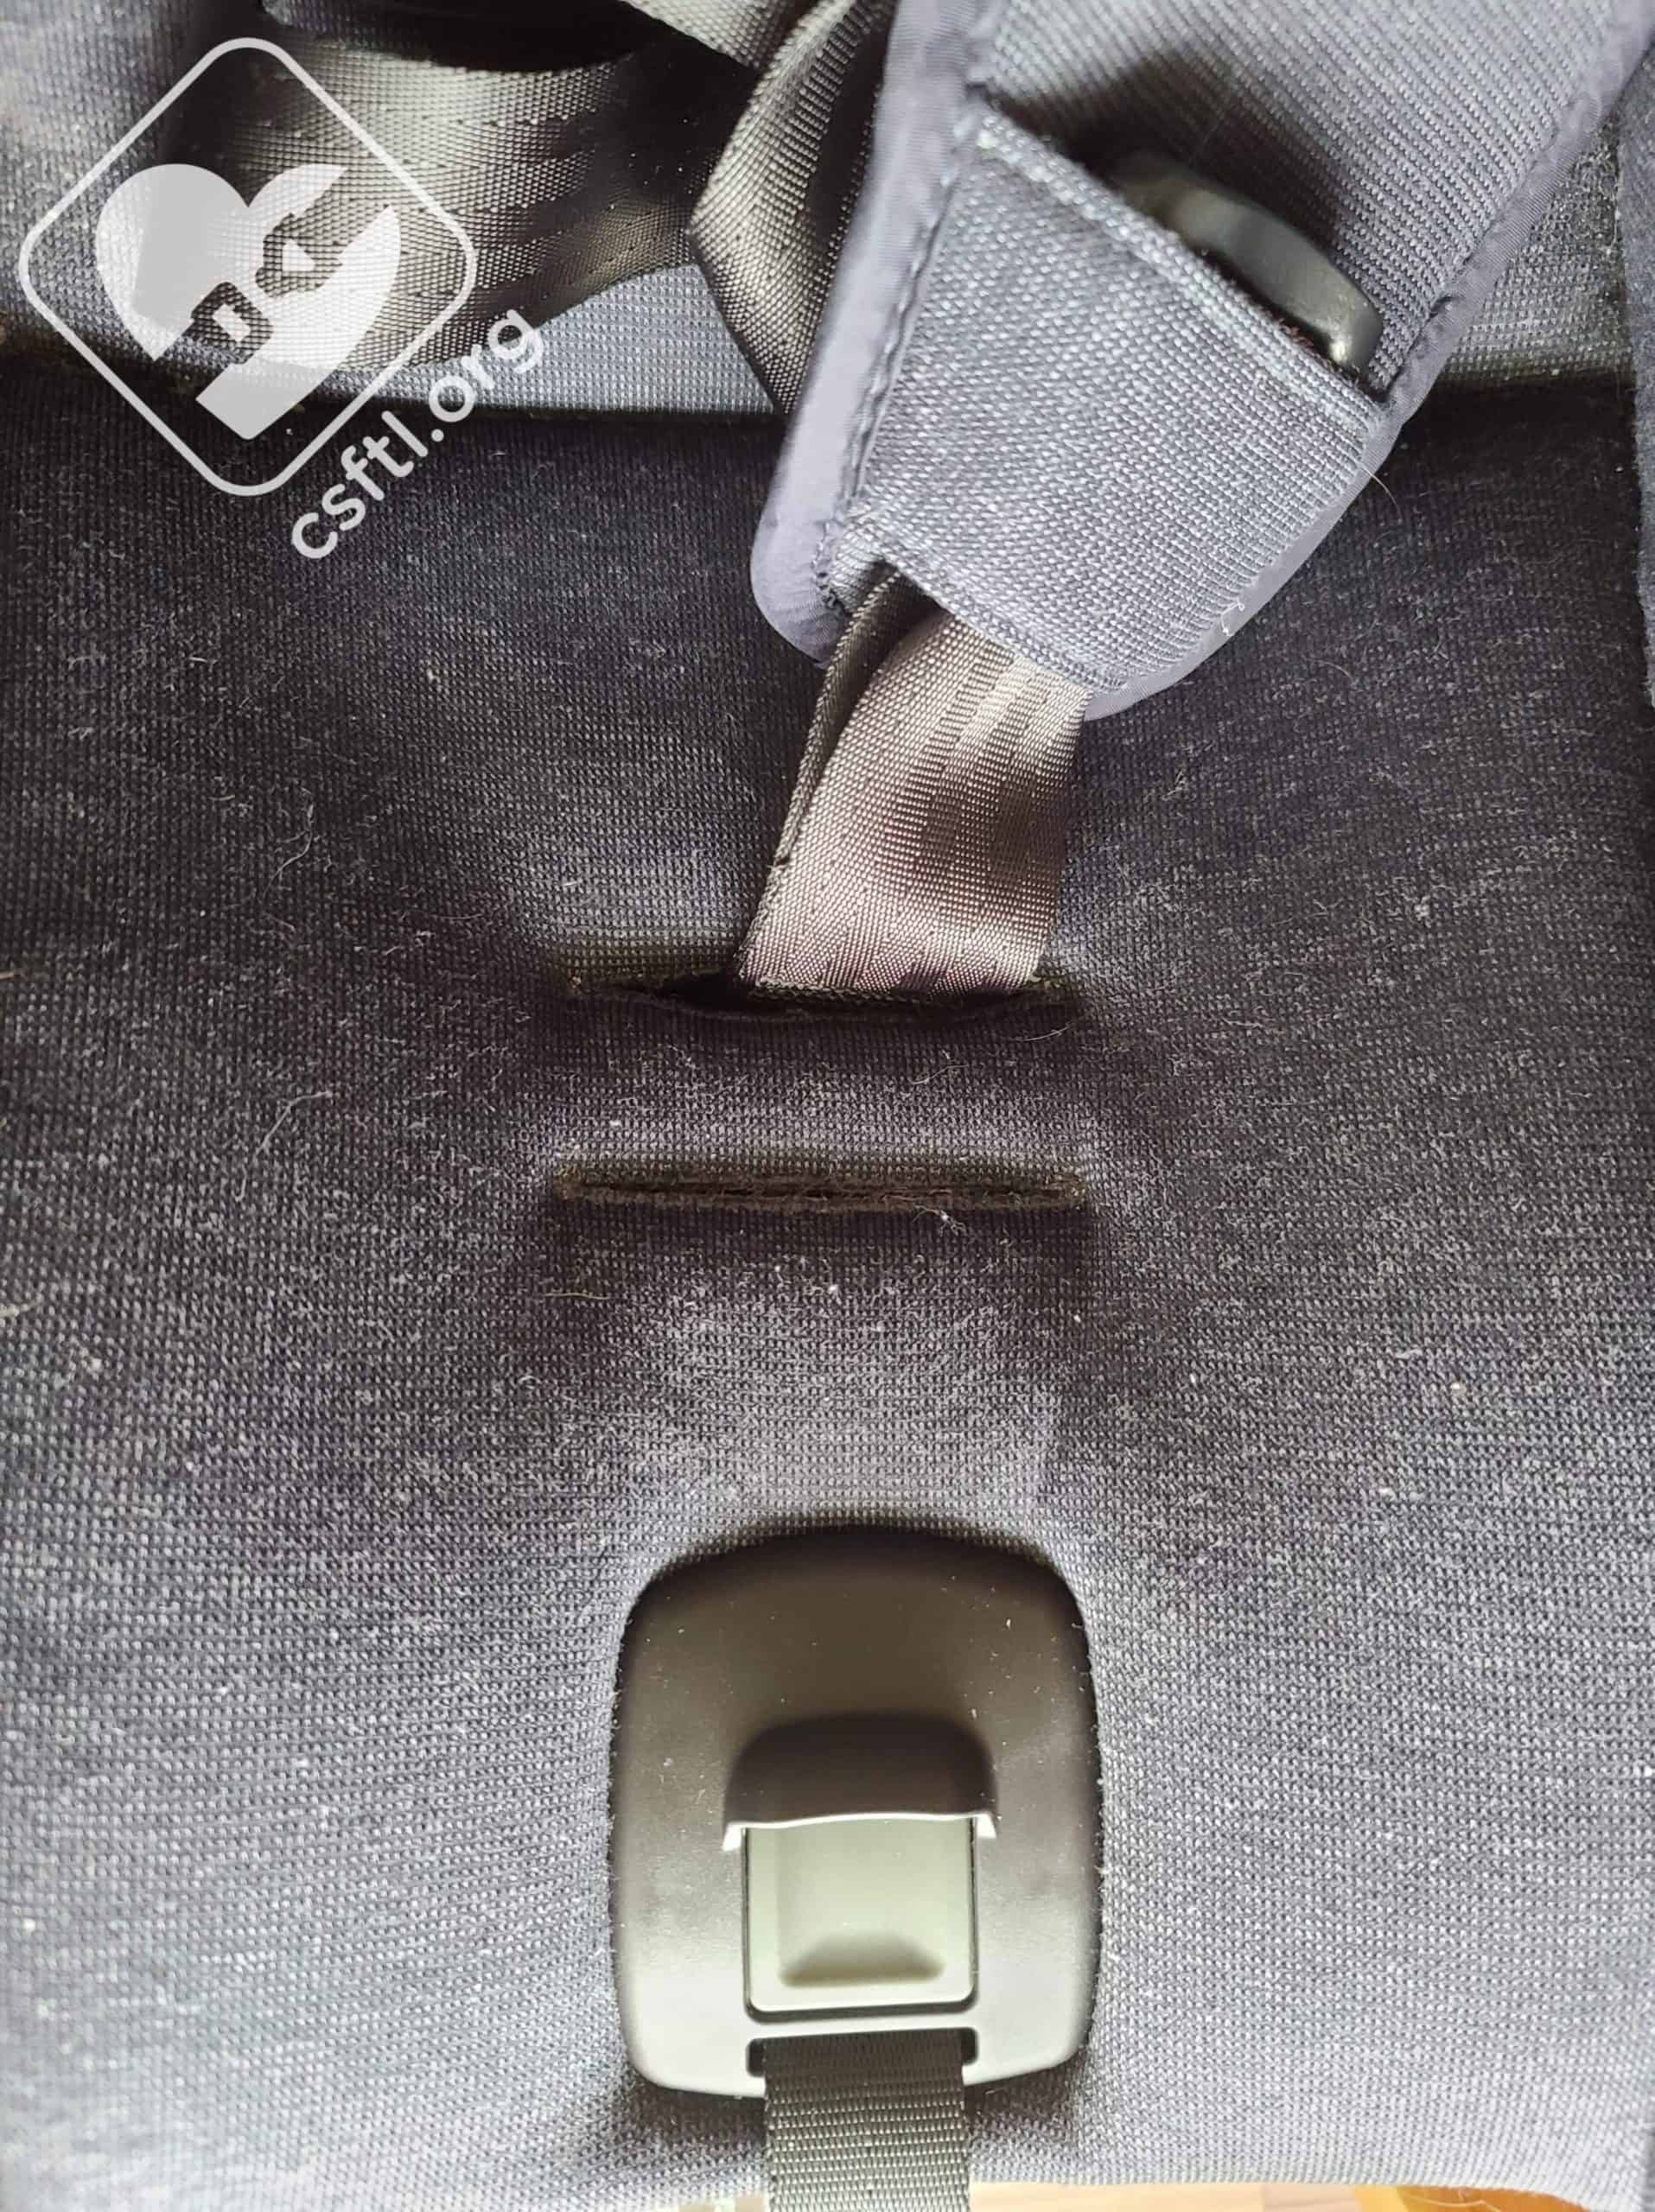
Nuna PIPA crotch buckle positions
The Nuna PIPA has two crotch buckle positions. There are no restrictions surrounding which one to use. The manual directs the user to choose the position that works best for the child and provides a snug fit.
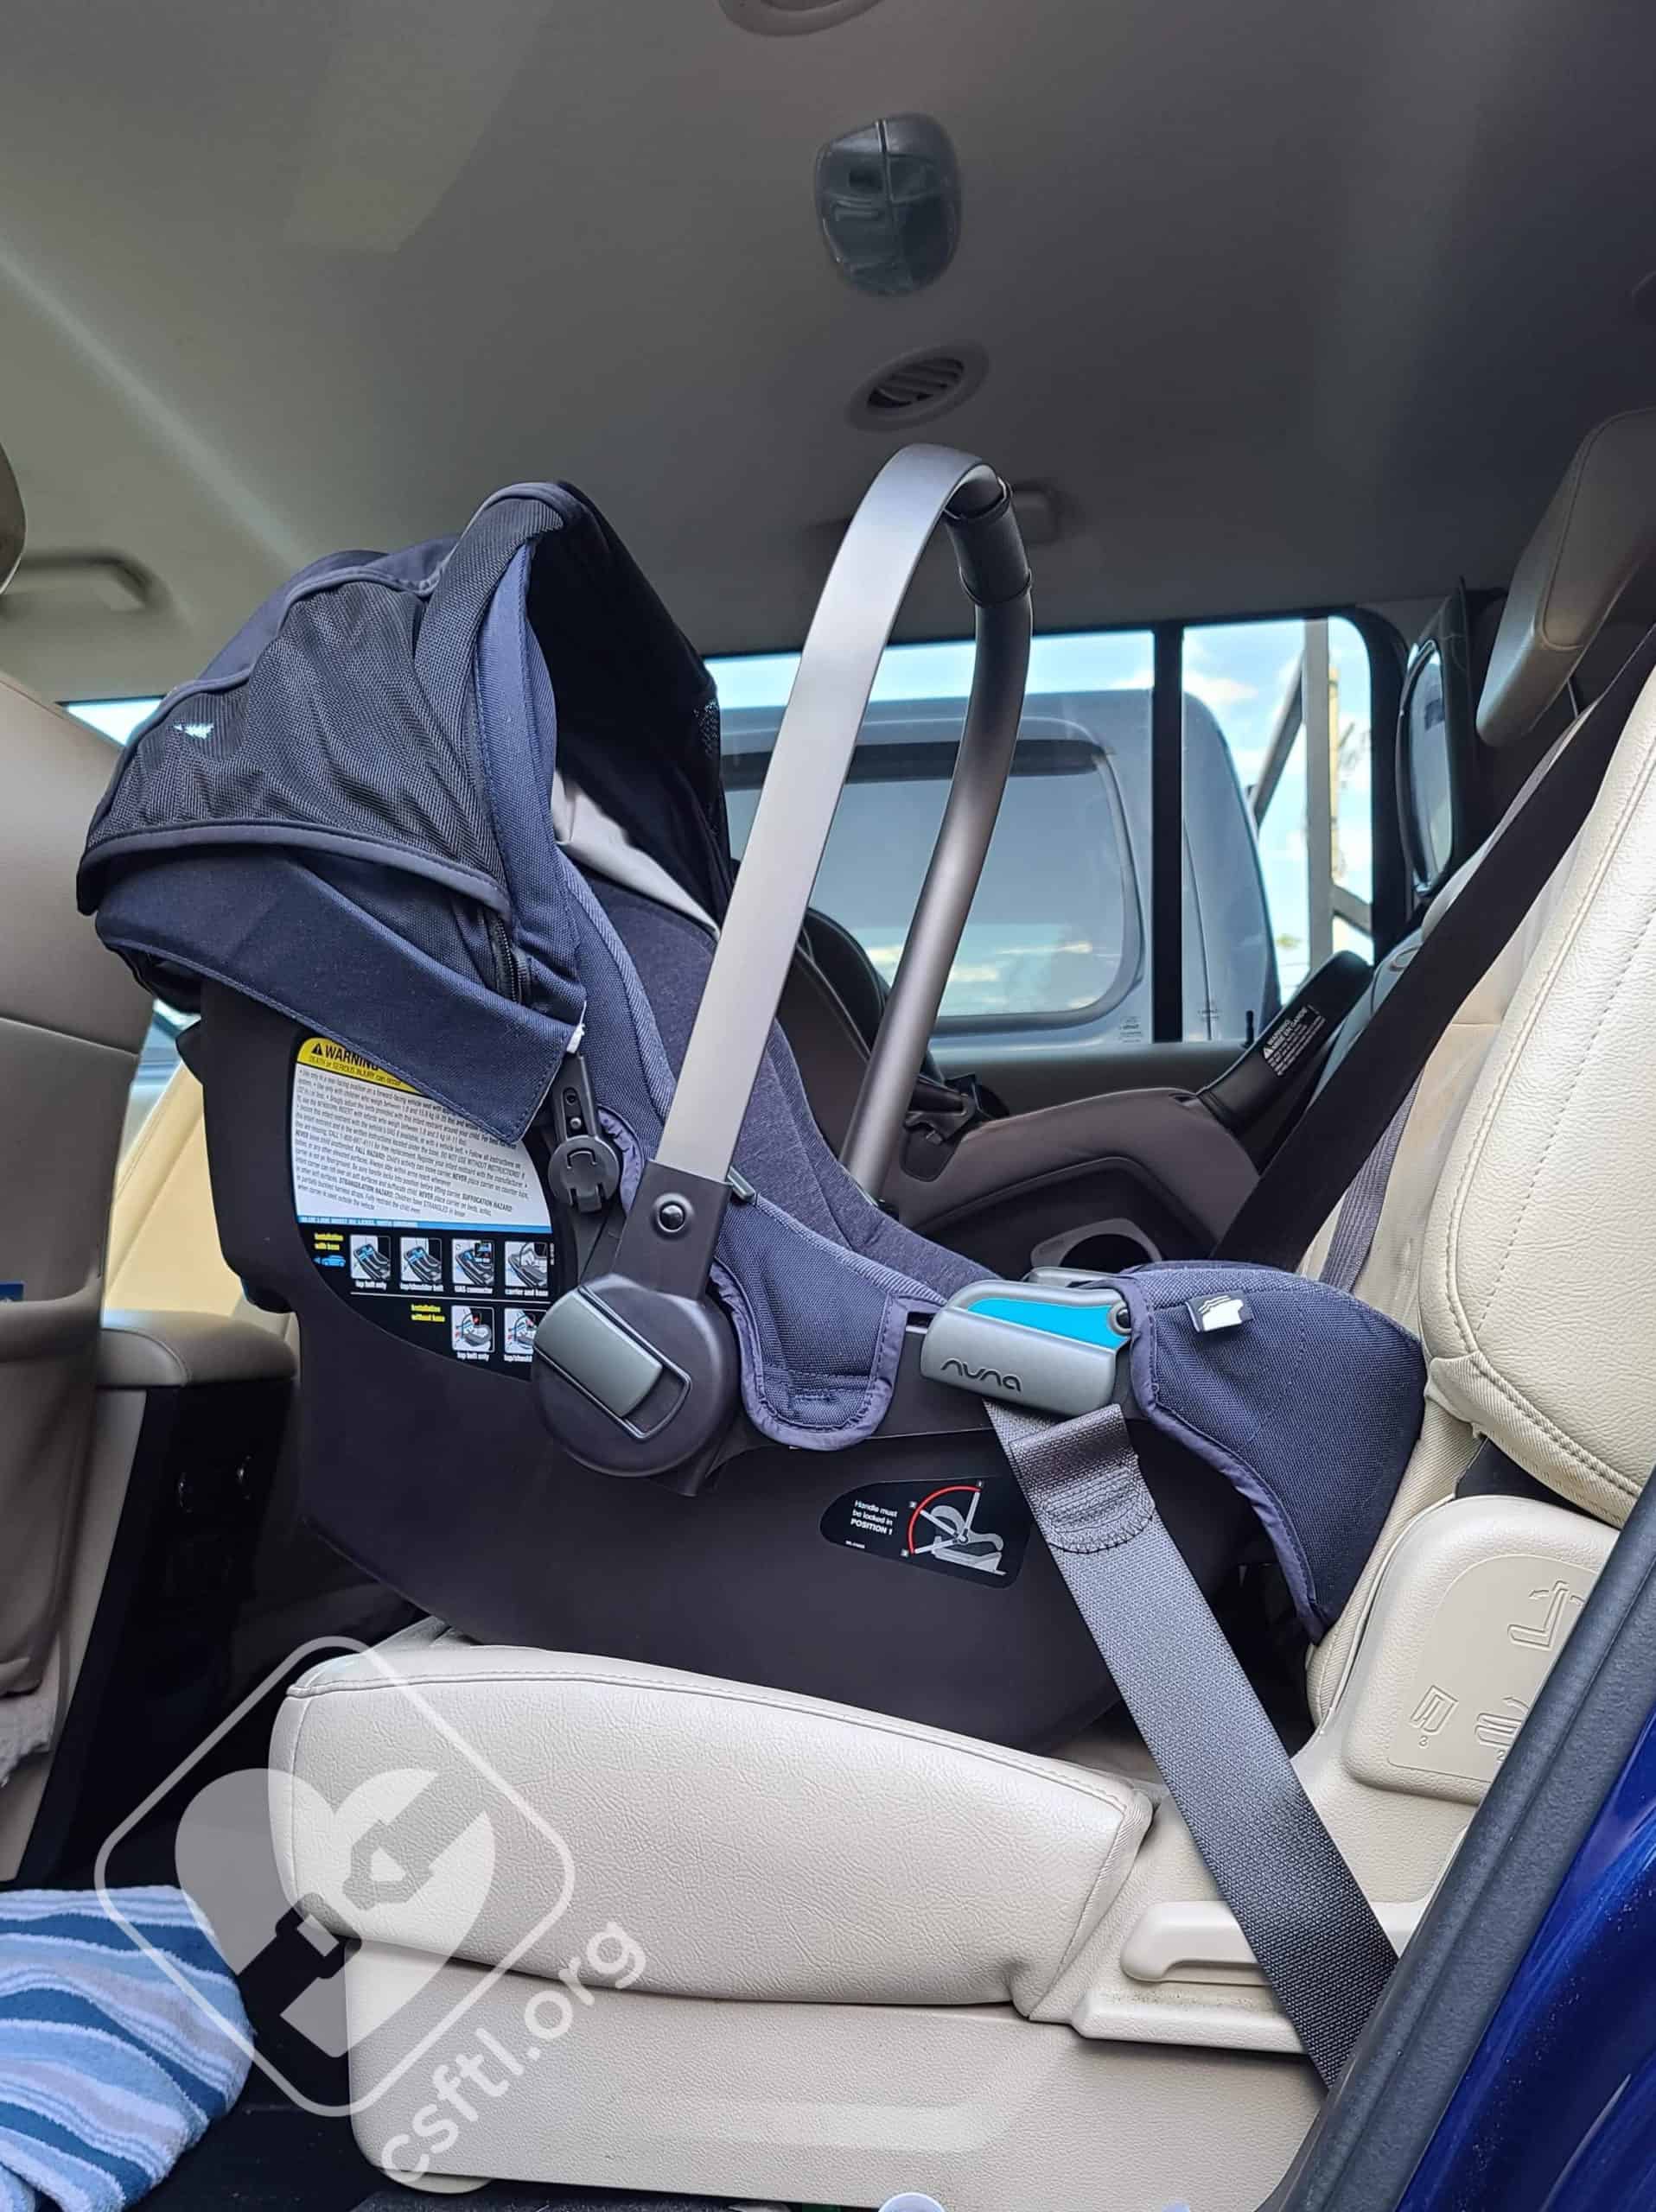
Installation – with the Base
With Vehicle Seat Belt, Using Lockoff
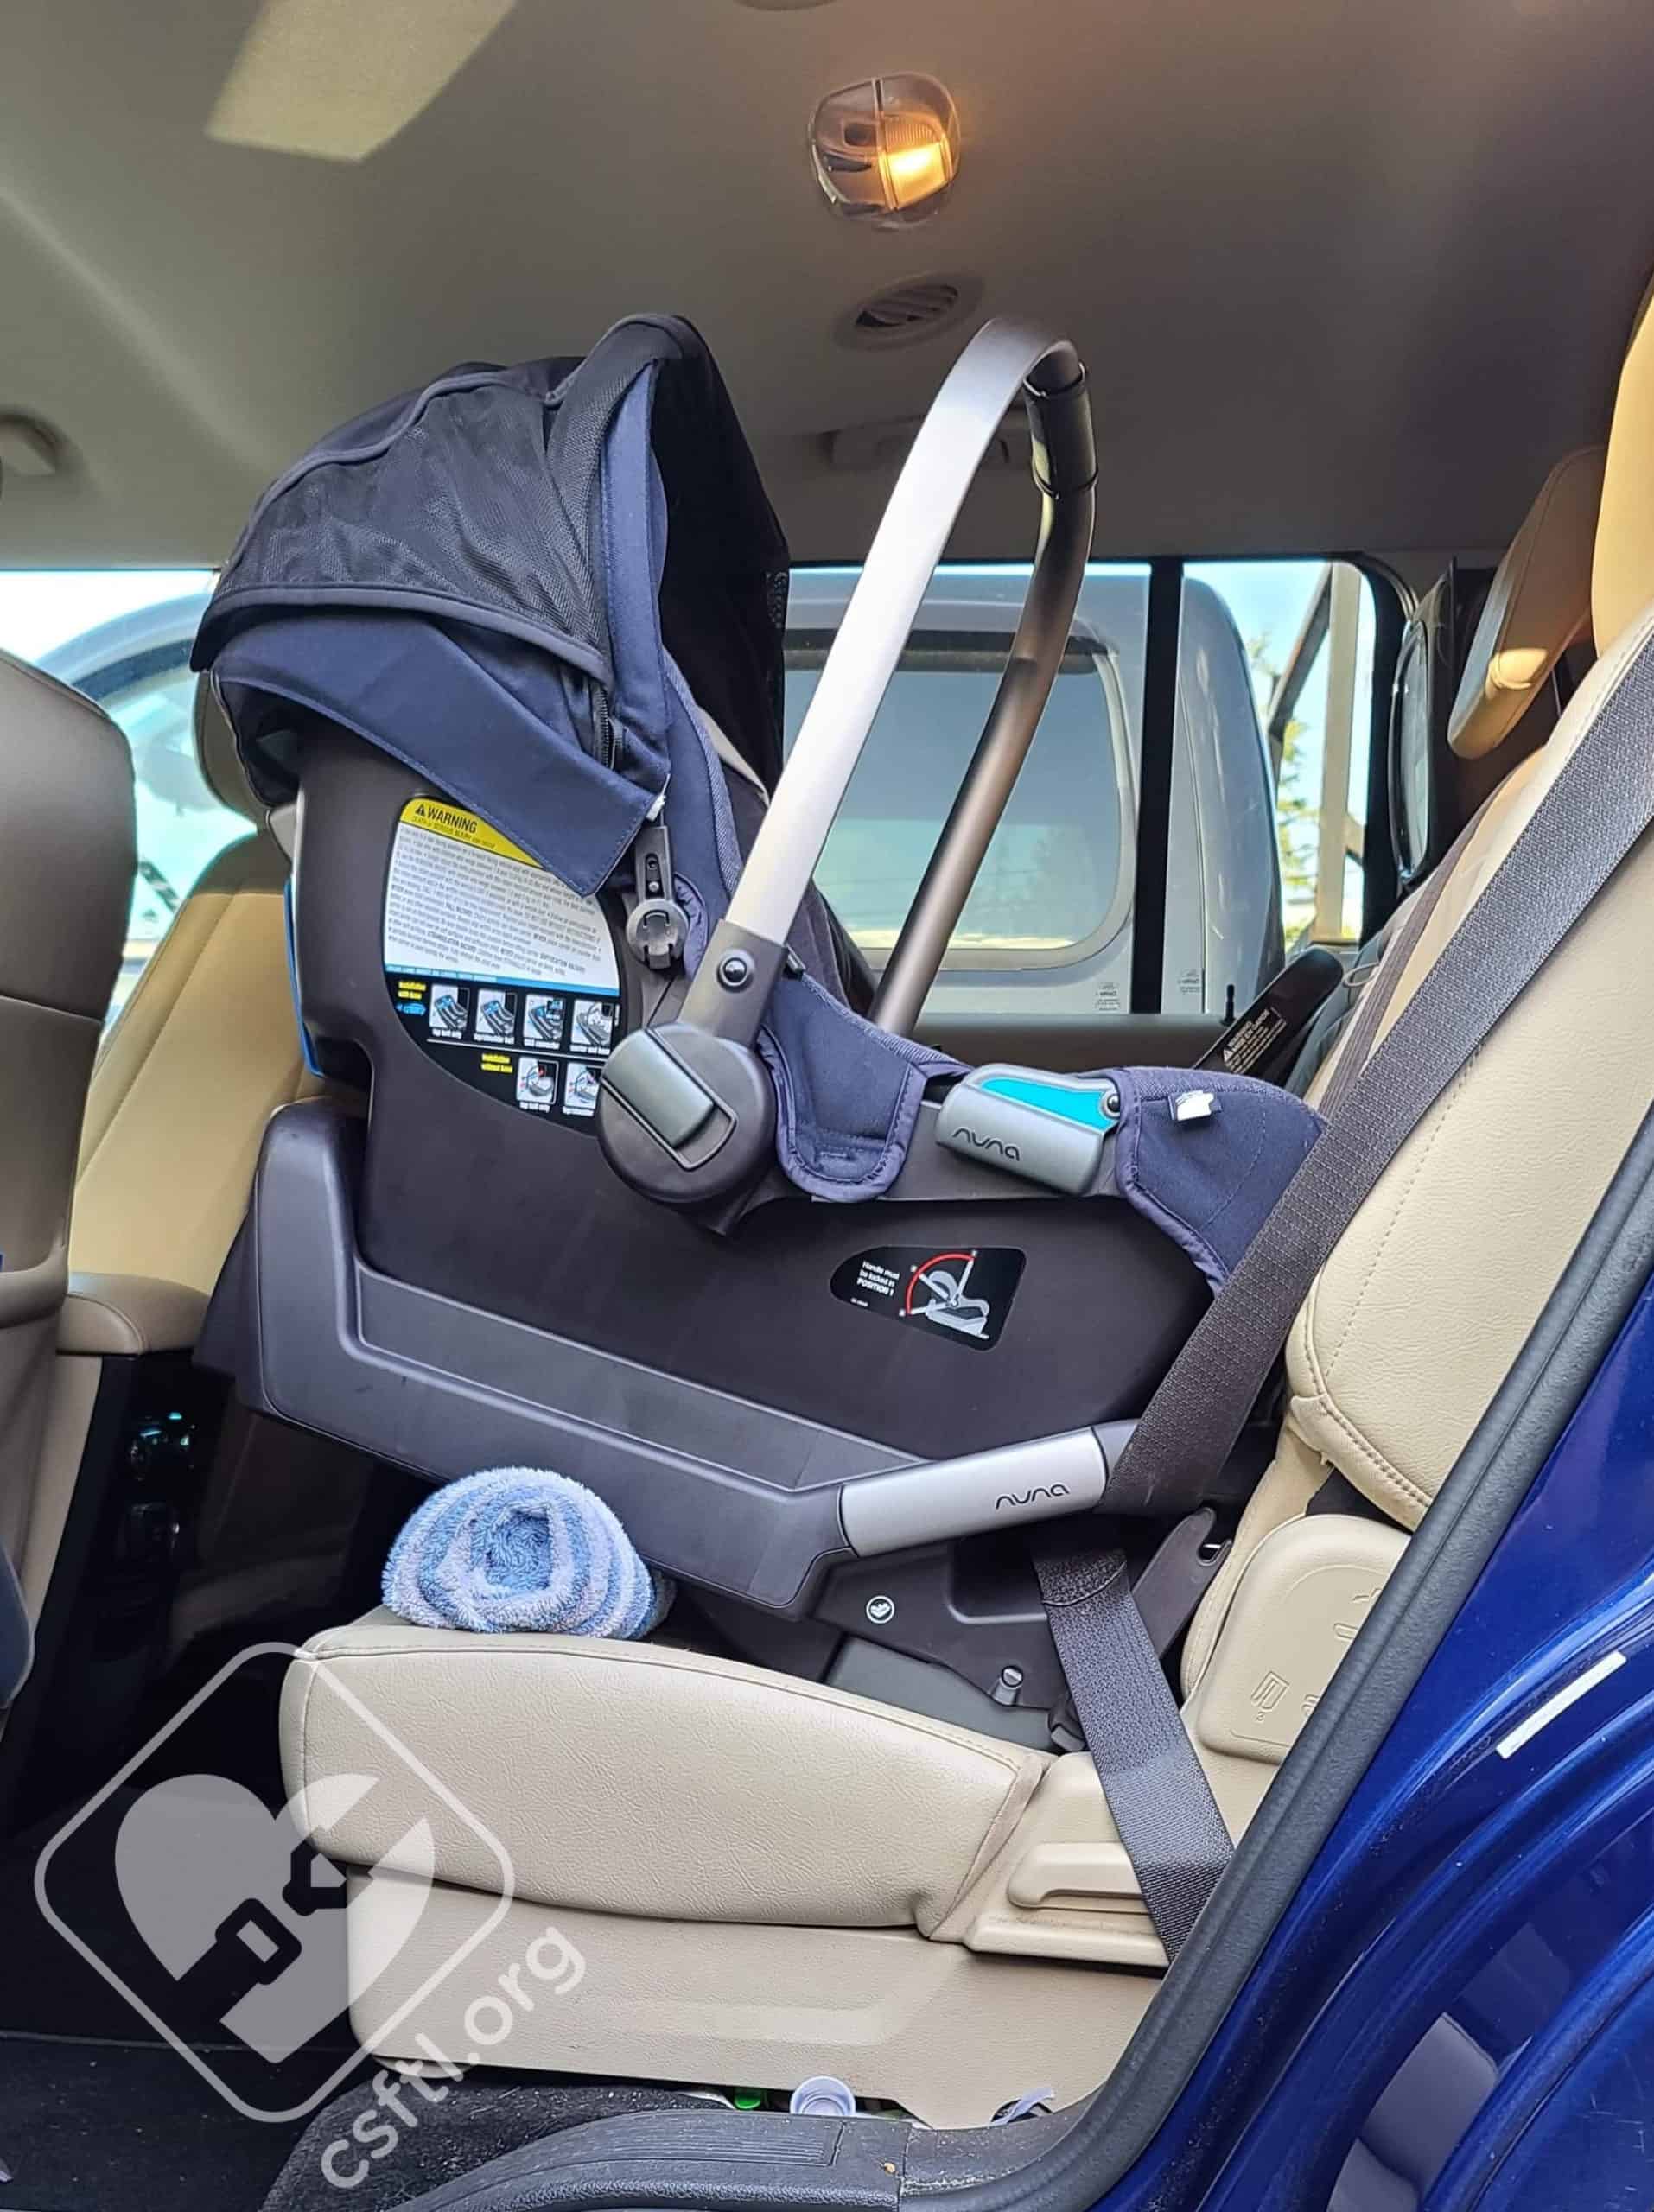
Nuna PIPA installed with vehicle belt using base lockoff
Installing the base with the vehicle seat belt is fairly simple. Set the base on the vehicle seat with the lockoff pointed toward the back of the vehicle seat. Open the lockoff, thread the vehicle seat belt through the belt guides, then through the lockoff, buckle the vehicle seat belt, apply some downward pressure on the base while pulling the vehicle seat belt snug, then close the lock off.
We found the convenience loop, convenience button, and/or convenience bars on some vehicle seat belts could get in the way of the lockoff, making the seat belt installation more difficult in those seating positions of some vehicles. This absolutely mirrors the experience of our American counterparts. In many of these cases, we would suggest using the LUAS instead of the vehicle seat belt. That may well mean moving the PIPA outboard instead of installing it in the middle seat.
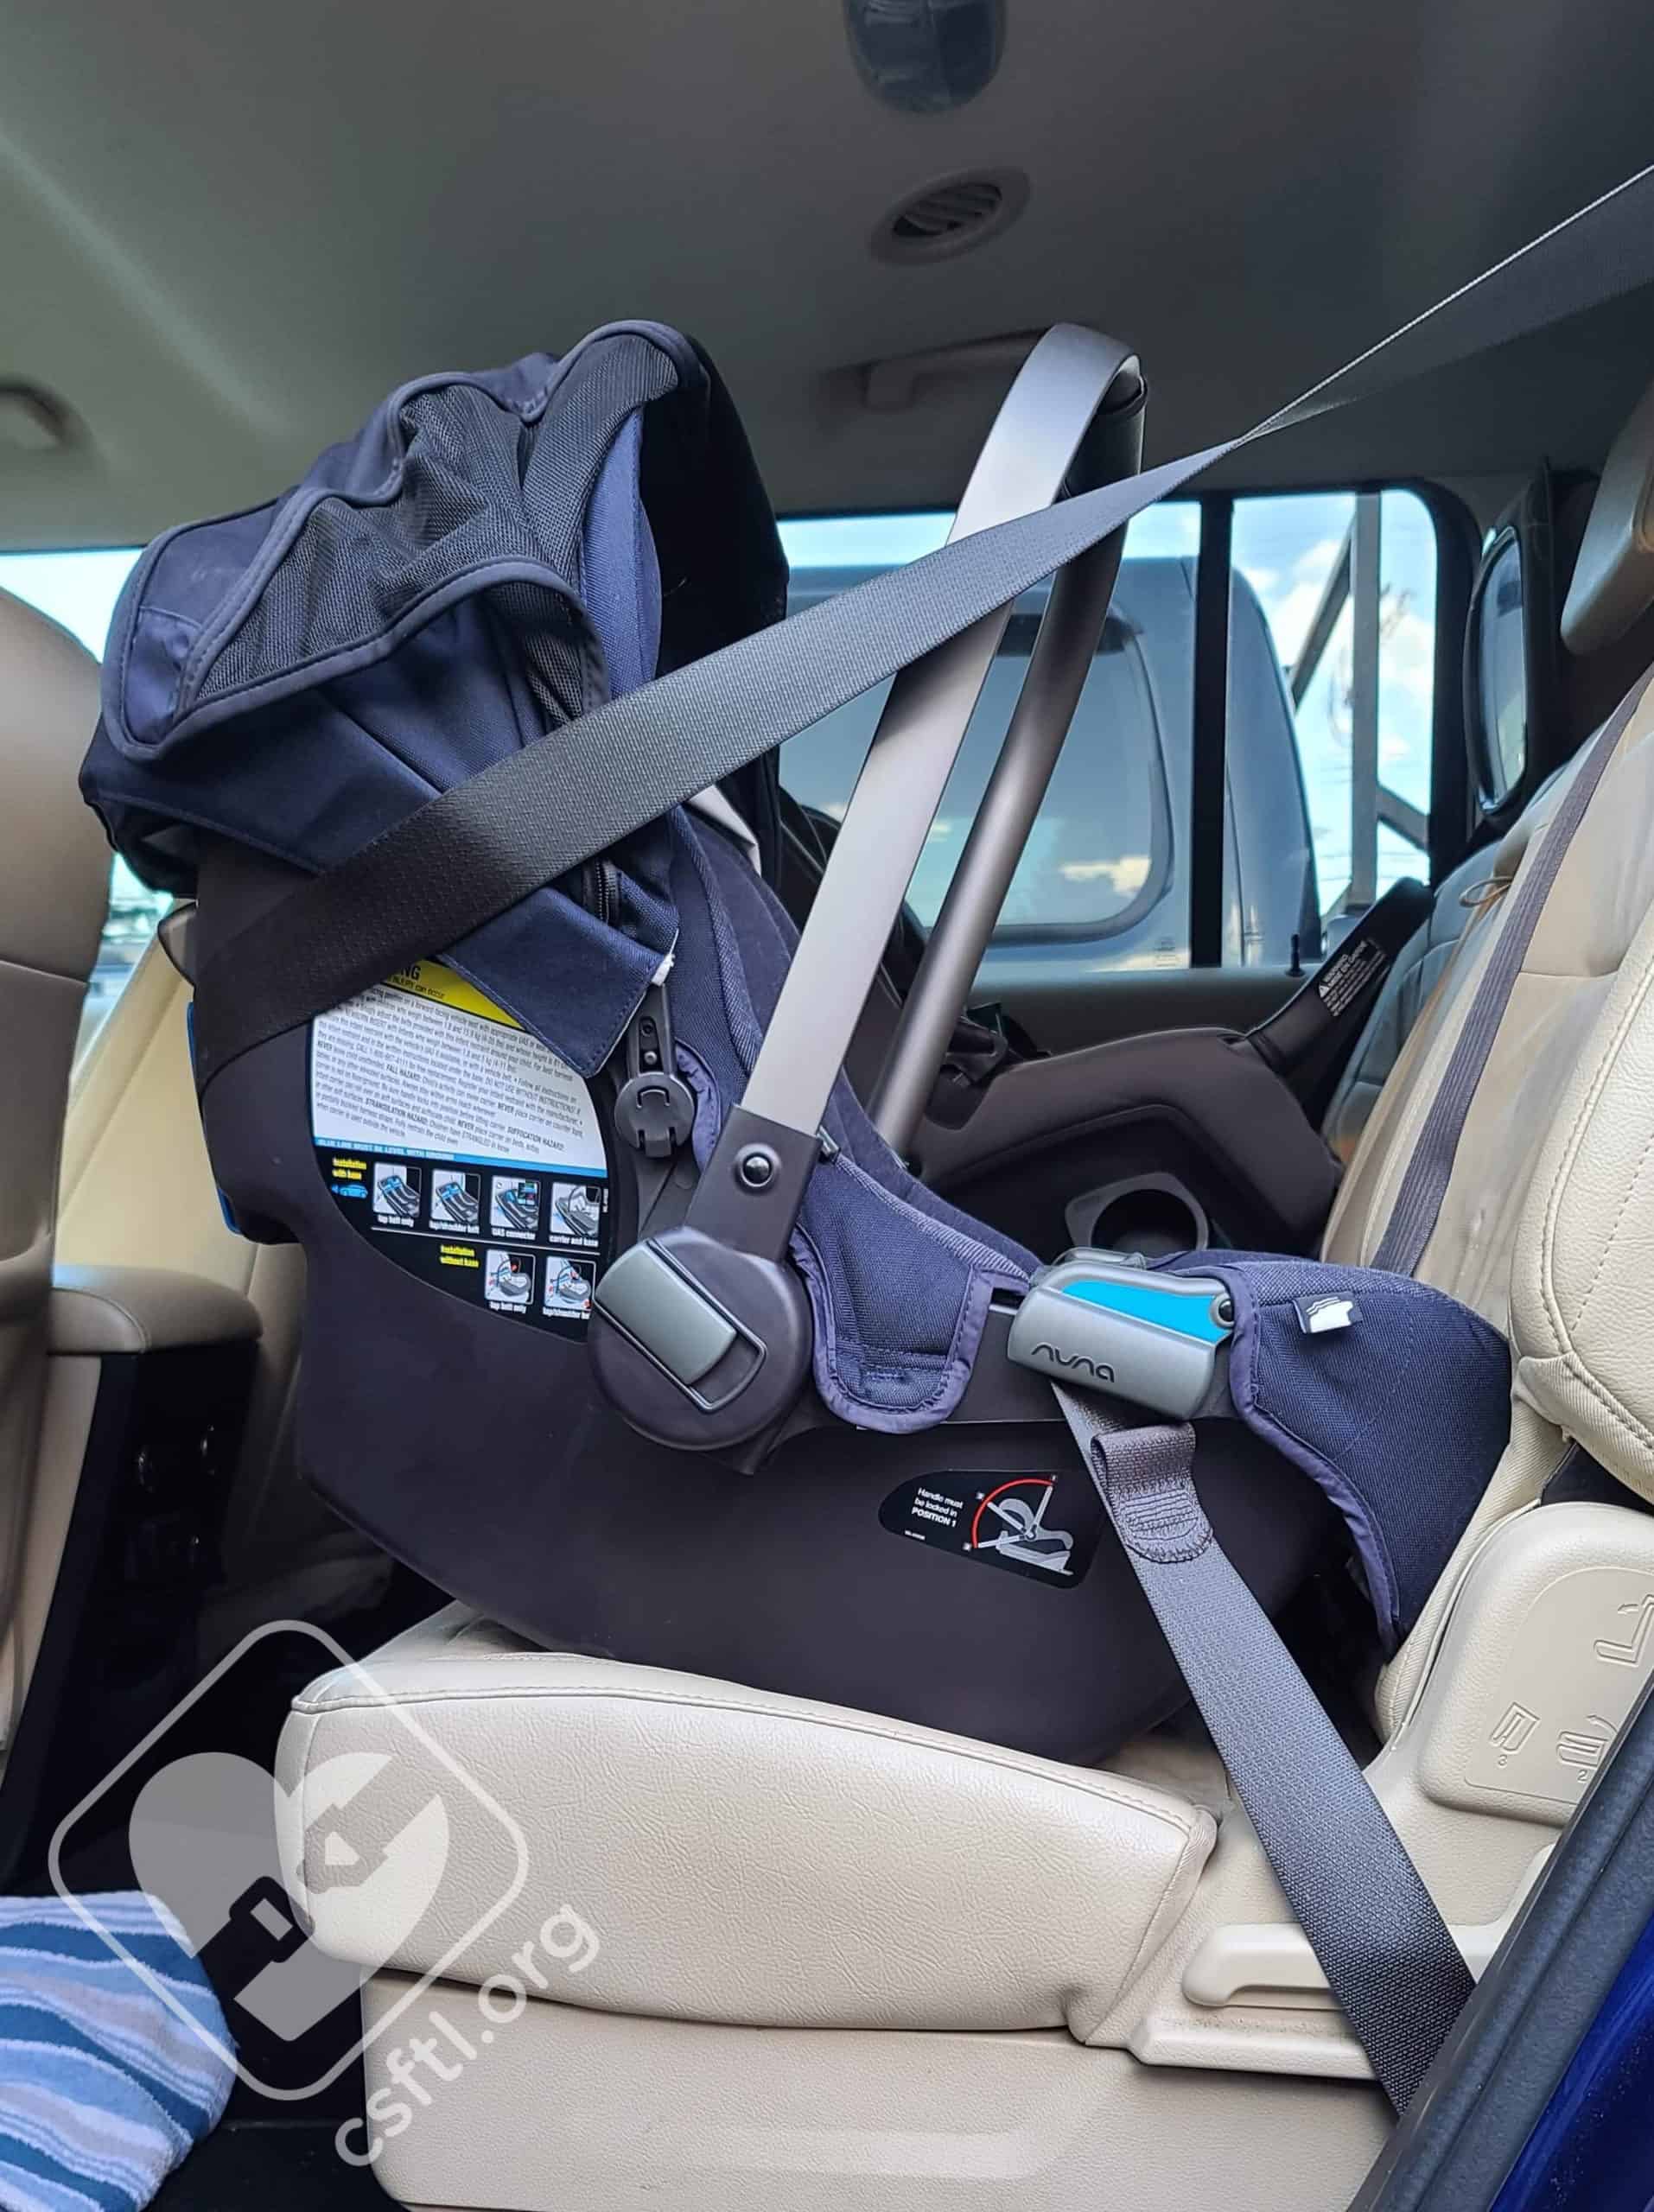
Note: the Pipa allows the use of the LUAS AND the vehicle seat belt for installation. This is a fairly unusual situation, most car seats DO NOT allow this. Always confirm in your car seat’s manual.
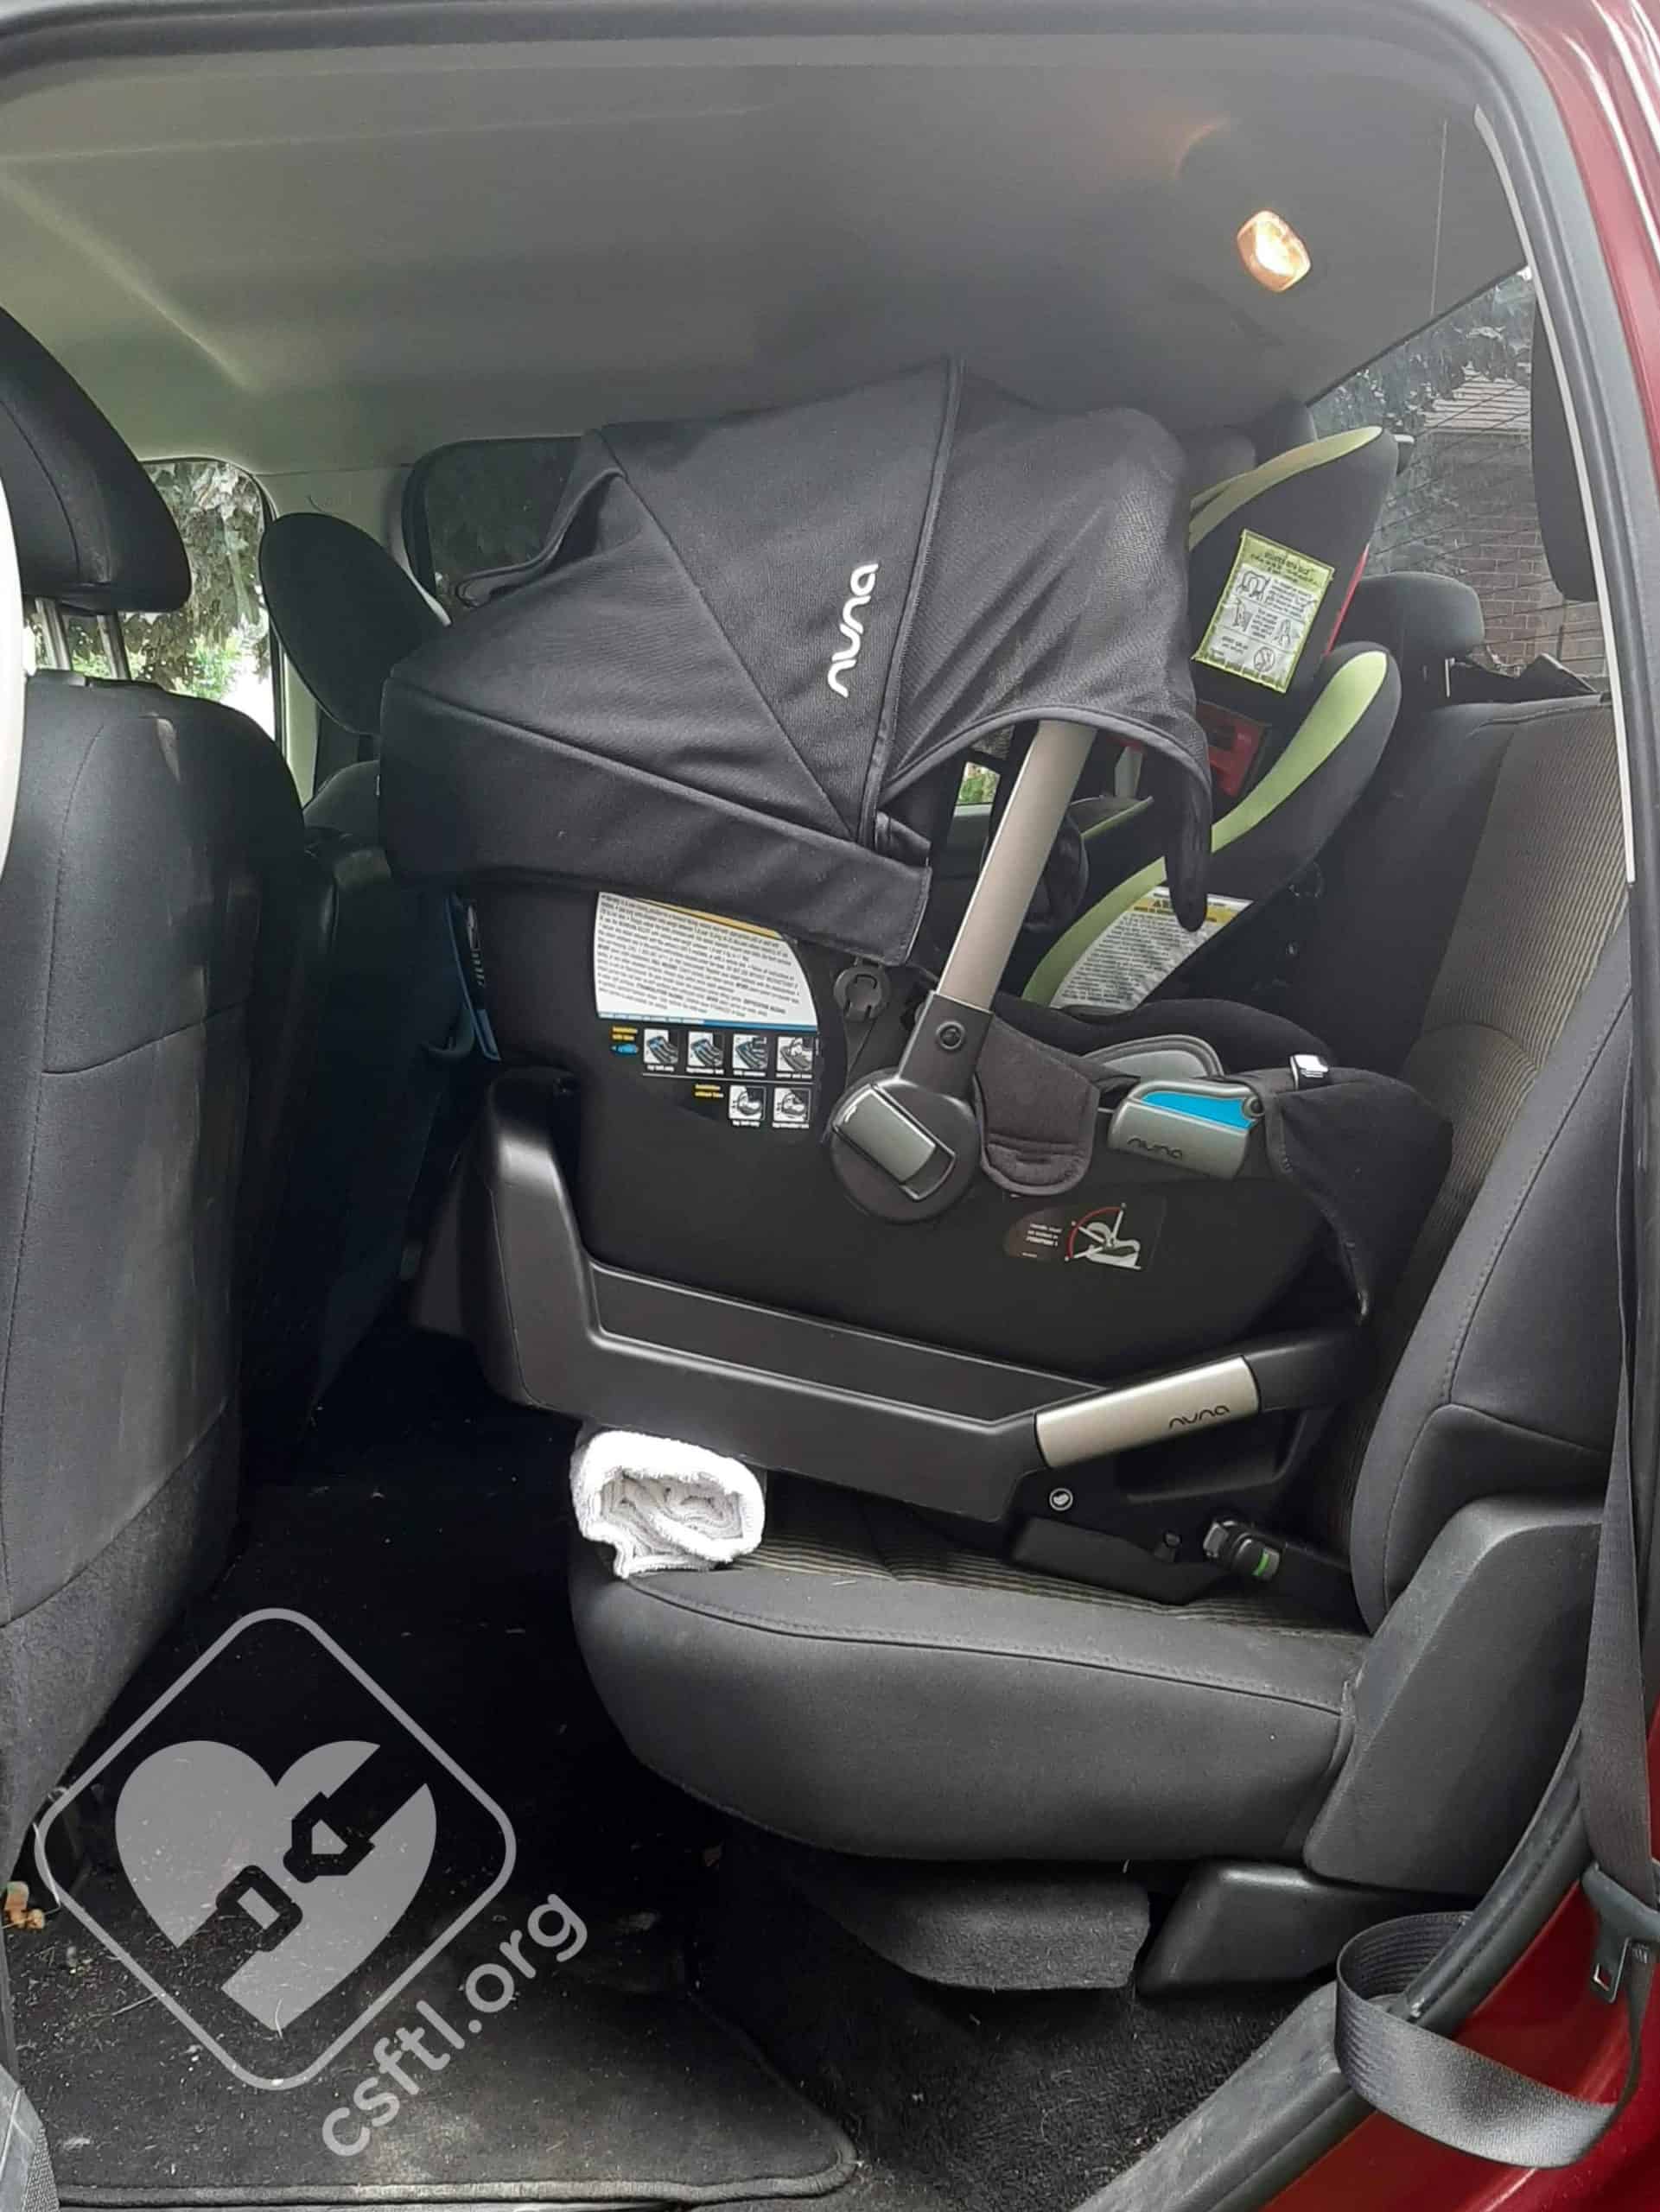
Installation with Lower Anchors/LUAS
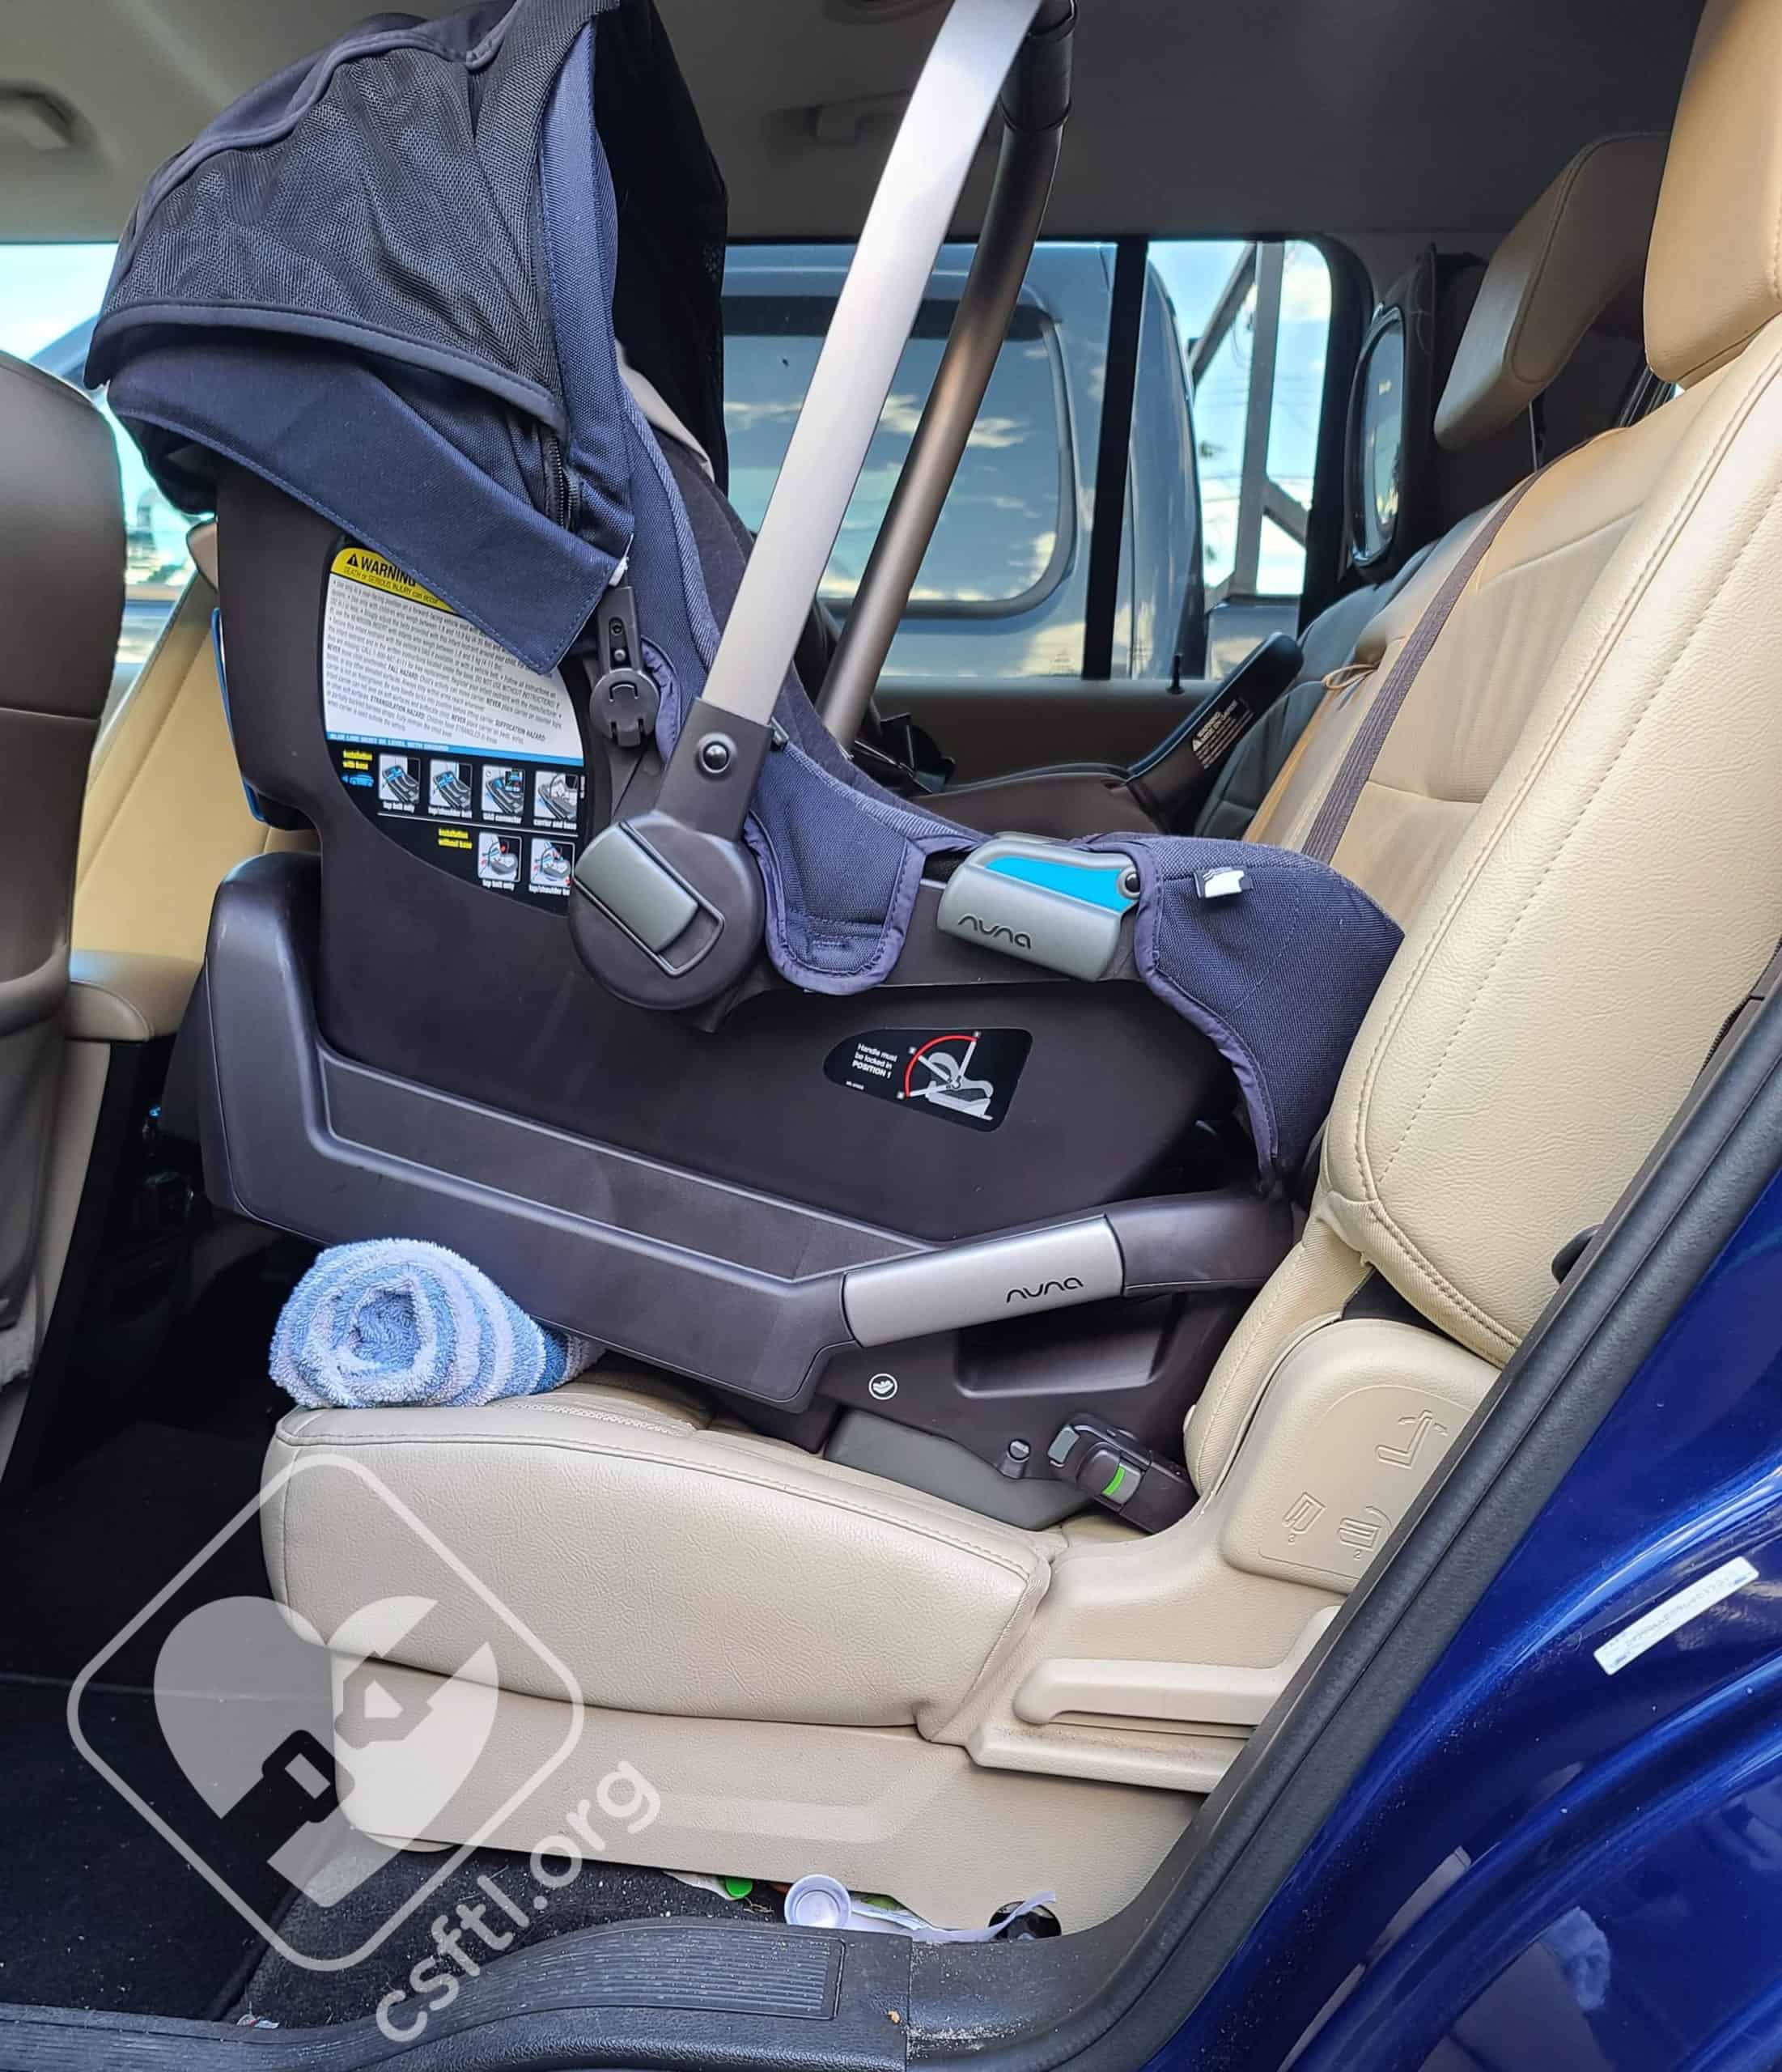
Nuna PIPA installed with rigid lower anchors
Installation with the LUAS is very simple. It’s so easy that many caregivers declare themselves car seat experts after installing a PIPA. We love that because it means they’re confident in their ability to install this seat! We do tend to follow up with a reminder to read those car seat manuals in case their child’s next car seat is a bit more challenging to use!
Set the base on the vehicle seat with the lockoff pointed toward the back of the vehicle seat. Rotate the rigid anchors down to the use position. They do not lock into place. Push them onto your vehicle’s lower anchors until they click. Once they are securely attached the indicator turns green, which means the anchors are properly latched. At this point all you need to do is check that the recline angle is correct and that the seat moves less than 1 inch at the belt path.
Note: the Pipa allows the use of the LUAS AND the vehicle seat belt for installation. This is a fairly unusual situation, as most car seats DO NOT allow this. Be sure to check that your vehicle does not prohibit the use of both before installing with this method.
Installation – Without the Base
Nuna PIPA installed baseless using the European routing
The baseless seat belt install uses European belt routing. In many cases, we find this type of installation very secure!
To install the seat without the base, place the carrier portion of the Pipa on the vehicle seat with the harness facing the back of the vehicle. Carefully extend the vehicle seat belt and thread the ap portion of the belt through the belt guides on the top of the carrier. This first part is like a typical baseless install.
Nuna PIPA’s European belt path
Here’s where the European routing is a little different. Carefully (because if the entire seat belt is extended, the seat belt will lock into place and start to retract back in!) route the shoulder portion of the vehicle seat belt around the back of the carrier, and under the blue belt guide. Check that the recline angle is correct (line level to the ground), and then lock the seat belt.
In many cases, the amount of vehicle seat belt required for a European routing is just about the entire seat belt. When writing this review, we found that some belts would lock while we were trying to route it around the back of the carrier and make this type of installation a bit more difficult, but once you get the hang of being extremely careful when extending the belt, it’s not as troublesome.
Nuna PIPA installed baseless with standard routing
If your vehicle seat belt does not fit all the way around the back of the carrier, the Pipa can be installed without the base using the traditional routing with the shoulder portion of the belt laying against the vehicle seat back.
Fit to Vehicle
For this review, we installed the Nuna PIPA in a variety of vehicles. We found that most vehicle seats resulted in the PIPA being over reclined requiring that rolled towel to correct the recline angle. We found using the seat belt, or both seat belt and LUAS install methods, helped make the PIPA more upright, but even with the ability to make the seat slightly more upright, most vehicles still required the rolled towel under the front edge.
2013 Ford Flex

Nuna PIPA installed in 2013 Ford Flex
Other than the over recline, we found no major issues in the 2013 Ford Flex. We could easily get a solid install with the vehicle seat belt and/or LUAS.
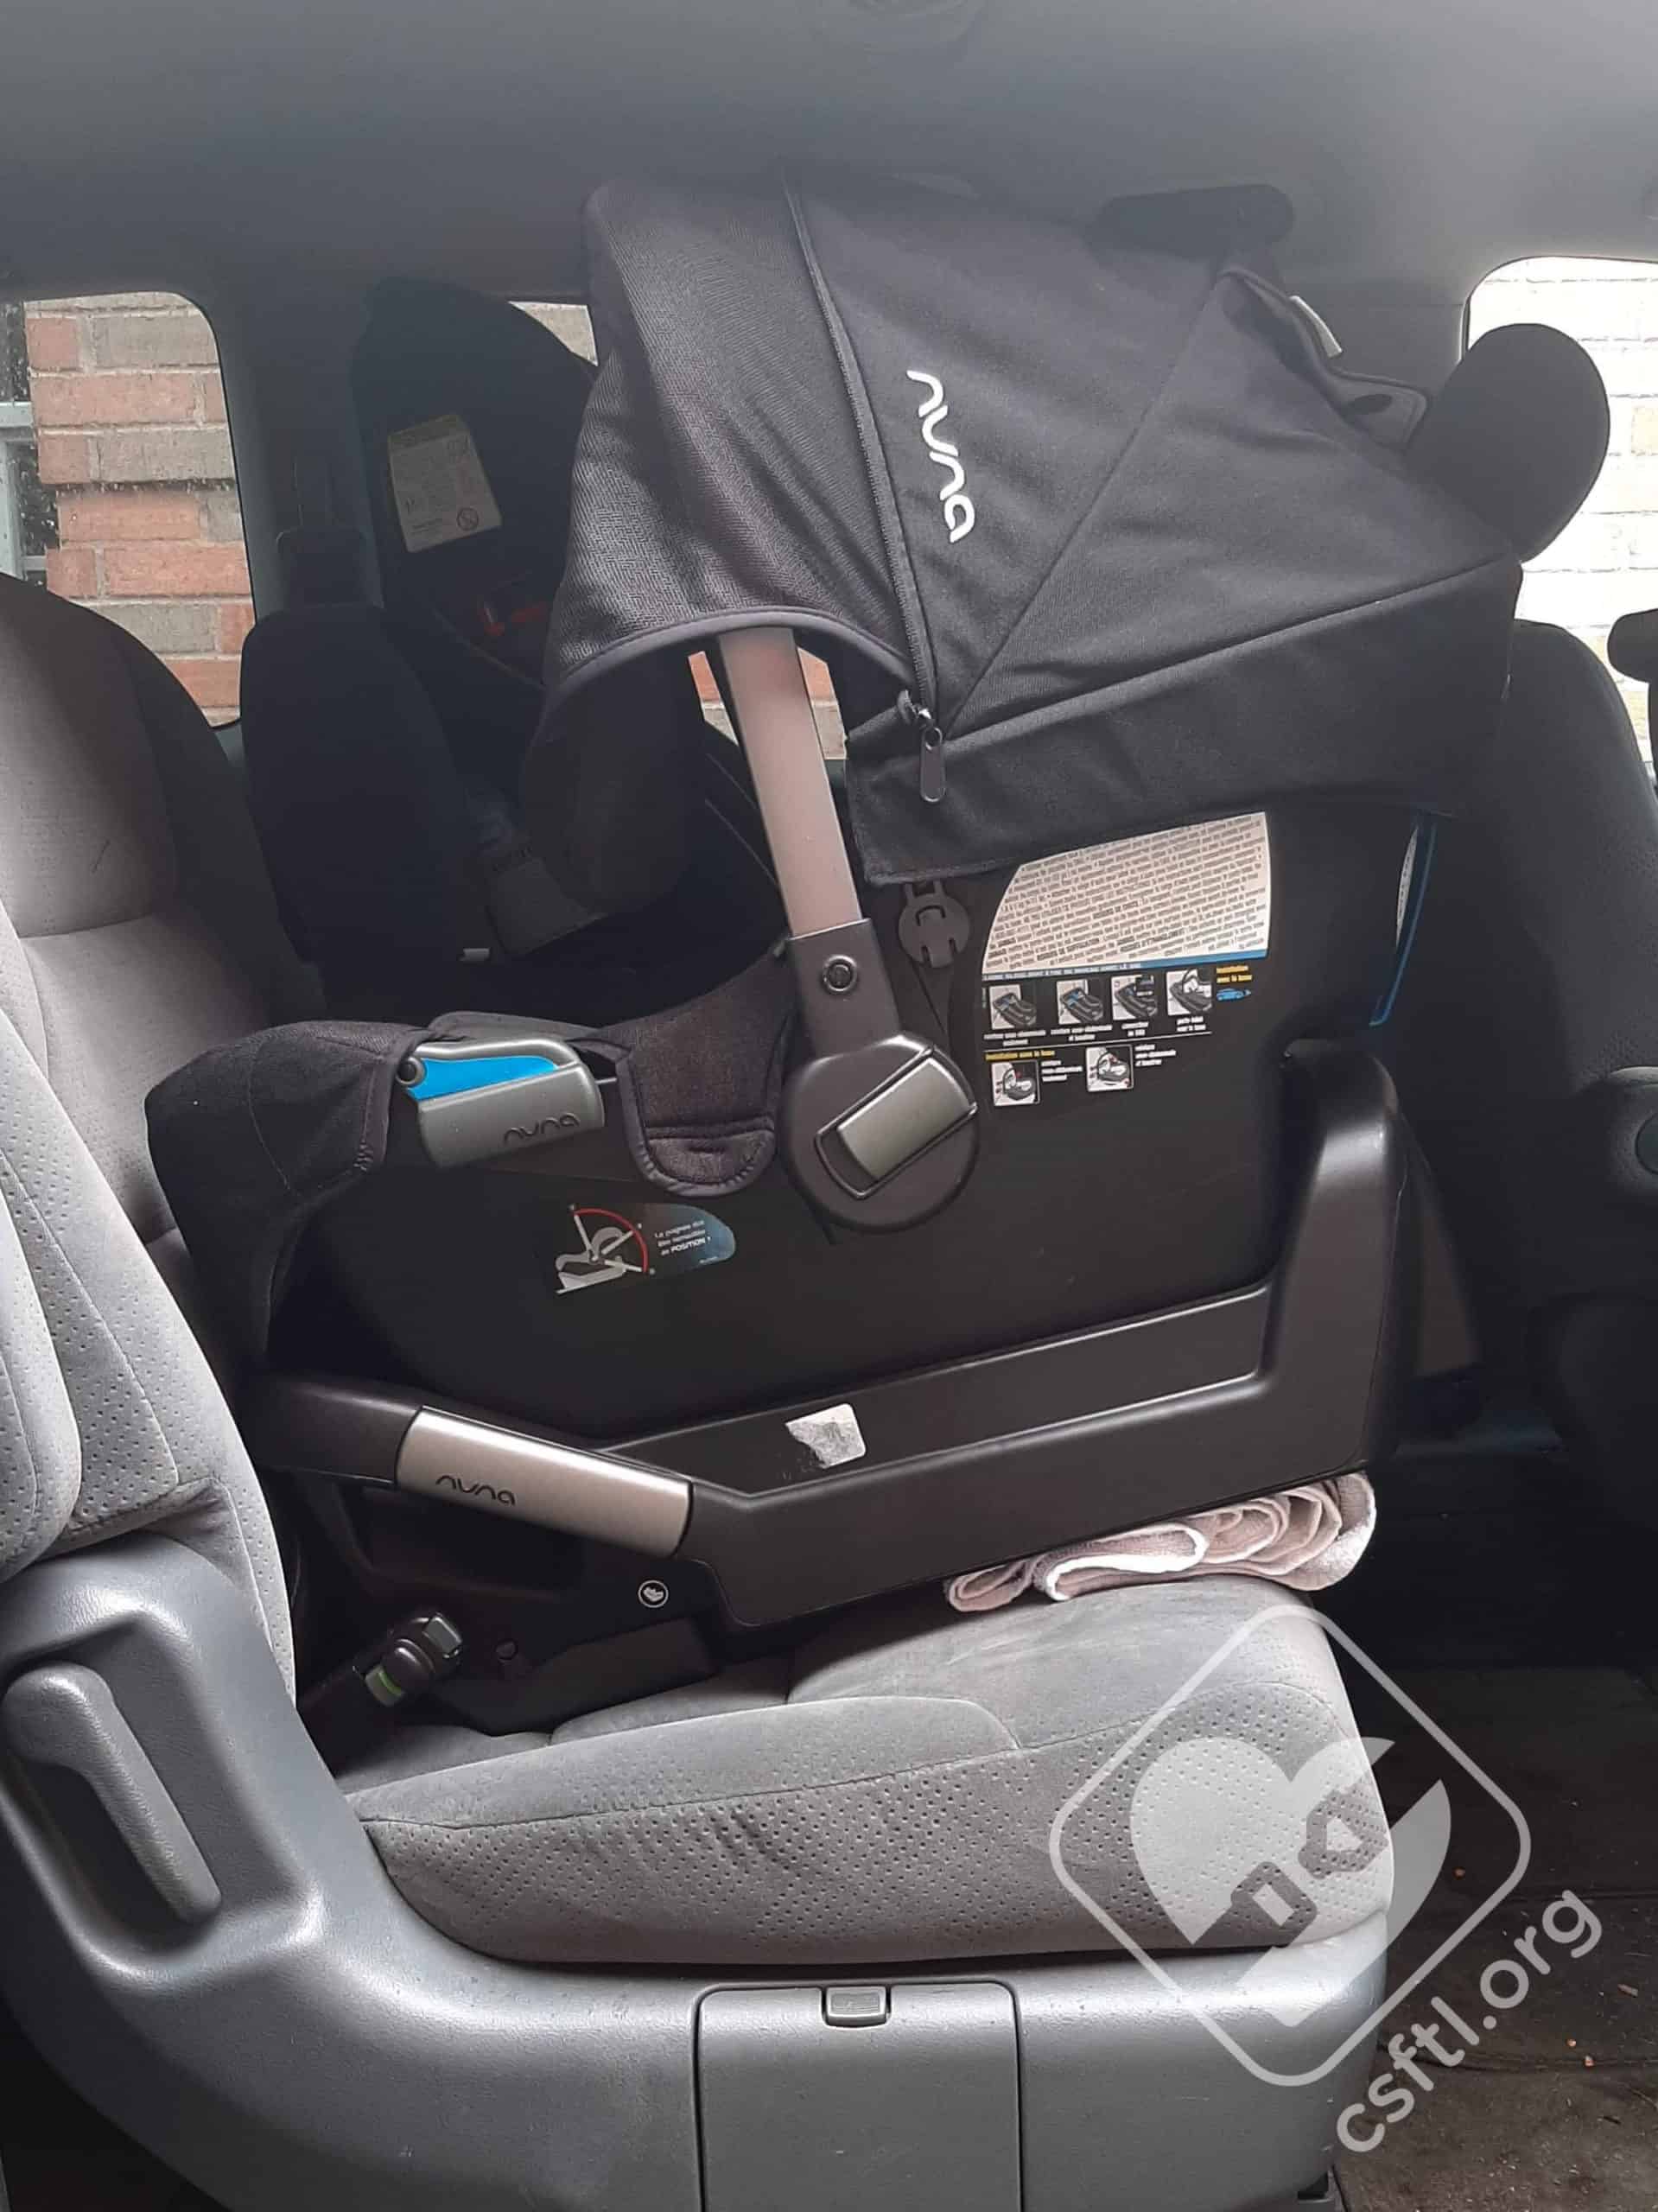
2012 Dodge Ram
Nuna PIPA in a 2012 Dodge Ram crew cab
We installed the Nuna PIPA easily in this Dodge Ram crew cab with LUAS. The seat installed very over reclined, so a thick rolled towel at the front edge of the base was required in order for the PIPA’s level line to be level to the ground.
2009 Silverado

Nuna PIPA in 2009 Chevrolet Silverado crew cab
In our 2009 Chevrolet Silverado we could not achieve a solid install with the base. The convenience loop on the seat belt stopped the PIPA from being secured in the lockoff, and the rigid UAS just slid along the anchors in the vehicle.
2007 Honda Odyssey
Nuna PIPA in a 2007 Honda Odyssey
We also tried the LUAS in this 2007 Honda Odyssey’s 2nd row captain’s chair. This vehicle needed the least help with the PIPA’s over recline – we had to loosen the rolled towel multiple times (to reduce the height of the towel) until we found the “sweet spot” where the PIPA’s level line was level to the ground. A small kitchen towel would likely have done the trick more easily in this vehicle.
Fit to Child
Newborn Doll
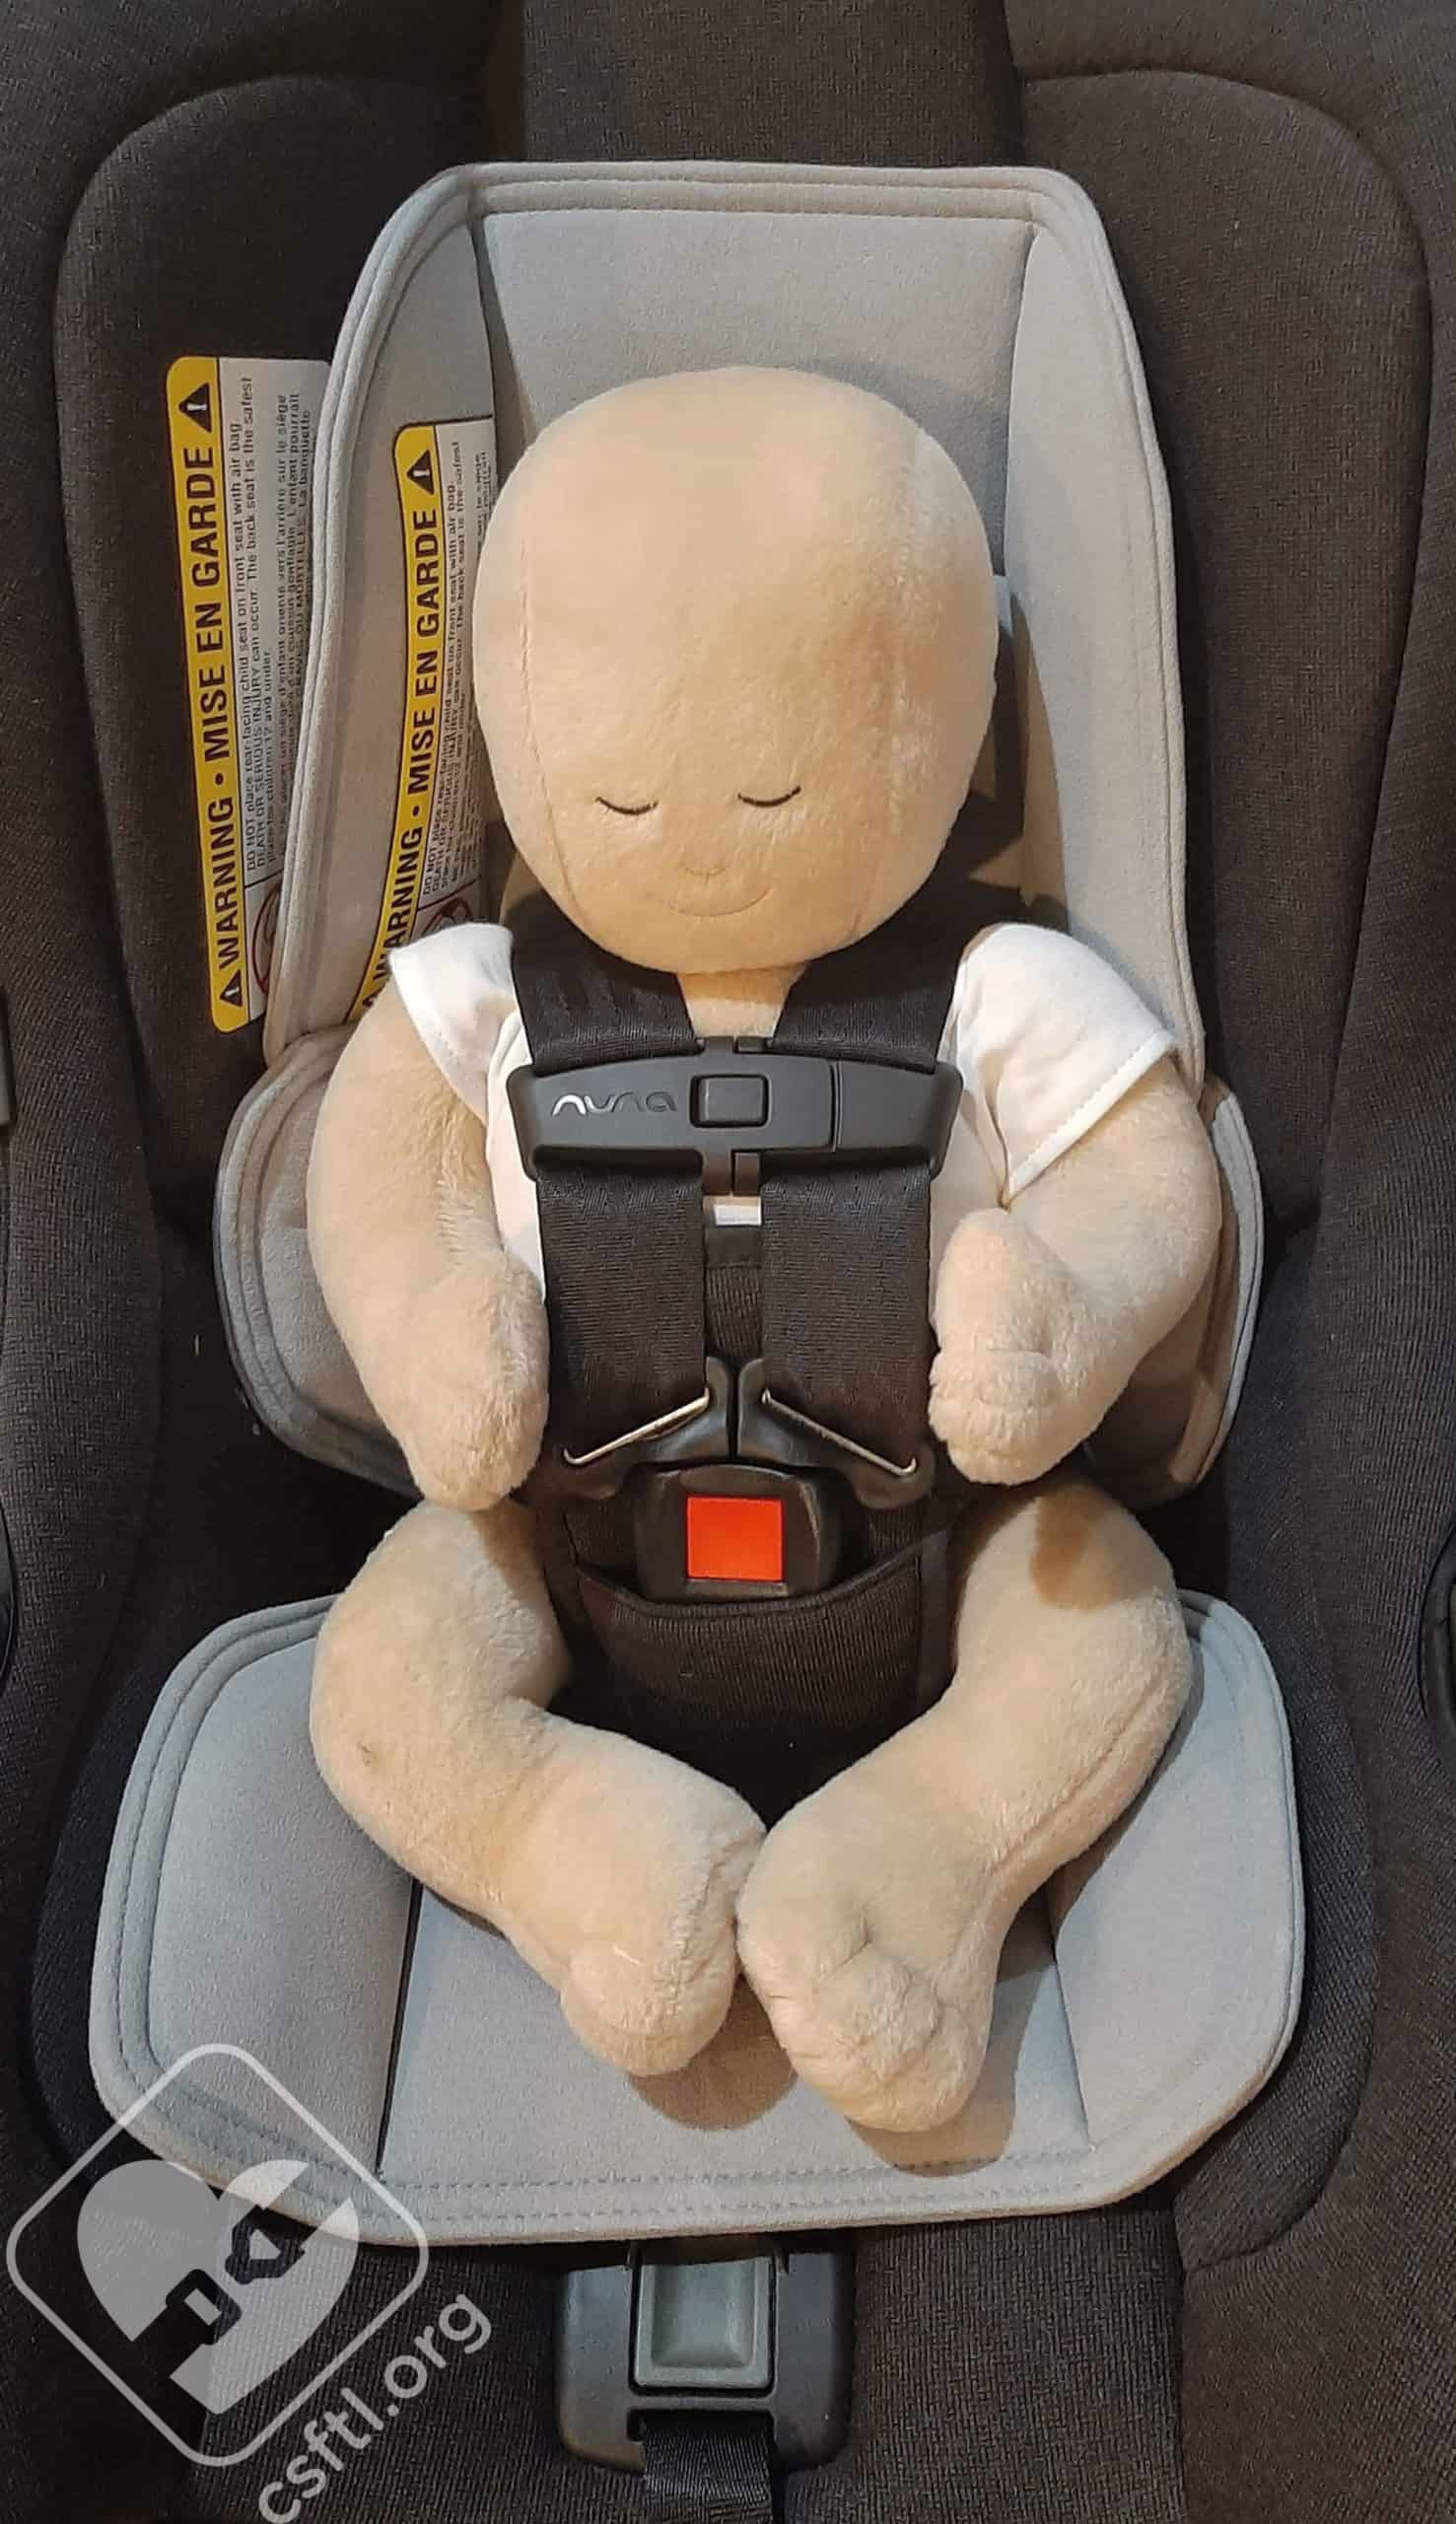
Newborn Huggable Images doll in the Nuna PIPA
This newborn Huggable Images doll is 17 inches long and weighs 7 pounds. We found that the low birth weight pillow was unnecessary so we opted not to use it. As you can see, the doll fits in the PIPA nicely – the harness passes the pinch test and is below the shoulders. We have removed the shoulder pads to show the harness position but have left the crotch buckle pad and infant insert in the seat.
3 Months Old
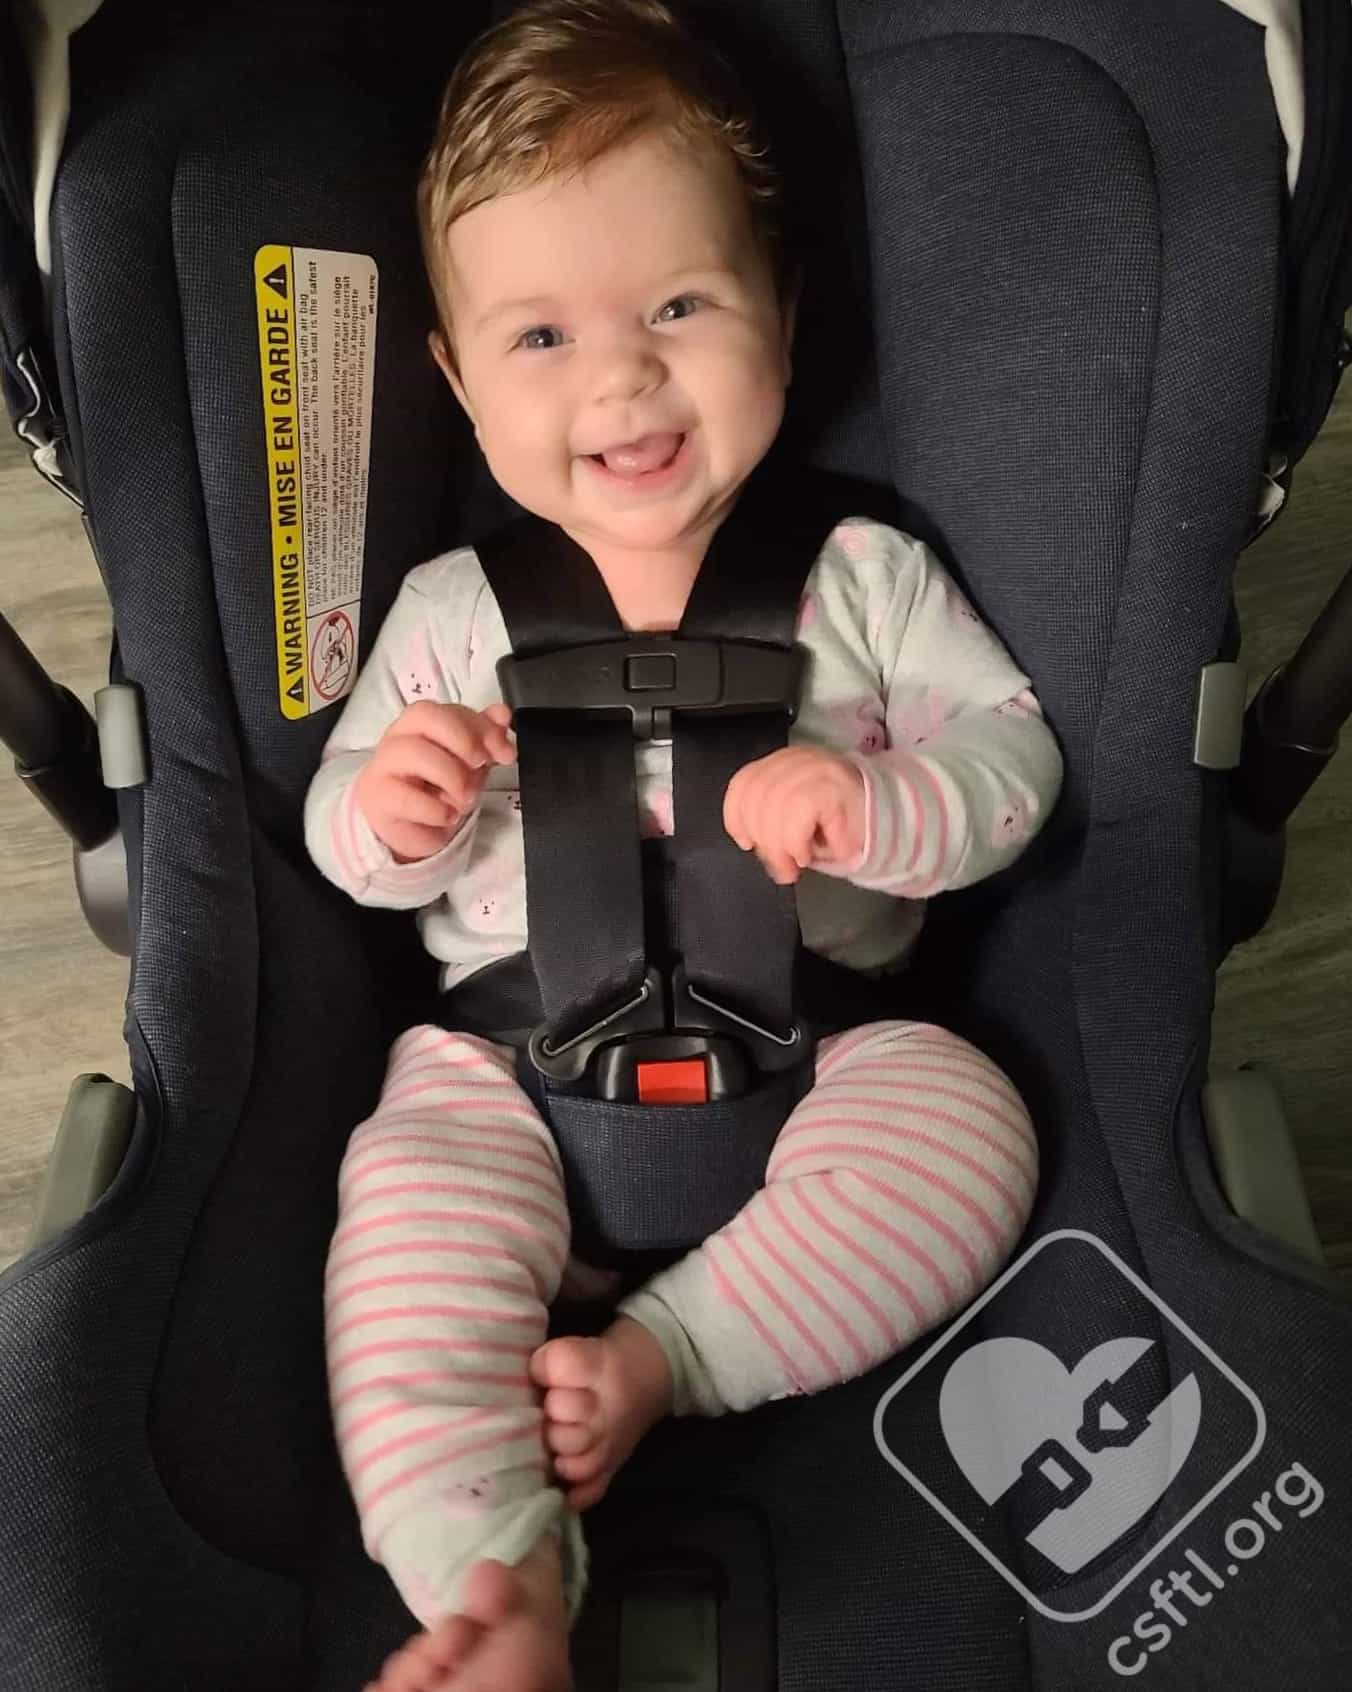
3 months old, 15 pounds and 25.5 inches tall (and all smiles) in the Nuna PIPA
This model is only 3 months old, but she’s quite large, at 25.5 inches long and 15 pounds. She is comfortable in the Nuna PIPA, and has a bit of room for growth. She appears to be sitting quite upright when the seat is installed at the correct recline (with the recline angle indicator level to the ground) but thankfully she has good head control and can tolerate the more upright angle of the PIPA. We found the canopy would get stuck on the handle easily and because of this very rarely moved the handle out of the carry position. When carrying the seat we found there is often a loud “clunk” we can’t reliably determine where the noise is coming from, but it is loud enough to wake the baby regularly.
5 Months Old
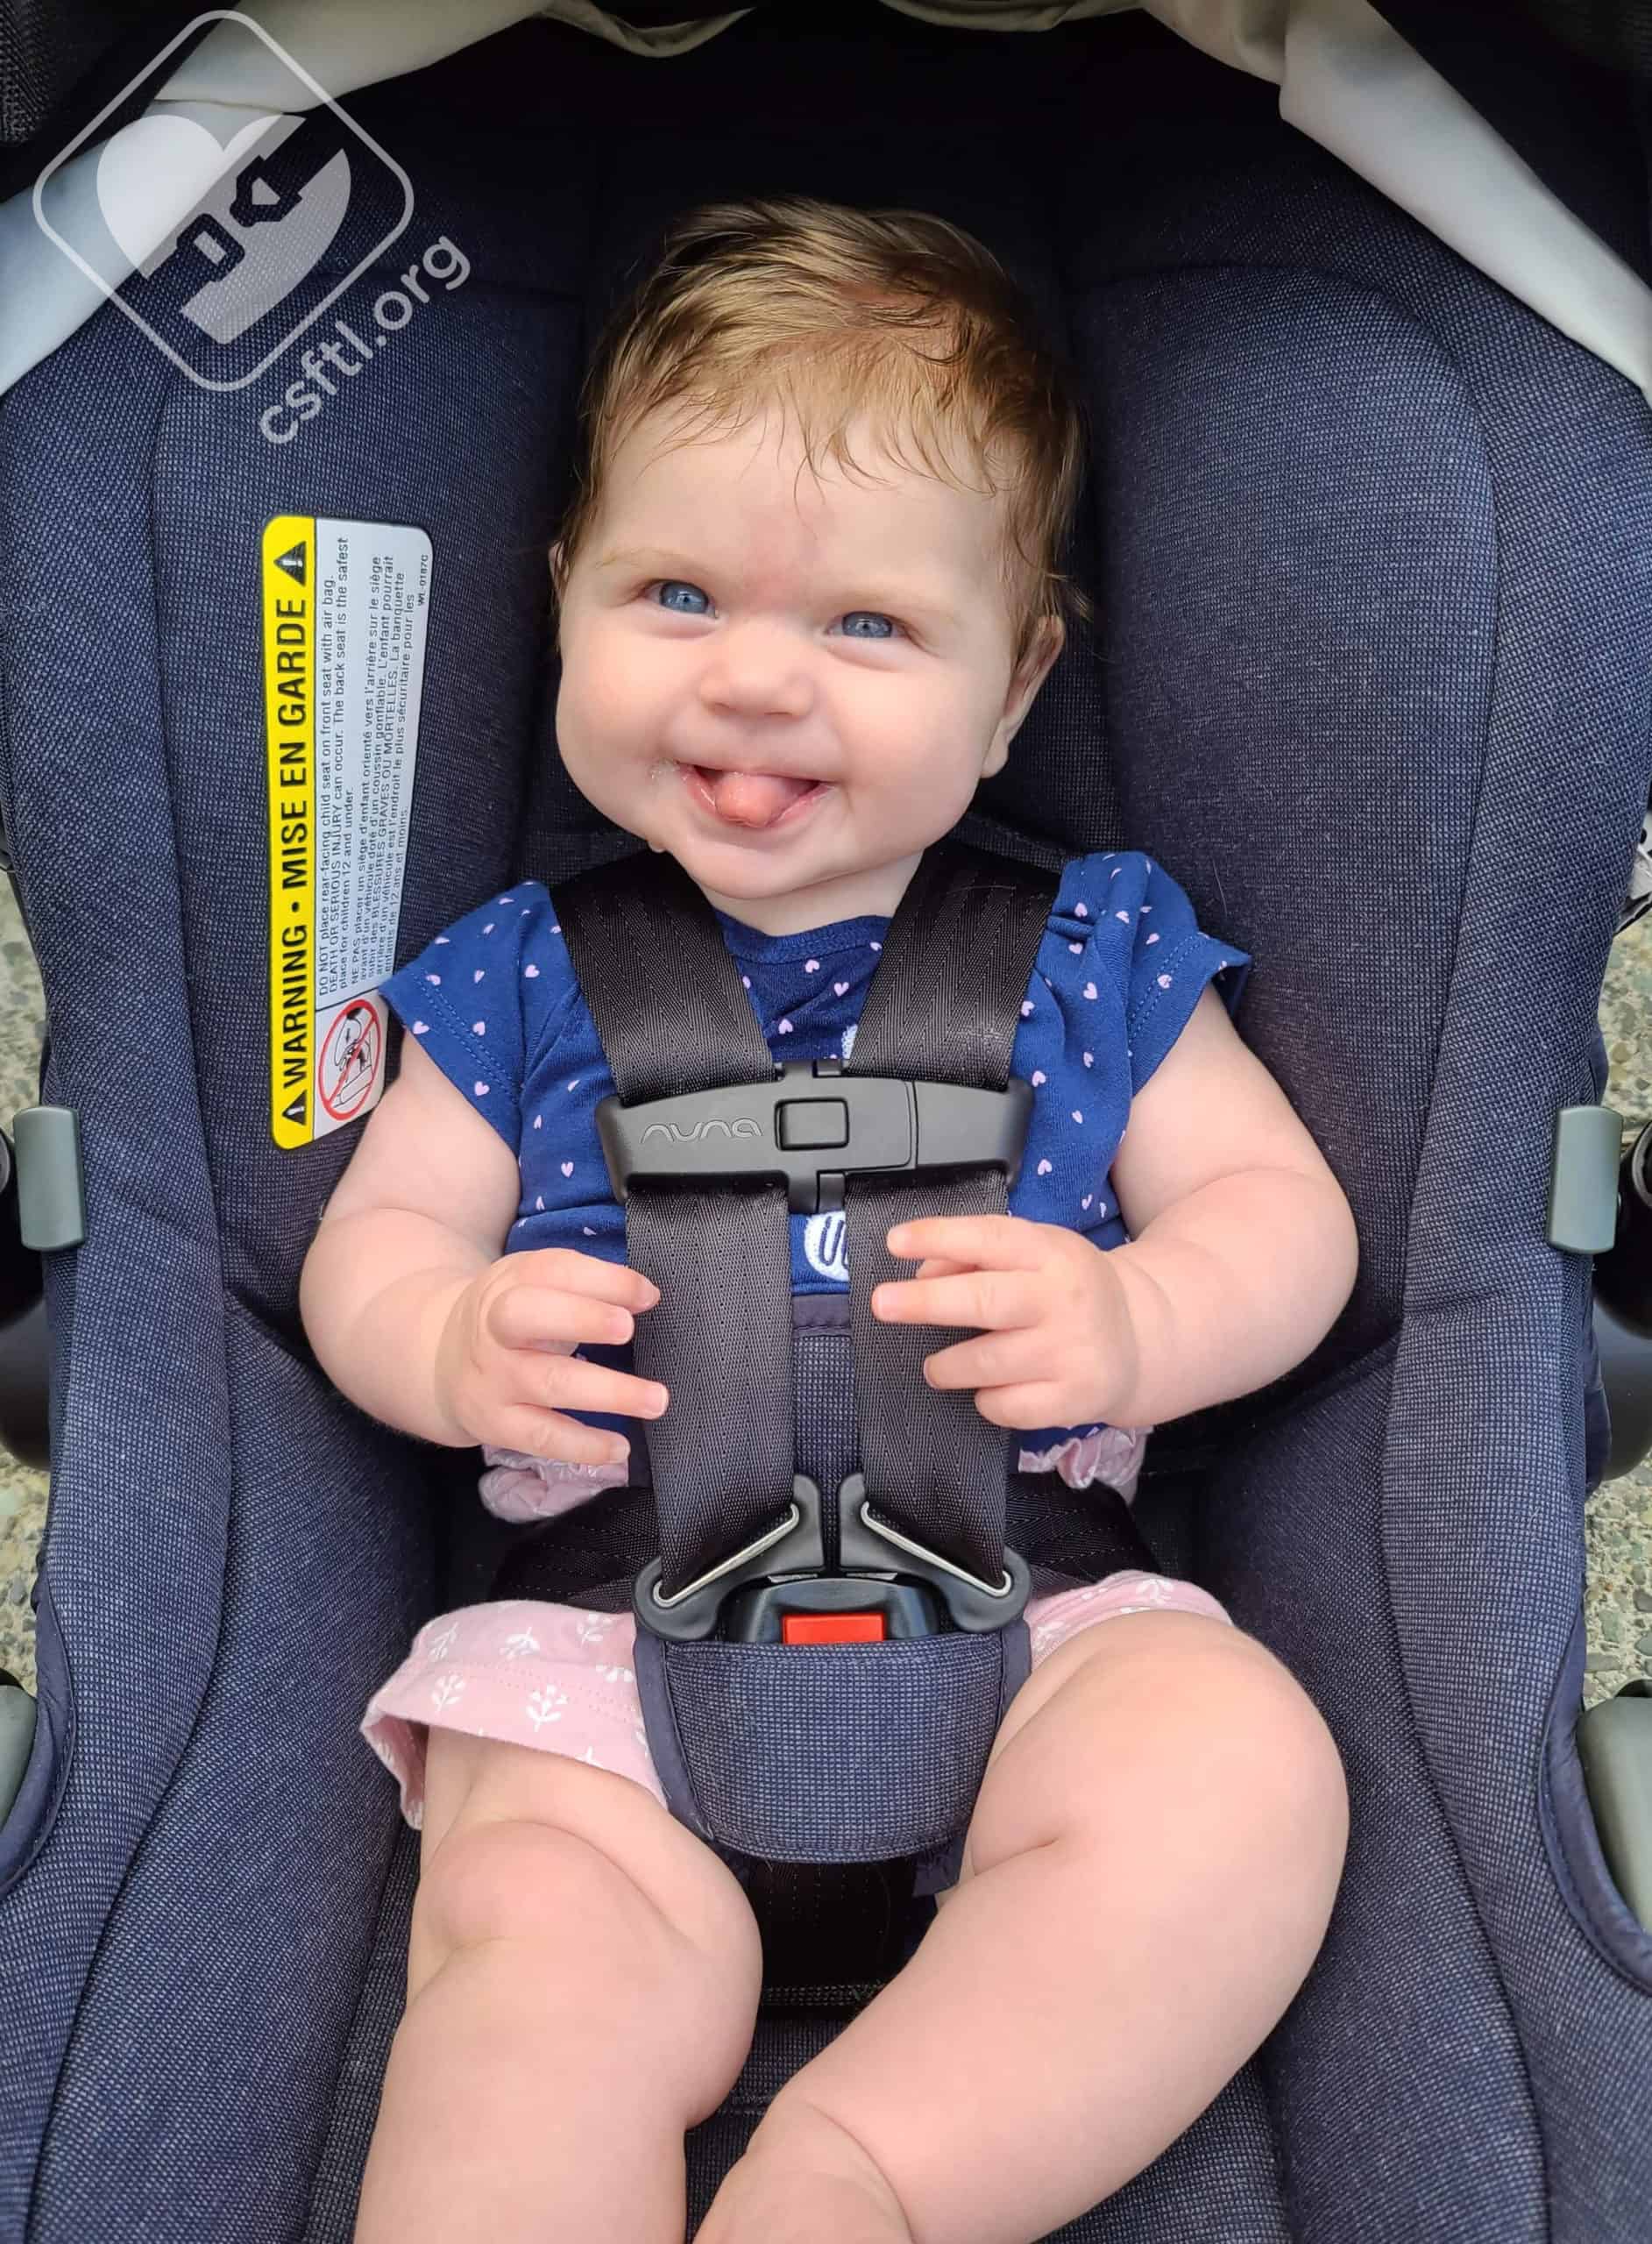
5 months, 17 pounds and 27 inches in the Nuna PIPA
Our 3 month old model has grown a bit! She is now 5 months old, weighs 17 pounds, and is 27 inches tall, she still fits comfortably in the PIPA and rides happily in it. She was too tall to use the infant insert the entire time we used the PIPA, but she is a tall baby who carries most of her height in her torso. We expect average-sized babies could use the insert until they’re somewhere around 5 months old. Your mileage may vary.
6 Months Old
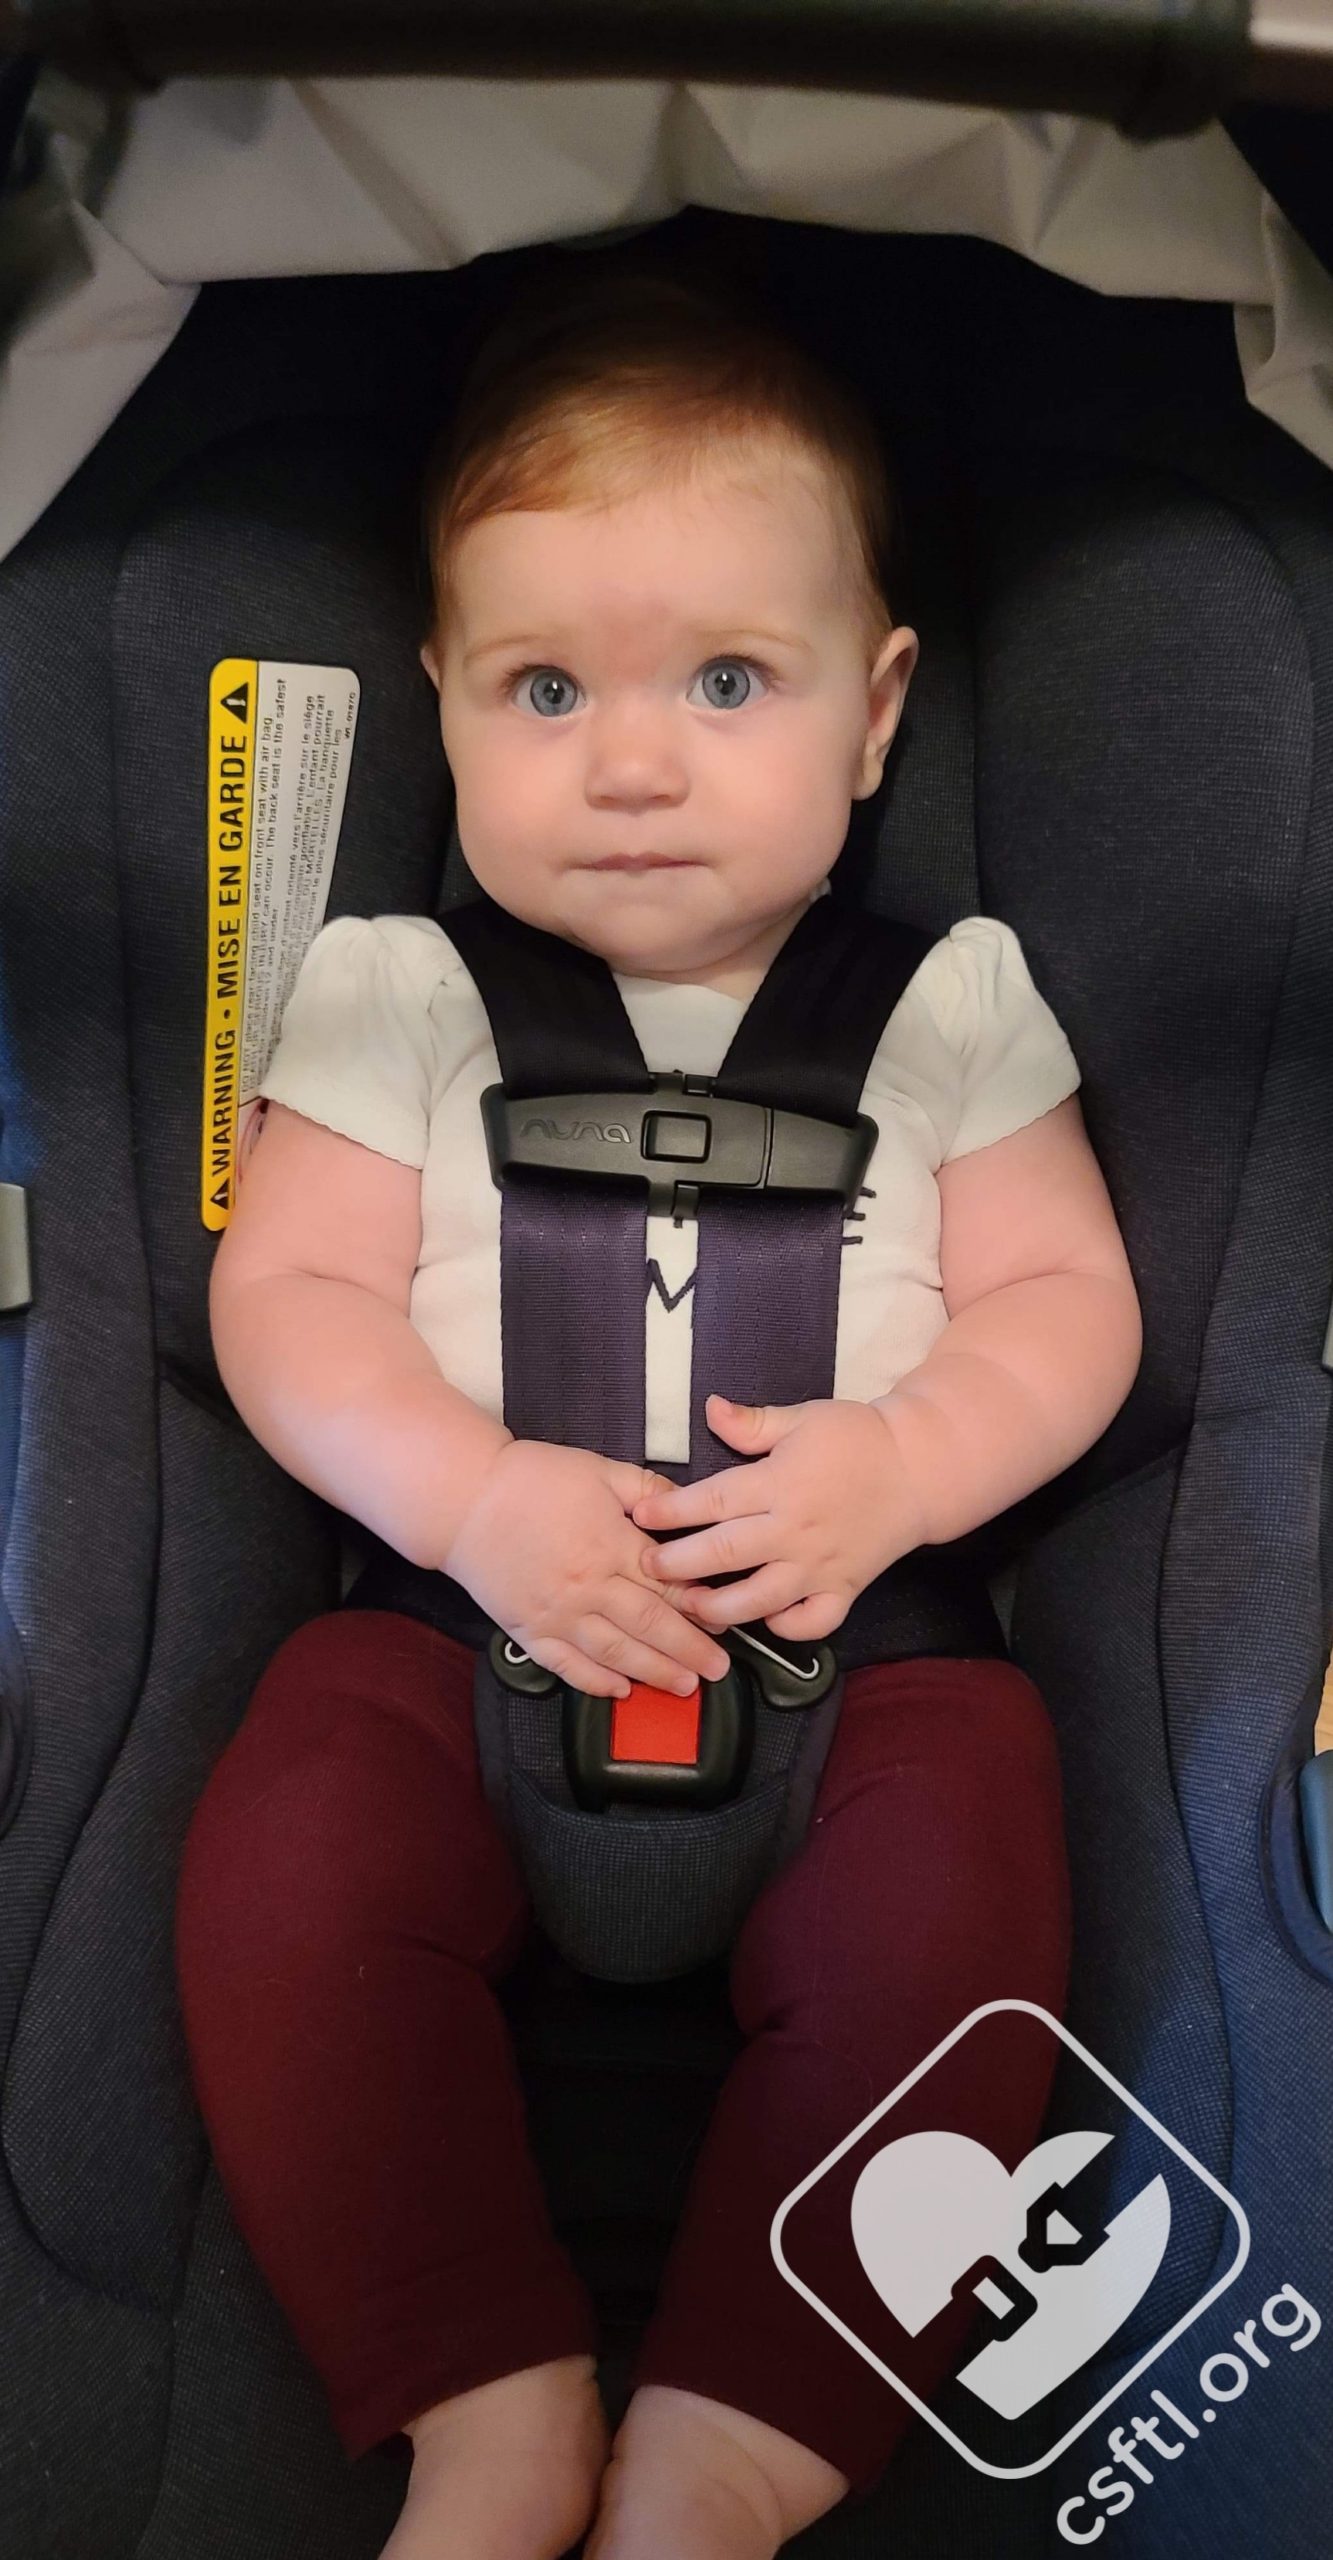
6 months old, 19.6 pounds and 27 inches in the Nuna PIPA
She grew again! Our model is now 6 months old, 19.6 pounds, and still hovering around 27 inches tall. She fits in the seat well, but the seat is starting to get a big snug width-wise.
She is also creeping closer to the top of the shell, we expect her to outgrow the seat by the “the seat is outgrown when the child’s head is within 1 inch of the top of the seat’s shell” rule in the next few weeks.
Now that she weighs nearly 20 pounds, we are finding it harder and more uncomfortable to carry her around in the seat. Leaving the PIPA installed in the vehicle and just removing the child from the seat is a totally fine option when the kiddo gets this heavy.
Important Information – Where to Find

Manufacturing and Expiry dates
Manufacture Date and Expiration: We were very happy to easily locate the manufacturing and expiration dates on the label on the bottom of the carrier, just under the harness splitter plate! The diagram of how to attach the straps to the splitter plate is a nice bonus for this area of the seat since it’s exactly where caregivers would look when it’s time to move the harness to the next set of slots..

FAA sticker
Airline approval: In Canada, the National Safety Mark shows that the seat is approved for use on an airplane. The PIPA has an additional label stating it is approved for aircraft use on the bottom of the carrier.
Nuna PIPA National Safety Mark
National Safety Mark: This label is located on the back of the carrier, next to the European belt guide routing.

Nuna PIPA manual storage position on underside of base
Manual Storage: The manual is stored on the underside of the PIPA base.
Overall Thoughts
The Canadian version of the Nuna PIPA has a few differences from the version sold in the United States, some of which impact the usability and fit. The Canadian PIPA does not have the load leg that’s included in the United States. This change does not make a large impact on usability but is a bit disappointing for Canadian families who may desire a load leg.
The single line recline angle indicator compared to the bubble recline range means that the Canadian PIPA installs at a very upright angle – which is not ideal for young babies who need more of a pronouced recline to support their head and neck. Adding a rolled towel under the front of the base is an unusual fix that’s unique to this seat. We found the towel would compress over time and start to recline the seat, so it’s a good idea to check regularly to ensure that the line is still level to the ground.
For older babies who have head control it is a nice, plush seat, with a generally easy install. The dream drape is a really nice feature (especially amid a pandemic) – the ability to almost completely cover the baby when out and about is great for keeping out the sun, wind, and germs! The fit to child is excellent, it fits small babies well both with and without the low birth weight cushion. The tall shell height should accommodate larger babies, as our 98th percentile 5 month old shows.
While the Canadian version of the PIPA isn’t a seat we’ll be recommending for newborns, it’s a solid option for babies with good head control and for caregivers with a larger budget who are looking for an easy to use seat.