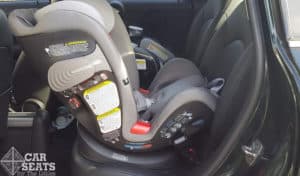
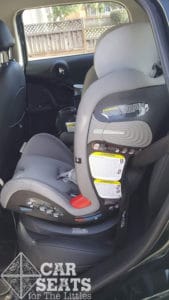
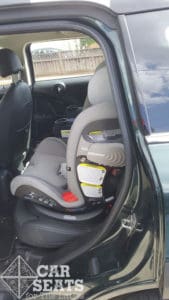
Cybex introduced the Sirona M convertible car seat to the market late last year. They quickly followed up that release with the Eternis. This multimode car seat takes the features of the Sirona and adds a booster mode.
CSFTL Quick Stats
- Rear facing weight range: 5-50 pounds
- Rear facing height range: 17-48 inches tall or until the child’s head is within 1 inch of the top of the headrest or backrest, whichever is higher.
- Forward facing height range: 28-49 inches tall
- Forward facing weight range: 22-65 pounds
- Booster mode weight range: 40-110 pounds
- Booster range height range: 44-57 inches tall
- Lower anchor weight limit: 40 pounds
- Seat weight: 25 pounds
Measurements
- Width at widest point: 19 inches
- 2 crotch buckle positions: 4 and 5.5 inches from the back of the seat pan
- Seat pan depth: 13 inches
- Lowest harness height: 8 inches without padding, 7 inches with padding
- Highest harness height: 17 inches
- Highest shoulder belt guide position: 18 inches
Recline Positions
- Rear facing: Recline positions 1,2, 3, or 4
- Forward facing: Recline positions 5 or 6
- Booster mode: Recline position 6 only
Unique Features
L.S.P.
The Linear Side Impact Protection extends from the side of the seat that’s closest to the vehicle door.
SensorSafe
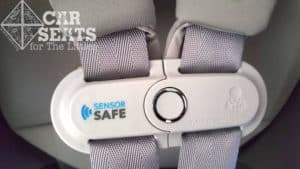
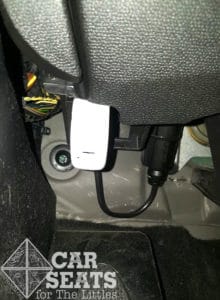
The Eternis S includes the SensorSafe system, which includes a special chest clip and a receiver that plugs into the vehicle’s OBD port. This system also works with an app that caregivers can download to their phones. The SensorSafe system still provides the critical alerts — child is left in the vehicle and the chest clip is undone — via the receiver in the vehicle and the Eternis’ chest clip.
Whether families are using the app or just the receiver+chest clip, all of this combines to do one important thing: remind caregivers when a child is left inside the car. Since preventing hot car deaths is never far from our minds, we welcome this system.
Here’s how it works: plug the receiver into your vehicle’s OBD port. Then, download the goodbaby SensorSafe app to your phone. This app does a number of things, but the most important thing it does is alert you, then alert a backup caregiver if your child is left in the vehicle.
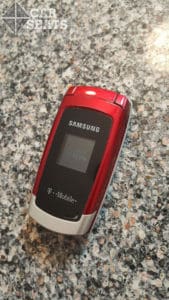
The emergency contacts feature requires those emergency contacts to also have the app. We don’t find this ideal — relying on other people to have the same app installed could be a bit of a burden. In my case, I’d be likely to have my parents be that emergency caregiver and their flip phone (no, I am not kidding) does not install apps. I’d prefer to see these secondary contacts notified in some other way that’s more accessible.
The system checks to see if the chest clip is connected, there’s a battery embedded in the clip itself. The manual warns to not leave the chest clip connected when the child isn’t in the car because it will wear the battery out, though it does shut itself off after 12 hours.
I tested the system by installing the adapter into my OBD port, then using the app to connect both my car and the Eternis S. I was also prompted to add an additional contact to our little family.
On my first trip with SensorSafe fully engaged on my phone and via the adapter in my car, a very pleasant, yet striking set of tones played when I turned off the car. That was my initial reminder that the chest clip was connected, it’s pretty hard to ignore. I purposefully left the chest clip connected to see what would happen. Within seconds, I got a notification on my phone that a child was left in the car. That notification included the location of my car and asked if I wanted to alert my alternate caregiver or call emergency services.
We’re pretty low-tech around here when it comes to preventing hot car deaths. Our mantra tends to be look before you lock, lock before you leave. But we also encourage caregivers to implement any system that works for them. If a caregiver chose the Eternis S solely because the SensorSafe system gives them confidence that they’ll avoid such a tragedy, we’re all for it.
Canadian Users
The Cybex Eternis S requires the use of an anti-rebound bar when the seat is installed rear facing in Canada.
Headrest Adjustment
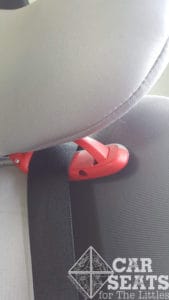
Adjusting the headrest can be a two step process. Unlike most seats with a no rethread harness, the Eternis’ headrest adjusts via a lever that’s mounted below the headrest — behind where the child’s neck would be if they were sitting in the seat. Reach into the slit in the cover with the height adjust label, then squeeze the handle and move the headrest up or down until it locks into place.
Reclining Headrest
The headrest reclines independently of the height adjustment. The handle for this adjustment is in the spot where most other no rethread harnesses would adjust so my first instinct was to adjust the headrest’s height via this handle. Which does not work. Here are the guidelines for the headrest recline positions:
- Height adjustable positions 1-3: no recline available
- Height adjustable positions 4: recline 1 and 2 available
- Height adjustable positions 5-12: recline 1,2, and 3 available
Installation: Rear Facing
Lower Anchors
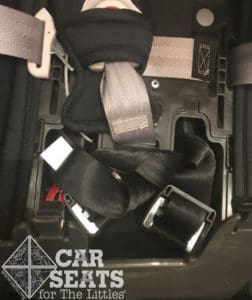
The seat ships with the lower anchors tucked away in their storage space underneath the seat pan. While this means they’re tucked away in a very tidy fashion, that makes them fairly tricky to locate and unearth before starting to install the seat. Once they’re unearthed, thread them through the rear facing belt path. When threaded correctly, they’ll be sticking out of the openings nearest to the edge of the seat pan.
Hopefully, newer versions of this seat will ship with the lower anchors threaded through the rear facing belt path so it’s ready for a rear facing installation with lower anchors.
The adjusters on the lower anchor webbing are fairly large. We found that this large piece can prevent a secure installation in vehicles with prominent anchors at some of the recline settings.
I had some lower anchor guides handy (note: these did NOT ship with the seat so I would suggest that families who may need these guides call Cybex to order some of their guides) so I tried to install the seat with the guides set up. This made things a lot worse.
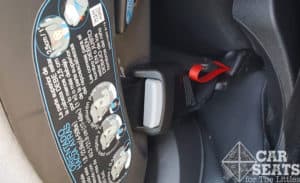
Recline Position Indicators
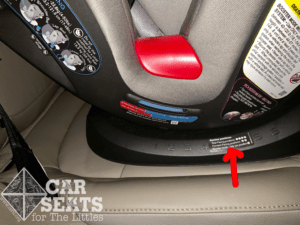
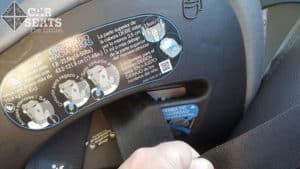
Unlike the Sirona M, the Eternis has indicators for the recline positions on the side of the seat. We’d had some struggles with the Sirona M because we couldn’t determine which recline setting the seat was on. We’d shared our struggles with Cybex and we’re so pleased that they’ve added this indicator in response. Unfortunately, the actual recline angle position is indicated by a black arrow pointing to a black shell so it’s almost impossible to tell which recline position the seat is in when it’s installed.
Vehicle Seat Belt
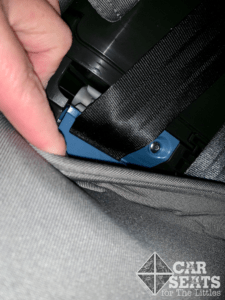
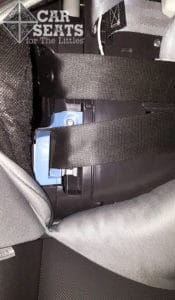
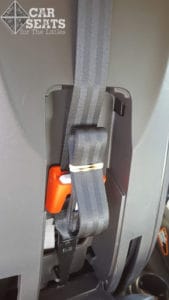
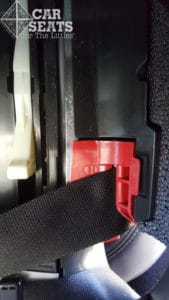
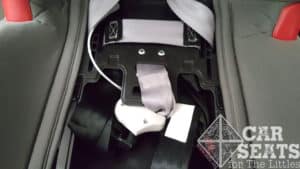
The Eternis S includes lockoffs for rear facing and forward facing. They’re kind of buried in the belt path and difficult to find easily. I went through kind of a lot to get these photos for you!
We spent an embarrassing amount of time figuring out the trick to the lockoffs. For science and for you. Here’s the trick: these lockoffs are one way lockoffs. Unlike other lockoffs, these have a grippy edge that runs in one direction. Instead of getting the vehicle seat belt tightly secured in the lockoff BEFORE closing the lockoff, the Eternis’ lockoffs need to start off loose on the inside of the seat — the more slack, the better. That’s contrary to almost every other lockoff I know so the learning curve was a bit steep because I was basically working backwards against myself as I installed the seat the first few times.
For both rear and forward facing installations, here’s what worked. Unsnap as much of the cover as possible — for rear facing, I found that the portion of the cover over the seat pan totally got in the way so I ended up tucking the end of it off to the side of the seat so it was out of the way while I worked. Thread the vehicle seat belt through the belt path, leaving a LOT of slack in the shoulder portion of the belt. Angle the vehicle seat belt to 45 degrees, then work it into the lockoff using a motion like flossing your teeth.
I found that the only way to get the seat belt into that lockoff was to pull up on the shoulder portion while doing the floss motion (but not the floss dance, though mine is quite impressive for a Mom). That’s contrary to the manual, which says to pull the seat belt down while flossing the belt into the lockoff. But by pulling up and flossing, I was eventually able to work the belt all the way into the lockoff.
Once the seat belt was in the lockoff, I pulled down on the shoulder portion of the seat belt from outside the seat’s shell to remove the slack while pushing on the seat pan with my other hand to compress the vehicle seat and remove even more slack. Thanks to the one way lockoff, that final motion secured the seat.
The lockoffs seem to loosen up just a bit over time so this particular challenge should grow easier as the seat is installed a few times. However, that first install is just as important as the 50th, so we’d like to make sure every caregiver who has an Eternis in their lives can install the seat correctly.
Vehicle Seat Belt Routing
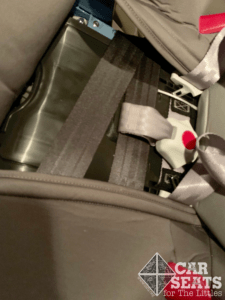
Like the Sirona, the Eternis allows the vehicle seat belt to route around the crotch buckle with the lap portion in front of the crotch buckle and the shoulder portion routed behind the crotch buckle. This can help with installations in some more recessed vehicle seats.
Fit to Child
One Week Old
Our tiny model is 1 week old. She weighs 8 pounds and is 21 inches long. The Eternis fit her very well! She was crying when we put her in and then started to fall asleep in the seat. That’s no small thing.
3 Weeks Old
This model is 3 weeks old. He weighs 9 pounds and is 21 inches long. Unlike our other model, this little guy isn’t happy in the seat but it does fit him very well.
Eight Months Old
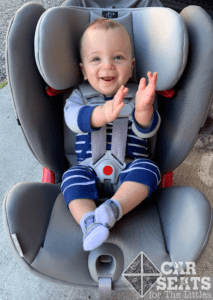
This little cutie is 8 months old. He weighs 22 pounds and is 28 inches tall. The harness provided him with a perfect fit and he was happy to be a spokesperson for the seat!
Two Years Old
Our 2 year old model has grown up helping us with reviews so we’re grateful for his help once again. He’s 2 years old, weighs 36 pounds, and is 37 inches tall. Though he was reluctant to help us out, the offer of an ice cream sundae was enough to solicit his assistance. It took a little help to get him into the seat — it has a fairly high profile when installed rear facing. Once he was in the seat, the harness fit him well, he had ample legroom, and was comfortable enough. However. the manual states that the seat is outgrown when the child’s head is within 1 inch of the top of the headrest rear facing. From this position, he’s outgrown the seat rear facing.
Forward Facing
The top tether is a crucial part of any forward facing installation. The Eternis’ top tether ships stored in a tidy pocket on the back of the seat so it could be easy for caregivers to miss. However, the top tether has an orange adjuster so it’s clear that it’s an important thing — once the door is opened to expose it. We appreciate the orange adjuster so much but would love to see it ship in a more obvious place.
Installation: Forward Facing
Vehicle Seat Belt
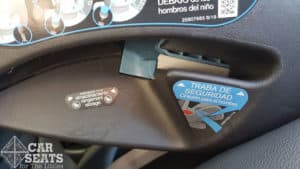
The Eternis S has lockoffs in both the rear and forward facing positions. I found the forward facing lockoff to be even more difficult to find and use than the rear facing ones. They’re sort of buried toward the top of the belt path, curving into the inside of the seat.
Eventually, I was able to get a secure installation by leaving a LOT of slack in the shoulder portion of the vehicle seat belt, then pulling the shoulder portion of the belt UP through the lockoff at a 45 degree angle, until the metal part of the forward facing lockoff engaged then, sliding the shoulder portion of the seat belt up through the lockoff like I was flossing my teeth until it was all the way in the lockoff.
The final step was to pull the shoulder portion of the vehicle seat belt snug by pulling up from outside of the seat’s shell.
Lower Anchors
Moving the lower anchors from the rear facing belt path to the forward facing belt path was fairly straightforward. Just unsnap the cover from the inside of the seat pan to expose the belt path. Pull the lower anchor connectors into the seat pan through the openings for the rear facing belt path, then move them up to the forward facing belt path. Once the lower anchor connectors are in the correct belt path, set the Eternis S on the vehicle seat with the harness facing the front of the vehicle. Attach the lower anchor connectors to the lower anchors in the vehicle, starting with the anchor that’s furthest away from you. Then, stand in front of the seat and push the back of the seat pan straight back into the vehicle seat back while pulling on each of the lower anchor connectors.
While the lower anchors are easily accessible from inside the belt path, I found that installing the seat was actually easier if I pulled the adjuster straight up from outside of the seat’s shell. This is a pretty rare thing, but it seemed to be the trick for installing the Eternis!
Lower Anchor Connector Adjuster Length
Installing the Eternis S with the lower anchors sounds easy enough but we had some challenges with them. The connectors are mounted fairly far away from the lower anchors. When it comes to installation, this distance placed the adjusters at the edge of the belt path in some of the vehicles we tried. In my car, a 2011 Mini Countryman with a fairly flat vehicle seat, it was almost impossible to tighten the anchors enough for a secure installation. I suspect that the Eternis would be easier to install in vehicles with a waterfall seat bight where there’s a little extra space between the belt path and the lower anchors.
Fit to Child
Four Years Old
Our four year old model weighs 38 pounds and is 40 inches tall. Unlike her brother, she remains willing to cooperate with our requests. She found the Eternis S quite comfortable and she’s got a little growing room left in the seat. Since the top harness position is 17 inches tall, it’s very possible that she’d outgrow this seat by height before she’s ready to make the switch to a booster seat.
Converting to Booster Mode
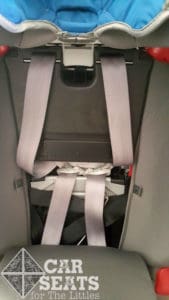
For all of the things that are kind of difficult on the Eternis, the instructions to convert it from harnessed mode to booster mode appear pretty simple. Raise the headrest all the way up to expose a storage compartment behind the seat back. Extend the harness all the way and clip both sides of the chest clip together. The instructions state that this part of the harness stores behind the seat back along with the buckle tongues. I’ve got a couple of howevers about this….However, I couldn’t figure out where that storage compartment is. Is it behind the hard plastic piece on the bottom of the headrest? How do you get the harness straps around the top of that piece? I reached out to the manufacturer for clarification and learned that the chest clip and buckle tongues all store in that area behind the plastic piece below the headrest.Since SensorSafe is activated by the chest clip being connected, I’m wondering how long the SensorSafe’s battery will last when it’s stored this way. Our friends at Cybex assured us that the chest clip will turn off after about 12 hours so this shouldn’t be an issue.
Storing the crotch buckle was the easiest part of the process. Fold the crotch buckle forward into the handy compartment on the seat pan. The crotch buckle remains attached to the seat so there are no spare parts to lose! I did find that getting the crotch buckle and the lower anchors connectors into that one compartment required a fair bit of careful folding and arranging.
Low Top Shoulder Belt Guide Height
With an 18 inch top shoulder belt guide, the Eternis is somewhat short lived in booster mode. However, the shoulder belt guide itself is quite nice and keeps the vehicle seat belt right where it belongs without any retraction issues.
Booster Mode
Fit to Child
Five Years Old
This longtime CSFTL review model is 5 years old and was happy to help with yet another review despite the heat wave going on while we were hanging out. He’s 44 inches tall and weighs 41 pounds. He found the seat comfortable and he was able to climb in without any issues. He had a bit of trouble buckling himself in — the Eternis is large enough that booster mode uses up almost all of the vehicle seat belt so it was easy to pull the seat belt all the way out and accidentally engage the locking mode. Once we figured that out, we found it easiest to offer him a little adult assistance with buckling himself in. The booster mode fits him well and he found the seat comfortable.
Important Information: Where to Find
Manual storage — the manual stores on the back of the seat’s shell, in the little cubby where the top tether stores. Just open the flap to expose the manual and the tether.
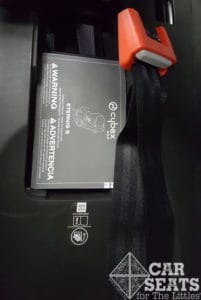
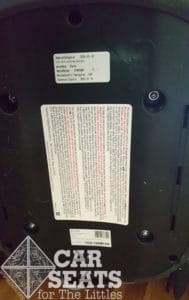
FAA Approval — the Eternis S is approved for use on aircraft when it’s in harnessed mode. The FAA Approval label is located on the bottom of the seat. Since the Eternis S weighs in at 25 pounds, we’d be pretty surprised if too many families end up using it for travel.
Date of manufacture label — the Eternis S expires 10 years after the date of manufacture. Both the manufacture date and the expiration date are on a label on the bottom of the seat.
Overall Thoughts
The Eternis S has a plush cover and offered all of our models an excellent fit, both in harness and booster mode. They all found it comfortable, so that’s a great thing. However, the struggles we had while installing the seat in all modes coupled with the short-lived forward facing harness and booster modes don’t put the Eternis at the top of our lists in any category.
