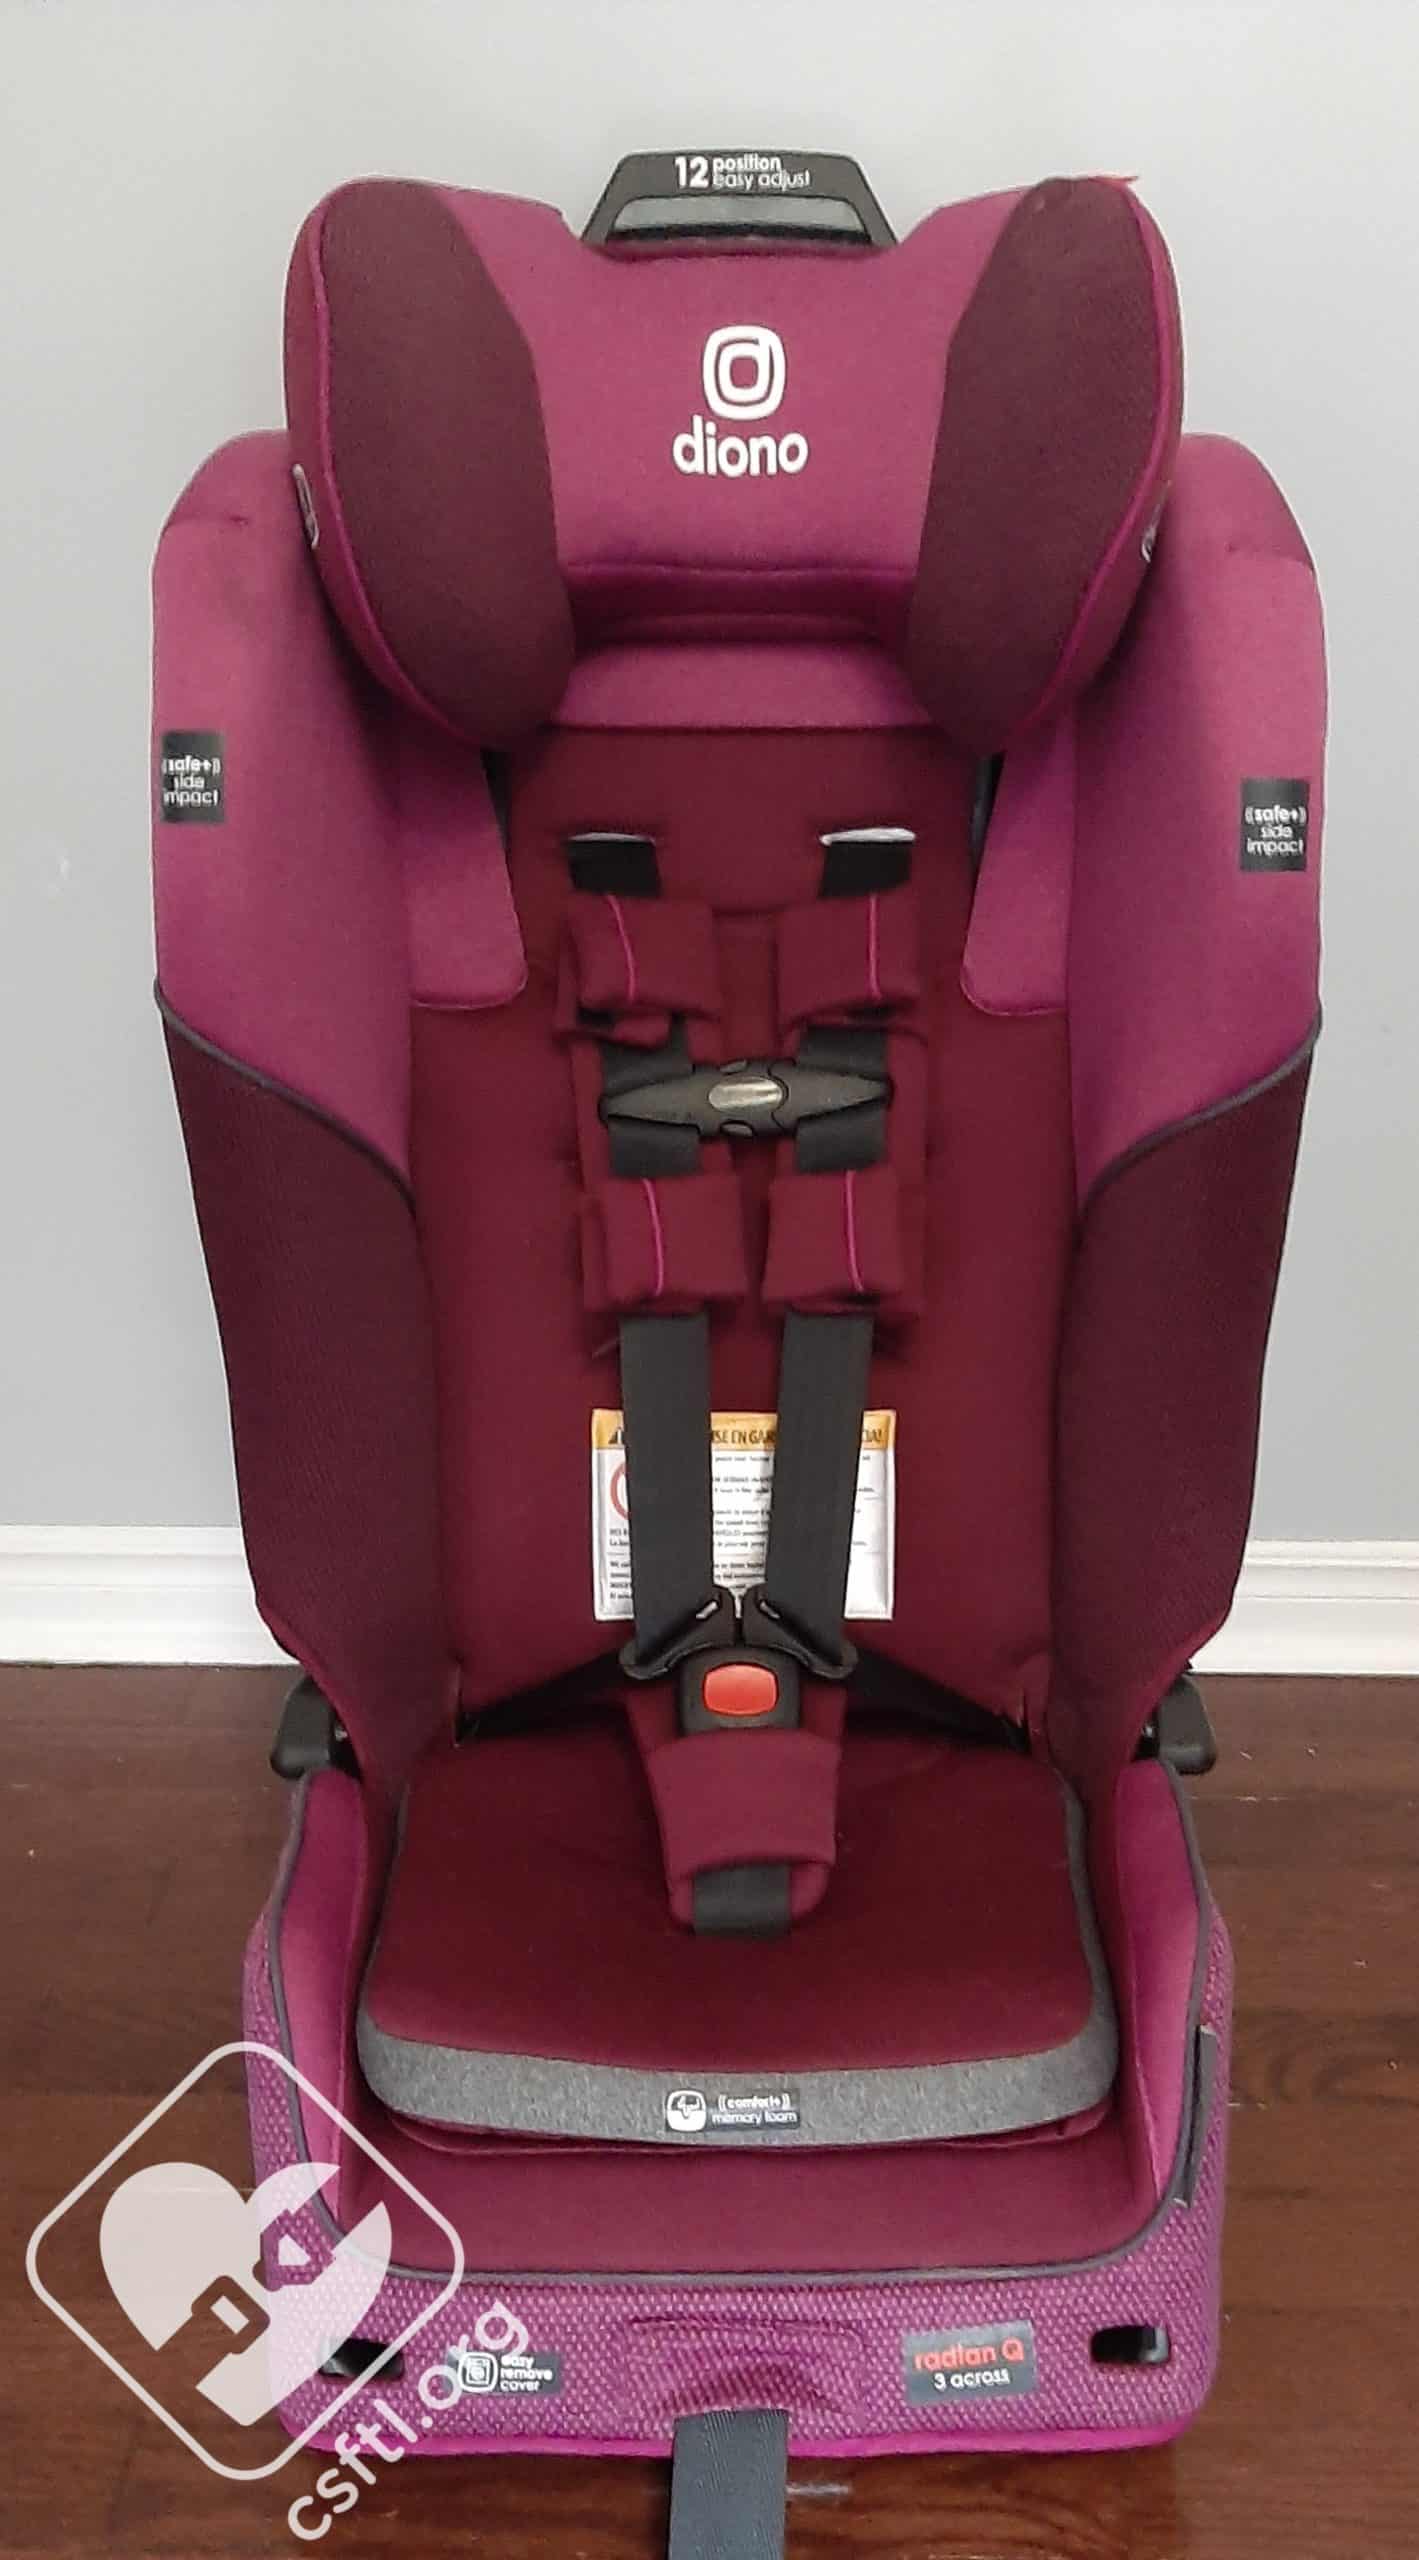
Diono Radian 3QXT
Diono has yet again introduced a new version of their Radian multimode car seat, which has been on the market since it was first introduced as a convertible seat by the Sunshine Kids brand in 2005.
Despite being on the market for 16 years (some of our CSFTL babies who rode in those first Radians are now driving!!), the seat itself has not changed much, though a short-lived booster mode has been added. Diono has also updated some of the height and weight limits, usage restrictions, and the soft goods on the newest versions of these seats. They’ve also introduced a naming convention that is a bit hard to follow.
For this review we are using the Diono Radian 3QXT, but we will mention any and all differences between it and the 3QX model.
CSFTL Quick Stats
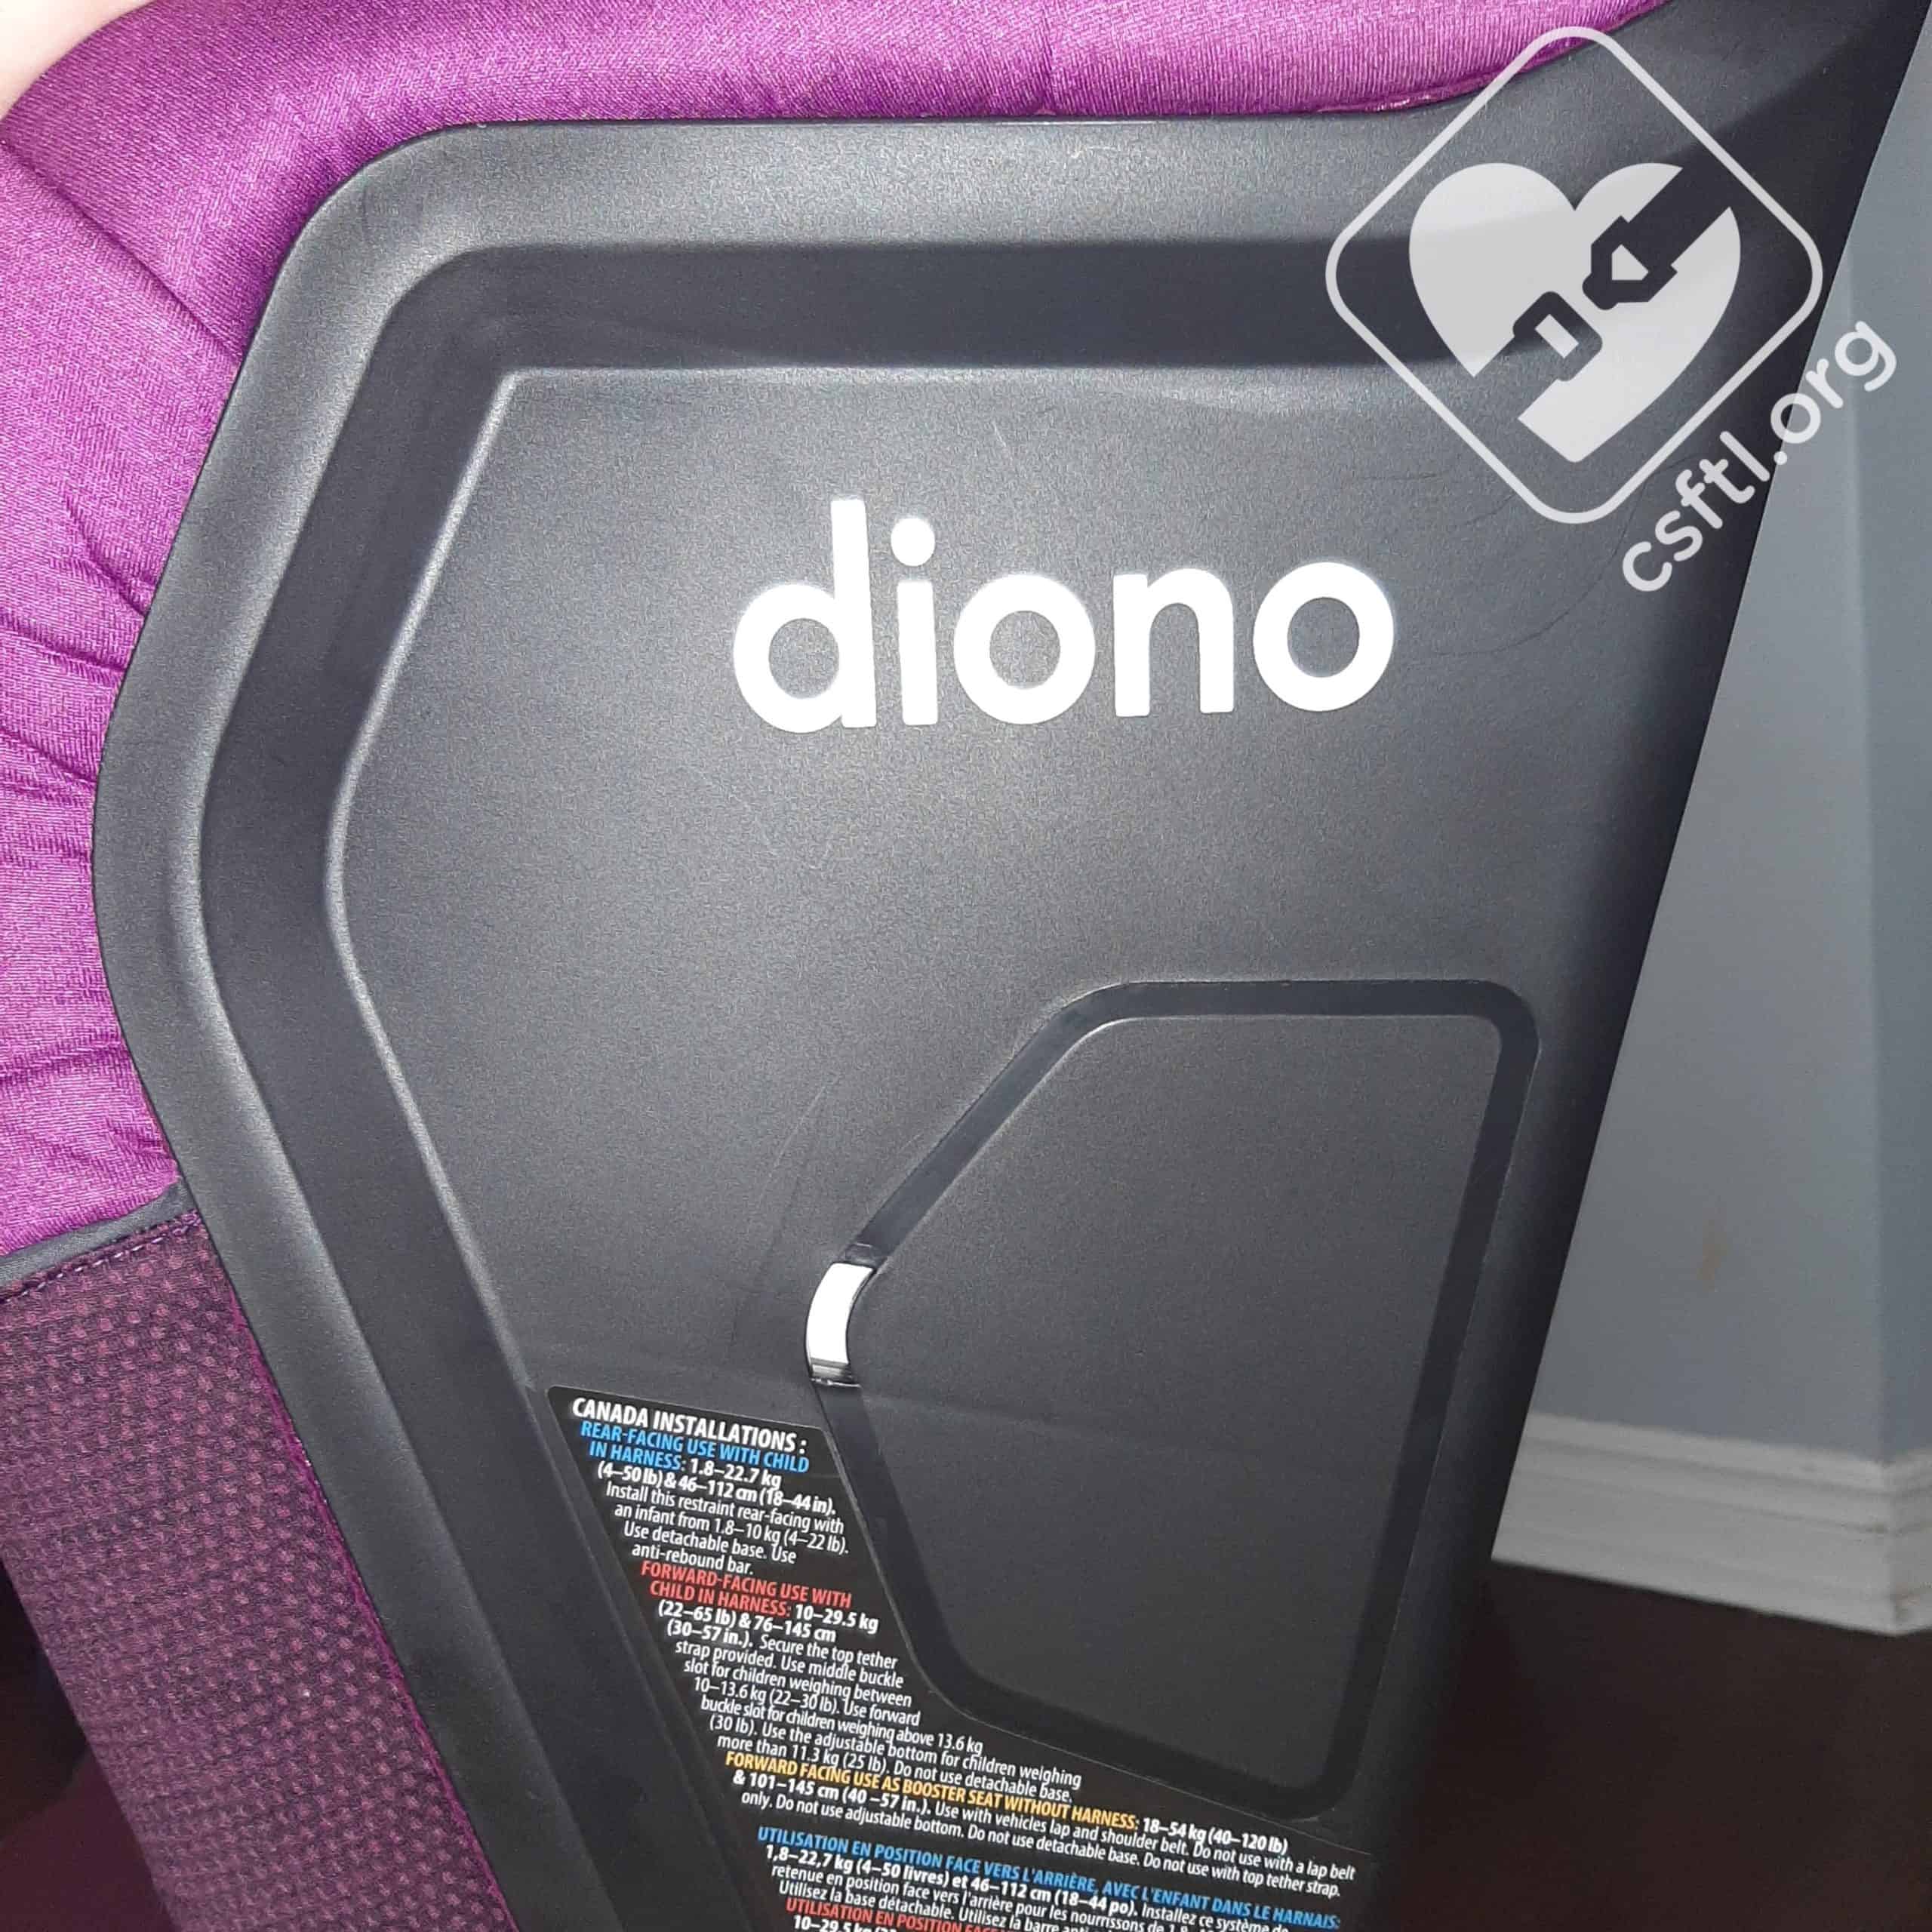
- Rear facing: 4-50 pounds
- Rear facing: 18-44 inches
- Rear facing: the top of the child’s head must be at least 1.5 inches below the top of the headrest
- Forward facing: 22-40 pounds with the Safe Stop attached to the harness
- Forward facing: 40-65 pounds without the Safe Stop attached to the harness
- Forward facing: 30-57 inches
- Forward facing: the child’s ears must be contained within the shell
- Booster mode: 40-120 pounds
- Booster mode: 40-57 inches tall
- Booster mode requires that the child’s shoulders are positioned at the 4th harness slot
- Expiration: 10 years from date of purchase (10 years from manufacture date if date of purchase is not known)
- Lower anchor weight limit: 35 pounds rear facing, 40 pounds forward facing
- Top tether is required when used forward facing
- Replacement after a collision:
- CANADA: do not use this child restraint system if it has been involved in a collision
- UNITED STATES: follows NHTSA criteria for replacement after a collision. Do not use this child restraint if it has been involved in a moderate or severe collision
Features
- Premium LUAS/lower anchors
- Optional cup holder
- Narrow for 3-across scenarios
- Adjusting expandable side wings
- Allows installation with Ford inflatable seat belts
- Side Impact Management Pod
- Memory Foam cushion
- Anti-rebound bar
Measurements
- Lowest harness position: 8 inches (7.5ish inches with infant support – this measurement is difficult to obtain due to the shape of the cushion). Measured from the highest point of the slanted harness slot
- Highest Harness position: 16.5 inches
- Highest booster belt guide: 17.5 inches
- Width at widest point (at the shoulders): 16.5 inches
- Crotch buckle positions at 3.5, 5.5, and 7 inches from the back of the seat
- Seat pan depth (inner): 13 inches
- Shell height: 27 inches with headrest fully extended
- Seat weight: 26.1 pounds (28.6 pounds when anti-rebound bar and rear facing base are attached)
Accessories/Required Attachments

Diono Radian 3QXT accessories
We don’t usually devote a section to the accessories or attachments that come with the seats we review, but because the Diono Radian 3QXT comes with so many extra items (and some must be used at different times) we wanted to summarize them all in one location:
- SafeStop: MUST be used in forward facing harness mode with a child who weighs less than 40 pounds
- Locking clip: for use with a vehicle seatbelt that does not lock on its own
- Large harness pads: optional for rear and forward facing
- Newborn harness pads: optional for use with smaller infants
- Buckle pad: optional for rear and forward facing
- Anti-rebound bar: MUST be used when rear facing
- Cup holder: optional at all times
- Infant support cushion: optional for use rear facing
- Infant support wedge: optional for use with the infant support cushion
- Newborn protection insert: optional for use rear facing. Cannot be used without the infant support cushion
- Side impact management pod: to be installed on the side of the 3QXT that is closest to the door (not to be used when the seat is installed in the vehicle’s middle seating position)
- Rear facing base: MUST be used when rear facing
- Lap belt cushion: MUST be used in forward facing harness mode when installing the 3QXT in a seating position with a lap only seatbelt and no top tether
- Angle Adjuster: must be purchased separately but may be used in rear facing mode to make the 3QXT more upright
That is a very large list of extra pieces that are a mix of optional and mandatory, so we hope anyone purchasing this seat has a safe space they can store the unneeded (at that time) padding for future use. We’ll go into more detail about these items later in this review.
Initial Setup
Folded Diono Radian 3QXT
The Diono Radian 3QXT arrives folded in the box. Here’s how to unfold the Radian 3QXT and prepare it for use:
- Place the car seat on its back on a flat surface and unfasten the red carry strap from the bottom.
- Rotate the bottom until you hear it ‘click’. This confirms that the car seat is locked and ready for use.
- Check that the harness slides freely by pulling on the adjuster strap. If it does not tighten freely, check that it is not caught in the seat’s shell.
- Tuck the red carry strap through the harness slot and behind the cover.
Lever to fold the Diono Radian 3QXT
To fold: release the lever at the bottom of the seat, fold the seat, and secure the seat pan with the red carry strap.
Crotch Buckle Rules
- 5-22 pounds may use any crotch buckle slot
- 22-30 pounds MUST use the middle slot
- 30 pounds and over MUST use the outer slot
Adjustable Headrest
Previous versions of the Diono multimode seats had headwings that could be “shimmied” up and down the seat to adjust their position. The adjustable headrest on the Diono Radian 3QXT is a new design that mimics the headrest of many no-rethread harness seats. Simply squeeze the adjuster lever at the top of the headrest and slide the headers up or down until it clicks into the desired position.
The rules for the headrest are as follows:
- When using the bottom harness slots, position the headrest level with the top of the seat
- When using the top 4 harness slots, position the headrest so that the bottom edge is above the shoulders and about level with the jaw. The headrest should be 1 inch above the child’s shoulders
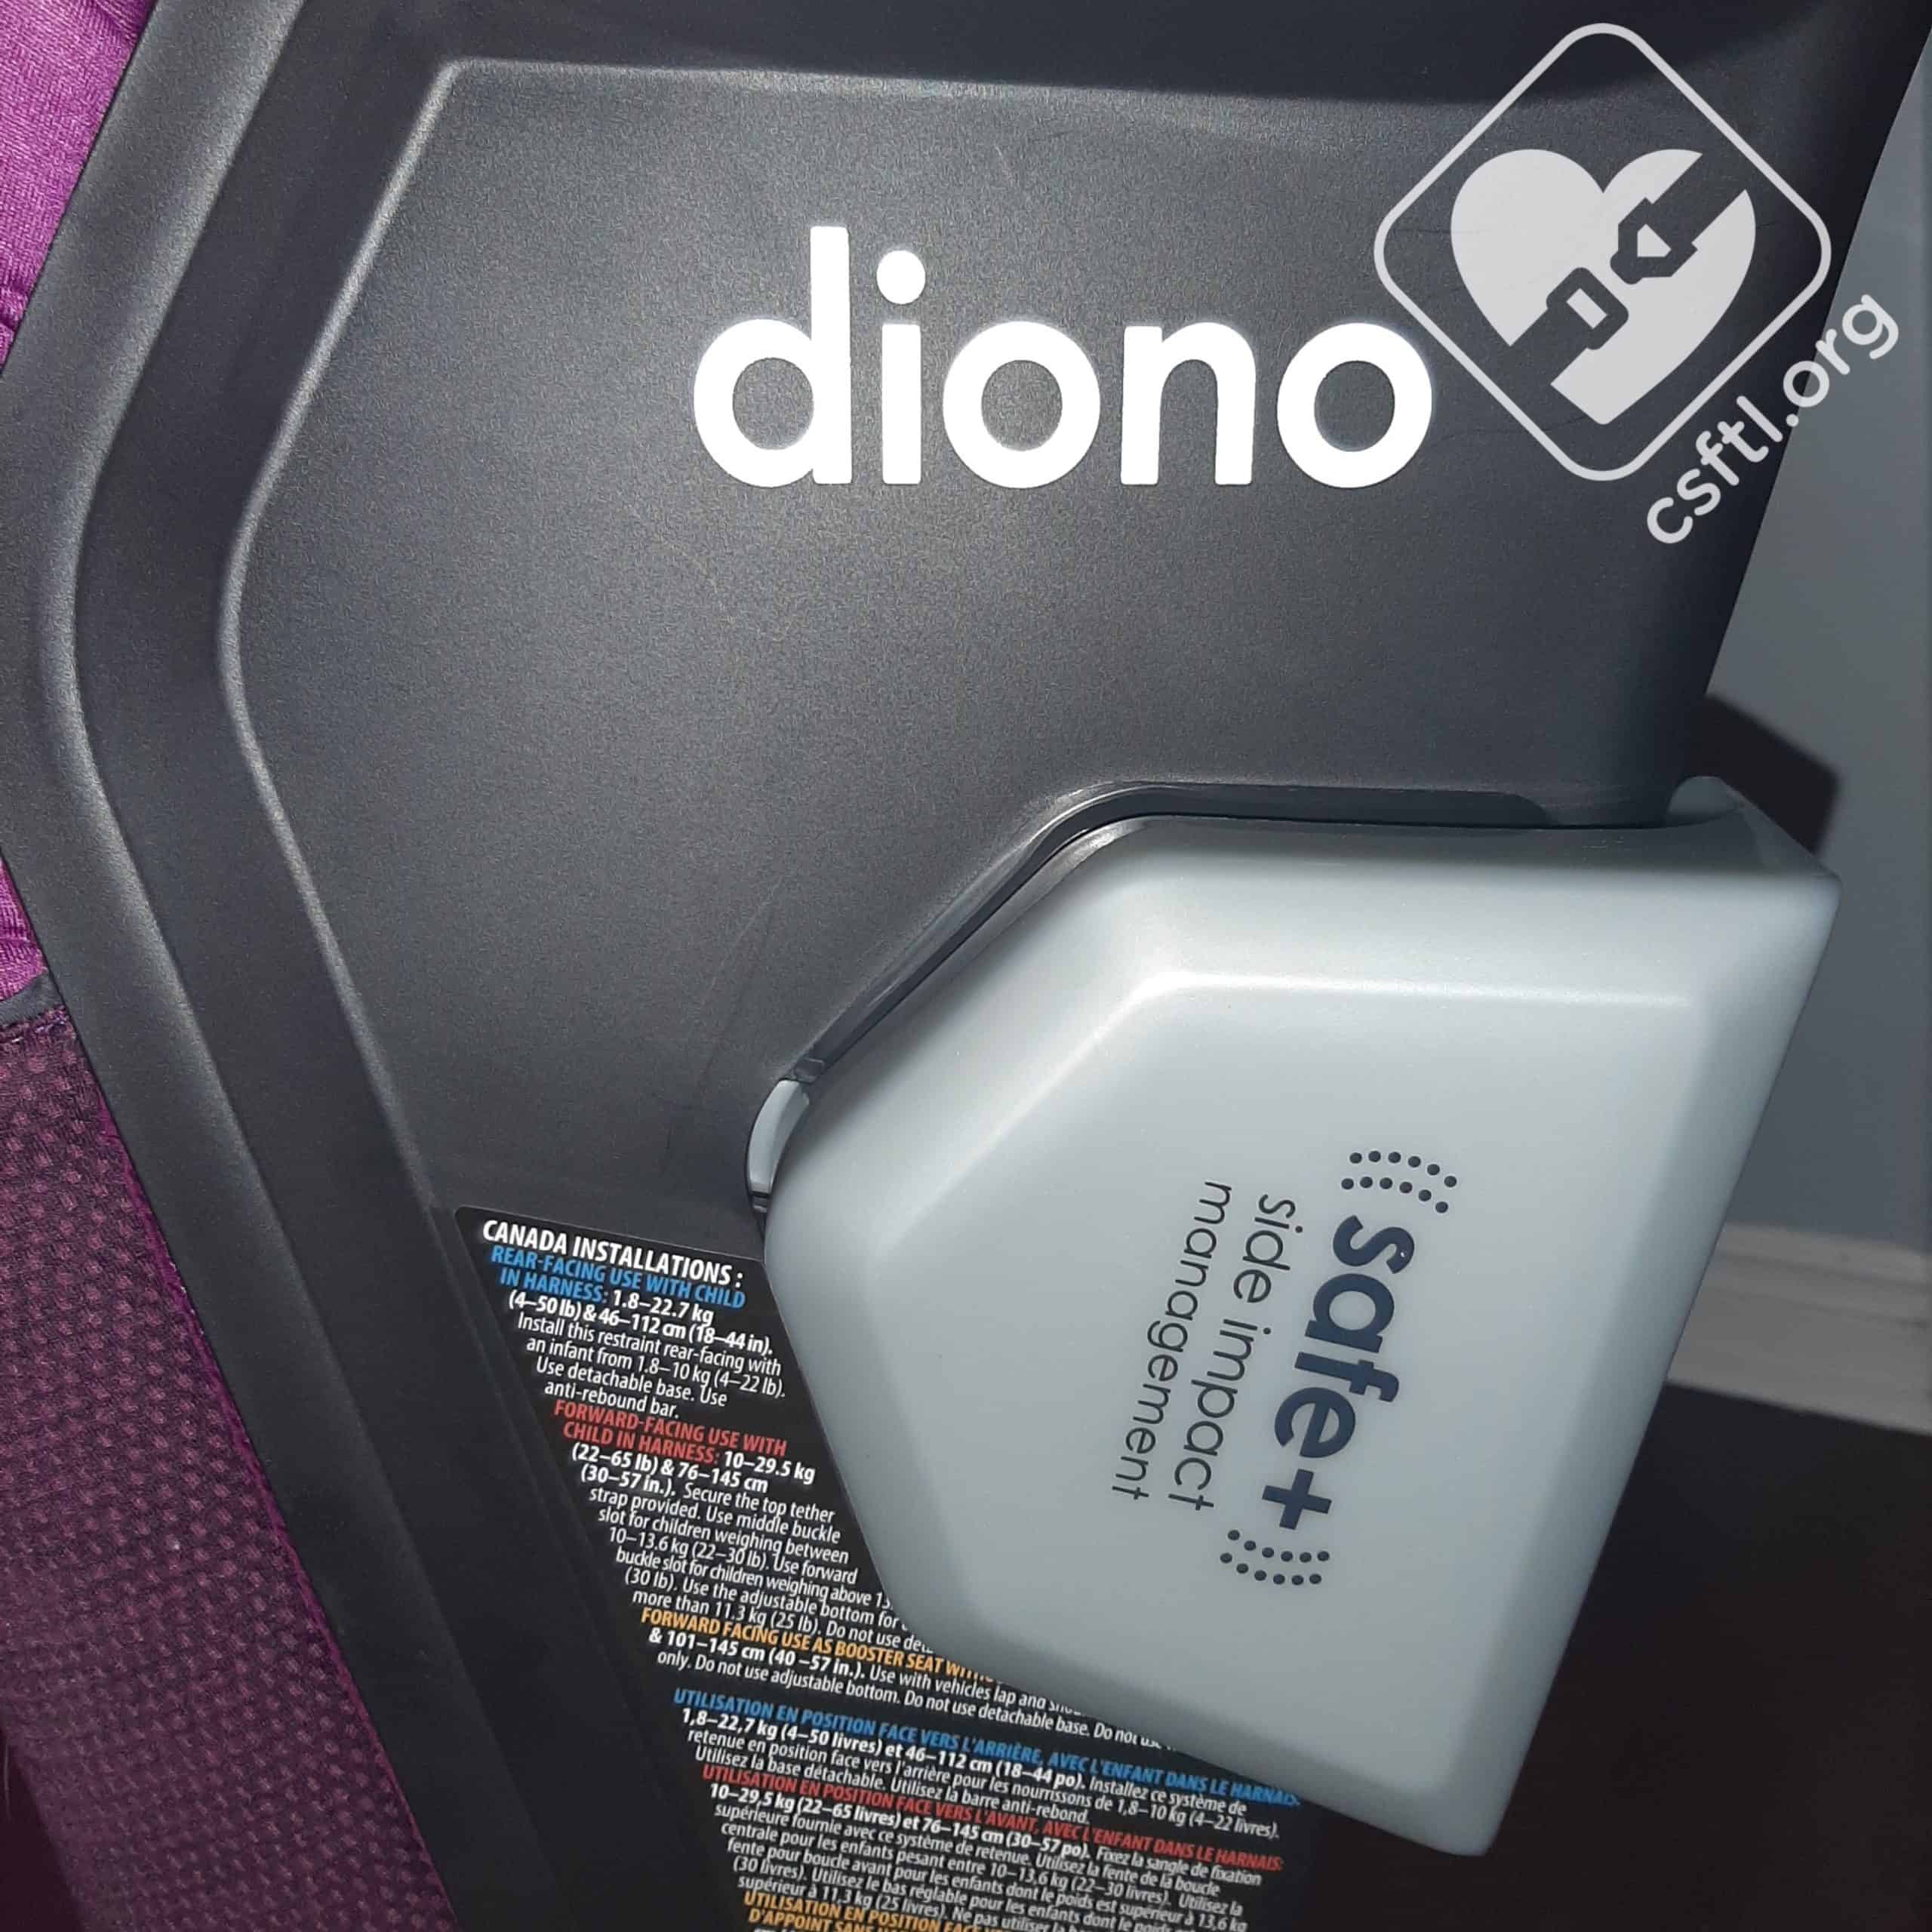
Side Impact Management Pod
No SIM Pod on the Diono Radian 3QXT
The Side Impact Management Pod (SIM) is another new feature on the diono Radian 3QXT. The purpose of this pod is to provide additional side impact protection. To use the pod when the Radian 3QXT is installed on either side of the vehicle, insert it on the side of the child restraint that is closest to the vehicle door. Do not use the SIM Pod when the Radian 3QXT is installed in the center seat of the vehicle.
To install the SIM Pod:
- Insert the front hook of the SIM Pod into the slot on the side of the seat
- Insert the back hooks into the slots on the back of the seat. An audible “click” should be heard when attached to the slots correctly
SIM Pod installed on the Diono Radian 3QXT
To remove the SIM Pod, lift the pod tab release from the back of the seat, then gently remove the front hook from the side of the seat (it may feel like you are going to break the SIM Pod when removing it).
Installation: Rear Facing
Anti-rebound Bar
Removing the Diono Radian 3QXT ARB
Yet another new feature on the Diono Radian 3QXT is the addition of an anti-rebound bar. The anti-rebound bar must ALWAYS be used when the seat is installed rear facing. It cannot be used when the seat is installed forward facing.
To install the anti-rebound bar:
- Place the anti-rebound bar into the slots on the front of the car seat
- Push the anti-rebound bar into the slots until an audible click is heard
To remove the anti-rebound bar, press the release buttons near the bar on the outside of the seat and pull the anti rebound bar out (the manual notes that you may need to release one side at a time). We found it took a few tries each time to remove the anti-rebound bar and a third hand would have been helpful. If you have someone able to help you remove it, take the help!
Rear-facing Base
The Rear-Facing Base is a separate black plastic piece that attaches to the bottom of the seat when it’s installed rear facing. This piece must be installed on the Diono Radian 3QXT when using the seat rear facing. Caregivers who have owned Radians and CPSTs who have worked with Radians over the years will recognize this critical piece of plastic right away! It’s required for all rear-facing installations and yet, it’s a separate piece that must be attached.
To install this base align the lower hooks on the rear facing base to the slots in the base of the car seat. Once aligned, insert hooks and push the top of the base in until an audible click is heard. Confirm the base is locked into the seat by checking if it moves. The base does not always click in on the first try – so be sure to double check that it is locked in to the seat before installing the Radian 3QXT.
To remove the base, press the release button and pull the top end outward to remove the top section and gently detach the base lower hooks from the car seat bottom.
Newborn Protection Insert
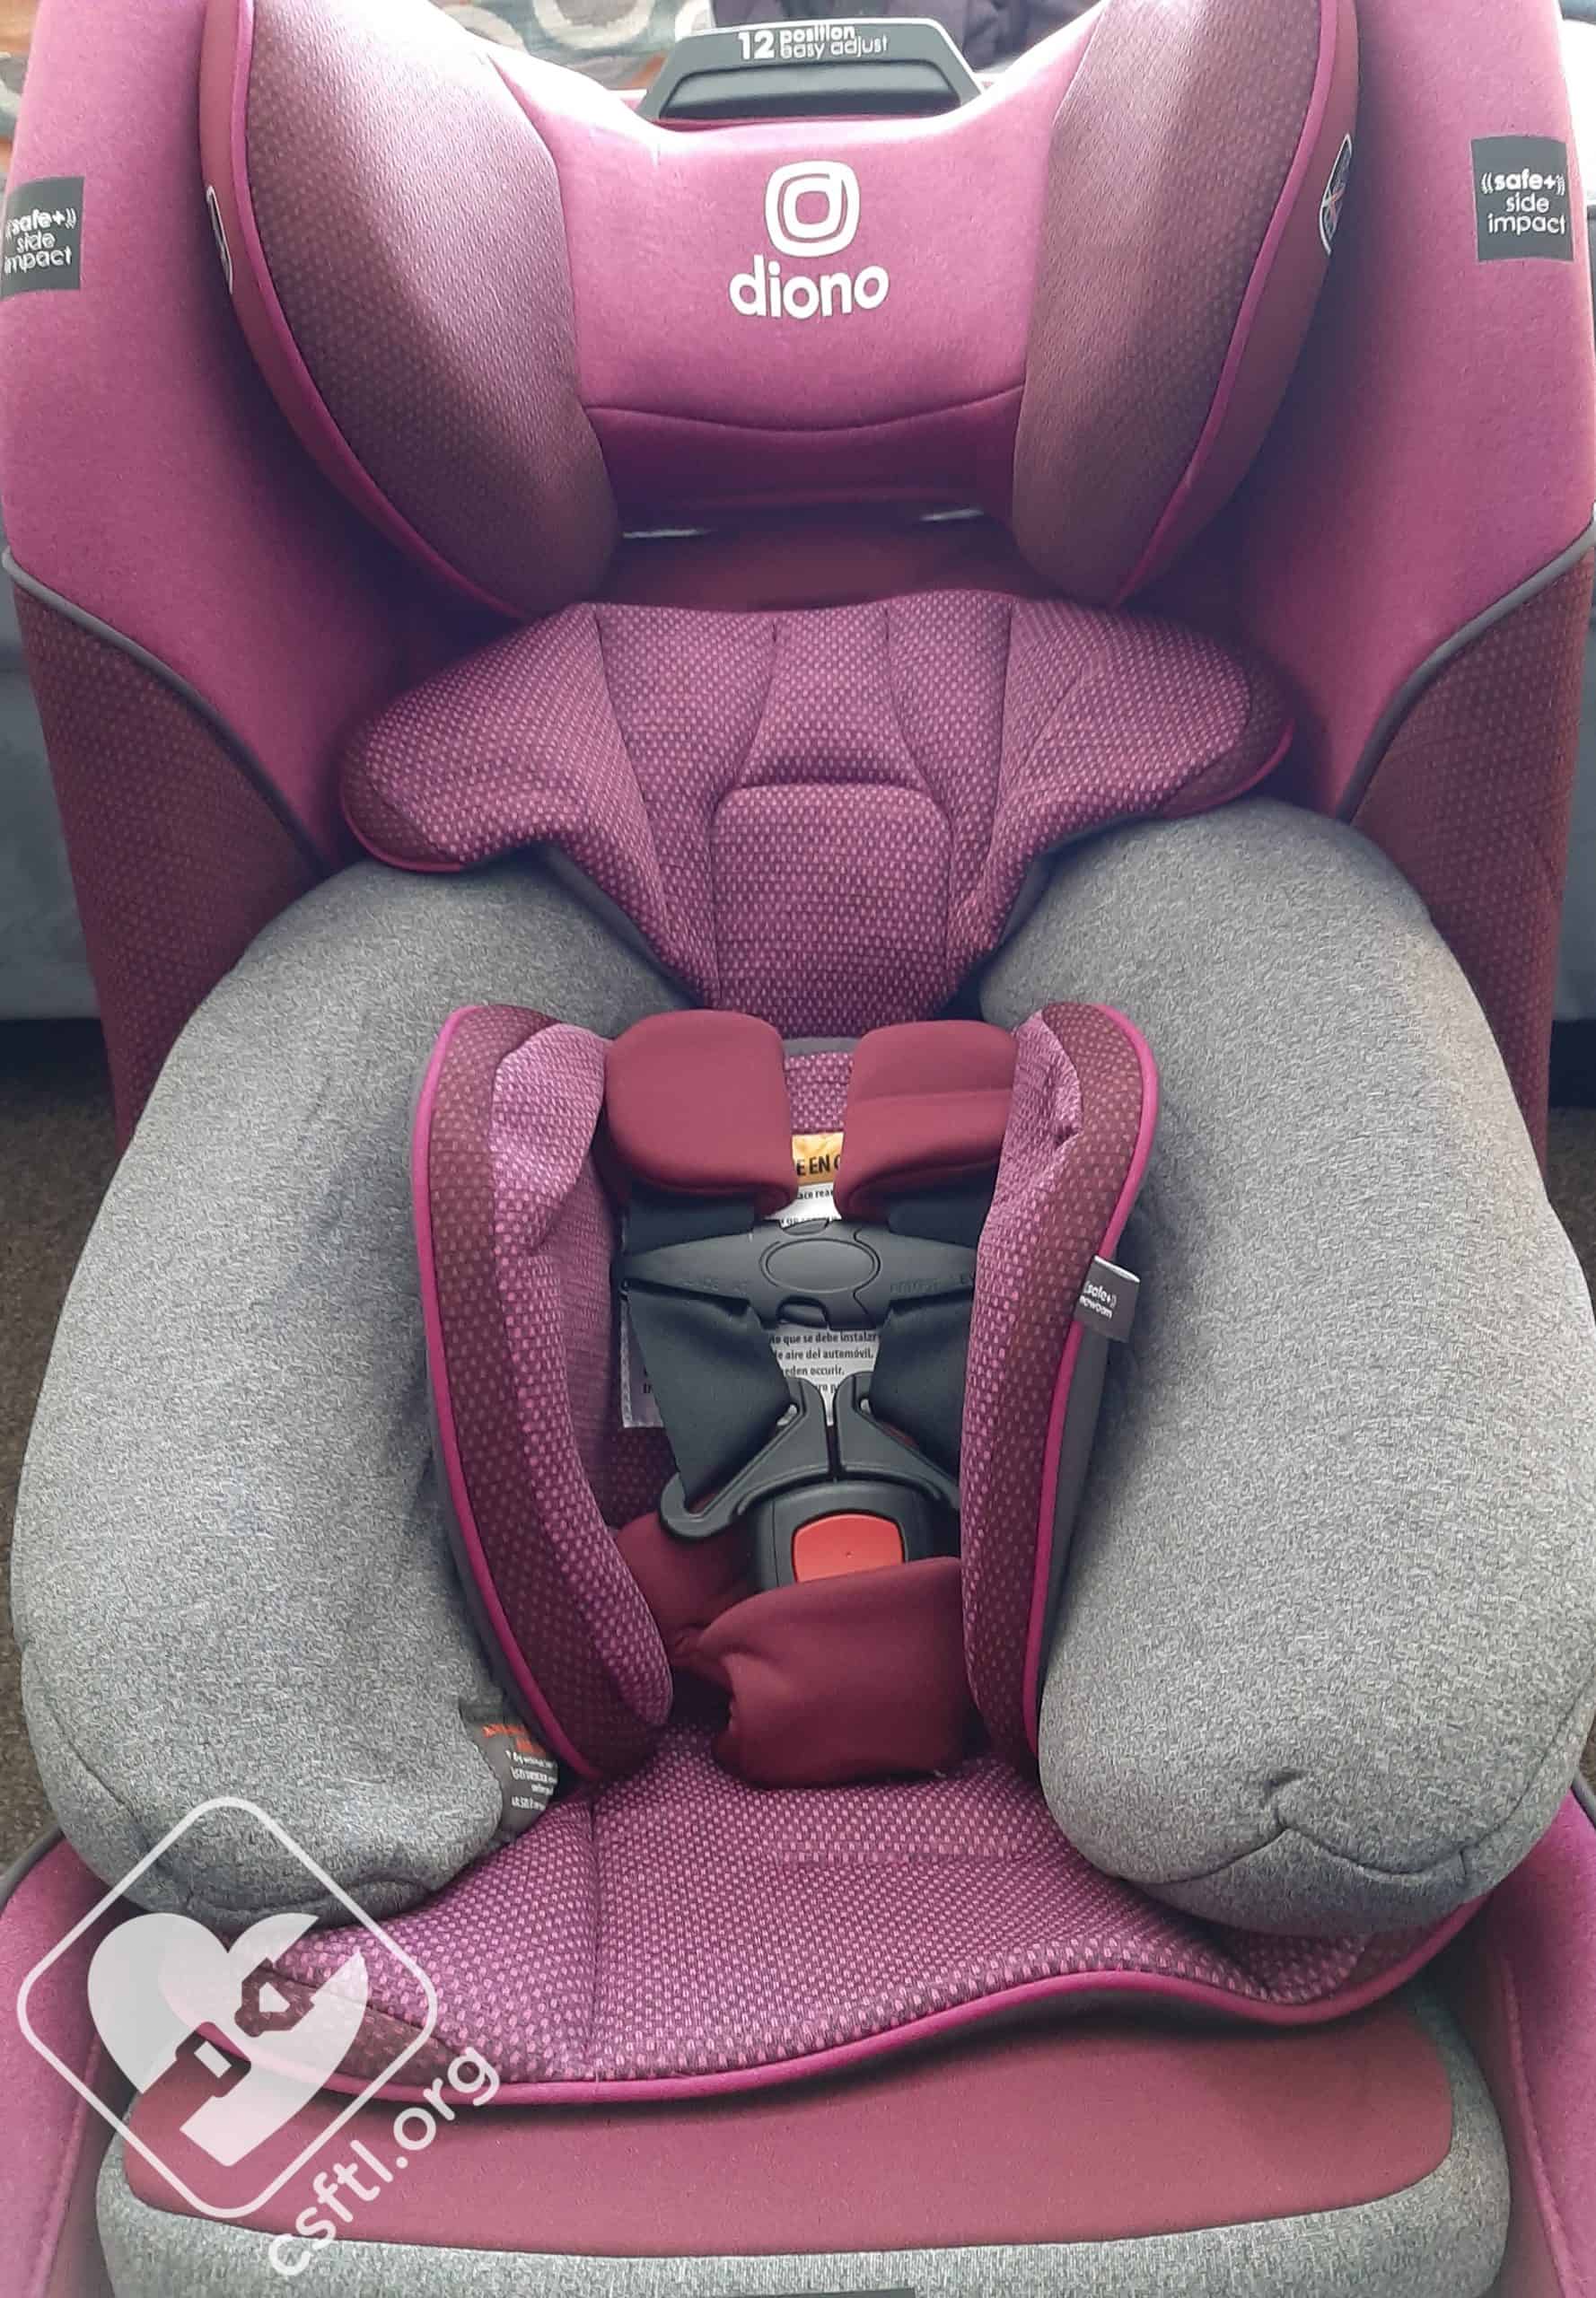
Diono Radian 3QXT set up for a newborn
The Newborn Protection Insert is additional padding that only ships with the Radian 3QXT model. It is used in combination with the infant support cushion to provide side protection in the event of a collision.
To use the Newborn Protection Insert, place it on the seat and install the infant support cushion over top, sliding the crotch buckle through the slot in the cushion that matches the slot used on the seat. DO NOT use the Newborn Protection Insert without the Infant Support Cushion.
The Newborn Protection Insert can be used any time between 4-10 pounds, but must be removed once the child weighs 10 pounds.
Infant Support Cushion
The Infant Support Cushion is full-body additional padding intended for smaller infants, and includes a removable comfort wedge for head support. Use of the cushions and the wedge is optional.
To use, slide the buckle through the buckle slot on the infant body cushion that matches the slot used on the seat.
Newborn Harness Pads
Also new to the Radian 3QXT are additional Newborn Harness Pads that were designed for smaller infants and newborns. They are to be used in place of the standard harness pads until the child is tall enough to need additional padding on the seat harness, and then the standard harness pads should be used.
Because this wording implies that the harness pads (either set) must always be used, we reached out to Diono’s customer service. We were advised that the harness pads are not required at all on any of their seats manufactured from 2018 and on.
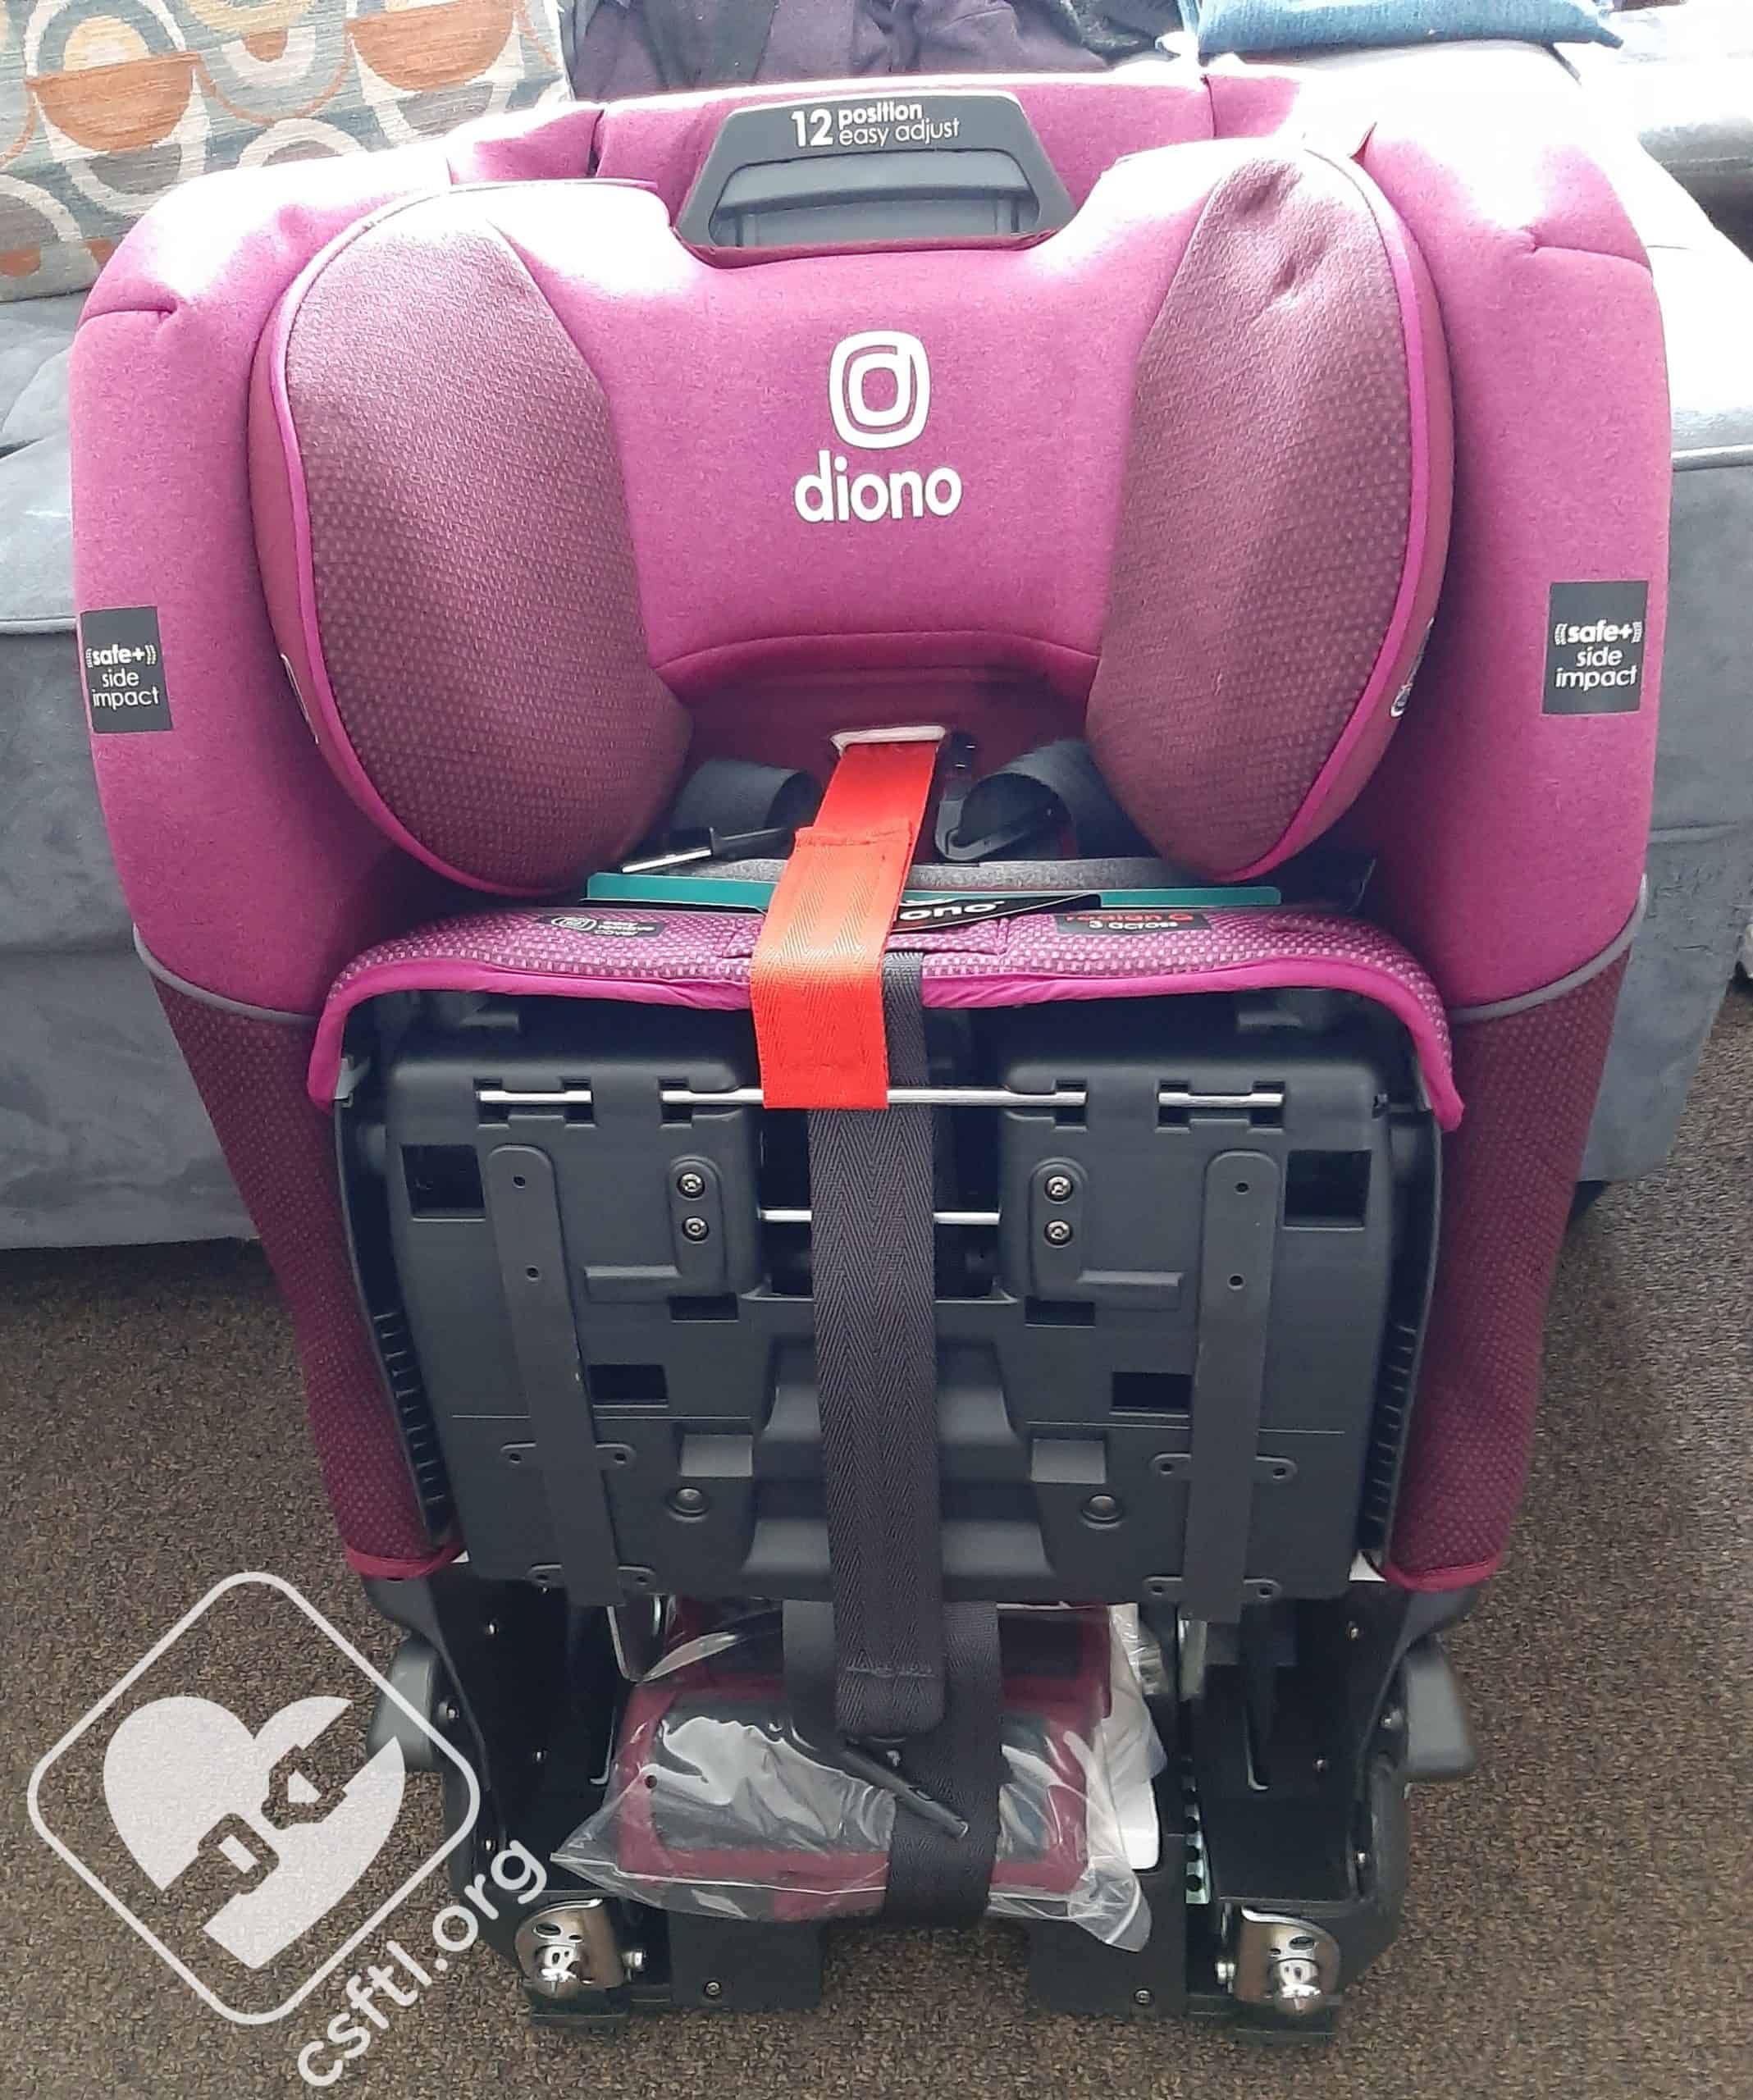
Top Tether and Lower Anchor Storage Location

Top tether and lower anchor storage location – closed
The top tether and lower anchors are stored in a plastic compartment on the upper back of the Radian 3QXT. The webbing ships neatly tucked into this compartment, but we warned that tucking the webbing of the top tether back IN to the compartment is no easy task.
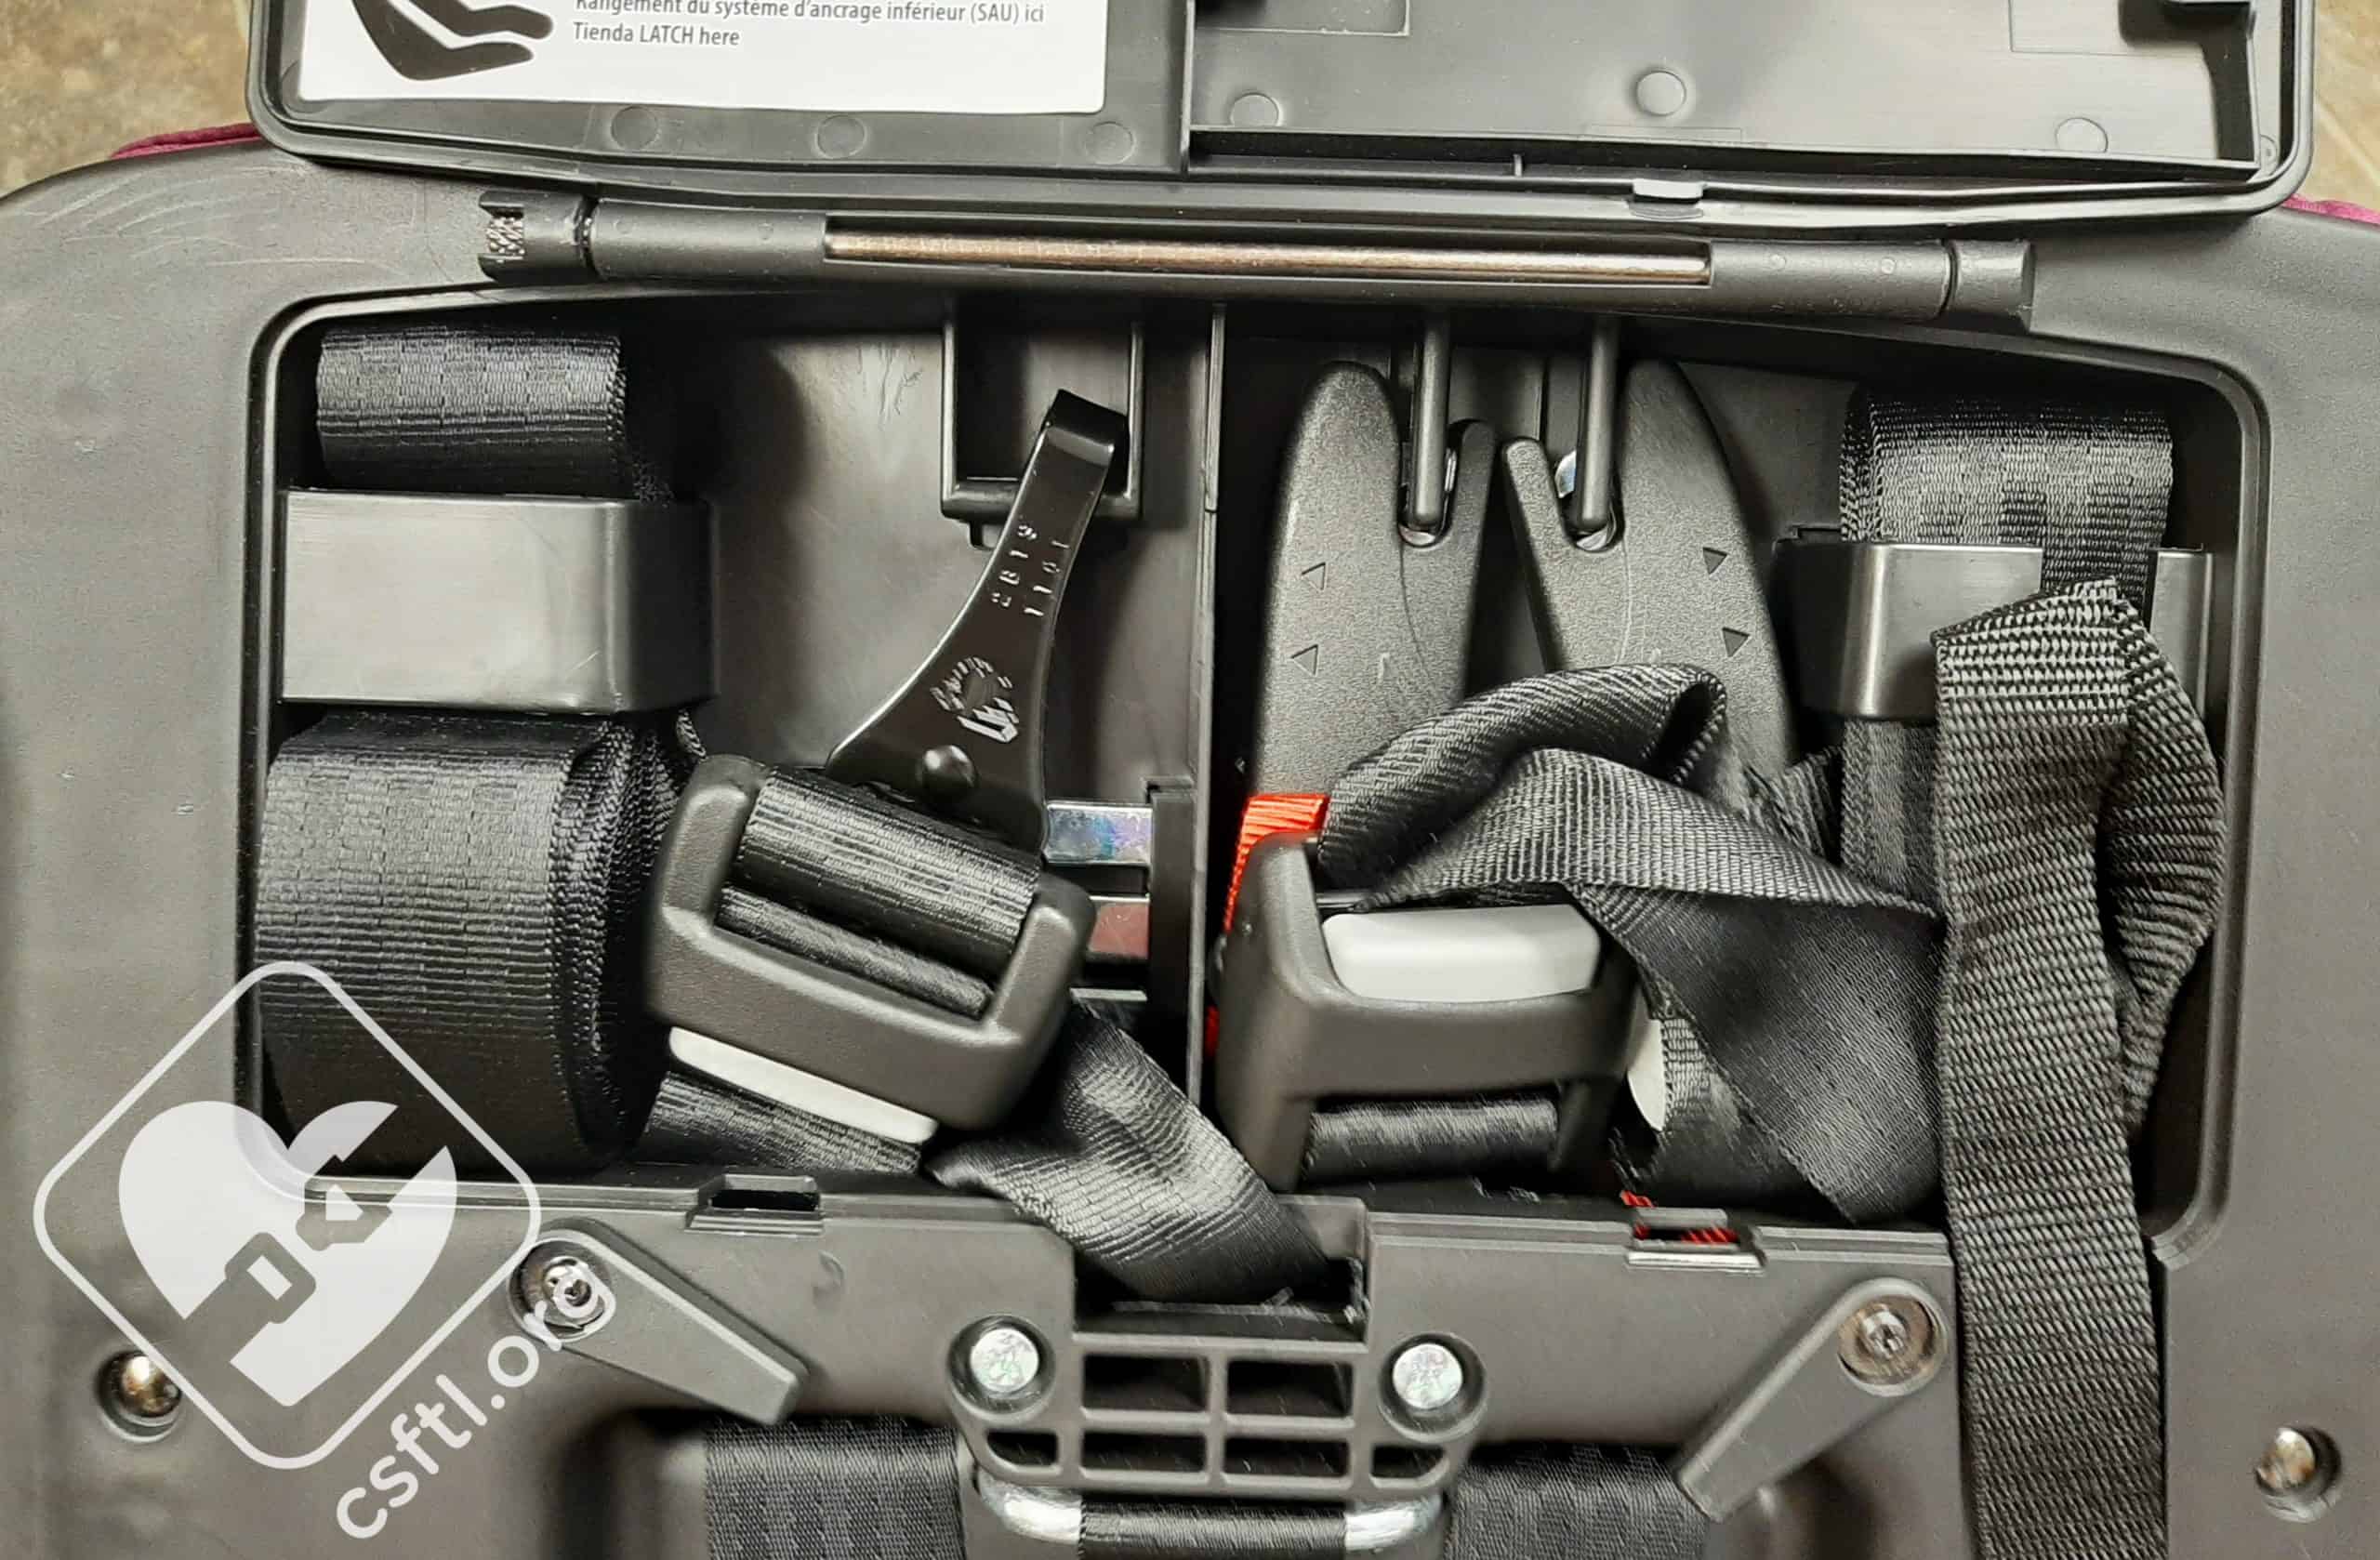
Top tether and lower anchor storage location – open
We found that the “sweet spot” with the webbing was a loose loop when rolling the webbing for storage. If your loop is too tight, the webbing will not fit through the plastic storage slot, and then the storage compartment will not close. Even with our loose loops, we had to encourage the storage compartment to close (and were thankful for the clips that slide over the door to hold it closed).
Rear Facing Installation
Before installing the Diono Radian 3QXT in your vehicle, ensure that the rear facing base and anti rebound bar are installed on the seat, and the adjustable bottom is not lowered.
If you plan on installing the seat on an outboard vehicle seat, the SIM Pod will also be required.
Installation with Lower Anchors
Diono Radian 3QXT – rear facing with lower anchors
To install the Diono Radian 3QXT rear facing with the lower anchors, remove the lower anchors from their storage location on the back of the seat. Push the red buttons to release them from the seat.
Extend the lower anchor webbing by pressing on the adjuster button and pulling on the strap. Slide the lower anchor strap down to the rear-facing belt path.
Place the car seat rear facing on the vehicle seat with the entire seat bottom flat on the vehicle seat, and connect the lower anchor connectors to the vehicle’s lower anchors. Press down firmly on the car seat with one hand while pulling on the tail of the LUAS webbing with the other hand until the slack is removed.
Once the seat is installed, ensure that the seat moves less than 1 inch at the belt path when checked side to side and front to back.
If the seat has been installed on an outboard seat in the vehicle, ensure that the SIM Pod is installed on the door side of the Radian 3QXT.
Note: do not use this installation method for a child who weighs more than 35 pounds.
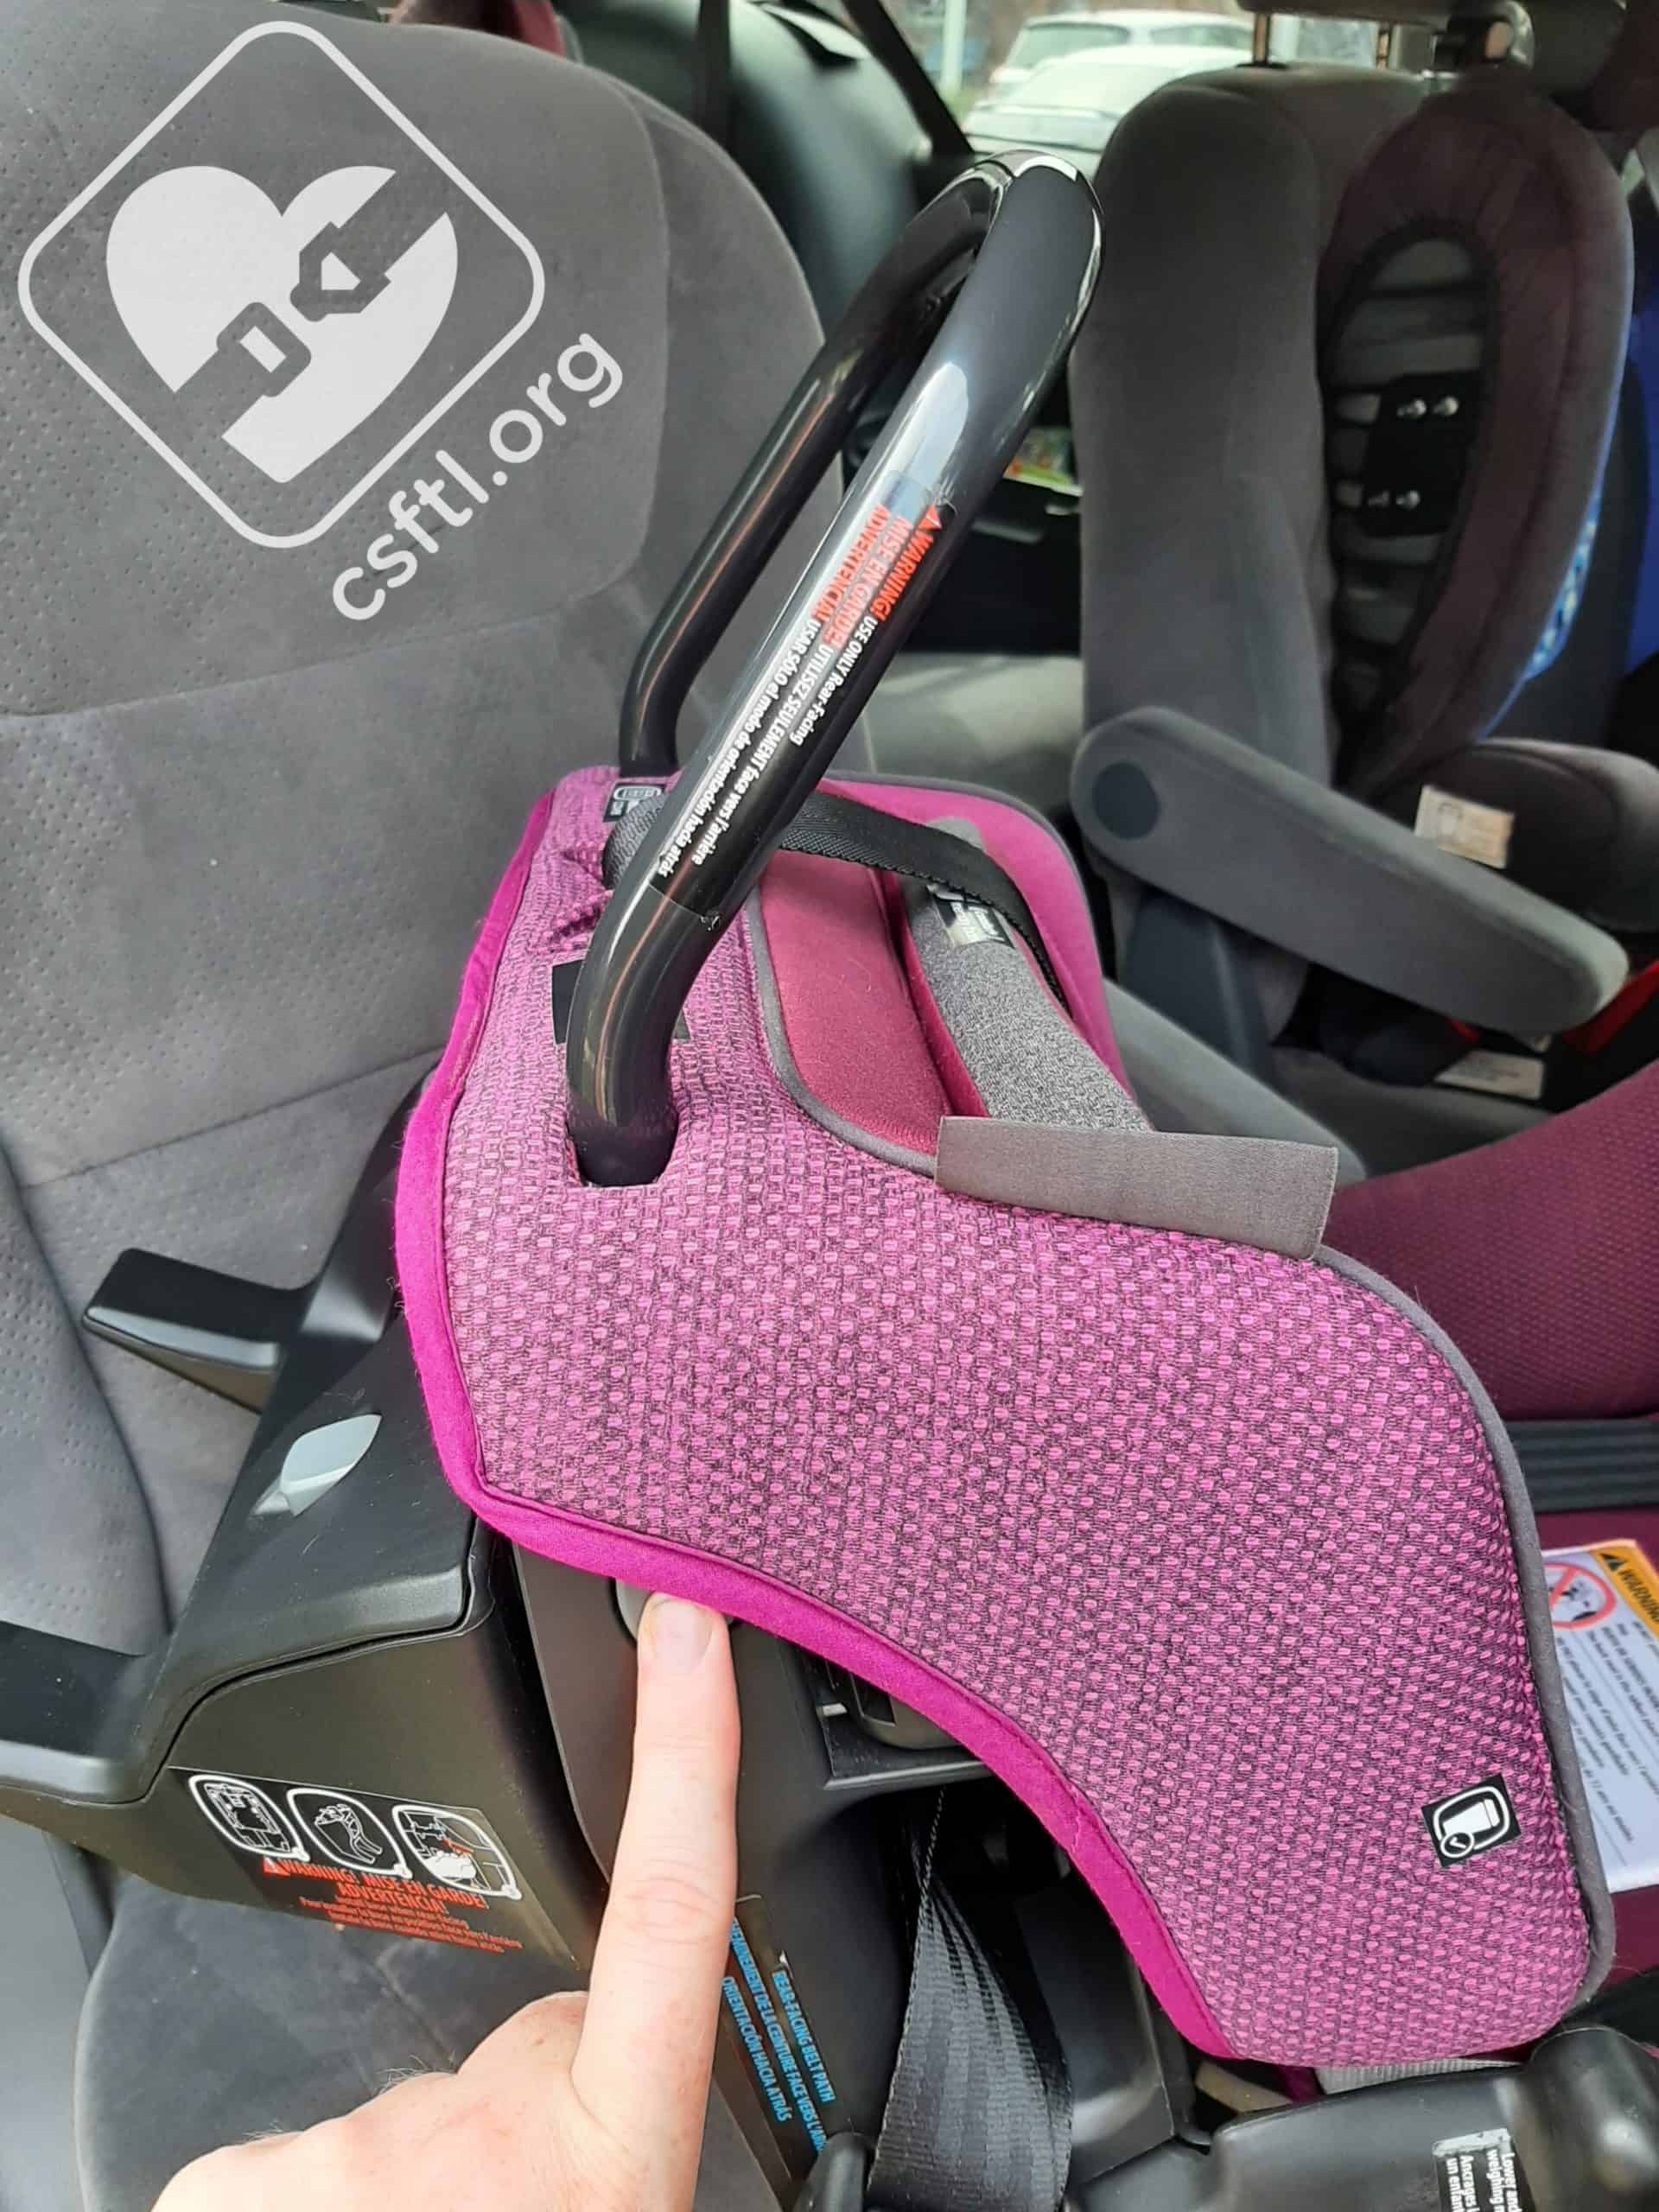
Installation with Vehicle Seat Belt
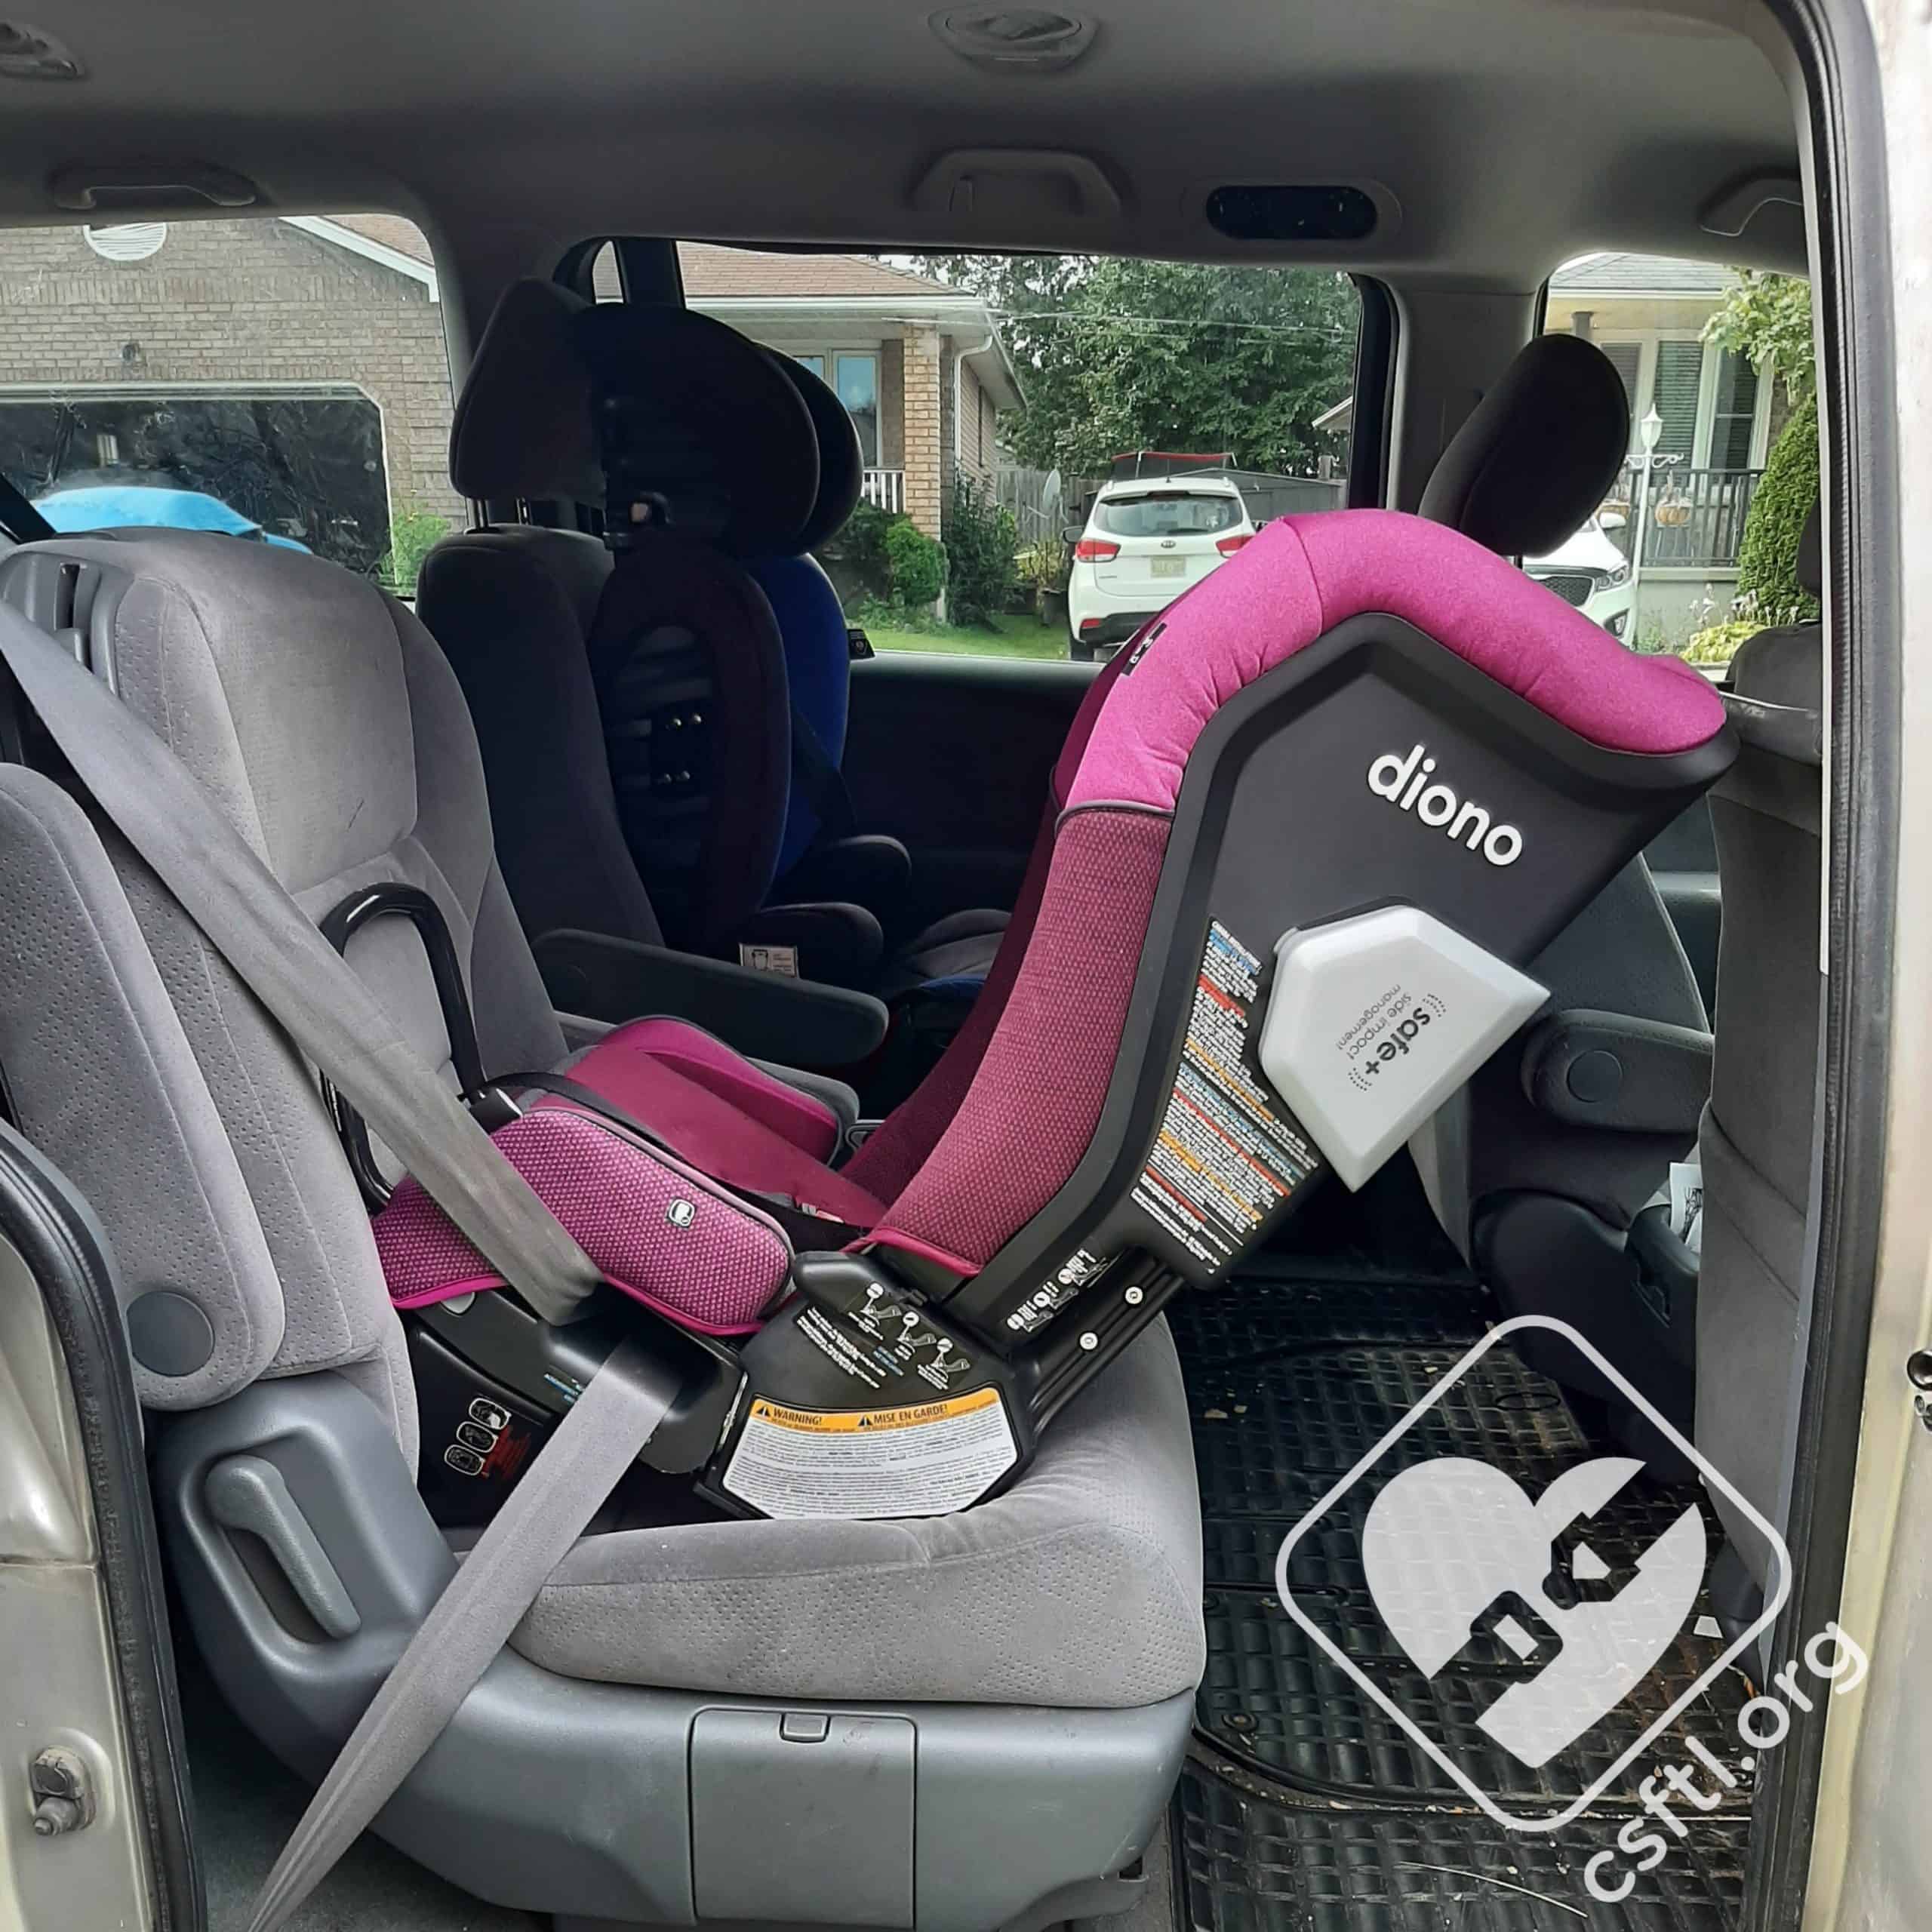
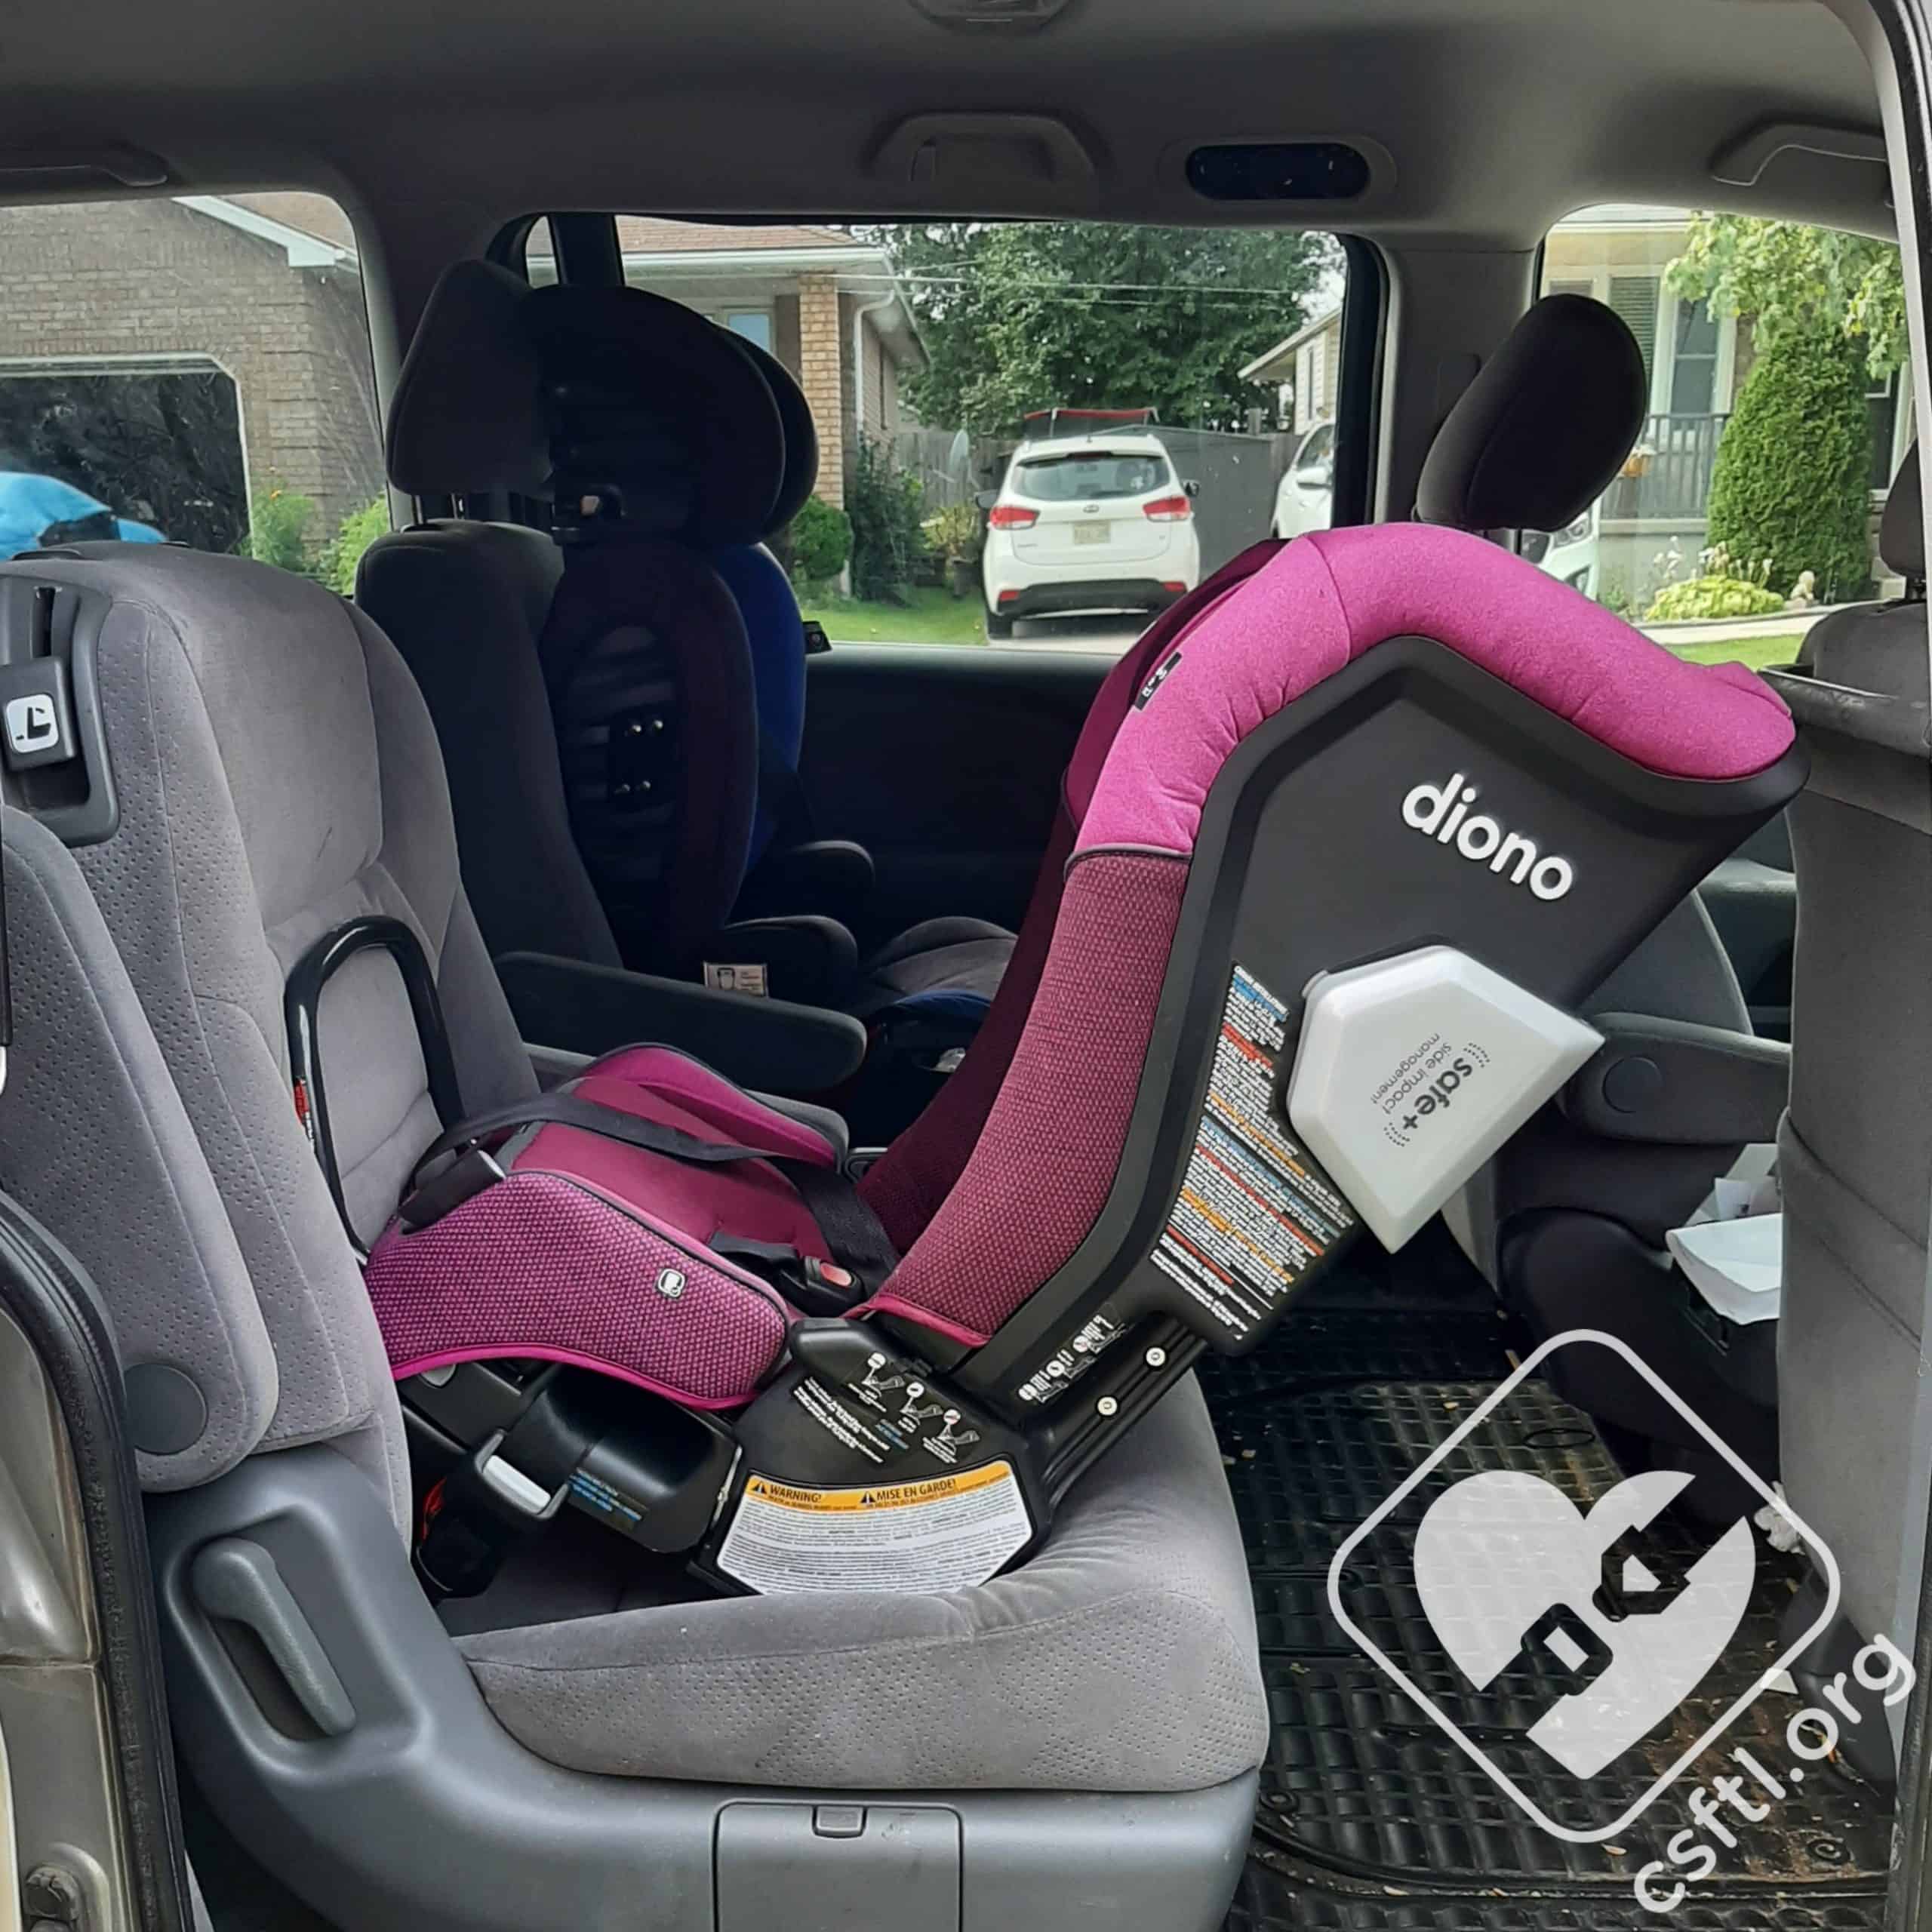
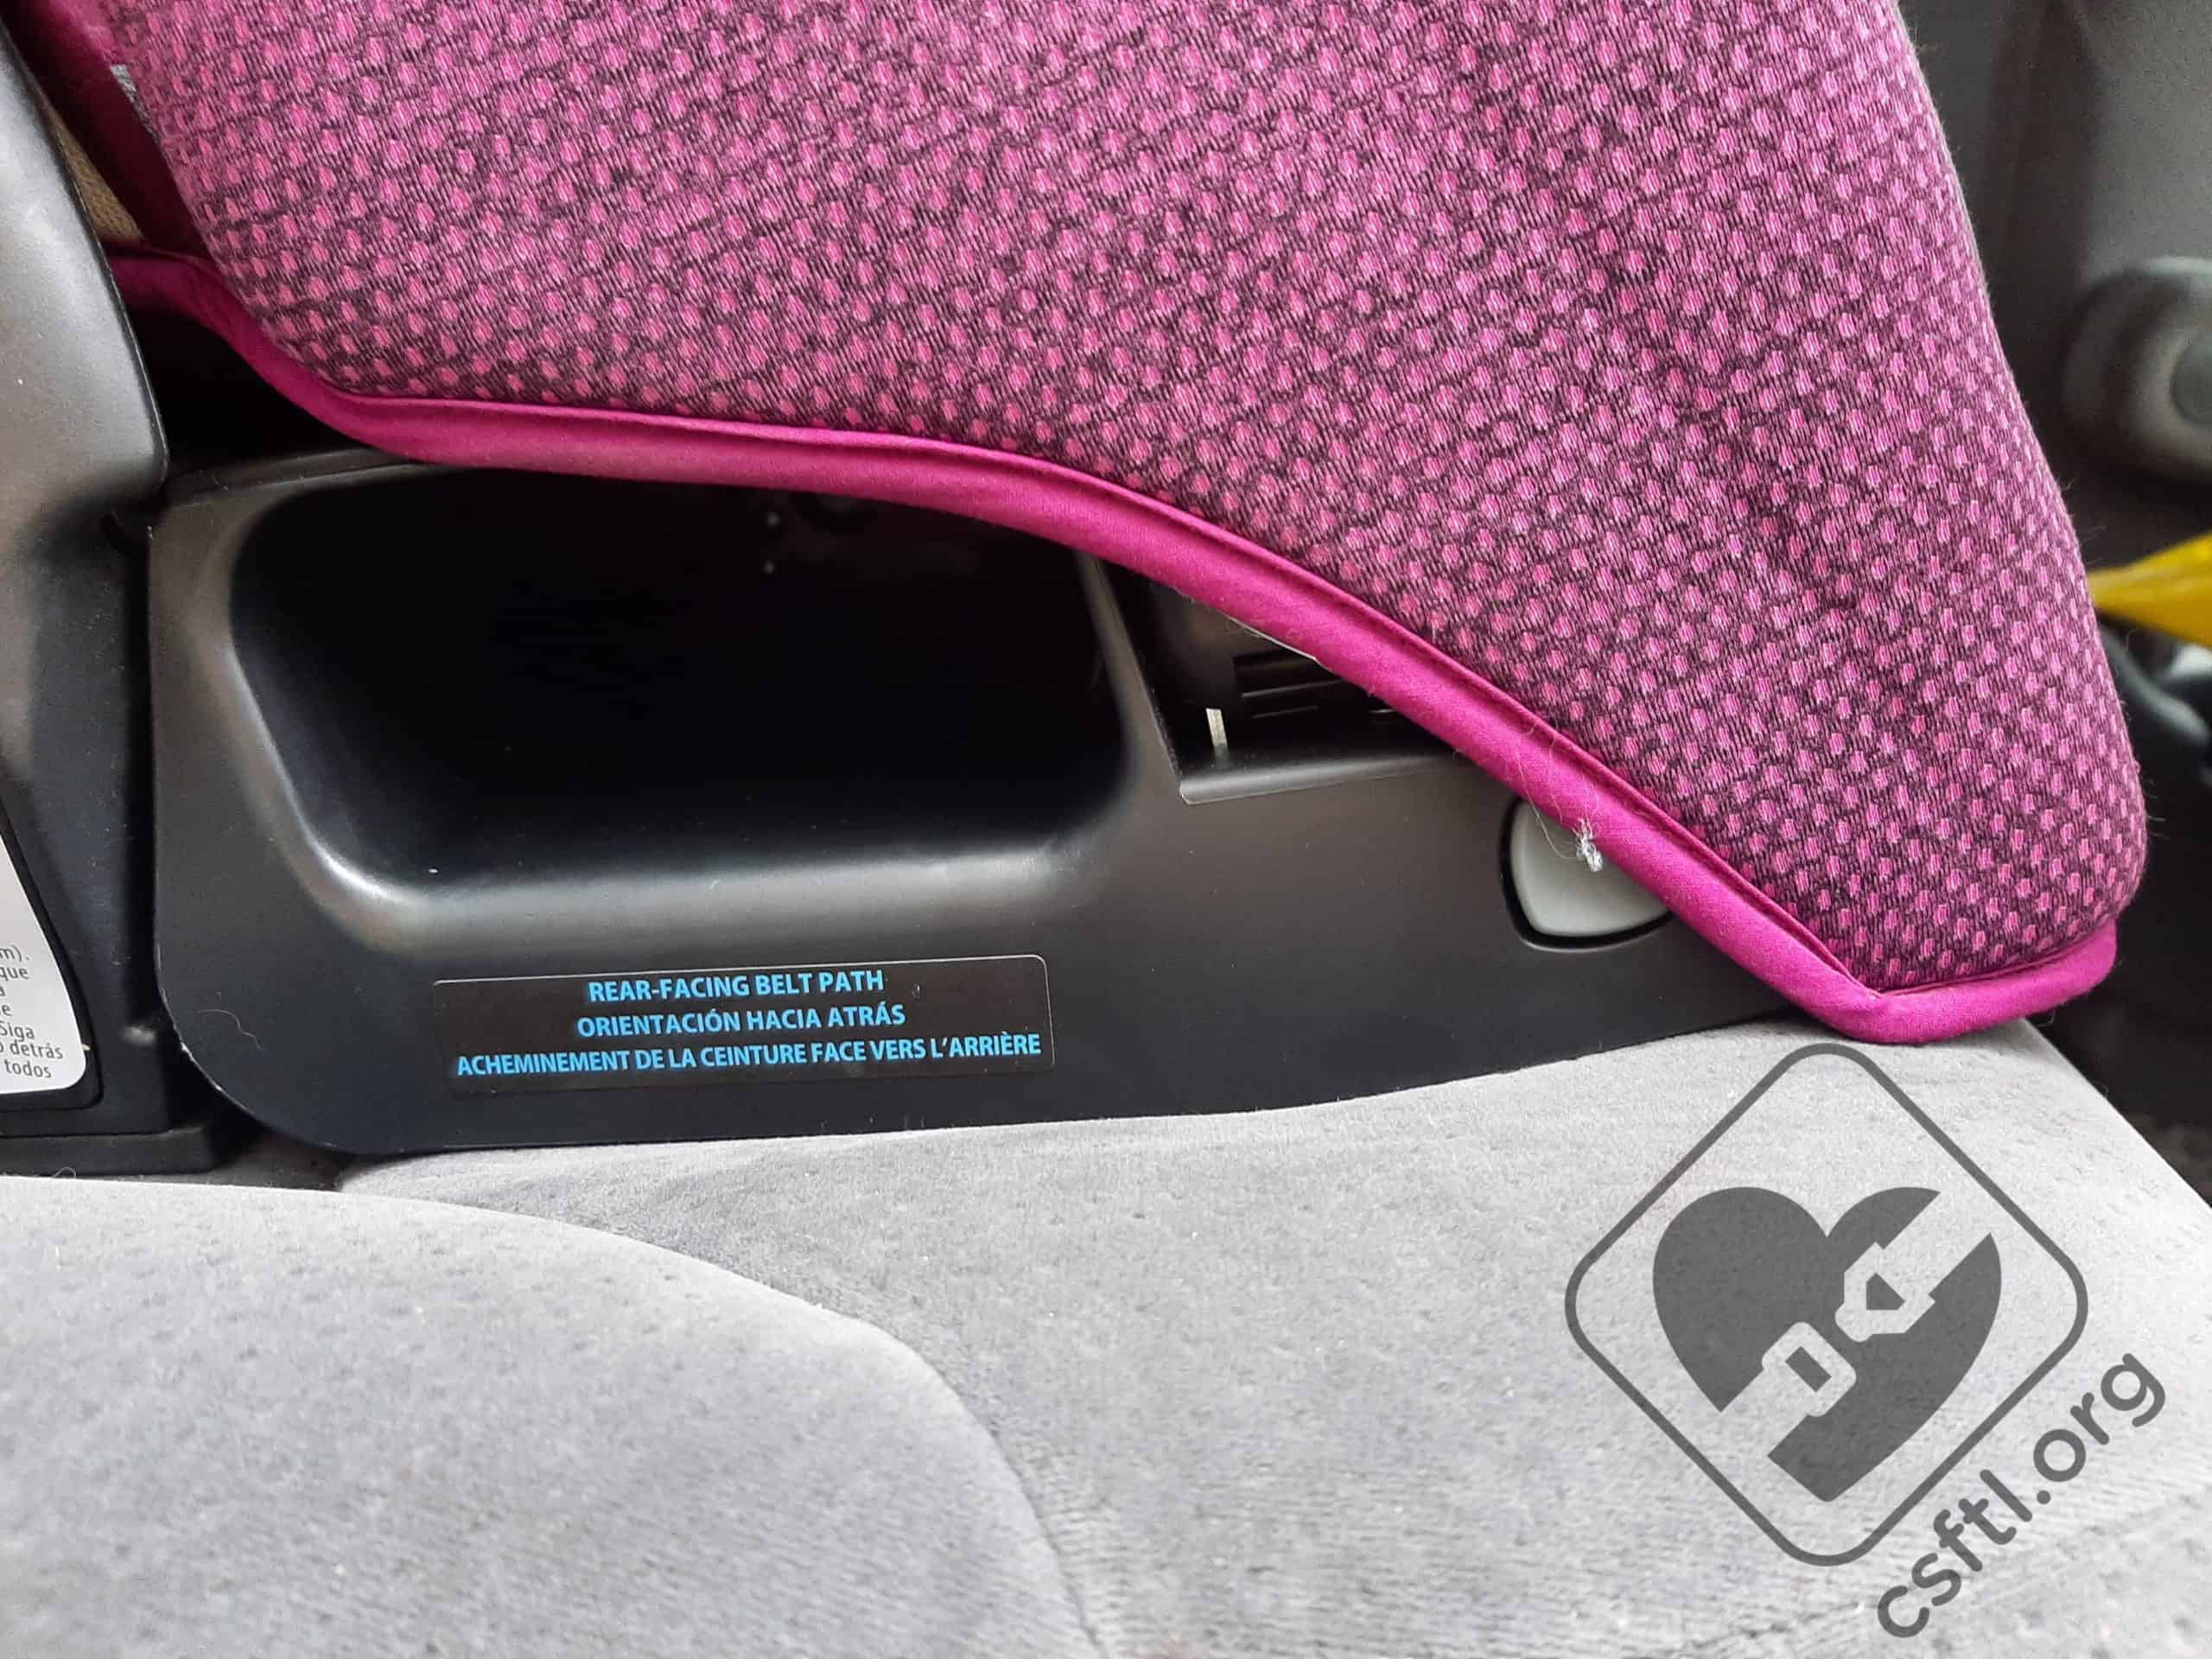
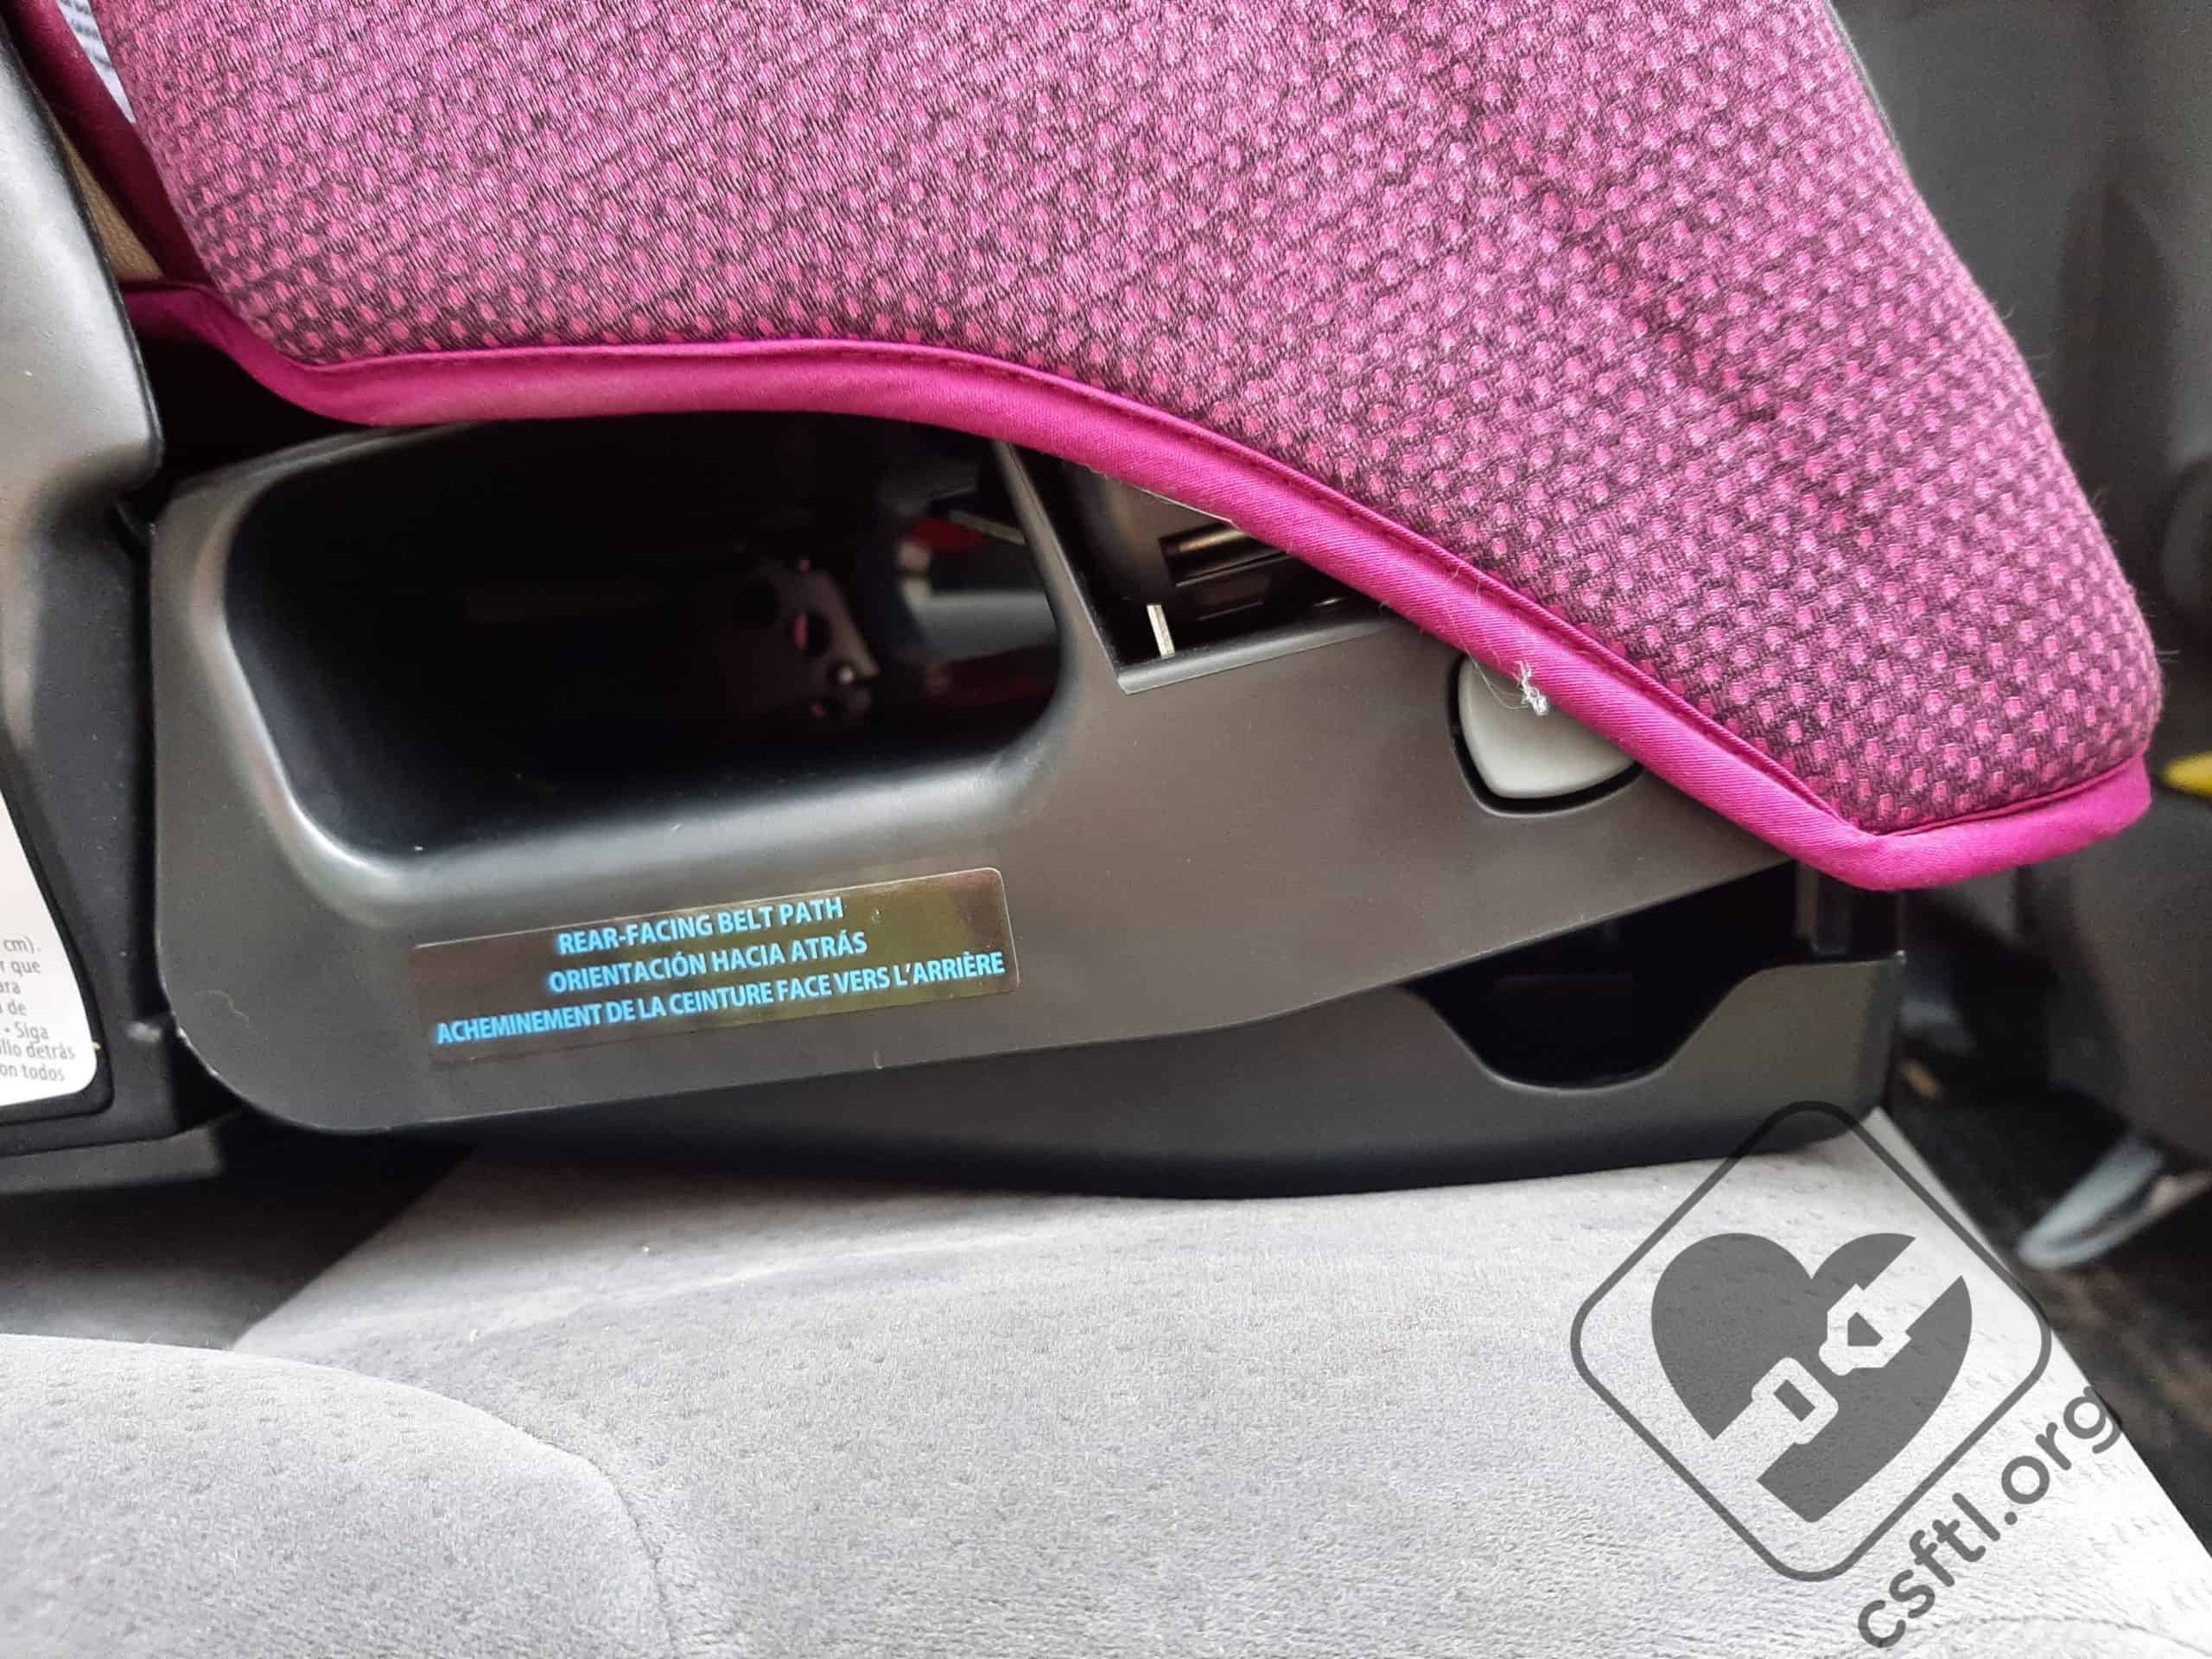
Diono Radian 3QXT installed rear facing with vehicle seat belt
To install the Diono Radian 3QXT rear facing with the vehicle lap/shoulder seat belt, route the vehicle seat belt through the rear-facing belt path and buckle it. The belt path is quite narrow, so it may require turning the Radian 3QXT on its side and dropping the seatbelt through the belt path if your hands don’t fit through the belt path.
Determine how your vehicle seat belts lock, and engage the locking mechanism. Press down firmly in the centre of the car seat and tighten the vehicle belt.
Once the seat is installed, check to ensure that the seat moves less than 1 inch at the belt path when checked side to side and front to back.
If the seat has been installed on an outboard seat in the vehicle, ensure that the SIM Pod is installed on the door side of the Radian 3QXT.
Using the Optional Angle Adjuster
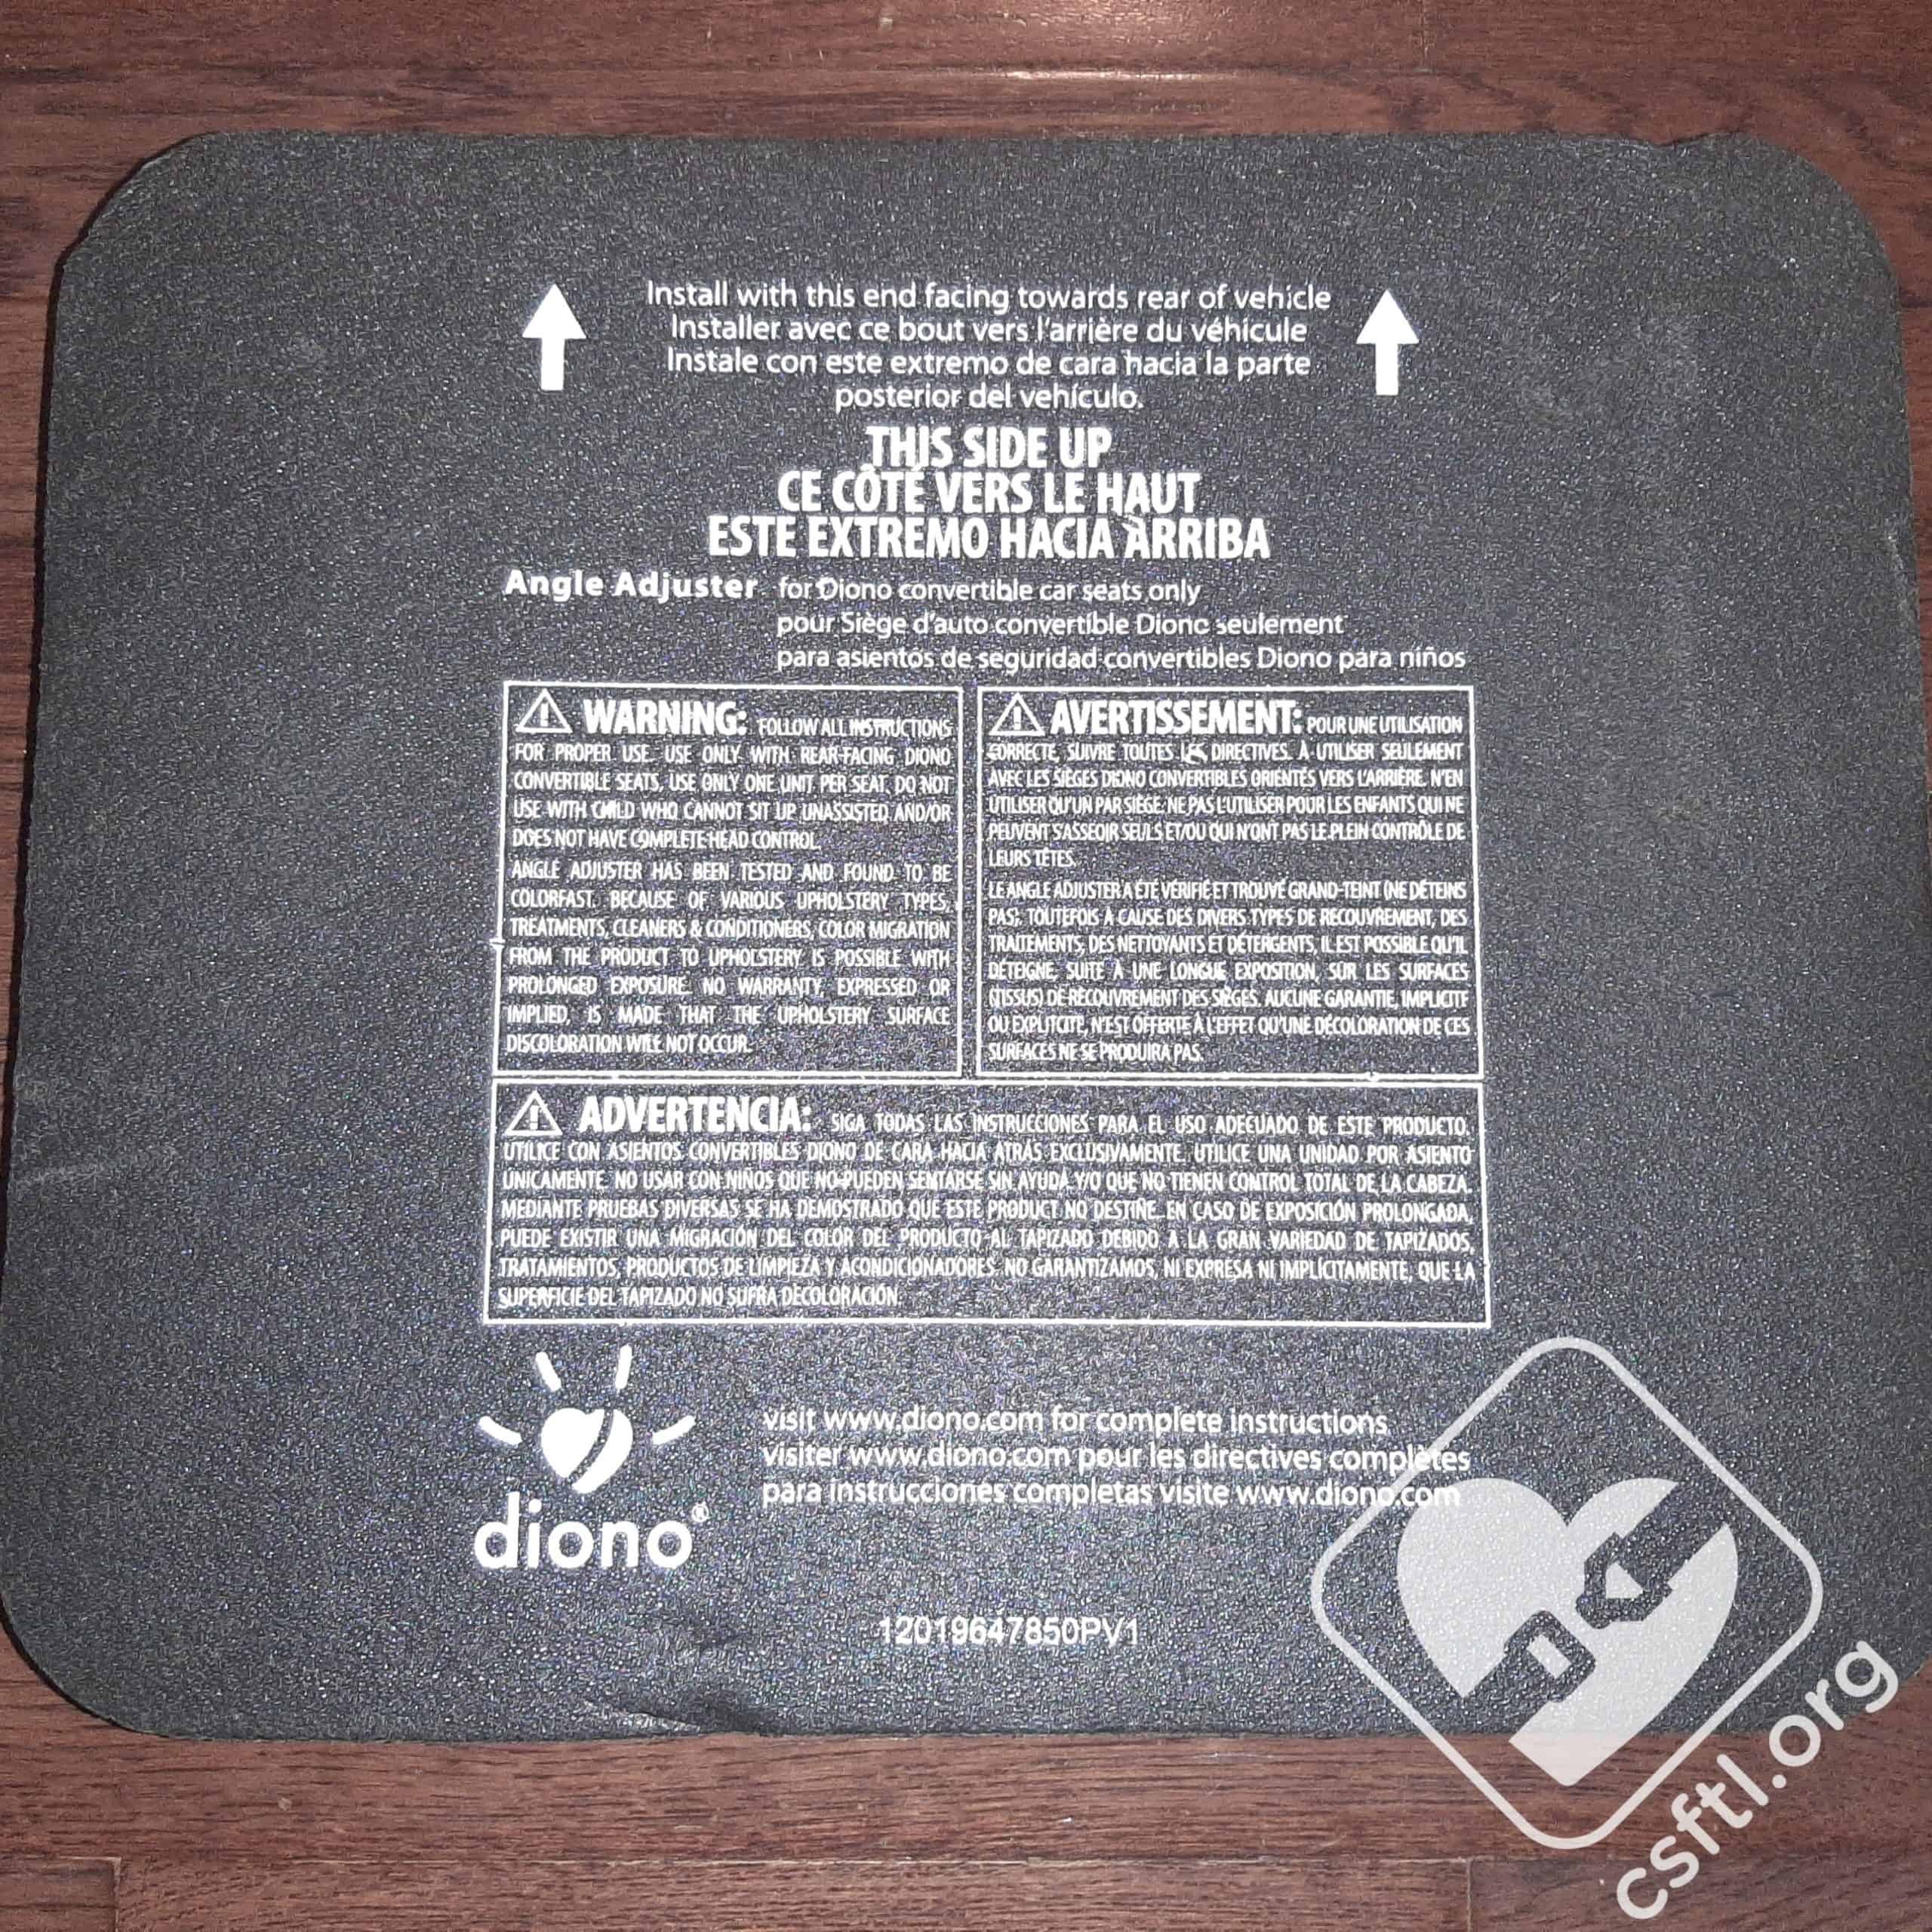
Diono angle adjuster
If you find that the Diono 3QXT takes up a lot of space rear facing, you may purchase a Diono Angle Adjuster separately and add it for a child who can sit unassisted and has complete head control. Many other car seats accomplish adjusting the recline angle by using recline angle adjusters that are not only included with the seat, they are permanently attached to it.
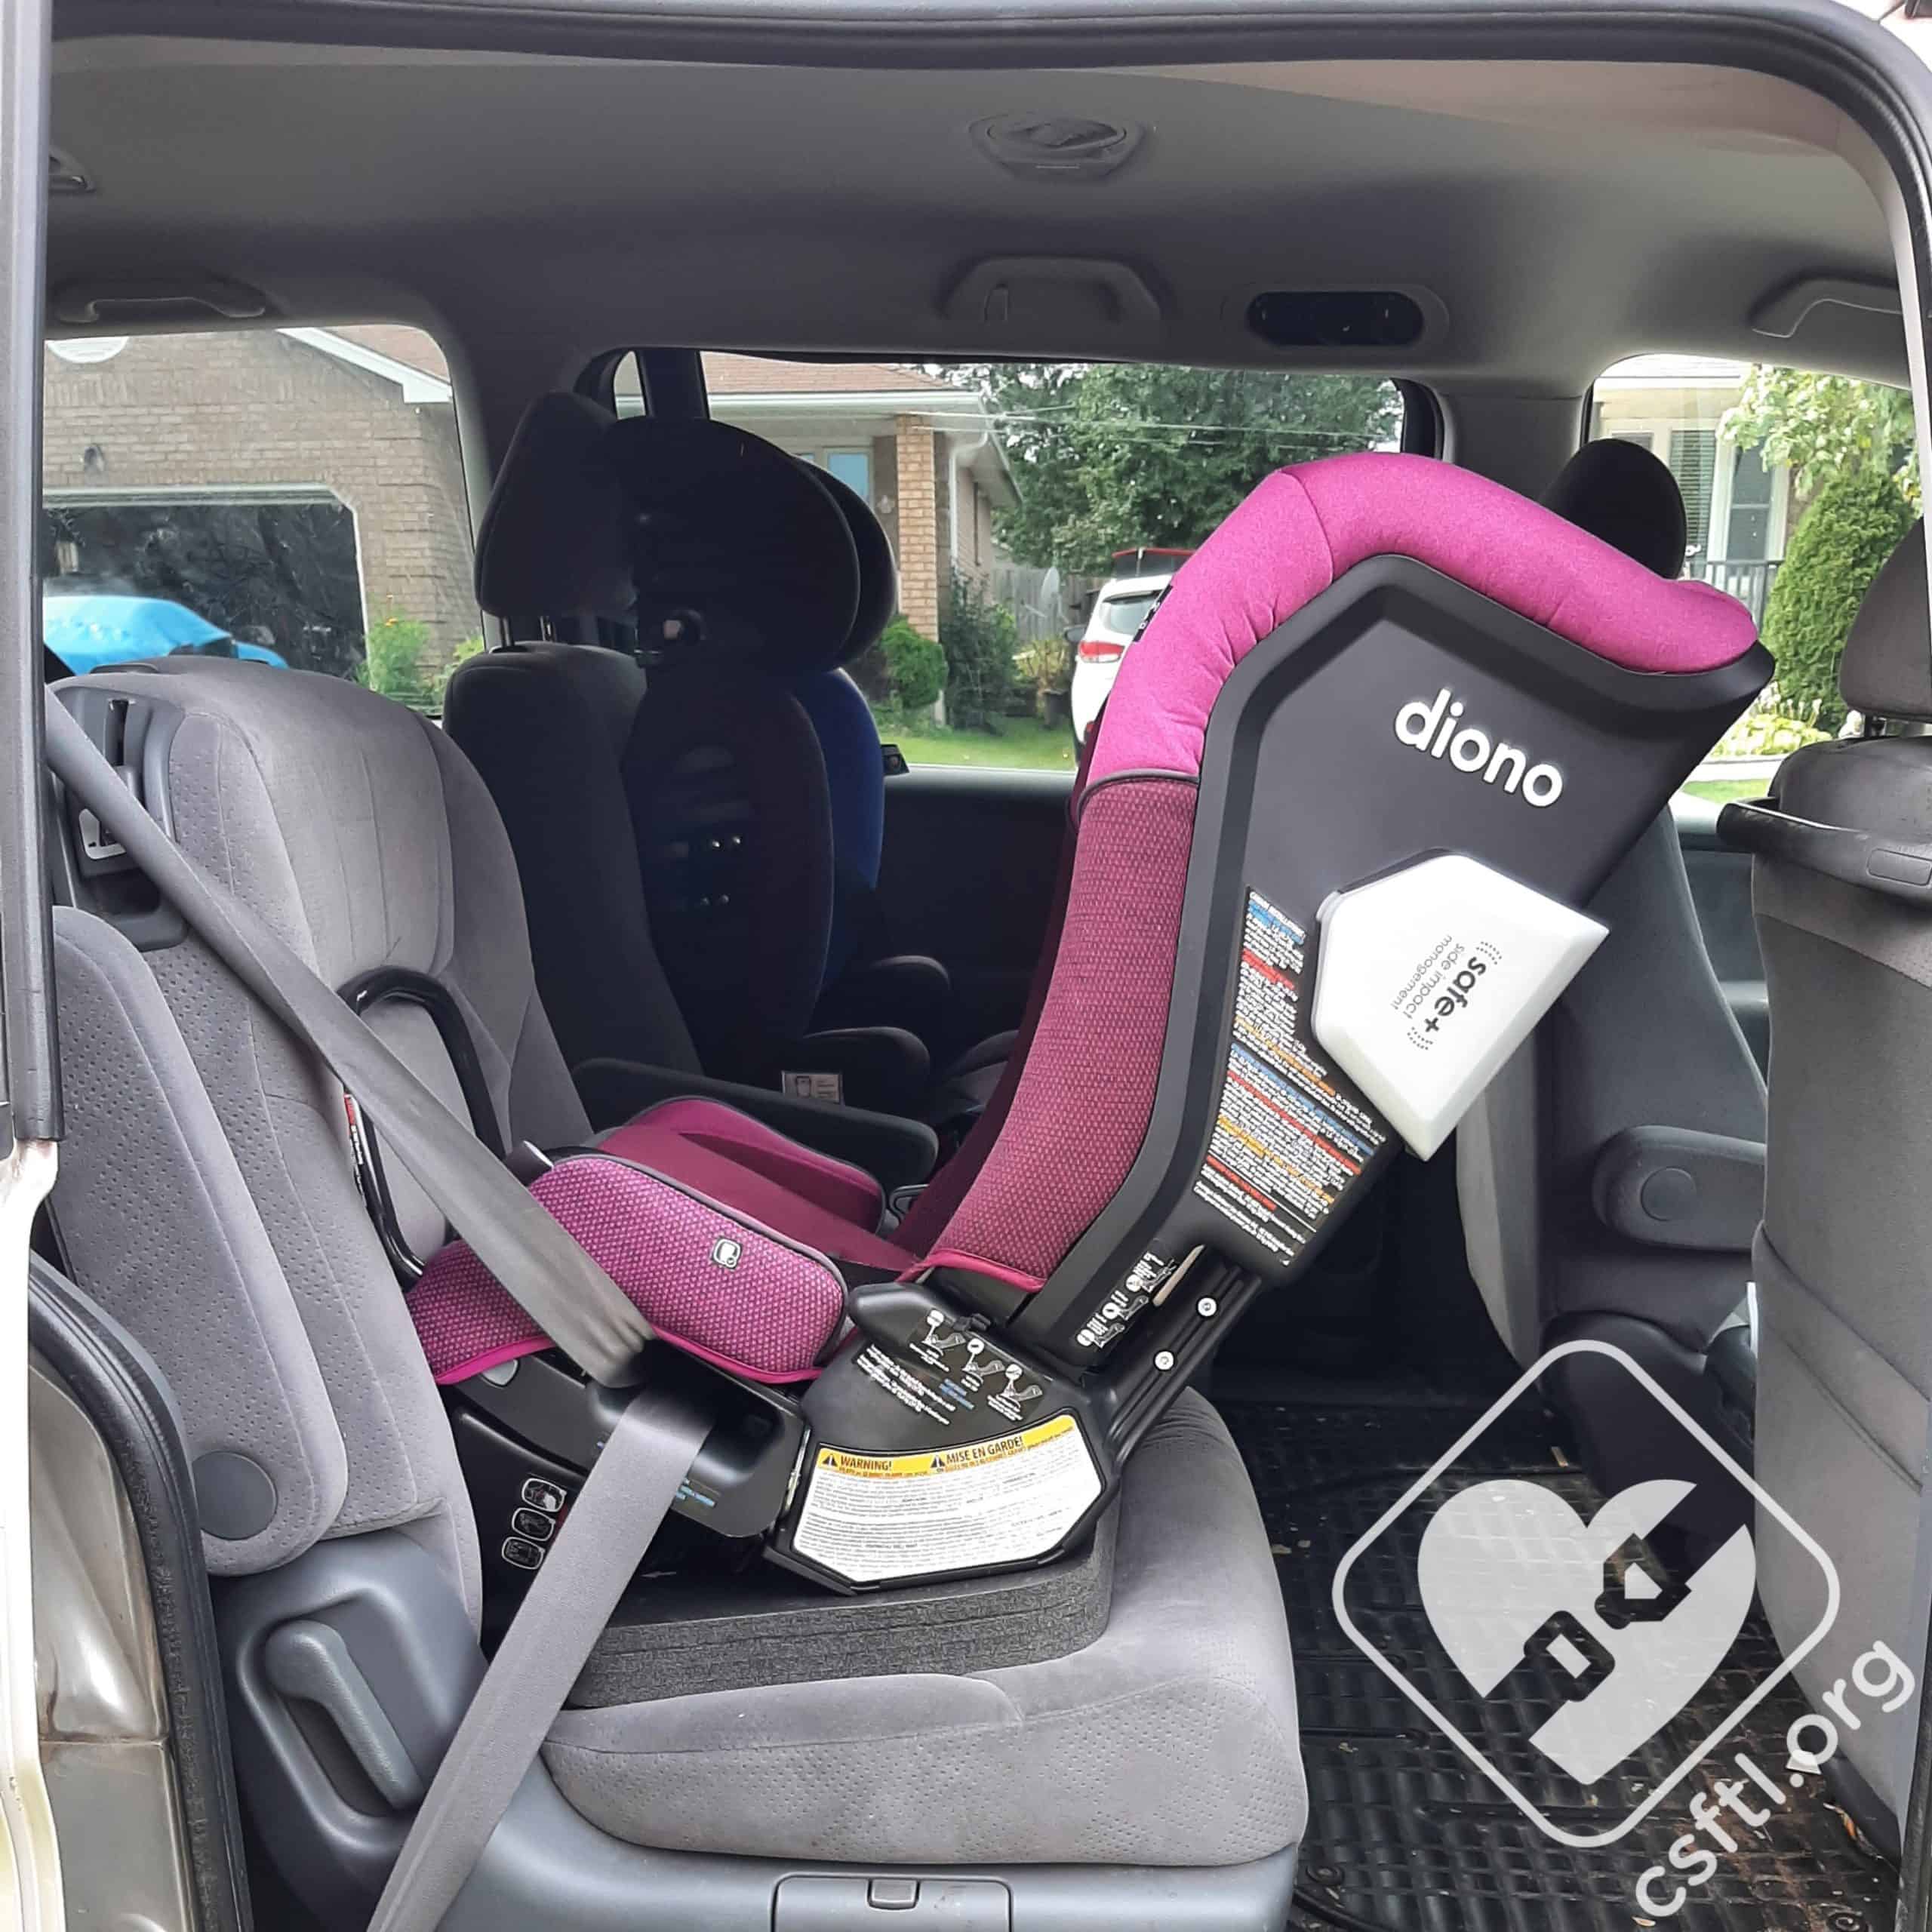
Diono Radian 3QXT installed rear facing with vehicle seat belt and angle adjuster
To use the Angle Adjuster:
- Install the Radian 3QXT rear facing in the vehicle
- Lift up the back of the 3QXT and slide the angle adjuster under the base of the seat, pushing it towards the rear of the vehicle until it contacts the “feet” of the rear facing base
Note: We found that the anti rebound bar made installing the angle adjuster quite difficult. The only way we were able to position it properly without help was pretty complex: it required sitting on the vehicle floor behind the Radian 3QXT and using one hand to push up on the back of the 3QXT while using the other hand to push the angle adjuster toward the rear of the vehicle. We could not get enough leverage to push the angle adjuster back under the Radian 3QXT from outside of the vehicle (this may be another case where a second person would be helpful).
Fit to Child: Rear Facing
When rear facing, the harness straps must be positioned at or below the shoulders. All harness positions can be used rear facing with the Diono Radian 3QXT (page 64 of the manual), and the child must have at least 1.5 inches of shell above their head.
3 Weeks Old
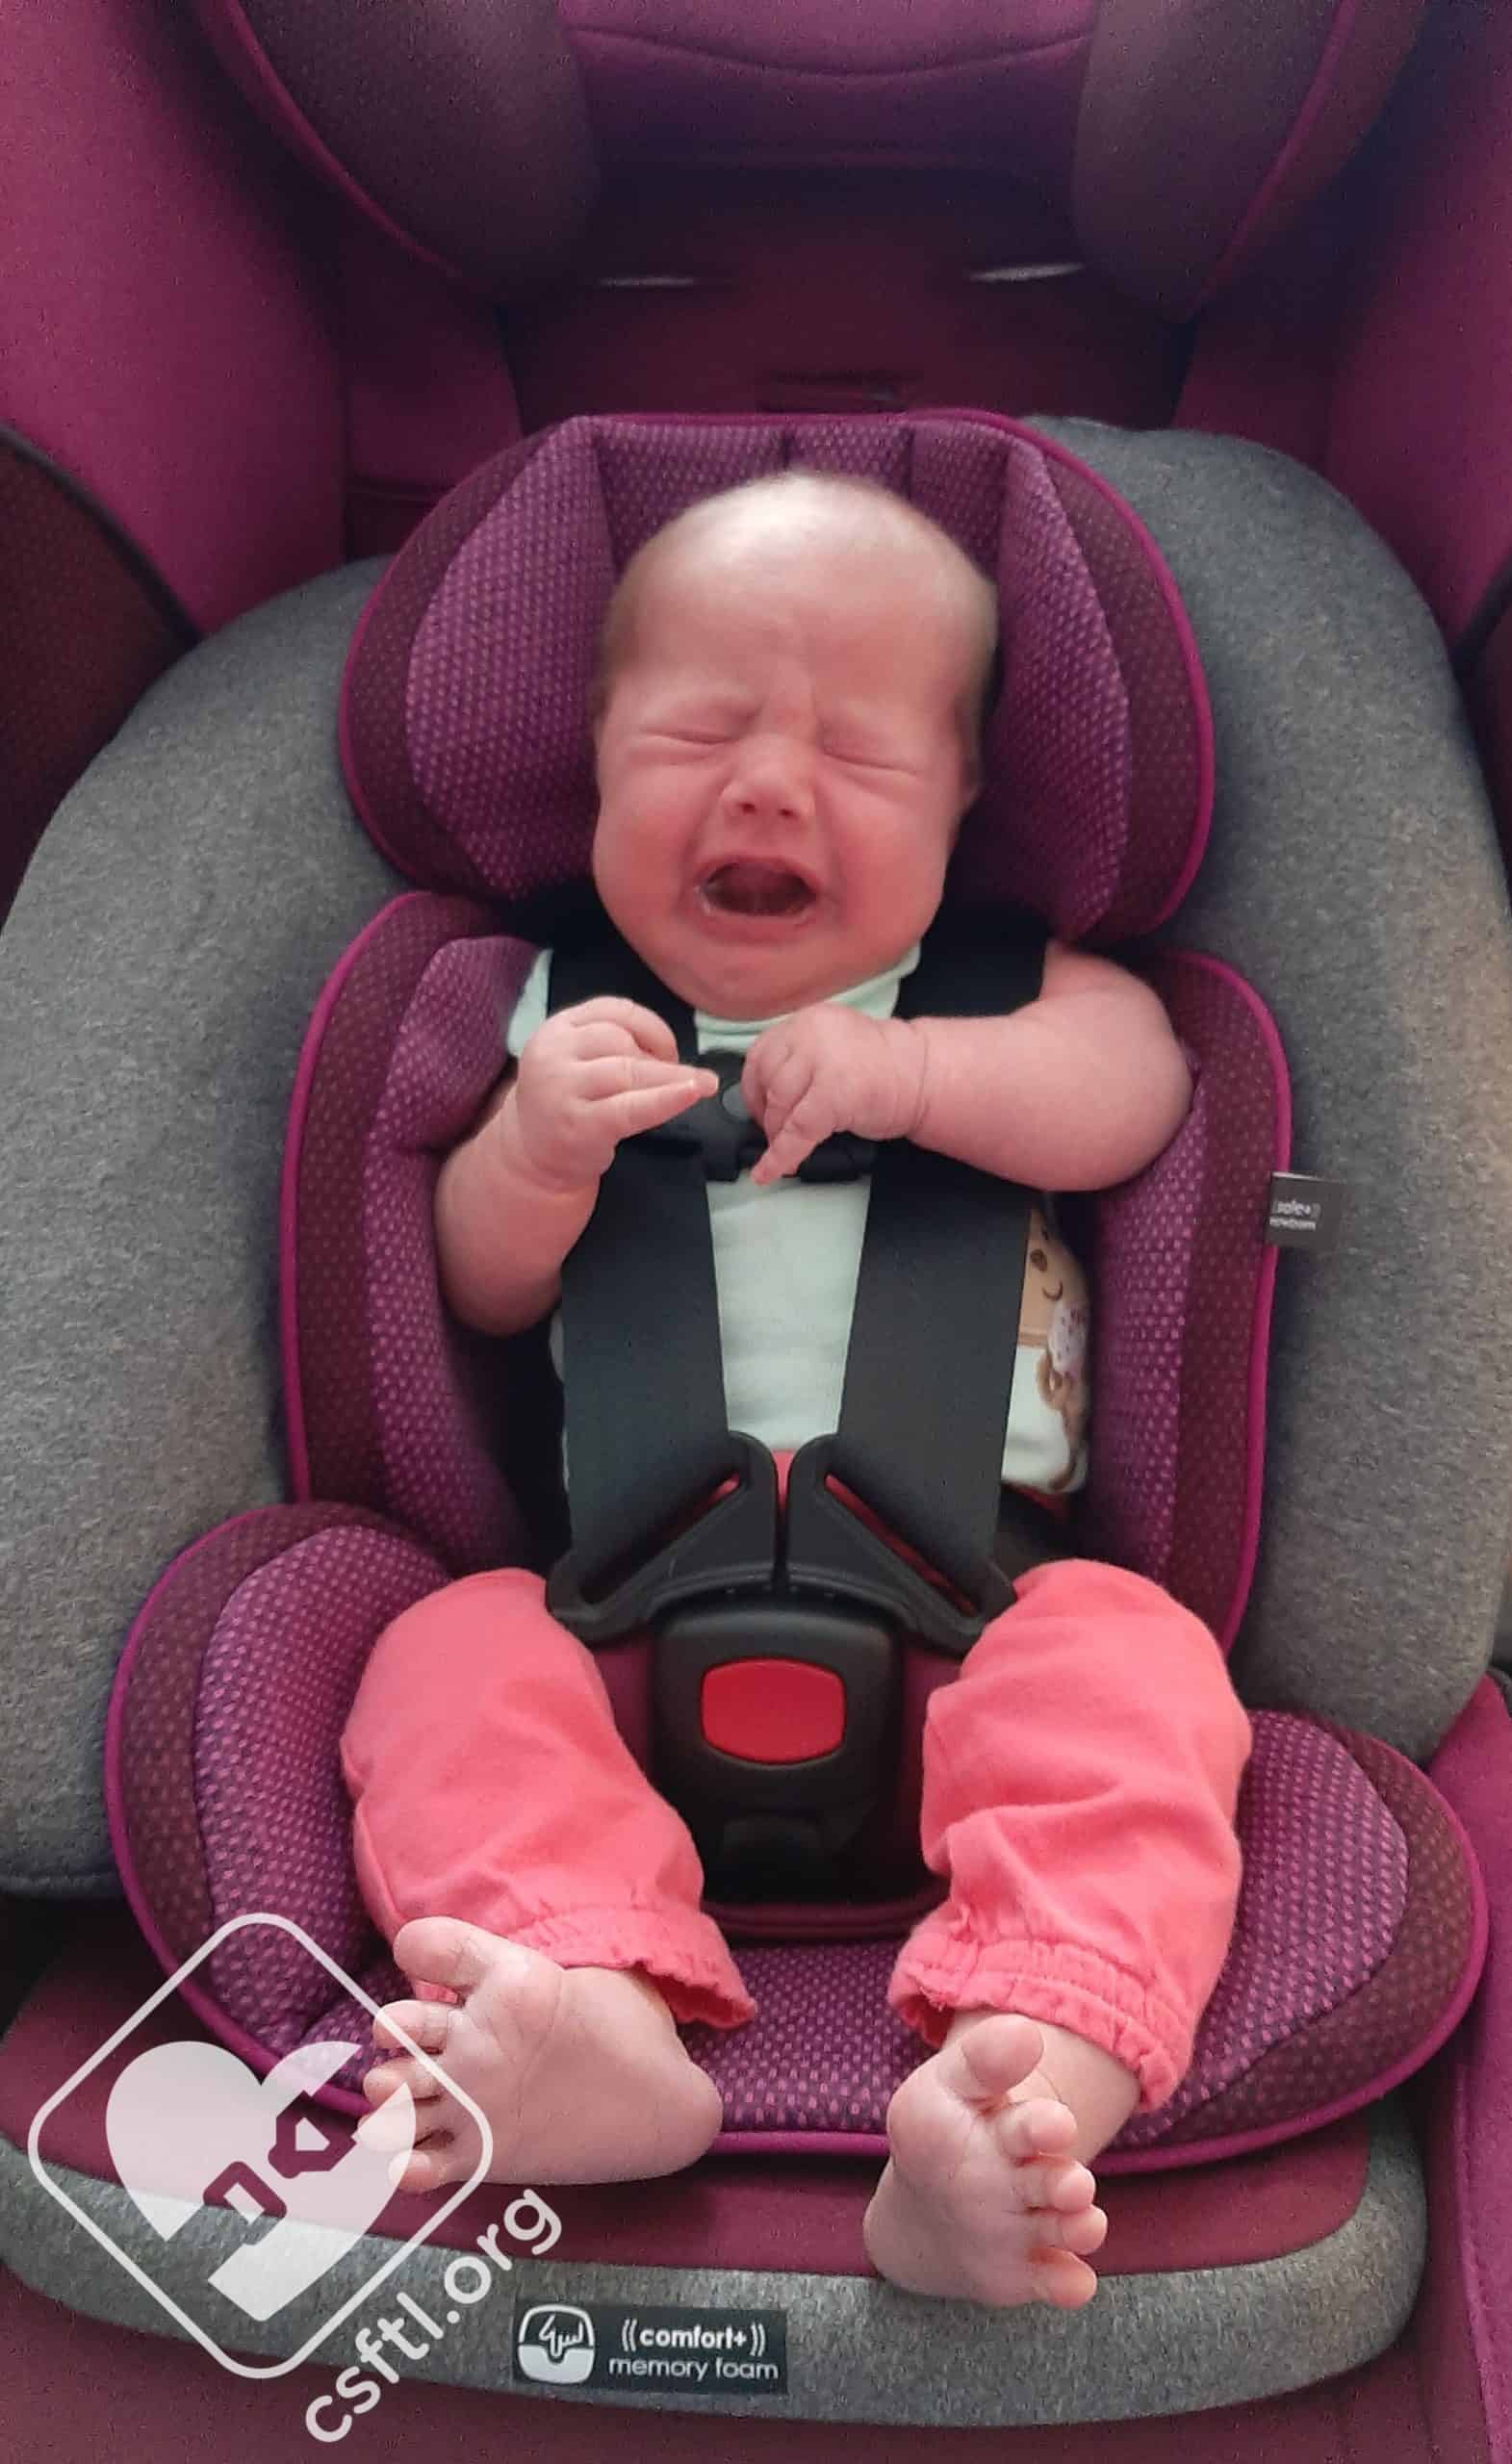
Diono Radian 3QXT – 3 weeks old
This newborn model is three weeks old, weighs 8.7 pounds and is 20.75 inches long. Despite our reviewer being an experienced CPST-I and mother of three, harnessing a newborn in the Radian 3QXT was a difficult task!
Because our model is only 3 weeks old, we opted to use the Infant Support, Newborn Protection Insert, and Buckle Pad. Altogether, that makes for a LOT of padding. We also tried to use the Newborn Harness Pads but all of the padding completely overwhelmed our model, so we removed the harness pads for a better fit.
The wedge-like padding of the Infant Support was prone to sliding, so positioning it properly while placing our newborn in the seat was difficult. We started with the crotch buckle in the innermost slot (we had expected that this would be the correct position for a newborn), but with all of the additional padding, our model was sitting on the crotch buckle. So we moved the crotch buckle to the middle slot (through the shell and through all of the padding), the harness fit was much better. The large amount of padding in the Infant Support pushes the baby’s hips and bum forward, leaning them backwards to support the child’s airway.
Once we had the crotch buckle position figured out and adjusted, it was time to put our model in the seat. The Infant Support combined with the Newborn Protection Insert provided a LOT of padding in the seat, and our model was quite squished. We had to be careful not to pinch her while harnessing her in the seat, as there was not a lot of room for us to work.
When we eventually had our squishy newborn model harnessed in the Radian QXT, the fit was quite good. The harness was positioned just slightly below her shoulders when in the lowest position, the Infant Support had her leaned back so that her airway was clear, and the padding surrounded her like a warm hug. Our model quickly fell asleep in the seat, which we take as a good sign – we only wish it was easier to get her in the seat in the first place!
15 Months Old

Diono Radian 3QXT – 15 months old
Our newborn model’s big sister was very interested in the purple seat, so she happily agreed to try it out for us. She is fifteen months old, 28 inches tall, and weighs 24 pounds.
After helping us move the harness up to the second harness position for her (the third positing would have been just slightly too high for her), she was not too sure about the large harness pads. Despite enjoying playing with them when they were not on the seat, she did everything she could to try to remove them while they were on the harness, so we removed them. She was much happier without the harness pads on, and so were we.
Installation: Forward Facing
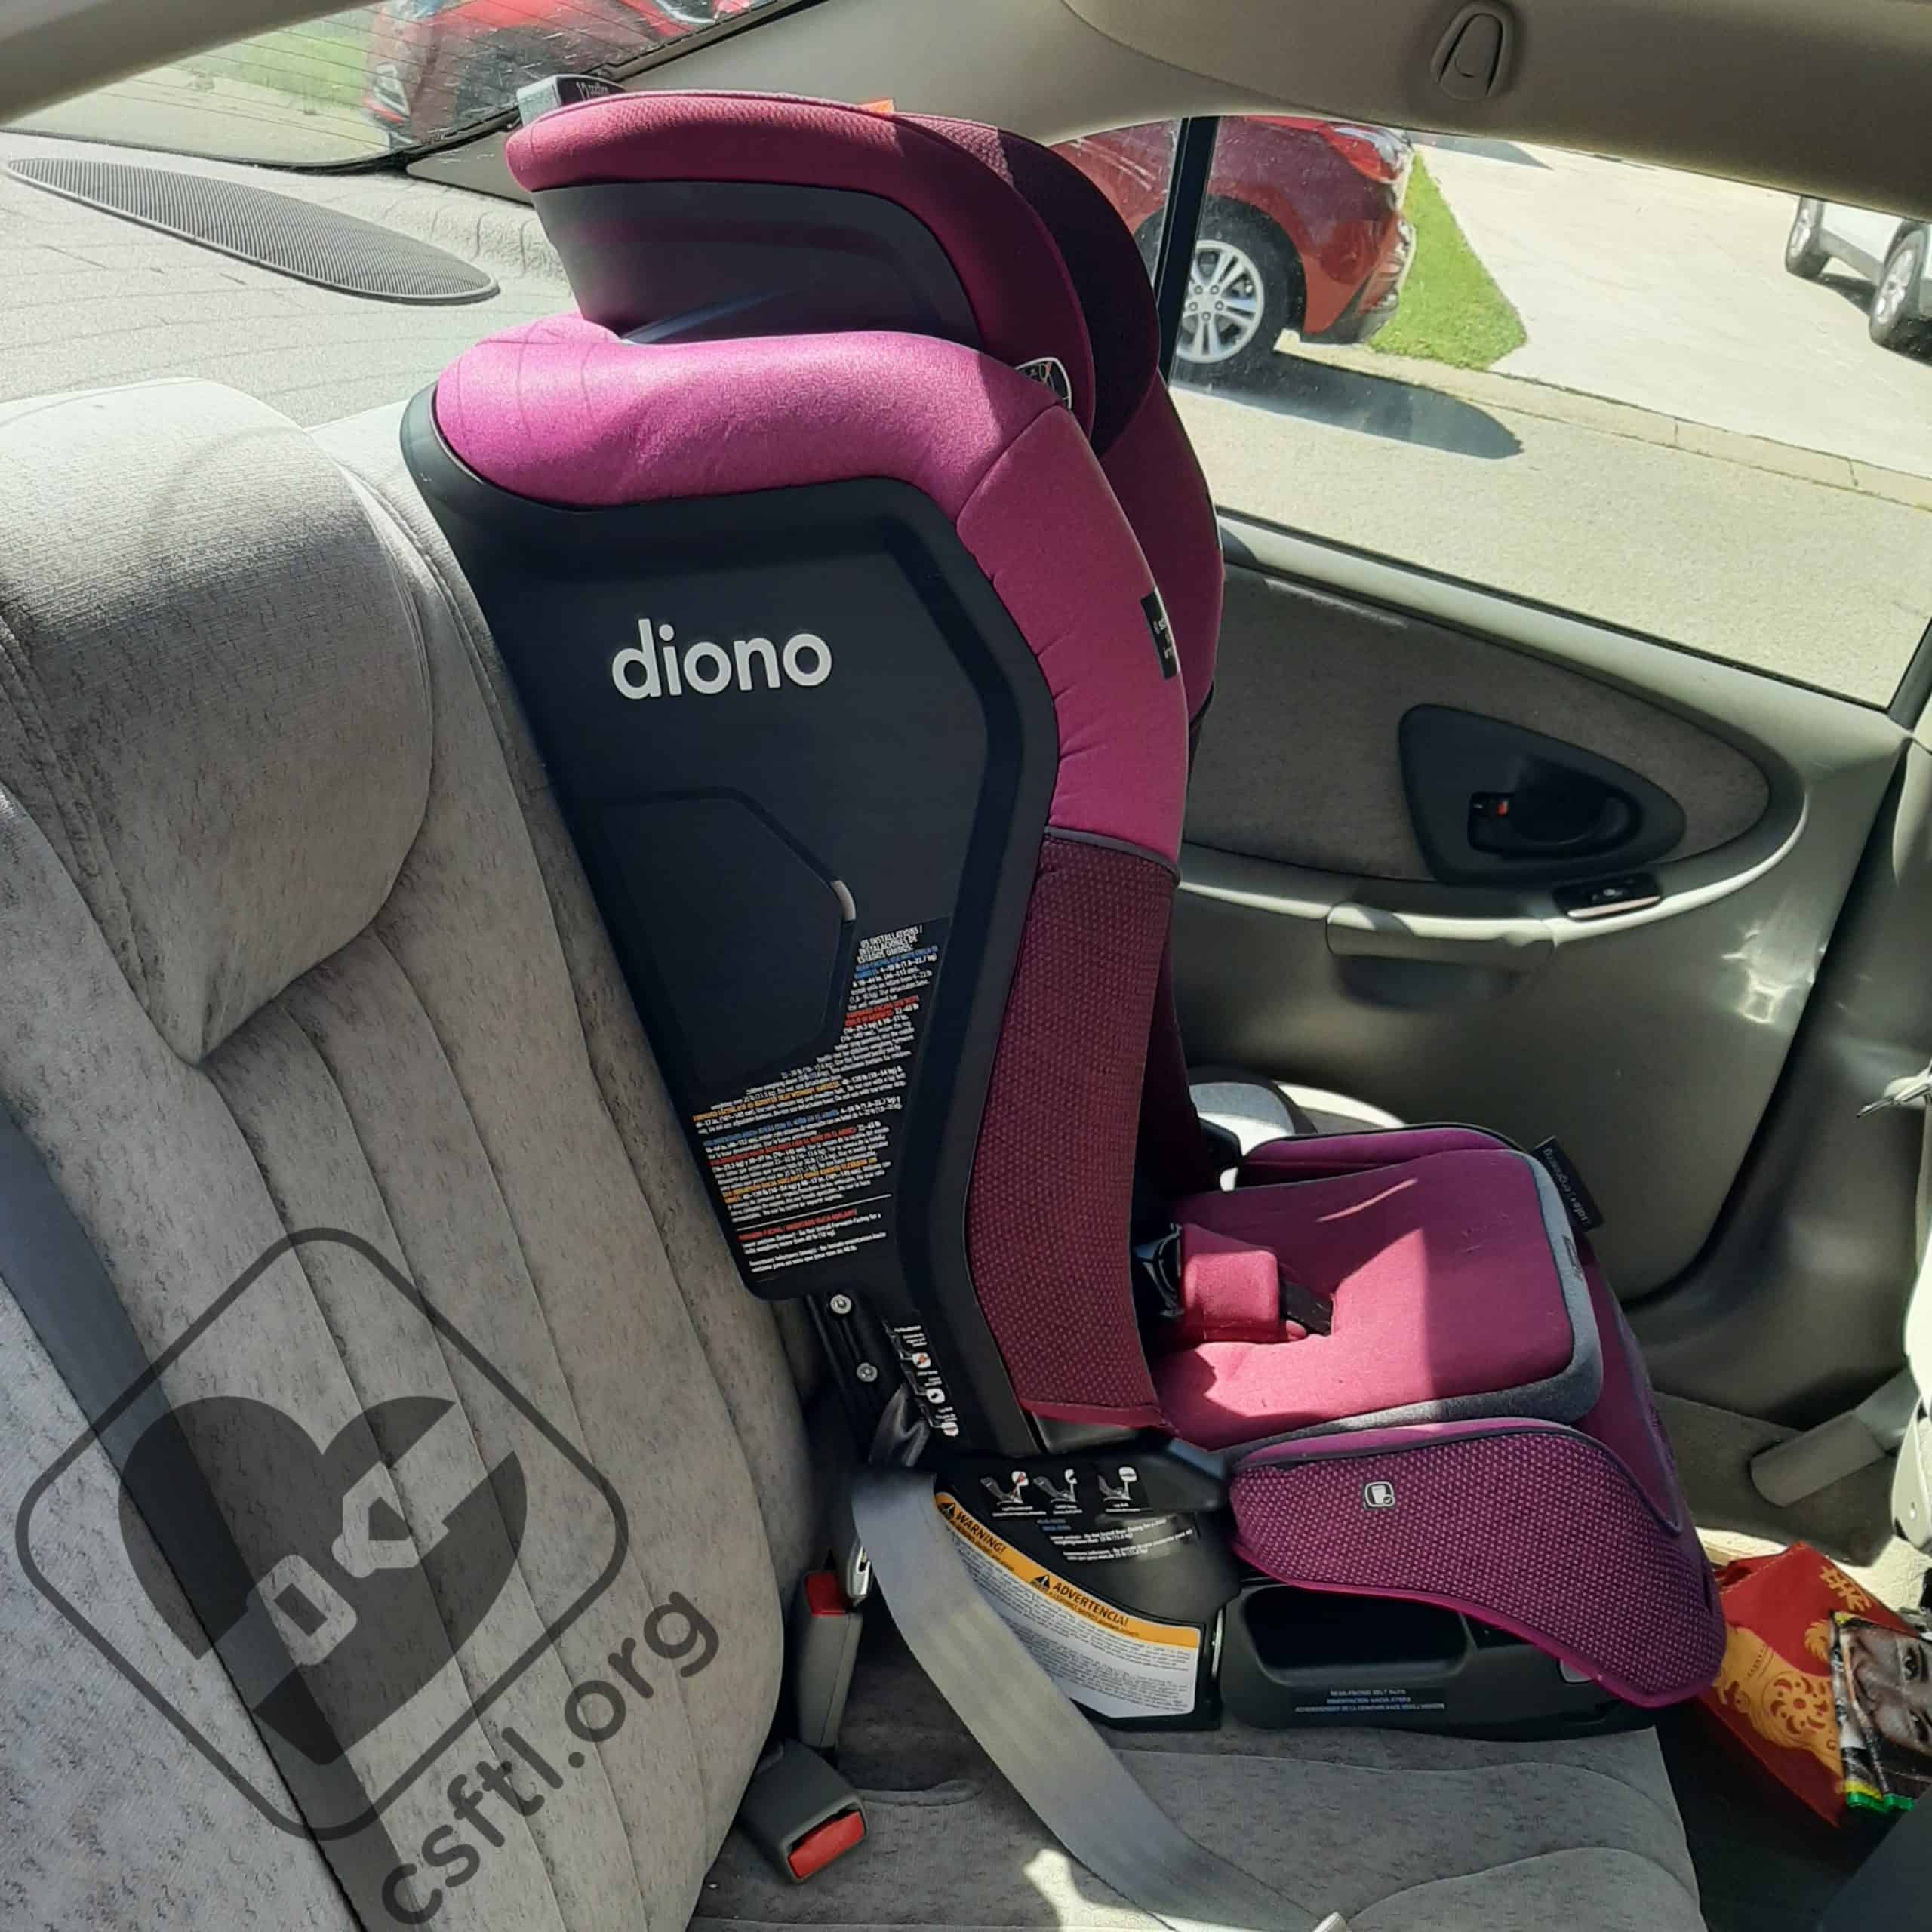
Adjustable Bottom
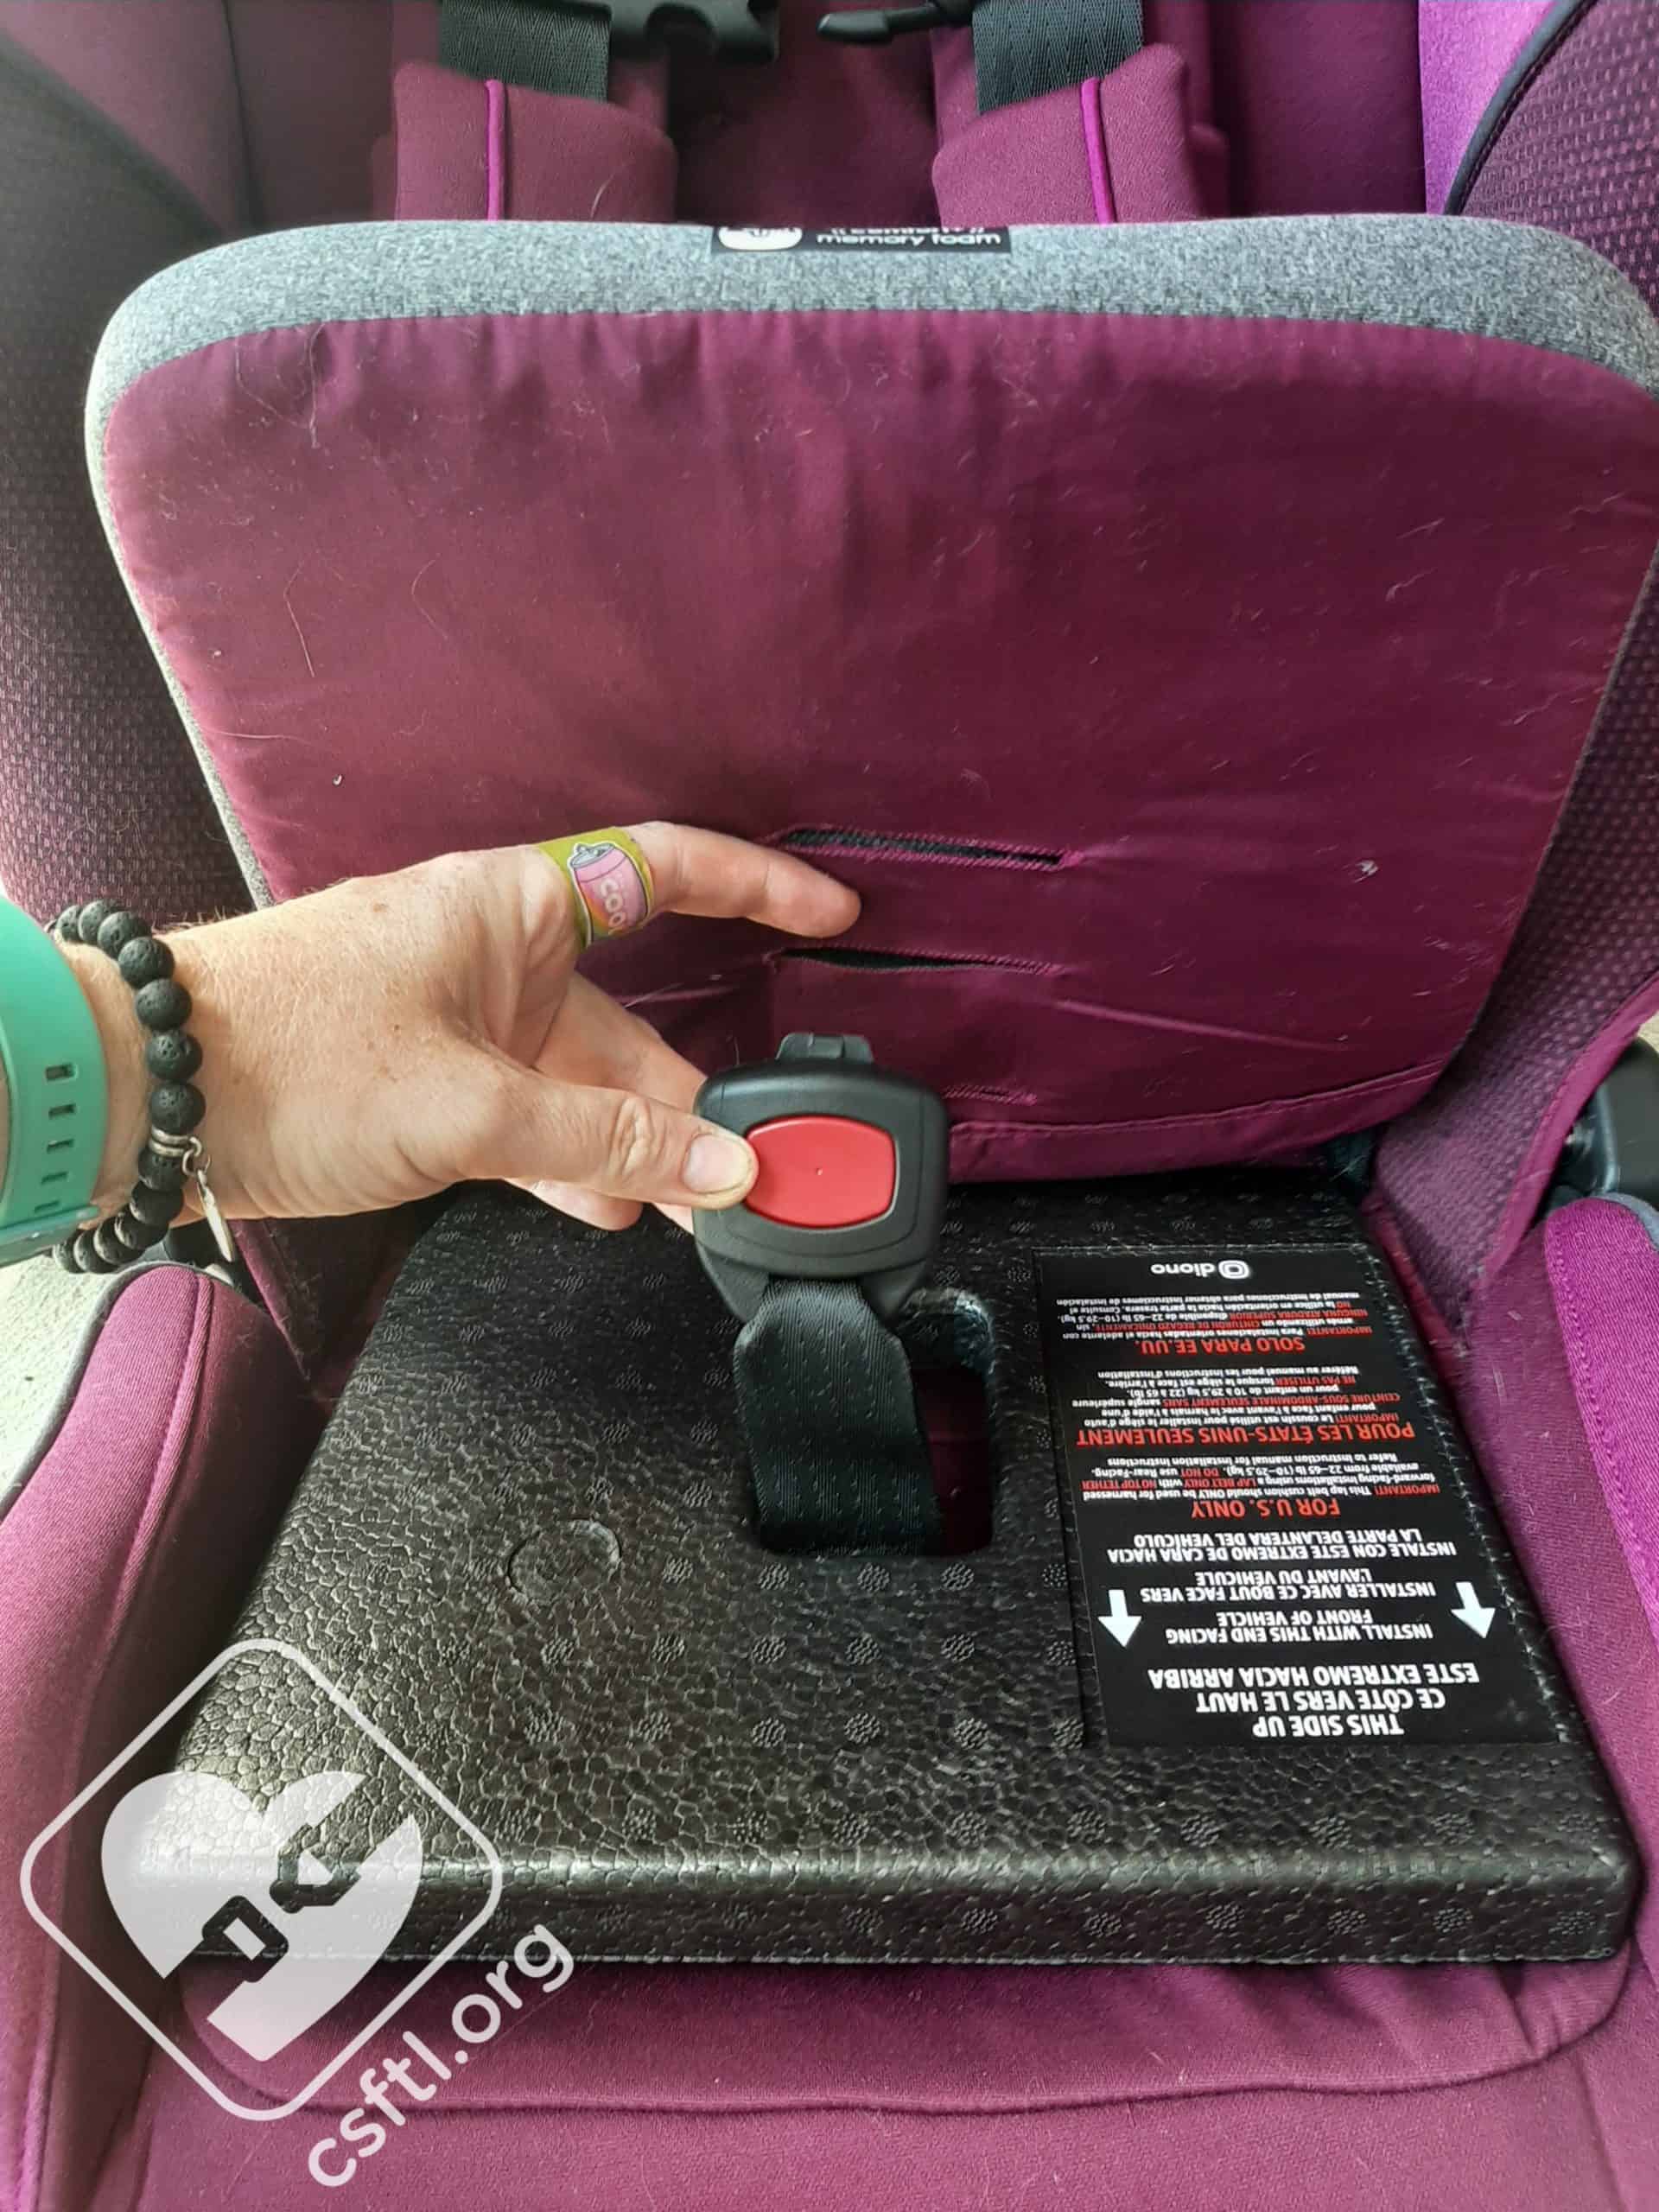
Diono Radian 3QXT – adjustable bottom not in use
The seat includes a recline adjuster that is only used for forward facing mode. This adjuster must be lowered when the seat is installed forward facing for children who weigh more than 25 pounds. The manual does not indicate if this adjuster can also be used for children who weigh between 22-25 pounds, so we reached out to Diono’s customer service. We were advised that a child under 25 pounds should not be forward facing, but if we chose to have a child who weighs less than 25 pounds ride forward facing, this piece only NEEDS to be dropped when the child weighs 25 pounds.
Diono Radian 3QXT – adjustable bottom in use
The manual very clearly states to NOT use the adjustable bottom in booster mode, so this adjustment will need to be made if and when the seat is converted to a booster.
Safe Stop
Diono Radian 3QXT – SafeStop not in use
If the child using the Diono Radian 3QXT weighs less than 40 pounds, the Safe Stop must be installed before forward facing use.
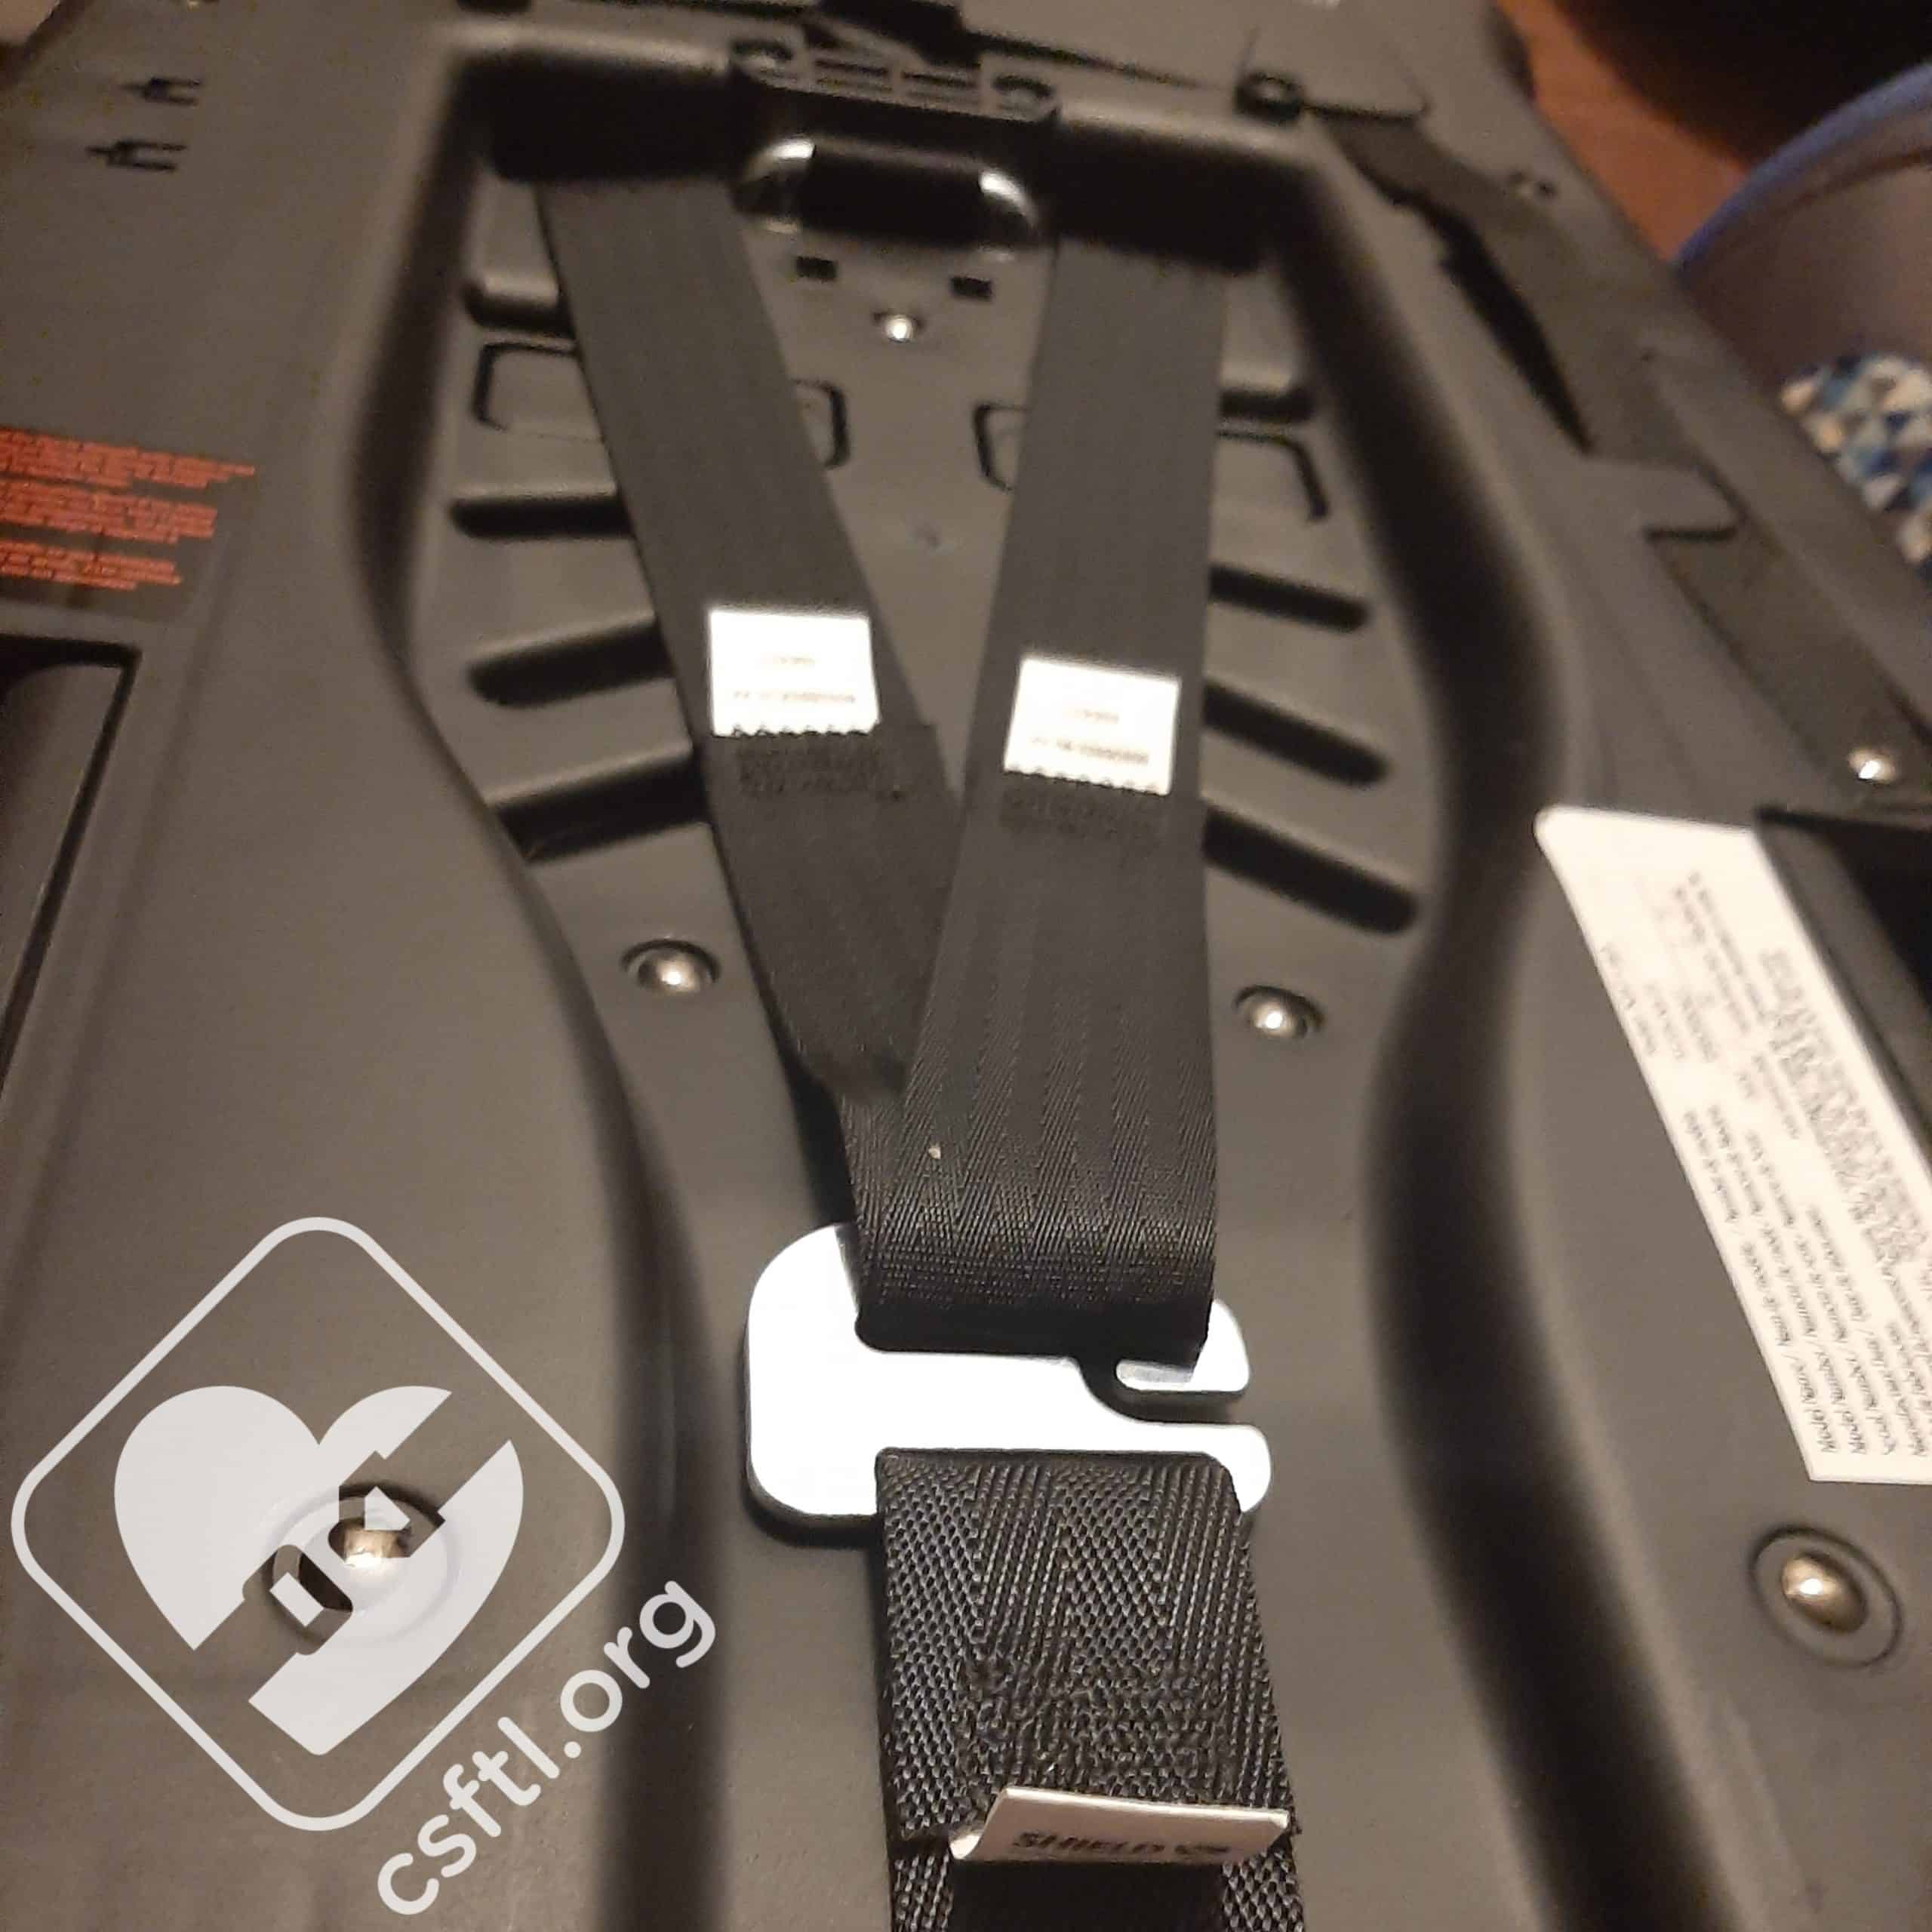
To install the Safe Stop:
- Locate the belt storage icon on the back of the seat and fold down the rear velcro flap. Detach the Safe Stop and remove it for use
- Unzip the cover on the back of the seat to access the harness straps. Remove the harness straps from metal splitter plate, thread both harness straps on to the metal hook of the Safe Stop (connect the left side first and then the right side)
- Thread the bottom of the Safe Stop back on to the splitter plate and close the back cover of the seat, taking care to ensure the harness is clear from any obstructions
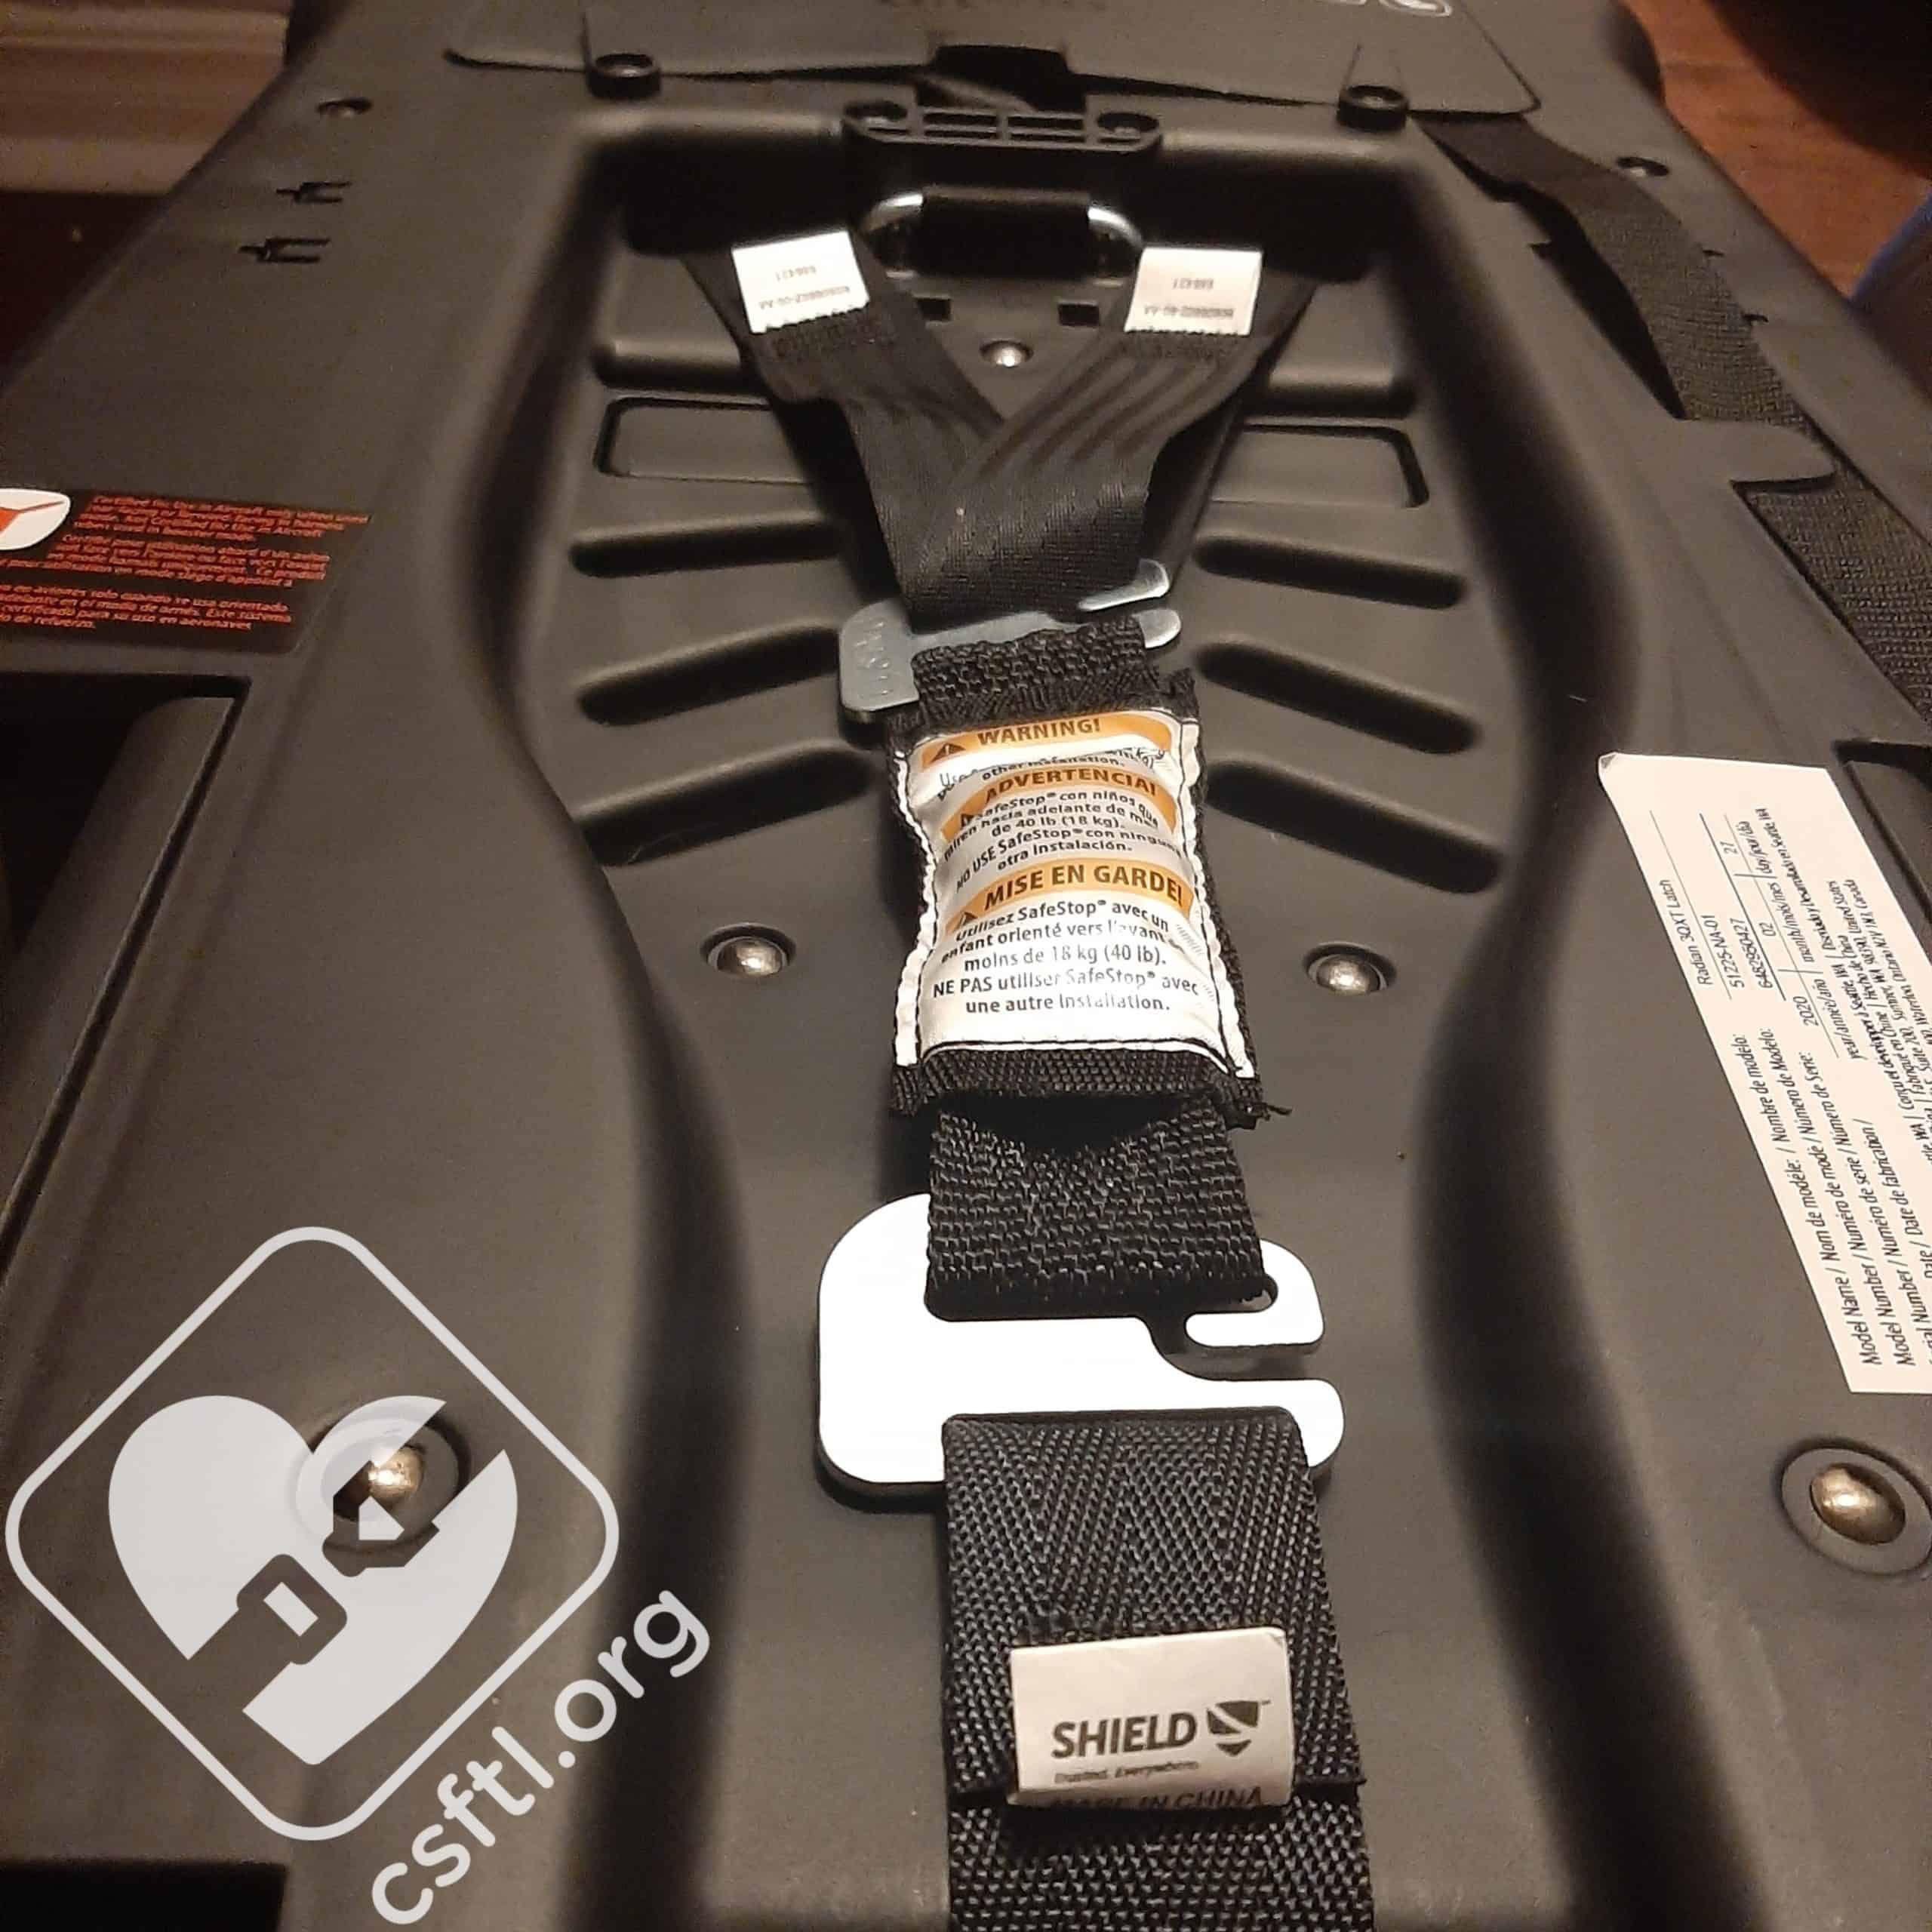
Diono Radian 3QXT – SafeStop in use
Note: the SafeStop must be removed once the child weighs 40 pounds.
Vehicle Headrest
Although it is not mentioned in the manuals, the Diono multimode seats require a vehicle headrest when installed forward facing if the vehicle seat is not flush with the child restraint. The vehicle headrest is not required when the vehicle seatback IS flush with the child restraint forward facing.
If you have any questions about whether your installation requires the presence of a vehicle headrest or not, we recommend contacting Diono’s customer service directly with pictures of your installation for personalized advice.
Installation with Lower Anchors
Note: Do not use this installation method for a child who weighs more than 40 pounds.
Diono Radian 3QXT installed forward facing with lower anchors – adjustable bottom not in use
To install the Diono Radian 3QXT forward facing with lower anchors, thread the lower anchor webbing through the forward facing belt path. Place the car seat forward facing on the vehicle seat and connect the lower anchor connectors to the vehicle’s lower anchors. Press down firmly on the car seat with one hand while pulling on the lower anchor strap tail with the other until all slack is removed. Attach the top tether to the vehicle tether anchor and tighten. Once installed, check that the seat moves less than 1 inch at the belt path when checked side to side and front to back. Note: the Radian 3QXT’s high, narrow belt path often means that a little extra pressure is required to complete a secure installation – if you are struggling with the front to back movement, try letting the seat sit where it wants to sit (don’t try to force it more upright), and tighten.
If the seat has been installed on an outboard seat in the vehicle, ensure that the SIM Pod is installed on the door side of the Radian 3QXT.
Installation: Vehicle Seat Belt

Diono Radian 3QXT installed forward facing with vehicle seat belt – adjustable bottom in use
To install the Diono Radian 3QXT forward facing with the vehicle seat belt, place the car seat forward facing on the vehicle seat and thread the vehicle seatbelt through the forward facing belt path. Determine how the vehicle seatbelt locks and engage the locking mechanism. Press down firmly on the car seat with one hand while pulling on the vehicle seatbelt with the other until all slack is removed. Attach the top tether to the vehicle tether anchor and tighten.
Once installed, check that the seat moves less than 1 inch at the belt path when checked side to side and front to back. Note: the Radian 3QXT’s high, narrow belt path often means that a little extra pressure is required to complete a secure installation – if you are struggling with the front to back movement, try letting the seat sit where it wants to sit (don’t try to force it more upright), and tighten.
If the seat has been installed on an outboard seat in the vehicle, ensure that the SIM Pod is installed on the door side of the Radian 3QXT.
Installation: Vehicle Lap-Only Belt without a top tether (US only)
Diono Radian 3QXT lap belt cushion installed
Because the manual states that the top tether is required at all times when using the Radian 3QXT forward facing, we were a bit confused why there was additional padding and instructions included with the seat for installation forward facing with a lap-only belt and no top tether, but because the instructions are in the manual, we’re including them in our review.
To install the Lap Belt Cushion:
- Remove the crotch buckle pad and flip up the Memory Foam Pad
- Place lap belt cushion on seat and slide the crotch buckle through the correct slot
- Flip down the Memory Foam Pad , slide the crotch buckle through the correct slot, and replace the crotch buckle pad
Diono Radian 3QXT with lap belt cushion installed
Note: if a longer crotch buckle is needed, they are available by contacting Diono’s customer care.
To install the Diono Radian 3QXT forward facing with the vehicle lap-only seat belt and no top tether (again, US ONLY), place the car seat forward facing on the vehicle seat and thread the vehicle seatbelt through the forward facing belt path. Most lap-only seat belts lock when buckled, but be sure to check how your vehicle’s seatbelt locks and, if necessary, engage the locking mechanism. Press down firmly on the car seat with one hand while pulling on the vehicle seatbelt with the other until all slack is removed.
Diono Radian 3QXT installed forward facing with lap-only belt, no top tether, and lap belt cushion in a 1998 Chevrolet Malibu
Once installed, check that the seat moves less than 1 inch at the belt path when checked side to side and front to back. Note: the Radian 3QXT’s high, narrow belt path often means that a little extra pressure is required to complete a secure installation – if you are struggling with the front to back movement, try letting the seat sit where it wants to sit (don’t try to force it more upright), and tighten.
If the seat has been installed on an outboard seat in the vehicle, ensure that the SIM Pod is installed on the door side of the Radian 3QXT.
Installation Challenges
Because the Diono Radian 3QXT features a high and narrow forward facing belt path, the seat may be difficult or impossible to install in vehicles with seatbelts positioned forward of the seat bight. Always check that the seat moves less than 1 inch at the belt path when checked with the force of a handshake side to side and front to back.
Fit to Child – Forward Facing
When this seat is installed and used forward facing, the harness straps must be positioned at or above the shoulders. Only the top three harness positions may be used forward facing with the Diono Radian 3QXT (page 64 of the manual).
Five Years Old
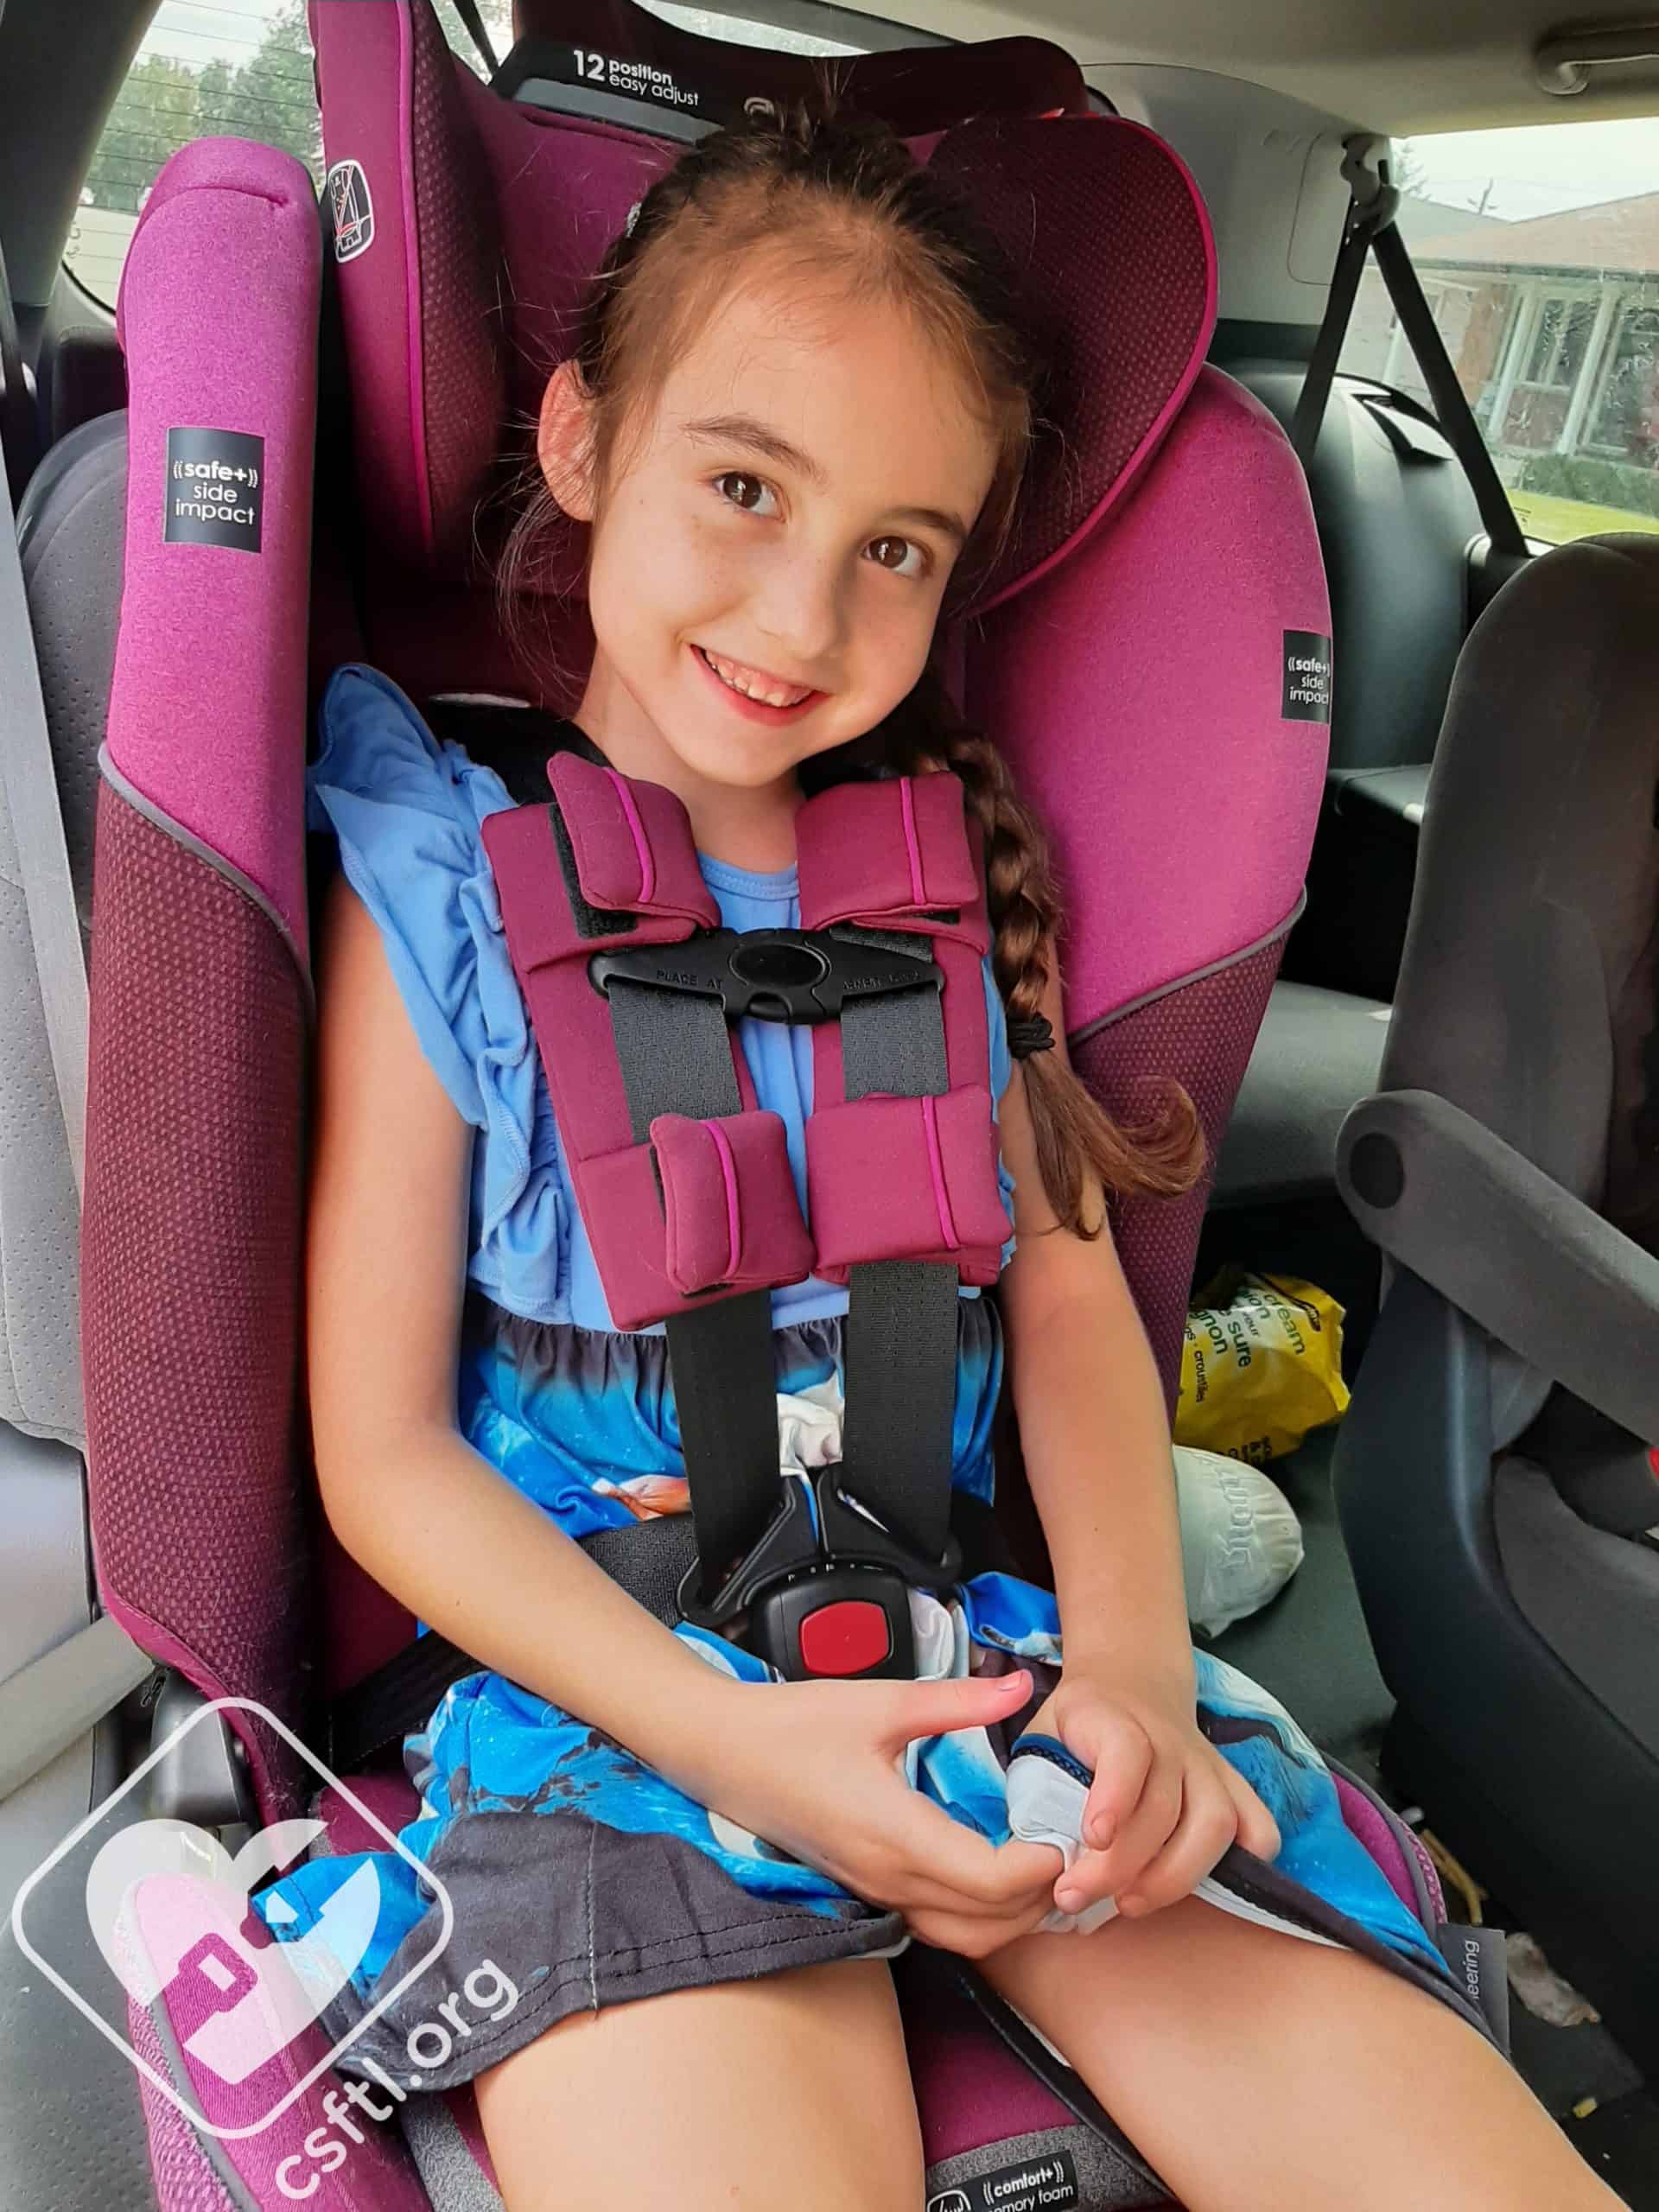
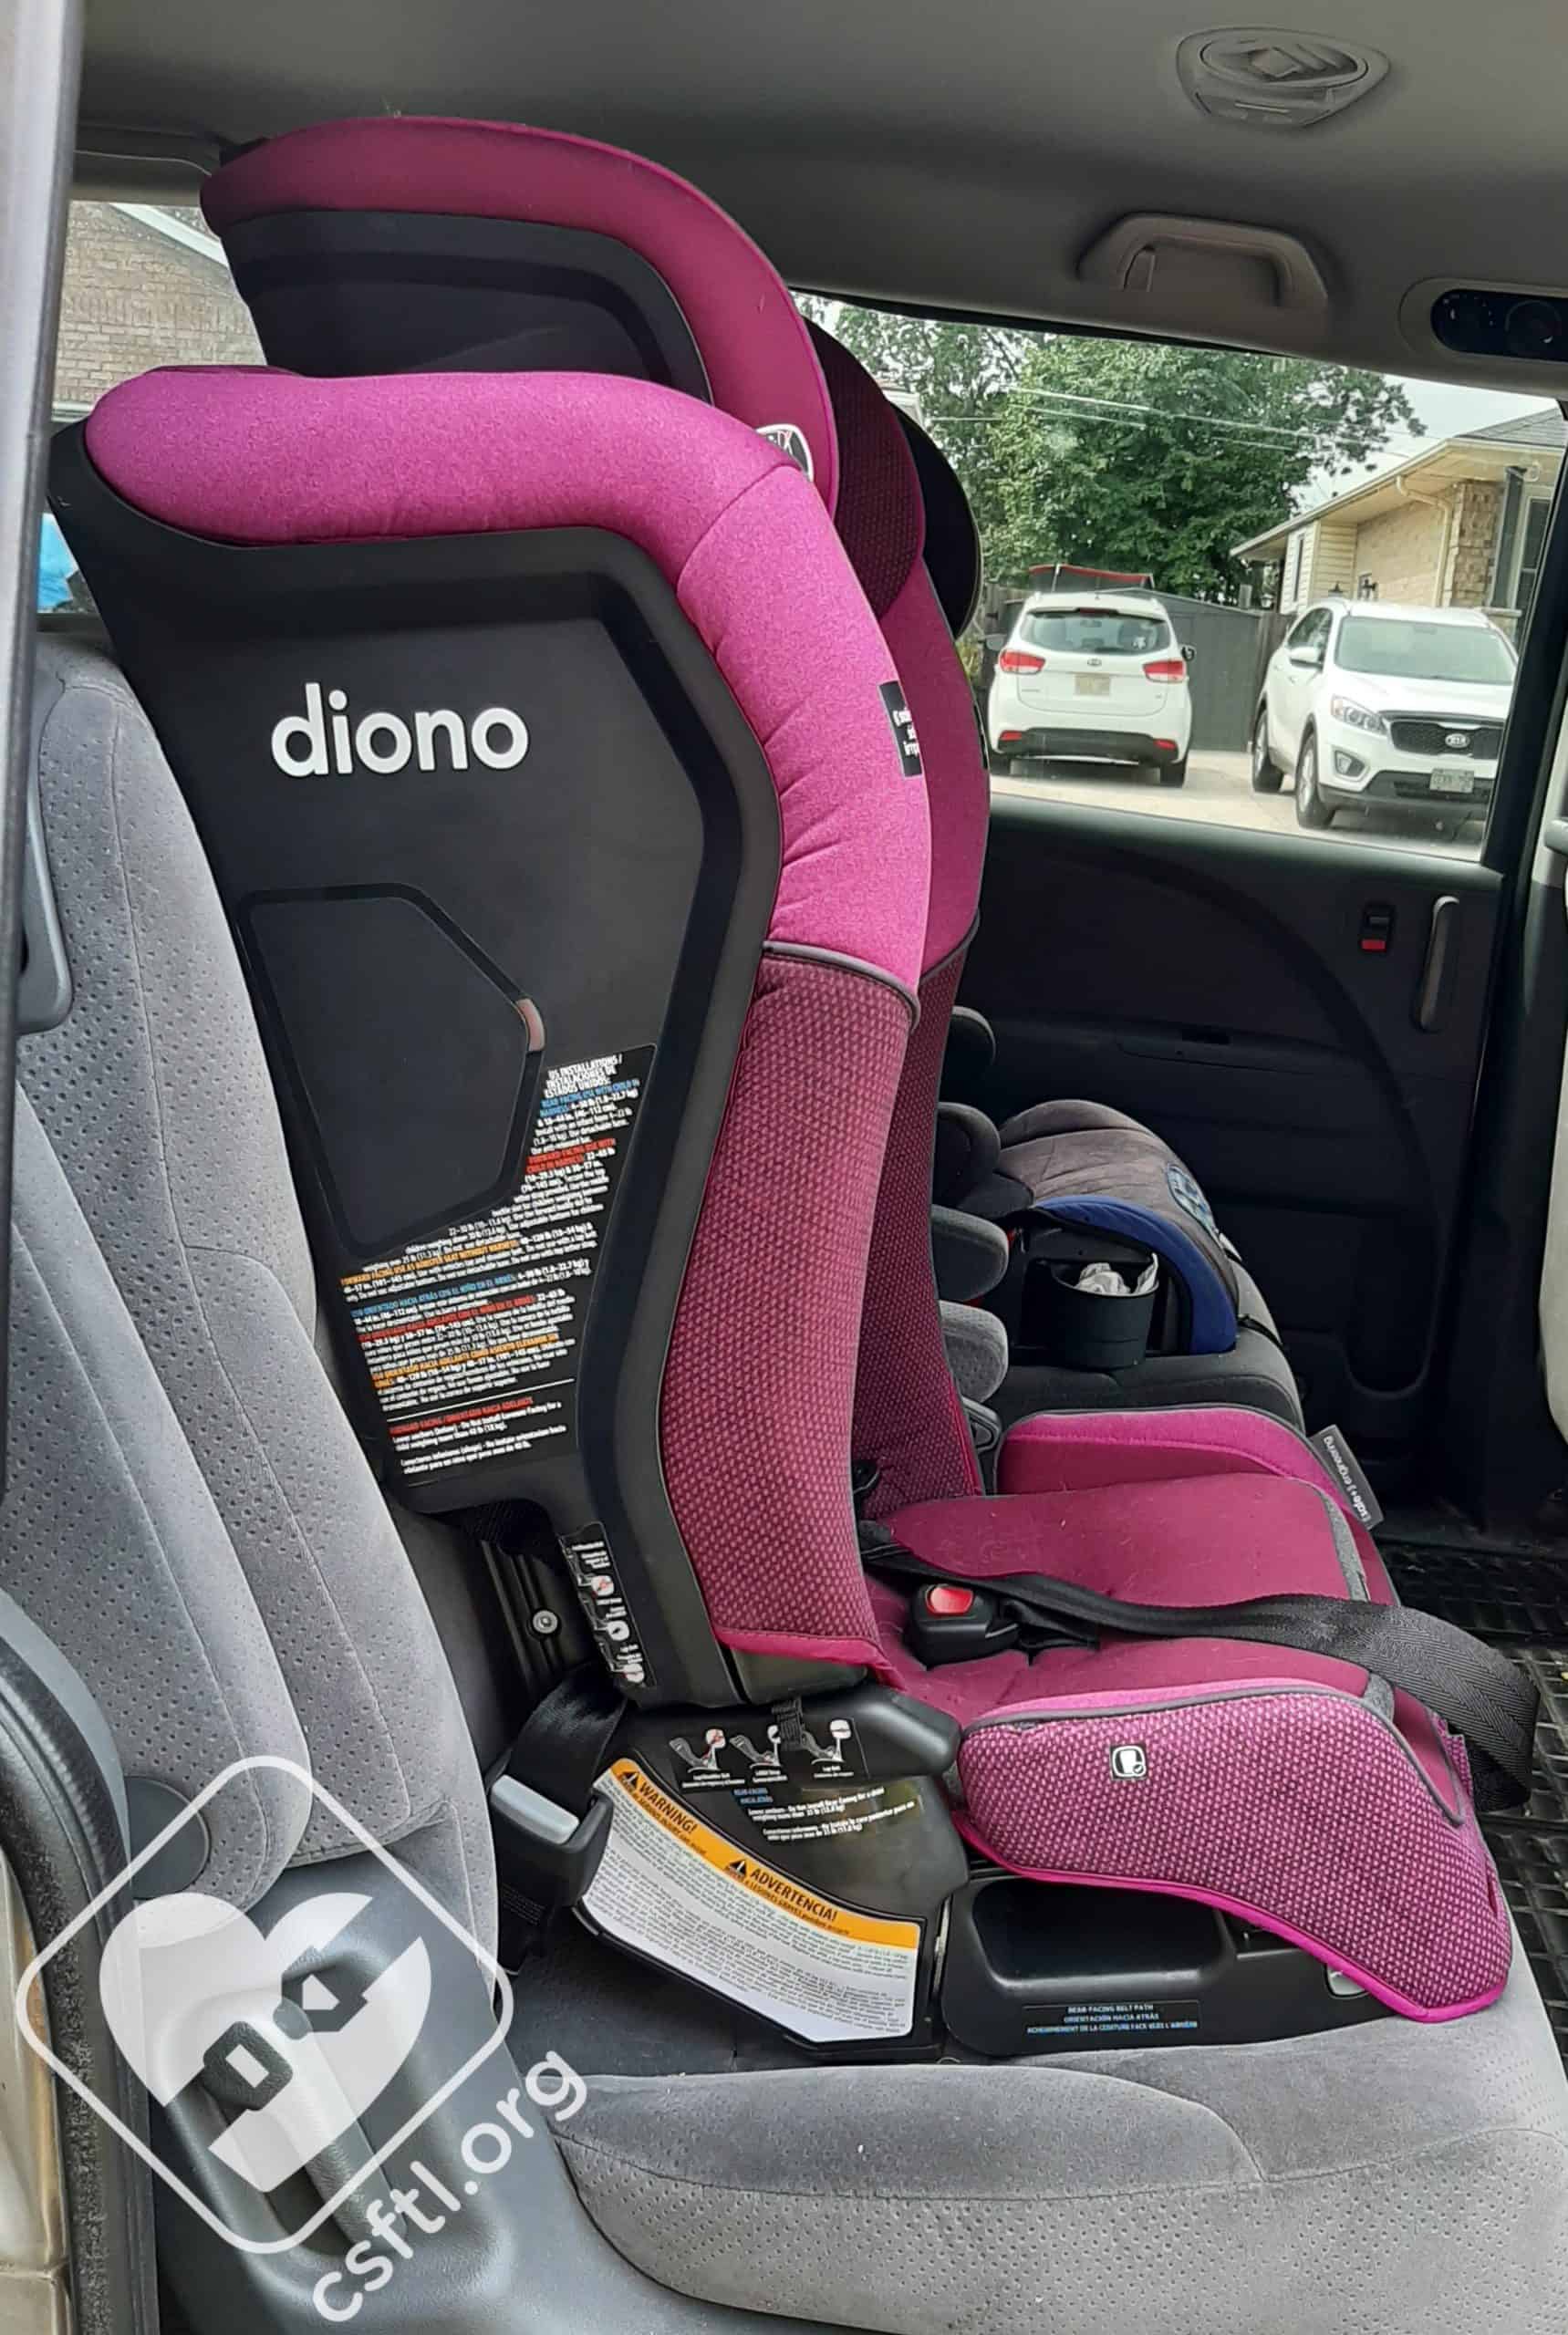
Diono Radian 3QXT – 5 years old
Our five year old model is 46 inches tall and weighs 45 pounds. She is well within the Radian 3QXT’s limits of 65 pounds and 57 inches, but as we can see, she has almost outgrown the seat by torso height. When forward facing, the harness must be positioned at or above the child’s shoulders, and the harness on this model is only slightly above her shoulders in the top harness position.. The Diono 3QXT will certainly be outgrown with her next growth spurt.
We ensured that the SIM Pod was installed and the adjustable bottom was in use for this model.
Converting to Booster Mode
Before we explain how to convert this seat from harness mode to booster mode, it’s worth noting that actually using the Radian 3QXT in booster mode has a pretty limited lifespan. The child must weigh at least 40 pounds and be short enough that their shoulders are below the 17.5 inch belt guide, while being long enough to be positioned at the 4th harness slot. We would recommend “dry fitting” the child in the Radian 3QXT before going through all of the work to convert it to a booster to ensure they fit in booster mode.
To remove the harness:
- Remove the harness from the splitter plate.
- Pull the harness straps out from the back of the seat. Remove the harness pads, chest clip, and buckle tongues.
- Using a “standard” (slot head) screwdriver, locate the notches in the harness access panel and use the screwdriver to pry the panel away from the seat. Remove the harness from the seat and re-fasten the panel.
- Remove the crotch buckle from the seat as the final step. Note: this step is not in the manual but since it is removable and not used in booster mode, it is unlikely that it was meant to remain on the seat in booster mode.
- Store the harness and accessories in a safe place in case the seat is ever converted back to harness mode
Fit to Child – Booster Mode
The Diono Radian 3QXT manual has very specific instructions for booster mode:
WARNING: Make sure vehicle seat belt has properly retracted before use
To use the seat in booster mode:
- Have the child sit in the seat with his/her back flat against the back of the booster seat
- Thread vehicle’s lap/shoulder belt over the booster seat and between inside of car seat shell and the belt guide in the headrest (we tried to take a picture of this belt guide, but it’s difficult to show in photos. If you reach under the side of the Radian 3QXT’s headrest, you will be able to feel the belt guide. It’s quite narrow and the belt may bunch when threading it through, but it should straighten out as the belt is pulled through).
- Buckle the vehicle seat belt. Be sure the shoulder belt lies across your child’s shoulders, between the neck and edge of the shoulder. Be sure the lap portion of the vehicle seat belt goes under the side nubs and the belt lies low across your child’s hips
The manual also states that in booster mode the “Child MUST be secured using ONLY the vehicle Lap and Shoulder Belt. Child MUST weigh at least 40 lbs (18 kg), with shoulders positioned at the 4th slot and remain in this position for the entire ride. If needed, adjust the headrest by positioning it accordingly by sliding it up or down.”
Note: the adjustable bottom must not be used in booster mode.
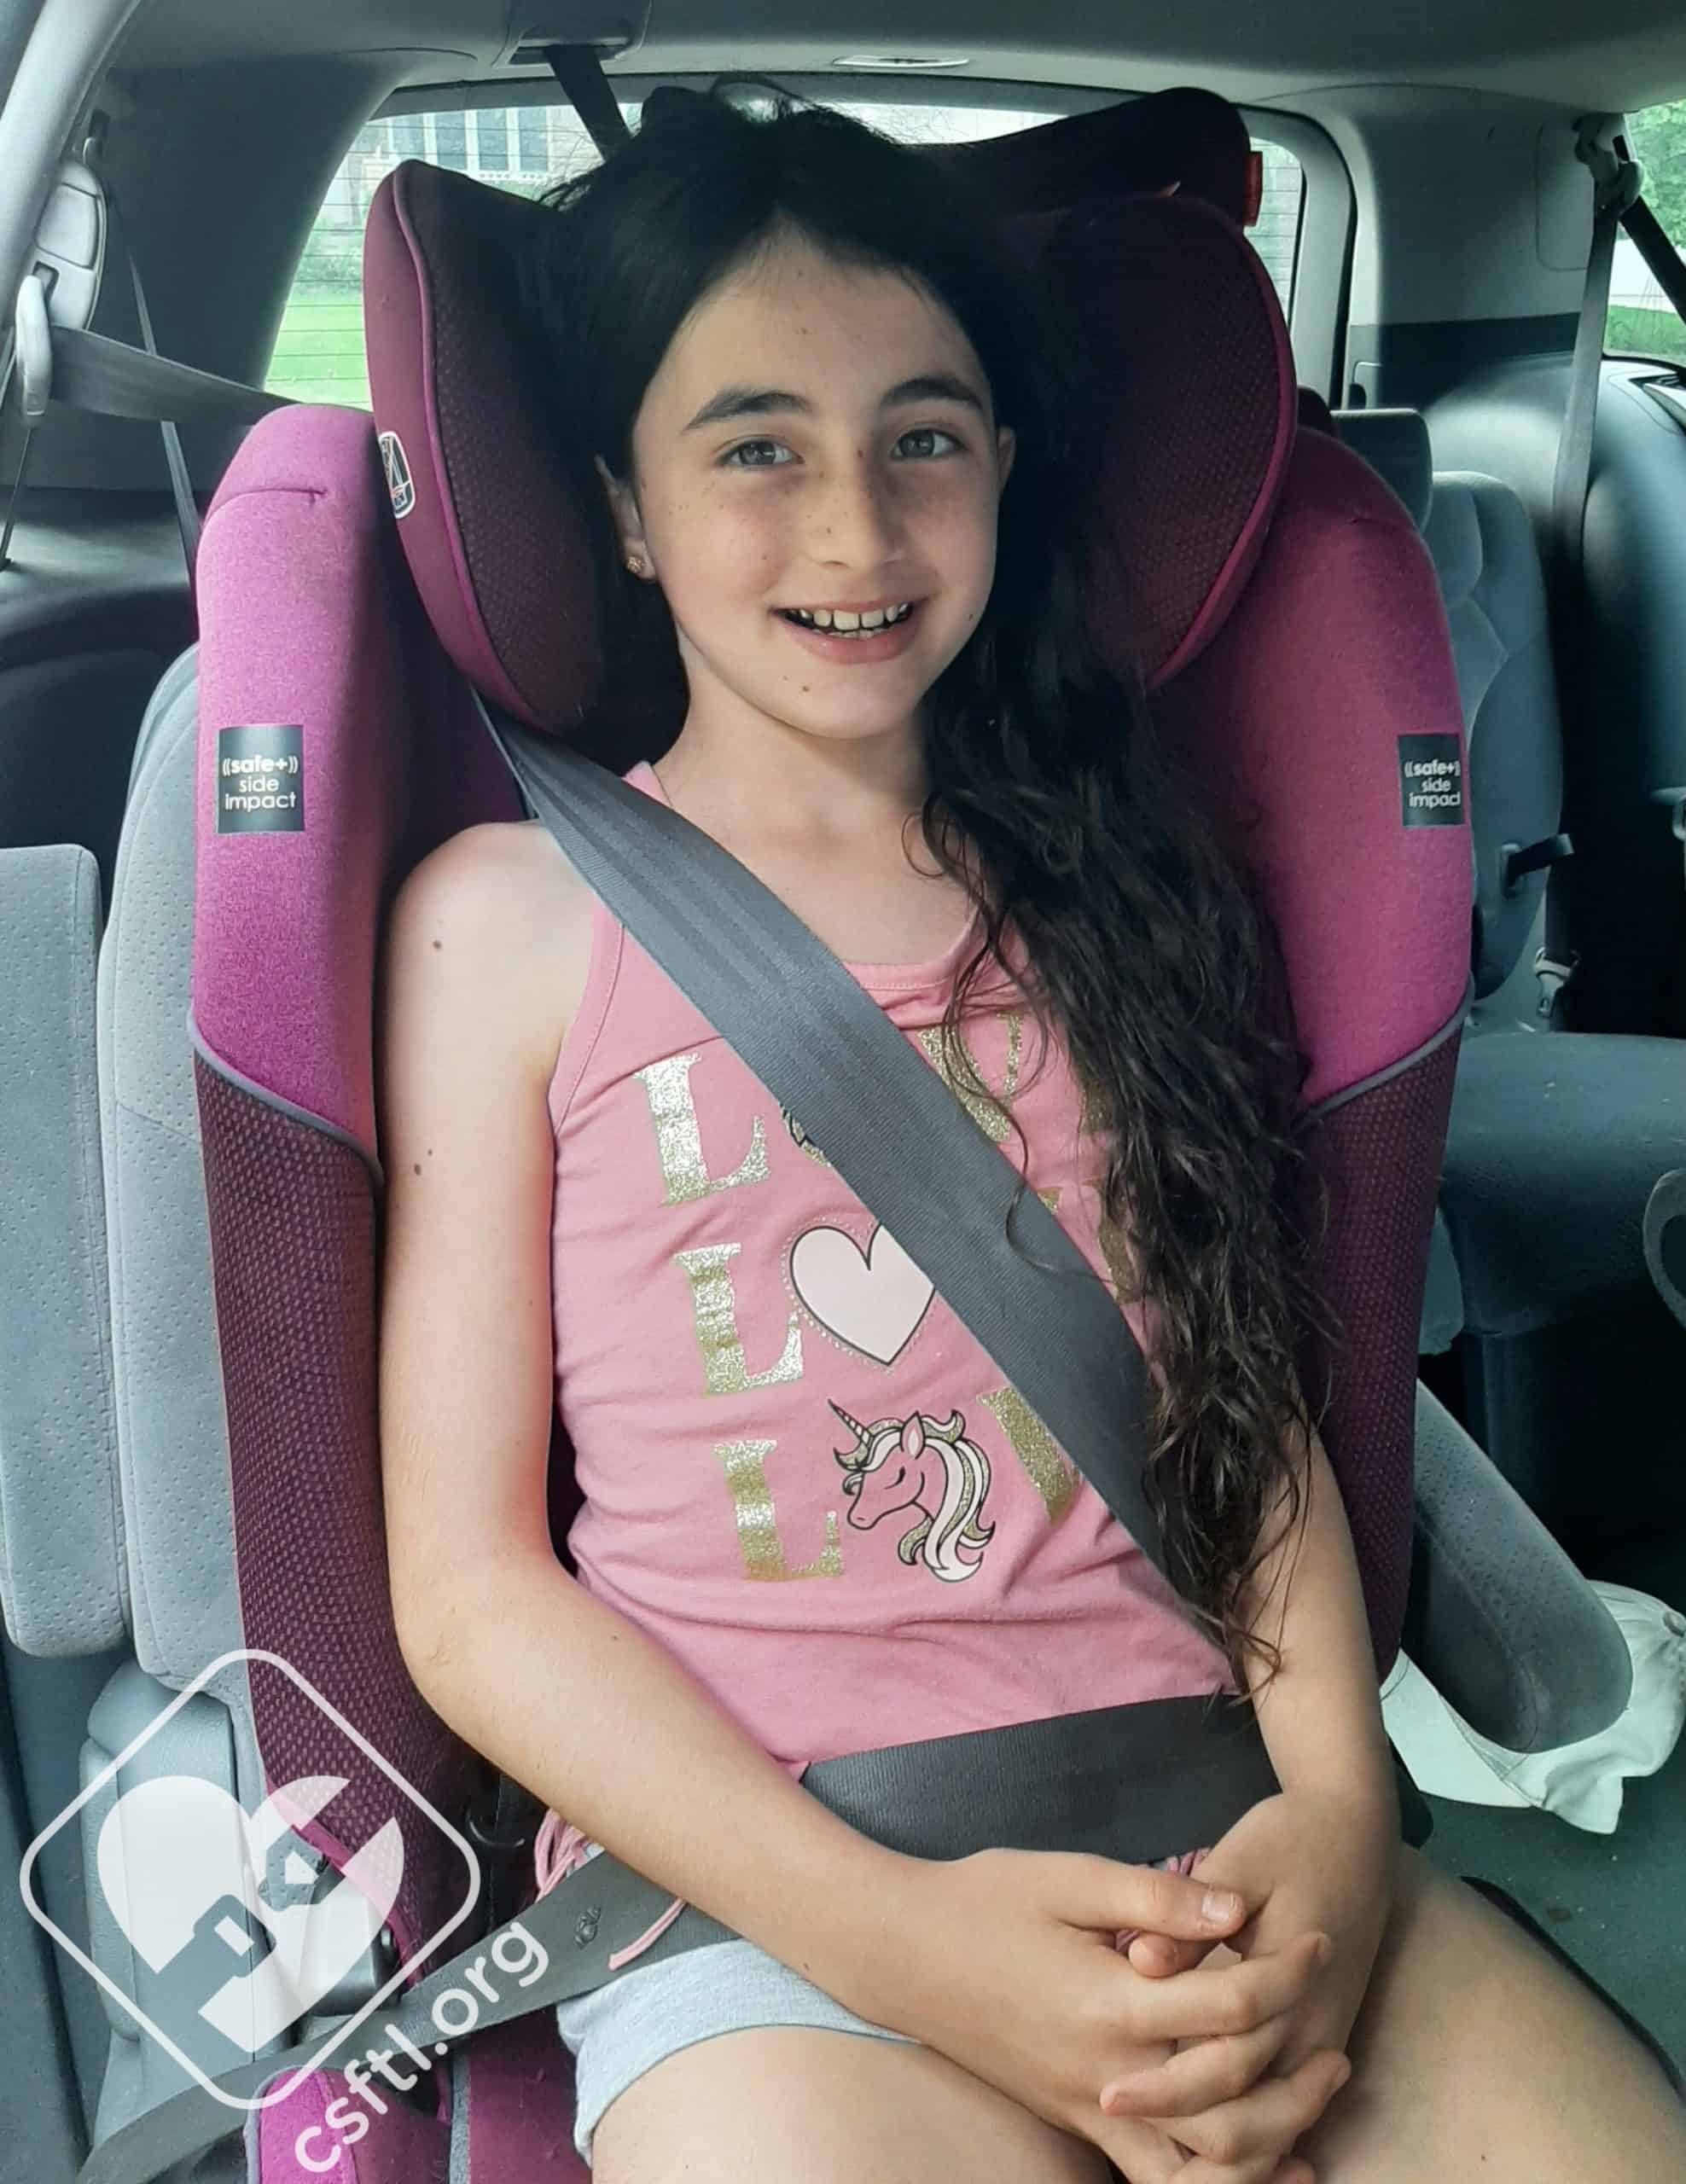
Five Years Old

Diono Radian 3QXT – 5 years old
Our five year old model remains 46 inches tall and 45 pounds. The headrest is positioned in the 2nd highest position, and the seatbelt fits her nicely. We were impressed with the fit until she leaned forward and the shoulder belt did not retract. The narrow belt guide made it impossible for the shoulder belt to move freely.
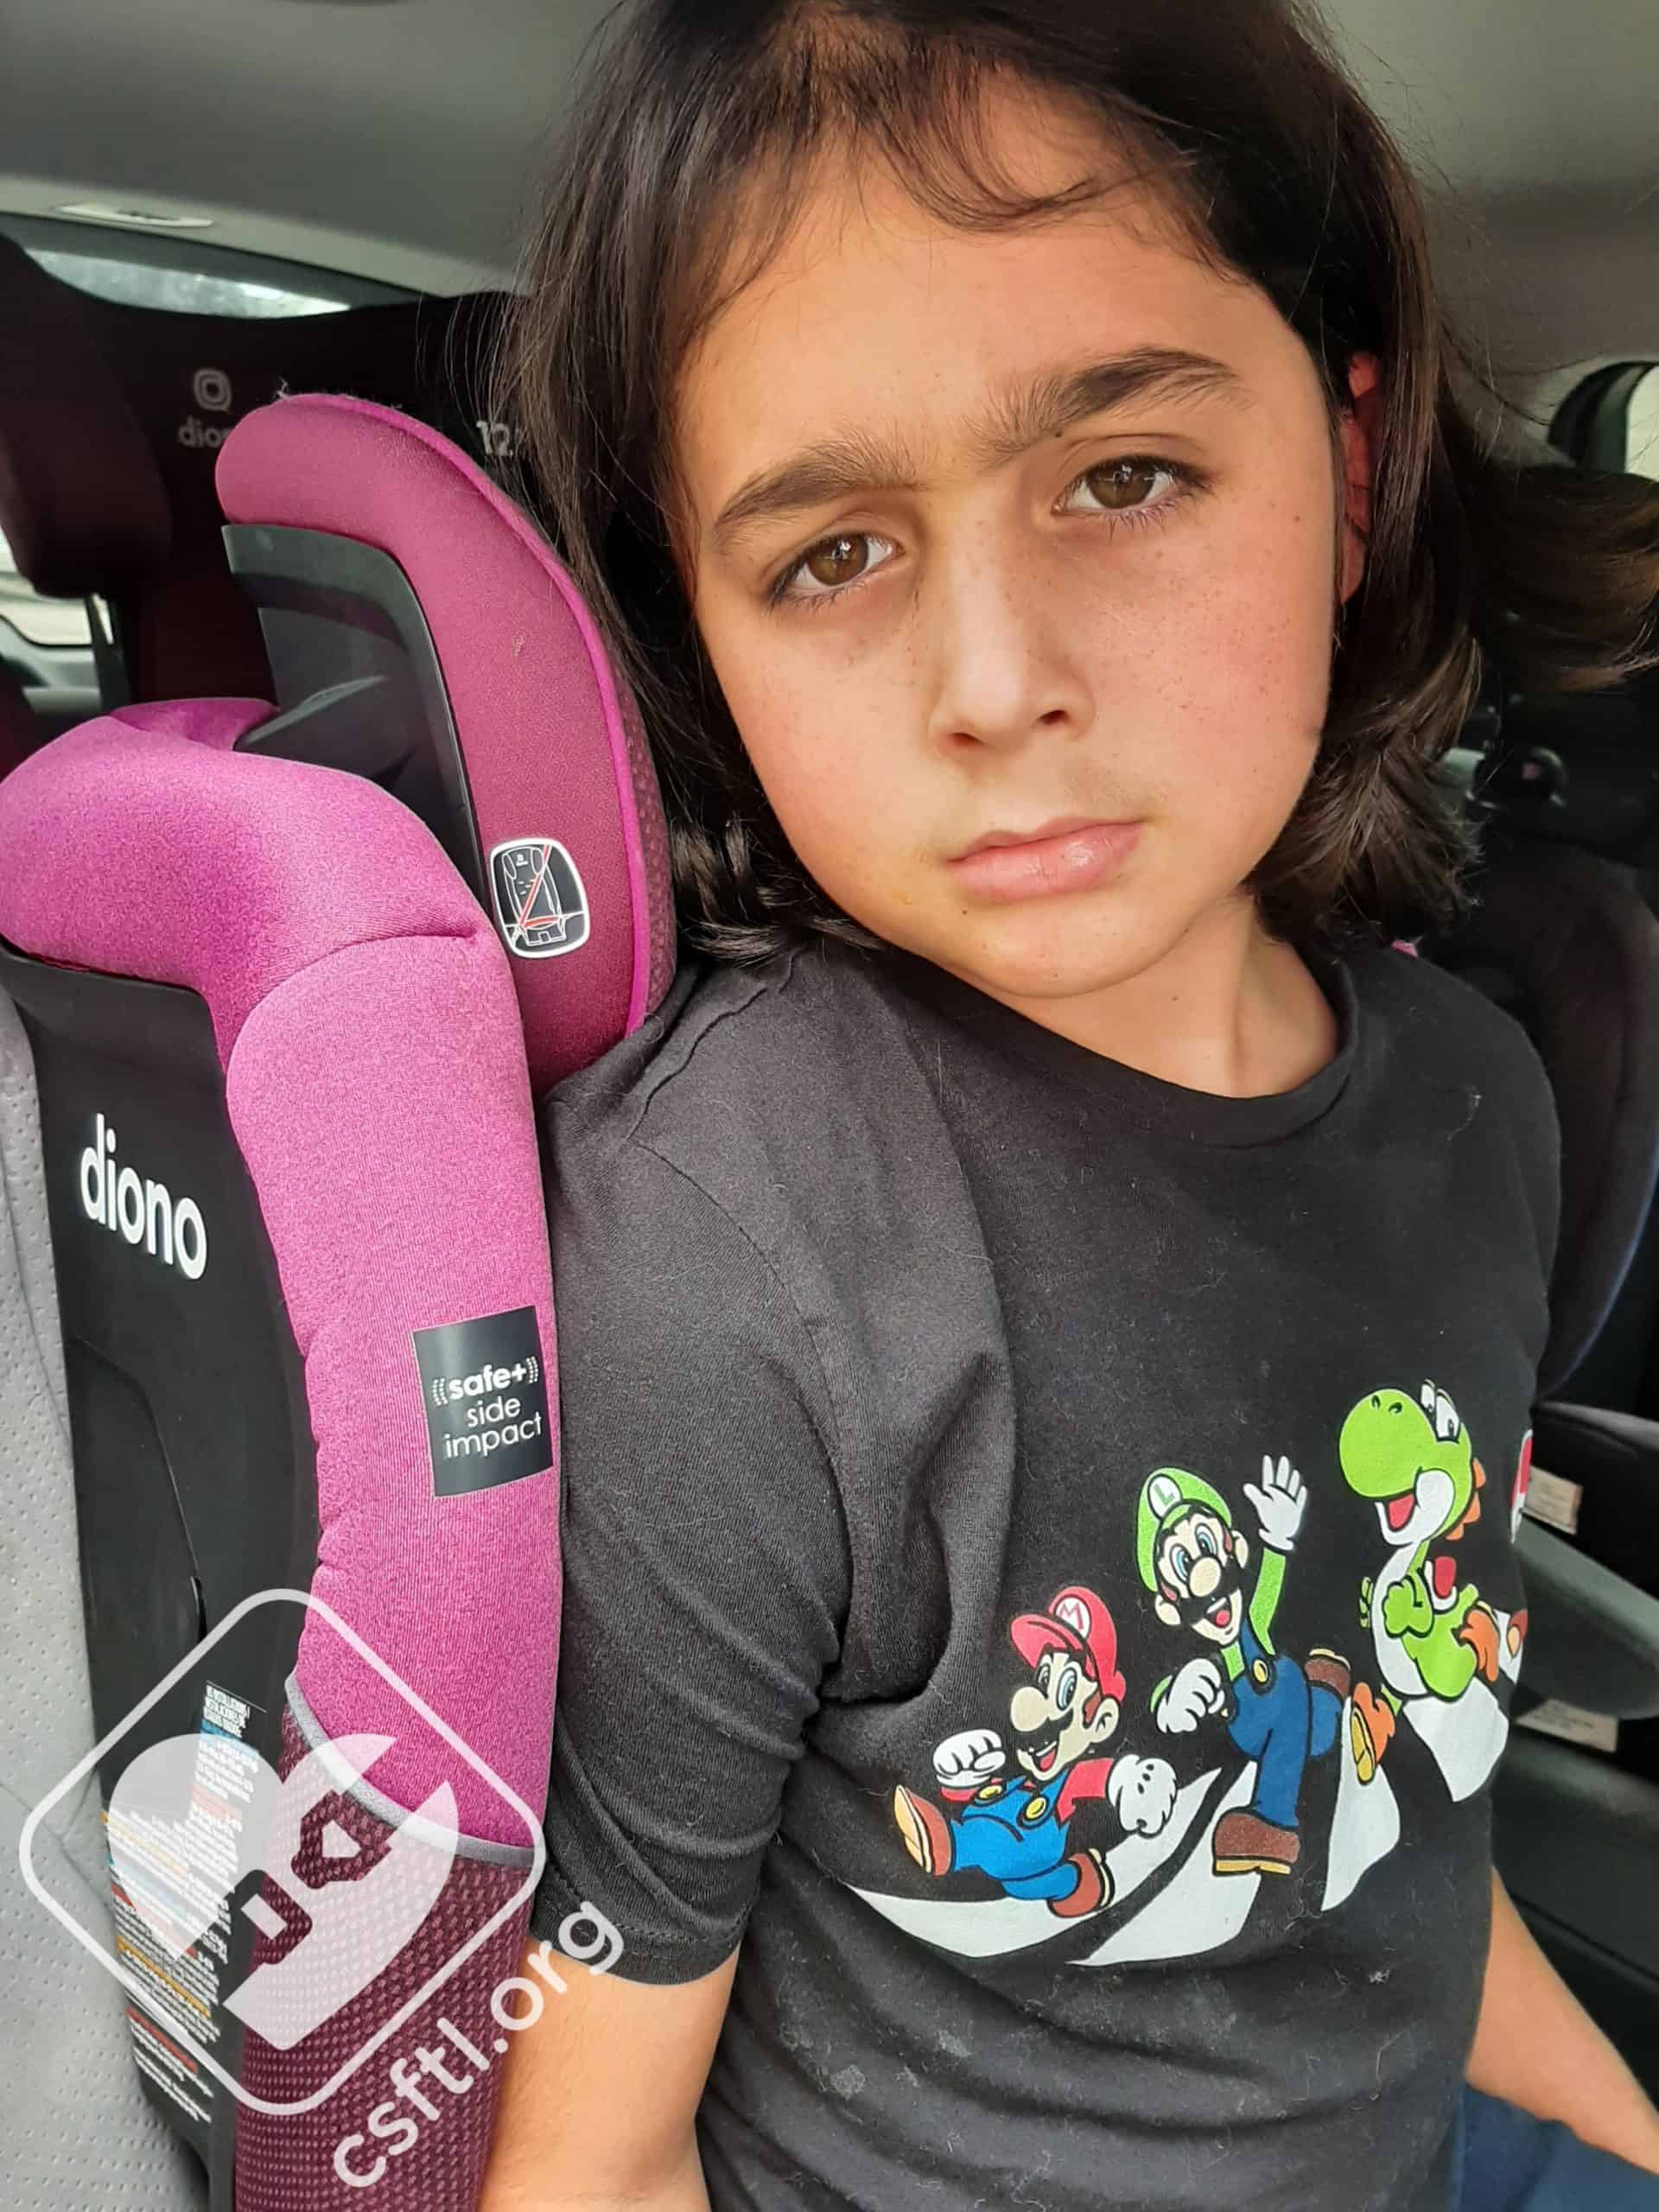
Seven Years Old
Diono Radian 3QXT – 7 years old
Our seven year old model stands 53 inches tall and weighs 63 pounds. We were planning on testing her out in the Radian 3QXT’s harness mode because she is under the stated limits, but she had outgrown the harness by torso height a long time ago.
We have extended the headrest (and therefore the shoulder belt guide) to the highest position, and this model just barely fits in the seat. She has maybe another 6 months to a year of growth before her shoulders hit the bottom of the headrest and she is no longer able to ride comfortably in the Radian 3QXT.
Nine Years Old
Diono Radian 3QXT – 9 year old does not fit
Disclaimer: This model does NOT fit in the Radian 3QXT. We try very hard not to show misuse in our reviews, but since the Diono Radian 3QXT advertises that the booster mode fits until 57 inches tall and 120 pounds, we wanted to show that those limits are unrealistic (like the forward facing limits).
Our nine year old model is 56 inches tall and weighs 90 pounds. He should still fit the Radian 3QXT in booster mode based on the stated limits. As we can see, he cannot squish himself into the seat to even be able to buckle the seatbelt. His shoulders are many inches above the top belt guide (he likely outgrew the booster mode a couple of years ago).
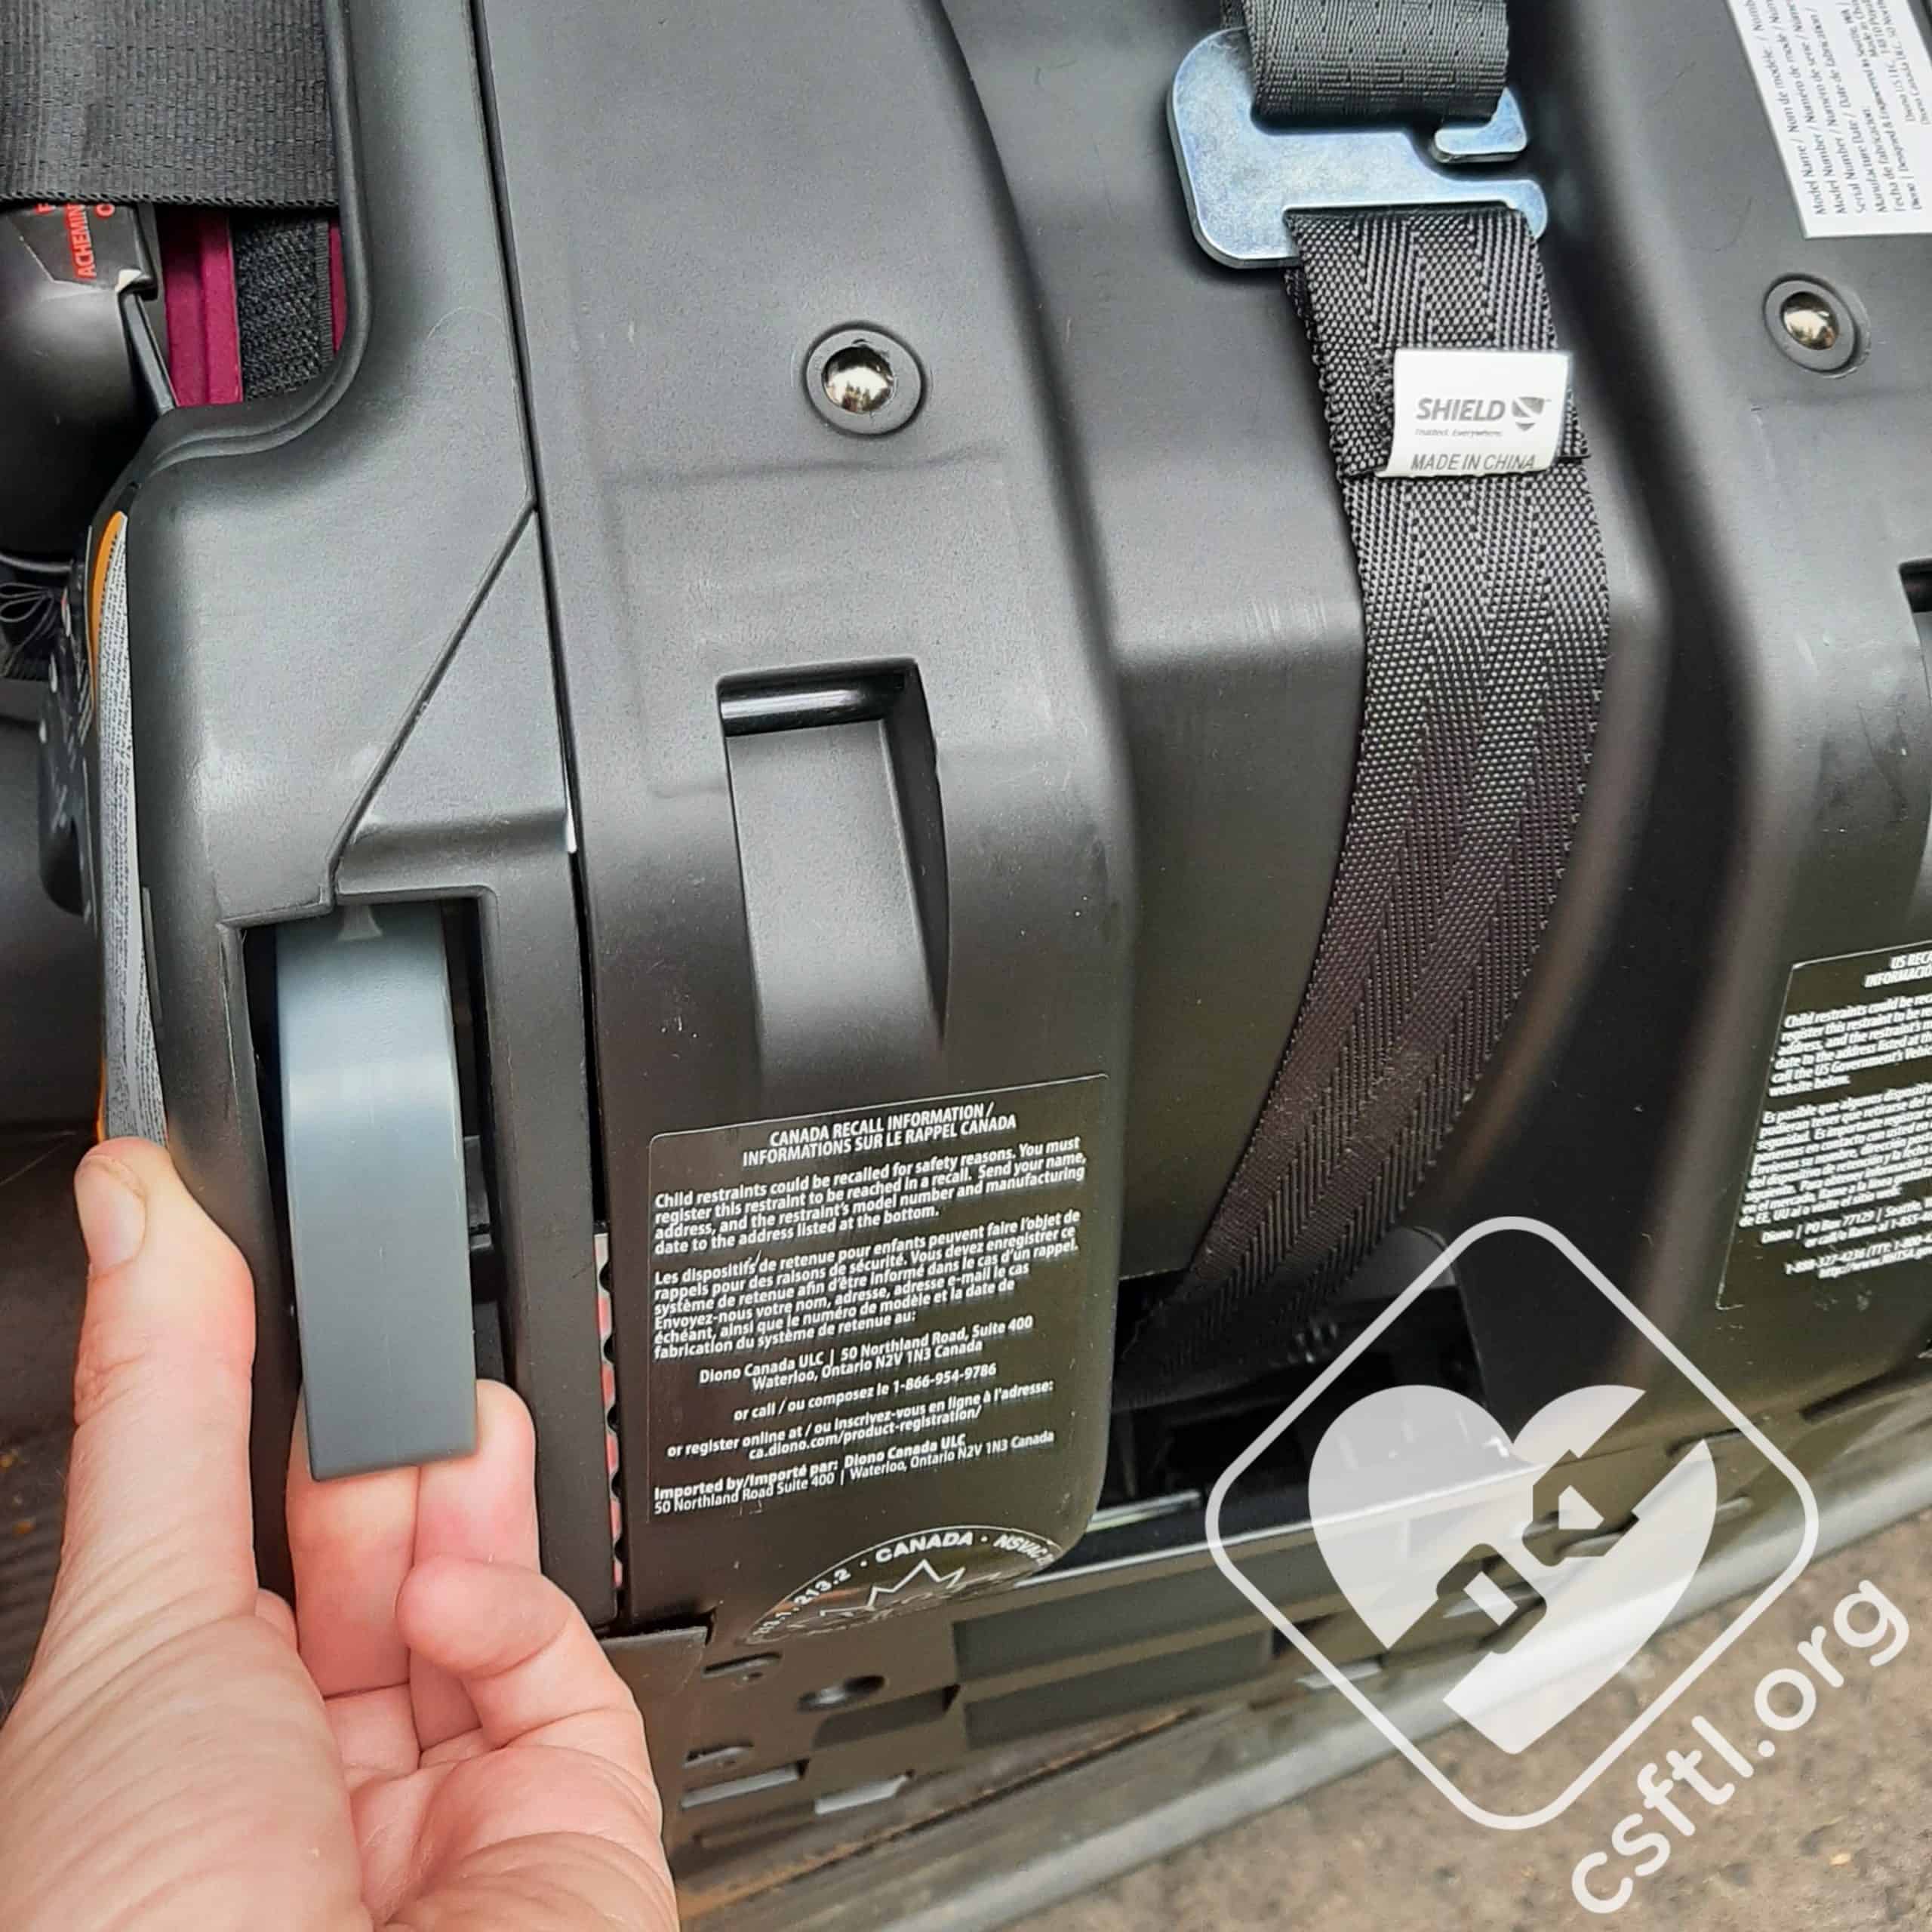
Important Information: Where to Find

Diono Radian 3QXT manual storage location
Manual Storage: the manual is stored inside the same compartment as the lower anchors at top tether on the upper end of the back of the seat’s shell
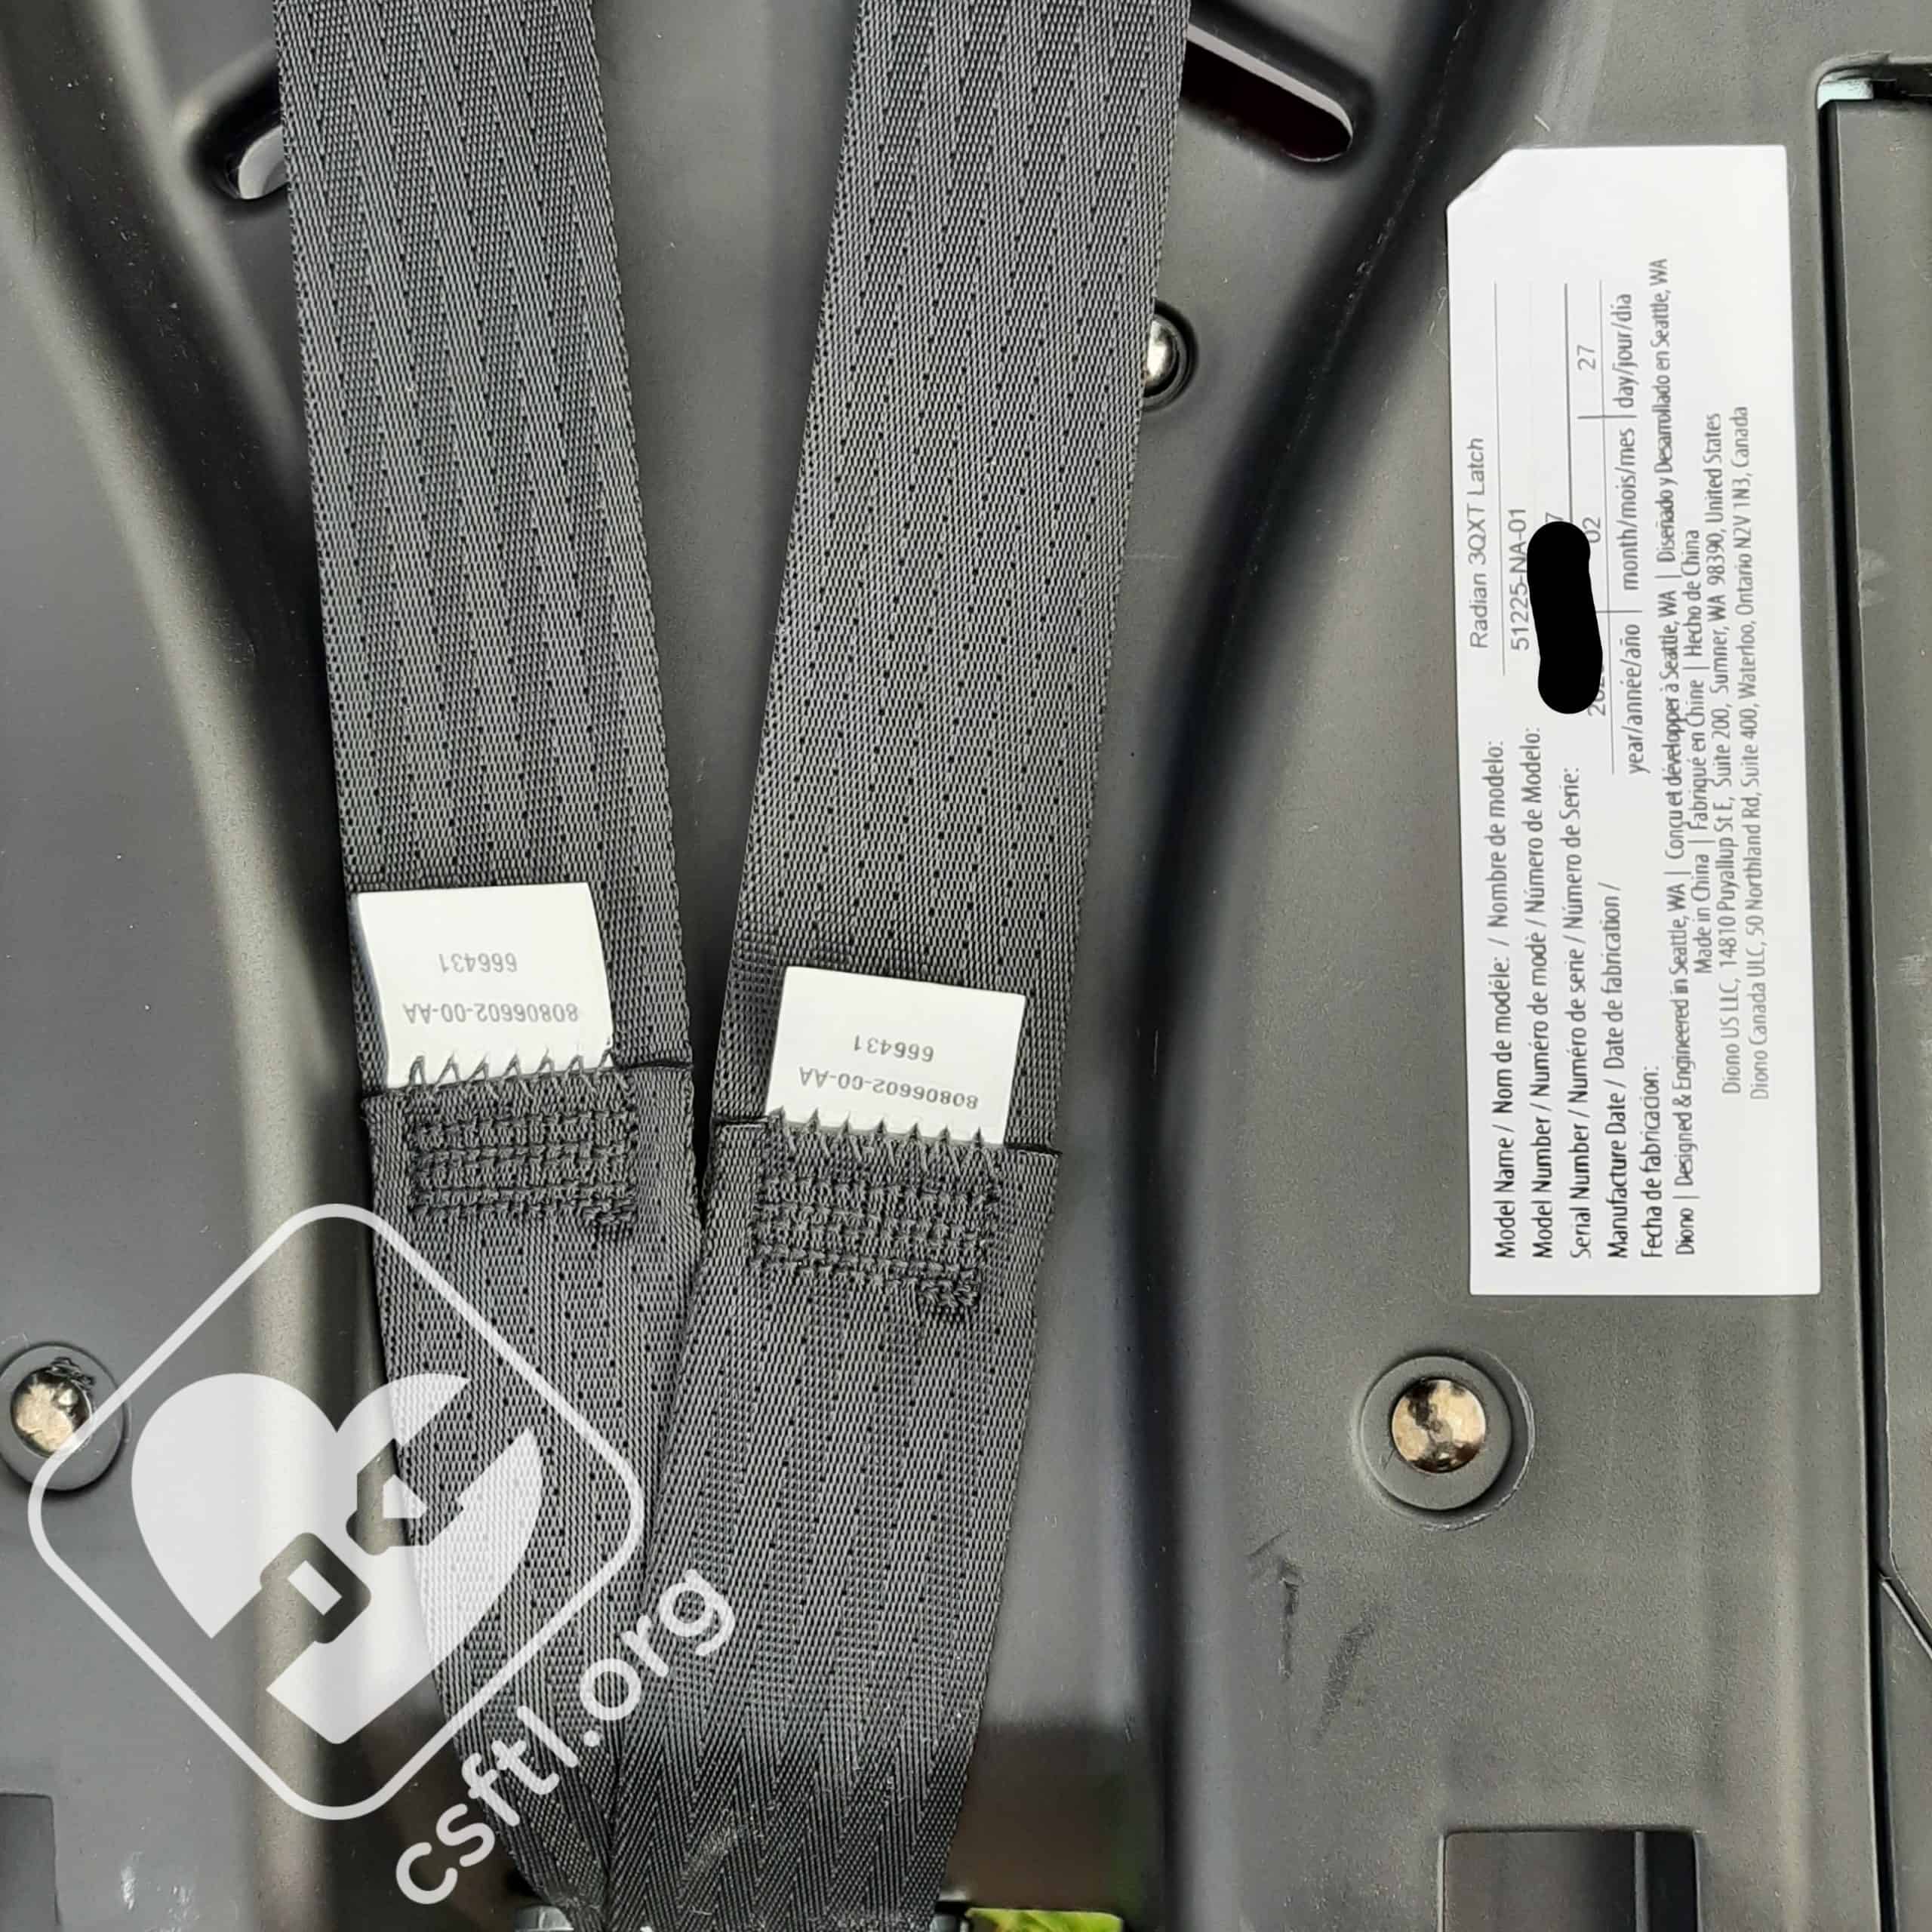
Diono Radian 3QXT date of manufacture label
Date of Manufacture: the date of manufacture label is located on the right side of the back of the seat
Expiration: the Diono Radian 3QXT expires 10 years from the date of purchase (or 10 years from the date of manufacture if the purchase date is not known). This information is on page 15 of the manual.
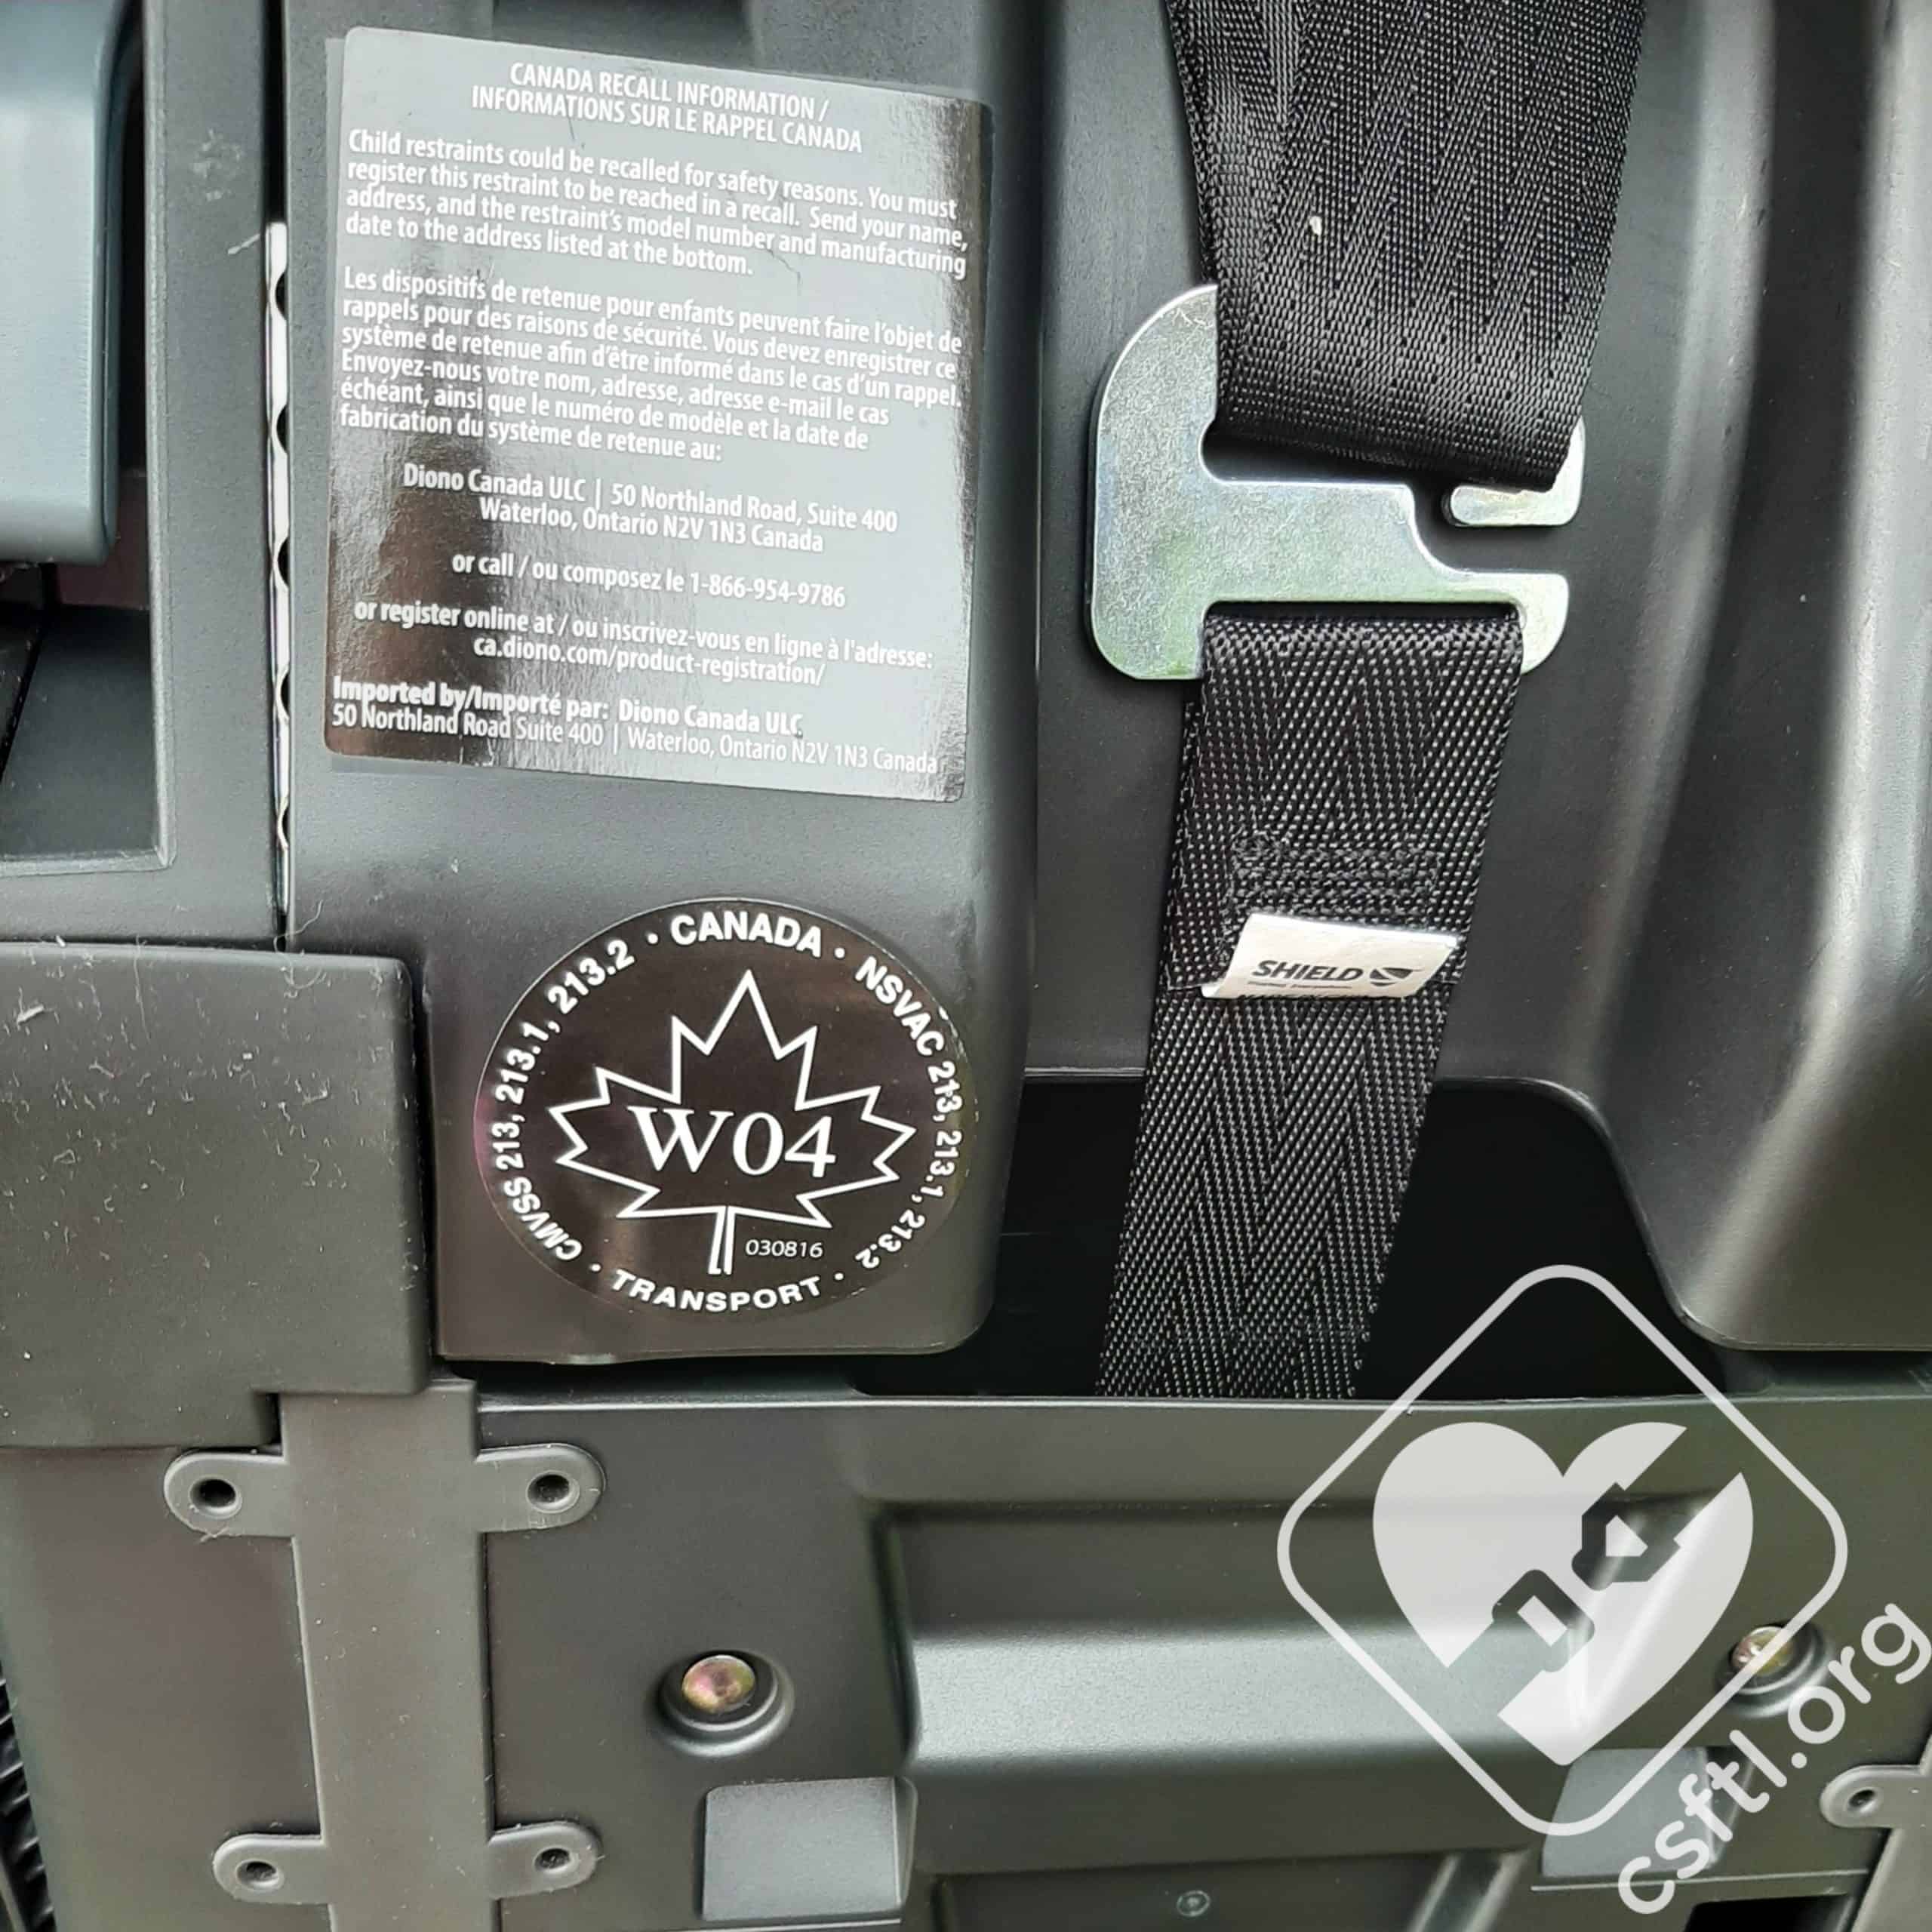
Diono Radian 3QXT National Safety Mark (Canadian Users)
National Safety Mark (Canadian Users): The National Safety Mark is located on the right side of the back on the seat, towards the bottom
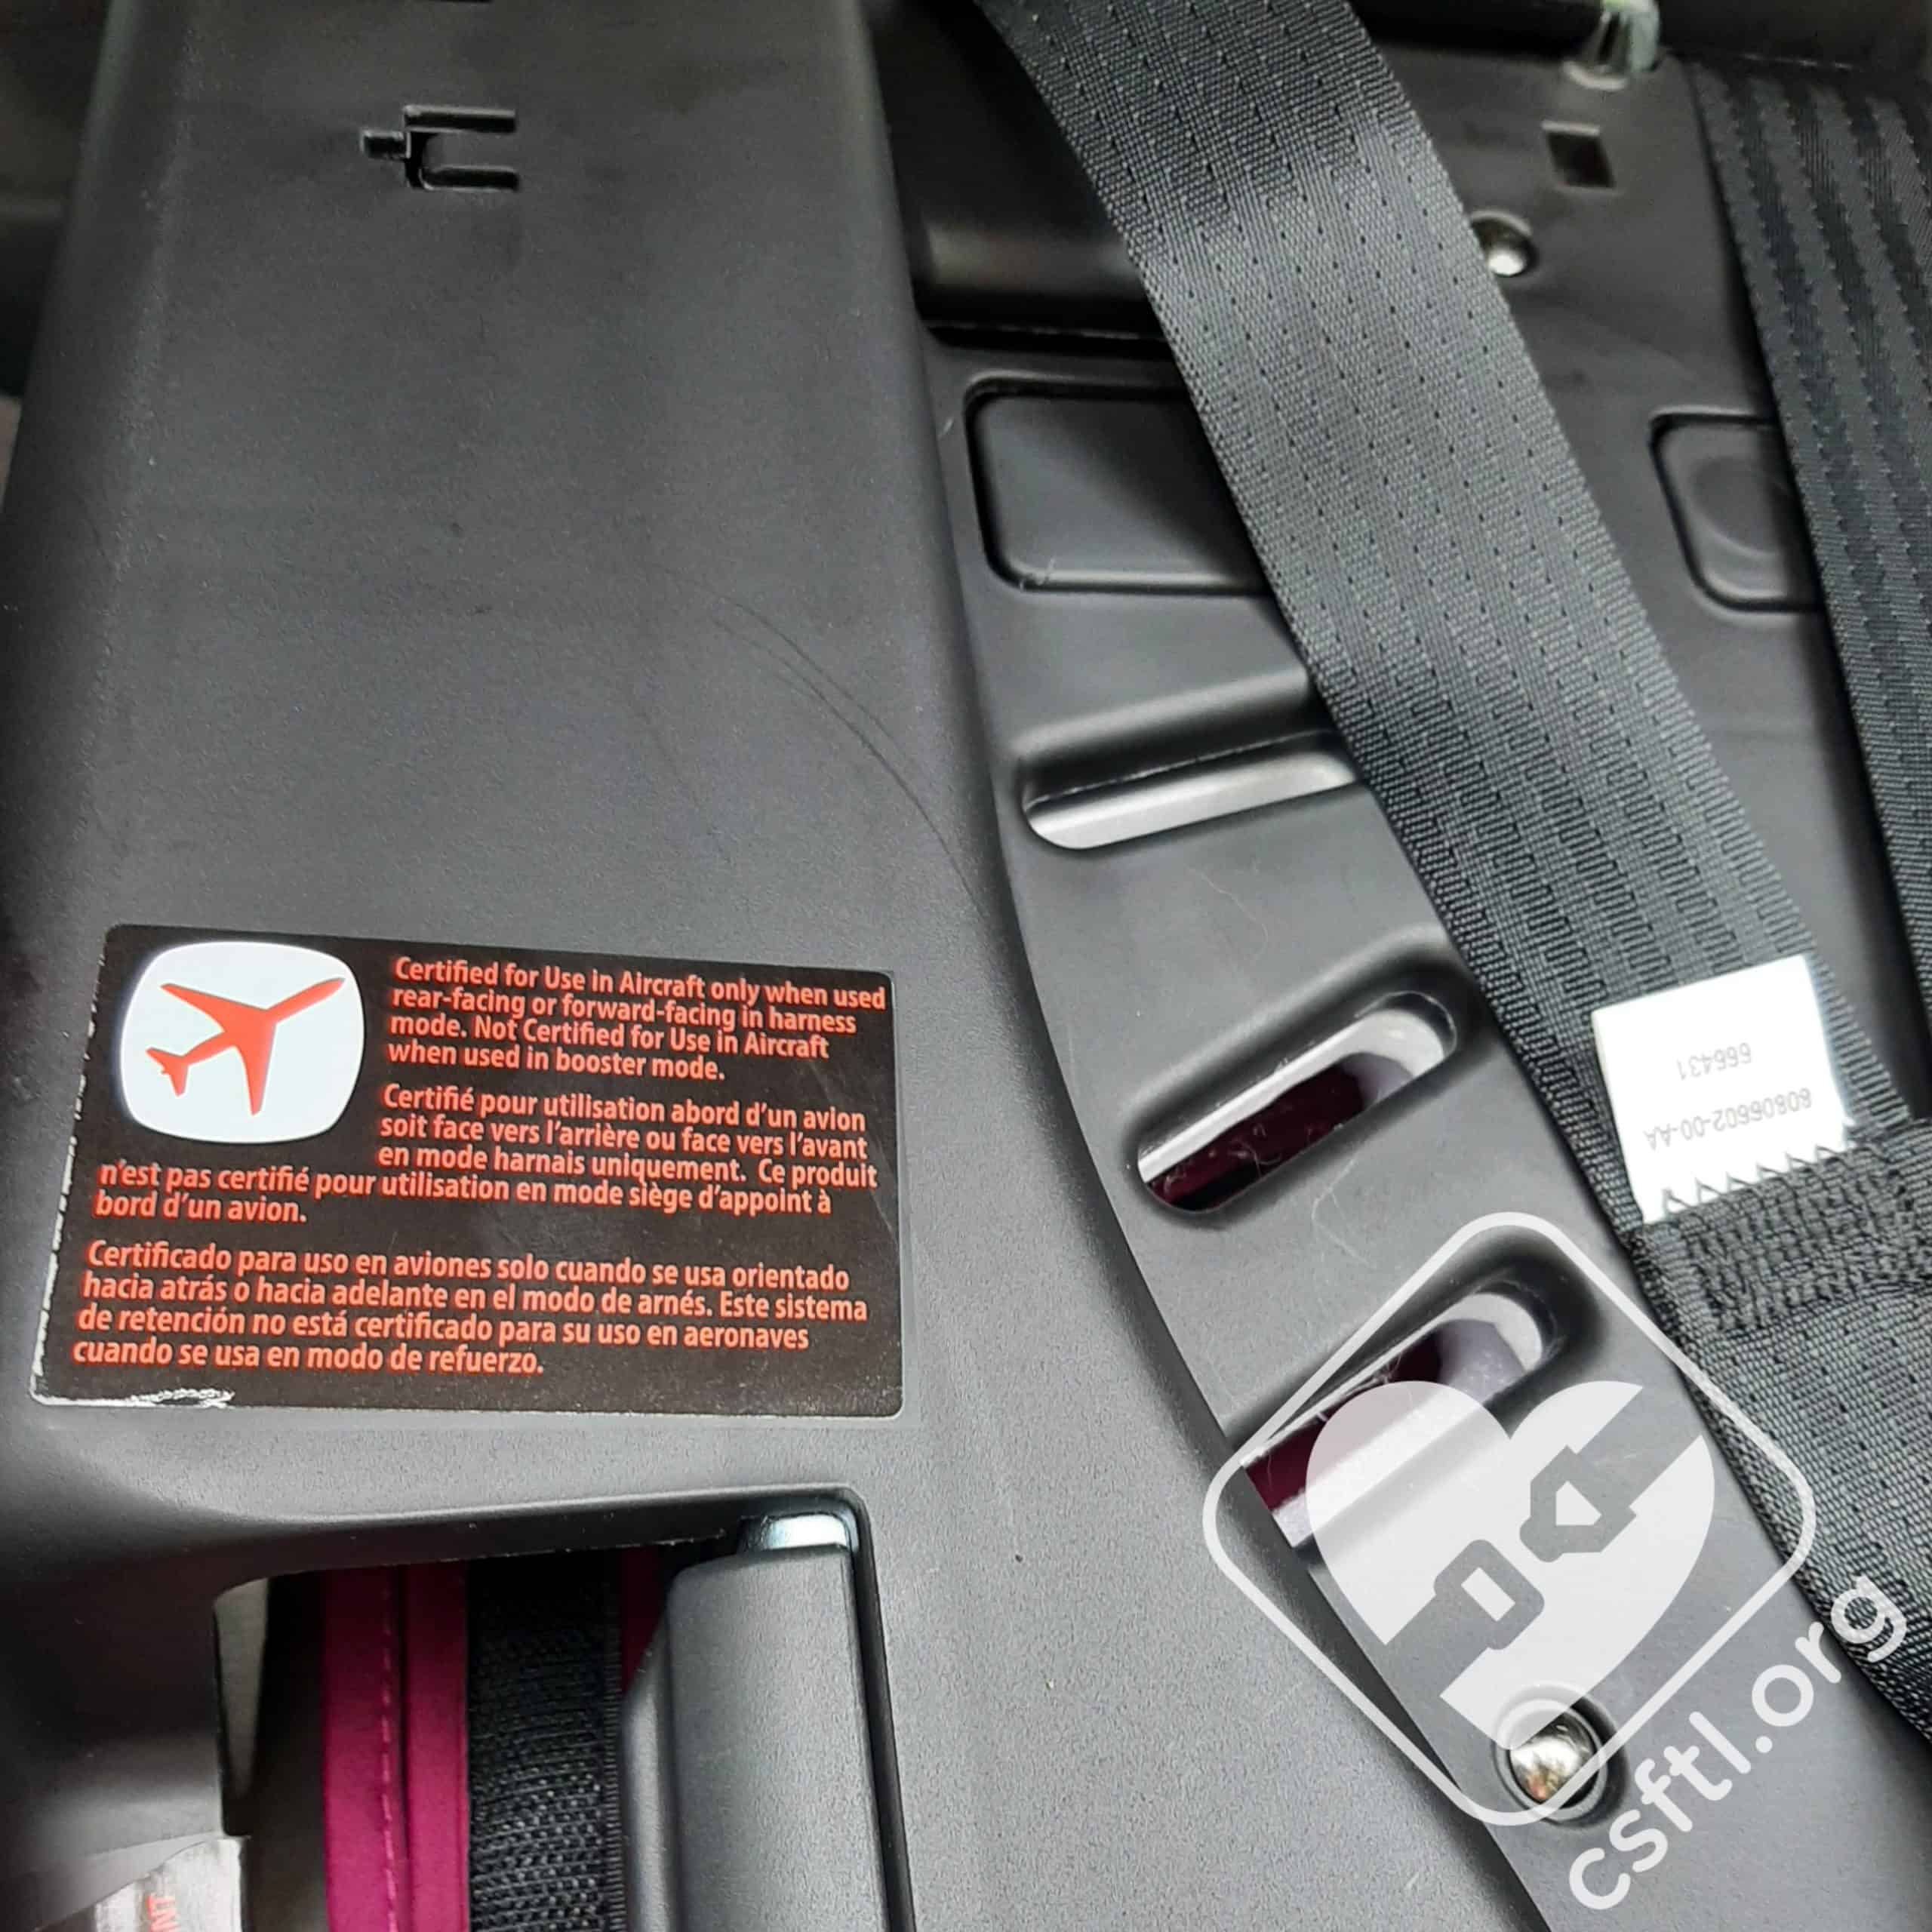
Diono Radian 3QXT FAA approval label (harness modes only)
FAA Approval: The FAA approval sticker (for harness modes only) is in red writing on the left side of the back of the seat
Overall Thoughts
When this seat was first released 16 years ago, it provided a narrow option that was great for 3 across scenarios. That’s still true today. Families who need 3 car seats across have a limited number of options available and the Radian still plays an important role in these scenarios.
We do find that the seat is a solid option for rear facing use, even though it has a rather large footprint and the rules around the padding use can be confusing. Unfortunately, with the many additional pieces and long list of rules (especially for forward facing use), the probability that the seat is used correctly is, in our opinion, very low.
- The 16.5 inch top harness position is quite low for a convertible/multimode seat, and children who are tall or who carry their height in their torsos may find themselves outgrowing the seat forward facing before they are ready for a booster seat.
- The booster mode that was already very short lived has been made even shorter by the adjustable headrest’s belt guide. While it may work for a short time for small children, another booster seat will almost certainly be required
The seat may work well in specific 3 across scenarios or for smaller children, but all of the rules and restrictions and extra pieces make this seat fairly difficult to use properly. We worry that caregivers will gloss over the instructions and miss important details because there are so many of them, and/or lose some of the many additional pieces that come with the Radian 3QXT and opt not to use them when required.
The stated height and weight limits are higher than many other multimode seats on the market, so it’s possible that caregivers will purchase the Radian 3QXT thinking it will be the only seat they will ever need when that’s likely not the case. Rear facing, it is unlikely that a child will fit until they weigh 50 pounds unless they are quite petite, forward facing it is unlikely that a child will fit to either the height or weight limits due to the low highest harness position, and in booster mode it is highly unlikely that a 57 inch or 120 pound child would be able to use this seat.
We have said this in other Diono multimode seat reviews and will say it again: a properly used car seat will protect a child extraordinarily well in a collision, but a complicated car seat makes that a lofty goal for even the most seasoned technicians and caregivers. Unfortunately, the Diono Radian 3QXT with its extra pieces and rules falls into the complicated category and is not a seat we would recommend outside of VERY specific scenarios.