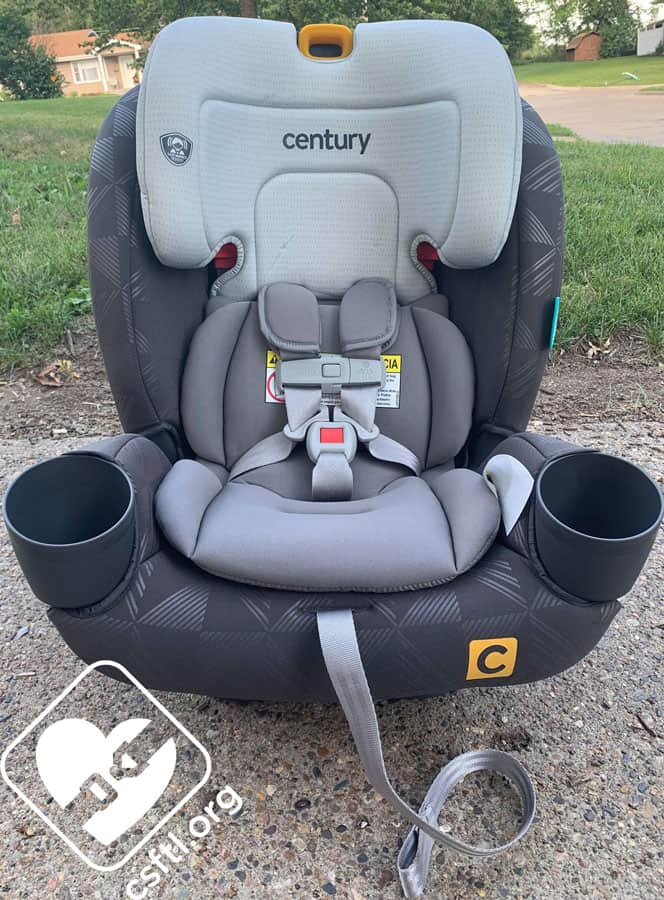
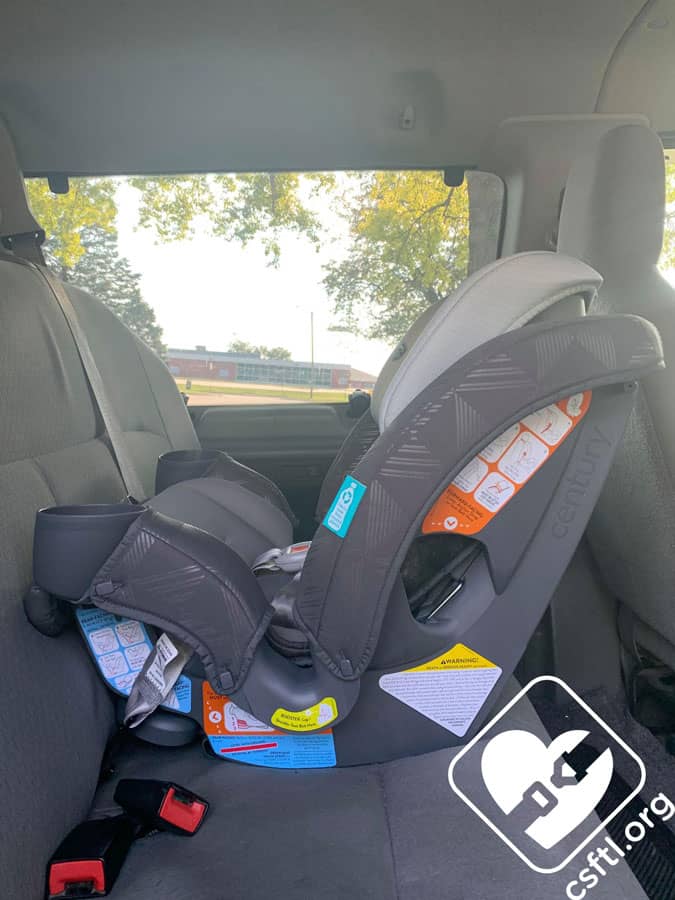
Century Drive On Multimode Car Seat
For many of us, the words “Century brand car seats” bring to mind images of the old car seats with the T-shield overhead harness. While that may still be true, it’s out with the old (and expired) and in with the new (and eco-friendly) with the newly relaunched Century brand of car seats. We are excited to see the new things the Century brand is bringing to the market with the new Century Drive On multimode car seat.

Old, expired, Century brand car seat (photo credit: CPSafety)
CSFTL Quick Stats
- Rear facing weight range: 5-40 pounds
- Rear facing height range: 1 inch from the top of the headrest when fully extended
- Forward facing weight range: 22-65 pounds
- Forward facing height range: less than 49 inches tall
- High back booster weight range: 40-100 pounds
- High back booster height range: 43-57 inches
- Expiration: 7 years in harness mode, 10 years in booster mode
- Lower anchor weight limit: 55 pounds
- LATCH permitted in booster mode
Measurements
- Lowest harness position (with insert): 6.5 inches
- Highest harness position: 16 inches
- Highest booster guide position: 18 inches
- Width at widest point (at the cupholders): 19 inches
- Base width: 11 inches
- Crotch strap positions: 3.25 inches and 5.5 inches from seat back
- Seat weight: 14 pounds
Assembly Required
Century Drive On cupholder assembly
Before you install the seat, the cupholders must be attached to the shell of the seat. They are labeled “L” and “R”, as are the spots they click in to. Tip the hook into the slot and slide the cupholder into place. It will click when the cupholder is fully installed.
Features
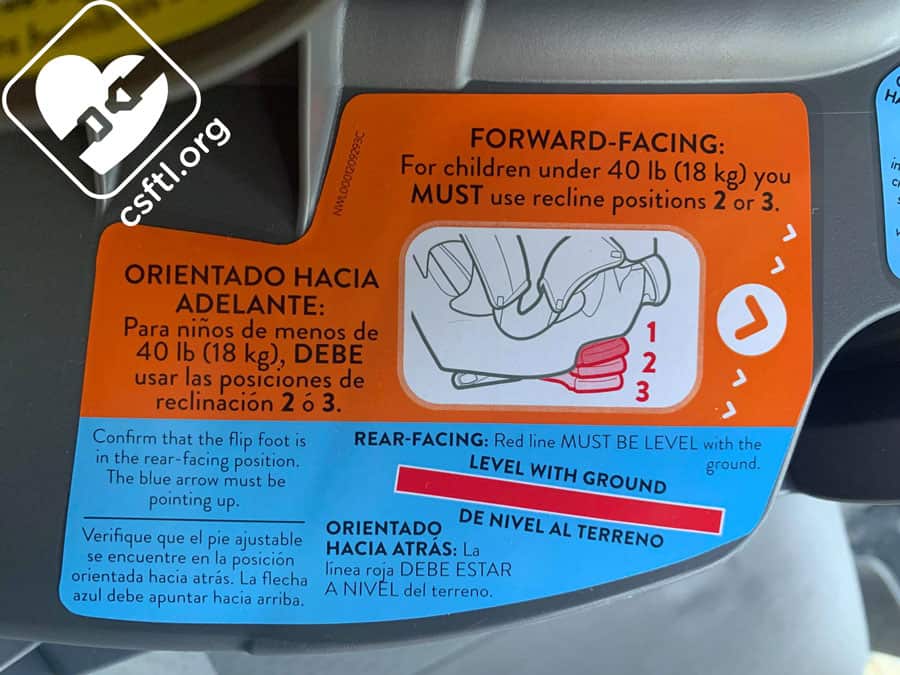
Multiple Recline Positions
The Drive On has 3 recline positions, each of which has some specific guidelines around their use. Here is a handy summary of the rules for each position:
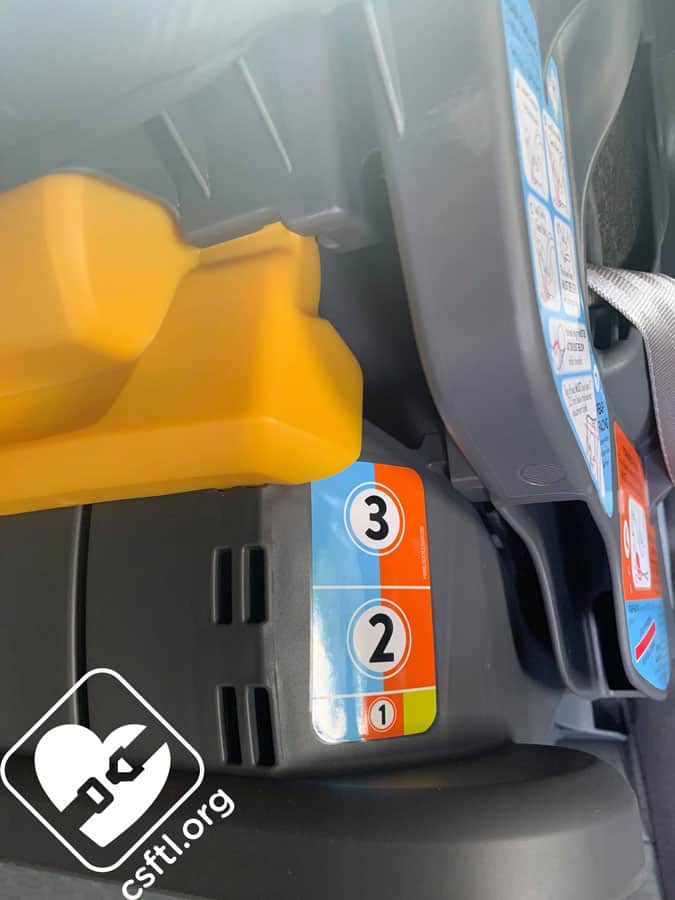
Century Drive On recline positions
Recline position 1 can be used rear facing if it can be installed at the proper recline angle for the child.
Recline position 1 MUST be used in booster mode.
Recline positions 2 or 3 MUST be used for a child weighing less than 40 pounds in forward facing mode.
Recline position 2 or 3 can be used rear facing if the seat can be installed at the proper recline angle for the child.

Century Drive On, forward facing, recline position 3
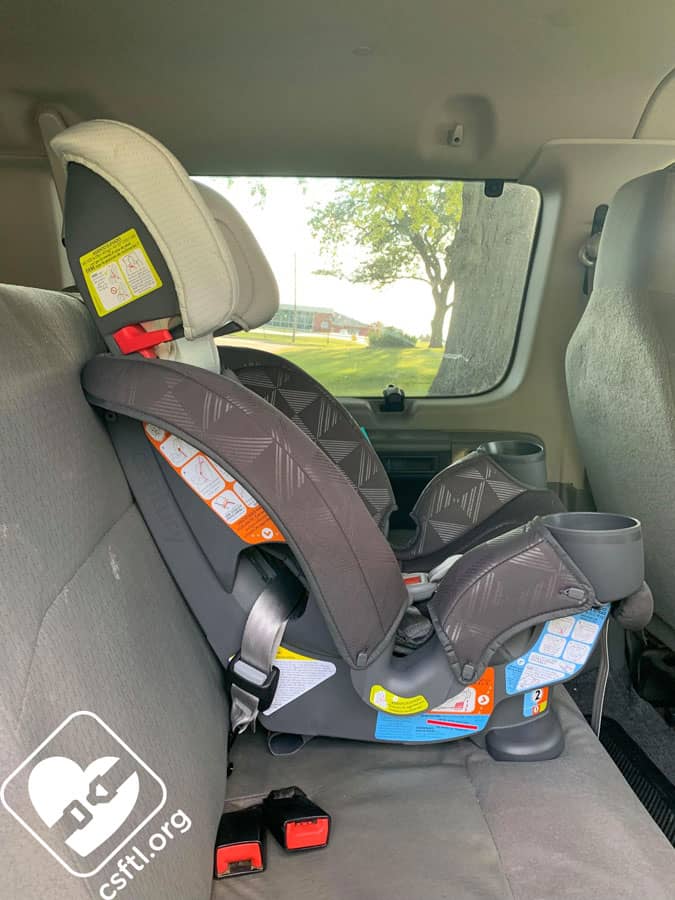
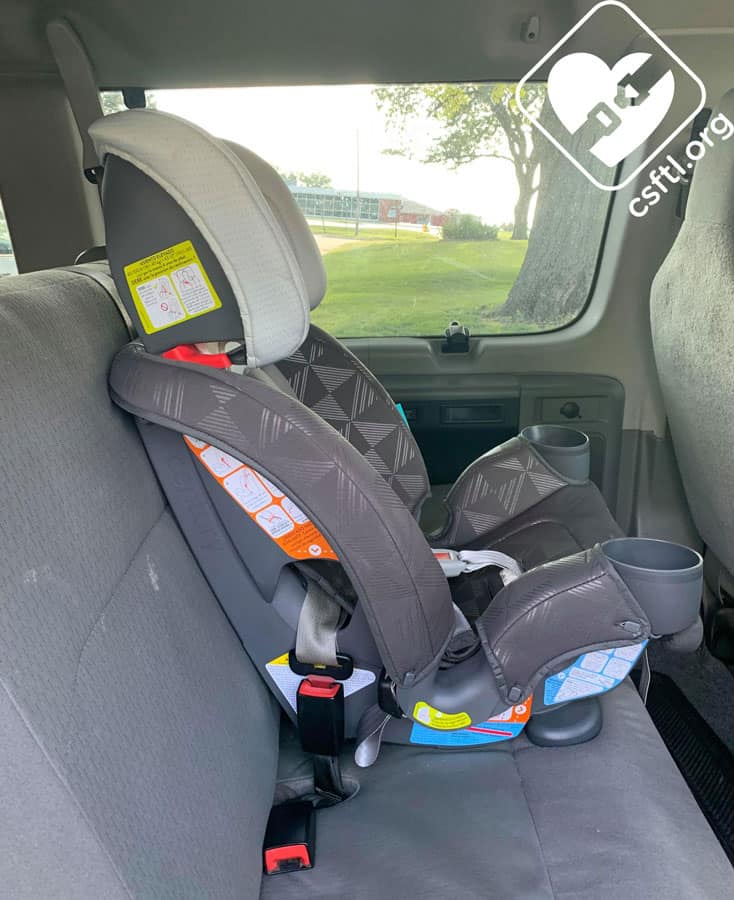
I was impressed to find the Drive On fit in the captain’s chair of the 2014 Traverse on recline position 3, aka the most reclined position. This is no easy task in this (and many other ) vehicles. So many times, we’ve seen that when a large recline is required when forward facing, it creates too much overhang. But that’s not the case with the Drive On!
Bonus Feature: Light Weight
The Century Drive On weighs in at just 14 pounds. That makes it easy to carry when transferring it between vehicles and would make a nice lightweight travel seat.
Fun Colors and Patterns!
In a world of car seats that are primarily in versions of black and gray, the Century seats stand out with their fun cover patterns and colors. We’re so glad to see that the Century line of seats is bringing some whimsy back into the car seat world.
After all, car seats are for kids!
Infant Body Support
The infant insert can only be used rear facing. It is only required when the harness comes from above the child’s shoulder when the insert is not being used.
Harness Covers
Century Drive On harness covers
The optional harness covers that are included with the seat can be used in both rear and forward facing modes. While these are optional, we did find that the newborn Huggable Images doll got a better fit (rear facing) without them.
Eco-forward Fabrics

Century Drive On eco-friendly fabric
The Drive On’s soft goods (cover, harness covers, infant padding) are made from recycled materials. They are super soft and spot clean very well, they can also go in the washing machine.
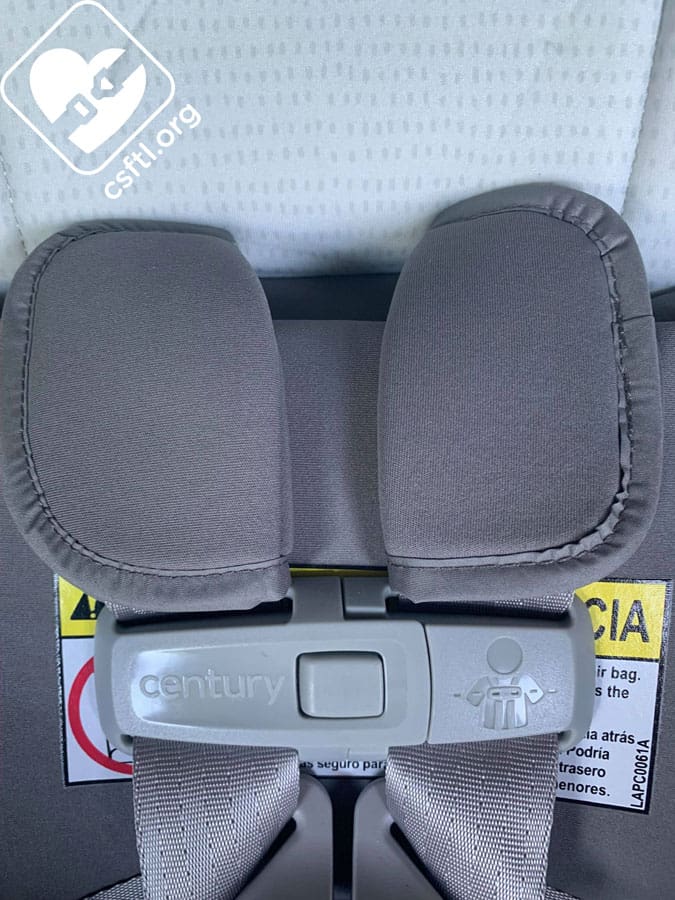
Easy Adjust Headrest

Century Drive On harness adjuster
The headrest and harness adjust together by lifting up on the orange tab at the top of the headrest. This allows for a caregiver to adjust the headrest into one of the 8 headrest positions.
Ease of Installation
The Drive On is very easy to install when using the seat belt or the lower anchors. One thing that seems to happen consistently is that lightweight seats like the Drive On are a bit tippy when they’re installed with the vehicle seat belt. That’s the case here as well but the belt paths are wide open, which means you won’t lose any skin when threading the seat belt through either belt path.
Installation: Rear Facing
Lower Anchors
Century Drive On installed with lower anchors
To install the Drive On in rear facing mode with the lower anchors, first rotate the flip foot on the bottom of the seat’s shell into the rear facing position. Choose the recline number that places the red recline indicator line parallel to the ground. Then, place the Drive On on the vehicle seat with the harness facing the back of the vehicle. Remove the lower anchor connectors from their storage position and connect them to the lower anchor bars in the vehicle seat bight. Apply pressure to the Drive On with one hand where the child’s bum goes while tightening the lower anchors with the other hand.
Tightening the lower anchors using the inside/outside trick
Check your Work
Check to see that the red level line is parallel to the ground. Ensure the car seat moves 1 inch or less at the belt path when tested side to side and front to back with the force of a firm handshake.
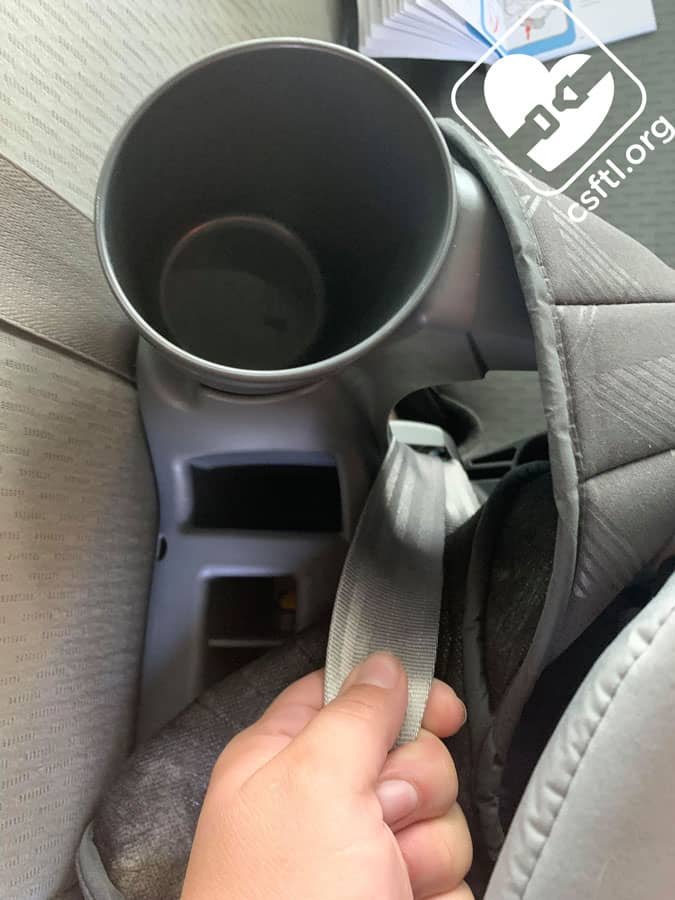
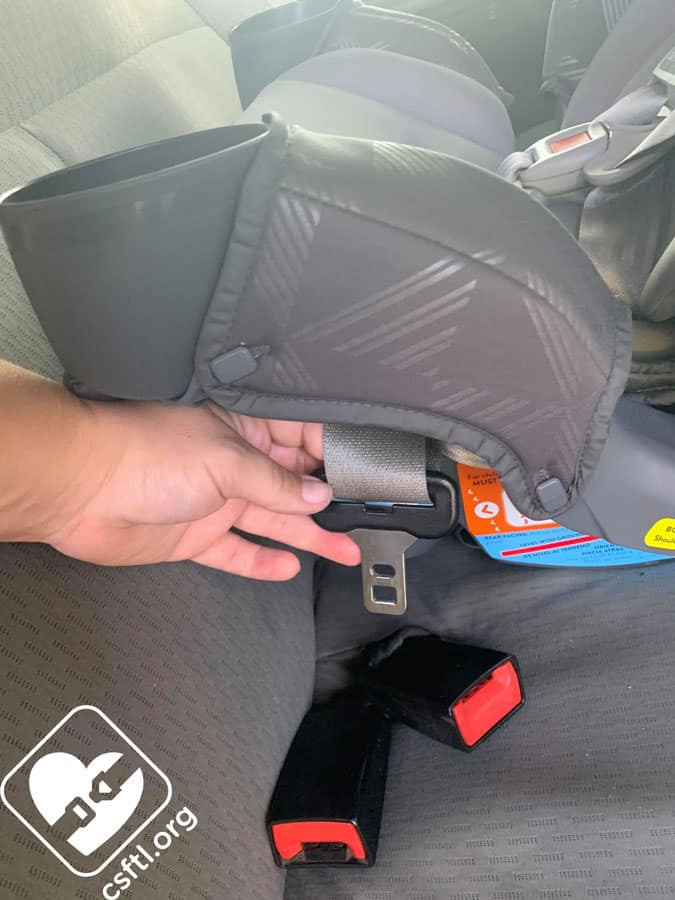
Installation: Vehicle Seat Belt
Century Drive on recline line MUST be parallel to the ground when rear facing
Installing the Drive On rear facing with the vehicle seat belt is quite similar to installing with the lower anchors. Start by rotating the flip foot into the rear facing position. Choose a recline number that places the red recline indicator line parallel to the ground. Then, place the Drive On on the vehicle seat with the harness facing the back of the vehicle. Thread the vehicle seat belt through the rear facing belt path and buckle the vehicle seat belt. Pull the shoulder portion of the vehicle seat belt all the way out to engage child seat mode, then feed the shoulder portion of the belt back into the vehicle until the seat is securely installed. Apply pressure to the Drive On where the child’s bum goes with one hand while tightening the vehicle seat belt with the other hand. In many cases, an additional pull from the outside of the seat’s shell will make the difference between a loose install and a secure install.
Installing the Century Drive On, rear facing with the vehicle seat belt
Check your Work

Century Drive On rear facing installed with the vehicle seat belt
Check to see that the red level line is parallel to the ground. Ensure the car seat moves 1 inch or less at the belt path when tested side to side and front to back with the force of a firm handshake.
Fit to Child
Rear Facing
Newborn
Century Drive On newborn Huggable Images doll with infant insert
Our newborn Huggable Images doll weighs 7 pounds and is 17 inches long. We found that the Drive On fits newborns well both with and without the insert. This model fit better without the optional harness covers.
With the insert, our Huggable Images newborn doll has the harness below the shoulder and the crotch buckle in the inner slot.
Century Drive On newborn Huggable Images doll without the infant insert
Without the insert, our Huggable Images newborn doll has the harness just below the shoulder and the crotch buckle in the inner position. The harness comes out of the seat at the bottom of the headrest.
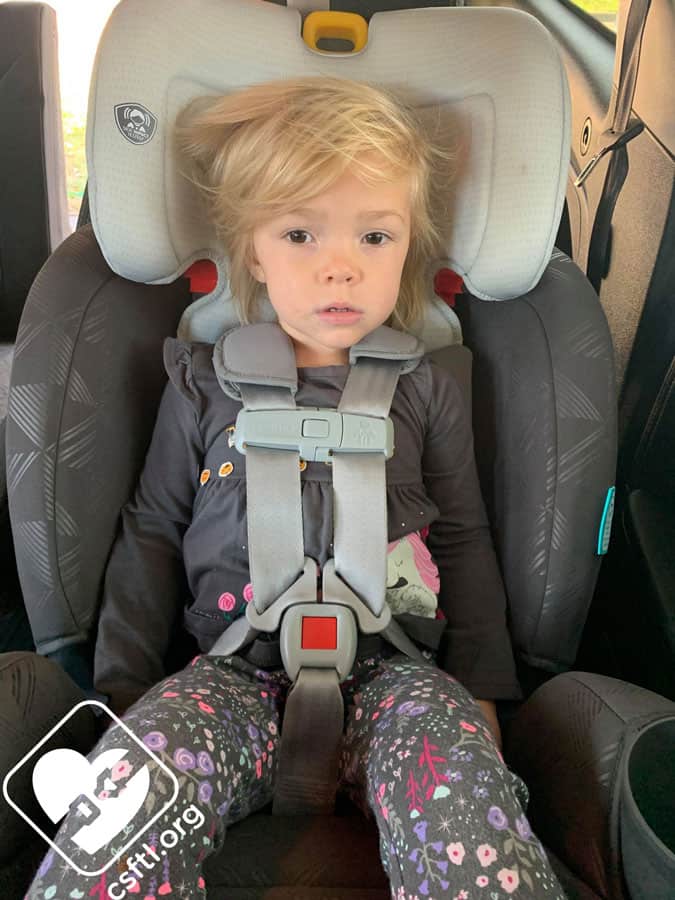
2 Years Old

Century Drive On 2 years old rear facing
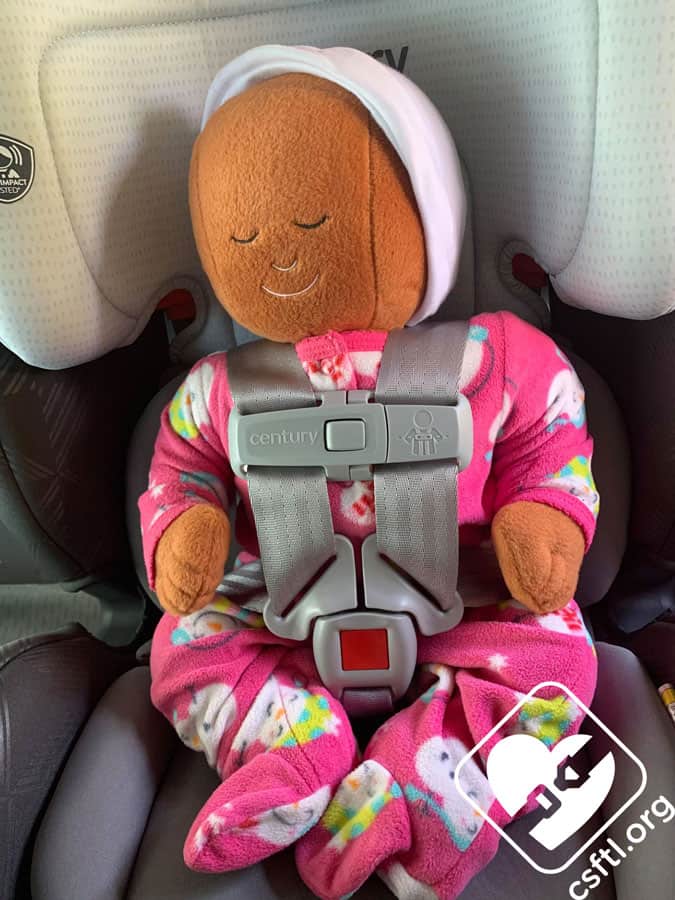
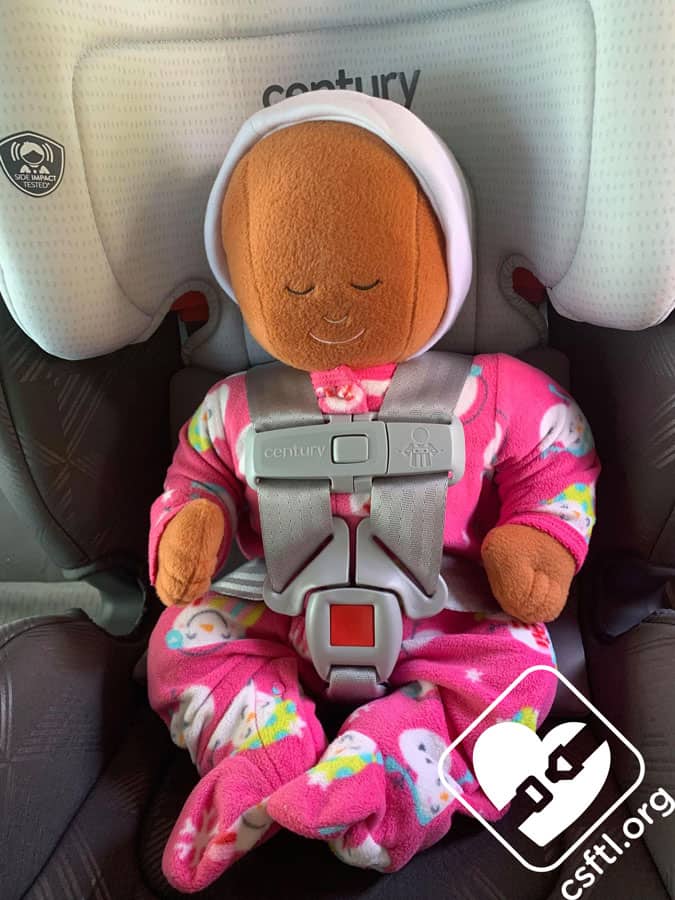
This little model is 2 years old, weighs 27 pounds and is 34 inches tall. She fits nicely in the Drive On with plenty of room to grow. The harness is just below the shoulder and the crotch buckle is in the outer position. This seat has quickly become one of her favorites. It is easy for her to buckle herself into, but she can not unbuckle it easily (which is a favorite pastime of hers!).
Installation: Forward Facing
Lower Anchors
Moving the Lower Anchors to Forward Facing

Century Drive On moving the lower anchors
To move the lower anchors from the rear facing belt path to the forward facing belt path, remove the cover from the seat, then move both of the lower anchor connectors to the (child’s) left side of the seat. Slide the lower anchor webbing up the metal bar to the forward facing belt path. Thread the lower anchor connectors through the new belt path and confirm that one connector is on each side of the seat.
Century Drive On forward facing recline 2
Rotate the flip foot that’s located on the bottom of the seat’s shell into the forward facing position. Set the recline foot to the appropriate number based on the child’s weight. Place the Drive On on the vehicle seat with the base flat and the harness facing the front of the vehicle. Loosely connect the top tether anchor to the top tether anchor in the vehicle. Connect the lower anchors to the lower anchor connectors in the vehicle seat bight. Press down where the child’s bum goes with one hand and tighten the lower anchors webbing with the other to remove all of the slack from the lower anchors. Finally, tighten the top tether anchor webbing until it is secure.
Check your Work
Ensure the car seat moves 1 inch or less at the belt path when tested side to side and front to back with the force of a firm handshake. If there is still a bit of movement at the belt path, repeat the steps above to remove that extra bit of slack from the lower anchor webbing until the seat moves less than an inch in any direction. In our experience, it’s that last bit of adjustment that makes the difference between a loose install and a secure install.
Vehicle Seat Belt
Century Drive On recline 1 installed with vehicle seat belt
To install the Drive On forward facing with the vehicle seat belt, rotate the flip foot into the forward facing position. Remove the top tether anchor connectorfrom its storage spot. Set the recline foot to the appropriate number based on the child’s weight. Loosely connect the top tether anchor. Thread the vehicle seat belt through the forward facing belt path and buckle the seat belt. Determine how the seat belt locks per the vehicle manual and lock the seat belt. Apply pressure where the child’s bum goes with one hand while tightening the seat belt with the other hand. Tighten the top tether anchor webbing.
Check your Work
Ensure the car seat moves 1 inch or less at the belt path when tested side to side and front to back with the force of a firm handshake.
Fit to Child
Forward Facing
3 Years Old
Century Drive On 3 years old forward facing
During the course of the review, this model had a birthday! We celebrated by testing this seat out in forward facing mode. She is now 28 pounds and 34 inches tall. While we prefer to keep children rear facing as long as possible, she is safe in a properly used forward facing harnessed car seat with the top tether securely attached. The seat is on recline 2 because she weighs less than 40 pounds. The harness is just above her shoulder and the crotch buckle is in the outer position.
5 Years Old
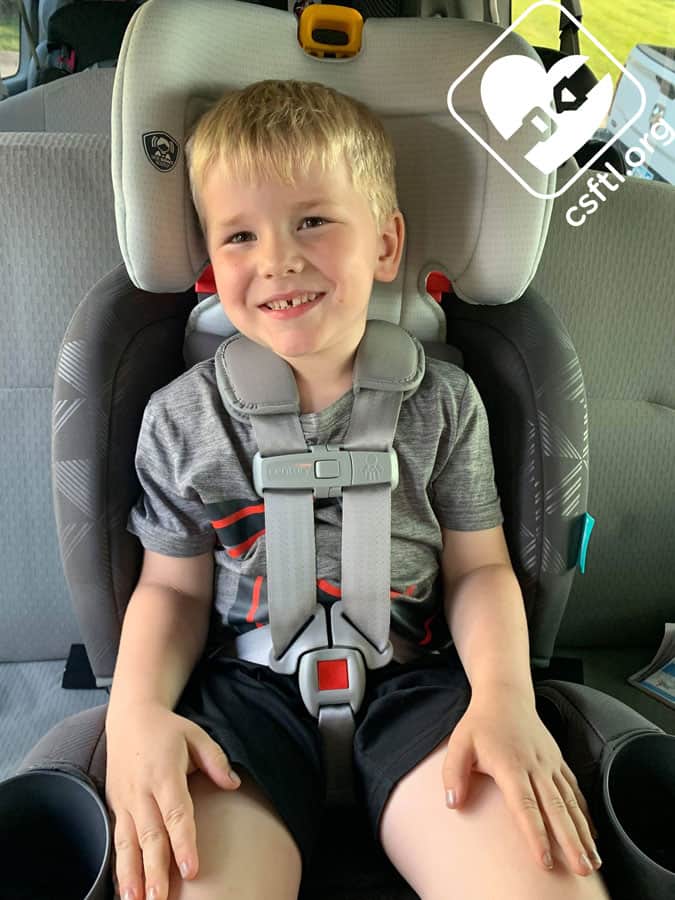
Century Drive On 5 years old forward facing
Our 5 year old model weighs 54 pounds and is 45 inches tall. He found the seat to be very comfortable and said the cover was soft. The seat is on recline 1, the harness is just above the shoulder, and the crotch buckle is in the outer position. He still has room to grow, with one click of the harness height left.
Converting to Booster Mode
Century Drive On fully converted to booster mode
Converting the Drive On to booster mode took about 5 minutes, that’s a pretty quick transition time! Here’s how to do it: start by completely loosening the harness and raising the headrest into the highest position. Remove the harness covers and store them in a place you’ll remember for future use.
Pro tip: use a piece of fabric tape to label the seat that these items belong to.
Then, unbuckle the chest clip and the crotch buckle. Undo the two snaps in the seat pad, near the headrest and flip the seat pad up toward the headrest. Next, undo the snaps in the seat pad near the child’s bum and flip the seat pad down toward the seat bottom.
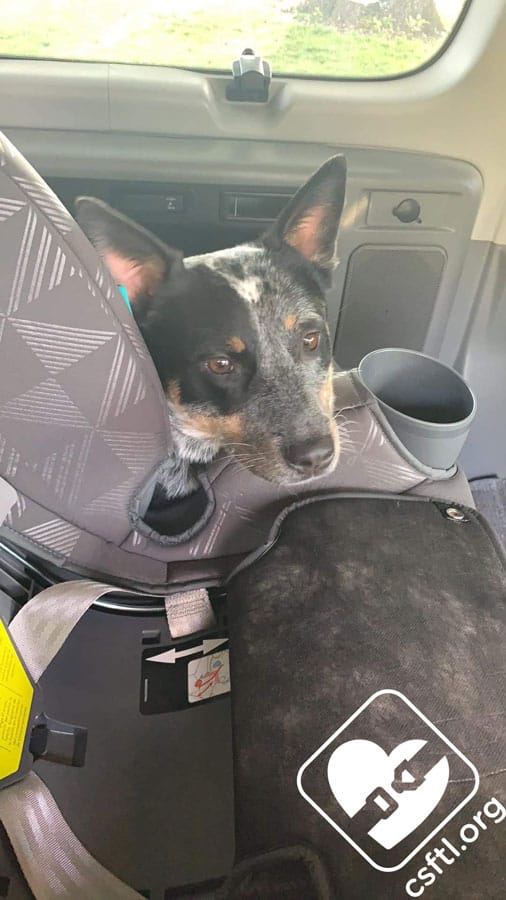
Review dog, Sadie, showing the Century Drive On bottom pad flipped down
To remove the crotch buckle, rotate the flip foot into the forward facing or booster position and recline the car seat completely. Then turn the metal crotch buckle retainer clip sideways and slide it up and out of the slot.
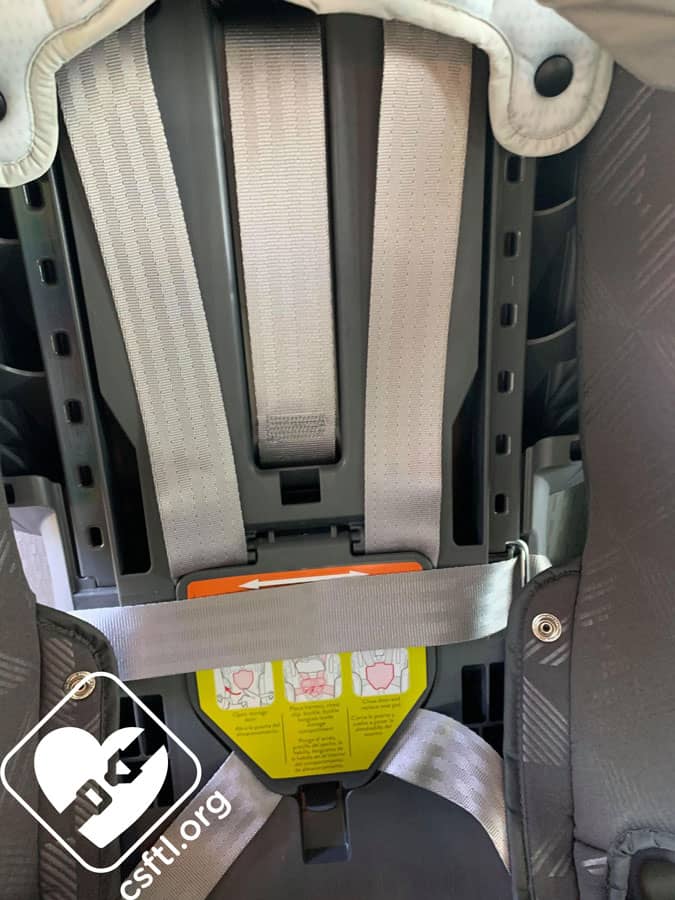
If the lower anchors are in the forward facing belt path, set them to the (child’s) left side of the seat to get the webbing off the top of the harness storage door. Open the harness storage door on the front side of the seat back.
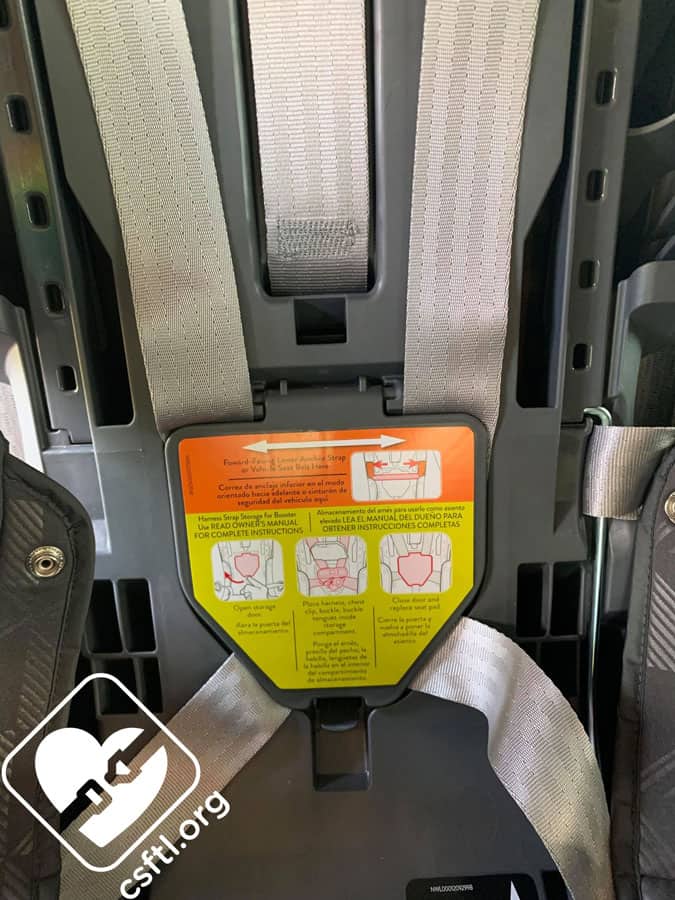
Century Drive On lower anchor webbing out of the way of the harness storage door
Slide the harness, chest clip, buckle tongues, and crotch buckle into the storage compartment and close the door. The harness should be in the slots at the top of the compartment door.
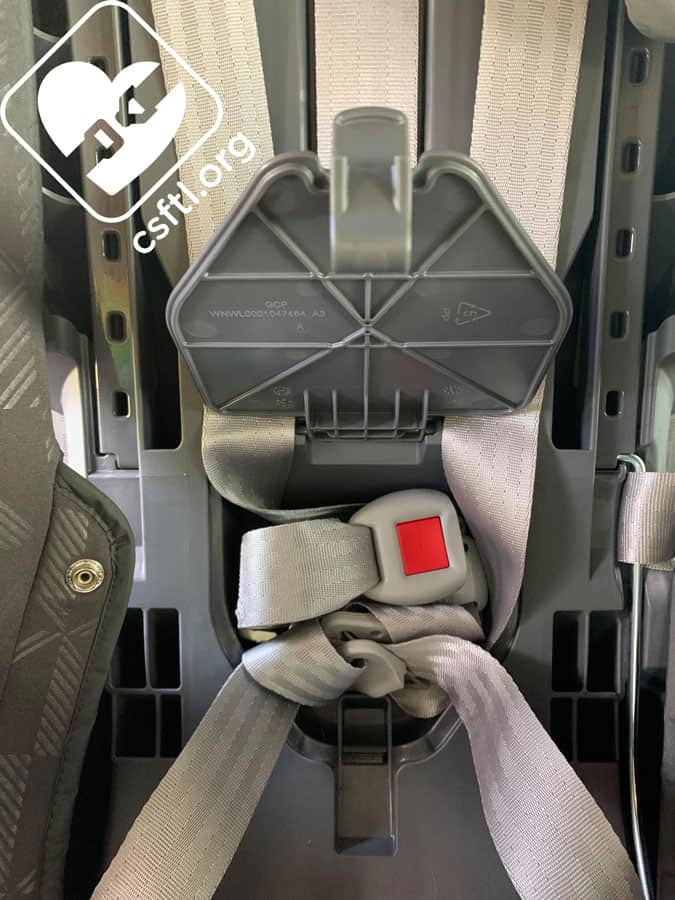
Century Drive On harness storage compartment
Replace the lower anchors in their storage spots if you are opting to not use them in booster mode.

Century Drive On booster belt guide
Replace the seat pad and recline the Drive On into position 1 for booster mode. Thread the vehicle seat belt through the red belt guide in the headrest of the Drive On.
Fit to Child
Booster Mode
Shoulder Belt Guide
8 Years Old
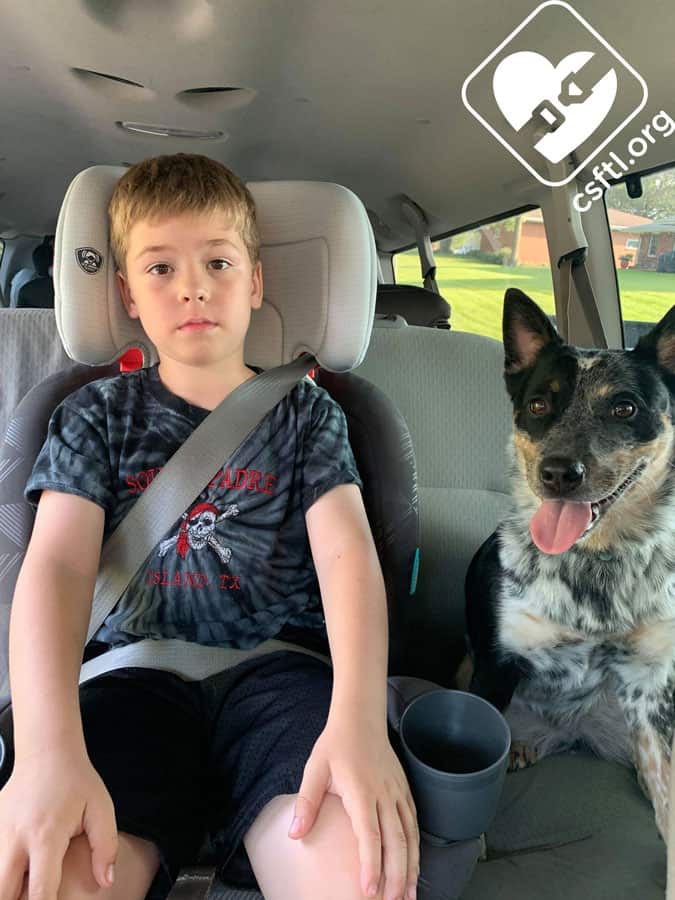
Century Drive On 8 years old booster mode
This model is 8 years old, weighs 64 pounds, and is 50 inches tall. He wasn’t as thrilled as review dog Sadie to model on this particular day. The seat belt does fit him nice and low on the hips, sitting on top of the thigh. The shoulder belt is centered on the collar bone. He will outgrow this seat in booster mode shortly, since he is on the last click of the headrest.
Important Information: Where to Find
Manual Storage: The manual stores on the underside of the base.
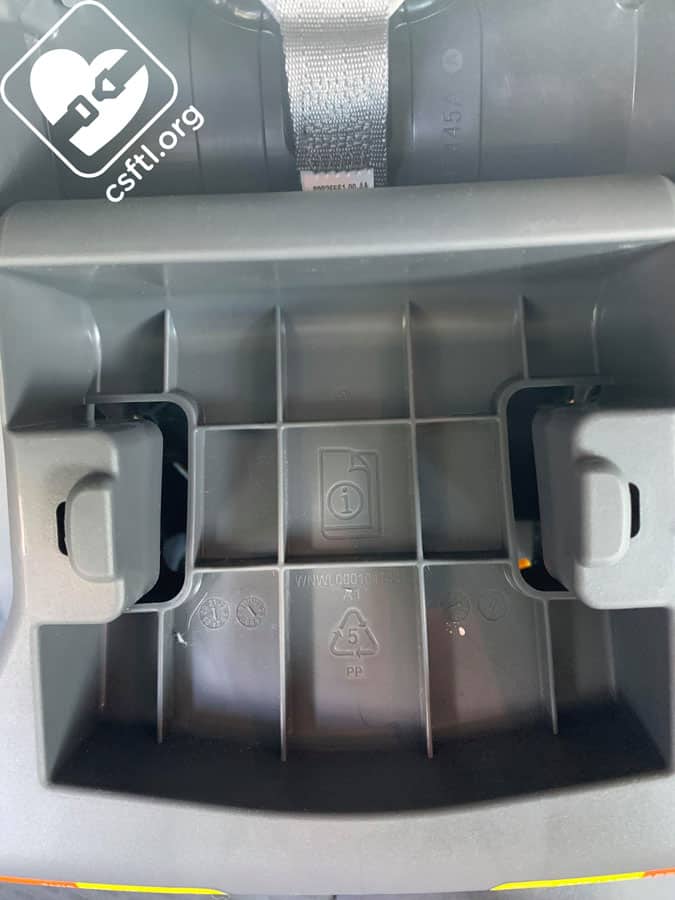
Century Drive On manual storage

Century Drive On date of manufacture label
Expiration: Page 20 of the manual states the seat expires 7 years after the date of manufacture in harness mode and 10 years after the date of manufacture in booster mode.
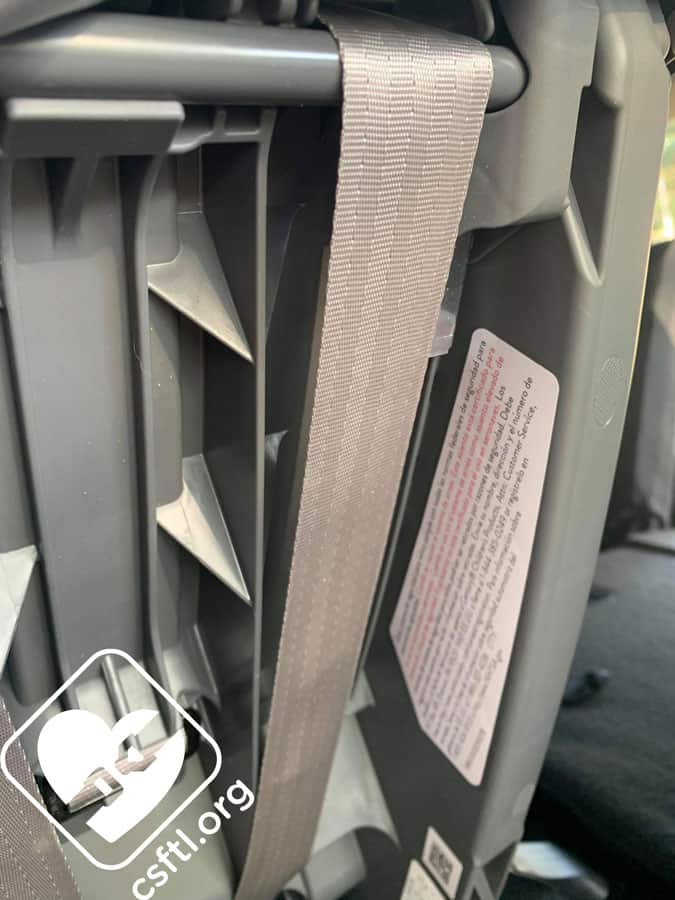
Date of manufacture label: The white, rectangular label with the date of manufacture is on the inside of the ridge on the back of the seat.
Century Drive On FAA approval
FAA Approval: The Drive On is FAA approved in harness mode only. The label is on the inside ridge of the back of the seat.

Century Drive On top tether storage
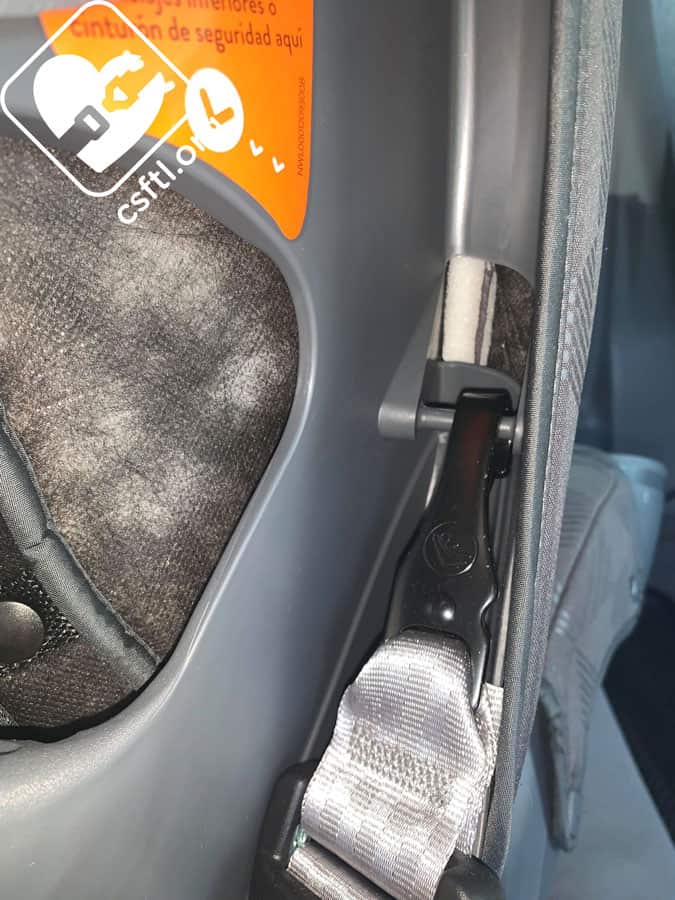
Top Tether Anchor Storage: The tether anchor stores on its own bar on the (child’s) right side of the seat, it attaches to a on a “lip” near the child’s shoulder
Century Drive On lower anchor storage
Lower Anchor Storage: Each lower anchor stores on its own bar on either side of the seat, under the “lip” near the child’s elbow.
Overall Thoughts
Century logo
The Drive On has a lot to offer, it impressed us in many ways. From the reasonable price point to the easy installation and soft fabrics that immediately stood out from the crowd. The harness storage compartment makes it so easy to convert the seat to booster mode (and not lose the parts)! In all fairness, I struggled to find a downside with this seat.
Giveaway!
Our friends at Century Baby are giving away one Drive On to a lucky reader in the United States! Please read our Terms and Conditions, then enter for your chance to win!
a Rafflecopter giveaway