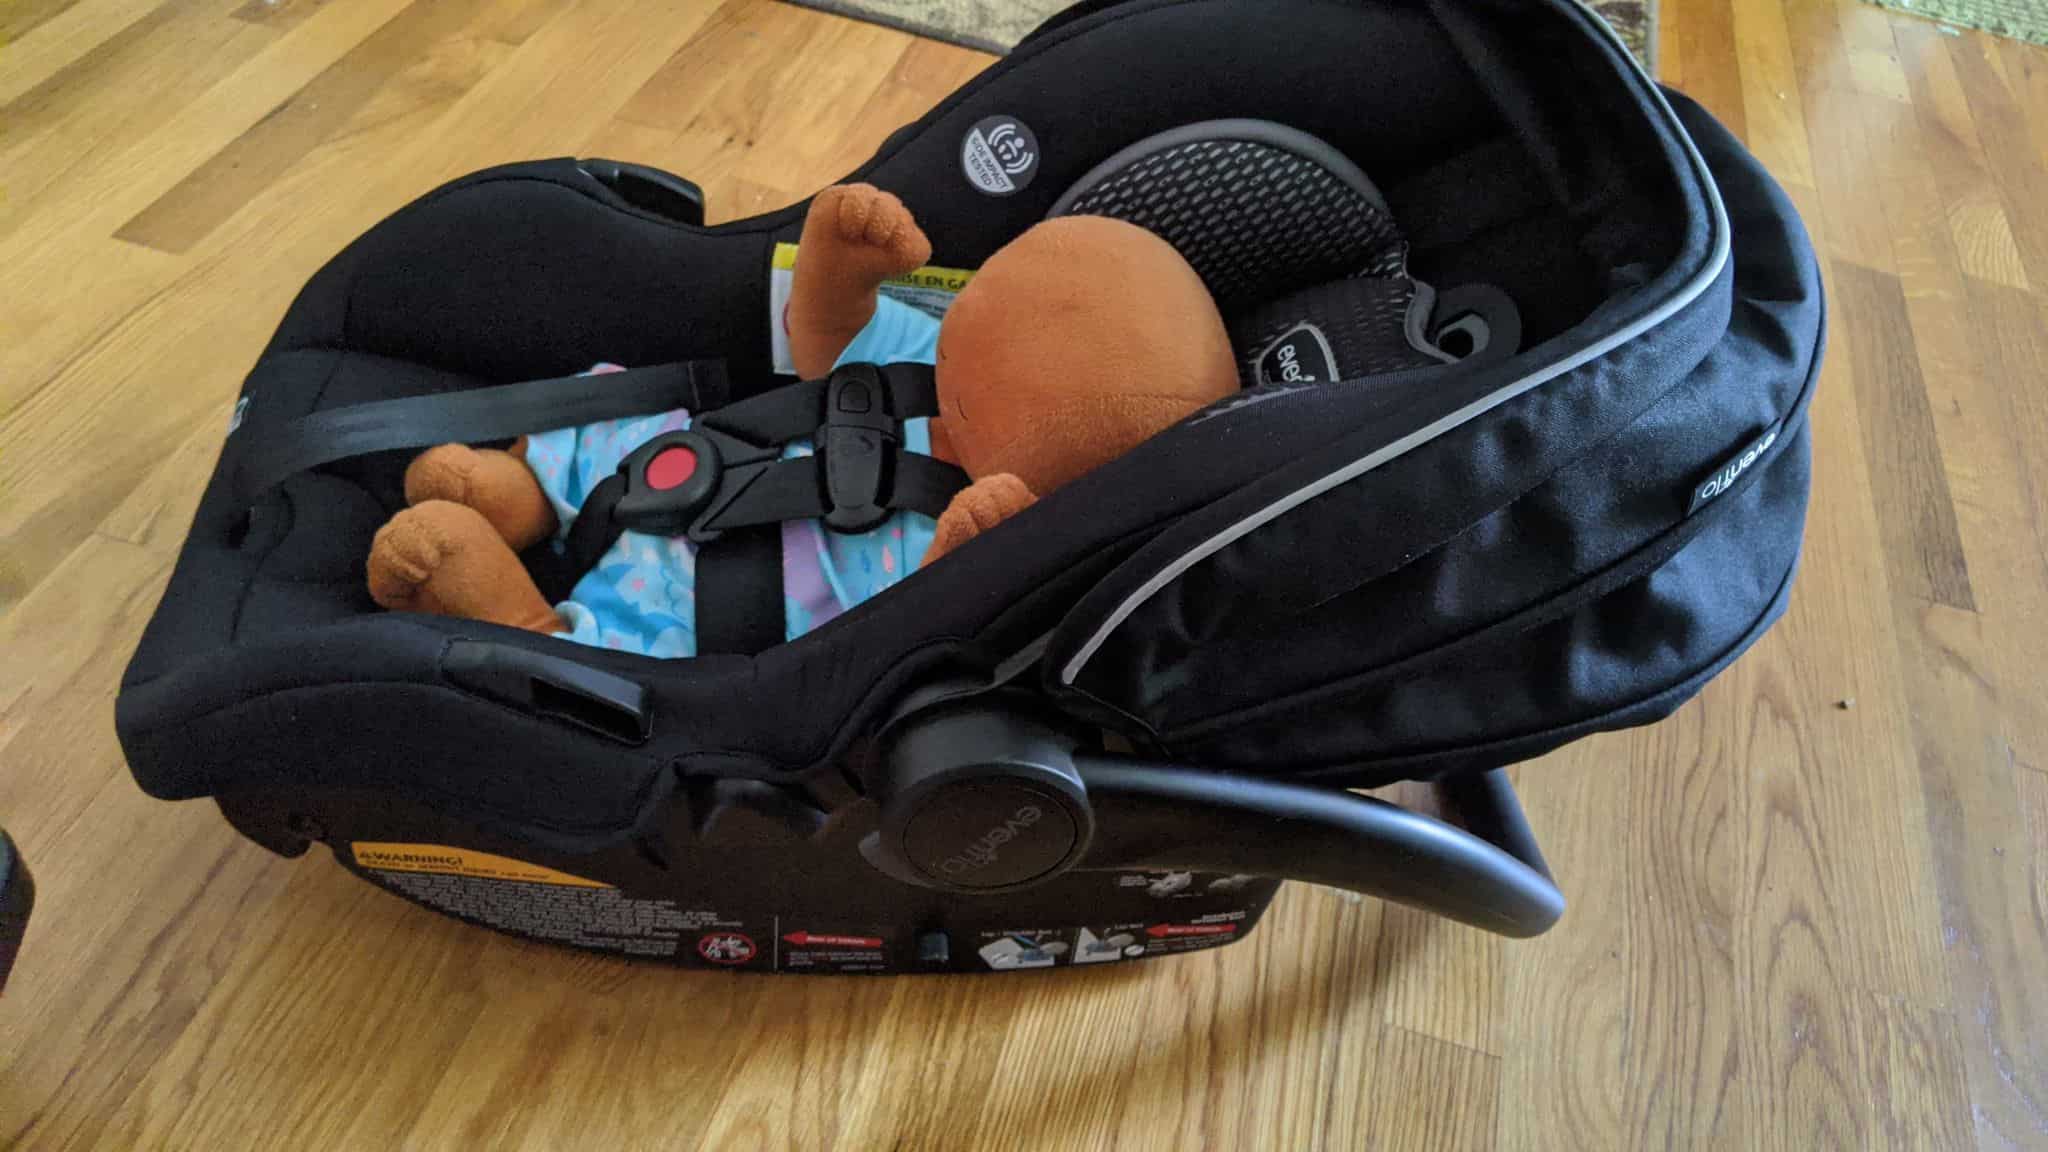
Evenflo LiteMax DLX
The Evenflo LiteMax is a staple of the rear facing only segment of the car seat market. There are a few models — the base model LiteMax that fits children starting as low as 3 pounds, the fully-featured SecureMax and in the middle of the product line is the LiteMax DLX. This seat takes the features we like from the LiteMax (the heavy-duty lockoff and great fit to child among them!) and adds a load leg and premium lower anchor connectors. Join us as we take a closer look at this seat.
CSFTL Quick Stats
- Weight range: 4 to 35 pounds *our seat was labelled with a 4 pound minimum weight but our friends at Evenflo have confirmed that any seat labelled “LiteMax” or “SafeMax” can be used from 3 pounds and 15.75 inches. We look forward to seeing label/manual updates to all seats that are part of this wonderful change!
- Height range: 17 to 32 inches tall and top of child’s head is at least 2.5 cm (1 in.) below the top of the child restraint seat back
- Carrier weight: 8.8 pounds
- Weight: carrier + base: 17.8 pounds
- Expiration: 6 years
- Width at widest point (edges of the handle): 17 inches
- Front-to-back: 29 inches (this very unofficial measurement will vary depending on the slope and shape of the vehicle seat)
- Lowest harness position: 6 inches with infant insert, 7 inches without
- Requires 1.5 inches of clearance between the carrier and the vehicle seat when it is not installed in the center vehicle seat
Features
- Load leg
- Premium lower anchor connectors
- No-rethread harness
- Robust infant padding — must be used if the child weighs less than 6 pounds
Handle Positions
The LiteMax DLX has some very specific rules around the handle positions. We are mentioning these rules early in the review because the seat’s handle is often something that caregivers find themselves moving throughout the day. Adding these rules to the handle increases the potential for misuse.
Evenflo LiteMax DLX handle position 1
Position 1 The most upright handle position is for carry and travel. The handle can be used in this position during travel in both the United States and Canada. Position 1 is the only handle position permitted for travel in Canada.
Evenflo LiteMax DLX handle position 2
Position 2
The manual refers to this position as the “convenience position.” This position can not be used to carry the seat or in the vehicle. With those restrictions, this handle position doesn’t add a lot of in-vehicle value, though it can help to stabilize the carrier when it’s not in the vehicle.
Evenflo LiteMax DLX handle position 3
Position 3
The handle can be used in this position during travel in the United States. However, it does add extra front-to-back space so it’s not the most compact handle position.
Evenflo LiteMax DLX handle position 4
Position 4
The manual refers to this position as the “stand position.”
Place the handle in this position when you set the carrier on the floor. NEVER use this position in a vehicle.
*IMPORTANT: NEVER use Positions 2 or 4 when traveling in a vehicle. U.S. and Canadian models differ in acceptable handle positions for travel
Base Compatability
The LiteMax DLX base is compatible with any LiteMax carrier. Translation: if a family wanted to add a load leg to their base model LiteMax, they could do so by purchasing an extra LiteMax DLX base!
Recline Angle Indicator
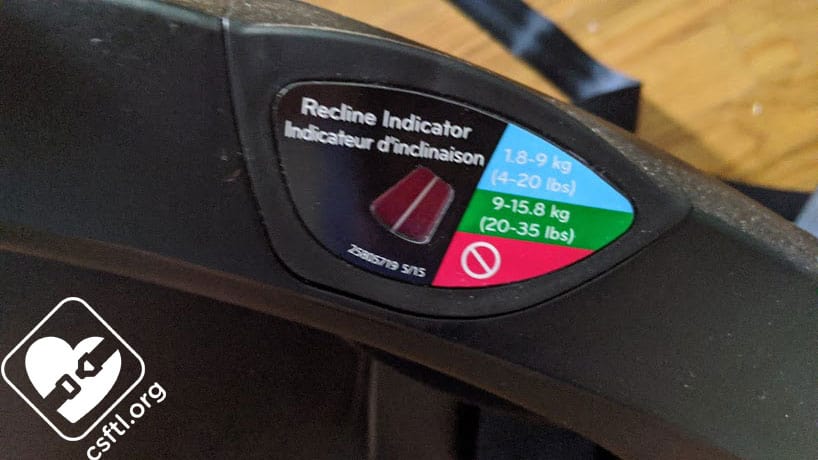
Evenflo LiteMax DLX recline angle indicator
The LiteMax DLX has two recline positions when it’s installed with the base:
Blue: 4 – 20 pounds
Green: 20 – 35 pounds
Ensure that the recline angle indicator is in the right zone for your child by extending or retracting the angle adjuster on the base. Twist the gray triangle on the top of the base up to extend or retract the adjuster as needed.
The white indicator line needs to be in the correct zone for the child. There’s a logic to having multiple recline positions for different weights — the seat should, in theory, always be installed at the correct recline angle for the child, but having multiple recline positions for the weight ranges does mean that it’s one more thing to adjust as the child grows.
No Rethread Harness
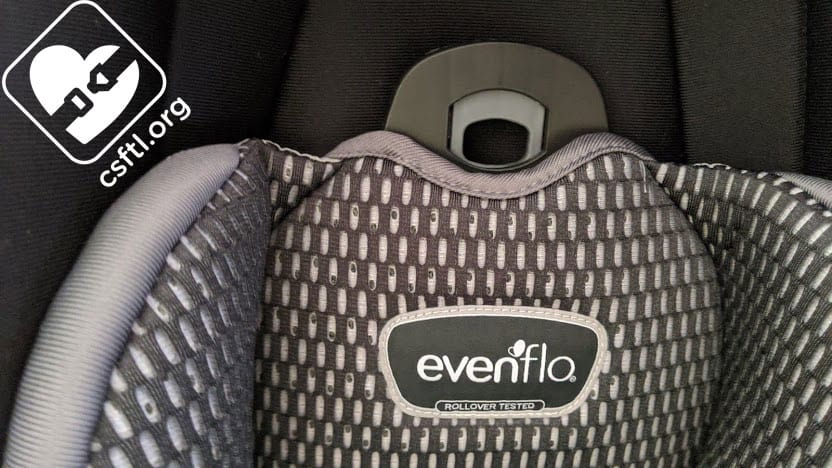
Evenflo LiteMax DLX headrest adjuster
The harness and headrest adjust quite easily by pulling a little handle at the top of the headrest.
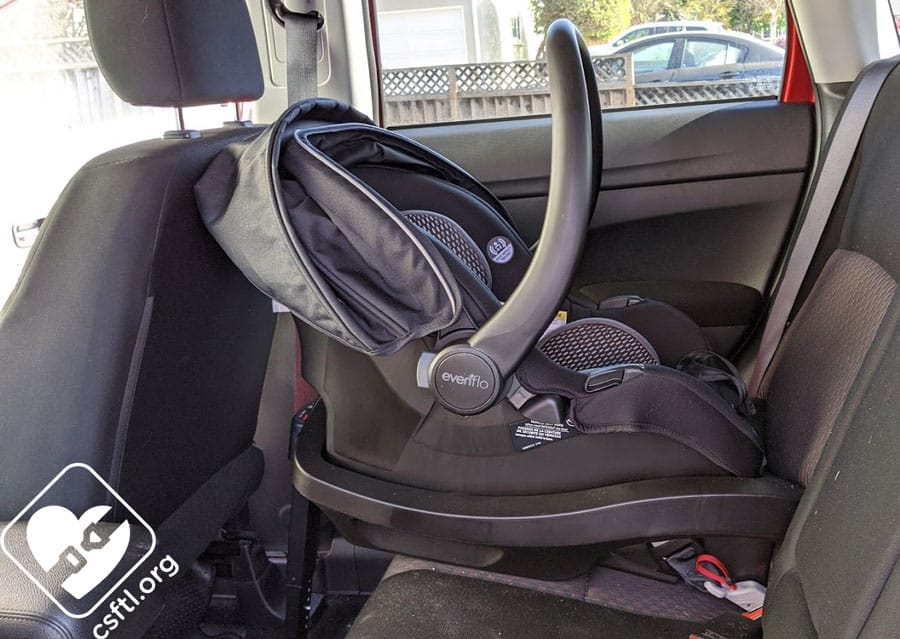
Not Particularly Compact
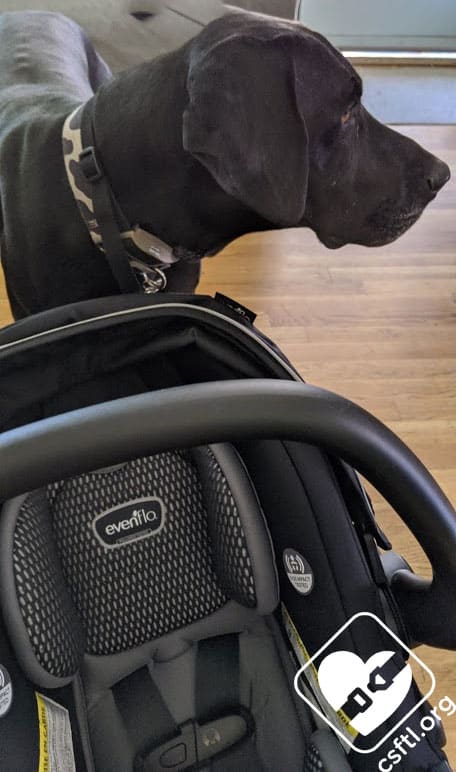
Evenflo liteMax DLX review dog
The carrier + base measures roughly 29 inches front to back when measured on a flat surface. It’s likely that the seat would be sightly more compact when installed but that still makes it fairly large. The manual requires 1.5 inches of clearance between the carrier and the vehicle seat in front of it when the seat is not installed in the center rear seating position. This requirement and the seat’s fairly sizeable footprint mean that it’s possible that the LiteMax DLX won’t be the best option for tight spaces.
The photo to the left is presented solely to highlight the way Review Dog Benson looks next to this lovely car seat.
Load Leg
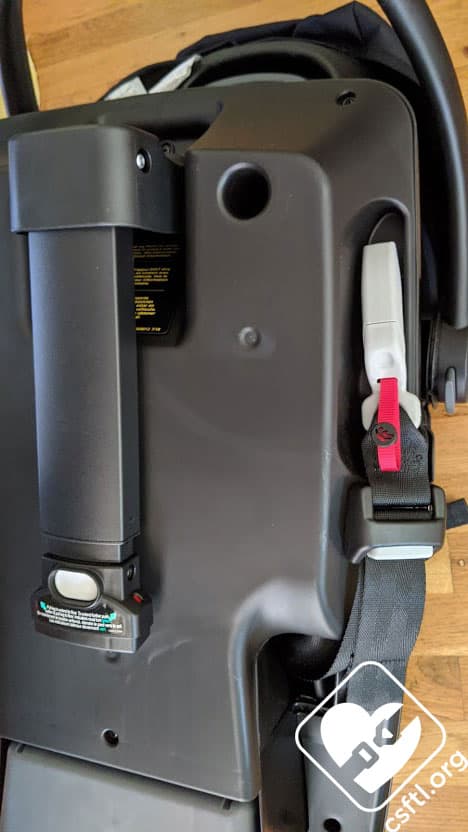
Evenflo LiteMax DLX load leg stored
One of the LiteMax DLX’s premium features is a load leg on the bottom of the base. This device can increase the ride-down time during a crash, reducing the overall impact of the crash on the child.
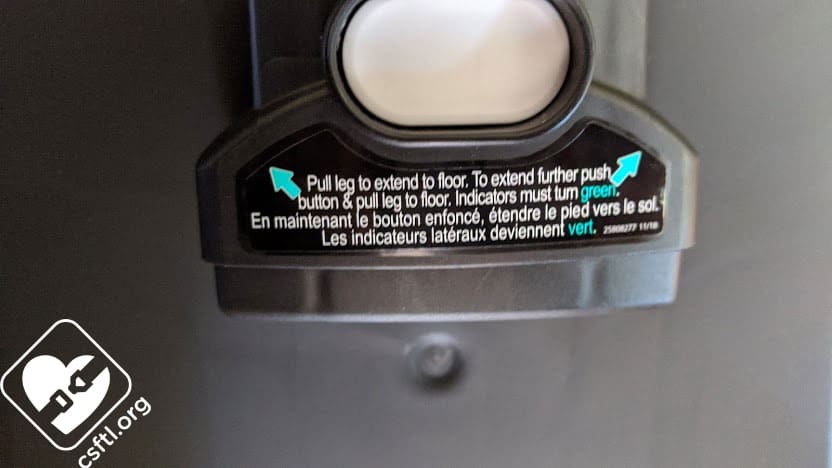
Evenflo LiteMax DLX load leg instructions
I found that the load leg on this seat has a couple of quirks. First, it doesn’t store flush with the bottom of the base. So when I was putting the seat through the paces, I found myself staring at a seat that refuses to sit flat on the floor. This is but a small complaint since I’m guessing most families won’t store the seat in their living room long-term.
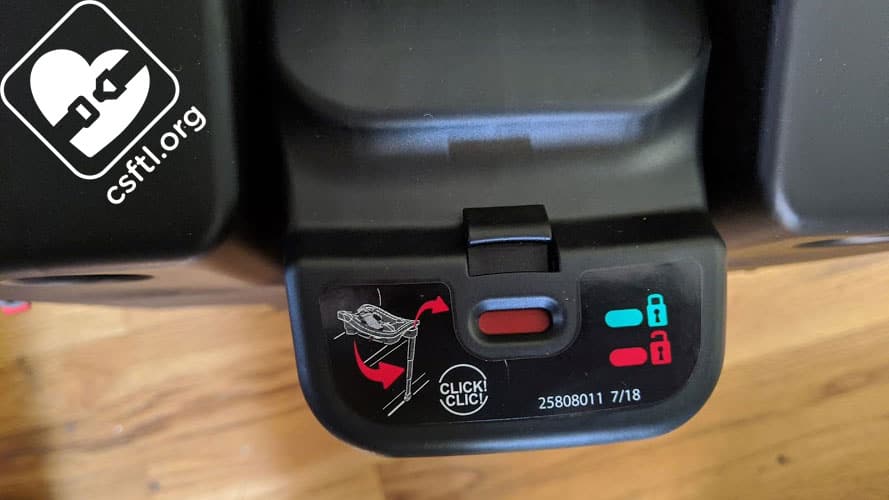
Evenflo LiteMax DLX load leg locked indicator
When the load leg is locked in place, the indicator at the end of the base turns to green.
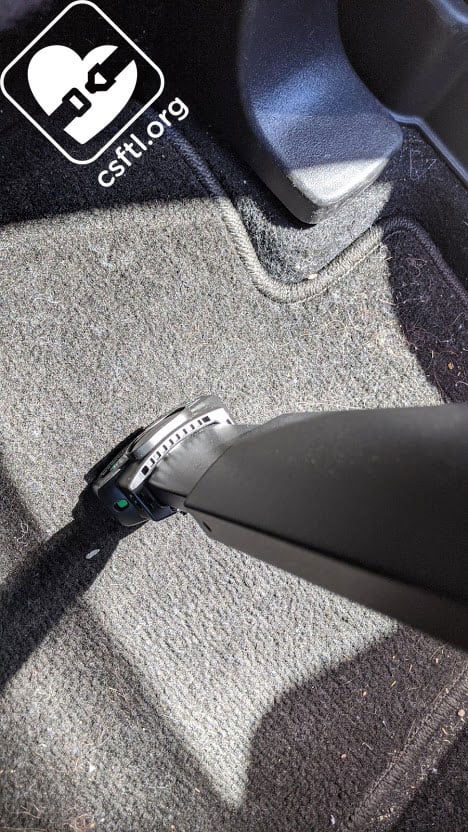
Evenflo LiteMax DLX load leg
The other quirk I encountered was with getting the load leg into place in my vehicle. I extended the leg, made sure that the indicator was green (acceptable), then set the base on the vehicle seat only to discover that the indicator at the end of the load leg had moved into the red/green (unacceptable) zone. Our friends at Evenflo suggested that sometimes the weight of a child in the seat would push the seat down and move the indicator back into place so I grabbed some hand weights (combined weight: 7.5 pounds) and put them in the seat. No change.
I also removed my not-particularly-thick floor may but that didn’t impact the indicator at all. Other families may have luck with removing their floor mats when installing this seat so it’s worth mentioning as an option.
Eventually, I figured out that extending the load leg slightly longer than it needed to be at first allowed it to sit level on the floor — the leg pushed the pressure indicator at the bottom of the load leg back in just a touch and moved that indicator firmly into the green range.
I also found that when the load leg was stored underneath the base, the LiteMax DLX couldn’t help but wobble. It sat akimbo on my living room floor when it wasn’t in the car.
Lockoff
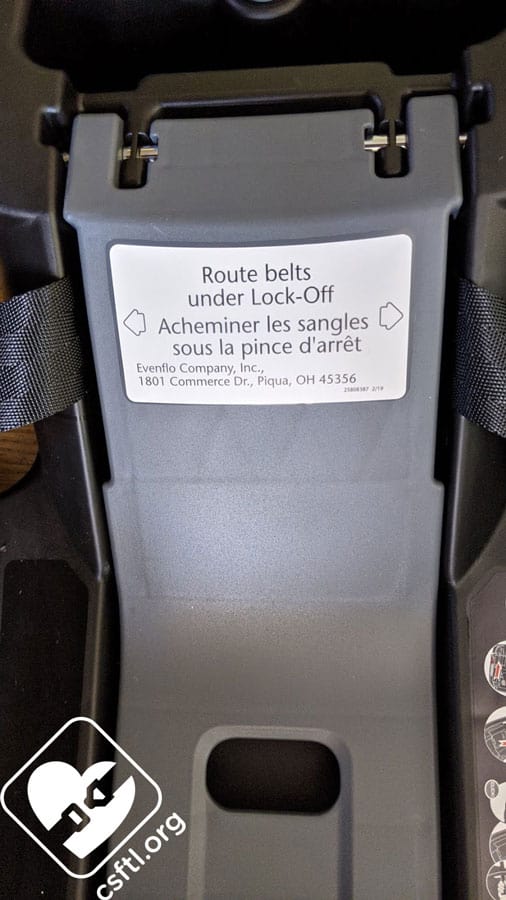
Evenflo LiteMax DLX lockoff
In the pre-pandemic times, I taught an introductory car seat class every month. We’d use our training vehicle seat to show expectant caregivers how to install and use their car seats properly. In addition to my beloved training seat full of retractors, we’d use the base model LiteMax as our demo seat. Today, we teach the same class over video and show a video of another instructor installing the LiteMax instead of providing a live demo for our students. I miss that classroom so much!
So when I unpacked the LiteMax DLX and saw the same lockoff on the base that I know so well, it was like coming home. This lockoff is used when installing the base by the vehicle seat belt or the lower anchors.
Harness Waist Strap Positions
Evenflo LiteMax DLX waist strap positions
Like the LiteMax, the LiteMax DLX has 3 crotch buckle positions, 3 waist strap harness positions, and 2 harness loops. That means the LiteMax DLX can be adjusted to fit a wide range of kiddos! There are some guidelines around when to use each set of waist strap positions.
Approximate child size: 4-6 pounds Waist strap position: Inner
Approximate child size: 6-20 pounds Waist strap position: Middle
Approximate child size: 20-35 pounds Waist strap position: Outer
Crotch Buckle Rules
The seat has 3 crotch buckle positions, plus the option to thread the webbing back through the largest slot, then back up through the smallest spot to fit the tiniest of passengers well. The manual contains instructions on how to adjust this webbing, along with the guideline for use: “insert the crotch strap anchor into the slot that is closest to the child but NEVER under the child’s bottom,”
Between the waist strap and crotch buckle positions, the LiteMax DLX has a lot of ways to adjust the harness for the best possible fit to child. We do suggest that caregivers consult the manual when making these changes to confirm that the harness is moved correctly.
Installation with the Base
Using the Lockoff — Vehicle Seat Belt
Evenflo LiteMax DLX installed with vehicle seat belt
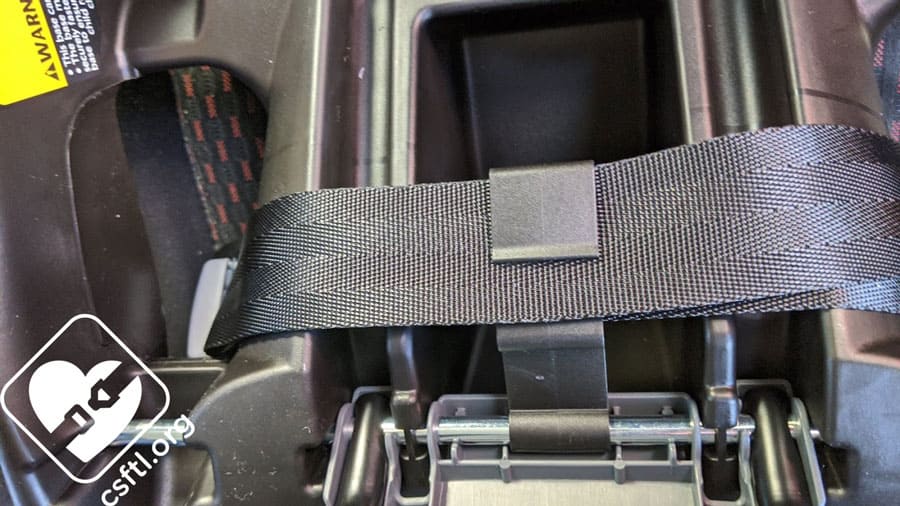
Installing the LiteMax DLX with the vehicle seat belt is pretty straightforward. Open the lockoff on the base, slide both the lap and shoulder portions of the vehicle seat belt through the lockoff, remove most of the slack from the belt, then close the lockoff.
Check your work by giving the base a firm handshake at the belt path. It should move less than an inch at the belt path.
Using the Lockoff — Lower Anchors
Lower Anchor Connector Guides
Evenflo LiteMax DLX lower anchor guides
The LiteMax DLX includes a set of lower anchor connector guides that can help caregivers line the lower anchor connectors up with the lower anchors in the vehicle. I didn’t need to use these in my 2019 Mitsubishi Outlander — my lower anchors are pretty easy to access, but that’s definitely not always the case so these little beauties could come in handy in vehicles where the lower anchors are more difficult to find.
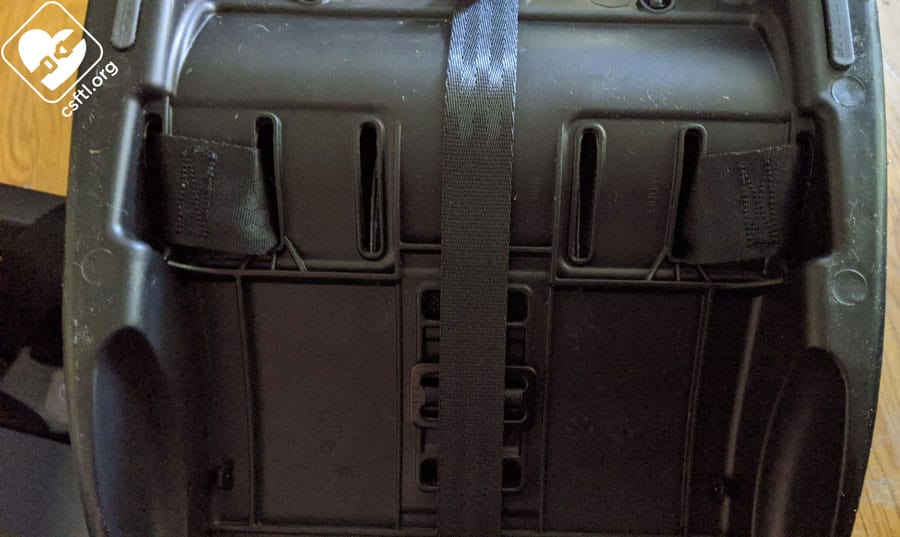
Installing the Base
Evenflo LiteMax DLX lower anchor webbing
Unlike the LiteMax that I know so well, the LiteMax DLX has premium lower anchors (instead of the standard j-hook style found on the LiteMax). These lower anchors release via a handy little fabric loop on the connector. The trickiest part of these connectors was that release — I found that the anchor itself needed to be almost horizontal to get them to release from the vehicle’s lower anchors. Attaching them was no problem at all in my vehicle, they just clicked onto the lower anchors.
Installing the LiteMax DLX with the lower anchors is pretty straightforward. First, loosely attach the lower anchor connectors to the lower anchors in the car. Open the lockoff on the base, then pull most of the slack out of the webbing. There’s a handy little piece of plastic attached to the webbing the keeps the tail end of the webbing tucked away, slide the tail end of that webbing through the plastic piece, then leave a teeny bit of slack — this will allow the lockoff to go to work and remove all of the tension from the webbing.
Evenflo LiteMax DLX installed with lower anchors
Press down on the gray part of the lockoff and push down firmly at the end to secure the lockoff in place. Check your work by giving the base a firm handshake at the belt path. It should move less than an inch at the belt path.
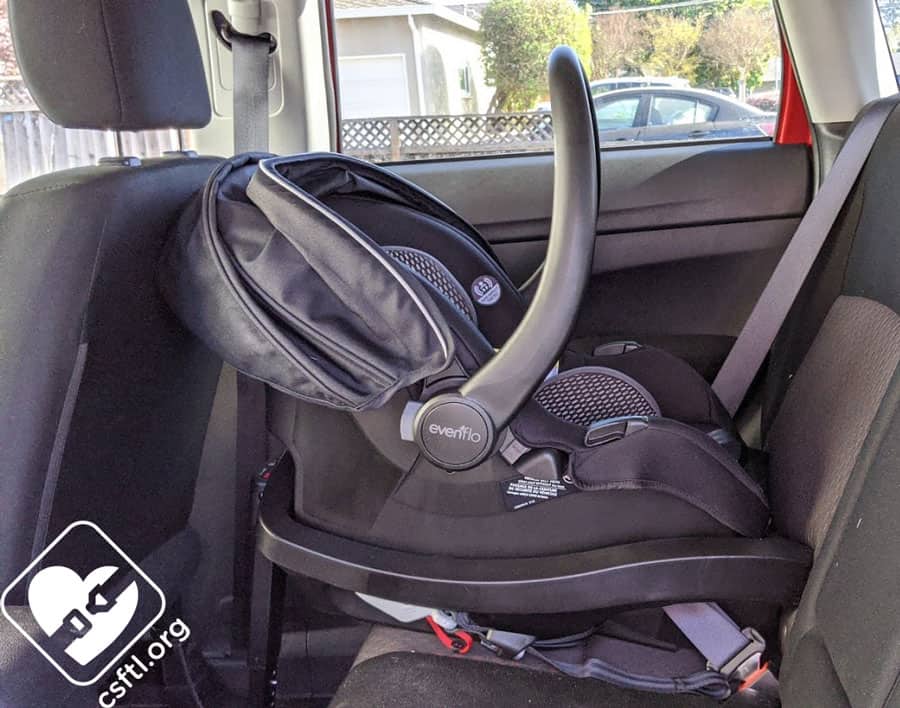
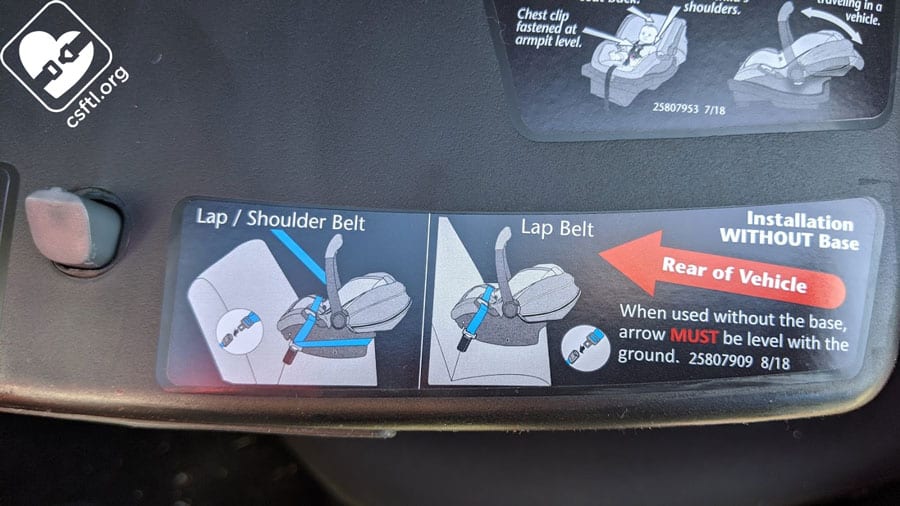
Installation without the Base
Evenflo LiteMax DLX installed without the base
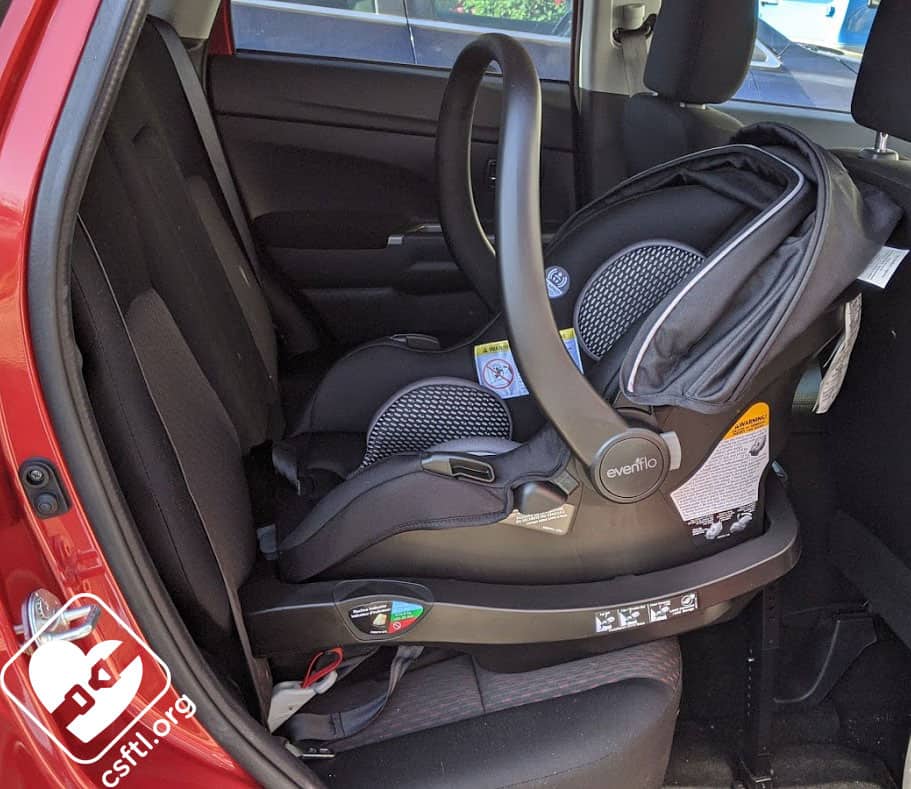
The LiteMax has two belt paths for baseless installations — traditional and Euro routing. The Euro routing method uses the entire vehicle seat belt — it wraps around the back of the carrier in addition to being threaded through the belt path.
I first installed the seat with the traditional belt routing where the lap portion of the vehicle seat belt is threaded across the belt guides on the carrier, then secured by locking the vehicle seat belt and removing all of the slack. I was able to install the carrier using this method without any issues.
Evenflo LiteMax DLX installed without the base
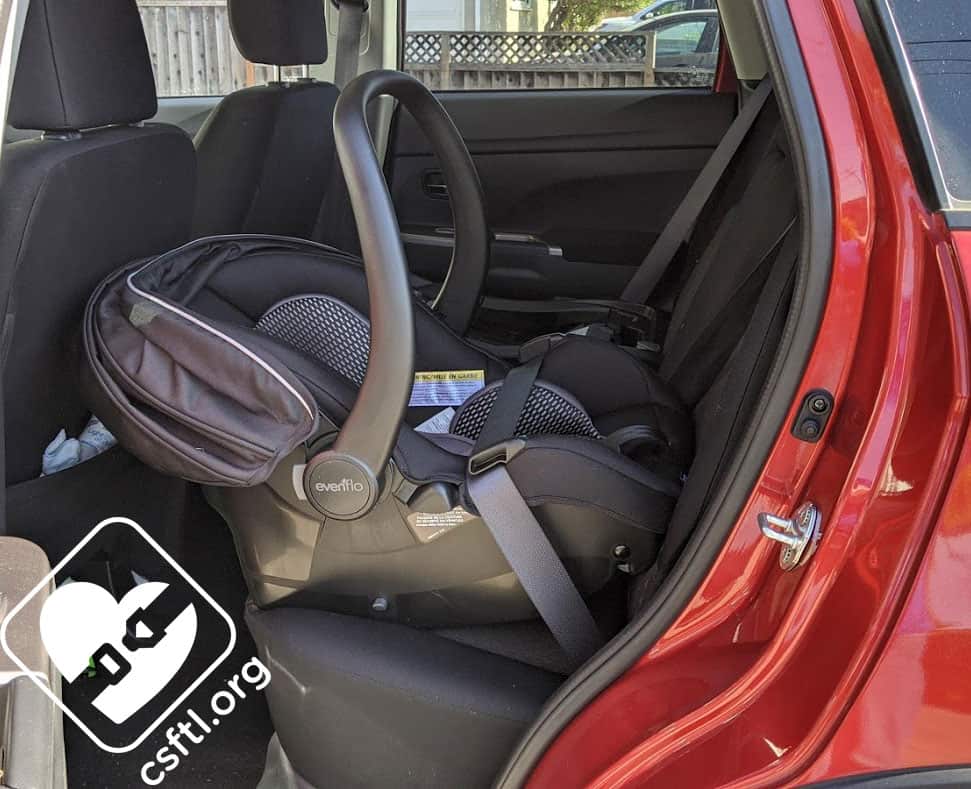
I then moved on to installing using the Euro routing method. In most cases, this type of installation is aided by a little clip or slot on the back of the carrier. Unfortunately, the LiteMax DLX doesn’t have that type of device on the back so I had a hard time getting the seat belt to remain where it was supposed to be on the back of the carrier.
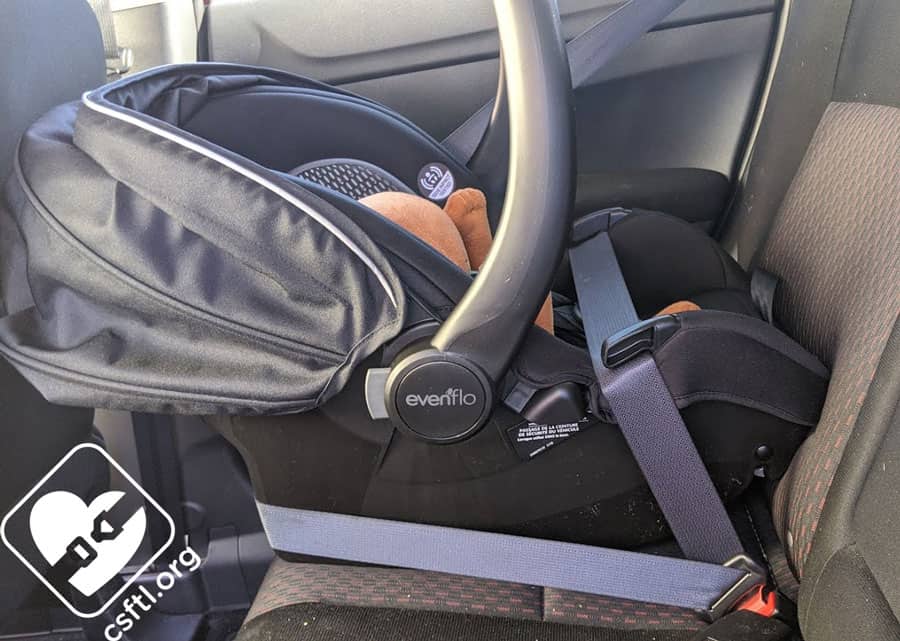
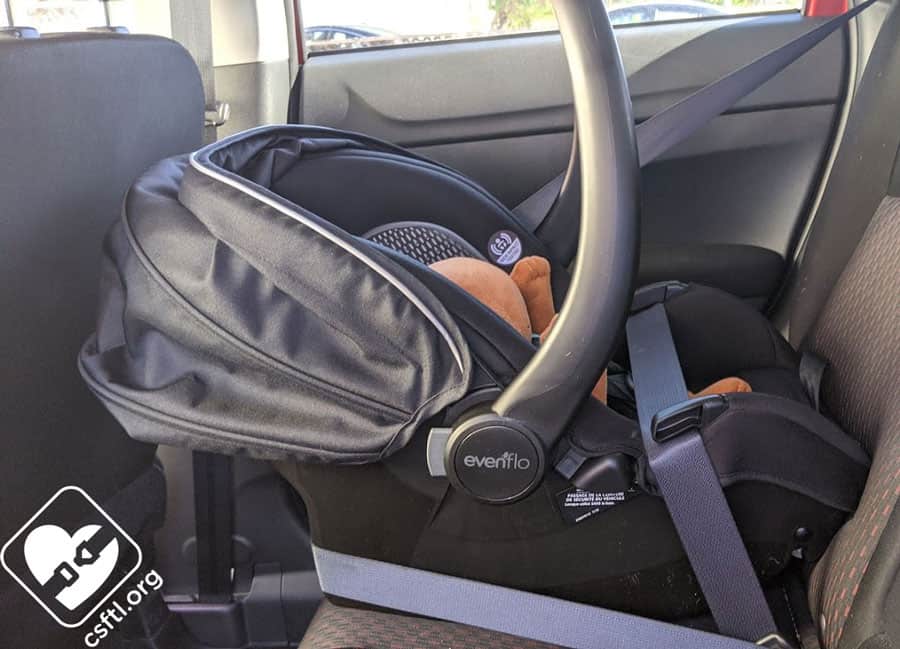
Evenflo LiteMax DLX seat belt low on the carrier
My vehicle’s buckles sit quite low on the vehicle seat, so I found that every time I installed the LiteMax DLX with this method, the shoulder portion of the seat belt slipped down to almost the bottom of the carrier.
I’d definitely prefer to see a clip added to the back of the carrier to help the shoulder belt stay in place.
Baseless Recline Recline Angle Indicator
Evenflo LiteMax DLX baseless recline angle indicator
Most of the time, the recline angle indicator on the carrier portion of a rear facing only car seat isn’t as featured as its counterpart on the base. But the LiteMax DLX takes this to a new level by having a line that isn’t clearly marked, is on an arrow, and not only all of that, but there are TWO identical arrows at slightly different angles on the outside of the carrier.
On one page, the manual shows the arrow/line at the back of the carrier as the recline angle indicator, but on another page, it has both of these arrows circled. We’d like to see only one “line” on the carrier to minimize confusion.
Fit to Child
Preemie Doll
Evenflo LiteMax DLX preemie fit
The LiteMax DLX is rated for children who weigh between 4-35 pounds so we asked our Huggable Images preemie doll to model the seat for us. Our doll is sporting a new outfit, courtesy of a nice mom in our local Buy Nothing group.
The seat fit our 4 pound, 17 inch long doll very well. We’d expect that since the other seats in the LiteMax family of seats also fit the tiniest of passengers very well! The infant padding is required for this doll since the doll weighs less than 6 pounds.
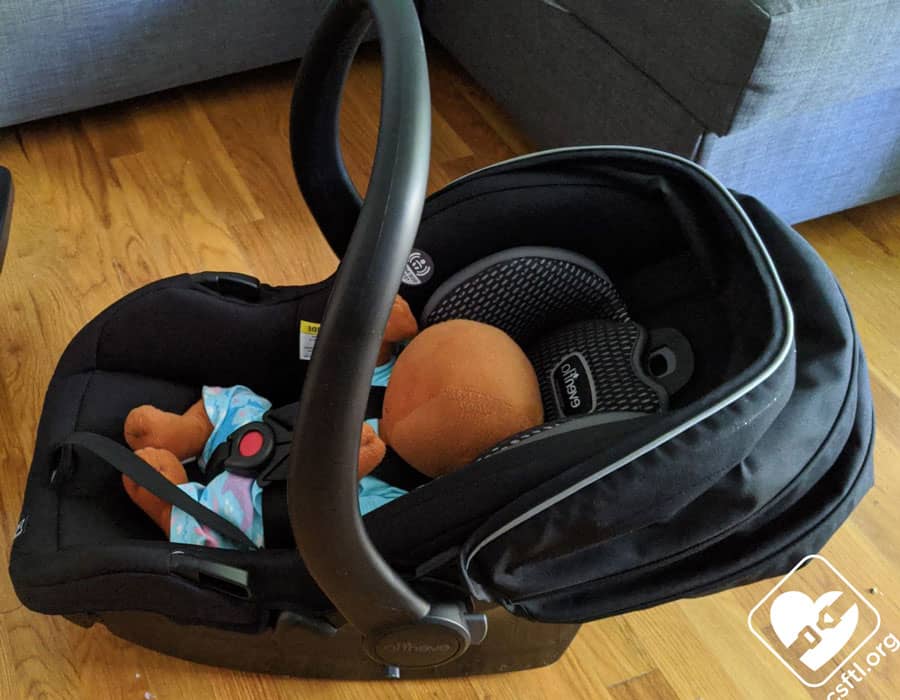
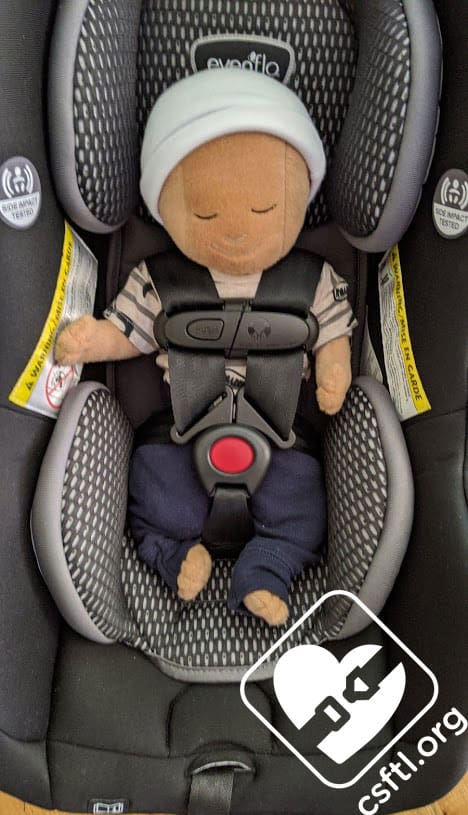
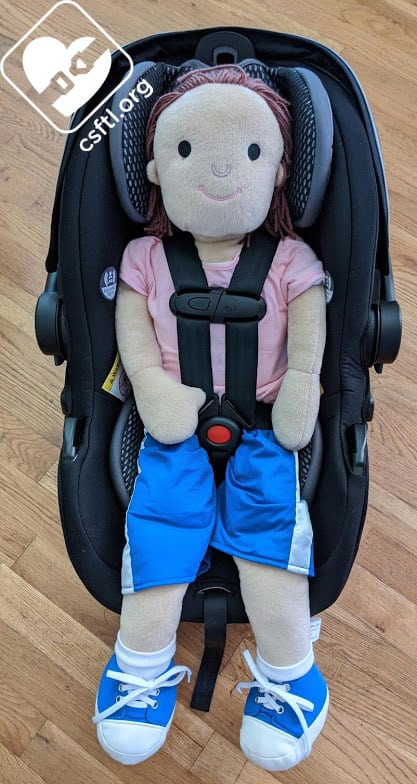
Newborn Doll
With Padding
Evenflo LiteMax DLX newborn doll
Our newborn Huggable Images doll weighs 7 pounds and is 17 inches long. Our doll seems a bit cramped with the infant padding in the seat, though the harness offers a great fit.
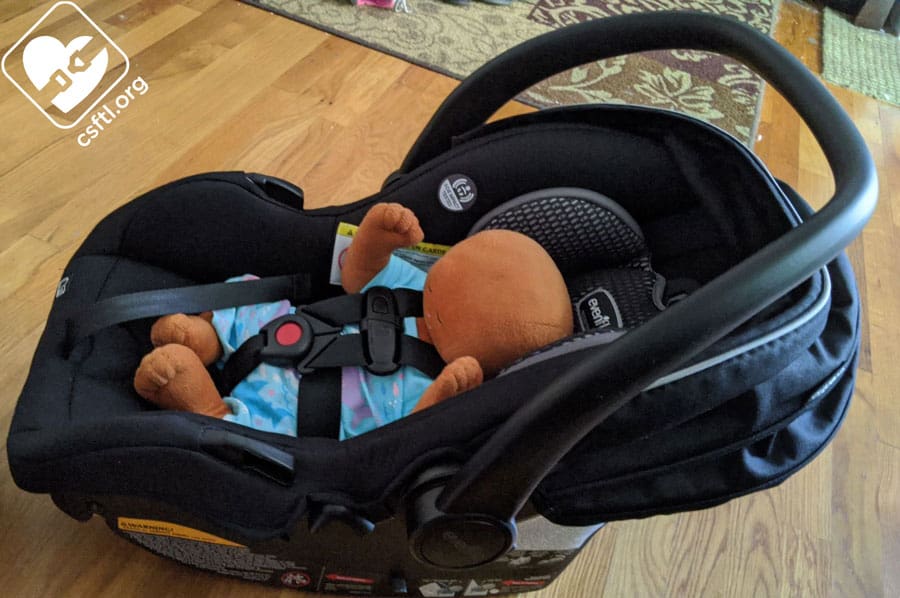
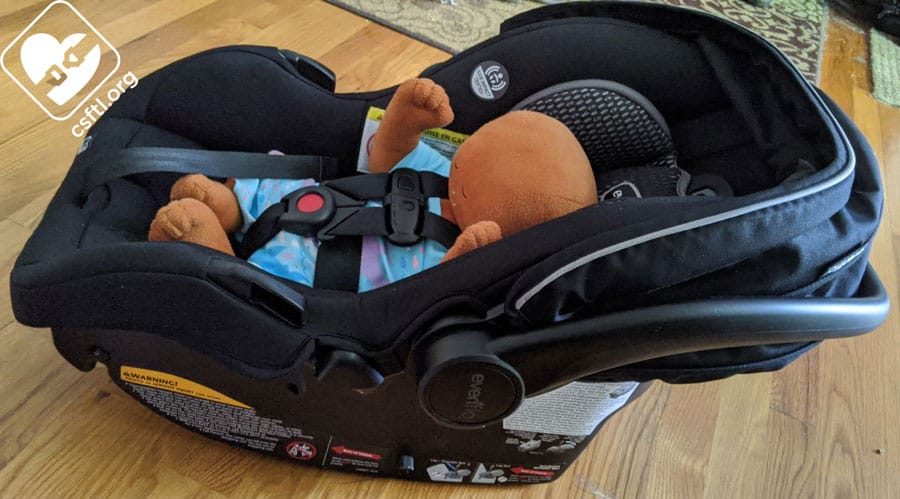
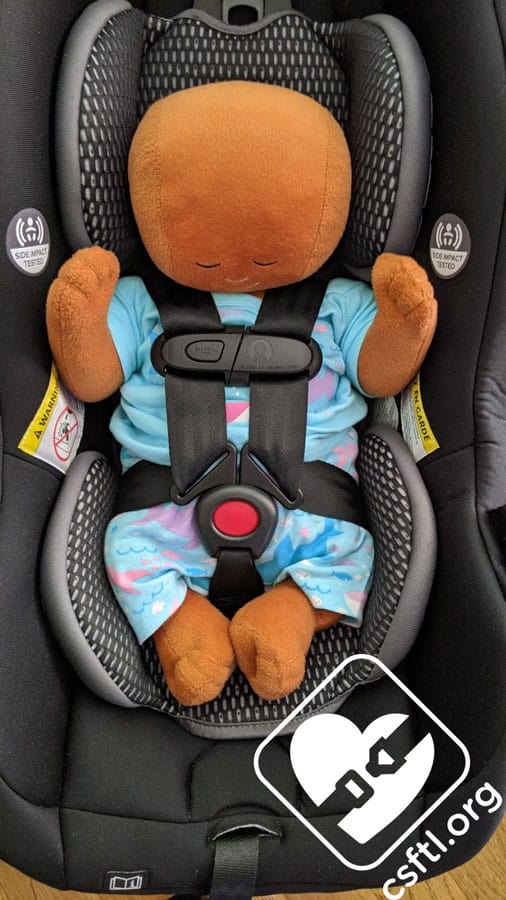
Evenflo LiteMax DLX newborn doll without padding
Without Padding
So we removed the padding and the doll seems more comfortable, at least as comfortable as a doll could appear. The padding is required until the child weighs 6 pounds so it’s optional for our 7 pound doll.
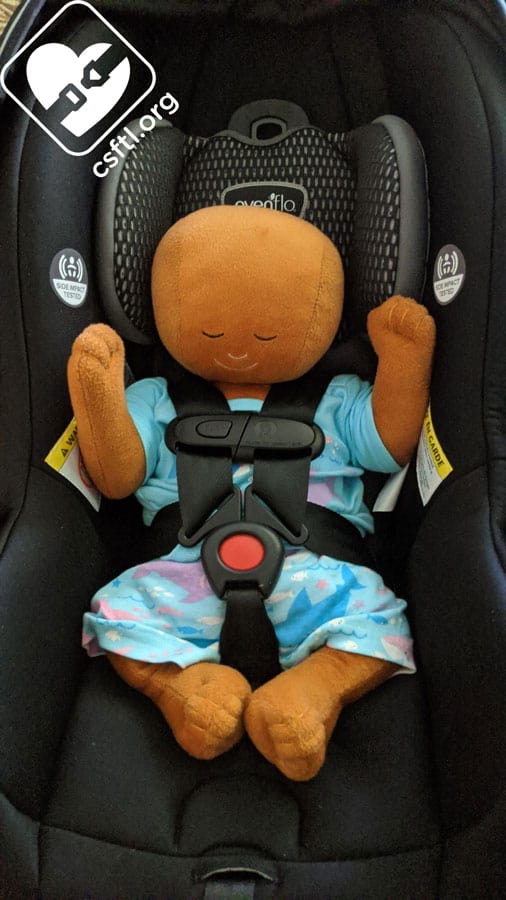
16 Month Old Doll
Evenflo LiteMax DLX 16 month old doll
Our 16 month old doll is 31 inches long. The seat is rated for children who are up to 32 inches tall so we had our doll model the seat. The doll’s head is just about an inch from the top of the seat’s shell, the seat is nearly outgrown at this point. Though many infant carriers are rated to 32 or more pounds, we find that it’s rare for a family to use a carrier past the first year.
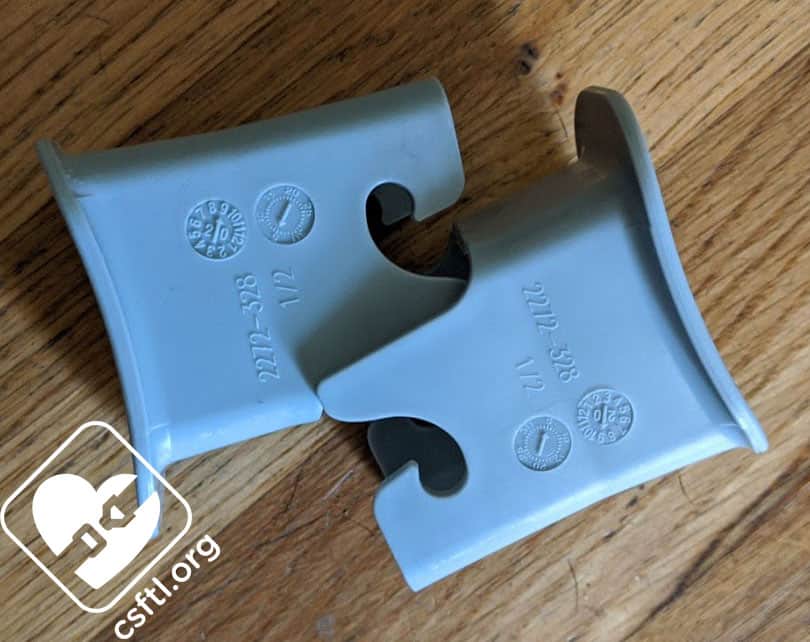
Important Information: Where to Find
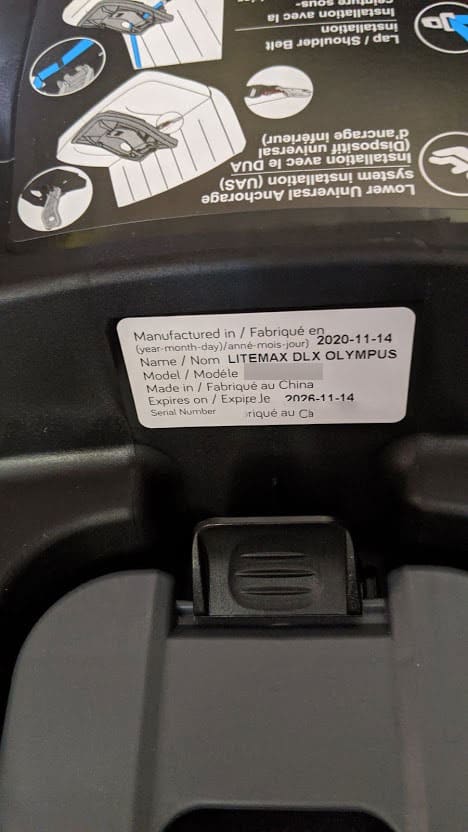
Evenflo LiteMax DLX date of manufacture label
Date of manufacture label: the LiteMax DLX has a 6 year lifespan. There’s a date of manufacture label that includes the expiration date on the underside of the carrier and another one on the underside of the base.
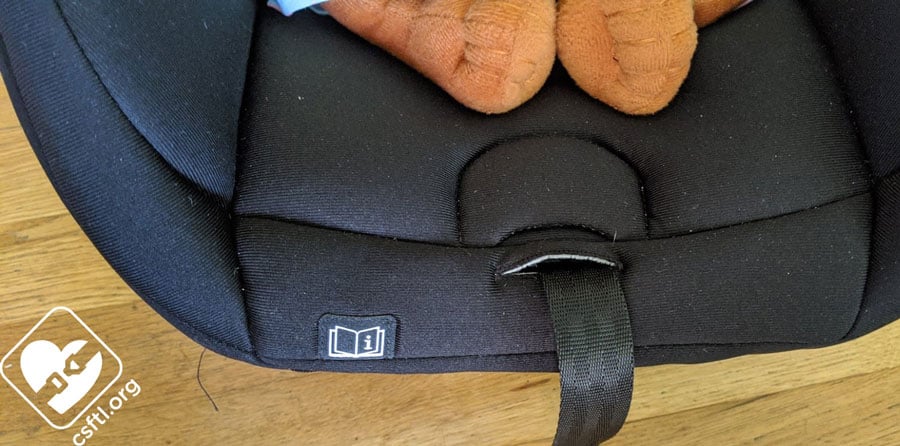
Evenflo LiteMax DLX manual storage
Manual storage: the manual stores underneath the cover of the carrier, it tucks under the child’s right foot. There’s a label on the edge of the carrier to indicate this storage location.

Evenflo LiteMax DLX FAA approval label
FAA approval label: the LiteMax DLX is approved for use on aircraft without the base. The approval label is on the underside of the carrier.
Overall Thoughts
The LiteMax DLX brings a lot of the features we know from other LiteMax seats into a well-featured, reasonably-priced package. It offers the same consistent fit to child that we know and adds a plush cover. The quirky load leg takes some getting used to but we did eventually figure it out! My only hesitation around this seat is from the lack of clip for baseless installations with the Euro routing– not having that clip makes getting the vehicle seat belt into the right place a challenge. Outside of that, this seat has a lot to offer at a reasonable price!
Giveaway
Our friends at Evenflo are giving one LiteMax DLX away to a reader in the United States or Canada. Read our terms and conditions, then enter below for you chance to win!