WAYB Pico unfolded, headrest in lowest position for travel
If there’s anything we know about traveling and flying with children, it can be a daunting task. We also know that children are safest when they are properly restrained in not only the car, but on the plane as well. Lightweight car seats do exist that some families prefer to use for travel, but they don’t do what the new WAYB Pico forward facing only harnessed car seat does.
The Pico is FAA approved, folds up for carrying, weighs just 8 pounds, and has a backpack style bag for even easier transportation from car to plane. Reviewing this seat in the middle of a pandemic means that we didn’t have a chance to test the Pico on an airplane but we’ll be sure to update this review as soon as we have that opportunity.
CSFTL Quick Stats
- Forward Facing harnessed weight range: 22-50 pounds
- Forward Facing harnessed height range: 30-45 inches tall
- Child’s shoulders must be below the top of the Pico seat back
- Child’s ears must be below the top of the Pico headrest
- Top harness height: 15.5 inches
- Crotch buckle depth: 5.5 inches
- Lower Anchor weight maximum: the lower anchors can be used up to the 50 pound harness weight limit on the seat
- Expiration: 6 years from date of manufacture
- FAA approved
- Follows NHTSA standards for replacement after a crash
Measurements
- Seat pan depth: 11 inches
- Seat pan width: 12 inches
- Widest point (at the child’s shoulders): 14.75 inches
- Weight: 8 pounds
- Dimensions when folded: 11 length x 14 width x 19 height (in inches)
Unique Features
Foldable
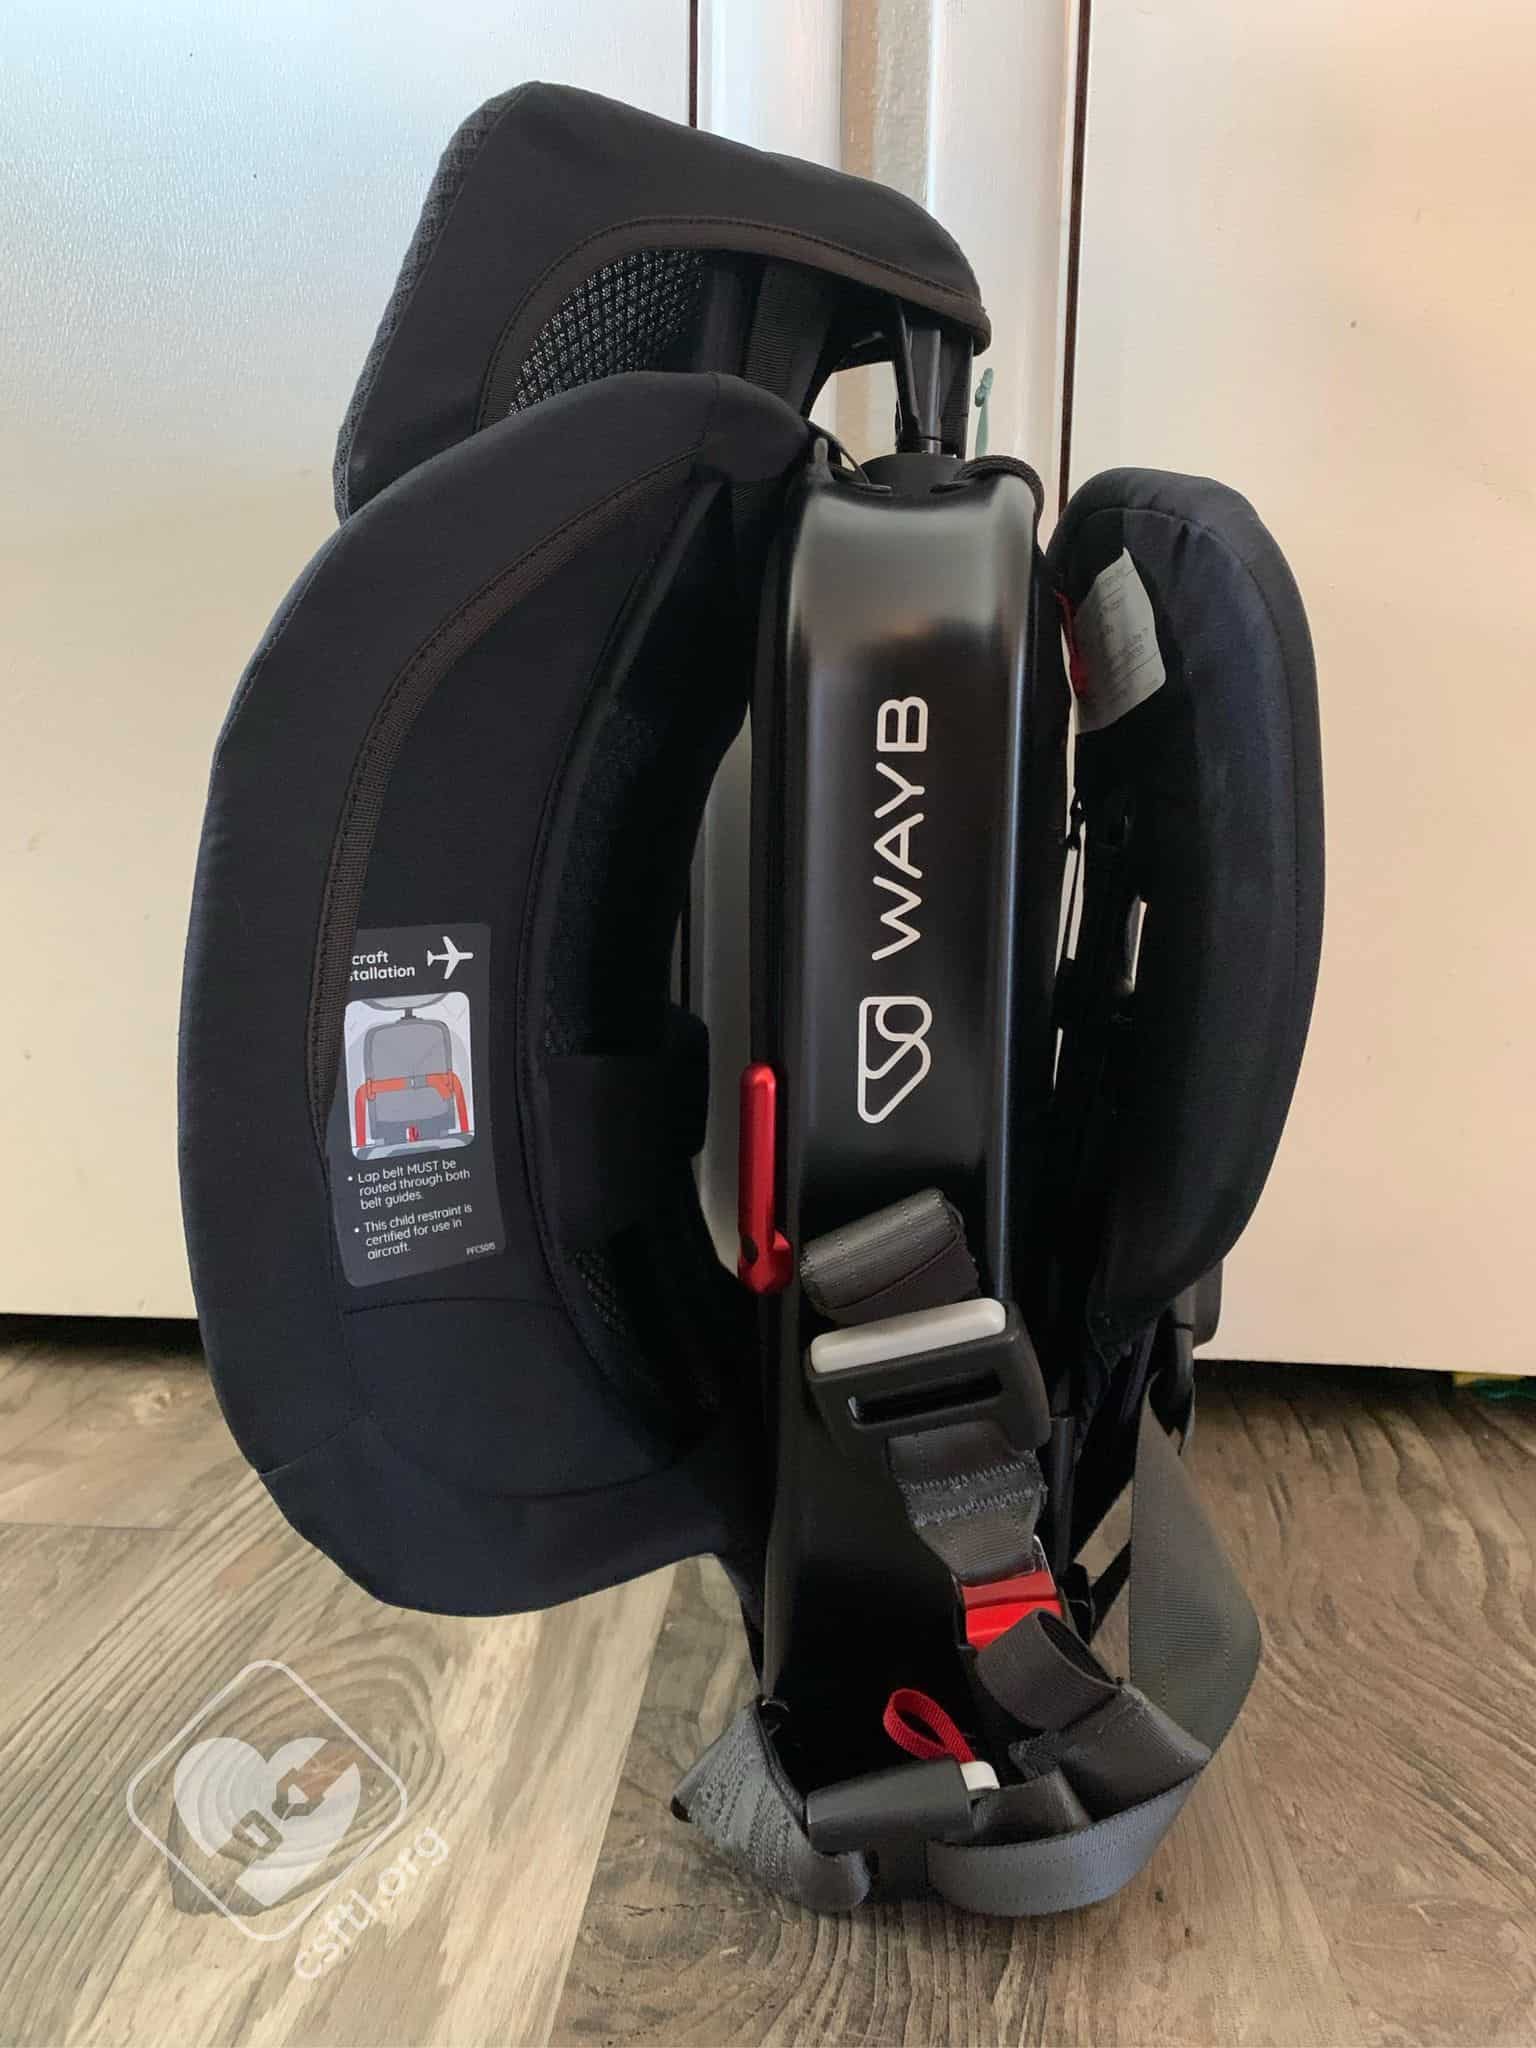
WAYB Pico folded
The Pico folds up into a lightweight, compact unit for easy carrying. One day, we hope to confirm that this small size and light weight makes it a great option for travel.
Narrow/Three Across
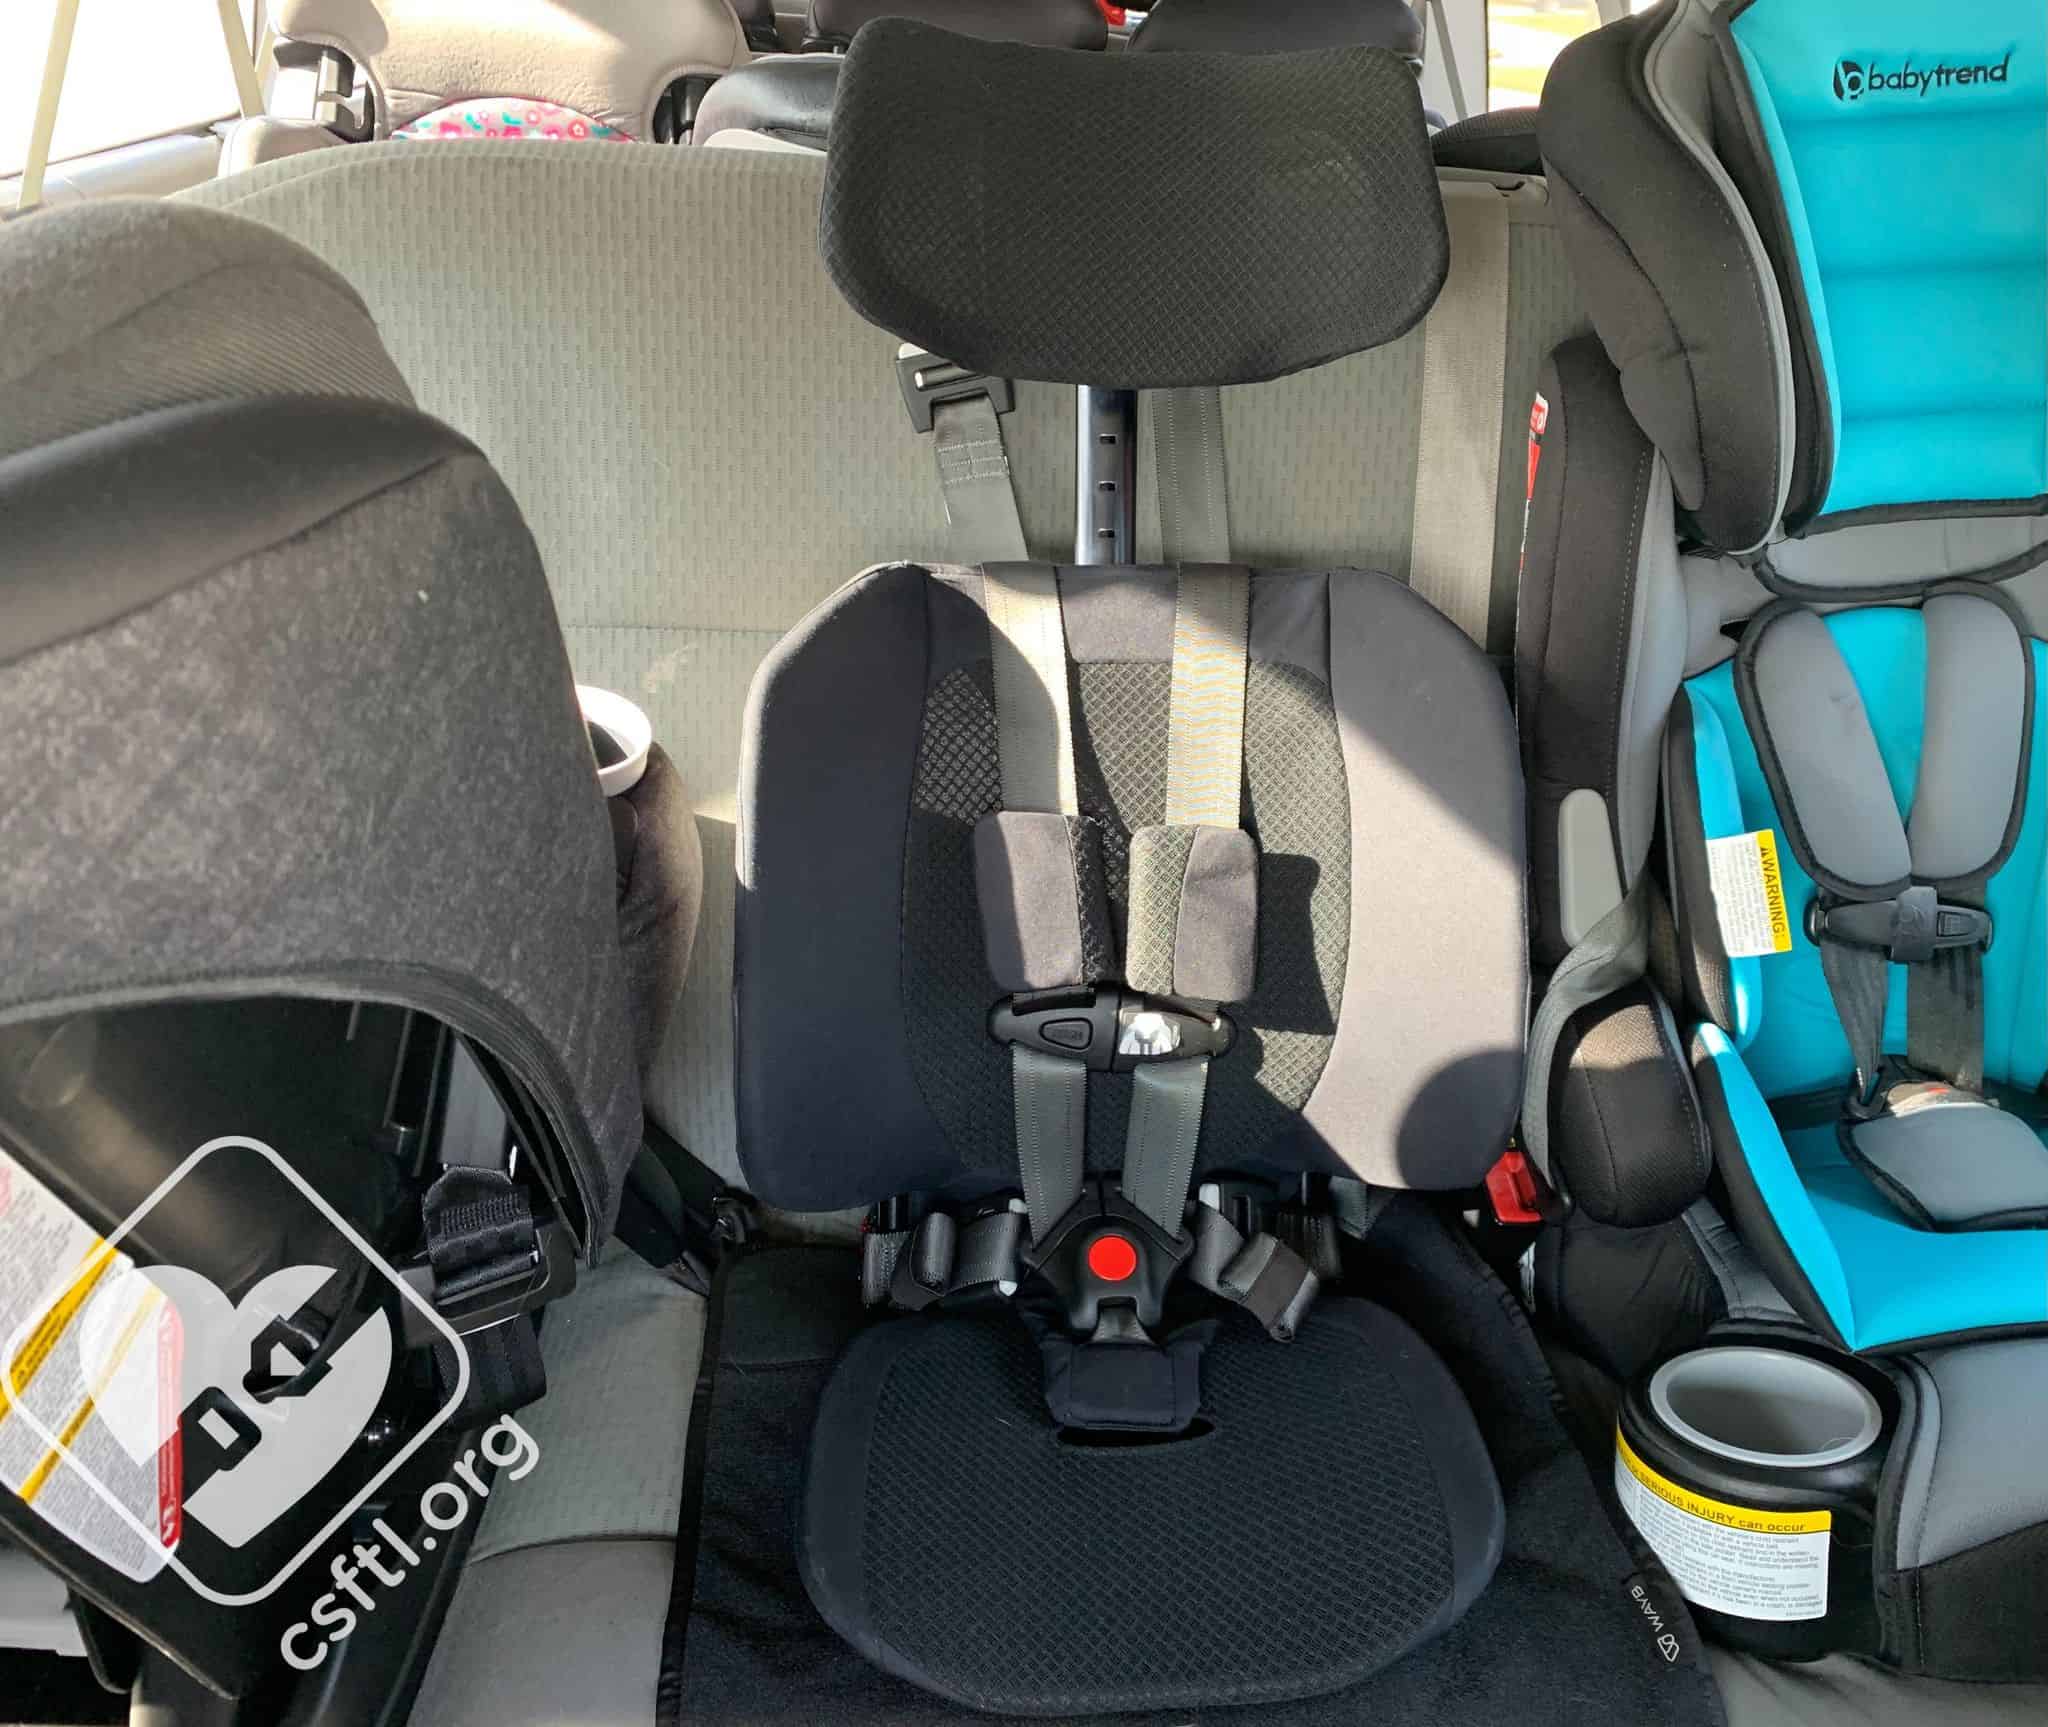
Three across with a Maxi Cosi Pria Max, WAYB Pico, and Baby Trend Hybrid
We kind of expected the Pico to be an easy solution to tricky three across situations but unfortunately, that wasn’t always the case. We were able to install the Pico along with an Evenflo Amp and a Graco RightGuide in the 3rd row of a 2014 Chevy Traverse but we kind of feel like any three across setup that includes the RightGuide isn’t a true, challenging configuration.We installed the Pico three across with a rear facing Maxi Cosi Pria Max 3 in 1 and a Baby Trend Hybrid 3 in 1. This was accomplished in a 2011 Ford E350 15 passenger van. While the vehicle seats are wide, so are the other two car seats we used and I didn’t have anything else in my collection that would fit in that position.
One Mode Only
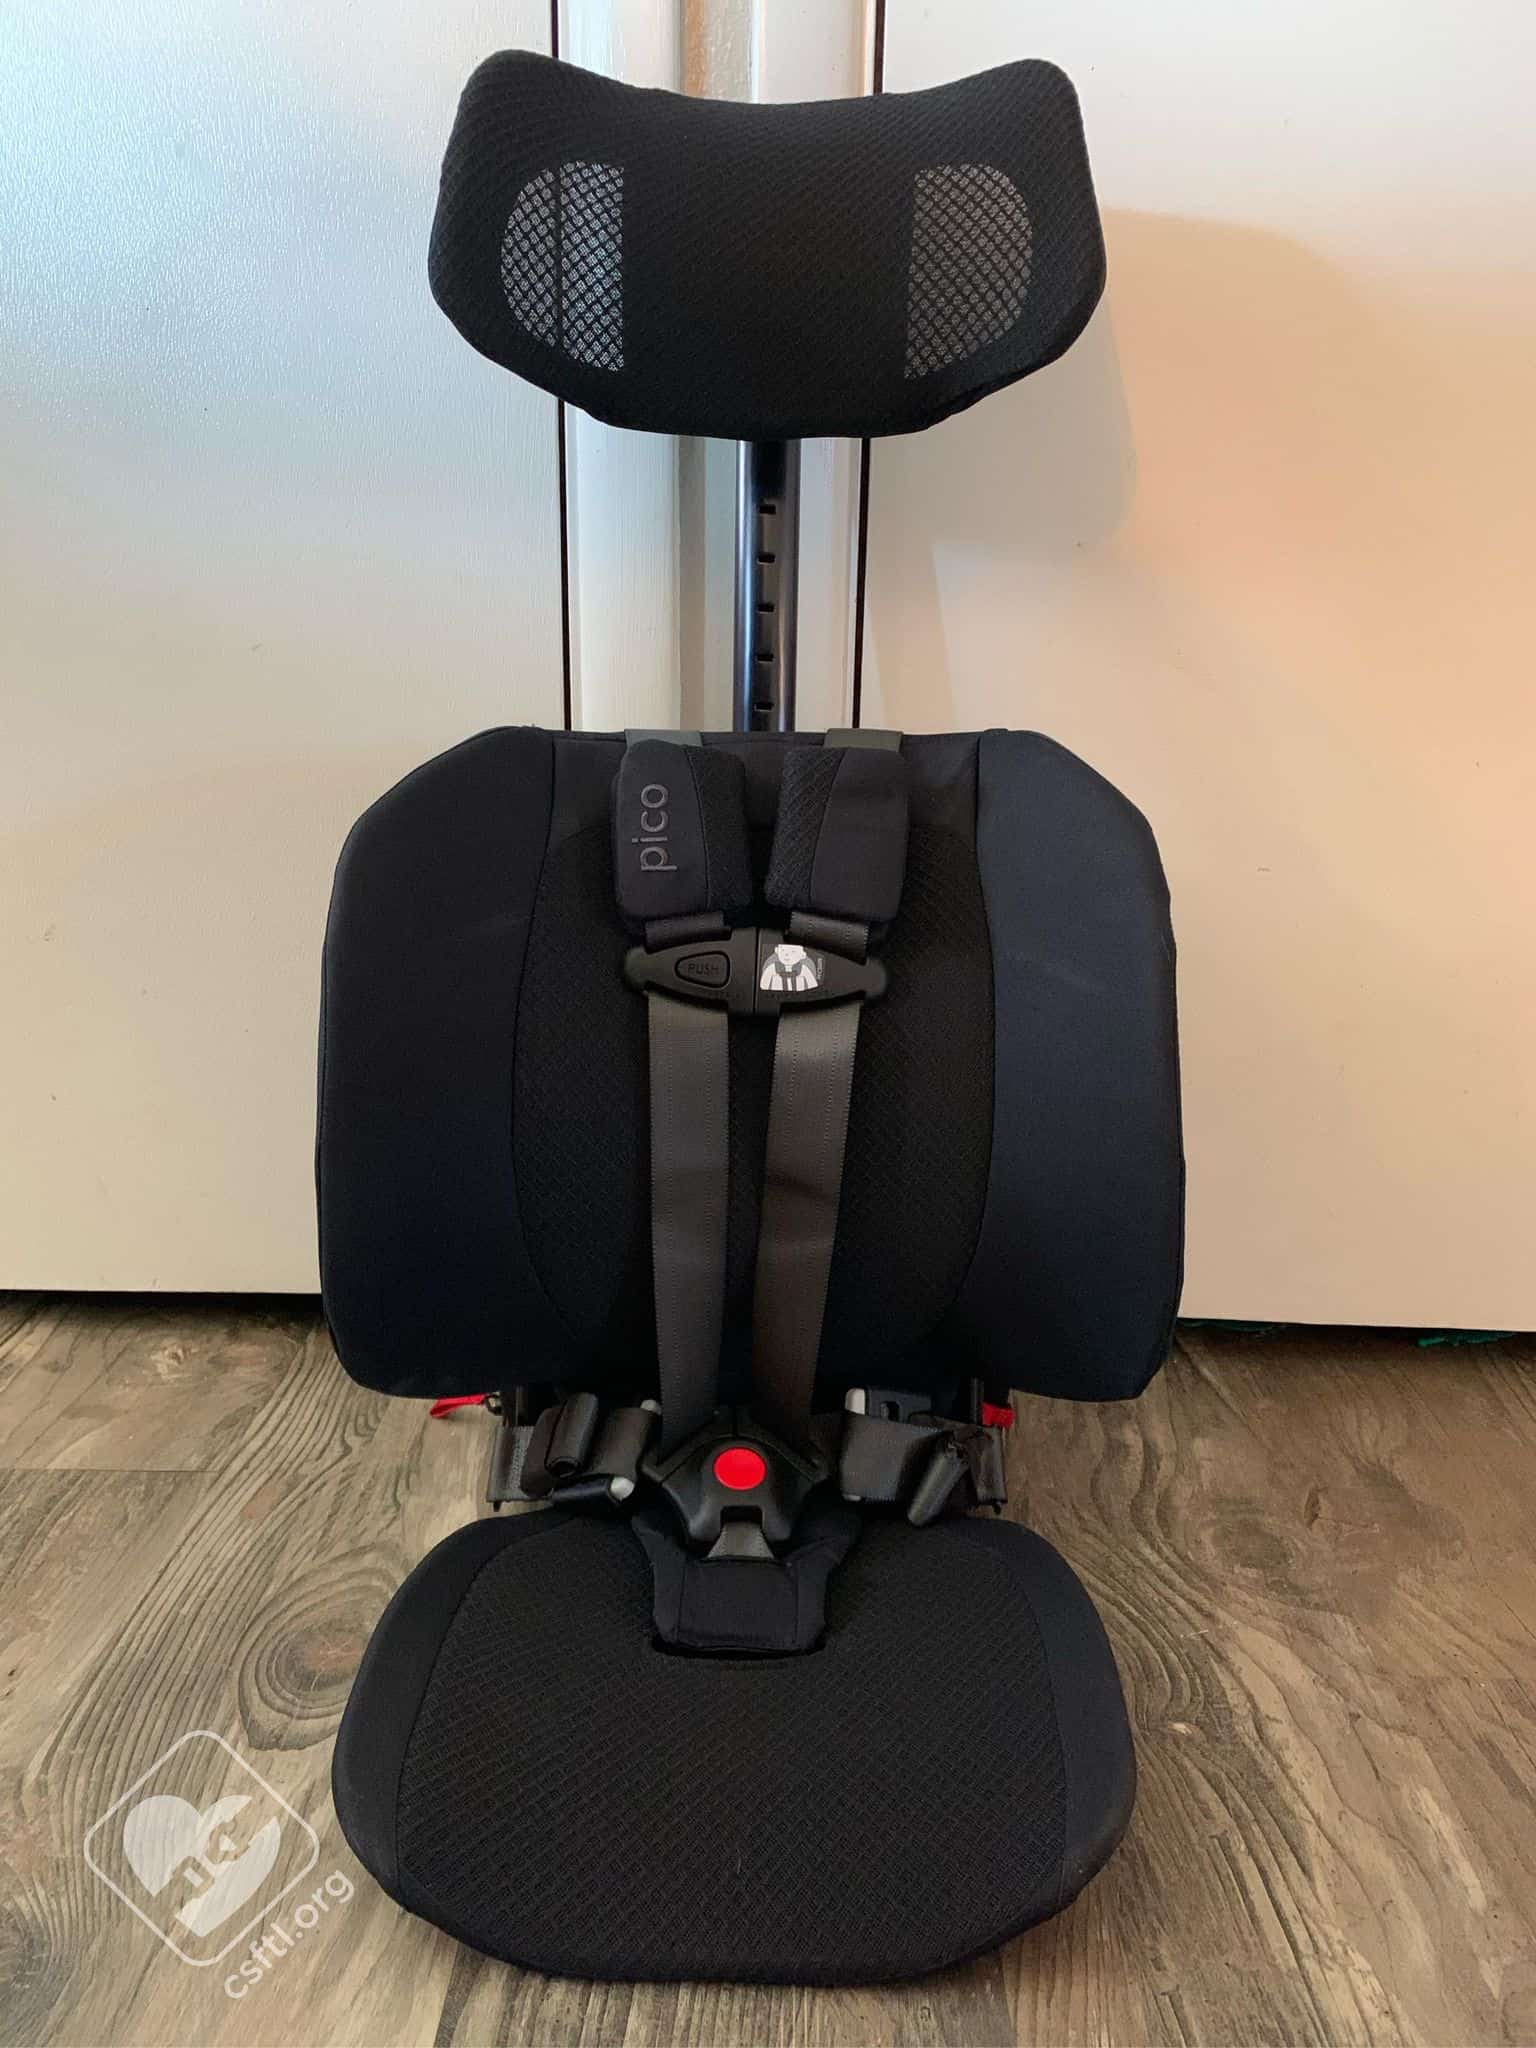
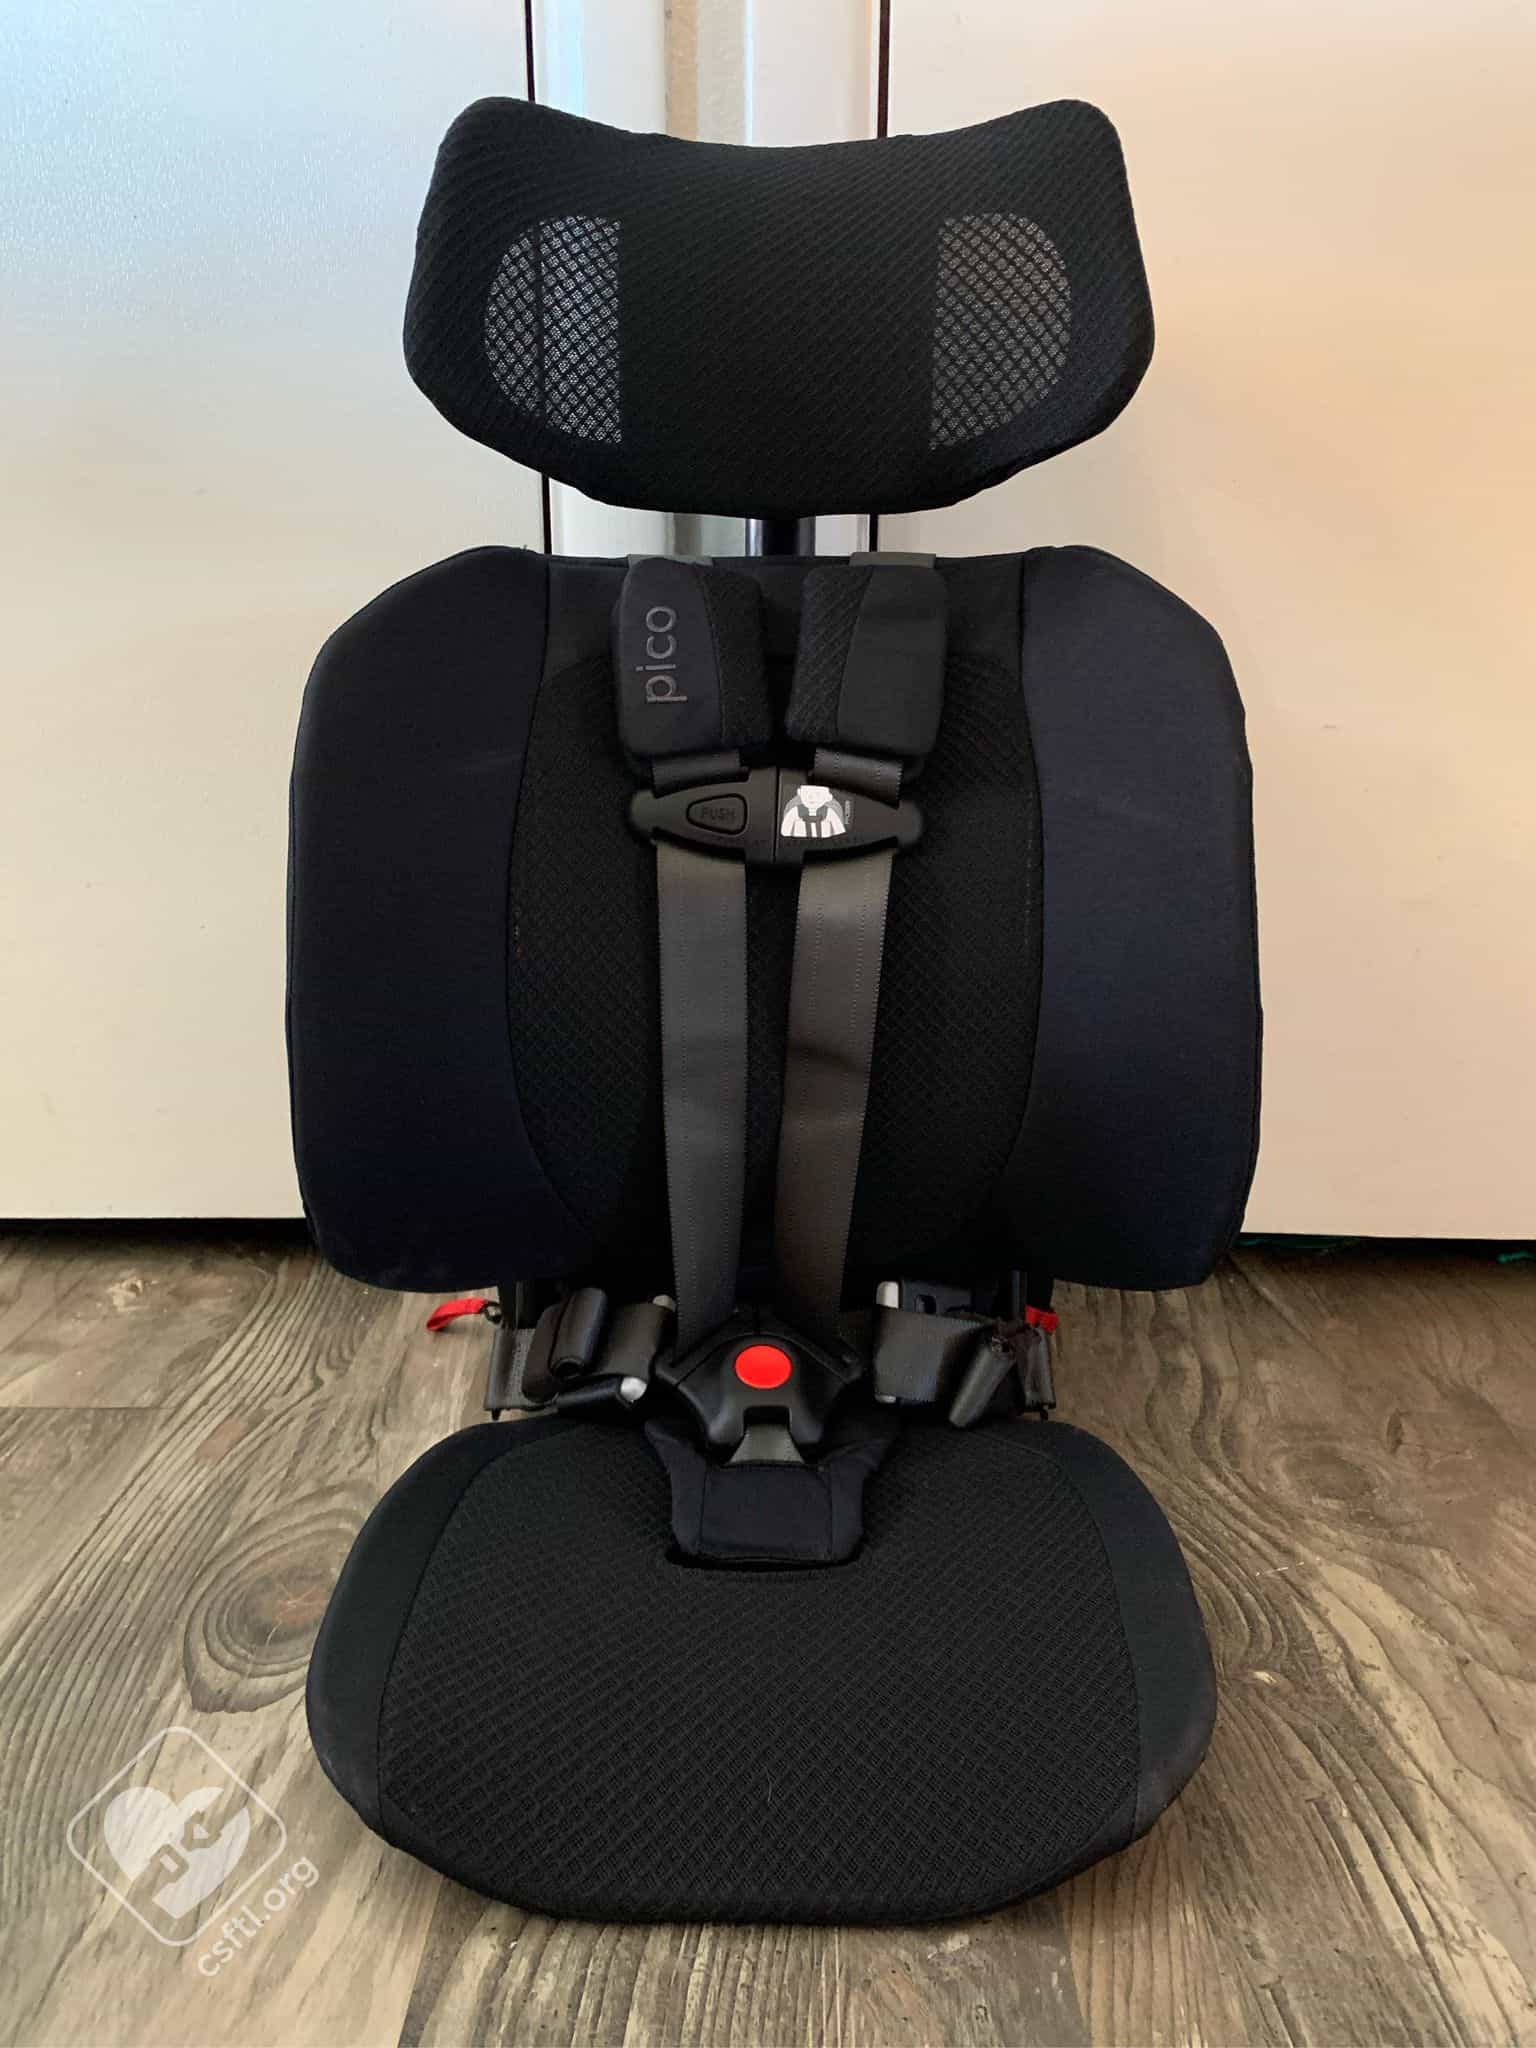
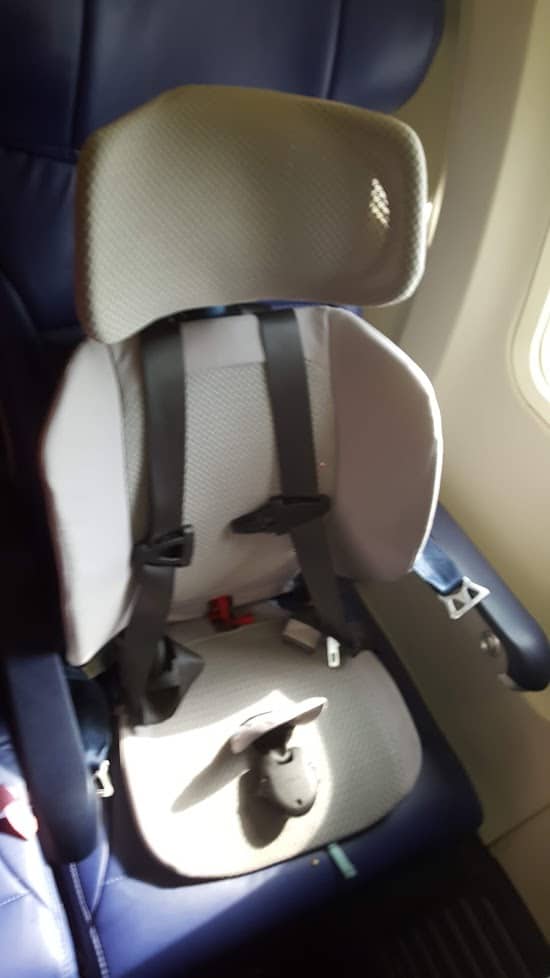
WAYB Pico unfolded and headrest in highest position for use
The WAYB Pico is a unique seat. It is a forward facing only seat (no booster mode) with one harness height and one crotch buckle position.
Harness Pads

WAYB Pico harness pads
The harness pads are removable and optional at all times.
Crotch Buckle Pad

WAYB Pico crotch buckle and pad
The crotch buckle pad is not removable, even to wash. It can be spot cleaned.
Clear Labels
The Pico has very clear usage and installation instructions on the side of the seat.
Optional Items
The seat protector and the travel bag are optional items that can be purchased separately from the Pico. We found the travel bag particularly handy and are grateful that we had the opportunity to try it out!
Seat Protector

WABY seat protector
WAYB has created a seat protector specifically for the Pico. The black on black on black was incredibly difficult to photograph. The seat protector came with no instructions, so I went to the manufacturer’s website in search of answers. The photos WAYB posted were helpful, so much so that we are borrowing two of them to share with you. The seat protector has two hook and loop closures that close around the bar on the back, bottom of the Pico.
Pico seat protector attached to the seat
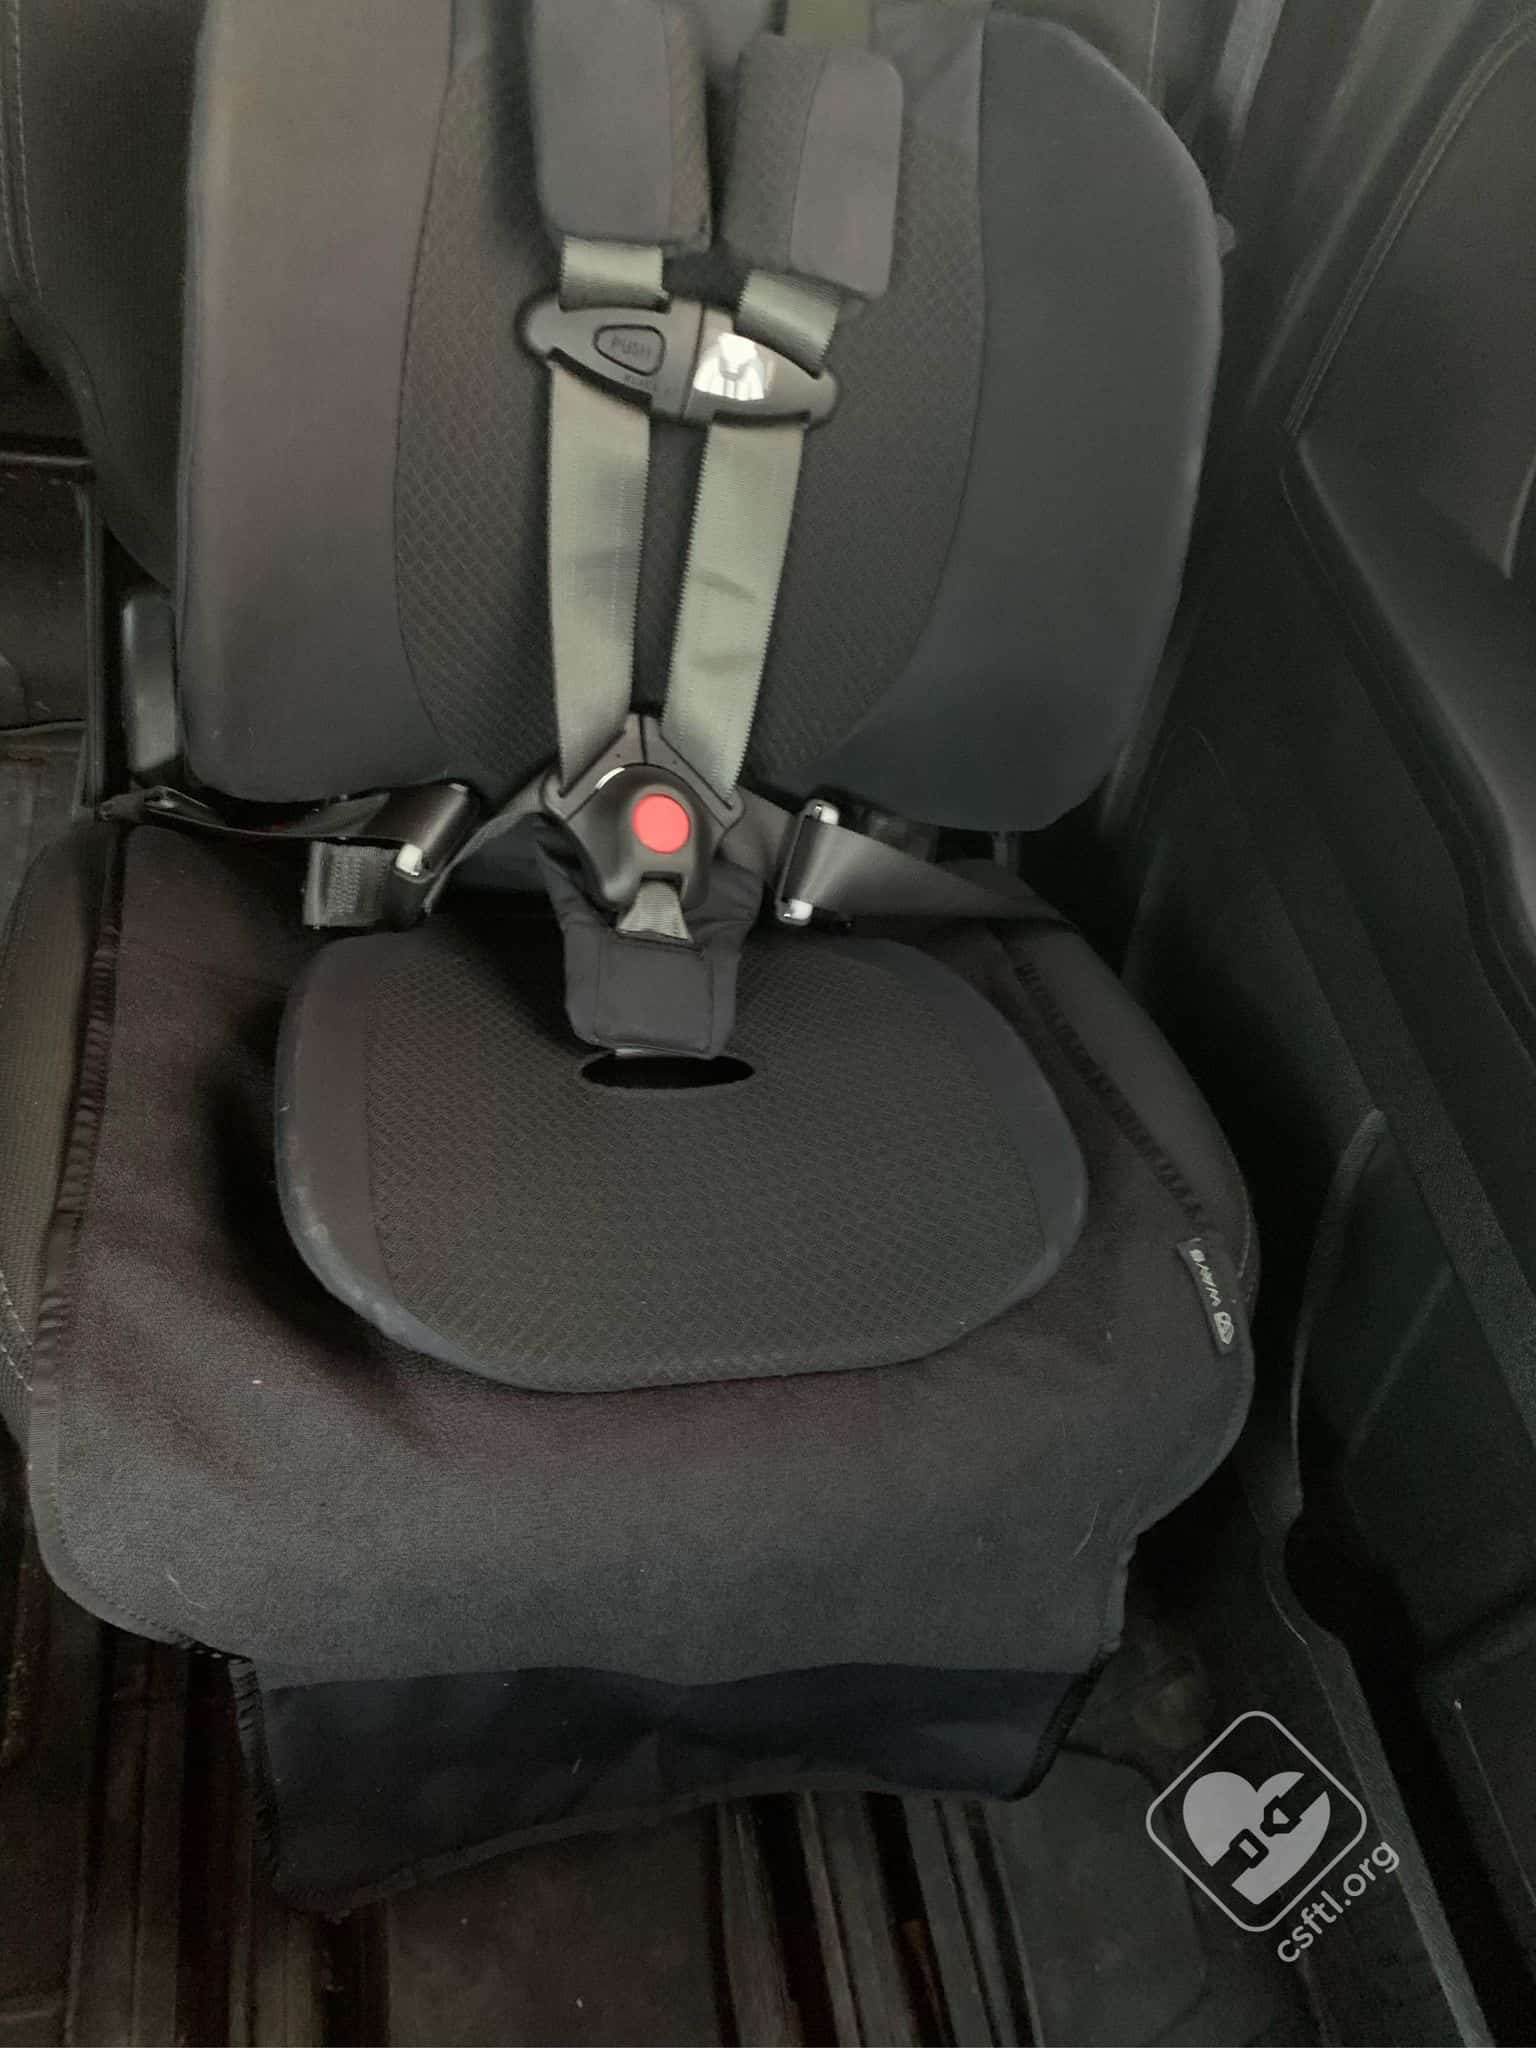
WAYB Pico seat protector
The fact that the seat protector attaches to the seat makes it harder to lose when moving from one mode of transportation to the next.
Travel Bag Features Backpack Straps
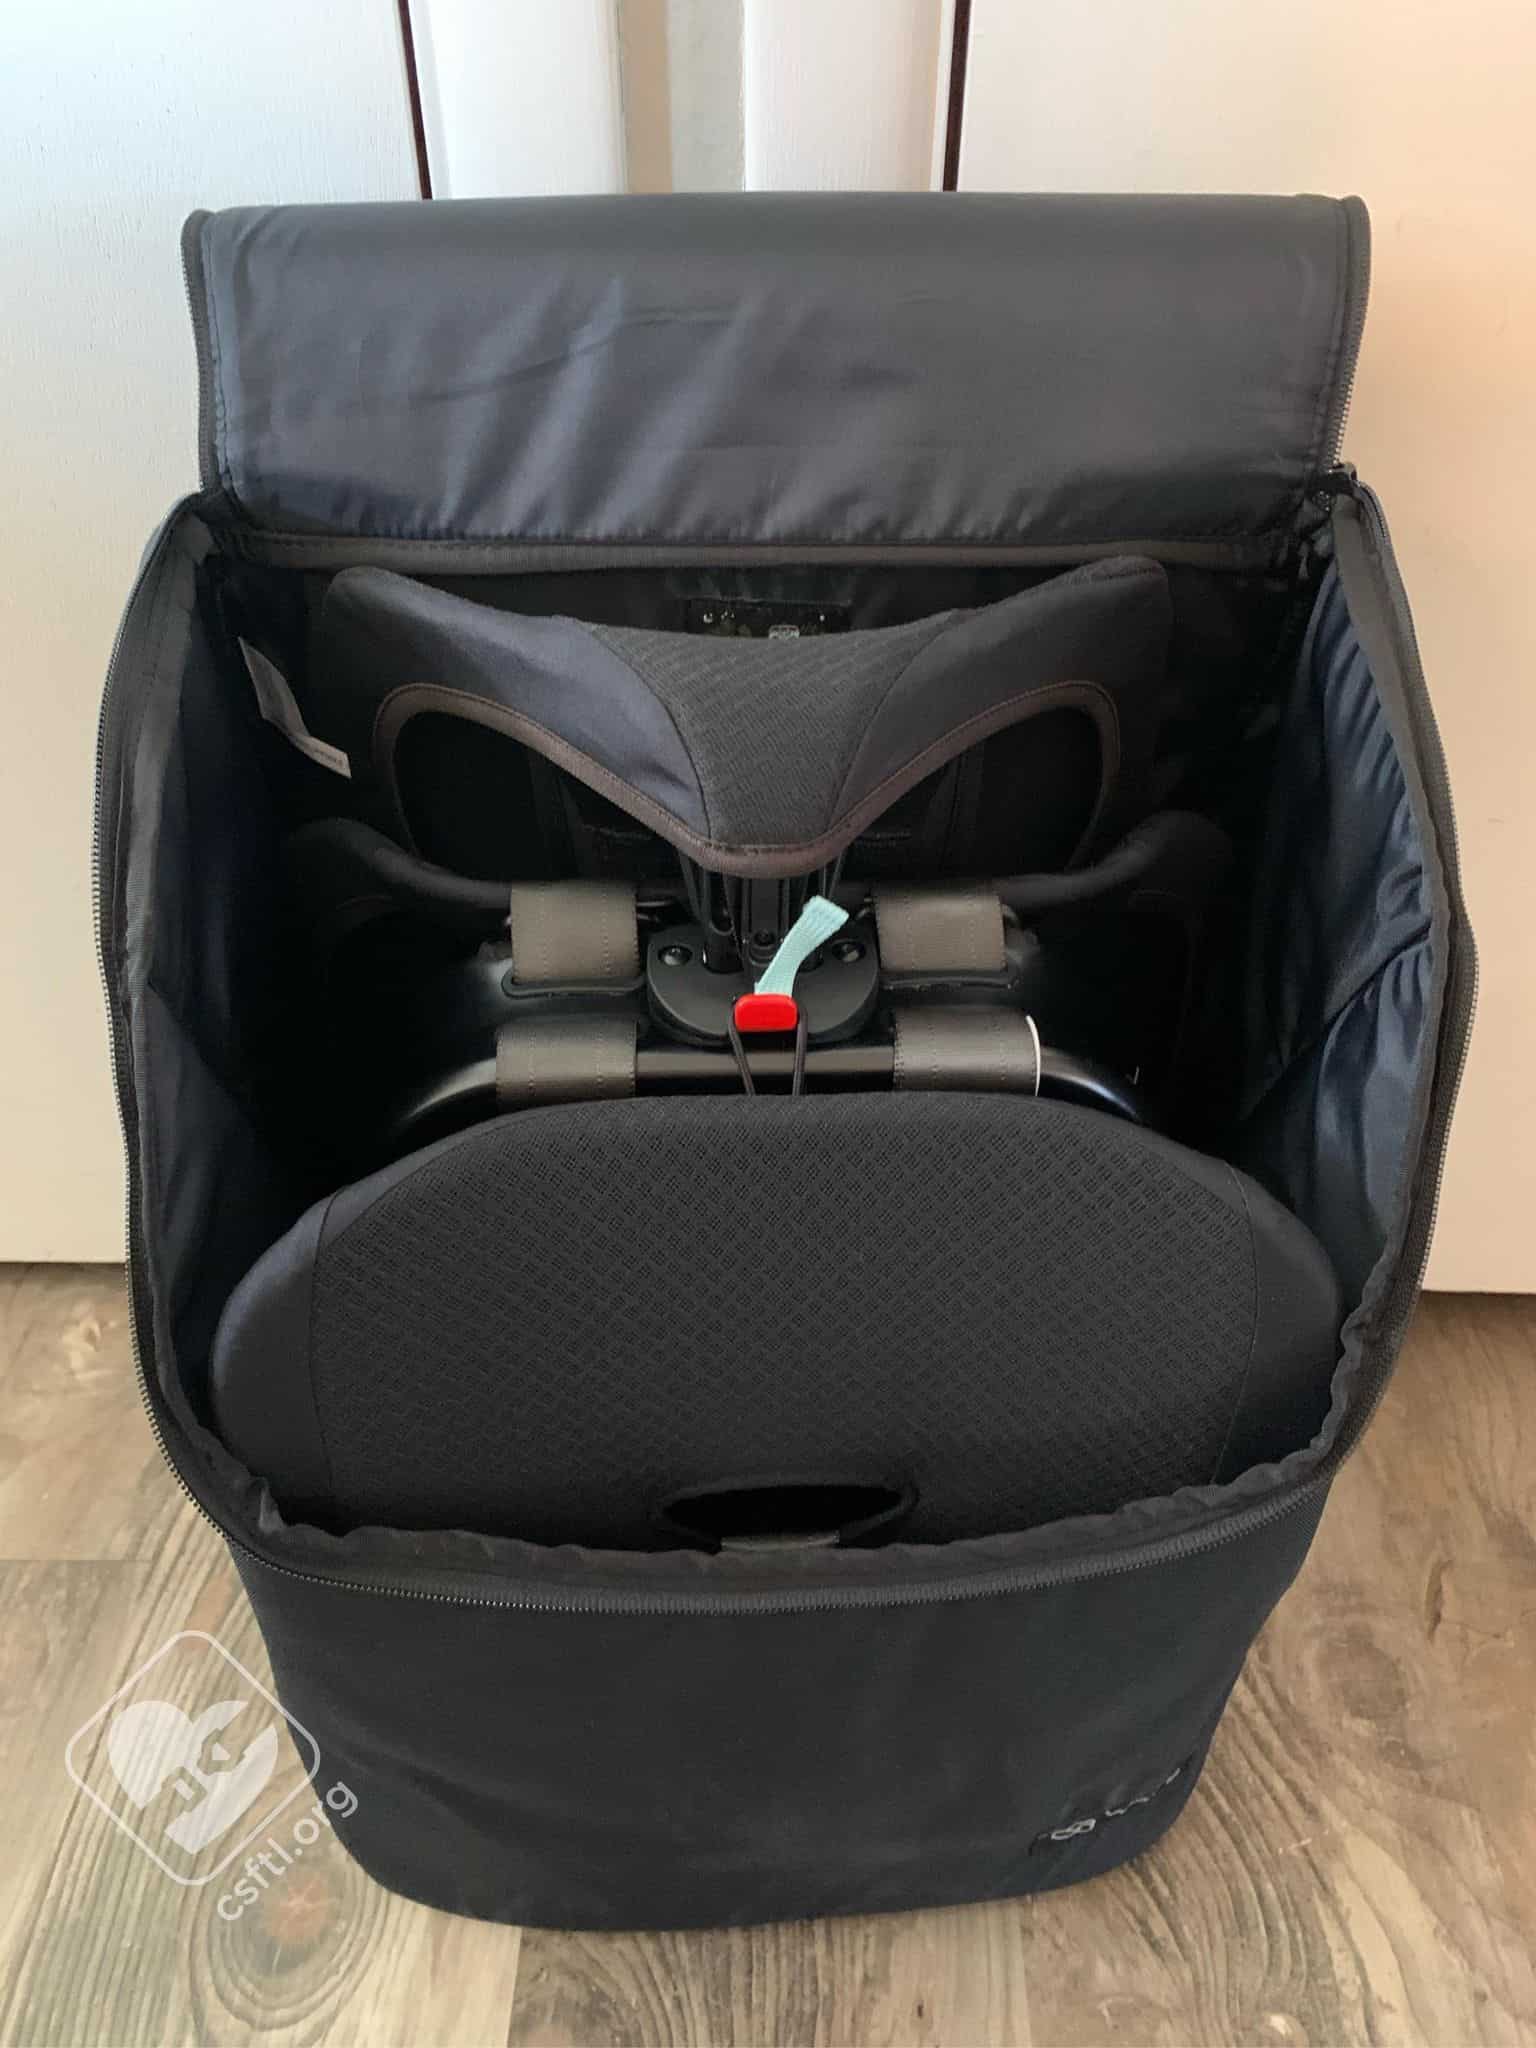
WAYB Pico folded in travel bag
The backpack straps on the travel bag made carrying the Pico easy enough that even my almost 5 year old could carry the seat! This could be a real bonus whenever we get to actually take the Pico on an airplane trip someday.
Luggage Strap
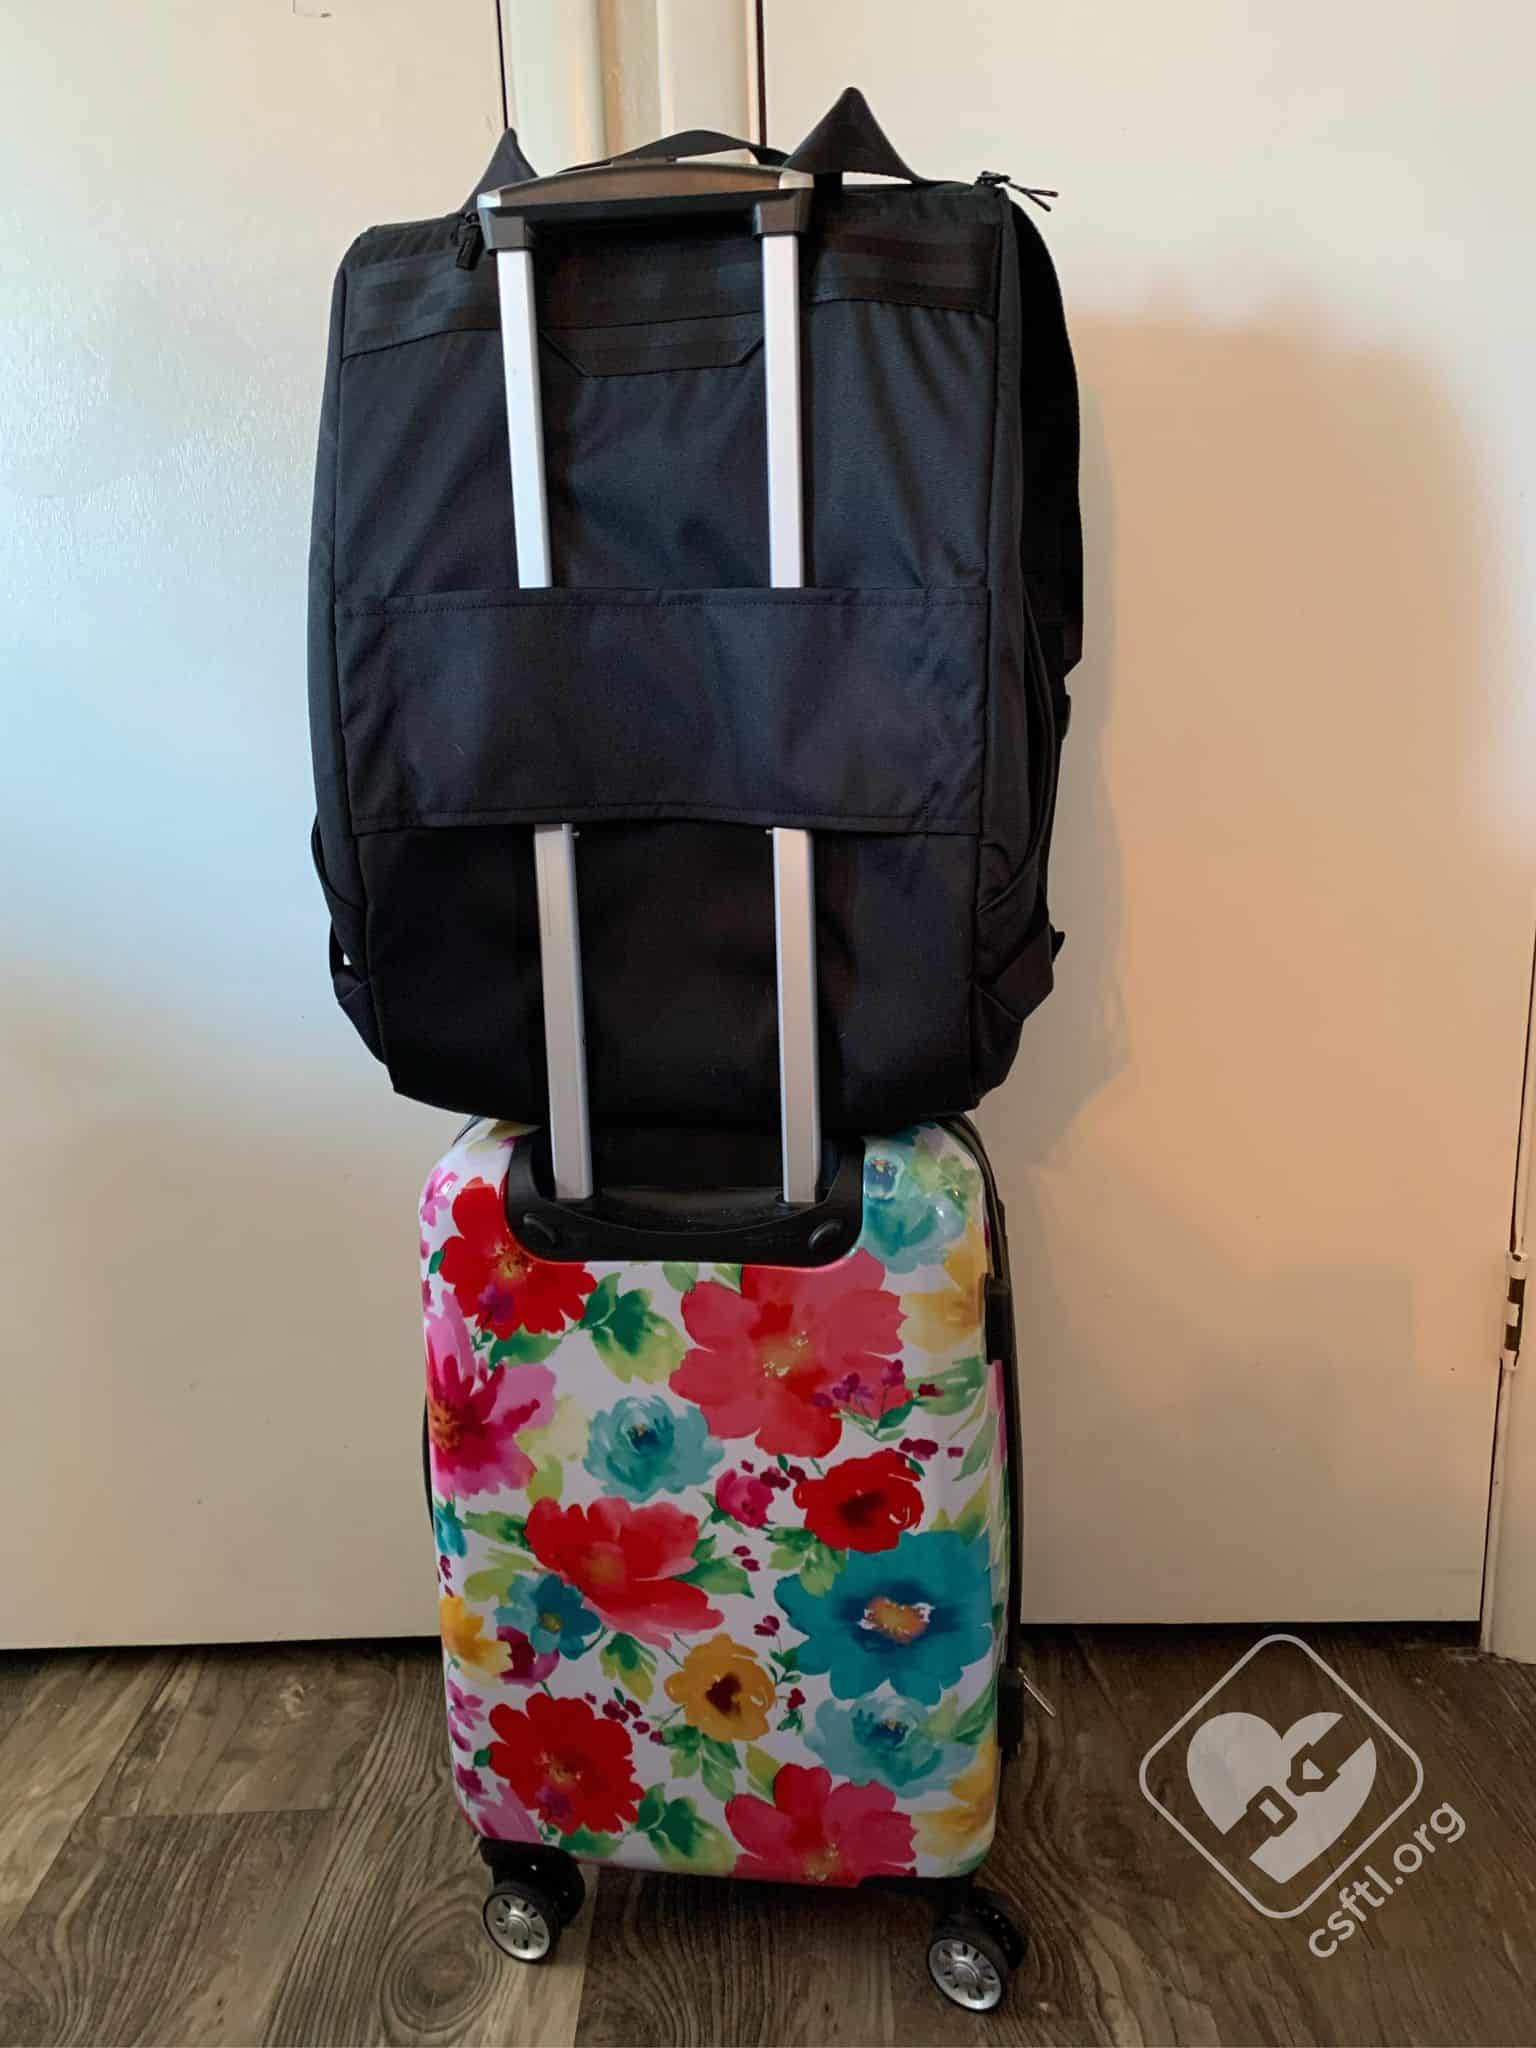
WAYB Pico travel bag on carry-on luggage
The luggage strap on the bag made it possible to hook the bag to my carry on bag. Maybe one day, I’ll get to use this setup on an actual trip!!
Pockets

WAYB Pico travel bag top pocket
The travel bag has pockets on either side and one on the top. The top one is zippered and would be great for storing boarding passes, ID, or other small items.
Preparing the Seat for Use

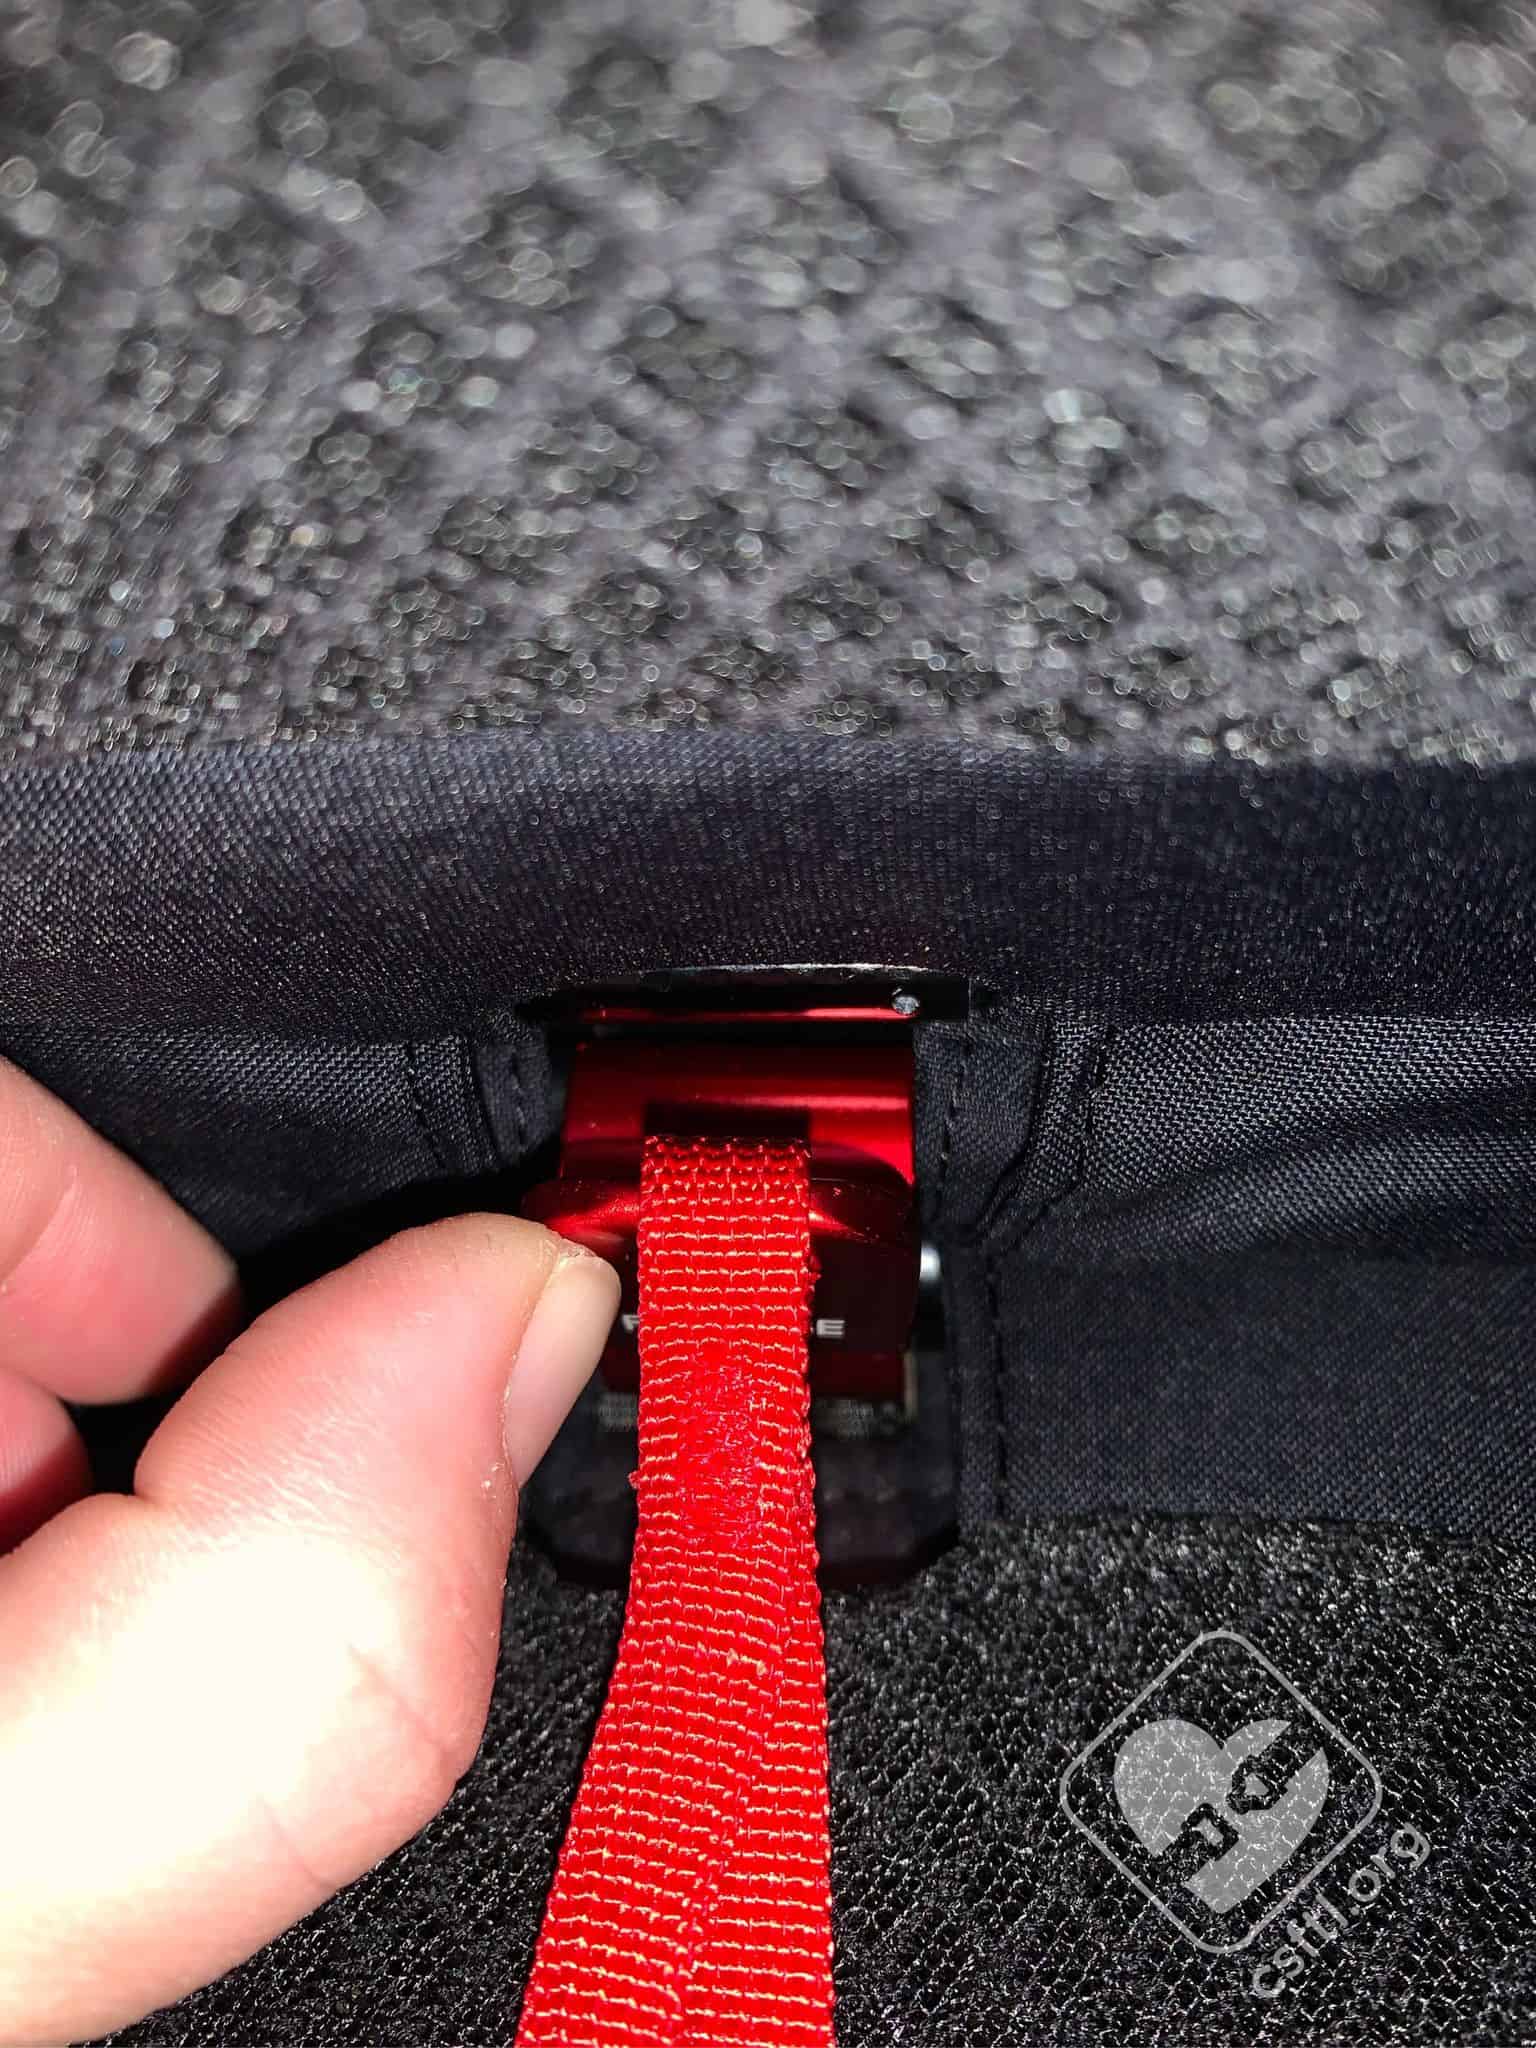
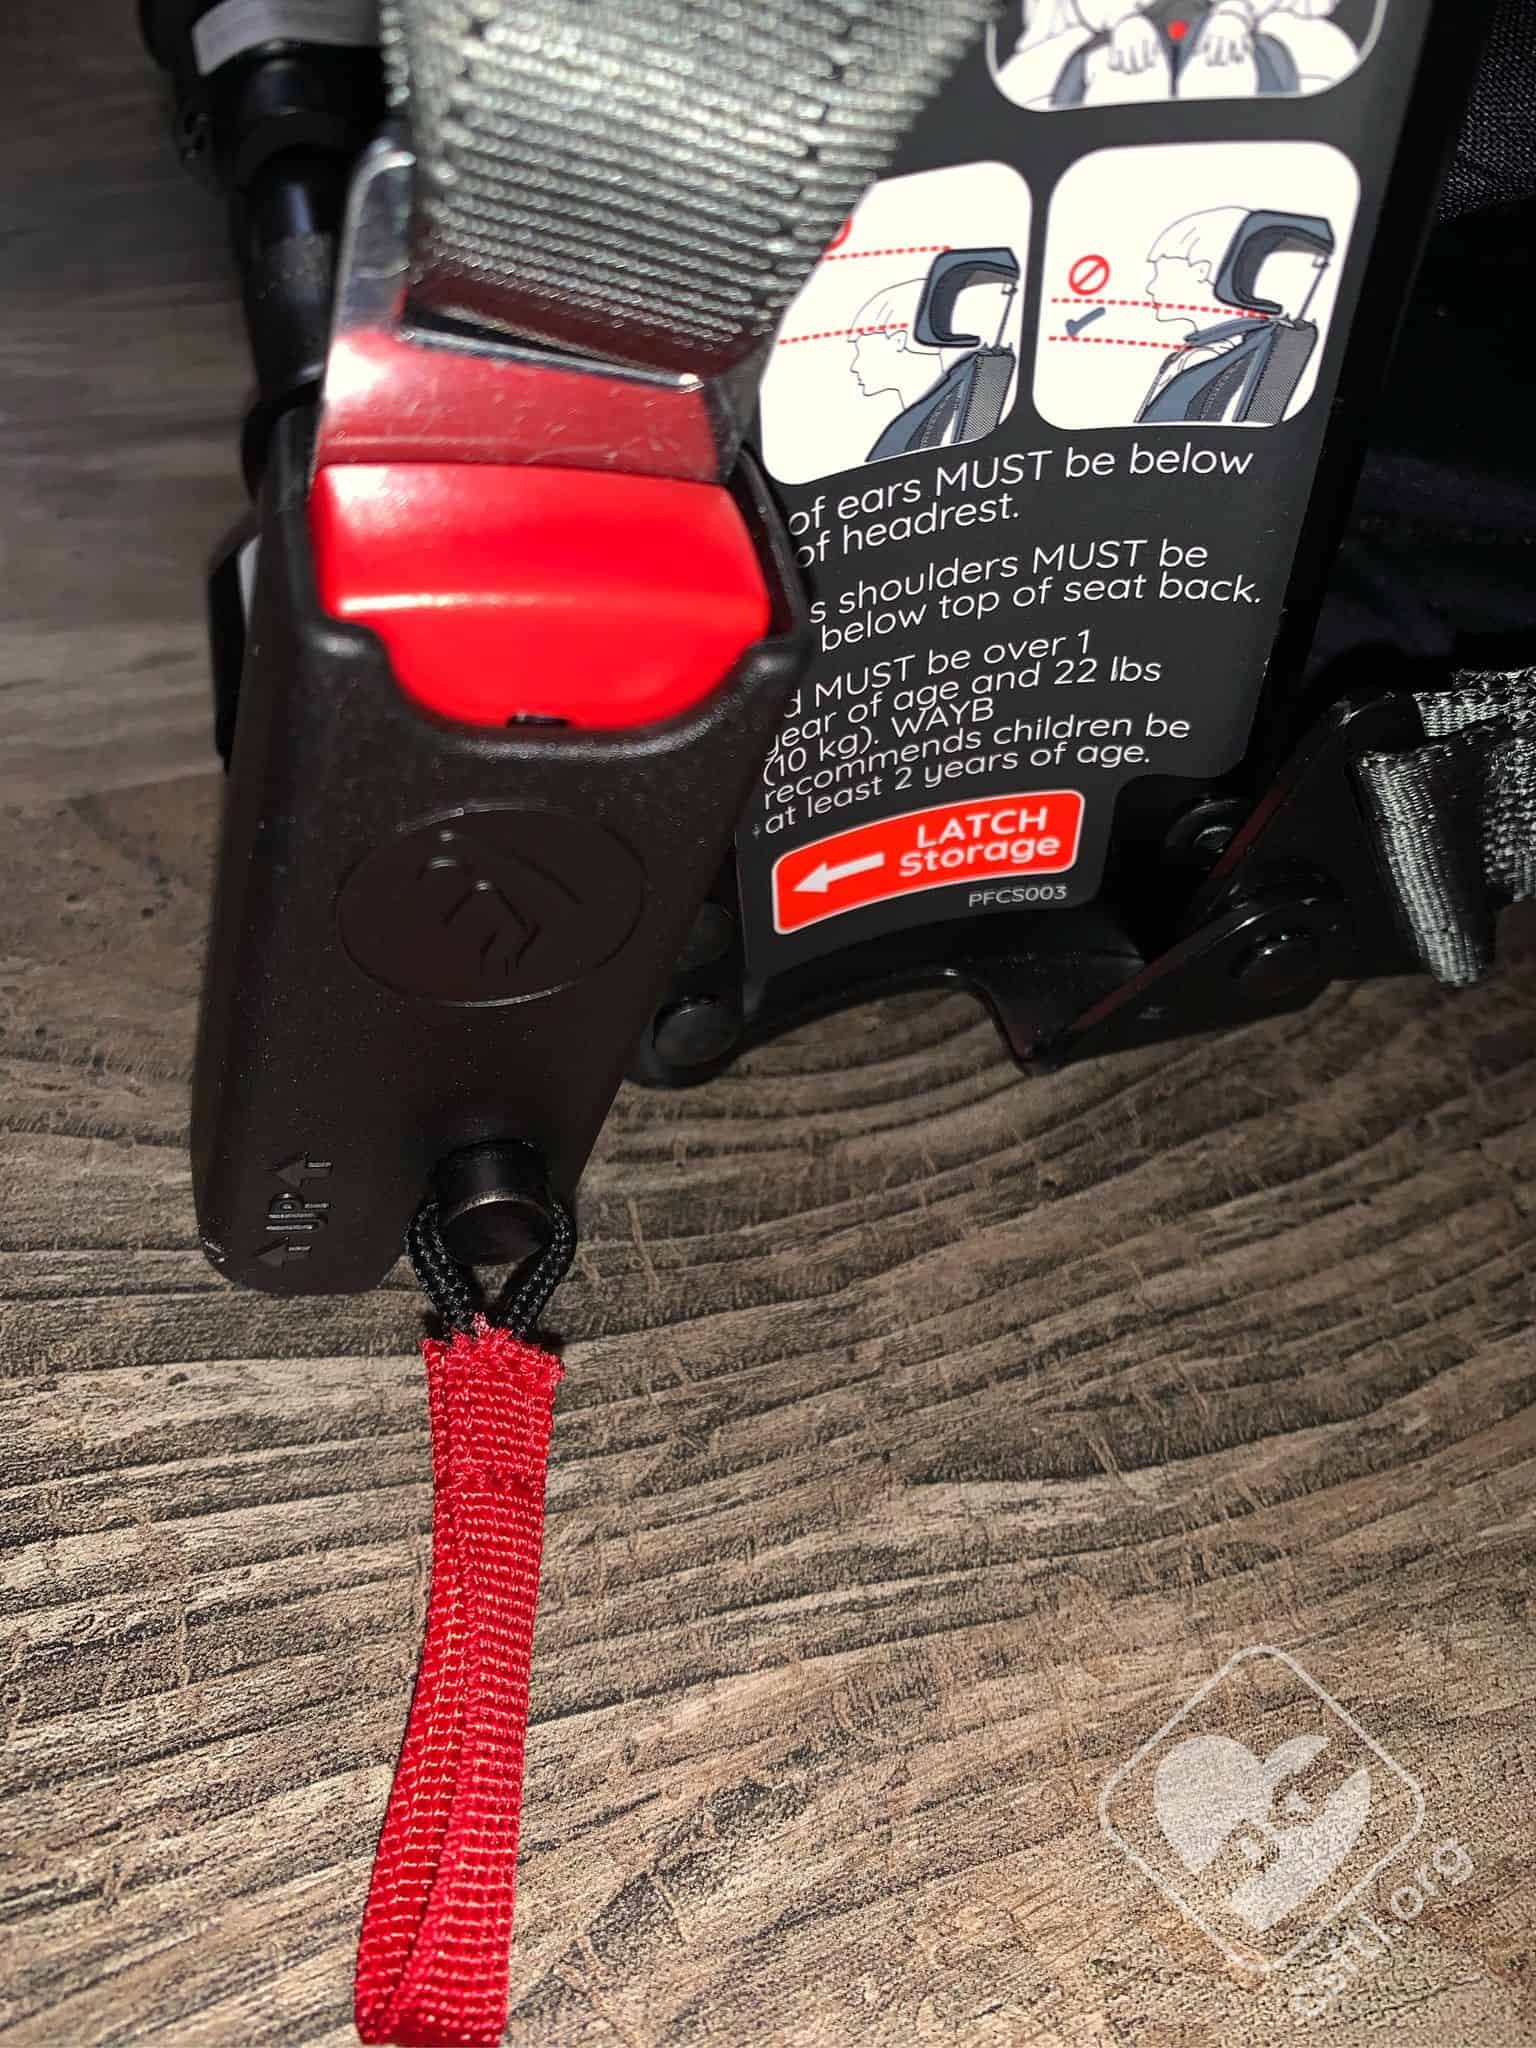
WAYB Pico folded — showing red headrest adjustment tab
To get the Pico ready for installation, lift up on the blue pull tab attached to the elastic loop on the red metal headrest adjustment tab on the back of the seat frame. This tab is behind the headrest.
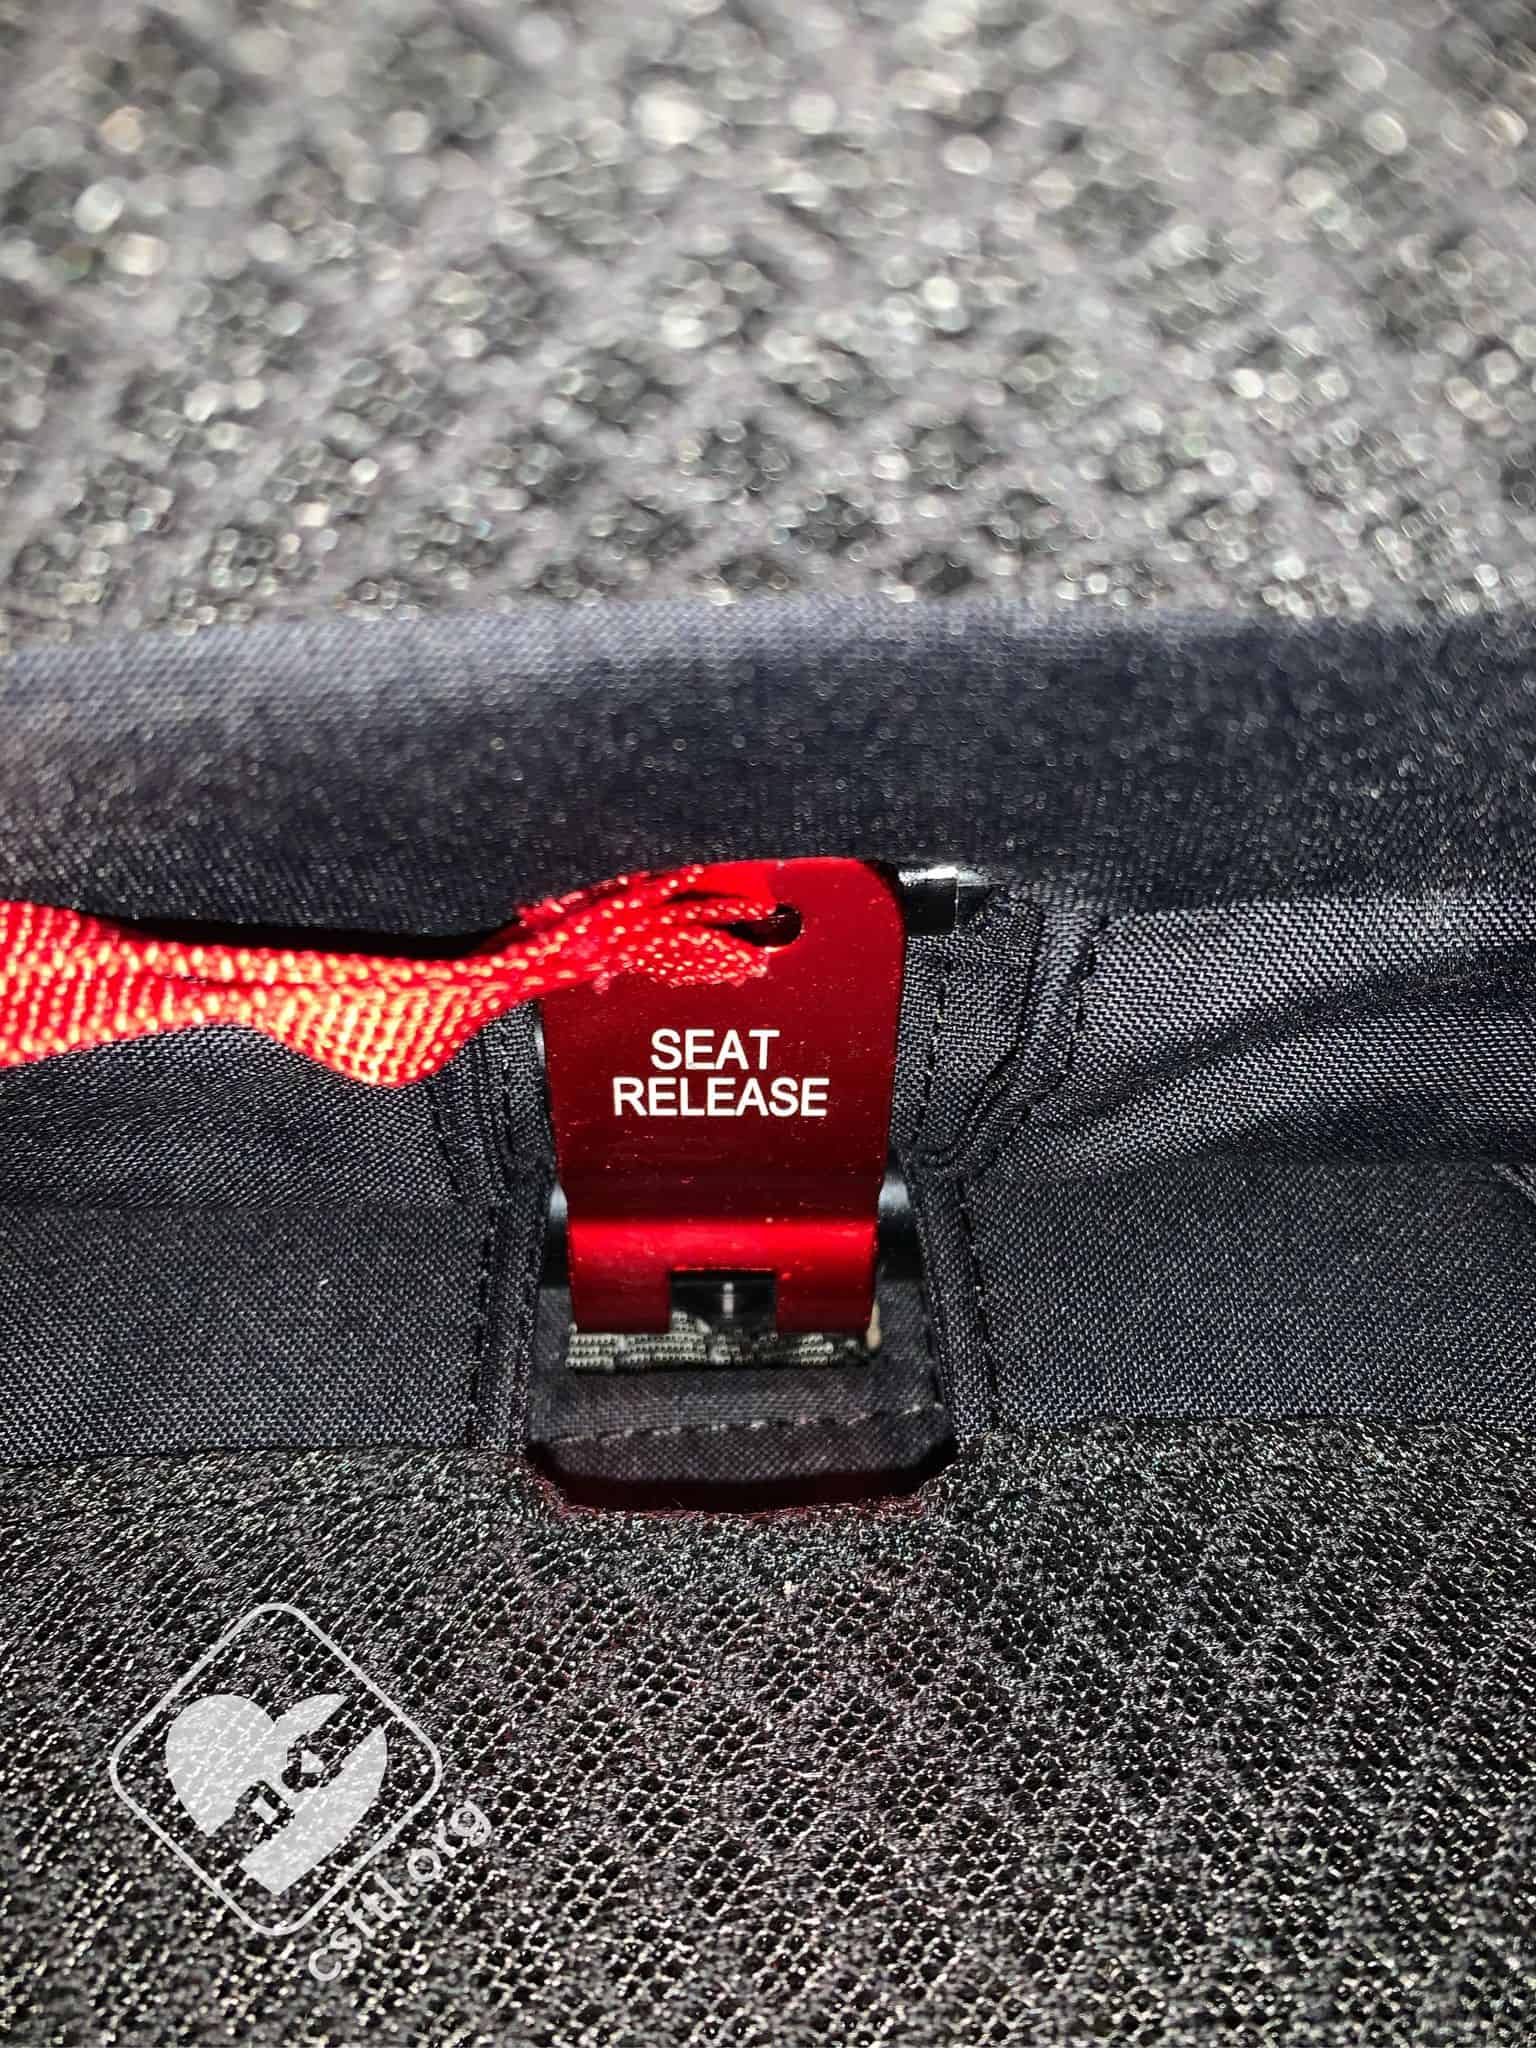
Lifting up on this tab will release the seat pan from the back of the seat. Rotate the seat pan toward the front of the vehicle or airplane seat. When the seat pan is fully rotated into position, push the red “seat release” over the metal bar it clicks into place.
WAYB Pico unfolding the seat
This description makes the process seem easy but it did take quite a bit of force to complete.
Using the Pico
Harness Adjustment
The harness adjuster on the Pico is different than most seats on the market. Instead of having one single adjuster strap, each side of the harness adjusts individually with an adjuster strap at each of the child’s hips. Even though this adjustment system is different, harness tightness is still checked by doing the pinch test. Once the harness passes the pinch test, roll the excess harness webbing and secure it to the seat with the hook and loop closure provided.
Lower Anchor Storage
WAYB Pico lower anchor storage
The Pico’s lower anchors store on a very unique little bar that extends out from the bottom of the seat.
WAYB Pico lower anchor storage
To store the lower anchor connectors on the Pico, pull the red pull tab on the bottom of the frame. This will expose a bar to attach the lower anchor connectors to.
WAYB Pico lower anchor stored
Tighten the lower anchor webbing, roll the excess webbing, and secure it with the hook and loop closure provided.
Top Tether Storage

WAYB Pico tether storage
After disconnecting the top tether anchor, slide the hook and webbing into the pocket on the back of the Pico frame.
WAYB Pico tether storage pocket
Folding the Pico
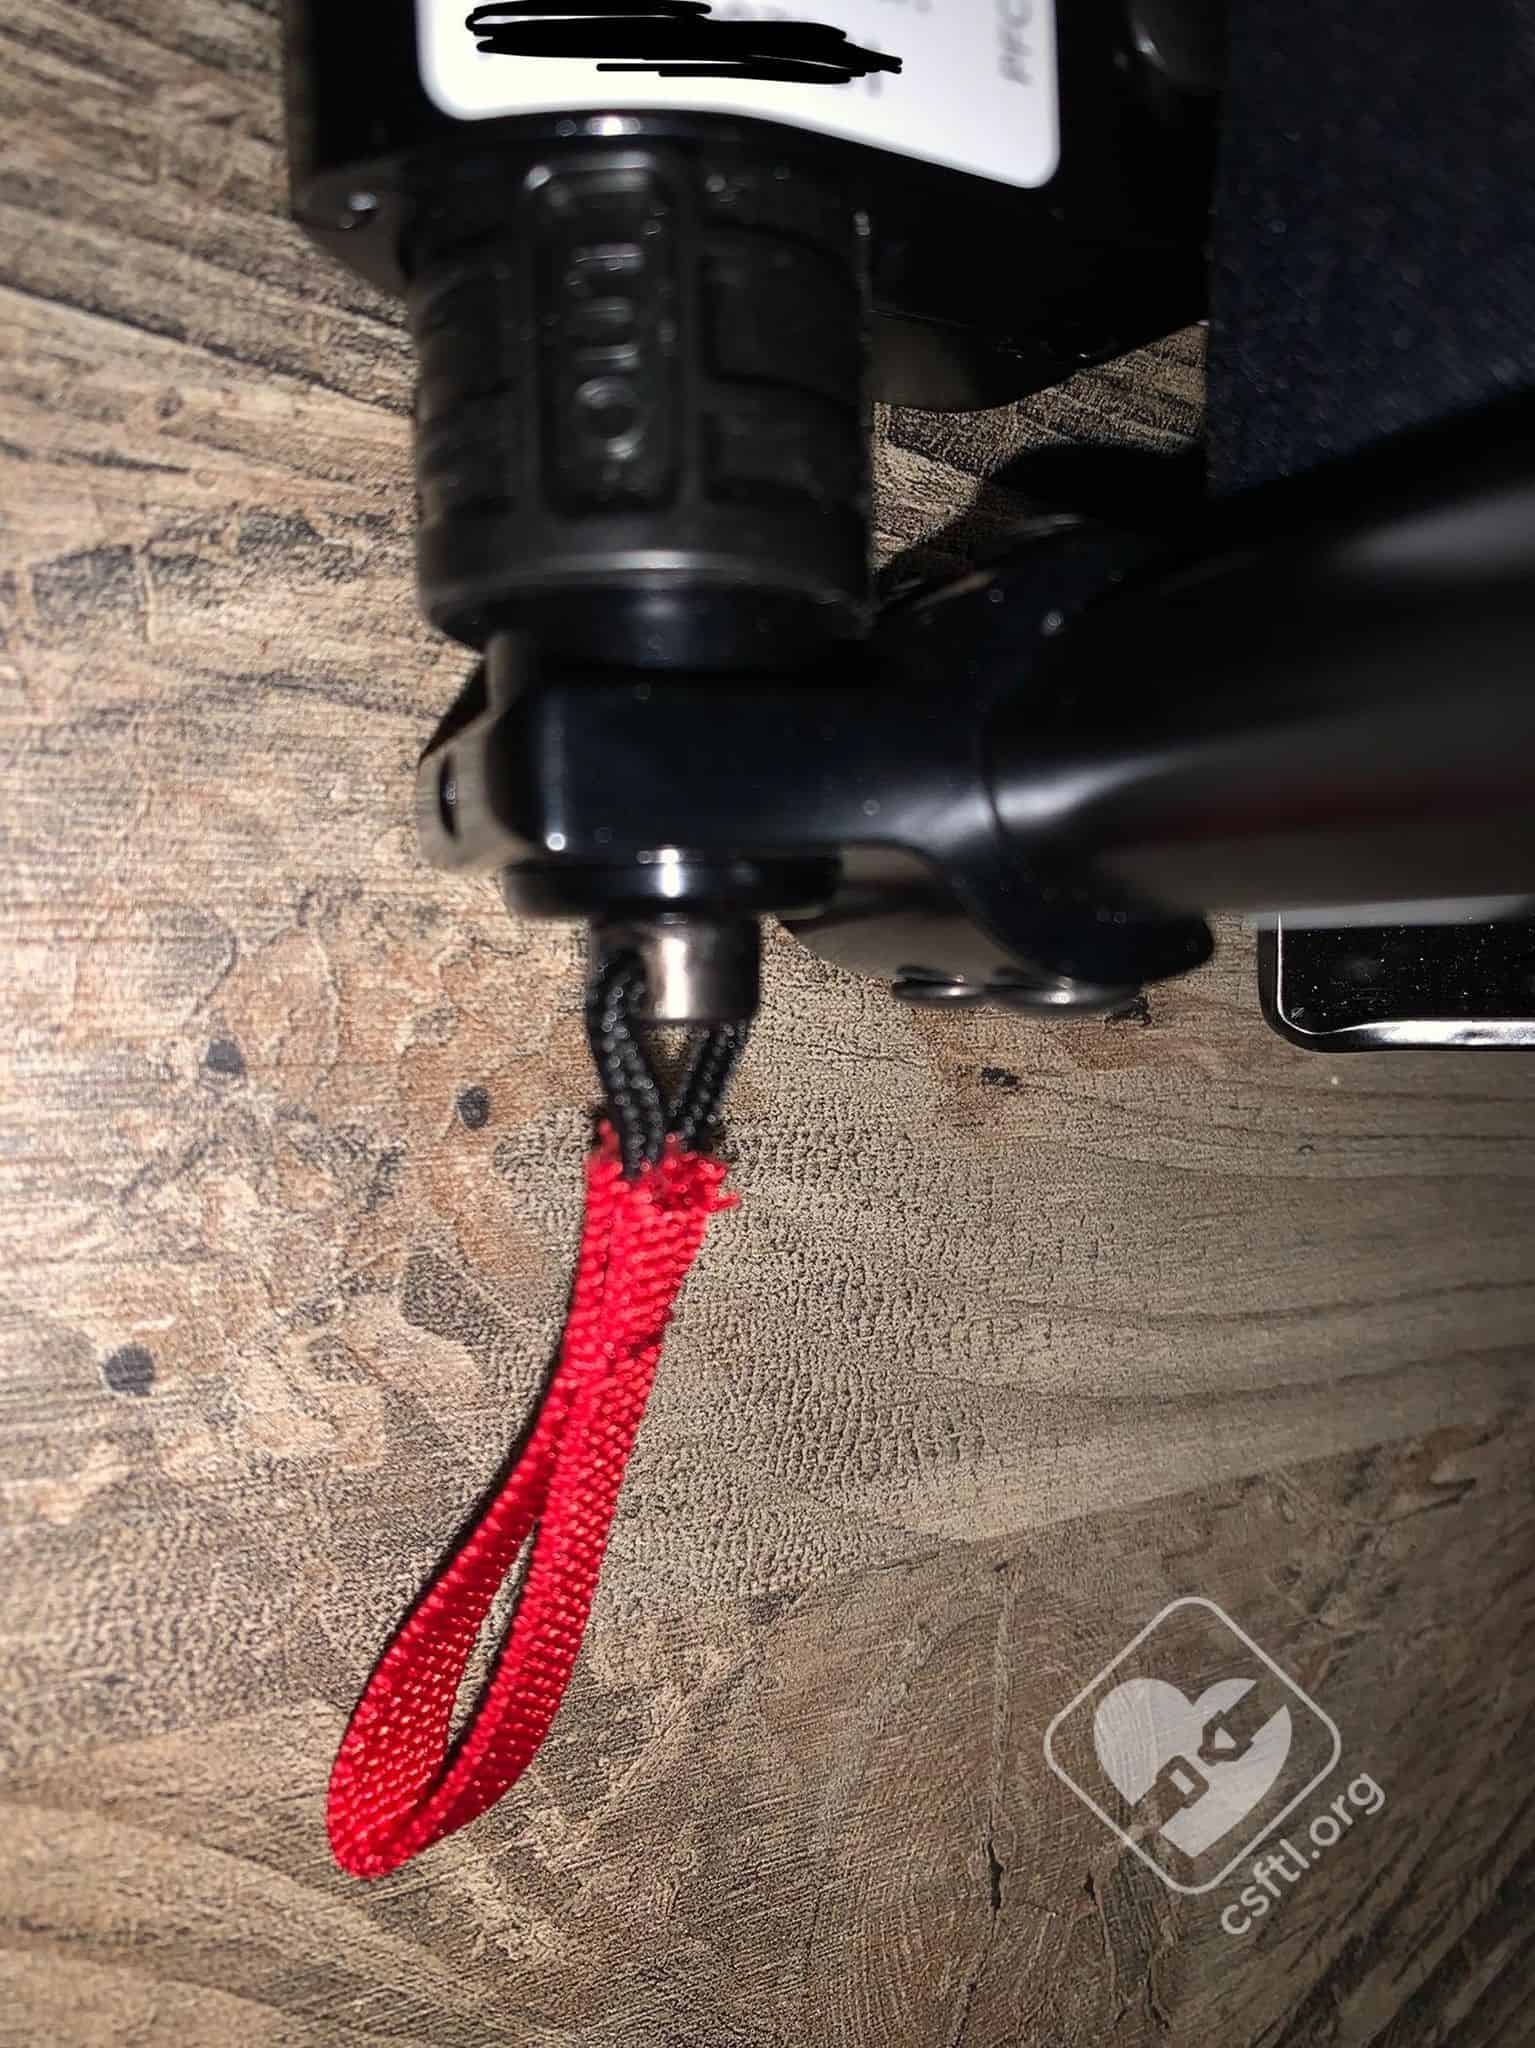
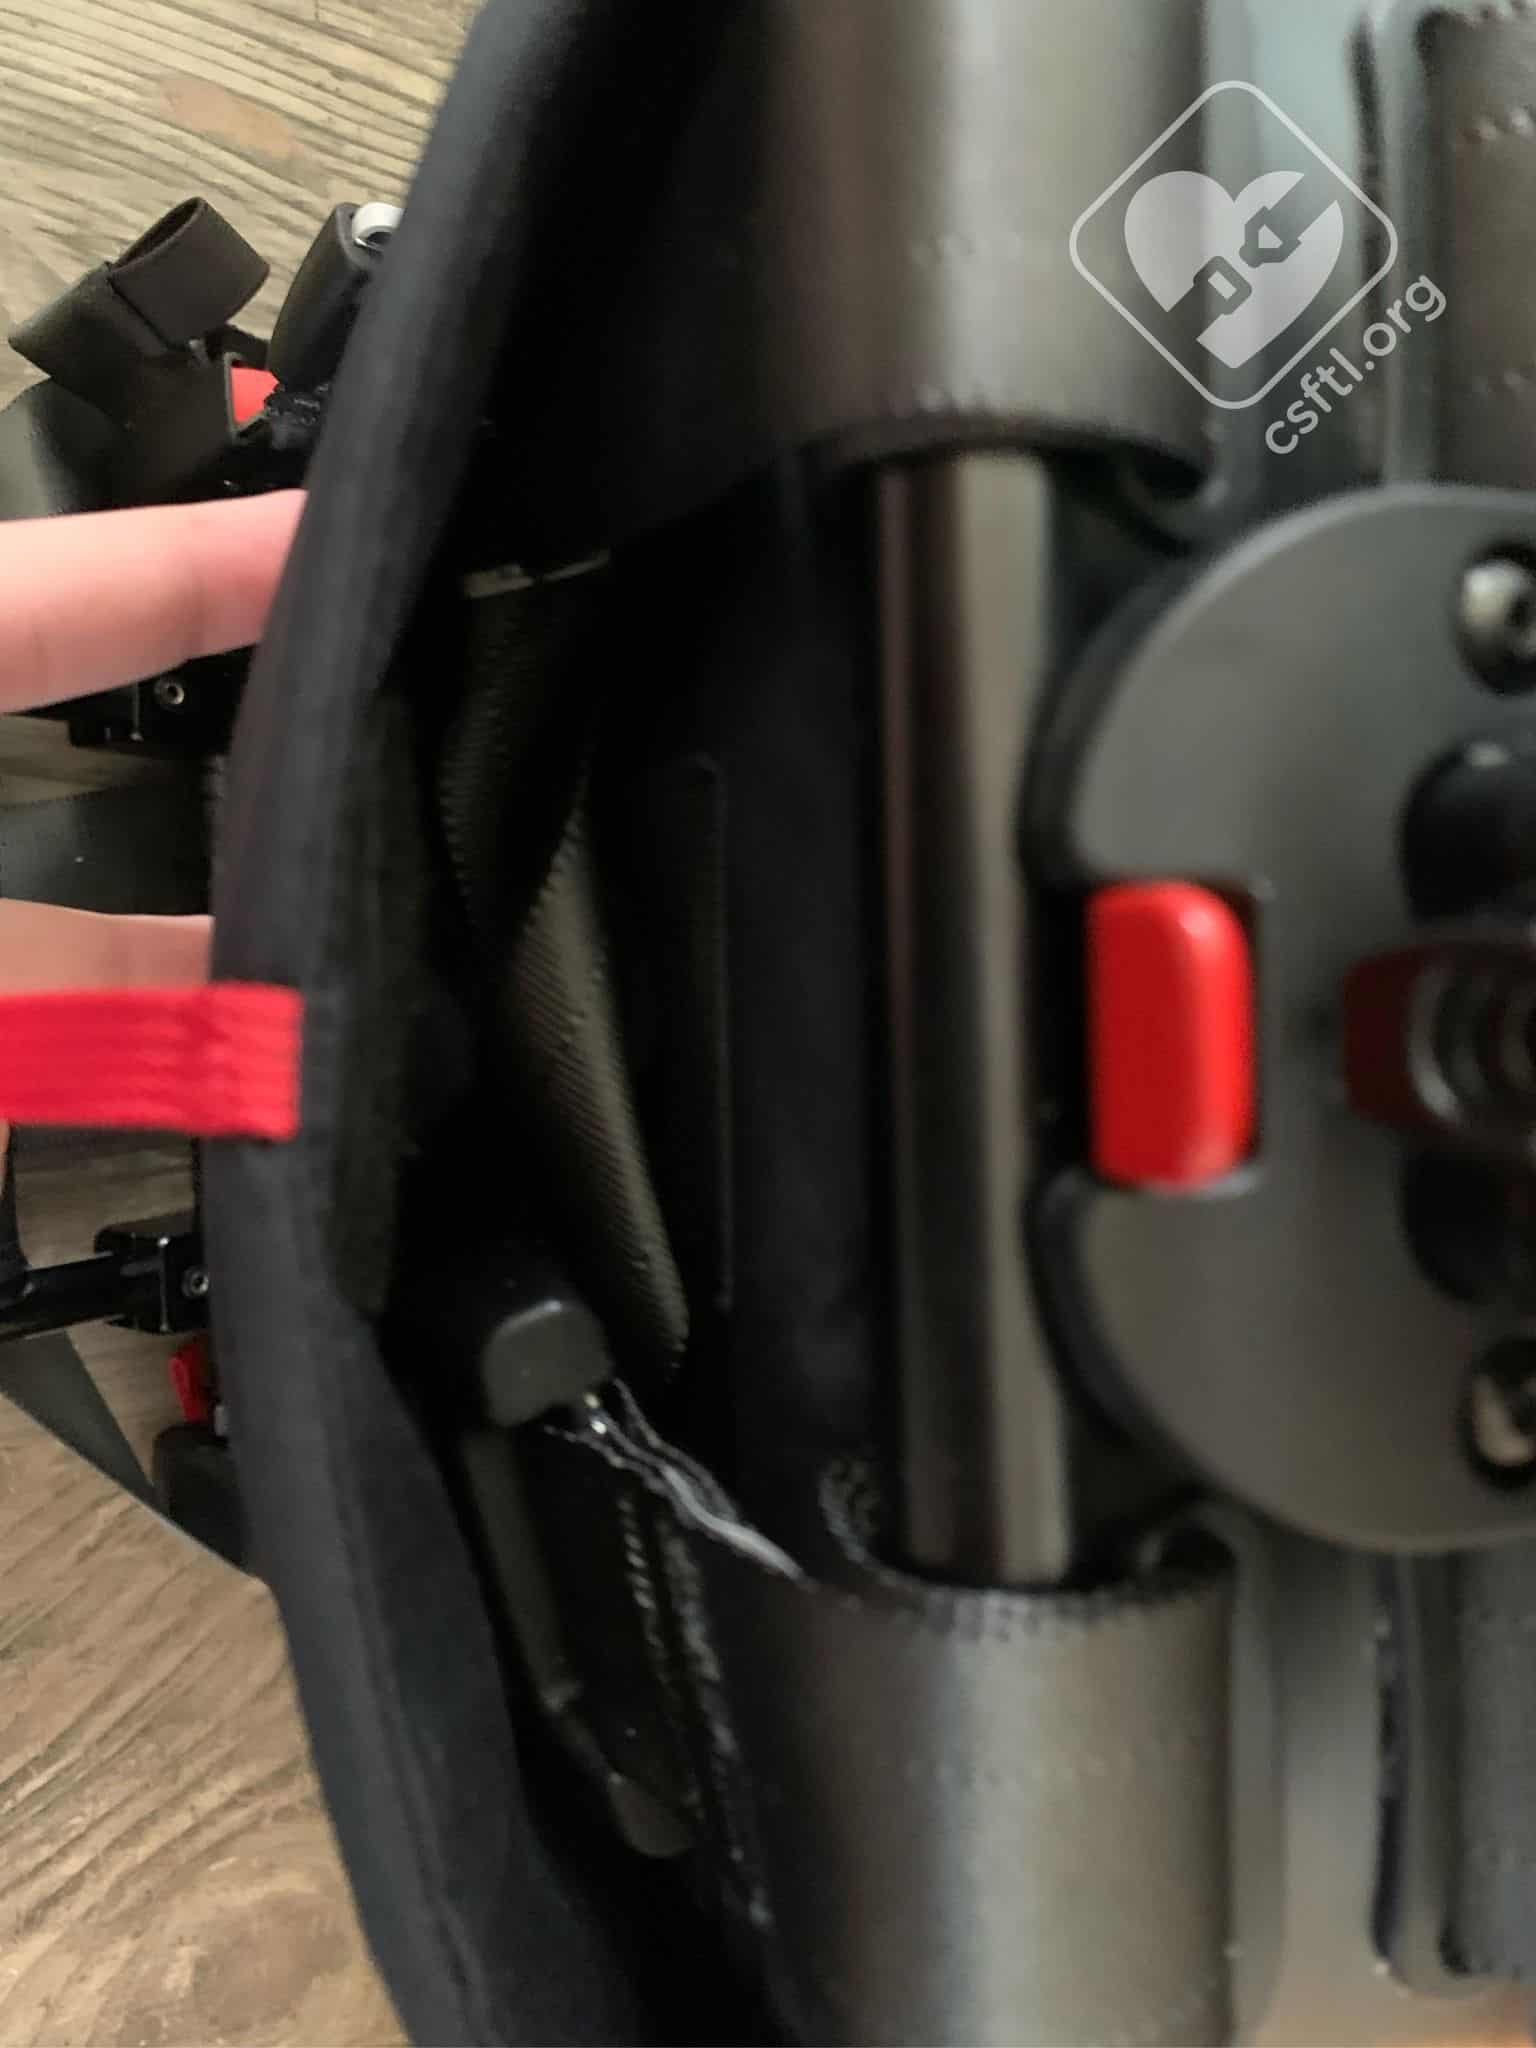
WAYB Pico seat release
To fold the seat, pull the red pull tab on the “seat release”. This took a fair amount of force to release. Rotate the seat pan towards the back of the seat frame. Hook the elastic loop with the blue pull tab over the red metal headrest adjustment tab behind the headrest.
Headrest Adjustment
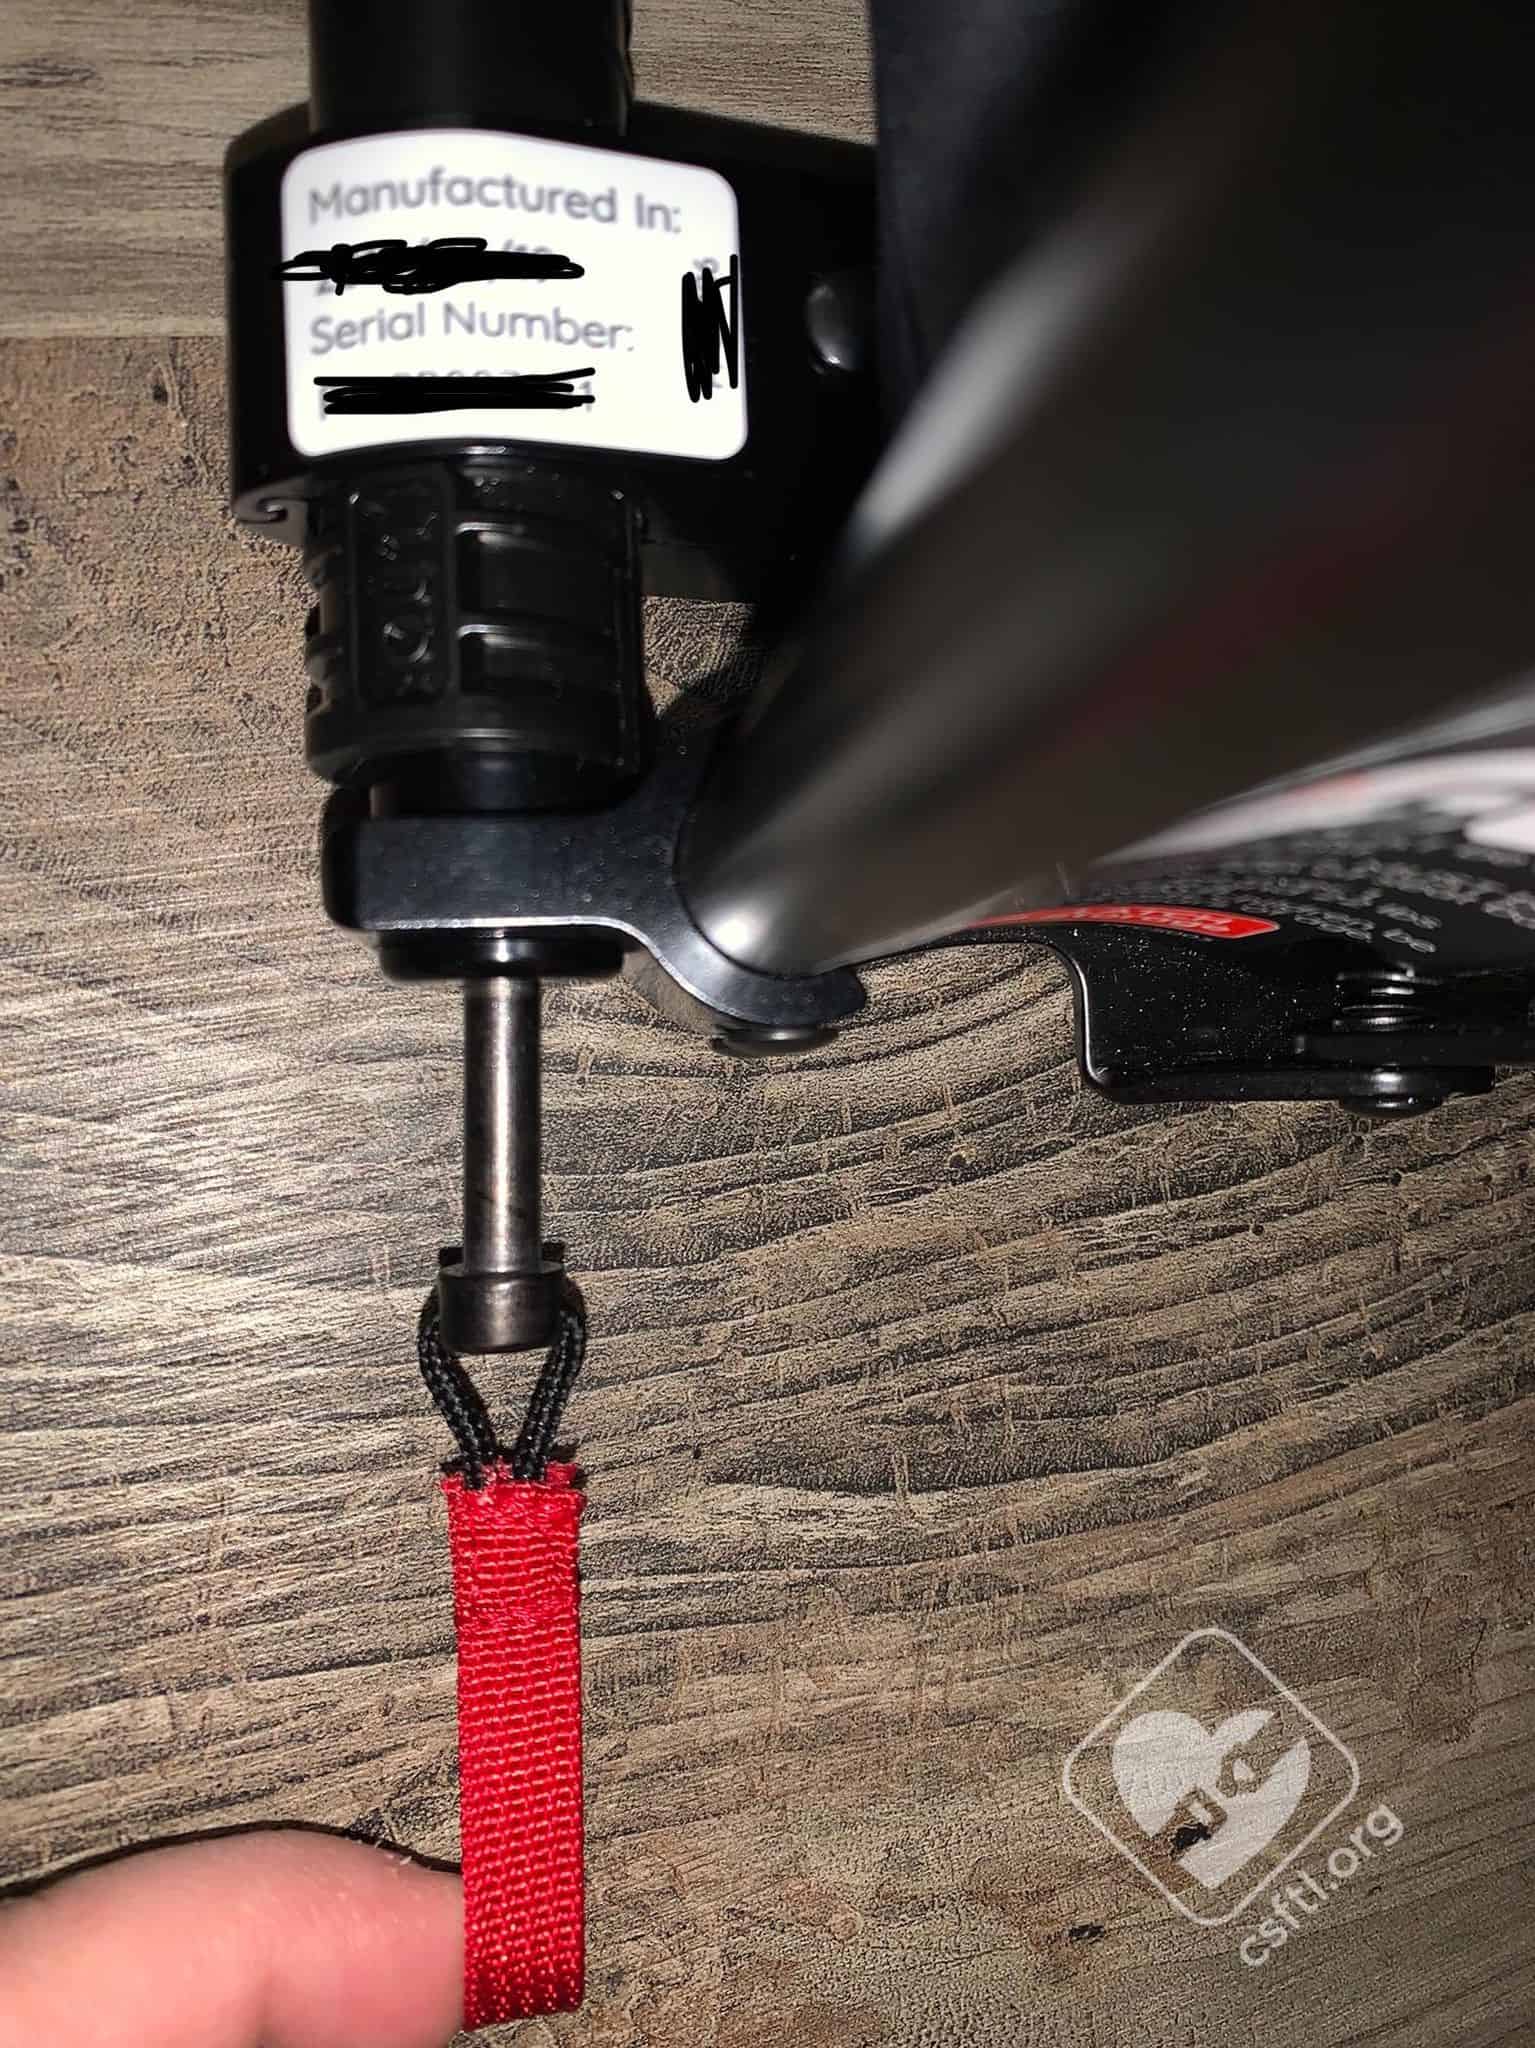
WAYB Pico folded — showing red headrest adjustment tab
To move the headrest up or down, push the red metal headrest adjustment tab, toward the headrest, and pull the headrest into the desired position. The Pico has 4 headrest settings. Position 1, the lowest position, is the storage position and can not be used for travel. Positions 2 through 4 are used for travel and should be placed in a position that allows the child’s ears to be below the top of the headrest.
Installation with Lower Anchors

WAYB Pico installed with lower anchors
The Pico requires the use of the top tether anchor when available. We always encourage the use of the top tether because it reduces head excursion.
To get the Pico ready for a lower anchor installation, remove the top tether anchor from the storage pocket on the back of the seat and loosely connect it to the top tether location indicated in the vehicle manual.
Per the manual, the preferred method of installation is with the lower anchors, when available. To install with the lower anchors, push the red button on the lower anchor connector and pull the lower anchor connector up and off the storage bar on the side of the Pico. Locate the lower anchors in the vehicle seat and attach the lower anchor connector. Remove all the slack from the lower anchor webbing. Press down and back with your hand on the seat pan to compress the Pico into the vehicle seat. Then remove the slack from the top tether anchor webbing.
Check your work: ensure the seat moves 1 inch or less at the belt path when checked with the force of a firm handshake
with your non-dominant hand.

Installing with the lower anchors
Installation with the Vehicle Seat Belt
Lap and Shoulder Belt
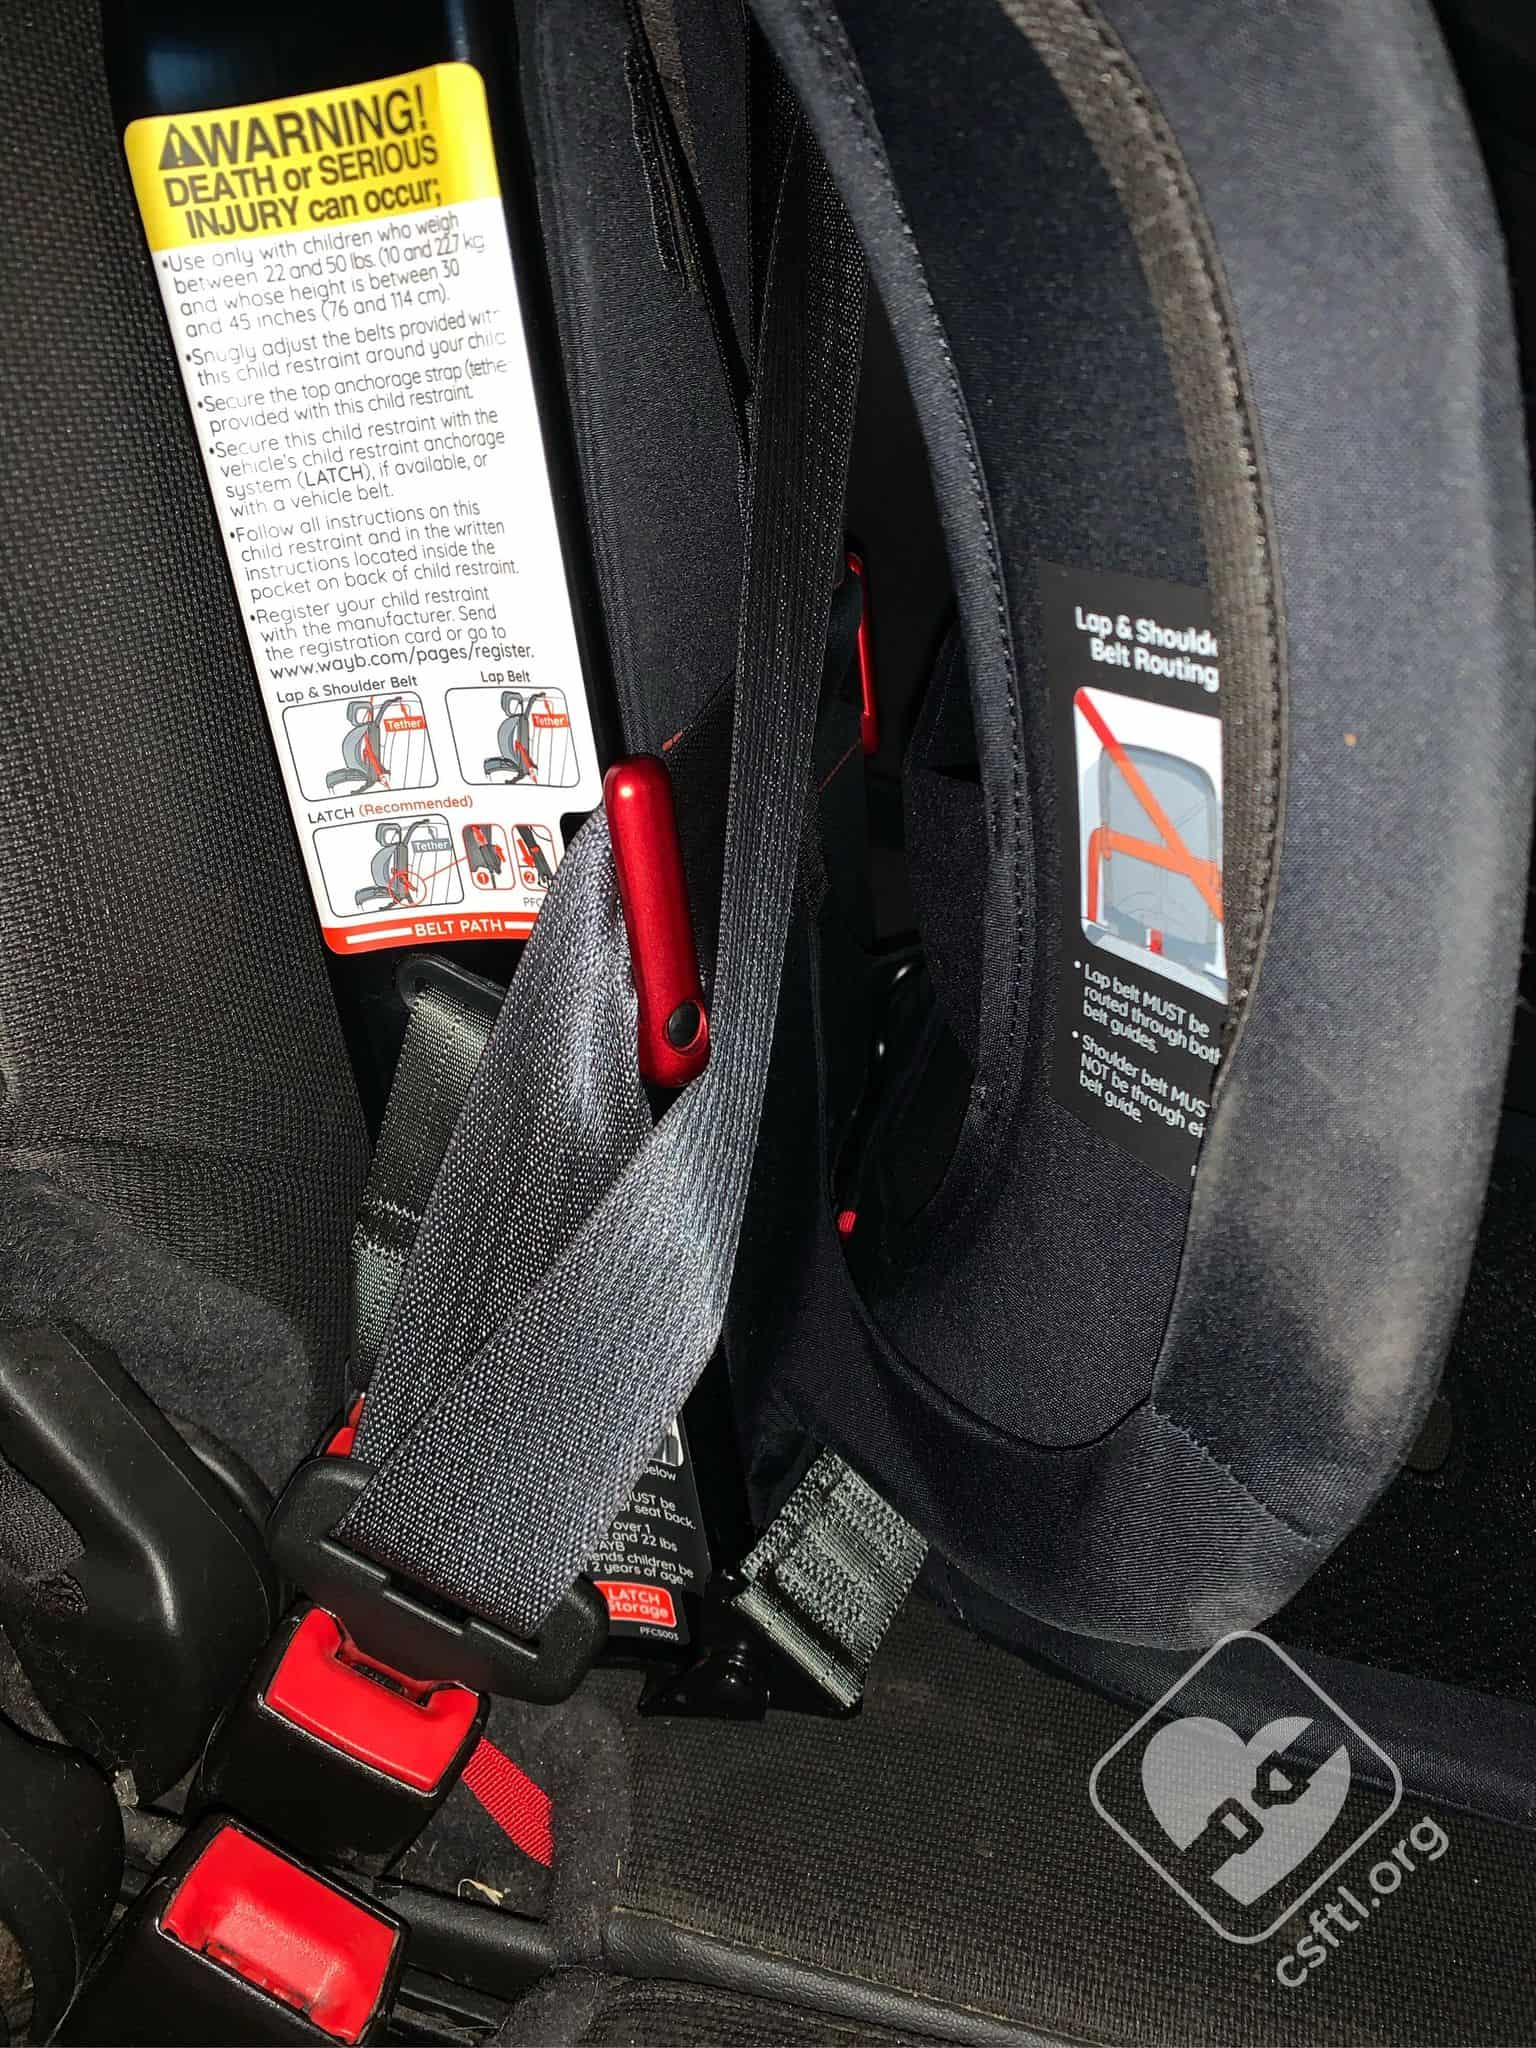
WAYB Pico installed with lap/shoulder belt
The Pico requires the use of the top tether anchor when available. We always encourage the use of the top tether because it offers some major safety benefits.
Remove the top tether anchor from the storage pocket on the back of the seat and loosely connect it to the top tether location as indicated by the vehicle manual.
Route the lap belt portion of the vehicle seat belt over the red metal guides on the frame of the seat. The belt path is handily labeled “lap belt path”. The shoulder belt does not go through the metal guides. Buckle the vehicle seat belt and lock it. Press down and back with your hand on the seat pan to compress the Pico into the vehicle seat. Remove all the slack from the vehicle seat belt. Then remove the slack from the top tether anchor webbing. Roll the excess webbing and secure with the hook and loop closure provided.
Check your work: ensure the seat moves 1 inch or less at the belt path when checked with the force of a firm handshake with your non-dominant hand.
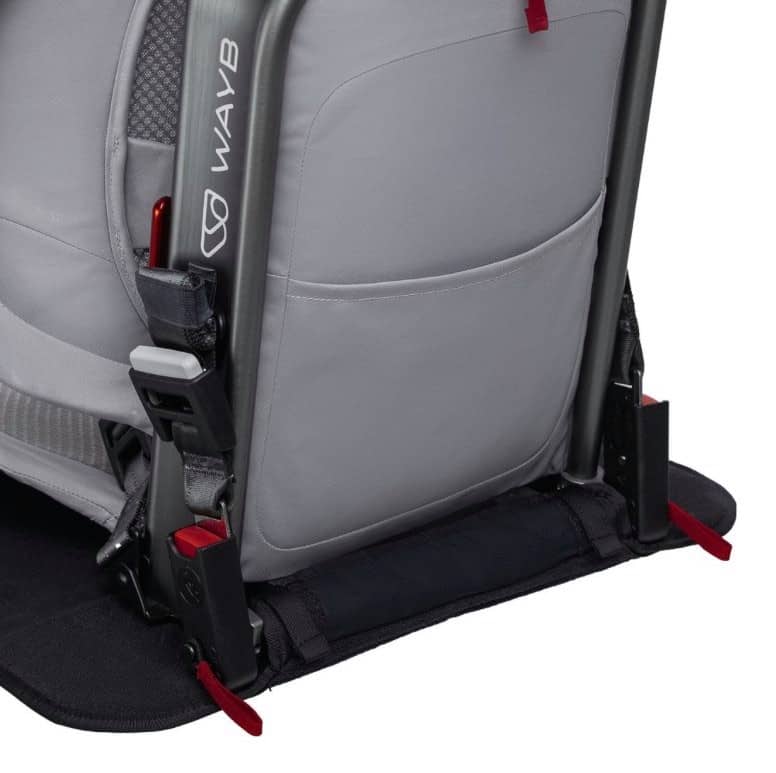
Lap Only Vehicle Seat Belt
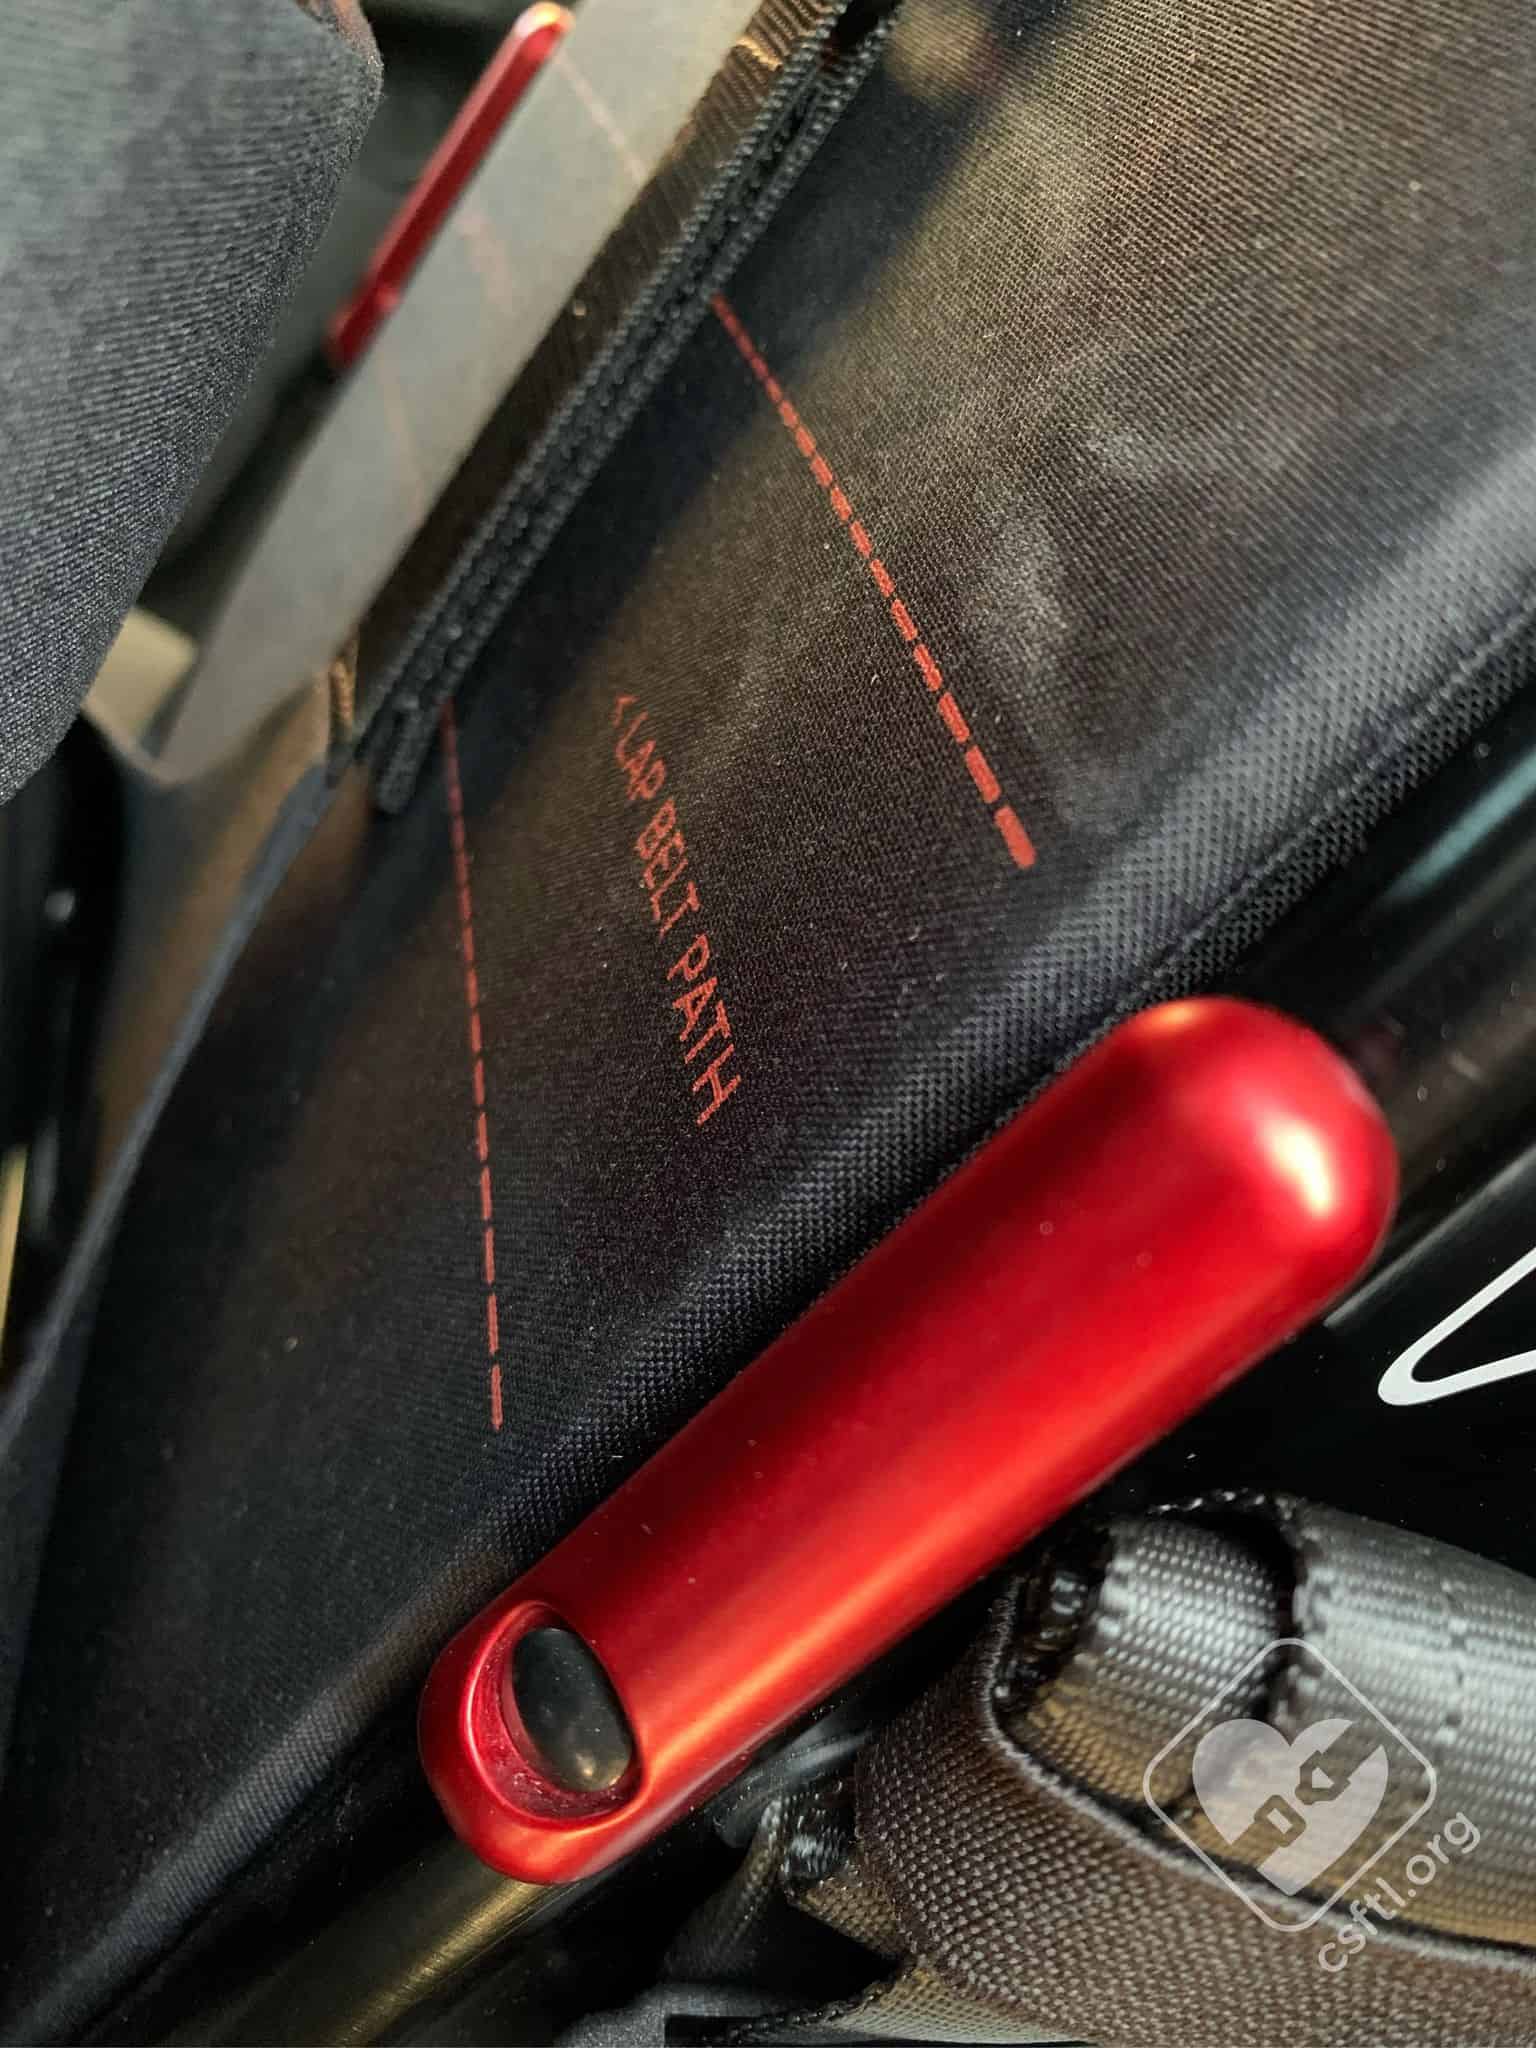
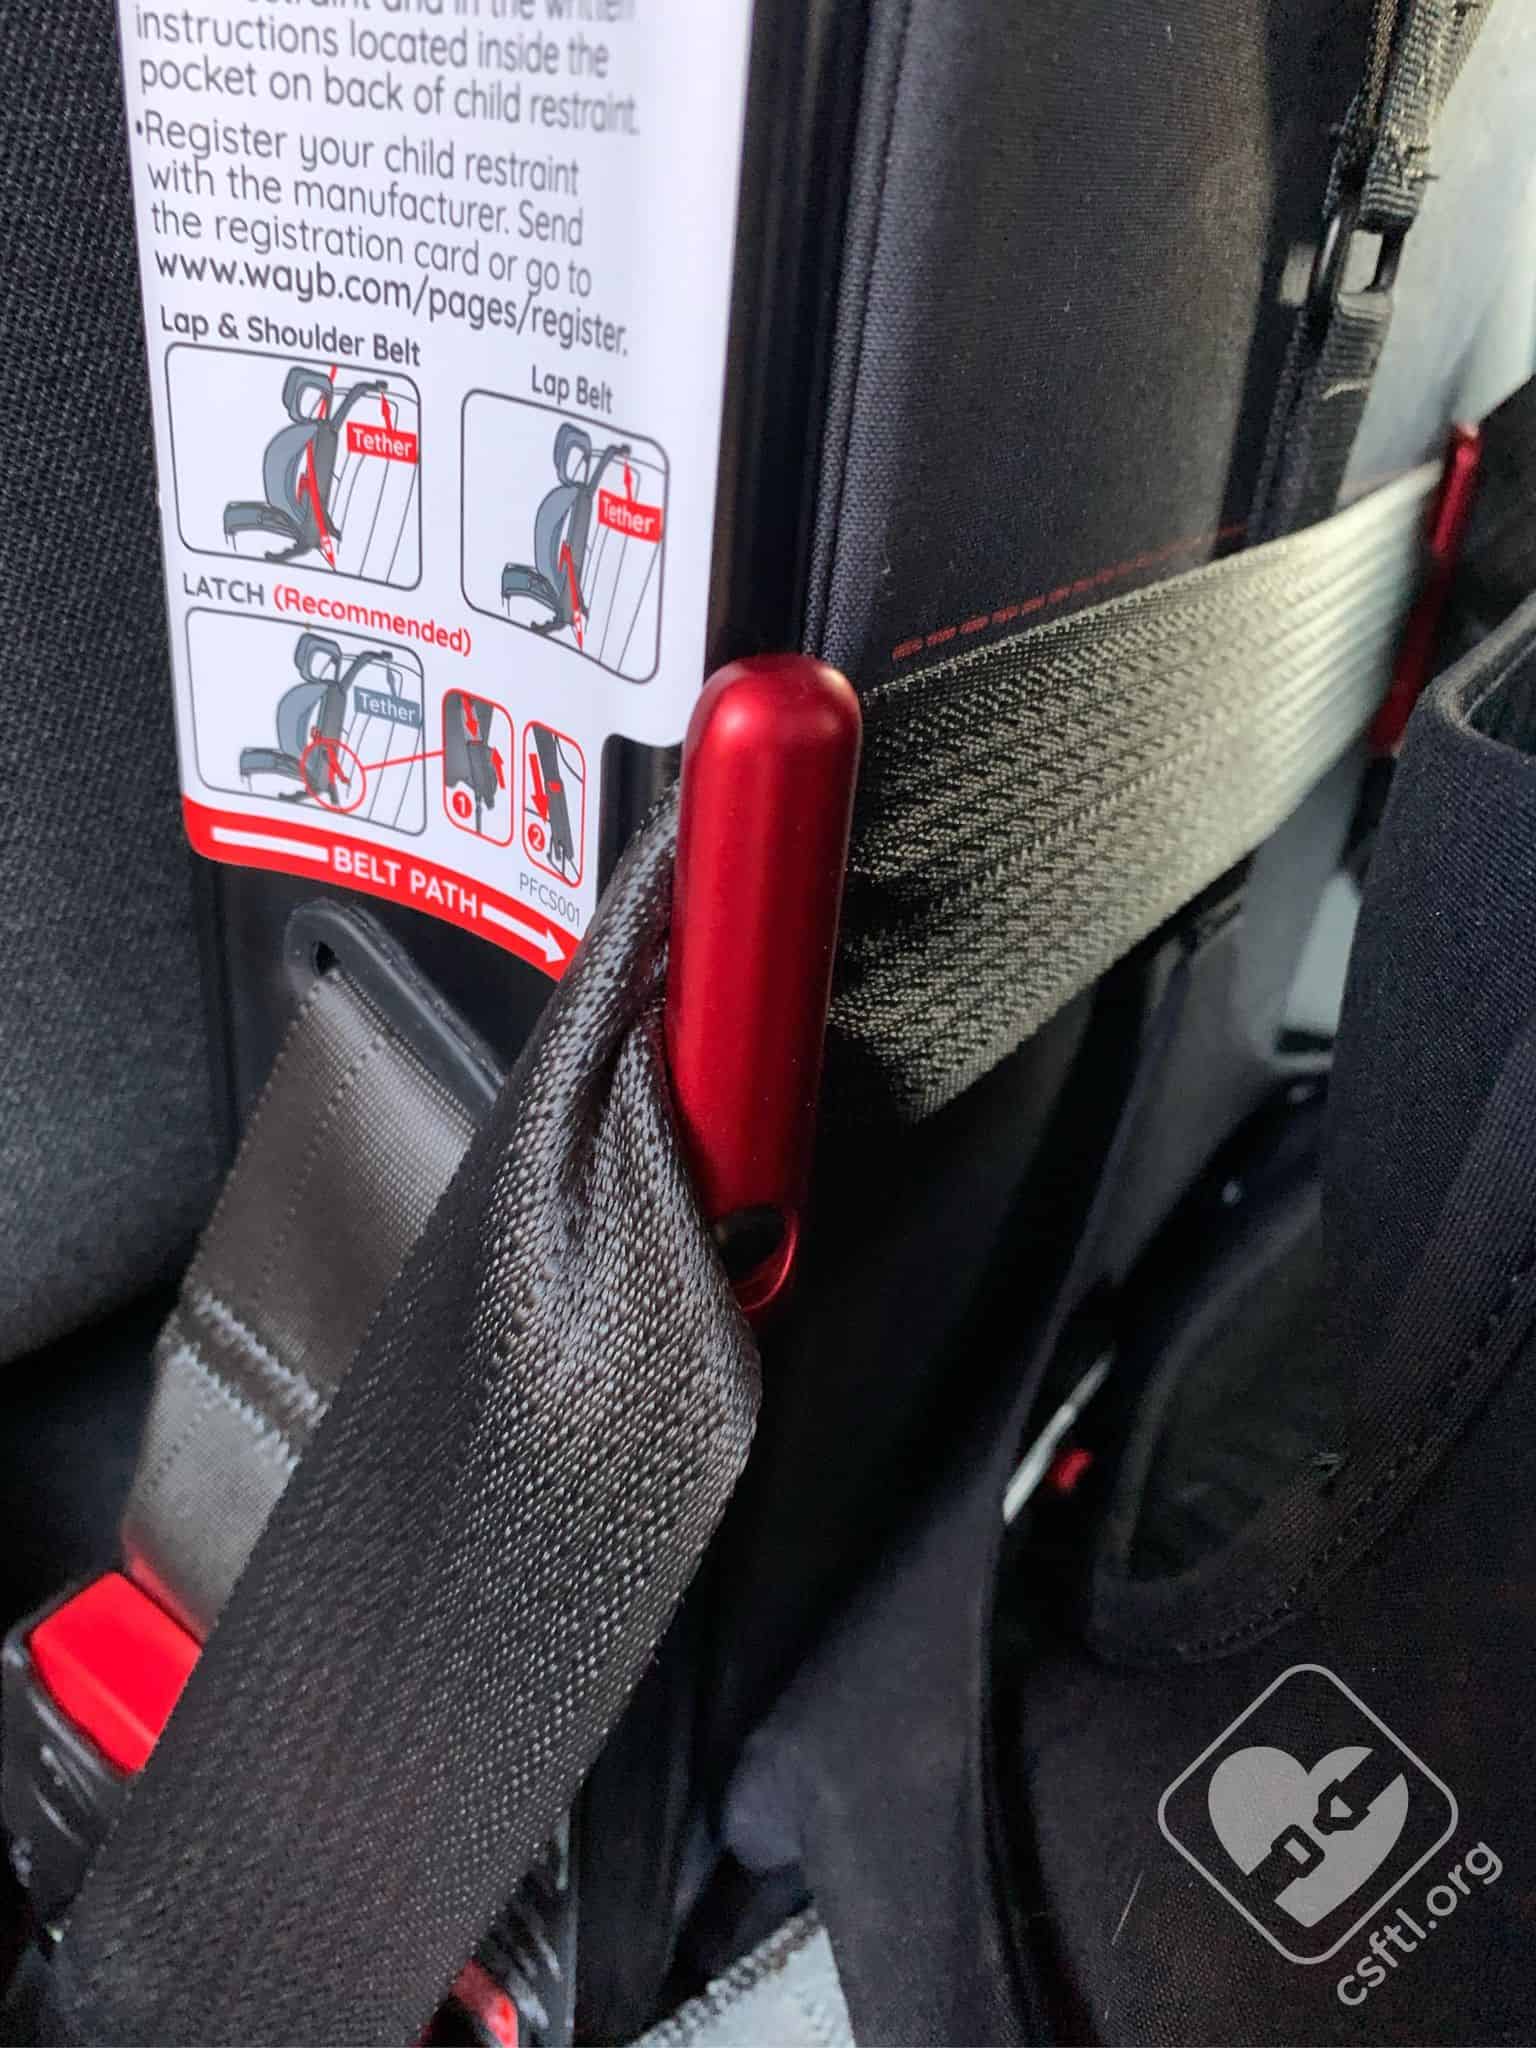
WAYB Pico lap belt path
Normally, we don’t include a section on installation with a lap belt only. That’s because most cars on the road today don’t have a lap only seat belt. Since the Pico is designed for use on airplanes and in vehicles, and airplanes ONLY have lap only belts, we wanted to include this information. The Pico requires the use of the top tether anchor when available. We always encourage the use of the top tether due to the major safety benefits.
WAYB Pico on an airplane
Most vehicles on the road today don’t have lap-only seat belts but airplanes do so these instructions are particularly useful for the Pico. When installing the Pico on an airplane, the top tether isn’t relevant since airplane seats do not have top tethers.
To install the Pico with a lap only seat belt in a vehicle, remove the top tether anchor from the storage pocket on the back of the seat and loosely connect it to the top tether in the vehicle.
Route the vehicle seat belt through the red metal guides on the frame of the seat. The belt path is handily labeled “lap belt path”. Buckle the vehicle seat belt. If the vehicle seat belt has a locking latchplate, the seat belt will be secured by pulling the tail end of the seat belt webbing until it is snug.
WAYB Pico lap belt path
To remove the last bit of slack from the belt, press down and back with your hand on the seat pan to compress the Pico into the vehicle seat. Remove all the slack from the vehicle seat belt. Then remove the slack from the top tether anchor webbing. Roll the excess webbing and secure with the hook and loop closure provided.
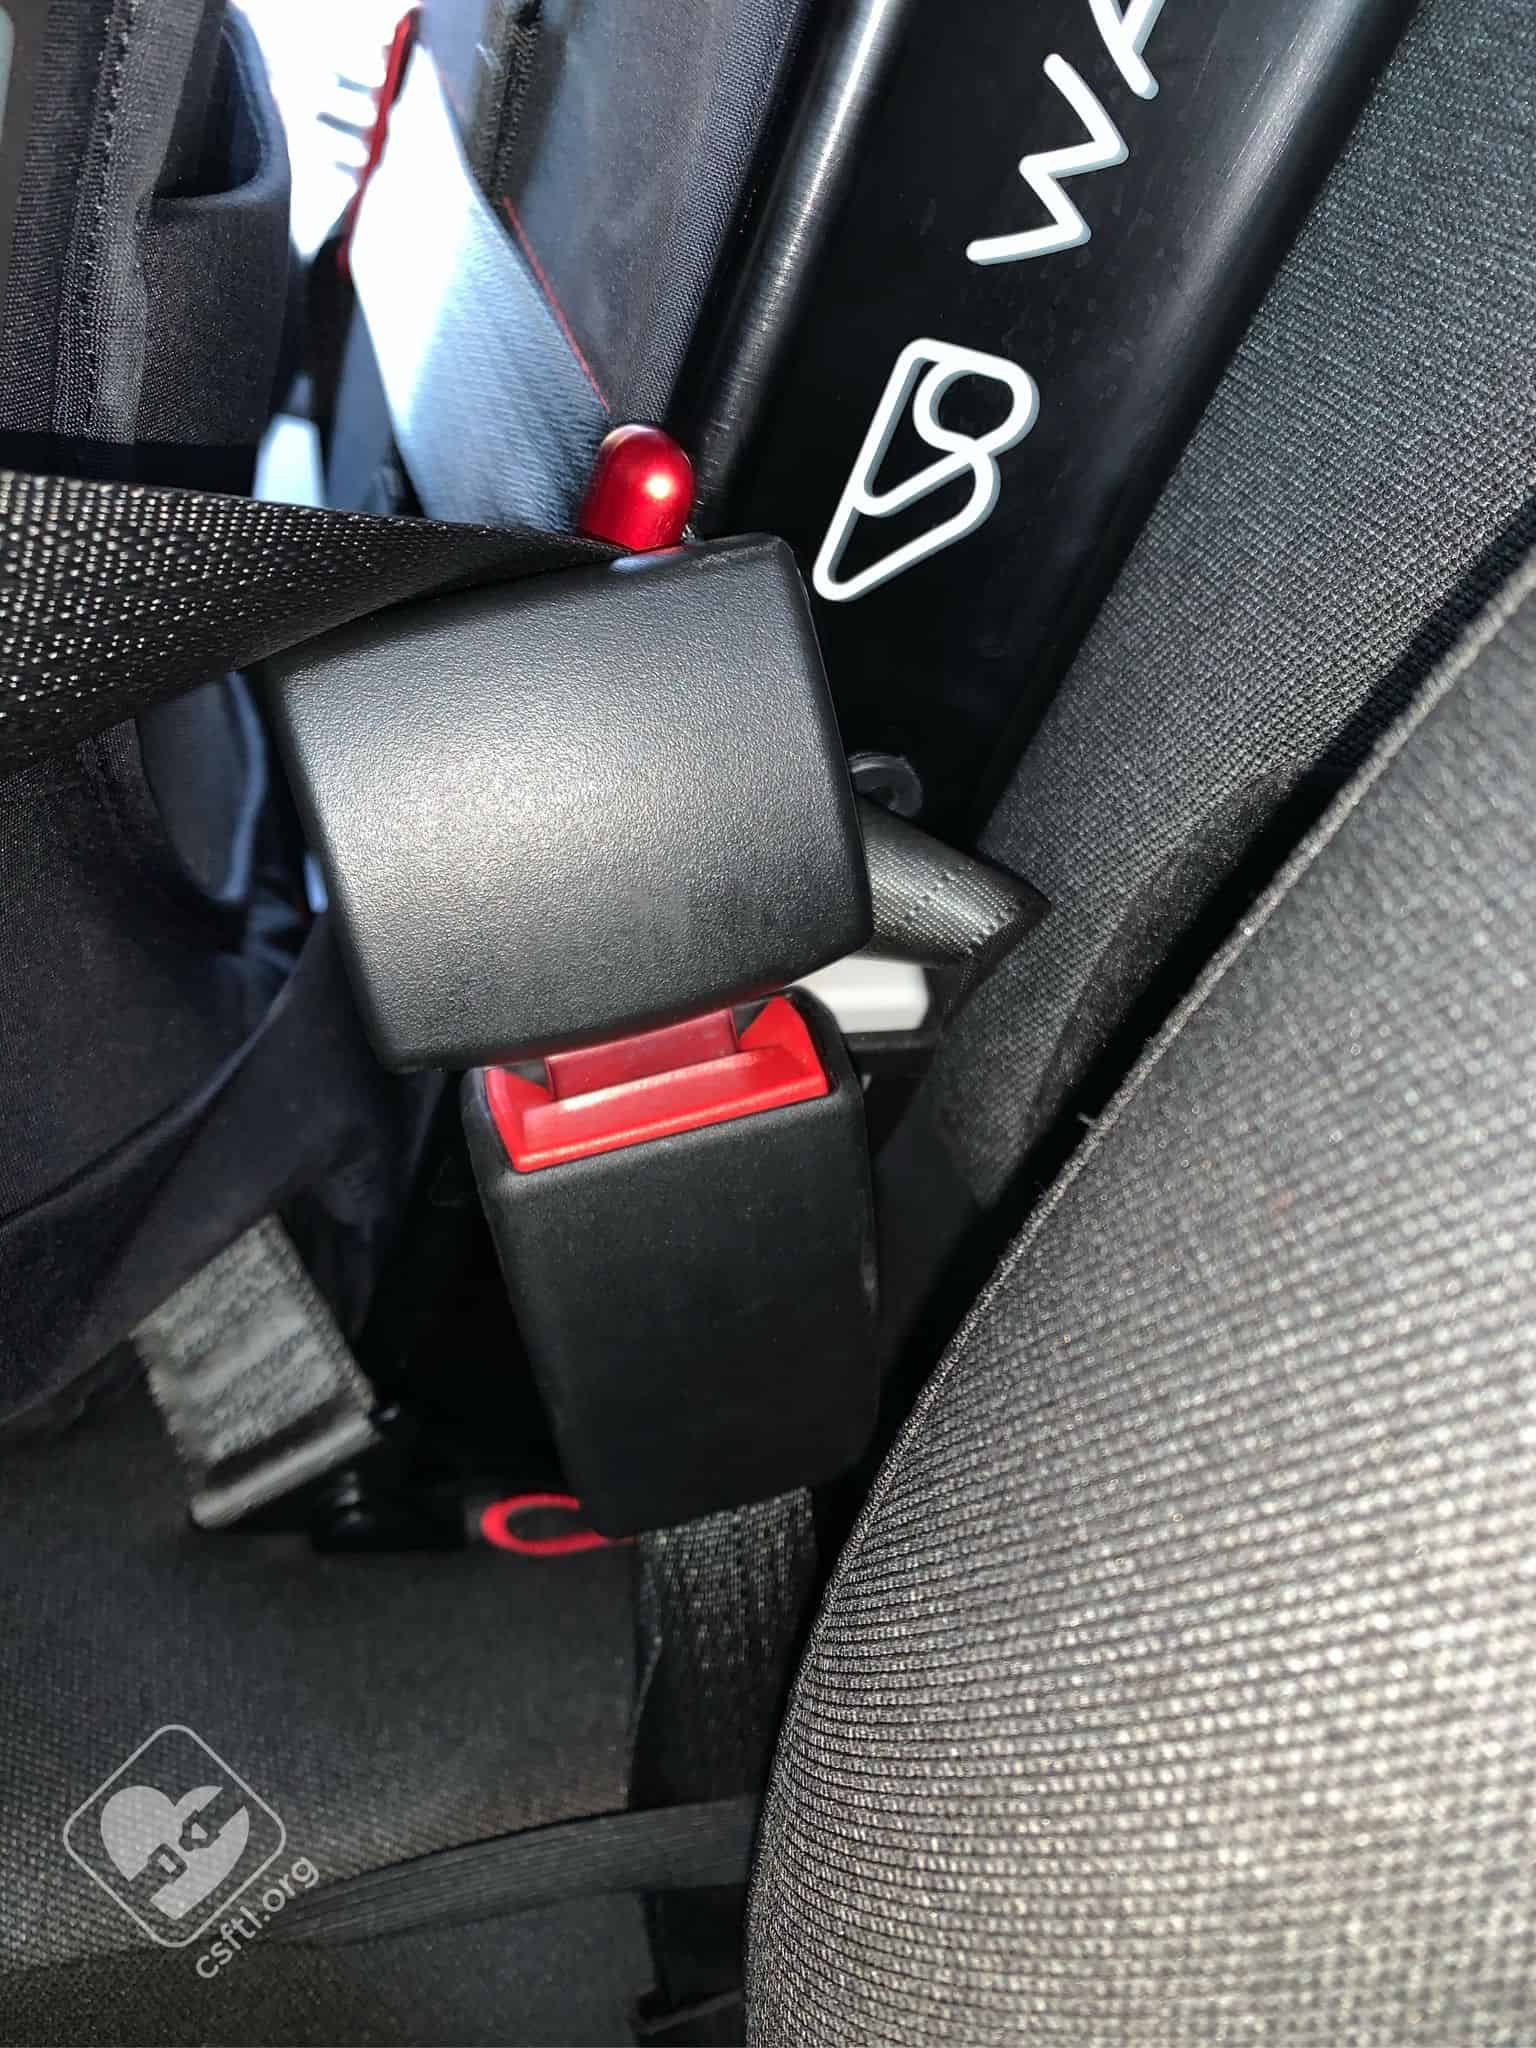
WAYB Pico buckle in the way
Check your work: ensure the seat moves 1 inch or less at the belt path when checked with the force of a firm handshake with your non-dominant hand.
WAYB Pico lap belt bunching
We did notice with a lap belt only install, the vehicle seat belt did bunch at the belt guides. We had to take extra care to make sure all the slack was out when tightening the seat.
Fit to Child
2 Years Old
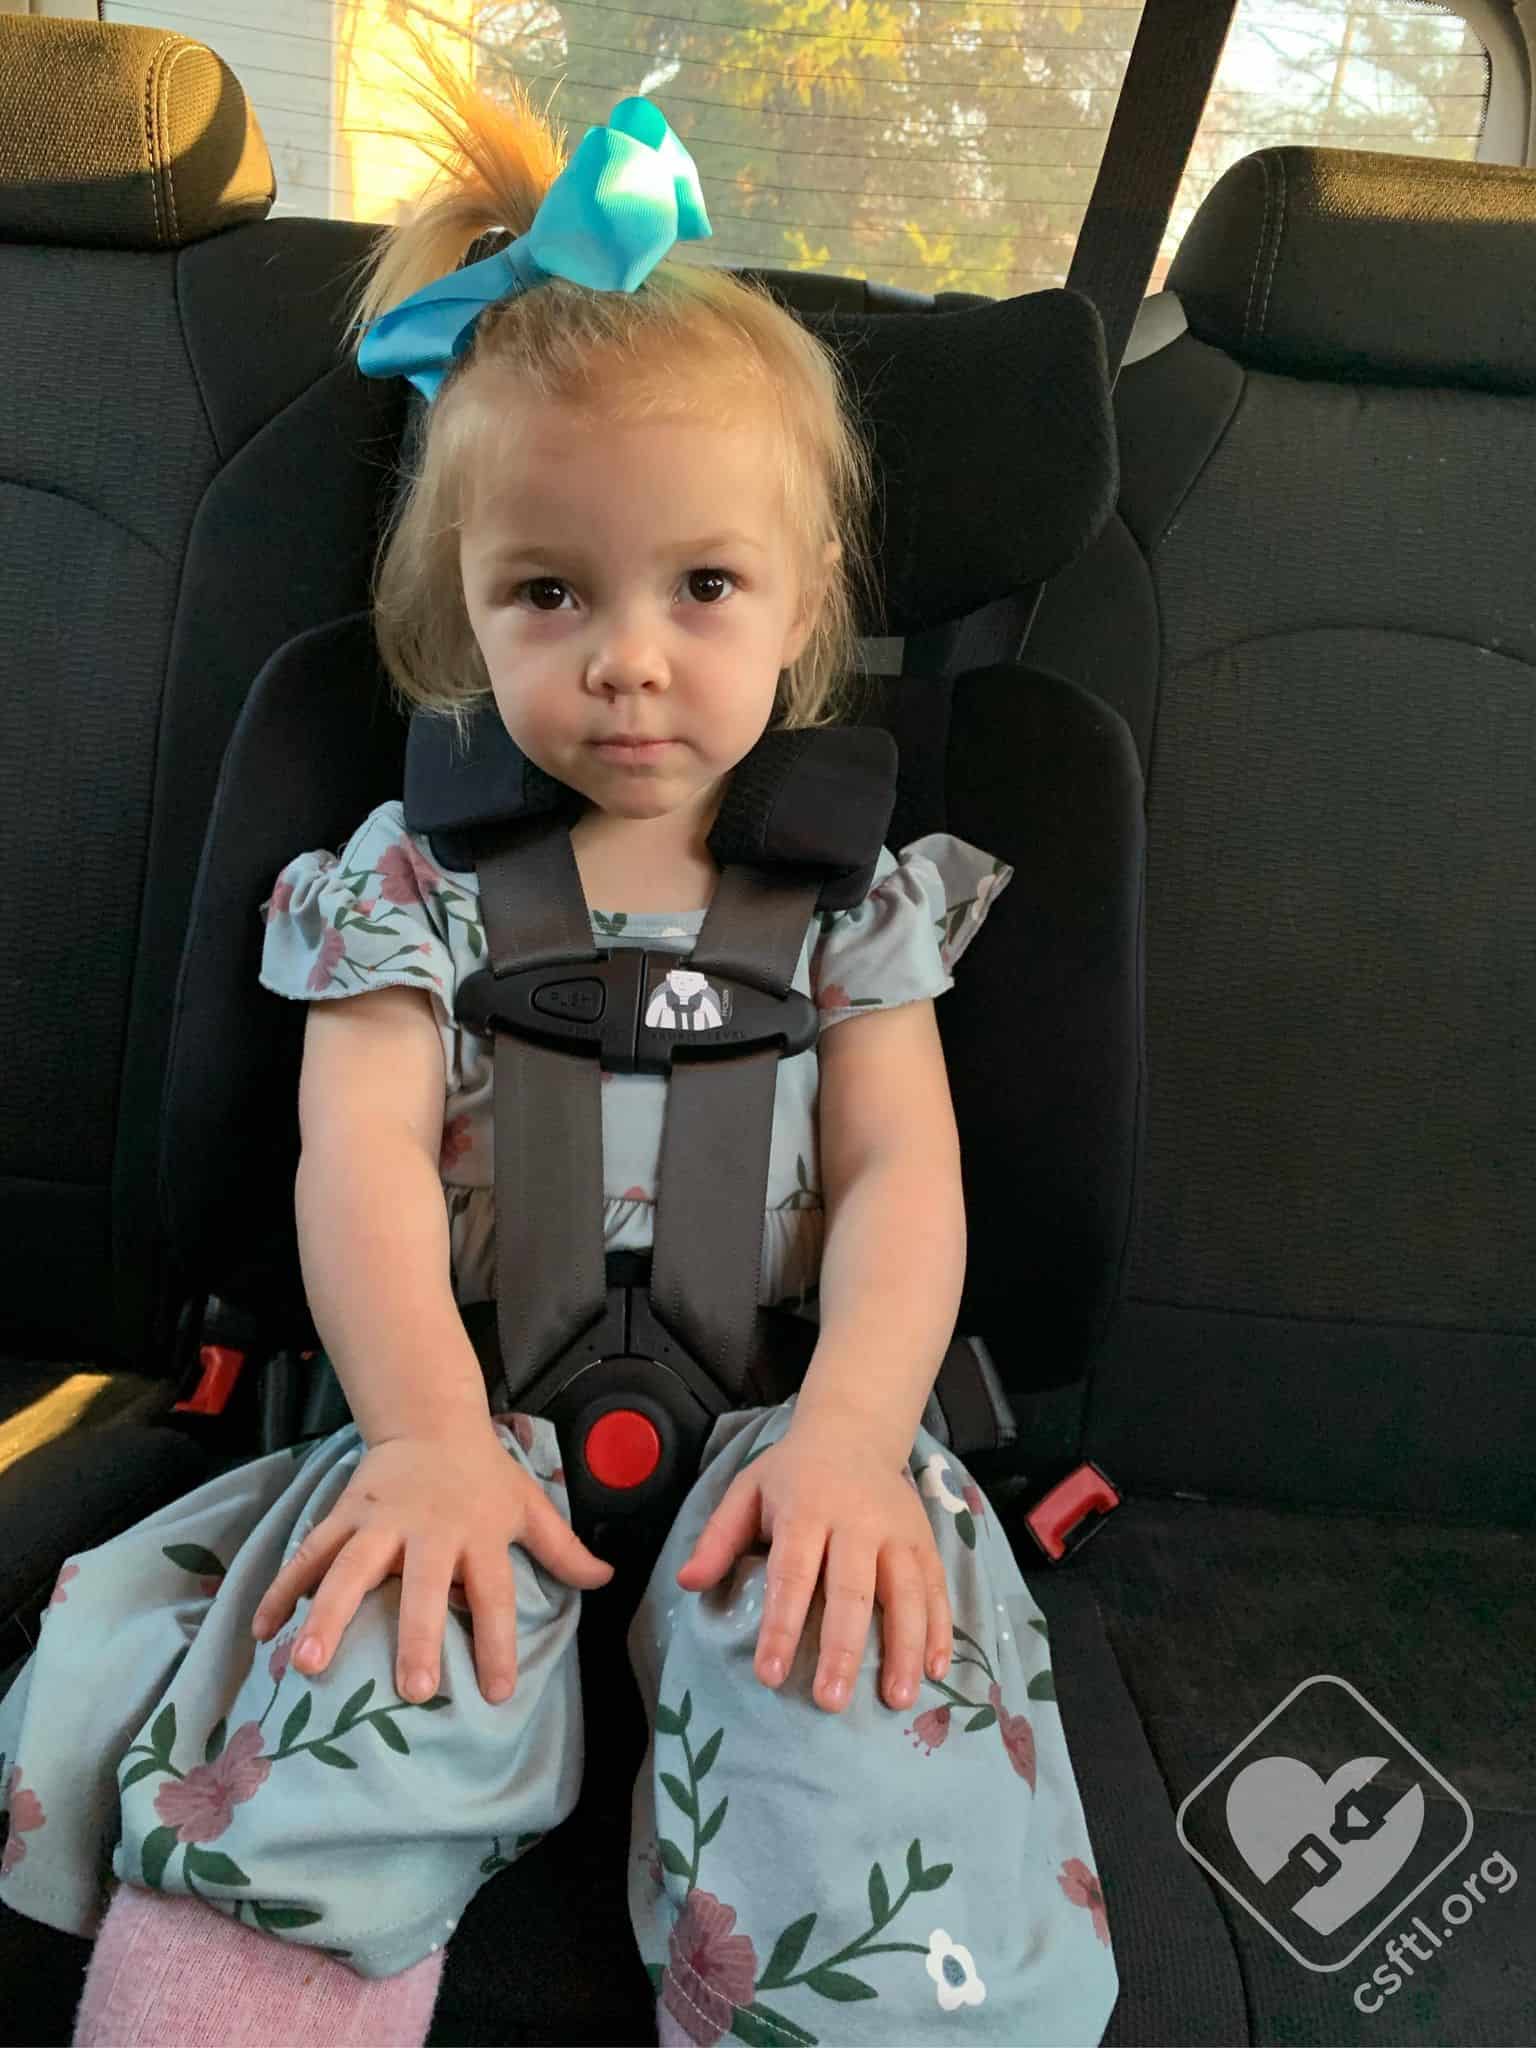
WAYB Pico 2 years old
Before we delve into the way this little lady fits in the Pico, I want to reiterate that we encourage rear facing for as long as possible. This toddler usually rides rear facing and was incredibly confused when we placed her in a forward facing seat. We wanted to demonstrate how the Pico fit a child on the lower end of the seat’s height and weight limits. This model is 2.5 years old, weighs 26 pounds, and 34 inches tall. She is just over the minimum weight requirement to use this seat but it fits her well with plenty of room to grow. Her shoulders are below the top of the car seat back and her ears are contained within the headrest. The crotch buckle is short on this seat but that doesn’t pose an issue for this child.
4 Years Old
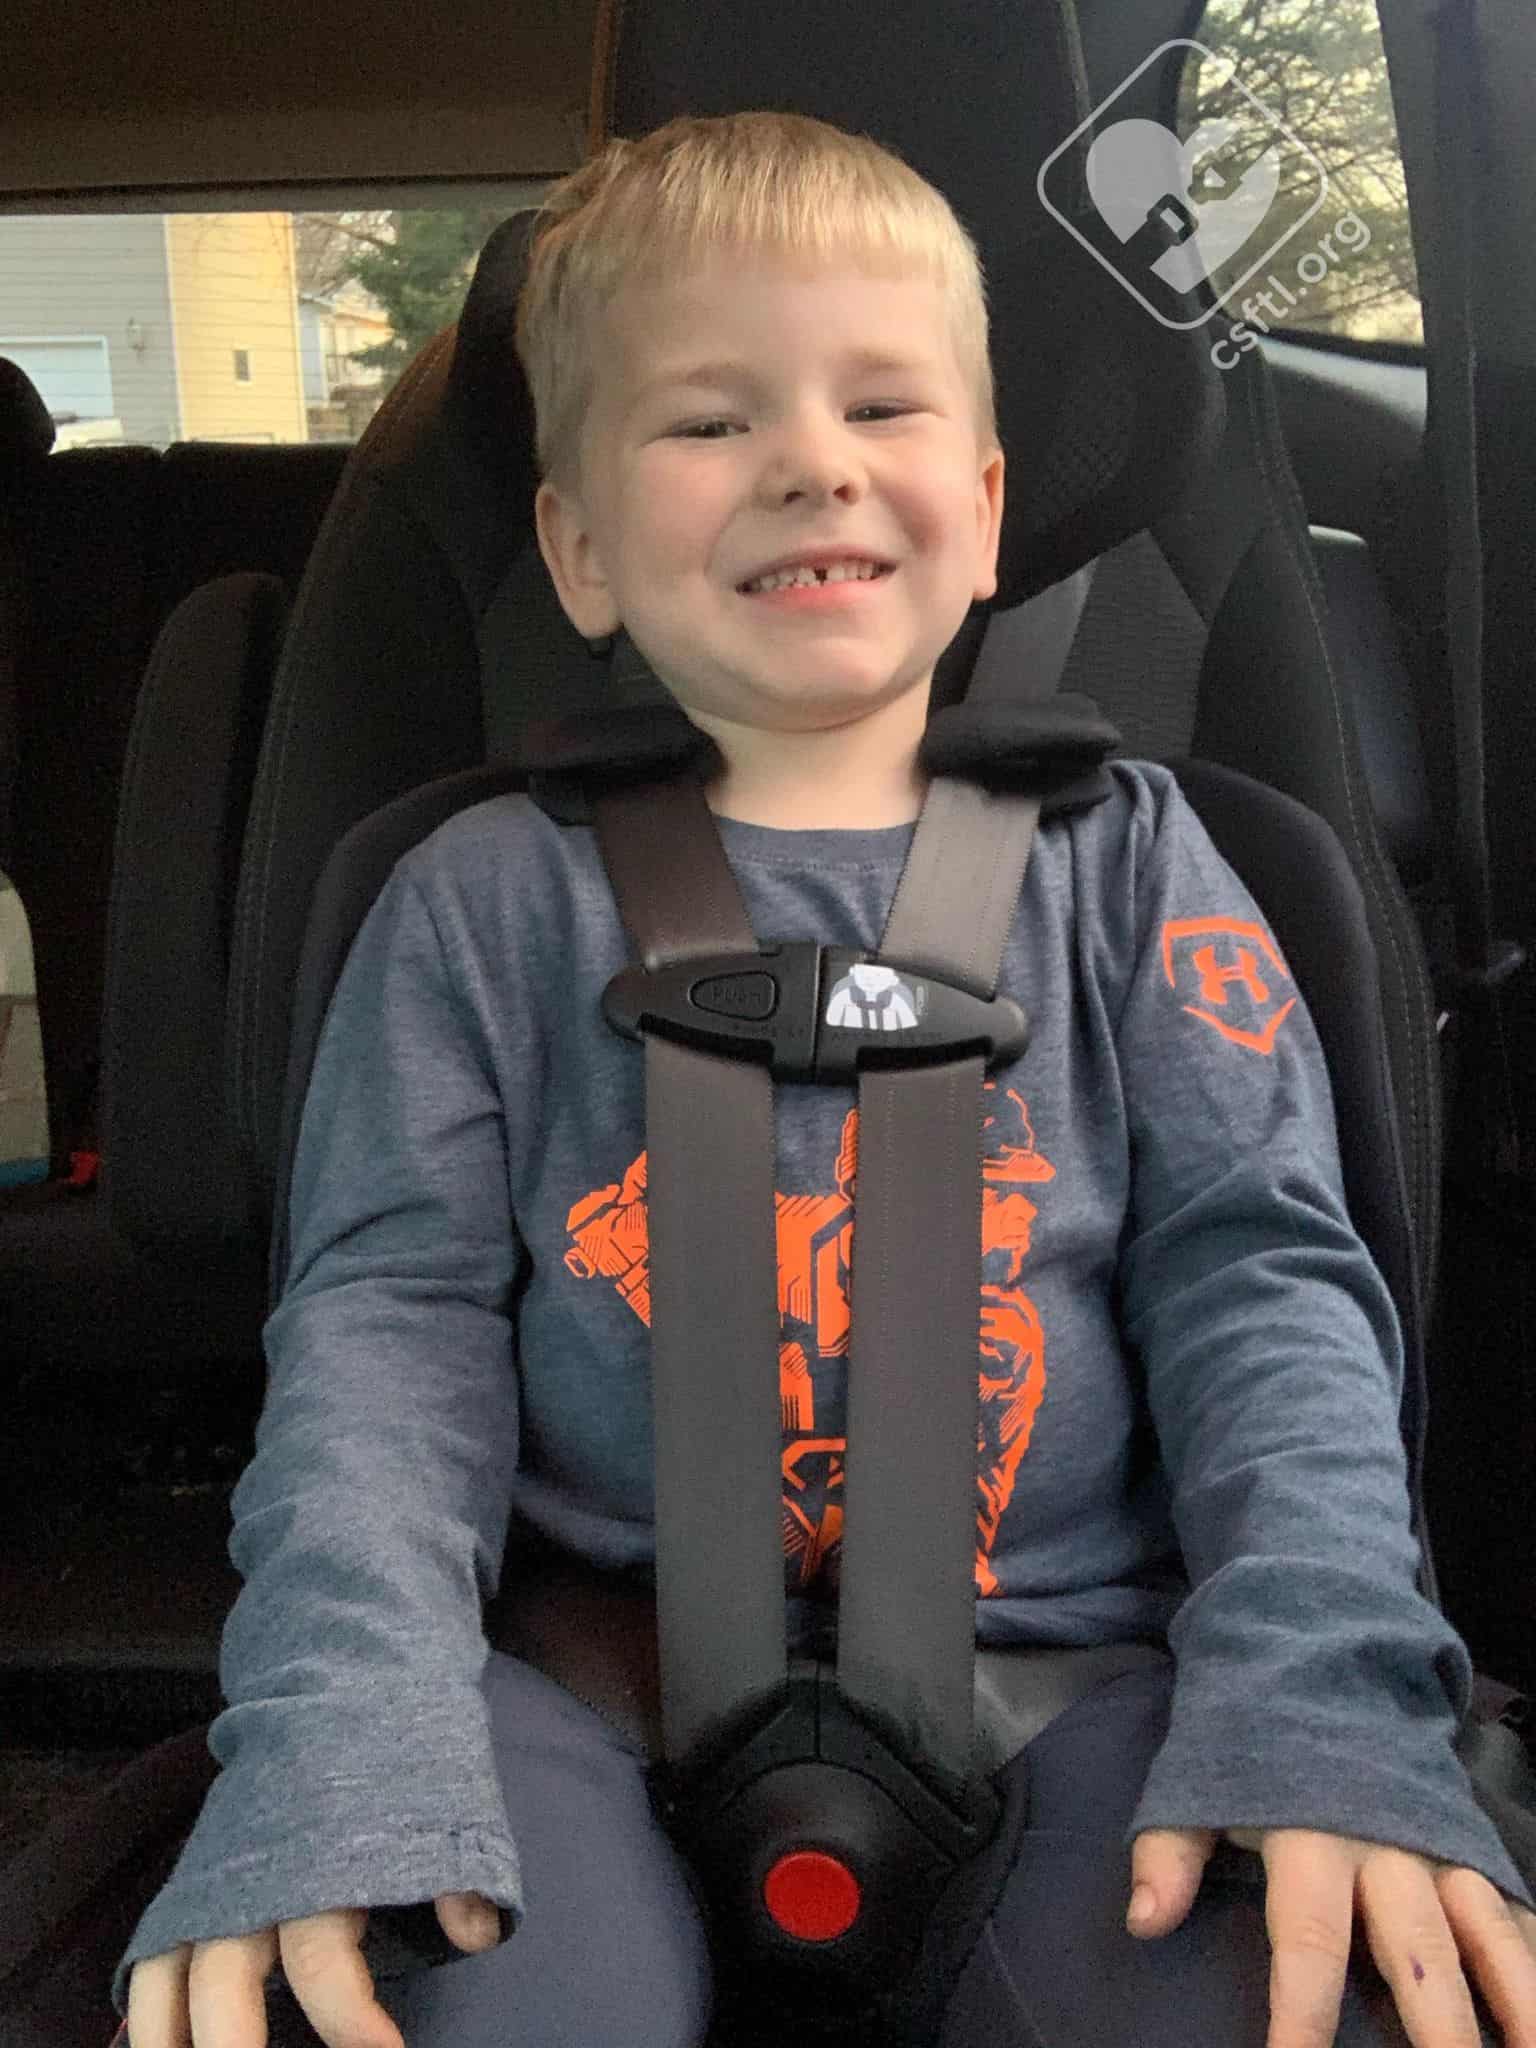
WAYB Pico – 4 years old
At 4 years old, 46 pounds, and 43 inches tall, this model is just below the height and weight limits of the Pico. His shoulders were about 1 inch below the top of the car seat back and his ears were below the top of the headrest. The crotch buckle was quite short and slightly difficult to buckle, though the child didn’t complain about the length of the buckle.
Important Information: Where to Find
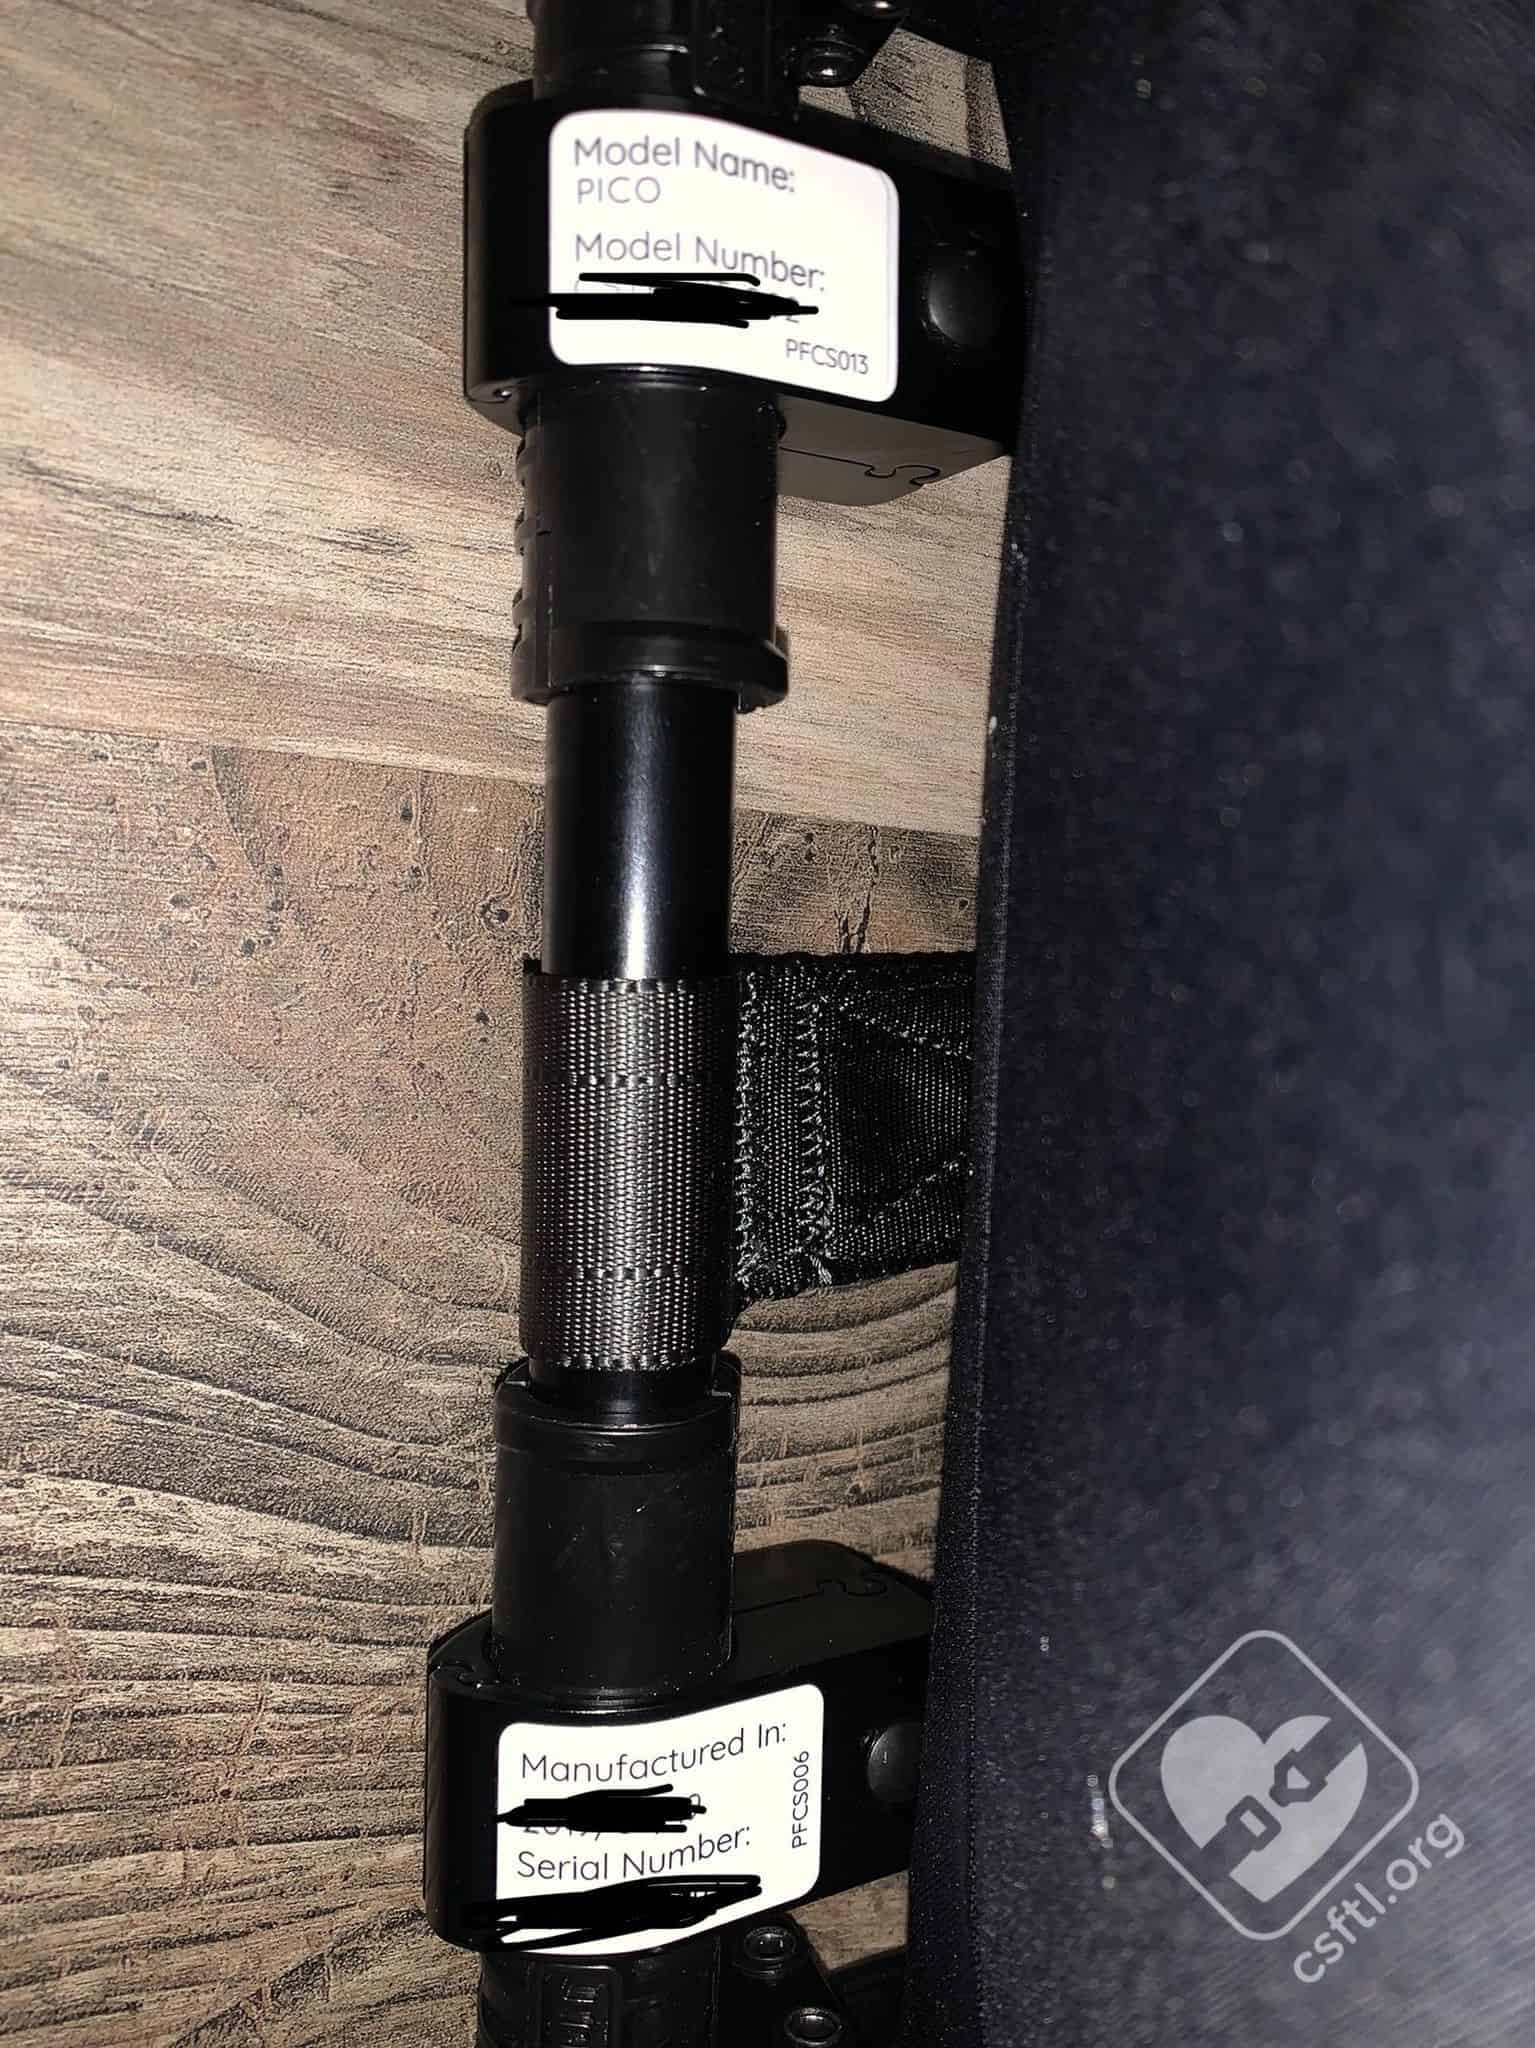
WAYB Pico date of manufacture
Date of Manufacture: The date of manufacture is located on the frame of the seat. When the seat is folded the date is located below the seat pan.
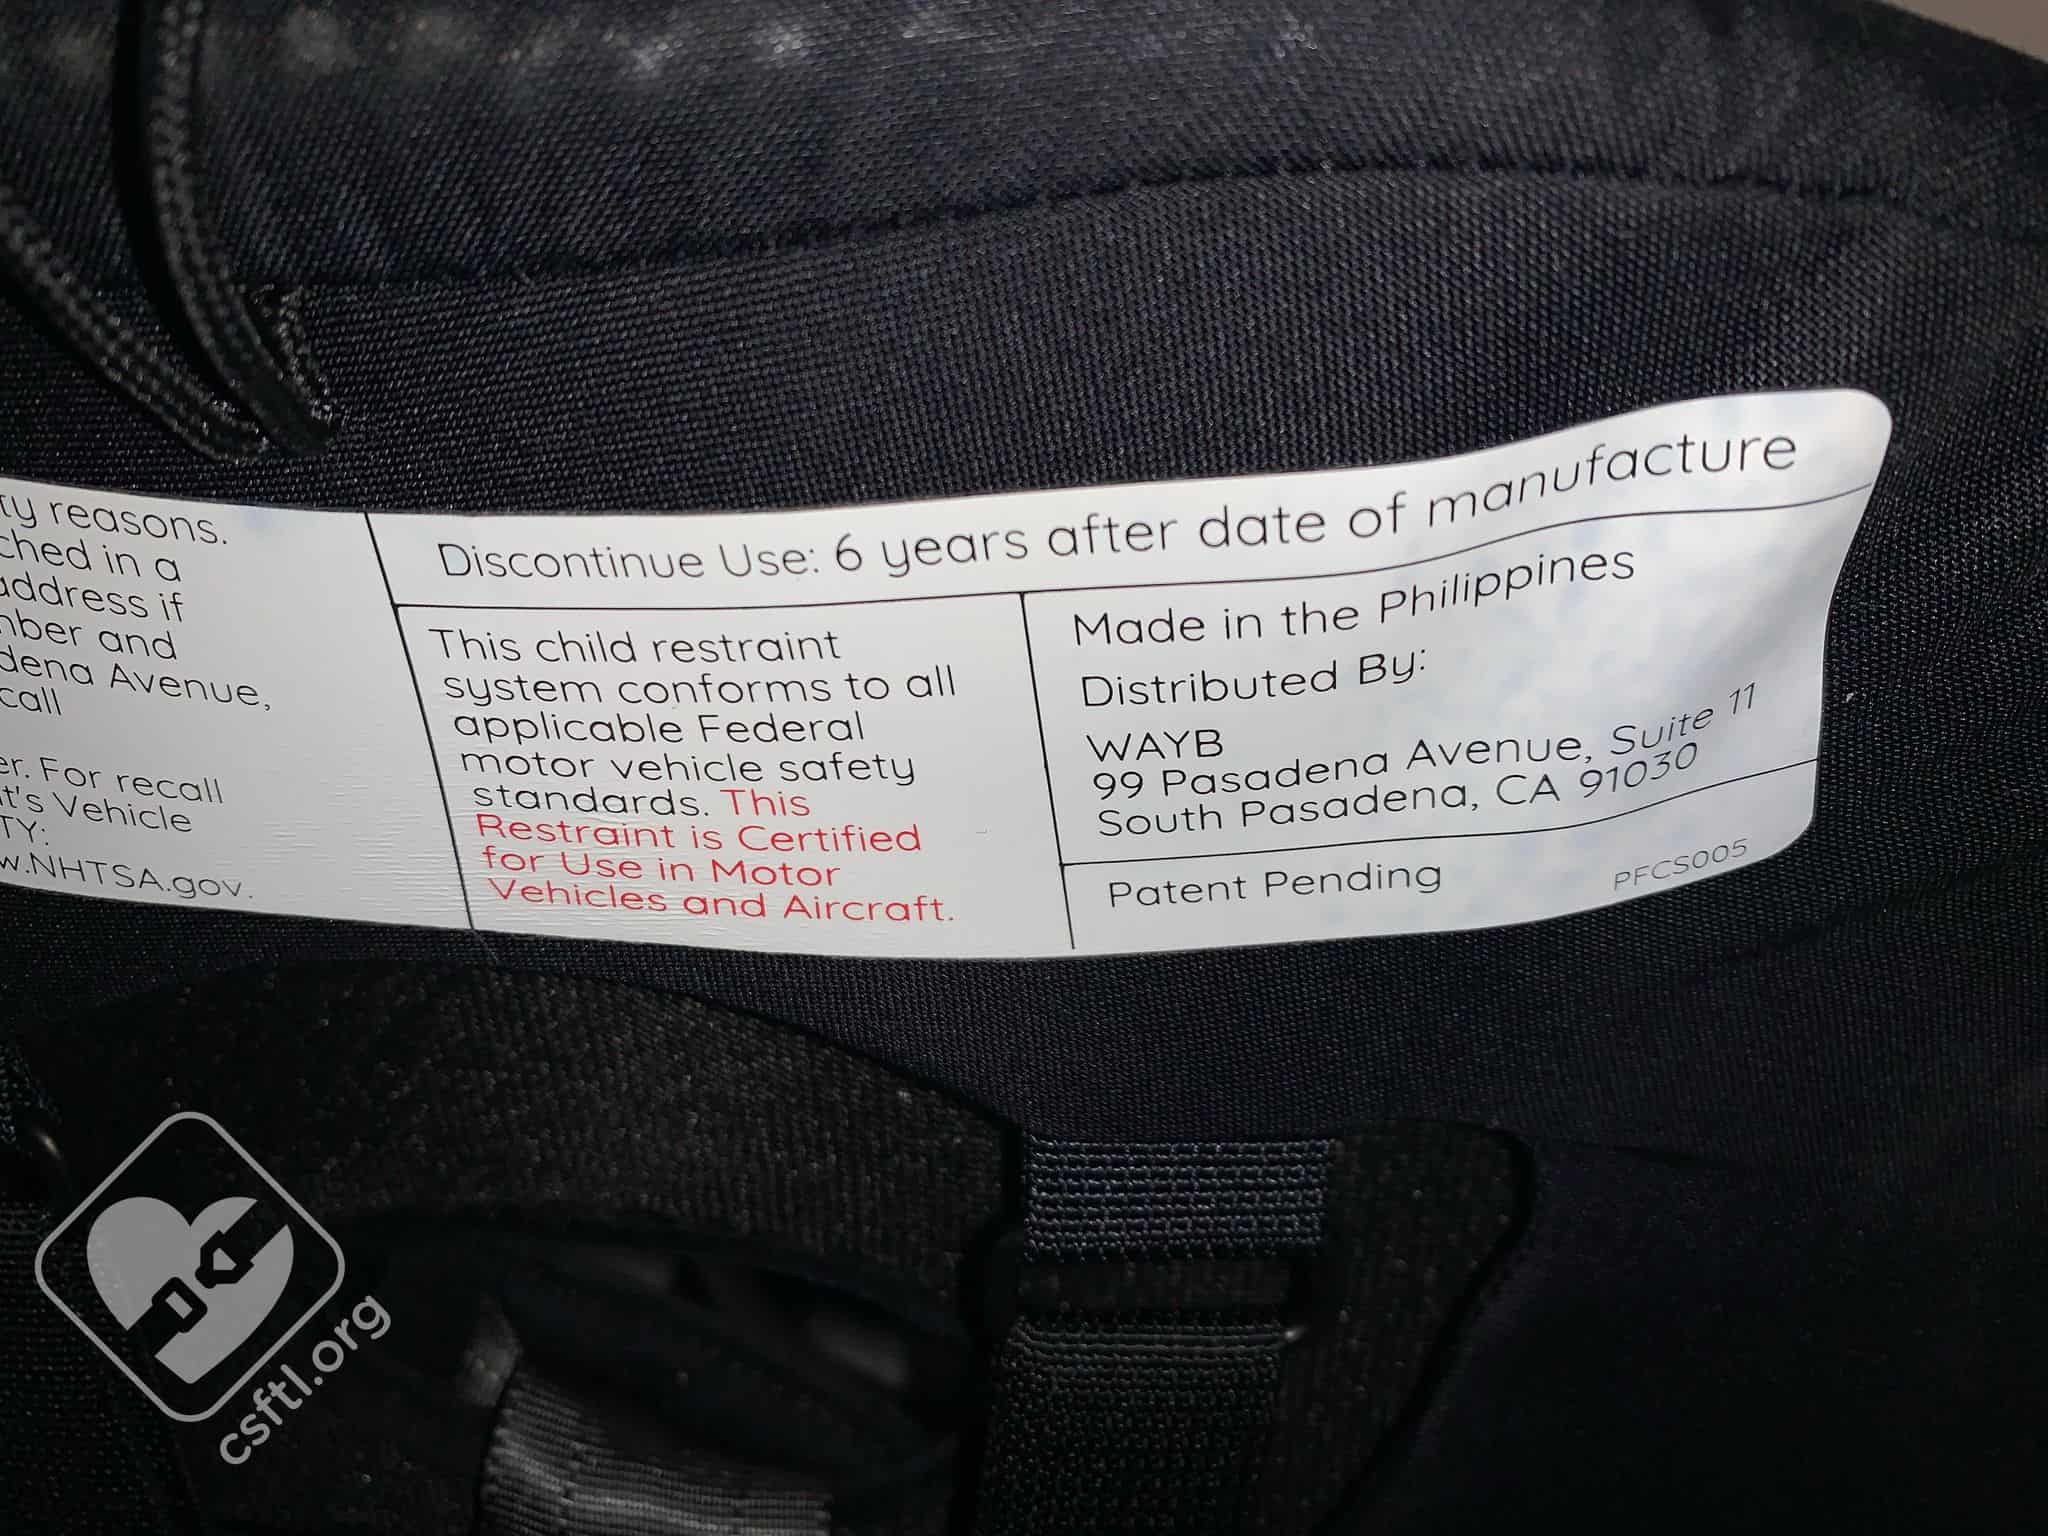
WAYB Pico statement of expiration date and FAA approval label
Expiration Date: The expiration date is located on a label on the underside of the seat pan. The Pico expires 6 years after the date of manufacture.

WAYB Pico FAA approval
FAA Approval: The FAA approval label is on the bottom of the seat, along with the expiration information. In addition, there’s a label with the aircraft installation belt path on the side of the seat.
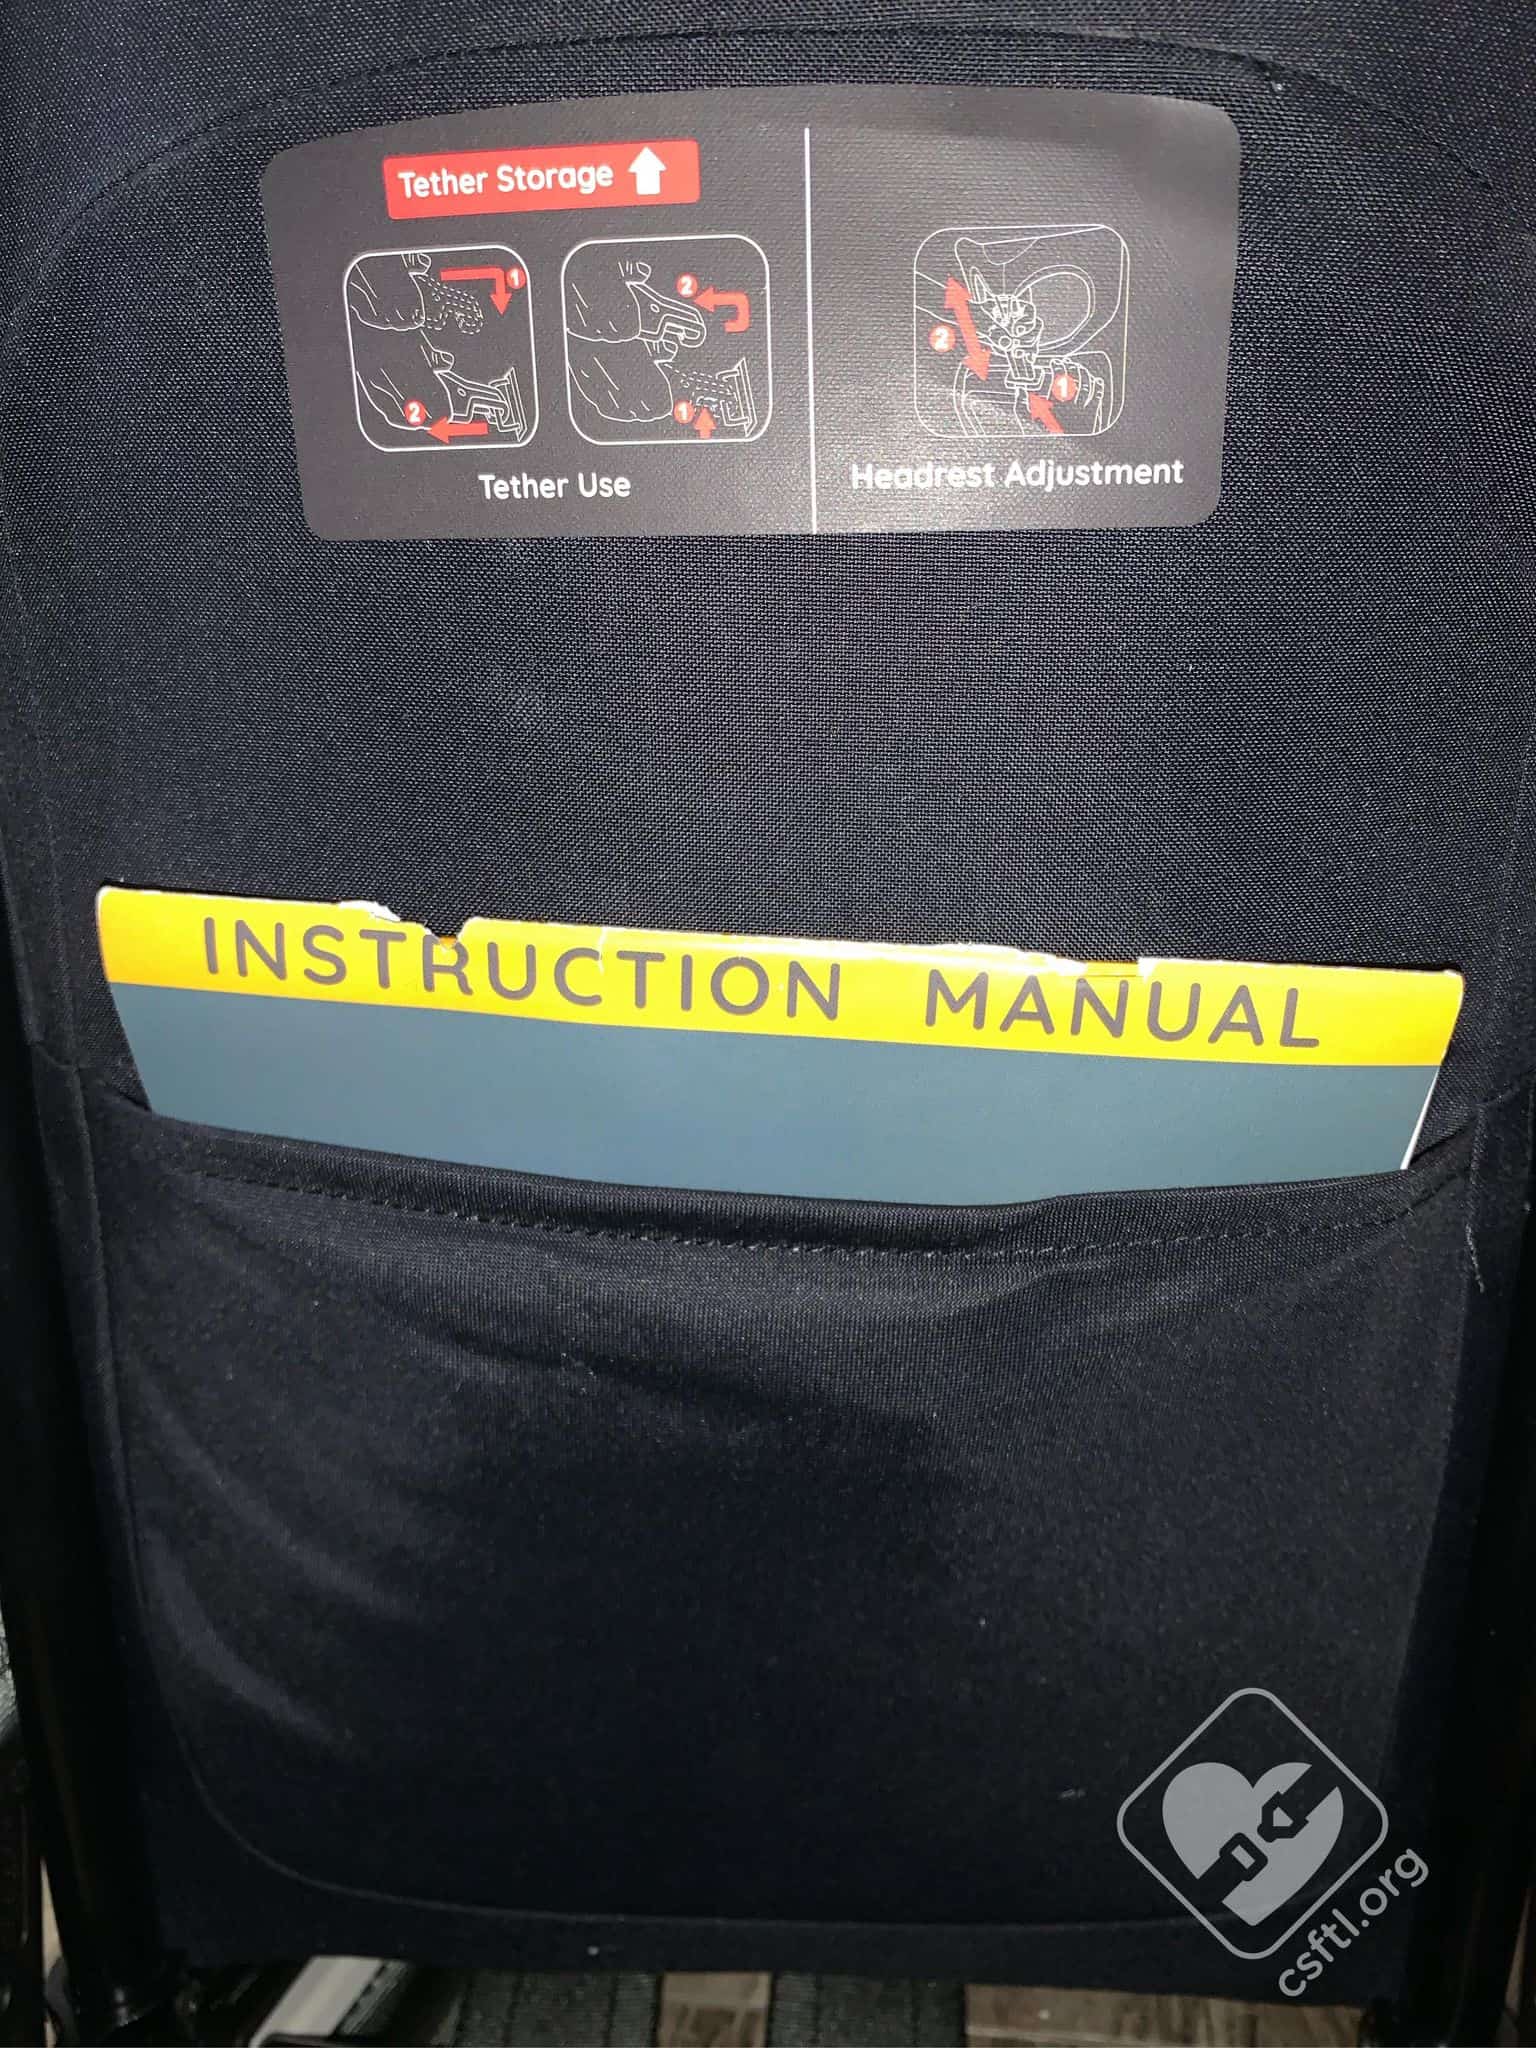
WAYB Pico manual storage
Manual Storage: The manual stores in a pocket on the back of the seat frame.
Overall Thoughts
The WAYB Pico is a very unique seat that many families could find helpful while traveling. The addition of the travel bag makes it even easier for families to travel with the seat. The seat is rather short-lived considering the cost, but we could see that families who have multiple young children could get plenty of use out of it. Another thing to consider is the cost of convenience, that’s where the Pico really shines. Families who are willing and able to purchase a Pico for their adventures would likely find it a good investment.
Giveaway!
Our friends at WAYB are giving away one Pico and a Travel Bag to a lucky reader in the United States. Please read our terms and conditions, then enter below for your chance to win!
a Rafflecopter giveaway