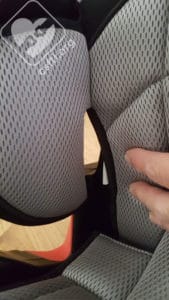
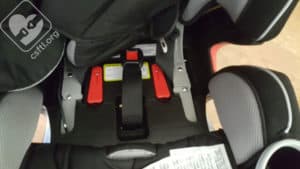
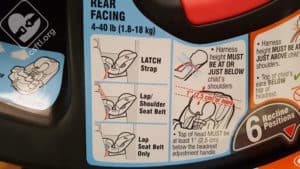
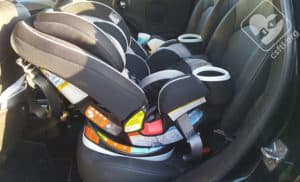
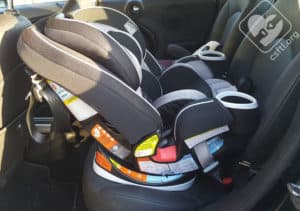
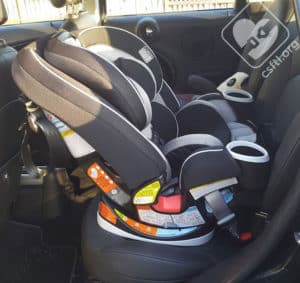
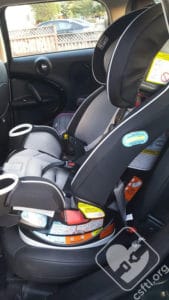
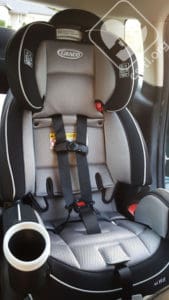
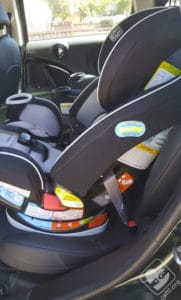
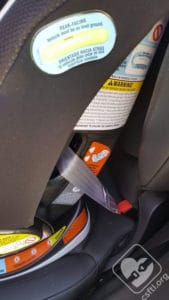
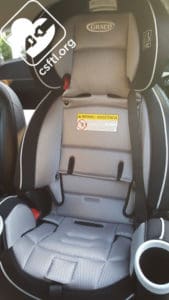
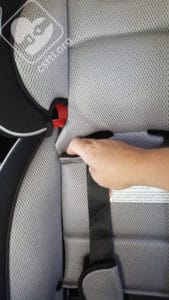
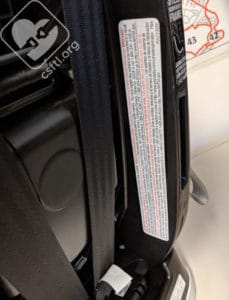
We first reviewed the Graco 4Ever multimode car seat when it was released. Since then, the 4Ever has stood the test of time and remained a fan favorite with the CSFTL team. So much so that our original 4Ever has spent time with a number of CSFTL families and become a bit worn over the years. Our friends at Graco were kind enough to provide us with a new (much cleaner!) version of this seat for an updated review.
The 4Ever was the first car seat to function well in all 4 modes: rear facing, forward facing, high back booster, and backless booster. A lot of the time, multimode car seats tend to fall short in at least one of the modes but the 4Ever was a game changer — it’s suitable for children ranging from a 4 pound rear facing newborn all the way up through an older child in backless booster mode.
CSFTL Quick Stats
- Rear facing weight range: 4-40 pounds
- Rear facing height range, United States: Until the child’s head is 1 inch below the adjuster handle on the headrest when fully extended
- Rear facing height range, Canada: until the child is 43 inches tall
- Forward facing weight range: 22-65 pounds (seats made before 2015 may have a lower minimum weight; always follow the manual that came with your seat).
- Forward facing height range: less than 49 inches tall
- High-back booster weight range, United States: 30-100 pounds
- High-back booster weight range, Canada: 40-100 pounds
- High-back booster height range, United States: 38-57 inches tall
- High-back booster height range, Canada: 40-57 inches tall
- Backless booster weight range: 40-120 pounds
- Backless booster height range: 40-57 inches tall
- Lowest harness position: 6 inches with infant insert
- Highest harness position: 18 inches
- Highest booster guide position: 19 inches
- Expiration: 10 years
- Lower anchor weight limit: 45 pounds (older models of this seat have a 42 pound lower anchor weight limit. Please verify your seat’s limit in the manual before installing with this method.)
Features
- Premium push button lower anchor connectors
- LATCH is permitted in high back booster mode
- Harness stores on the seat in high back booster mode
- No rethread harness
- 2014 IIHS Best Bet in both high back and backless mode
- Steel reinforced frame
Measurements
- Two crotch buckle slots: 4.5 and 6.5 inches from the back of the seat pan
- Width at widest part of the shell: 19 inches
- Width at the cupholders: 20 inches
- Shell height: 28 inches
- Seat pan: 12.5 inches deep
- Base width: 16 inches
- Narrowest part of the seating area: 13 inches at the back of the base
- Seat pan interior: 15 inches across, with 14 inches of interior hip room
- Widest part of the seating area: 14 inches at the front of the base
- Front to back space: ~28 inches (this is measured on a flat surface with the headrest on the lowest setting, this measurement will change as the child grows and the seat is installed more upright. This measurement also varies when the seat is installed.)
First, Assembly
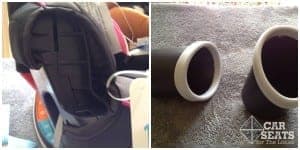
The 4Ever arrives mostly ready for a newborn to use. HOWEVER. The cupholders require assembly before the seat can be used. Directions for assembling the cupholders are in the manual — they slide into a channel and click into place. Once assembled, the cupholders are required to remain attached to the seat.
Now, Some Features
Steel-Reinforced Frame
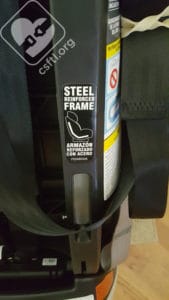
The 4Ever boasts a ‘steel-reinforced frame’. While we have no idea if this means it’s actually safer, we do know the trend in child restraint manufacturing is toward energy flow management and not just retention in the car.
Smooth Harness Adjuster
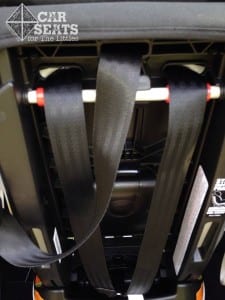
The harness mechanism pulls quite smoothly and does not require significant strength to tighten. The roller bar at the back of the seat helps achieve this smooth pull.
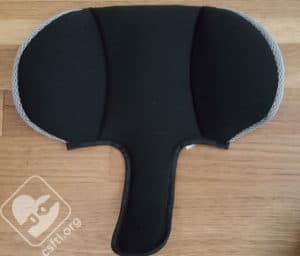
Infant Insert
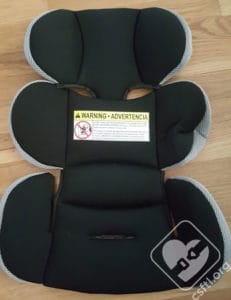
With the very firm, not plush infant insert in use, the bottom harness height is about 6 inches and the crotch buckle is 4 inches from the back of the seat pan. These adjustments should combine to make the 4Ever fit most newborns reasonably well.
The insert itself has a separate head and body support, with an adjustable elastic to raise the head support as the child grows.
The insert must be used if the baby’s shoulders do not reach the harness position in the lowest headrest position. It may not be used in the forward facing position.
Note: The body support may be used without the headrest, but the headrest cannot be used without the body support.
Recline Angle Indicator
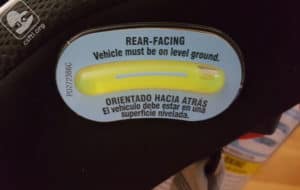
There are no restrictions on which of the first three recline positions must be used in rear facing mode. The recline angle indicator on the side of the seat has a bubble that must be entirely on the line. When installing rear facing, this seat can use any of the three rear facing recline positions as long as the bubble in the recline indicator stays fully on the blue line. If the seat is not reclined enough for the tiniest of passengers when it’s in the most reclined position (recline 1), Graco allows the use of a rolled towel or pool noodle to achieve a more reclined installation.
In rear facing mode, the harness should be positioned at or below the shoulders. While many no rethread harness seats have the harness exit the shell immediately below the adjustable headrest, the harness of the 4ever exits the shell a couple of inches below the headrest, which often confuses caregivers and results in the headrest (and harness) being positioned much lower than required by Graco. Adjusting the harness itself to at or just below the shoulders is what the instruction manual dictates – so ensure the harness is positioned correctly even if the headrest appears “high”. The crotch buckle should be in the position nearest to but not under the child. Either crotch buckle position may be used for either rear facing or forward facing installations.
Front to Back Space
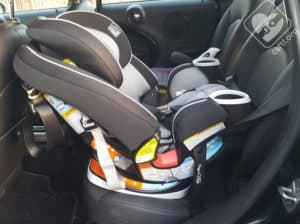
We know that when rear facing, the space that a car seat takes up can be a challenge in tight spaces. In rear facing mode, the 4Ever is compact enough that it can work even in a small sedan. The headrest extends up from inside the shell so as the child grows and the headrest is extended, the seat still fits well in most seating positions.
Recline Positions
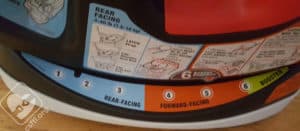
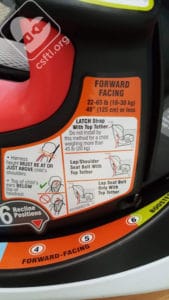
The 4Ever has 6 recline positions. Positions 1, 2, and 3 are for rear facing mode. Positions 4, 5 and 6 are for forward facing mode.
Recline position 4 MUST be used for a forward facing child who weighs between 20 and 40 pounds in the United States. Recline position 6 must be used in booster mode.
There are no restrictions on which of the first three recline positions must be used in rear facing mode. The recline angle indicator on the side of the seat has a bubble that must be positioned along a blue line on the indicator, and that bubble must be entirely on the line. To adjust the recline position, squeeze the white handle at the front of the seat (it says RECLINE on it), then push the seat’s back. The recline adjuster glides smoothly and is simple to use.
Lower Anchor Webbing
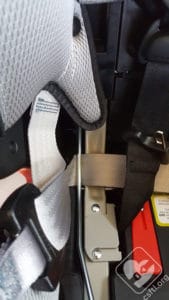
The 4Ever’s lower anchor webbing is attached to the seat via a narrow metal bar inside the belt path. To move the lower anchor connectors between the belt paths, just unsnap the cover on the inside of the seat, then slide the connectors to the other belt path and thread them back through the belt paths.
The belt paths are color coded and match the relevant pages by color in the manual.
Seat Bottom
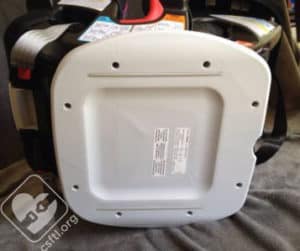
The bottom of the seat is smooth and solid, designed to minimize the pressure marks that occasionally result on vehicle upholstery from a tightly installed seat.
Side Overhang
When this car seat is installed on the plus one or jump seat of a minivan, Graco has confirmed up to 20% of the base can overhang the edge of the vehicle seat while in harness mode. In booster mode, the entire base must be in contact with the vehicle seat.
A Note about Rear Facing
The 4Ever’s manual contains several references to the American Academy of Pediatrics recommendation that children under 2 should ride rear facing. In addition, NHSTA recommends that children 1-3 years continue to use a rear facing restraint as long as they fit by height and weight. CSFTL echoes this recommendation.
A 40 pound 4 year old would be in the 80th percentile on the growth chart. We expect that the 4Ever’s tall shell can help almost every child ride rear facing until their 4th birthday.
Installation — Rear Facing
Lower Anchors
The 4Ever ships with the lower anchor connectors in the rear facing belt path and stored on the front of the seat. To install the seat rear facing, remove those lower anchors from their storage spots, then secure them to the lower anchors in the vehicle. There’s a very handy opening in the cover that makes accessing the belt path pretty easy. You can also unsnap the lower portion of the cover inside the belt path to expose the entire belt path — whichever method helps YOU install the seat correctly is the best one. Once the lower anchor connectors are attached to the vehicle and the loop at the end of the webbing is accessible, press down on the seat pan with one hand while pulling straight up on the webbing to remove all slack. The seat is installed securely when there’s less than an inch of movement at the belt path.
The lower anchor connector webbing is fairly short. This is on purpose so caregivers cannot install the seat with the lower anchor strap in the wrong belt path.
There are 2 lower anchor storage spots — store the lower anchors in the opposite belt path from the one you’re using when they’re not in use.
Vehicle Seat Belt
To install the 4Ever rear facing with the vehicle seat belt, makes sure that the lower anchors are stored in the forward facing storage locations on the seat’s shell, then set the car seat on the vehicle seat with the harness facing the back of the vehicle.
Thread the vehicle seat belt through the rear facing belt path. There’s a very handy opening in the cover that makes accessing the belt path pretty easy.
You can also unsnap the lower portion of the cover inside the belt path to expose the entire belt path — whichever method helps YOU install the seat correctly is the best one. Once the vehicle seat belt is threaded through the rear facing belt path and the shoulder portion of the belt is accessible, press down on the seat pan with one hand while pulling straight up on the top portion of the vehicle seat belt to remove all slack. Once the slack is removed, engage the seat belt’s locking mechanism to secure the installation and feed the excess slack back into the seat belt’s retractor. The seat is installed securely when there’s less than an inch of movement at the belt path.
Recline Positions
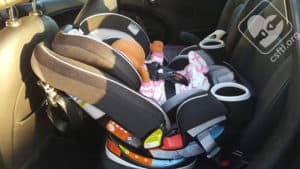
The 4Ever can be installed rear facing using recline positions 1, 2, or 3. Here’s a quick summary of how large the seat is when installed in those positions.
Recline position 1 would typically be used for the tiniest of passengers. This position takes up the most front to back space but also reclines the seat so that those tiny passengers have clear airways as they travel. If this recline position does not recline the seat enough for a newborn (per the bubble indicator), a rolled towel or pool noodle may be used to recline the seat further.
Recline position 2 is slightly more upright and takes up a little less front to back space.
Recline position 3 is the most upright of the rear facing recline positions.
Front to Back Space: Compared to a Contender
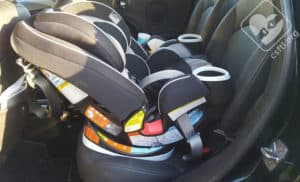
The 4Ever is fairly compact front to back, here we see one installed rear facing next to a rear facing Graco Contender in a Ford Edge. It’s a bit more compact than the Contender.
Fit to Child
Preemie Doll
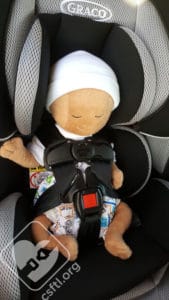
The 4Ever is rated from 4 pounds. Many a car seat has made this claim but not all actually work for a preemie because the bottom harness height is still too high for their tiny shoulders. In the name of science, we put our preemie Huggable Images doll in the 4Ever and here’s what we found.Yes, indeed, that’s a 4 pound, 17 inch long preemie doll fitting correctly and snugly in the 4Ever, with the harness coming out from just at her shoulders. Keep in mind that not all preemies have the same proportions, and just because it fits the Huggable Images preemie does not mean it will be suitable for all preemies. But we’re encouraged just the same.
Newborn
This tiny passenger is 3 days old! She weighs 8 pounds and is 21 inches long. We’ve added a rolled up washcloth behind the crotch buckle to help with the fit — this is permitted by the manufacturer. The harness is below her shoulders and the seat fits her very well.
Newborn Doll
Our newborn doll weighs 7 pounds and is 17 inches long. With the infant padding in the seat, the doll fits quite well and has plenty of room to grow. The 4Ever’s low sides mean that loading a newborn in and out of the seat shouldn’t be too difficult.
23 Months Old
This model is 23 months old, weighs 30 pounds, and is 32.5 inches tall. She’s still got lots of room left to ride rear facing in this seat and she seems quite happy about her ride!
Two Years Old
This model is 25 months old, weighs 22 pounds and is 33 inches tall. She seemed comfortable and had plenty of leg room. The seat allows for rear facing to within 1 inch of the adjuster at the top, or a seated height of about 27 inches tall. With those limits, she’s got plenty of room to grow.
Two Years Old
This model is 2 years old. She weighs 26 pounds and is 35 inches tall. Like our other models, she’s got plenty of room to grow in the 4Ever. Her mom loves how easy it is to install and adjust the seat. The openings in the cover make installing the seat with either the vehicle seat belt or lower anchors a breeze.
Three Years Old
Here’s our adorable model from above again. She’s been using the 4Ever regularly so we’re thrilled to share an updated picture of her in the seat almost 2 years later! She’s 3.5 years old, weighs 34 pounds, and is 39 inches tall. She’s still happily riding rear facing and has some room to grow. She regularly removes her shoes and tucks them into the cup holders – why not?
Installation: Forward Facing
Lower Anchors
When installing the 4Ever forward facing, it must be in recline positions 4, 5, or 6. If the occupant weighs less than 40 pounds, the recline angle must be in the 4th position. Note: This restriction is for the United States only.
The harness should be positioned at or above the shoulders and the buckle should be in the position nearest to but not under the child.
This seat may only be installed with lower anchors for children weighing under 42 or 45 pounds, depending on when your 4Ever was manufactured. If your child weighs more than the lower anchor weight limit, it can always be installed with vehicle seat belt and top tether instead of the lower anchors and top tether.
The lower anchors are initially stored in the rear facing belt path. To move them to the forward facing belt path, loosen the harness and extend the headrest all the way. Then, unsnap the cover on the inside of the seat to expose the seat’s interior, then slide the lower anchor connectors along the interior bar into the forward facing belt path and move the lower anchor connectors out through the forward facing belt path openings. Remove the top tether from the storage spot on the side of the seat’s shell and loosely connect it to the vehicle’s top tether.
Then, set the 4Ever on the vehicle seat with the harness facing the front of the vehicle. Unsnap the inside of the cover to expose the forward facing belt path and connect the lower anchor connectors to the lower anchor in the vehicle. Pull the loop on the end of the lower anchor connector webbing to remove the slack, then when there’s enough slack, feed the loop through the belt path into the inside of the seat’s shell. Press the back of the car seat into the vehicle’s seat back while pulling that loop straight out from the belt path to remove the slack. Once there’s less than an inch of movement at the belt path, secure the top tether and the installation is complete.
Vehicle Seat Belt
To install the seat forward facing with the vehicle seat belt for a child who weighs between 20 and 65 pounds, store the lower anchor connectors in the rear facing lower anchor connector storage spots and thread the vehicle seat belt through the belt path.
Children who weigh between 40-65 pounds may use recline positions 4, 5, or 6 for forward facing installations.
For all forward facing installations, the 4Ever’s base must be flat on the vehicle seat. That sometimes means there will be a gap between the back of the car seat and the vehicle seat back (especially in recline position 4!). This is completely fine as long as the 4Ever moves less than 1 inch at the belt path.
Top Tether
Regardless of whether a forward facing install uses the lower anchors or the vehicle seat belt, always attach the top tether to the tether connector on the vehicle.
We mentioned the tether, right? Always use it with a forward facing installation! The manual clearly states that the top tether is required for all forward facing installations. There is no option for installing the 4Ever without it.
Recline Position 4
We’ve installed the 4Ever forward facing at the required recline for a child who weighs less than 40 pounds. This is the required recline position for forward facing passengers who weigh less than 40 pounds in the United States (the Canadian version does not have this requirement).
The 4Ever is quite reclined in this configuration. The entire base of the 4Ever is flat on the vehicle seat. We’ve installed the 4Ever in a number of vehicles over the years and discovered that this recline position can be a bit tricky because 80% of the 4Ever’s base must be on the vehicle seat. In addition, the entire base must be flat on the vehicle seat but there can be a gap between the back of the 4Ever and the back of the vehicle seat as long as the car seat is installed correctly with less than one inch of movement at the belt path.
This recline position presents some challenges in vehicles with very sloped seats. In vehicles with more level vehicle seats, the 4Ever may install more easily at the 4th recline position.
Fit to Child
5 Years Old
This kiddo is 5.5 years old. She’s 44 inches tall and weighs 46 pounds. With the 4Ever in harness mode, she’s got a bit of room to grow and the seat still fits her well. As you can see, she’s also very fond of the cupholders!
5 Years Old
This kiddo is also 5.5 years old. At 48 inches tall and 47 pounds, she is one growth spurt away from outgrowing the 4ever in harness mode by standing height. She has used the 4ever on many long drives and finds it very comfortable. She has a love/hate relationship with the harness covers (can you guess what stage she was at here?) so we always keep them close by in the vehicle for the days when she wants to use them.
High Back Booster Mode
NHTSA recommends that children ages 1-3 continue to ride rear facing as long as they fit in their car seat by height and weight, and then use a forward facing 5 point harness. Children between 4-7 years old should continue to use their 5 point harness as long as they fit by height and weight, and then move to a belt positioning booster seat.
We mention this because 4 year olds do not ever belong in high back booster seats and yet the 4Ever’s manual lists 4 as the minimum age to use the 4Ever in booster mode. That’s a no from us. Earlier versions of this seat had a 3 year old minimum for booster mode, so while the 4 year old minimum is an improvement, we’d still encourage Graco to update this misguided low-end minimum on a seat that can certainly accommodate older children in the harness until they’re at least 5 years old.
Converting to Booster Mode
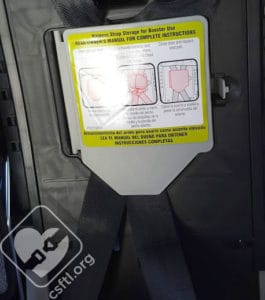
Once the child outgrows the harness, the 4Ever converts to a transitional booster seat that will last about another year or so. Graco devised a nifty system for harness storage in booster mode. The harness is never removed from the seat.
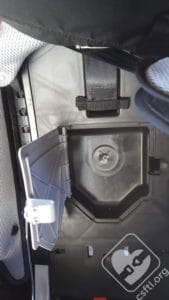
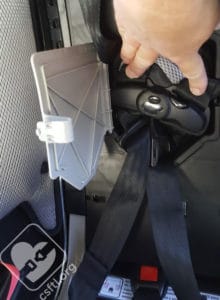
Instead, it is tucked away in a little door behind the seat pad, guaranteeing that you don’t accidentally lose it. Extend the headrest, expose the interior of the seat, then open the door to store the harness.
Secure the harness pads, retainer clip and buckle tongues in the compartment behind the door, then shut it.
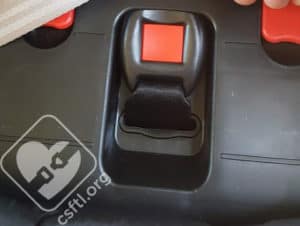
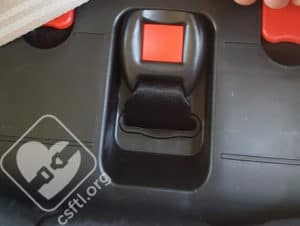
Store the buckle itself in the compartment provided in the seat pan.
Graco permits use of lower anchors and top tether when using the seat in booster mode. As always, if you choose not to use this feature, be sure to buckle the booster in when not occupied, to prevent it from moving unhindered through the cabin in an accident.
The recline position must be in position 6 for booster use.
5 Years Old
Here’s another longtime CSFTL review model. He’s 5 years old and gearing up for his first year in school — and his first year in a carpool so he’s starting to learn how to ride in a booster seat. The 4Ever fit him well in booster mode — the lap belt lies low on the lap, where it belongs, the vehicle seat belt moves freely through the shoulder guide and rests comfortably and correctly across the chest.
The 4Ever lists a 57 inch maximum height in high back booster mode, but it’s unlikely that a child who is 57 inches tall would fit in the seat in that mode.
Moving to a Backless Booster
In addition to continuing to use a harness to its capacity, CSFTL recommends backless boosters for older children who have outgrown their high backs, and do not need the support of a back to remind them to sit correctly, even when sleeping. Vehicle head support is required for backless boosters.
Converting to Backless Booster Mode
To change the seat from high back booster mode to backless booster mode, first make sure the seat is in recline position 6 or it’s impossible to detach the high back portion of the seat from the backless portion of the seat. I tested this for you just to be safe. The following directions assume that the harness has already been stored on the seat, and it’s in high back booster mode.
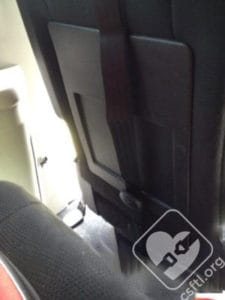
Detach both sides of the harness from the splitter plate behind the seat. Now, turn your attention to the front of the seat, where you’ll unsnap the cover on the front.
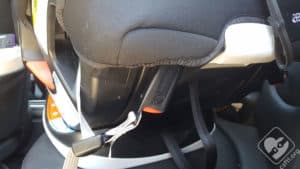
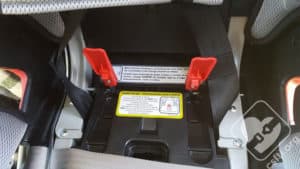
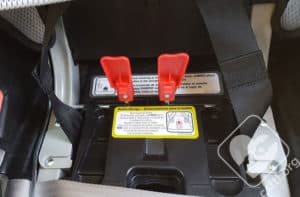
Expose the inside of the seat pan, then locate the two red tabs on the bottom of the seat pan. Rotate them upward, and then push them in together.
Move the crotch buckle to the outermost position and tuck it into the storage area. Then, lift the entire back off the bottom, harness and all, and move the red tabs back to their original position. Finally, replace the seat pad and secure the two remaining elastic loops onto the tabs at the back of the base. Tuck the splitter plate onto the storage area at the back of the seat. The remaining end of the seat pad tucks behind the seat when it’s in use.
When the 4Ever is in backless booster mode, it cannot be used with LATCH (since the connectors aren’t attached to the seat in this mode!), so remember to buckle it in when not in use. For younger and smaller children, we’d advocate that families use high back mode for as long as possible. The provided belt guide helps to correctly place the shoulder belt in backless booster mode. For older children, the shoulder belt will likely fall in place on its own.
Fit to Child
Backless Booster Mode
9 Years Old
This model is 9 years old. She’s 52 inches tall and wears a size 12 in clothes. For a long time, the 4EverExtend2Fit Platinum in backless booster mode was her very favorite car seat so I was eager to see what she thought of the 4Ever in backless booster mode. It fit her well and she found it quite comfortable. In backless booster mode, this seat is a bit taller than many backless booster seats so it worked well with the very high backed seats in my 2011 Mini Countryman. I also tried the 4Ever in backless booster mode for this kiddo in a 2009 Mazda 5 and found that the booster seat was so tall that it didn’t fit her well on those shorter vehicle seats.
Recline Level Indicator Replacement
Replacing the level indicator on the Graco 4Ever is a task that most families won’t have to tackle. But for the few who do, here’s a quick guide to this pretty simple process.
Graco provides detailed instructions with the new level indicator. You will need a hand-held Phillips screwdriver and about 60 seconds of your time, possibly less.
First: Locate the level indicator mounting screw, and remove it with the Phillips screwdriver. Keep the screw in a safe place, because you will need it again.
Then, pull the left side of the indicator out of the shell, rotate the indicator, and pull the right side of the indicator out of the car seat’s shell. Throw the defective indicator away.
Finally, insert the hook end (right side) of the new indicator in the hole of the seat, and rotate the left end into the shell. Align the holes and re-insert the screw. Do not over tighten the screw or the indicator could break.
With those steps complete, the new indicator is installed and ready to keep on indicating your Graco 4Ever’s recline angle.
Important Information: Where to Find
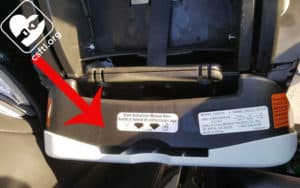
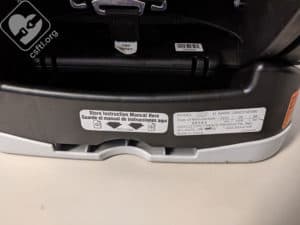
Manual Storage: We love it when a manufacturer thinks about the little things – like where can you stow the instruction manual for easy reference whenever a question comes up? The 4Ever has a handy little storage pocket at the back of the seat’s base the manual. It’s even clearly labeled!
FAA Approval: If you’re taking your 4Ever on an airplane to use in harness mode, a Flight Attendant may ask to see the FAA Approval label. It’s located on the inside of the pillar on the left side at the back of the seat. Please note that the label may be obscured if you’ve got a travel cart attached to the seat.
Date of Manufacture Label: The Date of Manufacture label is located on the seat’s base, on the right side. It’s right next to the manual storage compartment.
Pros
- Fits newborns and children through booster age
- Fairly compact and good in small spaces
- Two crotch buckle positions
- Push button lower anchor connectors
- Can use LATCH in high back booster mode
- Hideaway harness for switching to booster mode
- No re-thread harness
Cons
- Cannot use lower anchors in backless booster mode
- If used from birth, will most likely expire before the child is truly ready to travel without a booster
Overall Thoughts
CSFTL can give this seat a hearty and non-conditional thumbs up. It is easy to use, well designed, solid in feel, designed to be compatible in many vehicles, and will truly span a significant age range, from preemie on up. That’s a rare thing, so we celebrate it with a small note of caution that a seat that’s in use for 10 years in a row will certainly need regular cleaning!
While Graco markets this seat as the only seat you’ll ever need, we issue a small note of caution: children generally need a booster seat until they are around 4 feet 9 inches tall. That’s the size of a 10-12 year old. Since the 4Ever seat expires in 10 years, it will likely expire just before most children are ready to ride in a vehicle seat belt alone. Despite that small limitation, for a seat that can last most of those car seat days the 4Ever has a lot to offer!
Graco graciously provided this 4Ever for review. Our opinions, as always, are entirely our own.
Giveaway!
Our friends at Graco are offering one 4Ever to a lucky reader from Canada. Please read our terms and conditions, then enter below for your chance to win.
a Rafflecopter giveaway

