Graco Recline N’ Ride
We first met the Graco Recline N’ Ride multimode car seat at Lifesavers 2018. This seat takes some of Graco’s best features, puts them together, and adds an interesting premise: it can be reclined in harness mode even when it’s installed rear facing or forward facing.
Since almost every other car seat on the market today must be uninstalled to change the recline angle, the Recline N’ Ride certainly offers something different.
CSFTL Quick Stats
- Rear facing weight range: 5-40 pounds
- Rear facing height range: Until the child’s head is 1 inch below the adjuster handle on the headrest when fully extended
- Body and head support for use in rear facing mode only
- Lowest harness height: 6.5 inches with the infant insert, 7.5 inches without the infant insert
- Forward facing weight range: 22-65 pounds
- Forward facing height range: Less than 49 inches tall
- Top harness height: 18.5 inches
- Booster mode weight range: 40-100 pounds
- Booster mode age minimum: 4 years old. CSFTL advocates that children be AT LEAST 5 YEARS OLD before riding in a booster seat
- Booster mode height range: 43-57 inches tall
- Top booster mode shoulder belt guide position: 19 inches
- Crotch buckle positions: 3 inches from the back of the seat pan with the bottom pad. 4.5 and 6.5 inches from the back of the seat pan without the pad
- Lower anchor weight limit: 35 pounds rear facing, 40 pounds forward facing
- Harness pads: Required forward facing for children who weigh less than 25 pounds. Must be removed forward facing for children who weigh more than 40 pounds
- Expiration: 10 years
Measurements
- Seat pan depth: 12 inches
- Seat pan width: 12 inches at the child’s hips
- Internal seating area width: 13 inches at the child’s shoulders.
- Width at cup holders: 20.25 inches
- Shell height: 28.5 inches
- Width at widest point (at cup holders): 20.25 inches
- Seat weight: 28 pounds
- Front to back measurement (on a level floor, not installed in a vehicle): 29 inches with the headrest in the lowest position
Unique Features/Requirements
- Rear and forward facing lockoffs
- Seat must be fully reclined to expose the belt path during rear facing and forward facing installation
- Recline angle (rear facing and forward facing) can be adjusted while the seat is installed
- Recline foot mechanism
- Four recline angles each for rear and forward facing modes
- RapidRemove cover
- Removable cup holders
- Steel-reinforced frame
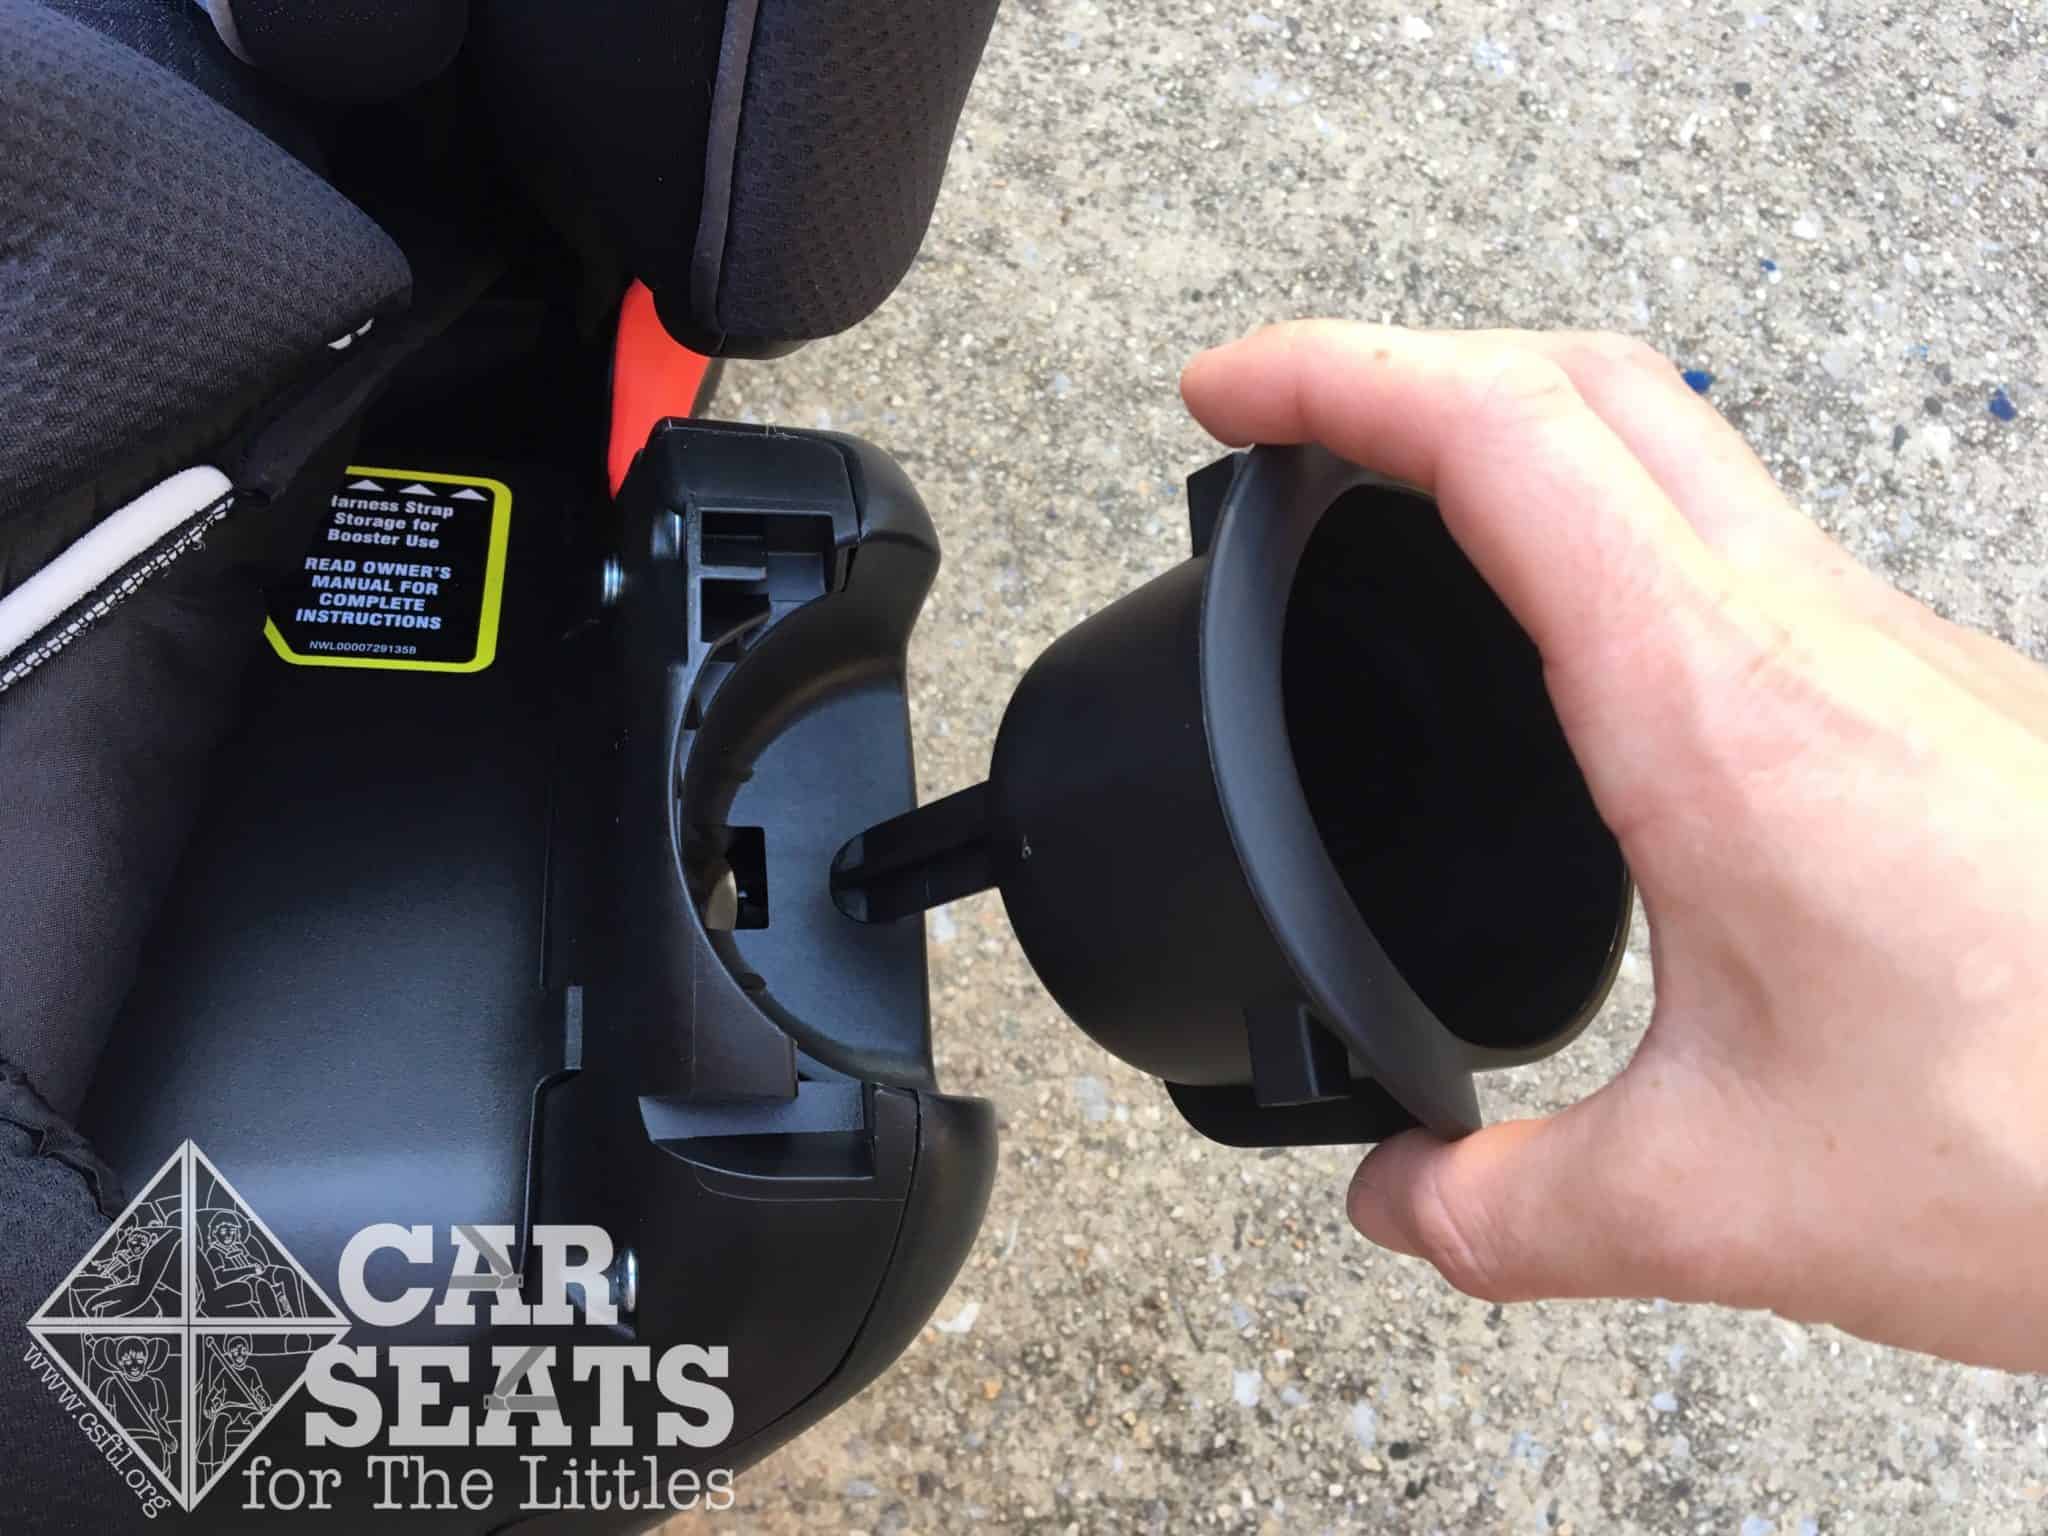
Step One: Assemble Cupholders
Graco Recline N’ Ride cupholder installation
The first instruction in the manual is to assemble the cupholders. When the manual says “Cup holders MUST be installed” that means they aren’t optional. Install the cupholders before proceeding.
These cupholders can be removed for washing and they’re dishwasher safe. But they’re not optional: they have to go right back on the seat before your child’s next car ride.
Unique Features
Rear and Forward Facing Lockoffs
Graco Recline N’ Ride rear facing lockoff
The Recline N’ Ride has lockoffs to lock the vehicle seat belt in both rear and forward facing installations. While we’re generally fans of lockoffs because they can make vehicle seat belt installations easier, we did run into a problem with the forward facing lockoff. We’ll go into greater detail about that challenge later in the review.
RapidRemove Cover
An unfortunate potty incident meant that we got to test the RapidRemove cover sooner than we’d intended to. Removing the cover for a wash required very little struggle. Compared to the many other car seats our family has used over the years, removing and cleaning the Recline N’ Ride was about the easiest. The wash instructions are fairly standard: machine wash in cold water, then line dry.
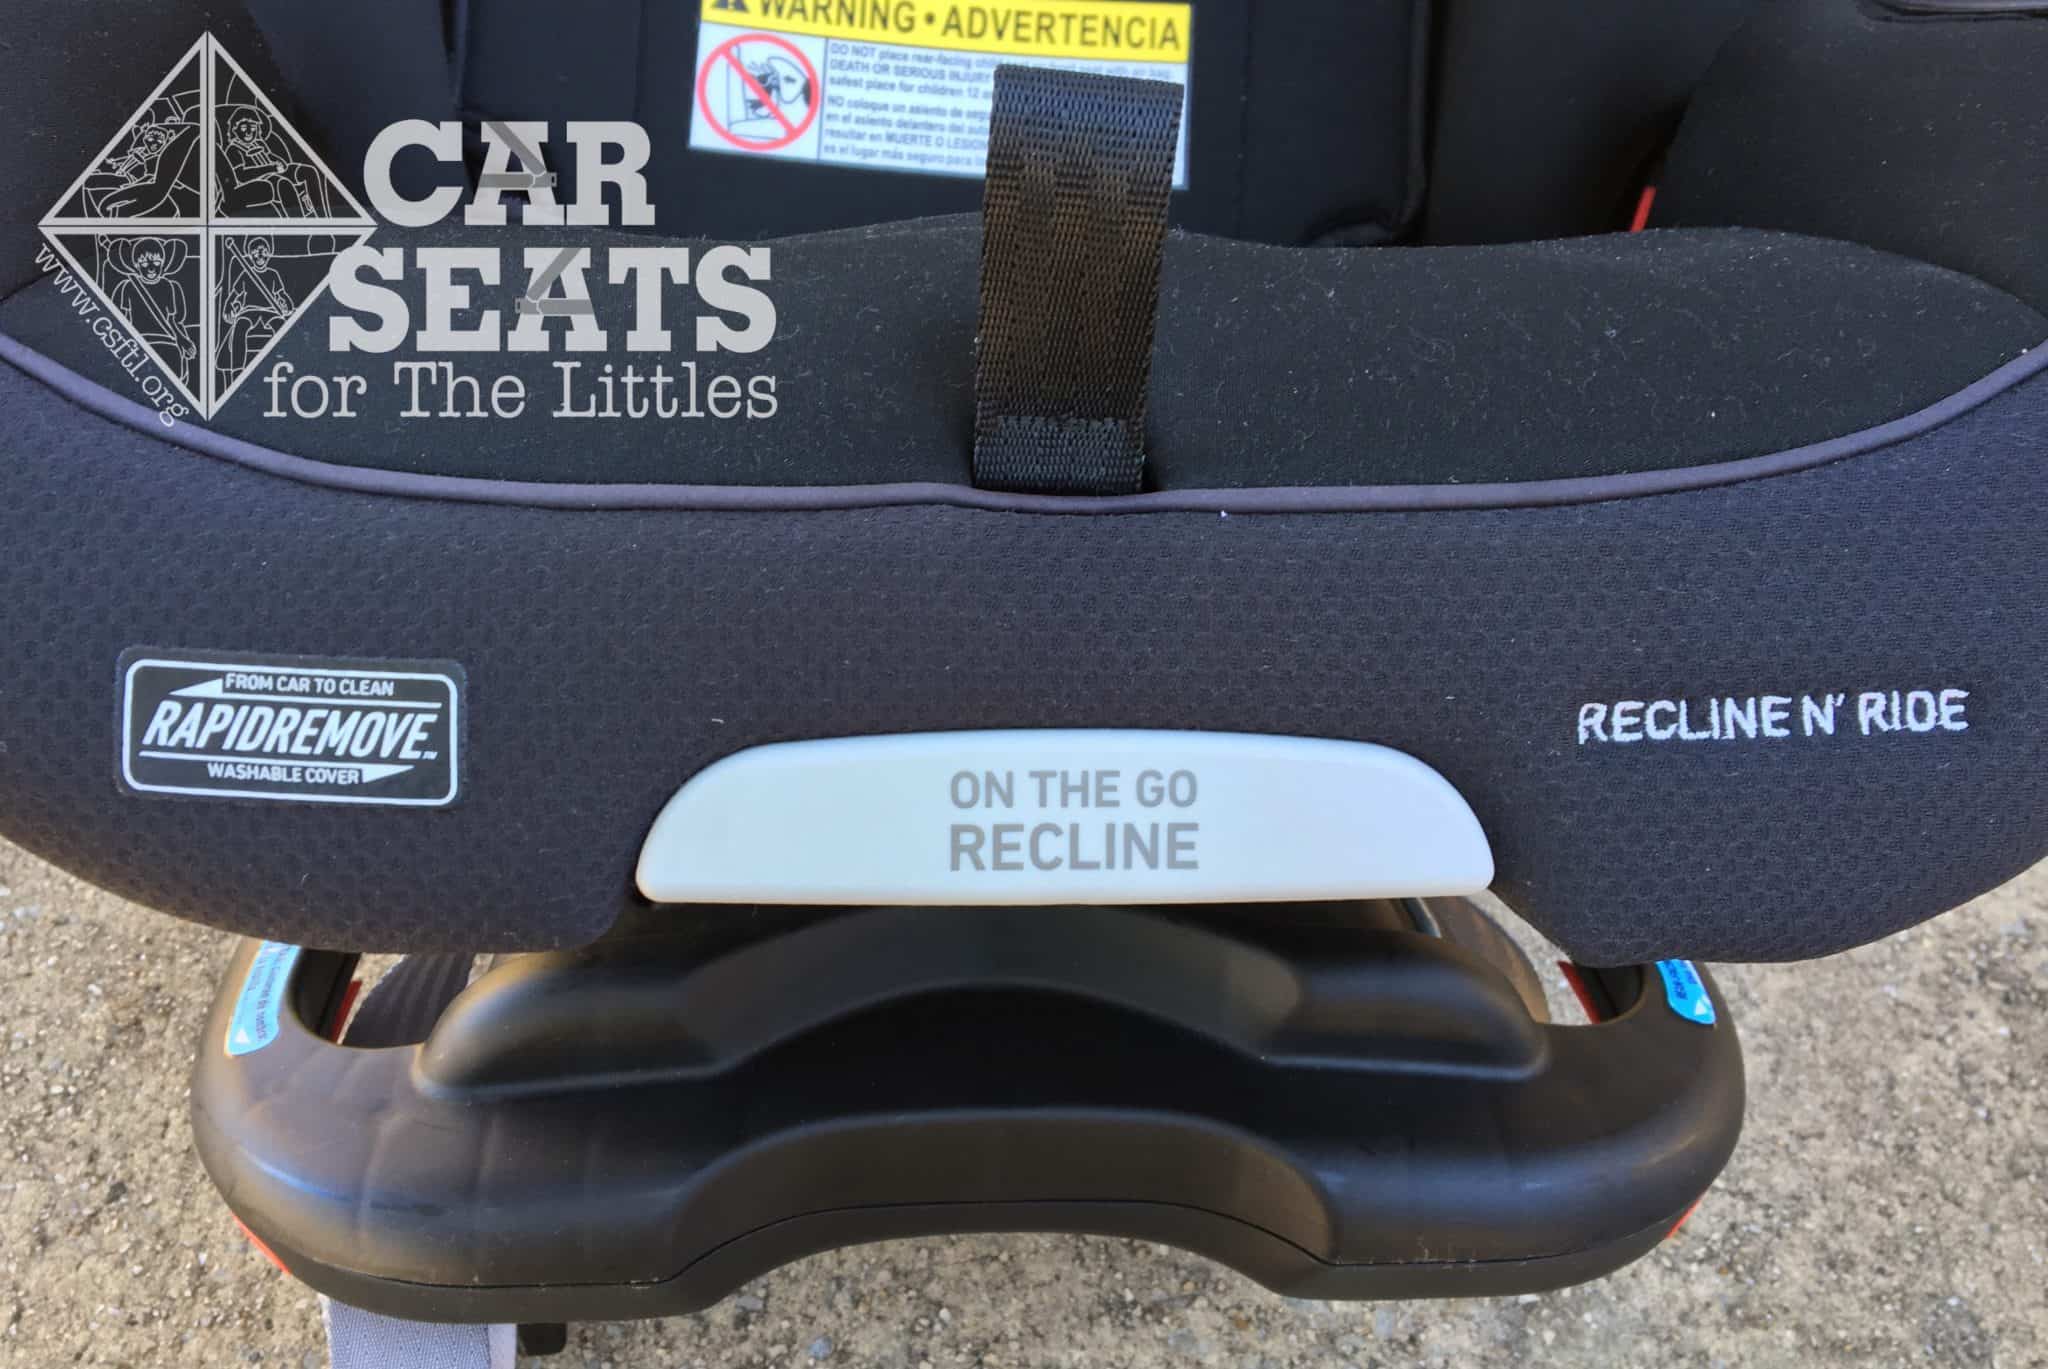
On the Go Recline
Graco Recline N’ Ride On The Go recline mechanism
The On the Go Recline is the most unique and interesting feature on this seat. The Recline N’ Ride has multiple recline angles for both rear and forward facing mode. AND the recline angle can be adjusted after it’s installed, which can be kind of a big deal for families who need that flexibility.
Recline Angle Indicator
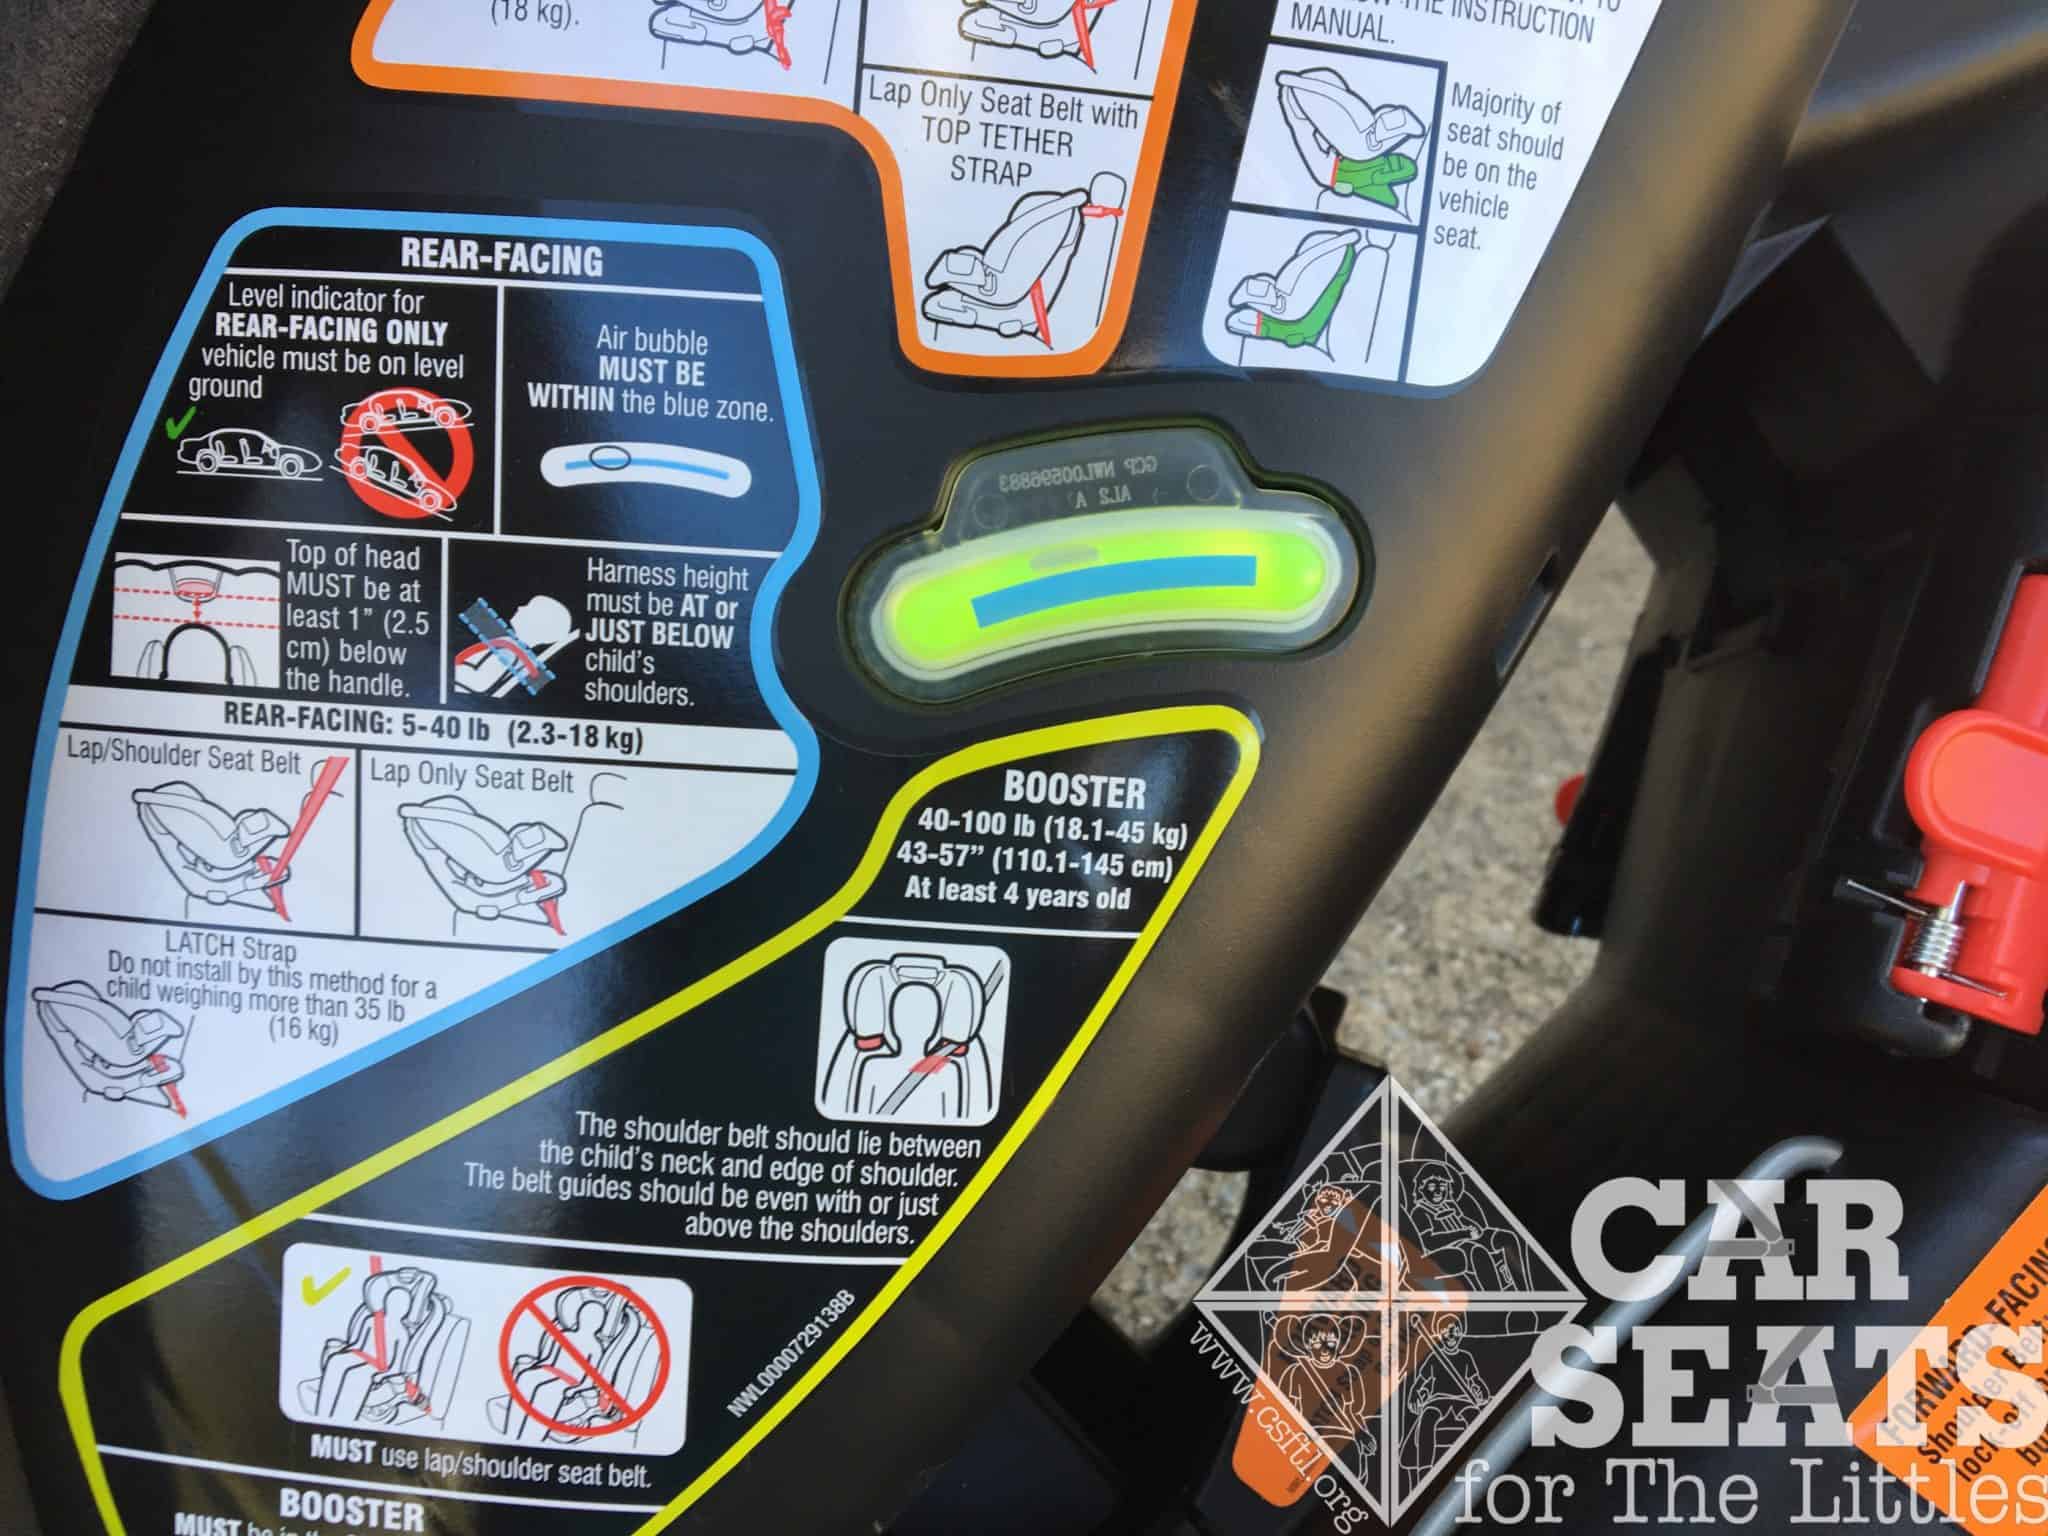
Graco Recline N’ Ride bubble level
The Recline N’ Ride uses a bubble recline angle indicator. Since the seat must be fully reclined to install, this indicator only applies AFTER the seat is installed. Before the child rides in the seat, make sure that the recline angle is correct.
Installation: Rear Facing
Setup
Before installing the Recline N’ Ride in rear facing mode, there are a few tasks to complete:
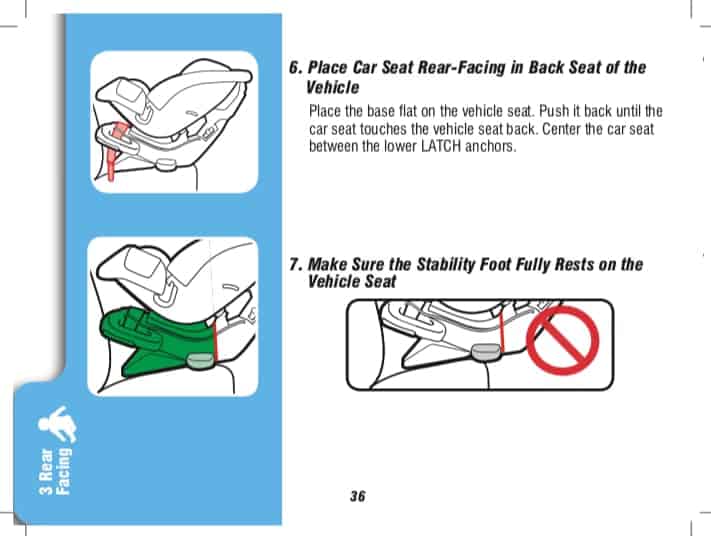
- Move the recline foot to the rear facing position.
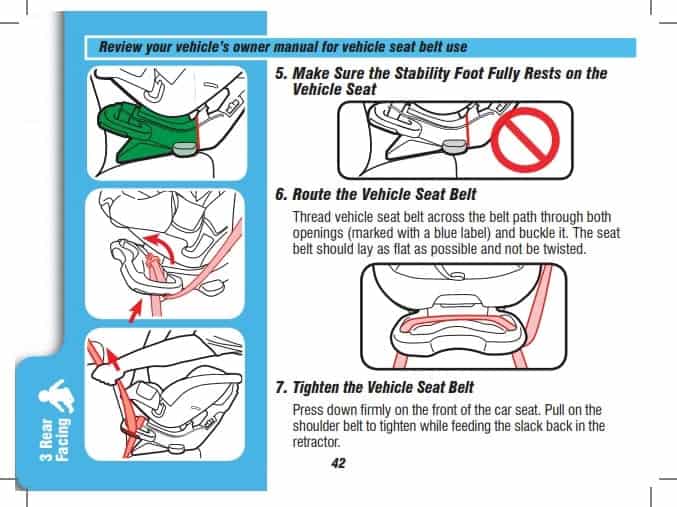
- Place the bottom of the seat flat on the vehicle seat.
- Confirm that the stability foot at the back of the base is entirely on the vehicle seat. (The stability foot is the plastic nub that sticks out of the side of the base.)
- Fully recline the Recline N’ Ride for installation.
Vehicle Seat Belt
Quirky Rear Facing Belt Path
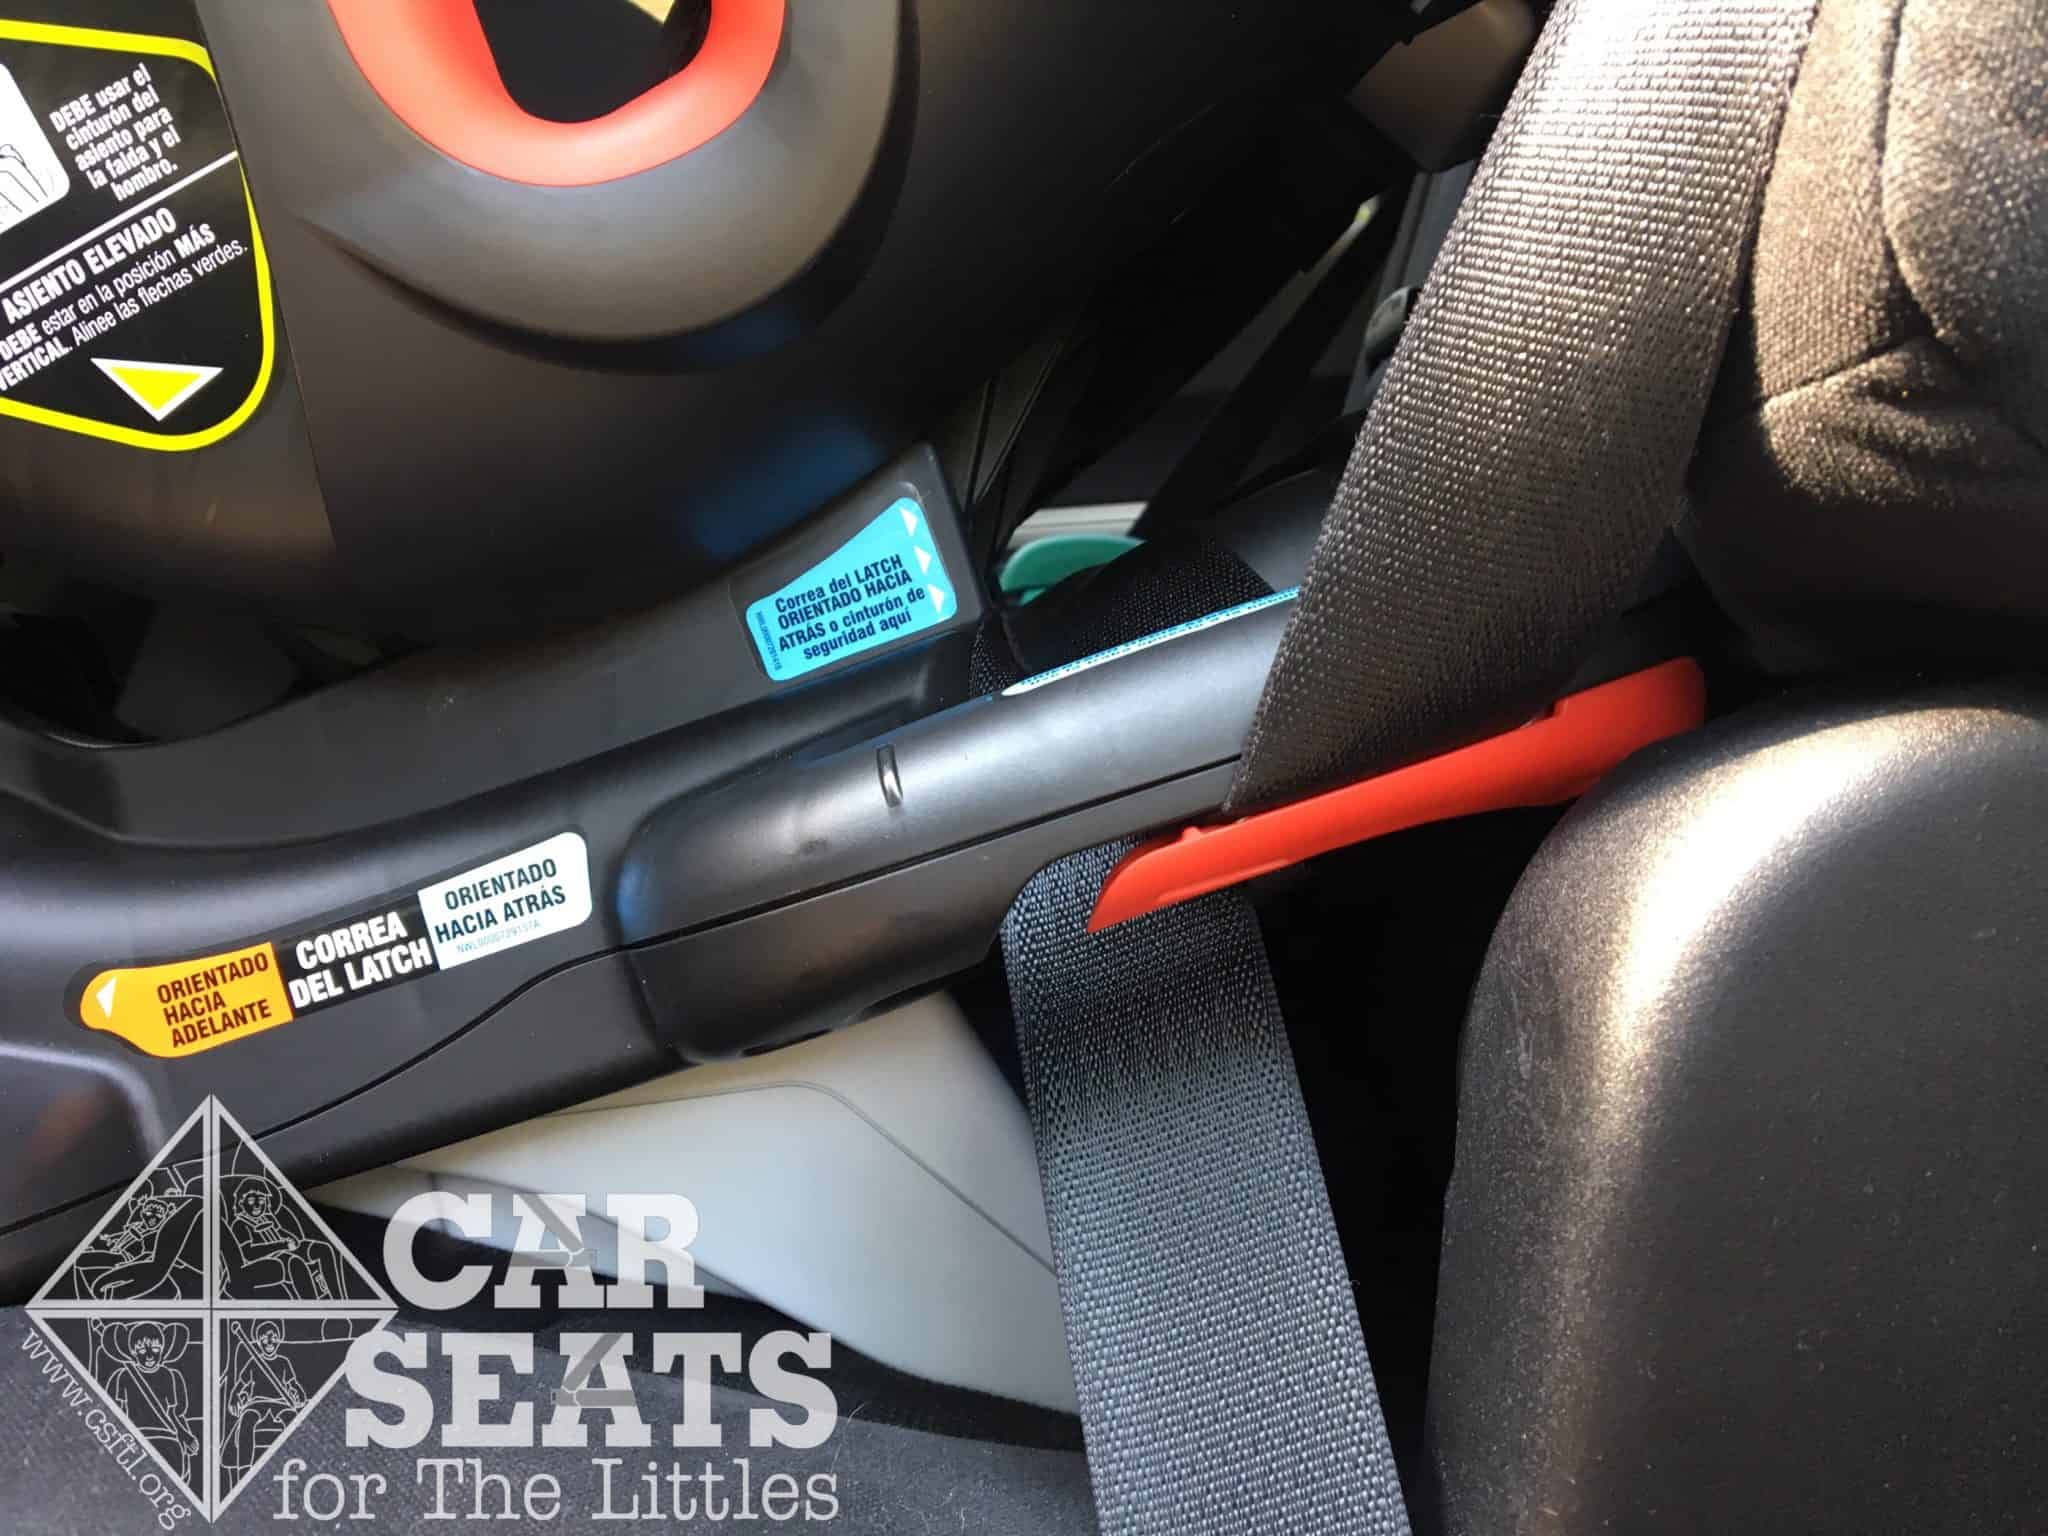
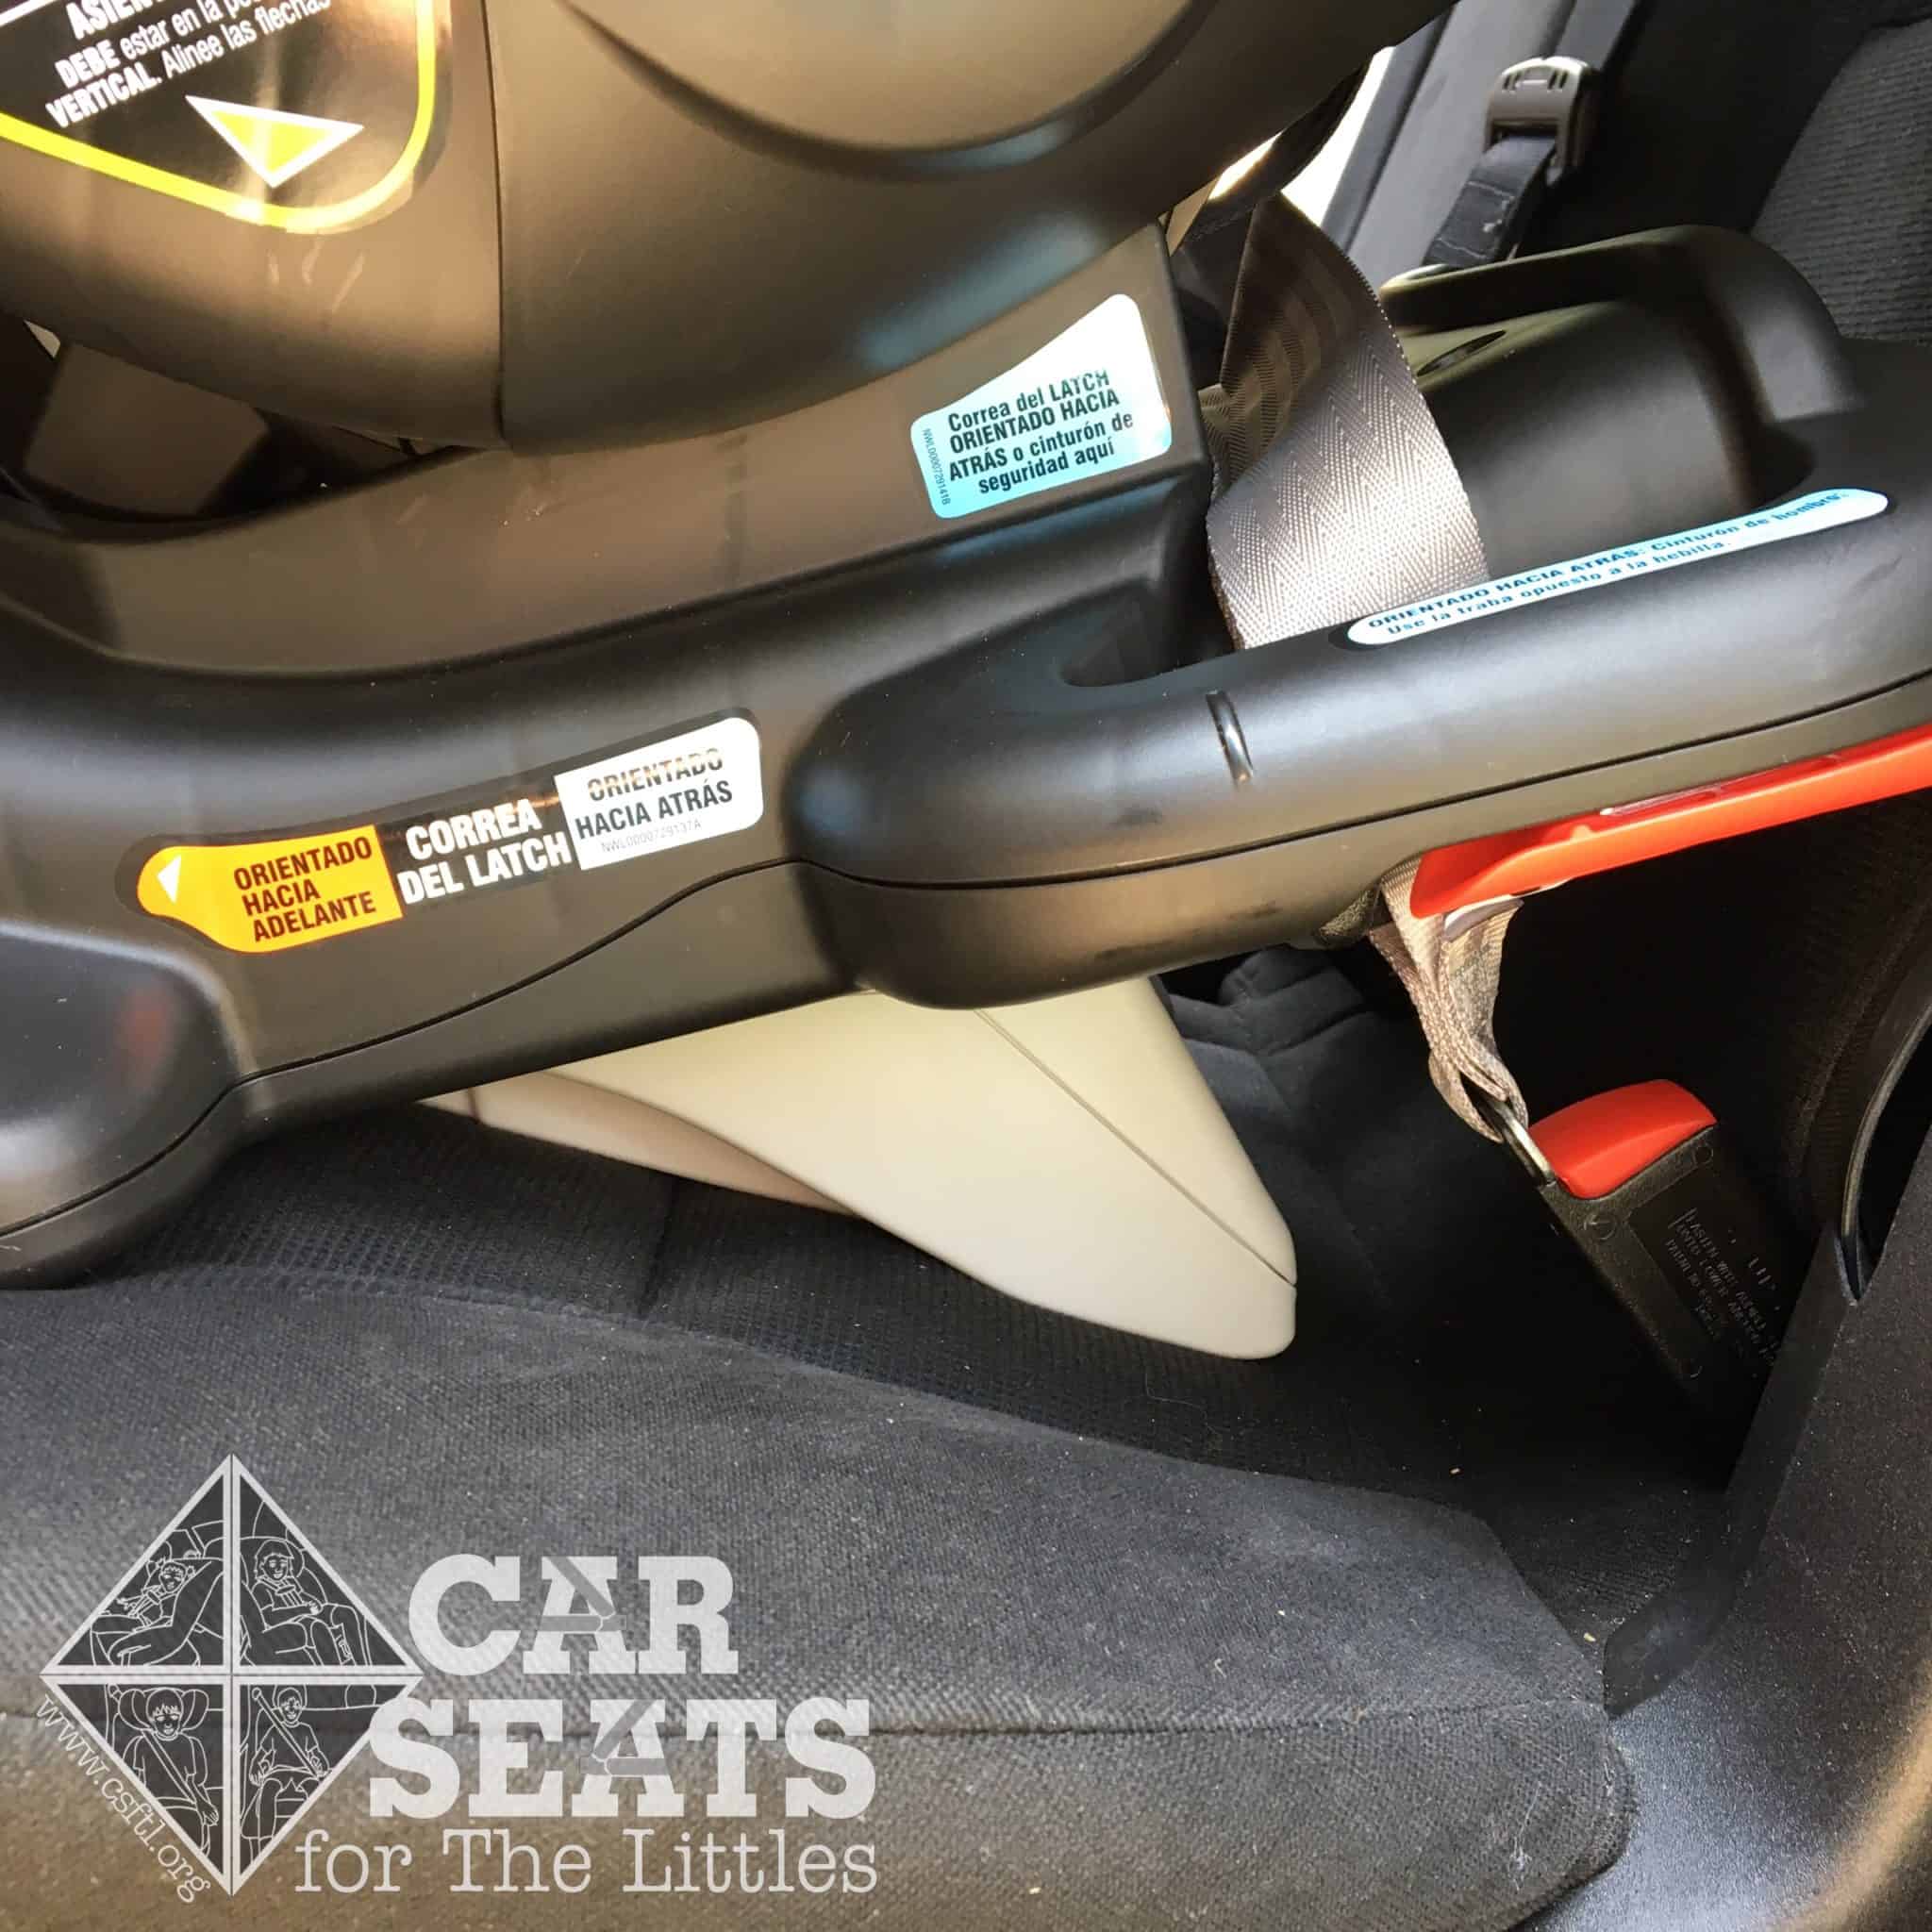
 The Recline N’ Ride ships with the lower anchors stored on the seat, so I left them where they were for a rear facing vehicle seat belt installation. The rear facing belt path presented my first challenge. The vehicle seat belt must be threaded up and through the belt path, then back down into the base. Though the manual (always read your manual!) illustrates this quirky belt path well, the routing wasn’t obvious to me, so we worry that it could confuse many caregivers.
The next part of the installation may seem more complicated than it is in person but we wanted to walk you through it.
Graco Recline N’ Ride rear facing belt path
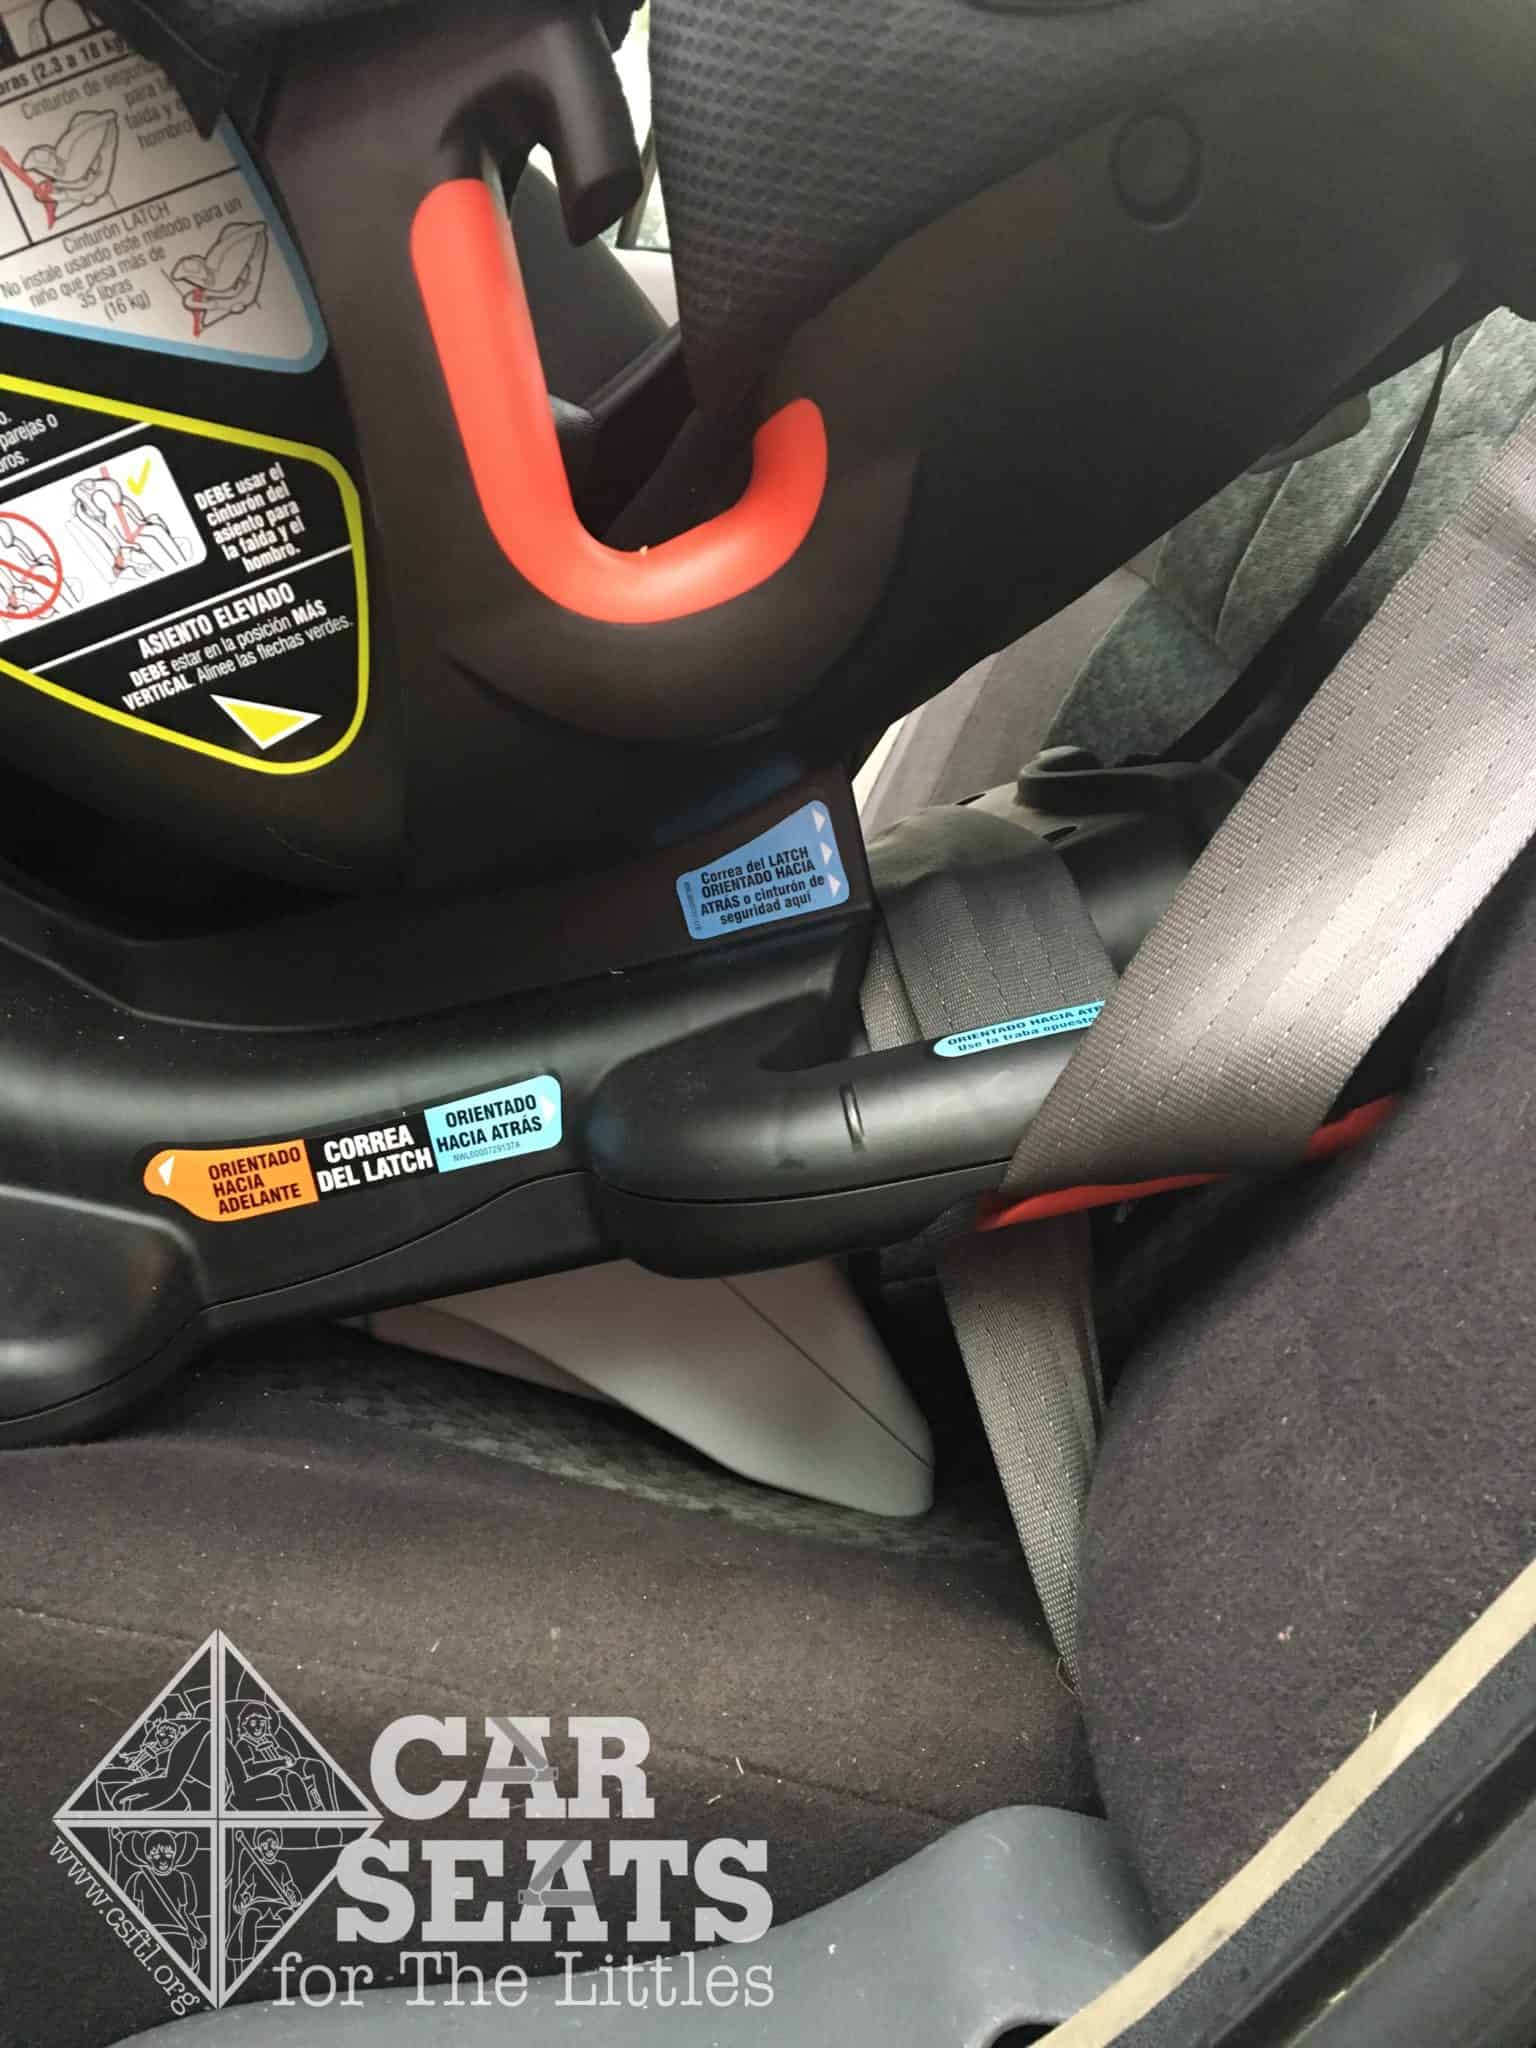
Buckle the vehicle seat belt, then thread the shoulder portion of the vehicle seat belt through the red lockoff on the side of the car seat that’s opposite the seat belt buckle.
Place the vehicle seat belt past a small red nib on the lockoff. This red nib is pretty difficult to see when looking down over the seat’s shell, which is unfortunately where most caregivers will find themselves while installing the seat. Here it’s best to double check the vehicle seat belt’s position before continuing.
Rigid Buckle Stalks
Graco Recline N’ Ride rear facing installation with a fixed short belt buckle
In one of our vehicles, the female end of the seat belt buckle is recessed into the vehicle seat and doesn’t move. The male end of the buckle fit into the hole in the base so I was able to buckle the vehicle seat belt.
We worry that a longer rigid buckle stalk might not work well with this particular car seat because it would protrude through the hole in the base.
Lower Anchors
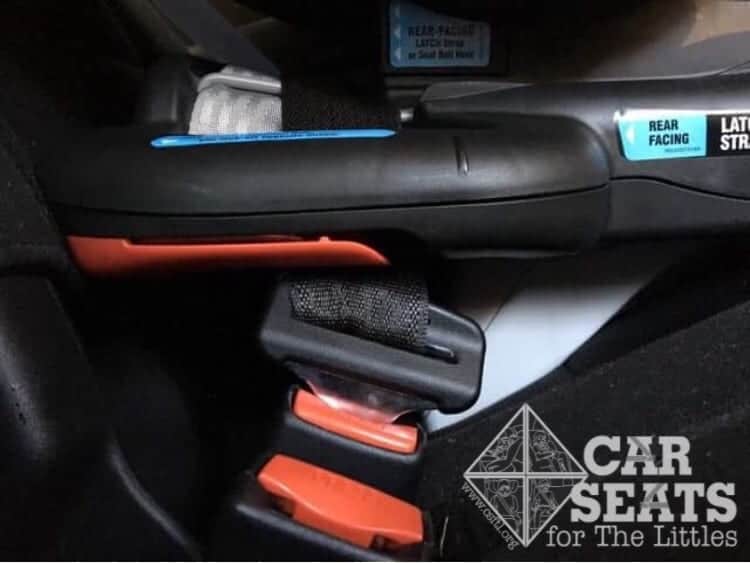
Graco Recline N’ Ride rear facing lower anchor installation
Using the lower anchors was more of a challenge than I’d expected. The unique shape of the base seemed to interfere with the lower anchor connectors. Additionally, the recline foot props the seat up quite a bit so the lower anchor connectors end up at a very upright angle.
Footprint and Recline Angle
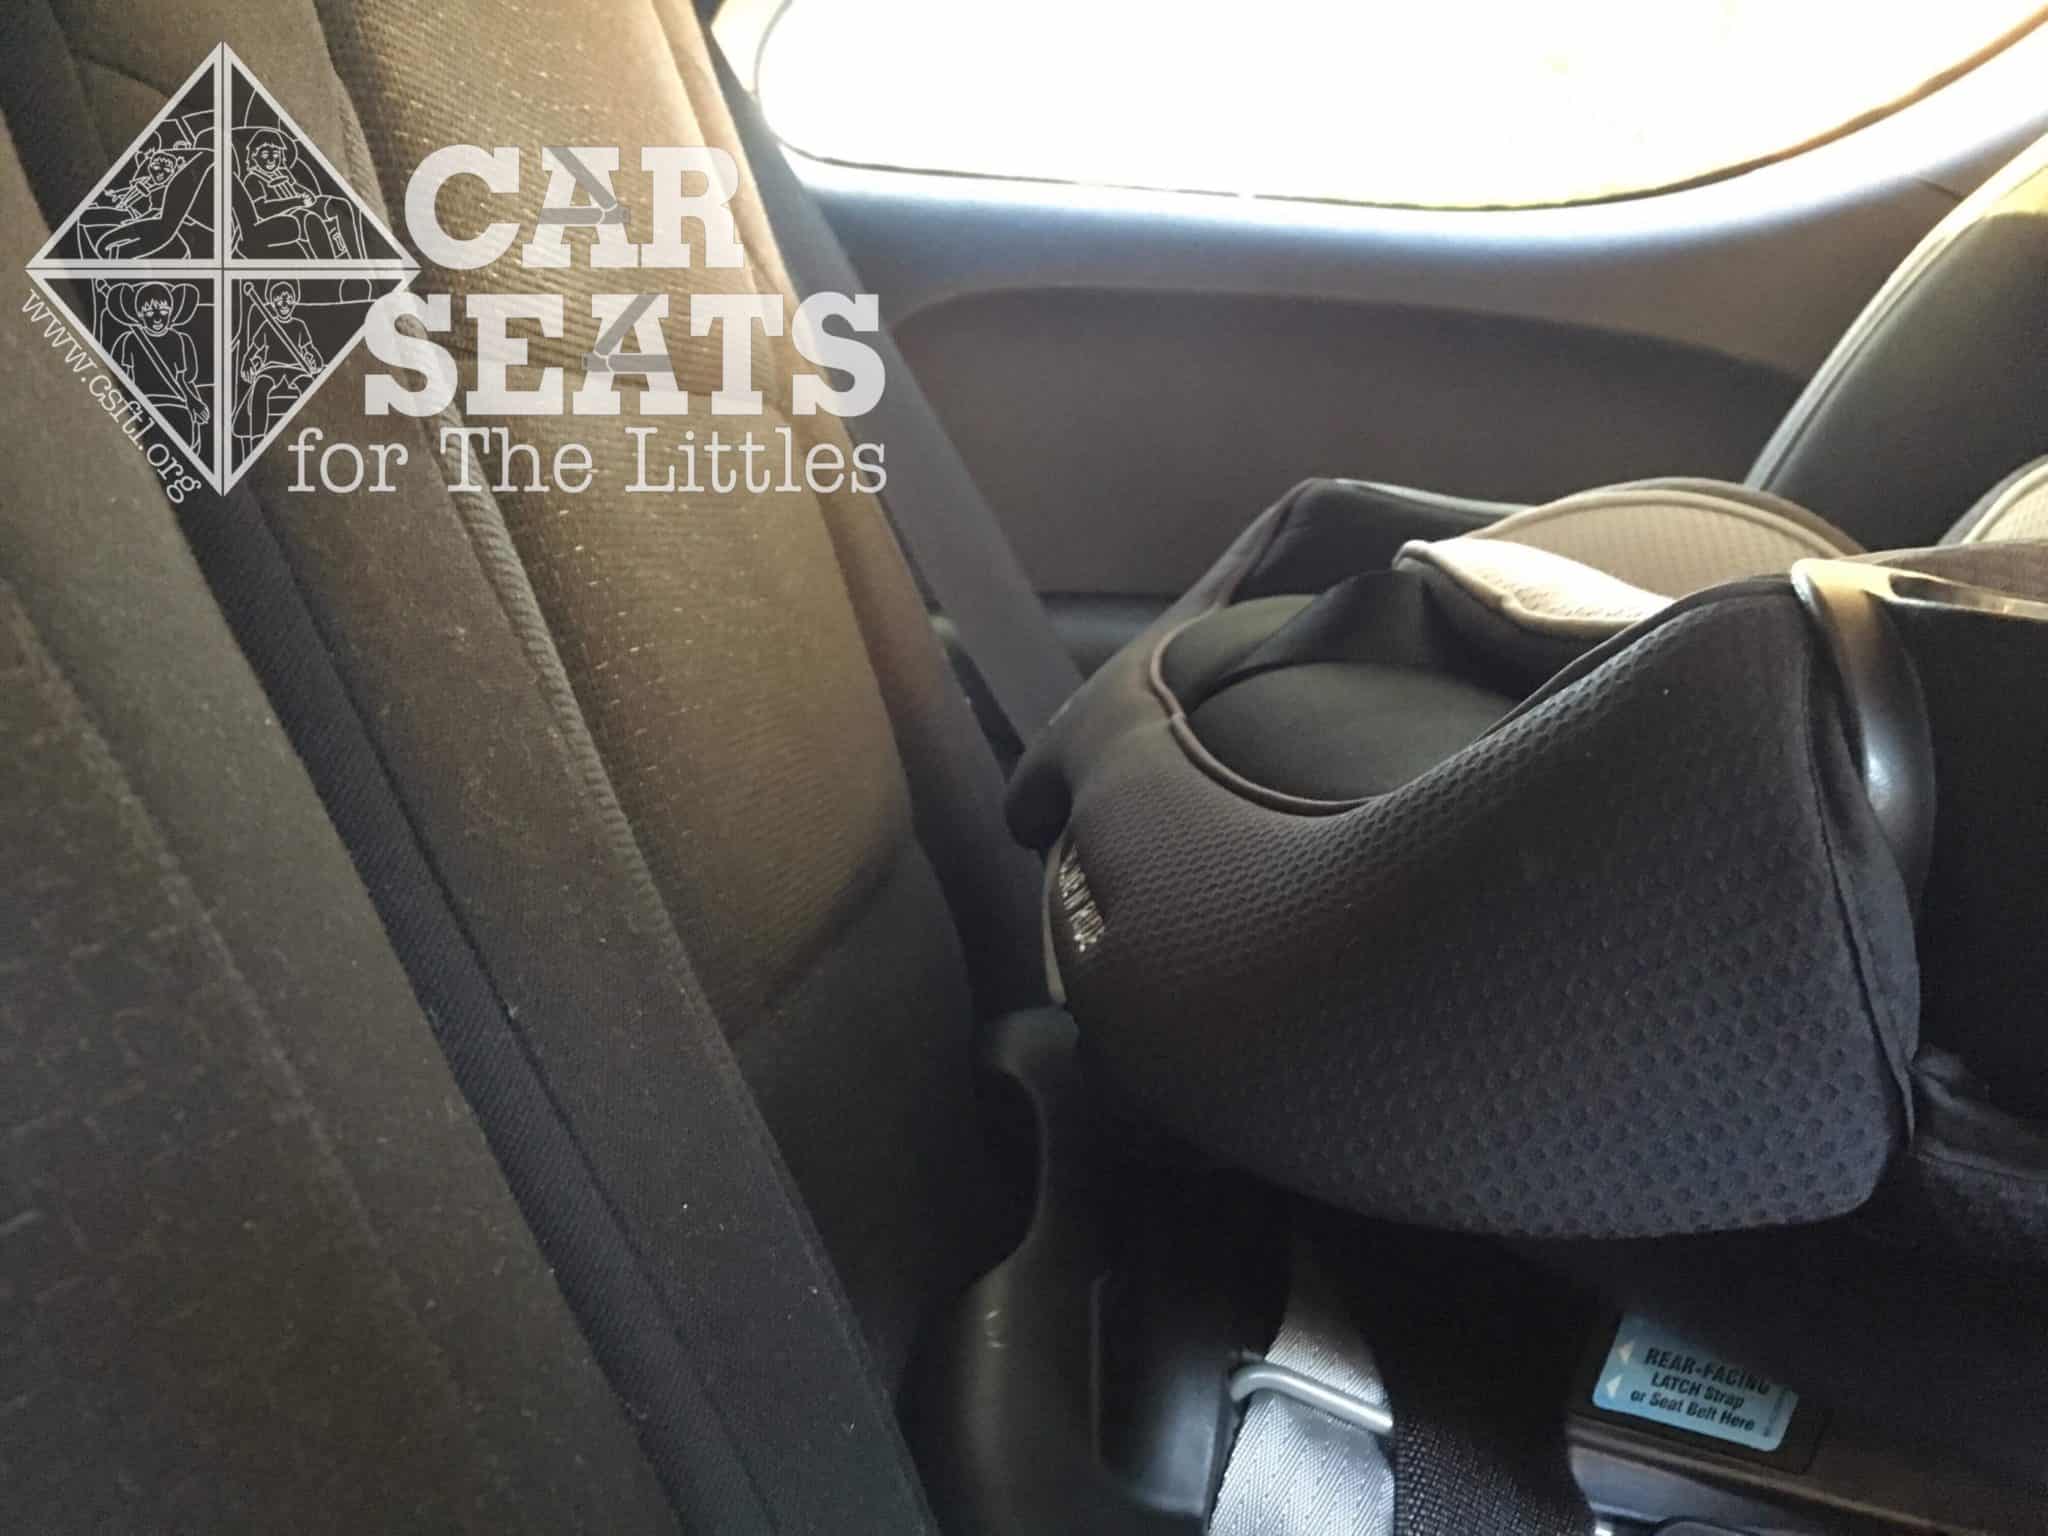
Graco Recline N” Ride third row rear facing but too big for the space
I installed the Recline N’ Ride in a number of seating positions. In pretty much every situation, it’s so large that I had to move the vehicle seat in front of it up quite a bit.
The Recline N’ Ride just didn’t fit in my Durango’s third row, so our experience suggests that it is best suited for the second row of larger vehicles.
Adjust the Recline AFTER Installation
And now, the exciting part: the recline angle can be adjusted for your kiddo once the seat is installed (when the vehicle isn’t moving!). Because the seat is fairly large, especially when it’s fully reclined, we found a lot of inconsistency in how it fit in different vehicles. Like almost all car seat purchases, we’d suggest trying the Recline N’ Ride in your vehicle before purchasing.
Overhang and the Stability Foot
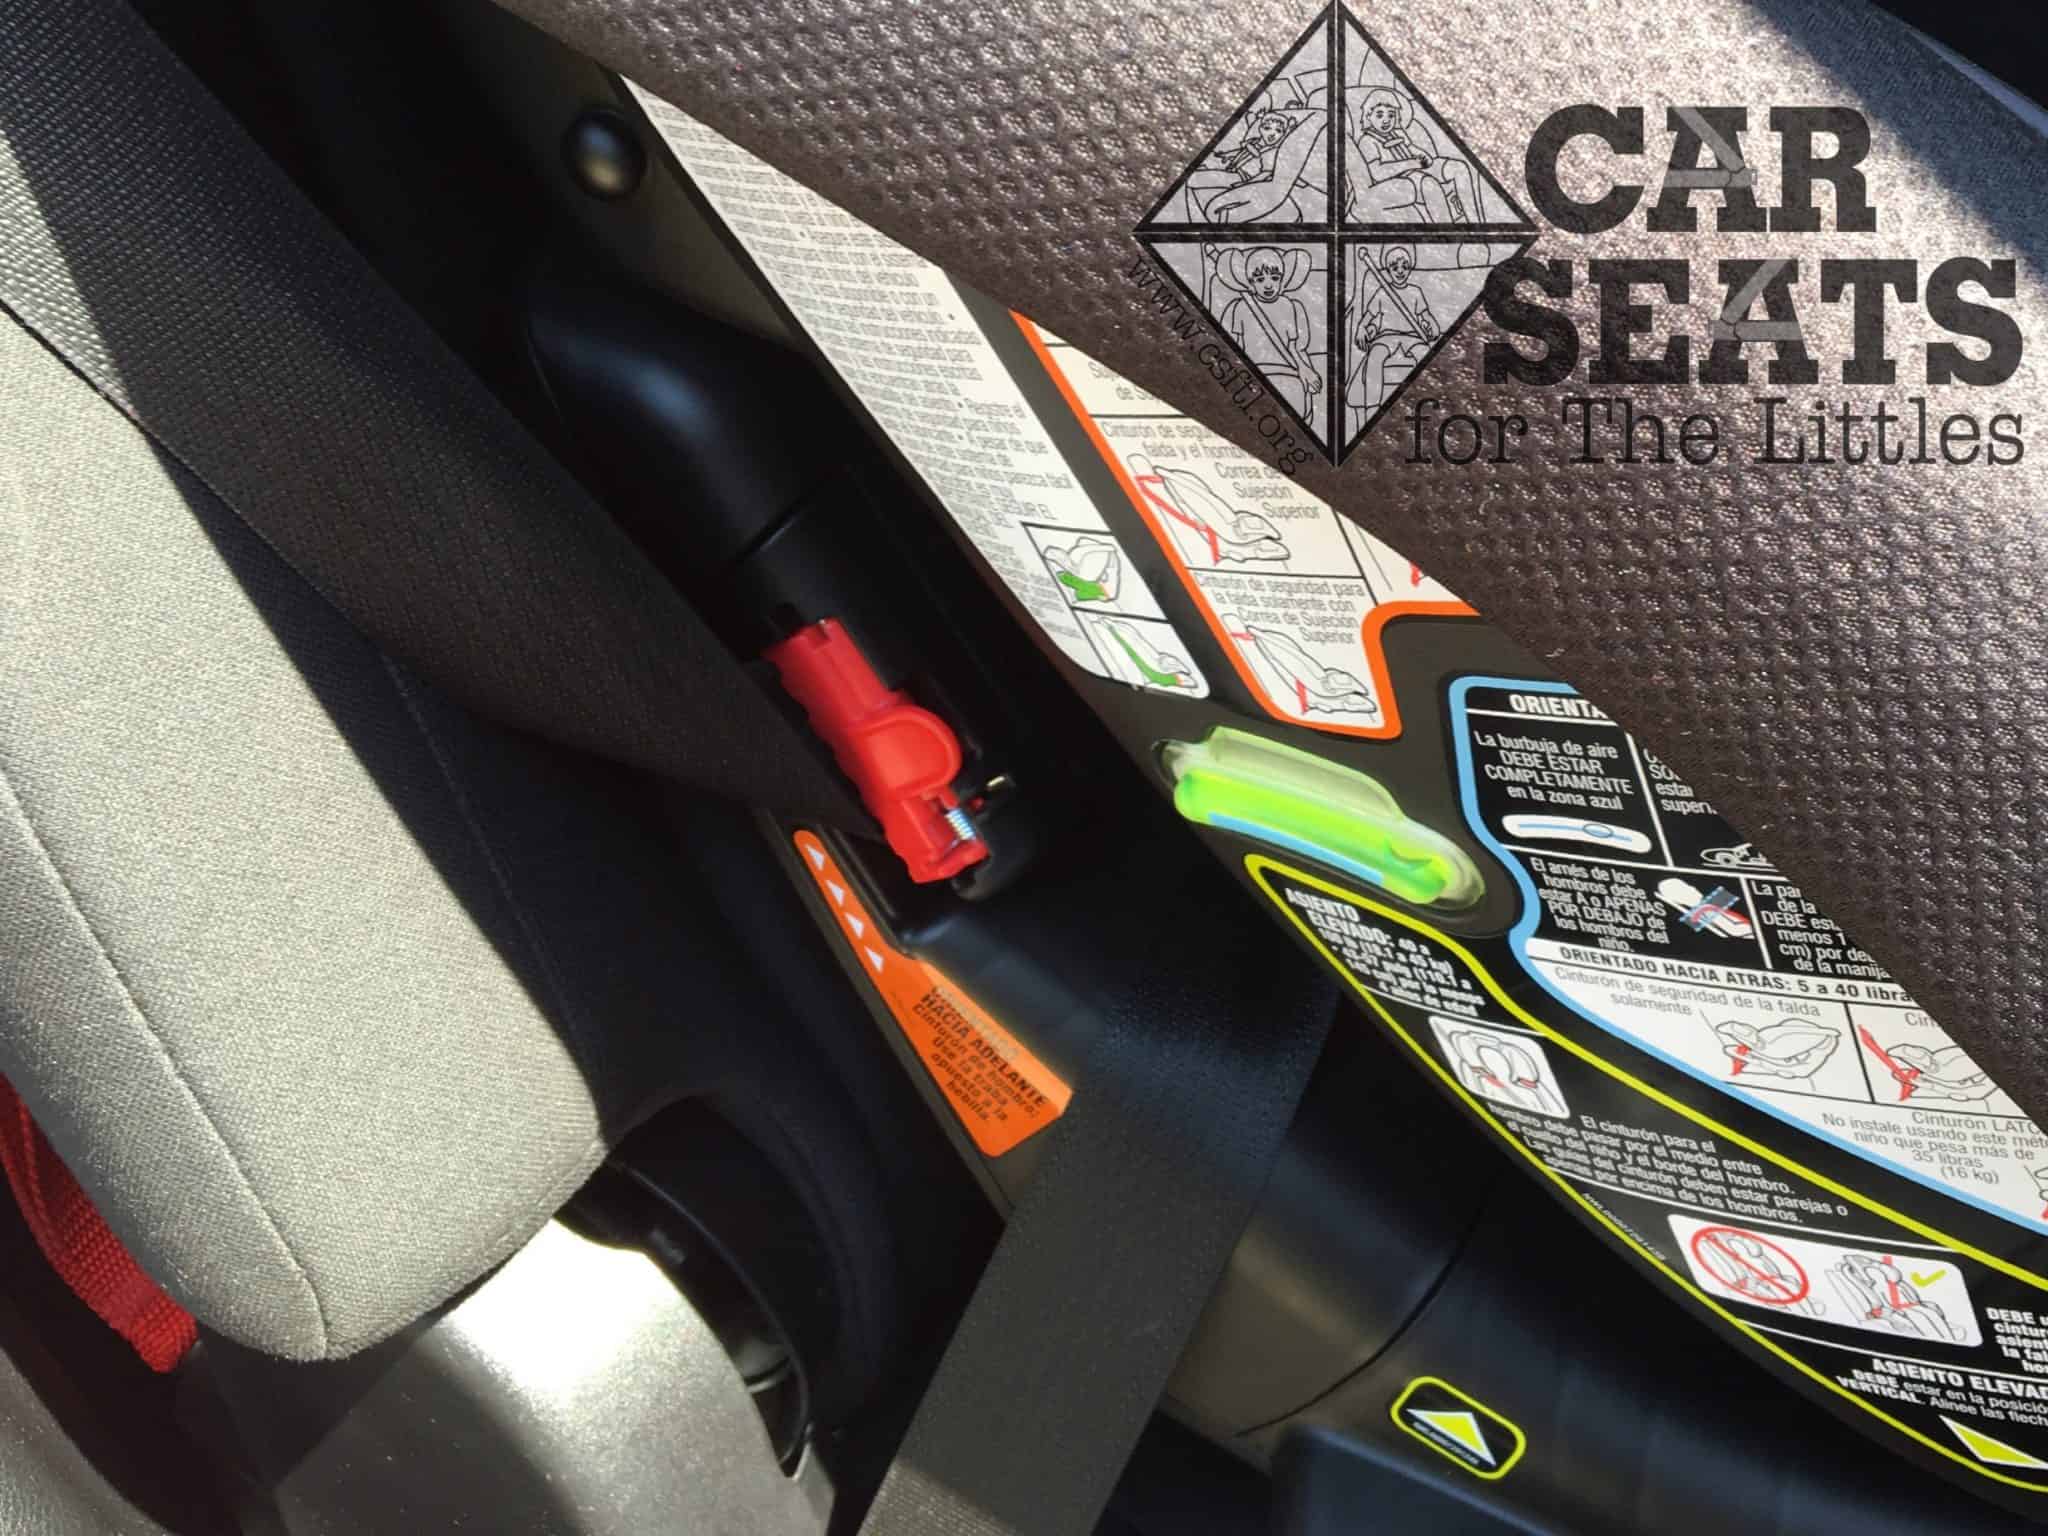
Graco Recline N’ Ride manual instructions for rear facing overhang
When the Recline N’ Ride is installed rear facing, the car seat’s base must be supported at least until the back end of the stability foot. What’s a stability foot, you ask? We asked that, too!
The stability foot is a round, protruding part on the side of the base, and it must be completely on the vehicle seat for installation.

Graco Recline N’ Ride maximum rear facing overhang
The manual does a fantastic job of explaining the front to back overhang rules. Since the seat is so large, these rules will be key information for a safe installation.
Fit to Child
Rear Facing
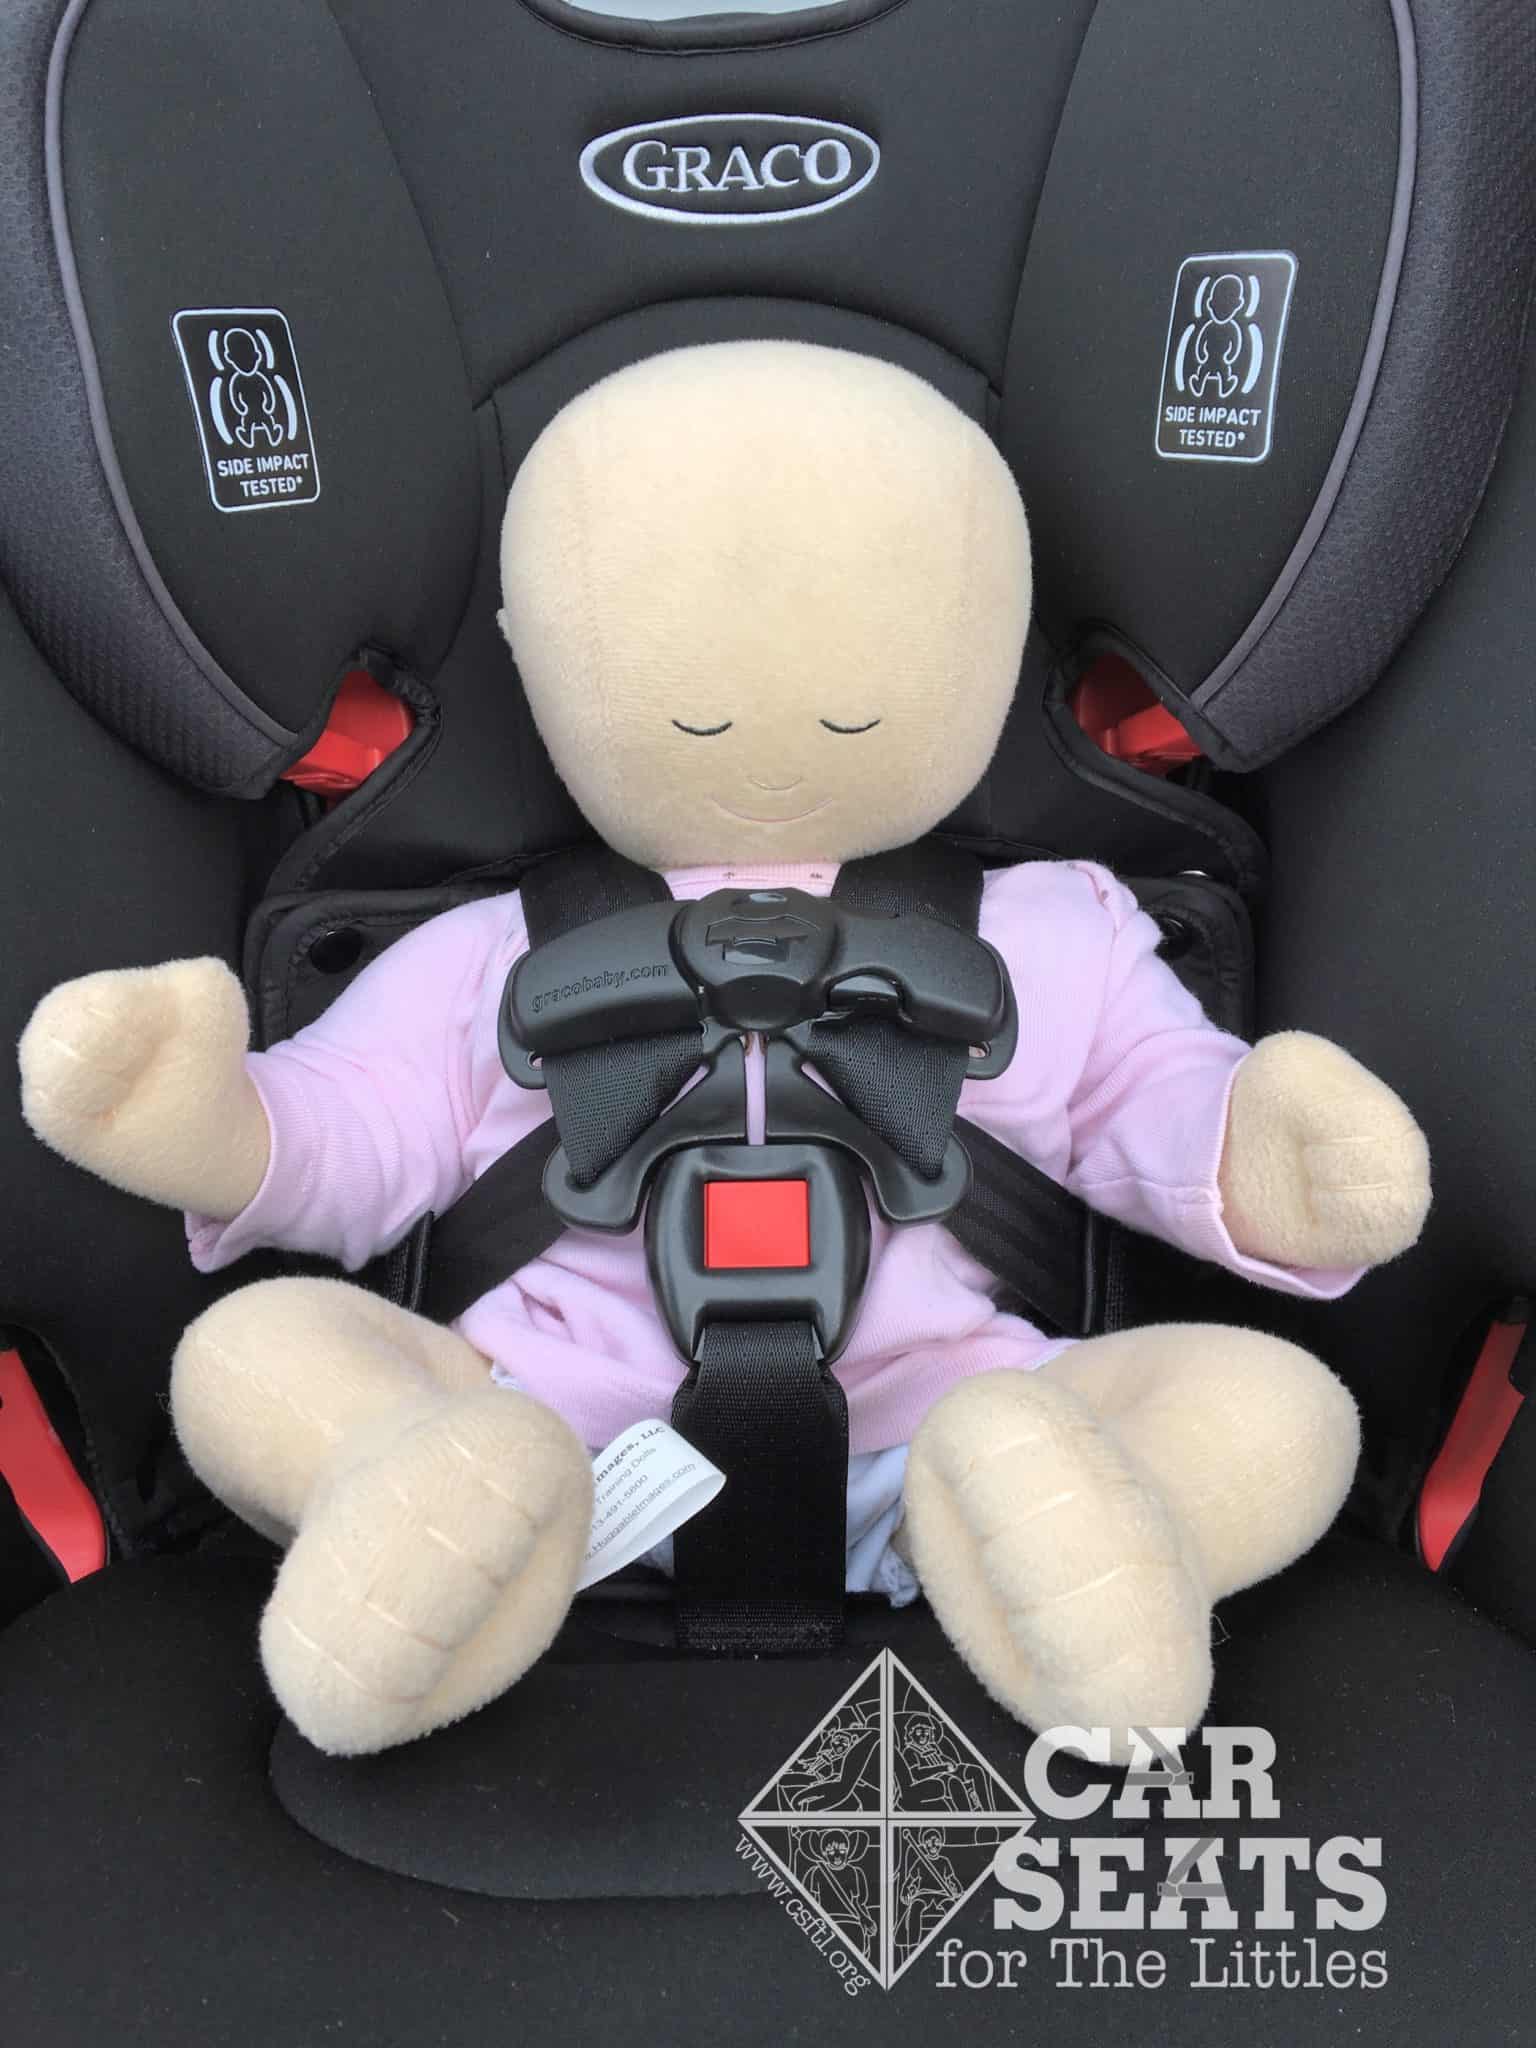
Newborn Doll
Graco Recline N’ Ride newborn doll
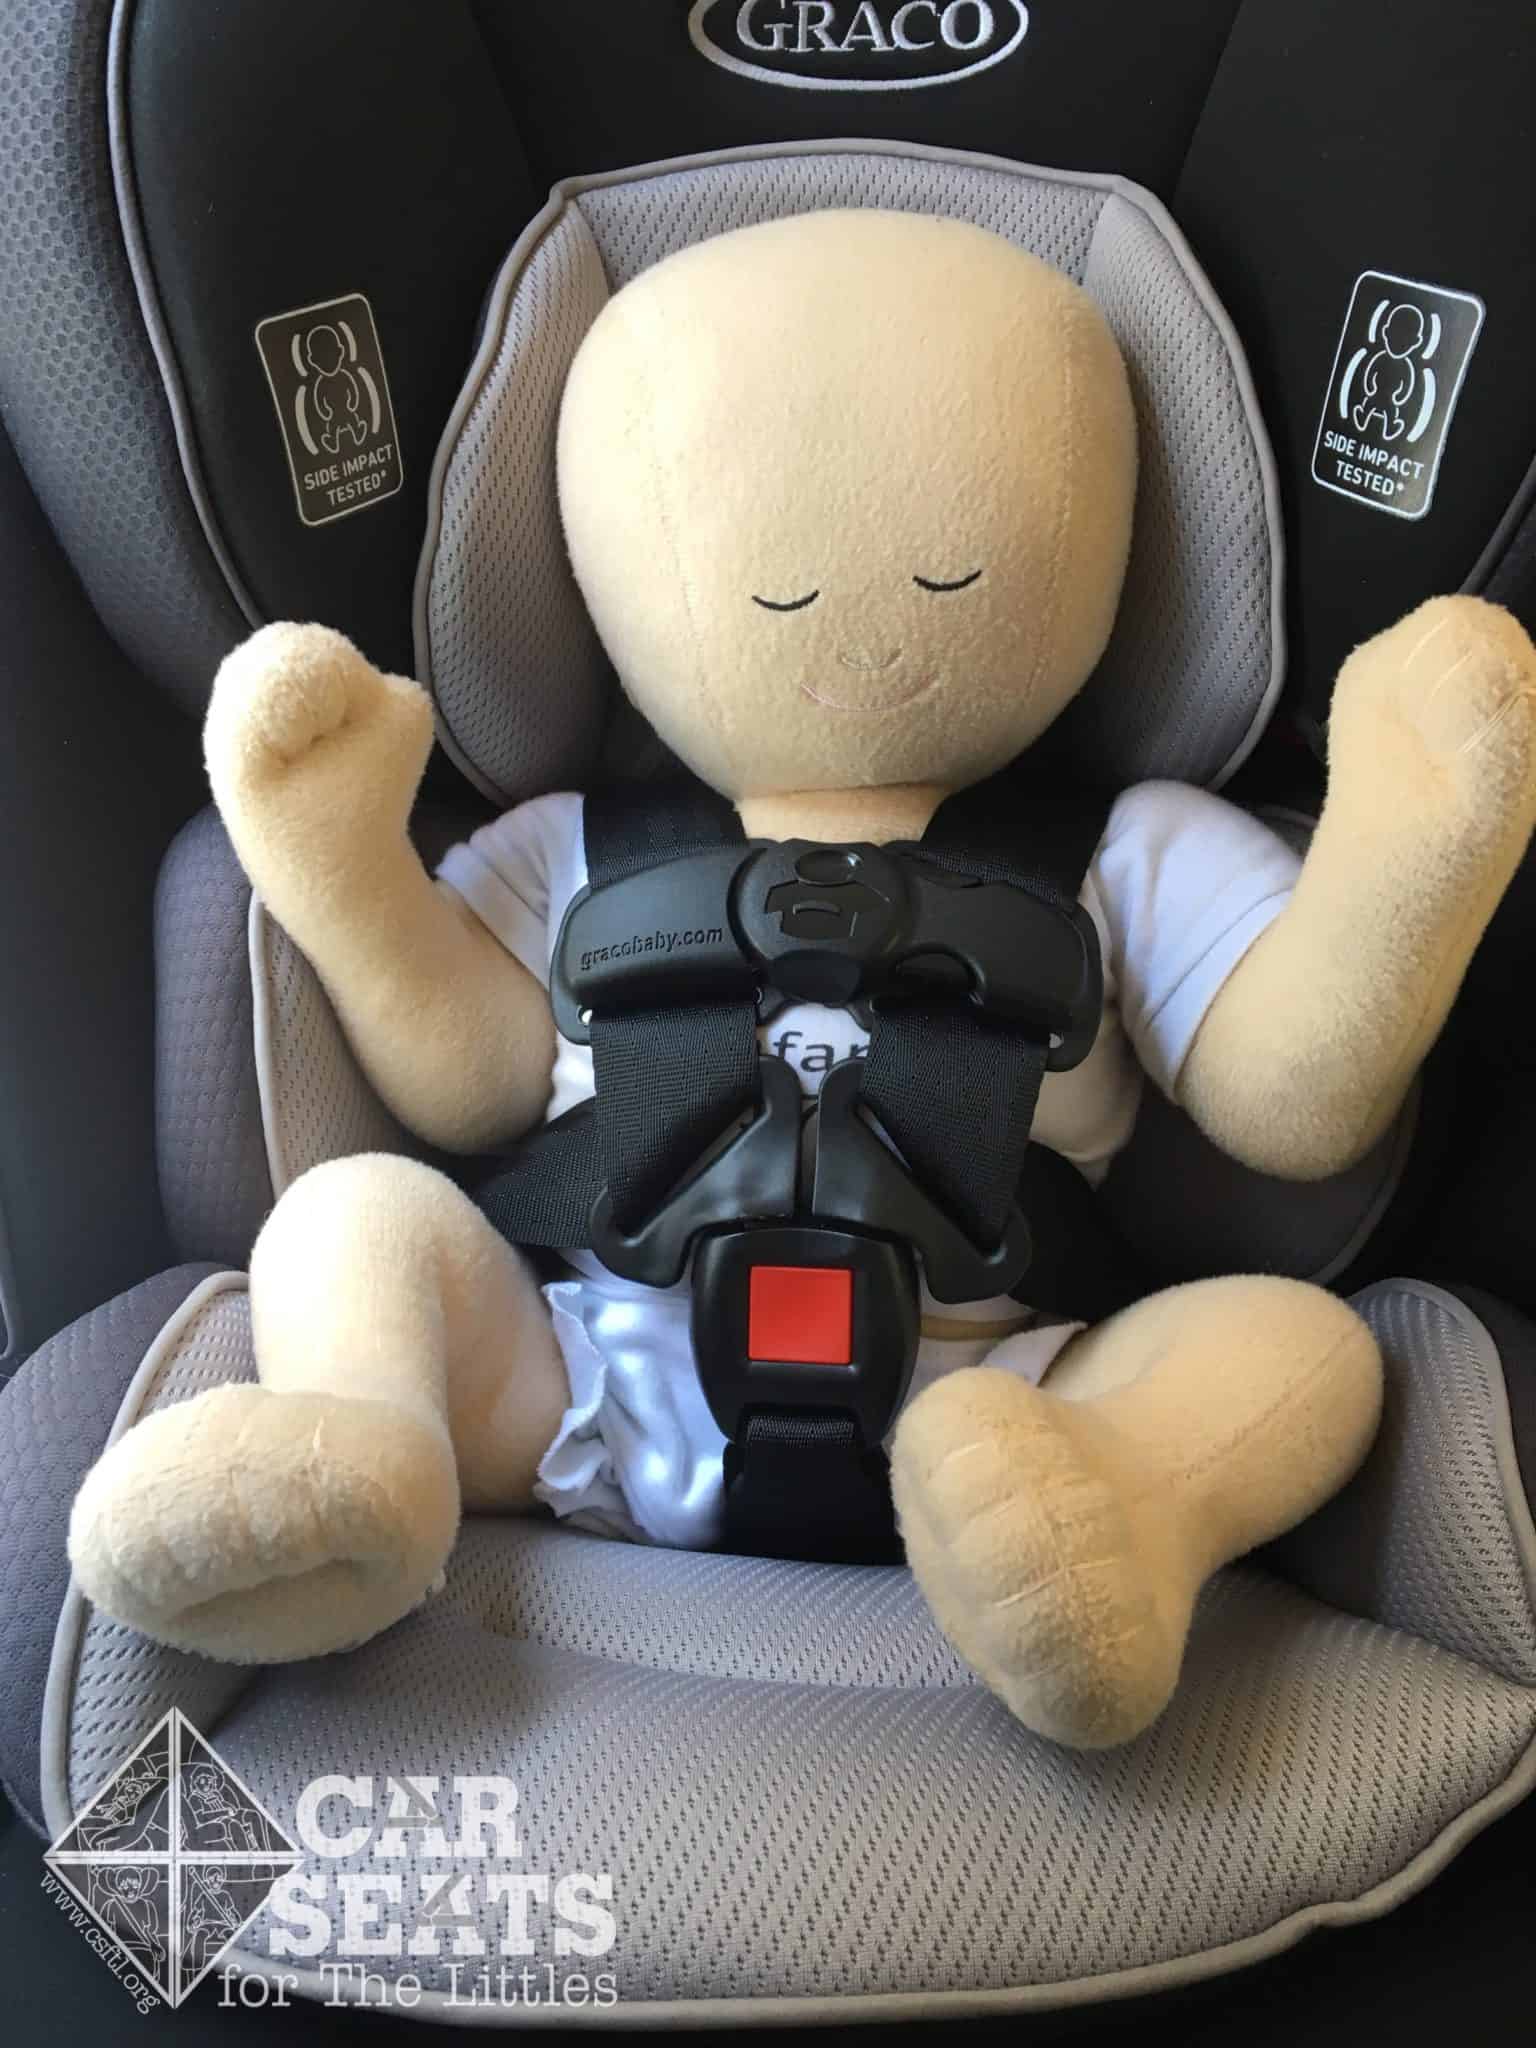
Our wee Huggable Images newborn doll is approximately the size of a larger newborn baby — she’s 7 pounds and 17 inches long. The Recline N’ Ride fit her very well with all of the infant padding on the seat and the harness pads removed. Her head position was fantastic without a hint of head slump, and the padding was very supportive.
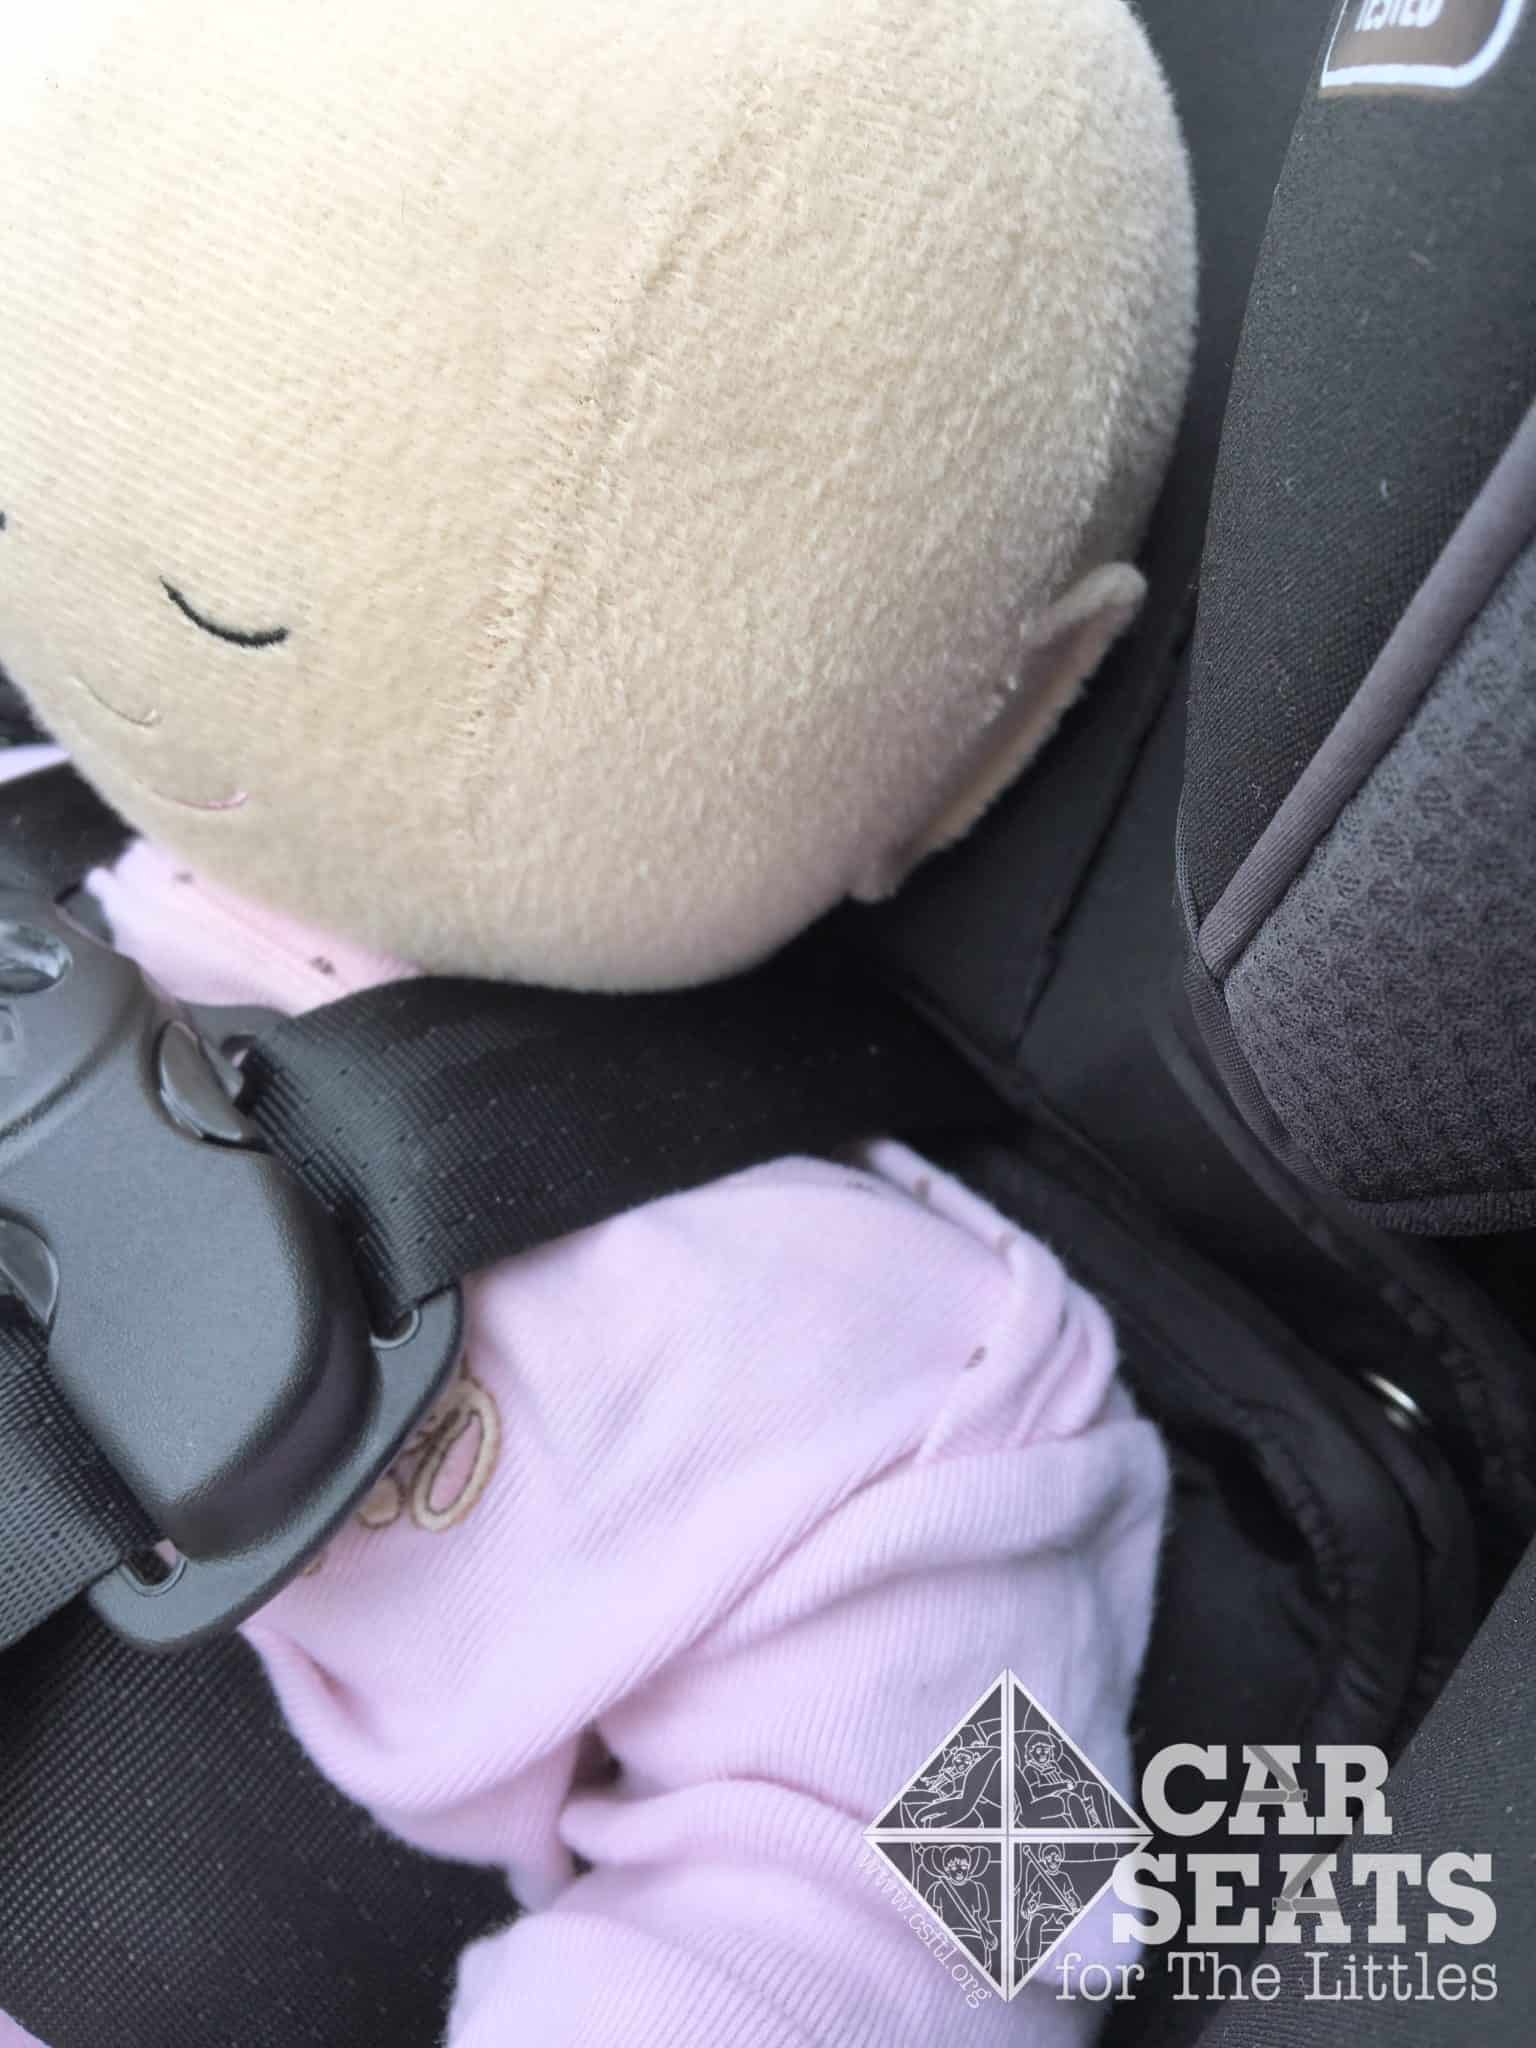
Graco Recline N’ Ride newborn fit without the padding
Without the infant padding, our newborn doll is too small to reach the bottom harness setting and the crotch buckle was simply too long. When the padding was removed the crotch buckle was so long that the chest clip overlapped the crotch buckle! She’d need the infant padding to use the seat safely.
Graco Recline N’ Ride newborn with the harness above the shoulders
Most newborns would need the bottom insert for a safe fit. Smaller newborns may fit better without the harness pads as well.
Our original review included pictures of children ages 4, 6, and 8 years old. We found that the harness fit those children well but the rear facing 4 year old had some trouble with the gap between the Recline N’ Ride and the vehicle seat back.
4 Years Old
Our preschool model turned 4 while this review was originally written. She was well within the Recline N’ Ride’s rear facing height and weight limits. The harness adjusted easily to fit her height, and she had oodles of room for growth. She didn’t like that the harness pads were stiff and didn’t find the rubber backing very comfortable.
Foot Fault
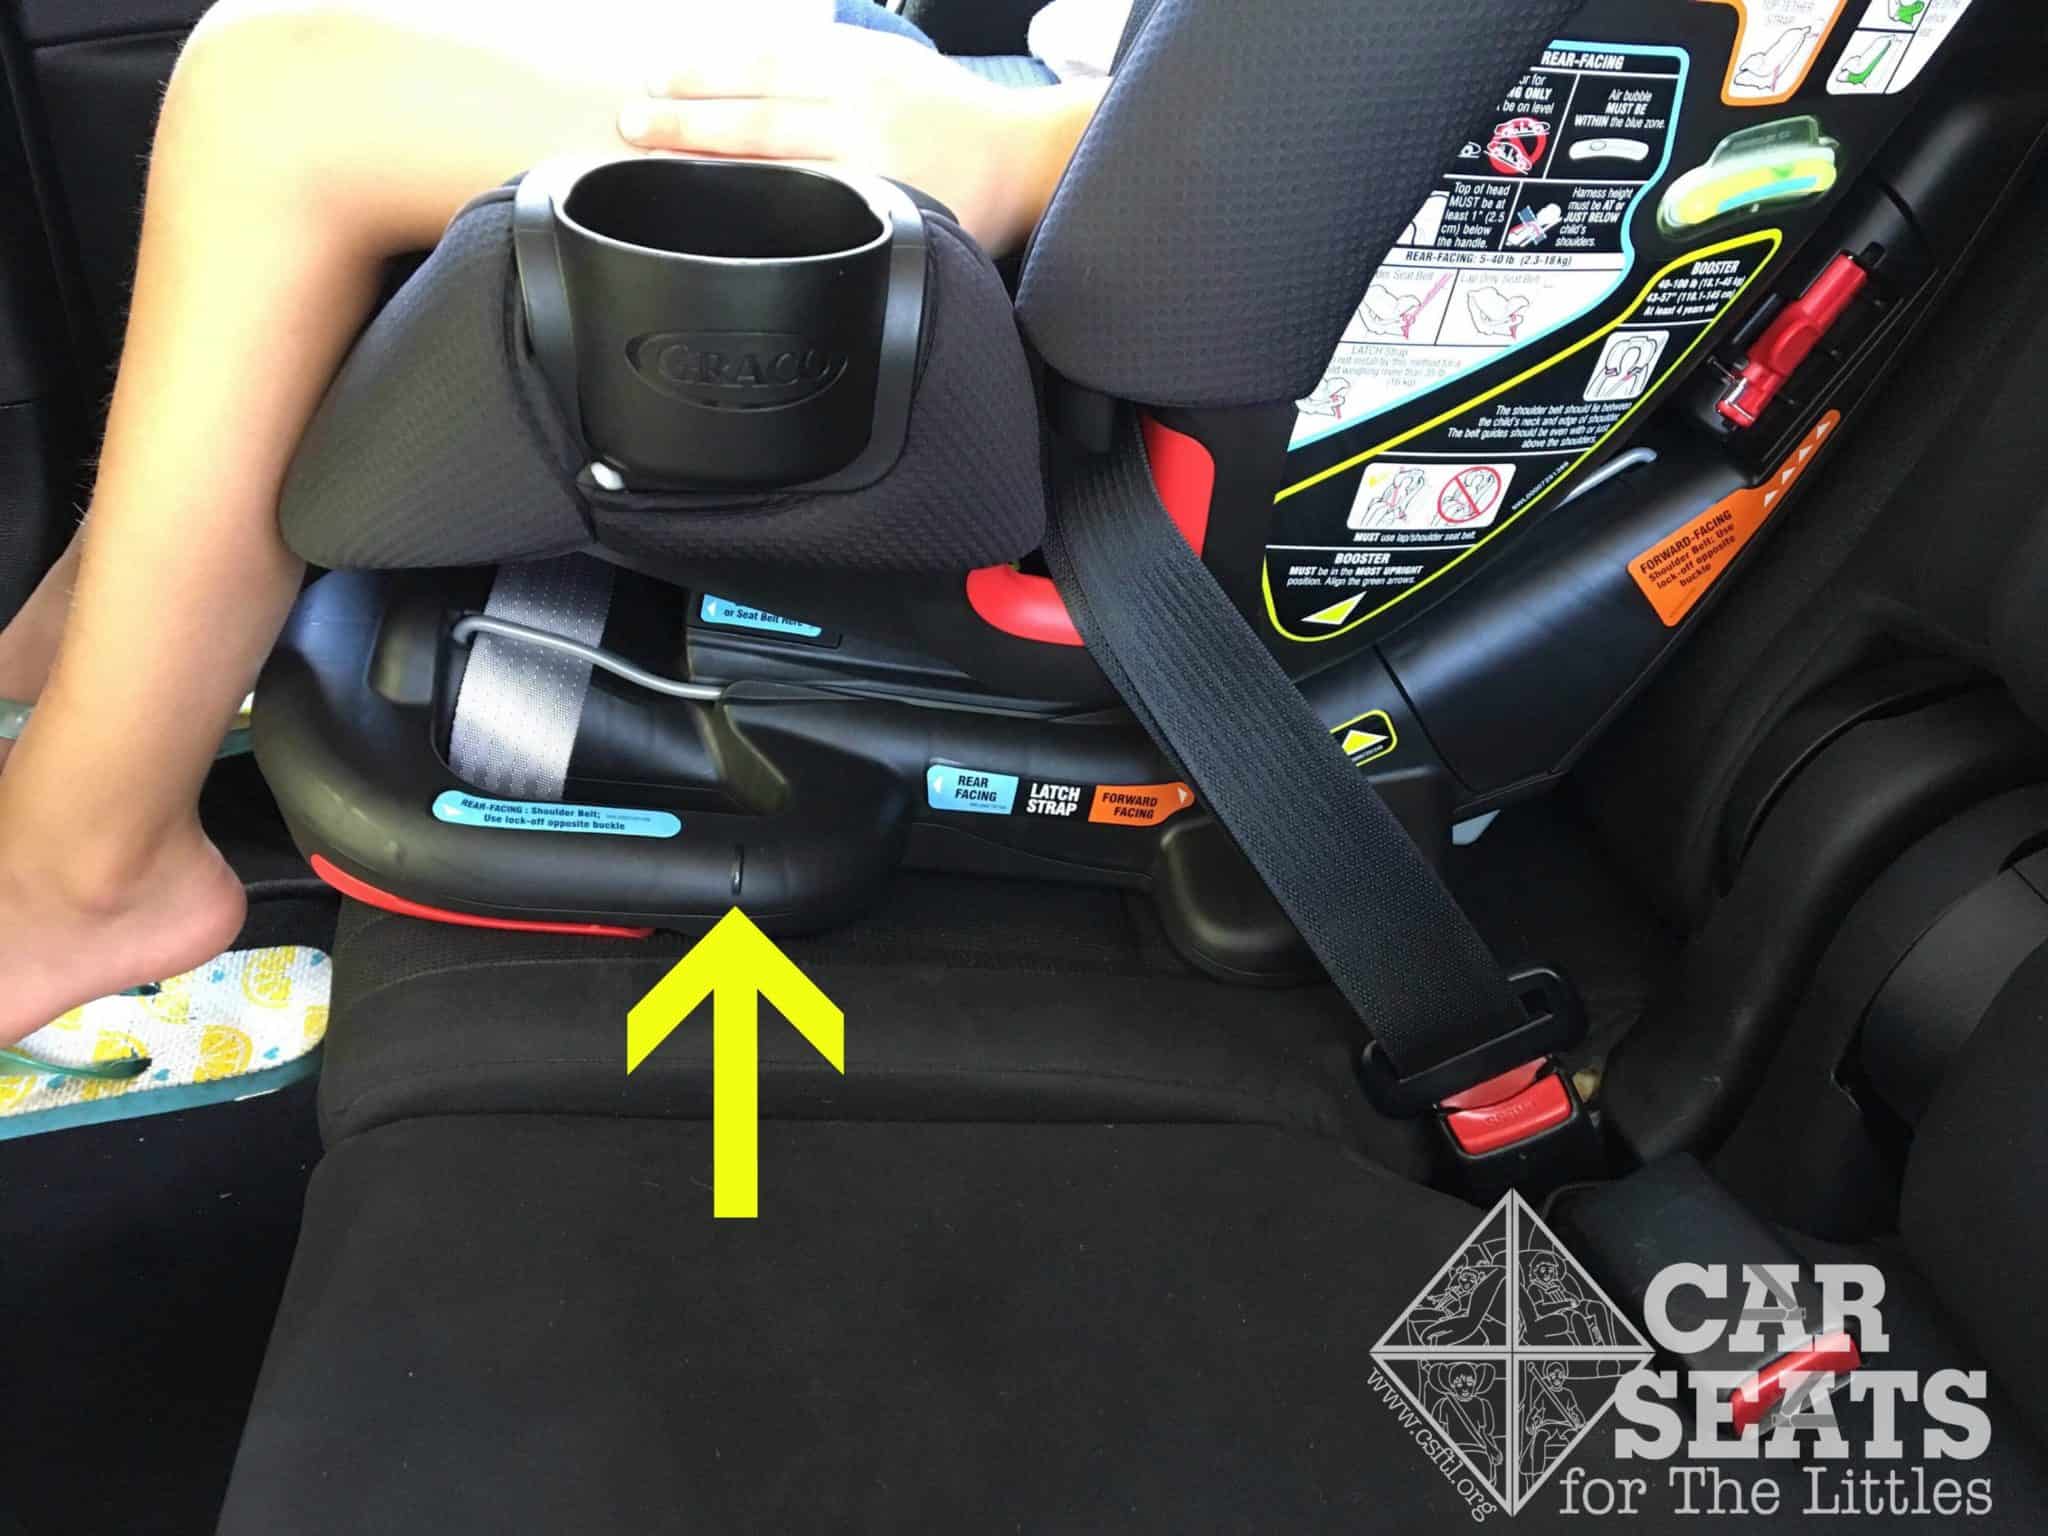
Graco Recline N’ Ride rear facing gap
The Recline N’ Ride ended up being relatively reclined in the Dodge Durango used in this review. Our 4 year old model preferred the most upright setting. However, when the Recline N’ Ride was installed at the most upright angle allowed, I discovered a very large gap between the seat pan and the vehicle seat back.
In the interest of science, I installed the Recline N’ Ride in two additional vehicles: a Nissan Armada and a Pontiac Grand Am, and discovered that this gap was very wide in both vehicles. The gap was so large that this 4 year old was able to wedge her foot into this gap.
We reached out to Graco about the gap situation. We were concerned that child could get a foot stuck during a ride or step into the gap when exiting or entering the vehicle. Having experienced many 4 year olds, it seemed possible to us that a child could be injured this way. Representatives from Graco told us that they did not believe this was a concern. They said that a pool noodle could close the gap but would then prevent the main feature — the ability to adjust the recline while the seat is installed — from working. We aren’t sure what to make of this.
Forward Facing
Setup and Installation
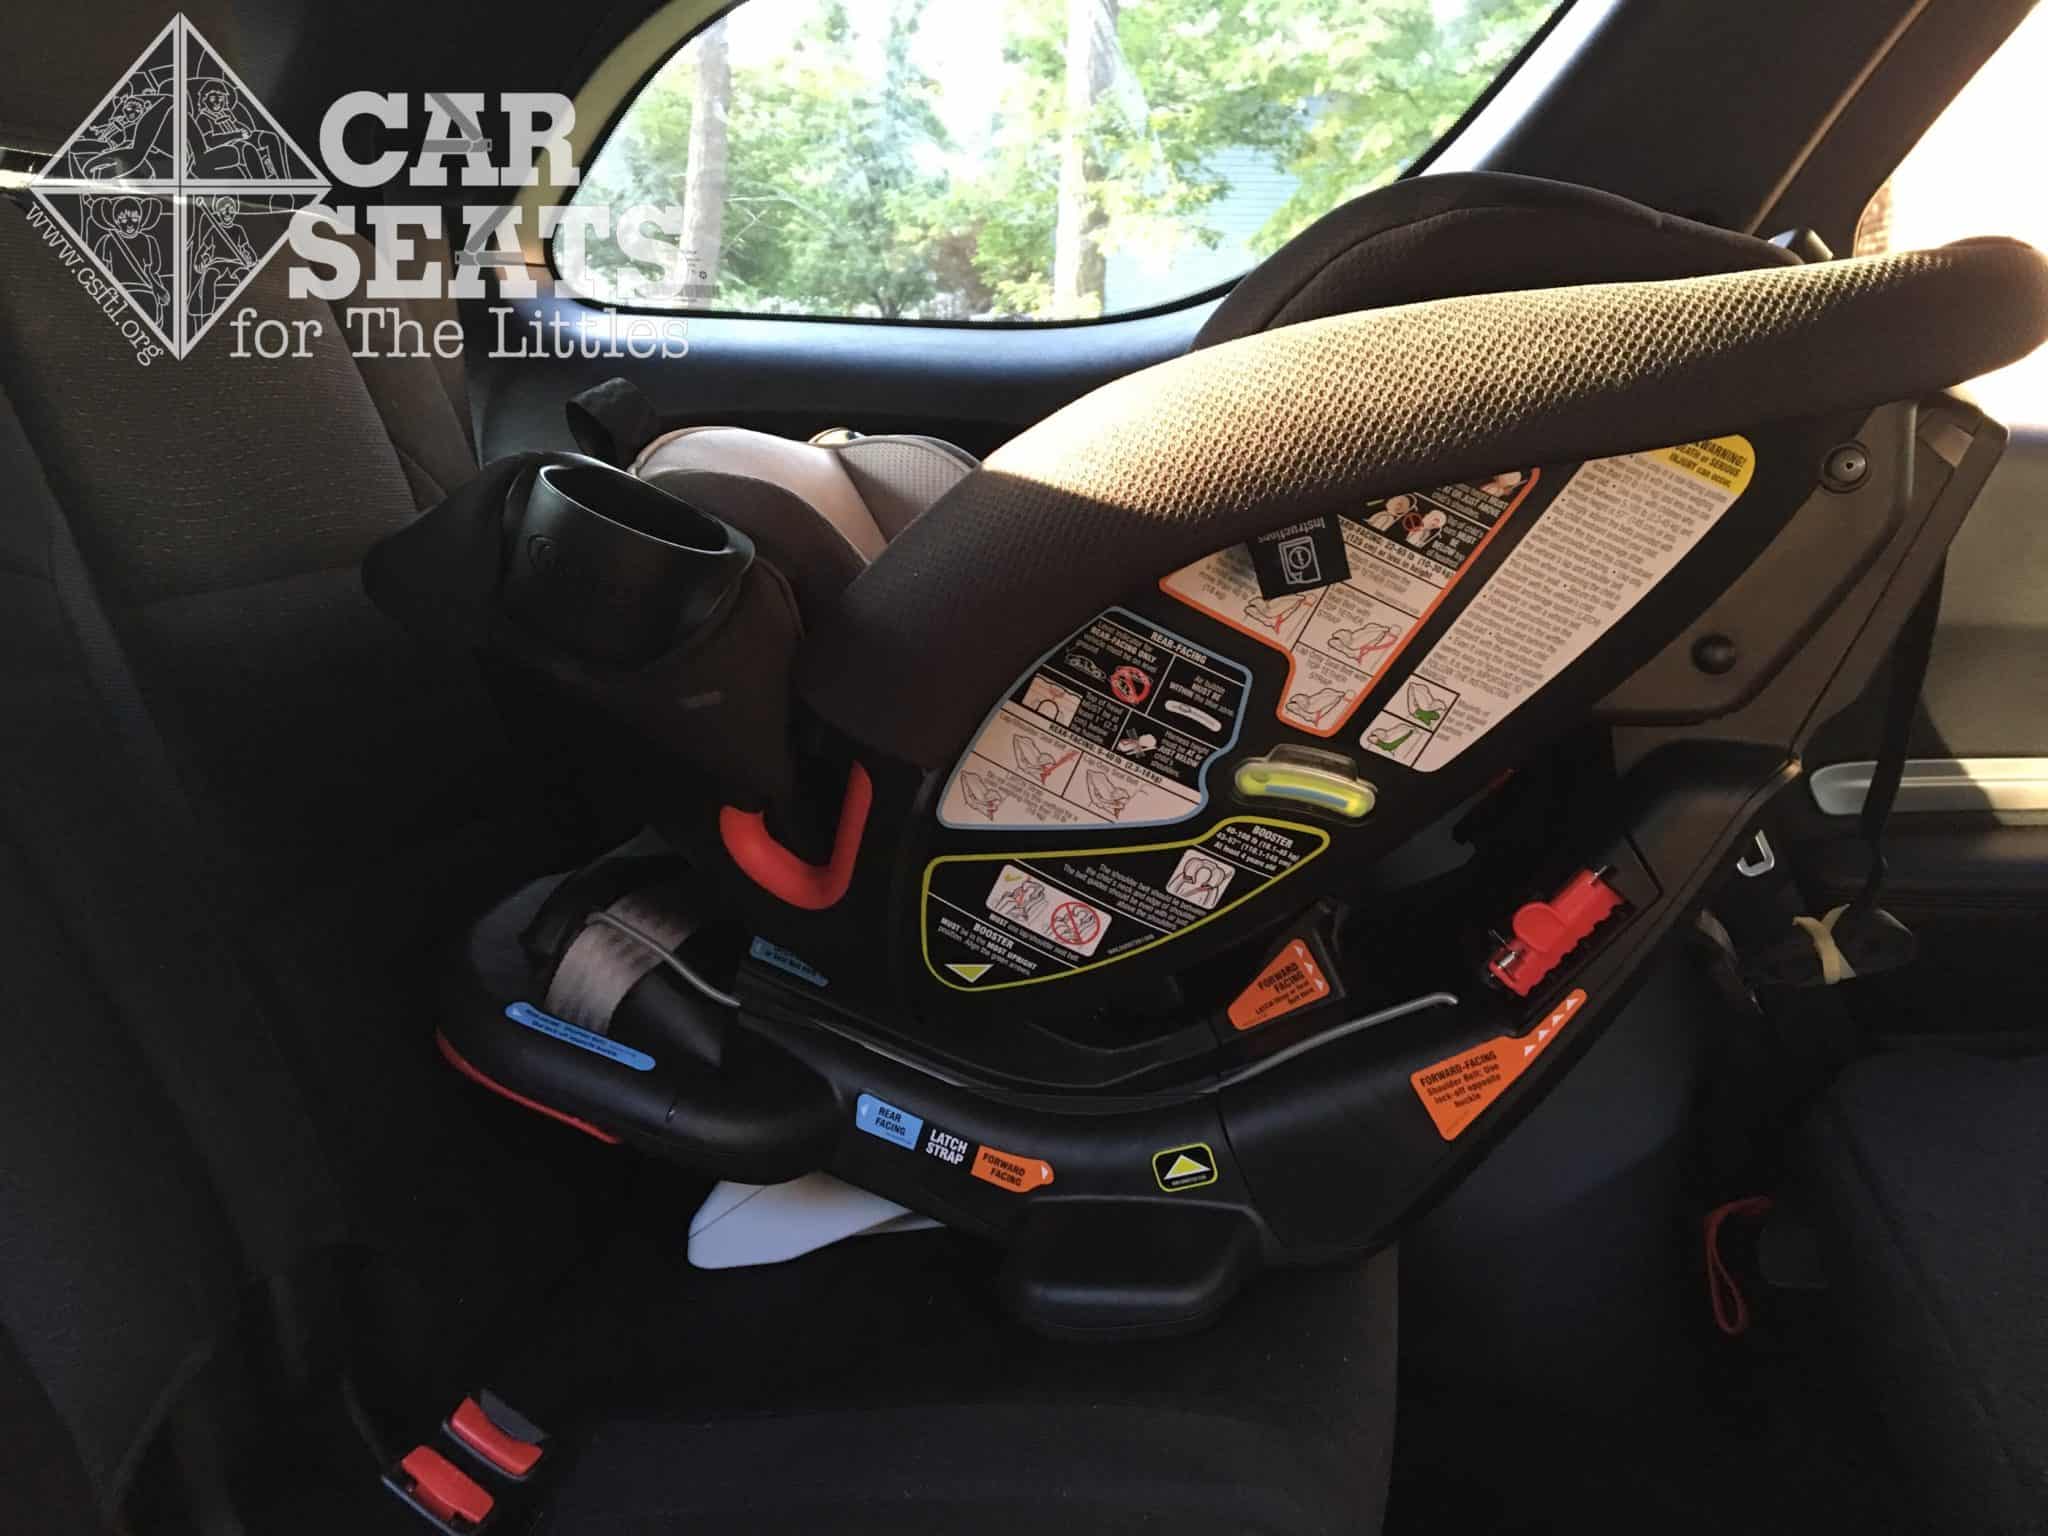
Graco Recline N’ Ride flip foot in forward facing position
To install the Recline N’ Ride forward facing, the recline foot must be moved to the forward facing position and the seat must be fully reclined. In some vehicles this can be problematic because a fully reclined Recline N’ Ride is pretty darn large.
In some vehicles, the fully reclined Recline N’ Ride pushes into the vehicle seat during installation. Then, when the seat’s angle is adjusted after installation, some of the tension caused by the seat against the vehicle seat back is removed, making the installation looser. At this point, it’s possible to tighten the vehicle seat belt through the lockoff, but the lower anchor connectors would be significantly harder to tighten in this scenario.
We often share two pro installation tips: pull the lower anchor webbing through the seat’s base or shell and pull on the webbing from a different angle but… the Recline N’ Ride’s unique belt path and requirement that it be completely reclined when installing render those two tips pretty much useless.
So I went back to the drawing board. Eventually I found a way to remove the slack from the lower anchors by pushing on the seat itself while pulling the webbing in the opposite direction from where I was pushing. When our team of seasoned CPSTs has trouble installing, we worry about how successful caregivers who aren’t as familiar with car seat installation will be.
Lockoffs
While using the rear facing lockoffs and navigating the rear facing belt path are fairly complicated, I was relieved to discover that the forward facing belt path and lockoff are relatively user friendly. Just recline the car seat, thread the vehicle seat belt through the forward facing belt path, buckle, and place the shoulder belt portion on the opposite side of the buckle inside the red lockoff.
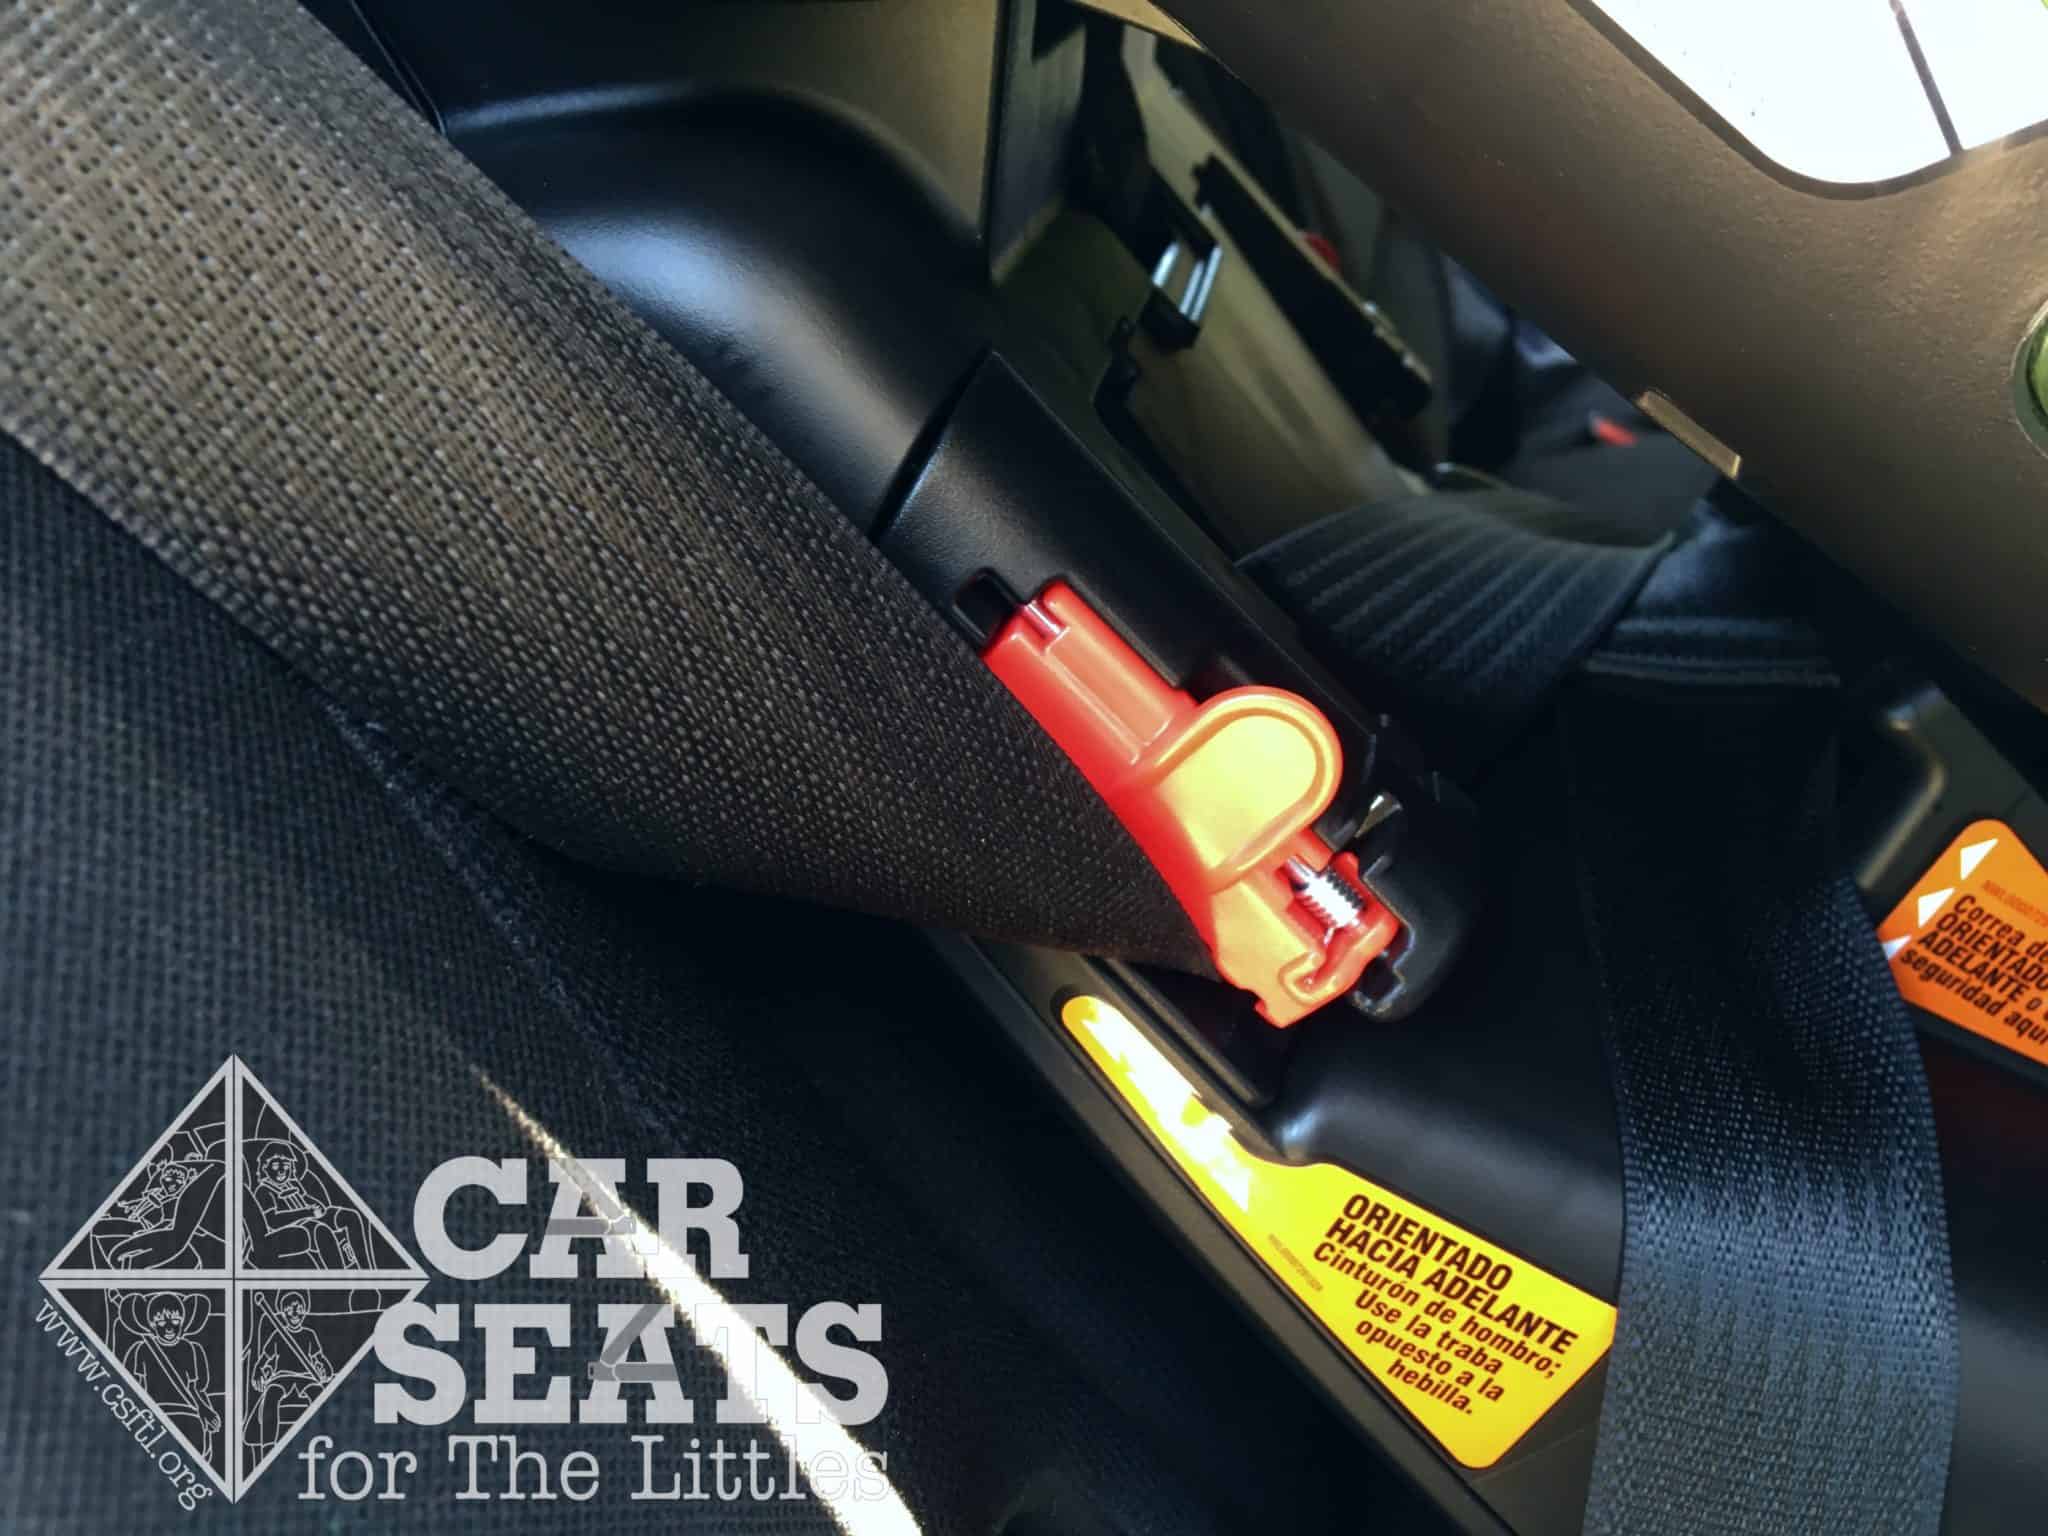
Graco Recline N’ Ride forward facing lockoff
The forward facing lockoff is spring loaded and opens by pushing on the red tab with just a finger. The lockoff closes over the vehicle seat belt to ensure a snug install.
Did We Break the Lockoff?
Unfortunately, after just one use, I broke the forward facing lockoff on the child’s left side. I installed the Recline N’ Ride just once, properly, in the third row of my SUV, to see if it fit and then took it out of the car. The lockoff somehow became “over sprung” at some point and wouldn’t open.
We contacted Graco and they suggested that I simply press down on the tab to fix the lockoff. I attempted this for a few days until I discovered the trick: use both hands at once, pressing down with my body weight at a certain angle, to release the spring in the lockoff and make it functional again.
Graco assured us that the lockoff would have been safe to use at this point. While we trust their engineers and the testing process, we worry about a seat breaking under normal conditions and also about expecting the average caregiver to be responsible for fixing a vital part of their child’s car seat. We’d always prefer that these devices just work. Our friends at Graco report that an updated version of this lockoff went into production in October, 2018.
Lower Anchors
Graco Recline N’ Ride forward facing lower anchor installation
Installing the Recline N’ Ride forward facing with the lower anchors was very frustrating. The lower anchor connectors tended to push on the sides of the base a bit in rear facing mode. I couldn’t find a good way to get leverage when installing the seat, and the large plastic base seemed to interfere with the lower anchors themselves.
Most of the time, when a forward facing seat is being difficult, I try to stand in front of it and use a knee to push the car seat back towards the vehicle seat. However, since the Recline N’ Ride must be so reclined for installation, there was no room for me to stand in front of it. When a seasoned CPST’s bag of tricks fails us, we are concerned about everyday users.
Vehicle Seat Belt
Graco Recline N’ Ride forward facing lockoff
The belt path is closed, so I couldn’t remove part of the cover to access the belt path directly. Another installation trick we like to try is basically doing a squat outside of the vehicle doing two things at once: pulling the vehicle seat belt toward the outside of the vehicle and pushing the car seat’s shell away.
Unfortunately, the SUV’s height and the very high lockoff on the Recline N’ Ride made this trick unworkable in our Durango. In the Pontiac Grand Am, I tried the squat trick only to find that the belt would slip forward out of the lockoff, instead of through it, and sometimes the seat itself would also slide forward as well.

Graco Recline N’ Ride manual instructions for forward facing overhang
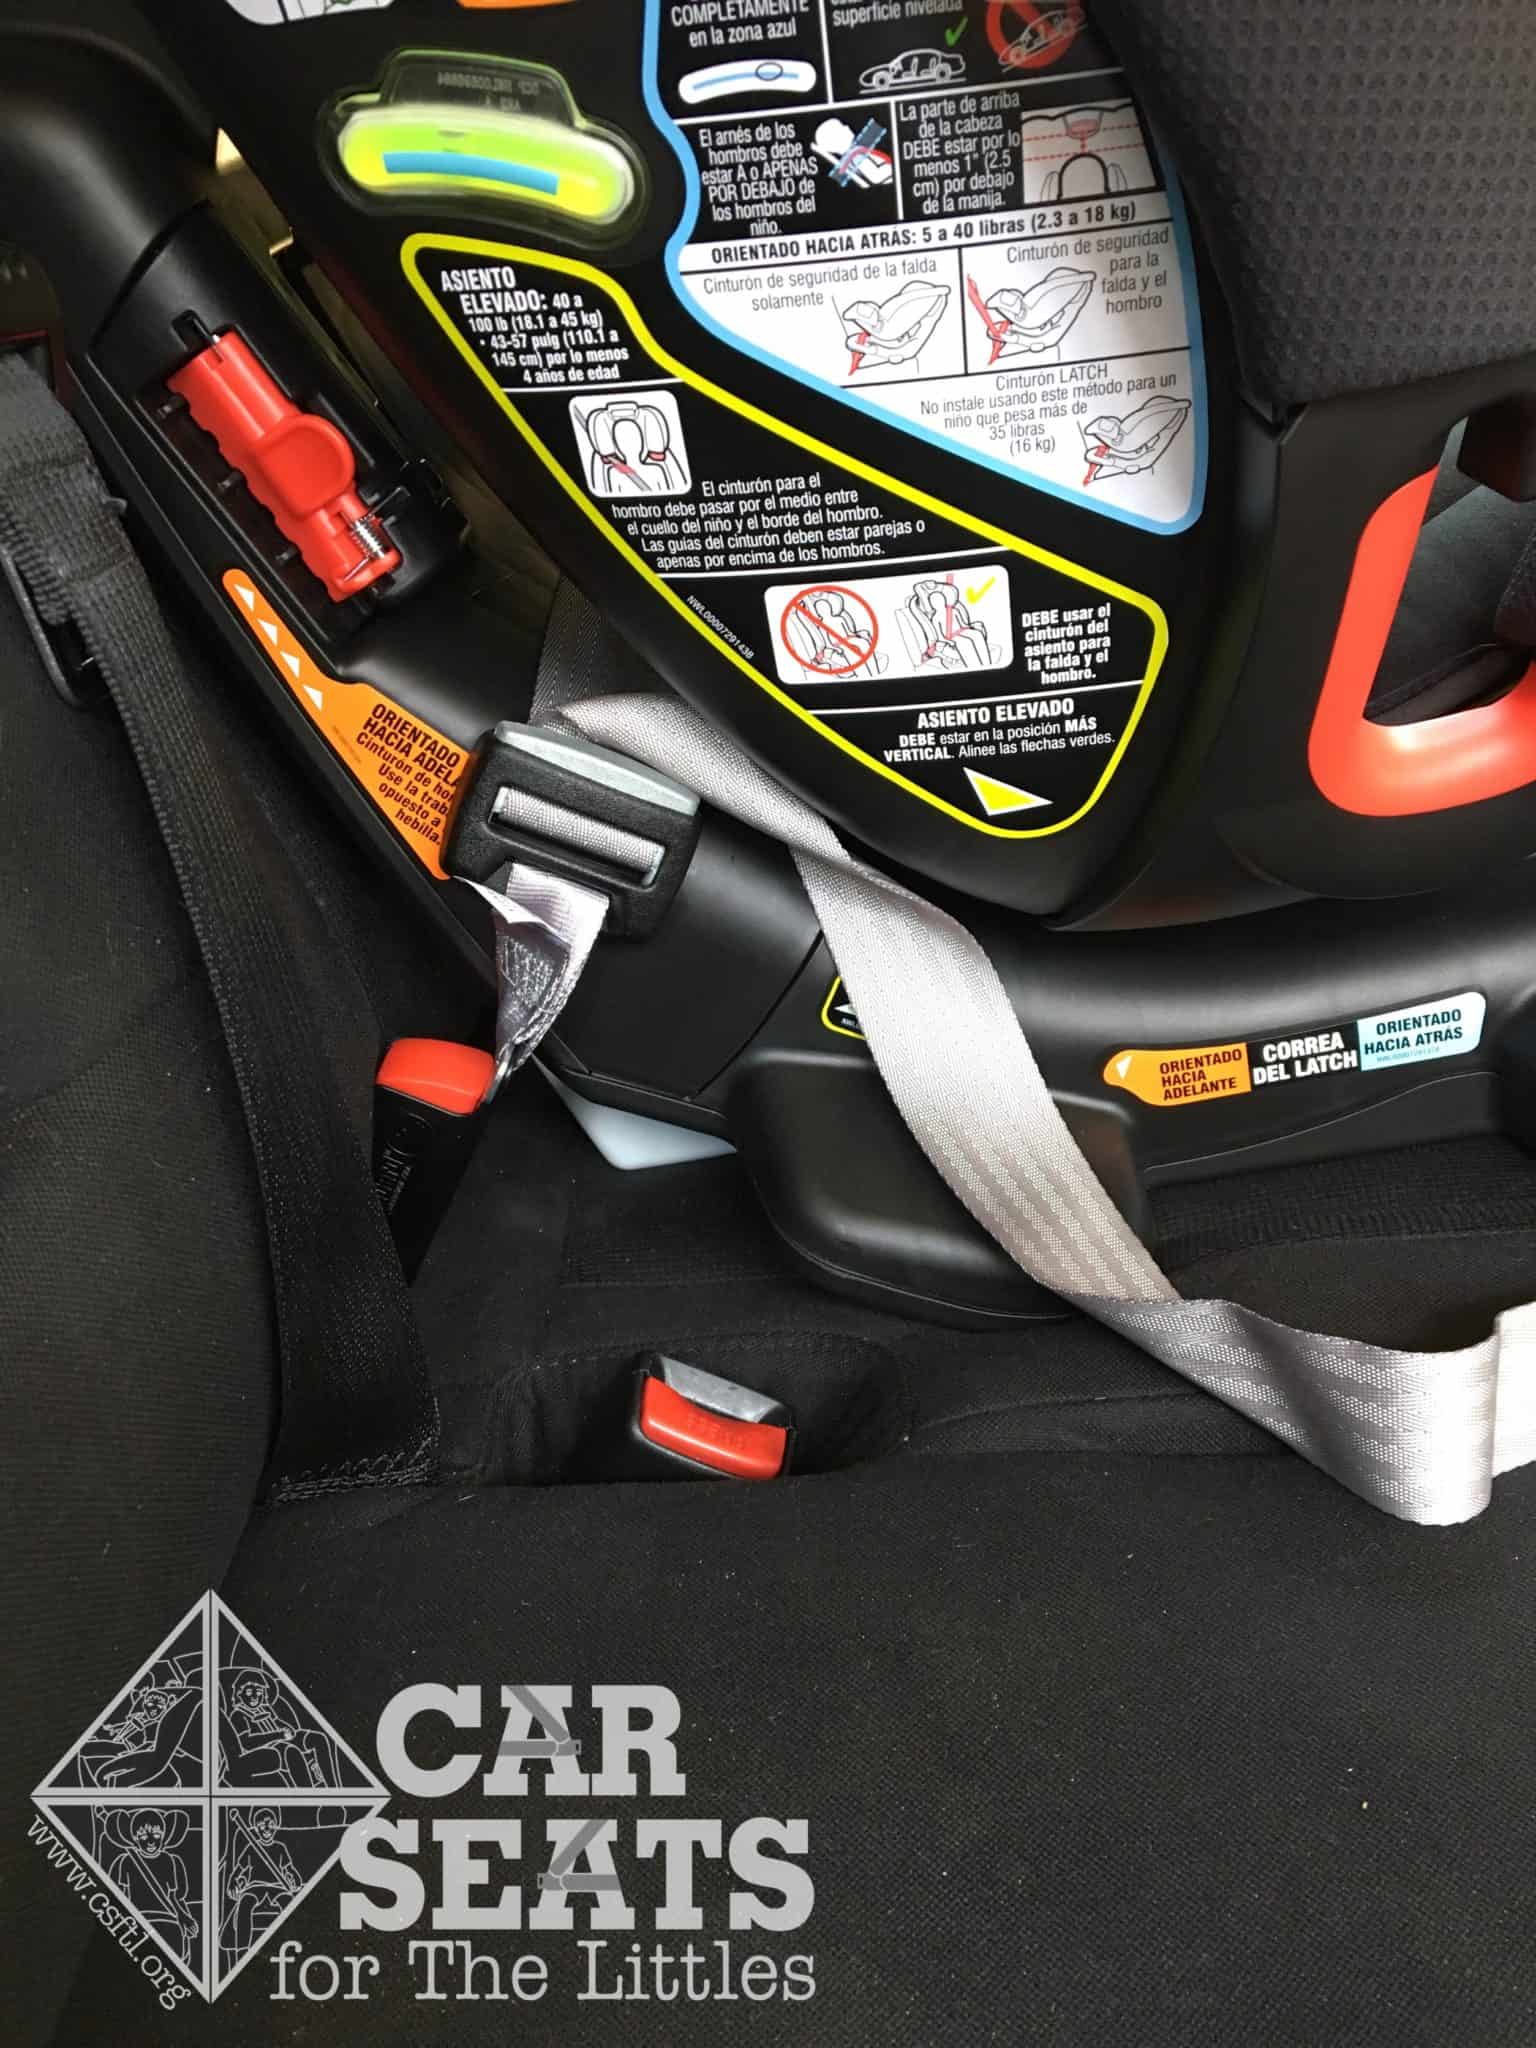
Graco Recline N’ Ride overhang labeling
For forward facing mode, the overhang requirement is marked right on the base itself. One might miss it at first glance, but Graco’s manual illustrates very clearly how much overhang is allowed.
Fit to Child
Forward Facing
6 and 8 Year Olds
We tested this seat with a 6 and 8 year old who are both on the smaller side of the growth charts. Though they both fit in the seat and had a bit of room to grow, they found that the harness is a bit narrow for their comfort.
Reminder: the harness pads cannot be used once a child weighs 40 pounds.
Converting to Booster Mode
Converting the Recline N’ Ride to booster mode is relatively simple and all of the harness parts store right on the seat! We’re always fans of parts that can’t get lost.
The recline foot must be in forward facing mode when using the Recline N’ Ride as a booster seat. The same overhang rules apply for booster mode as forward facing mode; the vehicle seat must provide coverage until the marked portion of the base.
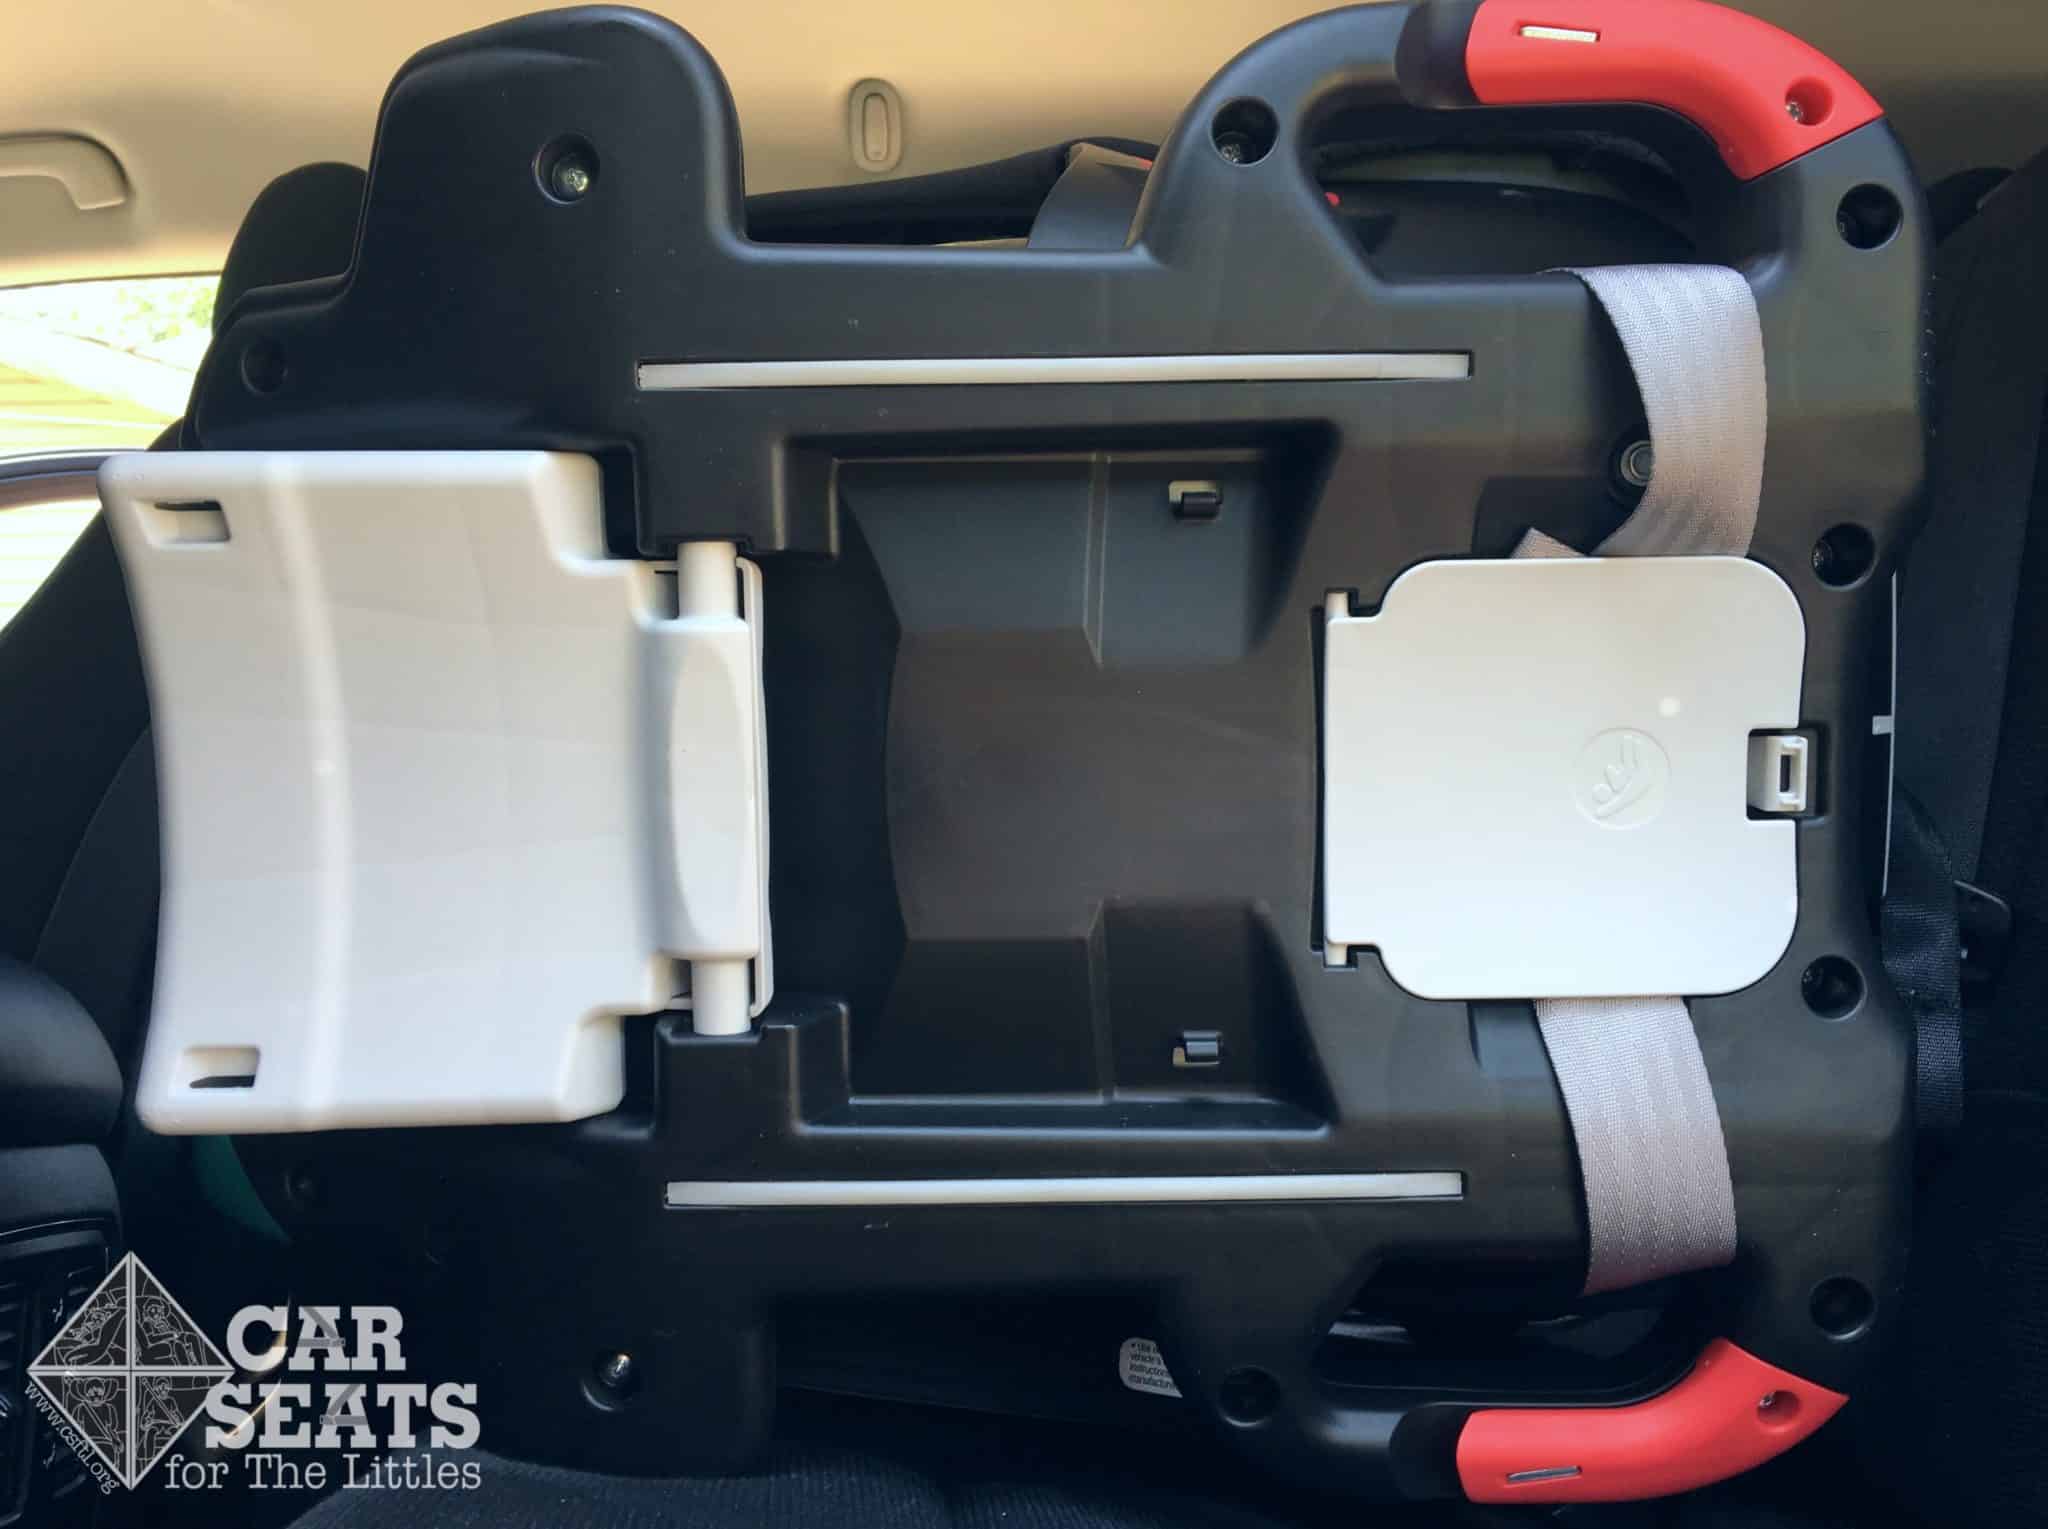
Harness Storage
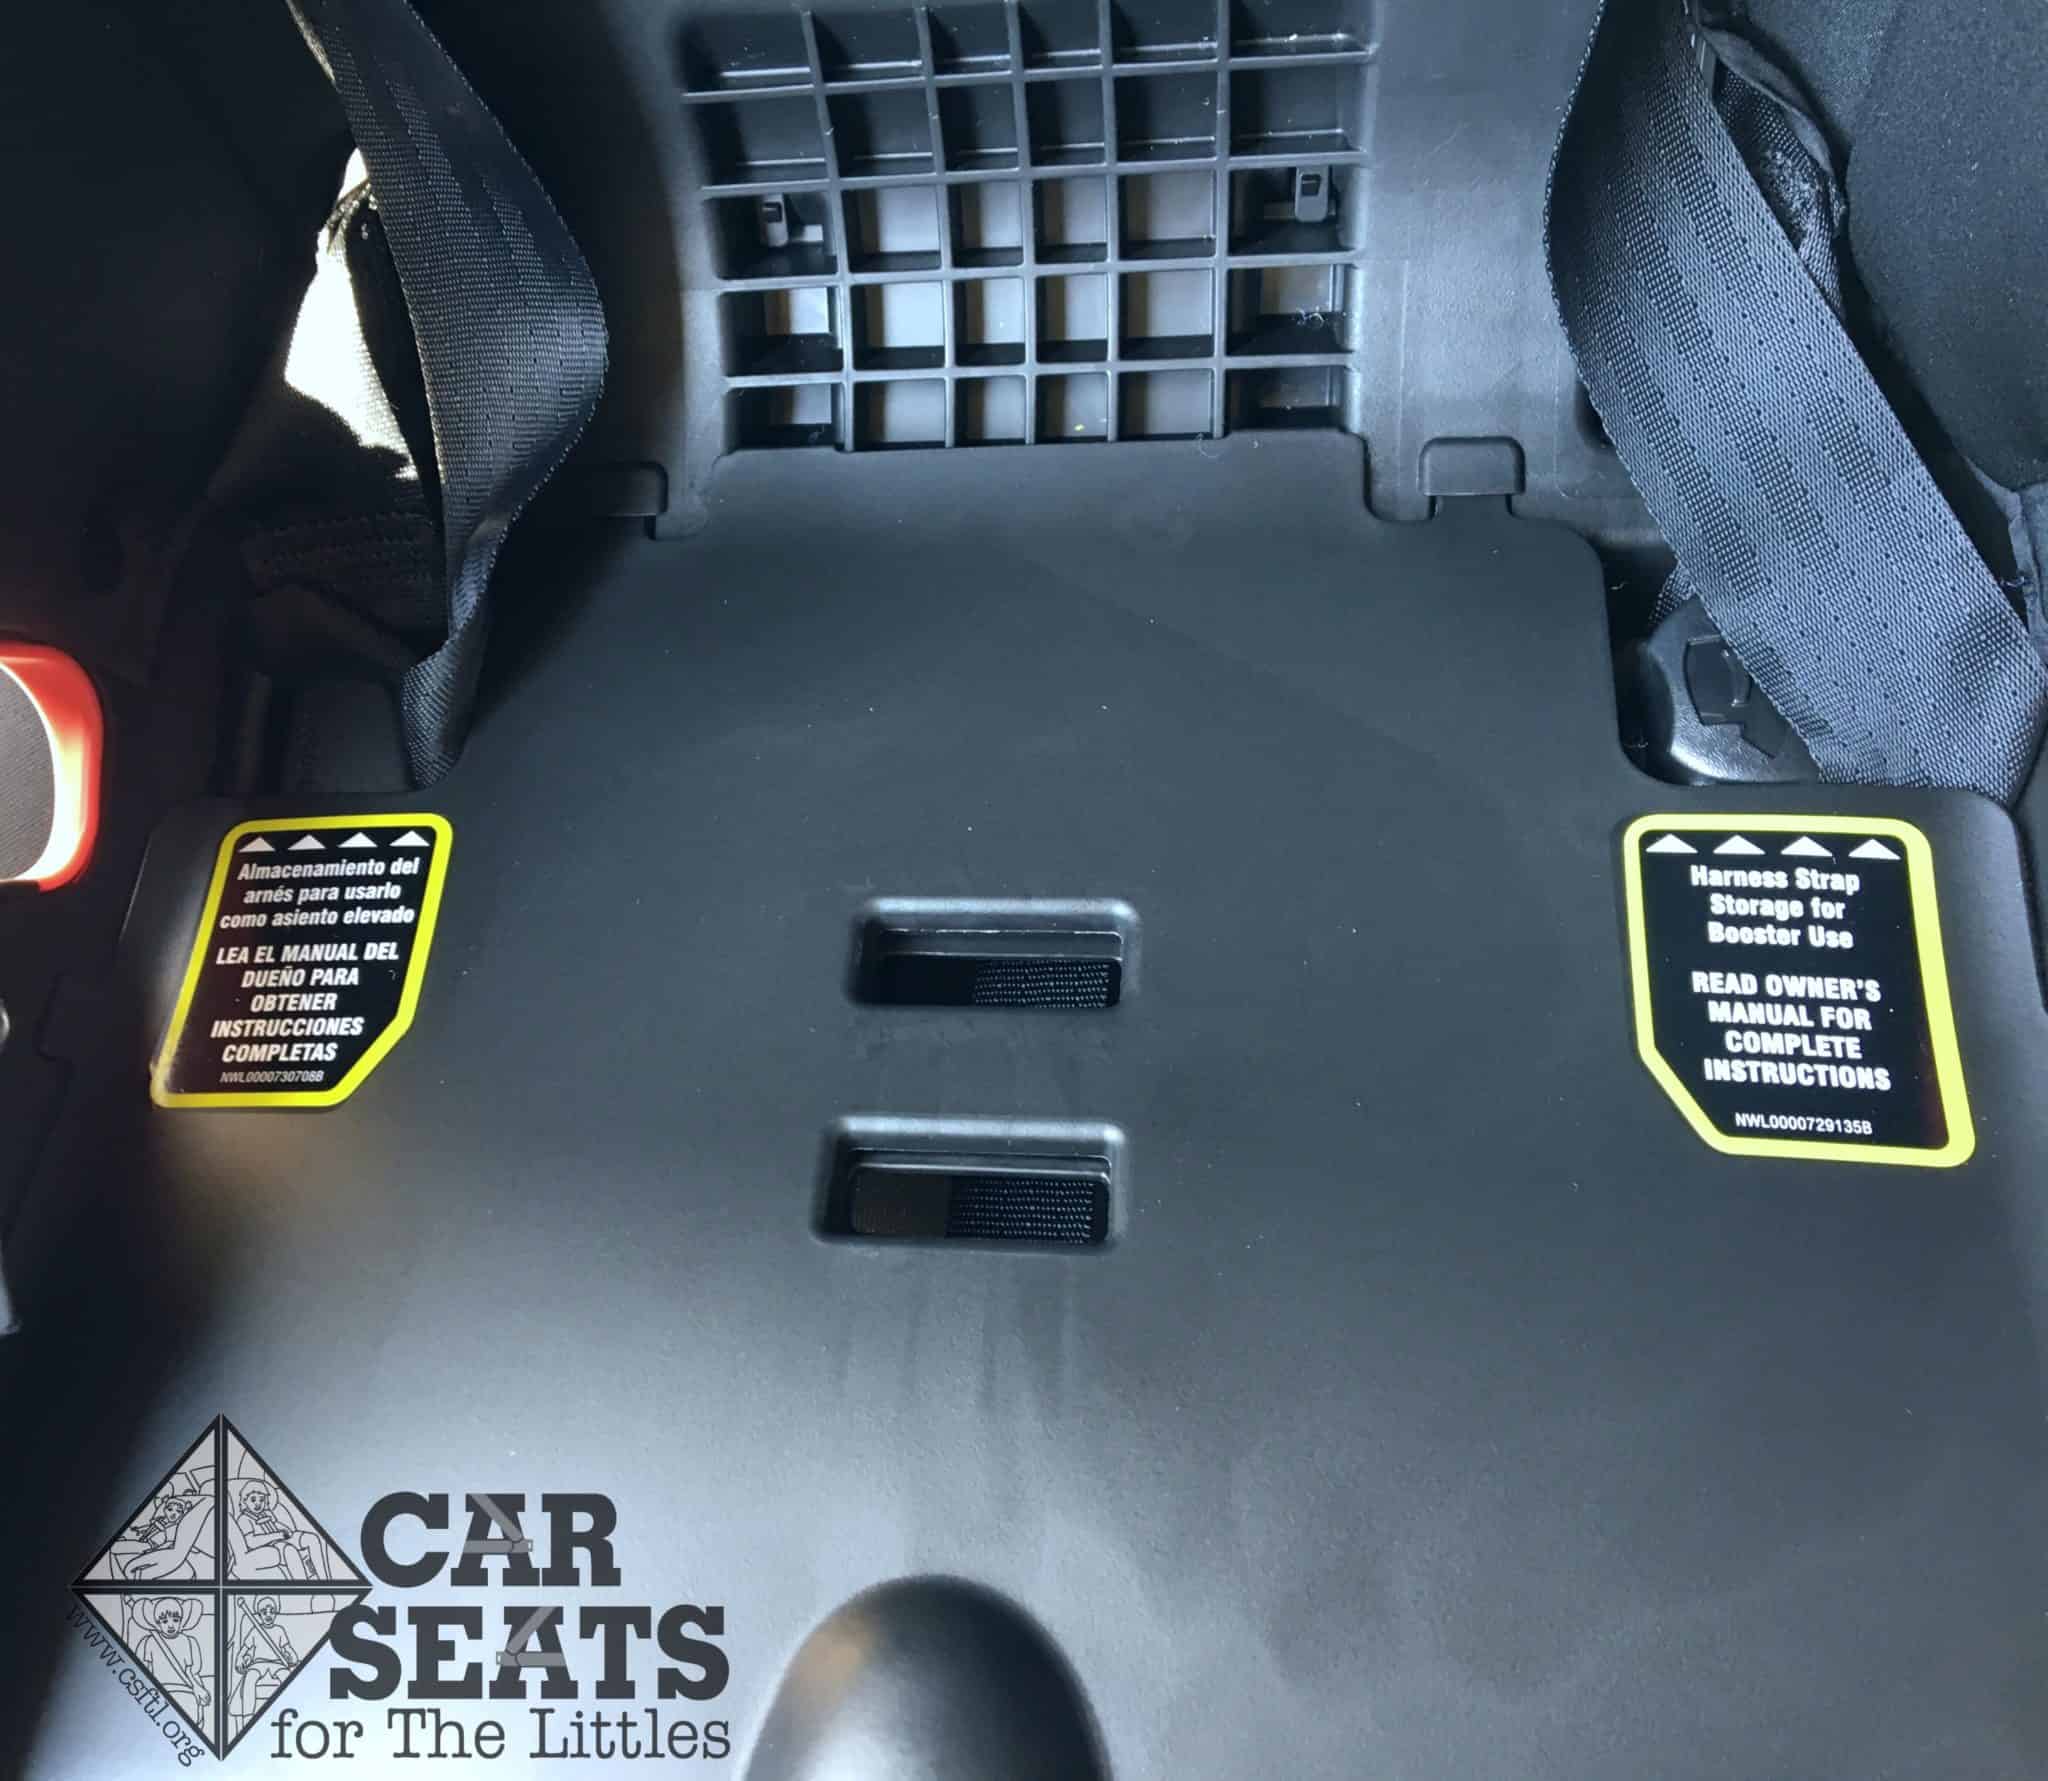
Graco Recline N’ Ride harness storage compartments
Remove the cover to expose the inside of the seat. Stow the harness, chest clip and buckle tongue in the designated storage spots on the seat pan.
Graco Recline N’ Ride buckle storage
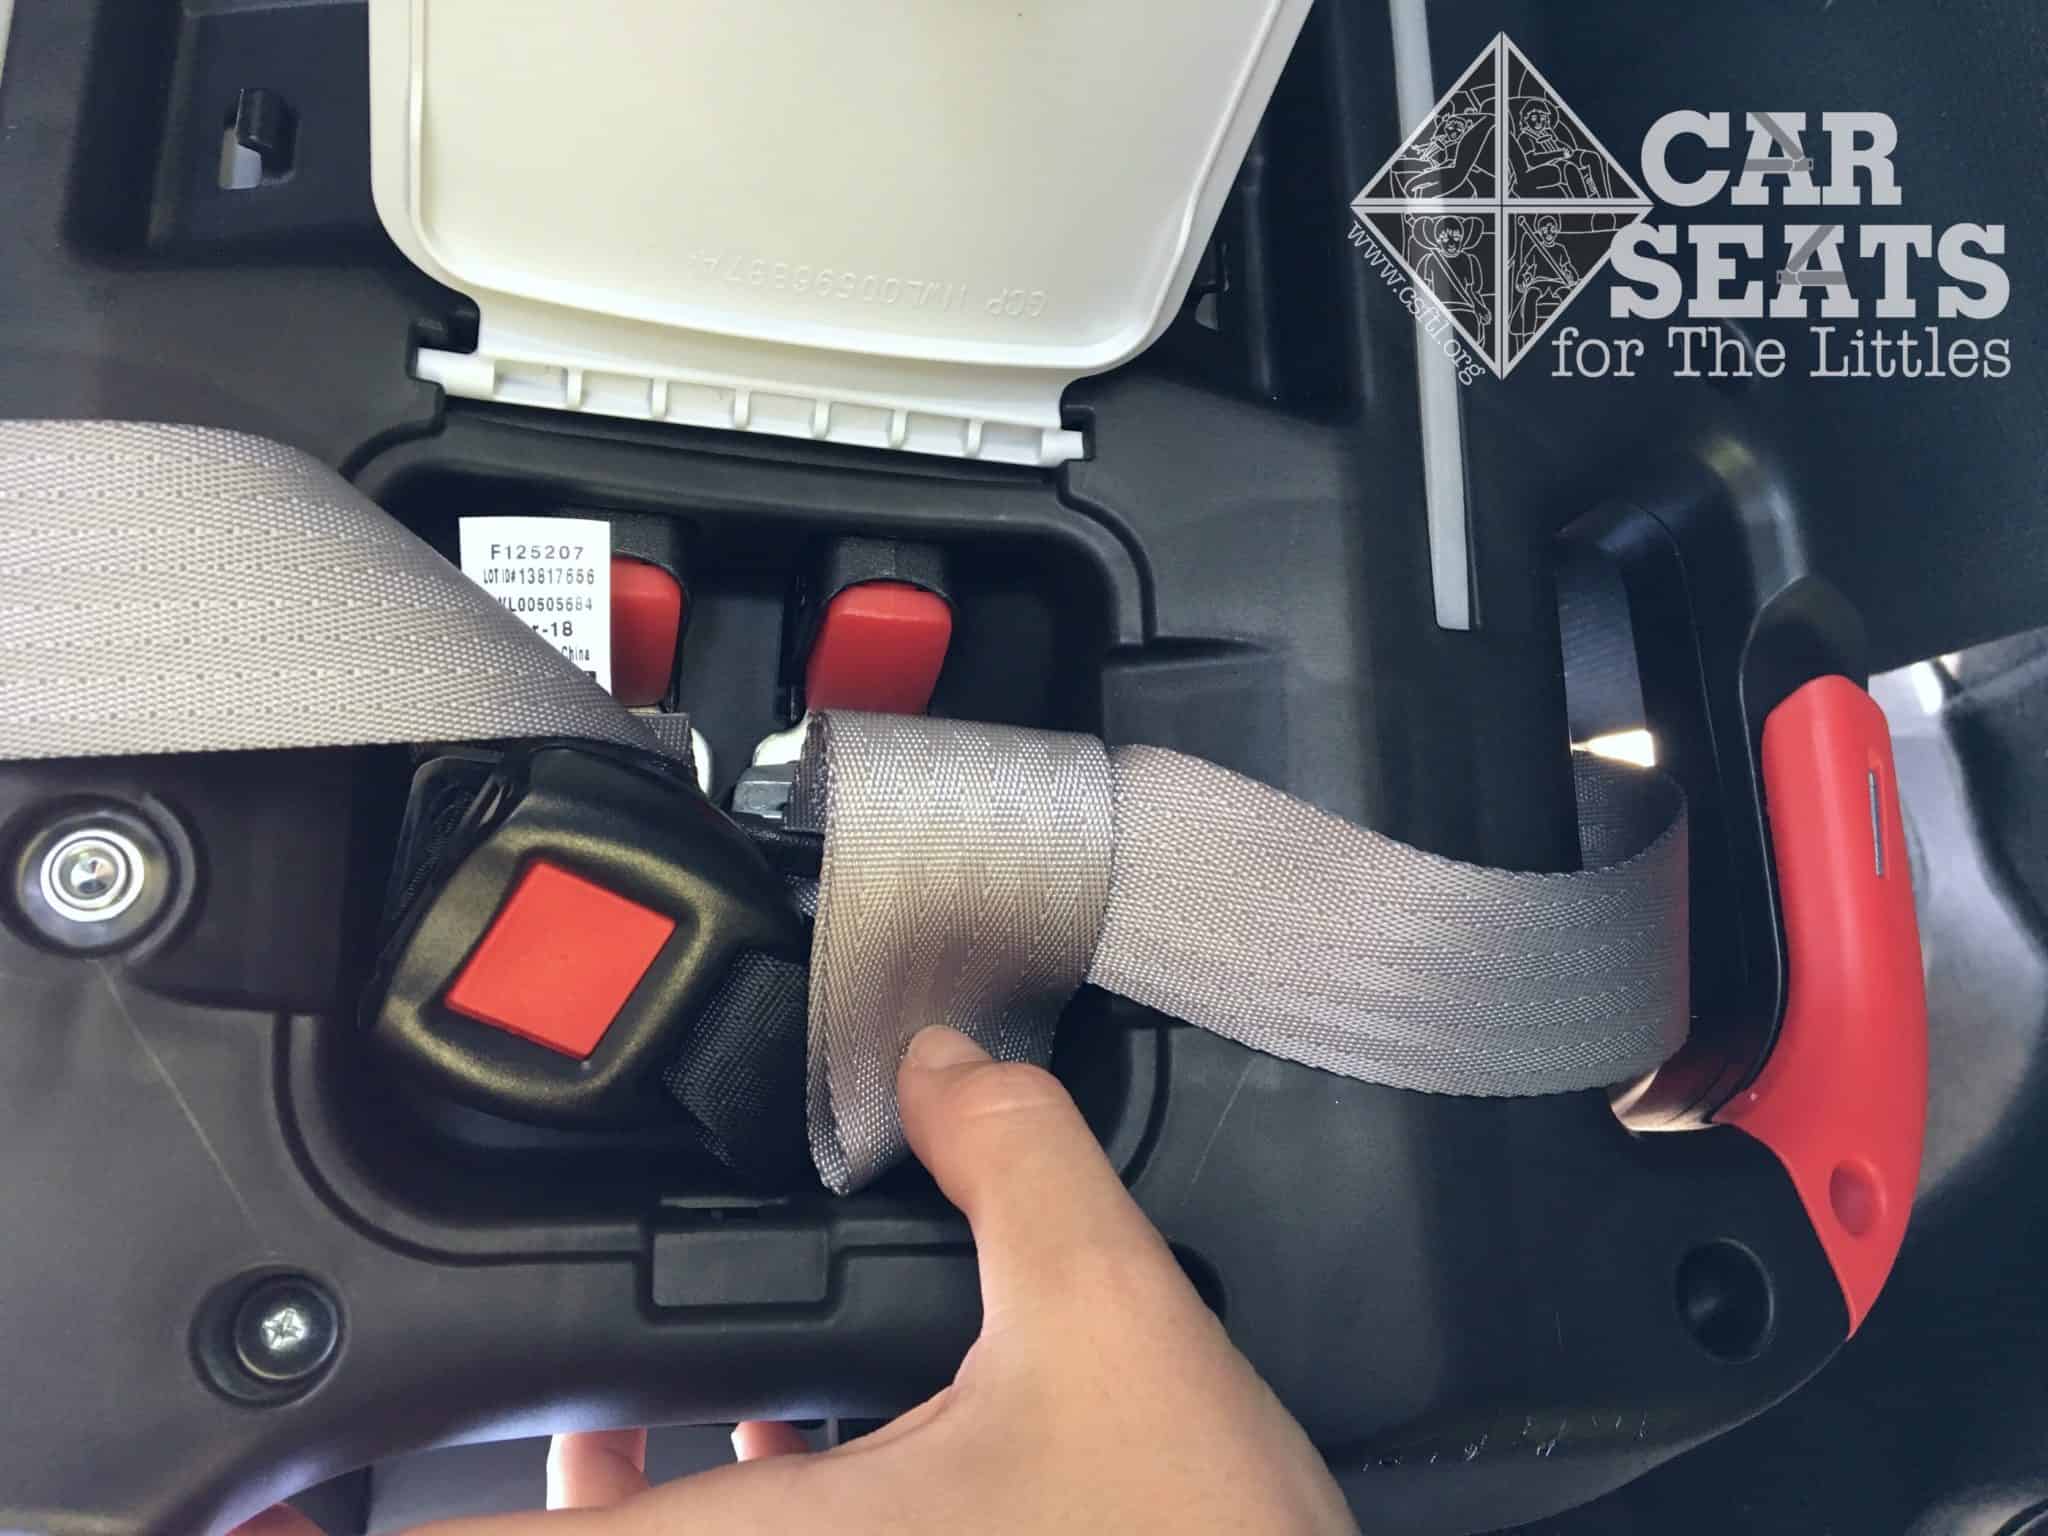
The crotch buckle stores in the lower anchor storage compartment.
Booster Mode
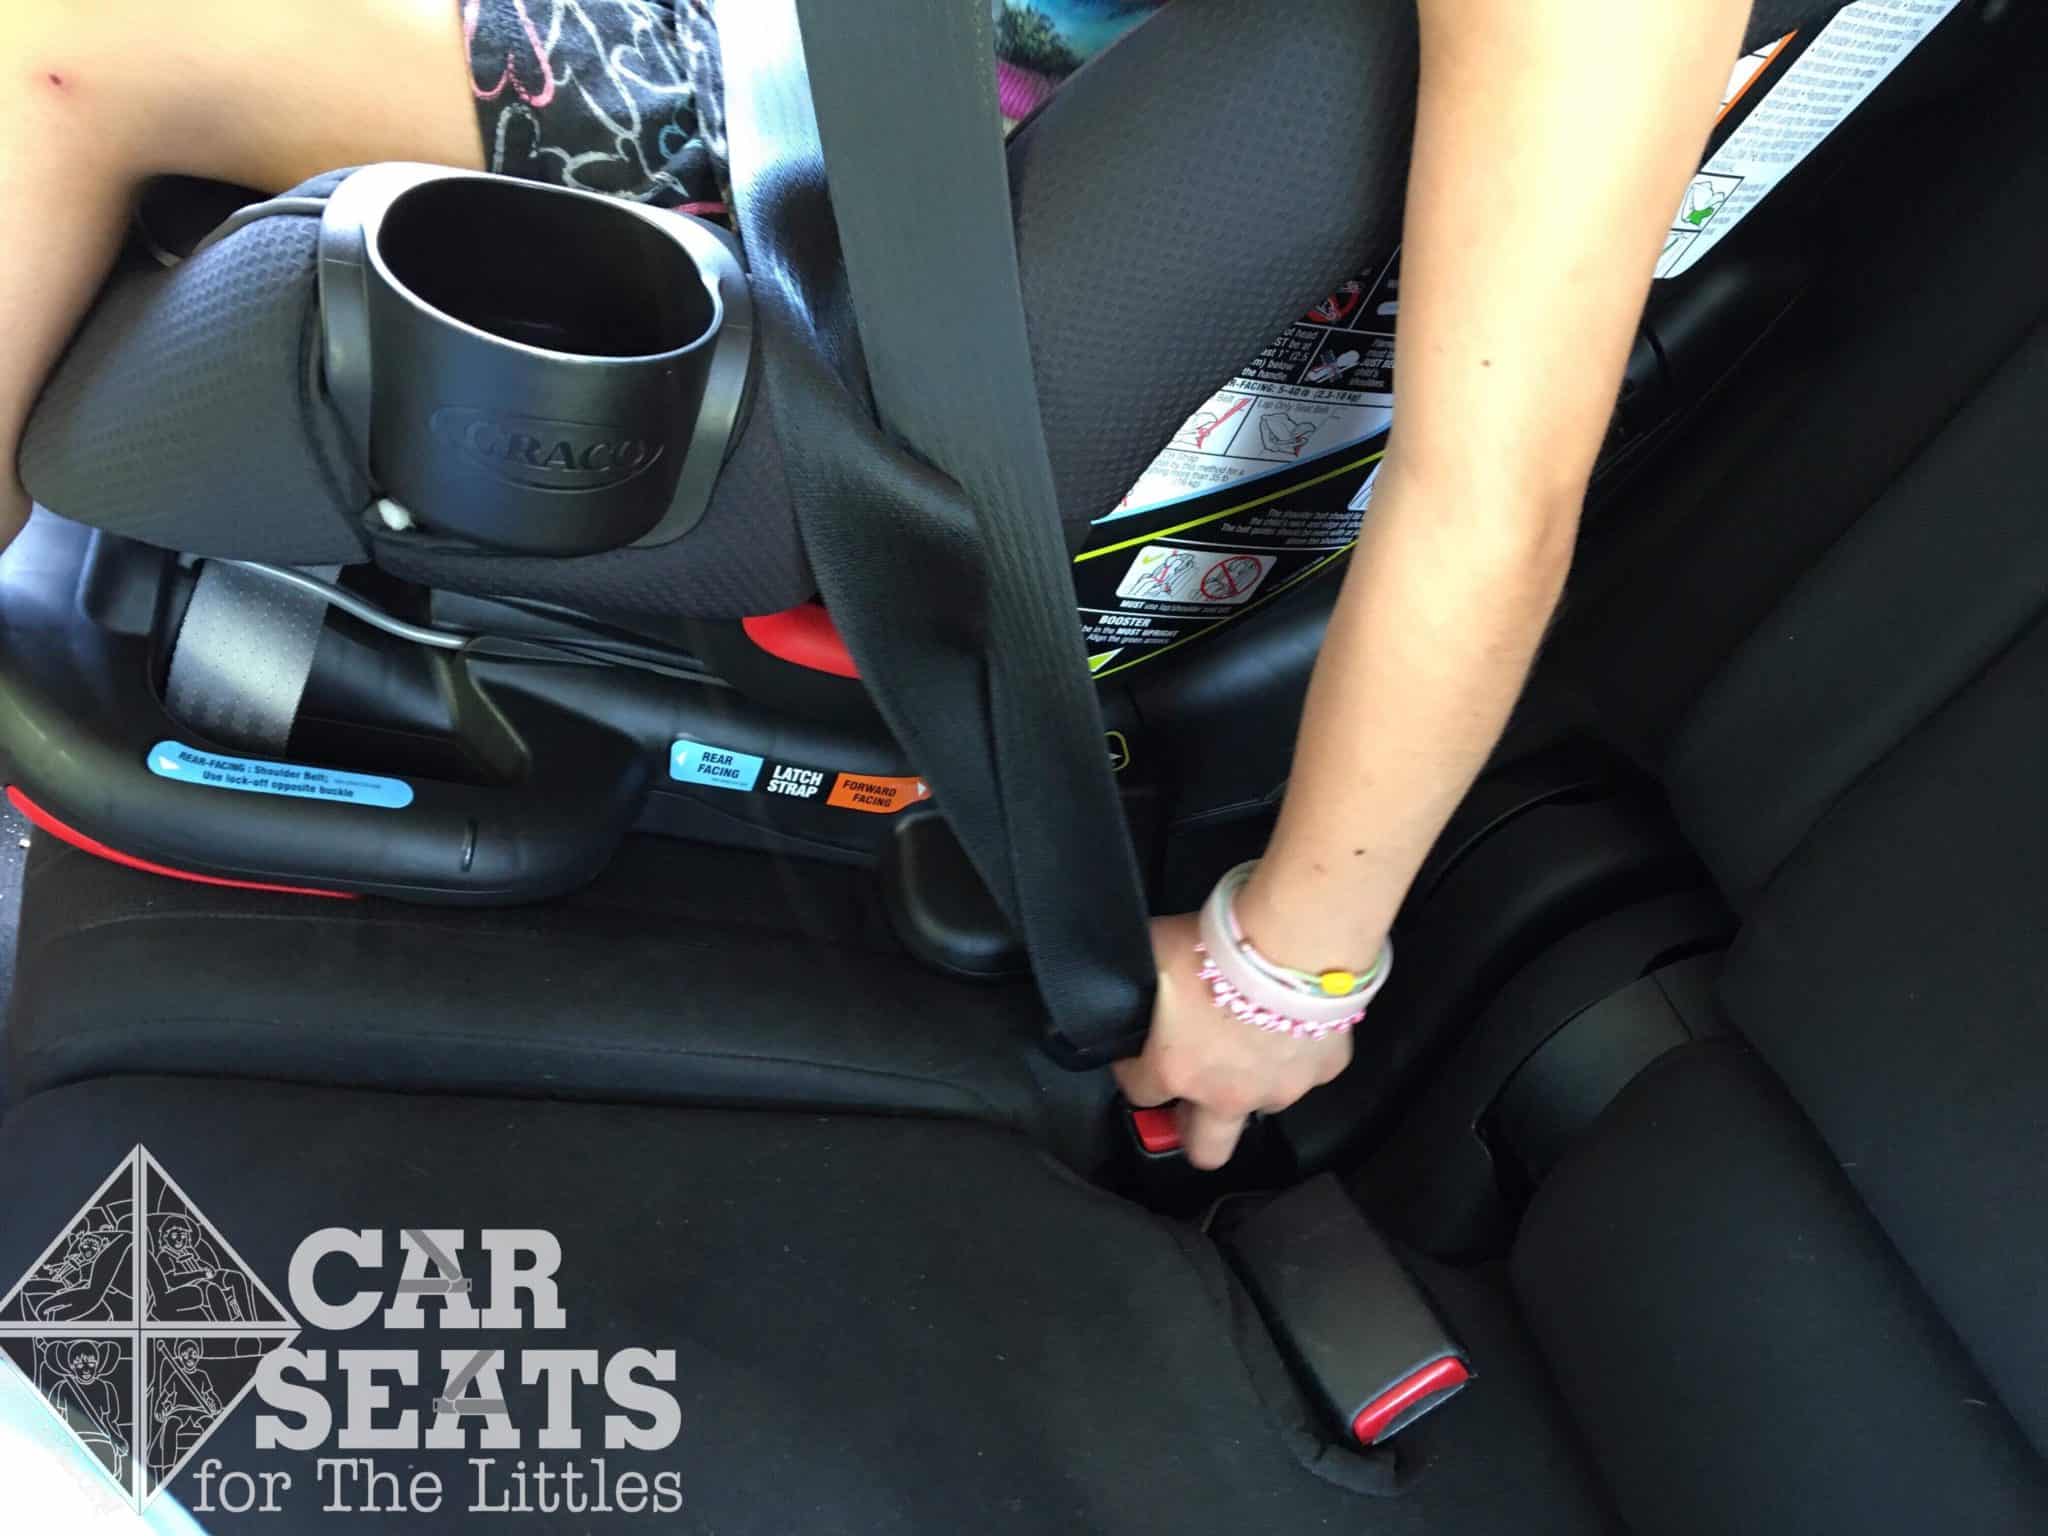
Graco Recline N’ Ride — difficult to buckle in booster modeThe Recline N’ Ride offered a great vehicle seat belt fit in booster mode but our models had a few difficulties. Some of them required assistance to reach the buckle, and once buckled in, their legs were much closer to the front seat than other boosters because the Recline N’ Ride sits up fairly high.
Important Information – Where to Find
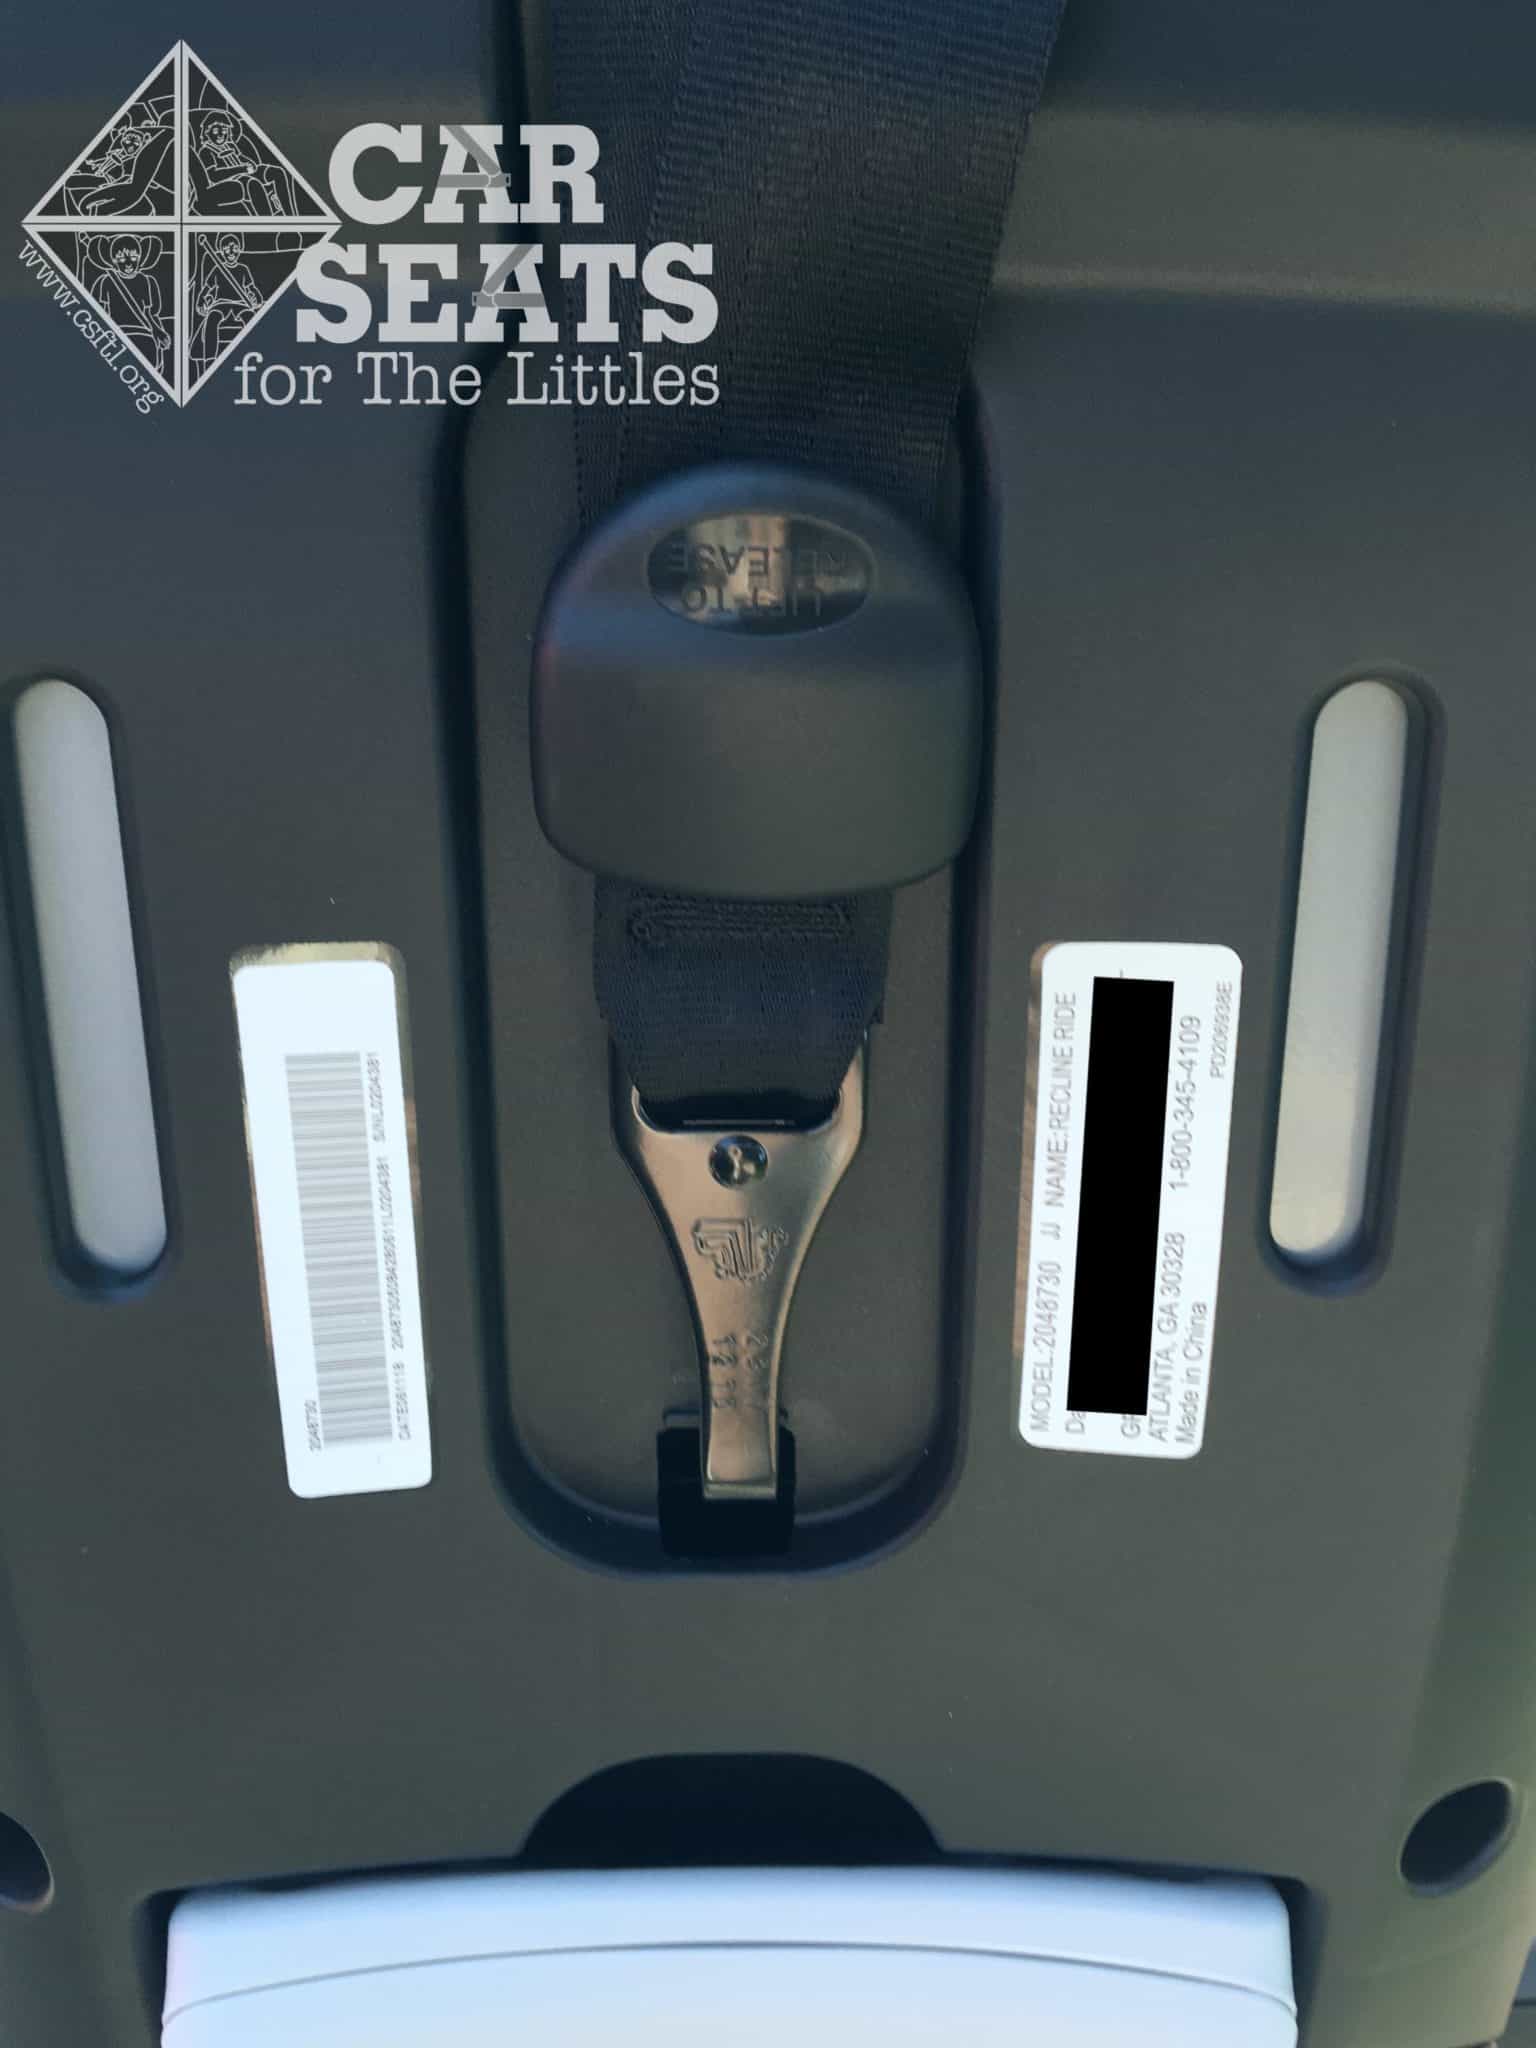
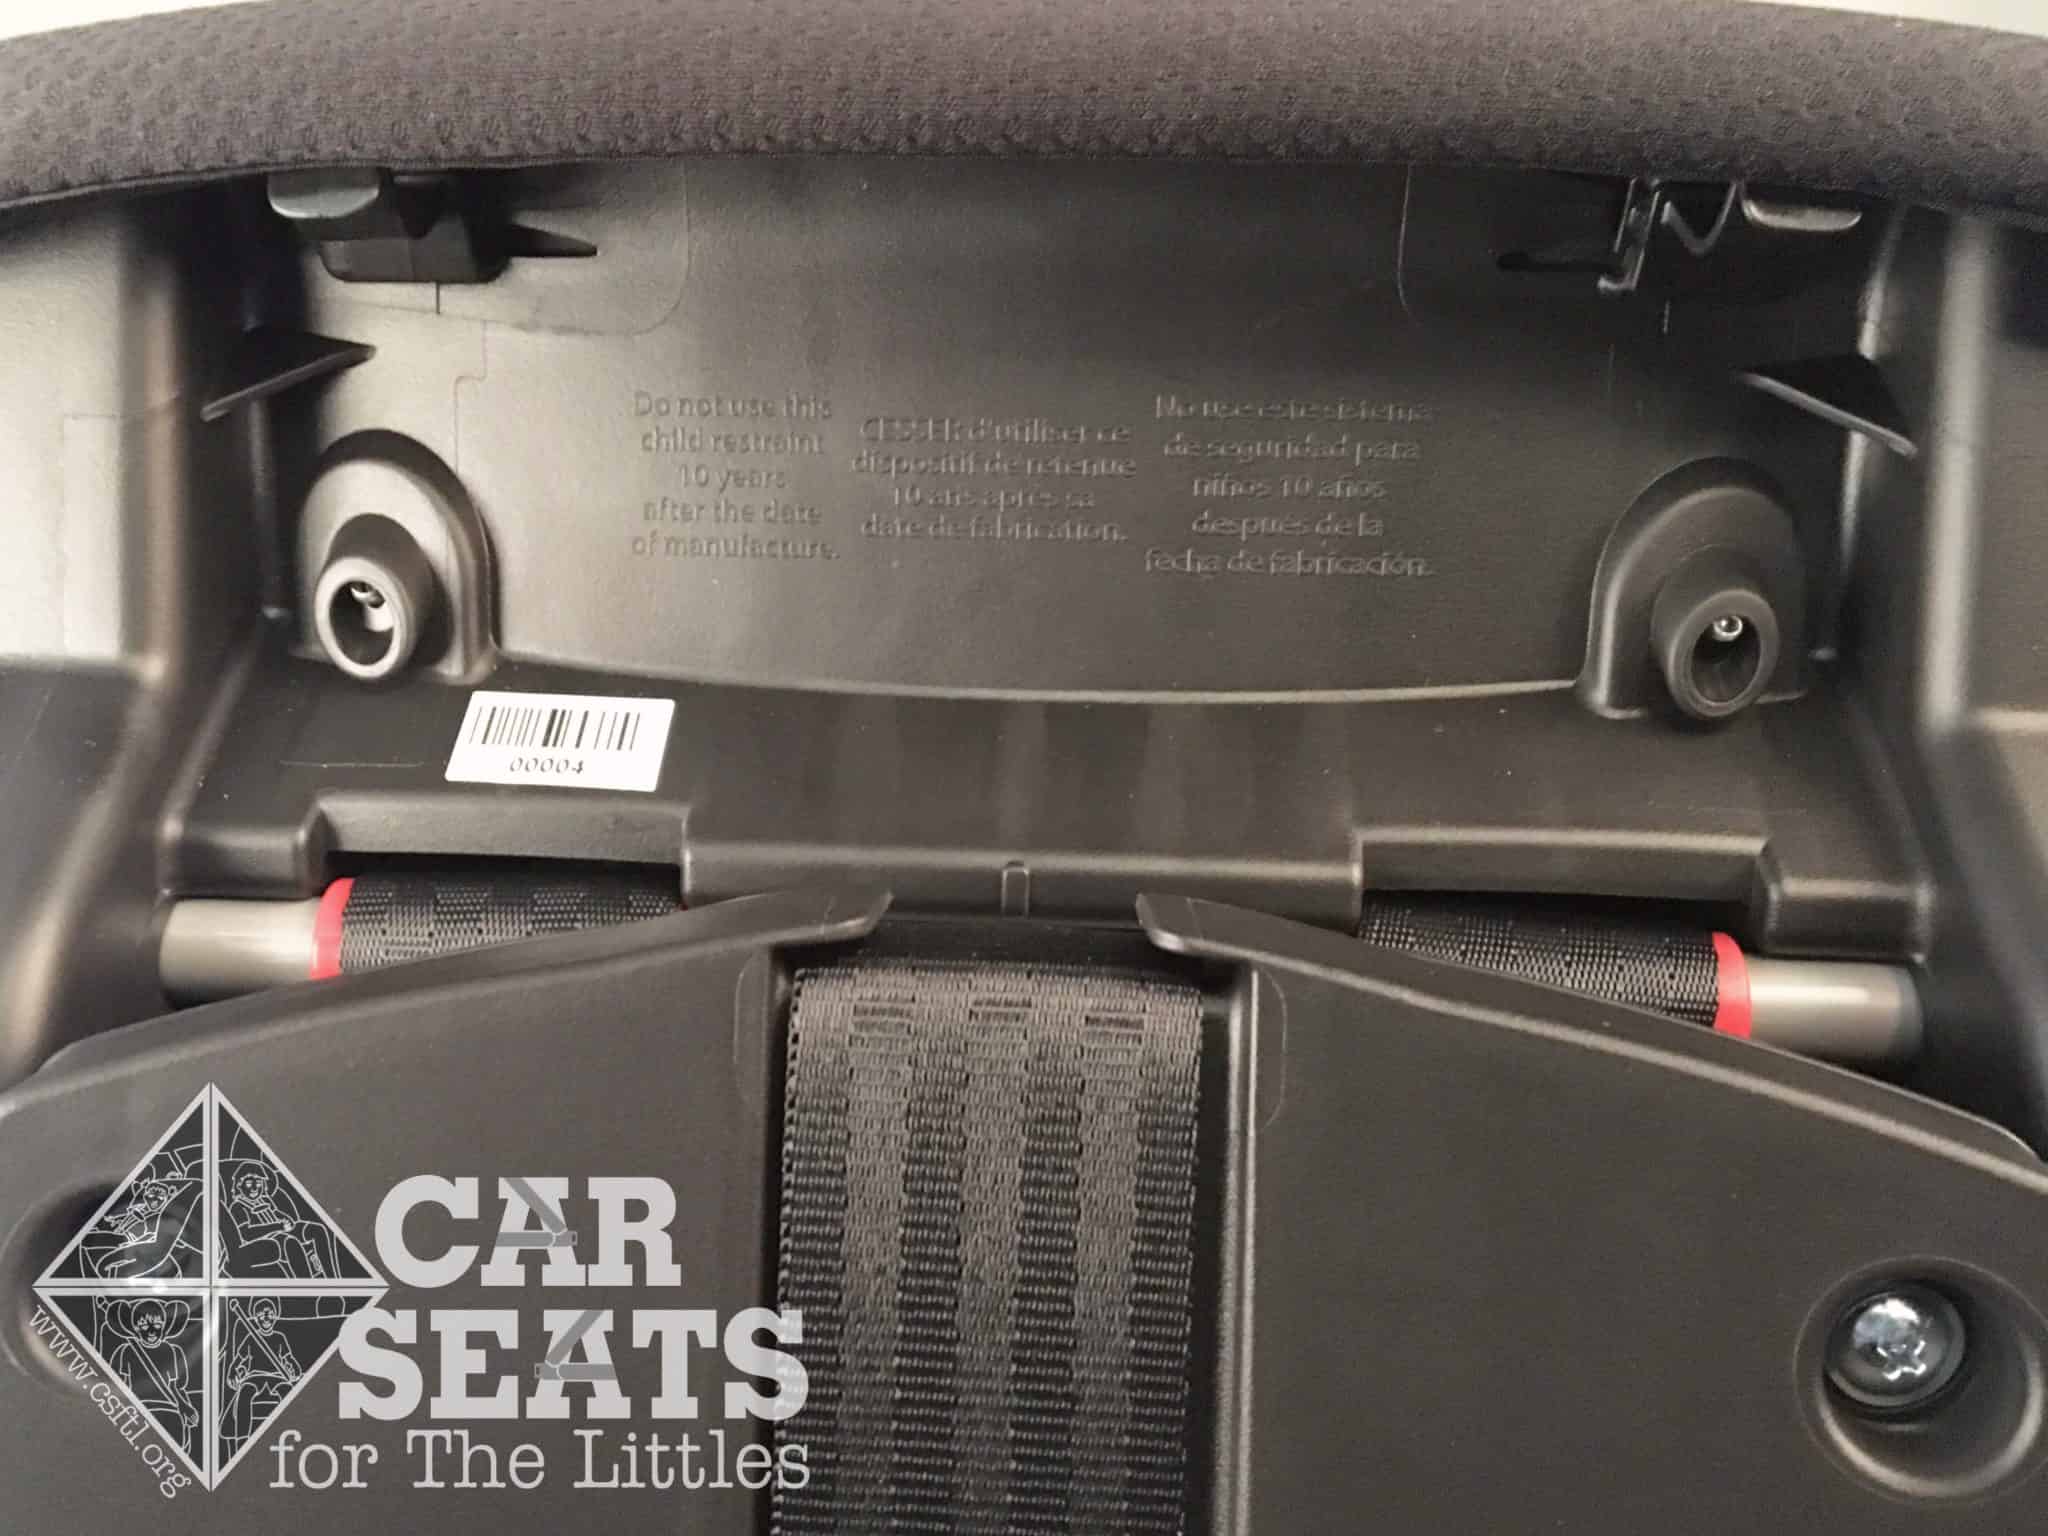
Graco Recline N’ Ride top tether storage
Date of Manufacture: The date of manufacture sticker is on the back of the seat, next to the tether anchor storage location.
Graco Recline N’ Ride manual storage
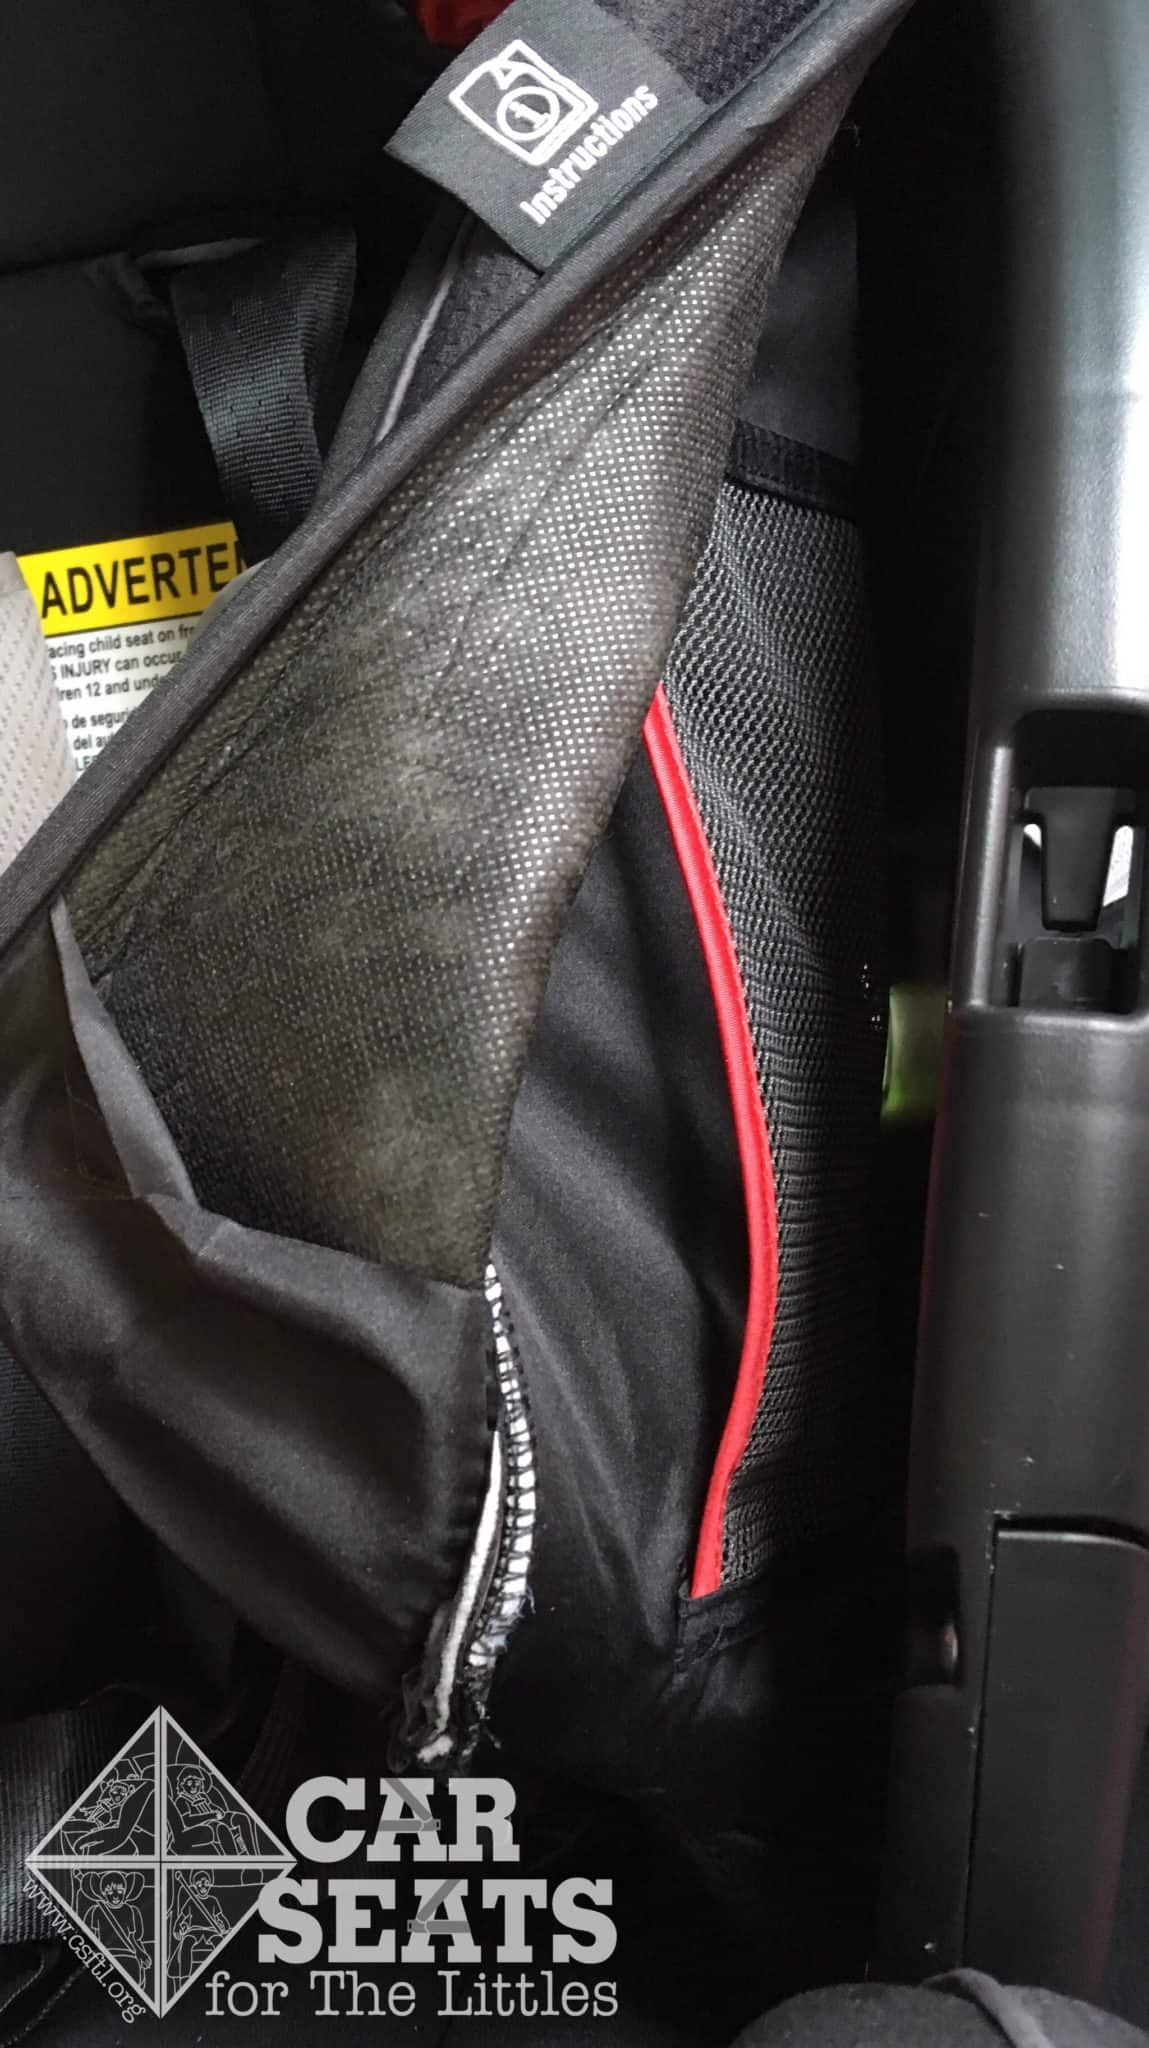
Manual Storage: Graco has cleverly hidden the manual storage spot under the cover. A tag on the cover marks the location.
Graco Recline N’ Ride expiration date is stamped into the shell
Expiration Date: The expiry range is embossed on the back of the headrest and is 10 years from the date of manufacture.
Graco Recline N’ Ride FAA approval label
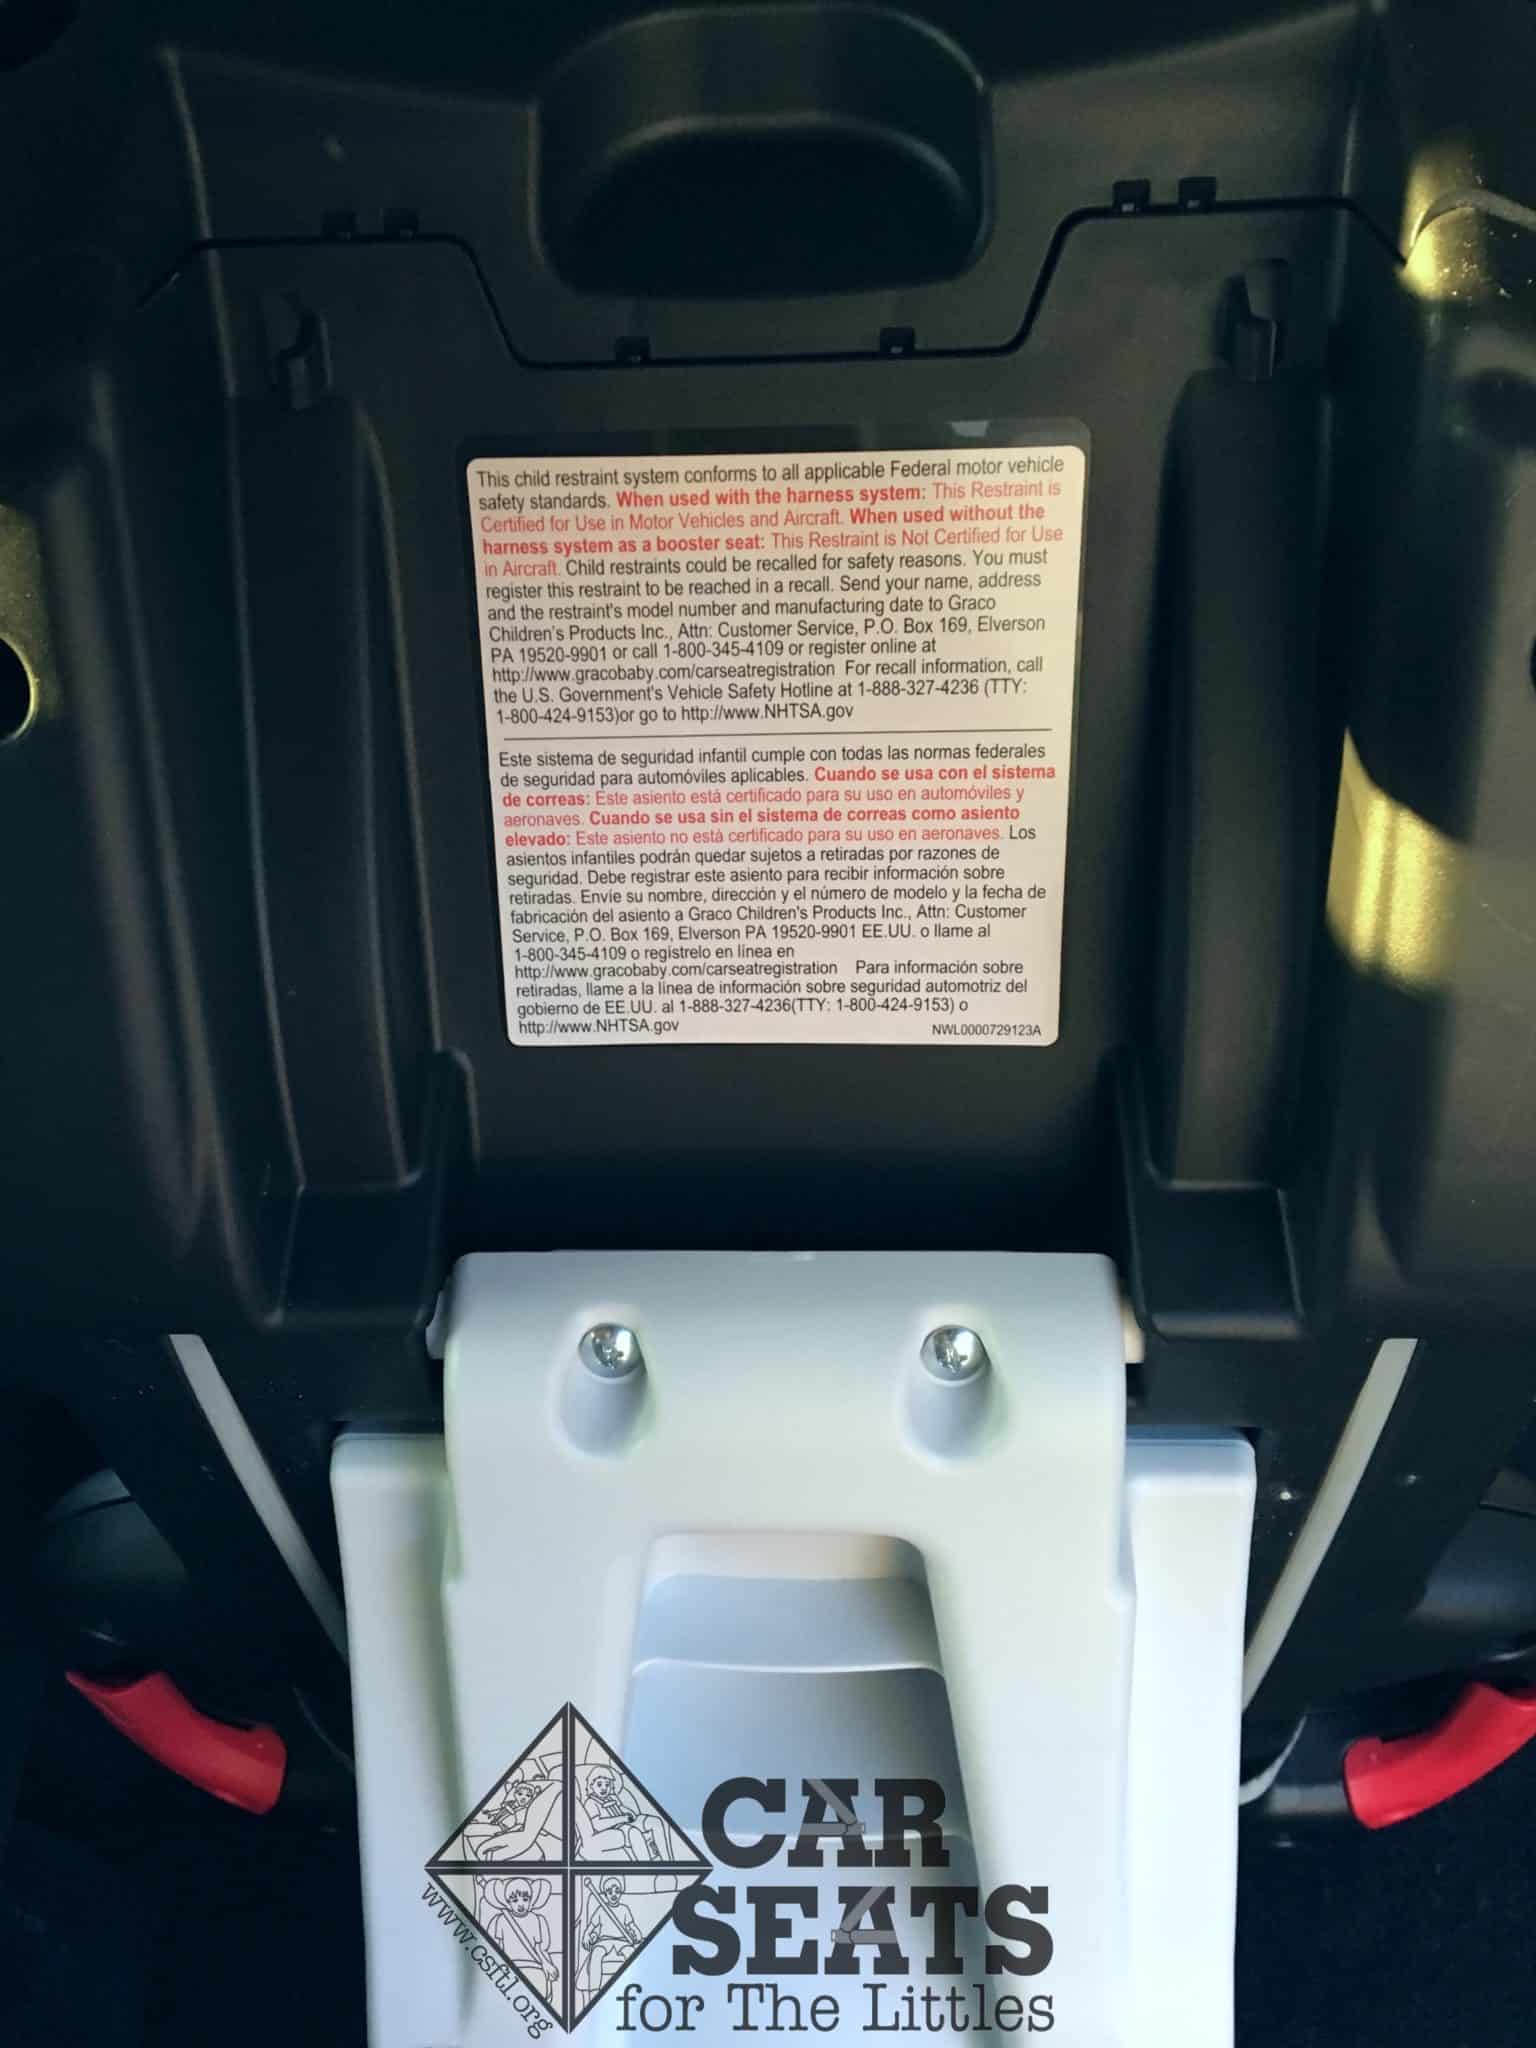
FAA Approval: The FAA approval label is located on the bottom of the seat, under the flip foot.
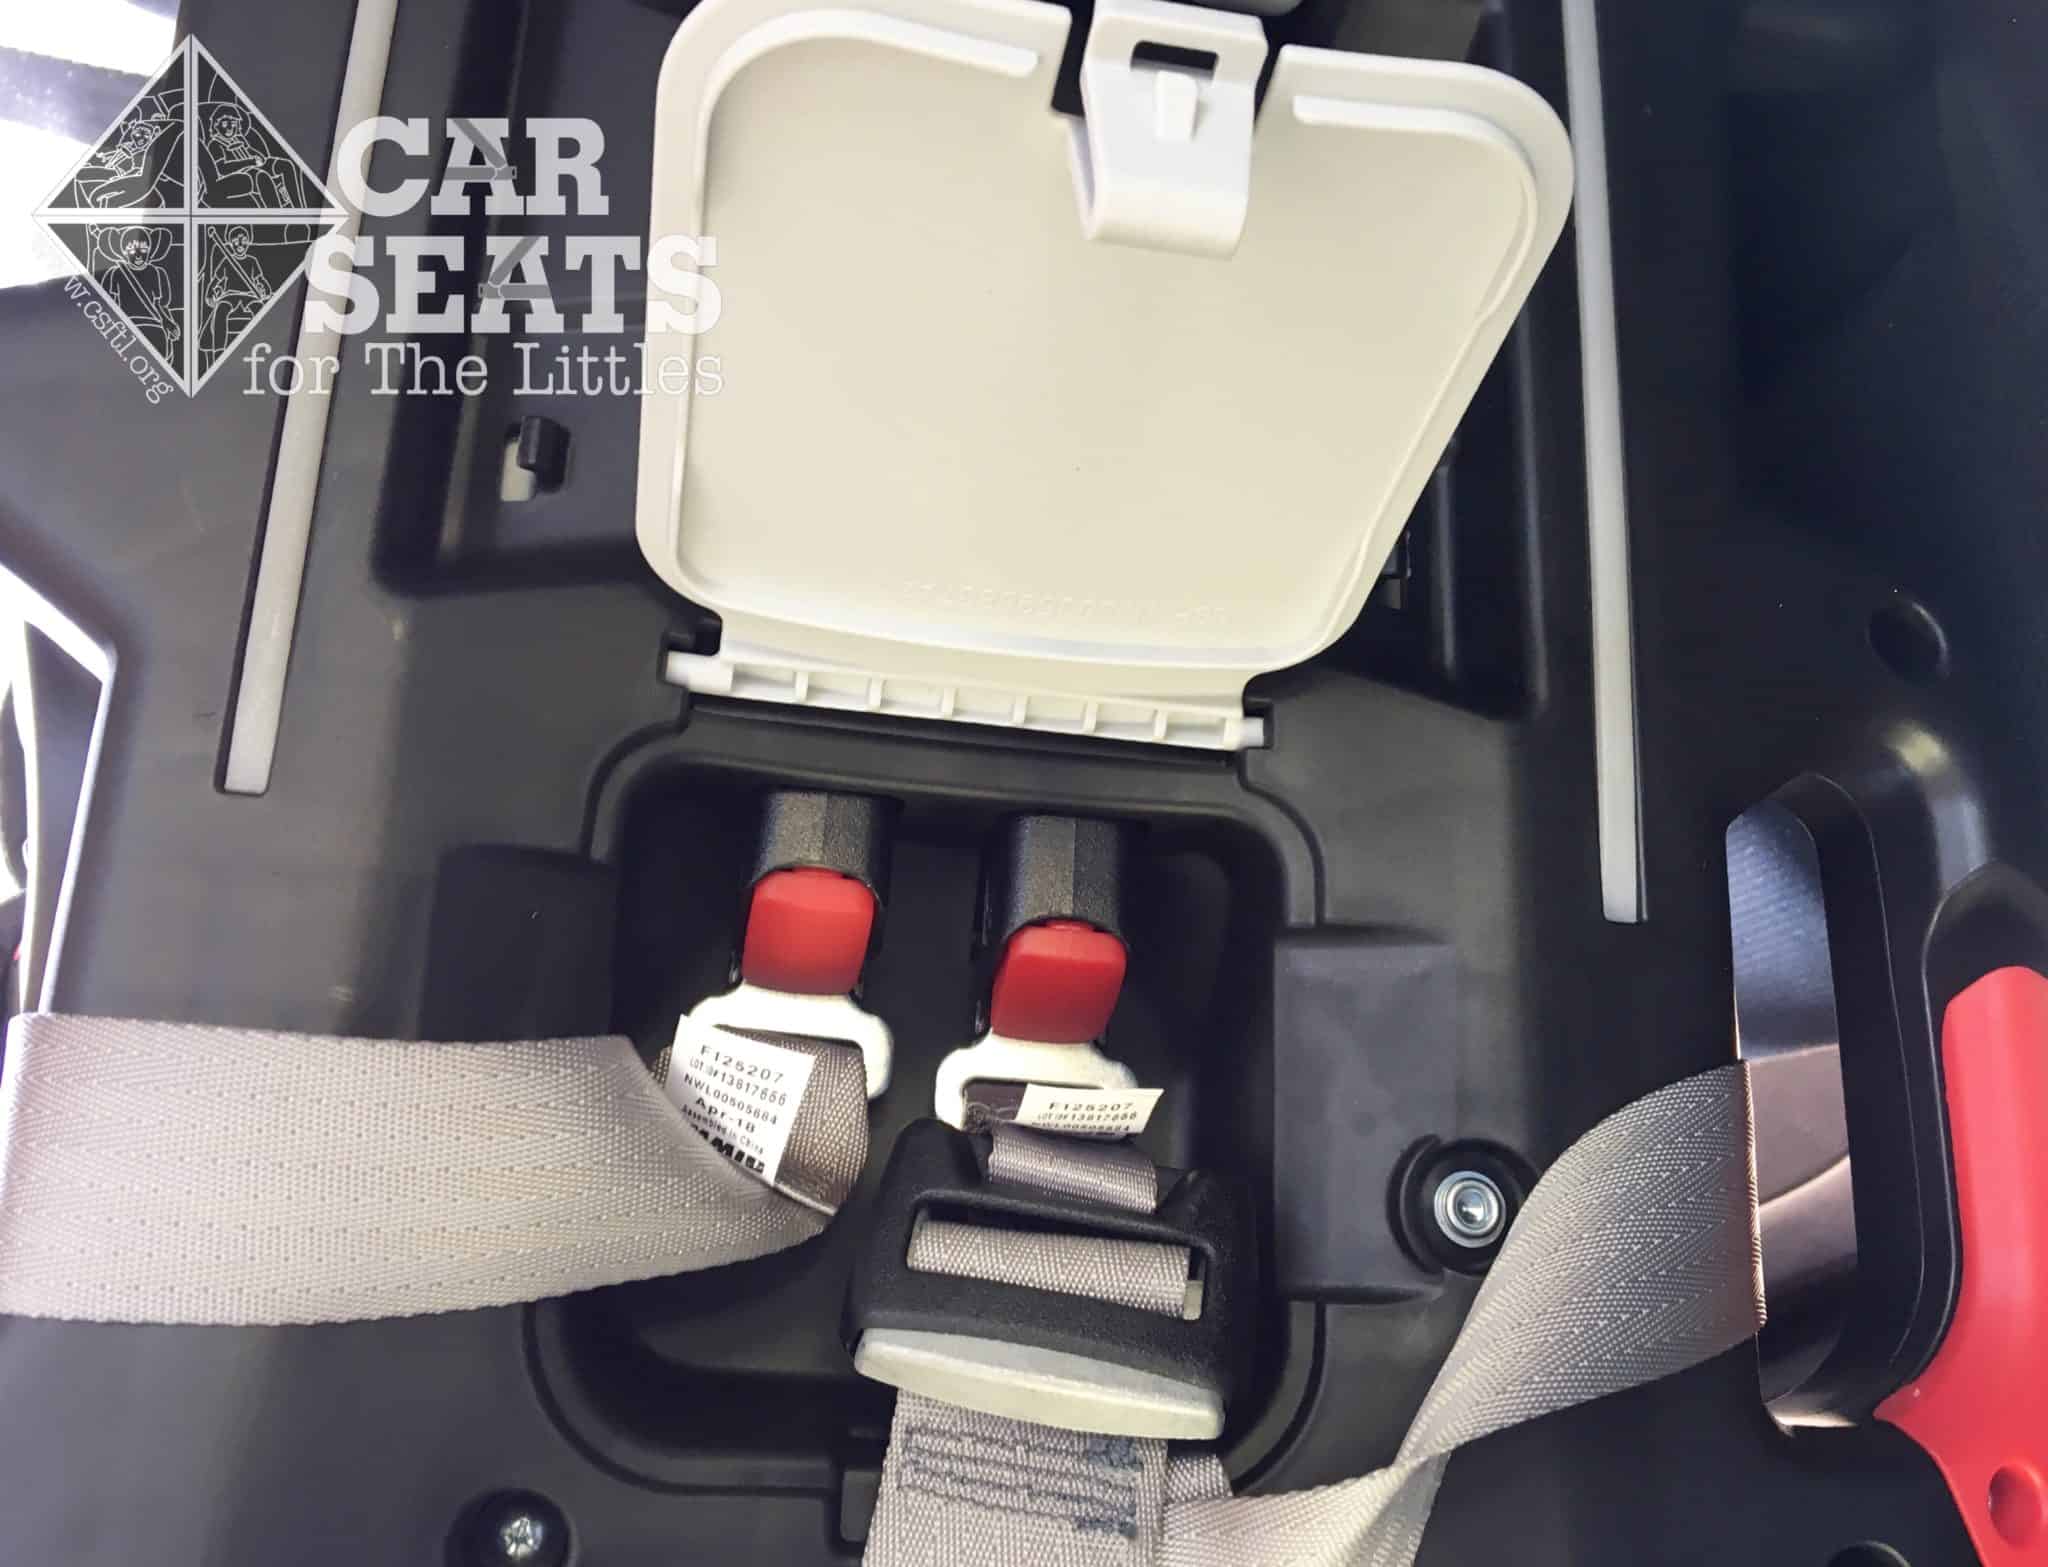
Graco Recline N’ Ride lower anchor storage
Lower Anchor storage: The lower anchors (and crotch buckle, when the seat is used in booster mode) are located in a compartment on the base.
Overall Thoughts
The Recline N’ Ride’s claim to fame — the On The Go Recline feature — is unique and may appeal to some families. The newborn fit and recline angle is superb, so the Recline N’ Ride could be a solid choice for parents who want to start with a convertible car seat instead of a rear facing only car seat, but only if it fits well and installs well in the car.
Our challenges with installing the seat lead us to assert that the Recline N’ Ride may not work well in some vehicles. It could, however, be a good choice for children with special needs who require a deep recline when forward facing. Its booster mode is limited since our models struggled to buckle themselves into the seat.
With an 18.5 inch top harness height, the Recline N’ Ride could be a long-lasting option for families who need the recline feature. Since we had so many challenges installing the seat, we’d advise families who are considering the Recline N’ Ride to test it in their vehicles before purchasing.
This article was originally written by Laurel, updated maintained by CSFTL.