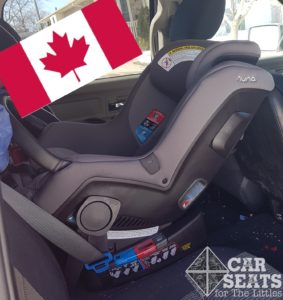
Nuna’s line of Canadian car seats includes the Pipa and Pipa Lite rear facing only car seats, and the AACE booster seat. We’re excited to see that Nuna has entered the Canadian convertible car seat market with their RAVA convertible car seat. Let’s take a look at this new car seat and see what changes it underwent to come to Canada.
CSFTL Quick Stats
- Rear facing weight range: 5-40 pounds
- Forward facing weight range: 25-65 pounds
- Overall height range: under 49 inches tall
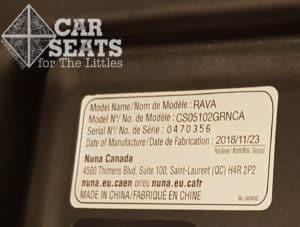
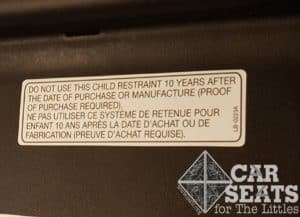
- Expiration: 10 years from date of purchase (proof of purchase required). If date of purchase is unknown, expiration is 10 year from date of manufacture
- Lower anchor borrowing: The RAVA does not allow lower anchor usage with non-standard spacing (it is designed to be used with lower anchors bars that are 11 inches apart)
- Must be replaced after any collision
Features
- No rethread harness
- Premium UAS (lower anchor) connectors
- One rear facing recline setting and five forward facing recline settings
- Belt tensioner for easy vehicle seat belt installation
- Buckle tongue holders
- Collapsible cupholders
Measurements
- Shell height: 27 inches when headrest is fully extended
- Highest harness position: 17 inches
- Lowest harness position: 8 inches (7 inches when infant insert is used)
- Width at widest point: 23 inches at the hips with both cup holders extended, 20.5 inches with one cup holder extended, and 19.5 inches at the shoulders with both cup holders stored
- Seat weight: 26.5 pounds
- Two crotch buckle positions at 4.5 and 6 inches from the seat back
- Crotch buckle strap is 3 inches long when buckle is in the inner position and 4 inches long when in the outer position
Collapsible Cupholders
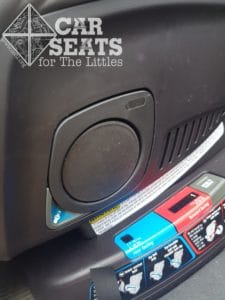
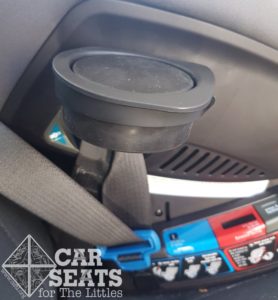
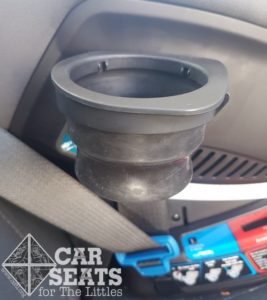
The RAVA includes two cupholders — one on each side of the seat. The seat ships with the cupholder in the stored position. To install the seat rear facing, extend the cupholders to provide access to the belt path.
When the cupholder is extended, it’s ready to hold whatever your Little would like to tuck in there. Our family seems to use cupholders for small stuffed friends and fallen leaves.
Buckle Tongue Holders
The buckle tongue holders make loading and unloading littles into the RAVA nice and easy – no digging under the child required to access the straps!
Soft Goods
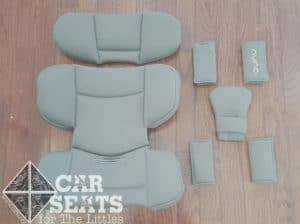
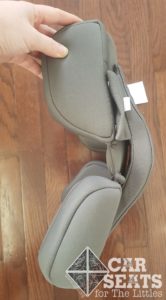
- Infant insert: may be used for children who weigh between 5 and 11 pounds to improve fit and increase recline angle
- Head insert: may only be used for children who weigh between 5 and 11 pounds
- Harness shoulder pads: may only be used for children who weigh between 5 and 11 pounds
- Crotch pad: may only be used for children who weigh between 5 and 11 pounds
- Harness hip pads: may only be used for children who weigh between 5 and 11 pounds
Note: the manual doesn’t indicate that the crotch pad and harness hip pads must be removed at 11 pounds. We reached out to NUNA and received the following direction: “All pads must be removed once the child reached 11 lbs (harness, crotch and hip harness pads).” We would of course love to see this clarified in a future version of the manual.
Labels
We always appreciate when a manufacturer uses clear labels on their car seats, and Nuna does just that on the RAVA.
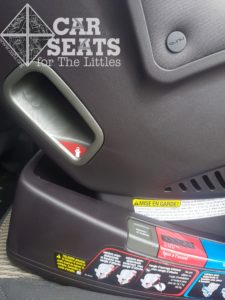
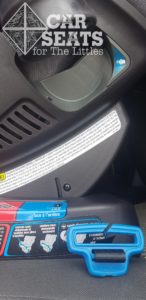
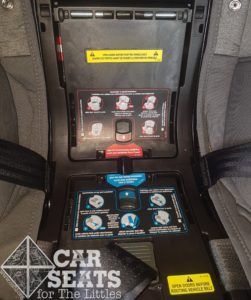
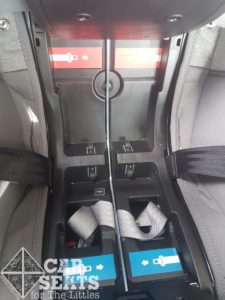
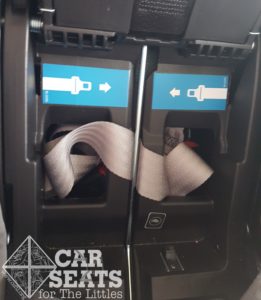
The labels are colour coded, where all rear facing features, belt paths, and labels are blue and all forward facing features, labels, and belt paths are red. This includes a sticker within both the rear and forward facing True Tension Doors that shows the vehicle seatbelt’s required path for a proper installation.
Crotch Buckle Adjustment
The Nuna RAVA crotch buckle adjusts differently than the crotch buckles we’re used to. To move the buckle away from the child, press the plastic adjuster and slide the crotch buckle away from the back of the seat. This simultaneously lengthens the crotch buckle webbing about an inch.
To move the crotch buckle closer to the child, slide the buckle toward the back of the seat while pushing on the adjuster.
Installation — Rear Facing
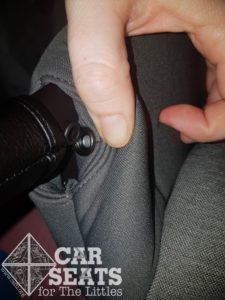
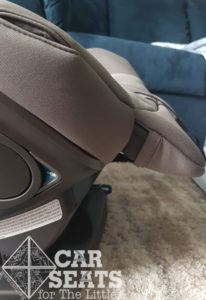
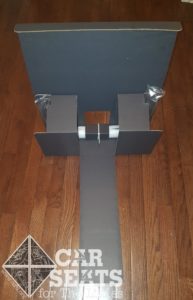
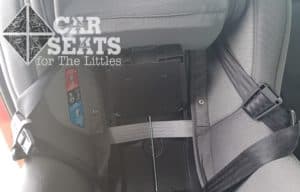
The Canadian Nuna RAVA requires the use of their rebound bar when using the seat rear facing. To install the rebound bar, pivot the cup holders into the USE position to expose the rear facing belt path. Slide the rebound bar into the openings at the base of the seat and attach the metal snaps on the inside of the seat cover to both sides of the rebound bar.
Ensure the calf support is in the USE position, and the RAVA is set to rear facing recline position 1.
About the Rebound Bar
The Nuna RAVA’s rebound bar is a lightweight plastic and comes zip tied to a piece of cardboard that must be removed from the box that the RAVA ships in to remove the car seat. Because it is not clearly marked and does not weigh much (about 13 ounces), we worry that caregivers may accidentally throw out the rebound bar while unpacking the RAVA.
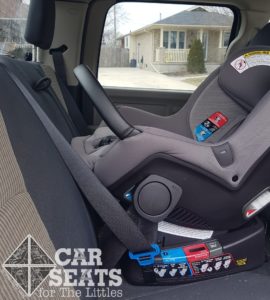
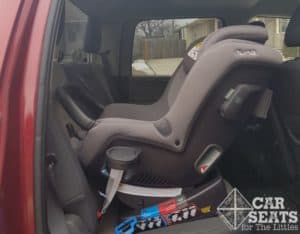
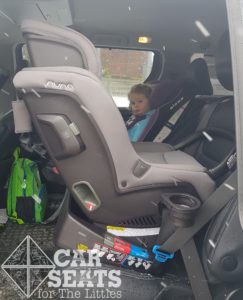
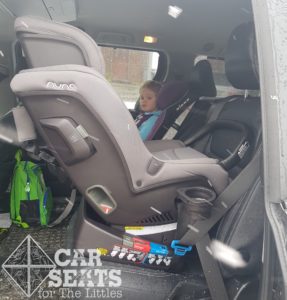
Large gap between vehicle seat back and Nuna RAVA rebound bar in the middle seat of a 2012 Dodge Ram
In some vehicles, the rebound bar will not make contact with the vehicle seat back. In a few vehicles, this may result in a large gap (like in the center seat of this 2012 Dodge Ram). If any of our readers experience a large gap like the one pictured and a child (like our three year old reviewer) who likes to stick their legs all the way through the bar, please contact Nuna’s customer service at [email protected] for suggestions.
Installation: Vehicle Seat Belt
The Nuna RAVA features two True Tension Doors (one for rear facing and one for forward facing) that make installation with a lap/shoulder vehicle seat belt very easy. The Canadian manual sadly does not feature the Nuna expression “belt is best!” that we see on the American RAVA. Instead, our review seat includes a small note under the heading that the vehicle seat belt is the preferred installation method. We want to stress that for the Nuna RAVA, BELT IS BEST and whenever possible, the RAVA should be installed with a lap/shoulder belt
To install the RAVA rear facing using the vehicle seat belt, adjust the harness to the highest position. Unsnap the bottom seat cover from the back portion of the RAVA’s cover and pull back to reveal the True Tension Doors. Though it sounds like revealing the True Tension Doors will also include music playing and a spotlight shining on the now-exposed belt path, sadly, that’s not the case.
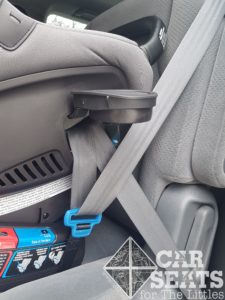
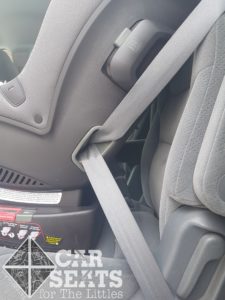
Once the True Tension Door is exposed, squeeze the blue door release to open the rear facing True Tension Door. Route the vehicle seat belt through the rear facing belt path and buckle the seat belt. Remove the slack from the seat belt, then close the True Tension Door. On the side of the RAVA that’s opposite the seat belt buckle, route the shoulder portion of the seat belt through the blue plastic shoulder belt clip, then lock the seat belt.
Note about the Shoulder Belt Clip
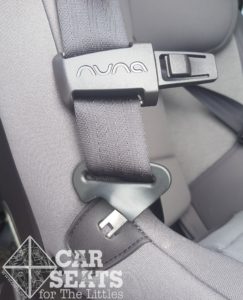
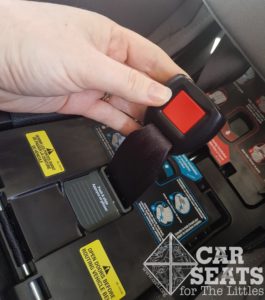
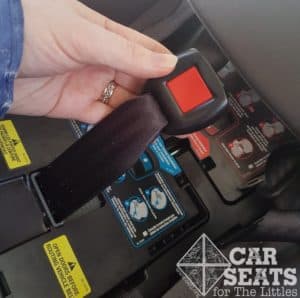
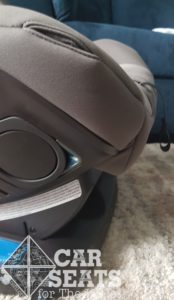
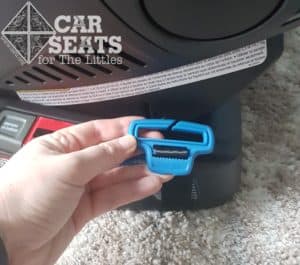
This part of the vehicle seat belt routing is unique to the Canadian version of this seat. It’s a piece that’s on the outside of the seat’s shell. After the vehicle seat belt is routed through the belt path and under the True Tension door, the shoulder portion of the seatbelt on the side opposite the belt buckle must also be threaded through this clip.
I read the manual multiple times before I actually installed the RAVA in my vehicle, but even knowing that I needed to use the shoulder belt clip, I missed that step during my first installation. Because it’s not a step any other seat on the Canadian market requires, it’s a step we can see caregivers missing when installing the RAVA rear facing with a lap/shoulder belt. I am glad the shoulder belt clip is blue, because seeing it lying on the vehicle seat reminded me that I needed to use it (if the step is missed before the seatbelt is locked, the vehicle seatbelt will need to be unbuckled and the installation process will need to be restarted).
Once the True Tension Door is closed, the belt is routed through the shoulder belt clip, and the vehicle seat belt is locked, ensure that the RAVA moves less than 1 inch at the belt path to confirm a secure installation.
Installation: Lap-Only Vehicle Seat Belt
Note: Installing the RAVA with the lap only vehicle seat belt does not require that the seat belt be threaded through the shoulder belt clip. That’s the primary difference between installing with a lap/shoulder belt and with a lap only belt.
To install the RAVA rear facing with lap-only vehicle seat belt, place the car seat on the vehicle seat in the rear facing direction, then adjust the harness to the highest position. Unsnap the bottom seat cover from the back portion of the RAVA’s cover and pull the cover back to reveal the True Tension Doors.
Squeeze the blue Door Release to open the rear facing True Tension Door. Route the seatbelt through the rear facing belt path and buckle. Remove slack and close the True Tension Door. If the seatbelt does not automatically lock at the latchplate, engage the locking mechanism.
Once the door is closed, ensure that the RAVA moves less than 1 inch at the belt path to confirm a secure installation.
Lower UAS Info
In the United States, the term LATCH refers to the full system of Lower Anchors and Tethers for CHildren. In Canada, this system is known as UAS — Universal Anchorage System.
UAS is the full system including the top tether. LUAS is the lower anchors only. Nuna refers to the lower anchors as the Universal Anchor Belt in the RAVA’s manual.
Lower UAS Weight Limits
Only use this method for a child who weighs 35 pounds or less. If the rear facing child weighs between 35 and 40 pounds, the RAVA must be installed with the vehicle seat belt.
Installation: Lower UAS
To install the RAVA rear facing using Universal Anchor Belt, Place the car seat on the vehicle seat in the rear facing direction, then raise the headrest to the highest position. Unsnap the bottom seat cover from the back portion of the RAVA’s cover and pull the cover back to reveal the True Tension Doors. Once again, lament the lack of spotlight shining on the newly exposed belt path at this reveal.
Remove the Universal Anchor Belt from the storage compartment and route the webbing through the rear facing belt path. Attach the Universal Anchor Belt to the vehicle anchor points, lengthening the webbing to lengthen the webbing as needed. Remove the slack from the webbing by pulling on the tail, then close the True Tension door, and replace the seat’s cover.
Once the door is closed, ensure that the RAVA moves less than 1 inch at the belt path to confirm a secure installation.
Rear Facing Recline Range
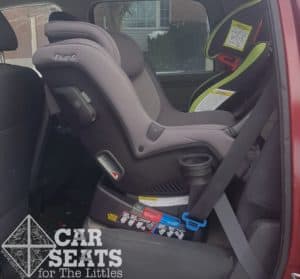
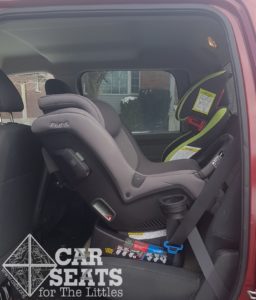
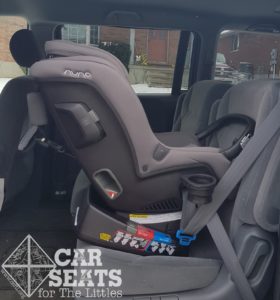
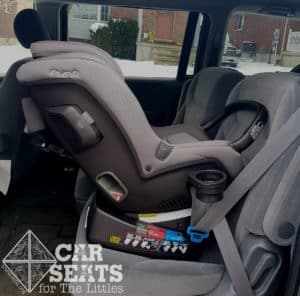
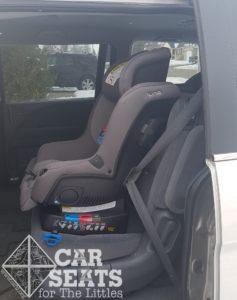
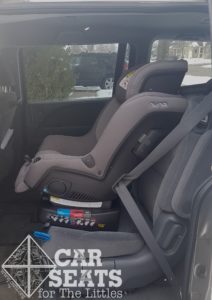
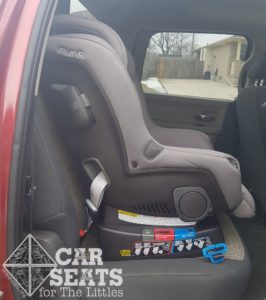
Because the Nuna RAVA installation instructions for rear facing are basically “set the RAVA on the vehicle seat and install”, the rear facing recline angle will vary greatly depending on the slope of the vehicle seat. We have installed the seat rear facing in three different vehicles – a 2007 Honda Odyssey, a 2012 Dodge Ram, and a 2015 Toyota Sienna. We also measured the approximate installation angle of the seat and front-to-back measurement to further illustrate the variance between vehicles.
In the 2015 Toyota Sienna with leather seats, we were able to manipulate the rear facing recline angle between 53-60 degrees (which took up approximately 30-32” of front to back space because the seats did not compress well).
In the 2012 Dodge Ram, we were able to manipulate the rear facing recline angle between 45-55 degrees (which took up approximately 31-32 inches of front to back space)
In the 2007 Honda Odyssey Captain’s chair, we were able to manipulate the rear facing recline angle between 57-65 degrees (which took up approximately 28-29.5 inches of front to back space)
Nuna has managed to combat the potential for the RAVA to be installed too upright for a newborn with their ingenious infant insert. The insert, when installed, reclines the infant about 15 degrees within the seat itself without affecting the installation. This is an excellent feature for newborns, but we worry that the 11 pound maximum may make the RAVA install at an angle that is not suitable for average to heavy newborns.
Installation — Forward Facing
Setting up the RAVA
Before starting to install the RAVA forward facing, place the car seat on the vehicle seat with the harness facing the front of the vehicle, then ensure the calf support is in the USE position, and the RAVA is set to any of the forward facing recline positions: 1 – 5. Position 1 is the most upright and 5 is the most reclined.
We found that whenever we installed the RAVA forward facing on recline 5, there was a very large gap between the back of the RAVA and the vehicle seat. In the case of the Toyota Sienna with leather seats, the installation of the RAVA on recline 5 was prohibited due to too much overhang. Having a wide range of allowable recline positions for forward facing is a great feature, but we caution caregivers to keep an eye on the RAVA’s overhang when looking to install the seat with a more reclined setup.
Installation: Vehicle Seat Belt
To install the RAVA forward facing using the vehicle seat belt, Place the car seat on the vehicle seat in with the harness facing the front of the vehicle. Next, take the top tether and either loosely connect it to the vehicle’s top tether or let it rest inside the seat so you remember to attach it at the end of the installation. Raise the headrest to the highest position. Unsnap the bottom seat cover from the back portion of the RAVA’s cover and pull back to reveal the forward facing True Tension Doors.
Once the True Tension Door is exposed, squeeze the red Door Release to open the forward facing True Tension Door. Route the vehicle seat belt through the forward facing belt path and buckle the seat belt. Remove the slack from the seat belt, then close the True Tension Door. Lock the vehicle seatbelt, then check your work: ensure the RAVA moves less than 1 inch at the belt path in any direction.
Installation: Lower UAS
Only use this installation method for a child who weighs 40 pounds or less. If the forward facing child weighs 40 pounds or more, the RAVA must be installed with the vehicle seat belt.
To install the RAVA rear facing using Universal Anchor Belt, place the car seat on the vehicle seat with the harness facing the back of the vehicle, then raise the headrest to the highest position. Unsnap the bottom seat cover from the back portion of the RAVA’s cover and pull the cover back to reveal the True Tension Doors.
Remove the Universal Anchor Belt from the storage compartment and route the webbing through the forward facing belt path, sliding the belt along the metal bar. Attach the Universal Anchor Belt to the vehicle anchor points, lengthening the webbing to lengthen the webbing as needed. Remove the slack from the webbing by pulling on the tail, then close the True Tension Door, and replace the seat’s cover.
Once the True Tension Door is closed, ensure that the RAVA moves less than 1 inch at the belt path to confirm a secure installation.
Be sure to attach the top tether and pull the webbing tight!
Fit to Child
Rear Facing
Newborn
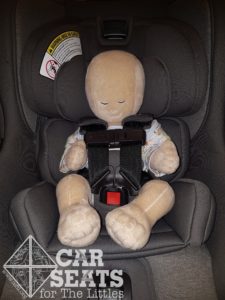
The Nuna RAVA has a minimum weight of 5 pounds, so we thought we would try our Huggable Images newborn doll in the seat. The newborn doll was designed to represent a 7 pound, 17 inch long newborn baby.
We left all of the additional padding in for the newborn doll. The biggest challenge to strapping the doll in was navigating through that additional padding! Once that was done, the newborn doll settled very snugly into the Nuna RAVA, and I imagine the fit on a real newborn would be very similar. The harness hip pads combined with the infant padding and crotch buckle pad really surrounded the doll, which helped the RAVA to provide a nice snug harness fit.
The harness in the lowest position was slightly below the newborn doll’s shoulders, which means that the Nuna RAVA should be a great option for an average-sized newborn baby.
5 Days Old
We were fortunate enough to have a newborn volunteer to try out the Nuna RAVA for us. Although we found the fit to be excellent on the real baby, there were some fit differences we felt we should note.
This little guy is 5 days old, 21 inches long and just shy of 8 pounds. We removed all of the additional padding, only leaving in the infant insert, as the additional padding seemed to overwhelm him. We found that the crotch buckle strap was quite short on this little guy, which made buckling him in a bit more challenging than we usually experience.
Aside from the short buckle, the RAVA fit this baby beautifully – he even fit without needing the infant insert, but we felt it was needed for the additional recline angle.
3 Months Old
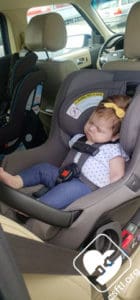
This adorable 3 month old model weighs 15 pounds and is 26 inches long. The Rava fits her very well and she’s got plenty of room to grow in the seat. Her mom loves how smoothly the harness adjusts. The seat is so deep and plush that there’s no smooth way to pull her out of the seat without waking her up! This kiddo has been very happy in the Rava — happier than she was in her rear facing only seat.
3 Years Old
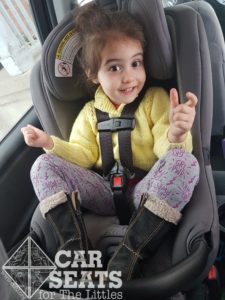
Our 3 year old model is well versed in car seat reviews already. She has been the official tester of many of our Canadian seat reviews, and was happy to help again.
I think it is worth mentioning that the RAVA is this little one’s new favourite car seat. She has started asking us to move the seat between our two vehicles, she loves it so much. It must be a very comfortable seat to receive such rave reviews from an expert review assistant.
Our three year model is 39 inches tall and weighs 33 pounds. She has quite a bit of growing room in the Nuna RAVA — a whopping 10 inches and seven pounds. While it appears that her legs may be a bit cramped in the RAVA, this is not something she has ever mentioned.
Because she is well over 11 pounds, we have removed all of the RAVA’s additional padding, and have moved the crotch buckle to the outer slot. The RAVA manual indicates that the crotch buckle should be in the position that is closest to, but not under the child.
The harness provided an excellent fit and she is quite comfortable in the Nuna RAVA.
Fit to Child
Forward Facing
5 Years Old
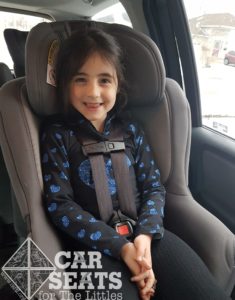
Our 5 year old model is also well versed in helping with car seat reviews. She is 47 inches tall and weighs 47 pounds. Her 16.5 inch torso height translates to approximately another six months of growing room in the Nuna RAVA. This may be a problem for her, because even though she has hit the minimum age to switch to a booster seat, she does not yet have the maturity to make that switch.
Again we have removed all of the additional padding that must come out at 11 pounds, and the crotch buckle is in the outer position. She is very comfortable in the RAVA and her only complaint was that with the narrow set harness straps that she wishes the strap covers could be used for additional comfort.
Important Information: Where to Find
National Safety Mark: located on the back of the seat, under the top tether storage.
Additional Aircraft Approval Sticker: located on the bottom of the seat.
Expiration: located on the bottom of the seat. The RAVA expires 10 years after purchase.
Overall Thoughts
We are always happy to see a well-featured convertible car seat enter the Canadian market that allows children to rear face for a long time. With no rear facing standing height limit (aside from the 49 inch overall limit of the seat), the Nuna RAVA will accommodate almost any child rear facing to 40 pounds, while also fitting average newborns beautifully.
The installation process requires a few extra steps with the unsnapping/snapping of the seat cover, the use of the True Tension Doors, and the Shoulder Belt Clip use rear facing with lap/shoulder belt, but most caregivers would not be reinstalling the seat as often as we do for reviews, so it is likely not anything they will be bothered by. Even with the extra steps, the RAVA is a very easy seat to install — something that always impresses us!
We are definitely giving Nuna a warm welcome to the world of Canadian convertible car seats, and we are grateful to have had the opportunity to review the new Nuna RAVA.
