Originally published Sept 15, 2014. Updated with airplane travel information on August 30, 2016.
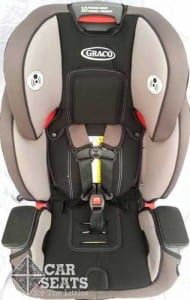
When Graco announced the 4Ever 4-in-1 car seat, we were thrilled to have the chance to take a close look at it. It turns out to be a seat that works well in all 4 modes and we’re happy to list it on our Recommended Seats page. When the 4Ever’s new cousin, the Milestone, arrived on the scene, we were just as excited about taking a look under the hood! The Milestone has 3 modes: rear-facing, forward-facing and high-back booster.
CSFTL Quick Stats
- Rear facing weight range: 5-40 pounds
- Rear facing height range: Until the child’s head is 1 inch below the adjuster handle on the headrest when fully extended
- Lower anchor weight limit: 45 pounds
- Premium lower anchors
- Forward facing weight range: 20-65 pounds
- Forward facing height range: <49 inches
- High-back booster weight range: 30-100 pounds
- High-back booster height range: 38-57 inches
- Lowest harness position: 8″ with insert
- Highest harness position: 17.5 inches
- Highest booster guide position: 18.75 inches
- No-rethread harness
- Expiration: 10 years
- 2014 IIHS Best Bet for booster fit
Measurements
- Width at widest point (at the child’s shoulders): 19 inches
- Width at narrowest point: 19 inches
- Crotch strap & pan depth (with insert): 3, 4.5, 5.75 inches
- Crotch strap & pan depth (without insert): 4, 5.5, 7 inches
- Seat pan depth: 12 inches
- Shell height: 28 inches tall
- Weight: 19 pounds
Installation
Rear Facing
Size range: 5-40 pounds, 8 inch lowest shoulder slot – lasts until the child’s head is 1 inch from the harness red adjuster button in the fully-extended headrest
Recline angle: 1 or 2
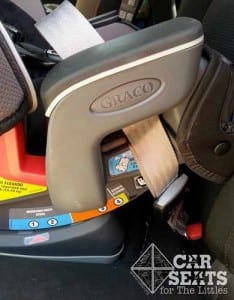
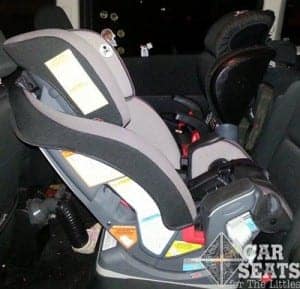
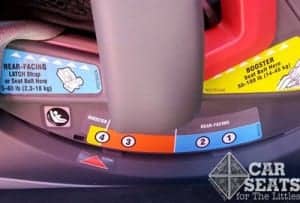
Early versions of the the seat had 2 different rear facing recline angles; angle 1 was the most reclined, angle 2 was more upright. These levels are used to help achieve a proper install. The recline level on the side of the seat indicates that the seat should always be level to the red line when rear facing. This translates to rear facing = always being at a more reclined angle that we’d consider more appropriate for infants than older rear-facing children.
Recline Indicator

Recline Indicator
Milestones produced starting late in 2014 now have a recline bubble similar to the ones found on the Graco Contender, MySize/Size4Me/Fit4Me and Head Wise. The Milestone can still be installed in the 30-45 degree range but now the correct position will be even easier to determine!
Installing the Milestone using lower anchors in the rear-facing position was quite simple. Using my non-dominant hand, I applied pressure to the seat while pulling the loop at the end of the lower anchor up through a well-placed gap between the seat cover and the seat. This little space allowed me to thread the loop up and pull the anchors tight without any trouble. I was really pleased at how quickly I was able to install the seat rear-facing using lower anchors. Installing the seat rear facing with the seat belt required the same fairly low effort level as the lower anchors.
I first installed the seat using the most reclined setting, position 1. Even at the required angle, the seat is fairly compact compared to other seats with high rear-facing weight limits on the market. I had to make my driver’s seat a little more upright than usual to accommodate the Milestone. Installing the seat at both angles using the lower anchors was stunningly easy.
Fit To Child
Rear Facing
Newborn
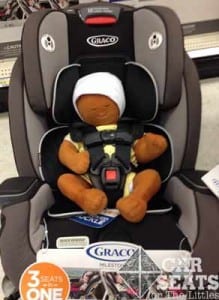
With the infant padding, the Milestone is a nice fit for our newborn model. The model is 7 pounds and 17 inches long. The manual states that the body support must be used if shoulders are below the lowest harness setting without the padding. Most newborns and young infants will likely need the infant padding to achieve a proper fit.
Older Infant
This model is 8 months old, weighs 20 pounds, and is 29.5 inches tall. She’s got plenty of rear-facing room to grow in the Milestone. The manual doesn’t specify when to remove the infant padding, so we left it in for this model. She seemed to find that comfortable. The fairly low sides of the seat made loading her a pretty simple task.
Toddler – 17 Months
This model is 17 months, weighs 20 pounds, and is 30 inches tall. She’s got plenty of leg room and a lot of room left to grow. She meets the legal minimum to ride forward-facing but she’ll be riding rear-facing until she reaches height or weight limits of her seat.
Toddler – 2 Years
Though our model wasn’t very pleased with being in the seat, it fit him well. He weighs 29 pounds and is 35.5 inches tall. He’s got plenty of height left in this seat but may outgrow the seat rear-facing by weight first.
Preschooler
At 41 pounds and 42 inches tall, the 4.5 year old model here is just over the weight limit for rear-facing in this seat. She’s shown here to illustrate the full range of sizes that the Milestone can accommodate rear-facing. She also wanted us to mention that she found the seat very comfortable.
Crotch Buckle Adjustment
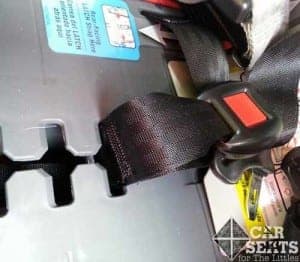
There are three crotch buckle positions — 5, 6, and 7 inches from the back of the seat. Moving the crotch buckle between these positions is yet another easy-to-use feature of the Milestone. Just lift the cover to expose the crotch buckle slots, twist the webbing, and slide the buckle between positions. The crotch buckle doesn’t interfere with the belt path in any of the positions. Moving the crotch buckle on other Graco seats I’ve owned has been far more challenging than I care to admit, so the ease of use here is a big win for me! The correct slot is the one that is closest to your child without being underneath them. The manual states that the lower anchor strap must always lie in front of the buckle when rear facing.
Switching Between Harnessed Modes
Switching the harness between rear and forward-facing modes is also fairly simple, though it requires a couple of steps. First, unsnap the front portion of the cover. That’s right; there are extremely handy snaps that allow you to access all of the important parts of the seat, with a snap!
Second, with the cover unsnapped, reach into the seat pan and pull the lower anchor connectors up into the seat. The connectors are attached via a unique bar, similar to the one found on the 4Ever. This bar holds one side in place, to switch modes, slide the connectors up that bar until they’re at the forward-facing belt path. Then push the connectors out through the sides, grab the connectors and install the seat. The belt path is clearly marked for both forward and rear-facing. This type of clear labeling is a big step forward for the car seat world, as it can help increase the amount of proper use for this seat. As CPSTs, we applaud the clear labeling that’s found all over this seat.
Installation
Forward Facing
Size range: forward facing: 20-65 pounds, <49 inches tall
Recline angle: 3 or 4
The Milestone can be used forward facing at reclines 3 and 4. This was a little unclear to me at first — the label seems to indicate that only level 3, which is a bit of an angle, can be used forward facing. The manual explained that both reclines are allowed forward facing. Installing the seat in forward facing mode using the lower anchors was almost as easy as the rear-facing install. The manual clearly stated that the lower anchor weight limit is 42 pounds for this particular seat. This weight may be different on newer models of the seat, so as always, read your seat’s labels and manual when installing.
Note: use of the tether is an important safety feature, regardless of whether the seat is installed with the lower anchors or the seat belt. It took just a little more sweat equity to achieve a proper install with less than 1″ of movement at the belt path.
The harness itself is quite smooth and the adjuster is easy to reach in both modes. At 11 inches, the seat pan is a bit shallow; at first my model didn’t find forward facing in this seat as comfortable as rear facing.
Installing the Milestone forward-facing with a seatbelt in my Mazda 5’s second row proved to be a bit of a challenge. I’ve found that seats with a high belt path like the Milestone don’t play well with the placement of the seat belt’s anchor points. For some seats, this configuration has made a solid installation nearly impossible.
However, with a fair bit of sweat equity, I was finally able to get a solid install by buckling the seat, pulling all the slack out of belt at the retractor, then pulling the seat belt out to engage the child seat mode, pulling as much slack out of the belt as possible, then carefully unbuckling the belt and feeding it two clicks back into the retractor. This took some coordination but eventually, I was able to get a solid install this way.
Installing the seat forward-facing in my Mazda 5’s insanely tricky third row proved impossible. That row features a very odd seat belt placement that ‘s been the source of more than one car seat-related headache so I wasn’t surprised at this result.
The middle section of Milestone’s cover snaps on and off for easy access to the harness, lower anchors, and belt path. One huge benefit of this is that the cover doesn’t slide around when the child is getting into or out of the seat. The cover’s fixed location plus the low sides have made the Milestone my new all-time favorite forward facing seat for my kiddo. I didn’t realize how much frustration and cajoling had been in our routine until suddenly, she could access the seat easily and felt comfortable enough to…. Just. Sit down. For this alone, the Milestone has quickly become one of our favorite seats ever. Add in all of the other features that make the Milestone easy to use and Graco has created a seat that’s got so many things going for it.
Booster Mode
Switching between harnessed and booster modes is another thing Graco has done very well with this seat. The entire harness tucks into a tidy little compartment behind the cover that closes with a very satisfying snap. Compare this to other combination seats, which require the harness to be removed either partially or taken all the way out, or to the Diono Radian, which requires caregivers to unbolt portions of the seat to access the harness and the Milestone earns high marks in this area. With a forward-facing harnessed child and a booster riding child in our family, we get a lot of use out of combination seats. I’ve spent more time than I care to admit removing or re-assembling harnesses so that the other child can use a particular seat or take a friend somewhere. The ease with which the Milestone moves between modes could be a real game-changer for families like mine.
Fit to Child
Booster Mode
Size range: Transitional high back booster: 30-100 pounds, 38-57 inches tall
Recline angle: 4, can not hang over the car’s seat edge
My 8-year-old booster rider is extremely picky about her modes of transportation. She’s slight of build and the lack of extra padding on her makes padding on her seat a top priority. Every time I ask her to test drive a car seat, I brace for her thumbs down. At first, the Milestone fell victim to her very selective criteria. She found the shallow seat pan to be uncomfortable and she didn’t like the way the seat reclined — in booster mode, it’s a bit more reclined than her main booster.
However, after a solid week of testing this seat, she’s come to appreciate it more. Once I busted out the cup holder (which is installed separately but ships with the seat), having a spot for her trinkets seemed to make the difference and now she’s much happier riding in the Milestone. From the front seat, I wasn’t thrilled about the lap belt path — it’s not quite wide enough for the seat belt. The belt bunched a bit at the belt path, making it hard for my model to thread the belt properly. However, the belt fit is very good on both the lap and shoulder portions and my model found it easy to use properly. Like other transitional booster seats, at 18.75 inches tall, the top shoulder belt guide position isn’t the tallest on the market, but my booster rider still has another click to go so this seat could last a child many years.
Shoulder Belt Guide
The shoulder belt guide is quite nice. It’s easy to access when the headrest is above the shell of the seat. The open design makes threading the belt fairly simple and the extra bit of plastic helps keep the belt retracting smoothly. In my Mazda 5’s third row, the seat belt didn’t retract smoothly due to the forward placement of my seat belt retractor. This is by no means the fault of the Milestone.
Steel-Reinforced Frame
The Milestone boasts a ‘steel-reinforced frame’. While we have no idea if this means it’s actually ‘safer’ we do know the trend in child restraint manufacturing is toward energy flow management, and not just retention in the car.
Milestone on the Move

Graco Milestone installed on the airplane
I took the Milestone on an airplane trip with my 6.5 year old kiddo. She goes between a harnessed car seat and a booster seat these days. We used the Milestone in harnessed mode on the airplane, then converted it to a booster when we arrived.
On the plane, I was a little surprised at how wide it is. I had to raise the armrest to make it fit. But the open belt path made for an easy installation and the seat sits low enough that my kiddo was able to use her tray table during our flight!

Graco Milestone in booster mode: 6 years old
Once we arrived, I was able to convert the seat to booster mode before we got off the plane — it’s that easy! My kiddo rode comfortably in our rental car and as I expected, the Milestone offered her a great belt fit.
Important Information: Where to Find
Date of Manufacture — the Date of Manufacture sticker is on the back of the seat, between the manual storage and the FAA approval sticker on the base.
Pros
- Easy to install
- Good fit for most children in all three modes
- Can use LATCH in booster mode
Cons
- Fixed rear facing angle on the earliest models
Overall Thoughts
The Milestone is a lightweight seat that’s easy to install and use properly in all three modes. As someone who is often moving seats around, this is a huge plus. The shallow seat pan helps the seat be more compact when rear-facing but the trade-off is less leg support in the forward-facing modes. This was an issue for both my models at first but may not be an issue for everyone. The Milestone has a lot to offer and could be a great choice for families with children of varying ages, caregivers who need one seat to be shared between multiple children, and it could be a nice option for a versatile, fairly lightweight travel seat.
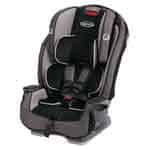 With an MSRP of $229.99, making it an affordable choice for many families. Installing the seat both rear and forward-facing using the lower anchors required very little sweat equity and the seat’s compact size make it an excellent option for rear-facing. The seat belt install proved a bit trickier to achieve but overall, this is an excellent seat with a lot of easy-to-use features and clear labeling that warm the cockles of this CPST’s heart.
You can find the Graco Milestone on Amazon.com.
Graco graciously provided the seat featured in this review but as always, the opinions shared in this review are all our own!
Huge Milestone, Great Giveaway!
To celebrate 300,000 members in our Facebook group, our friends at Graco are giving one Milestone to a lucky reader in the United States. Please read our terms and conditions before entering. Enter below for your chance to win!

