
Safety 1st onBoard 35 SecureTech
Recall Notice
Within days of us publishing this review, a recall was issued for this seat’s base. The temporary solution is to use the seat without the base, however, we had a lot of trouble determining where the recline angle indicator is on the carrier portion of this particular car seat. The baseless recline angle indicator is embossed on the seat itself. There is a label pointing to it but the actual indicator is that line, please refer to that line if you install your car seat without the base while waiting for this recall remedy.
…and now back to our review. The Safety 1st onBoard rear facing only car seat isn’t a new entry to the market but it’s definitely changed with the times — there have been a few versions of this well-priced, lightweight car seat. We tend to hold off on reviewing new versions of existing seats unless something is dramatically different about them. That’s why we’re introducing you to the onBoard 35 SecureTech today. It’s the onBoard we know from the past with some key enhancements to the base that make installation a lot easier. Safety 1st has added SecureTech tension indicators to the base along with a one-pull release for the lower anchors. The SecureTech alone was sufficient to pique my interest, the enhanced lower anchors were a bonus item that I’m eager to meet.
However, we had some pretty sizeable challenges with installing the seat at the correct recline angle without the base, please read further for more information about that experience and note that the manufacturer is working to resolve the issue on newer versions of this seat.
CSFTL Quick Stats
- Rear facing weight range: 4-35 pounds(1.8-15.9 kg)
- Rear facing height range: the child must be less than 32 inches tall. The top of your child’s head MUST be at least 1 inch (2.5 cm) below the top of
the car seat. From the manual: Children under 1 year of age MUST ride rear facing. CSFTL advocates that children ride rear facing until they have reached the maximum height or weight limits for their car seat. - Rethread harness
- Smaller harness adjustment for smaller infants
- 3 crotch buckle positions. Use the slot closest to your child, the buckle should not be underneath or behind your child.
- Body pillow and head pillow do not have weight restrictions — use or remove at any weight
- Premium lower anchors
Measurements
- Carrier weight: 8 pounds
- Lowest harness slot: 5 inches without insert, 4.75 inches with insert
- Front-to-back: ginormous: 30 inches (this is an unofficial measurement from a wall to the back of the seat. When installed in a vehicle, it would likely take up less room.)
- Width at widest point (handles): 19 inches
Unique Features/Requirements
Lock the Vehicle Seat Belt
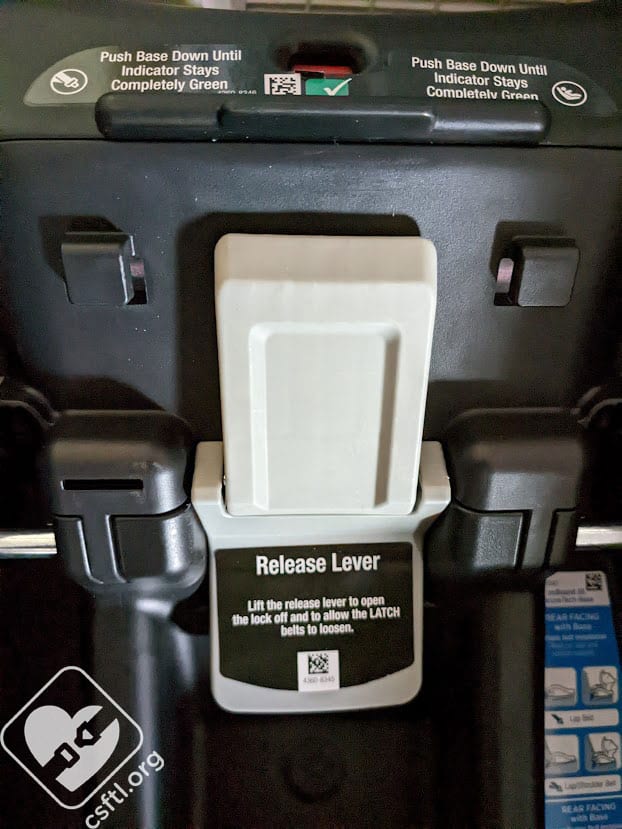
Recline angle indicators for onBoard 35 SecureTech release lever on base
The onBoard 35 with SecureTech includes a Release Handle that the manual describes as a lockoff. This is a bit confusing since we (CSFTL and many CPSTs) consider a lockoff as the single locking mechanism. Typically, the vehicle seat belt does not need to be locked with a lockoff.
Page 4-20 of the manual has a tiny little instruction window that I fear will be the path to misuse with this seat. It says:
“If your car has a switchable retractor, you MUST also use it to lock the belt. Review page 55 of this manual or your vehicle owner’s manual”
There are, however, devices that apply tension to the belt. We consider those “tensioning plates” or similar. So to see a device referred to as a lockoff when it also requires locking the belt, well, that confuses us. And generally, if things confuse us, our readers and other caregivers will also be confused. I would much prefer that the manual consistently refer to the “lockoff” as the Release Handle. Many caregivers would see the Release Lever and assume that it’s the only thing to adjust so we wanted to highlight this at the top of the review.
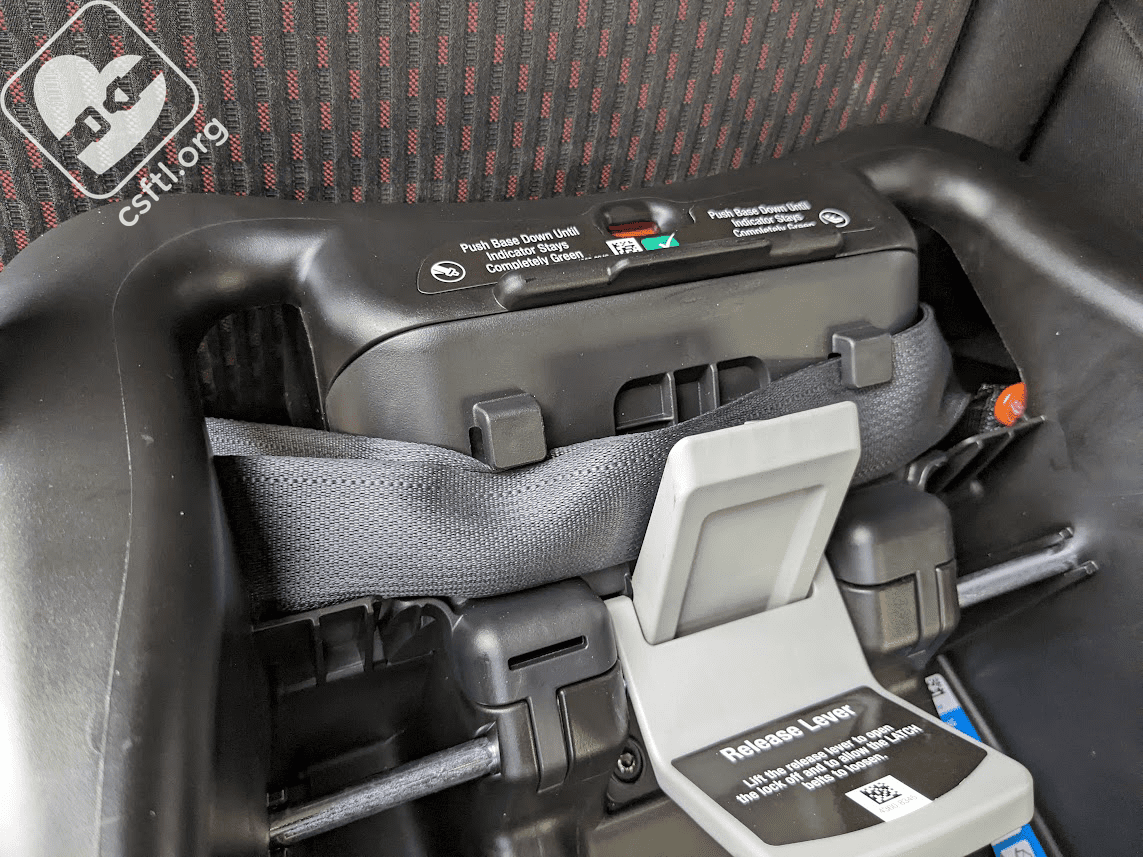
SecureTech Tension Indicator

Safety 1st onBoard 35 SecureTech tension indicator
I assume that the feature I’m talking about is the “SecureTech” part of this seat since that’s in the seat’s name. However, the manual only refers to the (pretty great) tension indicators as tension indicators. I’d prefer to see them named “SecureTech tension indicators” since that would make the seat’s name make a bit more sense.
Anyway…these handy devices on the base indicate when the base is installed with the correct tension. The red indicator will be completely green when the seat is installed at the correct tension. This indicator works with both lower anchors and the vehicle seat belt, though not at the same time. It was super easy to use, and made for simple, secure installation of the base.
Recline Angle Indicator

Safety 1st onBoard recline angle indicator
Many of the things I like about this seat are overshadowed by a pretty significant issue with the recline angle indicator for a baseless installation.
The onBoard 35 SecureTech is somewhat unique because it has just one recline angle indicator (most rear facing only car seats have one on the base and another one on the carrier itself so you can always see if the angle is correct regardless of whether or not the base is being used). The onBoard 35’s angle indicator is a black line that’s embossed into the side of the seat itself. I found that when installing the seat and using the base, this line was in the correct position. However…when installing the seat without the base, the angle changed pretty significantly.
During the course of this review, we met with the manufacturer more than once to discuss the issue. The indicator is a line that’s embossed into the seat. That line is surrounded by two labels, our label was affixed at just the wrong angle to make it seem like the seat had to be REALLY upright to be installed correctly. The manufacturer is working on a fix for this situation, we’d encourage caregivers who intend to use this seat without a base to mark their recline line with a light colored permanent marker so it’s easy to see. Don’t rely on the label itself, use the line instead.
Note: Safety 1st is continuing to iterate on a solution to make this line more visible. Until that change rolls out, we’ll continue to caution caregivers about this challenge.
Smaller Situation
Tag in the Way
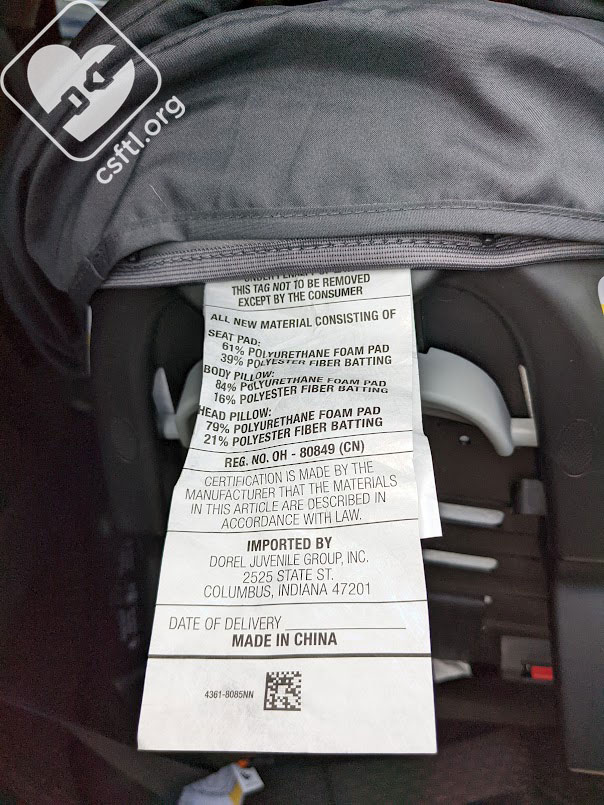
Safety 1st onBoard large tag
Out of the box, our onBoard 35 had a giant care tag hanging out of the back of the cover. The tag is so large, it got in the way of the carrier release handle. I’ve never seen such a large care tag in such a prominent location. The issue was easily resolved by moving the tag to the inside of the cover but using the seat would be a lot easier if that label was tucked inside the cover upon arrival!
Things we Like
Let’s Talk About the Manual
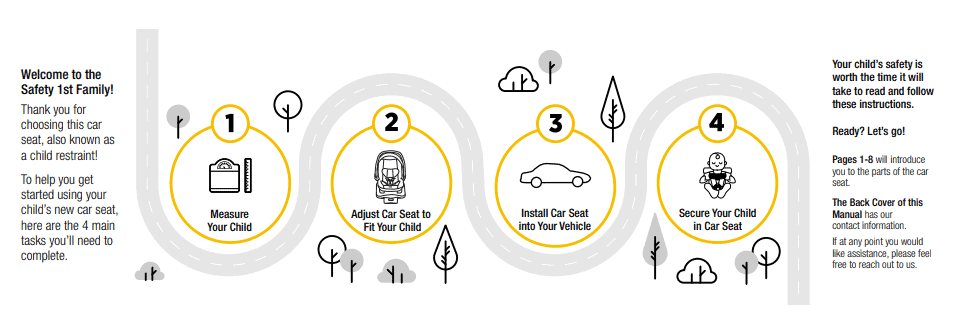
Safety 1st onBoard manual
The CSFTL team has read through a great number of manuals over the years. We tend to read them pretty closely (always with an eye for best practice and clarity, we work with our manufacturer friends to correct any mistakes we find) so it’s kind of a rare day when we’re surprised by a new look and feel to a manual. But today is that day!
The onBoard’s manual has had the benefit of a complete revamp with an eye on instructional design. It’s easy to read, easy to follow, and pleasing to the eye. I most certainly hope that other car seats have this style of manual in the future because I suspect that the clear instructions can only help to minimize misuse.
Contact Them
When I teach my monthly car seat class, I tell 3 jokes every time. One of them is that caregivers should not be afraid to contact their manufacturer because the manufacturer isn’t like Comcast — they actually want to help people use their products properly.
Note to Comcast: please stop calling me/dropping by my house. We know about the service you offer and will not be subscribers.
Anyhow, the manual’s back cover includes a very pleasant-looking invitation to contact Safety 1st directly via the following methods:
Send Us a Text: 1-812-652-2525
(US and Canada Only. Carrier Fees May Apply)
Find Us Online: www.safety1st.com
Email Us: support@djgusa.com
Give Us a Call: 1-800-544-1108
(Toll Free, US and Canada Only)
Unique Features
Recline angle indicators for onBoard 35 SecureTech release lever on base
The onBoard 35 SecureTech has a couple of things that make it unique. They also drive the price up a bit but I’m inclined to think that they’re worth it! The first is the Release Lever that secures the lower anchors, the second is the tension indicators that make it quite easy to see if the base is installed securely.
Installation with the Base

Safety 1st onBoard installed with the base
Because of the label’s position on the side of the carrier, we found installing without the base quite problematic. The seat needed to be at a VERY upright angle in order for that line to be correct. We just cannot recommend installing this seat without the base. However, installing this seat with the base was almost carefree, it was so easy!
Lower Anchors
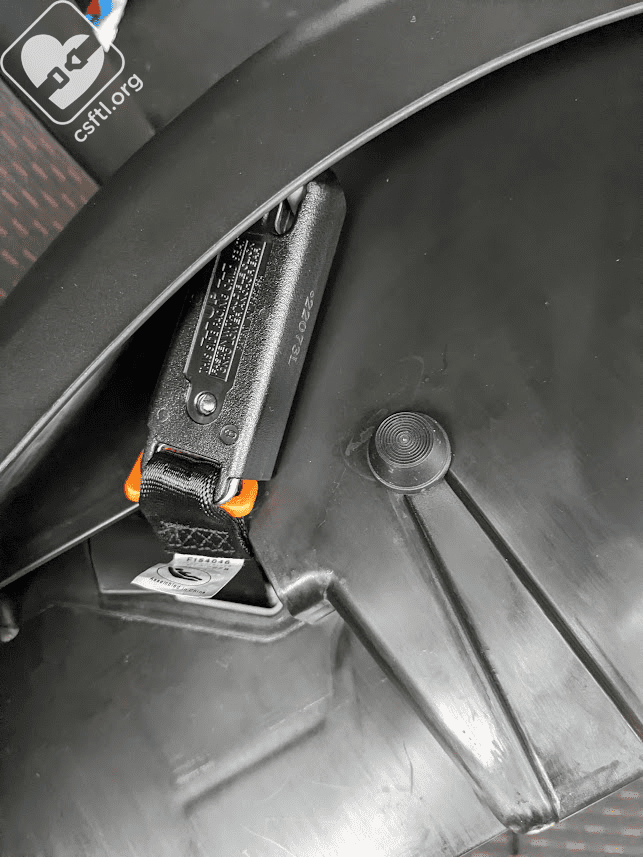
Safety 1st onBoard 35 SecureTech lower anchor storage
The Release Lever serves two important purposes: it releases and retracts the lower anchor webbing when opened, and, when closed, removes the slack from either the vehicle seat belt or the lower anchors. It opens and closes without much fuss. Unlike other similar devices on other seats, this one is super easy to use, you can open or close it with one hand! So as far as ease of use goes, the Release Lever wins in my book.To install the onBoard 35 with the lower anchors, remove them from their handy storage spots on the outside of the base by pressing the red button to release them. Set the base on your vehicle seat with the belt path facing the back of the vehicle. Pull on the connectors to extend the webbing, then attach each connector to the lower anchors inside your vehicle. Press down on the Release Lever to remove most of the slack from the webbing, then place one hand on each side of the base and press down. I find that rocking from side to side helps to evenly remove that slack. The tension indicators will turn green when the base is installed correctly. You can also check for movement in a more traditional way — by giving the base a firm handshake at the belt path. A properly installed base will move less than an inch side to side when checking for movement at the belt path.
Vehicle Seat Belt
Safety 1st onBoard 35 SecureTech vehicle seat belt not quite flat
Installing the onBoard 35 with the base and the vehicle seat belt was also fairly simple. Set the base on the vehicle seat, open the Release Lever, thread the seat belt through the belt path and under the Release Lever. Make sure that the belt lays flat under the little clips in the belt path. I did have some trouble with this at first, but resolved it by taking the shoulder portion out of the clips, pulling a little on the lap belt to remove some tension, then putting the shoulder portion back into the clips.
Once the belt is flat, pull up on the shoulder portion of the belt while pressing down on the base, then close the Release Lever when the slack is removed. The tension indicators will turn green when the base is installed correctly. Lock the vehicle seat belt. You can also check for movement in a more traditional way — by giving the base a firm handshake at the belt path. A properly installed base will move less than an inch side to side when checking for movement at the belt path.
Harness Adjustment for Smaller Infants
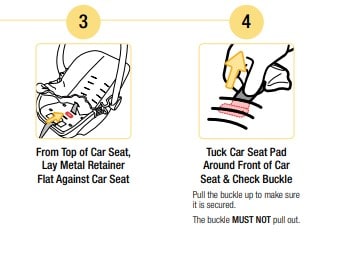
Safety 1st onBoard buckle routing
The harness can be adjusted to fit smaller infants. This is done by re-routing the crotch buckle and the harness loops to their smallest positions. I’ve moved a few crotch buckles in my day and I have to say that this one gave me a bit of trouble. First, the hole sewn into the cover for the innermost crotch buckle position was just a bit too small. I had to really work the buckle through there. Secondly, I had a difficult time with the webbing bunching up as I pulled it through the slot in the bottom of the seat.
Eventually, I got everything situated and had our preemie doll try the fit. With my doll sporting a cloth diaper and the infant insert in the seat, the harness did not fit my doll’s legs properly at all. Removing the insert from the diaper (which obviously isn’t a great option for children who actually need diapers) and removing the infant padding from the seat gave my doll a terrific fit.
Fit to Child
Preemie Doll
Smaller Harness Routing, with Cloth Diaper and Extra Seat Padding
Safety1st onBoard preemie doll with infant padding
The section above adequately describes the buildup to actually testing my dolls in the seat. Because I feel obligated to try every configuration, my preemie Huggable Images doll got a bit of a workout. With the head and body pillows in place and the smaller harness routing, the seat just did not fit my doll properly. As always, a human may fit differently so it’s always worth adding or removing the inserts (or switching to disposable diapers for a bit if you’re using cloth) to get the right fit for our tiny passengers.
Smaller Harness Routing, No Diaper or Extra Seat Padding
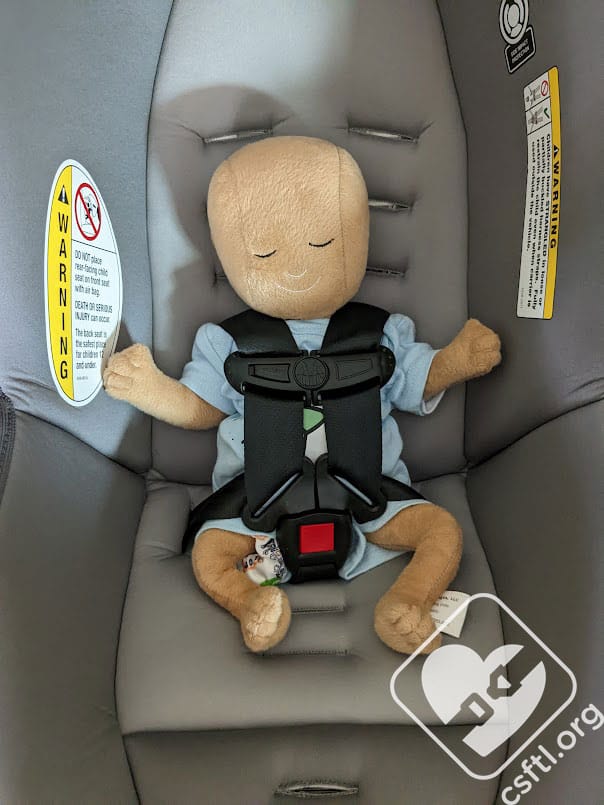
Safety 1st onBoard 35 SecureTech preemie doll with cloth diaper
So I did what anyone would do, I removed the insert from the doll’s diaper and the padding. Now the onBoard 35 fits my preemie quite well!
As this doll grows (oh,wait, our doll is unlikely to grow) we would need to move the crotch buckle out of the smaller routing and move the harness to the lower set of harness loops. Since our doll won’t grow, we’ll make that change for our newborn Huggable Images doll.
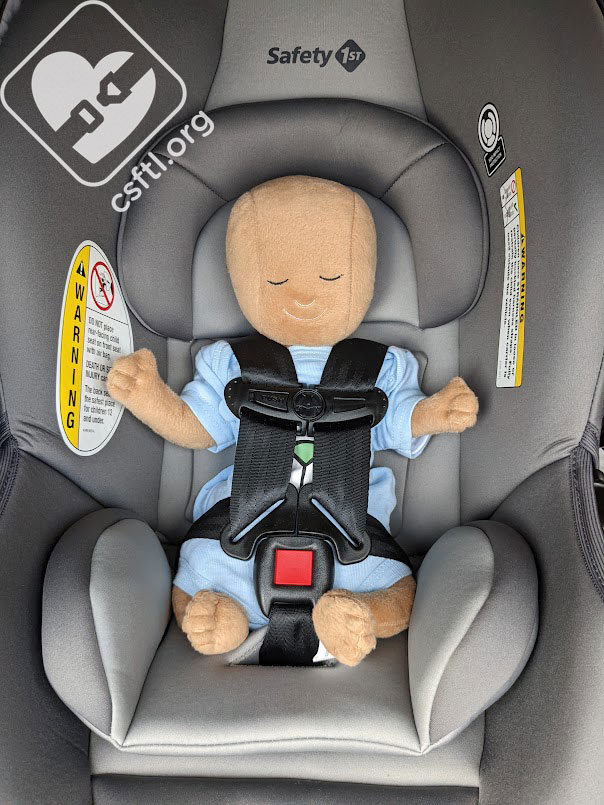
Newborn Doll

Safety1st onBoard newborn doll with infant padding
Our newborn doll weighs 7 pounds and is 17 inches long. With the crotch buckle in the middle position and the harness in the second slot from the bottom, our doll reported a nice fit. Okay, I’m reporting that nice fit on the doll’s behalf.
8 Month Old Human
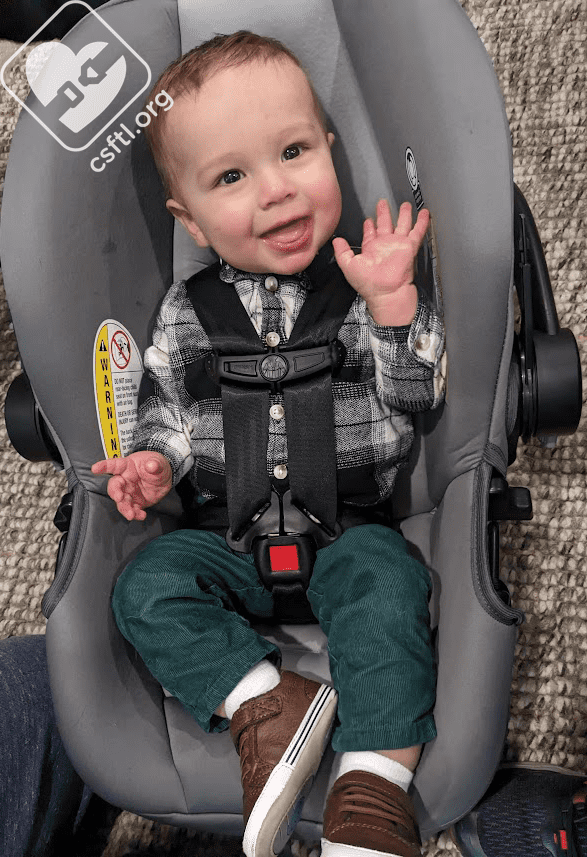
Safety 1st onBoard35 8 months old
Our newest CSFTL model is 8 months old. He weighs 19 pounds and is 28 inches tall. The seat fits him very well and he’s got plenty of room to grow yet.
16 Month Old Doll
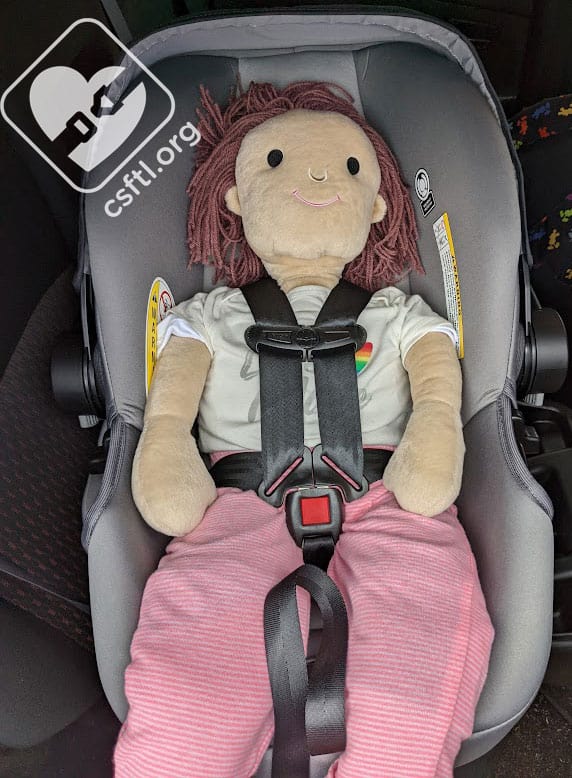
Safety1st onBoard 16 month old doll
The seat’s maximum height is 32 inches or when the child’s head is within 1 inch of the top of the seat’s shell. Since our doll is 31 inches tall, the doll was obligated to give the onBoard 35 a whirl. Granted, if a human child is this large, it’s pretty unlikely that the child’s family would use a rear facing only car seat, or if they did, they’d likely not be dragging it into or out of the house with the child in it. But for science, here we are. The doll barely fits (we expected that) but it does fit. The harness fit remains good though our doll seems a bit squished. We’d expect that since the doll has pretty much outgrown the seat.
Important Information: Where to Find

Safety 1st onBoard 35 manual storage
Manual storage: the manual stores under a clip on the bottom of the carrier.
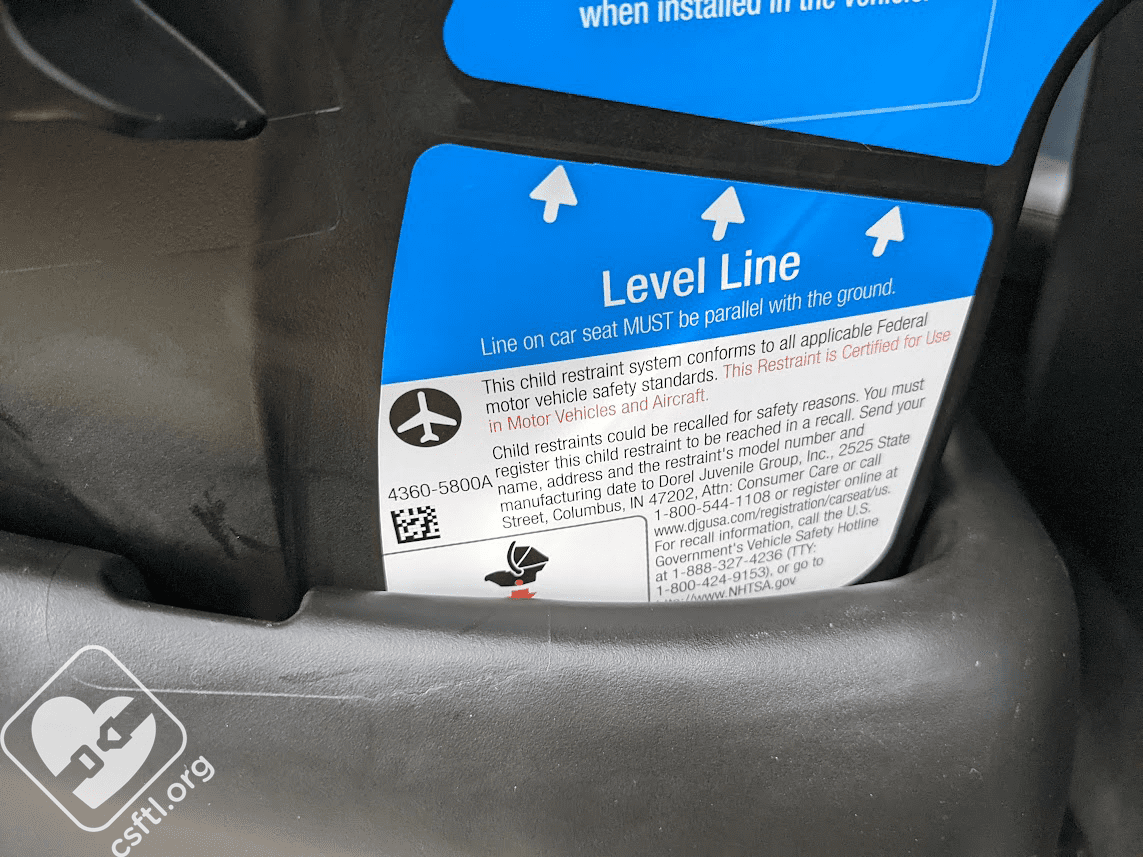
Safety 1st onBoard 35 FAA approval label
FAA approval label: the carrier is approved for use on aircraft, though we’d issue a note of caution: the seat is quite large front-to-back so it may not work in all seating positions on all aircraft. While this is true of many car seats (the variation in how a car seat might fit on a plane) it’s especially true of the onBoard.
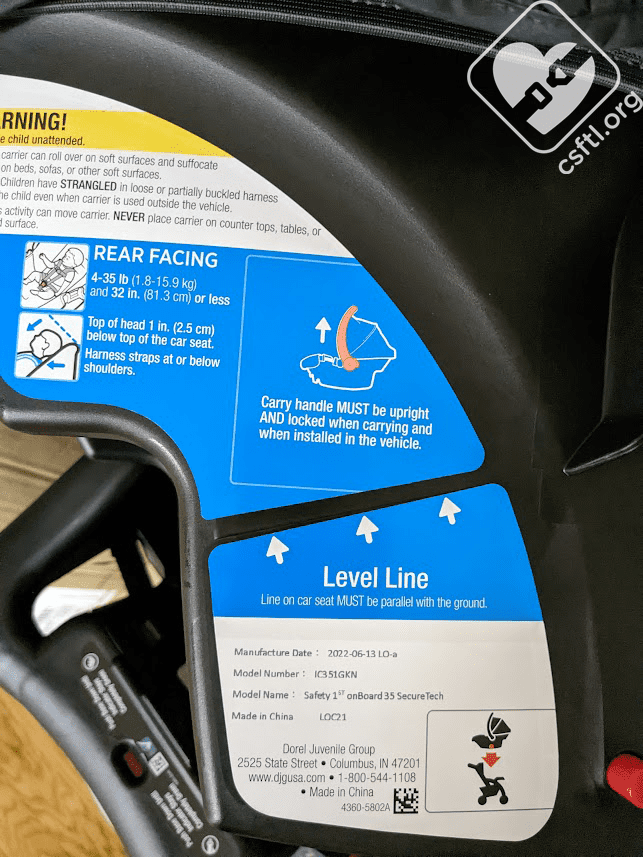
Safety 1st onBoard 35 SecureTech date of manufacture label
Date of manufacture label: the onBoard expires 10 years after the date of manufacture. There’s a label on the outside of the carrier and on the base itself.
Overall Thoughts
The things we like about this seat — the tension indicators and the Release Lever — are pretty great. They absolutely made installing the base a breeze. It also fits ALL of our models well (though the preemie fit took some trial and error when it came to using the padding) so families who choose the onBoard 35 SecureTech can be pretty confident that their child will fit well in this seat.
We’d caution caregivers who plan to use this seat without a base to identify that recline angle indicator before heading out for a ride so they know how to read it properly. Aside from that challenge, we were pleased overall with this seat.